

Blaupunkt Toronto-400-BT Owners Manual
Radio CD MP3 WMA
Toronto 400 BT 7 649 035 110 / 7 649 036 010
Bedienungs- und Einbauanleitung
Operating and installation instructions
Mode d’emploi et de montage
Istruzioni d’uso e di installazione
Gebruiksaanwijzing en inbouwhandleiding
Bruks- och monteringsanvisning
Instrucciones de manejo e instalación
Instruções de serviço e de montagem
Betjenings- og monteringsvejledning
Instrukcja obsługi i montażowa
Návod k obsluze a k montáži
Käyttö- ja asennusohje
Kezelési és beszerelési útmutató
Инструкция по эксплуатации и установке
Οδηγίες τοποθέτησης και χρήσης
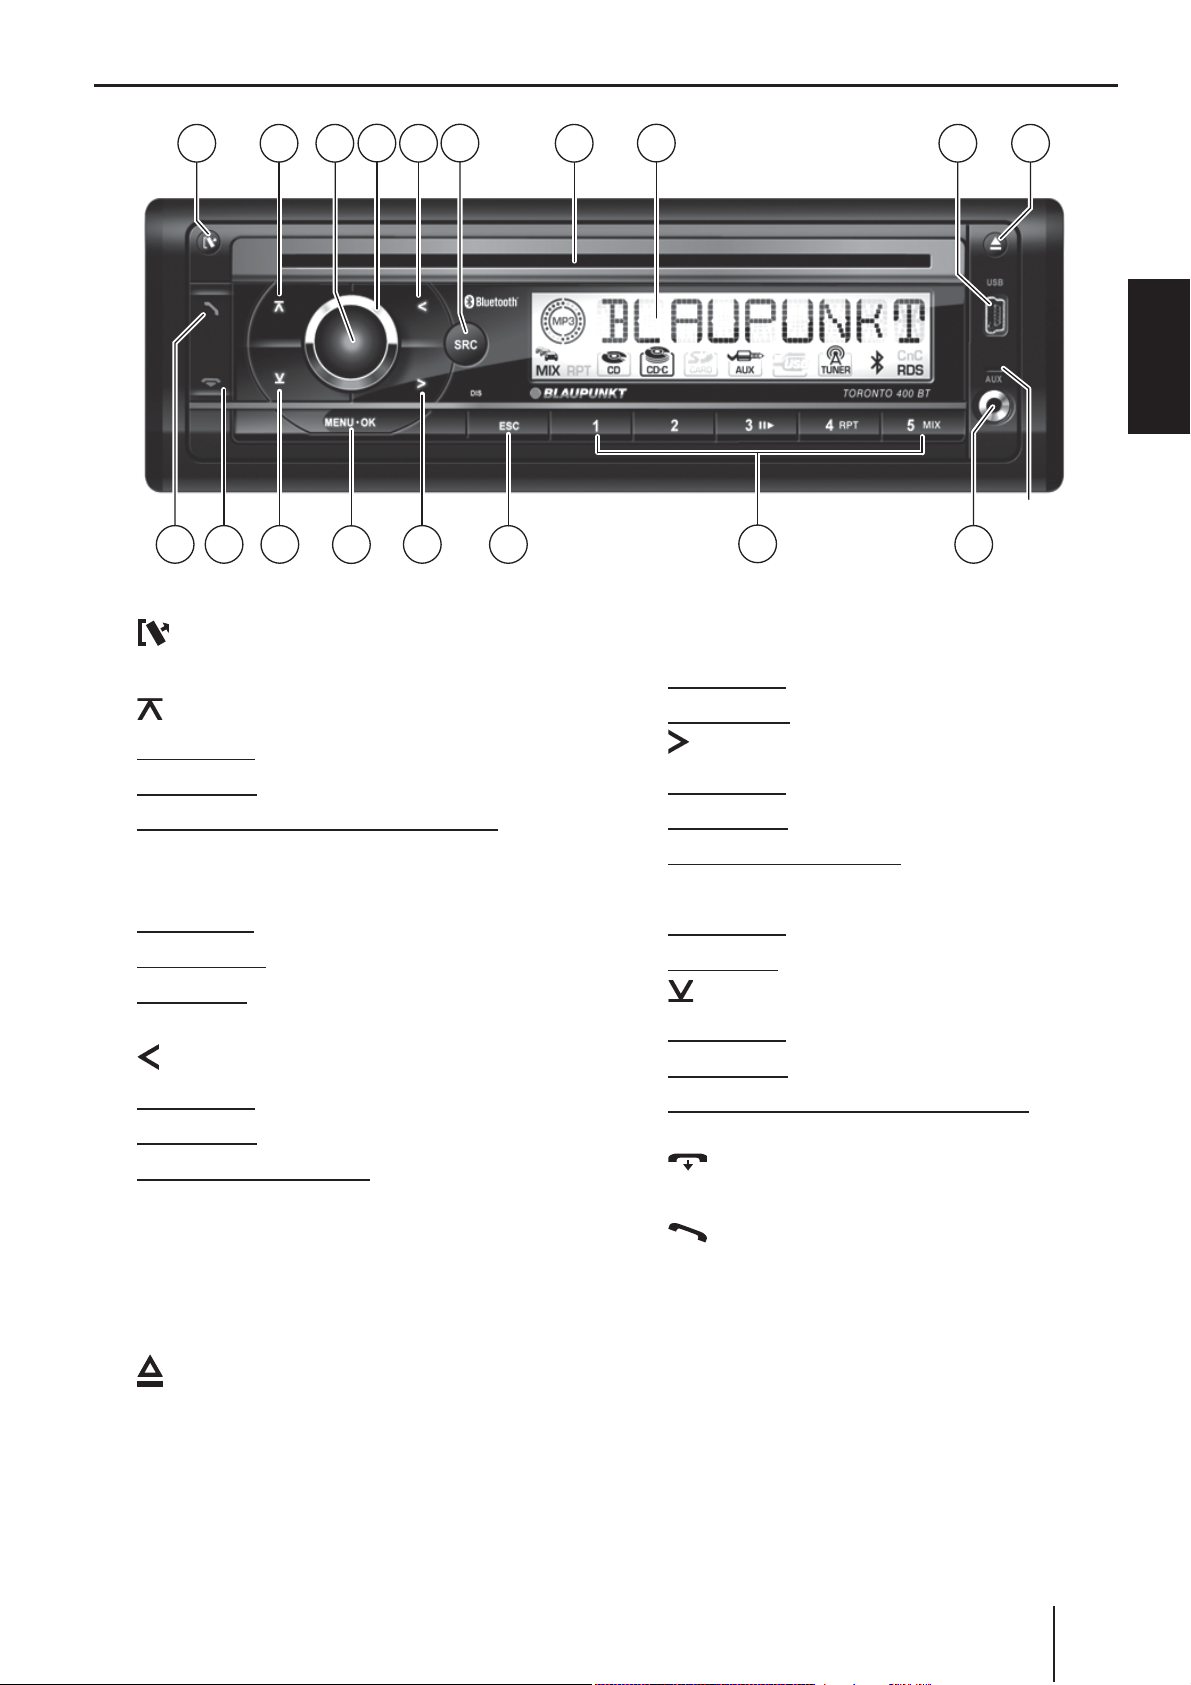
Controls
1
18 17
16 11
4
15
1 button
Unlock the detachable control panel
2 button
14
6
13
8
12
9 1072 53
ENGLISH
MIC
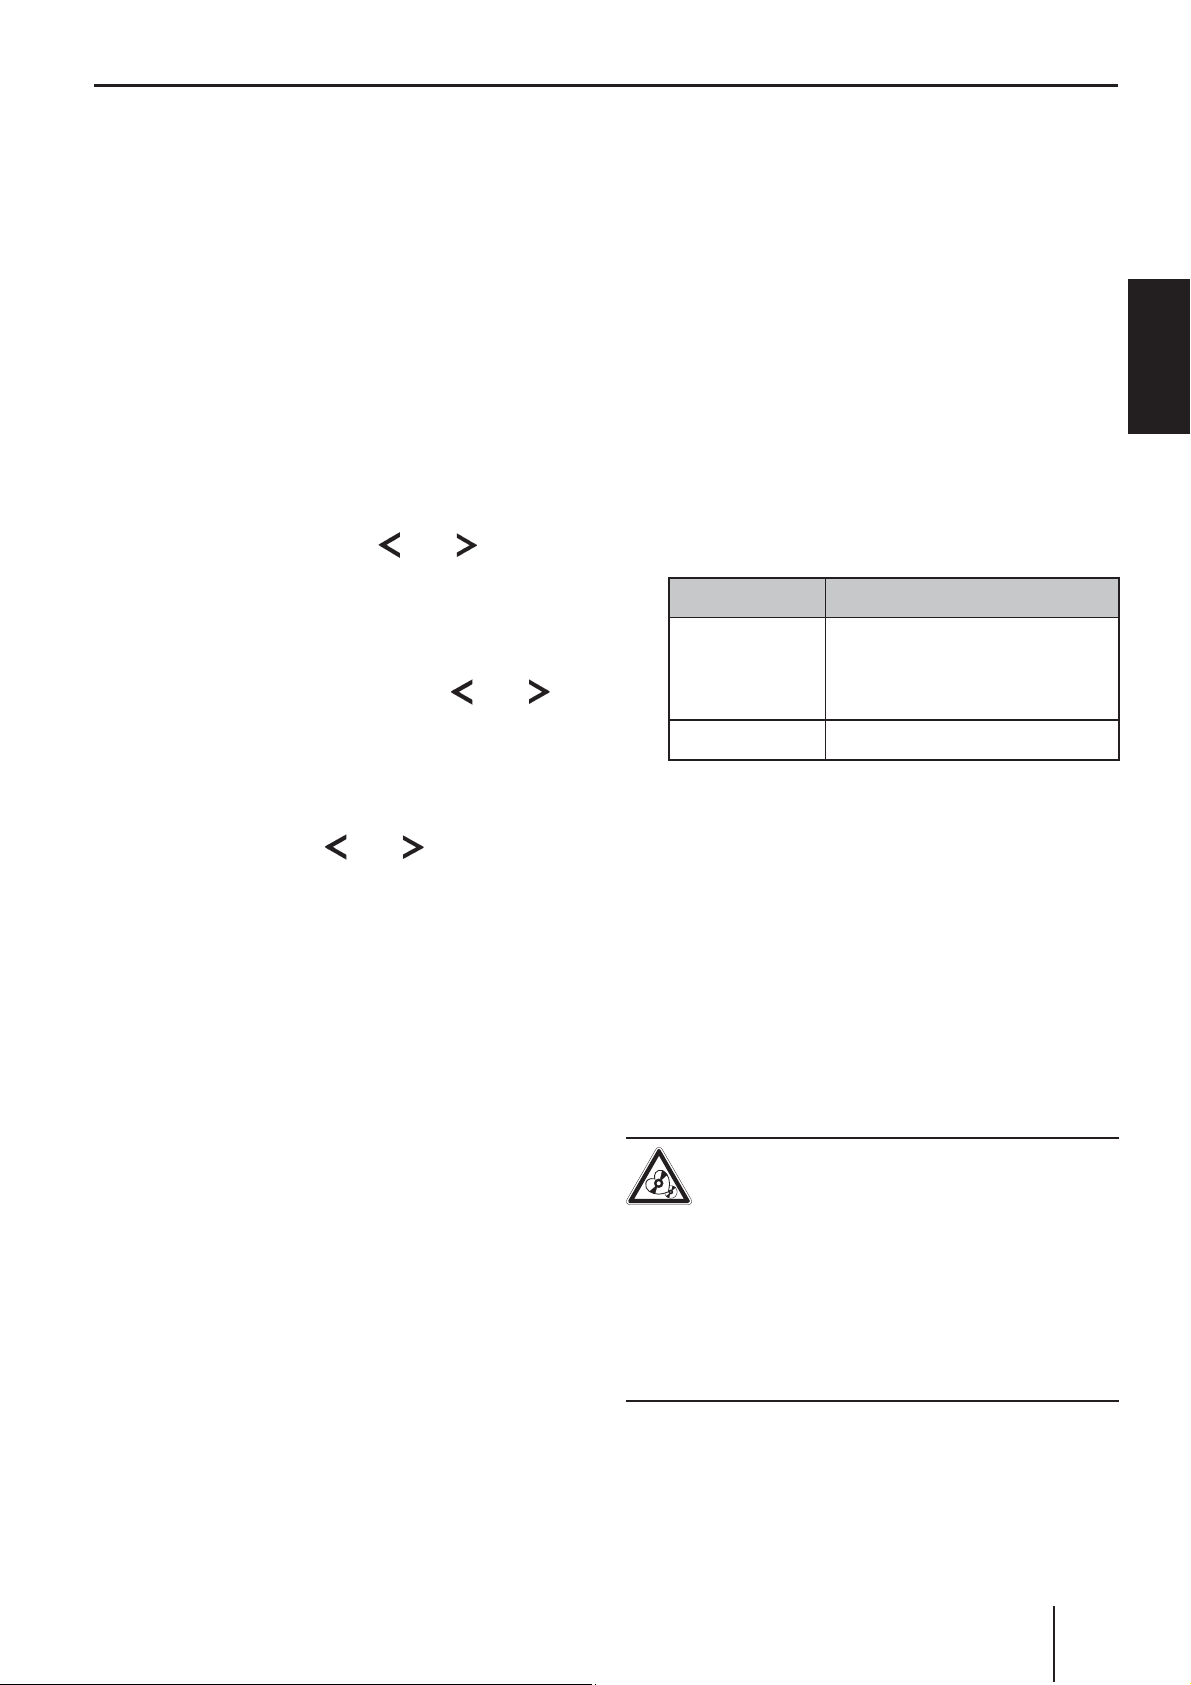
= DIS/ESC button
In the menu: Exit menu
In operation: Switch display
In the menu: Call up menu item
Radio mode: Select memory bank
MP3/WMA/C‘n‘C/CD changer mode: Change
to next folder / CD
3 On/Off button
Short press: Switch on car sound system
In operation: Mute car sound system (Mute)
Long press: Switch off car sound system
4 Volume control
5 button
In the menu: Change settings
Radio mode: Adjust the stations
Other operating modes: Track selection
6 SRC button
Selecting an audio source
7 CD tray
8 Display
> button
In the menu: Change settings
Radio mode: Adjust the stations
Other operating modes: Track selection
? MENU•OK button
Short press: Call up menu, confi rm settings
Long press: Start scan function
@ button
In the menu: Call up menu item
Radio mode: Select memory bank
MP3/WMA/C‘n‘C/CD changer mode: Change
to previous folder / CD
A button
Ending/rejecting a phone call
B button
Answering a call, speed dial
9 USB port
: button (Eject)
Eject a CD
; Front AUX-IN socket
< Keys 1 - 5
27

Contents
Safety notes .............................................29
Symbols used ........................................29
Road safety ...........................................29
General safety notes ...............................29
Declaration of conformity ........................29
Cleaning notes..........................................30
Disposal notes ..........................................30
Scope of delivery ......................................30
Optional equipment
(not part of the scope of delivery) .............30
Placing the device in operation ..................31
Attaching/detaching the control panel .......31
Setting the tuner region ...........................31
Switching on/off ....................................31
Volume .................................................32
Switching demo mode on/off ...................32
Displaying version numbers .....................32
Traffi c information ....................................32
Radio mode ..............................................33
RDS .....................................................33
Changing to radio mode ..........................33
Selecting the memory bank .....................33
Tuning into a station ................................33
Storing stations/Calling stored stations......34
Scanning stations ...................................34
Storing stations automatically (Travelstore) ...34
PTY ......................................................34
Confi guring the display............................35
CD/MP3/WMA/C‘n‘C/CD changer mode .....35
Basic information ...................................35
Changing to CD/MP3/WMA/C‘n‘C/
CD changer mode ...................................36
Inserting a CD ........................................37
Ejecting a CD .........................................37
Connecting/removing a USB data carrier ...37
Selecting tracks .....................................37
Select a folder/CD (only in MP3/WMA/
C‘n‘C or CD changer mode) ......................37
Fast searching ........................................38
Interrupting playback ..............................38
Playlist mode (only in MP3/WMA mode) ....38
Scanning all tracks..................................38
Playing tracks in random order .................38
Repeatedly playing individual tracks,
CDs or directories ..................................39
Confi guring the display............................39
Bluetooth® ...............................................39
Bluetooth® menu ....................................40
Registering and connecting a device ..........40
Telephone functions ...............................41
Bluetooth® streaming mode .....................42
Additional functions in the Bluetooth®
menu ....................................................43
External audio sources ..............................44
Front AUX-IN socket ................................44
Rear AUX input .......................................44
Sound settings .........................................45
Calling and exiting the audio menu ............45
Performing settings in the audio menu .......45
Calling and exiting the enhanced audio
menu ....................................................46
Performing settings in the enhanced
audio menu ...........................................46
User settings ............................................47
Calling and exiting the user menu ..............47
Performing settings in the user menu ........47
Factory settings ........................................50
Useful information ....................................51
Warranty ...............................................51
Service .................................................51
Technical data ..........................................51
Installation instructions ..........................381
28
Safety notes
The car sound system was
ing to the state of the art and established safety
guidelines. Even so, dangers may occur if you
do not observe the safety notes in these instructions.
These instructions contain important information to easily and safely install and operate the car
sound system.
•
Read these instructions carefully and completely before using the car sound system.
•
Keep the instructions at a location so that they
are always accessible to all users.
•
Always pass on the car sound system to third
parties together with these instructions.
In addition, observe the instructions of the devices used in conjunction with this car sound
system.
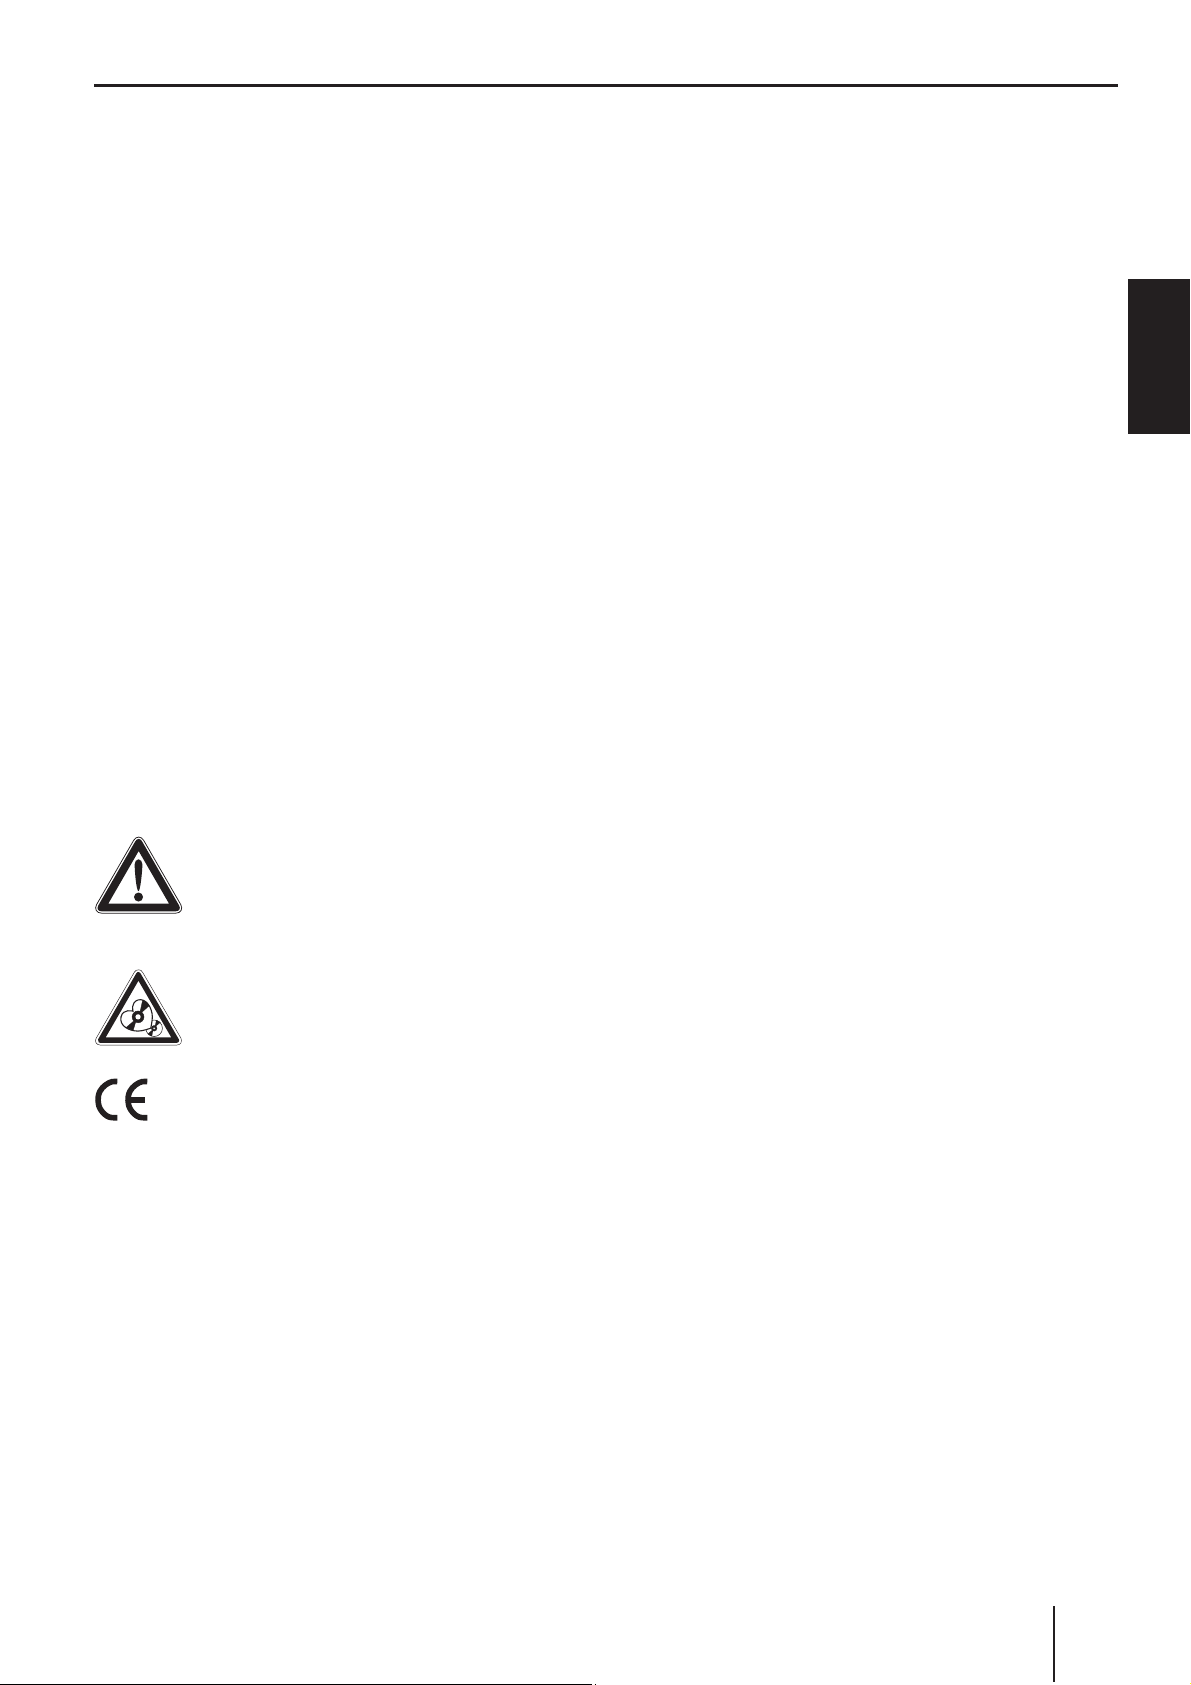
Symbols used
These instructions employ the following symbols:
DANGER!
Warns about injuries
CAUTION!
Warns about damaging the CD drive
manufactured accord-
Safety notes
Remove or attach the control panel only
•
while the vehicle is standing an.
Always listen at a moderate volume to pro-
•
tect your hearing and to be able to hear acoustic warning signals (e.g. police sirens). During
mute phases (e.g. when changing the audio
source), changing the volume is not audible.
Do not increase the volume during this mute
phase.
General safety notes
Observe the following notes to protect yourself
against injuries:
Do not modify or open the device. The device
•
contains a Class 1 laser that can cause injuries
to your eyes.
•
Do not increase the volume during mute
phases, e.g. when changing the audio source.
Changing the volume is not audible during a
mute phase.
Use as directed
This car sound system is intended for installation
and operation in a vehicle with 12 V vehicle system voltage and must be installed in a DIN slot.
Observe the performance limits in the technical data. Repairs and installation, if necessary,
should be performed by a specialist.
Installation instructions
ENGLISH
The CE mark confi rms the compliance
with EU directives.
쏅
Identifi es a sequencing step
•
Identifi es a listing
Road safety
Observe the following notes about road safety:
Use your device in such a way that you can
•
always safely control your vehicle. In case of
doubt, stop at a suitable location and operate
your device while the vehicle is standing.
You may only install the car sound system yourself if you are experienced in installing car sound
systems and are very familiar with the electrical
system of the vehicle. For this purpose, observe
the installation instructions at the end of these
instructions.
Declaration of conformity
The Blaupunkt GmbH declares that the car sound
system Toronto 400 BT complies with the basic
requirements and the other relevant regulations
of the directive 1999/5/EG.
29

Cleaning notes | Disposal notes | Scope of delivery
Cleaning notes
Solvents, cleaning and scouring agents as well as
dashboard spray and plastics care product may
contain ingredients that will damage the surface
of the car sound system.
Use only a dry or slightly moistened cloth for
•
cleaning the car sound system.
If necessary, clean the contacts of the control
•
panel regularly using a soft cloth moistened
with cleaning alcohol.
Disposal notes
Do not dispose of your old unit in the house-
hold trash!
Use the return and collection systems available to
dispose of the old device.
Optional equipment
(not part of the scope of delivery)
Contact your Blaupunkt specialised dealer or visit
us on the Internet under www.blaupunkt.com for
information about optional equipment, such as:
The steering wheel or handheld remote control
•
from Blaupunkt for safe and convenient operation of the basic functions (switching on/off
not possible with the remote control)
The C‘n‘C-ready interfaces from Blaupunkt
•
(C‘n‘C = Command and Control) for connecting additional data carriers and devices (e.g.
via the iPod®/USB interface)
Blaupunkt CD changer
•
Blaupunkt or Velocity amplifi er
•
Scope of delivery
The scope of delivery includes:
1 Car sound system
1 Operating/installation instructions
1 Case for the control panel
1 Support frame
1 Set of small parts
2 Disassembly tools
1 USB connecting cable
Extended scope of delivery
(for 7 649 036 010 only):
1 Connecting cable chamber A (power supply)
1 Connecting cable chamber B (loudspeaker)
1 Connecting cable chamber C1 (Line-Out)
1 Antenna connection adapter
1 Handheld remote control
2 Batteries (type AAA)
Note:
We recommend the use of original Blaupunkt
accessories (www.blaupunkt.com).
30

Placing the device in operation
Placing the device in operation
Attaching/detaching the control panel
The car sound system is equipped with a detachable control panel (release panel) to protect your
equipment against theft. In the delivery state, the
control panel is in the supplied case. To start operating the radio after installation, you must fi rst
attach the control panel (see the section "Attaching the control panel" in this chapter).
Always take the control panel with you when leaving the vehicle. The car sound system is worthless
to a thief without this control panel.
Caution
Damage to the control panel
Never drop the control panel.
Transport the control panel so that it is protected
against impacts and the contacts cannot become
dirty.
Do not expose the control panel to direct sunlight
or another heat source.
Setting the tuner region
This car sound system is designed for operation in
different regions with different frequency ranges
and station technologies. It is factory set to the
tuner region "EUROPE". Other available tuner
regions include "USA", "THAI" (Thailand) and
"S AMERICA" (South America). If you operate the
car sound system outside of Europe, you may fi rst
have to set a suitable tuner region:
Switch off the car sound system if it is not
쏅
already turned off.
쏅
Press and hold the buttons MENU•OK ?
4 < at the same time and press the On/
and
Off button 3.
The car sound system switches on. The currently set tuner region appears on the display.
Press the button
쏅
until the desired tuner region is displayed.
Press the MENU•OK
쏅
@ / 2 repeatedly
button ?.
Switching on/off
ENGLISH
Avoid direct skin contact with the control panel’s
electrical contacts.
Attaching the control panel
쏅
Push the control panel into the bracket at the
right edge of the device.
쏅
Push the control panel carefully into the left
bracket until it clicks into place.
Removing the control panel
쏅
Press the
button
1 to unlock the control
panel.
The left side of the control panel detaches
from the device and is secured by a latch
against falling out.
Grasp the control panel at the left side and
쏅
pull it beyond the resistance of the latch and
straight out of the bracket.
Note:
The car sound system automatically switches
off as soon as the control panel is removed.
Switching on/off with the On/Off button
For switch-on, press the On/Off button 3.
쏅
The car sound system switches on.
To switch off the device, press and hold down
쏅
the On/Off button 3 for longer than 2 sec-
onds.
The car sound system switches off.
Note:
If you switch on the car sound system while
the vehicle ignition is switched off, it automatically switches off after 1 hour to preserve
the vehicle battery.
Switching on/off via vehicle ignition
The car sound system will switch off/on simultaneously with the ignition if the device is correctly
connected to the vehicle’s ignition as shown in the
installation instructions and you did not switch the
device off by pressing the On/Off button 3.
31

Placing the device in operation | Traffi c information
Volume
Adjusting the volume
You can adjust the volume in steps from 0 (off) to
50 (maximum).
Turn the volume control
쏅
volume.
Note:
If a telephone or navigation system is connected with the car sound system as described in
the installation instructions, the car sound
system is muted in case of a telephone call
or navigation announcement so that you can
hear the playback of the telephone or navigation system undisturbed. While it is muted,
the display shows "TELEPHONE".
Muting the car sound system (Mute)
You can quickly reduce the volume to a preset
level.
쏅
Briefl y press the On/Off button 3 to mute
the car sound system or to reactivate the previous volume.
While it is switched low, the display shows
"MUTE".
To adjust the mute volume, please read the section "Performing settings in the user menu", "Mute
LVL" menu item in the chapter "User settings".
4 to change the
Switching demo mode on/off
The demo mode shows the functions of the car
sound system as scrolling text on the display. You
can turn the demo mode on or off:
Displaying version numbers
You can display the version numbers of the different device components.
Switch off the car sound system if it is not
쏅
already turned off.
Press and hold the buttons MENU•OK ?
쏅
1 < at the same time and press the On/
and
Off button 3.
The car sound system switches on. The display shows the version number of the fi rst
component. The fi rst character identifi es the
component: P = CPU, E = EPROM, A = Accordo, B = Bluetooth®.
Press the button
쏅
version number of the other components.
Press the MENU•OK
쏅
5 / > to display the
button ? to return to
the previously played audio source.
Traffi c information
In the tuner region "EUROPE", an FM station can
identify traffi c reports by means of an RDS signal. If the priority for traffi c announcements is
switched on, a traffi c announcement is automatically switched through, even if the car sound system is currently not in radio mode or if a station of
the wavebands MW or LW is set.
If priority is switched on, the display shows the
traffi c jam symbol (
during a switched-through traffi c announcement.
To switch the priority on and off, please read the
section "Performing settings in the user menu",
"TRAF" menu item in the chapter "User settings".
). "TRAFFIC" is displayed
Switch off the car sound system if it is not
쏅
already turned off.
쏅
Press and hold the buttons MENU•OK ?
2 < at the same time and press the On/
and
Off button 3.
The car sound system switches on. The display briefl y shows "DEMO MODE" if you
switched on the demo mode. By pressing any
button, the demo mode is interrupted and
you can operate the device.
32
Notes:
The volume is increased for the duration
•
of the switched-through traffi c announcement. You can adjust the minimum volume for traffi c announcements (see the
ch. "User settings", section "Performing
settings in the user menu", "TA VOLUME"
menu item).
To cancel a switched-though traffi c an-
•
nouncement, press the DIS/ESC button
=.
Traffi c information | Radio mode
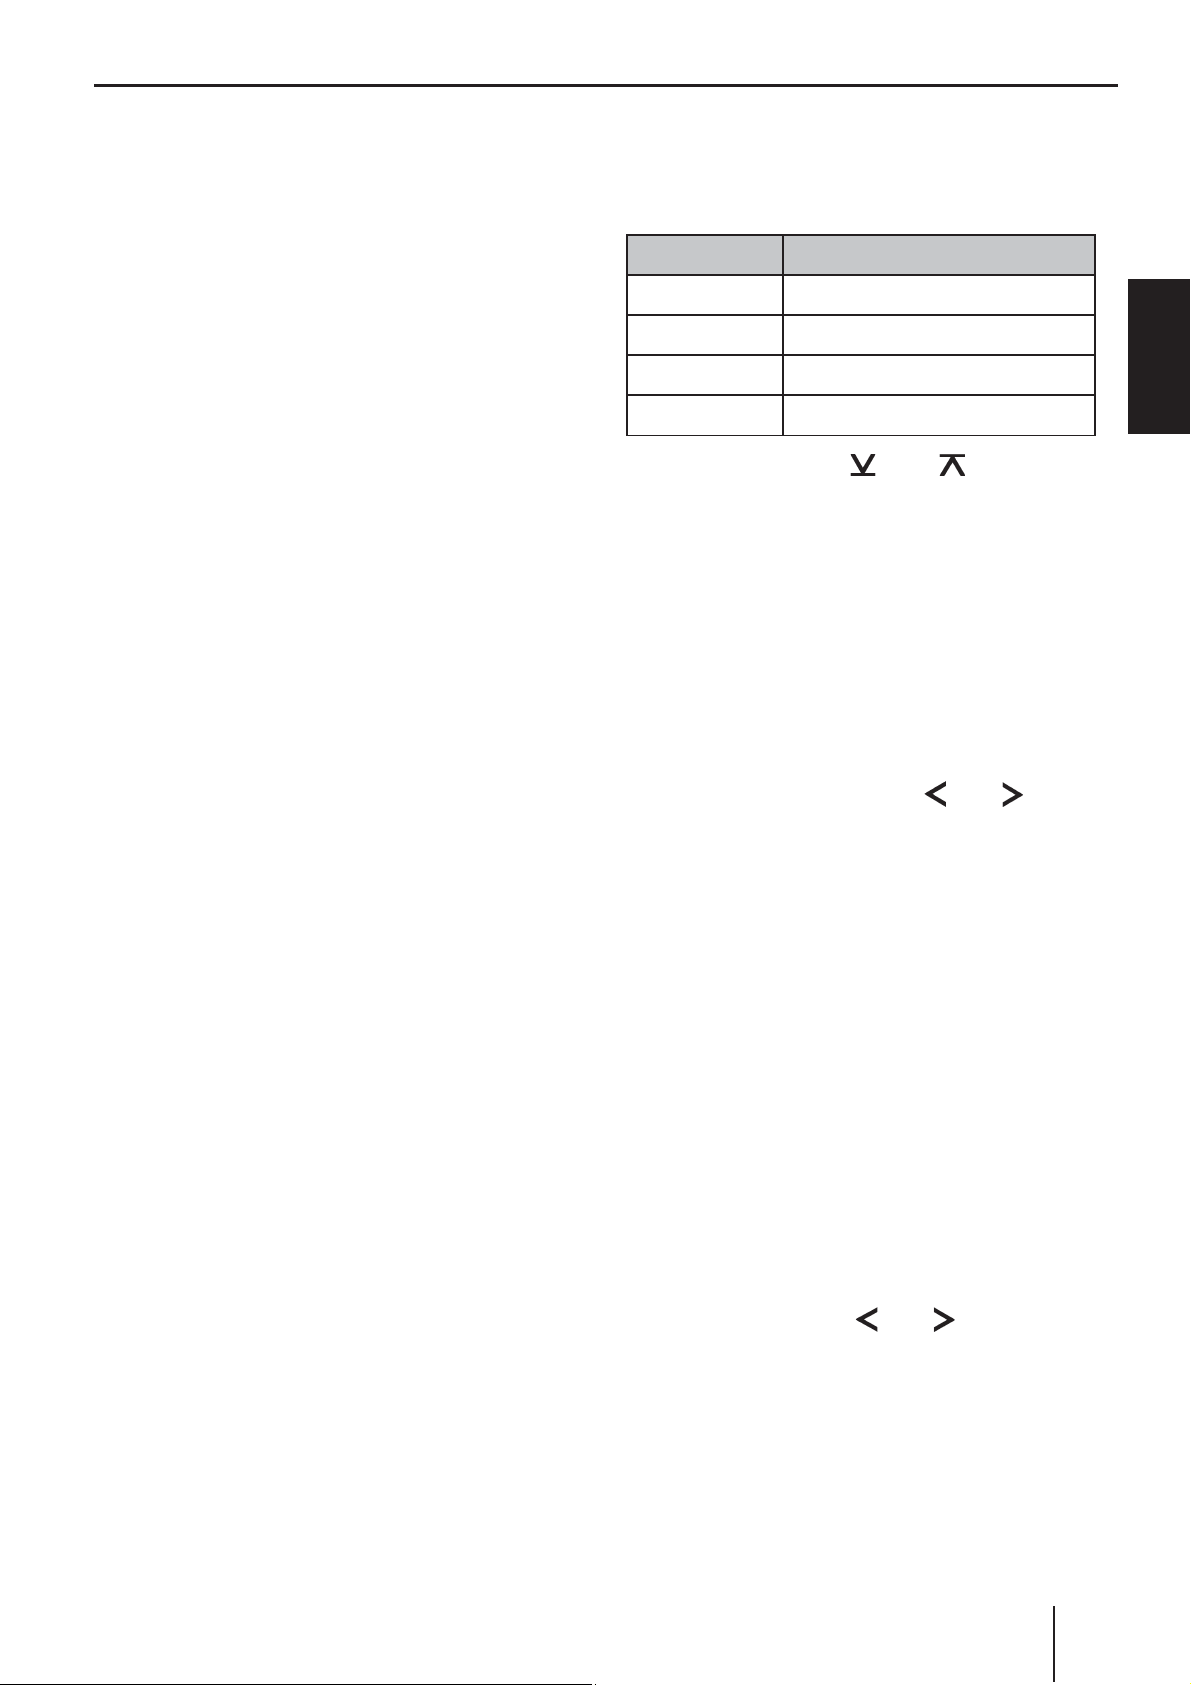
Selecting the memory bank
The following memory banks are available in the
different tuner regions:
Radio mode
RDS
Many FM stations broadcast an RDS (Radio Data
System) signal in addition to their programme in
the tuner region "EUROPE" that allows the following additional functions:
•
•
•
•
To switch the RDS or REG function on or off, please
read the section "Performing settings in the user
menu" in the chapter "User settings" (menu items
"RDS", "REG").
Changing to radio mode
쏅
station name is shown on the display.
The
The car sound system recognises traffi c an-
nouncements and news broadcasts and can
automatically switch them through in any operating mode (e.g. in CD mode).
Alternate frequency: If RDS is activated, the
car sound system automatically selects the
best receivable frequency for the station that
is currently set.
Regional (REG): At certain times, some radio
stations divide their programme into regional
programmes providing different content. If the
REG function is activated, the car sound system changes only to those alternate frequencies on which the same regional programme is
being broadcast.
Press the SRC button 6 repeatedly until
"TUNER" is displayed:
Region Memory banks
EUROPE
USA
THAI
S AMERICA
Press the button
쏅
until the desired memory bank is displayed.
Note:
Up to 5 stations can be stored in each memory bank.
FM1, FM2, FMT, MW, LW
FM1, FM2, FMT, AM, AMT
FM1, FM2, FMT, AM
FM1, FM2, FMT, AM, AMT
@ / 2 repeatedly
Tuning into a station
There are various ways of tuning into a station:
Tuning into stations manually
Briefl y press the button
쏅
or several times to change the frequency in
increments, or long to quickly change the
frequency.
Notes:
For the tuner region "EUROPE": In the FM
•
waveband, the next station of the broadcasting network is automatically tuned into
if the RDS function is switched on.
•
For the tuner regions "EUROPE", "USA" and
"S AMERICA": In the FM waveband, the current selected programme type is displayed
and can be changed if the PTY function is
activated (see the ch. "PTY").
5 / > once
ENGLISH
The current memory bank appears once as
scrolling text on the display.
Starting station seek tuning
쏅
Press the button
2 seconds to start station seek tuning.
The radio tunes into the next receivable station.
5 / > for approx.
33

Radio mode
Notes:
For the tuner region "EUROPE": In the FM
•
waveband, only traffi c information stations
are tuned into if the priority for traffi c information (
For the tuner regions "EUROPE", "USA"
•
and "S AMERICA": In the FM waveband,
the next station with the currently selected
programme type is tuned into if the PTY
function is activated (see the ch. "PTY").
•
The sensitivity of seek tuning can be adjusted (see the chapter "User settings",
section "Performing settings in the user
menu", menu item "SENS").
) is switched on.
Storing stations/Calling stored
stations
Select the desired memory bank.
쏅
If necessary, set the desired station.
쏅
Press the station button
쏅
2 seconds to store the current station under
the button.
- or -
Briefl y press the station button
쏅
call up the stored station.
1 - 5 < for approx.
1 - 5 < to
Storing stations automatically
(Travelstore)
With Travelstore, you can automatically search for
and store the 5 FM stations offering the strongest
reception in the region in one memory bank, Any
previously stored stations in this memory bank
are deleted in the process.
In the tuner regions "EUROPE" and "THAI", you
can store 5 FM stations in the FMT memory bank
with Travelstore. In the tuner regions "USA" and
"S AMERICA", you can also store 5 AM stations in
the AMT memory bank.
쏅
Select a memory bank of the desired waveband, e.g. FM1 or AM.
쏅
Press the button
2 seconds.
The tuner starts the automatic station seek
tuning; the display shows "FM TSTORE" or
"AM TSTORE". After the storing is completed,
the radio plays the station at memory location
1 of the FMT or AMT level.
Note:
For the tuner region "EUROPE": If the priority
for traffi c information is switched on (
only traffi c information stations are stored.
@ / 2 for approx.
),
Scanning stations
The scan function is used to scan every receivable
station of the current waveband.
Press the MENU•OK
쏅
2 seconds to start the scan, or long to continue playing the currently set station.
During the scan, the display alternately displays "SCAN" and the current frequency as
well as memory bank or station name.
Note:
For radio mode, you can adjust the scan time
for each station (see the ch. "User settings",
section "Performing settings in the user
menu", "SCAN TIME" menu item).
button ? for approx.
PTY
In the tuner regions "EUROPE", "USA" and "S
AMERICA", an FM station can transmit its current programme type, e.g. CULTURE, POP, JAZZ,
ROCK, SPORT or SCIENCE. Hence, the PTY function allows a targeted search for broadcasts of a
certain programme type, e.g. for rock or sports
broadcasts. Note that PTY is not supported by all
stations.
34
Note:
To use the PTY function, you must activate
it separately in the menu (see the ch. "User
settings", section "Performing settings in the
user menu", "PTY" menu item).
Selecting a programme type
Note:
In the tuner region "EUROPE", you can adjust
the language in which the programme types
are displayed (see the ch. "User settings",
section "Performing settings in the user
menu", "PTY LANG" menu item).
Briefl y press the button
쏅
5 / >.
Radio mode | CD/MP3/WMA/C‘n‘C/CD changer mode
If the tuned radio station or another station
•
on the broadcasting network broadcasts
your selected programme type at a later
point in time, the car sound system will automatically switch from the currently tuned
station or from the current audio source
(e.g. CD) to the station whose programme
type matches the one you selected. Note
that this function is not supported by all
stations.
Confi guring the display
Press the DIS/ESC button = to change be-
쏅
tween these two displays:
ENGLISH
The currently selected programme type is
briefl y displayed, and you can select a different programme type.
If necessary, press the button
쏅
repeatedly until the desired programme type
is selected.
Searching for stations
Press the button
쏅
2 seconds.
As soon as the seek tuning starts, the display
briefl y shows "SEARCH". Afterwards, the current programme type is displayed
As soon as a station is found, "PTY FOUND"
is briefl
type of the adjusted station corresponds to
the currently selected programme type, the
display alternately shows the programme
type and the station name or frequency.
Notes:
•
y shown. As long as the programme
If no station with the selected programme
type is found, "NO PTY" is briefl y displayed
and a beep sounds. The radio will then
retune to the station that it played last.
5 / > for approx.
5 / >
.
Display Meaning
ABCDEF
or
FM1 102.90
FM1 11:32
Station name
or
memory bank/frequency
Memory bank/time
CD/MP3/WMA/C‘n‘C/
CD changer mode
Basic information
CD/MP3/WMA mode
This car sound system can be used to play audio
CDs (CDDA) and CD-R/RWs with audio, MP3 or
WMA fi les as well as MP3 or WMA fi les on USB
data carriers.
Risk of severe damage to the CD drive!
Noncircular contoured CDs (shape CDs)
and CDs with a diameter of 8 cm (mini
CDs) must not be used.
We accept no responsibility for any damage to the
CD drive that may occur as a result of the use of
unsuitable CDs.
Notes:
To ensure proper functioning, use only CDs
•
with the Compact-Disc logo.
35

CD/MP3/WMA/C‘n‘C/CD changer mode
Blaupunkt cannot guarantee the fl awless
•
function of copy-protected CDs and all CD
blanks and USB data carriers available on
the market.
Note the following information when preparing an
MP3/WMA data carrier:
Naming of tracks and directories:
•
Max. 16 characters (CD) or 24 charac-
–
ters (USB) incl. the fi le extension ".mp3"
or ".wma" (if more characters are used,
the number of tracks and folders that are
recognisable by the car sound system is
reduced)
No umlauts or special characters
–
CD formats: Audio CD (CDDA), CD-R/RW,
•
Ø: 12 cm
CD data formats: ISO 9669 Level 1 and 2,
•
Joliet
CD burn speed: Max. 16x (recommended)
•
USB format/fi le system: Mass storage device/
•
FAT32
File extension of audio fi les:
•
.MP3 for MP3 fi les
–
.WMA for WMA fi les
–
WMA fi les only without Digital Rights Manage-
•
ment (DRM) and created with Windows Media
Player version 8 or later
MP3 ID3 tags: Version 1 and 2
•
Bitrate for creating audio fi les:
•
MP3: 32 to 320 kbps
–
WMA: 32 to 192 kbps
–
Max. number of tracks: 20,000
•
CD changer mode
You can connect the following CD changers to the
car sound system:
•
Blaupunkt CDC A03
•
Blaupunkt CDC A08
•
Blaupunkt IDC A09
Information on handling CDs, inserting CDs and
operating the CD changer can be found in the
operating instructions supplied with your CD
changer.
Before connecting a CD changer, check the mode
of the rear AUX input. For further details, please
read the section "Rear AUX input" in the chapter
"External audio sources".
Changing to CD/MP3/WMA/C‘n‘C/
CD changer mode
Press the SRC button 6 repeatedly until
쏅
the desired audio source is displayed:
"CD": Inserted CD.
•
"MP3": Inserted CD that has already been
•
recognised as MP3 CD.
"USB": Connected USB data carrier.
•
Name of the device connected via C‘n‘C
•
"CDC / AUX": Connected CD changer (if no
•
other external audio source is connected).
Notes:
The respective audio source can be select-
•
ed only if a corresponding CD is inserted or
a corresponding device (e.g. a USB data
carrier or CD changer) is connected.
C‘n‘C mode
The C'n'C interface from Blaupunkt (C'n'C = Command and Control) allows an even more convenient control of devices and data carriers that are
connected to the car sound system via a C'n'Cready Blaupunkt interface.
Before connecting a C'n'C-ready Blaupunkt interface, check the mode of the rear AUX input. For
further details, please read the section "Rear AUX
input" in the chapter "External audio sources".
36
If the car sound system fi rst has to read
•
the data of a connected device or data carrier before the playback, the display shows
"READING". For large data volumes, this
may take up to 1 minute. If the device or
data carrier is defective or the transferred
data cannot be played back, a corresponding message appears on the display (e.g.
"ERROR" or "USB ERROR").
If the connected CD changer fi rst acquires
•
the inserted CDs (e.g. after an interruption
of the power supply or a change of the magazine), "MAG SCAN" is displayed. If the CD
changer does not contain any CDs or magazine, "NO DISC" is displayed.
Inserting a CD
Note:
You must not hinder or assist the drive as it
automatically draws in the CD.
쏅
Insert the CD with its printed side up into the
CD tray
The CD is automatically pulled in and its data
are checked (the display shows "READING"
during this time). Afterwards, the playback
starts in CD or MP3 mode. If a CD is inserted,
the display shows the CD symbol.
Note:
If the inserted CD cannot be played back, "CD
ERROR" is briefl y displayed and the CD is automatically ejected after approx. 2 seconds.
7 until you feel a slight resistance.
CD/MP3/WMA/C‘n‘C/CD changer mode
Connecting/removing a USB data
carrier
To be able to connect a USB data carrier, the supplied USB cable must be connected to the car
sound system (see Installation Instructions).
쏅
Switch of the car sound system so that the
data carrier will be correctly registered and
unregistered.
쏅
Connect the USB data carrier to the USB
cable or pull it off.
If a USB data carrier is connected, the display
shows the USB symbol. If the USB data carrier is initially selected as audio source after
connecting it or after switching on the car
sound system, the data are read in fi rst (the
display shows "READING" during this time).
Notes:
•
If the connected USB data carrier cannot be
seen, "USB ERROR" is briefl y displayed.
•
The time required for reading in the data
depends on the design and size of the USB
data carrier.
ENGLISH
Ejecting a CD
Notes:
•
If a CD is ejected and not removed, the
drive will automatically draw it back in
again after approx. 10 seconds.
•
You can also eject CDs while the car sound
system is switched off or whilst another audio source is activated.
쏅
Press the
CD.
button
: to eject an inserted
Selecting tracks
Briefl y press the button 5 / > to
쏅
change to the previous/next track.
Note:
If the current track plays longer than 3 seconds, pressing
5 once restarts the track.
Select a folder/CD (only in MP3/
WMA/C‘n‘C or CD changer mode)
Press the button @ / 2 to change to
쏅
the previous/next folder or CD.
Note:
This also allows you to change between
playlists of a device connected via C‘n‘C.
37
CD/MP3/WMA/C‘n‘C/CD changer mode
Fast searching
Press and hold down the button 5 / >
쏅
until the desired position has been reached.
Interrupting playback
Press the button 3 < to interrupt the
쏅
playback ("PAUSE") or to continue.
Playlist mode (only in MP3/WMA
mode)
The car sound system can play playlists that were
created with an MP3 manager, such as WinAmp
or Microsoft Media Player. The playlists must be
stored in the root folder of the CD or USB data carrier. The following playlist formats can be recognised: M3U, PLS.
Selecting tracks in Playlist mode
Scanning all tracks
The scan function scans all available tracks.
쏅
Press the MENU•OK
2 seconds to start the scan, or long to continue playing the currently scanned track.
During the scan, the display alternately displays "SCAN" and the current track number
or fi le name.
Notes:
•
In the CD changer mode, the scan time per
track is approx. 10 seconds. For all other
operating modes, you can adjust the scan
time for each track (see the ch. "User settings", section "Performing settings in the
user menu", "SCAN TIME" menu item).
•
In the Playlist mode (MP3 mode), only the
tracks of the current playlist are scanned.
button ? for approx.
쏅
Press the 2 button < for approx. 2 seconds
to change to the Playlist mode:
"LIST MODE" briefl y appears on the display.
The fi rst track of the fi rst playlist is played.
Note:
If the data carrier does not contain any
playlists, "NO LIST" is briefl y displayed.
쏅
Briefl y press the button
5 / > to
change to the previous/next track of the current playlist.
Press the button
쏅
@ / 2 to change to
the previous/next playlist.
The display briefl y shows the name of the
selected playlist, and the fi rst track of the
playlist is being played.
Exiting the Playlist mode
Press the 2 button < for approx. 2 sec-
쏅
onds:
"LIST OFF" briefl y appears on the display. The
current track continues playing.
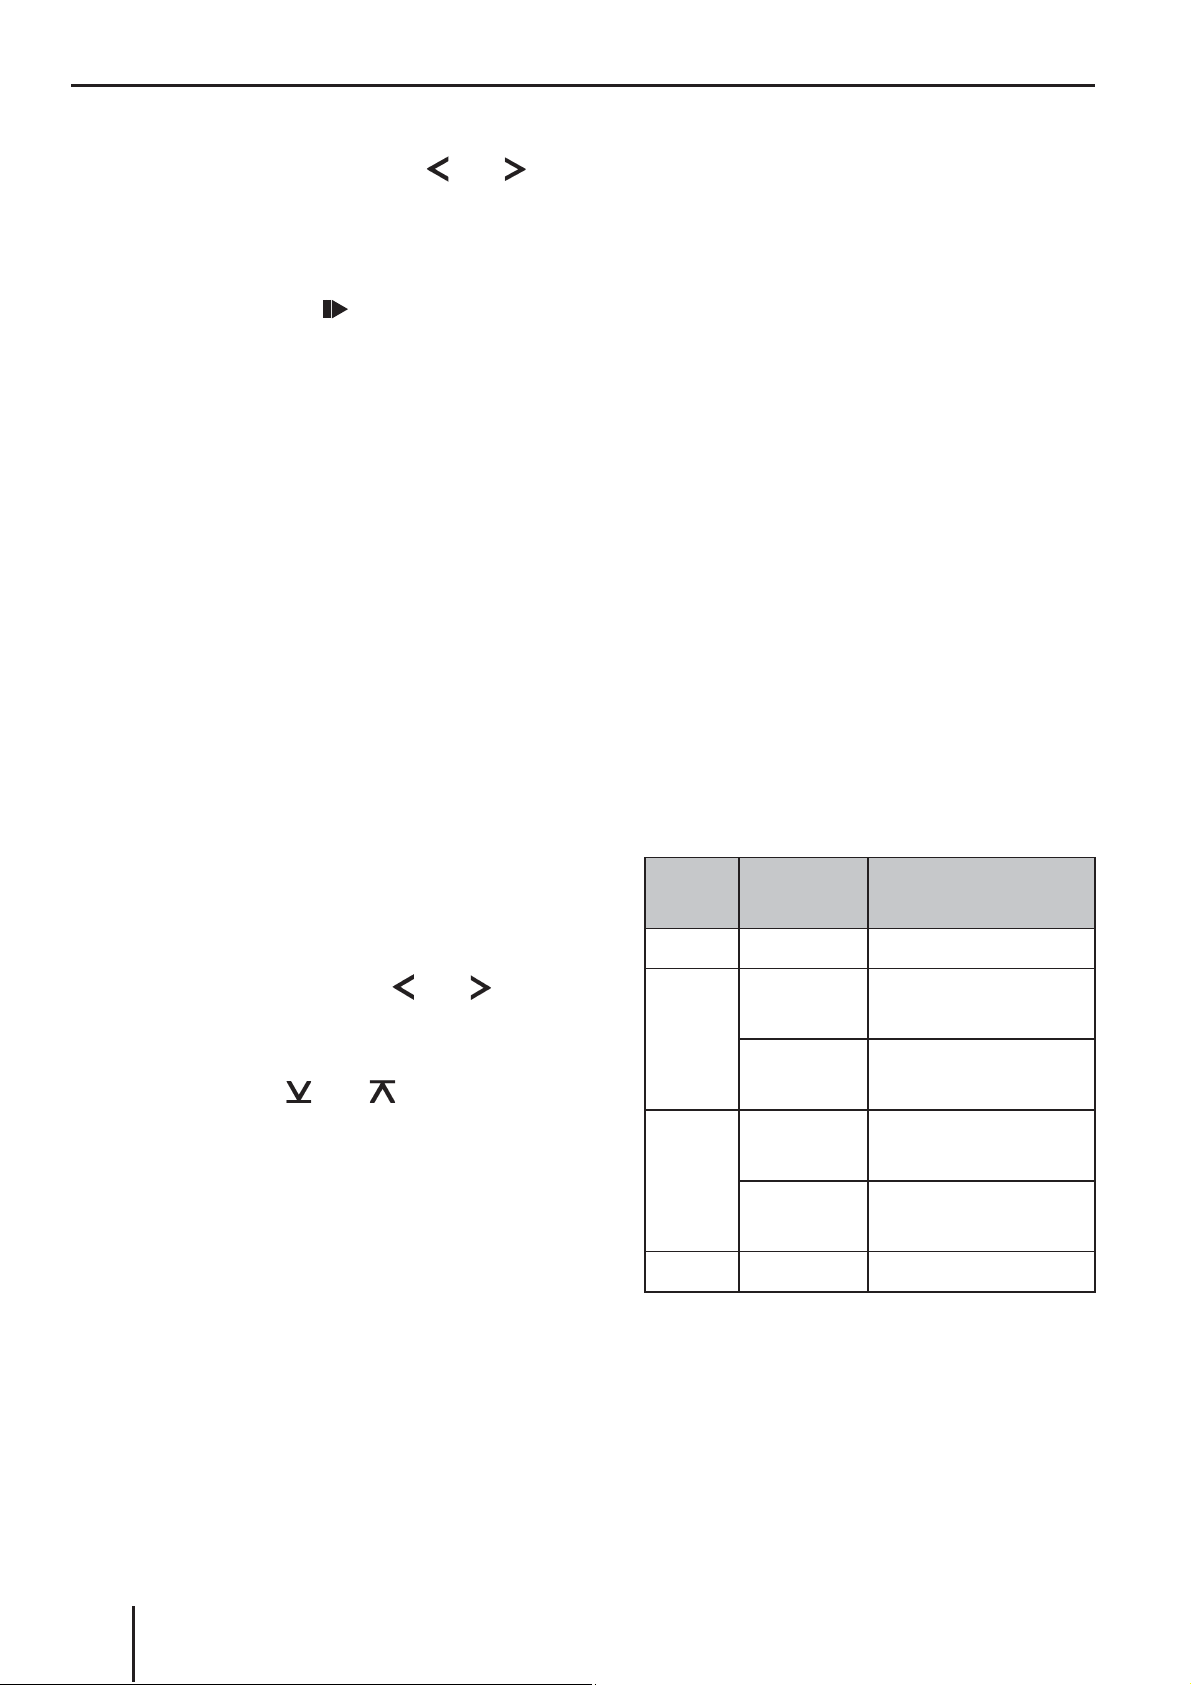
Playing tracks in random order
쏅
Press the 5 MIX button < to change be-
tween the playback modes:
Operation
CD
MP3/
WMA/
C‘n‘C
CDC
Gen.
1
In C‘n‘C mode, additional playback modes
may be available depending on the connected device
2
Not in MP3 Playlist mode
If the MIX function is active, the MIX symbol
appears on the display.
Display Meaning
MIX ALL
2
2
1
MIX DIR
MIX ALL
MIX CD
MIX ALL
MIX OFF
Mixing tracks
Mixing tracks of the
current folder
Mixing tracks of the
data carrier
Mixing tracks of the
current CD
Mixing tracks of
all CDs
Regular playback
38
 Loading...