

Page 1
In Car Video
IVMS-5601
IVMS-7001
Bedienungs- und Einbauanleitung
Operating and installation instructions
Notice d’emploi et de montage
Istruzioni d’uso e di installazione
Gebruiksaanwijzing en inbouwhandleiding
Bruks- och monteringsanvisning
Instrucciones de manejo e instalación
Instruções de serviço e de montagem
Betjenings- og monteringsvejledning
http://www.blaupunkt.com
Page 2
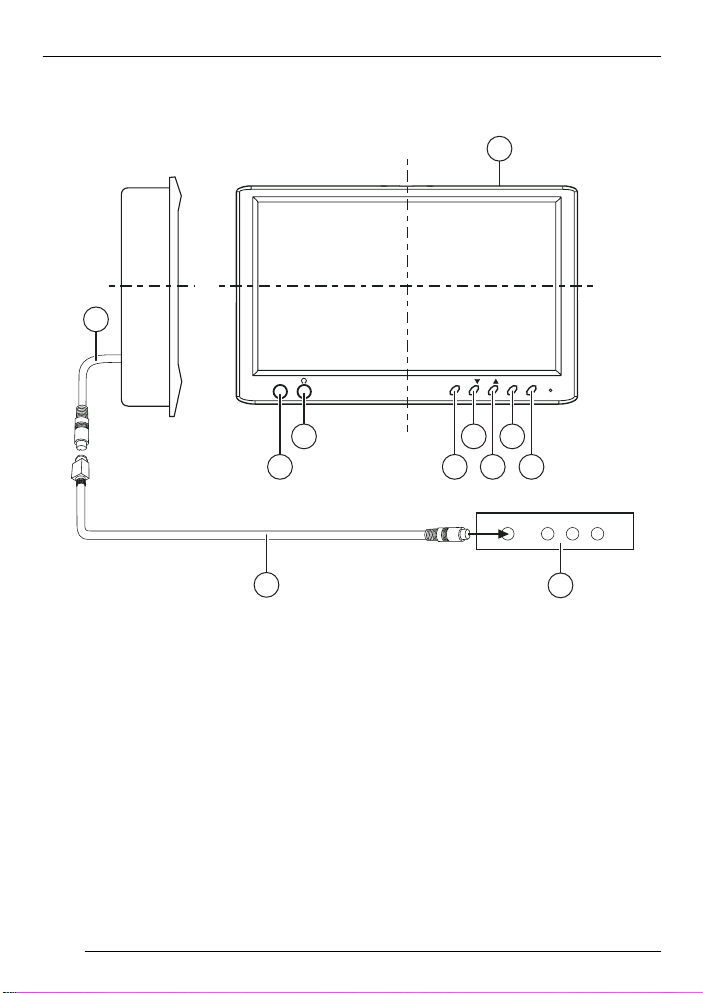
DEVICE OVERVIEW
9
5.6" and 7"
7
8
1
ON
OSDSRCVIDEO
3
5
2
4
6
10
1 5.6"/ 7" TFT LCD screen for
headrests
2 On/off switch
3 Key for screen menu display
(OSD menu)
4 Up menu
5 Down menu
6 AV channel setting
(AV1 - AV2 - AV3 - AV4 - AV5)
12
11
7 Headphone socket
8 Video input (internal)
9 Connecting cable
: Interface cable
; AV signal converter unit
Page 3

Notes / Accessories .............. 14
Fitting ..................................... 14
Prepare the working area .............. 14
Mark out the dimensions ................ 15
Carefully cut open the headrest
cover ............................................. 15
Open the headrest and remove
filling and other items ..................... 15
Lay the cable through the
headrest ........................................ 16
Insert the mounting frame in
the headrest .................................. 16
Insert the monitor .......................... 16
Check and adjust the monitor then
apply the Velcro strips ................... 17
Removal ................................. 17
OSD functions ........................ 18
Main menu .................................... 18
Sub-menu ..................................... 18
Technical data ........................ 20
Guarantee .............................. 21
TAB LE OF CONTENTS
DEUTSCH
ENGLISH
FRANÇAIS
ITALIANO
NEDERLANDS
SVENSKAESPAÑOL
13
PORTUGUÊS
DANSK
Page 4
NOTES / ACCESSORIES FITTING/REMOVAL
Important notes
This device is not intended for fitting in
the forward section of the passenger
compartment where it could also be
seen by the driver. Fitting this device in
any part of the vehicle where it could
interfere with or distract the driver’s attention is dangerous and is not permitted. The manufacturer cannot accept
responsibility for any damage caused
as a result of improper fitting of this device.
To avoid the risk of electrical
shock, the device must be protected
from water and moisture, and must
not be opened. Dangerously high
voltages are generated inside the
device.
We wish to point out that the right to
claim against warranty is invalidated by
any changes or modifications to the
device that have not been explicitly approved by the manufacturer.
Accessories supplied
Connecting cable
Extraction tool
Operating instructions
Fitting
Note
It is recommended that the fitting is carried out at a specialist workshop.
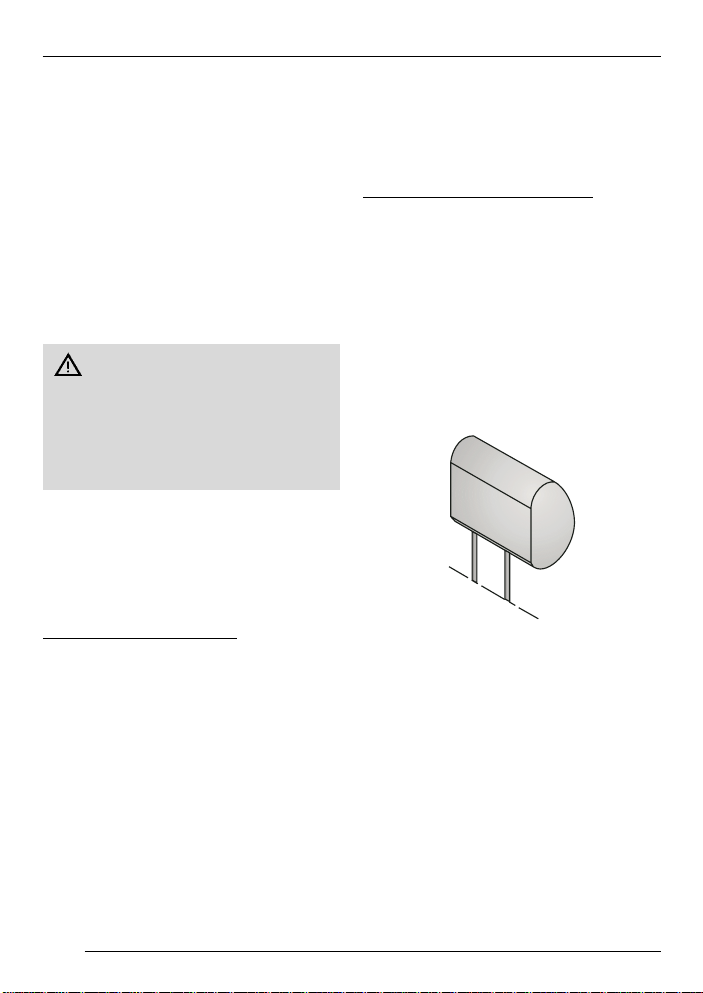
Prepare the working area
➮ Remove the headrest, and place it
on a working surface that has been
cleared and cleaned, where the
further assembly procedures may
be carried out.
Note:
Take appropriate action to ensure that
the headrest is not damaged while fitting the monitor.
14
Page 5
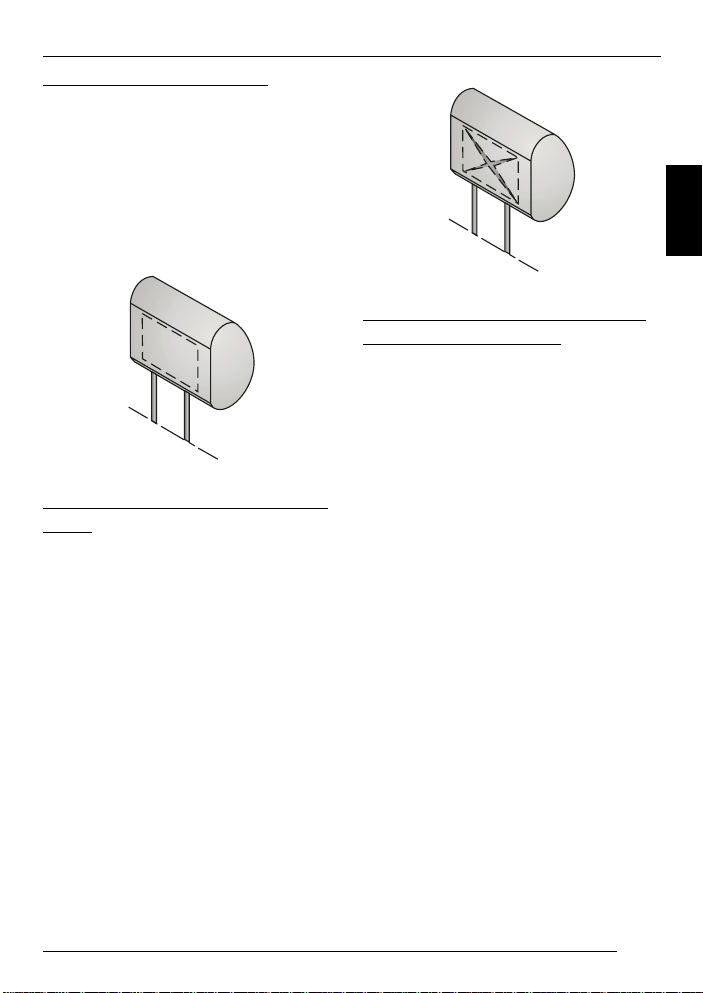
Mark out the dimensions
➮ Feel the covering of the headrest
carefully to ensure that there are
no invisible parts that would prevent the monitor from being fitted.
Use the cardboard template provided
to mark out the area that will need to be
cut.
Carefully cut open the headrest
cover
Use a knife with an adjustable cutting
depth to cut out the planned area.
➮ Make the first cut inside the
marked area at a point about
0.5 cm from one of the corners,
then make a diagonal cut to a point
about 0.5 cm from the opposite
corner.
➮ Make a similar cut between the
other two diagonally opposed corners.
FITTING/REMOVAL
Open the headrest and remove
filling and other items
➮ Carefully lift the covering material
away from the cut area.
➮ Adjust the cutting depth of the knife
to about 2.5 cm, and cut into the
headrest following a line about
0.5 cm inside the marked edge.
➮ Carefully lift the filling material at
one corner, and cut deeper into the
material with the knife.
➮ Remove the filling material in small
pieces.
➮ As you do this, lift one piece of the
filling material, and ensure that the
cut is being made to an even
depth.
To remove other pieces, use a Dremel
saw or another suitable tool.
DEUTSCH
ENGLISH
FRANÇAIS
ITALIANO
NEDERLANDS
SVENSKAESPAÑOL
15
PORTUGUÊS
DANSK
Page 6

FITTING/REMOVAL
➮ Insert the monitor to check that it
will fit into the cut area, and make
adjustments if necessary.
Lay the cable through the
headrest
➮ Now pass the supplied cables
through the opening so that they
emerge from the underneath of the
headrest.
➮ If possible, cover the cable with a
cable tunnel.
➮ Now connect the power supply,
ground and video signal cables, to
check that the monitor is working.
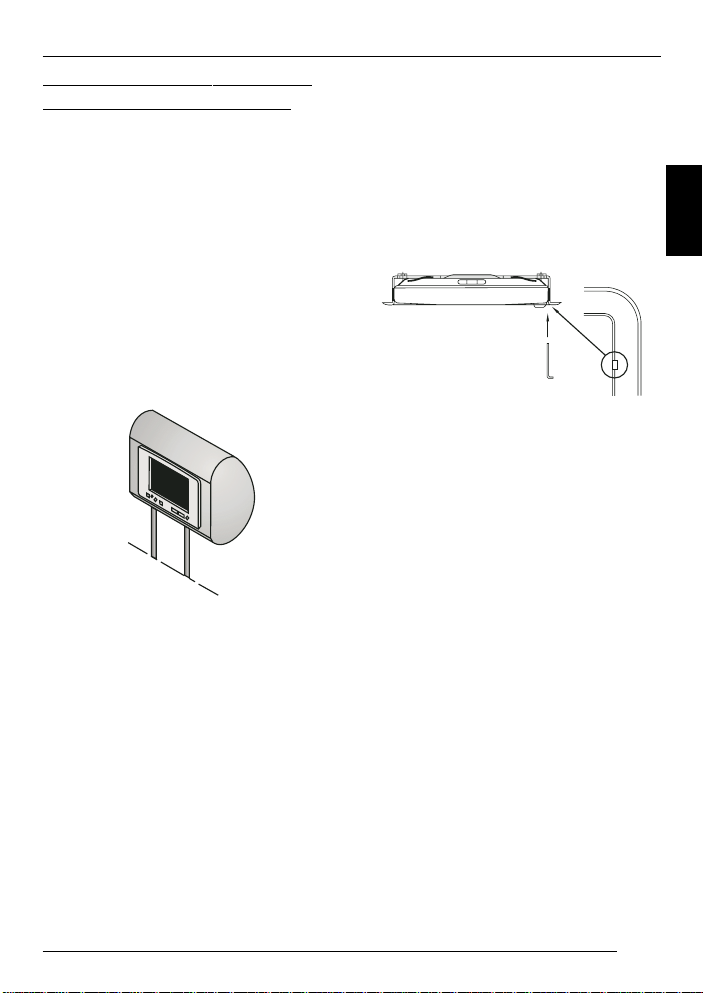
Insert the mounting frame in the
headrest
➮ Before connecting the monitor,
pass the connecting cables
through the holes provided in the
mounting plate, as shown in the illustration.
➮ Insert the mounting plate into the
area that has been cut out, and fix
it in place with appropriate fastenings.
Inserting the monitor
➮ Before connecting the monitor,
pass the connecting cables
through the holes provided in the
mounting plate, as shown in the illustration.
➮ Insert the monitor into the mounting
plate, and attach it with appropriate
fastenings.
16
Monitor
Mounting plate
Page 7
FITTING/REMOVAL
Check and adjust the monitor
then apply the Velcro strips
➮ Connect the monitor, place it tem-
porarily in the cut-out, and place
the headrest into position.
➮ Check the various monitor settings
such as brightness, headphone
function, volume control and so on.
➮ Then attach the Velcro strips to the
rear of the monitor, and push the
frame onto the headrest.
Take care not to press the screen
itself, and apply pressure only in
the region of the frame.
Removal
➮ To remove the screen, insert the
extraction tool between the screen
and the mounting plate.
➮ Insert the extraction tool at the
place where a slot has been provided between the screen and the
mounting plate.
Extraction tool
DEUTSCH
ENGLISH
FRANÇAIS
ITALIANO
NEDERLANDS
SVENSKAESPAÑOL
17
PORTUGUÊS
DANSK
Page 8

FUNCTION
OSD functions
Main menu
➮ Call up the main menu by pressing
the “MODE” key on the main device, or “MENU” on the remote
control unit.
➮ Select the “EXIT” option to leave
the OSD menu again.
VOLUME
BRIGHTNESS
CONTRAST
COLOR
TINT
MISC
EXIT
+
● VOLUME:
Volume adjustment
● BRIGHTNESS:
Brightness adjustment
● CONTRAST:
Contrast adjustment
● COLOR:
Color adjustment
● TINT:
Screen tint adjustment
● MISC:
Opens the sub-menu
● EXIT:
Leave the OSD menu
Sub-menu
➮ To reach the following menu op-
tions, select “MISC” from the main
menu.
➮ When in the sub-menu, select the
“MAIN MENU” option to return to
the main menu, then select “EXIT”
to leave the OSD menu.
AUTO PROGRAM
FM CHAN: OFF
AV OUT: LINE
ZOOM: FULL
SPEAKER: OFF
REVOLVE: LEFT RIGHT
REVOLVE: UP DOWN
RESET PICTURE
MAIN MENU
Note:
Rotate UP
● AUTO PROGRAM :
See the “AUTO PROGRAM” function
in the description of the remote control
unit.
● AV OUT:
Use this option to select between the
“constant” and “variable” AV output
modes.
DOWN (off function).
18
Page 9

FUNCTION
● ZOOM :
This mode is pre-set by default to “full”.
You can make the various adjustments
for the display mode that you want by
pressing the
or keys for the fol-
lowing options:
Full = display a 4:3 signal in a 16:9 im-
age format
ZOOM1 = picture height, zoom factor =
4/3
WIDTH1 = picture height and different
picture width
Normal = edge ratio 4:3
ZOOM2 = zoom factor = 8/7
WIDTH = different picture widths
WIDTH2 = picture height and different
picture width
ZOOM3 = picture height, zoom factor =
8/7
● SPEAKER:
Choose the “SPEAKER” option, then
switch the monitor loudspeaker on or
off with the
● REVOLVE
With this function and the
or keys.
and keys
you can revolve the display on the
screen.
● RESET:
Select the “RESET PICTURE” option to
return all the adjusted parameters to
their factory pre-set values.
● MAIN MENU:
If you are in the sub-menu, select this
option to return to the main menu.
● AUX (input):
Video input for connecting an additional signal source (games console, camcorder, etc.)
Note:
Only use original Blaupunkt
accessory 7 607 001 510.
Or else use a mono plug.
DEUTSCH
ENGLISH
FRANÇAIS
ITALIANO
NEDERLANDS
SVENSKAESPAÑOL
19
PORTUGUÊS
DANSK
Page 10

TECHNICAL DATA
Technical data
System: NTSC/PAL dual
system
Power supply / consumption:
112 V DC
± 10%, <700 mA
Standby: < 1 mA
Video input level: Combined video
signal 0.7 -
2.0 Vp-p, 75 Ohm
Audio input level: 0 - 0.3 Vrms,
10 - 20 kHz
Operating temperature:
0° C - +60° C
Storage temperature:
-20° C - +70° C
Screen size (diagonal):
5.6", 7"
Contrast ratio: 150
Resolution (pixels):
5.6": 720 (H) x 234 (W) =
168,480 pixels
7": 1440 (H) x 234 (W)
= 336,960 pixels
Black light: cold cathode tube
Visible screen area:
155.52 (W) x
87.75 (H) mm
Angle of view:
5.6": from left and right:
45°,
from above: 10°,
from below: 30°
7": from left and right:
60°,
from above: 60°,
from below: 30°
Full monitor dimensions:
5.6": 140 (W) x 114 (H) x
42 (D) mm
7": 200 (W) x 127 (H) x
33,5 (D) mm
Electrical power consumption:
< 9 W
Brightness: 400 cd/m
Screen technology:
TFT (thin film transistor) display system
20
Monitor weight: < 500 g
2
Subject to changes!
Page 11

Guarantee
The scope of the guarantee depends
on the regulations in force within the
country in which the unit was purchased.
If your unit develops a fault, please contact your dealer and present the purchase receipt.
If the statutory guarantee period in your
country is less than 12 months, Blaupunkt will grant a 12-month manufacturer’s guarantee. This guarantee does
not cover damage due to wear, incorrect usage or commercial use.
If you wish to enforce a claim under the
manufacturer’s guarantee that is provided by Blaupunkt, please send the faulty
equipment together with the purchase
receipt to the Blaupunkt customer service centre in your country. You can find
out which address is closest to you by
contacting the telephone hotline listed
on the back page of this booklet. Blaupunkt retains the right to rectify defects
or supply a replacement.
GUARANTEE
DEUTSCH
ENGLISH
FRANÇAIS
ITALIANO
NEDERLANDS
SVENSKAESPAÑOL
21
PORTUGUÊS
DANSK
Page 12

Service-Nummern / Service numbers / Numéros du service aprèsvente / Numeri del servizio di assistenza / Servicenummers /
Telefonnummer för service / Números de servicio / Números de
serviço / Servicenumre
Country: Phone: Fax: WWW:
Germany (D) 0180-5000225 05121-49 4002 http://www.blaupunkt.com
Austria (A) 01-610 390 01-610 393 91
Belgium (B) 02-525 5454 02-525 5263
Denmark (DK) 44 898 360 44-898 644
Finland (FIN) 09-435 991 09-435 99236
France (F) 01-4010 7007 01-4010 7320
Great Britain (GB) 01-89583 8880 01-89583 8394
Greece (GR) 0800-550 6550 01-576 9473
Ireland (IRL) 01-4149400 01-4598830
Italy (I) 02-369 6331 02-369 6464
Luxembourg (L) 40 4078 40 2085
Netherland (NL) 023-565 6348 023-565 6331
Norway (N) 66-817 000 66-817 157
Portugal (P) 01-2185 00144 01-2185 11 111
Spain (E) 902-120234 916-467952
Sweden (S) 08-7501500 08-7501810
Switzerland (CH) 01-8471644 01-8471650
Czech. Rep. (CZ) 02-6130 0441 02-6130 0514
Hungary (H) 01-333 9575 01-324 8756
Poland (PL) 0800-118922 022-8771260
Turkey (TR) 0212-3350677 0212-3460040
USA (USA) 800-2662528 708-6817188
Brasil
(Mercosur) (BR) +55-19 3745 2769 +55-19 3745 2773
Malaysia
(Asia Pacific) (MAL) +604-6382 474 +604-6413 640
Blaupunkt GmbH
08/02 CM/PSS2 - 8 622 403 177
 Loading...