


Toaster Oven
First Use Safety Recommendation
Please read through this booklet for safe and efficient use of the appliance. We urge you to read the "Hint's" section and also follow all detailed instructions even if you are familiar with using this appliance.
Keep this guide handy for future reference.
English |
Page 02 |
Arabic |
Page 19 |
TRO2000/TRO2000R/
TRO50/TRO55/TRO60

English
IMPORTANT SAFEGUARDS
While using electrical appliances, in order to reduce the risk of fire, electric shock, and/or injury to persons, basic safety precautions should be followed, including the following:
•Read all instructions carefully, even if you are familiar with the appliance.
•To protect against the risk of electric shock, DO NOT IMMERSE the appliance, cord set or plug in water or other liquids.
•To clean, wipe the exterior with a damp cloth.
•Close supervision is necessary when any appliance is used near children. Never leave an appliance unattended when in use.
•If the supply cord is damaged, it must be replaced by the manufacturer or its service agent or a similarly qualified person in order to avoid a hazard.
•Switch off and remove the plug from the power outlet when not in use before assembling or disassembling parts, cleaning or carrying out any maintenance of the appliance. Never pull the cord while unplugging out from power outlet.
•Do not operate the appliance if its damage in any manner. Return the complete appliance to your nearest authorized service facility for examination, electrical repair, mechanical repair or adjustments to avoid any hazard.
•The use of attachments or accessories not recommended or sold by this appliance manufacturer may result in fire, electric shock or personal injury.
•Do not let the cord hang over the edge of a table, counter, or touch hot surfaces.
•Avoid touching hot surfaces, use handles and knobs.
•Do not operate or place any part of this appliance on or near any hot surfaces (such as gas or electric burner or in a heated oven).
•Do not abuse the cord. Never carry the appliance by the cord or yank it to disconnect it from the outlet; instead, grasp the plug and pull to disconnect.
•When using an extension cord with your appliance, make sure the extension cord is correctly wired, and rated for its use.
•This product is intended for household use only.
•Do not attempt to repair the appliance yourself; instead, take it to your Black & Decker-owned or Authorized Service Centre for repair.
SAVE THESE INSTRUCTIONS
-2-

English |
|
|
|
|
|
|
|
TEMPERATURE |
|
|
|
|
50ºC |
100ºC |
1 |
|
|
3 |
|
|
|
|
0 |
150ºC |
|
|
|
|
|
|
|
|
250ºC |
200ºC |
|
|
|
|
|
|
|
|
SELECTOR |
OFF |
|
|
|
|
|
2 |
|
|
6 |
|
|
|
|
|
|
|
|
|
12 |
|
|
|
|
TIMER 9 3 |
OFF |
|
|
|
6 |
|
|
|
|
4 |
10MIN |
|
|
|
|
|
|
8 |
|
60 |
20 |
|
5 |
MIN |
MIN |
|
|
|
|
||
|
|
|
|
|
|
|
9 |
50MIN |
30MIN |
|
|
|
40 |
|
|
|
|
|
MIN |
|
|
|
|
POWER |
7 |
|
|
TRO50, TRO55 & TRO60 |
|
|
|
|
|
|
|
TEMPERATURE |
TEMPERATURE |
||
|
|
|
3 |
|
|
150ºC |
200ºC |
150ºC |
200ºC |
|
100ºC |
250ºC |
100ºC |
250ºC |
|
|
POWER |
5 |
POWER |
|
|
|
||
13 |
FUNCTION |
FUNCTION |
||
|
|
|
|
|
|
|
|
OFF |
|
|
|
|
6 |
|
11 |
|
|
|
|
|
10 |
|
|
|
|
12 |
|
|
12 |
12 |
TIMER 9 6 |
3 |
TIMER 9 6 3 |
|
|
OFF |
|
OFF |
|
|
10MIN |
4 |
10MIN |
|
|
|
|||
|
|
|
|
|
|
60 |
20 |
60 |
20 |
|
MIN |
MIN |
MIN |
MIN |
|
50MIN |
30MIN |
50MIN |
30MIN |
|
|
40 |
|
40 |
|
|
MIN |
|
MIN |
|
TRO2000R |
|
TRO2000 |
|
|
-3- |
|
|
|

English
Parts Identification
1.Shelf supports
2.Glass door
3.Temperature control
4.Timer
5.Power indicator lamp
6.Function selector
7.Shelf
8.Food tray
9.Crumb tray ( TRO50, TRO55 & TRO60 ) 10.Rotisserie skewer
11.Rotisserie forks 12.Rotisserie handle
13.Food tray handle
Intended use
Your Black & Decker toaster oven has been designed for toasting, baking etc. Your toaster oven should not be used for any other applications. This appliance is intended for indoor household use only.
Safety instructions
• Retain this manual for future reference.
Using your appliance
•Make sure that the appliance is switched off before connecting to or disconnecting from the power supply.
•Always take care when using the appliance.
•Do not use the appliance outdoors.
•Never pull the power supply cord to disconnect the plug from the socket. Keep the power supply cord away from heat, oil and sharp edges.
•If the power supply cord is damaged during use, disconnect the appliance from the power supply immediately. Do not touch the power supply cord before disconnecting from the power supply.
•Disconnect the appliance from the power supply when not in use, before carrying out any maintenance, fitting or removing parts and before cleaning.
Safety of others
Warning! When using mains-powered appliances, basic safety precautions, including the following, should always be followed to reduce the risk of fire, electric shock, personal injury and material damage.
Read all of this manual carefully before using the appliance.
•The intended use is described in this manual. The use of any accessory or attachment or the performance of any operation with this appliance other than those recommended in this instruction manual may present a risk of personal injury.
•This appliance is not intended for use by persons (including children) with reduced physical, sensory or mental capabilities, or lack of experience and knowledge, unless they have been give supervision or instruction concerning use of the appliance by a person responsible for their safety.
•Children must be supervised to ensure that they do not play with the appliance.
•Do not allow children or any person unfamiliar with these instructions to use the appliance.
-4-

English
•Do not allow children or animals to come near the work area or to touch the appliance or power supply cord.
•Close supervision is necessary when the appliance is used near children.
After use
•Switch off and remove the plug from the socket before leaving the appliance unattended and before changing, cleaning or inspecting any parts of the appliance.
•When not in use, the appliance should be stored in a dry place. Children should not have access to stored appliances.
Inspection and repairs
•Before use, check the appliance for damaged or defective parts. Check for breakage of parts, damage to switches and any other conditions that may affect its operation.
•Do not use the appliance if any part is damaged or defective.
•Have any damaged or defective parts repaired or replaced by an authorised repair agent.
•Before use, check the power supply cord for signs of damage, ageing and wear.
•Do not use the appliance if the power supply cord or mains plug is damaged or defective.
•If the supply cord is damaged, it must be replaced by the manufacturer or its service agent or a similarly qualified person in order to avoid a hazard.
•Never attempt to remove or replace any parts other than those specified in this manual.
Specific safety Instructions for toaster ovens
Warning! Accessible parts may become hot when the appliance is in use. Children should be kept away.
The following symbols are found on your appliance:
Denotes a hot surface.
•Always route the cord carefully to avoid a tripping hazard.
•Do not allow the cord set to hang over bench tops.
•Allow adequate space around and above the appliance for ventilation.
•Care must be taken when opening the appliance as hot air may escape on opening.
•The glass door and the outside surfaces of the oven get very hot during use. Oil and other cooking liquids may also get very hot during use. Always wear oven gloves when opening the glass door and when removing trays from the oven.
•Care should be taken to avoid touching heating elements inside the oven.
•Do not cover trays or other parts with metal foil as this may cause overheating.
•Surfaces may be hot during use and during the cool down period.
•Do not use a steam cleaner to clean this appliance.
•Never immerse the appliance, the cord set or the plug in liquid.
-5-
English
Never use the following items in your
toaster oven:
•Sealed containers such as sealed pouches or unopened cans.
•Glass lids on glass or metal bake-ware.
•Plastic wrapping or paperboard covers.
•Containers larger than those recommended ( larger and higher containers will interfere with air circulation).
•Containers with specific warnings against use in ovens.
Electrical safety
This product must be earthed.
Always check that the power
supply corresponds to the voltage on the rating plate.
Power plugs must match the outlet. Never modify the plug in any way. Do not use any adapter plugs with earthed (Class 1) appliances. Unmodified plugs and matching outlets will reduce the risk of electric shock.
Extension cables & Class 1 product
A 3 core cable must be used as  your appliance is earthed and of Class 1 construction. Up to 30m (100 ft) can be used without loss of power.
Additional instructions for your toaster
oven
•Metal, oven proof glass or glass ceramic bake-ware may be used in your oven.
•Follow manufacturer's instructions. When using deep oven proof glass or glass ceramic containers, make sure that the top edge of the container is at least 2.5 cm away from the upper heating elements.
•Many prepared frozen foods are packaged in nonmetallic containers suitable for use in microwave ovens as well as regular ovens. Check the package instructions to determine if the container is suitable for use in a regular oven.
•When using these containers in a toaster oven, always allow the oven to preheat for about 5 minutes before placing the ingredients inside.
•Remove any plastic wrapping and plastic or cardboard covers which may only be suitable for use in microwave ovens.
•Place the container holding the food to be cooked on the oven pan and cook according to the instructions or until the food is thoroughly heated.
•Never use these containers when cooking or top browning.
Use
•After cleaning, the food tray (7) can be lightly coated with butter, margarine or cooking fat.
-6-
English
Operation
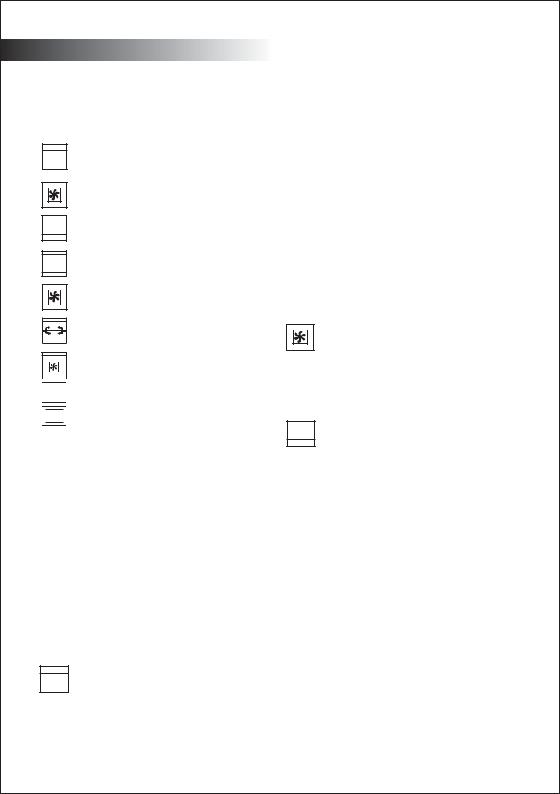
The function selector (6) on your appliance has the following symbols:
OFF
Top elements on (toasting) (TRO2000 & TRO2000R)
 Toasting with convection (TRO50, TRO55 & TRO60)
Lower elements on (baking) (TRO2000 & TRO2000R)
Broiling (top and bottom elements)
(TRO2000, TRO2000R, TRO50, TRO55 & TRO60)
 Broiling with convection (TRO50, TRO55 &
  TRO60)
Top elements on and rotisserie on (TRO50, TRO55, TRO60 & TRO2000R)
 Rotisserie convection and both elements
 (TRO50, TRO55 & TRO60)


 Rotisserie with bottom element


 Rotisserie with top and bottom elements
Tray positions
•Use the upper position for faster browning and cooking times, but be sure to allow at least 2.5 cm between the food and the heating elements. Use the lower position for longer cooking times or for delicate foods when less browning is required.
•Do not cover the shelf (7) with aluminium foil, as this prevents fats and juices from dripping into the food tray (8) and could cause the oven to overheat.
•Open the glass door (2) completely to pull out the shelf (7). Be sure to use protective gloves to prevent burns.
Toasting (top element only) (TRO2000 & TRO2000R)
•Slide the shelf (7) into one of the available positions.
•Place the bread on the shelf (7).
•Set the function selector (6) to the top element only position.
•Set the temperature control (3) to the required temperature.
•Turn the timer to the required time. If a time of less than 10 minutes is required, turn the dial past 10 minutes and then turn it back to the correct time. The oven will turn on automatically with the timer.
•As soon as the cooking time has elapsed, cooking will stop automatically and an alarm will be heard.
•Moist or fresh breads may cause condensation to form on the inside of the glass door (2). This is normal and will vary with the bread being toasted.
 Toasting with convection (TRO50, TRO55 & TRO60)
Toasting with convection is the same as "Toasting", however cooking will be completed faster due to the convection action. Reduce cooking times to suit.
Baking (bottom element only) (TRO2000 & TR2000R)
•Slide the shelf (7) into one of the available positions.
•Place the food on the shelf (7).
•Close the glass door (2).
•Set the function selector (6) to the bottom element only position.
•Set the temperature control (3) to the required temperature.
•Set the timer (4) to the required baking time.
•Turn the timer to the required time. If a time of less than 10 minutes is required, turn the dial past 10 minutes and then turn it back to the correct time. The oven will turn on automatically with the timer.
•As soon as the cooking time has elapsed, cooking will stop automatically and an alarm will be heard.
-7-
 Loading...