

Black & Decker Glacier User Manual
Hi
GETTING
TO
KNOW
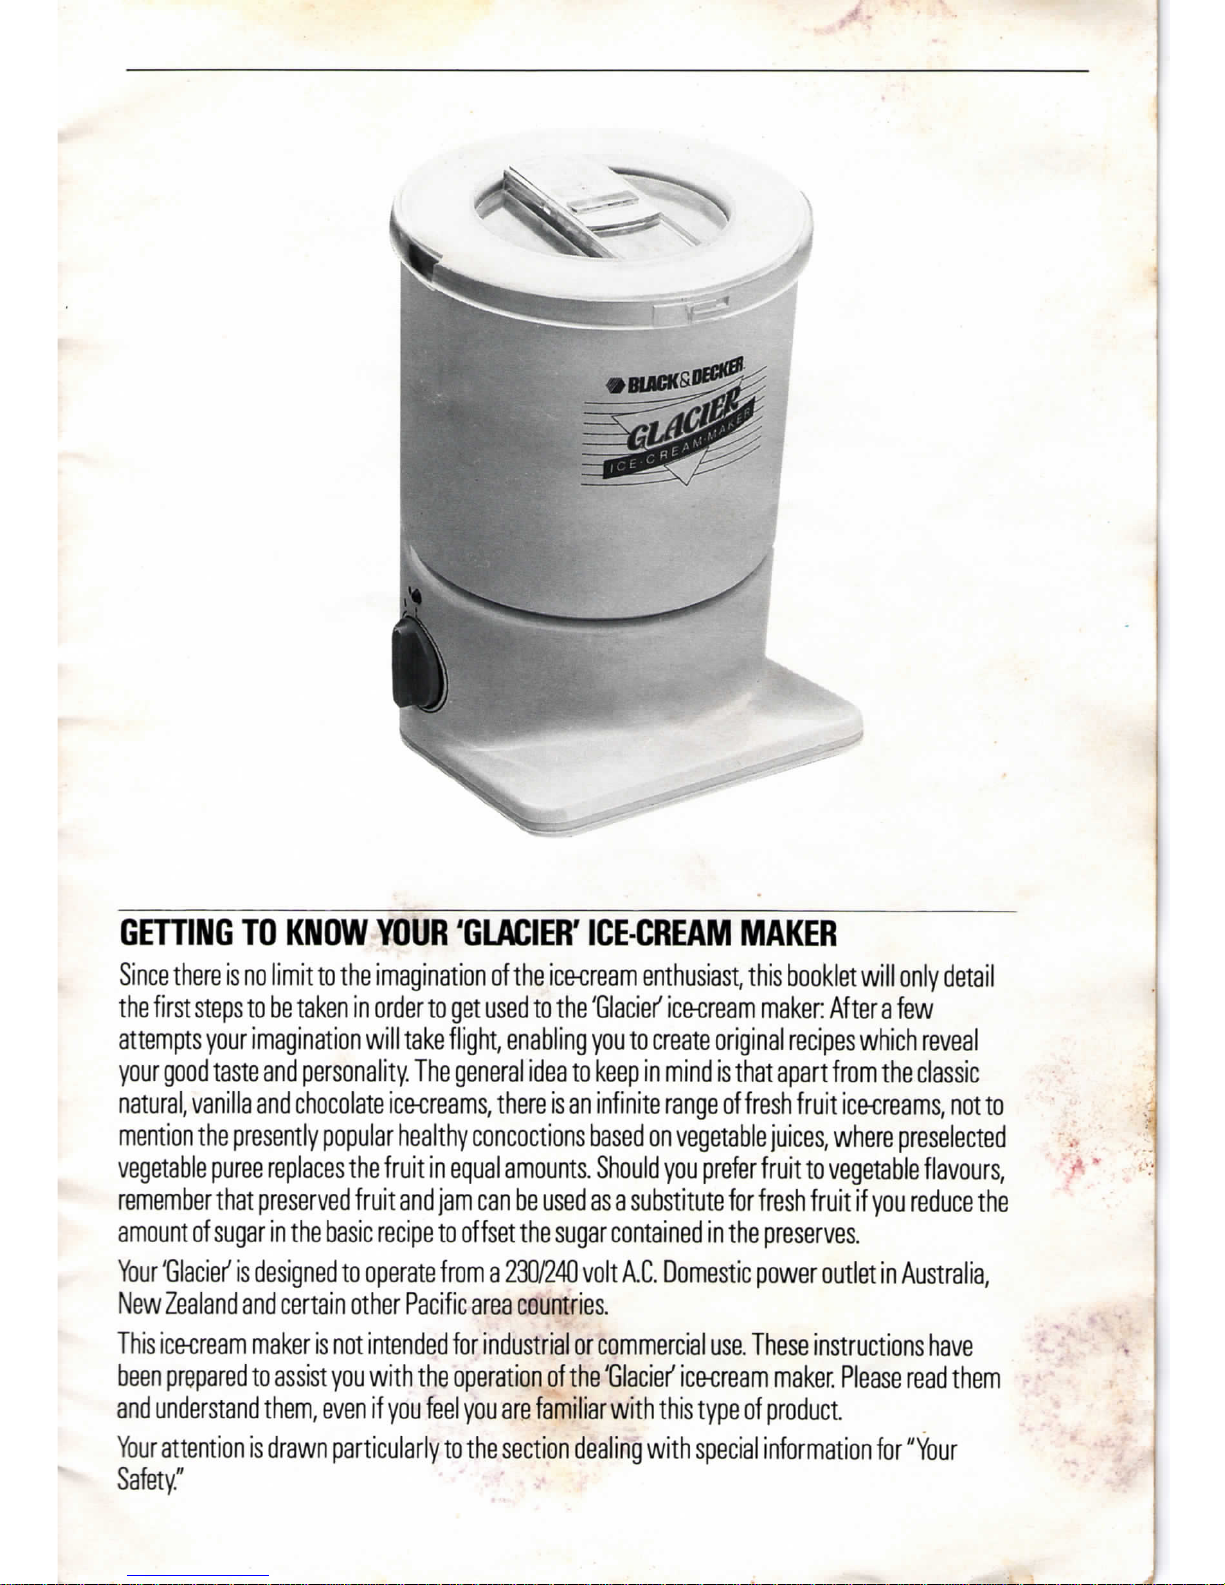
YOUR 'GLACIER' ICE-CREAM MAKER
Since
there
is
no
limit
to the
imagination
of the
icecream
enthusiast,
this
booklet
will
only
detail
the
first
steps
to
be
taken
in
order
to get
used
to the
'Glacier1
icecream
maker:
After a few
attempts
your
imagination
will
take
flight,
enabling
you to
create
original
recipes
which
reveal
your
good
taste
and
personality.
The
general
idea
to
keep
in
mind
is
that
apart
from
the
classic
natural,
vanilla
and
chocolate
icecreams,
there
is
an
infinite
range
of
fresh
fruit
ic&creams,
not to
mention
the
presently
popular
healthy
concoctions
based
on
vegetable
juices,
where
preselected
vegetable
puree
replaces
the
fruit
in
equal
amounts.
Should
you
prefer
fruit
to
vegetable
flavours,
remember
that
preserved
fruit
and jam can be
used
as a substitute
for
fresh
fruit
if you
reduce
the
amount
of
sugar
in the
basic
recipe
to
offset
the
sugar
contained
in the
preserves.
Your
'Glacier"
is
designed
to
operate
from a 230/240
volt
AC.
Domestic
power
outlet
in
Australia,
New
Zealand
and
certain
other
Pacific
area
countries.
This
icecream
maker
is
not
intended
for
industrial
or
commercial
use.
These
instructions
have
been
prepared
to
assist
you
with
the
operation
of the
'Glacier'
icecream
maker.
Please
read
them
and
understand
them,
even
if you
feel
you are
familiar
with
this
type
of
product.
Your
attention
is
drawn
particularly
to the
section
dealing
with
special
information
for
"Your
Safety."
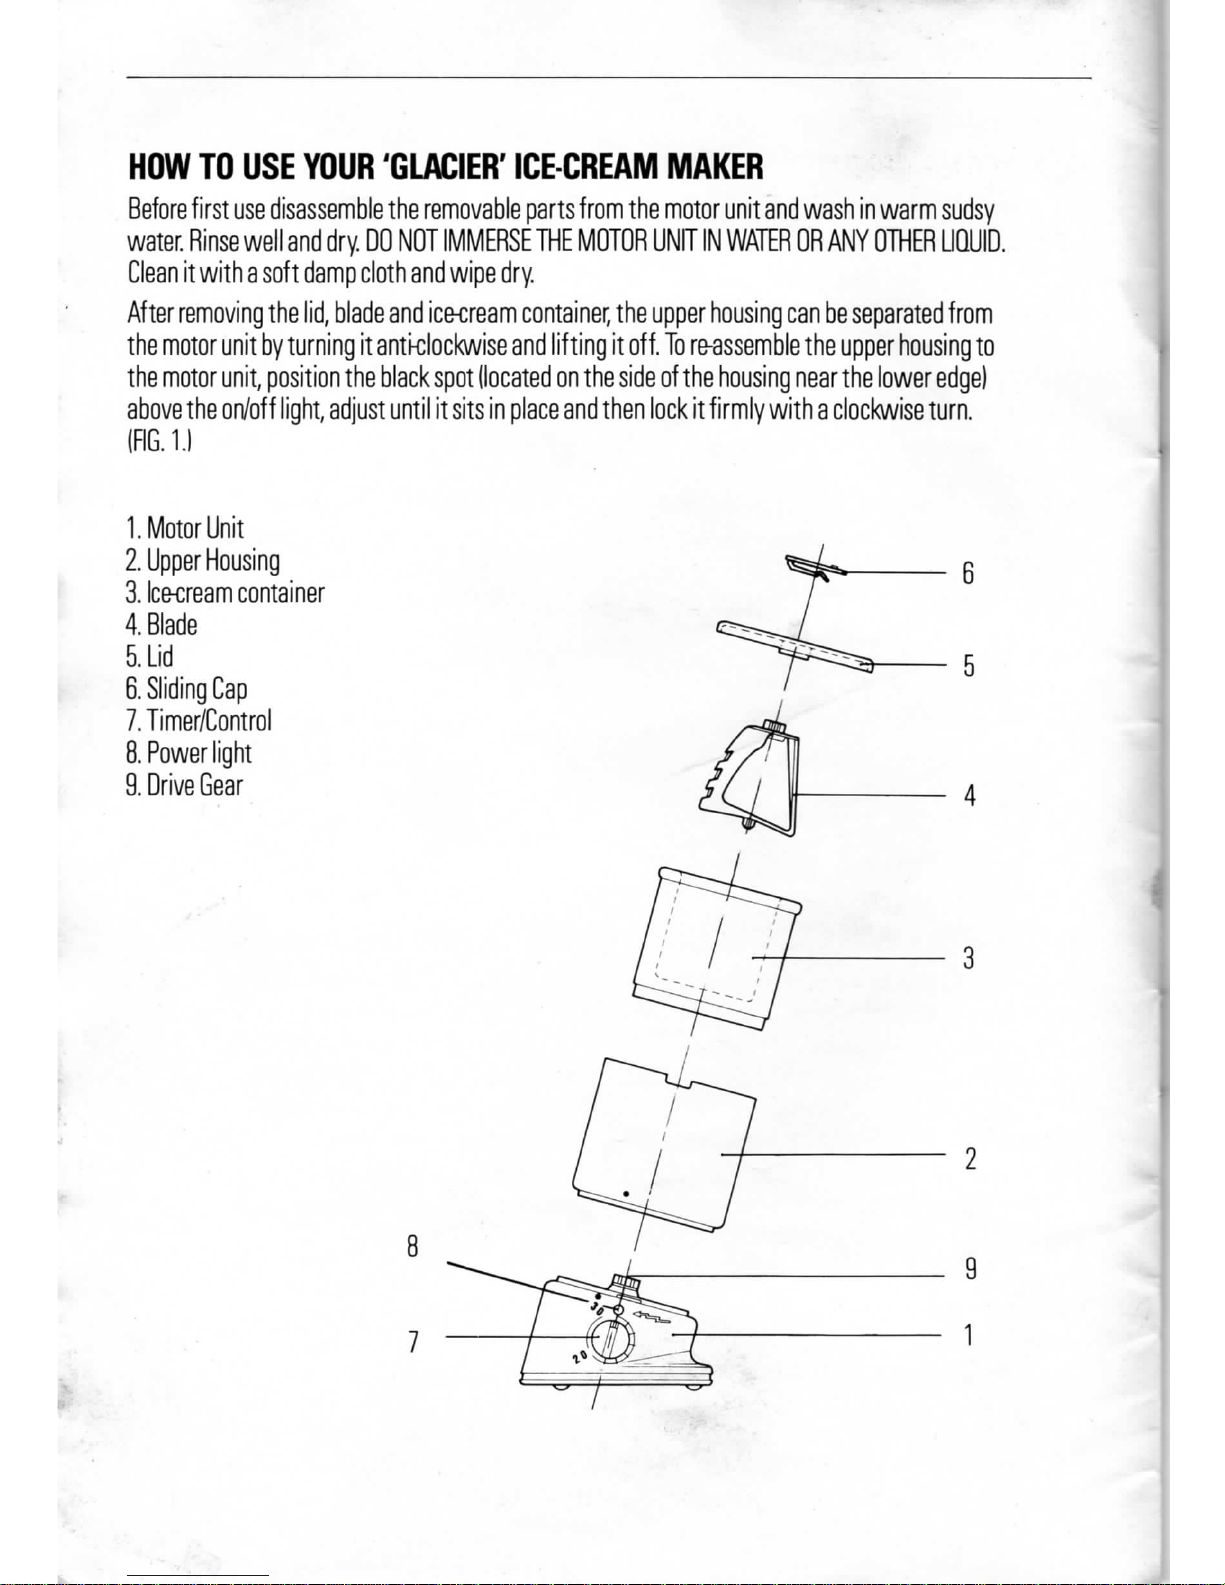
HOW TO USE
YOUR
'GLACIER'
ICE-CREAM
MAKER
Before
first
use
disassemble
the
removable
parts
from
the
motor
unit
and
wash
in
warm
sudsy
water.
Rinse
well
and dry. DO NOT
IMMERSE
THE
MOTOR
UNIT
IN
WATER
OR
ANY
OTHER
UQUID.
Clean
it
with a soft
damp
cloth
and
wipe
dry.
After removing
the lid,
blade
and
icecream
container,
the
upper
housing
can be
separated
from
the
motor
unit
by
turning
it
anticlockwise
and
lifting
it off.
To
re-assemble
the
upper
housing
to
the
motor
unit,
position
the
black
spot
(located
on the
side
of the
housing
near
the
lower
edge)
above
the
on/off
light,
adjust
until
it
sits
in
place
and
then
lock
it
firmly
with a clockwise
turn.
(FIG.
1.1
1.
Motor
Unit
2.
Upper
Housing
3.
Icecream
container
4.
Blade
5.
Lid
6.
Sliding
Cap
7.
Timer/Control
8.
Power
light
9.
Drive
Gear
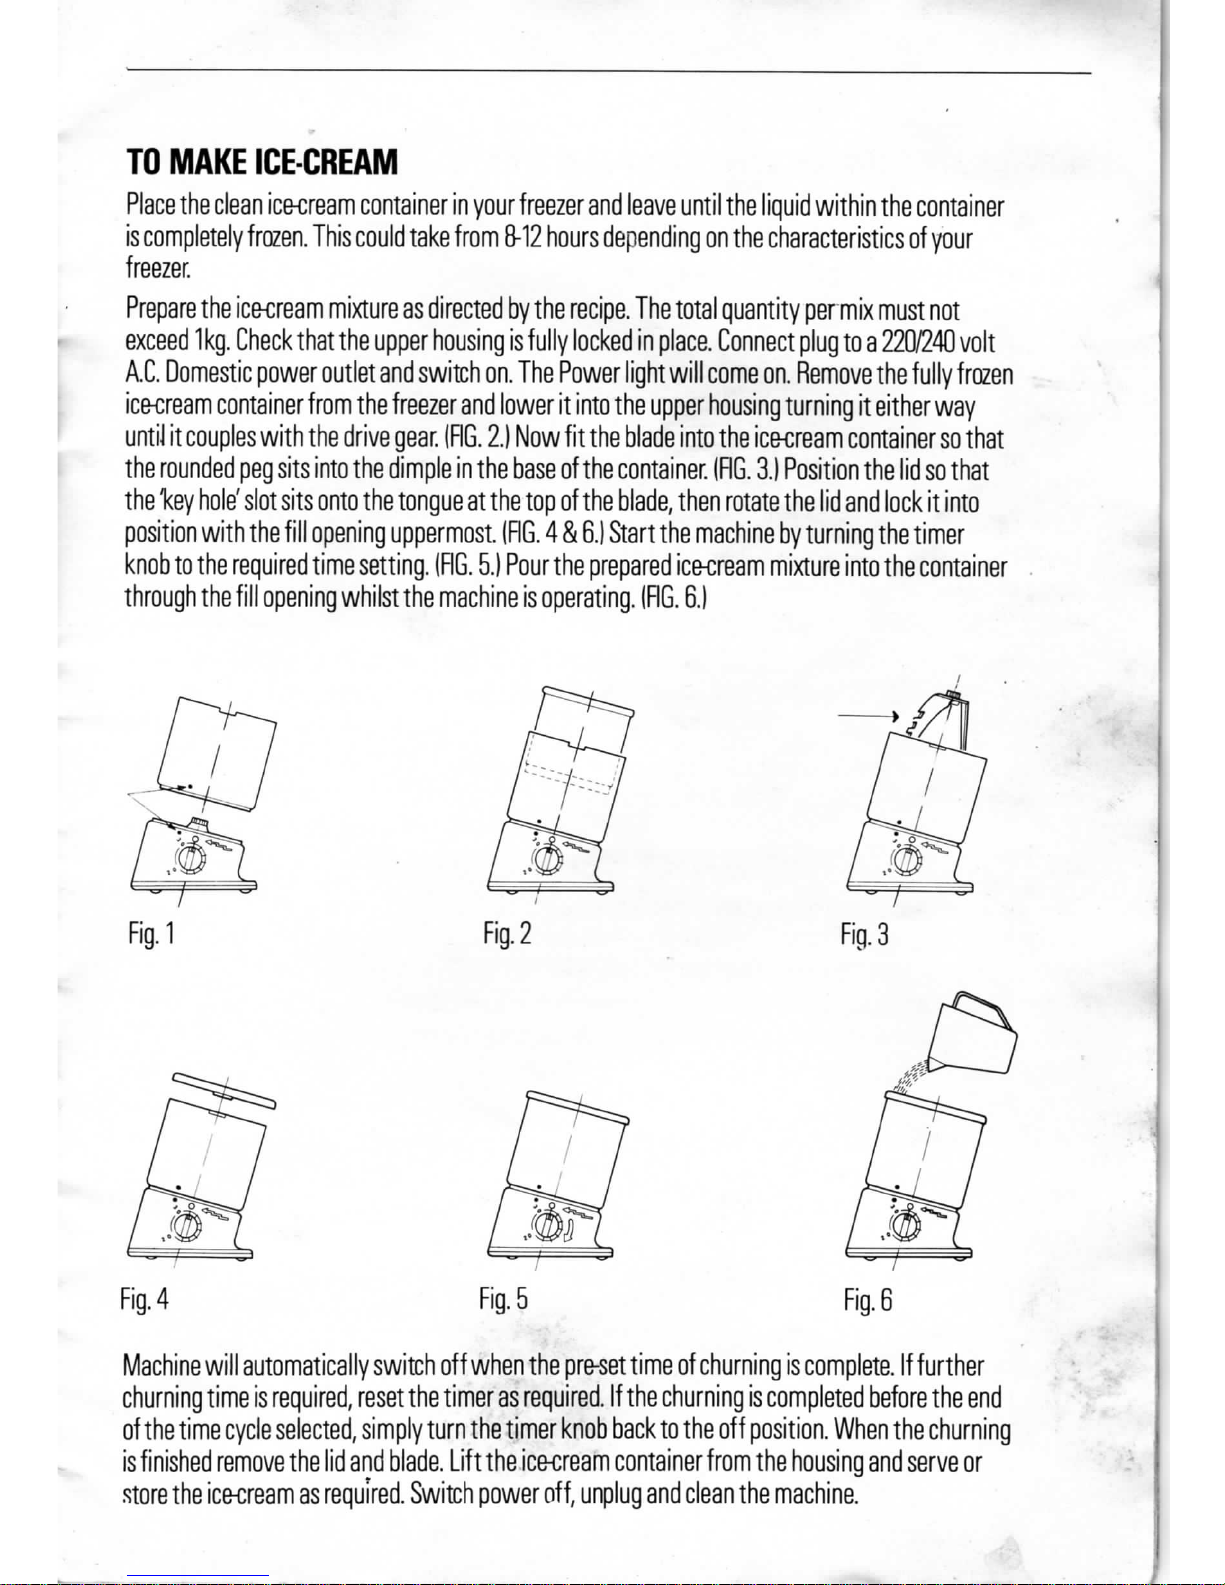
TO MAKE ICE-CREAM
Place
the
clean
icecream
container
in
your
freezer
and
leave
until
the
liquid
within
the
container
is
completely
frozen.
This
could
take
from
8-12
hours
depending
on the
characteristics
of
your
freezer.
Prepare
the
icecream
mixture
as
directed
by the
recipe.
The
total
quantity
permix
must
not
exceed
1 kg.
Check
that
the
upper
housing
is
fully
locked
in
place.
Connect
plug
to a 220/240
volt
A.C.
Domestic
power
outlet
and
switch
on. The
Power
light
will
come
on.
Remove
the
fully
frozen
icecream
container
from
the
freezer
and
lower
it
into
the
upper
housing
turning
it
either
way
until
it
couples
with
the
drive
gear.
(FIG.
2.) Now fit the
blade
into
the
icecream
container
so
that
the
rounded
peg
sits
into
the
dimple
in the
base
of the
container.
(RG.
3.)
Position
the lid so
that
the 1<ey
hole'
slot
sits
onto
the
tongue
at the top of the
blade,
then
rotate
the lid and
lock
it
into
position
with
the
fill
opening
uppermost.
(FIG.
4 & 6.)
Start
the
machine
by
turning
the
timer
knob
to the
required
time
setting.
(FIG.
5.)
Pour
the
prepared
ice-cream
mixture
into
the
container
through
the
fill
opening
whilst
the
machine
is
operating.
(FIG.
6.)
Fig.
4 Fig. 5 Fig. 6
Machine
will
automatically
switch
off
when
the
preset
time
of
churning
is
complete.
If
further
churning
time
is
required,
reset
the
timer
as
required.
If the
churning
is
completed
before
the end
of the
time
cycle
selected,
simply
turn
the
timer
knob
back
to the off
position.
When
the
churning
is
finished
remove
the lid and
blade.
Lift
the
icecream
container
from
the
housing
and
serve
or
store
the
icecream
as
required.
Switch
power
off,
unplug
and
clean
the
machine.
 Loading...