How it Works
Log In / Sign Up
Buy Points
How it Works
FAQ
Contact Us
Questions and Suggestions
Users
BlackBerry
Loading...
#
950
7
957
7
9000
8
9100
7
9105
3
9220
9300
8
9300 START HERE
9310
4
9320
5
9330
3
9350
5
9360
4
9370
5
9380
3
9500
4
9520
4
9530
3
9550
9620
5
9630
4
9650
7
9670
9700
10
9700 BOLD
2
9720
5
9780
6
9788
2
9790
3
9800
6
9810
3
9850
4
9860
4
9900
7
9930
5
A
ACC-03520-001
Access
2
Access for iOS
Alert
AMAZON MP3
AMAZON MP3 RELEASE NOTES 1.0.69
2
AOL INSTANT MESSENGER SERVICE
AOL INSTANT MESSENGER SERVICE RELEASE NOTES V2.5
AOL INSTANT MESSENGER SPORT CASE
APP WORLD SPORT CASE
App World storefront
APP WORLD STOREFRONT 2.0
2
APP WORLD STOREFRONT 2.1
2
APP WORLD STOREFRONT RELEASE NOTES V2.0
AtHoc
AtHoc IPAWS
B
BB10
BBA1001
BBB100-1
BBB100-2
2
BBB100-3
BBB100-5
BBCURVE
BBD100-1
BBD100-6
BBF100-1
BBF100-6
BBM for iPhone
Bold 2 9700
Bold 9000
98
BOLD 9600
Bold 9650
29
Bold 9700
31
Bold 9780
19
Bold 9788
2
Bold 9790
13
Bold 9900
16
Bold 9930
12
BROWSER VERSION 4.7.0
C
CHALK PUSHCAST PLAYER
2
CHALK PUSHCAST PLAYER 5.6
CHALK PUSHCAST PLAYER V5.6
Charging Pod
Classic
7
Classic Smartphone
CLIENT FOR IBM LOTUS
2
CLIENT FOR IBM LOTUS QUICKR
CLIENT FOR IBM LOTUS SAMETIME
CLIENT FOR IBM LOTUS SAMETIME 2.5.40 RELEASE NOTES
CLIENT FOR IBM LOTUS SAMETIME 2.5.42
CLIENT FOR NOVELL GROUPWISE MESSENGER
CLIENT FOR NOVELL GROUPWISE MESSENGER 2.5.40 RELEASE NOTES
CLIENT FOR USE WITH MICROSOFT OFFICE COMMUNICATIONS SERVER 2007
2
CLIENT FOR USE WITH MICROSOFT OFFICE COMMUNICATIONS SERVER 2007 2.5.40 RELEASE NOTES
CLIENT FOR USE WITH MICROSOFT OFFICE COMMUNICATIONS SERVER 2007 V2.5.16
CLIENT FOR USE WITH MICROSOFT OFFICE LIVE COMMUNICATIONS SERVER 2005
CLIENT FOR USE WITH MICROSOFT OFFICE LIVE COMMUNICATIONS SERVER 2005 2.5.40 RELEASE NOTES
Client pour IBM Lotus Connections
Client pour IBM Lotus Quickr
Client pour IBM Lotus Sametime
2
Client pour Microsoft Office Communications Server 2007
CLIENT POUR MICROSOFT OFFICE LIVE COMMUNICATIONS SERVER 2005
Client pour Novell Groupwise Messenger
2
Connect for Pocket
CONNECT FOR POCKET PC 2.1
Loading...
Loading...
Nothing found
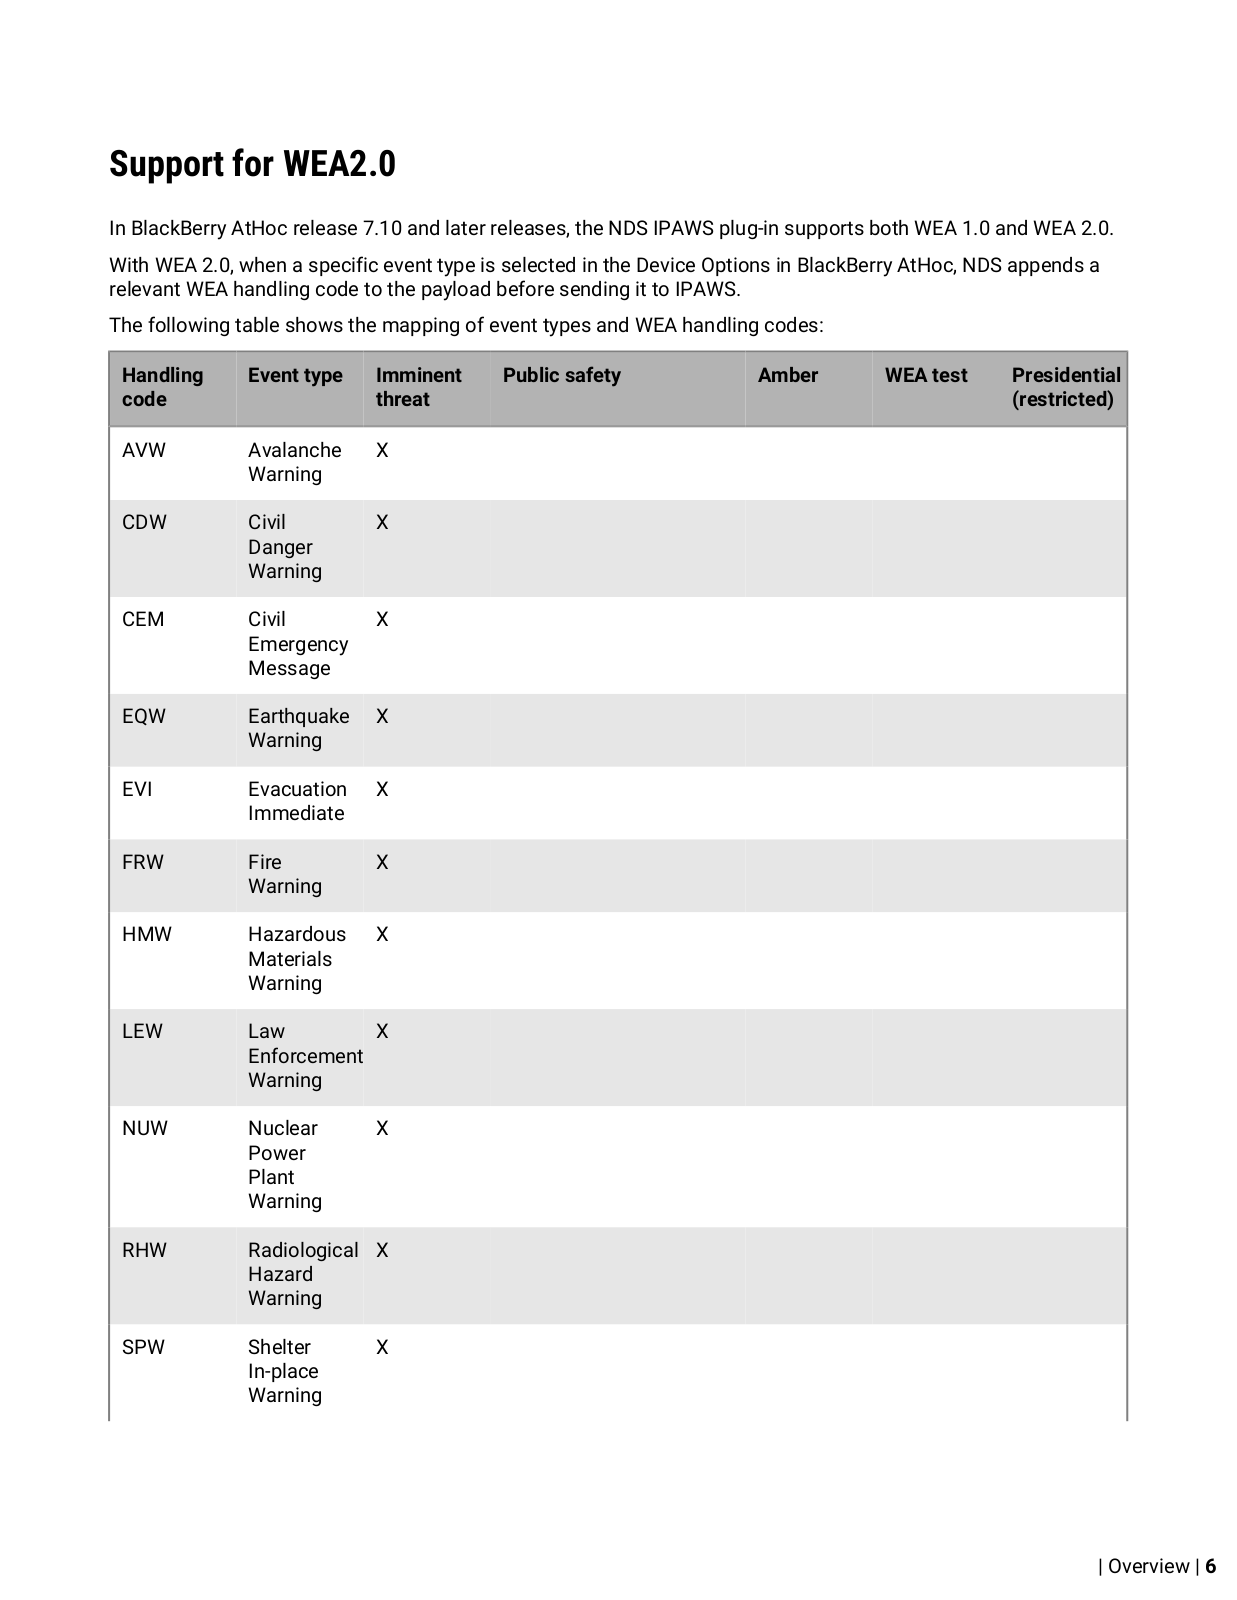
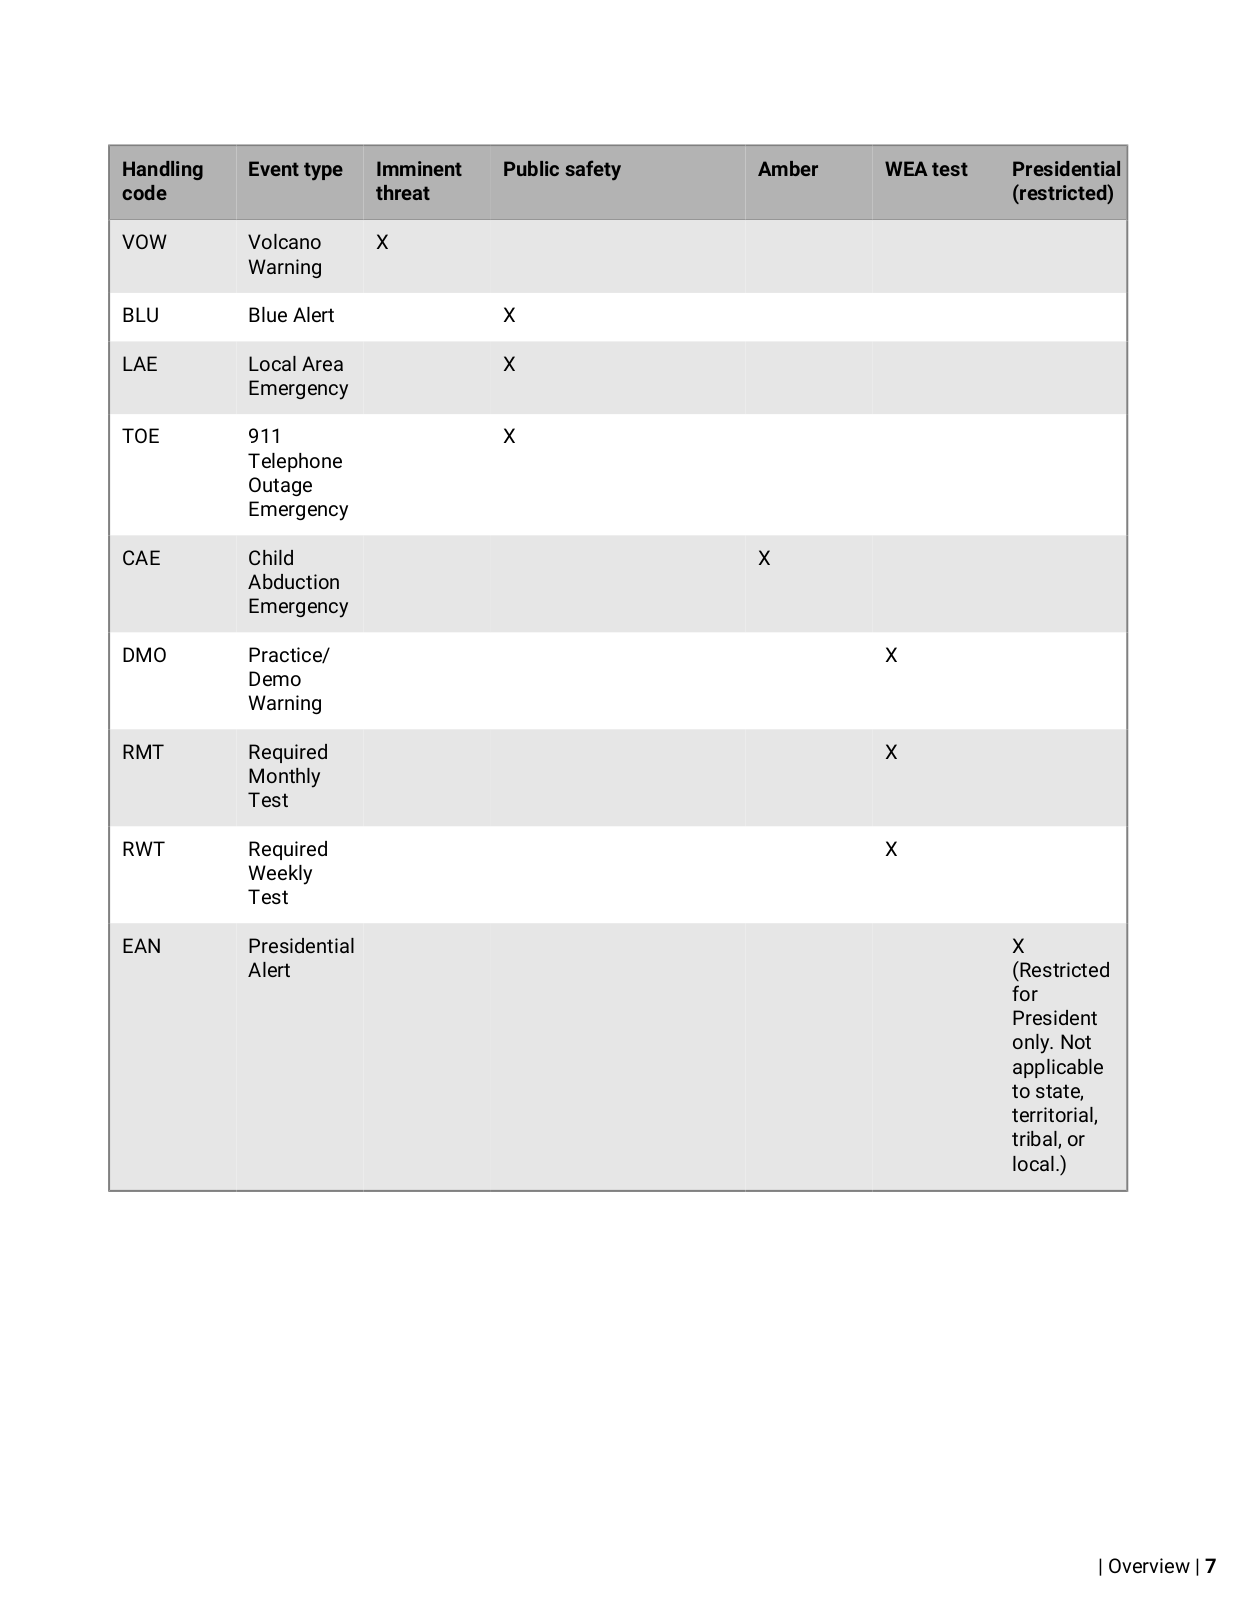
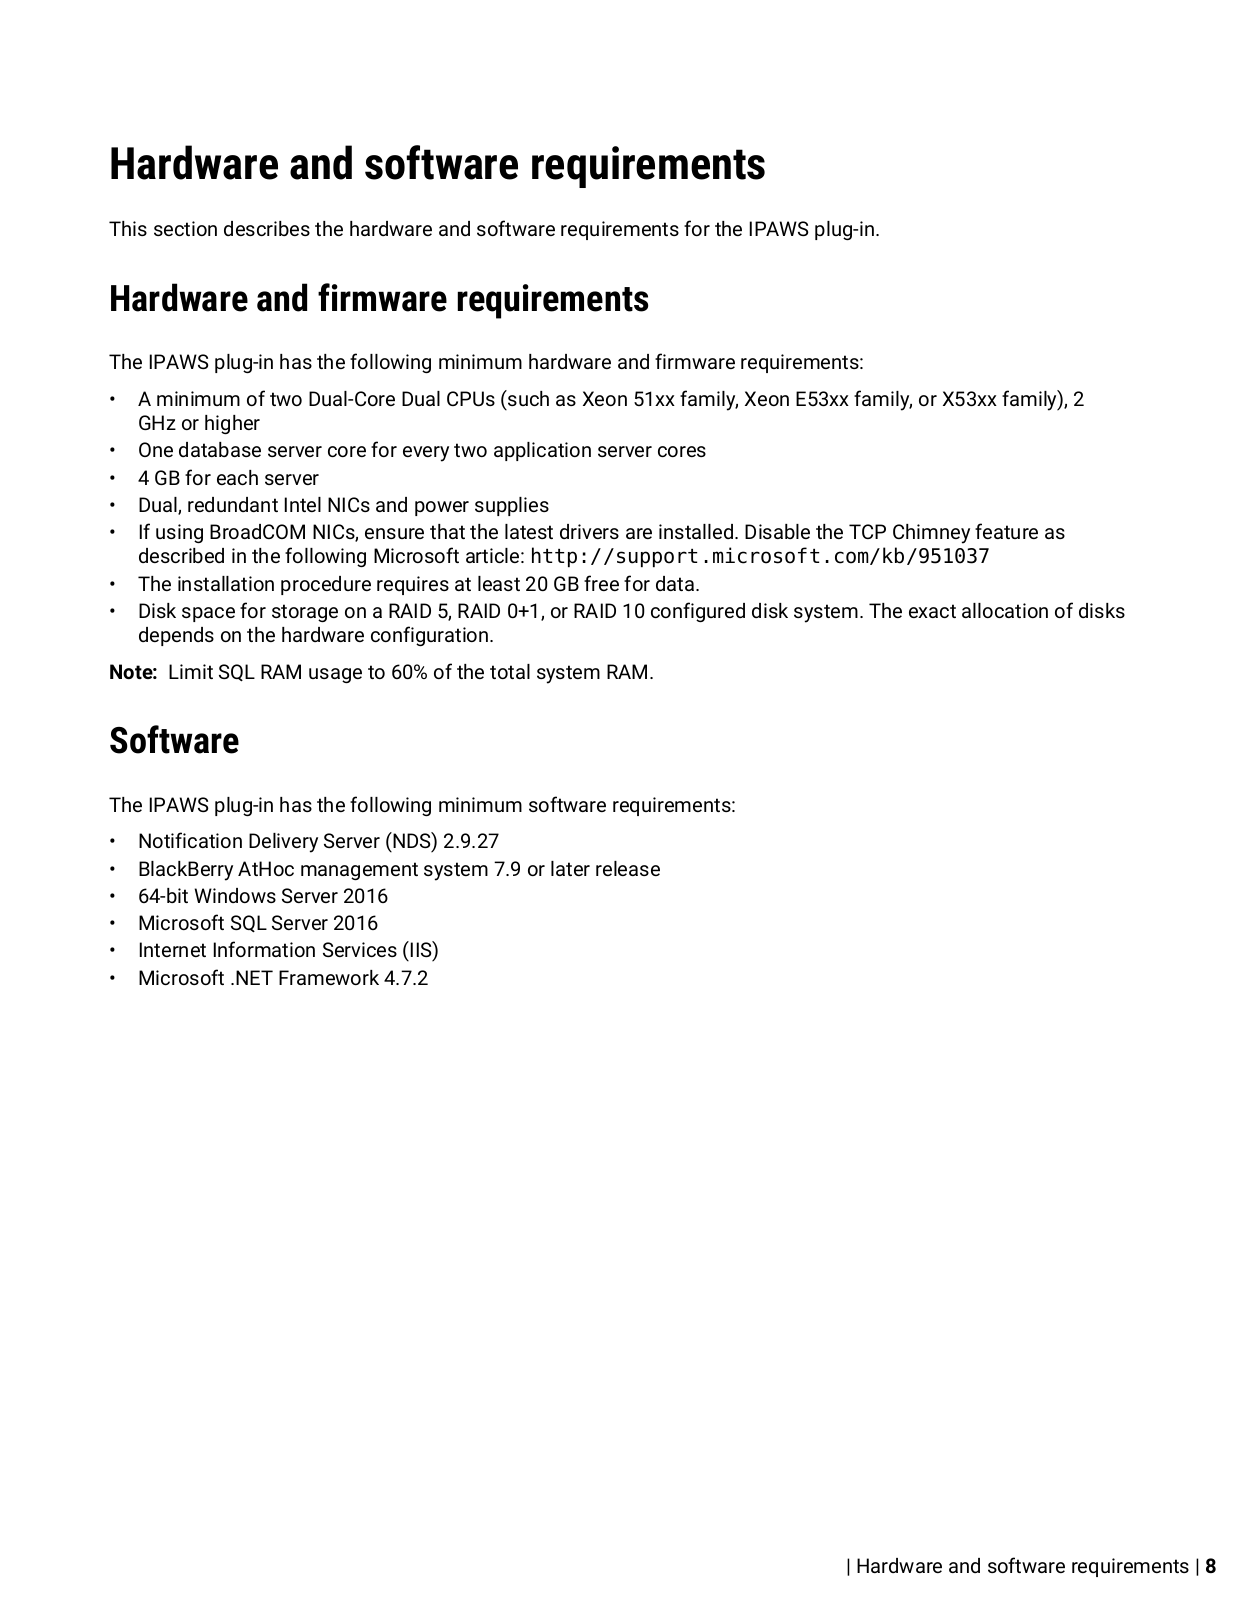
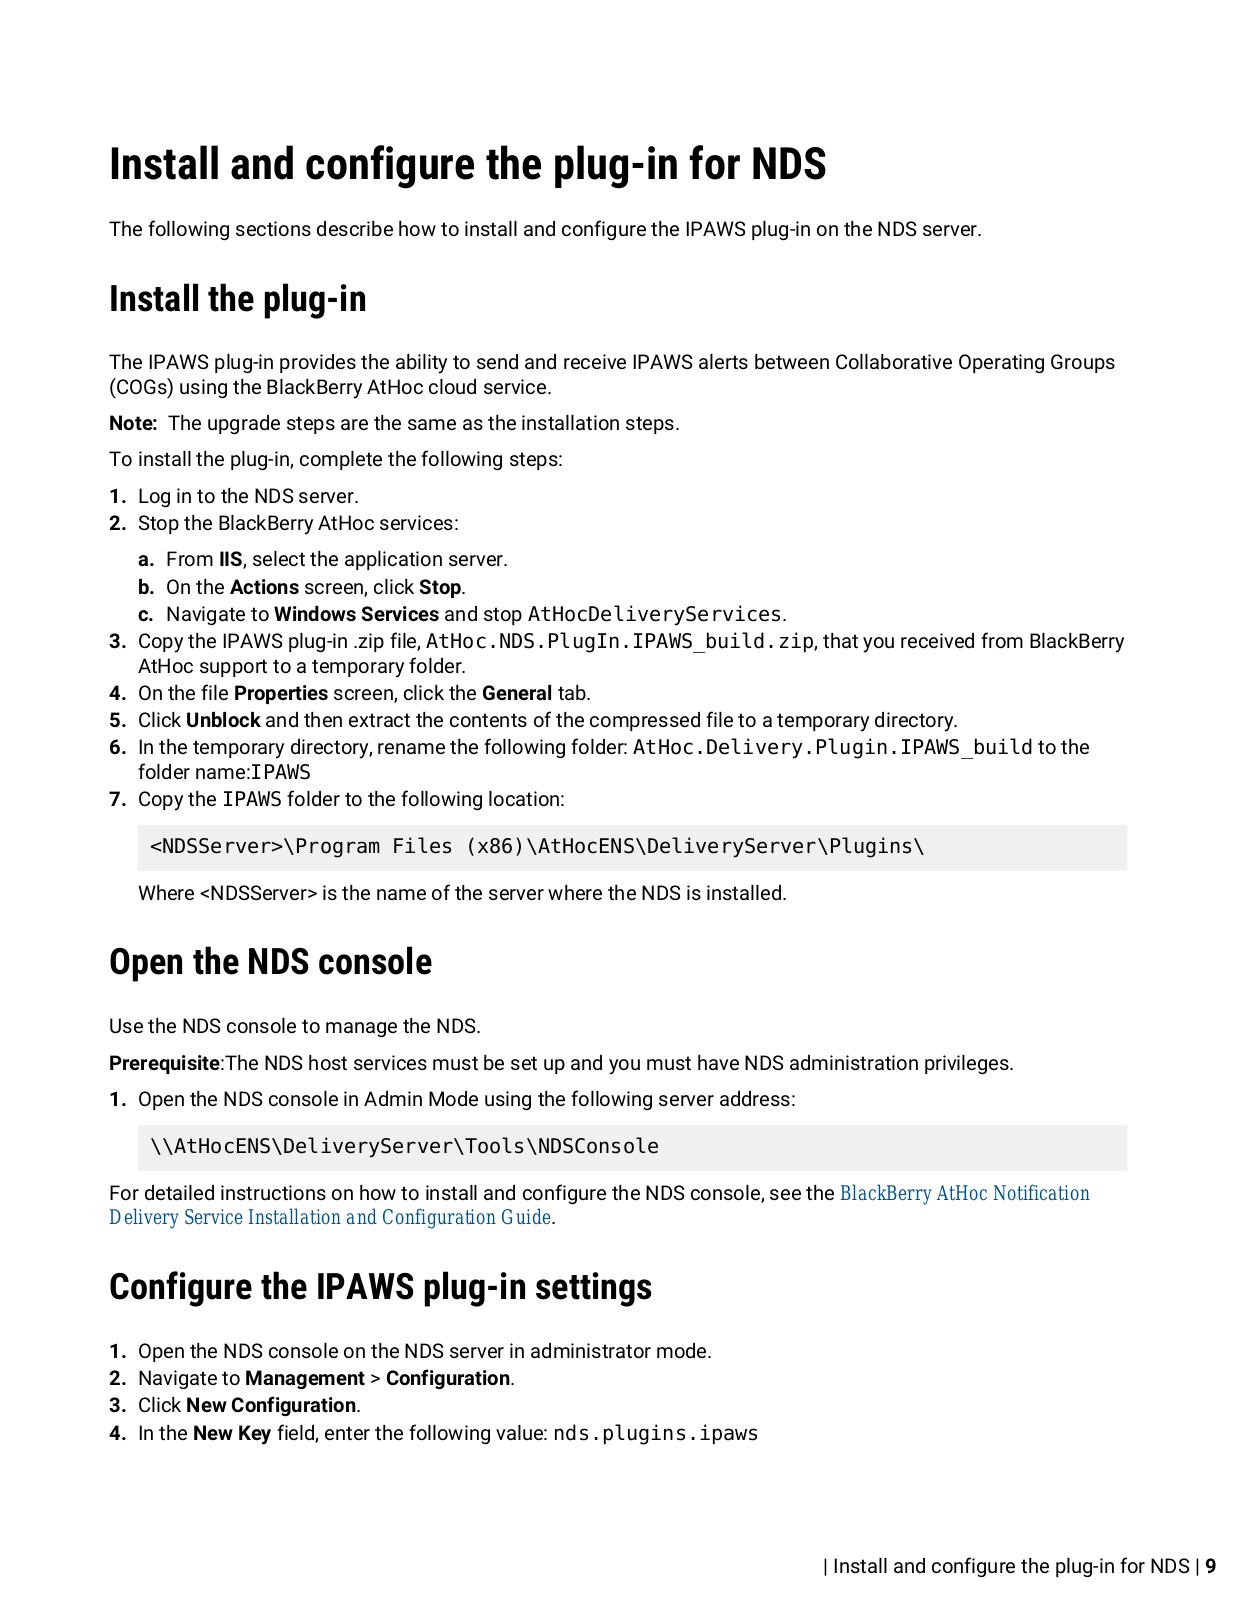
AtHoc IPAWS
Installation Manual
41 pgs
3.85 Mb
0
Table of contents
Loading...
BlackBerry AtHoc IPAWS Installation Manual
...
BlackBerry Installation Manual
Download
Specifications and Main Features
Frequently Asked Questions
User Manual
Download
Loading...
+
28
hidden pages
Unhide
You need points to download manuals.
1 point = 1 manual.
You can buy points or you can get point for every manual you upload.
Buy points
Upload your manuals