

Page 1

User Guide
U435/U505/U605 with Free Lifetime Maps
1st edition
www.binatoneglobal.com
www.ndrive.com
Page 2
SAFETY
2
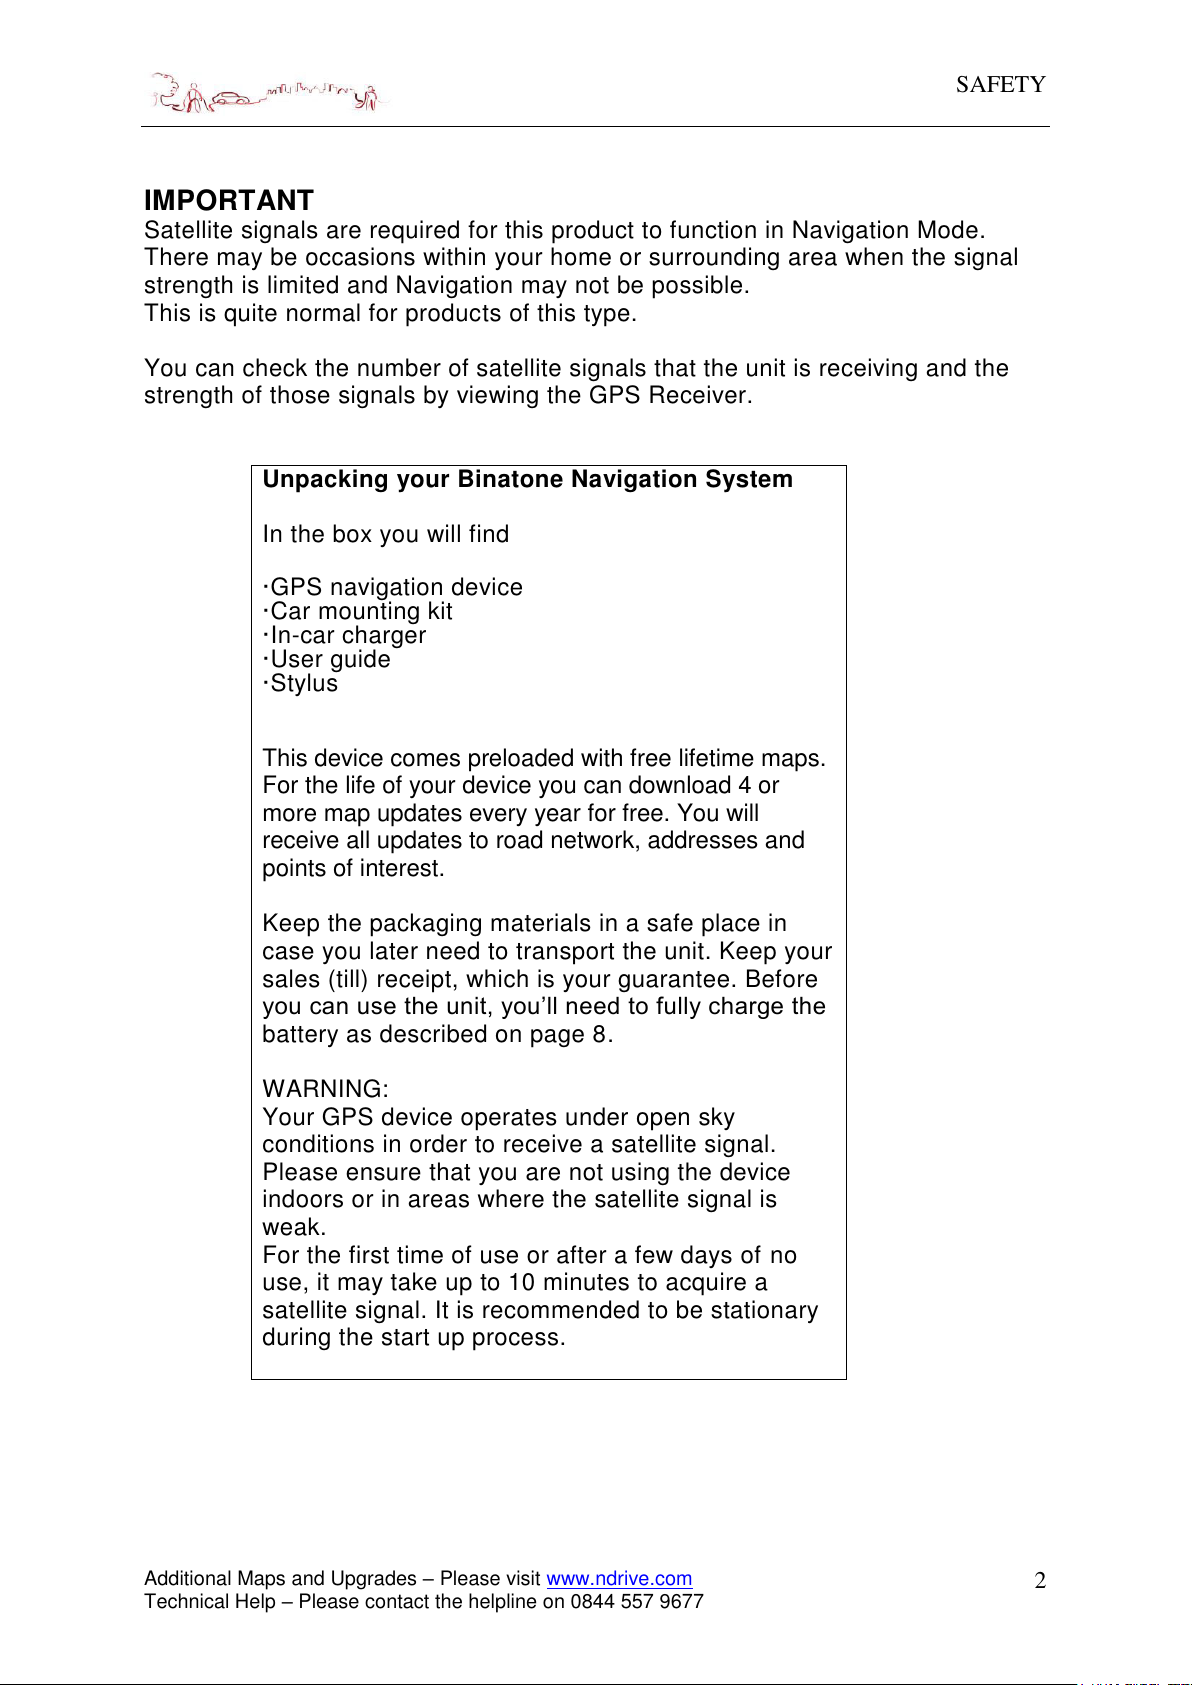
Unpacking your Binatone Navigation System
In the box you will find
·GPS navigation device
·Car mounting kit
·In-car charger
·User guide
·Stylus
This device comes preloaded with free lifetime maps.
For the life of your device you can download 4 or
more map updates every year for free. You will
receive all updates to road network, addresses and
points of interest.
Keep the packaging materials in a safe place in
case you later need to transport the unit. Keep your
sales (till) receipt, which is your guarantee. Before
you can use the unit, you’ll need to fully charge the
battery as described on page 8.
WARNING:
Your GPS device operates under open sky
conditions in order to receive a satellite signal.
Please ensure that you are not using the device
indoors or in areas where the satellite signal is
weak.
For the first time of use or after a few days of no
use, it may take up to 10 minutes to acquire a
satellite signal. It is recommended to be stationary
during the start up process.
IMPORTANT
Satellite signals are required for this product to function in Navigation Mode.
There may be occasions within your home or surrounding area when the signal
strength is limited and Navigation may not be possible.
This is quite normal for products of this type.
You can check the number of satellite signals that the unit is receiving and the
strength of those signals by viewing the GPS Receiver.
Additional Maps and Upgrades – Please visit
Technical Help – Please contact the helpline on 0844 557 9677
www.ndrive.com
Page 3

SAFETY
3
Safety
The Global Positioning System
The Global Positioning System (GPS) is a satellite based system that provides
location and timing information around the globe. The GPS is operated and
controlled under the sole responsibility of the Government of the United States of
America, who are responsible for its availability and accuracy. Any changes in
GPS availability and accuracy, or in environmental conditions, may impact the
operation of you Binatone GPS Device.
Using Your GPS in the Car
When using your GPS while driving it is essential that you drive with due care
and attention. Never modify the settings or program your GPS while driving. Only
look at the map when it is safe to do so. When mounting the GPS in your car
make sure that it does not obscure your view or impede the operation of any
driving controls.
Prohibited Areas
Do not operate your GPS in hospitals or near any electrical medical equipment.
Do not operate your GPS in aircraft.
Do not operate while on a petrol station forecourt.
Battery
Your GPS device uses a Li-polymer battery. Do not use it in humid, wet or
corrosive environments. Do not operate or store your GPS in high temperatures
(>60°) or in direct sun light. Do not pierce or break the battery casing.
Failure to follow these cautions will invalidate the warranty and may
cause the battery to leak acid, become hot, explode or ignite and
cause injury or damage.
If you come into contact with leaked battery acid wash the contact
area thoroughly and seek medical attention.
The Li-polymer battery contained in this unit must be recycled or
disposed of properly.
Do not dispose of in household waste or burn.
Additional Maps and Upgrades – Please visit
Technical Help – Please contact the helpline on 0844 557 9677
www.ndrive.com
Page 4

CONTENTS
4
CONTENTS
Important 02
In the Box 02
Safety 03
The Global Positioning System 03
Using Your GPS DEVICE in the Car 03
Prohibited Areas 03
Battery 03
Contents 04
Quick Start Guide 07
Position of the Controls 07
Charging the Battery 08
SD Memory Card 08
Car Adaptor 08
Turning the Sat Nav Unit On/Off 09
Turning the Sat Nav Unit Off (Sleep Mode) 09
System Reset 09
Windscreen Holder Installation 10
Getting Started 11
Starting Up 11
Settings 12
Multi-Media 13
Picture Viewer 13
Document Viewer 14
GPS Receiver 15
Additional maps and upgrades 16
Additional Maps and Upgrades – Please visit www.ndrive.com
Technical Help – Please contact the helpline on 0844 557 9677
Page 5

CONTENTS
5
NAVIGATION
1. Introduction 17
1.1 GPS connection 17
2. Getting Started 18
3. Main Map Screen 18
3.1 Map View 18
3.2 Navigation View 19
3.3 Context View 20
4. Basic Commands 20
4.1 Exploring Menu Screens 20
4.2 Using the Keyboard 20
5. How to Navigate 22
5.1 Navigate to a Postcode 22
5.2 Navigate to a Recent Location 22
5.3 Navigate to an Address 22
5.4 Navigate to Home 23
5.4.1 Setting Your Home Location 23
5.5 Navigate to Places 23
5.5.1 Navigate to a Point Of Interest (POI) 24
5.5.2Navigate Using Co-ordinates 24
5.5.3 Navigate to a Favourite Location 24
5.5.3.1 Storing Favourite Locations 25
5.5.4 Navigate Using Itinerary 25
5.5.4.1 Creating an Itinerary 25
5.5.4.2 Changing an Itinerary 26
5.5.4.3 Navigating an Itinerary 26
6. Go Screen 27
7. My Route 27
7.1 Show Route 27
7.2 Stop Navigation 28
7.3 Road Book 28
7.4 Alternative Routes 28
7.4.1 Calculate Alternative 28
7.4.2 Roadblock 28
7.4.3 Avoid Part of Route 28
7.4.4 Calculate Original 28
7.5 Start Demo 28
8. Settings 29
8.1 General 29
8.1.1 Speaker 29
8.1.2 Light 29
8.2 International 29
8.2.1 Language 29
8.2.2 Keyboard Type 29
Additional Maps and Upgrades – Please visit www.ndrive.com
Technical Help – Please contact the helpline on 0844 557 9677
Page 6

CONTENTS
6
8.2.3 Kph/Mph 29
8.3 Map Appearance 30
8.3.1 Lane Assistance 30
8.3.2 North Up in 2D 30
8.3.3 Dynamic Zoom 30
8.3.4 Templates 30
8.3.5 Points Of Interest 31
8.4 Routing Options 31
8.4.1Routing Options 31
8.4.2 Tolls 31
8.4.3 Adventure Mode 32
8.5 Safety Options 32
8.5.1 Speed Limit Alarm 32
8.5.2 Safety Camera Alert 32
8.6 System 33
8.6.1 Time Format 33
8.6.2 Restore Settings 33
8.6.3 Theme 33
8.7 GPS 33
8.7.1 GPS 33
8.7.2 Co-ordinates 33
9. My NDrive 33
9.1 Define Home 34
9.2 Start Up Wizard 34
9.3 My Maps 34
9.4 GPS 34
9.5 Version 34
9.6 Data Import/Export 34
9.6.1 Importing Data 34
9.6.2 Exporting Data 35
9.6.2.1 Exporting Itineraries 35
9.6.2.2 Exporting Favourites 35
10. Exit 35
11. Store 36
12. Nplus 36
12.1 Buy 36
12.1.1 Paying for Purchases 37
12.2 Updates 37
12.3 My Products 37
12.4 Enter Serial 38
12.5 Device Information 38
12.6 Help 38
Frequently Asked Questions 39
Technical Specifications 41
EC Declaration of Conformity 42
Additional Maps and Upgrades – Please visit www.ndrive.com
Technical Help – Please contact the helpline on 0844 557 9677
Page 7

QUICK START GUIDE
7
Quick Start Guide
Please make sure that you read all of the information contained within this user
guide before operating this unit.
If you experience any problems, please go through the user guide before contacting
the customer helpline.
Position of the controls
1. Touch Screen
2. Charge Indicator – Displays the charging status of the battery.
Red – charging.
Green - fully charged.
3. On/Off Switch – Press and hold to turn the unit On.
Press and hold to turn the unit Off or put to Sleep
via the on screen options.
4. Reset Button– System reset switch.
5. Speaker – Output for voice guidance instructions.
6. Memory Card Slot – For use with Micro SD type cards.
7. USB Port – For charging and data transfer.
8. Stylus Pen – For use with the touch screen
Additional Maps and Upgrades – Please visit www.ndrive.com
Technical Help – Please contact the helpline on 0844 557 9677
Page 8
QUICK START GUIDE
8
Charging the Battery
Before using your GPS device for the first time, we recommend that you charge the
unit for 5 hours via a USB cable or the car charger supplied, or until the charge light
turns green.
Plug the USB cable/car charger into the USB socket.
NOTE: Charging via USB cable. It is possible to charge the unit via a USB cable but
the charge time will be significantly increased. Also if the battery is very low the unit
will not fully charge.
The charging indicator on the unit will light up red. When fully charged the red light
will turn green.
When using the GPS device in your car, we recommend that you always use the car
charger in order to maintain the battery level.
NOTE: The unit is not designed to be run on battery power alone, the battery is there
for back up purposes only
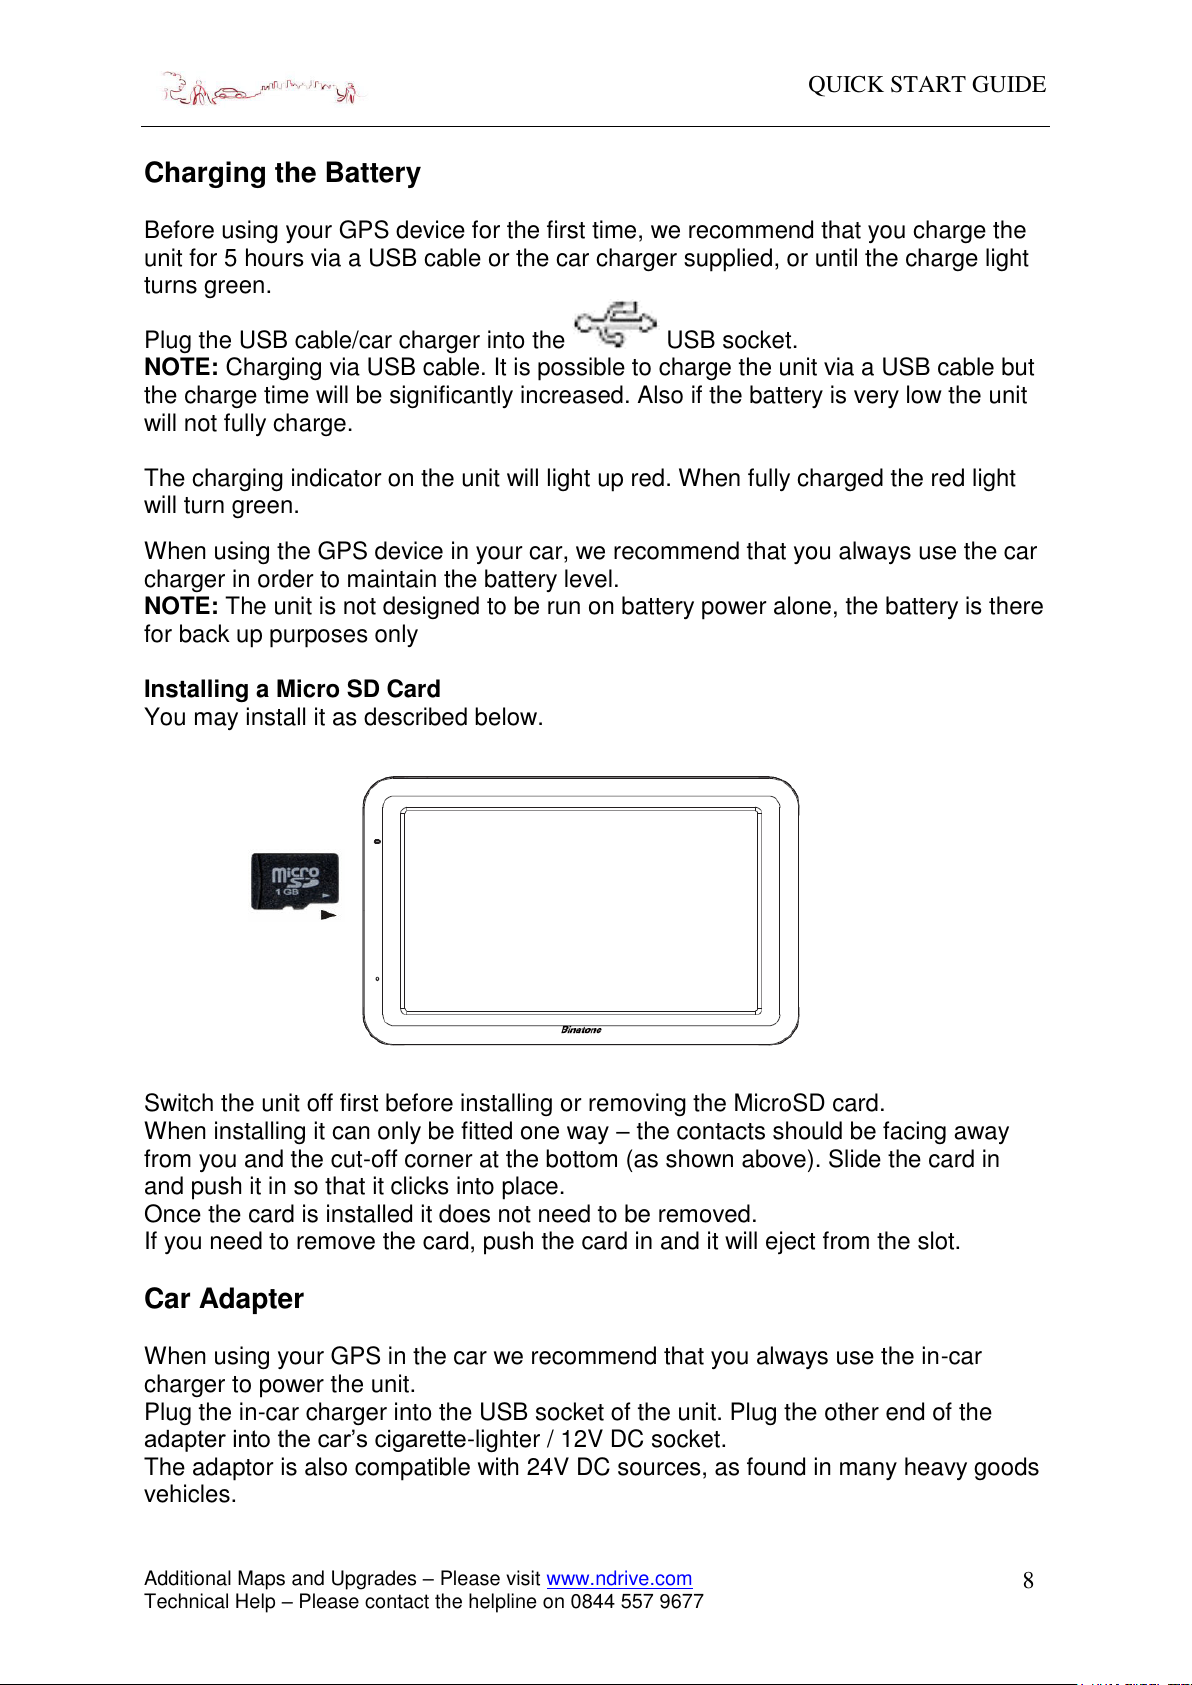
Installing a Micro SD Card
You may install it as described below.
Switch the unit off first before installing or removing the MicroSD card.
When installing it can only be fitted one way – the contacts should be facing away
from you and the cut-off corner at the bottom (as shown above). Slide the card in
and push it in so that it clicks into place.
Once the card is installed it does not need to be removed.
If you need to remove the card, push the card in and it will eject from the slot.
Car Adapter
When using your GPS in the car we recommend that you always use the in-car
charger to power the unit.
Plug the in-car charger into the USB socket of the unit. Plug the other end of the
adapter into the car’s cigarette-lighter / 12V DC socket.
The adaptor is also compatible with 24V DC sources, as found in many heavy goods
vehicles.
Additional Maps and Upgrades – Please visit www.ndrive.com
Technical Help – Please contact the helpline on 0844 557 9677
Page 9

QUICK START GUIDE
9
Note: If the unit is not to be used for a long period of time it is advised that you switch
the unit Off.
Turning the GPS Unit On/Off
Press and hold the On/Off button on the top of the unit for around 3 seconds, the unit
will power up and display the Menu screen.
Press and hold the On/Off button for
around 3 seconds during operation,
the unit will show up the following
display,
Turning the GPS Unit Off or
Sleep Mode
Press the sleep icon to put
the unit into sleep mode.
Press and hold the On/Off button
again, to bring the unit out of sleep
mode. When brought out of sleep
mode the unit will show the same screen as when the unit entered sleep mode.
Press the Off icon to turn the unit Off.
There is a 10 second timer which starts to count down, if there is no selection made
within 10 seconds, the unit will turn off automatically.
System Reset
Under extreme circumstances it may be necessary to reboot the system. Reset the
system if the following situation occurs:
Long delay experienced with screen refresh rate or operation, resulting in an
inoperable unit.
The system will not turn Off with the power button.
No response with selection made on the screen.
The reset button can be found on the rear of the unit. Insert the tip of the stylus pen
or small blunt implement into the reset hole in order to press the button. The system
will be immediately reset.
Additional Maps and Upgrades – Please visit www.ndrive.com
Technical Help – Please contact the helpline on 0844 557 9677
Page 10
QUICK START GUIDE
10
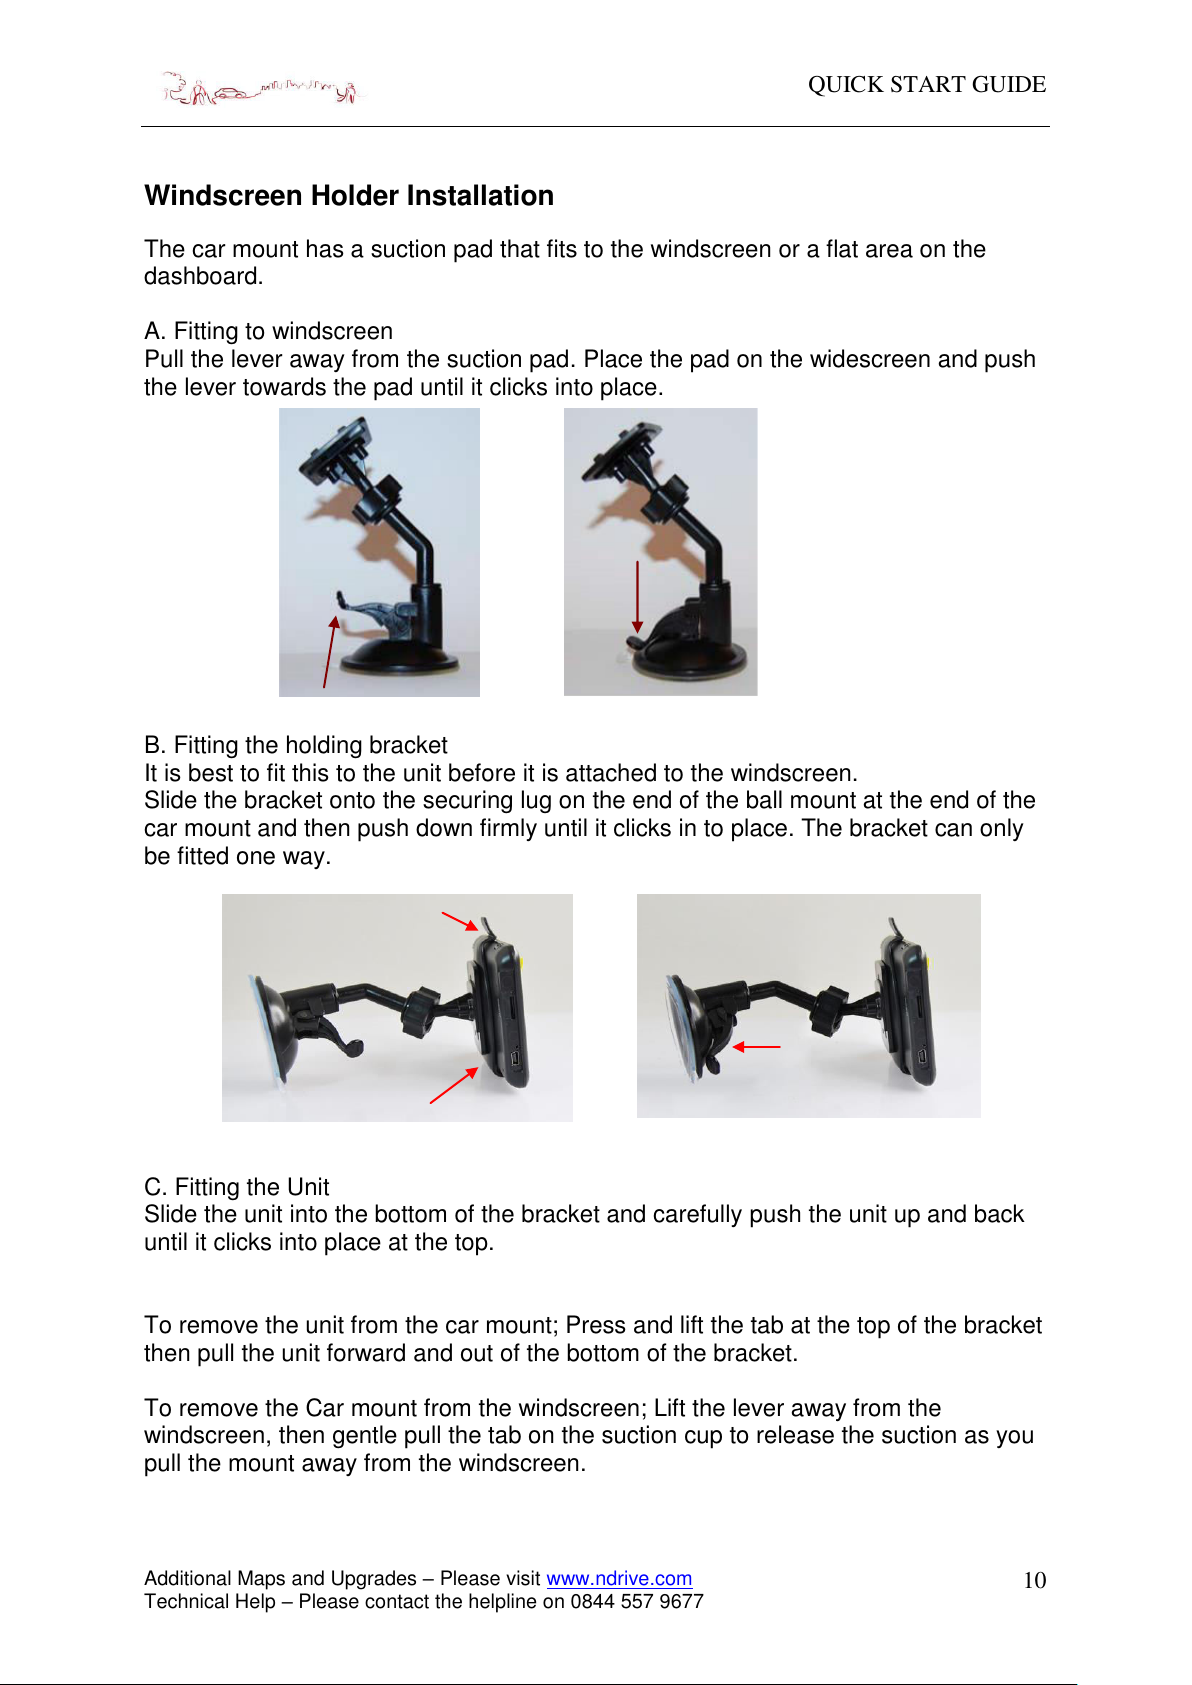
Windscreen Holder Installation
The car mount has a suction pad that fits to the windscreen or a flat area on the
dashboard.
A. Fitting to windscreen
Pull the lever away from the suction pad. Place the pad on the widescreen and push
the lever towards the pad until it clicks into place.
B. Fitting the holding bracket
It is best to fit this to the unit before it is attached to the windscreen.
Slide the bracket onto the securing lug on the end of the ball mount at the end of the
car mount and then push down firmly until it clicks in to place. The bracket can only
be fitted one way.
C. Fitting the Unit
Slide the unit into the bottom of the bracket and carefully push the unit up and back
until it clicks into place at the top.
To remove the unit from the car mount; Press and lift the tab at the top of the bracket
then pull the unit forward and out of the bottom of the bracket.
To remove the Car mount from the windscreen; Lift the lever away from the
windscreen, then gentle pull the tab on the suction cup to release the suction as you
pull the mount away from the windscreen.
Additional Maps and Upgrades – Please visit www.ndrive.com
Technical Help – Please contact the helpline on 0844 557 9677
Page 11
MAIN MENU
11
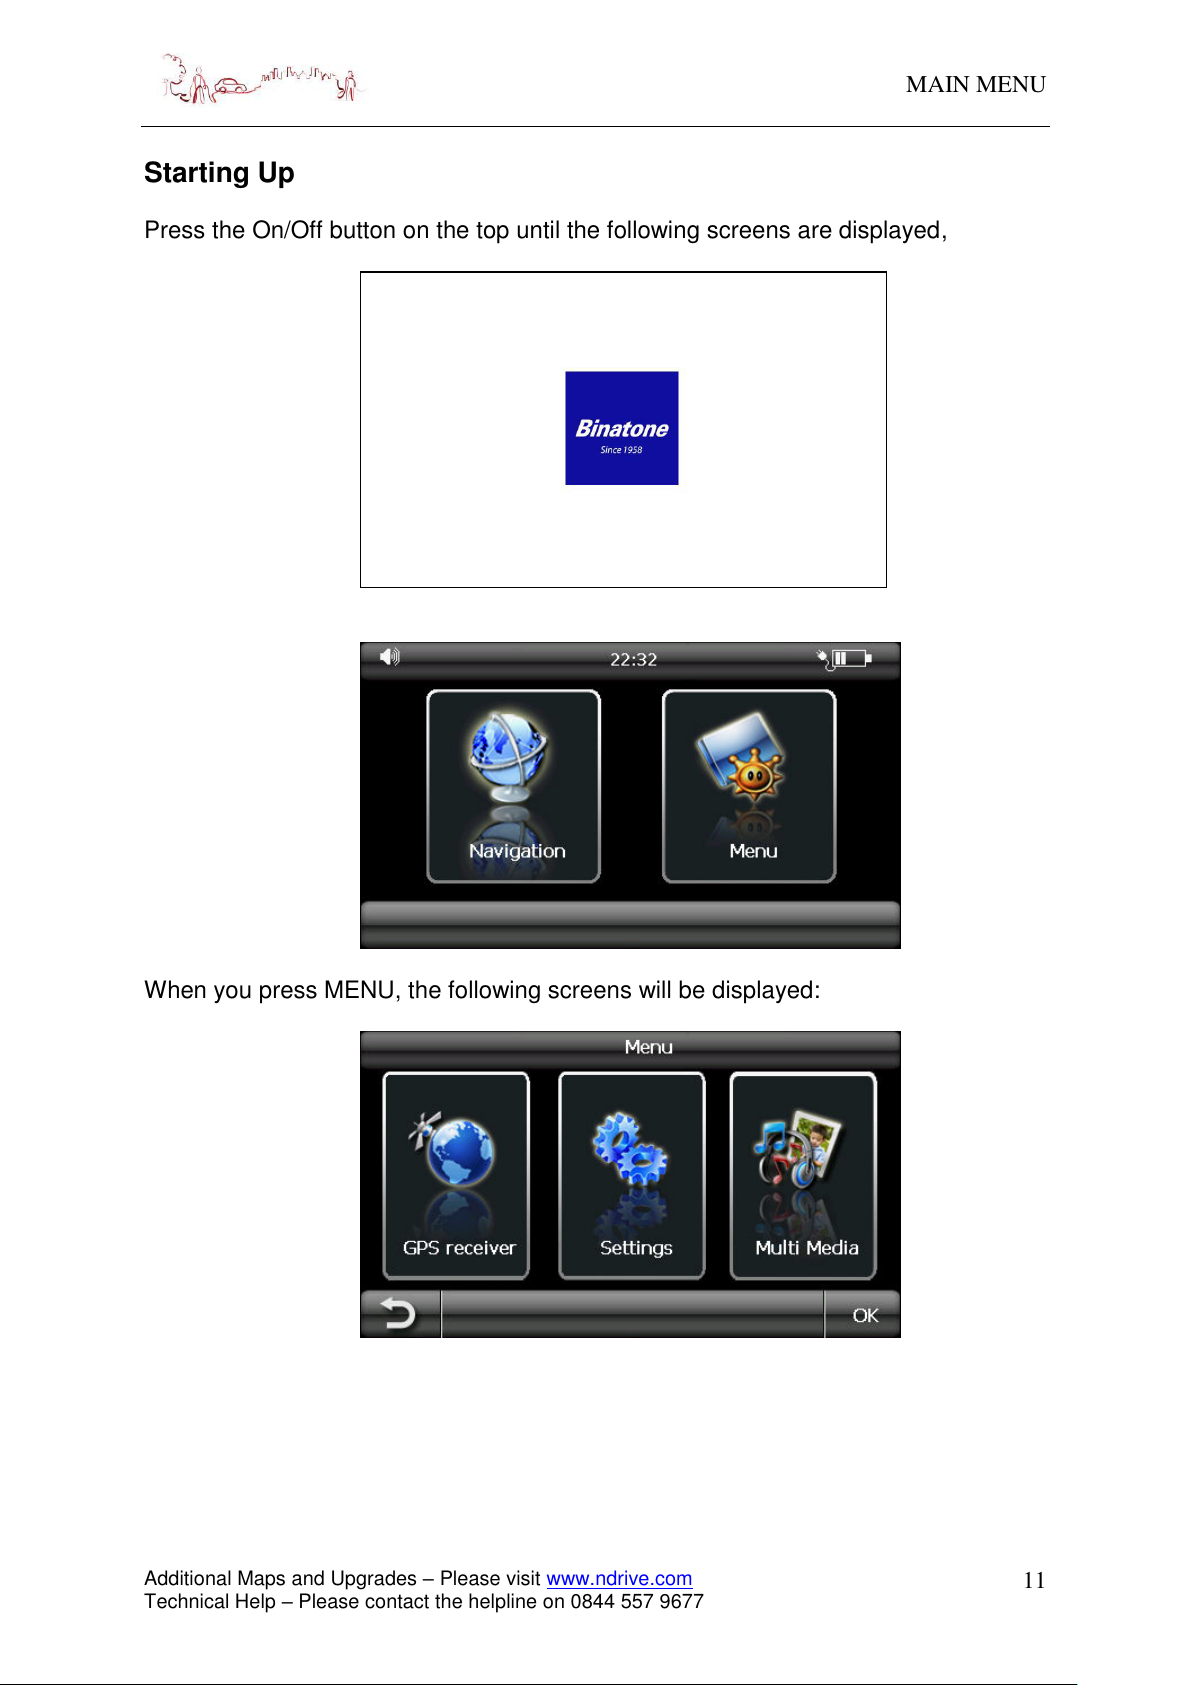
Starting Up
Press the On/Off button on the top until the following screens are displayed,
When you press MENU, the following screens will be displayed:
Additional Maps and Upgrades – Please visit www.ndrive.com
Technical Help – Please contact the helpline on 0844 557 9677
Page 12
MAIN MENU
12
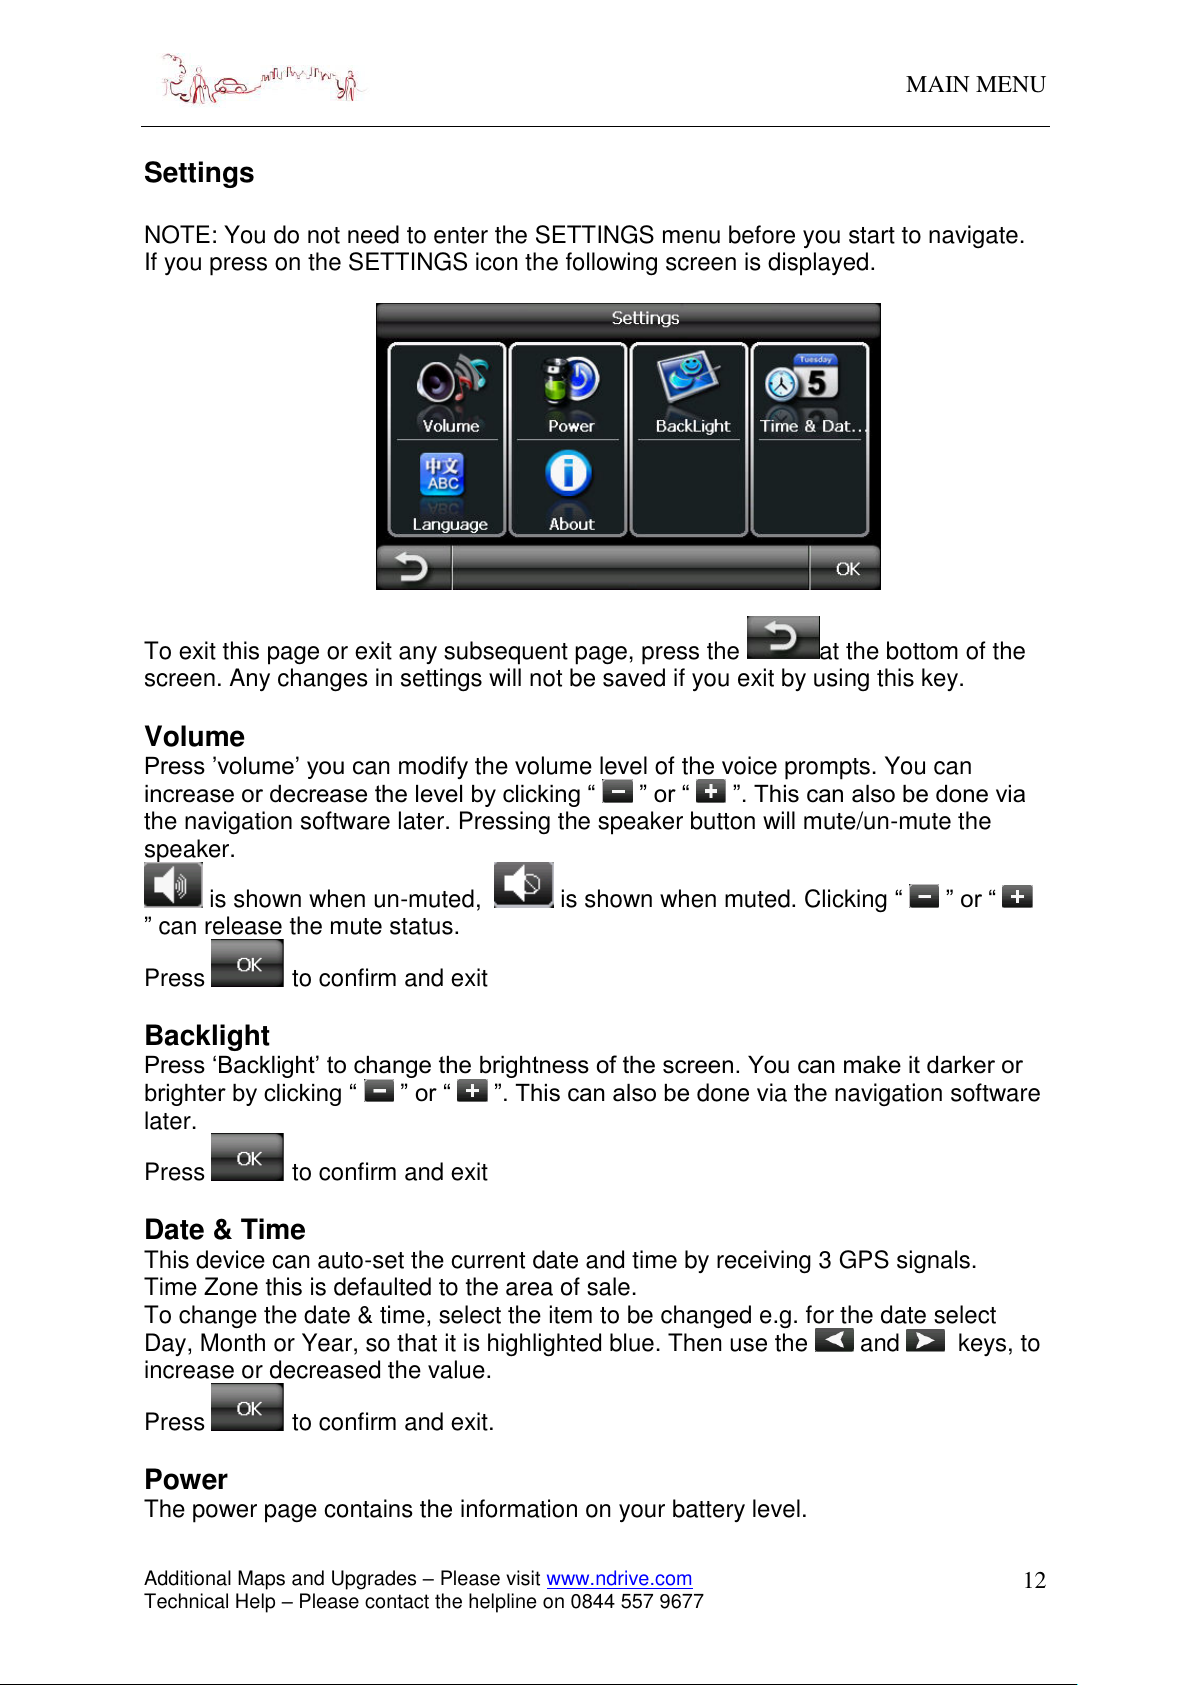
Settings
NOTE: You do not need to enter the SETTINGS menu before you start to navigate.
If you press on the SETTINGS icon the following screen is displayed.
To exit this page or exit any subsequent page, press the at the bottom of the
screen. Any changes in settings will not be saved if you exit by using this key.
Volume
Press ’volume’ you can modify the volume level of the voice prompts. You can
increase or decrease the level by clicking “ ” or “ ”. This can also be done via
the navigation software later. Pressing the speaker button will mute/un-mute the
speaker.
is shown when un-muted, is shown when muted. Clicking “ ” or “
” can release the mute status.
Press to confirm and exit
Backlight
Press ‘Backlight’ to change the brightness of the screen. You can make it darker or
brighter by clicking “ ” or “ ”. This can also be done via the navigation software
later.
Press to confirm and exit
Date & Time
This device can auto-set the current date and time by receiving 3 GPS signals.
Time Zone this is defaulted to the area of sale.
To change the date & time, select the item to be changed e.g. for the date select
Day, Month or Year, so that it is highlighted blue. Then use the and keys, to
increase or decreased the value.
Press to confirm and exit.
Power
The power page contains the information on your battery level.
Additional Maps and Upgrades – Please visit www.ndrive.com
Technical Help – Please contact the helpline on 0844 557 9677
Page 13
MAIN MENU
13
Language
Press ”Language” to change the language. Use the and keys to
scroll between further language options. Select the language you desire from the
available options so that it is highlighted white. Then press to confirm and
exit.
About
The About page contains information about your operating system software version.
It also allows you to default the unit or to calibrate the screen to your touches.
Default
The unit will be returned to how it was when it left the factory. After selecting this
option you will be asked to confirm the reset.
Note: If you encounter any problems when connecting your unit to a PC using
ActiveSync. Carry out a reset of the unit before trying again.
Calibration
This function calibrates the unit to respond to your screen taps. You will need to use
this function only if the unit begins to respond inconsistently to your screen taps.
After selecting follow the on screen directions. Once the calibration has been
completed, press anywhere on the screen to return to the previous menu.
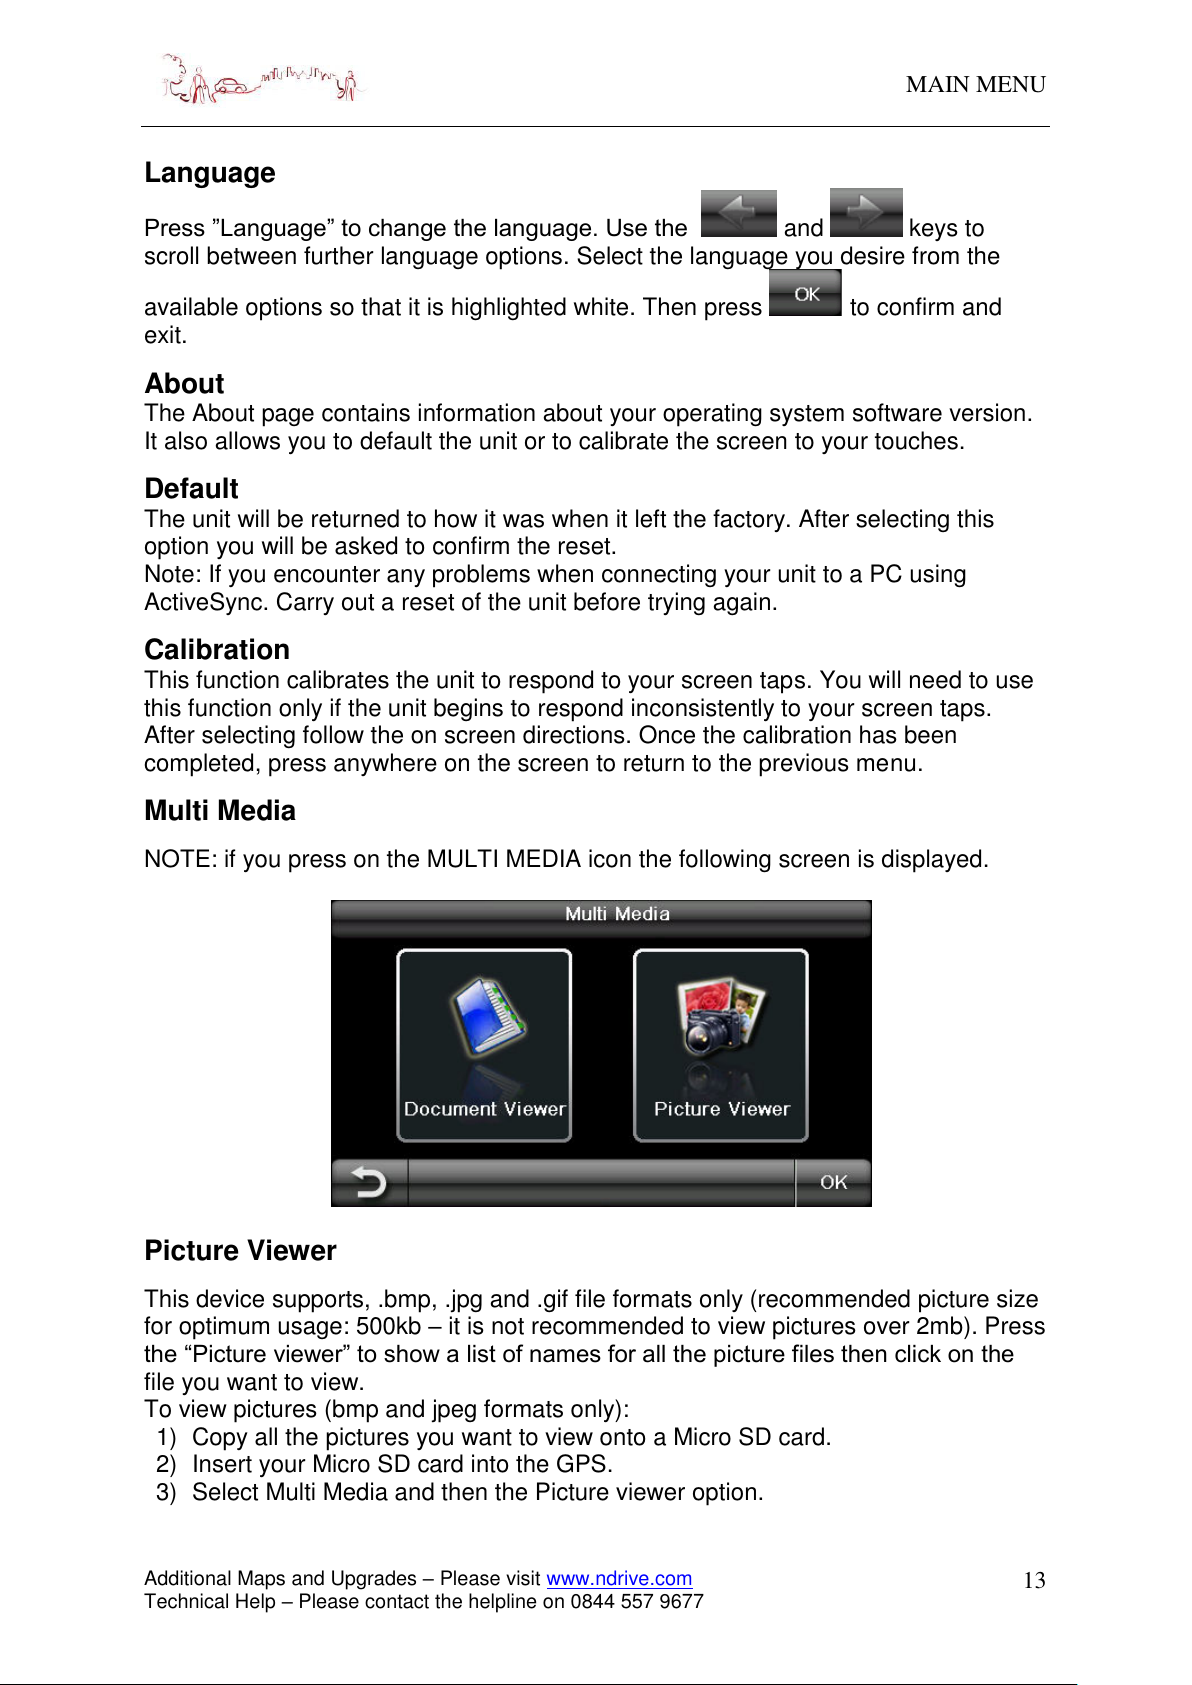
Multi Media
NOTE: if you press on the MULTI MEDIA icon the following screen is displayed.
Picture Viewer
This device supports, .bmp, .jpg and .gif file formats only (recommended picture size
for optimum usage: 500kb – it is not recommended to view pictures over 2mb). Press
the “Picture viewer” to show a list of names for all the picture files then click on the
file you want to view.
To view pictures (bmp and jpeg formats only):
1) Copy all the pictures you want to view onto a Micro SD card.
2) Insert your Micro SD card into the GPS.
3) Select Multi Media and then the Picture viewer option.
Additional Maps and Upgrades – Please visit www.ndrive.com
Technical Help – Please contact the helpline on 0844 557 9677
Page 14

MAIN MENU
14
1 2 3 4 5 6 7
8
1 2 4
3
5
4) Click on SD/MMC folder to open it and then click on a picture or a further folder.
To continue searching or to load a photo it into the viewer. To go back through
the menu structure, press the option “...”
The following screen will be shown:
Button function list of Picture Files:
1. Return - Press this to return back to the list of pictures on the unit.
2. Zoom out - Press to zoom out of the picture.
3. Zoom in - Press to zoom into the picture.
4. Previous - Press to view the previous picture in the list.
5. Forward - Press to view the next picture in the list.
6. Full screen - Press to enlarge the picture so that it fills the whole screen. You can
now use the stylus to scroll around the picture. To return back to the above
screen, double tap the screen. You can also double tap to switch to full screen
mode.
7. Rotate - Press to rotate the image 90 degree right.
8. Document name - This shows the file name of the current document.
Document Viewer
This device supports, txt file format viewing only, as with the picture viewer copy the
files you want to read to an SD card. Press the “Doc Viewer” you can then access
the SD/MMC folder. The procedure for viewing documents is the same for viewing
pictures. But once loaded the following screen will be shown.
Additional Maps and Upgrades – Please visit www.ndrive.com
Technical Help – Please contact the helpline on 0844 557 9677
Page 15

MAIN MENU
15
Button function list of Document Files:
1. Return - Press this to return back to the list of documents on the unit.
2. Page number - This shows the number of the current page and the total number
of pages in the document.
3. Page up - Press to scroll to the previous page.
4. Page down - Press to scroll to the next page.
5. Document name - This shows the file name of the current document.
GPS Receiver
NOTE: This page is for information only. You can view the number of satellite signals
the unit is receiving also the strength of these signals.
This page gives your current position in degrees longitude and latitude, your current
speed and the status of your position, i.e. Fixed 3D or Fixed Invalid etc.
The compass circle shows the satellites that the unit is receiving and the bar chart
shows the signal strength for these satellites
NOTE:
At least four GPS signals are required for the device to function.
There may be occasions within your home or surrounding area when the
signal strength is limited and GPS navigation Mode may not be possible.
This is quite normal of products of this type.
Additional Maps and Upgrades – Please visit www.ndrive.com
Technical Help – Please contact the helpline on 0844 557 9677
Page 16

MAIN MENU
16
Additional maps and upgrades:
Please visit www.ndrive.com and download the NPlus software in order to gain
access to further content (see section 11 for more details)
This device comes preloaded with free lifetime maps. For the life of your device you
can download 4 or more map updates every year for free. You will receive all
updates to road network, addresses and points of interest.
The life is defined as the useful life of the device (Max. 3 years), which means the
period of time that Binatone continues to support your device with software updates,
services, content or accessories. A device will have reached the end of its life when
none of these are available any more.
Technical Support or contact:
If you have a technical problem with your device please contact the helpline on
0844 557 9677 or for more information regarding you product go to
www.binatonetelecom.com
Additional Maps and Upgrades – Please visit www.ndrive.com
Technical Help – Please contact the helpline on 0844 557 9677
Page 17

NAVIGATION
17
Note; It may take up to 10 minutes to establish the first connection. Subsequent connections will
be faster (30 seconds to 1 minute), but if you have not used the unit for several days or are far
away from the last location where you used the unit, it may take up to 10 minutes again to find a
strong signal.
1 Introduction
You have chosen a cutting-edge navigation system. Congratulations! Please enjoy using it. This
navigation system leads you straight to your destination, whether you are travelling by car or on
foot. You can navigate and plan your route with an easy-to-use and intuitive interface, just by
using your finger. You can also use this application to plan your trip to suit your personal
preferences and interests and to save interesting destinations before you set off on your journey.
This manual leads you through the main features of the system.
1.1 GPS Connection
Your navigation device uses GPS technology for navigation. The device receives signals from a
number of GPS satellites in order to determine your current position.
Place your navigation device in a location with an unobstructed view to the sky to set up
your first satellite connection. In the car this will usually mean mounting the unit on the lower part
of the windscreen.
Additional Maps and Upgrades – Please visit www.ndrive.com
Technical Help – Please contact the helpline on 0844 557 9677
Page 18

NAVIGATION
18
2 Getting Started
Please make sure that the battery in your device is charged (see page 8).
Switch on the unit and from the menu select Navigation. The NDrive navigational software will
start to load.
The following user guide will guide you through the operation of the NDrive software of both the
basic and advanced features it has to offer.
When running the navigational software for the first time. You will be asked to select a language
and to accept the terms of use.
3 Main Map Screen
3.1 Map View
Select from the map screen to enter the main menu to enter the main Menu from where
you will have access to the many features of the unit.
Note – The message “Waiting for a valid GPS signal” will scroll along the bottom bar when ever
the GPS signal is lost. In this state the unit will not show your current location on the map and
navigation will not be possible. Please ensure that you have an open view to the sky in order to
obtain a strong enough signal.
Additional Maps and Upgrades – Please visit www.ndrive.com
Technical Help – Please contact the helpline on 0844 557 9677
Page 19

19
3.2 Navigation View
NAVIGATION
(*) – Time, speed and distance controls show different information. Tap each in turn to toggle
between the alternative modes as shown below.
- Estimated time left to destination
- Speed limit on the current street
- Current speed
Additional Maps and Upgrades – Please visit www.ndrive.com
Technical Help – Please contact the helpline on 0844 557 9677
- Estimated time of arrival
- Distance left to destination
- Current time
Page 20

NAVIGATION
20
3.3 Context View
If you click on any point on the map, the context bar shows up on the bottom and the following four
actions can be performed.
4 Basic commands
4.1 Exploring Menu Screens
All menu screens show two buttons at the top which allow for the following actions:
4.2 Using the Keyboard
Whenever you want to perform a search, filter results from a list or input data, the keyboard will
appear on the screen. Different keyboard layouts can be selected depending on the information
you wish to enter. Here are some tips you should keep in mind:
· When searching for a street, you can simply write the initials, separated by a space,
and results will show up. Example: enter “C P W” and “Central Park West” will show up on the
results list.
· Start writing the first few letters, and results will be automatically updated on the list
Additional Maps and Upgrades – Please visit www.ndrive.com
Technical Help – Please contact the helpline on 0844 557 9677
Page 21

21
NAVIGATION
below.
Standard Keyboard
Numeric Keyboard
Additional Maps and Upgrades – Please visit www.ndrive.com
Technical Help – Please contact the helpline on 0844 557 9677
Page 22

22
Extended character keyboard Symbol keyboard
5 How to Navigate
5.1 Navigate to a Postcode
NAVIGATION
From the main menu select Go To and then select Postcode .
If necessary select the country from the shown list after selecting the field Country.
Select Postcode and use the keyboard to enter the postcode (Note- You can enter the postcode
with or without a space). Select the postcode from the shown list, you can then enter the house
number and select it from the list (see Note section 5). Alternatively you can select anywhere or a
particular road junction by selecting the options anywhere or crossing (note – crossing will show
a list of road names that join with the road shown under the postcode).
After completing your selection you will be taken to the Go Screen, then click
5.2 Navigate to a Recent Location
From the main menu select Go To and then Recent Location .
Select a destination from the list of recent locations used.
After completing your selection you will be taken to the Go Screen, then click .
.
5.3 Navigate to an Address
From the main menu select Go To and then Address .
If necessary select the country from the shown list after selecting the field Country.
Additional Maps and Upgrades – Please visit www.ndrive.com
Technical Help – Please contact the helpline on 0844 557 9677
Page 23

NAVIGATION
23
Select City and enter the city name using the keyboard (note – that the unit will begin to match
possible matches based on what you enter so you may not have to enter the full name). Select the
desired city from the list and the unit will switch to the street field.
Enter the desired street using the keyboard, again the unit will begin to match and show possible
matches. Select the desired street from the list and the unit will prompt you to enter a house
number enter the house number and select it from the list (see Note section 5). Alternatively you
can select anywhere or a particular road junction by selecting the options anywhere or crossing
(note – crossing will show a list of road names that join with the road shown under the postcode).
After inputting the address you will be taken to the Go Screen then click .
5.4 Navigate to Home
From the main menu select Go To , and then Home and then from the Go Screen click
.
Note – In order to use the Home option, you will first need to set the home location. The first time
you use this option if you have not already stored your home location, you will be asked to set the
location.
5.4.1 Setting Your Home Location
From the main menu select My NDrive
and then Define Home . Select one of the available
options for setting your home location; Postcode , Address , Places , Recent
Location . Use the method as described in Section 5 for your chosen option to enter your
location. Alternatively you can set the location using your current GPS location or the location
currently shown on the map (if you do not have a GPS signal) by using the Here option.
After selecting and entering your location, click .
5.5 Navigate to Places
Places allows you to set your destination in a number of different ways; Via a POI (point of
interest) either around you on in a different city, Via co-ordinates or from your list of favourites
From the main menu select Go To and then Places .
Additional Maps and Upgrades – Please visit www.ndrive.com
Technical Help – Please contact the helpline on 0844 557 9677
Page 24

NAVIGATION
24
5.5.1 Navigate to a Point of Interest (POI)
Select Around Me to select a POI which is located around your current GPS location or the
location currently shown on the map.
Select a POI category from the list of available categories and sub categories to narrow down your
search. When at the lowest category level for the category your have chosen, you will be able to
view the list of all possible POI matches or use the keyboard to narrow down the search if you
know the name of the POI you are looking for.
After completing your selection you will be taken to the Go Screen, then click .
You may also select All and search for a POI within the entire database; note that this will take
longer. POI locations are shown in order of distance from you.
Select In a City to select a POI which is in a location not around your current GPS location.
First you will need to enter a location via the city field, if the city field already contains your
desired location, you can skip this step and either begin searching via category or directly for a
place name via the places field.
After completing your selection you will be taken to the Go Screen, then click .
5.5.2 Navigate Using Co-ordinates
Select Coordinates , use the keyboard to input the location's latitude and longitudinal
coordinates. You can enter the co-ordinates in either decimal or degrees:minutes:seconds as the
unit will automatically change formats to suit. Once the co-ordinates have been entered click
.
After completing your selection you will be taken to the Go Screen, then click .
5.5.3 Navigate to a Favourite Location
Select Favourites . You can then scroll through your list of favourite locations or use the
search bar to search directly for a favourite location.
After completing your selection you will be taken to the Go Screen, then click .
Before you can use the favourites option you will need to store locations to the favourite list. (See
page 24)
Additional Maps and Upgrades – Please visit www.ndrive.com
Technical Help – Please contact the helpline on 0844 557 9677
Page 25

NAVIGATION
25
5.5.3.1 Storing Favourite Locations
Select your location to be saved to favourites using one of the methods described in section 5 to
enter that location.
Once entered, Click and you will be taken to the Add to favourites screen.
Here you will be able to select and edit information
relating to the favourite such as Name, address,
tags and telephone number.
The Name and Tag information is used, when
searching for a favourite location as described in
section 5.5.4.1.
Once entered, Click .
5.5.4 Navigate Using an Itinerary
Select Itineraries . You can then create a new itinerary, or select an itinerary from the list, if
you have already created or imported one.
5.5.4.1 Creating an Itinerary
To create an itinerary, click +Add New Itinerary. Select each of the shown fields in turn Add or
Edit the itinerary name and description using the keyboard. Once done click
to
proceed. You will now have to define the waypoints to be included in your itinerary.
Click +Add New Waypoint, selecting from either Address , Places , Recent Location ,
Favourites or Home enter the way point location as described in section 5, repeat the
process for each additional new waypoint. Once you have finished adding waypoints, click
to finish creating the itinerary.
Note - You can also add a waypoint by selecting any point on the map, and then clicking the
waypoint button shown on the context bar. Then you can either add it to an existing itinerary or
create a new one where the selected waypoint will be included.
Additional Maps and Upgrades – Please visit www.ndrive.com
Technical Help – Please contact the helpline on 0844 557 9677
Page 26

NAVIGATION
26
5.5.4.2 Changing an Itinerary
Select an itinerary from the list.
To edit the itinerary’s name and description, click Edit/Rename and alter the fields as
described in “Creating an itinerary”.
To delete the itinerary, click Delete .
To view the whole itinerary on the map, click View On Map . Only the route between the
itinerary waypoints will be calculated and shown. To calculate the route from your current GPS
location select Navigate .
The first waypoint is represented by a green flag and the last one by a chequered flag. The
waypoints in between are marked with orange flags.
To edit the itinerary’s waypoints, click Show Waypoints . You can then add a new waypoint as
described in “Creating an itinerary”.
You can also select each waypoint in turn and perform several actions:
View the waypoint’s location on the map;
Mark the waypoint as visited, so that when you are
navigating the itinerary, you skip that location;
Move the waypoint up on the itinerary’s list;
Move the waypoint down on the itinerary’s list;
Mark the waypoint as the next destination, all previous
waypoints will be marked as visited;
Delete the waypoint from the itinerary list.
5.5.4.3 Navigating an Itinerary
Select an itinerary from the list then click Navigate
. The unit will begin calculating the route to
your first waypoint starting at your current GPS location or position currently shown on the map.
Additional Maps and Upgrades – Please visit www.ndrive.com
Technical Help – Please contact the helpline on 0844 557 9677
Page 27

27
6 Go Screen
NAVIGATION
The go screen as well as allowing you to navigate to your chosen destination shows you
information about the location you have selected and allows you to carry out the following
functions.
- Allows you to view the entered location on the map.
- Allows you to save the location to your favourites for quick use in the future.
- Used to calculate your route and begin navigation.
Note – That Share and Contact are not used on this device as it has no network capability.
7 My Route
From the main menu select My Route .
The my route menu allows you access to several options for viewing and manipulating the route
that has been calculated. Note – that this option is only available when a route has been
calculated.
7.1 Show Route
Select View On Map . An overview of the full route will be temporarily shown on the display.
7.2 Stop Navigation
Select Stop Navigation . This will cancel the current route and return you to the main menu
screen.
Additional Maps and Upgrades – Please visit www.ndrive.com
Technical Help – Please contact the helpline on 0844 557 9677
Page 28

NAVIGATION
28
7.3 Road Book
Select Road Book . A summary list of all required manoeuvres for the route will be shown,
detailing the distance to that manoeuvre, the type of manoeuvre, the road name you will be joining
as well as an estimated time to that manoeuvre.
7.4 Alternative Routes
Select Alternatives . You will be shown a number of options to allow you to make
changes/alterations to your calculated route.
7.4.1 Calculate Alternative
Select Calculate Alternative , the unit will now calculate an alternative route based on your
set route preferences. An overview of the full route will be displayed temporarily before navigation
begins. You can re-calculate the route numerous times, just by selecting Calculate Alternative.
7.4.2 Roadblock
This option allows you to quickly calculate a detour around an obstruction like traffic jams which
are on your planned route.
Select Roadblock . You will be shown a number of different distance options. Select the
option which is longer than the distance to the expected obstruction. The unit will re-calculate a
route which will avoid the original planned route for this distance. The old route will be shown on
the map by a light blue line.
7.4.3 Avoid Part of Route
This option allows you to avoid part or parts of the currently calculated route and allows you to
change the route to take into account high traffic areas or road works so that these roads will be
avoided.
Select Avoid Part Of Route
, You will be shown a list of all the roads which are currently being
used to complete your route. Simply scroll through the list selecting the roads you wish to avoid.
To select the road to be avoided tap in the small square at the right hand side. You will see a small
red cross appear and the road name will also turn red.
Once you have selected all the roads you wish to avoid, click .
A new route will be calculated based on the roads you have excluded. An overview of the route
will be briefly shown with the original route shown with a light blue line.
7.4.4 Calculate Original
Select Calculate Original . The unit will re-calculate the route that was originally calculated.
So resetting any changes that you may have made to the route under section 7.
7.5 Start Demo
Select Start Demo . The unit will begin travelling the route in demo mode. While in demo the
unit will follow the planned route and make any voice announcements that it would normally. The
unit will travel the route at the speed limit defined by the road that the unit is currently following.
To stop demo mode, re-enter the My Route menu and select Stop Demo
Additional Maps and Upgrades – Please visit www.ndrive.com
Technical Help – Please contact the helpline on 0844 557 9677
.
Page 29

NAVIGATION
29
8 Settings
From the main menu select Settings .
You will now have the option of selecting from 7 different settings categories as described below.
8.1 General
8.1.1 Speaker
Use the + and – to either increase or decrease the speaker volume then select to
confirm the setting. You will be returned back to the main settings menu.
Note – You can change the volume while navigating by tapping on the bottom bar in the centre.
8.1.2 Light
Use the + and – to change between System or Always on then select to confirm the
setting. You will be returned back to the main settings menu.
If you select System then the backlight will be set from the setting defined by the GPS unit.
8.2 International
8.2.1 Language
Scroll up and down through the list of available languages, select the desired language and you
will hear an example of the voice in that language then select to confirm the setting.
You will be returned back to the International menu and the display text will have changed to the
new language setting.
8.2.2 Keyboard Type
Use the + and – to either change between the available keyboard layout types then select
to confirm the setting. You will be returned back to the main settings menu.
8.2.3 Kph/Mph
Use the + and – to change the measurement of speed which will be displayed and announced on
the unit then select to confirm the setting. You will be returned back to the main
settings menu.
Additional Maps and Upgrades – Please visit www.ndrive.com
Technical Help – Please contact the helpline on 0844 557 9677
Page 30

NAVIGATION
30
8.3 Map Appearance
8.3.1 Lane Assistance
Displays information about the up and coming lane layout of junctions on major roads when a
manoeuvre required. There are two ways in which this information is displayed, simplified and
detailed.
In simplified mode you are shown the lane layout as
simple arrows indicating the directional flow of the traffic
for each lane.
In detailed view the same information is shown but as
visual signposts as you would see along the side of the
road.
Select to confirm the setting. You will be
returned back to the main settings menu.
8.3.2 North up in 2D
When switched to On the map will stay orientated North and the cursor will change to show your
current direction. When switched to Off the cursor remains pointing up and the map will move
accordingly to your direction.
Use the + and – to change between On and Off then select to confirm the setting.
You will be returned back to the main settings menu.
8.3.3 Dynamic Zoom
Use the + and – to change between On and Off, when On the zoom level will automatically adjust
to suit your current speed. (The faster you are travelling the further out the zoom will be). Select
to confirm the setting. You will be returned back to the main settings menu.
8.3.4 Templates
Allows you to customise the appearance of the map as well as allowing you to select the
automatic change between day and night mode.
Select a template to change (Note – the Night
Template is only available to be changed if Enable
Auto Toggle has been selected. Scroll through the
available Day or Night templates, a snapshot of
how the template will look is shown for each
option. If you select “Enable auto toggle” the
chosen templates will change automatically
between day and night, according to the times
shown for each.
Select to confirm your settings. You
will be returned back to the Map Appearance
menu.
Additional Maps and Upgrades – Please visit www.ndrive.com
Technical Help – Please contact the helpline on 0844 557 9677
Page 31

NAVIGATION
31
8.3.5 Points of Interest
Allows you to customise which POI categories will be shown on the map. Scroll through the list
and select the categories you would like to be shown. Categories which will be shown on the map
are shown with a tick in the right hand box. The default setting is for all categories to be shown.
Select to confirm your settings. You will be returned back to the Map Appearance
menu.
8.4 Routing Options
8.4.1 Routing Options
Allows you to change the way your route is calculated. You can chose from three available
options.
Use the + and – to change between each of the described below options.
Fastest – calculates the fastest route, regardless of the distance. It is highly recommended
that you select this option: the planned route will not only be the fastest, but also more
economic and pleasant to drive, since wider and faster roads such as motorways are given
priority.
Shortest – calculates the shortest route, regardless of the quality of the road. Note that this
route may take more time and some of the roads may be narrow or steep.
Pedestrian Mode –calculates your route using the shortest path available for walking or riding
a bicycle; routing calculation will not consider traffic signs and routing is limited to a 20km or
12.4 Mile distances.
Select to confirm your settings. You will be returned back to the Main Settings menu.
8.4.2 Tolls
Allows you to change if toll roads are to be included in the route calculation. Use the + and – to
change between yes and avoid.
Select Yes to allow toll roads to be used in the calculation.
Select Avoid to calculate a route which does not use toll roads.
Note - that even if you’ve selected the option Avoid, toll roads will still be considered, if there is no
other option for the route.
Select
to confirm your settings. You will be returned back to the Main Settings menu.
Additional Maps and Upgrades – Please visit www.ndrive.com
Technical Help – Please contact the helpline on 0844 557 9677
Page 32

NAVIGATION
32
8.4.3 Adventure Mode
Allows you to navigate to a location or set of co-ordinates which are not located near a road.
Select this mode for outdoor activity use or when travelling by sea or air. In this mode, the distance
to your destination is calculated in a direct line and a compass will be displayed to guide you
towards your destination.
Select to confirm your settings. You will be returned back to the Main Settings menu.
8.5 Safety Options
8.5.1 Speed Limit Alarm
Allows you to activate/deactivate an alarm to warn you that you have exceeded the speed limit for
the road that you are currently on. Use the + and – to change between the available options.
Off – The alarm will be switched off
Visual – The Road speed limit warning icon will be shown indicating the current
speed limit for the road.
Visual and Sound – In addition to the speed limit warning icon, you will also hear warning
beeps.
Select
to confirm your settings. You will be returned back to the Main Settings menu.
8.5.2 Safety Camera Alert
Allows you to activate/deactivate the alert to warn that you are approaching a speed camera
location. Use the + and – to change between On and Off.
Select to confirm your settings. You will be returned back to the Main Settings menu.
Additional Maps and Upgrades – Please visit www.ndrive.com
Technical Help – Please contact the helpline on 0844 557 9677
Page 33

NAVIGATION
33
8.6 System
8.6.1 Time Format
Allows you to change the time format between 12 hour and 24 hour. Use the + and – to change
between 12H and 24H.
Select to confirm your settings. You will be returned back to the Main Settings menu.
8.6.2 Restore Settings
Selecting this option will restore all of the settings back to the factory default. Once selected you
will be asked to confirm, select Yes to confirm and restore the unit or No to cancel. After selecting
Yes you will then be asked to restart the NDrive software. Select OK, you will be returned back to
the initial screen seen after powering on. Select Navigation again to restart NDrive.
8.6.3 Theme
Allows you to change between two different themes for the menu button colour Classical and
Rainbow. With Classical the buttons will be shown red while Rainbow will show each button in a
different colour. Use the + and – to change between Classical and Rainbow.
Select to confirm your settings. If you have made a change to the current theme the
changes will only be applied after a restart of the software is carried out. You will be asked if you
wish to restart the software now, select Yes to carry out the restart or No if you wish to restart the
software later.
8.7 GPS
Allows you to switch the GPS On and Off as well as changing the input method for entering co-
ordinates. Other information relating to the GPS connection is shown, but cannot be modified.
8.7.1 GPS
Use the + and – to change between On and Off. When switched Off you will not be able to
navigate.
Select
to confirm your settings. You will be returned back to the Main Settings menu.
8.7.2 Co-ordinates
Use the + and – to change between the available options.
DDD – Degrees and decimal degrees
DMM – Degrees and minutes
DMS – Degrees, minutes and seconds
Select to confirm your settings. You will be returned back to the Main Settings menu.
9 My Ndrive
Allows access to information about your device/software, as well as allowing access to further
preferential settings.
Additional Maps and Upgrades – Please visit www.ndrive.com
Technical Help – Please contact the helpline on 0844 557 9677
Page 34

NAVIGATION
34
9.1 Define Home
Allows you to set or change your home location, See section 5.4.1 for information about how to
set/change your home location.
9.2 Start up Wizard
Allows for the legal information screen to be re-shown the next time the software is started.
After selecting, choose Yes to confirm or No to cancel.
9.3 My Maps
Displays information relating to the maps you have installed on your device, including the country
the map is for and the date when it was compiled.
9.4 GPS
Displays information relating to the status of the GPS signal to your device.
9.5 Version
Displays information relating to the version of NDrive software you are running on your device.
9.6 Data Import/Export
Allows you to back up your saved data or to import files from another device.
Note - You can import itineraries created on Google Earth as they can be saved to your computer
in the .KML format.
9.6.1 Importing data
Firstly in order to import data you will need to either connect the device to your computer via a
USB cable or remove the SD card (if applicable) and connect it directly to your PC. You can then
copy the .KML files from your source into the corresponding folder: Speedcams, Itineraries or
Favourites. Located inside the main NDrive folder located on your device or on your SD card.
The information in the .KML file will not be recognised by your device until it has been extracted
Additional Maps and Upgrades – Please visit www.ndrive.com
Technical Help – Please contact the helpline on 0844 557 9677
Page 35

NAVIGATION
35
using the import function as described below.
From the main menu select My NDrive , then select Data Import/Export .
Then, depending on what you wish to import, select Import Safety Cameras , Import
Itineraries , or Import Favourites .
You will see a list of files which can be imported, select a file by clicking on it and the import
process will begin automatically.
Once finished click , you will be returned to the Data Import/Export screen.
9.6.2 Exporting Data
When exporting your favourites/Itineraries the information will be converted back into a .KML file
and will be exported to the same corresponding folder as described in section 9.6.1. From there
you will be able to copy them to your PC for future use, using the methods described previously to
copy the files to the folders on your device or SD card.
From the main menu select My NDrive , then select Data Import/Export .
Then, depending on what you wish to export select Export Itineraries or Export
Favourites .
9.6.2.1 Exporting Itineraries
After selecting Export Itineraries, you will be taken to the itineraries list screen. Scroll through the
available itineraries until you find the one you wish to export. Select the itinerary and it will
automatically be exported.
Once finished click
9.6.2.2 Exporting Favourites
After selecting Export Favourites, your favourites will be automatically exported.
Once finished click , you will be returned to the Data Import/Export screen.
, you will be returned to the Data Import/Export screen.
10 Exit
Select to exit the navigational software.
From the main menu select Exit .
You will be asked to confirm you wish to exit the NDrive software, choose Yes to confirm and No
to cancel exiting.
Additional Maps and Upgrades – Please visit www.ndrive.com
Technical Help – Please contact the helpline on 0844 557 9677
Page 36

NAVIGATION
36
11 Store
This feature is not available on this device as it does not have any network connection capability. If
you select Store , you will be shown the following screen.
Please select to be returned to the
main menu. To gain access to the NDrive store
in order to make purchases and to update the
software on your device, please visit
www.ndrive.com select the support tab and
then NPlus.
Download and install the NPlus software to
your PC. Once installed connect your device to
your PC via a USB cable and then launch the
NPlus software.
Note: If connecting the device to a computer with windows XP, you will first need to download
ActiveSync from the Microsoft® website. For Windows Vista, 7, 8 when you connect you device
Windows Mobile Device Centre will start. Once loaded select the option “Connect without setting
up device” you are now ready to run Nplus.
12 Nplus
When running Nplus for the first time you will need to create an
account, Click on Create account and you will be taken to an
online webpage where you will be able to set up your account and
create you login details.
Every time you run Nplus you will need to login so please make a
note of your login details for future use. After logging in you will be
shown the main Nplus screen from where you are able to make
purchases/select updates and install these onto your device.
12.1 Buy
Select Buy to be taken to a different
screen where you will be able to purchase
additional maps, additional language
voices, TTS voices (Text To Speech).
Your can select and purchase items here
which can then be downloaded and
installed via the My Products screen
described later in this section.
Note: Some additional language voices
are free and do not need to be paid for.
Simply select the voice for the language
Additional Maps and Upgrades – Please visit www.ndrive.com
Technical Help – Please contact the helpline on 0844 557 9677
Page 37

NAVIGATION
37
you wish to be downloaded and installed
12.1.1 Paying for purchases
When you select an item which needs to be purchased, Nplus will take you to the payment screen.
You can pay for your purchase using one of the following cards Visa, MasterCard or American
Express. Select and enter your details into the provided fields before selecting
to continue with your purchase.
If you have a serial number to activate a map, use the option to be taken to a
screen where you can enter your serial number.
12.2 Updates
Select Updates to have Nplus check your
device for any available map updates. If
there are no updates available Nplus will
show this on the update screen, if updates
for your device are available then a list of
updates will be shown. You can select
individual updates by selecting
or select all free updates by selecting
. Note: some updates may
not be free.
In order to download and install these
updates you will need to select My
Products.
12.3 My Products
Select My Products to begin
downloading and installing your selected
updates/purchases. A list of items to be
downloaded and installed will be shown; if
there is an update to the software this will
also be shown in the list of downloadable
items.
To begin the download and installation
process select
.
After selecting Nplus will begin
downloading your updates/purchases, a
green progress bar will be shown at the
bottom of the screen to indicate the current download progress.
After your updates/purchases have been downloaded, you will be asked if you wish to install now
Additional Maps and Upgrades – Please visit www.ndrive.com
Technical Help – Please contact the helpline on 0844 557 9677
Page 38

NAVIGATION
38
or later. Select Yes to begin installing your updates/purchases, you will be shown a second pop up
window when installation has been completed. You can now closedown Nplus and disconnect
your unit from the computer.
If you wish to install your updates at a later date, select No. When you wish to install your
updates/purchases, connect your device to the computer and run Nplus again. Select My
Products and then .
12.4 Enter Serial
Select Enter Serial if your map requires a serial number in order to validate the map. After
selecting Enter Serial, you will be taken to a screen where you can enter and confirm your serial
number.
12.5 Device Information
Select Device Information to be shown further detailed information about the device which is
currently connected to Nplus.
12.5 Help
Select Help to gain access to Ndrives online help sections, which will provide help and advice on
using the Ndrive software. Select from one of the four available categories to be taken directly to
the webpage containing that information.
The categories you have the choice from are as follows:
User guides
Frequently Asked Questions (FAQ)
Video Tutorials
Technical support
Additional Maps and Upgrades – Please visit www.ndrive.com
Technical Help – Please contact the helpline on 0844 557 9677
Page 39

TECHNICAL SPECIFICATIONS
39
Frequently asked questions
I can’t find an address.
Please make sure you have correctly spelt your entry. If you do not know how an add ress is
spelt correctly, simply enter the parts of the address, you know of sure (e.g., “ond”, “Leic” for
Leicester Square in London). Then browse the results list and look for the address. Also make
sure the city in which you are looking for an address is correct. Sometimes the official postal
address differs from the address you are looking for. In that case, search for a known address
nearby and browse the map.
If you find the address on the map but you cannot find it while searching for it, please conta ct
NDrive via the support tab on the website
The map contains an error / POl’s are missing.
If you detect an error in the map data (e.g., a street is missing completely), we would like to
inform our map data provider. Please contact the helpline on 0844 557 9677 to report any map
error’s you detect.
I am experiencing problems getting a GPS fix.
If you have problems getting a satellite fix with GPS(you can see how many satellites are
being received by going to the main menu and selecting GPS receiver), please make sure you
are outside and the GPS antenna has good ‘visibility’ to the open sky. Some models also
support an additional external active antenna. Please consult the hardware manual of your
device to get further information on how to obtain a GPS fix.
Where can I get technical hardware support?
Please contact our help line 0844 557 9677.
Where can I get software updates?
Please see sections 11 & 12 of the user guide for information about how to update your
software.
Where can I get additional maps and guides?
Please see sections 11 & 12 of the user guide for information about how to obtain map
updates.
www.ndrive.com.
Additional Maps and Upgrades – Please visit www.ndrive.com
Technical Help – Please contact the helpline on 0844 557 9677
Page 40

40
Technical Specifications
CPU
Mstar 2531
Operating
System
Microsoft WinCE.NET 6.0 Core Version
Antenna
Built-in GPS high sensitivity receiver (42 channels)
Memory
128MB SDRAM Built-in
Display
U435
U505
U605
4.3″colour TFT touch
screen
5″colour TFT touch
screen
6.2″colour TFT
touch screen
Weight
0.142 kg
0.185 kg
0.235 kg
I/O
Input
Method
Touch
Expansion
Slot
MicroSD card
Speaker
Built-in
1.0W loud speaker
USB
USB Client for Active Sync
Battery
Re-chargeable Lithium Polymer battery
Dimension
122mmx78mmx12mm
135mmx90mmx13.5mm
171mmx105mmx13mm
TECHNICAL SPECIFICATIONS
Additional Maps and Upgrades – Please visit www.ndrive.com
Technical Help – Please contact the helpline on 0844 557 9677
Page 41

TECHNICAL SPECIFICATIONS
41
BINATONE TELECOM PLC
1 Apsley Way London NW2 7HF,United Kingdom.
Tel: +44(0) 20 8955 2700 Fax: +44(0) 20 8344 8877
e-mail: binatoneuk@binatonetelecom.co.uk
________________________________________ .
EC Declaration of Conformity
We the manufacturer / Importer : Binatone Telecom Plc
1 Apsley Way London
NW2 7HF, United Kingdom.
Declare under our sole responsibility that the following product
Type of equipment: GPS
Model Name: U435/U505/U605 series
Country of Origin: China
Brand: Binatone
complies with the essential protection requirements of Article 3.1 (b) of R&TTE Directive 1999/5/EC and
the following standards:
Radio Spectrum: ETS 300440-1 V1.6.1 (2010-08)
ETS 300440-2 V1.4.1 (2010-08)
EMC: EN 301489-3 V1.6.1 (2013-08)
EN 301489-1 V1.9.2 (2011-09)
Electrical Safety: EN 60950-1:2006 +A11:2009 +A1:2010+A12:2010+A2:2013
The product is labelled with the European Approval Marking CE as show. Any Unauthorized modification
of the product voids this Declaration.
Manufacturer / Importer
(signature of authorized person)
Henry Leung, Product Manager London,
Signature: Place & Date: 07 Nov, 2014
Additional Maps and Upgrades – Please visit www.ndrive.com
Technical Help – Please contact the helpline on 0844 557 9677
 Loading...