

Page 1
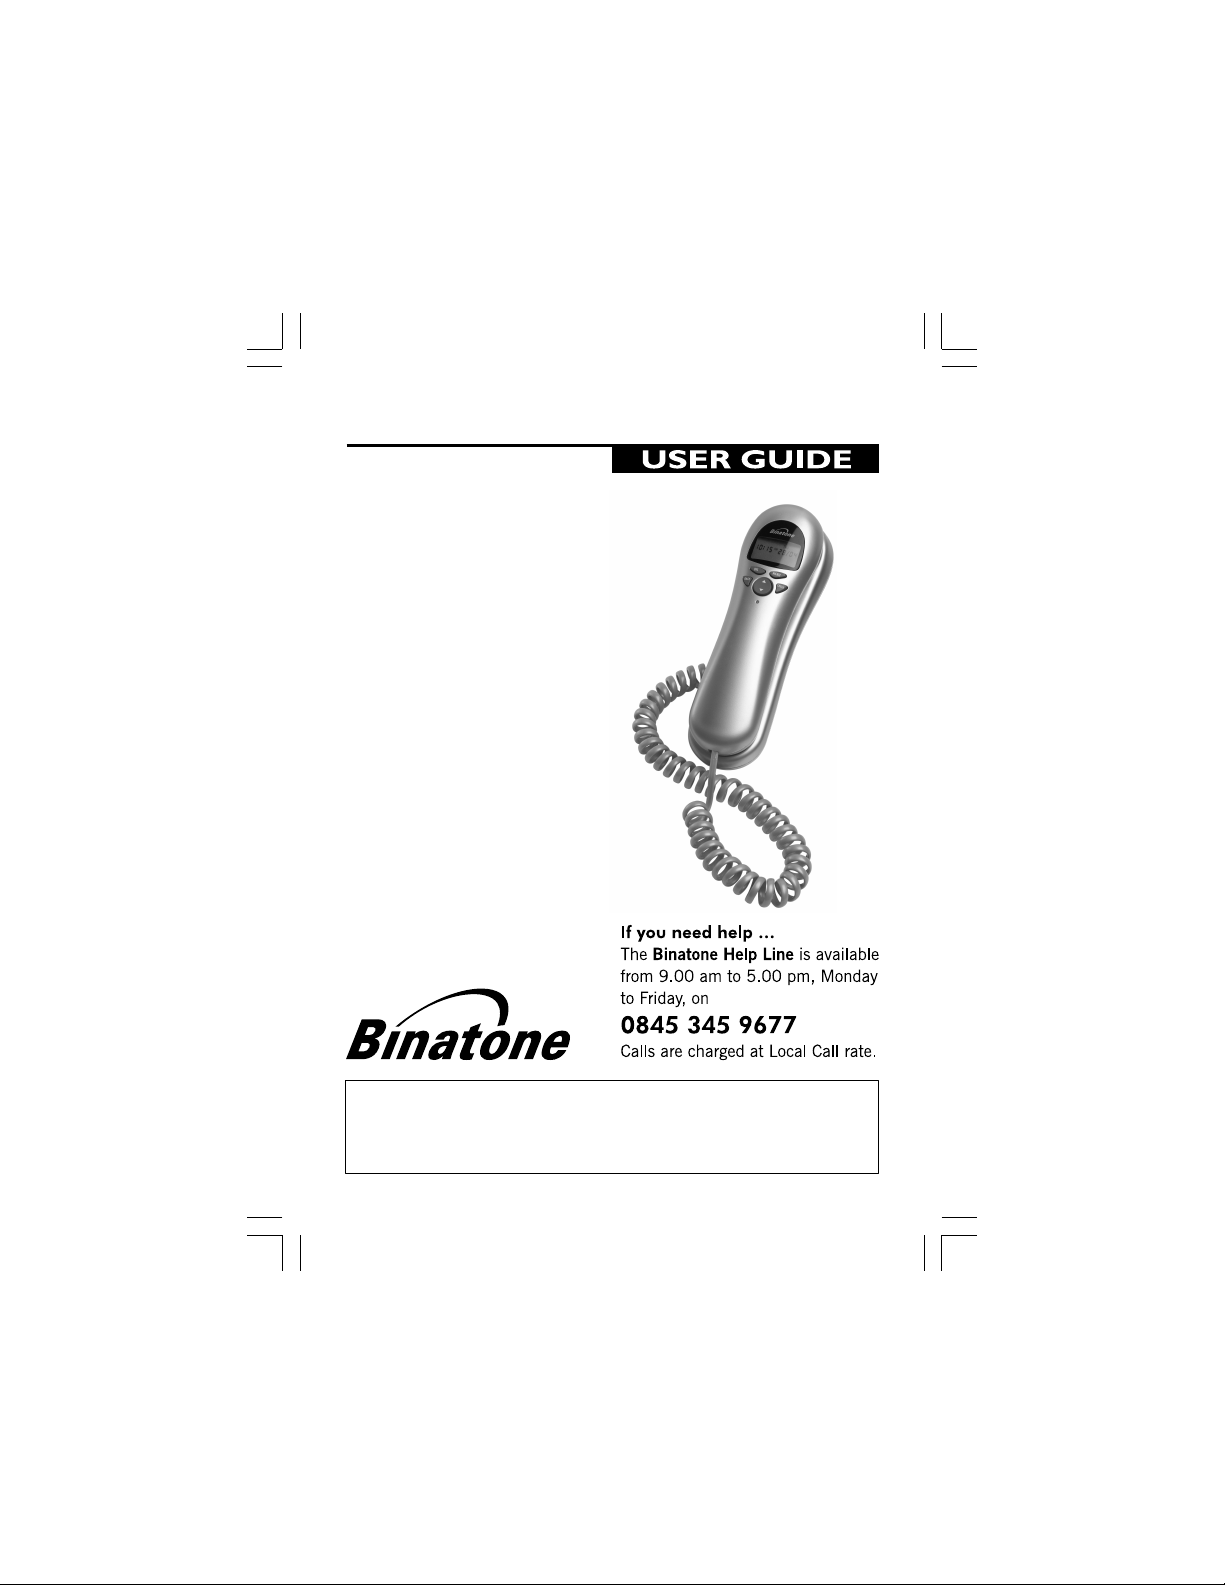
TREND 3 EXECUTIVE
Unpacking your phone
In the box you will find:
• Base Unit
• Handset
• Coiled Handset cor d
• Telephone line cord
for Base unit
• User manual
Keep the pac ki n g ma terials
in a safe place in case you
later need to transport the
unit.
Keep your sales (till)
receipt, which is your
guarantee.
Corded Telephone
Important note---back up batteries
The Trend 3 Executive requires 2 x 1.5V AAA size Alkaline batteries
installed into the battery compartment before use.
Warning: The caller display will not work without batteries installed.
1
Page 2
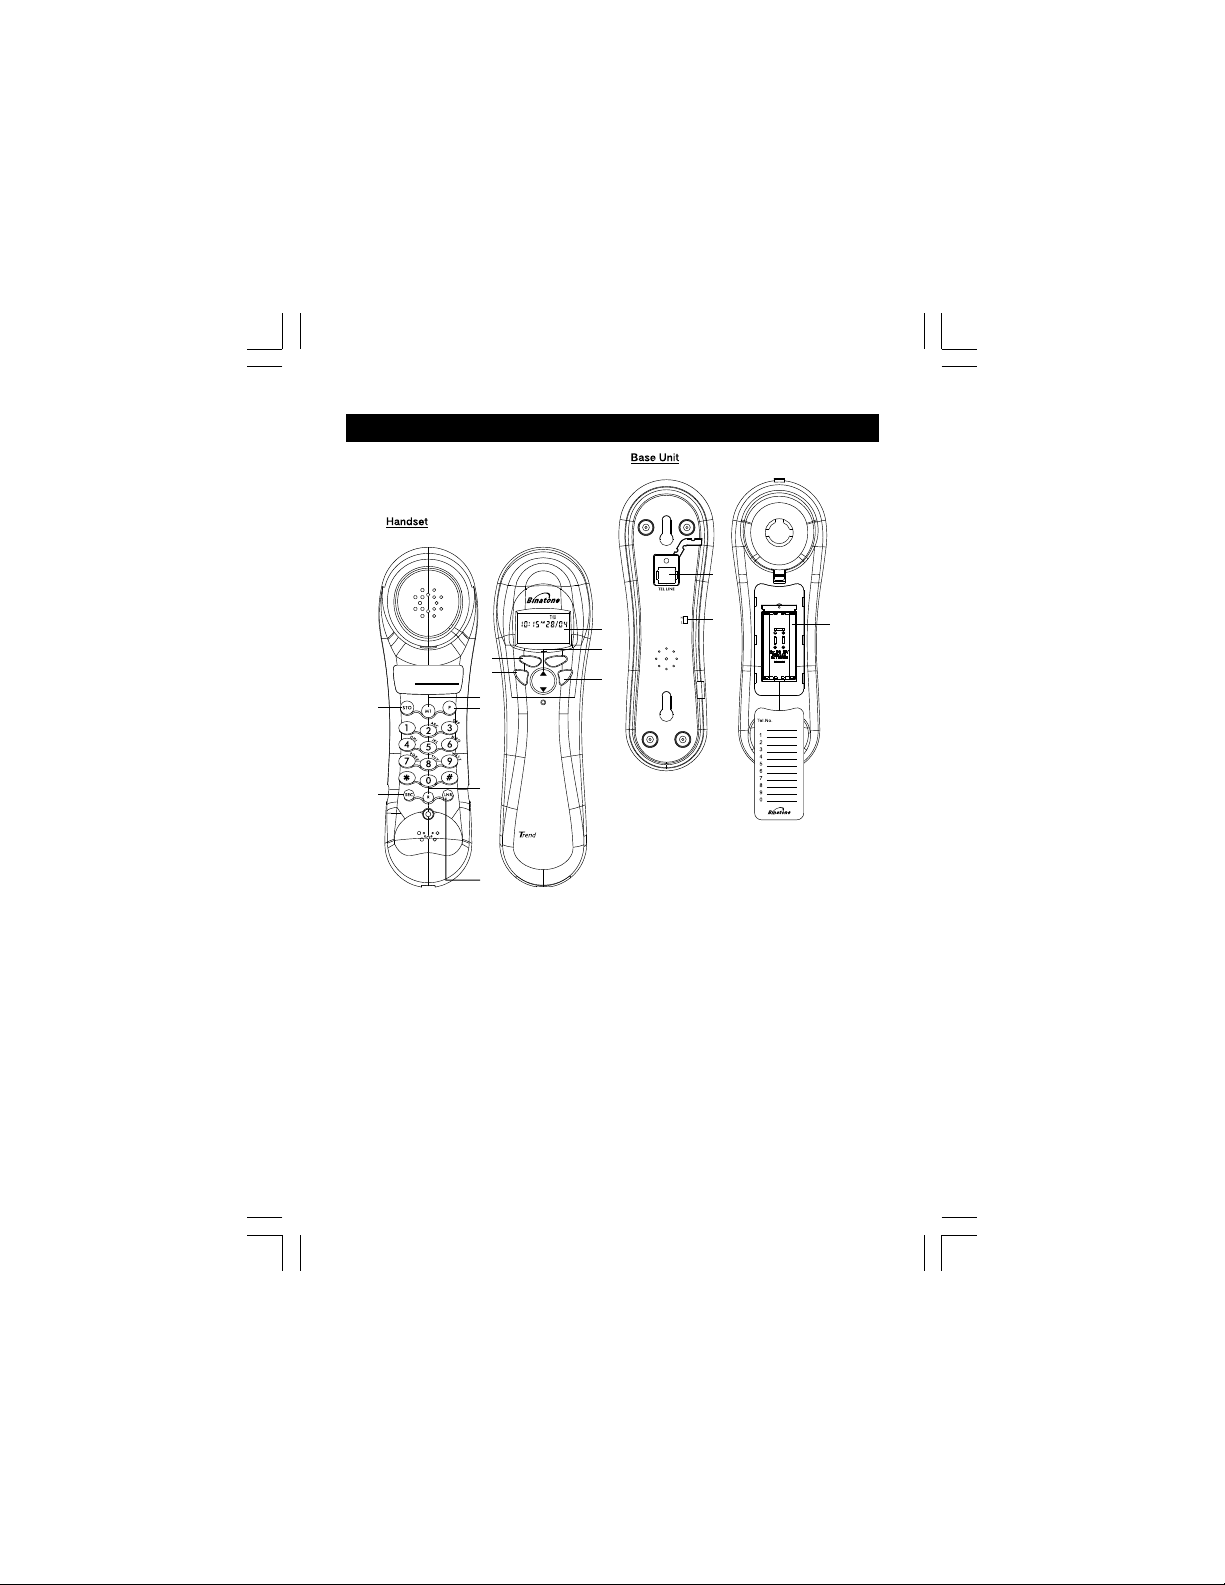
1. Where to find it
12
1
4
DEL
Tel N o
6
7
3
8
new
9
10
3 Executive
2
MENU
CHECKBACK
5
1. LCD Screen
2. Scroll Up & Down buttons
14
3. Call Back button
4. Delete button
5. Check button
6. Store button
7. Secrecy button
8. One-Touch Memory button
9. Pause button
10.R(Recall) button
11.Battery Compartment
12.Telephone Line Socket
13.Ringer Volume Switch
14
.LNR(Last Number Redial) button
Binatone Help Line - 0845 345 9677
Calls are charged at Local Call rate.
2
13
M1
11
Page 3
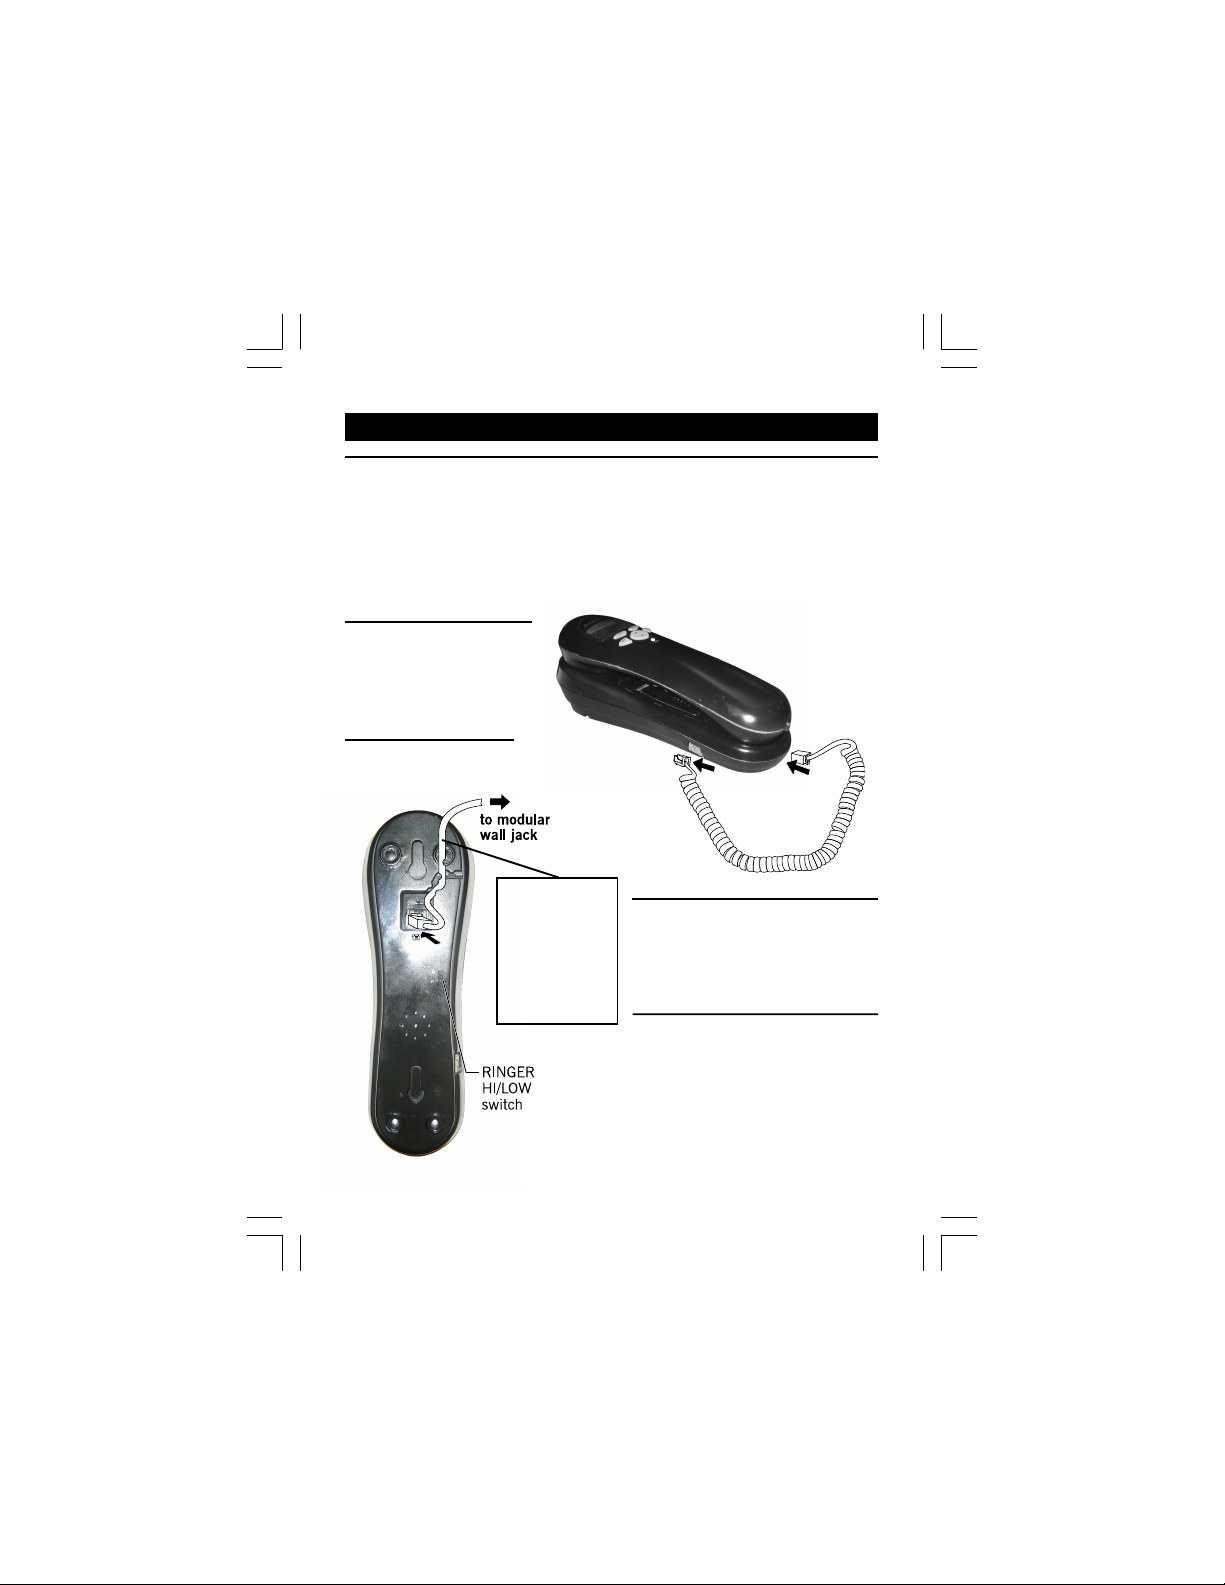
2. Installation
1. Locating the Base unit
The Base unit should be placed on a level surface, in a position where:
the telephone line cable will reach your telephone line socket or
extension socket.
it is not close to a sink, bath or shower, or anywhere else where it
might get wet.
it is not close to other electrical equipment - fridges, washing
machines, microwave ovens, TVs, fluorescent lights, etc.
2. Plug the coiled handset
cord into the Handset.
Plug the other end into
the jack on the left
side of the Base unit.
3. Place the Handset in
the Base unit.
make sure the
plugs click
into place.
Always use the
telephone line
cord supplied
with your Trend 3
Executive phone.
Other telephone
line cords may
not work.
4. Plug the telephone line cord
free end into a modular wall jack.
Press the cable into the groove
so that the Base unit stands level.
5. Lift the Handset and check for
Dial tone in the earpiece.
Binatone Help Line - 0845 345 9677
Calls are charged at Local Call rate.
3
Page 4
3=L?Q >LCP?L
<;NN?LS >IIL
06x JF;N?
4?F?JBIH?
HOG<?L =;L>
NI IJ?H
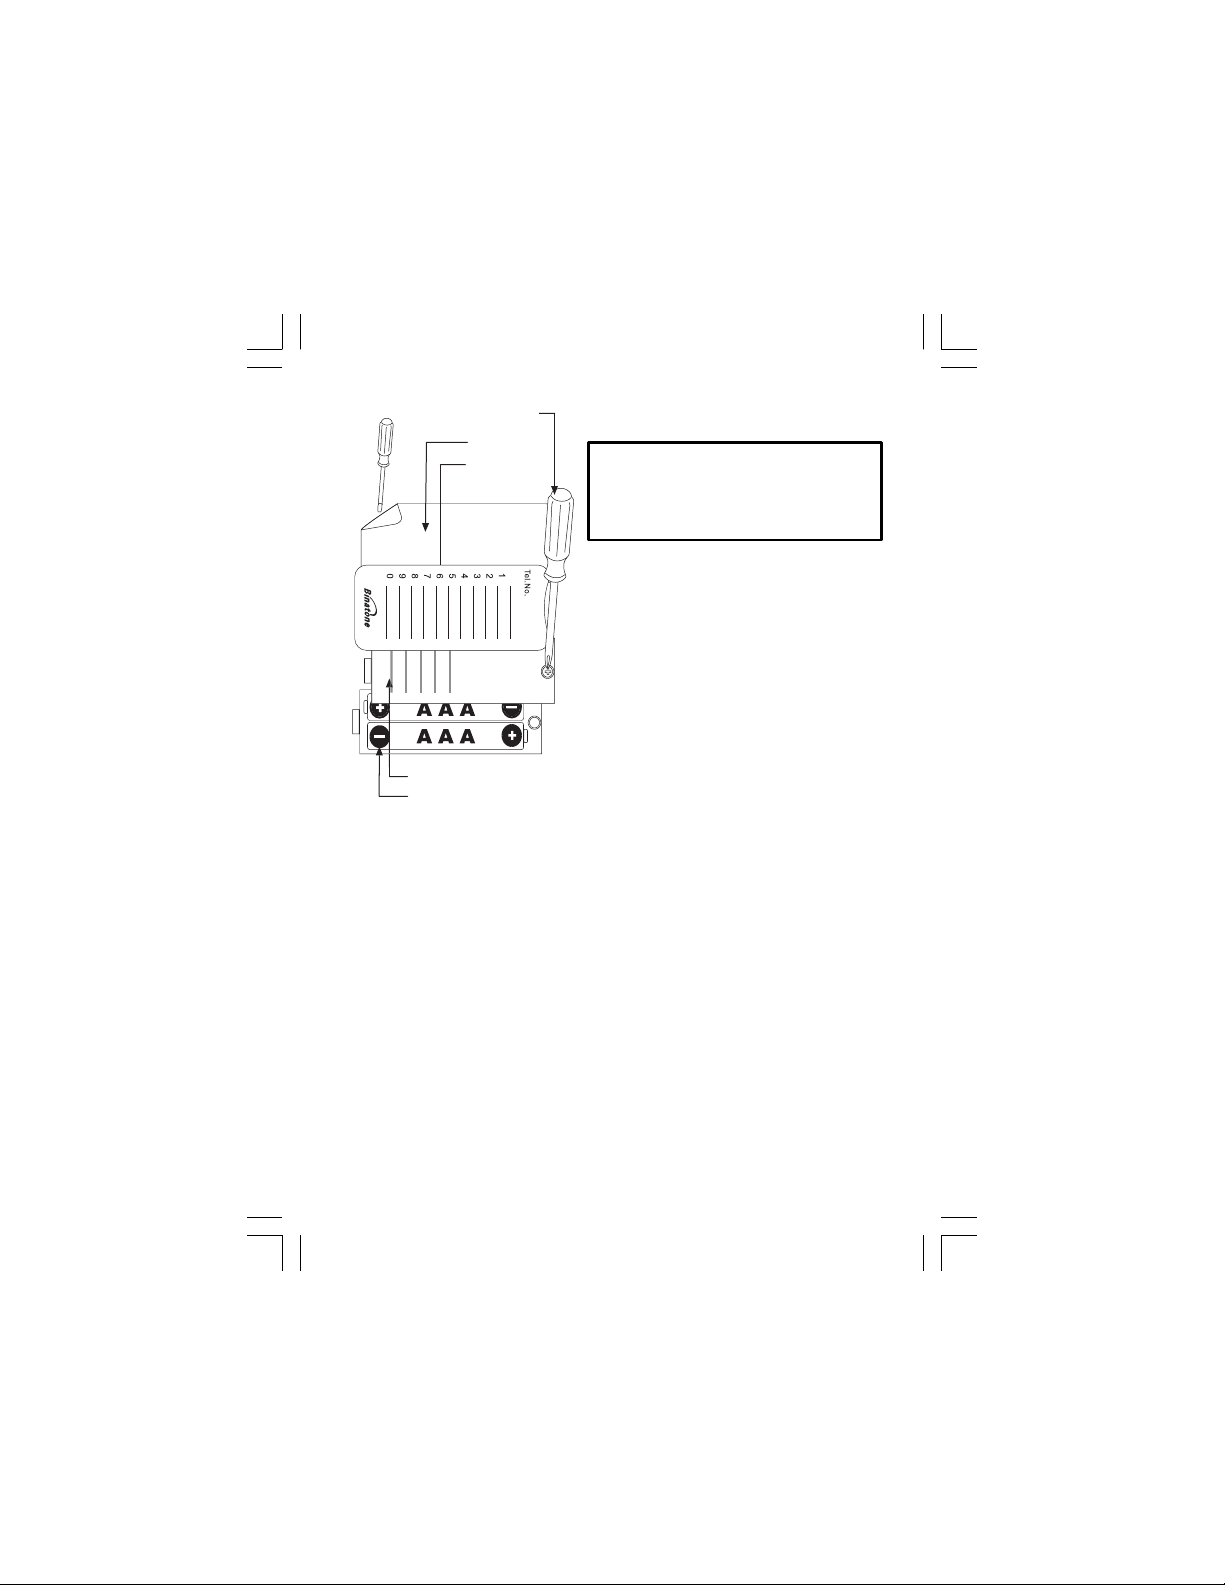
Installing (or Replacing) the Battery
IMPORTANT
- Before removing the
battery compartment cover, always
make sure the base unit is
disconnected from the telephone line.
M1
w;NN?LS =IGJ;LNG?HN
l 2jmivvv vFE;FCH? <;NN?LC?M
=IP?L
Use a screwdriver to remove the screw
in the battery compartment cover on the
top of the base unit.
Install 2 pcs of Alkaline AAA batteries
into the battery compartment and place
back the cover before use.
Note: 1) Please do NOT use Rechargeable
batteries in this phone.
2) The Caller display will not work
without batteries fitted.
Binatone Help Line - 0845 345 9677
Calls are charged at Local Call rate.
4
Page 5
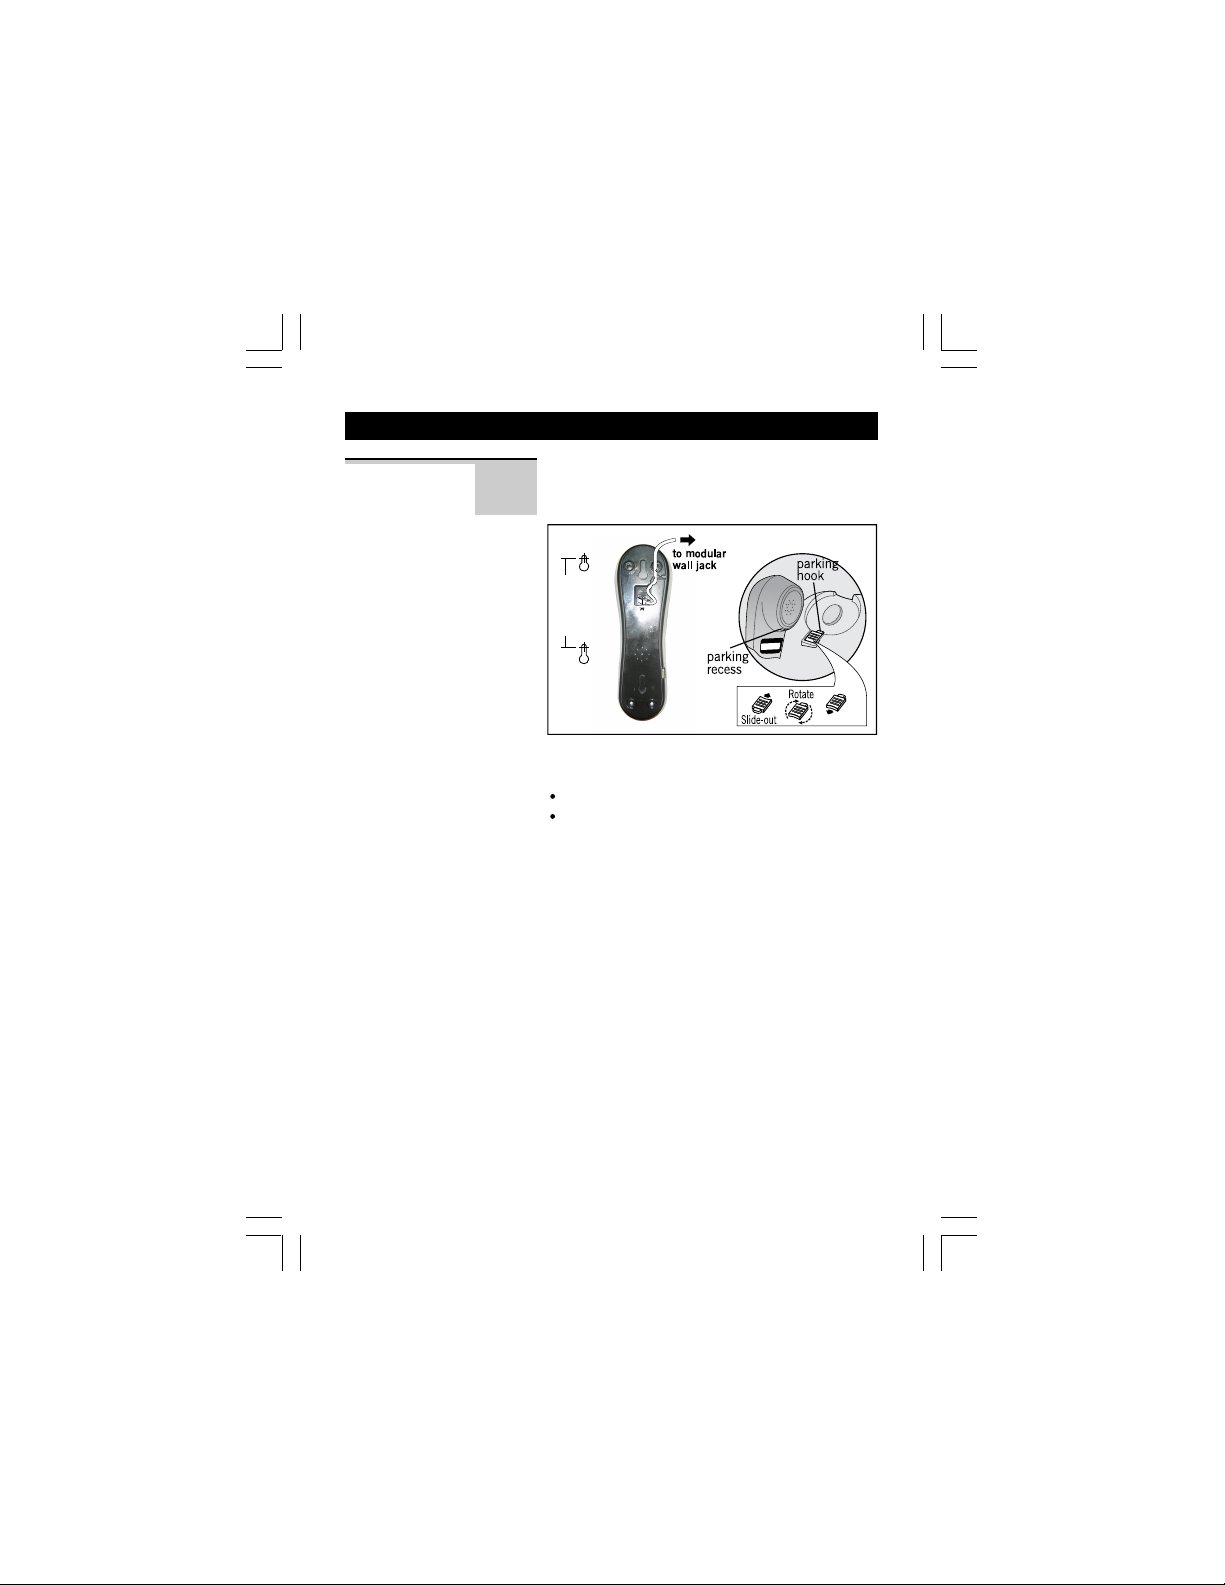
3. Wall mount installation
Wall mount
To place the Trend 3 Executive phone on a wall,
mark two points on the wall that are
apart to lay the fixing centers as shown below.
130 mm
130 mm
Slide-back in
IMPORTANT
Before you wall mount, please check that:
you are not drilling into any hidden wiring
the telephone line cord will reach the
telephone socket
Fix two screws at the marketed locations, leaving
approximately 7mm between the wall and
the screw head. Hang the cradle unit on the
screws using the wall mount slots. You may need
to remove the telephone from the wall and
tighten the screws so that the cradle is securely
fixed and does not wobble. Place the Handset on
the cradle with the packing hook on the cradle
arranged to fit in the parking recess under the
earpiece on the Handset.
Binatone Help Line - 0845 345 9677
Calls are charged at Local Call rate.
5
Page 6

4. Setting up your phone
Press the MENU button to enter the menu and
then use UP or DOWN buttons to cycle through
the following options:
SET 1 DATE
SET 2 LCD
SET 3 FLASH
Note: The system will time out if you leave more
than 8 seconds between key presses.
Set Time/Date
You will need to set the correct time and date
so they can be displayed correctly on the display.
If you subscribe to a Caller Display service, the
time and date will be set automatically on receipt
of your first incoming call.
MENU
1 In standby mode, press MENU button.
Ö The display shows ' SET 1 DATE '.
MENU
2 Press MENU button to confirm.
Ö The 'year' icon will be blinking.
3 Press UP or DOWN button to set the year.
4 Press MENU button to confirm.
MENU
Ö The 'month' icon will be blinking.
5 Press UP or DOWN button to set the month.
6 Press MENU button to confirm.
MENU
Ö The 'date' icon will be blinking.
7 Press UP or DOWN button to set the date.
MENU
8 Press MENU button to confirm.
Ö The 'hour' icon will be blinking.
9 Press UP or DOWN button to set the hour.
Ö When setting the 'hour', the 'AM' or 'PM' icon
will automatically turn on to correspond the
hour time.
Binatone Help Line - 0845 345 9677
Calls are charged at Local Call rate.
6
Page 7

10 Press MENU button to confirm.
MENU
Ö The 'minute' icon will be blinking.
11
Press MENU button to confirm the setting.
12
Press UP or DOWN button to set the minute.
MENU
Ö The display shows ' SET 2 LCD ' , you can
continue with programming, or press DELETE
DEL
button to return to standby mode.
Set LCD
Contrast
1
In standby mode, press MENU button.
MENU
Ö The display shows ' SET 1 DATE '.
2 Press UP or DOWN button until the display
shows 'SET 2 LCD'.
3 Press MENU to confirm.
MENU
4 Press UP or DOWN button to select your
comfortable display viewing level (1~8).
The default setting is 3.
5
Set Flash
Time
Press MENU button to confirm the setting.
MENU
Ö The display shows ' SET 2 LCD ' , you can
continue with programming, or press DELETE
DEL
button to return to standby mode.
This telephone gives you the possibility to
use the special services of your network provider.
When pressing the RECALL button, the phone
generates a line interruption and the length
depends on your Flash Time setting.
1
In standby mode, press MENU button.
MENU
Ö The display shows ' SET 1 DATE '.
2 Press UP or DOWN button until the display
shows 'SET 3 FLASH'.
3 Press MENU to confirm.
MENU
4 Press UP or DOWN button to select 100 (default),
300, 600, or 1000.
Binatone Help Line - 0845 345 9677
Calls are charged at Local Call rate.
7
Page 8

5
Press MENU button to confirm the setting.
MENU
Ö The display shows ' SET 1 DATE ' , you can
continue with programming, or press DELETE
DEL
button to return to standby mode.
5. Telephone Operations
Making a
1
call
2 Dial the telephone number you wish to call.
3 To end the call, return the Handset to the Base
Receiving a
1
call
2 Pick up the Handset to answer the call.
3 To end the call, return the Handset to the Base
Last Number
Redial
Binatone Help Line - 0845 345 9677
1
2 Press LNR button.
Lift the Handset, listen for a dial tone.
Ö The display shows ' 00-00 '.
Ö The display shows the number as you dial
(maximum of 14 digits will be shown).
unit.
When the phone rings, the ringer indictor flashes
and the incoming phone number will be shown
on the display.
Ö The call timer starts about 7 seconds after
going on line.
unit cradle.
Lift the Handset.
Ö The phone automatically dials the last
number you called (maximum of 32 digits).
Calls are charged at Local Call rate.
8
Page 9

Mute
1
Function
2
During a call press SECRECY button.
Ö When the mouthpiece is muted, the person
at the other end of the call cannot hear you
but you can hear his side.
To get back to the call, release SECRECY
button again.
Inserting a
Pause in
the dialing
sequence
Use on PBX
Making a call
from the
outgoing call
records
Binatone Help Line - 0845 345 9677
1
2
3
For some switchboard system, an access number
must be dialed (usually an 8 or 9) to get another
dial tone and an outside line.
Pressing PAUSE button immediately after the
access number, a pause of about 3.6 seconds
will be entered, and the desired number can be
dialed immediately.
Press PAUSE button to insert a pause when
dialing or storing Long Distance Access Codes.
If you are using your Trend 3 Executive phone
on a PBX, and the PBX user guide tells you to
press RECALL;
Press R (RECALL) button on your Trend 3
Executive phone.
The telephone remembers the last 5 outgoing calls.
CHECK
In waiting mode, press CHECK button.
Ö The most recent outgoing call number and
duration will be displayed.
Press CHECK repeatedly to find the record you
CHECK
wish to call.
BACK
Press BACK button to auto-redial.
Calls are charged at Local Call rate.
9
Page 10

Deleting an
outgoing call
record
1
CHECK
2
CHECK
DEL
3
4
DEL
In waiting mode, press CHECK button.
Ö The most recent outgoing call number and
duration will be displayed.
Press CHECK repeatedly to find the record you
wish to delete.
Press DELETE button.
Ö The display shows the next record.
Press and hold DELETE button 3 seconds will
delete all outgoing call records.
Storing a
1
Lift up Handset, press STORE button.
Number in
a One-Touch
memory
Dial out
Stored
2
3
1
Press M1 button and then telephone number,
up to 14 digits.
Ö The largest length cannot exceed 14 digits
and if exceed, the memory will not store the
correct number.
Press STORE button to confirm the storing
number.
Lift up Handset, press M1 button.
Ö The number dials automatically.
number
6. Caller Display Operation
VERY IMPORTANT:
To use Caller Display you must first subscribe to your network provider's Caller
Diaply service.
If you subscribe to a Caller Display service, you can see the phone number of
the person calling you before you answer. The caller display information includes:
The caller's number
The date and time of the call
Binatone Help Line - 0845 345 9677
Calls are charged at Local Call rate.
10
Page 11

Condition of Incoming Caller Information
It is a duplicate one
It is a new one
It has exceeded the range of the service
It is a secret one
It may not be nicety for the reason of outside
There is a voice information in your mailbox
(This function is available only when you have
applied for this service from your telecommunication
network)
Caller Display list
Trend 3 Executive dynamically stores up to 50 groups (8digits) incoming
information. If a call is received when the Call list is full, then the new entry
will replace the oldest one.
LCD Screen will display
REP
NEW
UNAVAILABLE
WITHHELD
ERROR
Viewing the
Caller Display
list
1
2
In standby mode, press UP or DOWN Dutton.
Ö The display shows the most recent record.
If there are no Caller Display records, the display
will show ' 00 CALL '
Press UP or DOWN again to scroll to the next
Caller Display record.
To return
a call
1
BACK
When the Caller Display record is displayed.
Press BACK button.
Ö The phone automatically dials out the
displayed record.
To delete
Caller Display
record
When the Caller Display record is displayed.
DEL
Press DELETE button will delete the Caller
Display record.
Ö The display shows the next Caller Display record.
Press and hold DELETE button 3 seconds,
DEL
all the Caller Display records will be deleted.
Ö The display automatically return to standby mode.
Binatone Help Line - 0845 345 9677
Calls are charged at Local Call rate.
11
Page 12

7. Operational notes
Electrical safety
DON’T let the Base unit get wet. Electrical equipment can cause serious
injury if used while you are wet or standing in water.
If the Base unit ever falls into water, DON’T retrieve it until you have
unplugged the power lead from the mains and the telephone line plug
from the telephone socket; then pull it out by the unplugged cables.
NEVER use your Trend 3 Executive outdoors during a thunderstorm
- unplug the Base unit from the telephone line when there are storms in
your area. Damage caused by lightning is not covered by the guarantee.
Locating the Base unit
The Base unit should be placed on a level surface, in a position where:
the telephone line cable will reach your telephone line socket or
extension socket.
it is not close to a sink, bath or shower, or anywhere else where it might
get wet.
it is not close to other electrical equipment - fridges, washing machines,
microwave ovens, TVs, fluorescent lights, etc.
Cleaning and care
Don’t clean any part of Trend 3 Executive with benzene, thinner or other
solvent chemicals - this may cause permanent damage which is not
covered by the Guarantee. When necessary, clean it with a damp cloth.
Keep your Trend 3 Executive away from hot, humid conditions or strong
sunlight, and don’t let it get wet.
Every effort has been made to ensure high standards of reliability for your
Trend 3 Executive. However, if something does go wrong, please do not
try to repair it yourself - consult your supplier or the Binatone Help Line.
Binatone Help Line - 0845 345 9677
Calls are charged at Local Call rate.
12
Page 13

8. Troubleshooting
The Trend 3 Executive must be serviced by trained engineers. NEVER
attempt any repairs or adjustments yourself - you could make the problem
!
worse and invalidate the guarantee.
ALWAYS check you have followed the steps listed on Section 2 to
first that: install and set up your Trend 3 Executive.
“I cannot make or Make sure you're using the telephone line cable that
answer calls.” supplied with your Trend 3 Executive. Other telephone
“The phone does Make sure you're using the telephone line cable that
not ring” supplied with your Trend 3 Executive. Other telephone
“The Caller Display
feature isn't
working”
all connectors are firmly inserted in their sockets.
the batteries are correctly and securely installed,
and are not run down.
Everyday use
line cables might not work.
line cables might not work.
Check that the total REN value of all equipment
connected to your telephone line is not more than 4.
Disconnect one or more telephones.
You need to subscribe to the Caller Display service
from your network service provider. Contact the local
network service provider for details on how to subscribe.
The caller may have withheld their number by dialing
141. Or they may be calling from a network that does
not transmit the caller's number (e.g. it may be an
international call.)
“ERROR message
is displayed”
Binatone Help Line - 0845 345 9677
ERROR appears in the display if the unit detects
anything other than valid Caller Display information
during silent period after the first ring. This message
indicates either the presence of noise on the line, or
that an invalid message has been sent from the network
service provider.
Be sure to wait until the second ring before answering.
Calls are charged at Local Call rate.
13
Page 14

“Last Number Redial
and/or memory
dialing don't work
on a PBX”
“My Trend 3
Executive system
won't work properly
on a PBX”
PBX use
When you first make a call, try pressing the PAUSE
button for s pause between the outside line access digit
(e.g. 9) and the telephone number.You should later be
able to redial the number.
When storing numbers in memory, you can include
the outside line access digit (e.g. 9) with each number.
If your PBX requires you to wait for a second dial tone
before dialing the telephone number, press the PAUSE
button for a pause between the access digit and number.
You may need to change the RECALL setting. Call
Binatone Help Line for advice. It will help if you have
your PBX documentation on hand when you make
the call.
If the fault persists …
Disconnect all other instruments connected to the same
line as the Trend 3 LCD Executive and see whether you
you can make a call.
Disconnect the Base unit from the telephone line
and plug a different phone into the master telephone
socket. Try making a call. If this works, the line is OK.
If the call does not work, and you are using a two-way
socket adapter, remove it and plug a telephone directly
into the socket. If the call now works, the adapter may
be faulty.
If you cannot make a call, the fault may be on the
exchange line. Contact the service provider (the BT
engineers on 151, or your cable company).
If you still cannot identify the cause of the problem,
contact the Binatone Help Line on
Calls are charged at Local Call rate.
Binatone Help Line - 0845 345 9677
Calls are charged at Local Call rate.
14
0845 345 9677
Page 15

9. Guarantee and service
The Binatone Trend 3 Executive is guaranteed for 12 months from the date of
purchase shown on your sales receipt. The Guarantee does not cover damage
by misuse or negligence, or by excessive voltages - for example, faults on the
telephone line, or lightning. This does not affect your statutory rights.
Please keep your sales (till) receipt - this is your guarantee. You should also
keep the original packaging material.
In the unlikely event that you need to return your Trend 3 Executive to our Repair
Centre while it is under guarantee, there will be a £5 handling charge.
While the unit is under Guarantee
1. Disconnect the Base unit from the telephone line and the mains electricity
supply.
2. Pack up all parts of your Trend 3 Executive, using the original packaging.
Remember to include the mains adapter
3. Return the unit to the shop where you bought it, making sure you take
your sales receipt.
After the Guarantee has expired
If the unit is no longer under Guarantee, first follow steps
under Guarantee. Then …
3. Call our Service Department on 0845 345 9677 and ask for a quotation
of the repair charge and details of where to send your Trend 3 Executive
for repair.
4. Make sure you include with your Trend 3 Executive:
your name and address.
a cheque or postal order for the value of the repair charge.
5. Return your Trend 3 Executive to the address given by the Service
Department.
Binatone Help Line - 0845 345 9677
Calls are charged at Local Call rate.
15
1 and 2 as for repair
Page 16

10. Technical details
Standard Trend 3 Executive Telephone
Temperature range Operating 0 ºC to 40 ºC
PBX compatibility Timed break recall: 98 ms. Pause length: 3.6 seconds.
Network connection This equipment is intended to be used in the UK only.
Declaration of conformity
The Binatone Trend 3 Executive phone complies with the essential protective
requirements and objectives of:
EC R&TTE Directive 1999/5/EC
EC Low Voltage Directive 2006/95/EC
EC EMC Directive 89/336/EEC
and conforms to the following relevant harmonized standards:
Storage -20 ºC to 60 ºC
Signalling type: DTMF (dual-tone multifrequency) also
called tone dialing.
Operation on other countries’ PSTN termination points
cannot be guaranteed.
Network: TBR37, TBR38
EMC: EN 55022, EN 55024
Safety: EN 60950
Binatone operates a policy of continuous product improvement, and so
reserves the right to make changes to the product and functions without
notice.
Waste electrical products must not
be disposed of with household waste.
This equipment should be taken to
your local recycling centre for safe
treatment.
Binatone Help Line - 0845 345 9677
Calls are charged at Local Call rate.
16
Page 17

Connection and conditions for use
You can connect your Trend 3 Executive phone to a direct exchange line
(DEL) - a line connected to a local exchange, with its own phone number;
to an extension socket connected to a DEL; or to an extension on an
approved compatible PBX. Do not connect the Trend 3 Executive phone
as an extension to a pay phone.
The ringer equivalence numbers (RENs) of all instruments (phones, fax
machines, etc.) connected to an exchange line must not add up to more than
4 - otherwise, one or more of them may not ring and/or answer calls correctly.
The Trend 3 Executive phone has a REN of 1, and most other telephones
have a REN of 1 unless marked otherwise.
Contents of this User Guide
1. Where to find it
2. Installation
3. Wall mount installation
4.
Setting up your phone
5. Telephone operation
6. Caller display operation
7. Operation notes
8. Troubleshooting
9. Guarantee and service
10.Technical details
Pressing buttons on your phone
When the instructions in this user guide tell you simply to ‘press’ a
button, this means that you should press the button briefly, then release
it.
When the instructions tell you to ‘press and hold’ a button, this means
you should keep the button pressed until the display changes and/or you
hear a tone.
If you need help …
The Binatone Help Line is
available from 9.00 am to
5.00 pm, Monday to Friday, on
0845 345 9677
Calls are charged at Local Call
rate.
UK BTP Ver 2 Aug 07
17
 Loading...