

Binatone Carrera C350 User Manual
user guide
C350
G52-56511X1

IMPORTANT
IMPORTANT
Satellite signals are required for this product to function in Navigation Mode.
There may be occasions within your home or surrounding area when the signal stren gth is
limited and Navigation Mode may not be possible.
This is quite normal for produ cts of this typ e. I f you experience difficulty in receiving a
signal in your car you may need to use an external antenna (optional).
You can check the number of satellite signals that the unit is receiving and the strength of those
signals by viewing the GPS Receiver.
Unpacking your Binatone Carrera C350
In the box you will find
z GPS navigation device
z Car mounting kit
z In-car charger
z USB cable *
z Stylus pen
z User guide
Keep the packaging materials in a safe place in case
you later need to transport the unit.
Keep your sales (till) receipt, which i s your guarantee.
Before you can use the unit, you'll need to fully
charge the battery as described on page 6, please
also read the notes on the page 3.
WARNING:
Your GPS device operates under open sky conditions
in order to receive a satellite signal.
Please ensure that you are not using the device
indoors or in areas where the satellite signal i s weak.
For the first time of use or after a few days of no use,
it may take upto 10 minutes to acquire a satellite
signal. It is recommended to be stationary during the
start up process.
* USB cable can be either used to charge your device with your computer or update your system
(latest map and software, latest safety camera information) via your computer and the internet
(updates are payable).
2

Safety
Safety
The Global Positioning System
The Global Positioning System (GPS) is a satellite based system that provides location and timing
information around the globe. GPS is operated and controlled under the sole responsibility of the
Government of the United States of America, who are responsible for its availability and accuracy.
Any changes in GPS availability and accuracy, or in environmental conditions, may impact the
operation of your Binatone Carrera Personal Navigation Device (PND).
Using Your PND in the Car
When using your PND while driving it is essential that you drive with due care and attention. Never
modify the settings or program your PND while driving. Only look at the PND map when it is safe to
do so. Only follow the PND instructions when the road regulations allow you to do so. When
mounting the PND in your car make sure that it does not obscure your view or impede the
operation of any driving controls.
Prohibited Areas
Do not operate your PND in hospitals or near any el ectrical medical equipment.
Do not operate your PND in aircraft.
Battery
Your PND uses a Li-ion battery. Do not use it in humid, wet or corrosive environments. Do not
operate or store your PND in high temperatures (>60℃) or in direct sun light. Do not pierce or
break the battery casing.
Failure to follow these cautions will invalidate the warranty and may cause the battery
to leak acid, become hot, explode or ignite and cause injury or damage.
If you come into contact with leaked battery acid wash the contact area thoroughly
and seek medical attention.
The Li-ion battery contained in this unit must be recycled or disposed of properly. Do not dispose of
in household waste or burn.
3

CONTENTS
CONTENTS
IMPORTANT ................................................................................................... 2
Safety .............................................................................................................. 3
The Global Positioning System ........................................................................................................3
Using Your PND in the Car...............................................................................................................3
Battery ............................................................................................................................................. 3
CONTENTS..................................................................................................... 4
Getting Started ................................................................................................ 5
Position of the controls..................................................................................................................... 5
Battery Consuming ..........................................................................................................................6
Car Adapter...................................................................................................................................... 6
External Antenna (sold separately) .................................................................................................. 7
Switching On/ Off.............................................................................................................................7
SD Card Installation......................................................................................................................... 9
Connect to PC ...............................................................................................................................10
Photo ............................................................................................................................................. 11
Settings.......................................................................................................................................... 14
INTRODUCTION........................................................................................... 21
............. 21 GPS Function....................................................................................................................
Introduction of .................................................................................................... 21
Safety Instructions ......................................................................................................................... 21
Getting Started...............................................................................................................................22
Main Menu..................................................................................................................................... 22
Binatone Carrera
ACTIVE MAP ELEMENTS............................................................................. 23
About Screen ................................................................................................................................. 23
ICONS
MAIN ELEMENTS.
Explanation of map display contents and features
General settings............................................................................................................................. 31
Map settings .................................................................................................................................. 33
Sound settings ............................................................................................................................... 34
Route parameter settings............................................................................................................... 35
Language & Units ..........................................................................................................................37
Advanced settings.......................................................................................................................... 38
Selecting destination
Entering a destination
Destination
Entering
Entering
Entering
Some
Offline route planning
FREQUENTLY ASKED QUESTIONS........................................................... 75
Technical Specifications................................................................................................................. 6
...............................................................................................
.........................................................................................
.........................................................
", Route
............
............
menu
........
List
.........
................ .....................................
.......
.....................................
.......
.....................................
selection via
a
Destination via
a
Destination via
a Destination
Navigation
..
via " Find
via address..........................................
" Recent
via
Examples
...........................................
and Go "
Destinations
Coordinates................................
POI..
..........
Favourites
......
.......
- Using the find
................................
.
......
.......
................................
.......................
.............
.............
.............. 25
............ Entering destinations and route planning...........................................................................
............ ...........................................
............ ...........................................
............ ........................................
............ ...............................................
............ ...............................................
....
....
24
2
53
55
5 6
5
60
6
6
6
7
7
5
3
8
9
4
9
4
GETTING STARTED
Getting Started
This device combines GPS function and photo viewer. Before you begin to install and use this
product, please read this manual carefully for fully exploiting the functions of this product. If you
experience any problems, go through the user guide before contacting the customer helpline.
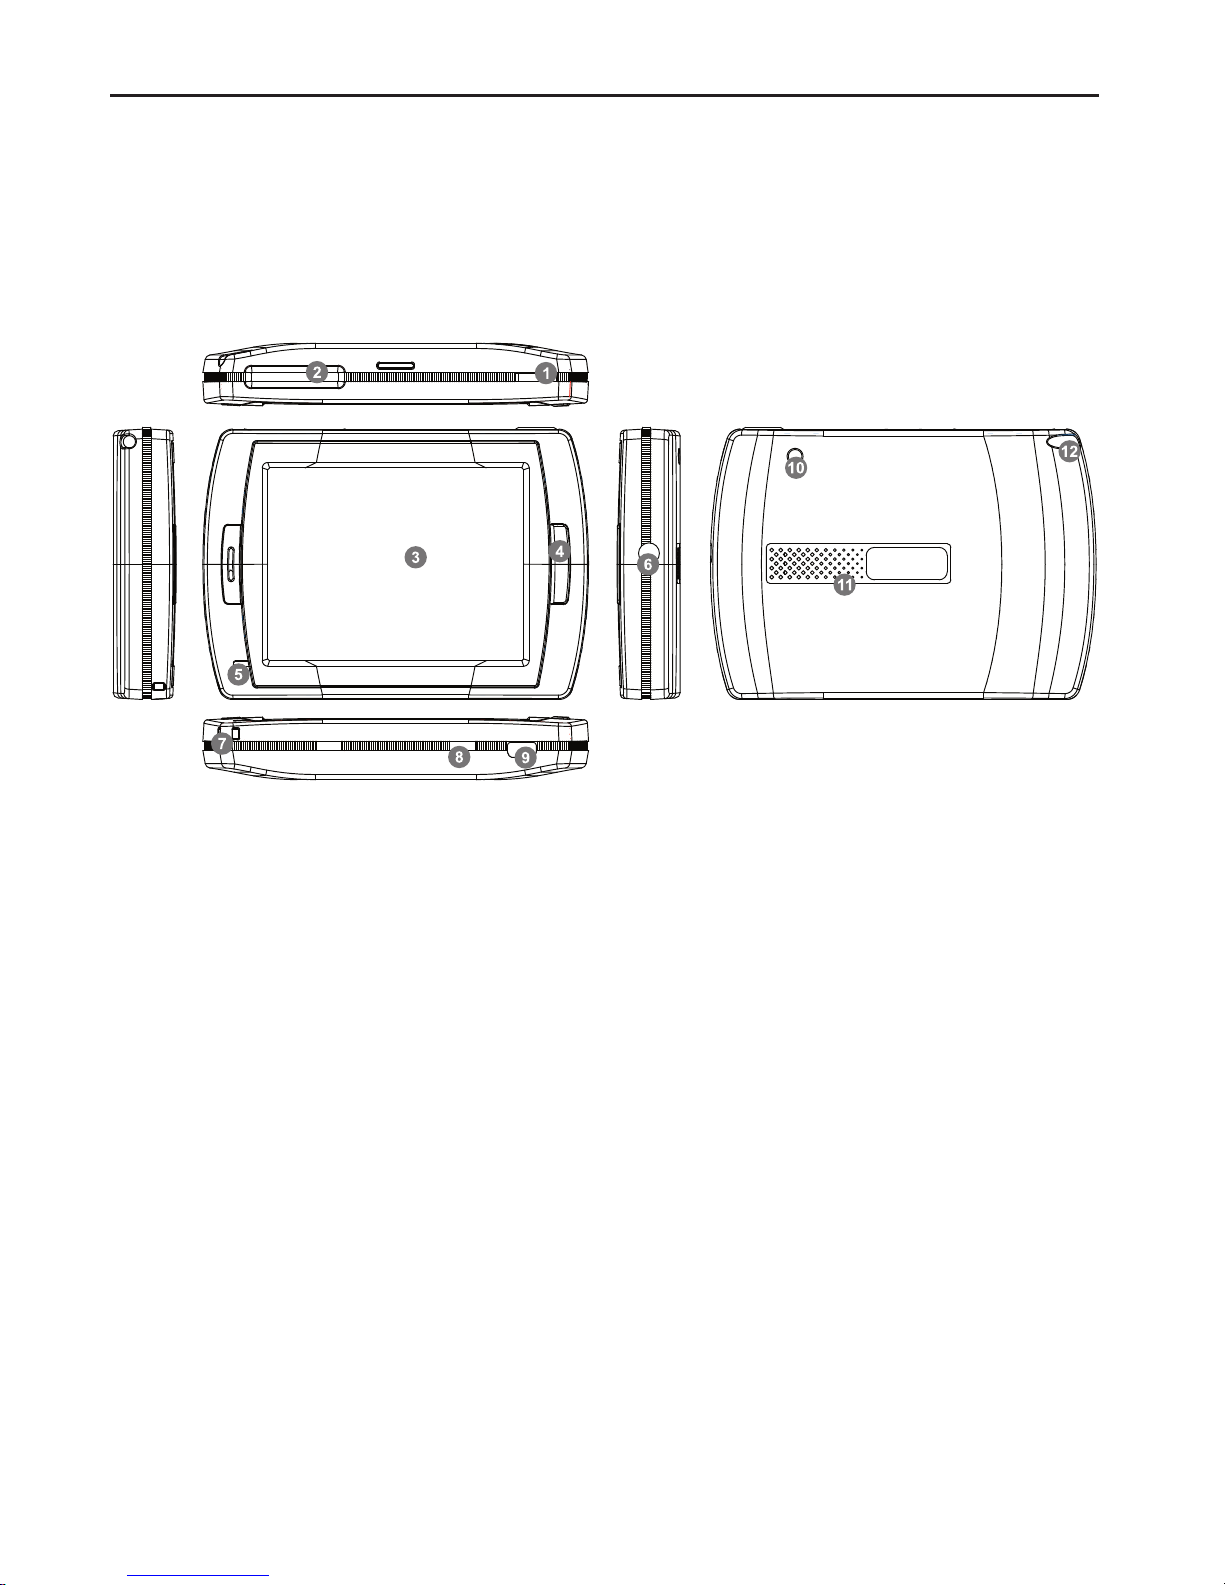
Position of the controls
1. Power Button
2. SD Card Slot
3. Touch Panel
4. Menu Button
5. Indicator Light (When it charges the red light will be on; when fully charged the green light will be on.)
6. Headphone Jack
7. Strap Hole
8. Battery Switch (For leaving long term unused, switch it to off. Or, switch it to off and on for reset.)
9. USB Port
10. External GPS Antenna Port
11. Speaker
12. Stylus Pen/ Slot (Slides the stylus pen out of the slot for operation.)
5
GETTING STARTED
Battery Consuming
The device is integrated with a 1000mAH/ 3.7V Li-polymer battery. It can be used for about 3 hours
for GPS function.
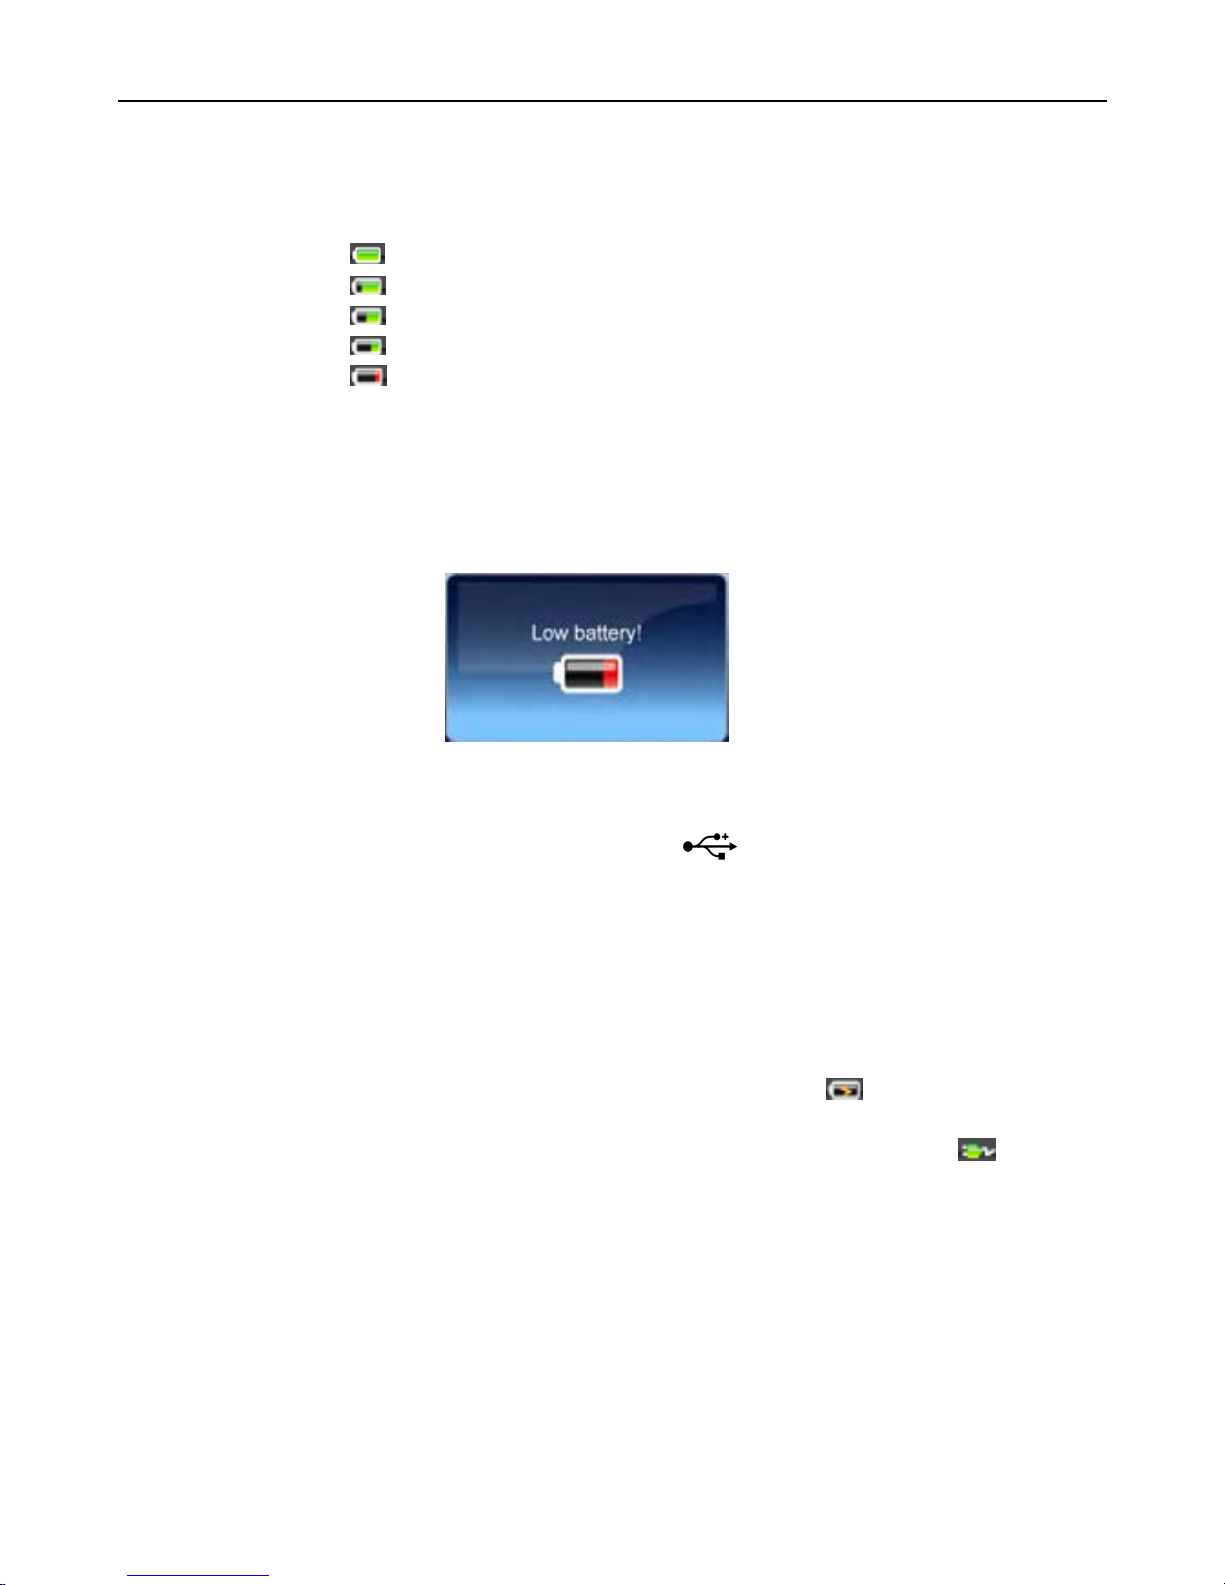
The battery icon shows at the right upper corner of the display.
: means the battery capacity is full.
: means the battery capacity is 80% left.
: means the battery capacity is 60% left.
: means the battery capacity is 40% left.
: means the battery capacity is 20% left.
You can also go to Settings/ Power Status item to know the specific percentage of remaining
battery capacity.
Display shows “Low Battery!” message automatically in weak battery status. When battery capacity
leaves 15%, the message will be shown for 2 seconds. However, when electric charge leaves 5%,
the message will keep showing on the screen until the user shuts down or the electricity is run out.
Charging the Battery
Before using your PND for the first time, we recommend you to charge the unit for 5 hours via the
USB cable or 2 hours via the car charger in order to charge the battery.
Plug the USB cable or the car charger into the USB socket .
When you use the PND in your car, we recommend that you always use the car charger in order to
maintain the battery level.
*Disclaimer: some laptops could have insufficient power through the USB port and could lead to
damage your laptop USB port. Binatone Carrera will not be held in any way responsible for the
damages caused to any laptop by charging the device through the laptop USB port
*Charging via USB cable will be faster when the unit is powered off.
When the device is connected to car charger the battery icon will become
on the front of the unit will blink in red.
When the battery is fully charged, and the car charger is still connected, the icon will be . And
the LED will be in green color.
. The LED indicator
Car Adapter
When using your PND in the car we recommend that you always use the in-car charger to power
the unit, especially on long journeys.
Plug the in-car charger into the USB socket of the unit. Plug the other end of the adapter into the
car’s cigarette-lighter / 12V DC socket.
6
r
GETTING STARTED
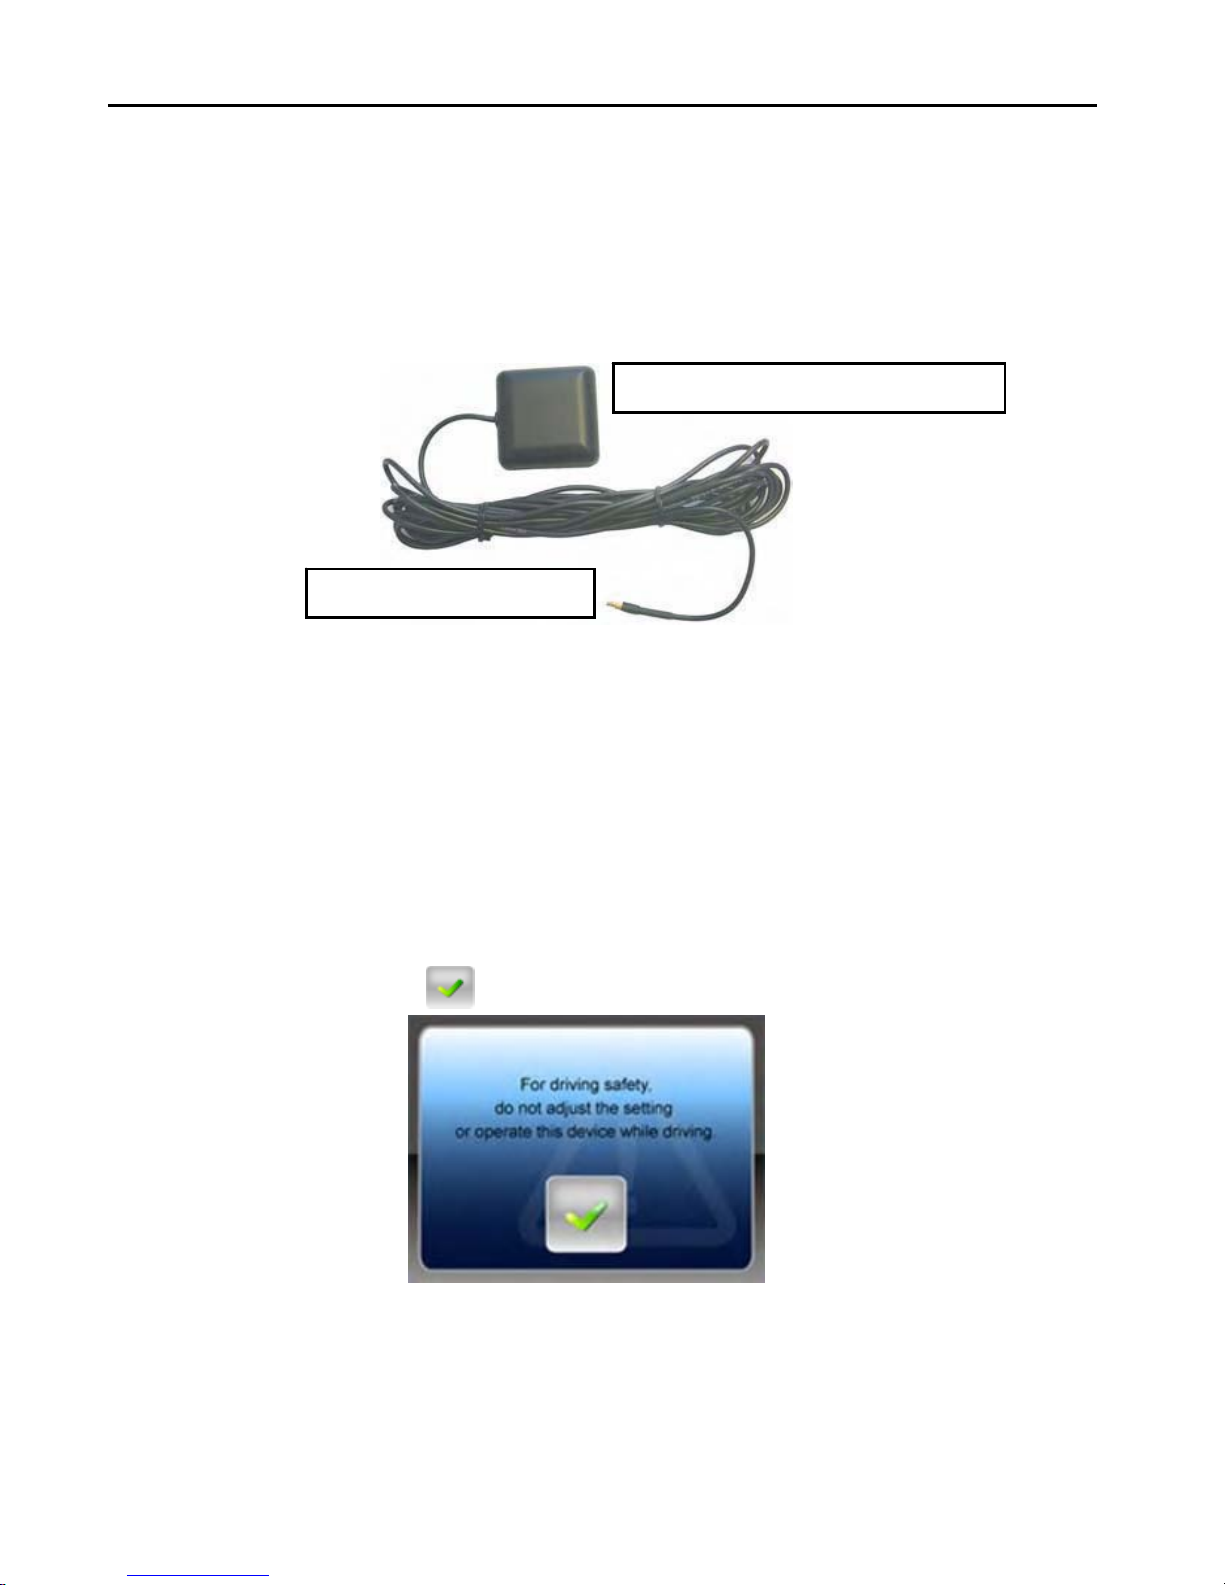
External Antenna (sold separately)
If the GPS receiver fails to acquire a valid signal when mounted in your car it may be due to a heat
reflecting coating or heating elements in your windscreen. In these cases use an external antenna.
The antenna has a magnet and can be positioned in various locations in or outside your car to
obtain the best signal reception. Push the antenna into the socket on the rear of the unit until it
clicks into place. Then position the antenna so that you receive a valid signal.
Position the antenna on the roof of your ca
Plugs into the back of the PND
*External Antenna Optional
Additional maps and upgrade:
Please visit on www.binatonecarrera.com website for more information.
Switching On/ Off
NOTE: For the very first time using the unit, you have to switch the Hardware Reset Switch to ON
with the stylus.
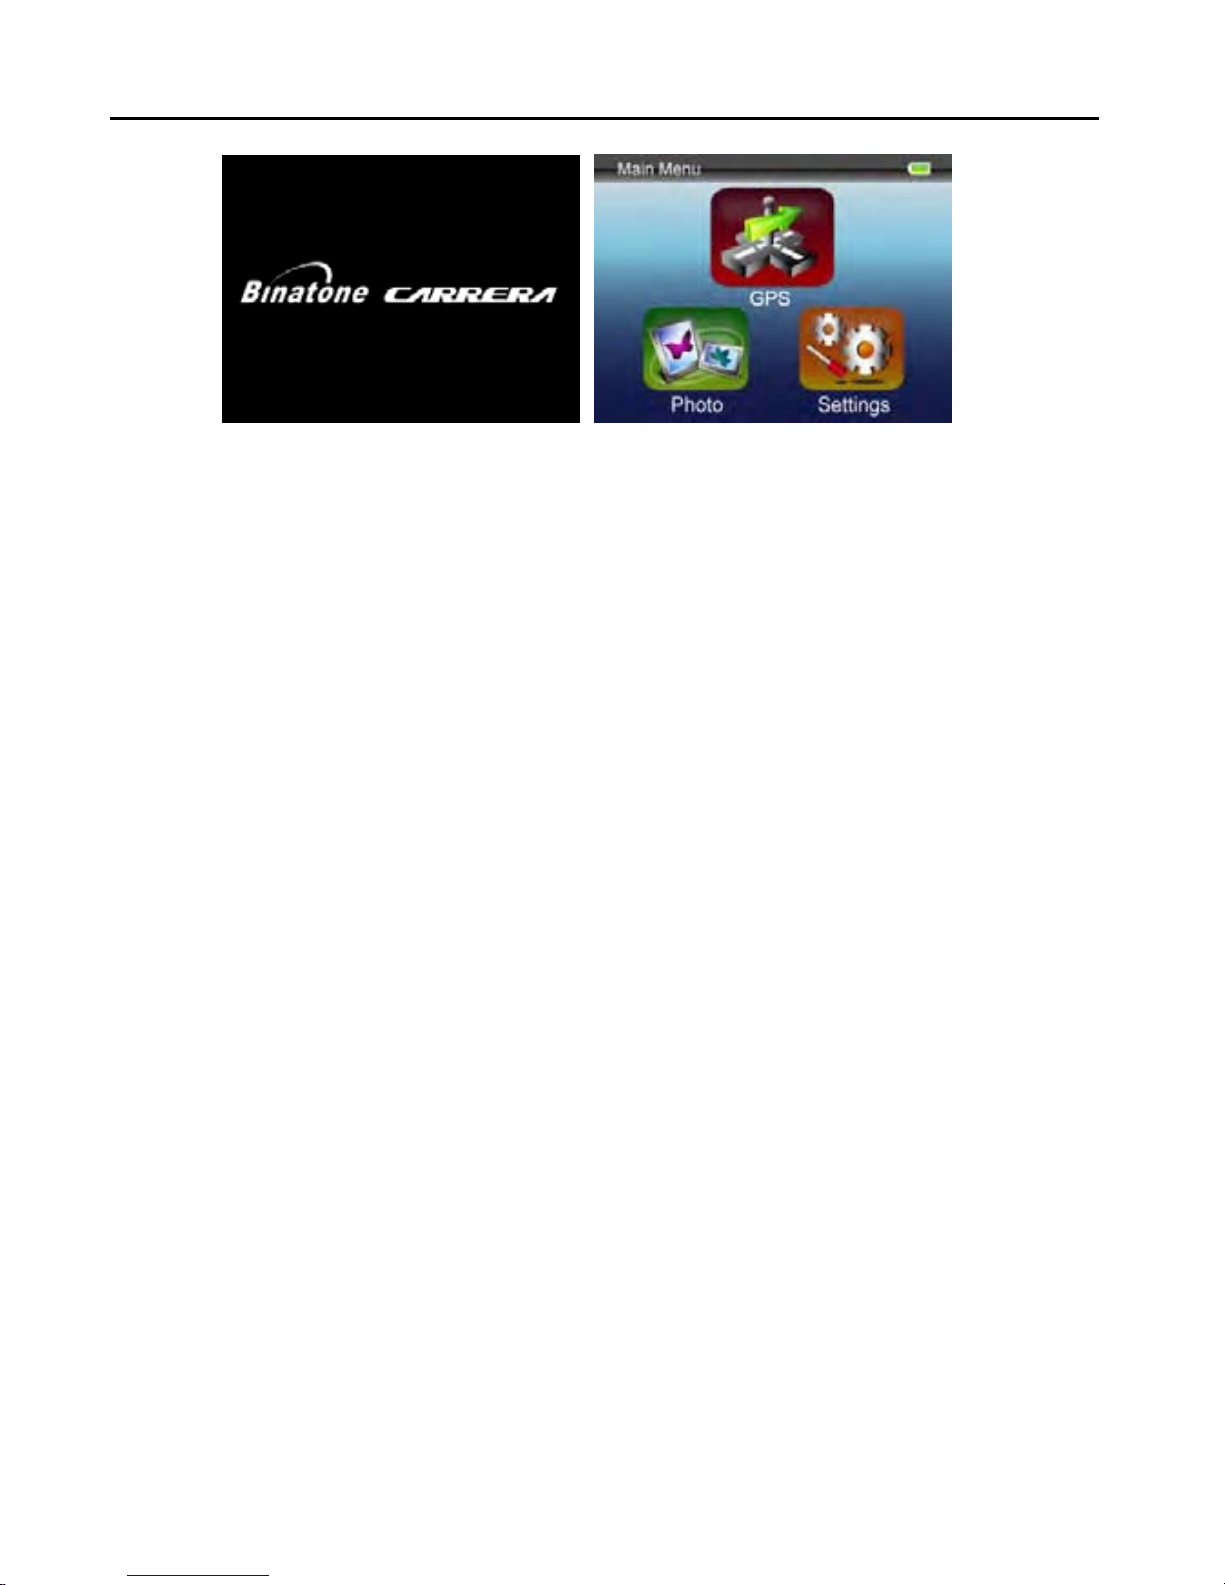
Press the Power Button for 3 seconds to turn the unit ON; you will see the figure below to warn you
about driving safety. Tap on the
button to continue.
When the Hardware Reset Switch is at ON position, press the Power Button for 3 seconds to turn
the unit on. The following screens will be displayed, and the unit is ready to be used. Tap on an
icon to enter the function.
7
GETTING STARTED
Press the Power Button for 3 seconds to turn the unit into Sleep Mode.
Press Power button for 5 seconds to wake up the device, then display shows the status before
entering Sleep Mode.
8
GETTING STARTED
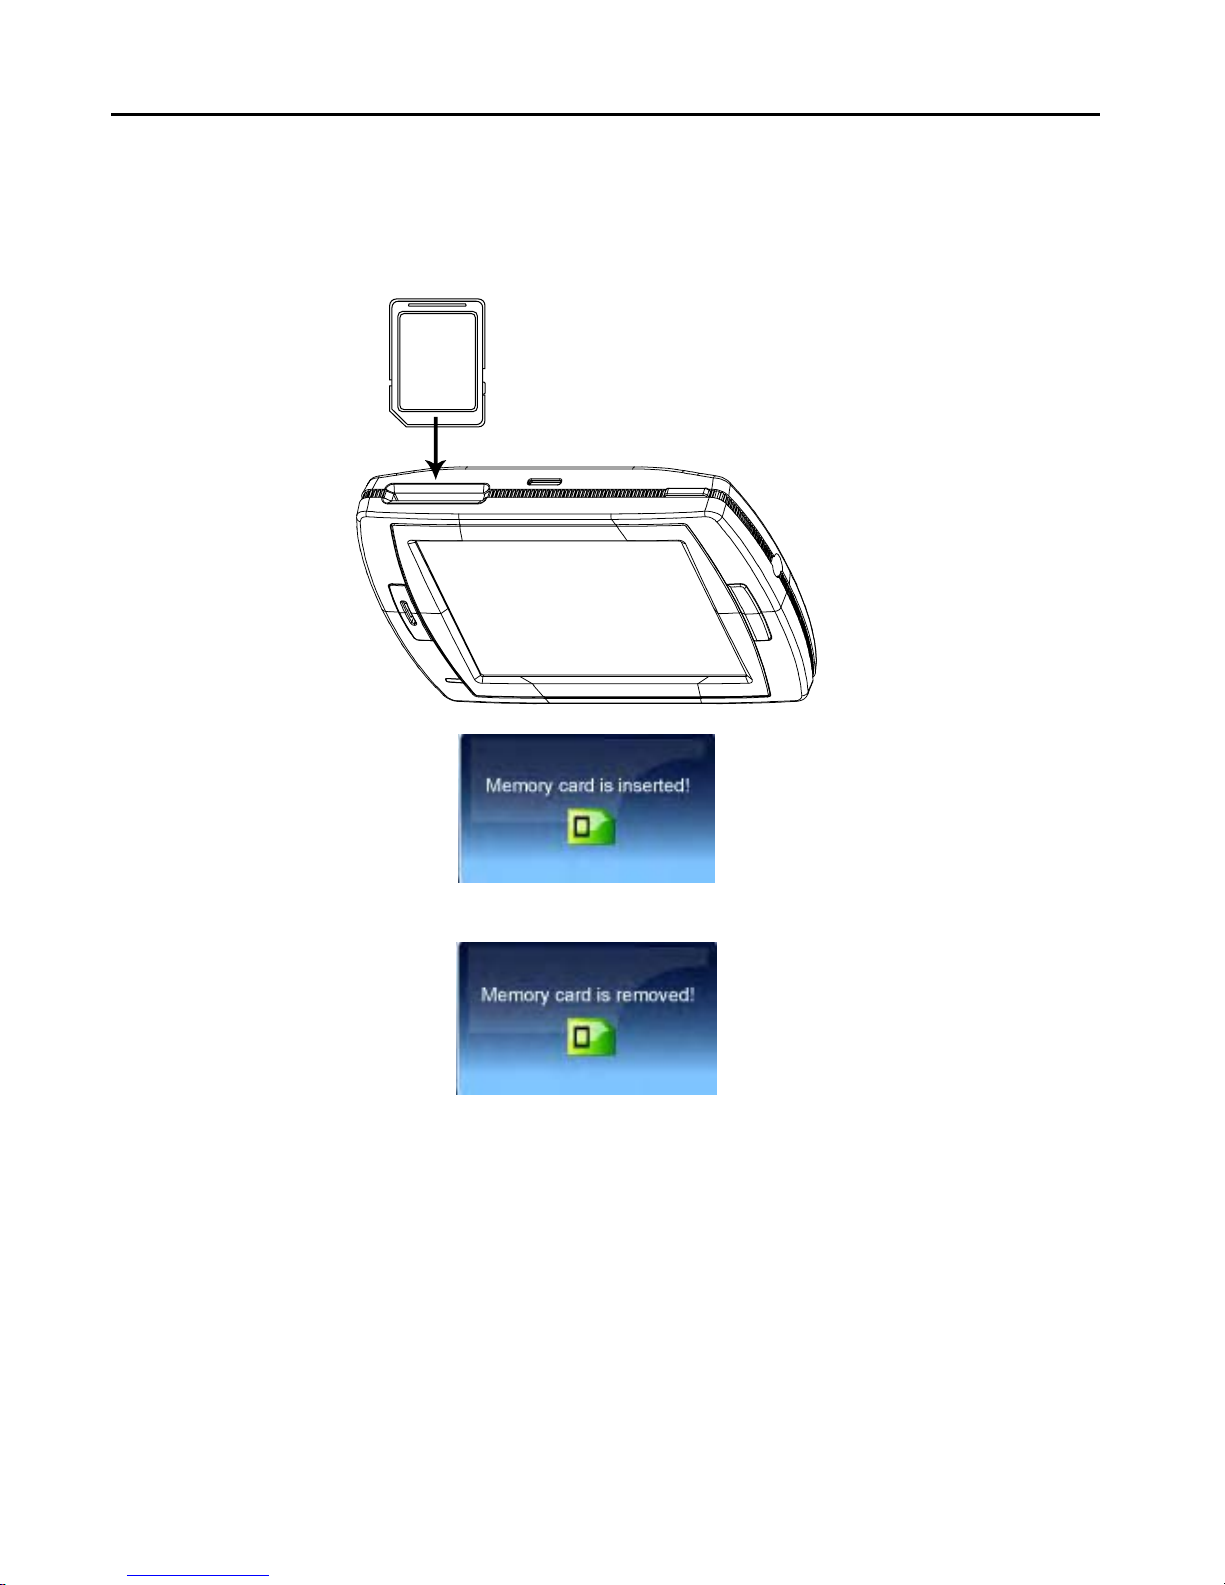
SD Card Installation
If you have a SD or MMC memory Card, you may install it to extend the storage capacity of the unit,
or to view the photo saved on the card. When installing it can only be fitted one way – the wording
face towards you and the cut-off corner at the bottom as shown. Insert the card in and push it in so
that it clicks in place.
Insert a SD card into the slot, and you will see the message as below.
If you need to remove the card, push the card in and it will eject from the slot. And you will see the
figure below.
Note: the card slot can also be a card reader, refer to the following section to operate.
9

GETTING STARTED
Connect to PC
You can connect the unit to PC for transferring data. Insert a SD/ MMC card to the card slot, you
can use the unit as a card reader.
1. Power on the unit.
2. Plug B-type end of the supplied USB cable to the mini USB port of the unit, and plug the other
end to your computer.
3. The system will try to recognize and connect the device; the display will show as the figure
below.
4. And now you can find 2 new USB devices in My Computer. The second device represents the
memory card slot, only available when a SD/ MMC card is inserted. Copy or move the data
needed between your PC and the unit.
10
GETTING STARTED
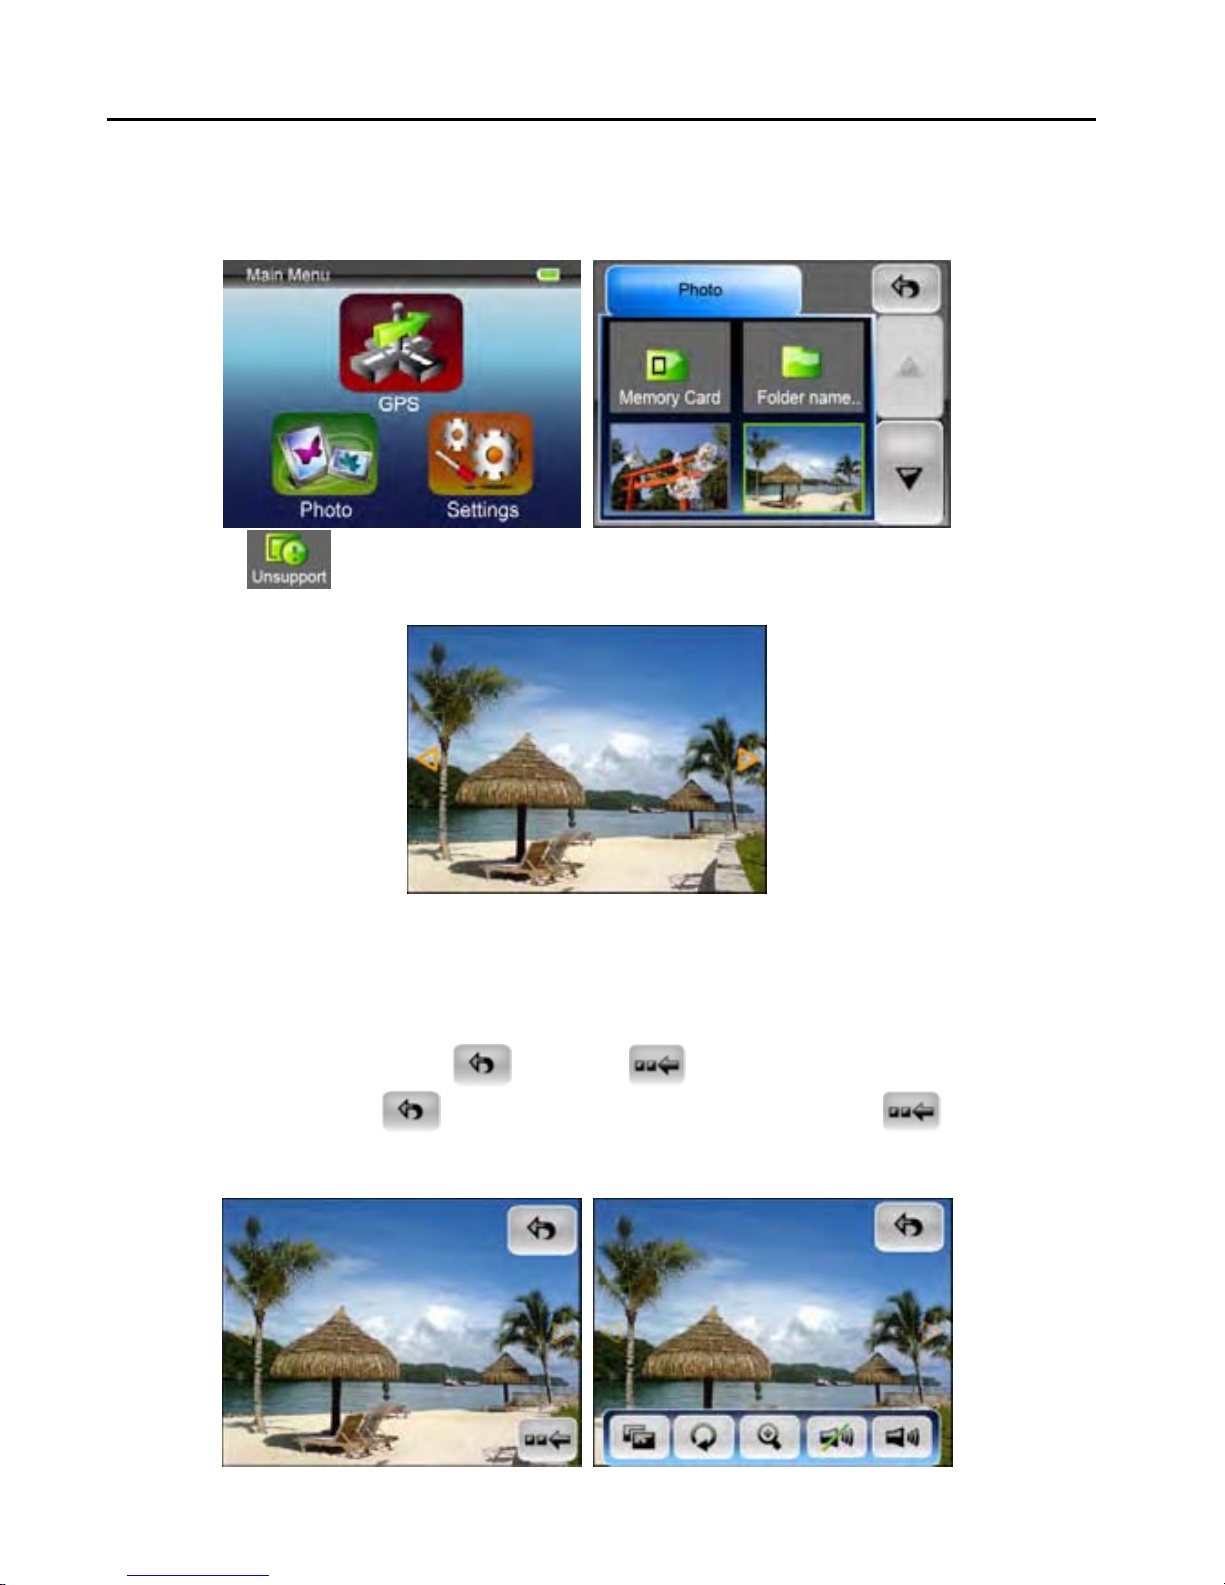
Photo
This device supports jpg, bmp, png, gif formats (up to 12MegaPixel file). Enter "Photo" function to
see thumbnails for all the photo files.
Note: press Menu button to go back main menu.
If you see an icon on the list, it means that photo is unsupported. Tap on a photo you
want to view, and then you can tap on the left or right triangle to view the previous or next photo.
To view pictures (bmp and jpeg formats only) from a SD card:
1) Copy all the pictures you want to view into the SD card.
2) Insert the SD card into the slot. In Photo thumbnails list, tap on "SD Card" folder to enter.
3) You will see thumbnails of photos on the card, view and operate as you do to photos on unit.
Tap on the photo, you will see Exit
corner of right side. Tap on
open the Tool Bar. After 5 seconds idling, the buttons and the tool bar will disappear, tap the photo
again to see and operate the buttons.
button to go to previous level menu. Tap on button to
and More buttons on the upper and lower
11
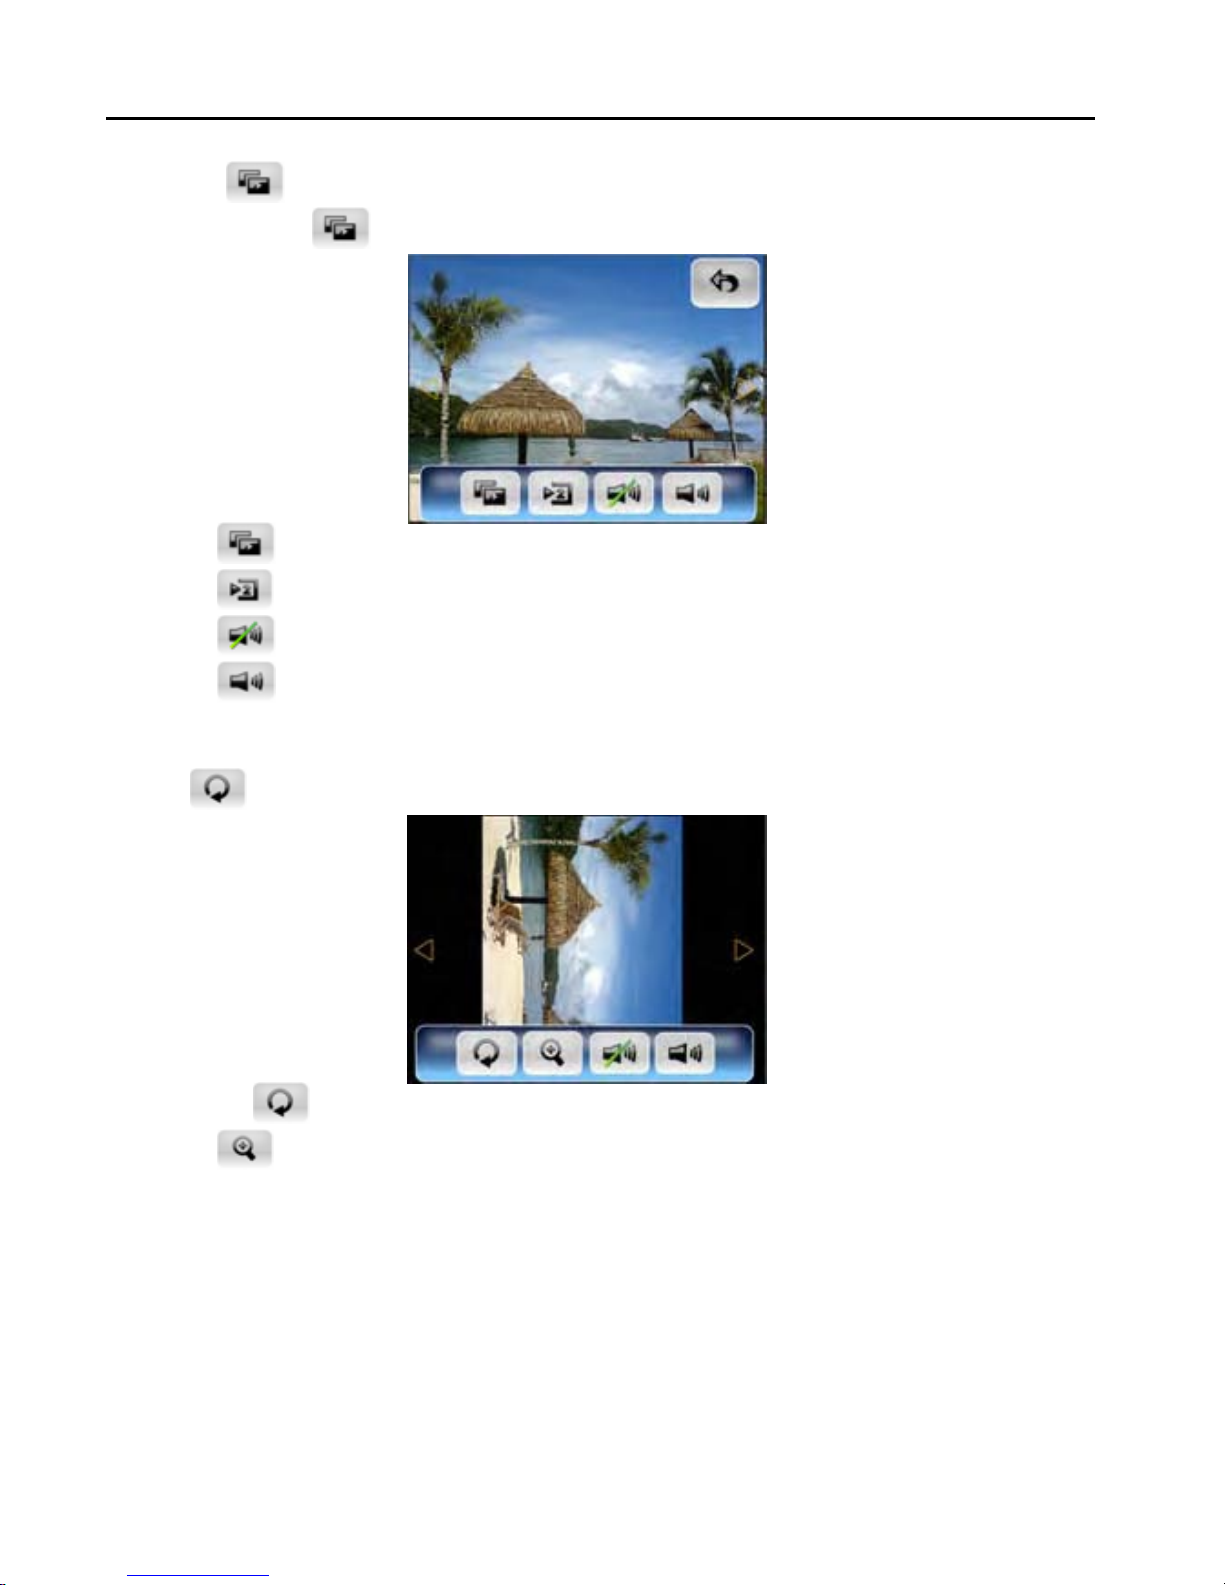
Slideshow
GETTING STARTED
Tap on the
button to view the photos show one by one automatically.
After tapping on the
y Tap on
y Tap on
y Tap on
y Tap on
button again to stop slideshow.
button to set the slideshow interval among 2, 3, and 5 seconds.
button to mute the touch tones.
button to adjust the touch tones.
Rotate
button, slideshow tool bar will prompt instead.
Tap on
y Tap on the
y Tap on
button to rotate the current photo.
button again to rotate the photo by 90 degree clockwise again.
button to restore the photo and zoom in.
12
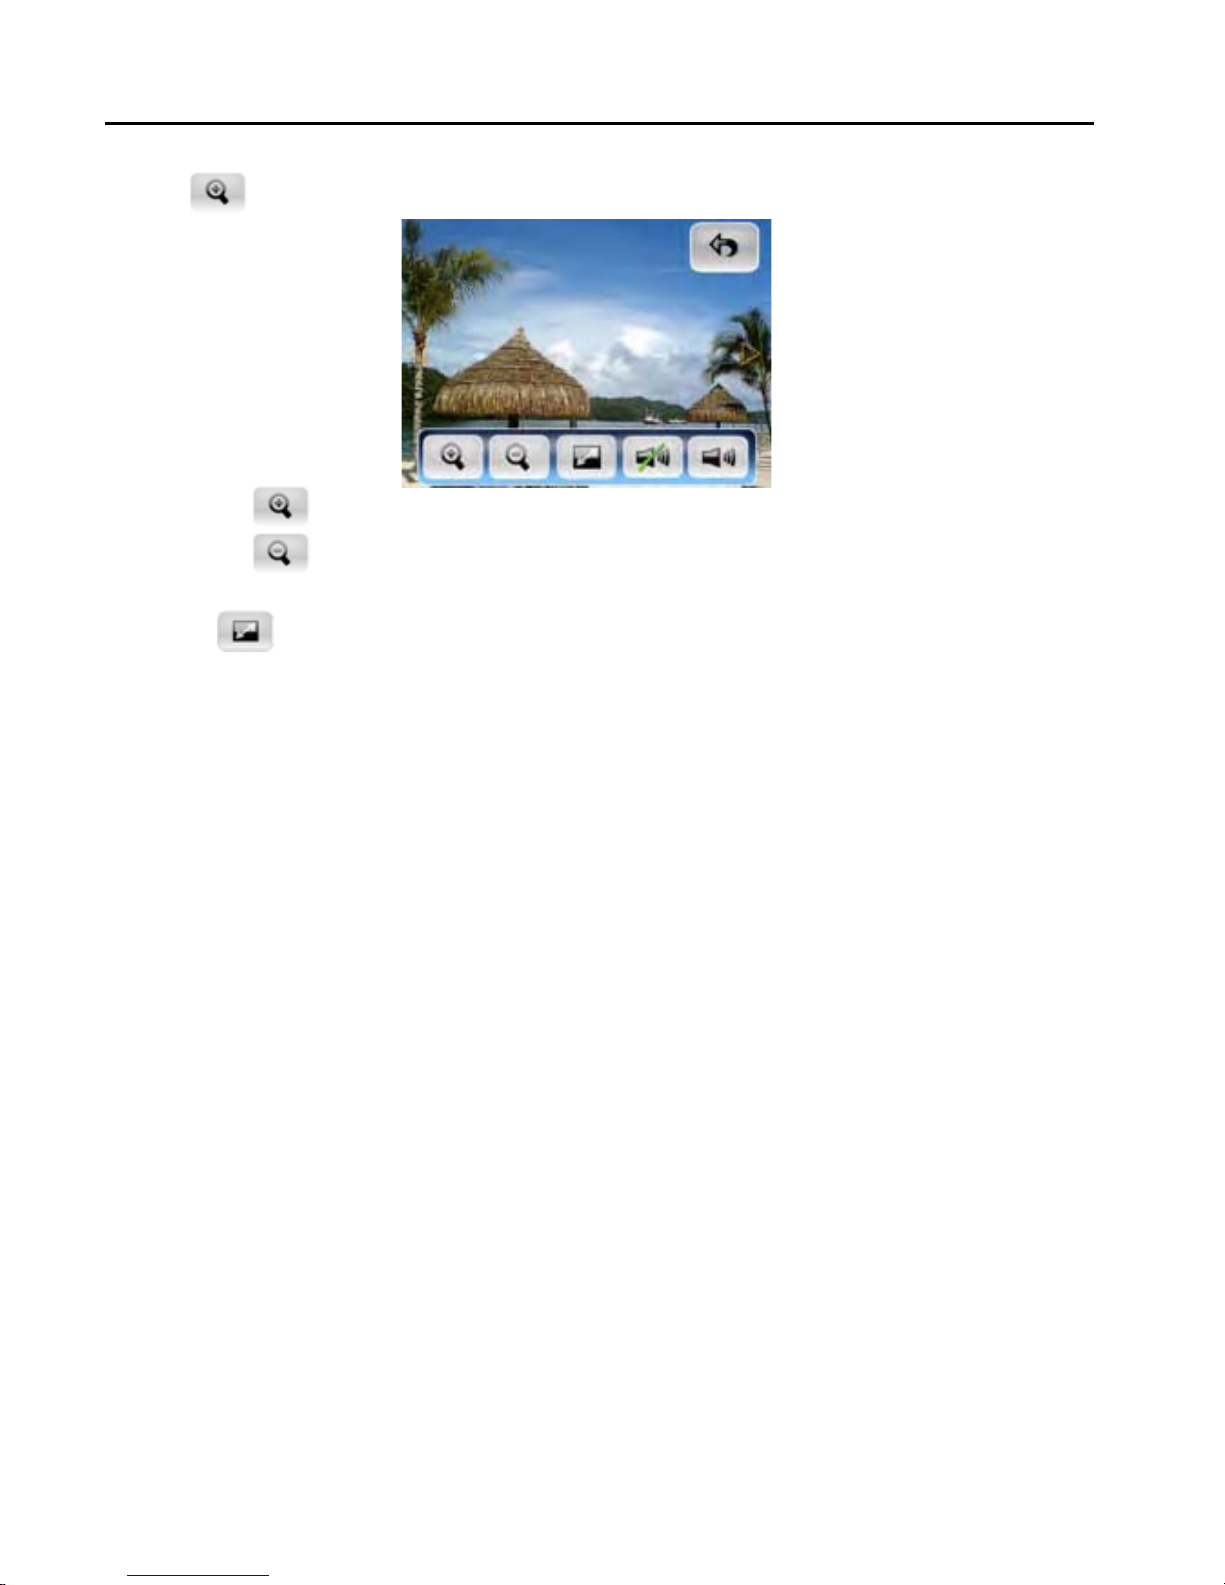
Zoom in
GETTING STARTED
Tap on
y Tap on the
y Tap on the
view the part you need.
y Tap on
Note: when the zoom in or zoom out limitation is met, the zoom in/ zoom out button will become in
gray color and not selectable.
button to zoom in the photo.
button to zoom in.
button to zoom out. When the photo is zoomed in, you can tap and drag it to
button to restore the photo.
13
GETTING STARTED
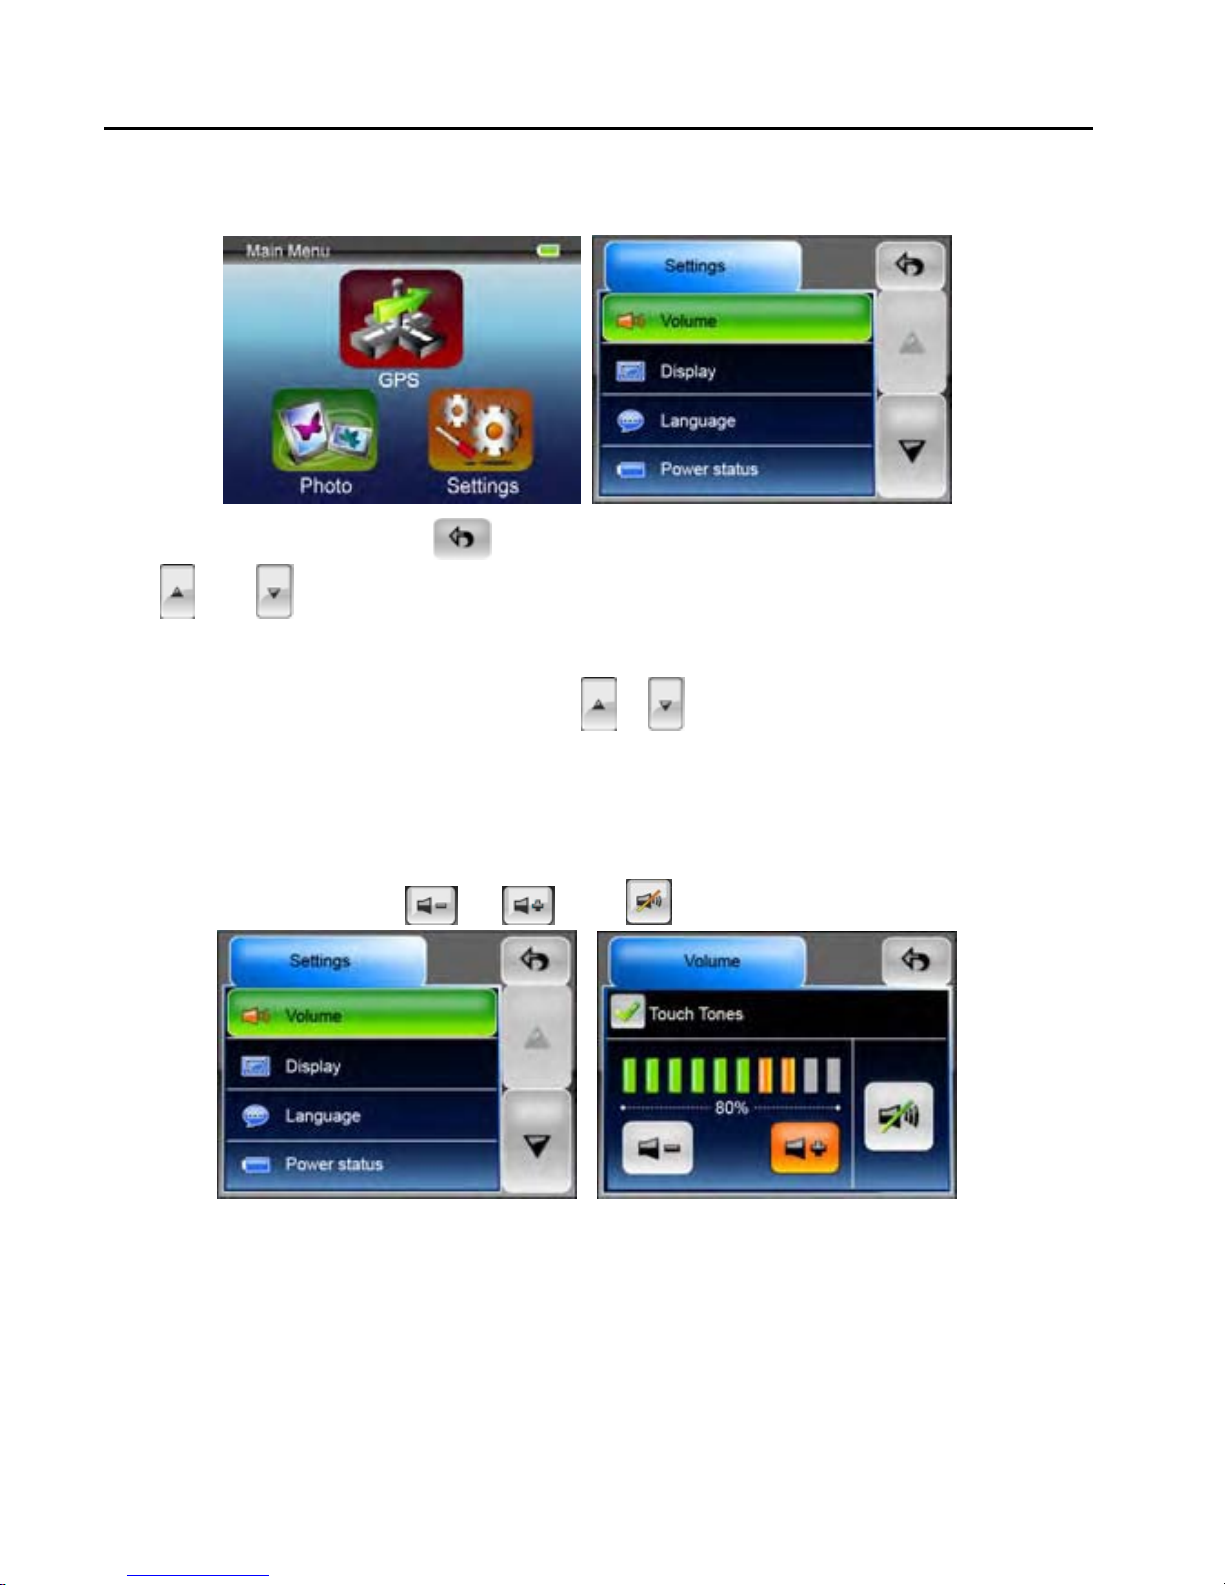
Settings
NOTE: You do not need to enter the Settings menu before you start to navigate. Tap on the
Settings icon on the Main Menu, the following screen is displayed.
To exit this page, tap on the Exit
The
the list to find out the other options.
Note: when there is no option above/ below, the
not selectable.
and button means there are more options available. Tap on one of them to scroll
button at the upper-right corner of the screen.
/ button will become in gray color and
Volume
Press 'Volume' you can modify the volume level of the voice prompts. You can increase or
decrease the level by clicking
or . Click to mute.
You can also check or un-check the blank of Touch Tones, to enable or disable the beep sound
when you touch the screen.
Note: when the minimum or maximum volume level is met, the volume down/ volume up button will
become in gray color and not selectable.
14
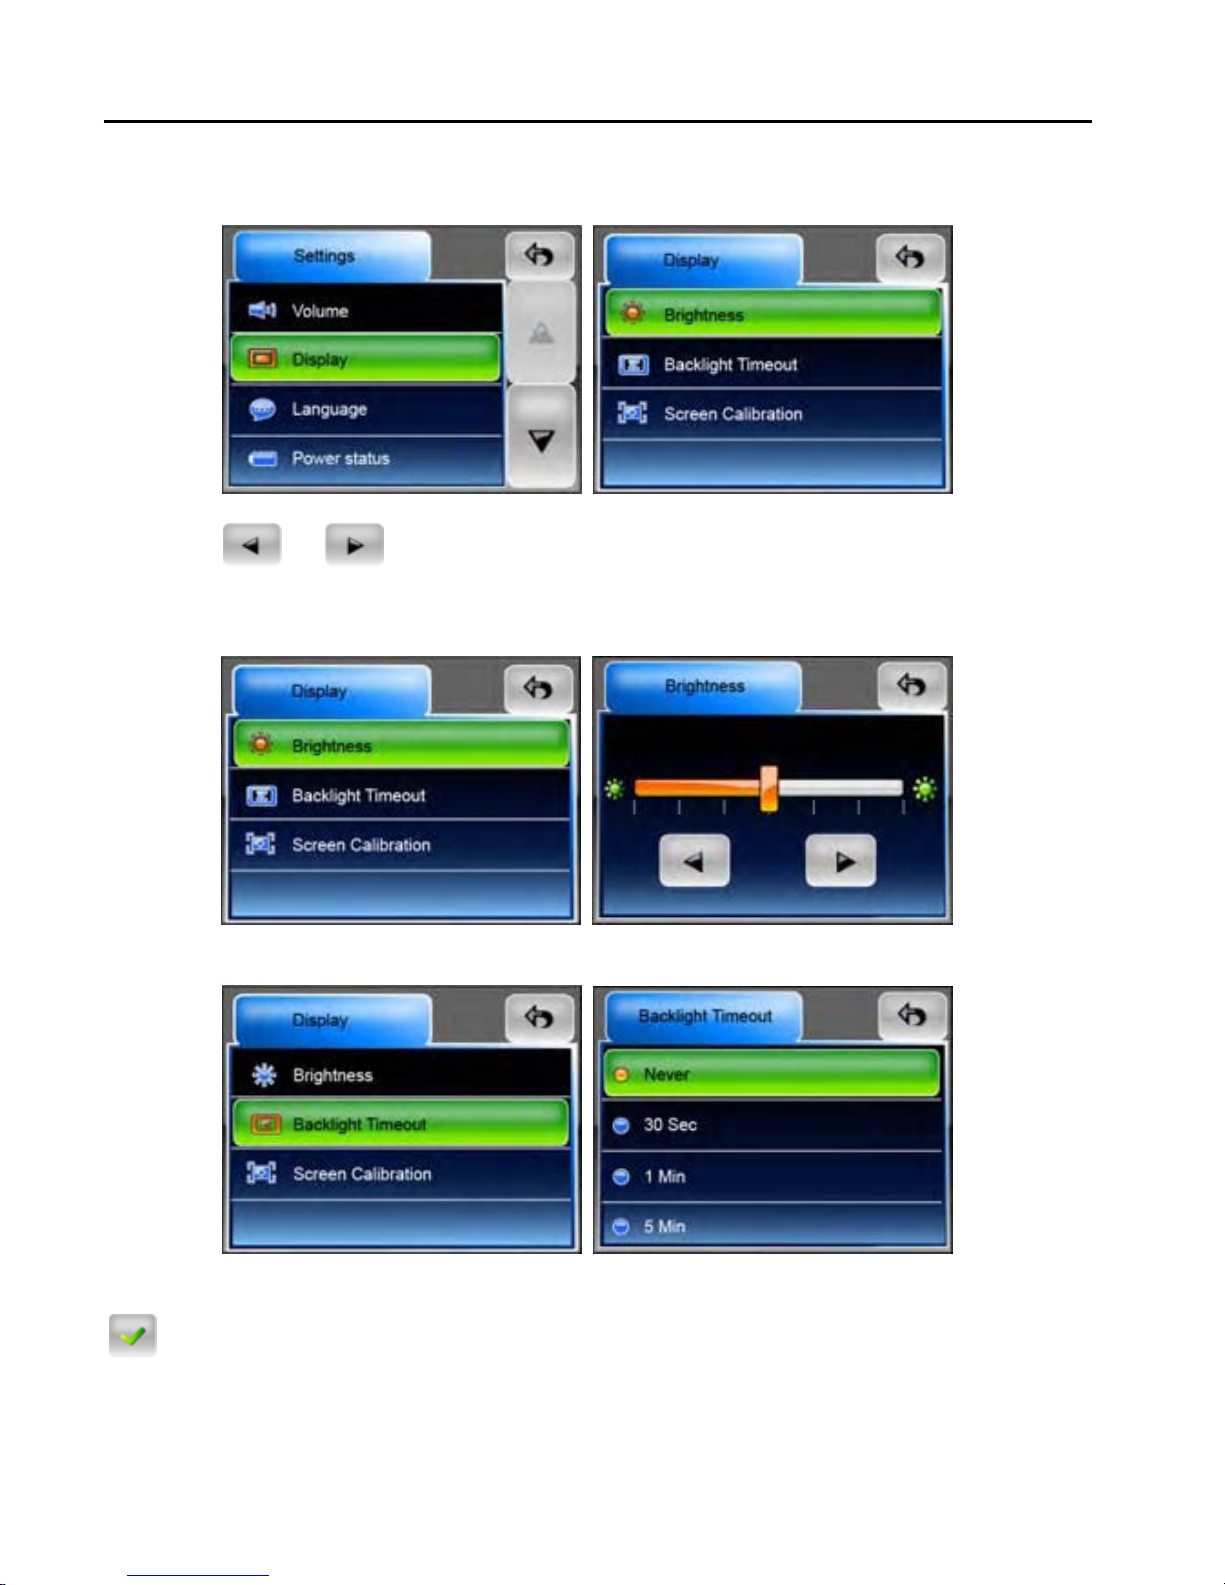
GETTING STARTED
Display
Tap on the Display option to enter display submenu. There are 3 items to adjust: Brightness,
Backlight Timeout, and Screen Calibration.
Brightness: With this item, you can change the brightness of the screen. Adjust it darker or brighter
by tapping
or button.
Note: when the minimum or maximum brightness level is met, the level down/ level up button will
become in gray color and not selectable.
Backlight Timeout: Select an option to set idling time to shut down the display to save battery
consuming. If you want it to display continuously, select “Never”.
Screen Calibration: This function calibrates the unit to respond to your screen taps. You will need
to use this function only if the unit begins to respond inconsistently to your screen taps. Tap on
button to start.
15
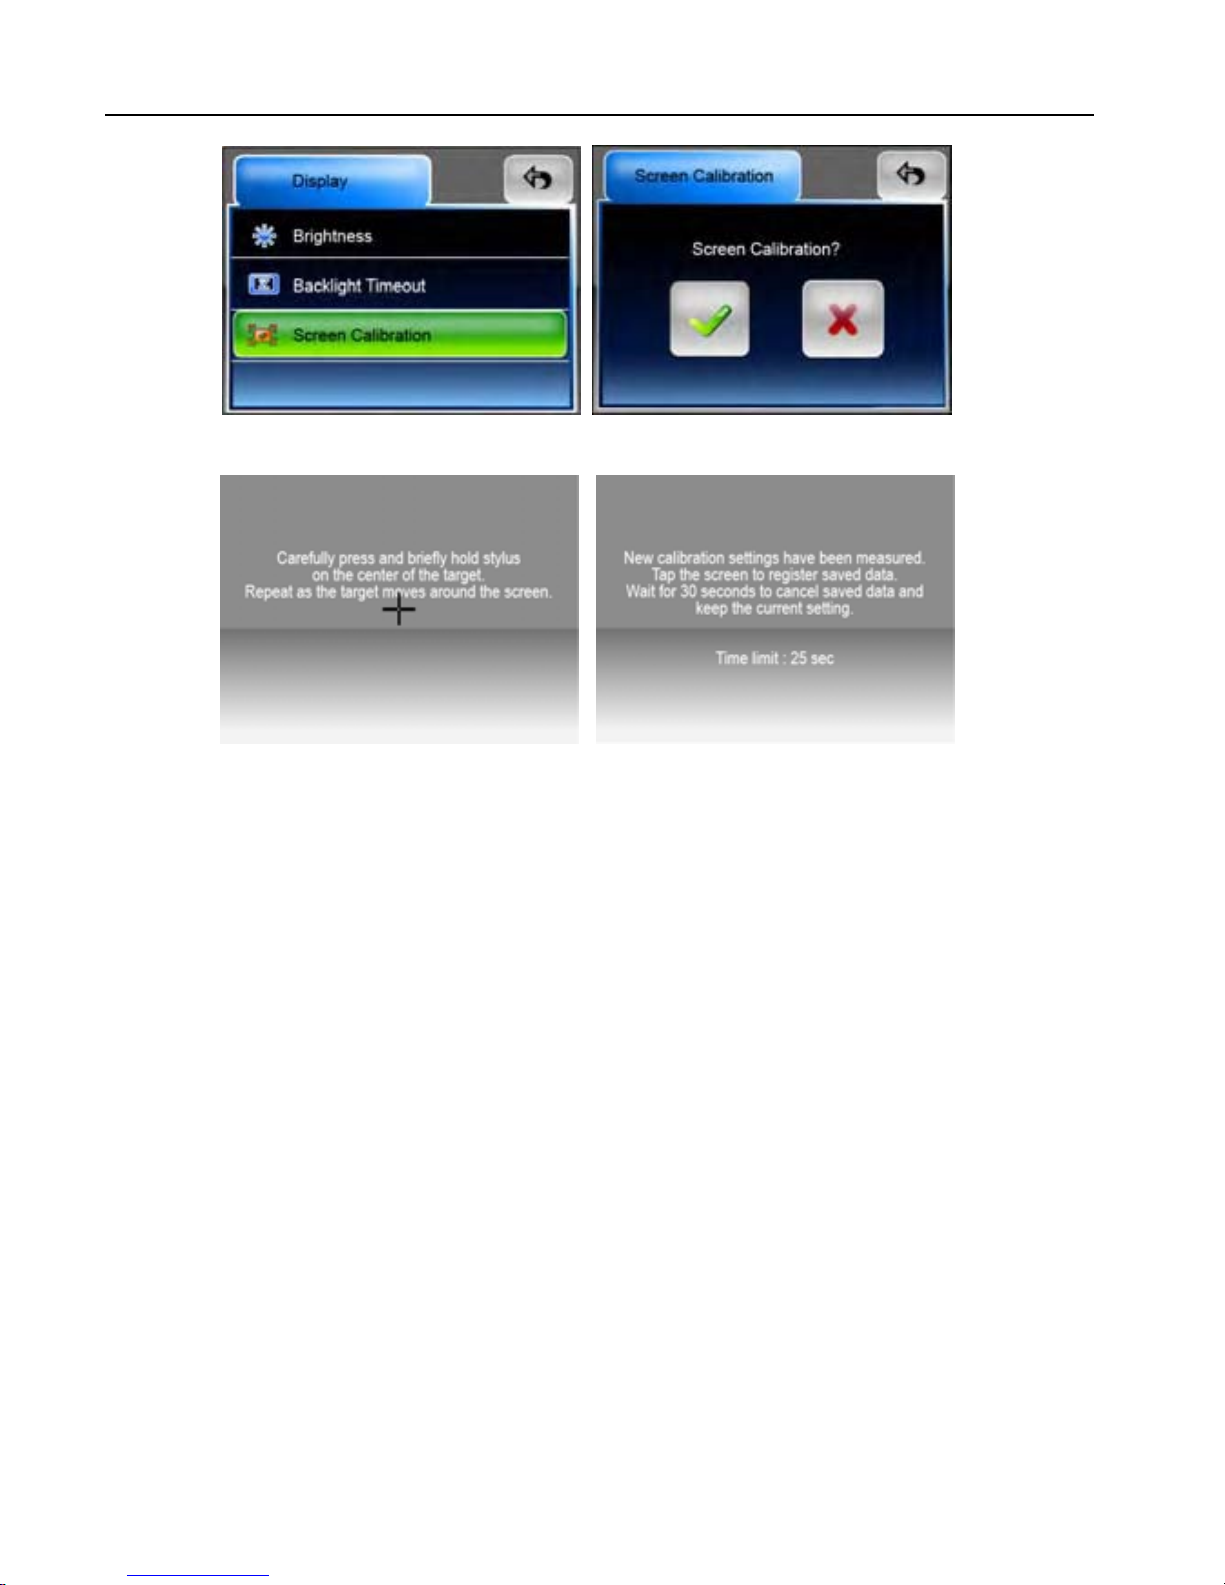
GETTING STARTED
Follow the on screen directions to tap on the center of the cross to calibrate. When the steps are
done, you will see the second figure, tap on screen to save and apply the new calibration.
16
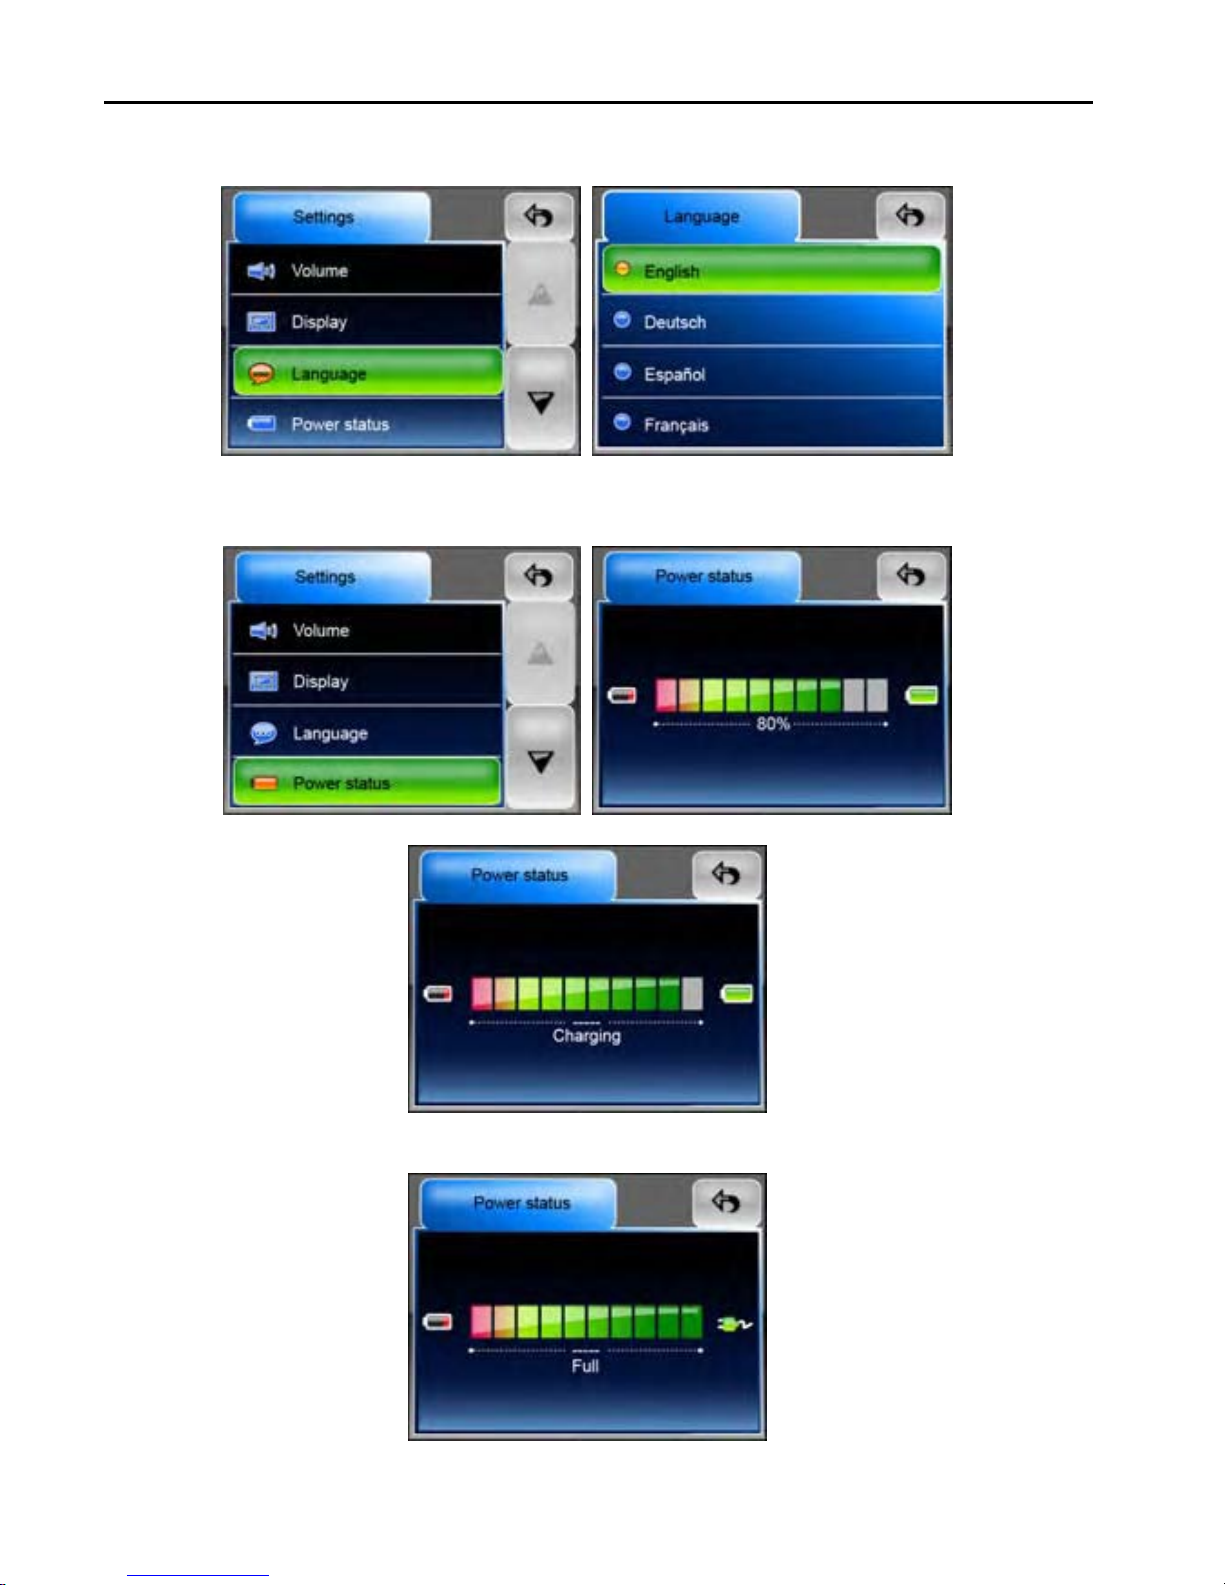
Language
Tap to select a language from the list to suit your need.
Power Status
Enter this filed to know the battery status.
GETTING STARTED
While charging, the status will be in motion, and noted “Charging”.
If the battery is fully charged and the USB cable is still connected, the display will show as the
figure below.
17
GETTING STARTED
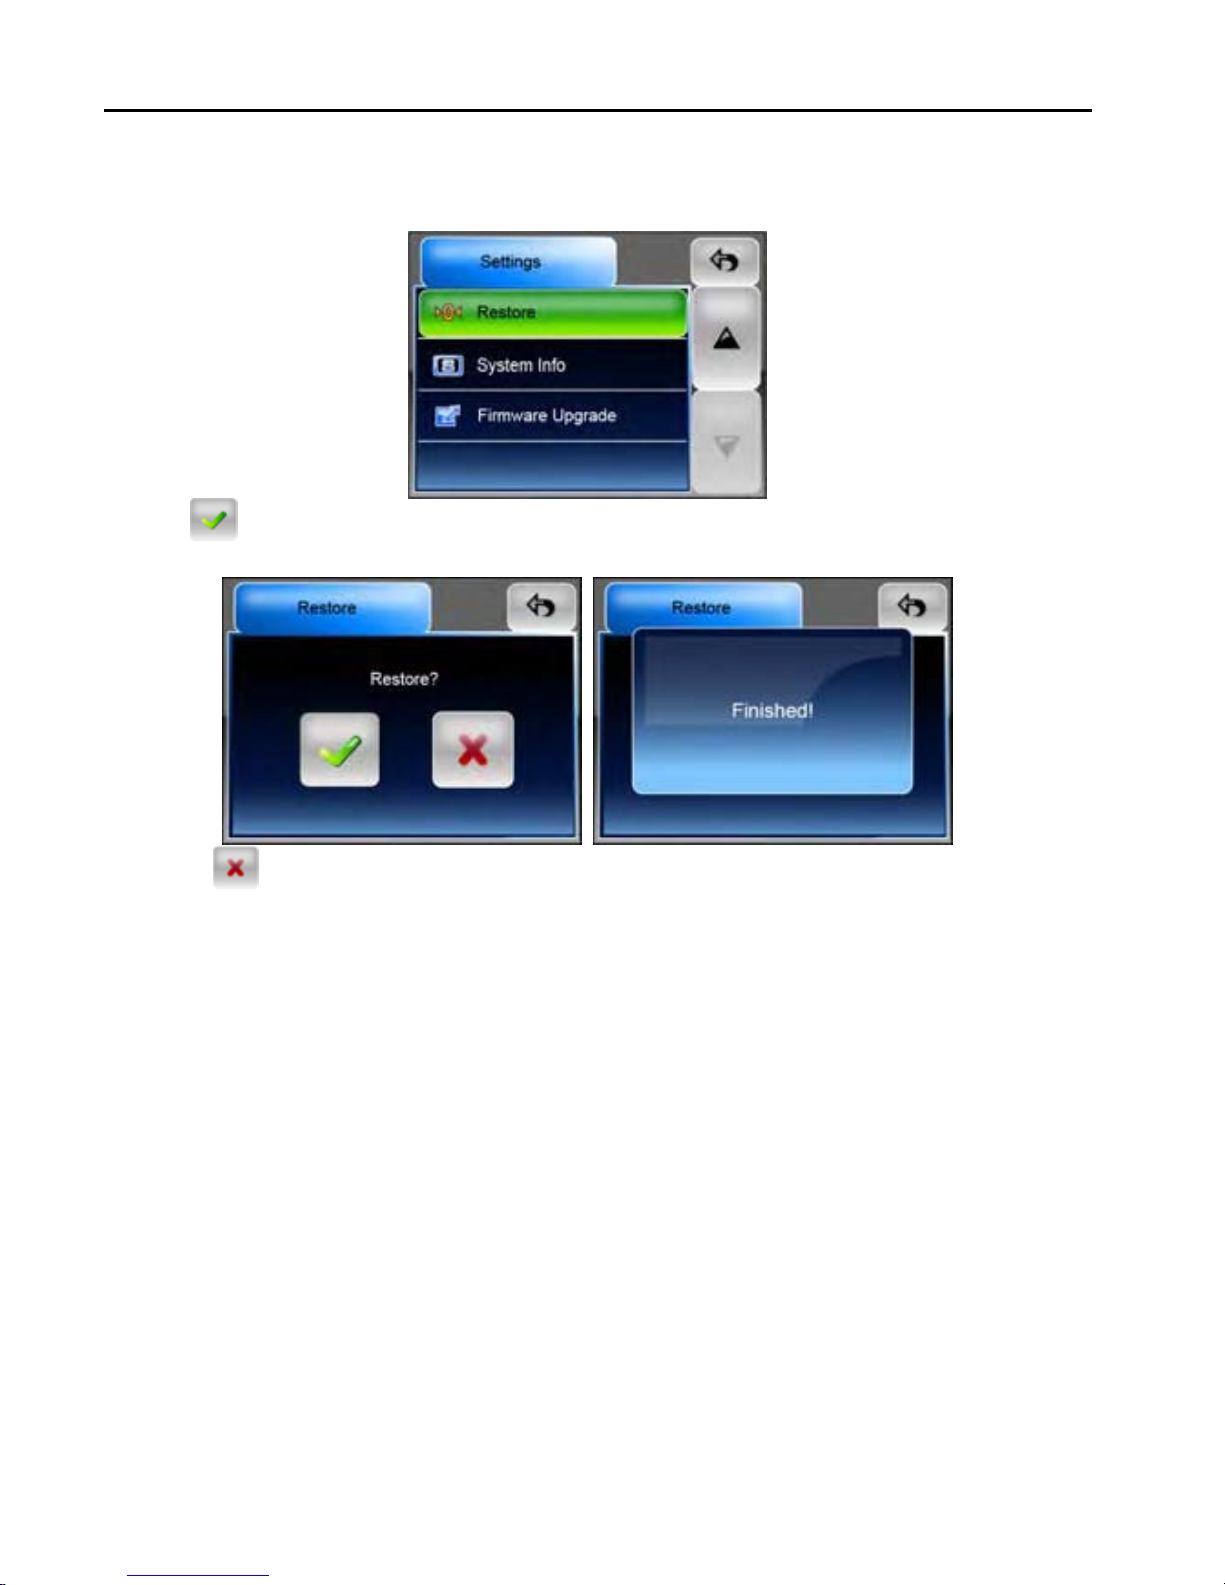
Restore
This field is for you to restore the settings to default values. When necessary, tap on “Restore” item
to enter.
Tap on
button to restore all the setting values. After the procedure is done, the “Finished!”
message will prompt.
Or tap on
to cancel and exit.
18
GETTING STARTED
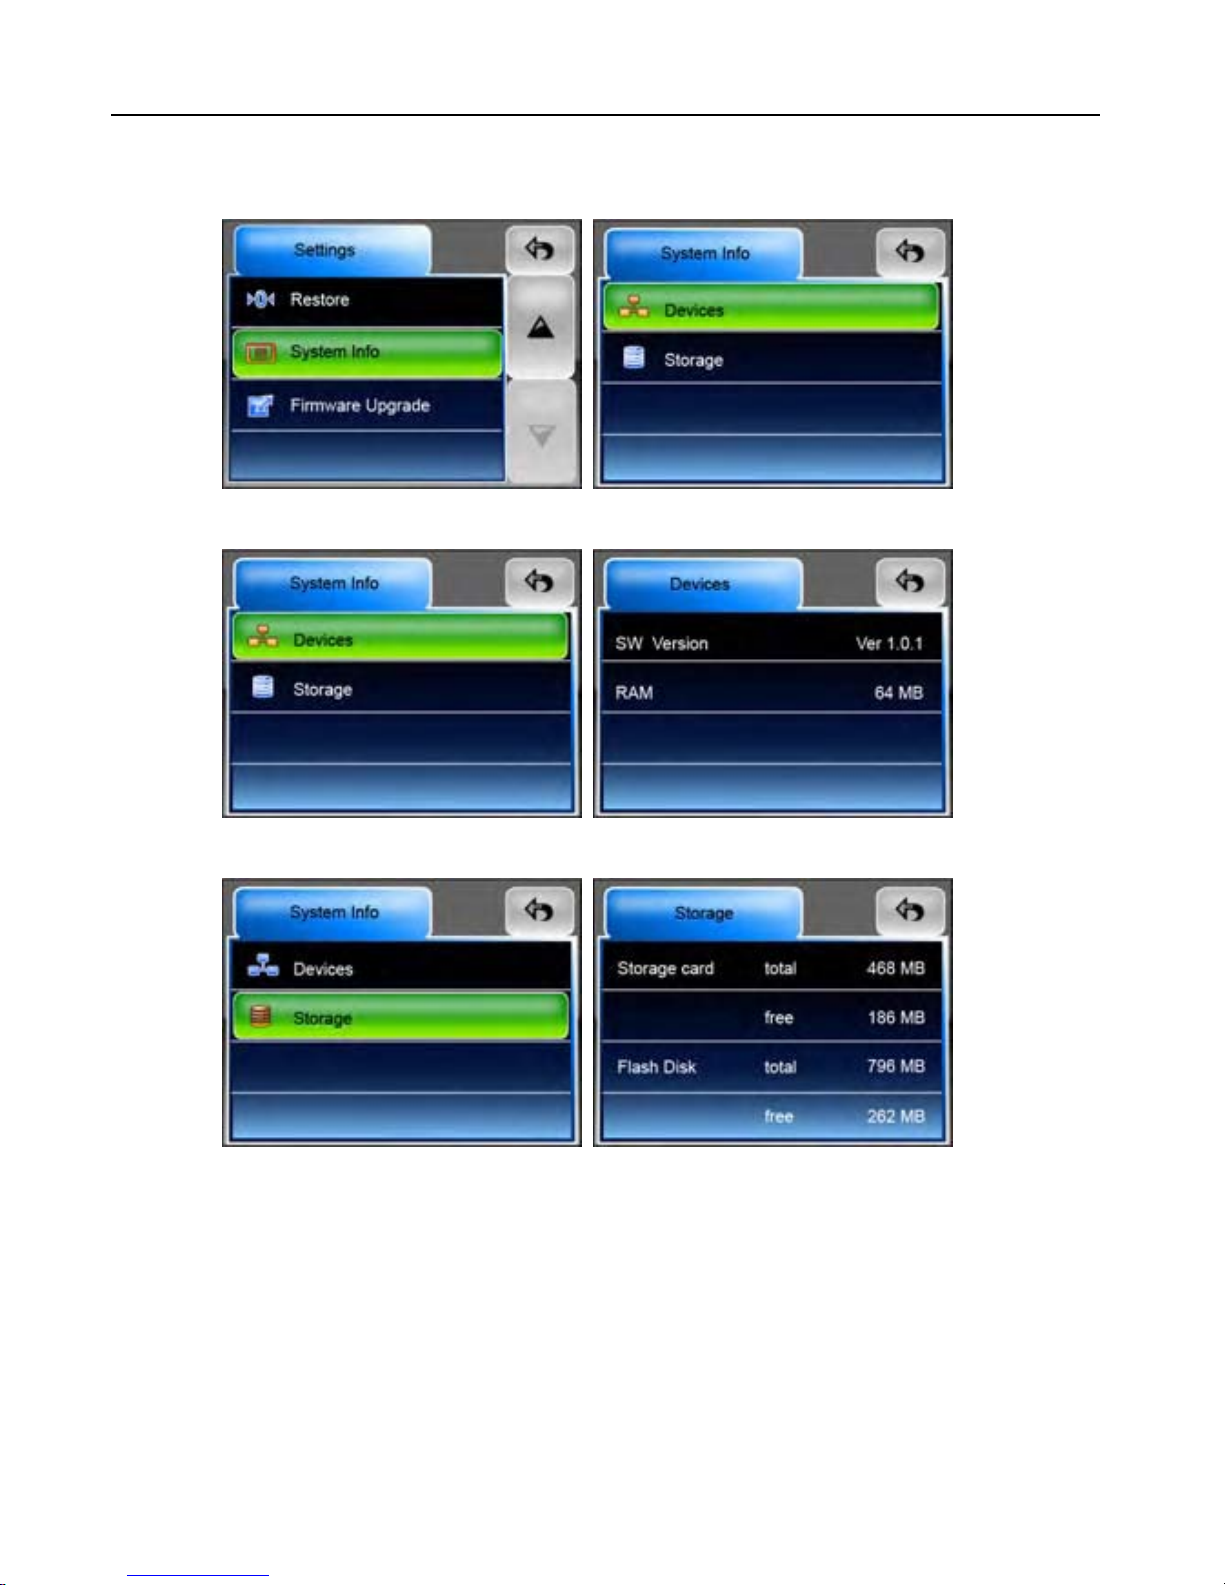
System Info
Tap on System Info to know the information of the unit and the inserted memory card. There are 2
items to read: Device and Storage.
Devices: The Devices page shows information about your software versions and capacity of the
embedded memory.
Storage: The Storage page tells the total capacity and free capacity of your storage card (if
installed) and the flash disk. If no storage card is installed, the information will show as N/A.
19

GETTING STARTED
Firmware Upgrade (advanced feature)
You can upgrade the firmware of the unit for better performance or/ and more functions. Follow the
steps below to do so.
Note 1: only advanced users are recommended to operate this feature.
Note 2: before upgrading, please make sure that the battery capacity if filled, or power the unit with
the car charger to ensure the upgrading will not be corrupted.
Note 3: do not remove the memory card during upgrading!
Note 4: please visit on www.binatonecarrera.com
1. Download the firmware file from our website. Uncompress the file and copy it to a SD/ MMC
memory card. Insert the card into the card slot of the unit.
2. Tap to enter this field; you will see the figure as the second below.
website for more information.
3. To start to upgrade, tap on the
button. The unit will restart automatically and the
“Upgrading…” message will prompt. In some seconds, “Finished!” message will prompt after the
upgrading is done.
4. If the upgrading is failed, you will see the below figure, shows “Failed!” message.
20

INTRODUCTION
GPS FUNCTION
You have chosen a cutting-edge navigation system. Congratulations! Please enjoy using it. Binatone
Carrera is embedded as Global Positioning System in this unit. Th
straight to your destination, whether you are traveling by ca
your route with an easy-to-use and intuitive interface, just by
also use this application to plan your trip to suit y
to save interesting destinations before you set off on your
main features of the system.
r or on foot. You can navigate and plan
using your finger or the stylus. You can
our personal preferences and interests and
journey. This manual leads you through the
is navigation system leads you
Introduction of Binatone C a r r er a
Binatone Carrera is a navigation system optimized for in-car us
for both single and multi-point routes using adaptable route
of planning routes throughout the whole installed map set. Unlike some
Carrera does not require that you change maps or switch to a poorly detailed gen
between map segments or countries. You always have complete freedom to
Just select your destination and go.
Note: the position information obtained from the GPS receiver will not be transmitted anywhere, so
others will not be able to track you by the help of this program.
Safety Instructions
y The driver’s attention should always be on the road. If you are the driver of the vehicle, we do
not recommend you to operate this unit while driving. Plan your route before departure and pull
over if you need to change route parameters.
y from using the screen functions
Binatone Carrera has a built-in Safety Mode that will prevent you
if your car is in motion. Unless a passenger will be the only one to operate Binatone Carrera, we
strongly encourage you to turn on the Safety Mode.
y It is also important that you look at the display only if it is absolutely safe to do so.
y You should always observe traffic signs and road geometry before obeying instruction from
Binatone Carrera.
e. It provides door-to-door navigation
parameters. Binatone Carrera is capable
other products, Binatone
eral map to navigate
go wherever you wish.
21
INTRODUCTION
Getting Started
Please make sure that the battery in your device is fully charged, or use the car charger to power
on the PND device.
Connect the external antenna for better reception. (the external antenna is optional)
Install or place your PND device in a location with an unobstructed view to the sky. (In a car this
will usually be on the dashboard.)
Switch on the unit and choose GPS.
It may take up to some minutes to establish the first connection. Subsequent connections will be
faster (30 seconds to 1 minute), but if you have not used the unit for days or are far away from
the lastlocation whereyou used it, it maytake up to 10 minutes again to find a strongsignal.
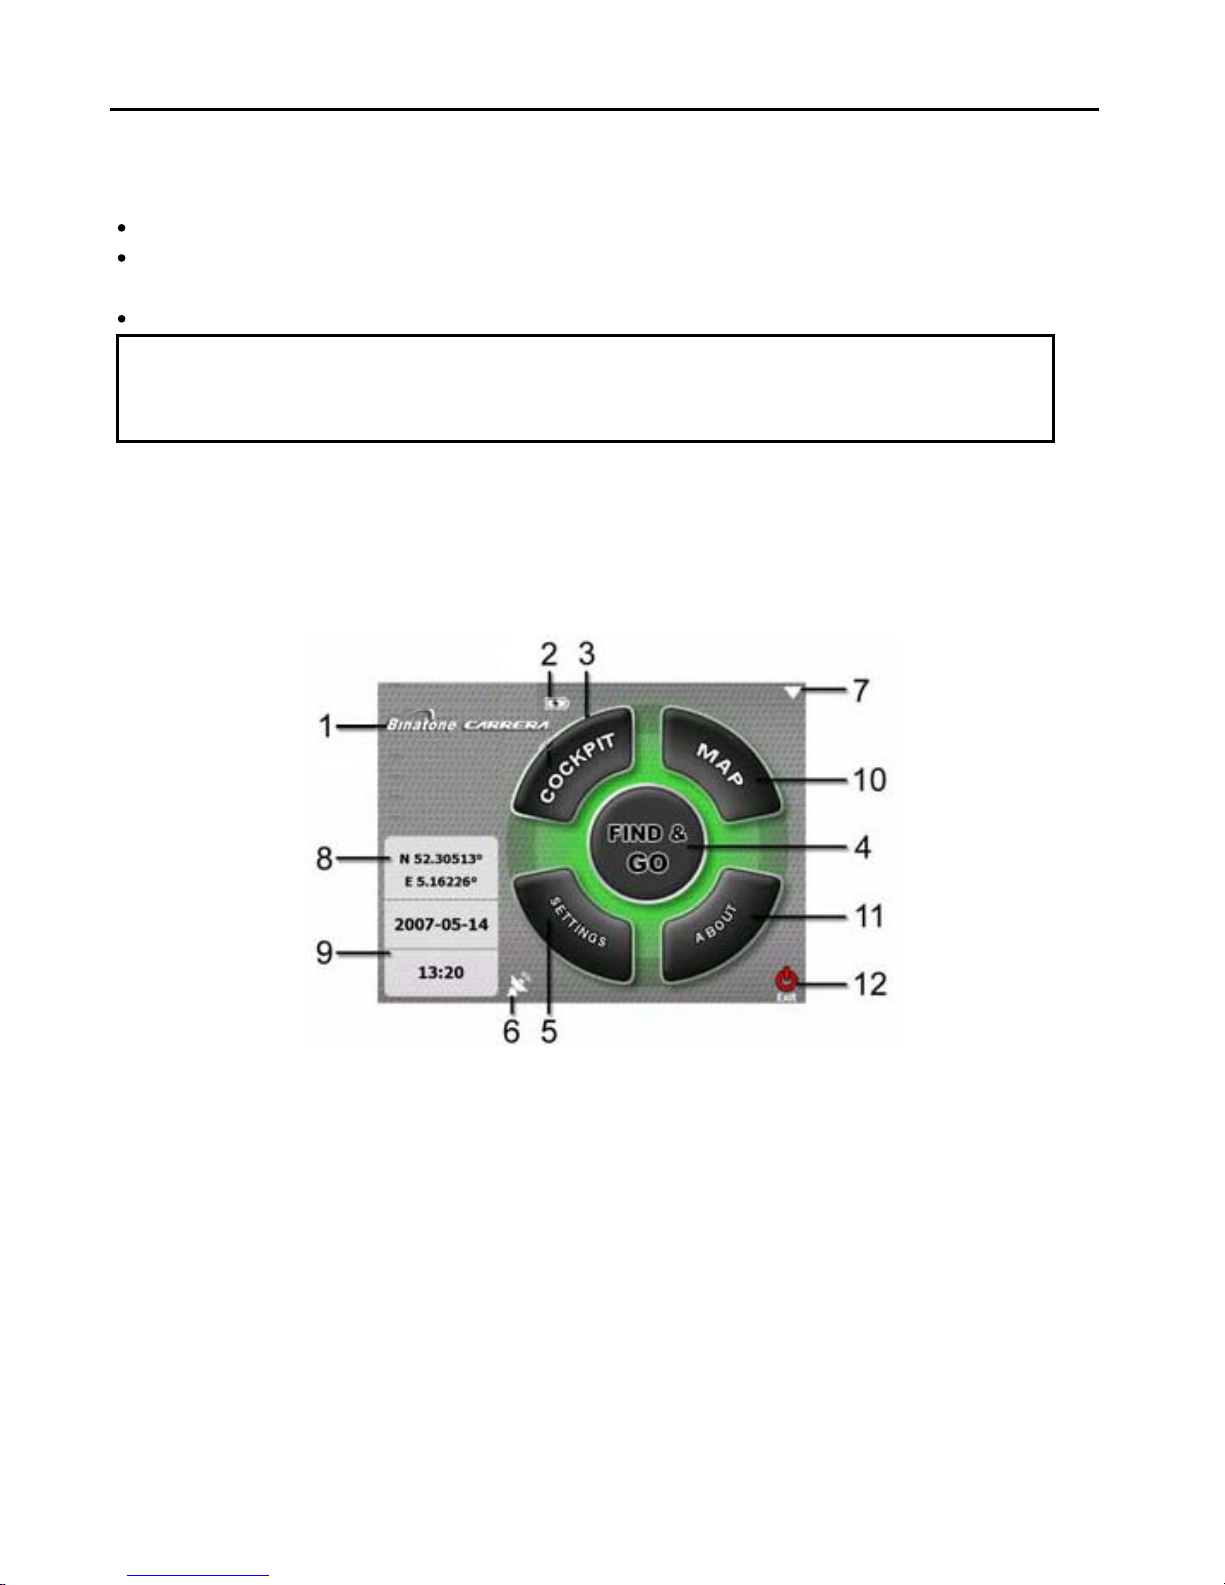
Main Menu
Binatone Carrera starts by displaying the Main menu. This is
you need to return here very rarely while using the program
other to reduce the number of actions needed to in
Most parts of the program are directly accessible from here by using the buttons described below.
itiate a function or change a setting.
the root of the screen hierarchy, but
. Screens are also accessible from each
1.
Binatone Carrera
2. Battery Status indicator
3. Button to open Cockpit screen
4. Button to open Find menu
5. Button to open Settings
6. Button that displays GPS Status and opens the GPS Data screen
7. Button to shut down and exit
8. Current position
9. Current date and time
10. Button to open Map screen
11. Button to open About screen
22
Binatone Carrera
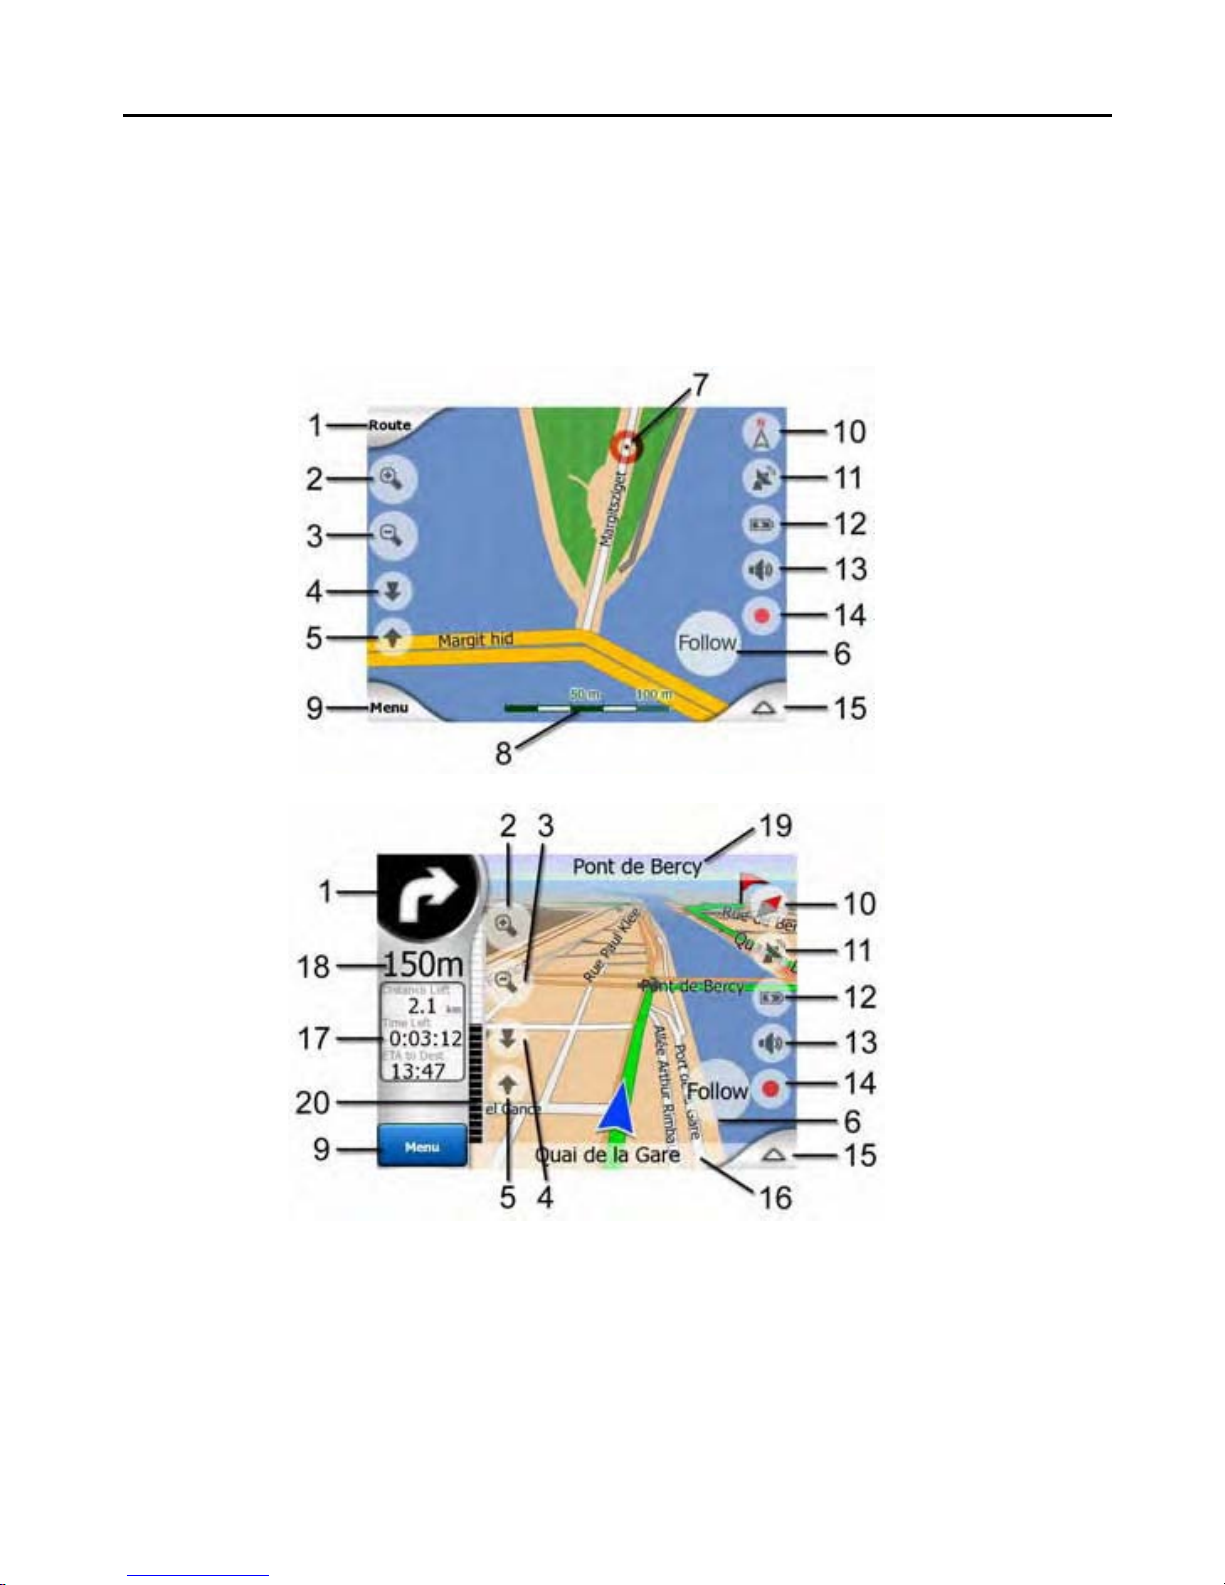
ACTIVE MAP ELEMENTS
About Screen
Tap About on the Main menu screen to open this screen. The About screen is not used in normal
navigation. It is there to inform you about the map licenses you have, the creators of Binatone Carrera
and the legal aspects of using the program.
Map Screen
Cockpit Screen
23
 Loading...