

Page 1
KOMPERNASS GMBH · BURGSTRASSE 21 · D-44867 BOCHUM
www.kompernass.com
ID-Nr.: KH498-03/08-V1
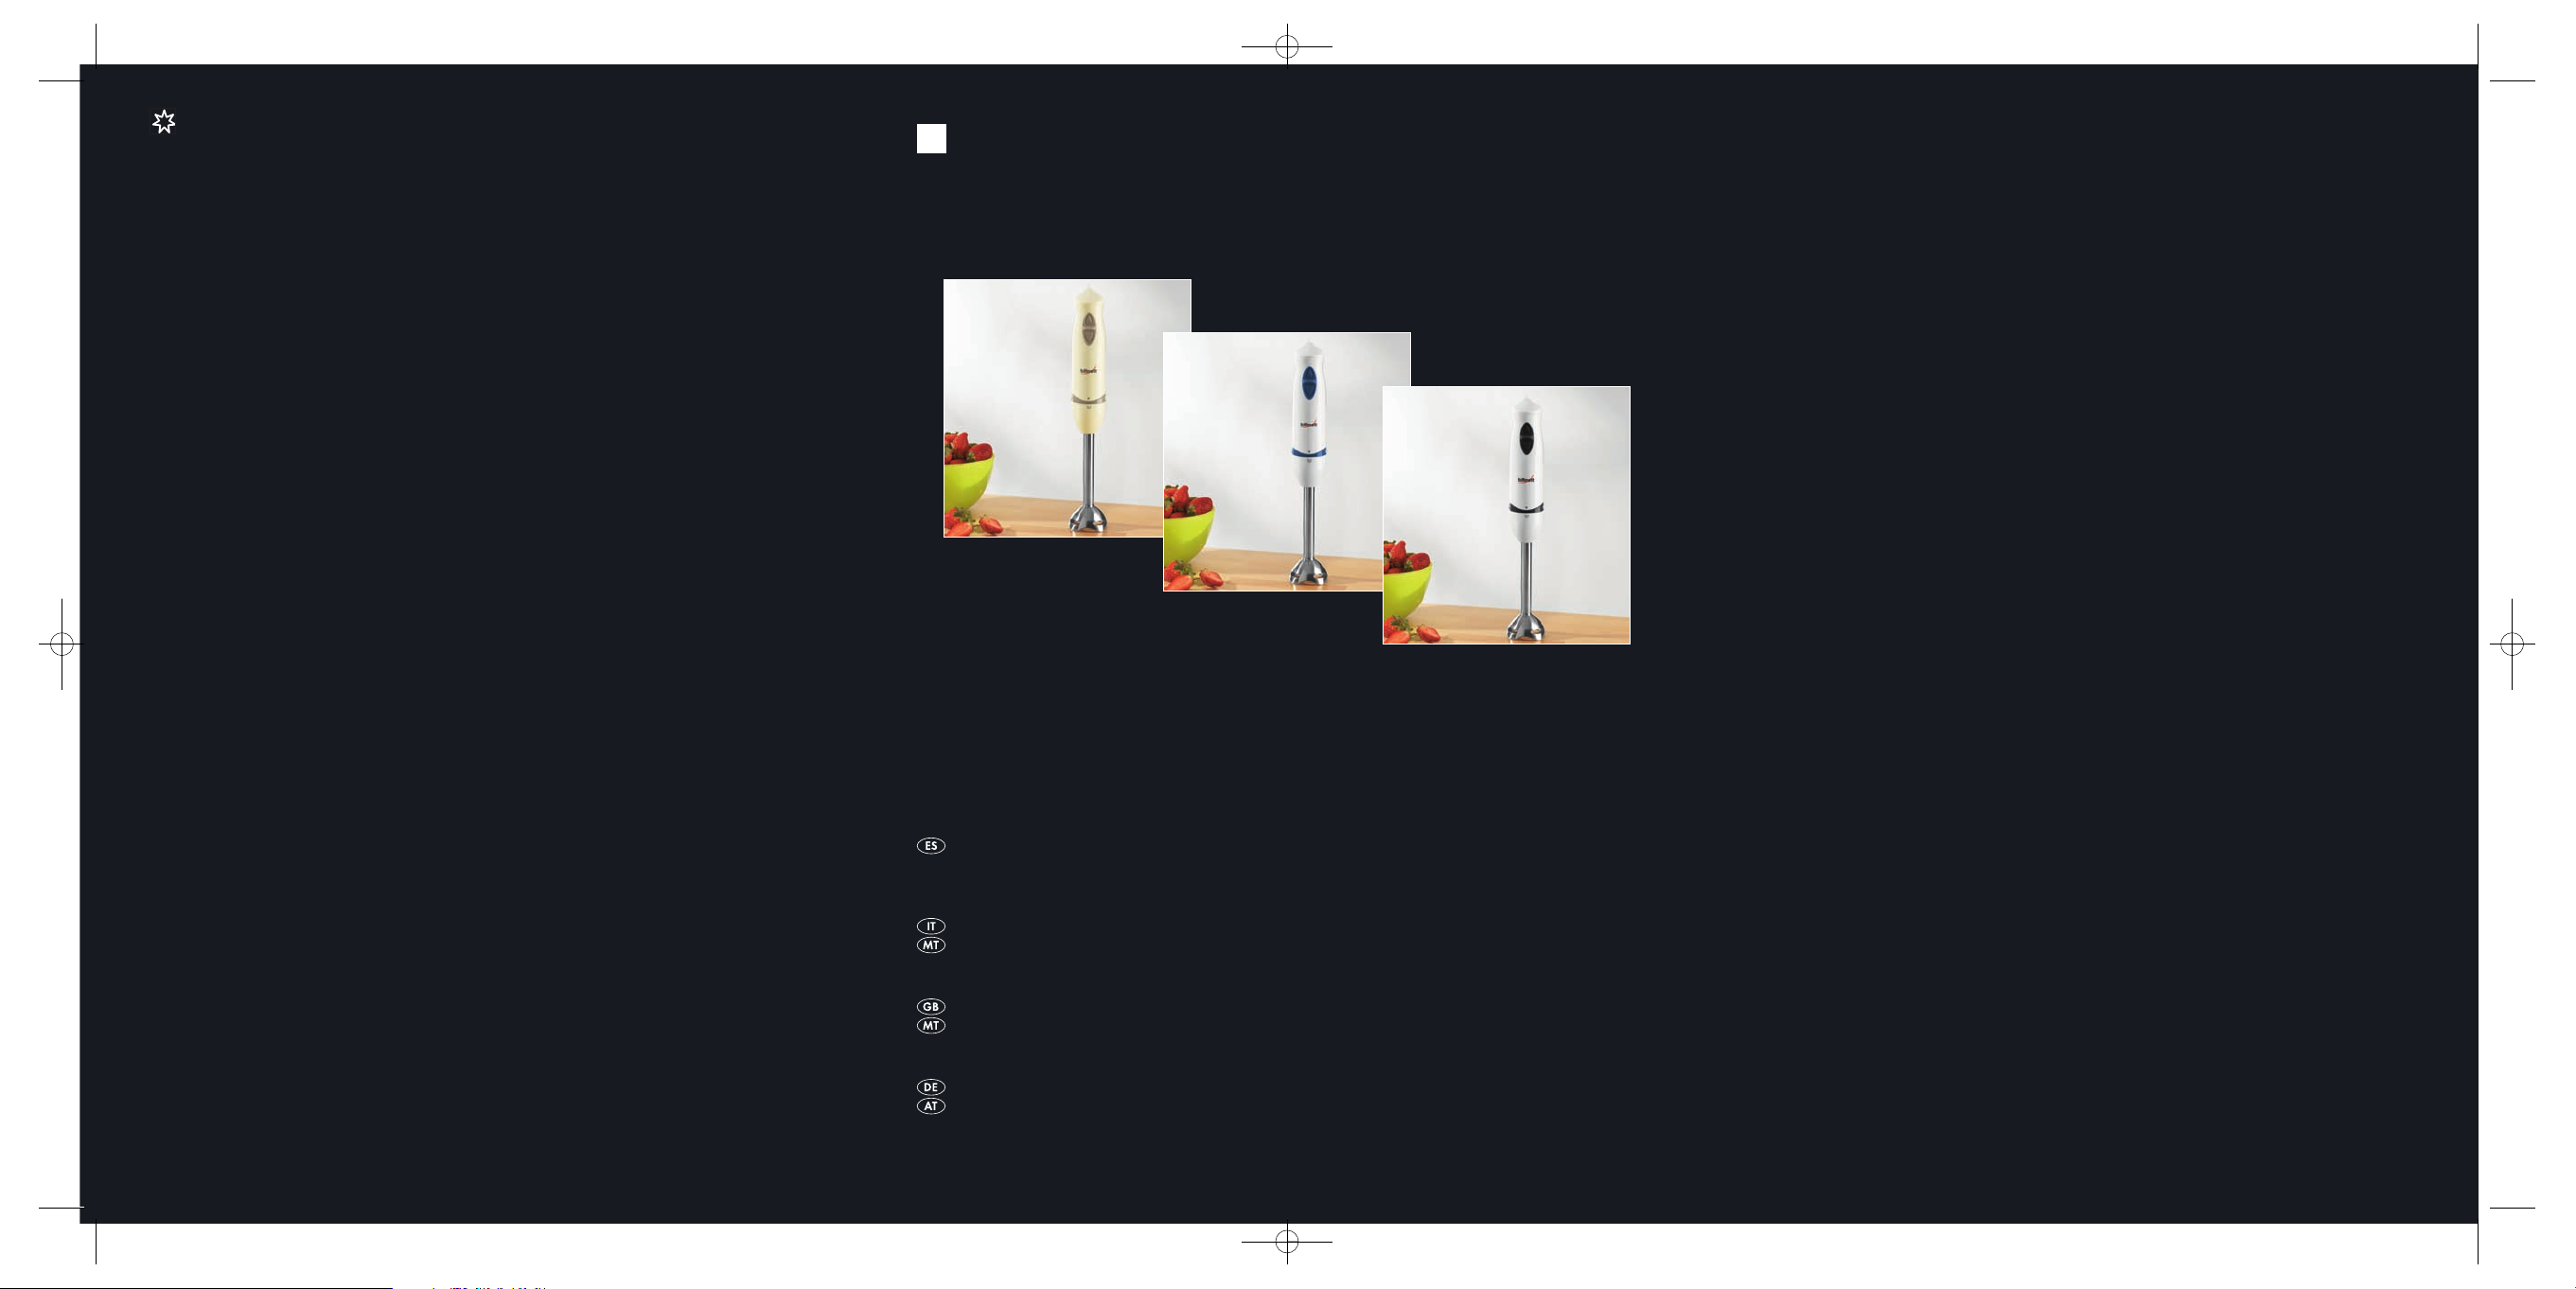
BATIDORA DE BRAZO
Instrucciones de uso
FRULLATORE A IMMERSIONE
Istruzioni per l'uso
HAND BLENDER
Operating instructions
5
BATIDORA DE BRAZO
FRULLATORE A IMMERSIONE
STABMIXER
Bedienungsanleitung
CV_KH498_E3339_LB5.qxd 10.03.2008 14:19 Uhr Seite 1
Page 2
쐎
쐉
쐈
쐅
쐋
쐏
CV_KH498_E3339_LB5.qxd 10.03.2008 14:19 Uhr Seite 4
Page 3

- 1 -
¡Guardar estas instrucciones para preguntas posteriores – e, igualmente entregar éstas,
en caso de dar el aparato a terceras personas!
ÍNDICE PÁGINA
Datos técnicos 2
Descripción del aparat/accesorio 2
Indicaciones de seguridad 2
Uso conforme a lo prescrito 3
Utilización 3
Ensamblaje 3
Ensamblaje de la batidora de brazo 3
Ensamblaje del accesorio de batir 3
Ensamblar la trituradora 4
Manejo 4
Montaje mural 4
Limpieza 4
Evacuación 5
Garantía y servicio 5
Importador 5
IB_KH498_E3339_ES_LB5 05.03.2008 15:12 Uhr Seite 1
Page 4

- 2 -
BATIDORA DE BRAZO
KH 498
Datos técnicos
Tensión de red: 220–240 V ~50/60 Hz
Potencia nominal: 300 W
Clase de protección: II
Periodo KB: 1 minuto
Periodo KB
Con el periodo KB (funcionamiento por un corto
periodo de tiempo) se indica durante cuánto tiempo puede funcionar un aparato sin que el motor
se sobrecaliente ni se dañe. Tras el periodo KB
indicado deberá apagarse el aparato hasta que
el motor se haya enfriado.
Capacidad
Vaso medidor: 500 ml
Cantidad de
llenado máx: 300 ml
Descripción del aparat/
accesorio
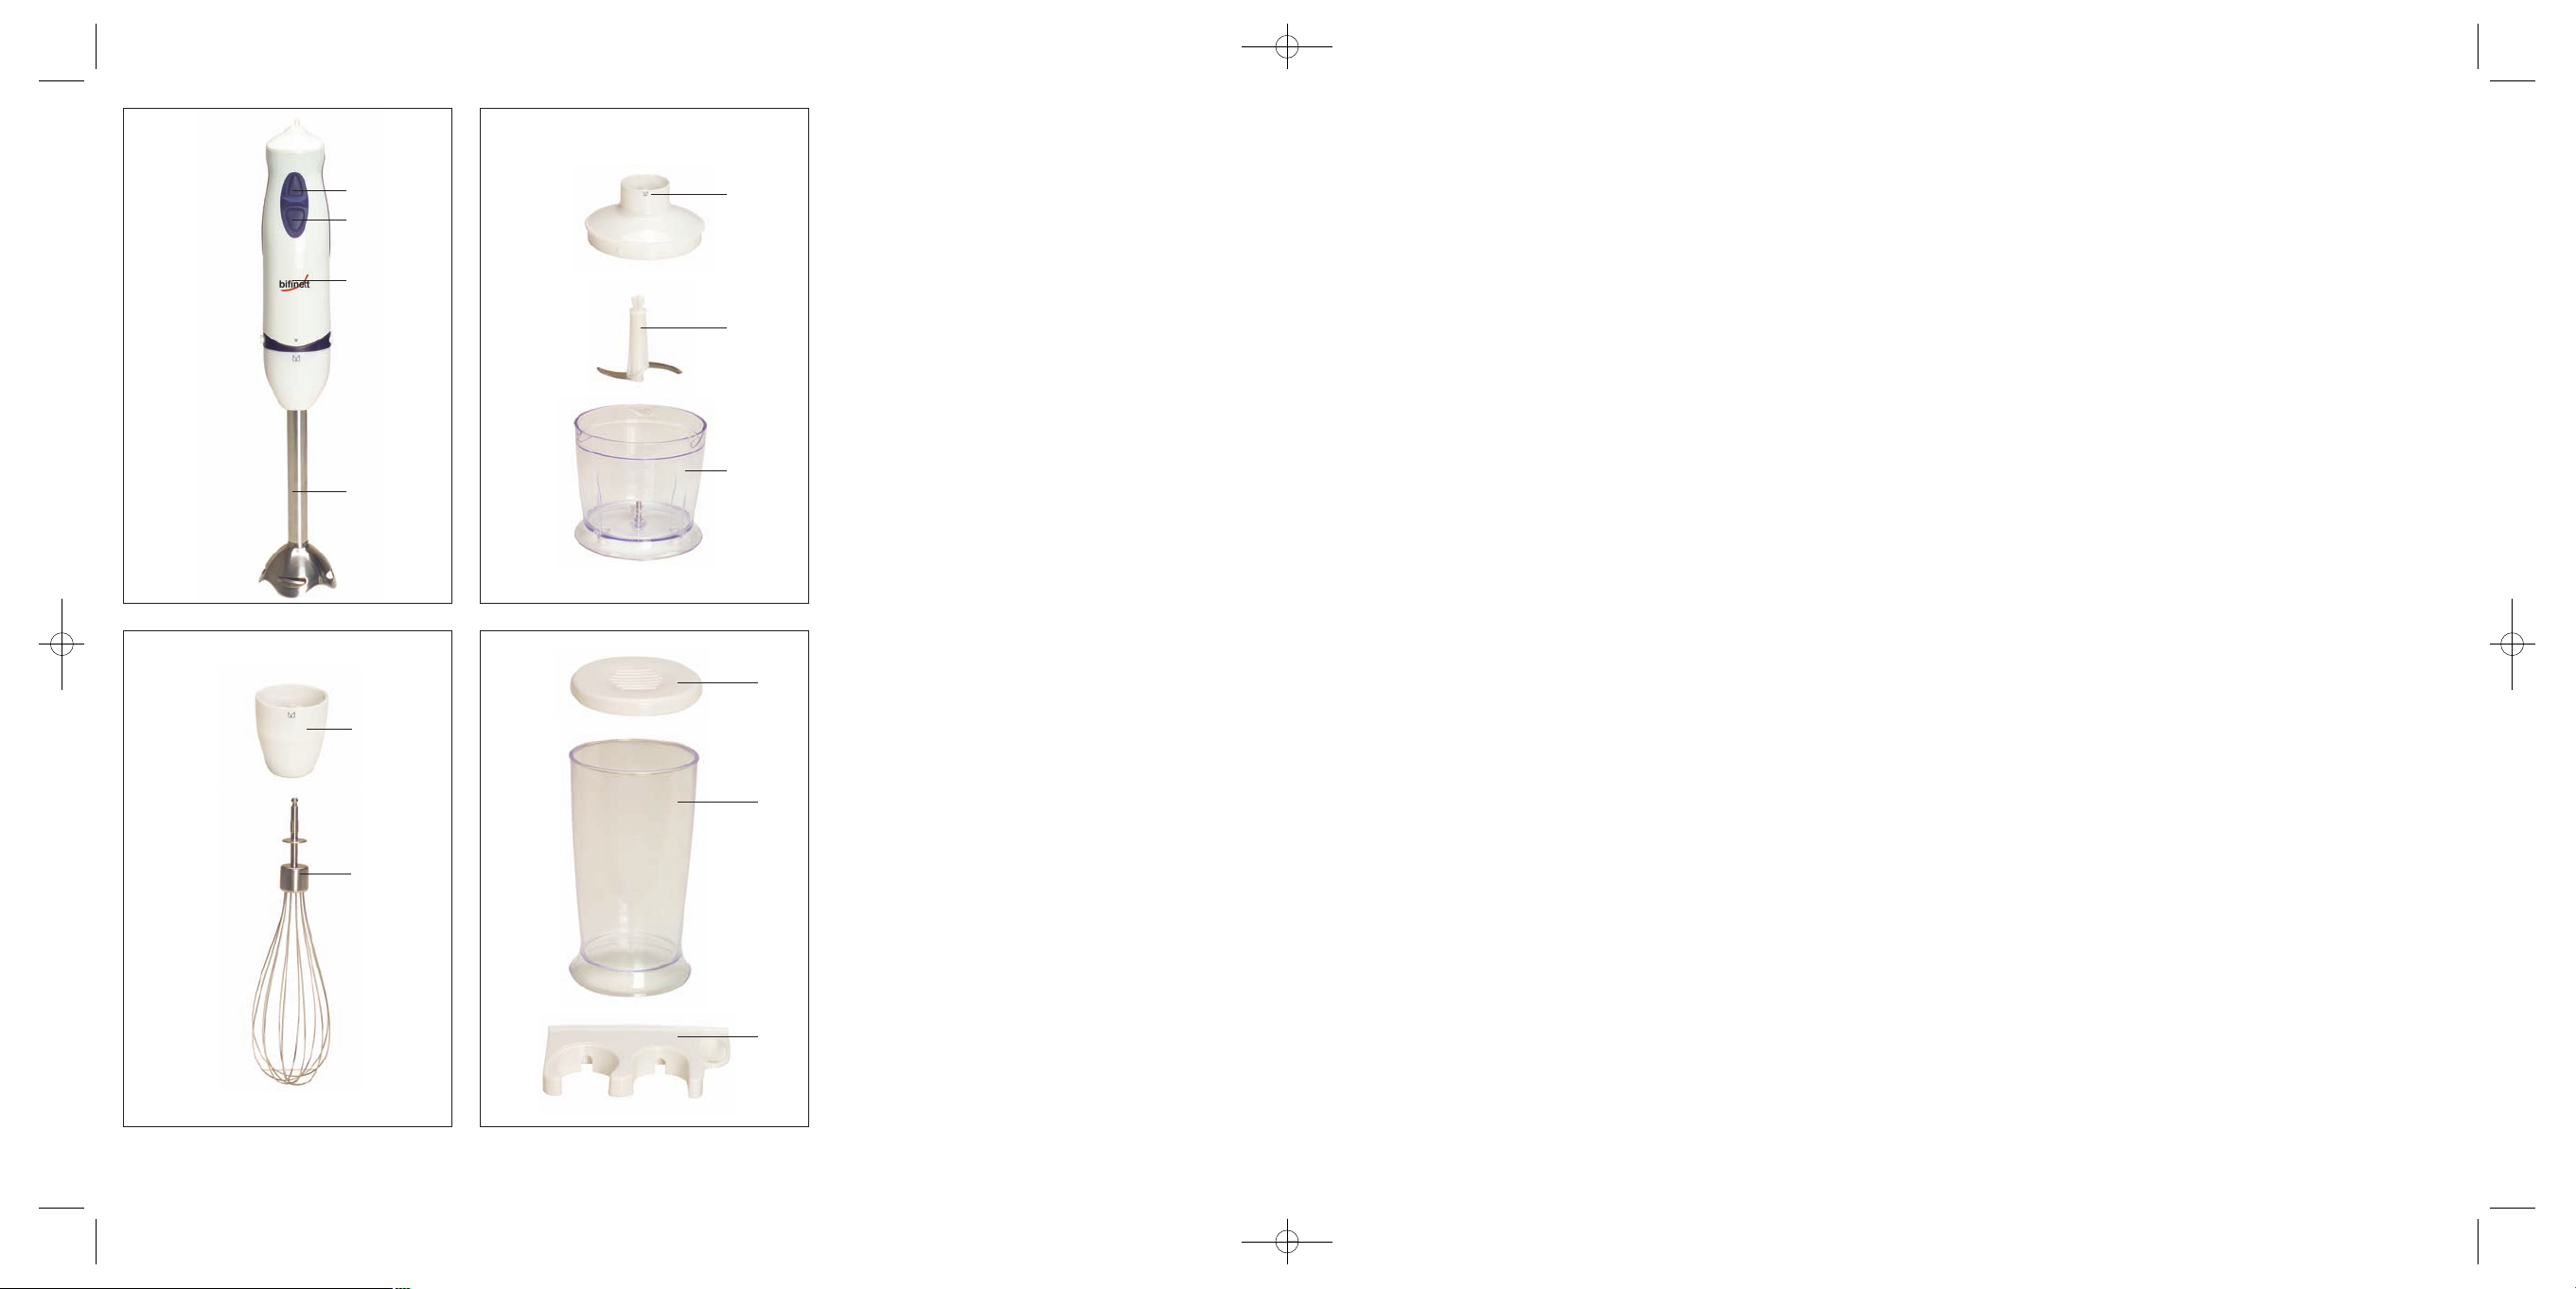
1
Interruptor (velocidad norma)
2
Interruptor turbo (velocidad rápida)
3
Bloque de motor
4
Batidora de brazo
5
Tapa del vaso
6
Cuchilla
7
Vaso
8
Soporte para la varilla
9
Varilla
0
Tapa del vaso medidor
q
Vaso medidor
(volumen de llenado máx. 500 ml)
w
Soporte para pared incl. tornillos y tacos
Indicaciones de seguridad
¡Peligro de descarga eléctrica!
• Conecte la batidora de brazo únicamente a
una base de enchufe instalada según la normativa con una tensión de red de 220–240 V,
con 50/60 Hz.
• Antes de limpiar o en caso de fallos de funcionamiento de la batidora de brazo, extraiga
siempre la clavija de red del enchufe.
De ningún modo sumerja el bloque motor de
la batidora de brazo en líquido y evite que
penetren líquidos en el interior de la carcasa
del bloque motor.
• El aparato no debe exponerlo a humedad
ni utilizarlo tampoco a la intemperie.
• En caso de que en alguna ocasión entre líquido en la carcasa del aparato, extraiga inmediatamente la clavija de red del aparato de
la base de enchufe y hágalo reparar por
personal cualificado.
• Nunca toque la batidora de brazo, el cable
de red ni la clavija de red con las manos
mojadas.
• Extraiga siempre el cable de red de la base
de enchufe tirando de la clavija, y no del
cable mismo.
• No doble ni aprisione el cable de red y
tiéndalo de tal manera que nadie pueda
pisarlo ni tropezar con él.
• En caso de averiarse la clavija o el cable
de red, encargue su reparación de forma
inmediata a un técnico autorizado o al
servicio de asistencia técnica para evitar
riesgos innecesarios.
• No está autorizado a abrir la carcasa del
bloque de la batidora de brazo. En este
caso no estará protegido y perderá el
derecho a la garantía.
IB_KH498_E3339_ES_LB5 05.03.2008 15:12 Uhr Seite 2
Page 5

- 3 -
• No permita utilizar el aparato a personas
(incluidos los niños) cuyas facultades físicas,
sensoriales o mentales, así como su falta de
conocimientos o de experiencia, les impida
hacer un uso seguro del mismo si no están
bajo vigilancia por una persona encargada
de su seguridad o hayan sido instruidos como
utilizar el aparato correctamente.
• Los niños deben estar bajo vigilancia para
asegurarse de que no juegan con el aparato.
Uso conforme a lo prescrito
La batidora de brazo sirve exclusivamente
para la preparación de alimentos en pequeñas
cantidades. Sólo es adecuada para el uso en
ámbitos privados. La batidora de brazo no está
prevista para el uso comercial.
Utilización
Advertencia:
Con el vaso medidor qpueden medirse
líquidos hasta 500 ml. Introduzca para su
preparación un máximo de 300 ml, de lo
contrario puede salirse el líquido fuera del
vaso medidor
q
.
• Con la batidora de brazo
4
pueden preparar-
se dips, salsas, sopas y alimentos para bebés.
Advertencia:
no utilice la batidora de brazo para
la preparación de alimentos sólidos.
¡Conllevaría daños irreparables del aparato!
• Con la varilla 9puede montar nata o clara de
huevo y remover masa, postres o mayonesa.
• Con la trituradora, consistente en cuchilla
6
y
vaso
7
, también puede triturar alimentos duros.
Advertencia:
no utilice la trituradora para la preparación
de líquidos. ¡Conllevaría daños irreparables
del aparato!
Ensamblaje
Peligro de lesiones:
Inserte después del ensamblaje la clavija de red
en la base de enchufe.
Ensamblaje de la batidora de brazo
➩ Coloque la batidora de brazo 4sobre el
bloque motor
3
, hasta que esta se encaje
de forma audible.
Advertencia:
las flechas que se encuentran en el bloque
motor y en el accesorio deben superponerse
la una a otra .
Ensamblaje del accesorio de batir
➩ Inserte el accesorio de batir 9 en el soporte
del accesorio de batir
8
.
➩ Coloque la varilla así montada sobre el
bloque motor
3
, hasta que se encaje de
forma audible.
Advertencia:
las flechas que se encuentran en el bloque
motor y en el accesorio deben superponerse
la una a la otra .
IB_KH498_E3339_ES_LB5 05.03.2008 15:12 Uhr Seite 3
Page 6

- 4 -
Ensamblar la trituradora
Advertencia:
¡Las cuchillas están muy afiladas! Manéjelas,
por ello, con cuidado. ¡Peligro de lesiones!
➩ Coloque con precaución la cuchilla
6
sobre el soporte en la fuente 7.
➩ Introduzca en la fuente los alimentos a triturar.
➩ Coloque la tapa
5
sobre la fuente y gírela
firmemente. En este proceso deberá guiar
los salientes de la tapa en la ranura del borde
de la fuente.
➩ Coloque el bloque motor
3
sobre la tapa 5,
hasta que se encaje de forma audible.
Advertencia:
las flechas que se encuentran en el bloque
motor y en el accesorio deben superponerse
la una a la otra .
Manejo
Advertencia:
¡Los alimentos no deben estar demasiado calientes!
Si el contenido se rebosa podría causar lesiones.
Riesgo de incendio:
no sobrepase nunca la duración de funcionamiento
máxima de1 minuto si trabaja con alimentos blandos, o bien15 segundos si se trata de alimentos
duros. Deje enfriar el aparato unos 2 minutos
antes de volver a conectarlo de nuevo.
Una vez que haya montado la batidora de brazo
a su gusto, introduzca ...
➩ la clavija de red en la base de enchufe.
➩ Mantenga pulsado el interruptor
1
para batir
los alimentos a velocidad normal.
➩ Mantenga pulsado el interruptor turbo 2para
batir los alimentos a una mayor velocidad.
➩ Una vez finalizada la elaboración de los
alimentos, suelte simplemente el pulsador
accionado.
Montaje mural
En el volumen de suministro se encuentran 2 tacos
y 2 tornillos, para montar el soporte para pared
w
.
Se recomienda colocar el aparato den la proximidad de una base de enchufe.
➩ Marque la posición de los orificios de perfora-
ción mediante el soporte del aparato
w
.
➩ Taladre los orificios con una broca de 6 mm
de Ø.
➩ Inserte los tacos en los orificios tala-drados.
➩ Coloque ambos orificios del soporte para
pared sobre los orificios de perforación y
fíjelos con los dos tornillos.
Limpieza
¡Peligro por descarga eléctrica!
Antes de limpiar la batidora de brazo, extraiga
siempre la clavija de red del enchufe. De ningún
modo puede sumergir el bloque motor
3
durante la
limpieza en agua o mantenerlo bajo agua corriente.
¡Peligro de lesiones!
Al manipular cuchillas extremadamente afiladas
6
existe riesgo de lesiones. Una vez utilizado y limpiado la picadora, deberá volver a montarla con
el fin de que no se lesione por las cuchillas sueltas.
Guarde bien la cuchilla fuera del alcance de los
niños.
IB_KH498_E3339_ES_LB5 05.03.2008 15:12 Uhr Seite 4
Page 7
- 5 -
¡Atención!
No debe lavar las partes de la batidora de brazo en
el lavavajillas, ya que al hacerlo podrían dañarse.
➩ Extraiga la clavija de red.
➩ Limpie el bloque motor
3
, la batidora de
brazo
4
, la tapa 5y el soporte para la
varilla
8
con una esponja bien escurrida.
Asegúrese de que no entra agua en los
orificios de la batidora de brazo
4.
➩ Limpie el resto de los accesorios bajo agua
corriente y séquelos bien con un paño.
Evacuación
En ningún caso deberá tirar el aparato
a la basura doméstica. Este producto
está sometido a la directiva europea
2002/96/EC.
Elimine el aparato a través de una empresa de
evacuación de basuras autorizada o por medio
del centro de evacuación de basuras municipal.
Tenga en cuenta las normativas actuales en vigor.
En caso de duda póngase en contacto con el
centro de evacuación de basuras.
El material de embalaje debe
desecharse de forma respetuosa
con el medio ambiente.
Garantía y servicio
Con este aparato recibe usted 3 años de garantía
desde la fecha de compra. El aparato ha sido
fabricado cuidadosamente y ha sido probado
antes de su entrega. Guarde el comprobante de
caja como justificante de compra. Si necesitara
hacer uso de la garantía, póngase en contacto por
teléfono con su punto de servicio habitual. Éste es
el único modo de garantizar un envío gratuito.
La garantía cubre los defectos de fabricación o
del material, pero no las piezas sujetas a desgaste
y los daños sufridos por las piezas frágiles. Este
producto ha sido diseñado exclusivamente para el
uso particular y no para el uso industrial.
En caso de manipulación indebida e incorrecta, uso
de la fuerza y en caso de abrir el aparato personas
extrañas a nuestros centros de asistencia técnica
autorizados, la garantía pierde su validez. Esta
garantía no reduce en forma alguna sus derechos
legales.
Kompernass Service España
C/Invención 7
Polígono Industrial Los Olivos
28906 Getafe – Madrid
Tel.: 902 430758
Fax: 91 6652551
e-mail: support.es@kompernass.com
Importador
KOMPERNASS GMBH
BURGSTRASSE 21
D-44867 BOCHUM
www.kompernass.com
IB_KH498_E3339_ES_LB5 05.03.2008 15:12 Uhr Seite 5
Page 8

- 6 -
IB_KH498_E3339_ES_LB5 05.03.2008 15:12 Uhr Seite 6
Page 9

- 7 -
Conservare le presenti istruzioni per consultarle in futuro; in caso di cessione dell’apparecchio a terzi,
consegnare anche le istruzioni!
INDICE PAGINA
Dati tecnici 8
Descrizione dell’apparecchio/Accessori 8
Indicazioni di sicurezza 8
Uso corretto 9
Utilizzo 9
Montaggio 9
Montaggio del frullatore 9
Montaggio della frusta 9
Montare il tritatutto 10
Funzionamento 10
Montaggio a muro 10
Pulizia 10
Smaltimento 11
Garanzia & assistenza 11
Importatore 11
IB_KH498_E3339_IT_LB5 05.03.2008 15:17 Uhr Seite 7
Page 10

- 8 -
FRULLATORE A
IMMERSIONE KH 498
Dati tecnici
Tensione di rete: 220–240 V ~50/60 Hz
Potenza nominale: 300 W
Classe di protezione: II
Tempo di funzionamento abbreviato: 1 minuto
Tempo di funzionamento abbreviato
Il tempo di funzionamento abbreviato indica il
tempo di funzionamento dell’apparecchio senza
pericolo di surriscaldamento e di guasti al motore.
In base al tempo di funzionamento abbreviato,
l’apparecchio dev’essere spento fino al completo
raffreddamento del motore.
Capacità
misurino: 500 ml
Capacità max. di
riempimento: 300 ml
Descrizione dell’apparecchio/
Accessori
1
Interruttore (velocità normale)
2
Interruttore turbo (velocità superiore)
3
Blocco motore
4
Frullatore a immersione
5
Coperchio ciotola
6
Coltello
7
Ciotola
8
Supporto per frusta
9
Frusta
0
Coperchio misurino
q
Misurino (capacità max. 500ml)
w
Supporto a parete incl. vite e tassello
Indicazioni di sicurezza
Pericolo di scossa elettrica!
• Collegare il frullatore a immersione
esclusivamente a una presa di rete installata
a norma con tensione di rete di 220–240 V,
con 50/60 Hz.
• Disinserire la spina dalla presa di rete in
caso di malfunzionamento e prima di pulire
il frullatore.
Non immergere mai il blocco motore del
frullatore a immersione in liquidi e impedire
la penetrazione di liquidi nell’alloggiamento
del blocco motore.
• Non esporre l’apparecchio a fonti di umidità
e non utilizzarlo all’aperto.
• In caso di penetrazione di liquidi nell’ alloggiamento dell’apparecchio, staccare subito
la spina dalla presa e fare riparare l’apparecchio da personale specializzato equalificato.
• Non afferrare mai il frullatore a immersione,
il cavo e la spina con le mani umide.
• Estrarre la spina dalla presa tirando sempre
dalla spina, mai dal cavo.
• Non piegare o schiacciare il cavo di rete
e collocarlo in modo tale che non sia
d’ostacolo o di inciampo.
• Fate sostituire la spina o il cavo danneggiata/
o immediatamente da personale specializzato
autorizzato o dal servizio di assistenza clienti
ai fini di evitare pericoli.
• Non aprire l’alloggiamento del blocco motore
del frullatore a immersione. In tal caso non
viene garantita alcuna sicurezza e la garanzia
decade.
IB_KH498_E3339_IT_LB5 05.03.2008 15:17 Uhr Seite 8
Page 11

- 9 -
• Impedire l’uso dell’apparecchio a persone
(inclusi bambini) che per motivi di natura fisica,
sensoriale o mentale, o a causa della scarsa
esperienza e conoscenza non possono utilizzare
l’apparecchio in sicurezza senza controllo o
senza essere stati prima istruiti in merito.
• Spiegare ai bambini il funzionamento
dell’apparecchio e i suoi pericoli per
impedire che lo usino come un giocattolo.
Uso corretto
Il frullatore a immersione serve esclusivamente
per la lavorazione di alimenti in piccole quantità.
Esso è previsto esclusivamente per l’uso in ambiente
domestico privato. Il frullatore non è adibito all’uso
commerciale.
Utilizzo
Avviso:
con il misurino qè possibile misurare liquidi
fino a 500 ml. Per la lavorazione, introdurre
un massimo di 300 ml, altrimenti il liquido
potrebbe fuoriuscire dal misurino
q
.
• Con il frullatore a immersione
4
si possono
preparare salse, minestre o pappe per
bambini.
Avviso:
non utilizzare il frullatore a immersione per
la lavorazione di alimenti solidi. Ciò crea
danni irreparabili all’apparecchio!
• Con la frusta 9è possibile montare la panna
o l’albume e preparare impasti, dessert o
maionese.
• Con il tritatutto, composto di coltello
6
e
ciotola
7
, è possibile sminuzzare alimenti
più solidi.
Avviso:
non utilizzare il tritatutto per la lavorazione
di liquidi. Ciò crea danni irreparabili
all’apparecchio!
Montaggio
Pericolo di lesioni:
inserire la spina nella presa solo dopo il
montaggio dell’apparecchio.
Montaggio del frullatore
➩ Posizionare il frullatore a immersione 4sul
blocco motore
3
, fino al suo inserimento
udibile.
Avviso:
le frecce sul blocco motore e sull’accessorio
devono essere sovrapposte .
Montaggio della frusta
➩ Inserire la frusta 9 nell’apposito supporto 8.
➩ Posizionare la frusta così composta sul blocco
motore
3
, fino al suo inserimento udibile.
Avviso:
le frecce sul blocco motore e sull’accessorio
devono essere sovrapposte .
IB_KH498_E3339_IT_LB5 05.03.2008 15:17 Uhr Seite 9
Page 12

- 10 -
Montare il tritatutto
Avvertenza:
il coltello è molto affilato! Procedere con cautela.
Pericolo di ferimento!
➩ Collocare con cautela il coltello 6 sul
supporto nella ciotola
7
.
➩ Versare nella ciotola i cibi da tritare.
➩ Posizionare il coperchio
5
sulla ciotola e
avvitare saldamente. Le sporgenze del
coperchio devono rientrare negli intacchi
sul bordo della ciotola.
➩ Posizionare il blocco motore
3
sul coperchio
5
, fino al suo inserimento udibile.
Avviso:
le frecce sul blocco motore e sull’accessorio
devono essere sovrapposte .
Funzionamento
Avviso:
i cibi non devono essere troppo caldi! Il contenuto
potrebbe spruzzare e provocare ustioni.
Pericolo di incendio:
non superare mai la durata massima di impiego
di 1 minuto per gli alimenti morbidi e di 15 secondi
per gli alimenti solidi. Lasciare raffreddare l’apparecchio 2 minuti prima di riavviarlo.
Dopo aver montato il frullatore a immersione in
base alle proprie esigenze, inserire ...
➩ la spina nella presa di corrente.
➩ Tenere premuto l’interruttore
1
, per
lavorare gli alimenti a velocità normale.
➩ Tenere premuto l’interruttore turbo 2, per
lavorare gli alimenti a velocità superiore.
➩ Al termine della lavorazione dei cibi,
rilasciare semplicemente il tasto.
Montaggio a muro
Nella fornitura sono compresi 2 tasselli e 2 viti
per montare il supporto a parete
w
. Si consiglia
di collocare l’apparecchio nelle vicinanze di una
presa di corrente.
➩ Contrassegnare la posizione dei fori in base al
supporto dell’apparecchio
w
.
➩ Eseguire i fori con un trapano da 6 mm.
➩ Inserire i tasselli nei fori fatti.
➩ Posizionare entrambe le aperture del supporto
a parete sui fori e fissarlo con entrambe le viti.
Pulizia
Pericolo di scossa elettrica!
Prima di pulire il frullatore, disinserire sempre
la spina dalla presa. Per la pulizia, non immergere
mai il blocco motore
3
in acqua e non collocarlo
sotto l’acqua corrente.
Pericolo di infortuni!
L’uso del coltello estremamente affilato
6
comporta il pericolo di infortuni. Dopo l’uso e la
pulizia, ricomporre il tritatutto per evitare di ferirsi
con il coltello. Il coltello dev’essere reso inaccessibile ai bambini.
IB_KH498_E3339_IT_LB5 05.03.2008 15:17 Uhr Seite 10
Page 13

- 11 -
Attenzione!
Non lavare i pezzi del frullatore a immersione in
lavastoviglie, poiché ne verrebbero danneggiati.
➩ Disinserire la spina.
➩ Pulire il blocco motore
3
, il frullatore a
immersione
4
, il coperchio 5e il supporto
per la frusta
8
con una spugna ben strizzata.
Assicurarsi che non penetri acqua nelle
aperture del frullatore a immersione
4.
➩ Ripulire i restanti accessori sotto acqua
corrente e asciugarli con un panno asciutto.
Smaltimento
Non gettare per alcun motivo l’apparecchio insieme ai normali rifiuti
domestici. Questo prodotto sottostà
alla direttiva europea 2002/96/EC.
Smaltire l’apparecchio presso un’azienda autorizzata o presso l’ente comunale di smaltimento.
Rispettare le norme attualmente in vigore. In caso
di dubbi, contattare l’azienda di smaltimento
competente.
Smaltire tutti i materiali d’imballo in
conformità alle norme per il rispetto
dell’ambiente.
Garanzia & assistenza
Questo apparecchio è garantito per tre anni a partire dalla data di acquisto. L’apparecchio è stato
prodotto con cura e debitamente collaudato prima
della consegna. Conservare lo scontrino come prova d’acquisto. Nei casi contemplati dalla garanzia,
mettersi in comunicazione telefonicamente con il
centro di assistenza più vicino. Solo in questo
modo è possibile garantire una spedizione
gratuita della merce.
La prestazione della garanzia vale solo per difetti
del materiale o di fabbricazione. Il prodotto è
destinato esclusivamente all’uso domestico e non a
quello commerciale.
La garanzia decade in caso di impiego improprio o
manomissione, uso della forza e interventi non eseguiti dalla nostra filiale di assistenza autorizzata.
Kompernass Service Italia
Corso Lino Zanussi 11
33080 Porcia (PN)
Tel.: 0434 550833
Fax: 0434 550833
e-mail: support.it@kompernass.com
Importatore
KOMPERNASS GMBH
BURGSTRASSE 21
D-44867 BOCHUM
www.kompernass.com
IB_KH498_E3339_IT_LB5 05.03.2008 15:17 Uhr Seite 11
Page 14

- 12 -
IB_KH498_E3339_IT_LB5 05.03.2008 15:17 Uhr Seite 12
Page 15

- 13 -
Read the operating instructions carefully before using the appliance for the first time and preserve this
booklet for later reference. Pass the manual on to whomsoever might acquire the scale at a later date.
CONTENT PAGE
Technical data 14
Description of appliance/attachments 14
Safety instructions 14
Proper Use 15
Utilisation 15
Assembling 15
To assemble the hand blender 15
Assembling the wire whisk 15
Assembling the liquidiser 16
Operation 16
Wall mounting 16
Cleaning 16
Disposal 17
Warranty & Service 17
Importer 17
IB_KH498_E3339_GB_LB4-5 05.03.2008 15:06 Uhr Seite 13
Page 16

- 14 -
HAND BLENDER KH 498
Technical data
Mains voltage: 220–240 V ~50/60 Hz
Rated output: 300W
Protection class: II
CO Time: 1 Minute
CO Time
The CO Time (Continuous Operation Time) details
how long an appliance can be operated without
the motor overheating and becoming damaged.
After the appliance has run for this period it must be
switched off until the motor has cooled itself down.
Capacity
Measuring cup: 500 ml
Max. capacity: 300 ml
Description of appliance/
attachments
1
Switch (Standard Speed)
2
Turbo-Switch (High Speed)
3
Motor unit
4
Hand blender
5
Bowl lid
6
Knife
7
Bowl
8
Whisk holder
9
Whisk
0
Measuring cup lid
q
Measuring cup (Capacity – max. 500 ml)
w
Wall bracket incl. screws & plugs
Safety instructions
Danger of electric shock!
• Only connect the hand blender to correctly
installed wall sockets having a mains current
of 220–240 V at 50/60 Hz.
• Unplug the hand blender from the socket if
you notice any faulty operation and when
you decide to clean it.
Under no circumstances may the motor unit
be immersed in liquids, or liquids be permitted to permeate into the motor unit housing.
• Do not expose the appliance to humidity and
do not use it outdoors.
• Should liquids nonetheless gain entry into the
appliance housing, immediately unplug the
appliance from the mains and arrange for it
to be repaired by qualified specialists.
• Never touch the hand blender, power cable
or plug with wet hands.
• To unplug the appliance, always pull the plug
from the socket, do not pull the cord itself.
• Do not crease or crimp the power cable and
place it in such a way as to prevent anyone
from stepping on or tripping over it.
• Arrange for defective power plugs and/or
cables to be replaced as soon as possible
by a qualified technician or by our Customer
Service Department to avoid the risk of injury.
• You may not open the motor unit housing
of the hand blender. In such an event, safety
is not guaranteed and the warranty shall
become void.
IB_KH498_E3339_GB_LB4-5 05.03.2008 15:06 Uhr Seite 14
Page 17

- 15 -
• Do not allow individuals (including children)
to use the appliance whose physical, sensorial
or mental abilities or lack of experience and
knowledge hinder their safe usage of it if
they have not previously been supervised or
instructed in its correct usage.
• Tell children about the appliance and its potential dangers so that they do not play with it.
Proper Use
The hand blender is intended exclusively for the processing of foodstuffs in small quantities. It is intended
exclusively for private domestic use only. The hand
blender is not intended for commercial use.
Utilisation
Note:
With the measuring cup qyou can measure
amounts of fluids up to 500 ml. For food
processing, fill it to a maximum of 300 ml,
otherwise fluids could overflow from the
measuring cup
q
.
• With the hand blender
4
, you can prepare
dips, sauces, soups or baby food.
Note:
Do not use the hand blender for the
preparation of solid foods. This would cause
irreparable to damage the appliance!
• With the whisk 9, you can whip cream,
beat egg whites and mix pastry, desserts
or mayonnaise.
• With the liquidiser, comprising of the knife
6
and bowl 7, you can liquidise solid foods.
Note:
Do not use the liquidiser for processing liquids.
This would cause irreparable to damage the
appliance!
Assembling
Injury hazard:
Only insert the plug into the power socket after
you have assembled the appliance for use.
To assemble the hand blender
➩ Place the hand blender 4on the motor unit 3,
ensuring that it clicks in audibly.
Note:
The arrows on the motor unit and the accessory
must stand one above the other .
Assembling the wire whisk
➩ Insert the whisk 9 into the whisk holder 8.
➩ Place the assembled whisk on the motor unit
3,
ensuring that it clicks in audibly.
Note:
The arrows on the motor unit and the accessory
must stand one above the other .
IB_KH498_E3339_GB_LB4-5 05.03.2008 15:06 Uhr Seite 15
Page 18

- 16 -
Assembling the liquidiser
Warning:
The blade is extremely sharp.
Handle it with great care. Risk of injury!
➩ Place the blade 6carefully on its retainer
in the bowl
7
.
➩ Fill the bowl with the foodstuffs you wish to
liquidise.
➩ Place the lid
5
over the vessel and turn it until
tight. Ensure that the lid lugs are guided into
the grooves of the vessel on the edge.
➩ Place the motor unit
3
on the lid 5, ensuring
that it clicks in audibly.
Note:
The arrows on the motor unit and the accessory
must stand one above the other .
Operation
Warning:
Foodstuffs should not be too hot.
Squirted-out contents may cause scalding.
Fire Danger:
Never exceed the maximum operating duration of
1 minute for soft foodstuffs, respectively,15 seconds
for solid foodstuffs. Allow the appliance to cool
down for 2 minutes before switching it on again.
When you have assembled the hand blender for
your particular purpose, place ...
➩ the plug in the mains socket.
➩ Hold down the switch
1
to process the
foodstuffs at the standard speed.
➩ Hold down the turbo-switch
2
to process
the foodstuffs at the higher speed.
➩ When you have completed processing
the foodstuffs, simply release the switch.
Wall mounting
Included are 2 plugs and 2 screws to enable the
wall bracket
w
to be assembled. We recommend
mounting the appliance close to a power point
➩ Mark the position of drill holes using the
appliance holder
w
.
➩ Bore the holes with a 6 mm drill.
➩ Insert the dowels into the drill holes.
➩ Position the openings of the wall bracket
over the bored holes, then fix it using
both screws.
Cleaning
Danger of electrical shock!
Before you clean the hand blender, unplug the
appliance from the power socket. Under no circumstances may the motor unit
3
be cleaned by immer-
sing it in water or holding it under running water.
Danger of injuries!
To prevent injuries, exercise caution when handling
the extremely sharp blade
6
. Reassemble the liquidiser after use and cleaning to prevent injuries from
exposed knife blades. Keep the blade out of the
reach of children.
Attention!
The attachments of the hand blender may not
be cleaned in a dishwashing machine, this would
damage them.
➩ Unplug the power cord from the wall socket.
➩ Clean the motor unit
3
, the handblender 4,
the lid
5
and the whisk holder 8with a well
squeezed out sponge.
➩ Ensure that no water can enter the openings
of
4
the hand mixer.
➩ Clean the rest of the attachment components
under running water and dry them off well
with a dish-towel.
IB_KH498_E3339_GB_LB4-5 05.03.2008 15:06 Uhr Seite 16
Page 19

- 17 -
Disposal
Do not dispose of the appliance in
your normal domestic waste. This
product is subject to the European
guideline 2002/96/EC.
Dispose of the appliance through an approved
disposal centre or at your community waste facility.
Observe the currently applicable regulations.
In case of doubt, please contact your waste disposal
centre.
Dispose of all packaging materials in an
environmentally friendly manner.
Warranty & Service
The warranty for this appliance is for 3 years from
the date of purchase. The appliance has been
manufactured with care and meticulously examined
before delivery. Please retain your receipt as proof
of purchase. In the case of a warranty claim, please
make contact by telephone with our service department. Only in this way can a post-free despatch for
your goods be assured.
The warranty covers only claims for material and
manufacturing defects, not for wearing parts or for
damage to fragile components. This product is for
private use only and is not intended for commercial
use.
The warranty is void in the case of abusive and
improper handling, use of force and internal
tampering not carried out by our authorized
service branch. Your statutory rights are not
restricted in any way by this warranty.
DES Ltd
Units 14–15
Bilston Industrial Estate
Oxford Street
Bilston
WV14 7EG
Tel.: 0870 787 6177
Fax: 0870 787 6168
e-mail: support.uk@kompernass.com
Importer
KOMPERNASS GMBH
BURGSTRASSE 21
D-44867 BOCHUM
www.kompernass.com
IB_KH498_E3339_GB_LB4-5 05.03.2008 15:06 Uhr Seite 17
Page 20

- 18 -
IB_KH498_E3339_GB_LB4-5 05.03.2008 15:06 Uhr Seite 18
Page 21

- 19 -
Lesen Sie die Bedienungsanleitung vor der ersten Verwendung aufmerksam durch und heben Sie diese für
den späteren Gebrauch auf. Händigen Sie bei Weitergabe des Gerätes an Dritte auch die Anleitung aus.
INHALTSVERZEICHNIS SEITE
Technische Daten 20
Gerätebeschreibung/Zubehör 20
Sicherheitshinweise 20
Bestimmungsgemäßer Gebrauch 21
Verwendung 21
Zusammenbauen 21
Den Stabmixer zusammenbauen 21
Den Schneebesen zusammenbauen 21
Den Zerkleinerer zusammenbauen 22
Bedienen 22
Wandmontage 22
Reinigen 22
Entsorgen 23
Garantie & Service 23
Importeur 23
IB_KH498_E3339_DE_LB2 05.03.2008 14:59 Uhr Seite 19
Page 22

- 20 -
STABMIXER KH498
Technische Daten
Netzspannung: 220–240 V ~50/60 Hz
Nennleistung: 300 W
Schutzklasse: II
KB-Zeit: 1 Minute
KB-Zeit
Die KB-Zeit (Kurzzeitbetrieb) gibt an, wie lange man
ein Gerät betreiben kann, ohne dass der Motor überhitzt und Schaden nimmt. Nach der angegebenen
KB-Zeit muss das Gerät solange ausgeschaltet werden, bis sich der Motor abgekühlt hat.
Fassungsvermögen
Messbecher: 500 ml
Max. Einfüllmenge: 300 ml
Gerätebeschreibung/Zubehör
1
Schalter (normale Geschwindigkeit)
2
Turbo-Schalter (schnelle Geschwindigkeit)
3
Motorblock
4
Stabmixer
5
Schüssel-Deckel
6
Messer
7
Schüssel
8
Schneebesen-Halter
9
Schneebesen
0
Messbecher-Deckel
q
Messbecher (Füllmenge max. 500 ml)
w
Wandhalter inkl. Schrauben & Dübel
Sicherheitshinweise
Stromschlaggefahr!
• Schließen Sie den Stabmixer nur an eine
vorschriftsmäßig installierte Netzsteckdose
mit einer Netzspannung von 220–240 V,
mit 50/60 Hz an.
• Ziehen Sie bei Betriebsstörungen und bevor
Sie den Stabmixer reinigen den Netzstecker
aus der Netzsteckdose.
Sie dürfen den Motorblock des Stabmixers
keinesfalls in Flüssigkeit tauchen und keine
Flüssigkeiten in das Gehäuse des Motorblocks gelangen lassen.
• Sie dürfen das Gerät keiner Feuchtigkeit
aussetzen und nicht im Freien benutzen.
• Falls doch einmal Flüssigkeit in das Geräte-
gehäuse gelangt, ziehen Sie sofort den Netzstecker des Geräts aus der Netzsteckdose und
lassen Sie es von qualifiziertem Fachpersonal
reparieren.
• Fassen Sie Stabmixer, Netzkabel und -stecker
nie mit nassen Händen an.
• Ziehen Sie das Netzkabel stets am Netzstecker
aus der Netzsteckdose, ziehen Sie nicht am
Kabel selbst.
• Knicken oder quetschen Sie das Netzkabel
nicht und verlegen Sie das Netzkabel so,
dass niemand darauf treten oder darüber
stolpern kann.
• Lassen Sie beschädigte Netzstecker oder Netz-
kabel sofort von autorisiertem Fachpersonal
oder dem Kundenservice austauschen, um
Gefährdungen zu vermeiden.
• Sie dürfen das Motorblock-Gehäuse des
Stabmixers nicht öffnen. In diesem Falle ist
die Sicherheit nicht gegeben und die Gewährleistung erlischt.
IB_KH498_E3339_DE_LB2 05.03.2008 14:59 Uhr Seite 20
Page 23

- 21 -
• Dieses Gerät ist nicht dafür bestimmt, durch
Personen (einschließlich Kinder) mit eingeschränkten, physischen, sensorischen oder
geistigen Fähigkeiten oder mangels Erfahrung
und/oder mangels Wissen benutzt zu werden,
es sei denn, sie werden durch eine für ihre
Sicherheit zuständige Person beaufsichtigt oder
erhielten von ihr Anweisungen, wie das Gerät
zu benutzen ist.
• Kinder sollten beaufsichtigt werden, um sicherzustellen, dass sie nicht mit dem Gerät spielen.
Bestimmungsgemäßer Gebrauch
Der Stabmixer dient ausschließlich der Verarbeitung
von Lebensmitteln in kleinen Mengen. Er ist ausschließlich für die Benutzung im privaten Haushalt bestimmt.
Der Stabmixer ist nicht für den gewerblichen Gebrauch vorgesehen.
Verwendung
Hinweis:
Mit dem Messbecher qkönnen Sie Flüssigkeiten bis zu 500 ml abmessen. Füllen Sie
zum Bearbeiten maximal 300 ml ein, sonst
kann Flüssigkeit aus dem Messbecher
q
herauslaufen.
• Mit dem Stabmixer
4
können Sie Dips,
Saucen, Suppen oder Baby-Nahrung
zubereiten.
Hinweis:
Benutzen Sie den Stabmixer nicht zur
Bearbeitung fester Lebensmittel. Das führt zu
irreparablen Schäden am Gerät!
• Mit dem Schneebesen 9können Sie Sahne
oder Eiweiß schlagen und Teig, Nachtisch
oder Mayonnaise anrühren.
• Mit dem Zerkleinerer, bestehend aus Messer
6
und Schüssel 7, können Sie auch härtere
Lebensmittel zerkleinern.
Hinweis:
Benutzen Sie den Zerkleinerer nicht zur
Bearbeitung von Flüssigkeiten. Das führt zu
irreparablen Schäden am Gerät!
Zusammenbauen
Verletzungsgefahr:
Stecken Sie den Netzstecker erst nach dem
Zusammenbau in die Steckdose.
Den Stabmixer zusammenbauen
➩ Setzen Sie den Stabmixer 4auf den
Motorblock
3
, bis dieser hörbar einrastet.
Hinweis:
Die Pfeile auf dem Motorblock und dem
Zubehör müssen übereinander stehen .
Den Schneebesen zusammenbauen
➩ Setzen Sie den Schneebesen 9in den
Schneebesen-Halter
8
.
➩ Setzen Sie den so zusammengebauten
Schneebesen auf den Motorblock
3
, bis
dieser hörbar einrastet.
Hinweis:
Die Pfeile auf dem Motorblock und dem
Zubehör müssen übereinander stehen .
IB_KH498_E3339_DE_LB2 05.03.2008 14:59 Uhr Seite 21
Page 24

- 22 -
Den Zerkleinerer zusammenbauen
Warnung:
Das Messer ist extrem scharf! Gehen Sie stets
vorsichtig damit um. Verletzungsgefahr!
➩ Setzen Sie vorsichtig das Messer 6auf die
Halterung in der Schüssel
7
.
➩ Füllen Sie die zu zerkleinernden Lebensmittel
in die Schüssel.
➩ Setzen Sie den Deckel
5
auf die Schüssel
und drehen Sie ihn fest. Dabei müssen die
Nasen des Deckels in die Aussparungen
am Rand der Schüssel geführt werden.
➩ Setzen Sie den Motorblock
3
auf den Deckel
5
, bis dieser hörbar einrastet.
Hinweis:
Die Pfeile auf dem Motorblock und dem
Zubehör müssen übereinander stehen .
Bedienen
Warnung:
Die Lebensmittel dürfen nicht zu heiß sein! Herausspritzender Inhalt könnte zu Verbrühungen führen.
Brandgefahr:
Überschreiten Sie niemals die maximale Betriebsdauer von1 Minute bei weichen Lebensmitteln bzw.
15 Sekunden bei harten Lebensmitteln. Lassen Sie
das Gerät 2 Minuten abkühlen, bevor Sie es erneut
einschalten.
Wenn Sie den Stabmixer wie gewünscht
zusammengebaut haben, stecken ...
➩ Sie den Netzstecker in die Netzsteckdose.
➩ Halten Sie den Schalter
1
gedrückt, um die
Lebensmittel mit normaler Geschwindigkeit zu
verarbeiten.
➩ Halten Sie den Turbo-Schalter 2gedrückt,
um die Lebensmittel mit hoher Geschwindigkeit
zu verarbeiten.
➩ Wenn Sie mit der Verarbeitung der Lebens-
mittel fertig sind, lassen Sie einfach den
gedrückten Schalter los.
Wandmontage
Im Lieferumfang enthalten sind 2 Dübel und
2 Schrauben, um den Wandhalter
w
zu montieren.
Es empfiehlt sich das Gerät in der Nähe einer
Steckdose anzubringen.
➩ Markieren Sie sich die Position der Bohrlöcher
anhand des Wandhalters
w
.
➩ Bohren Sie die Löcher mit einem 6 mm-Bohrer.
➩ Setzen Sie die Dübel in die gebohrten Löcher
ein.
➩ Positionieren Sie die beiden Öffnungen des
Wandhalters über die Bohrungen und fixieren
Sie diesen mit den beiden Schrauben.
Reinigen
Gefahr eines elektrischen Schlags!
Bevor Sie den Stabmixer reinigen, ziehen Sie immer
den Netzstecker aus der Netzsteckdose. Sie dürfen
den Motorblock
3
bei der Reinigung keinesfalls in
Wasser tauchen oder unter fließendes Wasser halten.
Verletzungsgefahr!
Beim Umgang mit dem extrem scharfen Messer
6
besteht Verletzungsgefahr. Setzen Sie den Zerkleinerer nach Benutzung und Reinigung wieder zusammen, damit Sie sich nicht am freiliegenden Messer
verletzen. Machen Sie das Messer für Kinder unzugänglich.
IB_KH498_E3339_DE_LB2 05.03.2008 14:59 Uhr Seite 22
Page 25

- 23 -
Achtung!
Sie dürfen die Teile des Stabmixers nicht in der
Geschirrspülmaschine reinigen, diese würden
dadurch beschädigt.
➩ Ziehen Sie den Netzstecker.
➩ Reinigen Sie Motorblock
3
, den Stabmixer 4,
den Deckel
5
und den Schneebesen-Halter
8
mit einem gut ausgedrückten Schwamm.
Stellen Sie sicher, dass kein Wasser in die
Öffnungen des Stabmixers
4
gelangt.
➩ Reinigen Sie die restlichen Zubehörteile unter
fließendem Wasser und trocknen Sie diese mit
einem Trockentuch gut ab.
Entsorgen
Werfen Sie das Gerät keinesfalls in
den normalen Hausmüll. Dieses
Produkt unterliegt der europäischen
Richtlinie 2002/96/EC.
Entsorgen Sie das Gerät über einen zugelassenen
Entsorgungsbetrieb oder über Ihre kommunale
Entsorgungseinrichtung.
Beachten Sie die aktuell geltenden Vorschriften.
Setzen Sie sich im Zweifelsfall mit Ihrer Entsorgungseinrichtung in Verbindung.
Führen Sie alle Verpackungsmaterialien
einer umweltgerechten Entsorgung zu.
Garantie & Service
Sie erhalten auf dieses Gerät 3 Jahre Garantie ab
Kaufdatum. Das Gerät wurde sorgfältig produziert
und vor Anlieferung gewissenhaft geprüft. Bitte
bewahren Sie den Kassenbon als Nachweis für
den Kauf auf. Bitte setzen Sie sich im Garantiefall
mit Ihrer Servicestelle telefonisch in Verbindung.
Nur so kann eine kostenlose Einsendung Ihrer
Ware gewährleistet werden.
Die Garantieleistung gilt nur für Material- oder
Fabrikationsfehler, nicht aber für Verschleißteile
oder für Beschädigungen an zerbrechlichen Teilen,
z. B. Schalter oder Akkus. Das Produkt ist lediglich
für den privaten und nicht für den gewerblichen
Gebrauch bestimmt.
Bei missbräuchlicher und unsachgemäßer Behandlung, Gewaltanwendung und bei Eingriffen, die
nicht von unserer autorisierten Service-Niederlassung
vorgenommen wurden, erlischt die Garantie. Ihre
gesetzlichen Rechte werden durch diese Garantie
nicht eingeschränkt.
Schraven
Service- und Dienstleistungs GmbH
Gewerbering 14
D-47623 Kevelaer
Tel.: +49 (0) 180 5 008107
(14 Ct/Min. aus dem dt. Festnetz
ggf. abweichende Preise aus dem Mobilfunk)
Fax: +49 (0) 2832 3532
e-mail: support.de@kompernass.com
Importeur
KOMPERNASS GMBH
BURGSTRASSE 21
D-44867 BOCHUM
www.kompernass.com
IB_KH498_E3339_DE_LB2 05.03.2008 14:59 Uhr Seite 23
Page 26

- 24 -
IB_KH498_E3339_DE_LB2 05.03.2008 14:59 Uhr Seite 24
 Loading...