

Page 1
The #1 Source for Donut and Bakery Equipment www.belshaw.com
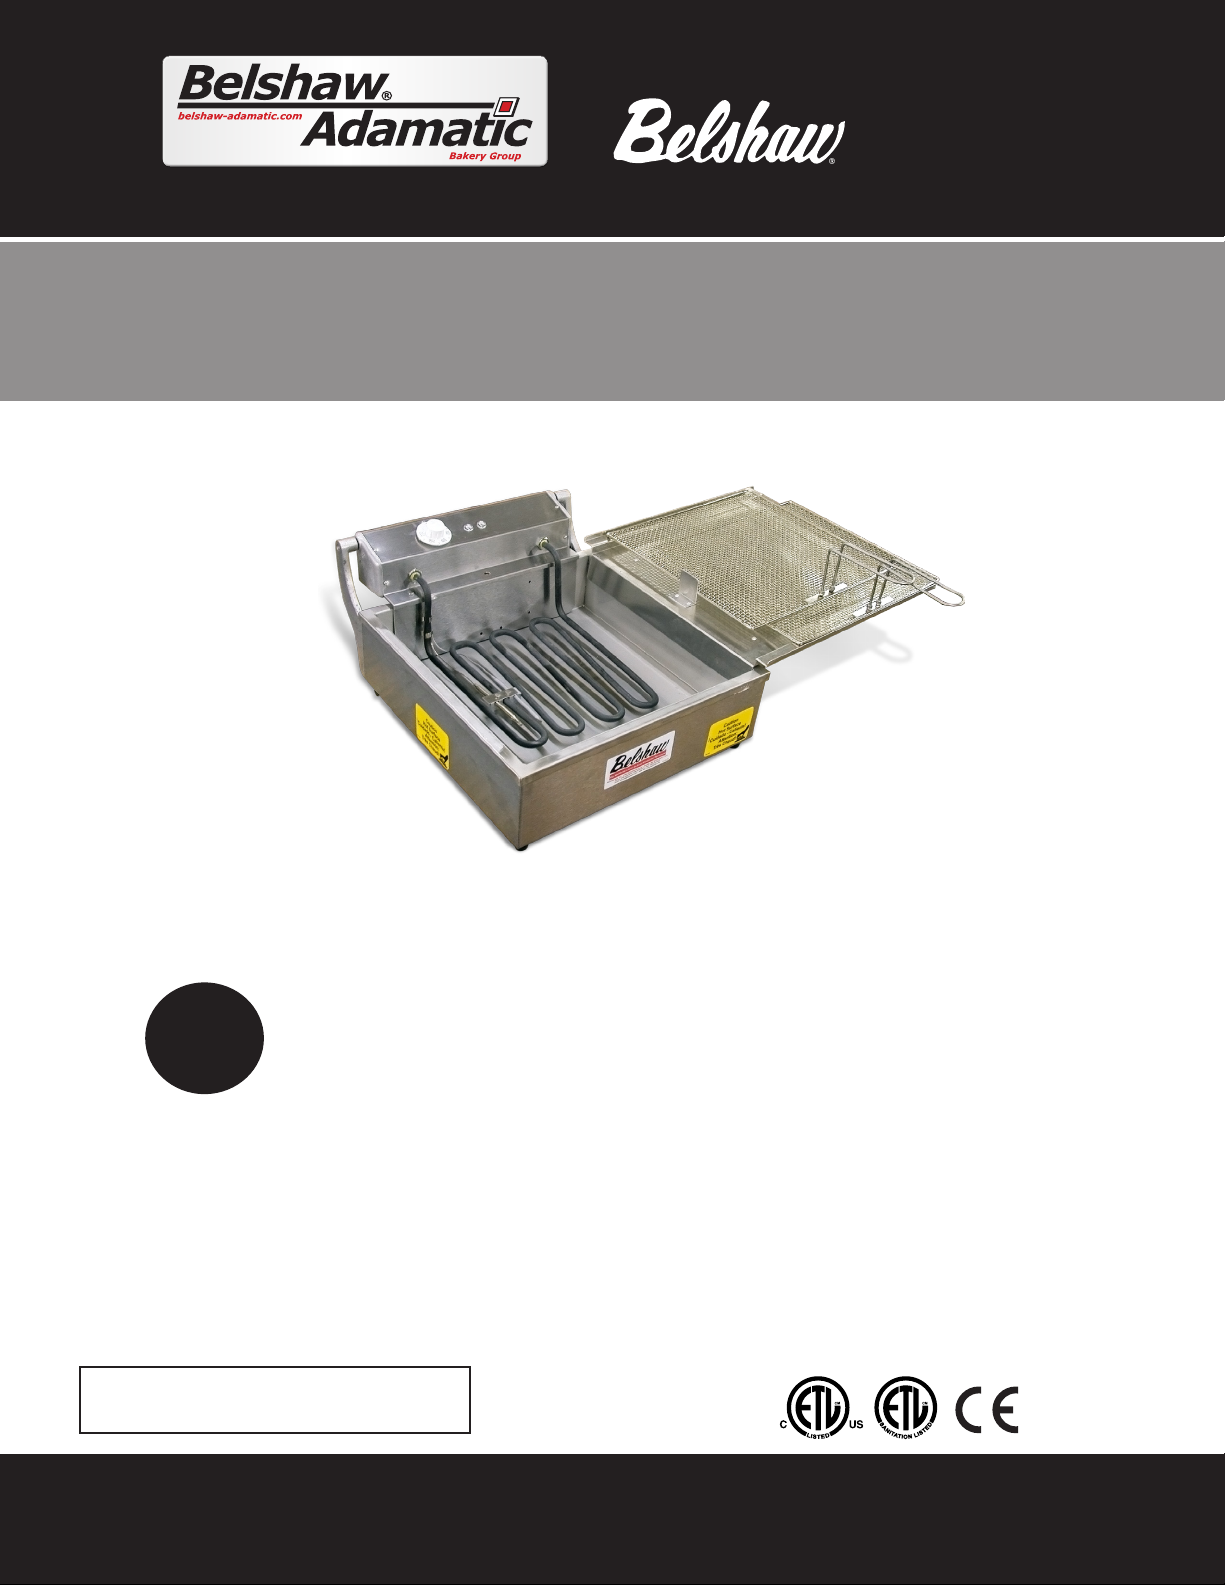
OPERATOR’S MANUAL
TECHNICAL SUPPLEMENT
PARTS AND ELECTRICAL DIAGRAMS
Donut Fryer
Part of
Cut-N-Fry
system
(optional)
Mark your fryer’s item number and serial number below. They are printed on the data tag attached to the fryer.
8848011 208V/60Hz/1-Phase, Domestic
8848012 236V/60Hz/1-Phase, Domestic
Insert Serial Number here:
(on data tag attached to equipment)
SUPPORT
Model: 616B
8848014 236V/50-60Hz/1-Phase, International CE
8848015 236V/50-60Hz/1-Phase, International
Manual should only be used with
the Item Number(s) shown above.
USA/Canada 1-800-578-2547
International (+1) 253-886-5340
Email service@belshaw.com
Web www.belshaw.com
Page 2

Page 3

Counter Top Fryer
616B
Operator’s Manual
Belshaw Adamatic Bakery Group
814 44th Street NW, Suite 103
Auburn, WA 98001 USA
Phone: 800-578-25474 • (+1) 253-886-5340
service@belshaw.com • www.belshaw.com
Belshaw Adamatic Bakery Group • service@belshaw.com • 800-578-2547 • (+1) 253-886-5340
616B TS MN-1138EN 1
Page 4

EQUIPMENT RECORD
Please provide the information below when you correspond with Belshaw about your machine.
Purchased by _____________________________________________________________________
Installed by ______________________________________________________________________
Date of Installation ________________________________________________________________
Model: 616B Countertop Fryer _______________________________________________________
Serial number
IN CASE OF DAMAGE TO EQUIPMENT
In case of damage to the equipment upon delivery, follow these steps immediately.
1. Inform the freight carrier. The phone number will be on the shipping receipt or label.
2. Take photographs of the equipment, both inside and outside the box or crate.
3. Do not throw away any packaging.
4. Report the damage to the distributor (or other party) from whom you bought the equipment.
5. Email your photos to the distributor (or other party) AND to Belshaw Customer Service at
service@belshaw.com. Include a Belshaw Order Number in your communications. Your Order
Number will begin with “CO…, followed by 6 digits) and should be marked on the box or crate.
IN CASE OF MISSING ITEMS
1. If possible, note the missing items on the delivery receipt of the freight carrier.
2. Take photographs of the entire shipment.
3. Follow steps 2 – 5 above.
021017
MN-1137EN
Belshaw Adamatic Bakery Group
814 44th Street Northwest, Suite 103
Auburn, WA 98001 USA
Phone: (206) 322-5474 • Fax: (206) 322-5425
E-mail: service@belshaw.com • http://www.belshaw-adamatic.com
Belshaw Adamatic Bakery Group • service@belshaw.com • 800-578-2547 • (+1) 253-886-5340
2 MN-1137EN 616B OM
Page 5

Contents
Sections
1 Operation 5
Frying Tips 6
2 Cleaning 7
Cleaning the Exterior Surfaces 7
Cleaning the Frying Screen 7
Cleaning the Kettle 7
3 Donut-Making Helps 9
Tips on Making Quality Cake Donuts 9
Calculating Correct Water Temperature 10
Ratios of Plunger Sizes to Donut Weights 10
Temperature Conversion 10
Belshaw Adamatic Bakery Group • service@belshaw.com • 800-578-2547 • (+1) 253-886-5340
616B OM MN-1138EN 3
Page 6

Preface
The 616B and 616BT donut fryers have been
designed and built using the finest materials and
components available. It is the result of years of
research and development. Designed into this
unit are many features which will insure more
quality in your products and reduce your
operating cost. Attention to the instructions
regarding installation, operation, and
maintenance should result in years of trouble-free
service.
The operator must work safely at all times and
read this manual and follow its instructions and
warnings. A thorough understanding of how to
install, maintain, and safely operate the fryer will
prevent production delays and injuries.
Heed the following warnings and all other
warnings that appear in this manual:
• To avoid damaging the machine, never
use force to assemble, disassemble,
operate, clean, or maintain it.
• Hot shortening can cause serious burns.
Make sure that the system and the
shortening are cool before attempting
any cleaning, adjustment, disassembly,
or repair.
• To avoid electrocution or other injury,
unplug the machine before attempting
any cleaning, adjustment, disassembly,
or repair.
• Be careful never to get shortening, water,
or other materials on the floor. If
anything does get spilled on the floor,
mop it up immediately. Materials on the
floor can cause people to slip or fall,
resulting in serious injury or loss of life.
• To prevent unintentional startup and
possible fire, unplug the machine if there
is a local power outage. When the power
is restored, it is safe to plug the machine
in again.
• Never let water and hot shortening come
in contact with each other. Moisture
causes hot shortening to spatter, which
may cause serious burns.
• Do not overfill the kettle with
shortening. If shortening overflows the
kettle, it could cause serious burns or
could cause someone to slip on the floor
and be seriously injured.
Belshaw Adamatic Bakery Group • service@belshaw.com • 800-578-2547 • (+1) 253-886-5340
4 MN-1137EN 616B OM
• To avoid electrocution, make sure that
all electrical cords are not frayed or
cracked and that they do not pass
through any water or shortening.
• Make sure that all electrical cords are
routed so that no one will trip over them.
Page 7

1 Operation
Read each step completely before doing what it
tells you to do.
1. Put enough shortening in the kettle to
completely cover the heating elements,
thermocouple, and high-temperature limit
control probe.
Put shortening in the kettle using one of
these methods:
WARNING
Hot shortening causes severe burns.
• Melt shortening in a pan on the stove and
pour it into the kettle.
• Put solid shortening into the kettle,
packing it tightly around the heating
elements, thermocouple, and hightemperature limit control probe.
• Melt shortening in a pan on the stove and
pour it into the kettle.
• Very carefully put solid shortening into
the kettle.
WARNING
To avoid serious burns, be very careful not
to splatter hot shortening when you add
shortening to the kettle.
Because shortening expands as it increases
in temperature, put shortening in the kettle
gradually. Let the shortening in the kettle
heat up before you add more.
5. After all of the shortening has melted, set the
thermostat to the desired frying temperature.
The “Heating” pilot light will go out if the
high temperature limit control breaks the
circuit.
WARNING
Air spaces can cause the shortening to
overheat and catch on fire.
2. Turn on the unit by turning the thermostat
clockwise 1/16 turn. When the unit is turned
on, the power light located next to the
thermostat knob will be lit.
3. Set the thermostat to 250°F/121°C. The
“Heating” pilot light above the elements will
light up, indicating that the shortening has
not yet reached the selected temperature.
4. Continue adding shortening to the kettle
until it reaches the “Oil Level” marks on the
kettle. Use one of the following methods.
Belshaw Adamatic Bakery Group • service@belshaw.com • 800-578-2547 • (+1) 253-886-5340
616B OM MN-1137EN 5
Note: If the high temperature limit control
does break the circuit, push the red reset
button on the back of the heater head.
6. Wait for the shortening to reach the desired
temperature.
WARNING
To avoid serious burns, when the fryer is
operating, do not touch any part of the
fryer that is in contact with hot shortening.
7. If you are frying cake or French donuts,
move the cutter into place over the fryer.
Refer to the cutter manual (Type N cutter)
Page 8

for complete installation and operation
instructions.
To fry yeast-raised donuts, place donuts on
the fry screen and slowly lower the screen
into the fryer. With the donut stick, turn the
donuts over to fry the top side. Remove the
fry screen and donuts when the donuts are
completely fried by lifting up the fry screen
with the donuts on top of it. Immediately
place on or over a tray to catch dripping
shortening.
WARNING
Hot shortening will drip off the fry screens,
causing a slip hazard. To avoid serious
injury or loss of life, be very careful and
immediately clean up any drips.
Frying Tips
1. Use a high quality hydrogenated shortening.
2. Store your supply of cooking shortening at
room temperature.
3. To prolong the life of the shortening, do not
keep shortening at high temperature if the
fryer is not being used.
4. Drain and strain shortening periodically.
Several layers of cheesecloth will do a good
job of filtering.
5. Keep the fryer and screens clean.
6. Maintain shortening at the proper level in the
fryer. Add fresh shortening to keep the level
at the “Oil Level” marks stamped on the
kettle sides.
7. Add at least 15% fresh shortening to your
kettle daily.
WARNING
To avoid serious burns, be careful of hot
shortening dripping from the fry screens.
Do not touch hot shortening and
immediately clean up spills and drips.
8. Continue supplying shortening to the kettle
as required. Keep the kettle filled up to the
“Oil Level” marks on the side.
9. When you are done frying donuts, move the
thermostat knob counter-clockwise as far as
it will go.
8. Discard shortening as soon as it tends to
bubble or foam during frying.
9. At least once a day, cool a small sample of
shortening from the fryer and taste it to see if
it has picked up a foreign or rancid taste.
Belshaw Adamatic Bakery Group • service@belshaw.com • 800-578-2547 • (+1) 253-886-5340
6 MN-1137EN 616B OM
Page 9

2 Cleaning
For your safety, observe the following warnings
throughout the entire cleaning process.
WARNING
Thoroughly clean and dry the floor if
shortening, water, or other materials are
spilled. Materials spilled on the floor can
cause serious injury or loss of life.
WARNING
To avoid electrocuting yourself or
damaging the machine, never allow water,
steam, shortening, cleaning solution, or any
other liquid to enter the electrical box or
the heater head.
WARNING
To avoid being burned in an explosion,
never use any flammable materials for
cleaning.
Cleaning the Frying Screen
1. In a sink or a dishwasher, wash the frying
screen using warm water and mild detergent.
Do not use an abrasive cleaner or scraper.
2. Rinse the frying screen in clear water.
3. Dry the frying screen thoroughly, using a
soft cloth, before you use it again.
WARNING
Dry the frying screen thoroughly.
Moisture causes hot shortening to spatter,
which may cause serious injury.
4. Check the frying screen to make sure no
metal is flaking off of it. If the screen is
flaking, replace it immediately, so you do
not get metal particles in your product.
Cleaning the Kettle
Removing the Shortening
WARNING
Cleaning the Exterior
Surfaces
1. Clean the polished and painted surfaces of
the fryer with a soft, damp cloth. Use a nonabrasive cleaner to remove any
discoloration.
2. Polish these surfaces with a soft, dry cloth.
Belshaw Adamatic Bakery Group • service@belshaw.com • 800-578-2547 • (+1) 253-886-5340
616B OM MN-1137EN 7
To avoid being burned or electrocuted,
disconnect the fryer from the power source
before cleaning it.
1. Disconnect the machine from the power
source.
2. Let the shortening cool to 100°F/38°C.
3. Carefully dip out the shortening into a
suitable container. Do not disturb the
accumulated sediment in the bottom of the
kettle.
Page 10

WARNING
Do not use a plastic container. If the
shortening is not cool enough, the container
will melt, possibly causing you to be
burned, and causing shortening spill.
WARNING
Do not allow the shortening to overflow the
containers. Shortening will get on the
floor, and if the shortening is not cool
enough, you may be burned.
4. After the kettle has been drained, brush any
accumulated carbon from the heater coils.
Accumulated carbon causes corrosion and
poor heat recovery.
5. Remove the drain tray.
WARNING
Thoroughly clean and dry the floor if
shortening is spilled. Shortening on the
floor can cause serious injury or loss of life.
6. Remove the heater head and element.
7. Lift out the kettle and pour out the remaining
shortening and accumulated sediment.
8. Flush out the kettle with hot water to remove
all sediment.
Washing
1. Wash the kettle carefully with detergent to
remove all stains and burned shortening.
2. Scrub the inside of the kettle. Do not use
any abrasive cleaners or scrapers.
WARNING
To avoid being burned, be very careful as
you work with hot cleaning solution. Never
put your hands in the solution. Wear
gloves and long sleeves in case any solution
splashes.
3. Dry the kettle thoroughly with a soft cloth
before replacing in the fryer cabinet.
WARNING
Dry the kettle thoroughly. Moisture causes
hot shortening to spatter or erupt.
Shortening may spatter or overflow the
sides of the fryer may result in fire, serious
injury, or death.
4. Make sure the kettle is properly seated in the
case.
5. Install the heater head.
Belshaw Adamatic Bakery Group • service@belshaw.com • 800-578-2547 • (+1) 253-886-5340
8 MN-1137EN 616B OM
Page 11

3 Donut-Making Helps
Tips on Making Quality
Cake Donuts
• Use the correct batter temperature.
In general, the correct batter temperature is
75°-80°F/24°-27°C. Check the mix
manufacturer’s instructions, as the
recommended temperature range may vary.
If the batter is too warm, the donuts will lack
volume and may “ring out” or be misshapen.
If the batter is too cold, the donuts will stay
under the shortening too long, fry too slowly,
and crack open or ball up. They may also
absorb excess shortening and lose volume.
• Use the correct floor time.
A floor time of 10 minutes between mixing
and cutting allows the baking powder to
react with the water. This helps the donuts
attain the proper volume the proper level of
shortening penetration.
If the floor time exceeds 30 minutes, the mix
will gas off, the donuts will lose volume and
shape and will absorb too much shortening.
• Use the correct frying temperature.
The correct shortening temperature for
frying is 370°-380°F/188°-193°C.
If the shortening is too hot, the donuts will
fry too quickly on the outside and will lose
volume. The donuts may also become dense
inside.
If the shortening is too cold, the donuts will
spread too rapidly, will form large rings, will
tend to crack open, will be too light in
appearance, and will absorb too much
shortening.
• Maintain the proper shortening level. We
recommend a distance of 1 1/4” between the
cutter and the shortening.
If the shortening is too deep, the donuts may
not turn over when they reach the turner,
causing them to cook unevenly.
If the shortening is too shallow (too far
below the cutter), the donuts may not drop
flat, may turn over while submerging and
surfacing, and may become irregular,
cracked, or rough-crusted.
• Ensure that the donuts absorb the right
amount of shortening.
Donuts should absorb 1-1/2 to 3 oz/42 to 85
g of shortening per dozen, depending on
their weight. You can achieve proper
absorption by following tips 1-3.
• If the donuts do not absorb enough
shortening, they will not keep well.
If they absorb too much shortening, they will
lose volume and may become misshapen. If
this happens, follow tips 1-3, mix the batter
a little longer than usual, turn the donuts as
soon as they become golden brown, and turn
the donuts only once.
Belshaw Adamatic Bakery Group • service@belshaw.com • 800-578-2547 • (+1) 253-886-5340
616B OM MN-1137EN 9
Page 12

°F °C °F °C
Room temperature
72
22.2 72
22.2
Dry mix temperature
+70
+21.1
+70
+21.1
Total A
142
43.3
142
43.3
Desired batter temperature
75
23.9 80
26.7
x3
x3
x3
x3
Total B
225
71.7
240
80.1
Total B
225
71.7
240
80.1
-Total A
-142
-43.3
-142
-43.3
Desired water temp. for cake donuts
83°F
28.4°C
98
36.8
↓
↓
Figure from above
98
36.8
Temperature increase during mixing (average: 30°F/17°C)
-30
-17
Desired water temperature for yeast-raised donuts
68°F
19.8°C
1”
5-8 oz/142-227 g
1 7/16”
10-17 oz/283-482 g
1 9/16”
14-21 oz/397-595 g
1 13/16”
19-23 oz/539-652 g
°F °C °F °
55
12.8
340
171.1
60
15.6
345
173.9
65
18.3
350
176.7
70
21.2
355
179.4
75
23.9
360
182.2
80
26.7
365
185.0
325
162.8
370
187.8
330
165.6
375
190.6
335
168.3
380
193.3
Calculating Correct Water
Temperature
The following is an example of how to calculate
the correct water temperature to use. You must
Cake Donuts Yeast-Raised Donuts
use your own room temperature, dry mix
temperature, desired batter temperature, and, if
you are making yeast-raised donuts, estimated
temperature increase during mixing.
Ratios of Plunger Sizes to
Donut Weights
The weights given are for donuts without icings
or other toppings. They are provided for
reference only, as weights vary according to the
density of the batter.
Plunger Size Donut Weight per
Dozen
Temperature Conversion
To convert temperatures from Fahrenheit to
Celsius, subtract 32 from °F and divide the result
by 1.8. For example, 212°F-32/1.8 = 100°C.
To convert temperatures from Celsius to
Fahrenheit, multiply °C by 1.8 and add 32 to the
result. For example, (100°C x 1.8) + 32 = 212°F.
C
Belshaw Adamatic Bakery Group • service@belshaw.com • 800-578-2547 • (+1) 253-886-5340
10 MN-1137EN 616B OM
Page 13

Counter Top Fryer
616B
Technical Supplement
Belshaw Adamatic Bakery Group
814 44th Street NW, Suite 103
Auburn, WA 98001 USA
Phone: 800-578-25474 • (+1) 253-886-5340
service@belshaw.com • www.belshaw.com
Belshaw Adamatic Bakery Group • service@belshaw.com • 800-578-2547 • (+1) 253-886-5340
616B TS MN-1138EN 1
Page 14

EQUIPMENT RECORD
Please provide the information below when you correspond with Belshaw about your machine.
Purchased by _____________________________________________________________________
Installed by ______________________________________________________________________
Date of Installation ________________________________________________________________
Model number ____________________________________________________________________
Serial number
IN CASE OF DAMAGE TO EQUIPMENT
In case of damage to the equipment upon delivery, follow these steps immediately.
1. Inform the freight carrier. The phone number will be on the shipping receipt or label.
2. Take photographs of the equipment, both inside and outside the box or crate.
3. Do not throw away any packaging.
4. Report the damage to the distributor (or other party) from whom you bought the equipment.
5. Email your photos to the distributor (or other party) AND to Belshaw Customer Service at
service@belshaw.com. Include a Belshaw Order Number in your communications. Your Order
Number will begin with “CO…, followed by 6 digits) and should be marked on the box or crate.
IN CASE OF MISSING ITEMS
1. If possible, note the missing items on the delivery receipt of the freight carrier.
2. Take photographs of the entire shipment.
3. Follow steps 2 – 5 above.
021017
MN-1138EN
Belshaw Adamatic Bakery Group
814 44th Street Northwest, Suite 103
Auburn, WA 98001 USA
Phone: (206) 322-5474 • Fax: (206) 322-5425
E-mail: service@belshaw.com • http://www.belshaw-adamatic.com
Belshaw Adamatic Bakery Group • service@belshaw.com • 800-578-2547 • (+1) 253-886-5340
2 MN-1138EN 616B TS
Page 15

Contents
Sections
1 Installation 5
Unpacking the Fryer 5
Initial Cleaning 5
Installing the Fryer 5
Moving the Fryer 6
2 Cleaning 7
Cleaning the Exterior Surfaces 7
Cleaning the Frying Screen 7
Cleaning the Kettle 7
3 Calibrating The Fryer 9
Calibration of 618-0006 Temperature Indicator 9
4 Cut-N-Fry Installation with Type N Depositor (Optional) 10
Mounting Instructions 10
5 Parts Lists and Diagrams 12
Belshaw Adamatic Bakery Group • service@belshaw.com • 800-578-2547 • (+1) 253-886-5340
616B TS MN-1138EN 3
Page 16

Preface
The 616B and 616BT donut fryers have been
designed and built using the finest materials and
components available. It is the result of years of
research and development. Designed into this
unit are many features which will insure more
quality in your products and reduce your
operating cost. Attention to the instructions
regarding installation, operation, and
maintenance should result in years of trouble-free
service.
The operator must work safely at all times and
read this manual and follow its instructions and
warnings. A thorough understanding of how to
install, maintain, and safely operate the fryer will
prevent production delays and injuries.
Heed the following warnings and all other
warnings that appear in this manual:
• To avoid damaging the machine, never
use force to assemble, disassemble,
operate, clean, or maintain it.
• Hot shortening can cause serious burns.
Make sure that the system and the
shortening are cool before attempting
any cleaning, adjustment, disassembly,
or repair.
• To avoid electrocution or other injury,
unplug the machine before attempting
any cleaning, adjustment, disassembly,
or repair.
• Be careful never to get shortening, water,
or other materials on the floor. If
anything does get spilled on the floor,
mop it up immediately. Materials on the
floor can cause people to slip or fall,
resulting in serious injury or loss of life.
• To prevent unintentional startup and
possible fire, unplug the machine if there
is a local power outage. When the power
is restored, it is safe to plug the machine
in again.
• Never let water and hot shortening come
in contact with each other. Moisture
causes hot shortening to spatter, which
may cause serious burns.
• Do not overfill the kettle with
shortening. If shortening overflows the
kettle, it could cause serious burns or
could cause someone to slip on the floor
and be seriously injured.
Belshaw Adamatic Bakery Group • service@belshaw.com • 800-578-2547 • (+1) 253-886-5340
4 MN-1138EN 616B TS
• To avoid electrocution, make sure that
all electrical cords are not frayed or
cracked and that they do not pass
through any water or shortening.
• Make sure that all electrical cords are
routed so that no one will trip over them.
Page 17

1 Installation
Unpacking the Fryer
1. Use a fork lift to transport the shipping crate
to the work station.
2. Break down the shipping crate.
3. Remove all the packing materials from the
fryer. These include foam, tape, brown
paper, plastic, and white protective coating.
4. Check the fryer carefully for any damage
that may have occurred during shipping.
File any claims with the shipping company.
5. Position the fryer to allow sufficient space
on either end of the machine for any
equipment you plan to use with it.
Initial Cleaning
Clean your fryer before using it. Wipe the inside
of the kettle with a soft, damp cloth. Dry the
kettle thoroughly.
WARNING
To avoid electrocuting yourself or
damaging the machine, never allow water,
steam, cleaning solution, or other liquid to
enter the heater head or the electrical box.
WARNING
Never let water and hot shortening come in
contact with each other. Moisture causes
hot shortening to spatter, which may cause
serious injury. Prior to use, make sure the
kettle and any other parts you have washed
are dry.
Installing the Fryer
1. Make sure the power requirements of the
machine, found on the data/name plate,
match your power source.
2. Set the fryer cabinet on a flat, dry counter or
table.
3. Level the fryer.
4. Connect the fryer to a properly grounded
power source. Do not turn on the power.
5. When first filling the kettle with shortening,
if a hydrogenated or semi-solid shortening is
used, melt some shortening and pour it into
the kettle.
6. Cover the elements, thermostat bulb and high
temperature limit control bulb with
shortening before turning on the power.
Do not turn the thermostat above 250°F
until all the shortening has melted.
7. Due to the delicate mechanism of the
thermostat, it is possible for it to get out of
adjustment. If this occurs, recalibrate per the
instructions in section 4.
Belshaw Adamatic Bakery Group • service@belshaw.com • 800-578-2547 • (+1) 253-886-5340
616B TS MN-1138EN 5
WARNING
Page 18

8. The heater head assembly is equipped with a
high temperature limit control. Push the reset
button on the back of the heater head if
power to the heater elements is cut off.
9. When heating shortening that has solidified, a
pocket of shortening may overheat and cause
the high temperature limit control to cut
power to the elements. Push the reset button
to resume heating.
Moving the Fryer
If you ever want to move the fryer to a different
workstation, follow this procedure:
1. Turn off the fryer and disconnect it from the
power source.
2. Allow the machine and the shortening to
cool.
WARNING
6. Level the fryer and connect it to the power
source, as explained in “Installing the Fryer”
above.
Do not touch hot shortening. It can cause
serious burns.
3. Remove the shortening from the fryer as
explained in “Removing the Shortening” in
the Operator's Manual.
WARNING
To avoid burns, falls, other injury, or
death, never attempt to move the fryer
when it has shortening or other liquid in it.
WARNING
Thoroughly clean and dry the floor if
shortening is spilled. Materials on the floor
can cause people to slip or fall, resulting in
serious injury or loss of life.
Belshaw Adamatic Bakery Group • service@belshaw.com • 800-578-2547 • (+1) 253-886-5340
6 MN-1138EN 616B TS
Page 19

2 Cleaning
For your safety, observe the following warnings
throughout the entire cleaning process.
WARNING
Thoroughly clean and dry the floor if
shortening, water, or other materials are
spilled. Materials spilled on the floor can
cause serious injury or loss of life.
WARNING
To avoid electrocuting yourself or
damaging the machine, never allow water,
steam, shortening, cleaning solution, or any
other liquid to enter the electrical box or
the heater head.
WARNING
To avoid being burned in an explosion,
never use any flammable materials for
cleaning.
Cleaning the Frying Screen
1. In a sink or a dishwasher, wash the frying
screen using warm water and mild detergent.
Do not use an abrasive cleaner or scraper.
2. Rinse the frying screen in clear water.
3. Dry the frying screen thoroughly, using a
soft cloth, before you use it again.
WARNING
Dry the frying screen thoroughly.
Moisture causes hot shortening to spatter,
which may cause serious injury.
4. Check the frying screen to make sure no
metal is flaking off of it. If the screen is
flaking, replace it immediately, so you do
not get metal particles in your product.
Cleaning the Kettle
Removing the Shortening
WARNING
Cleaning the Exterior
Surfaces
1. Clean the polished and painted surfaces of
the fryer with a soft, damp cloth. Use a nonabrasive cleaner to remove any
discoloration.
2. Polish these surfaces with a soft, dry cloth.
Belshaw Adamatic Bakery Group • service@belshaw.com • 800-578-2547 • (+1) 253-886-5340
616B TS MN-1138EN 7
To avoid being burned or electrocuted,
disconnect the fryer from the power source
before cleaning it.
1. Disconnect the machine from the power
source.
2. Let the shortening cool to 100°F/38°C.
3. Carefully dip out the shortening into a
suitable container. Do not disturb the
accumulated sediment in the bottom of the
kettle.
Page 20

WARNING
Do not use a plastic container. If the
shortening is not cool enough, the container
will melt, possibly causing you to be
burned, and causing shortening spill.
WARNING
Do not allow the shortening to overflow the
containers. Shortening will get on the
floor, and if the shortening is not cool
enough, you may be burned.
4. After the kettle has been drained, brush any
accumulated carbon from the heater coils.
Accumulated carbon causes corrosion and
poor heat recovery.
5. Remove the drain tray.
WARNING
Washing
1. Wash the kettle carefully with detergent to
remove all stains and burned shortening.
2. Scrub the inside of the kettle. Do not use
any abrasive cleaners or scrapers.
WARNING
To avoid being burned, be very careful as
you work with hot cleaning solution. Never
put your hands in the solution. Wear
gloves and long sleeves in case any solution
splashes.
3. Dry the kettle thoroughly with a soft cloth
before replacing in the fryer cabinet.
WARNING
Dry the kettle thoroughly. Moisture causes
hot shortening to spatter, which may cause
serious injury.
Thoroughly clean and dry the floor if
shortening is spilled. Shortening on the
floor can cause serious injury or loss of life.
6. Remove the heater head and element.
7. Lift out the kettle and pour out the remaining
shortening and accumulated sediment.
8. Flush out the kettle with hot water to remove
all sediment.
4. Make sure the kettle is properly seated in the
case.
5. Install the heater head.
Belshaw Adamatic Bakery Group • service@belshaw.com • 800-578-2547 • (+1) 253-886-5340
8 MN-1138EN 616B TS
Page 21

3 Calibrating The Fryer
Calibration of 618-0006
Temperature Indicator
To check calibration, use the
following steps.
1. Turn the dial of the thermostat to a medium
temperature setting of approximately 350° F.
2. Allow enough time for the temperature to
stabilize and the thermostat to cycle ON and
OFF.
3. Use a potentiometer or a good grade of
thermometer to determine temperature.
To Recalibrate:
1. Remove the ring (A) and glass crystal.
2. Insert a screwdriver in slot B, and while
holding the slotted stem in position, move the
temperature indicating needle (C) to the
correct setting with your finger.
3. Check the temperature of the frying area
again and check this against the indicator
temperature reading.
To check calibration:
1. Important: Make sure that the fryer is filled
with shortening. Read the warnings on the
control panel about high temperatures.
2. Use a good thermometer that reads
temperatures up to 400°F/204°C. Place the
thermometer in the shortening.
3. Set the fryer temperature to 375°F/190°C.
Allow enough time for the temperature to
stabilize.
4. During a 10 minute test period, the
temperature should not fall below
365°F/185°C, or exceed 385°F/196°C.
To Recalibrate:
1. Remove temperature dial from shaft B by
pulling upward.
2. Using a small screwdriver, turn screw A as
follows:
• Counter clockwise to increase
temperature
• Clockwise to decrease temperature
3. Replace the control dial on the dial shaft
4. Re-install the ring (A) and glass crystal.
4. Recheck the calibration and continue
adjusting as necessary.
Calibrating the Thermostat
Each thermostat is adjusted at the factory and
calibrated on precision instruments to control
temperatures accurately. Adjustment or
recalibration is not needed unless the thermostat
has been mishandled in transit or changed or
abused while in service.
Belshaw Adamatic Bakery Group • service@belshaw.com • 800-578-2547 • (+1) 253-886-5340
616B TS MN-1138EN 9
Page 22

4 Cut-N-Fry Installation with Type
N Depositor (Optional)
This section shows how to mount a Type N depositor with your 616B fryer to form a Cut-N-Fry
combination.
SAFETY NOTICE
The cut-n-fry unit should be located on a
solidly constructed countertop with the
heater head toward the wall. When the unit
is not mounted near the wall and is
accessible from all sides, the 616B fryer
should be bolted to the table (or other
surface that supports it). A hole can be
drilled through the bottom of the outer
case, after removing the kettle.
Belshaw Adamatic Bakery Group • service@belshaw.com • 800-578-2547 • (+1) 253-886-5340
10 MN-1138EN 616B TS
Mounting Instructions
1. Mount the Mounting Brackets at the
rear of the 616B FRYER.
• Fasten securely to the metal block
using the included 1/4 inch bolts.
2. Place the 616B Fryer in the position
where it will be used, and slide the
Mounting Column into place.
• The column should rest on the
counter top surface. Tighten the set
screws in the mounting brackets.
Page 23

3. Place the Set Collar with Pin onto the
column as shown, approximately 2 inches
(51mm) above the Heater Head of the
fryer.
• The pin should point upward. Tighten
the set screw securely. Oil the column
above the set collar with light
machine oil.
4. Slide the Large Bracket Arm onto the
Mounting Column until it rests on the
Set Collar With Pin.
• Oil the pin slightly and install the
Nylon Washer.
5. Place the Small Bracket Arm onto the
pin of the Large Bracket Arm.
• Oil the pin slightly and install the
Nylon Washer.
6. The Hopper Base of the Type N
Depositor will be mounted on the pin of
the Small Bracket Arm.
• The bottom of the depositor should be
1/4" (6 mm) above the rim of the
616B Fryer.
Belshaw Adamatic Bakery Group • service@belshaw.com • 800-578-2547 • (+1) 253-886-5340
616B TS MN-1138EN 11
Page 24

Page 25

5 Parts and Electrical Diagrams
Mechanical and electrical diagrams for 616B Fryers with Item Numbers 8848011, 8848012, 8848014,
8848015 are indicated in the table below.
ABOUT ITEM NUMBERS:
All machines are identied by an Item Number. The Item Number is located on a data tag attached to
machine.
You need to know your fryer’s Item Number to identify parts diagrams for that fryer.
When you have found your Item Number, mark it on the front cover of this manual, and also immediately
below.
RECORD YOUR ITEM NUMBER AT LEFT BELOW:
MARK
FOR YOUR
FRYER ITEM NUMBER MODEL VOLTS HERTZ PHASE TYPE
For Item Numbers not listed, contact Belshaw Service at service@belshaw.com.
RECORD YOUR SERIAL NUMBER HERE:
8848011
8848012
8848014
8848015
616B 120V 50/60 hz 1 DOMESTIC
616B 236V 50/60 hz 1 DOMESTIC
616B 236V 50/60 hz 1 INTERNATIONAL (CE)
616B 236V 50/60 hz 1 INTERNATIONAL
© 2017 Belshaw Adamatic Bakery Group, Auburn, WA 98001 USA. All Rights Reserved
DIAGRAMS PAGE 1
Page 26

DIAGRAM: 616B-1500, 616B-1501, 616B-1502 COMBINED
USE THIS DIAGRAM FOR
MODEL: 616B
ITEM NUMBER:
8848011, 8848012, 8848014, 8848015
TO IDENTIFY MODEL AND ITEM NUMBER, SEE DATA TAG ON
CONTROL PANEL
BILL OF MATERIAL
ITEM NBR
TYPE
VOLTAGE
ASSEMBLY
REF QUANTITY PART NUMBER DESCRIPTION
1 1 DR42-0162 DR42-0162 DR42-0162 THERMOSTAT 1P, W/ AUXILIARY
3 1 FM200-0065M FM200-0065M FM200-0065M HI-LIMIT SWITCH
4 1 H-0001 H-0001A H-0001A ELEMENT
5 2 #PLT-0001 #PLT-0001 #PLT-0001 CLEAR NEON PILOT LIGHT
8 1 MK-0274 MK-0274 MK-0274 BULB BRKT CLAMP,UNIVERSAL
9 1 614A-0007 614A-0007 614A-0007 HEATER HEAD SKIRT
10 1 MK-0275 R02 MK-0275 R02 MK-0275 R02 BULB CLAMP TOP
11 1 616BT-0506 616BT-0506 616BT-0015 R10 HEATER HEAD BOTTOM ASSY
12 1 614A-0500 R05 614A-0500 R05 614A-0500 R05 HEATER HEAD CASE WLDT
13 1 618-0008A 618-0008A DR42-0338 THERMOSTAT KNOB
15 1 MK-0282-1 MK-0282-1 MK-0282-1 ELEMENT TERMINAL INSULATOR
16 2 MK-0283-A R01 MK-0283-A R01 MK-0283-A R01 HIGH LIMIT MOUNTING BRACKET
8848011 8848012 8848014-8848015
DOMESTIC DOMESTIC INTERNATIONAL
208V/60/1 236V/60/1 236V/50-60/1
616B-1500 616B-1501 616B-1502
DIAGRAMS PAGE 2
©2017 Belshaw Adamatic Bakery Group, Auburn, WA 98001 USA. All Rights Reserved
Page 27

© 2017 Belshaw Adamatic Bakery Group, Auburn, WA 98001 USA. All Rights Reserved
DIAGRAMS PAGE 3
Page 28

DIAGRAM: 616B-4001
USE THIS DIAGRAM FOR
MODEL: 616B
ITEM NUMBER:
8848011, 8848012, 8848014, 8848015
TO IDENTIFY MODEL AND ITEM NUMBER, SEE DATA TAG ON
CONTROL PANEL
DIAGRAMS PAGE 4
#8848011
#8848012, #8848014, #888015
©2017 Belshaw Adamatic Bakery Group, Auburn, WA 98001 USA. All Rights Reserved
Page 29

DIAGRAM: 616--0512
USE THIS DIAGRAM FOR
MODEL: 616B
ITEM NUMBER:
8848011, 8848012, 8848014, 8848015
TO IDENTIFY MODEL AND ITEM NUMBER, SEE DATA TAG ON
CONTROL PANEL
© 2017 Belshaw Adamatic Bakery Group, Auburn, WA 98001 USA. All Rights Reserved
DIAGRAMS PAGE 5
Page 30

Belshaw Adamatic Bakery Group Limited Warranty / Return Policy
Subject to the terms and limitations set forth in this limited warranty
(“Limited Warranty”), Belshaw Adamatic Bakery Group (also referred to
as “the Manufacturer”) warrants to the original purchaser (“Purchaser”)
of Manufacturer’s equipment and parts (“Products”), Belshaw Adamatic
Bakery Group’s manufacture and assembly of Products to be free from
defects in workmanship and material which would result in product
failure under normal use and service. Belshaw Adamatic Bakery
Group’s entire liability under this Limited Warranty is limited to either
repairing or replacing at Manufacturer’s factory or on Purchaser’s
premises, at Belshaw Adamatic Bakery Group’s option, any Products
purchased by Purchaser which shall be determined by the
Manufacturer to be defective. If necessary to return Products to
Manufacturer’s factory, Products must be shipped by Purchaser with
transportation charges prepaid by Purchaser.
Belshaw Adamatic Bakery Group reserves the right to make changes in
design or add any improvement to its Products at any time without
incurring any obligations to install the same on Products previously
sold.
Possession, use or operation of Products sold hereunder for any other
than their designed purpose, or use of Products which are in poor
repair, modified, improperly operated, or neglected, is done at the
Purchaser’s risk. Belshaw Adamatic Bakery Group hereby disclaims
any liability for these actions and shall not be liable for defects in or for
any damages or loss to any property which is attributable to such
actions.
Under no circumstances shall Belshaw Adamatic Bakery Group be
liable for any indirect, special, incidental, or consequential
damages arising out of, or from the use of its Products by
Purchaser, its assignees, employees, agents or customers.
THIS LIMITED WARRANTY SHALL BE PURCHASER’S SOLE AND
EXCLUSIVE REMEDY WITH RESPECT TO DEFECTIVE PRODUCTS.
Warranty Period
This Limited Warranty covers Products manufactured by Belshaw
Adamatic Bakery Group and sold by Belshaw Adamatic Bakery Group
or its authorized distributor (“Distributor”) or authorized dealer
(“Dealer”), and this Limited Warranty shall extend for a period of one (1)
year from date of shipment to Purchaser, and to the original Purchaser
only.
Limited Warranty
With respect to products not manufactured by Belshaw Adamatic
Bakery Group, warranty coverage shall be limited to the warranty of the
original manufacturer of the product, or the Belshaw Adamatic Bakery
Group Limited Warranty, whichever is the lesser coverage period.
Replacement Products provided under the terms of this Limited
Warranty are warranted for the remainder of the original warranty
period applicable to the Product.
Exclusions
This Limited Warranty excludes from its coverage and does not apply
to: (a) solenoid and relay coils; (b) lamps; (c) “O” rings; (d) belts; and
(e) impellers. This Limited Warranty also excludes the cost of labor for
removing and replacing Products subject to a warranty claim, other
than the labor incurred directly by the Manufacturer when, in Belshaw
Adamatic Bakery Group’s opinion, a repair of the Product by the
Manufacturer is justified.
Warranty Claims
In case of warranty claims relating to your Product, you must follow the
instructions below.
Report Claims to Your Authorized Distributor or Dealer or to
Belshaw Adamatic Bakery Group
As soon as you discover a problem, contact the Distributor or Dealer
from whom you purchased the Product or Belshaw Adamatic Bakery
Group. Your Distributor or Dealer will notify Belshaw Adamatic Bakery
Group for you. Only Belshaw Adamatic Customer Service can
approve or authorize warranty claims.
You must state the following:
1. Your name, company name, and telephone number
2. The location, phone number, and contact name where the Product
is located
3. The invoice number and date of purchase of the Product
4. The Model and Serial Number of the Product, as written on the
data tag attached to the Product
5. A description of the problem and how it occurred
Shipping Damage and Missing Items
Damage to the Packaging or Crate. On delivery, promptly check all
packages thoroughly for any sign of damage. In cases of visible
damage, always note the damage on the Delivery Receipt. Failure
to note damage is taken by the Freight Carrier to mean that the
package is in good condition at time of receipt, and can result in denial
of a Freight Claim. Take photographs that clearly show the damage.
Damage to Products. If you find any damaged Product inside the
shipment, photograph the damage both inside and outside of the
package. Do not throw the packaging away. Photos of the package
and contents are needed to show the condition of the Product at the
time it was received.
Missing Items. As soon as you believe any items to be missing from a
shipment, promptly report this to the Distributor or Dealer from whom
the Product was purchased or to Belshaw Adamatic Bakery Group. If
possible, photograph the entire contents of the delivery and email this
to your Distributor or Dealer, or to Belshaw Adamatic Customer Service
at service@belshaw.com
Returning Products to Belshaw Adamatic Bakery Group
Under the terms of the Limited Warranty, you may be asked to return to
Belshaw Adamatic Bakery Group any Product that is the subject of a
warranty claim. These Products must be clearly labeled with a Return
Goods Authorization Number (“RGA Number”) given to you by your
Distributor or Dealer, or by Belshaw Adamatic Customer Service.
Products received without an RGA Number will not be processed. All
Products must be shipped freight prepaid by the Purchaser to Belshaw
Adamatic Bakery Group at the address below.
Contacting Belshaw Adamatic Bakery Group
At any time, you can contact Belshaw Adamatic Bakery Group
customer service for assistance:
Belshaw Adamatic Bakery Group Customer Service
814 44th St. NW, Suite 103,
Auburn WA 98001, USA
Phone: 800-578-2547 (USA/ Canada) or (+1)253-886-5340
(Worldwide)
Email: service@belshaw.com
Office Hours: Monday – Friday, 6am to 4pm, USA Pacific Time
.
Belshaw Bros., Inc. doing business as Belshaw Adamatic Bakery Group
www.belshaw-adamatic.com, www.belshaw.com Phone (+1) 253-886-5340
Revised 08/31/15 Limited W arranty Page 1 of 1
Page 31

BELSHAW ADAMATIC BAKERY GROUP
814 44th Street NW, Suite 103
Auburn, WA 98001 USA
1-800-578-2547 (USA/Canada)
(+1) 253-886-5340 (Worldwide)
service@belshaw.com
The #1 Source for Donut and Bakery Equipment
www.belshaw.com
an Ali Group Company
The Spirit of Excellence
 Loading...