

Page 1
English Version
Instruction Manual
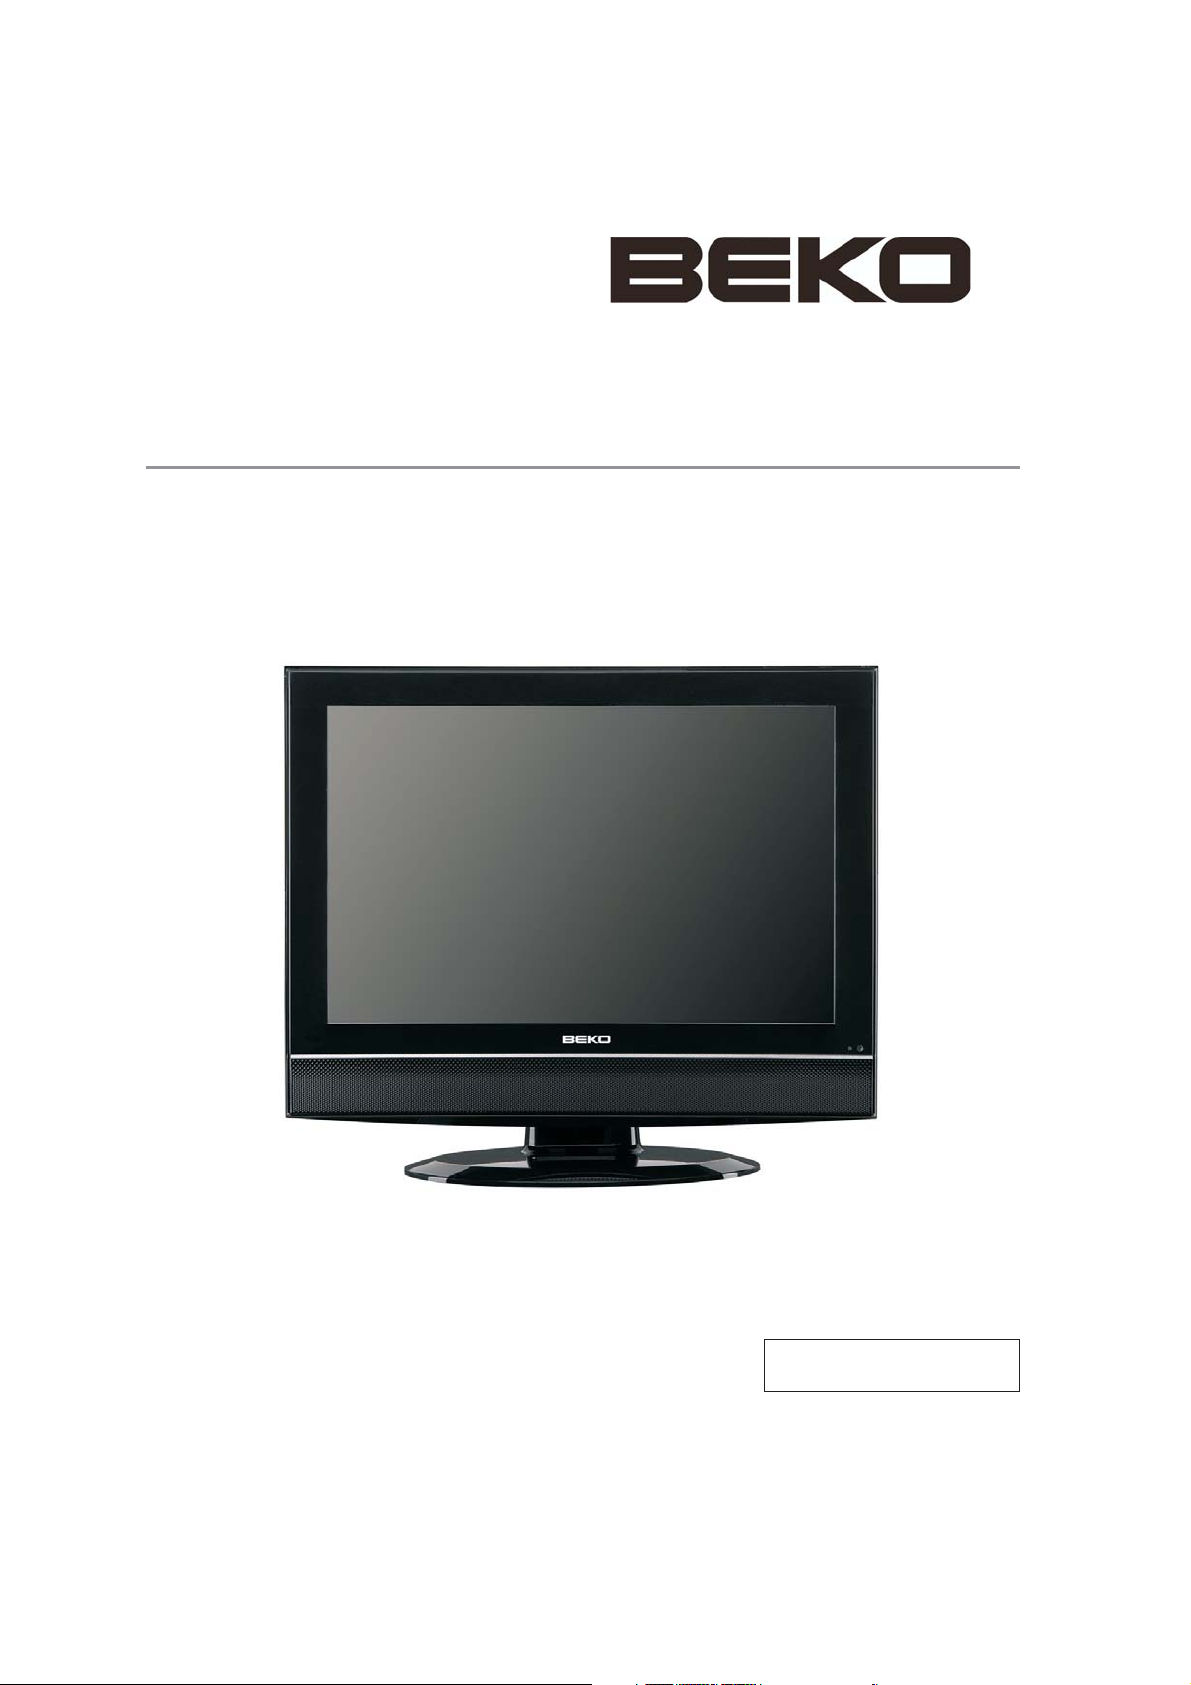
19 22 LCD TV""/
Model 19WLM550DHID 22WLM550DHI D//
Page 2
IMPORTANT SAFETY INSTRUCTIONS
WARNI NG
To red u c e th e ris k of fir e o r el e c tr i c s h o ck , do no t ex p o se thi s
eq u i pm e n t to ra in or moi s t ur e .
CAUT IO N
RISK OF ELECTRIC SHOCK
DO NOT OPEN
CAUTION: TOAVOID THE RISK OF ELECTRIC SHOCK,
DO NOT REMOVE COVER (OR BACK).
NO USER-SERVICEABLE PARTS INSIDE.
REFER SERVICING TO QUALIFIED SERVICE PERSONNEL.
This symbol is intended to alert the user to avoidthe risk of
electric shock, do not disassemble this equipment by anyone
except a qualified service personnel.
This symbol is intended to alert the user to the presence
of important operating and maintenance instructions
in the literature accompanying the appliance.
CAUT IO N
Us e o f c ont rols or adjustm ent s o r p erf or m ance of procedu res other than those
sp ecified here in may result in hazardous radiat ion exposure
Safety Instructions
TV User Guide
1
Page 3
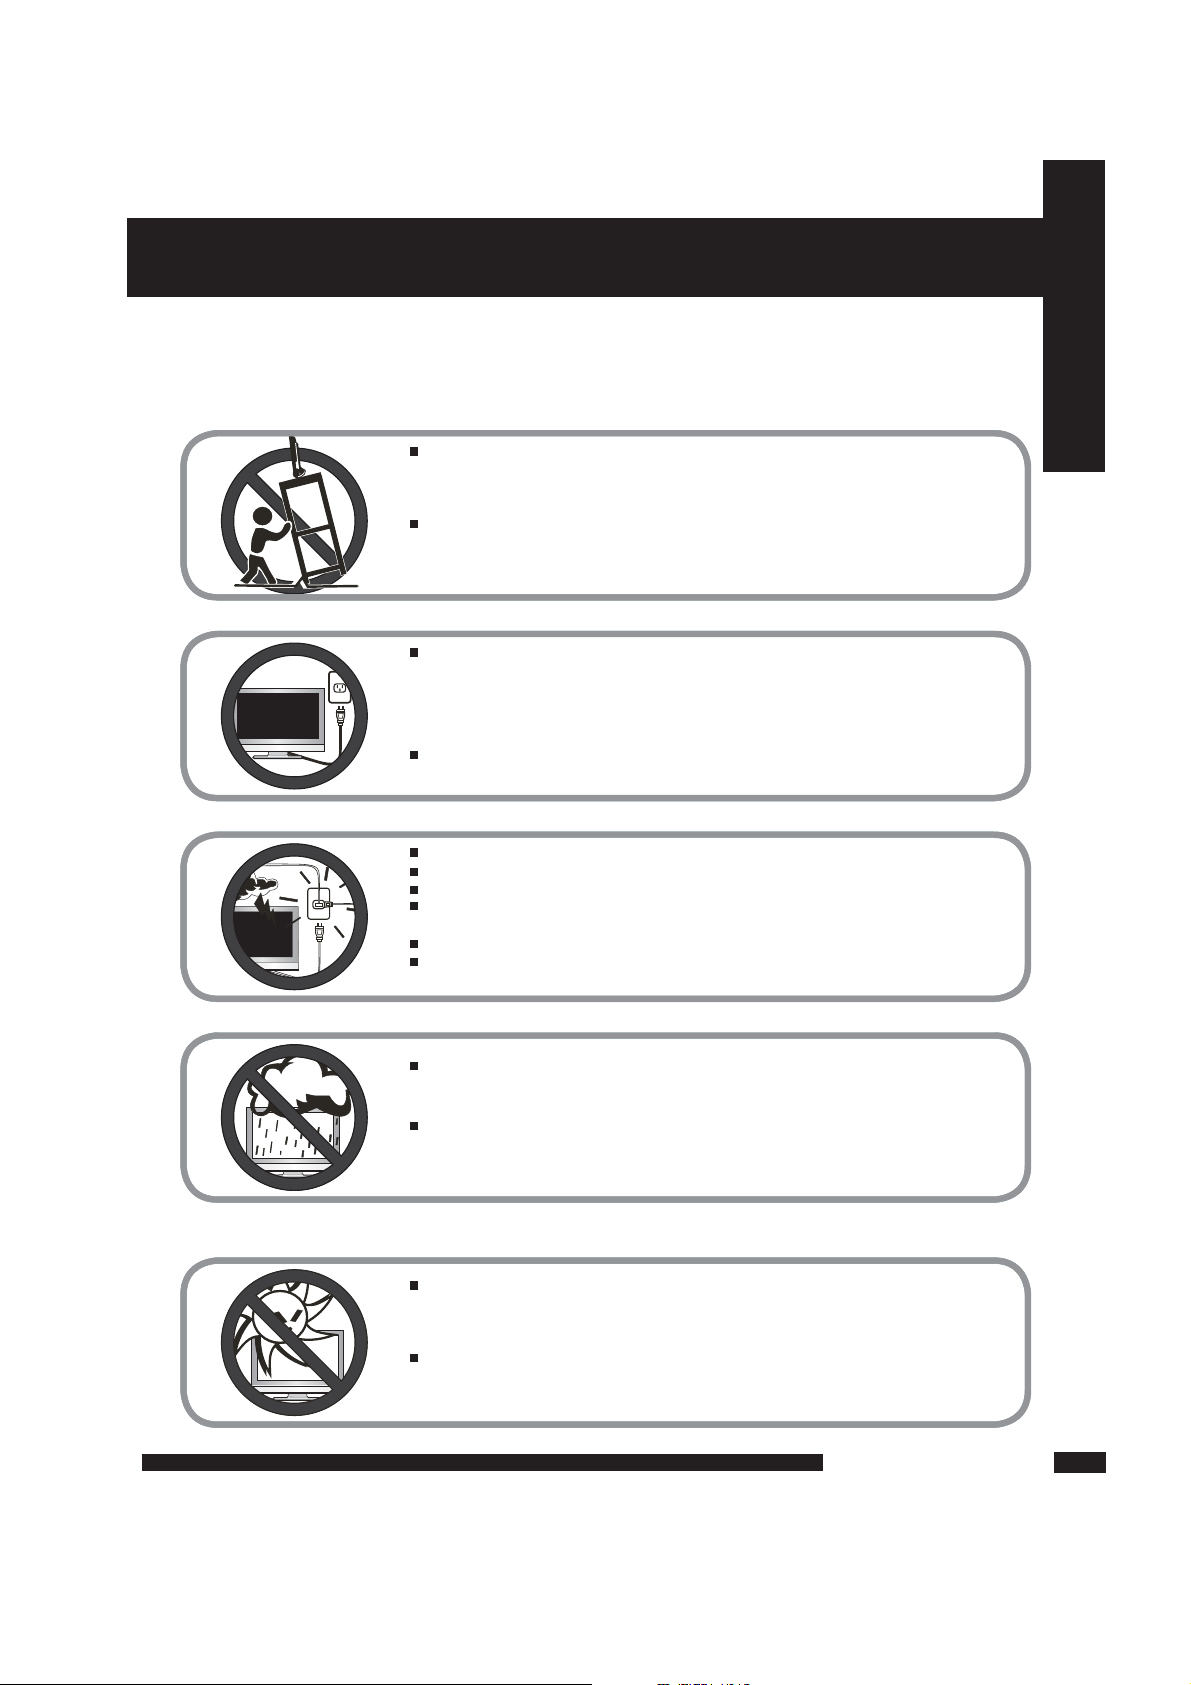
Do n ot p l a ce t he e qui pm ent o n a ny u nev en o r u nst abl e ca rts ,
st and s, t ab les , sh elv es e tc..
Th e eq uip men t ma y fa ll, cau sin g s eri ous inj uri es t o ch ildre n or a d u lts
an d se rio us d ama ge t o th e eq uip me nt i tse lf.
Us e on ly a c ar t or s tand r eco mme nd ed b y th e ma nuf act ure r.
Th is e qui pm ent a nd r ec omm end ed c ar t or s tan d s hou ld b e ha ndl ed
wi th c are . Qu ick sto ps , exces siv e fo rce , an d un eve n su rface s ma y
ca use the equ ipm ent and rec omm en ded car t or s ta nd t o ov ert urn .
Do n ot d i s abl e th e 3- wir e gr oun din g t ype p lu g. T he g ro und ing pin
on t he 3 - p ron g pl ug i s an i mp ort ant fea tur e. R em ovi ng t he g ro und ing
pi n wi ll i ncr eas e t he r isk of d ama g i ng t he e qui pm ent .
If y ou c a n n ot f it t h e p lug int o th e el ect ri cal out let , co nta ct a n
el ect ric ia n to i ns tal l a g rou ndi ng o ut let .
Al way s op era te t hi s eq uip men t fr om t he t ype of p ow er s our ce
in dic ate d o n the rea r of the ser ial /m ode l pl ate .
Ne ver ove rlo ad w al l ou tle ts a nd e xt ens ion s.
Us e an d h a ndl e th e po wer cor d wi th c are .
Do n ot p l a ce a ny h eav y ob jec ts o n th e AC p owe r co rd.
Do n ot p u l l the A C po wer cor d. D o no t ha ndl e th e AC p owe r co rd
wi th a wet h an d.
Do n ot t o u ch t he p owe r co rd a nd a n t enn a ca ble dur ing lig htn in g.
Wh en t he e quipm ent has not b ee n us ed f or a lon g pe rio d of tim e,
un plu g it fro m th e wa ll o utl et.
Do n ot p l a ce, u se o r ha ndle t his equ ipm ent nea r w ate r.
Ne ver exp ose the equ ipm en t to l iq uid , ra in, or m ois ture.
Se ek f or s ervic e if a n y o f th e ab ove is s pil le d into t he e qui pment .
Do n ot e x p ose t he e qu ipm ent to e xtr em e tem pe rat ure s or
to d ir ect sun lig ht, the equ ipm en t ma y overh eat and can b e d ama ged .
Do n ot i n s tal l th e eq uip men t ne ar a ny h eat sou rc es s uch as
ra dia tor s, h eat reg is ter s, s toves , or a n y o the r a ppa rat u s
th at m igh t pr odu ce h ea t.
To pr e v e n t any i n j u r i e s , the fo l l o w i n g safety p r e c a u t i o n s should b e observed
in t h e installation, u s e , servicing an d maintenance o f this e q u i p m e n t .
Before o p e r a t i n g this e q u i p m e n t, p l e a s e read t h i s manual c o m p l e t e l y,
and k e e p it n e a r b y for fu t u r e reference.
IMPORTANT SAFETY INSTRUCTIONS
Safety Instructions
TV User Guide
2
Page 4
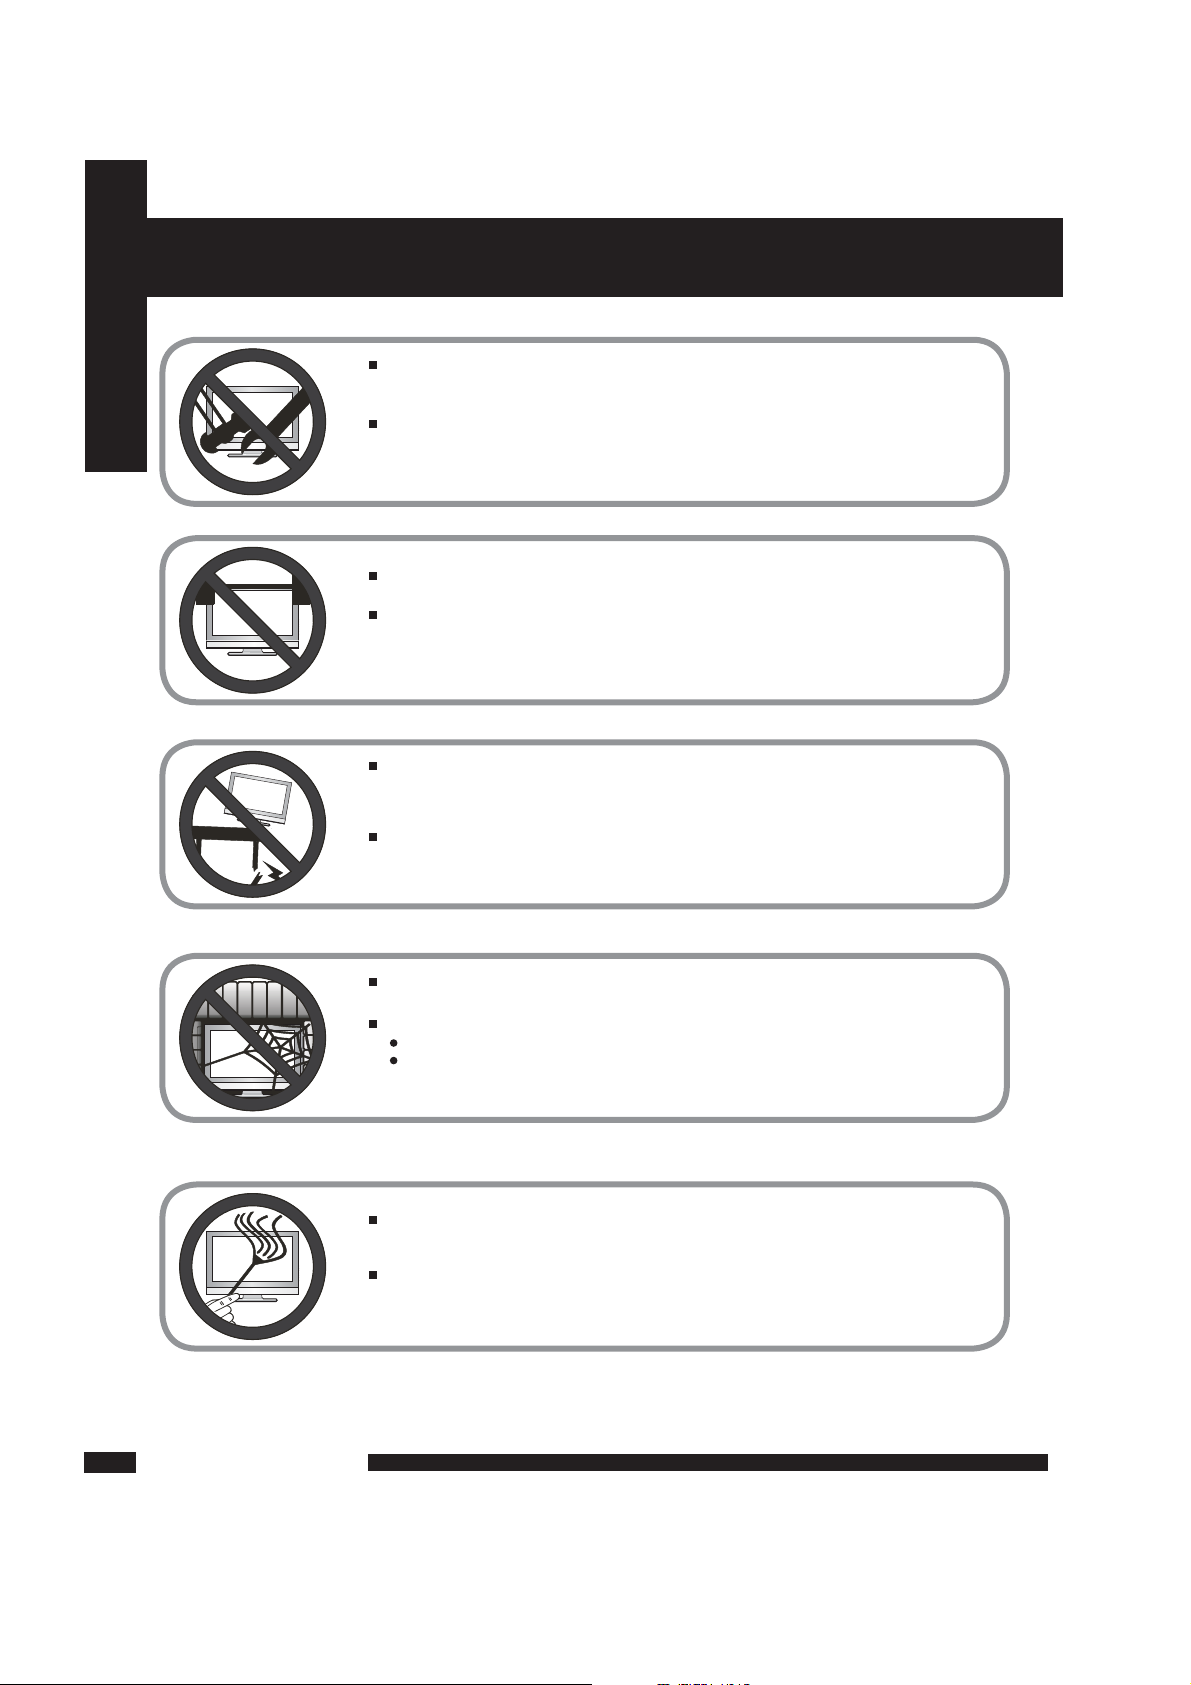
Do not place or drop any other objects on top.
Do n o t at t e mpt t o ser v ice t h e equ i pment your s e lf.
Op ening and removin g the cov ers may e xpose you to dang ero us
vo ltage or any ot her hazards an d may voi d your warr anty.
Re fer serv ice fr om qua lifie d pers onnel .
Do not insert anything into the ventilation holes of your equipment.Inserting any
metal or flammable objects may result to fire or electric shock.
Do not place the equipment on uneven or unstable carts, stands,
tables, shelves etc. .
The equipment may fall, causing serious injuries to children or adults
and serious damages to the equipment itself.
Always place the equipment on the floor or on a surface that
is sturdy, level , sta ble and strong enough to support
the weight of the equipment.
Do not block any ventilating openings, leave an open space around the equipment.
Never place the equipment :
on a bed, sofa, rug, or any other similar surfaces;
too close to drapes/curtains/walls, in a bookcase,
built-in cabinet, or any other similar places that may cause
poor ventilation.
Always remove the cord from the outlet before cleaning the equipment.
Never use cleaners, harsh or abrasive chemicals or solvents on the
equipment. Clean only with a dry, soft, lint-free cloth.
IMPORTANT SAFETY INSTRUCTIONS
Safety Instructions
TV User Guide
3
Page 5

CONTENT
CONTENT
PREPARATION ................................................................. ........................................................ 5
Features ............................................................................... ............................................................................. 5
Package Contents ..............................................................................................................................................6
TV ......................................................................................................................................................................7
Front View .........................................................................................................................................................7
Rear View .........................................................................................................................................................10
Remote Control ................................................................................................................................................11
USING THE FEATURES ....................................................... .....13...............................................
Watching your TV ...................................................................... ....................................................................... 13
SPECIFICATION ......................................................... .............................................................. 30
Wide-Screen Mode ...........................................................................................................................................14
First Time Installation ............................ ............................. ............... ................................................................ 15
Picture ..............................................................................................................................................................16
Sound ...............................................................................................................................................................17
Setup ................................................................................................................................................................18
Timer ................................................................................................................................................................22
Function ........................................................................................................................................................... 22
DTV Channel List Options ................................................................................................................................24
DTV Setup ............................................... ............................ ............................................................................ 25
EPG ..................................................................................................................................................................27
TV User Guide
4
DVD SETUP Menu .........................................................................................28......................................... ........
GUARANTEE ..................................................... 31......................................................... .............
Page 6

PREPARATION
PREPARATION
PREPARATION
C o n g r at u l a t i o ns on t h e p u r c ha s e of yo u r ne w H i gh De f i n i t i on C o m p a t i b l e
Te l e v i s io n . In or d er t o m a x i m iz e t h e po t en t i a l o f t hi s t e l e v i s i o n , yo u m u s t u s e
i t i n c o nj u n c t i o n wi t h a H i gh De f i n i t i on S i g n a l S ou r c e , u t i l i z i n g a pr o p e r H i g h
D e f i n it i o n r e c e i vi n g un i t (of t e n r e f e rr e d to as a "s e t - t o p " b o x ) . O n ly " t r u e "
H i g h De f i n i t i o n tr a n s m i t t e d vi d e o wi l l yi e l d op t im u m pi c tu r e qu a l i t y.
P l e a s e co n t a c t y ou r c a b l e o r sa t e l l i t e p r o v i d e r fo r m o r e in f o r m a t i o n o n
h o w t o r ec e i v e H ig h D e f i n i t io n p r o g r a m mi n g .
5
Features
Various Audio/Video terminals for external equipment connection
1 set of C ompos i t e v i deo input te r m inal
1 set of S -VIDE O in p ut t ermin a l
1 set of H DMI input te r m inal
1 set of V GA i n p u t t ermin a l
Component Video Inputs
Offe r th e best video q u a lity f o r D V D (4 8 0 i / 4 8 0 p ) , a n d d i g i t a l s e t - t o p - b o x
(HD1080 i , 7 2 0 p ) co n n e c t i o n s .
High-Definition Multimedia Interface (HDMI)
This interface can accommodate a copy-protected digital connection (HDCP) to other d igital set-top
boxes that have com patible interf ace.
1 set of S CART t e r m inal
Page 7
PREPARATION
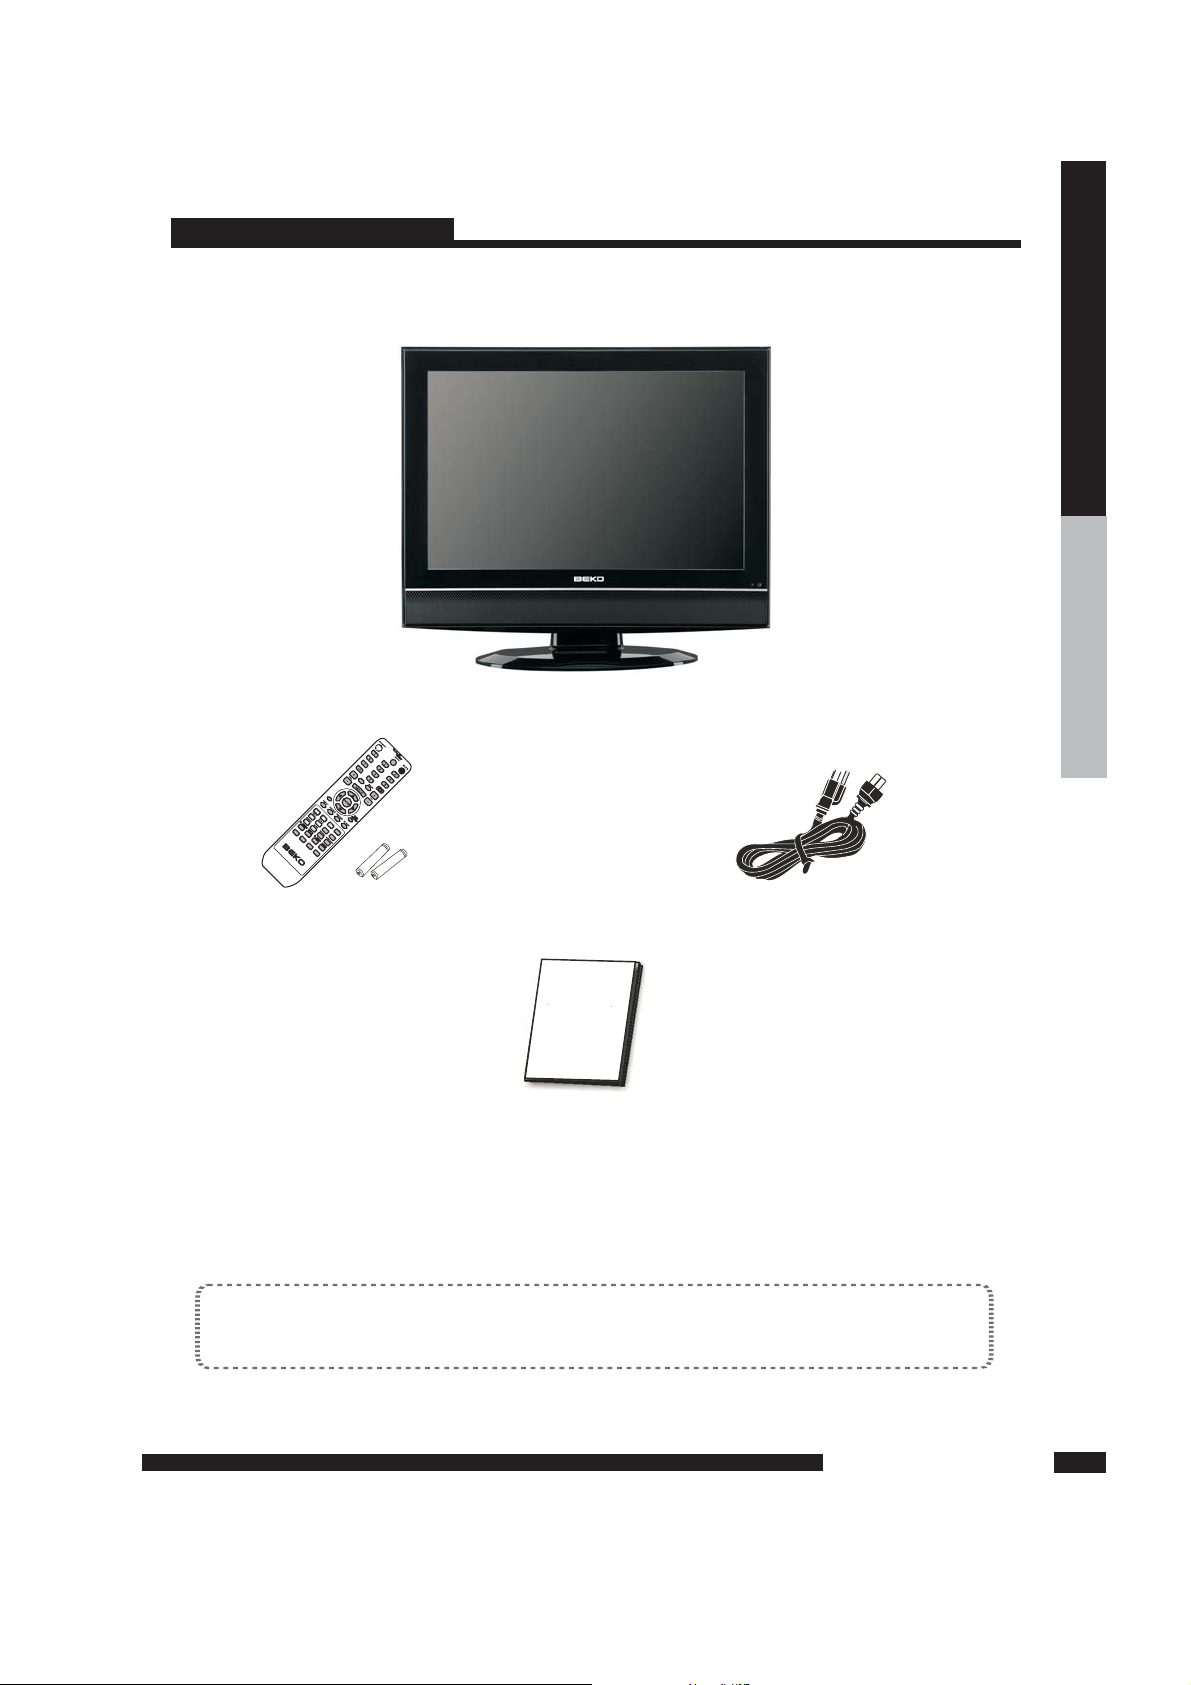
Package Contents
Power Cord
Remote control/
AAA batteries
Onc e you o p en t he b ox, make sure all of th e follow i ng c onten ts a re i n clud e d.
If miss i ng a ny i tems, pl e ase retur n this p rodu c t to the o r igin a l place
of purc h ase.
These items are all you need to set up and operate the TV
in its basic configuration.
*Most devices (VCRs, DVD player, etc.) come with the necessary
cable for connection. If you want to set up a complex system, you may need to buy
extra cable, connector, etc.
9
PREPARATION
6
Instruction Manual
Instruction
Manual
TV
FAV
LCD
MENU
EXIT
FAV- FAV+ EPG
LANG
SUBTITLE
ASPECT
PROG
INTRO
REPEAT
AB-AB-
Page 8
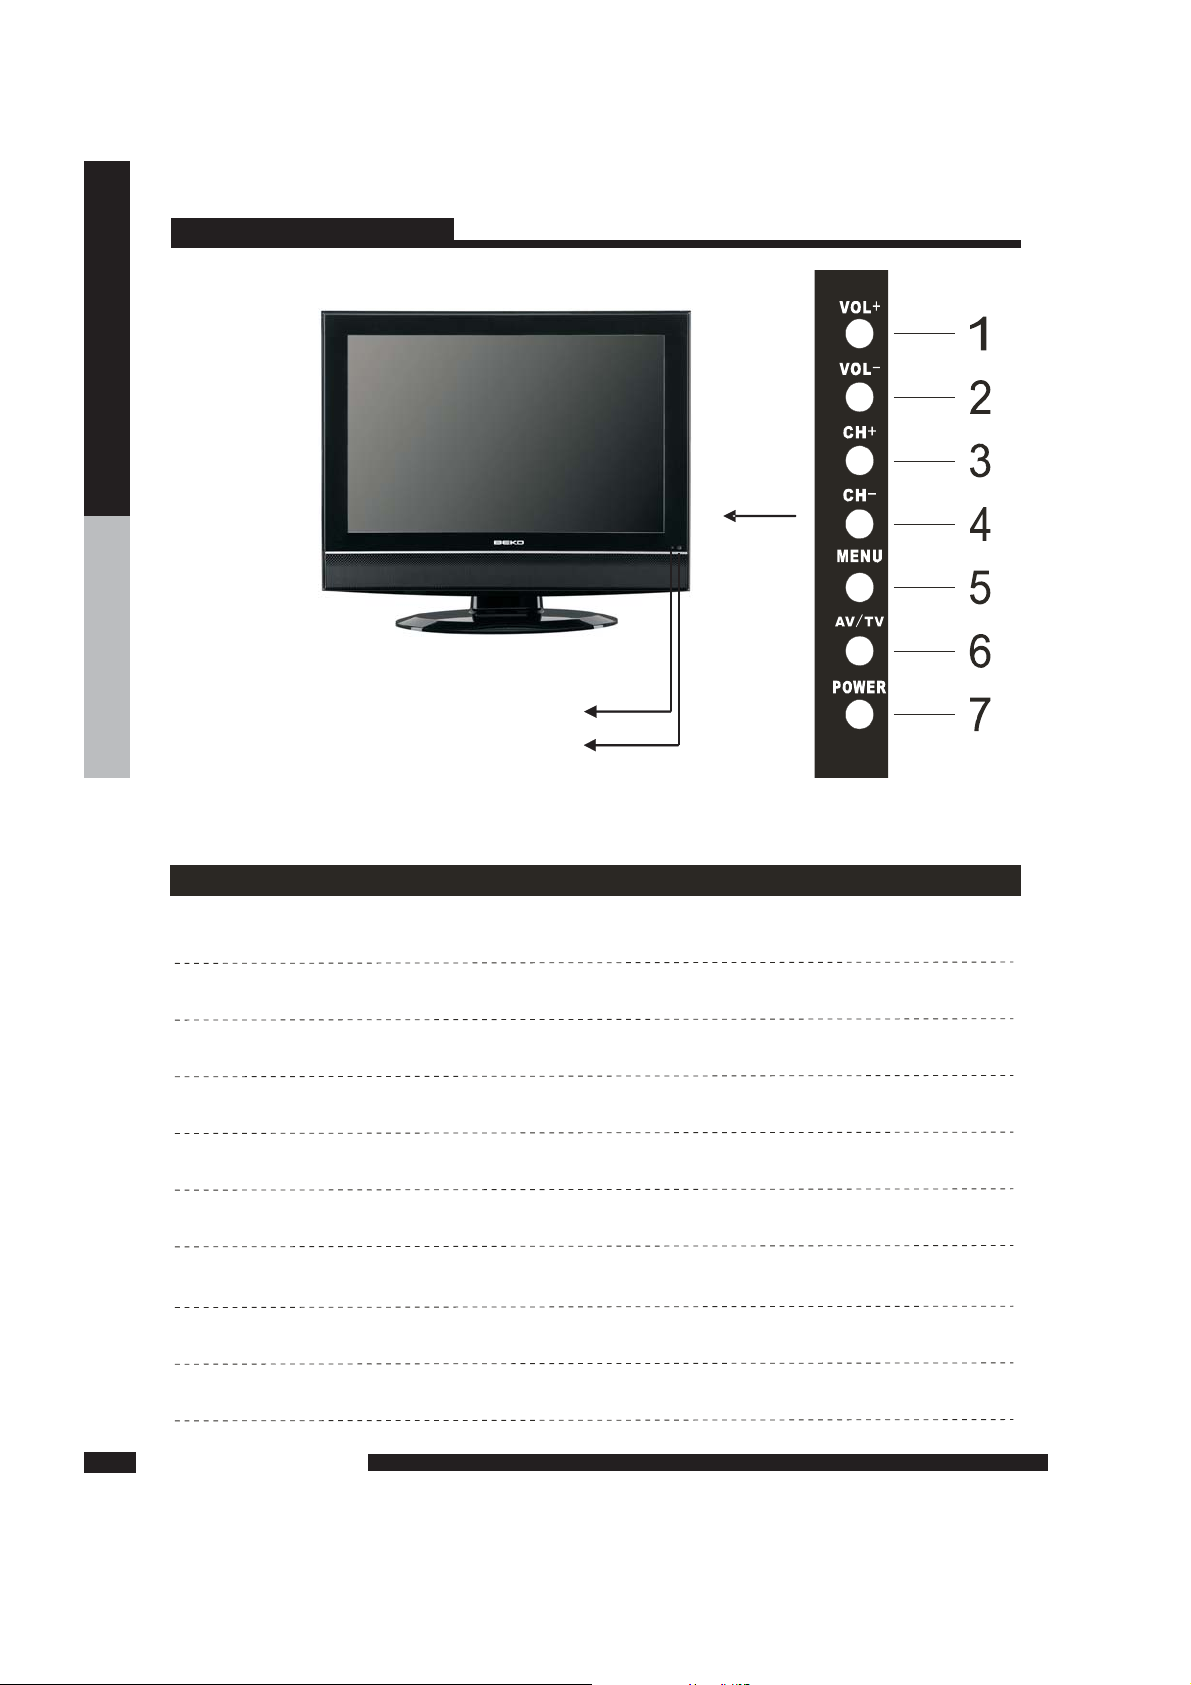
PREPARATION
TV
7
ITEM
DESCRIPTION
5 MENU
3 CH+
1 VOL+
8 LED
9 IR
6 AV/TV
Power On/Off (Standby)
MENU/ENTER
Select the input signals
TV channel down/dow n orientation
TV channel up/up orient ation
Volume down/left orie ntation
Volume up/right orientation
The LED light indicates when the TV is ac tivated
Infrared Receiver
7 POWER
PREPARATION
4 CH-
2 VOL-
9
8
DESCRIPTIONFront View
Page 9
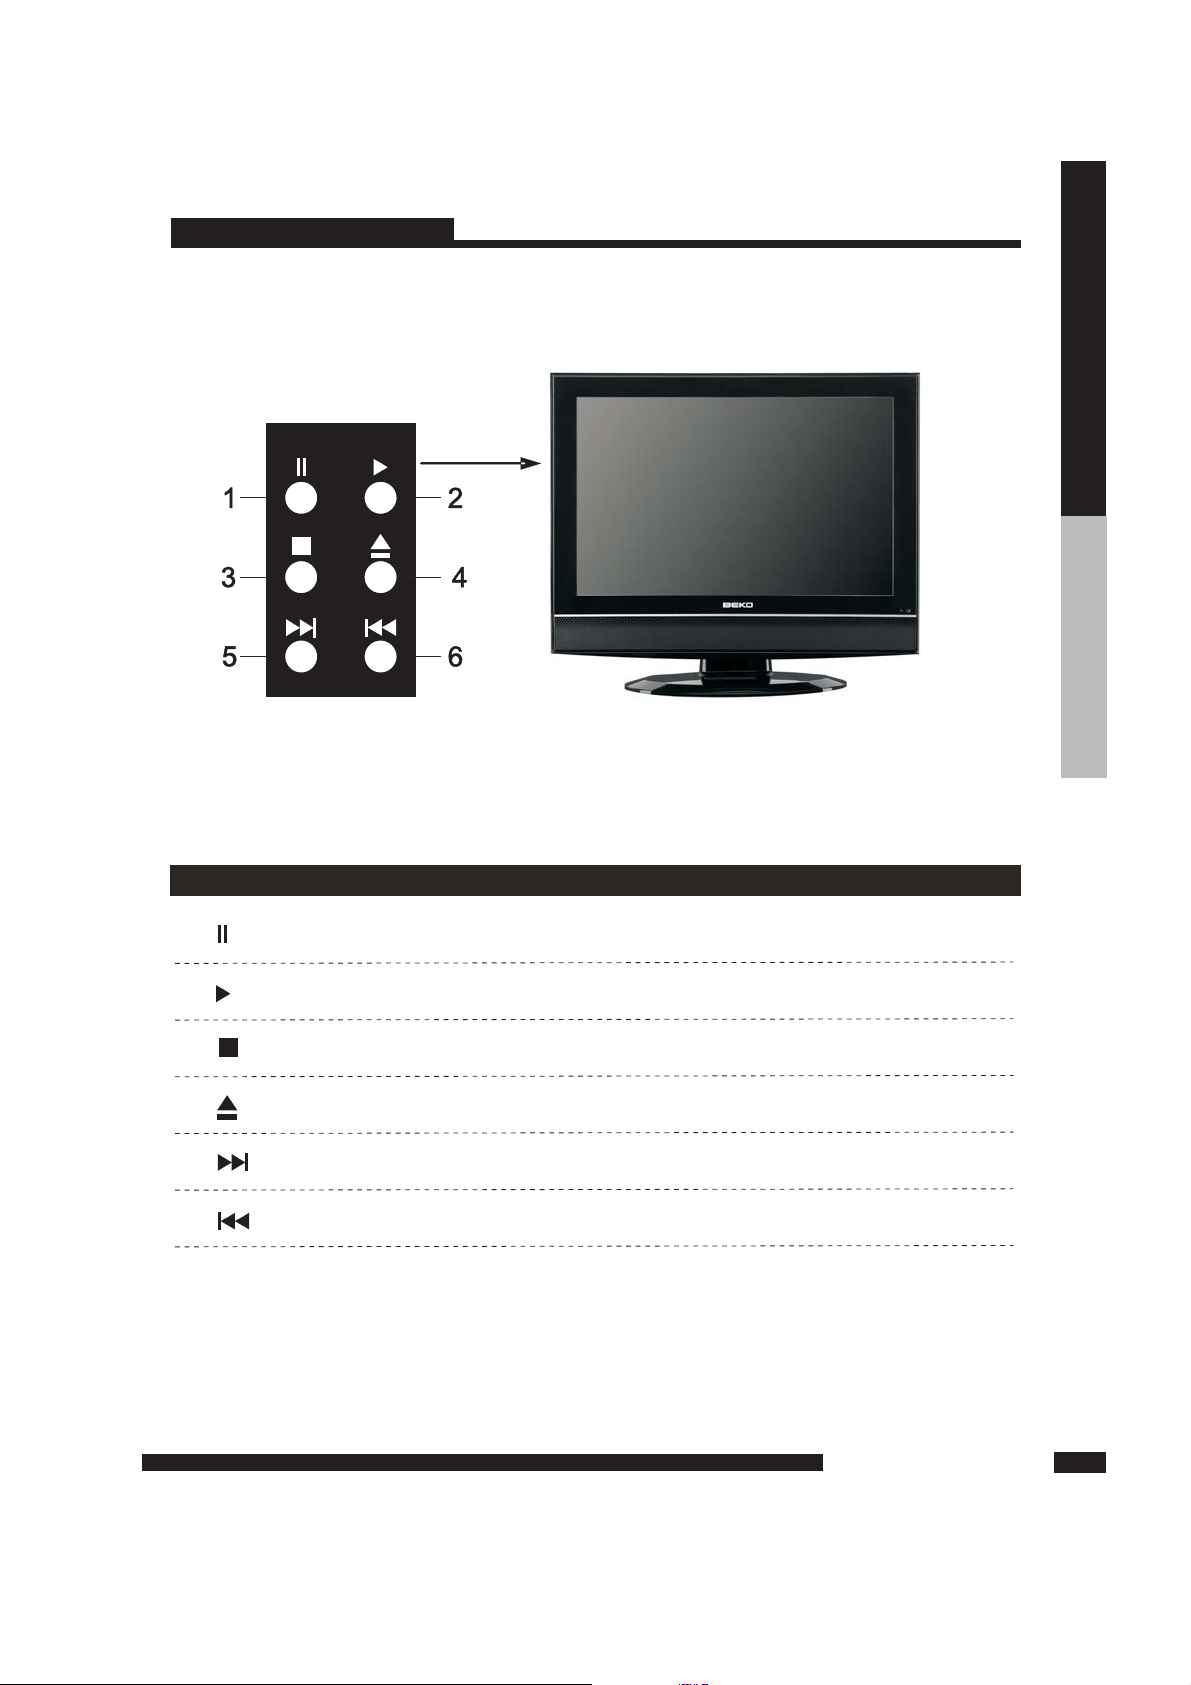
PREPARATION
LC D TV
PREPARATION
8
DVD
ITEM
5
4
6
2
DVD Open/Close
DVD Stop
DVD Play
DVD Previous
DVD Next
1
3
DVD Pause
Front View
Page 10

PREPARATION
TV
9
PREPARATION
ITEM
DESCRIPTION
1 DC 12 V IN
Powe r inpu t in te rface 12V DC .
()
2 HDM I
3 VGA
Conn ec ts to the comp os ite A /V i np ut out pu ts jac k s o n yo ur v id eo
equipment.
Conn ec ts to the S-VI DE O in tput j acks a nd Au di o in tput j a c ks on
your vid eo e qu ipment.
6 CVB S
9 CI
Used to connec t a video sign al fro m a person al com puter
.
5 S-VIDE O
Connects to the SCART input jacks of the audio or video equipment.
CI slot
Connects to a digital set-top box or other deceives with a HDMI
interface.
4 SCA RT
Rear View
The RF input tha t co nn ects t o yo ur V HF /UHF a n t enna o r ca ble.
Connects to the -.sound output port of a personal computer
7 PC Aud io
Earphone out interface
.
8 Ear ph one out
10 RF 75( Ω)
Page 11

PREPARATION
LC D TV
PREPARATION
10
09
- --
- :
.
:,
TV channel number s elect or Teletext page number
select
/ One bit two bit or thr ee bit TV channel select.
POWER
Turns the TV on and into standby mode .
MUTE
Mutes and restores your TV sound.
2
09- , -/--
3
NICAM
NICAM/GERMAN Stereo server select .
5
ASPECT
6
Volume up/down.
VOL+/-
7
CH+ -/
Channel up/down.
8
DISPLAY
Displays the source and channel s information .'
9
Return your latest program.
4
ENTER
10
Allows you to move,select and setup the OSD options.
EXIT DVD SETUP/
11
Exit f rom the current menu./Brings up DVD SETUP menu to
the screen DVD Mode( ).
LCD MENU
12
Displays the OSD menu .(on screen display)
PMODE
13
Select picture mode.
SMODE
14
Select sound mode.
INPUT
15
Source elect.s
SLEEP
16
Sets .the TV sleep time
Selects from the following modes settings:
Auto,4:3, 1 4:9,16:9,Subtitle,FullScreen,Zoom1,Zoom2
(See Page14 for details)
.
1
Remote Control
17
:.
:.
:.
:.
:.
:.
:.
DVD Play/Pause
DVD Stop
DVD Open
DVD Previous
DVD Next
DVD Forward
DVD Backward
12
11
10
9
8
7
1
2
20
3
4
6
5
15
16
13
14
18
20
FAV
LCD
MENU
EXIT
FAV- FAV+ EPG
LANG
SUB TITL E
ASP ECT
PROG
INTRO
REP EAT
AB-AB-
17
19
AUDIO
ANGLE
ZOOM
Page 12

PREPARATION
PREPARATION
11
LC D TV
Remote Control
Auto adjust .(PC mode) DVD open/ ./ .
19
21
FAV,FAV-/FAV+,EPG
AUTO/EJECT
FAV: .
FAV- FAV+:
EPG:
/ S
Press to display FAV menu
ource decrease fav channel.
Press to show the Electronic Program Guide menu.
20
D MENU,T ITLE D DISP GOTO PROG INTRO
REPEAT A B
. , . , , , ,
,-
-
D MENU
TITLE
D DISP
.
.
..
:.
:.
:.
:.
:
Bring up the DVD menu to the screen
Brings up the DVD menu to the screen
Display the DVD s informat ion
/
/
’
- .
:
:
:
.
GOTO
PROG
INTRO
REPEAT
AB
Goto the files time preriod that you want to play
Change the display effect edit the playing order
No use
Select repeat mode
Repeat from A to B
-
TEXT HOLD LANG AUDIO INDEX SIZE
REVEAL ANGLE SUBPAGE ZOOM
, , , , , ,
,
/
//
SUBTITLE
TEXT
HOLD
LANG AUDIO
INDEX
SIZE
REVEAL ANGLE
SUBPAGE ZOOM
:
:.
:
/(
)
:
:.
:.
: . .
:.
( ).
witch to Teletex with text mode
Toggle hold on or off for current display page
/
AUDIO mode in DVD
mode .
To switch the dialogue a t the bottom of the screen.
Refer to index page
Change display size
/ Reveal/hidden the hidden words /No use
/ Sub coded page access /Enlarg or
reduces the main picture size in DVD mode
S.
To show the list of audio languages available for the
current channel.Just in DVB mode Select
SUBTITLE
18
12
11
10
9
8
7
1
2
20
3
4
6
5
15
16
13
14
18
20
FAV
LCD
MENU
EXIT
FAV- FAV+ EPG
LANG
SUB TITL E
ASP ECT
PROG
INTRO
REP EAT
AB-AB-
17
19
AUDIO
ANGLE
ZOOM
Page 13

Remote Control
Effective range
Note :
Installing the batteries in your remote control
Do not use caustic cleaners( porcelain, stainless steel, toilet, or oven cleaner, etc...).
You may cause damage to your remote control.
Your remote control can be activated from up to the TV 5m away, if pointed directly
in front of the device.
1
2
3
Pul l t he tab of th e b a ck cov e r a nd pul l u p o n
the cover to o pen the batte r y c omp a rtme n t
of t h e r e mote contr o l.
Ins ert two AAA size ba tt e r ies.
Mak e s ure to mat ch the (+) a n d ( -) end s o f
the batte r ies wi t h t he (+) an d ( -) end s i n di c a ted
in the b a tter y c ompa r tmen t.
Ali gn the low er tabs of t he back cover to t he
rem ote con t rol an d s n ap the co ver in t o p lace .
PREPARATION
PREPARATION
12
5M
O
30
O
30
Page 14

If th e TV does not display any picture,please check all the connections.
Note:
Sele ct the menu lan guage before operatin g the TV
(see page 15, ).LANGUAGE
Press the button to turn your TV on.POWER
Press the button to enter TV mode.INPUT
Press the + - button to change channel number,
or use the buttons to select a channel.
The one two digit numbers can be set by pressing
button.
CH
0-9 & - --
- --
/
/
//
Press the button to alternate back and forth
between the current and previous channel.
Press the button to adjust the volume.
Press the button to turn the sound off.
Press again to turn the sound on.
VOL + -
MUTE
/
Press the button th display the information such
as the channel and channel label.
DISPLAY
1
2
3
4
5
6
Using the Features
Watching your TV
13
U SI N G T H E F E A T UR E S
USIN G TH E FE ATURES
USING THE FEATURES
13
6
3
5
2
1
5
4
FAV
LCD
MENU
EXIT
FAV- FAV+ EP G
LANG
SUBTITLE
ASPECT
PROG
INTRO
REP EAT
AB-AB-
AUDIO
ANGLE
ZOOM
3
Page 15

13
Wide-Screen Mode
Wide-S cr een mode all ow s y ou watch the broadcasts with var io us picture for mat in wide
screen mode. Press the button repeatedly to tog gle throu gh the following wide
mode settings.
ASPECT
When watching 4:3 image, the ori ginal
image wil l str et ch horizontally to a 16:9
image to fill the screen.
You c an enjoy the picture format of 14:9 or
genera l TV program with the 14:9 mode.
The origi na l i ma ge will extend the
1.25:1 image to fill the screen.
16 9:
14 9:
Zoom1
When watching 4:3 image, the original
image will be unchanged and there will
be vertical bars on the side of the screen.
43:
Press the b ut to n t o s el ec t r ep ea tedly modes settings as f ol l o ws:ASPECT
SubtitleFullScreem
Zoom1Zoom2
16:9
4:3
Auto
14:9
Note: You can only select 4:3 and 16:9 (Wide) in RGB[PC], HDMI mode only.
You can only select 4:3, 16:9 (Wide) and Zoo m in RGB[DTV], HDMI[DTV],
Component [DTV] mode o nl y.
USING THE FEATURES
USIN G TH E FE ATURES
1214
Page 16

14
Country
Language
Other
English
First Time Install at io n
Select
Adjust
OK
Cancel
Delet e Analo g P r og ram
Delet e Digi ta l Pr ogram
Analo g Prog ra m Sea rch
Digit al Progr am Se ar ch
First Time Installation
If this is the first tim e yo u open the TV and there is no
prog ra ms in the TV memory,the first time instal la tion
menu wil l ap pe ar in the pict ur e.
Country
Pres s button and then use to sele ct the
coun tr y.
Language
Pres s button and then use to sele ct the
OSD lang ua ge.
Afte r se tt ing the items,select OK to finish the fir st
time in stallation, or s el ect Cancel t o ex it thi s me nu .
Auto Tunin g
422.00MHz
1
Searching
ATV
Exit
MENU
Auto Tunin g
422.00MHz
1
Searching
ATV
Please wait .. ..Please wait ....
Auto Tunin g
474.00MHz
1
Searching
DTV
TV sa vin g cha nn els d o n ot po wer o ff or pr ess a ny bu ton sTV saving channels do not power off or press any butons
OK
Press :
You ca n pr ess LCD-MENU button to stop auto
tuni ng a nd c lo se the OSD men u.
You ca n pr ess LCD-MENU button to stop auto tuni ng a nd c lo se the OSD men u.
Begi n au to t un ing in DTV cha nn el.
First Ti me Installation
Unfortu na tely t he TV d id no t find an y chan ne ls.
Please c heck y ou r aer i al co nnetion
and re fe r to th e use r ma nu al.
Do you wi sh to re-tu ne you TV.
YES
Do It ne xt ti me
NO
First Ti me Installation
First ti me inst a ll at ion is no t fini sh ed!
Are yo u sure to ex it?
YES
Do It ne xt ti me
NO
If there is no progr am a ft er aut o tu ni ng,the suggesti on w il l ap pearon t he scr een.
If you cance ll ed the fir st t im e in stallation, it w il l re mind y ou w he ther t o se t th e fi rs t ti me
inst al lation next time
Cancel
Pres s :
USING THE FEATURES
USIN G TH E FE ATURES
15
Page 17

15
ATV Menu
PICTURE menu options
Pres s but to n on the fro nt pan el o r on the remote cont ro l to dis play
the main men u.
MENU LCD- ME NU
4. When you are satisfied with your adjustment,press
the button to retun the pr evious menu
or press the button to exit the main menu.
LCD-MENU
EXIT
2. Press button to select the option that you
want to adjust in the menu.PICTURE
1. Press in the main menuPICTUREbutton to select
3. Press button to adjust.
Pict ur e Mo de
Sele ct p ic ture m od e in menu.( Avai la ble picture mode:Standa rd ,Movie,Sport,Mi l d ,Game.)
If you change the valu e of Con tr ast,Brightness, Co lour,Tint ,S h a rpness o r Co lour
temp er ature on t he pic t u re men u, the picture mode will be c hanged t o “P ersonal” automatica ll y.
You ma y se lect t he pic t u re mod e di re ctly b y pr es sing button.
PICT UR E
PMOD
TIPS Pict ur e Mo de: You c an p re ss PMO D bu tt on on the remote con tr ol to select the dire ct ly.
Cont ra st
Brig ht ness
Colour
Shar pn ess
DNR( Di gital Noise Reduction )
Colo ur t em perature
Tint
Pres s button and then use to adju st the con trast of t he p ic ture.
Pres s button and then use to adju st the bri ghtness of t he pic tu re.
Pres s button and then use to adju st the col our saturation.
Pres s to sel ect t h e sh arpness mode of your
TV.(Av a i lable Sharpend Mode :N ormal,Sharp ,
Sharpest,Softest,Soft.)
If thebr oa dcast signal received is weak ,you c an s el ect
the DNR opti on t o re du ce the vid eo n oi se lev e l
betw ee n Off,Lo w,Mid a nd H ig h.
Sele ct a n op ti mum colour t emperature mode to suit
your eye s fo r vi ew ing among Normal,Warm and Cold.
Pres s button and then use to adju st the ton e of col our when y ou r sy stem i s in NTS C.
Afte r ad ju sting the value you want,pres s button to retu r n t o th e pr ev iew MENU.LCD-MENU
NOTE: this optio n is inv al i d i n PC mode, an d it w il l be sho wn ing ra y
NOTE:T hi s op tion is avai la ble on ly in PC mode.
Contrast
28
USIN G TH E FE ATURES
USING THE FEATURES
12
16
Page 18

SETUP
ATV Menu
SOUND menu options
Pres s but to n on the fro nt pan el o r on the remote cont ro l to dis play
the main men u.
MENU LCD- ME NU
4. When you are satisfied with your adjustment,press
the button to return the previous menu
or press the button to exit the main menu.
LCD-MENU
EXIT
2. Press button to select the option that you
want to adjust in the menu.SOUND
1. Press in the main menuSOUNDbutton to select
3. Press button to adjust.
Volume
Sound Mode
Bass
Trebl e
Trebl e
Pres s button a nd the n us e to adj us t th e so un d le vel.
Sele ct S ou nd Mode in menu.(Available soun d mo de :Personal,Voice, M u sic,Theatre.)
If you change the valu e of Bas s and Trebl e on the Sound men u, the sound mode w il l be c ha nged to
“Per so nal” a ut omatically.
You ma y se lect t he s ou n d m od e di rectly b y pr essing button.
SOUN D
SMOD E
Pres s button a nd the n us e to inc re ase or dec re ase th e le vel of the lower -pitched sounds.
Pres s button a nd the n us e to inc re ase or dec re ase th e le vel of the highe r- pitched
sounds.
Pres s button and then use to incr ea se or decr ea se the lev el o f th e au di o ou tput b etween
left and rig ht s pe akers.
Afte r ad ju sting the value you want,pres s button to retu r n t o th e pr ev iew MENU.LCD-MENU
TIPS : SMOD EYou ca n pr ess bu tt on on the remo te c on trol t o se l e ct the Sou nd Mod e di re ctly.
Volu me
28
USING THE FEATURES
U SI N G T H E F E A T UR E S
USIN G TH E FE ATURES
17
Page 19

17
SETUP
ATV Menu
SETUP menu options
Pres s but to n on the fro nt pan el o r on the remote cont ro l to dis play
the main men u.
MENU LCD- ME NU
4. When you are satisfied with your adjustment,press
the button to retun the pr evious menu
or press the button to exit the main menu.
LCD-MENU
EXIT
2. Press button to select the option that you
want to adjust in the menu.SETUP
1. Press in the main menuSETUPbutton to select
3. Press button to adjust.
Country
Auto Tuning
This opt io n al lows y ou t o se le ct the cou nt ry.
This opt io n al lows y ou t o tu ne t he c ha nnels that c an be rece ived a ut omatically.
Pres s key to start .OK
Note:Befo re y ou per form Au to Tu ni ng,you must choose the countr y wh ere you are by
sele ct ing Country option.
NOTE:SETUP HDMI/
VGA SETU P
menu s ar e di fferen t fo r di ffer en t in put sources,if the input sour ce is sele ct ed
and ther e ar e no rel at ive input signal, menu will be unavai lable.
SETPUT menu o f TV input:
Auto Tunin g
422.00MHz
1
Searching
ATV
Exit
MENU
You ca n pr ess butt on to stop aut o tuni ng and clo se t he menu .LCD - M ENU OSD
USIN G TH E FE ATURES
USING THE FEATURES
18
Page 20

18
ATV Menu
2. Press button to perform yor selection,the menu of
will display on the screen.Manual Tuning
3. Press to perform yor selection,the menu of will display as below.Program Label
4. Press the numeric buttons to input the numbers directly or pre ss to select the letters.
1. Press in the
setup menu
Manual Tuningbutton to select
2. Press in the menuProgram Labeled SETUP .to select
5. Press to move the cursor.
This option has two functions:
6. Press , or button to confirm and return to previous menu.ENTER LCD-MENU EXIT
1. Set the puency of channel for AFT option.
2. Press button for 3+ seconds a nd it will start auto tuning from this frepuency.
1. Select a channel you wa nt to labeled.
NOTE:Before you per fo rm Man ua l Tun ing,you must choose the country where you are by
sele ct ing Country optiom.
This opt io n al l o ws you to perf or m Ma n u al Tuni ng .
The curren t pr og ram number.press u pp er or lower prog ra m.
Pres s to sel ec t a co rr esponding sound system, su ch as I,DK ,B G.
Pres s to sel ec t a co rr esponding colour system ,s uch as Auto ,PAL,SE CA M.
Due to weak signal s or a wrong anten na c on figuration,some of the chan ne ls may not be tuned
to the best recept ion c o ndition.AFT function allows you to fine tune channe l se le cted(the
freq ue ncy of cha nn el is arou nd the val ue i n opti on ).Manual Sear ch
This opt io n al lows y ou t o la be l a ch an nel,you can also relabe l th e pr og rams h av e be en lab e l ed.
Manu al Tuning
Program
Soun d Sy st em
Colo ur S ys tem
AFT( Au to Fin e Tune)
Manu al S ea rch
Prog ra m La bel
Pr o gr am La bel
Ma n ua l S ear ch
MHz
.
USING THE FEATURES
USIN G TH E FE ATURES
1219
Page 21

19
SETUP
ATV Menu
This fun ct ion allows y pu to sort the TV programs acc or ding t o yp ur p re ferences,as fol lo wing:
Prog ra m Ed it
Press button to open the ,you can open your favourite programs then Press to
select the channel y ou want to watch.
FAV Favorite List
1. Press in the
menu
Program Edit SETUPto select
.
3. Press the channel in the list which you
would like to sort
to select
.
5. Press the location you would like to
place the channel.
to select
2. Press to enter into t he sub menu,a channel list
will display.
4. Press to perform your selection.
6. Press to perform your selection.
7. Press to return to the previous menu or
press to exit
LCD-MENU
EXIT .
Favorite:Press green button on remote control to select the favourite programs.
Skip:Press yellow button on remote control to select which programs you want to skip.
Press yellow button again thes program will u nlock.
Favorite:Press blue button on remote control to lock the programs.
Press blue button again this program will not be skipped.
USIN G TH E FE ATURES
USING THE FEATURES
1220
Page 22

SETUP
ATV Menu
SETU P VGAmenu of input(for sett ing t h e PC p ic ture p osition):
SETU P HDMImenu o f input( fo r se tting the HDMI p icture p osition):
USING THE FEATURES
USIN G TH E FE ATURES
12
21
Page 23

21
SETUP
ATV Menu
Timer menu options
F unction menu options
Pres s but to n on the fro nt pan el o r on the remote cont ro l to dis play
the main men u.
MENU LCD- ME NU
Pres s but to n on the fro nt pan el o r on the remote cont ro l to dis play
the main men u.
MENU LCD- ME NU
4. When you are satisfied with your adjustment,press
the button to retun the pr evious menu
or press the button to exit the main menu.
LCD-MENU
EXIT
2. Press button to select the option that you
want to adjust in the menu.TIMER
1. Press in the main menuTIMERbutton to select
3. Press button to adjust.
4. When you are satisfied with your adjustment,press
the button to retun the pr evious menu
or press the button to exit the main menu.
LCD-MENU
EXIT
2. Press button to select the option that you
want to adjust in the FUNTION menu.
1. Press in the main
menu
FUNCTIONbutton to select
3. Press button to adjust.
Slee p Timer
OSD Timer
Language
Video Size
Blue Scr ee n
Sele ct t he s le ep tim e to put aut om atically the T V in sta nd by mod e. Timer can be selecte d as 0mi n,
15mi n, 30min,45min ,6 0min,75min,90 min,105min,12 0 m in.Also you can select the slee p ti me b y
pres si ng button repeat ed ly.SLEEP
You ca n se lect t he t im e wh en the OSD dis pl ay on the scre en s uc h as :5sec,10sec ,1 5sec,20sec,
25sec,30sec.
Pres s to sel ect t h e OS D la nguage.
This opt io n al lows y ou t o se le ct the scr ee n di splay mode which best corre sp onds t o yo ur
view in g re quirements.
This opt io n al lows y ou t o se le ct the blu e ba ck ground on or o ff.I f on ,t he scr e e n ba ckground
will tur n bl ue v er y we ak or no signa l co nd ition.
NOTE:The availa bl e as pect m od e ma y be differe nt in different inpu t si gn al.
USING THE FEATURES
USIN G TH E FE ATURES
12
22
Page 24

22
SETUP
ATV Menu
Chil d Lo ck
Chil d Lo ck
Reset
Firs t Time Installat i o n
Key Lock
Chan ge P IN C od e
Old PIN Code
Ente r Aga in
New PIN Code
Pres s or butto n to set the child loc k.ENTER
Pres s or btton to set the chil d lock .ENTER
Pres s or btton to rese t th e TV to t h e f ac tory d ef ault.ENTER
Pres s b utton to o pe n th e Fi rs t Tim e In stallation menu,and the ope ra tion of this men u is in page 13.
Pres s or btton to set the key lock.ENTER
Pres s or btton to set the Change PIN Cod e.ENTER
Pres s 0~ 9 butt o n s to e nt er the corre c t o ld P IN c od e , you can not change t h e P IN
code if you entere d a wron g PIN code .
Pres s 0~ 9 butt o n s to e nt er the PIN code you entere d in the New PIN Code menu
agai n to confi rm t he n ew PIN cod e.
Pres s 0~ 9 butt o n s to e nt er the new PIN code you want.
TIPS :T he sup er user’s( ad ministrator ’s)password is 4711.
You ne ed to enter the PIN code if the is set “on”,an d th e defa ul t PI N co de is
empt y,you can press button direct ly to enter.
Chil d Lo ck
ENTER
USING THE FEATURES
USIN G TH E FE ATURES
1223
Page 25

23
SETUP
DTV Menu
C hannel List opt ions
F avorite List op tions
Pres s EN TE R bu t t on to open the Chann el L is t,then p r e ss to select the channel you
want to watch.
Pres s FAV b utton open t he Favor i t e Li st,then press to select the cha nn e l y ou w an t to wat c h .
USING THE FEATURES
USIN G TH E FE ATURES
12
24
Page 26

24
SETUP
DTV Menu
C hannel Search options
4. When you are satisfied with your adjustment,press the button to retun the previous
menu or press the button to exit the main menu.
LCD-MENU
EXIT
2. Press button to select your option what you want to adjust in the menu.SETUP
Press button to select Manual Search,Press ENTER or button to set the Manual Tuning.
1. Press in the main menuSETUPbutton to select
3. Press button to adjust.
Channel
Star t Se ar ch
Serc ic e Fo und
Sign al Q ua lity
Sign al S tr ength
Freq ue ncy
The curren t ch an nel number.Press t o se le ct the upper or lowe r ch an n e l,Press 0~9 to
sele ct t he c ha nnel d ir ectly.
To select whether to start sea ch ing in beg in/searching/ f i nished.
The serv ic es be foun d.
The sign al q ua lity o f cu rr ent channel.
The sign al s tr ength of c ur rent c hannel.
The freq ue ncy of cur re nt cha n n el.
USING THE FEATURES
USIN G TH E FE ATURES
25
Page 27

SETUP
DTV Menu
Prog ra m Ed it
Comm on I nt erface
This fun ct ion al lows y o u t o ed it the DTV pro gr ams according to your preferenc es ,as following:
If you have insert e d t he C I ca rd to the TV,you can see the infor m a tion o f th e it.
USING THE FEATURES
USIN G TH E FE ATURES
1226
Page 28

26
SETUP
EPG Menu
E PG(Electronic Programme Guide) options
Use EPG button on the remo te c on t r ol to disp la y th e EP G me nu d ir ectly as b el ow:
Press button again to exit EPG.EPG
Press button to select advance day.yellow/blue
Press button to set the reminder function.OK
Press to navigate the menu.
Press to select the program you want to teleview.Press OK button.When this program
begin to play,you will be reminded.
USING THE FEATURES
USIN G TH E FE ATURES
1227
Page 29

27
SETUP
DVD SETUP Menu
General
2 DVD SETUP.,Press - key show the main menu.
4 Press to move the highlight to the items that is to be setup Press for conf irmation or
press to the setup menu
..
.
ENTER
1 Input mode DVD..:
5 Press to adjust items
6 Press to then press or pre ss - key to exit setup menu.
..
.,EXIT SETUP ENTER DVD SETUP
3 Press to chose items that are going to be set up Then pres to enter the setup menu. . .
Notice The system au to ma tically ch an ge to the p au se mode after enter the s et up men u: .
TV Display
Angle Mark
OSD Languge
Captions
Screen Saver
Last Memory
:.
:.
:.
:.
:.
:.
Set TV Display mode
Set Angle Mark
Set OSD Languge
Captions
Screen Saver
Set Last Memory
A udio
Downmix:.Set Downmix mode
USING THE FEATURES
USIN G TH E FE ATURES
12
28
Page 30

SETUP
DVD SETUP Menu
DOLBY
Video
Preference
DYNAMIC:.Screen display as following
Sharpness
Brightness
Contrast
:.
:.
:.
Adjust the sharpness of the picture
Adjust the Brightness of the picture
Adjust the Contrast of t he picture
:
26
USING THE FEATURES
USIN G TH E FE ATURES
Audio
Subtitle
Disc
Parental
Password
Default
:.
:.
:.
:.
:.
:.
Set Audio language
Set Subtitle language
Set Disc language
Set Parental control
Change Password
Load factory setting
1229
Page 31

29
PAL I,D/K B/G SECAM D/K B/G,,
DC 12V
S-VIDEO input
22 inch LCD panel
2×3W
1
1
1
1
11
11
11
11
1680 1050( )× ( )HV
<48W
Earphone out
Panel System
Display Resolution
Television System
Inputs/Output
CVBS input/AUDIO(L/R)
SCART input
HDMI input
VGA input
Speaker Out
Power supply
Power Waste
SPECIFICATIONS
19 inch LCD panel
1440 900(( )× )HV
<60W
OSD language
English,Frenc h ,Spanish,German,
Italian, Portuguese
USING THE FEATURES
SPEC IF ICATI ON
11
P AUDIOC
CI slot
1
1
30
Page 32

GUARANTEE
SPEC IF ICATI ONGUAR AN TEE
26
GUARANTEE
1231
Page 33

GUARANTEE
GUARANTEE
GUARANTEE
32
 Loading...