

Page 1

User Manual
EUROLIVE PROFESSIONAL
B2520 PRO
High-Performance 2,200-Watt PA Loudspeaker System with Dual 15" Woofers
B1800X PRO
Professional 1,800-Watt 18" PA Subwoofer
B1520 PRO/B1220 PRO
Professional 1,200-Watt 15"/12" PA Loudspeaker System
Page 2

2 EUROLIVE B2520 PRO/B1800X PRO/B1520 PRO/B1220 PRO User Manual
Table of Contents
Thank you ....................................................................... 2
Important Safety Instructions ...................................... 3
Legal Disclaimer .............................................................3
Limited Warranty ........................................................... 3
1. Introduction ...............................................................5
2. Optimal Operation .................................................... 6
3. Operating Modes ....................................................... 6
4. Pin Assignment (B1800X PRO) ..................................7
5. Additional Considerations ........................................ 7
6. Application Examples ............................................... 7
7. Troubleshooting ........................................................ 9
8. Specications ........................................................... 10
Thank you
By purchasing BEHRINGER EUROLIVE PROFESSIONAL speakers, you have obtained
a rst-class PA loudspeaker system. Now, you own (at least) one component of
an expandable system that will reproduce the sound of your musical material
unadulterated and perfectly balanced.
Page 3
3 EUROLIVE B2520 PRO/B1800X PRO/B1520 PRO/B1220 PRO User Manual
Terminals marked with this symbol carry
electrical current of su cient magnitude
to constitute risk of electric shock. Use only
high-quality commercially-available speaker cables with
¼" TS plugs pre-installed. All other installation or
modi cation should be performed only by
quali ed personnel.
This symbol, wherever it appears,
alerts you to the presence of uninsulated
dangerous voltage inside the
enclosure - voltage that may be su cient to constitute a
risk of shock.
This symbol, wherever it appears,
alerts you to important operating and
maintenance instructions in the
accompanying literature. Please read the manual.
Caution
To reduce the risk of electric shock, do
not remove the top cover (or the rear
section). No user serviceable parts inside. Refer servicing
to quali ed personnel.
Caution
To reduce the risk of re or electric shock,
do not expose this appliance to rain and
moisture. The apparatus shall not be exposed to dripping
or splashing liquids and no objects lled with liquids, such
as vases, shall be placed on the apparatus.
Caution
These service instructions are for use
by quali ed service personnel only.
To reduce the risk of electric shock do not perform any
servicing other than that contained in the operation
instructions. Repairs have to be performed by quali ed
service personnel.
Read these instructions.1.
Keep these instructions.2.
Heed all warnings.3.
Follow all instructions.4.
Do not use this apparatus near water.5.
Clean only with dry cloth.6.
Do not block any ventilation openings. Install in 7.
accordance with the manufacturer’s instructions.
Do not install near any heat sources such as 8.
radiators, heat registers, stoves, or other apparatus
(including ampli ers) that produce heat.
Do not defeat the safety purpose of the polarized 9.
or grounding-type plug. A polarized plug has two blades
with one wider than the other. A grounding-type plug
has two blades and a third grounding prong. The wide
blade or the third prong are provided for your safety. If the
provided plug does not t into your outlet, consult an
electrician for replacement of the obsolete outlet.
Protect the power cord from being walked on or 10.
pinched particularly at plugs, convenience receptacles,
and the point where they exit from the apparatus.
Use only attachments/accessories speci ed by 11.
the manufacturer.
Use only with the 12.
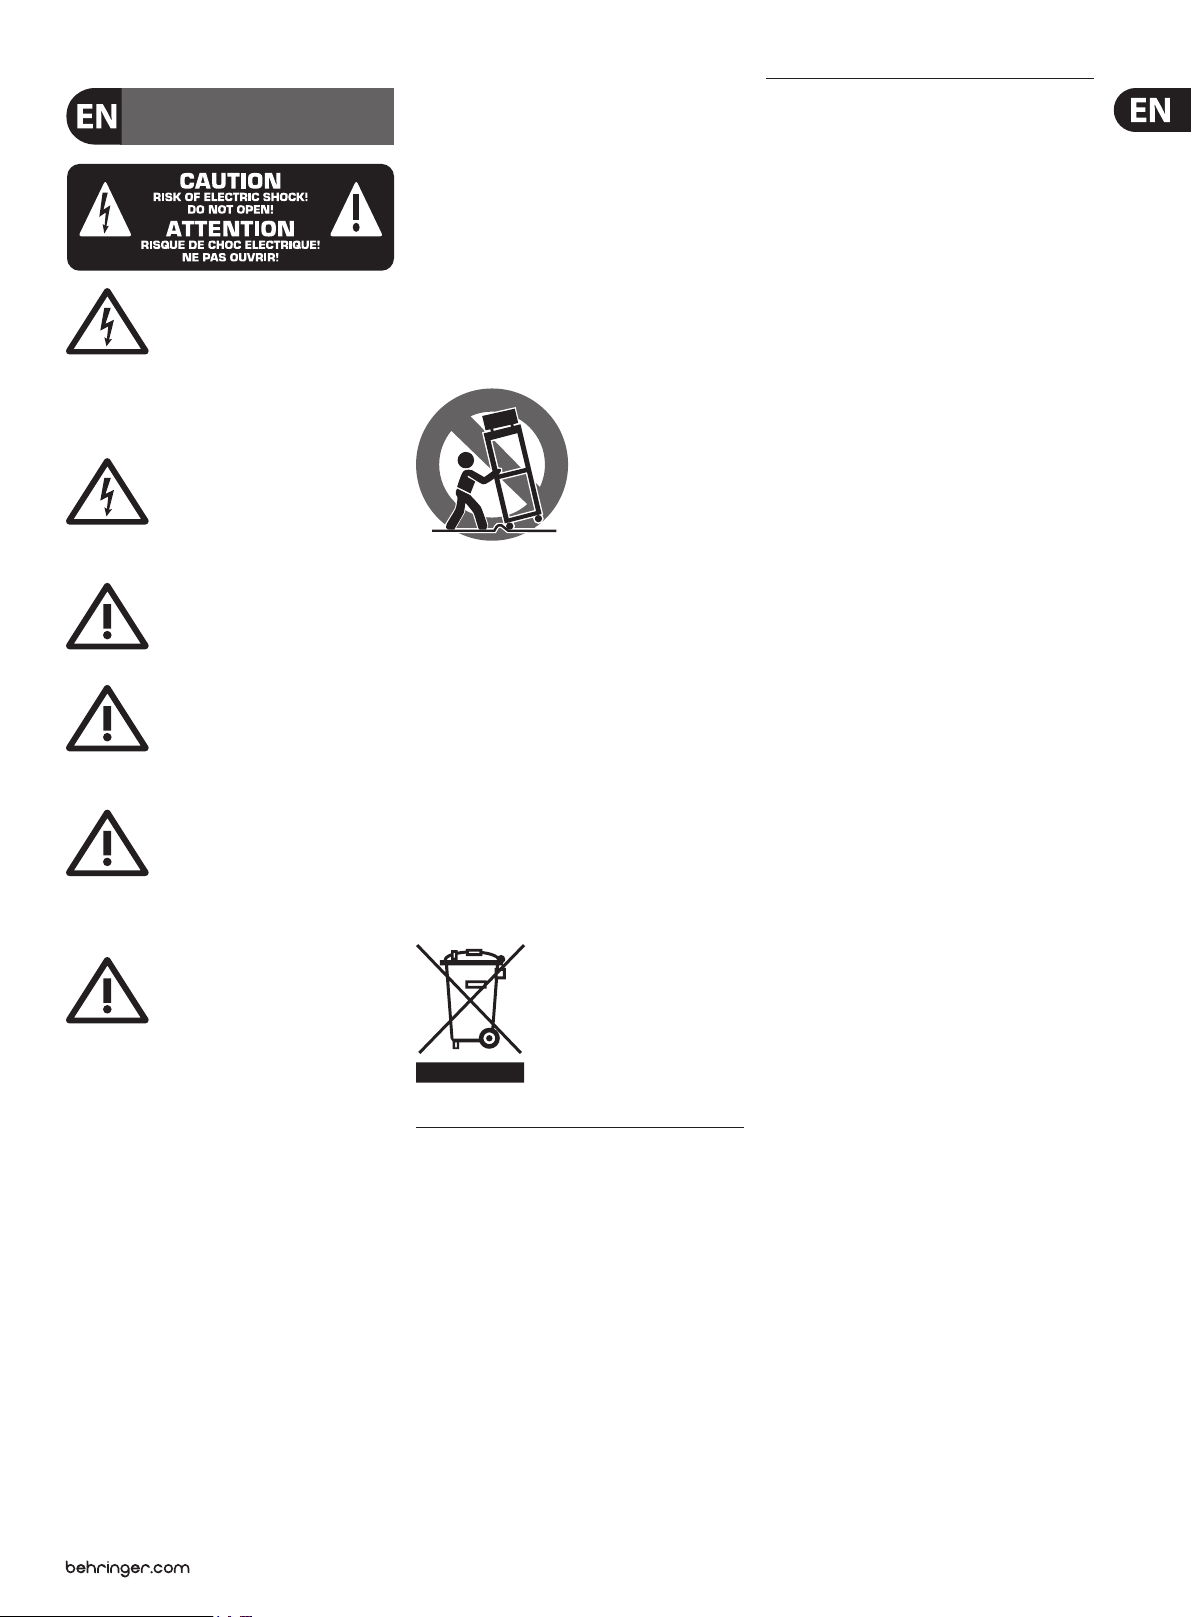
cart, stand, tripod, bracket,
or table speci ed by the
manufacturer, or sold with
the apparatus. When a cart
is used, use caution when
moving the cart/apparatus
combination to avoid
injury from tip-over.
Unplug this apparatus during lightning storms or 13.
when unused for long periods of time.
Refer all servicing to quali ed service personnel. 14.
Servicing is required when the apparatus has been
damaged in any way, such as power supply cord or plug
is damaged, liquid has been spilled or objects have fallen
into the apparatus, the apparatus has been exposed
to rain or moisture, does not operate normally, or has
been dropped.
The apparatus shall be connected to a MAINS socket 15.
outlet with a protective earthing connection.
Where the MAINS plug or an appliance coupler is 16.
used as the disconnect device, the disconnect device shall
remain readily operable.
Technical speci cations and appearance are subject to change without
notice. The information contained herein is correct at the time of printing.
All trademarks are the property of their respective owners. MUSIC Group
accepts no liability for any loss which may be su ered by any person
who relies either wholly or in part upon any description, photograph or
statement contained herein. Colors and speci cations may vary slightly from
product. BEHRINGER products are sold through authorized dealers only.
Distributors and dealers are not agents of MUSIC Group and have absolutely
no authority to bind MUSIC Group by any express or implied undertaking
or representation. This manual is copyrighted. No part of this manual may
be reproduced or transmitted in any form or by any means, electronic or
mechanical, including photocopying and recording of any kind, for any
purpose, without the express written permission of MUSIC Group IP Ltd.
ALL RIGHTS RESERVED.
© 2011 MUSIC Group IP Ltd.
Trident Chambers, Wickhams Cay, P.O. Box 146,
Road Town, Tortola, British Virgin Islands
Warranty§ 1
This limited warranty is valid only if you purchased (1)
the product from a BEHRINGER authorized dealer in the
country of purchase. A list of authorized dealers can be
found on BEHRINGER’s website behringer. com under
“Where to Buy“, or you can contact the BEHRINGER o ce
closest to you.
MUSIC Group* warrants the mechanical and (2)
electronic components of this product to be free of defects
in material and workmanship if used under normal
operating conditions for a period of one (1) year from
the original date of purchase (see the Limited Warranty
terms in § 4 below), unless a longer minimum warranty
period is mandated by applicable local laws. If the product
shows any defects within the speci ed warranty period
and that defect is not excluded under § 4, MUSIC Group
shall, at its discretion, either replace or repair the produc t
using suitable new or reconditioned product or parts.
In case MUSIC Group decides to replace the entire product,
this limited warranty shall apply to the replacement
product for the remaining initial warranty period, i.e.,
one (1) year (or otherwise applicable minimum warranty
period) from the date of purchase of the original product.
Upon validation of the warranty claim, the repaired (3)
or replacement product will be returned to the user freight
prepaid by MUSIC Group.
Warranty claims other than those indicated above (4)
are expressly excluded.
PLEASE RETAIN YOUR SALES RECEIPT. IT IS YOUR PROOF
OF PURCHASE COVERING YOUR LIMITED WARRANTY.
THIS LIMITED WARRANTY IS VOID WITHOUT SUCH PROOF
OF PURCHASE.
Online registration§ 2
Please do remember to register your new BEHRINGER
equipment right after your purchase at behringer. com
under “Support” and kindly read the terms and conditions
of our limited warranty carefully. Registering your
purchase and equipment with us helps us process
your repair claims quicker and more e ciently.
Thank you for your cooperation!
Return materials authorization§ 3
To obtain warranty service, please contact the (1)
retailer from whom the equipment was purchased.
Should your BEHRINGER dealer not be located in your
vicinity, you may contact the BEHRINGER distributor for
your country listed under “Support” at behringer. com.
If your country is not listed, please check if your problem
can be dealt with by our “Online Support” which may
also be found under “Support” at behringer. com.
Alternatively, please submit an online warranty claim at
behringer. com BEFORE returning the product. All inquiries
must be accompanied by a description of the problem
and the serial number of the product. After verifying
the product’s warranty eligibility with the original sales
receipt, MUSIC Group will then issue a Return Materials
Authorization (“RMA”) number.
Legal Disclaimer
Limited Warranty
Important Safety Instructions
Legal Disclaimer
Limited Warranty
Page 4

4 EUROLIVE B2520 PRO/B1800X PRO/B1520 PRO/B1220 PRO User Manual
Subsequently, the product must be returned in (2)
its original shipping carton, together with the return
authorization number to the address indicated by
MUSIC Group.
Shipments without freight prepaid will not (3)
be accepted.
Warranty Exclusions§ 4
This limited warranty does not cover consumable (1)
parts including, but not limited to, fuses and batteries.
Where applicable, MUSIC Group warrants the valves or
meters contained in the product to be free from defects in
material and workmanship for a period of ninety (90) days
from date of purchase.
This limited warranty does not cover the product (2)
if it has been electronically or mechanically modi ed
in any way. If the product needs to be modi ed or
adapted in order to comply with applicable technical
or safety standards on a national or local level, in any
country which is not the country for which the product
was originally developed and manufactured, this
modi cation/adaptation shall not be considered a defect
in materials or workmanship. This limited warranty does
not cover any such modi cation/adaptation, regardless
of whether it was carried out properly or not. Under the
terms of this limited warranty, MUSIC Group shall not
be held responsible for any cost resulting from such a
modi cation/adaptation.
This limited warranty covers only the product (3)
hardware. It does not cover technical assistance for
hardware or software usage and it does not cover
any software products whether or not contained in
the product. Any such software is provided “AS IS”
unless expressly provided for in any enclosed software
limited warranty.
This limited warranty is invalid if the factory-(4)
applied serial number has been altered or removed from
the product.
Free inspections and maintenance/repair work (5)
are expressly excluded from this limited warranty, in
particular, if caused by improper handling of the product
by the user. This also applies to defects caused by normal
wear and tear, in particular, of faders, crossfaders,
potentiometers, keys/buttons, guitar strings, illuminants
and similar parts.
Damage/defects caused by the following conditions (6)
are not covered by this limited warranty:
improper handling, neglect or failure to operate the •
unit in compliance with the instructions given in
BEHRINGER user or service manuals;
connection or operation of the unit in any way •
that does not comply with the technical or safety
regulations applicable in the country where the
product is used;
damage/defects caused by acts of God/Nature •
(accident, re, ood, etc) or any other condition that
is beyond the control of MUSIC Group.
Any repair or opening of the unit carried out by (7)
unauthorized personnel (user included) will void the
limited warranty.
If an inspection of the product by MUSIC Group (8)
shows that the defect in question is not covered by the
limited warranty, the inspection costs are payable by
the customer.
Products which do not meet the terms of this (9)
limited warranty will be repaired exclusively at the buyer’s
expense. MUSIC Group or its authorized service center will
inform the buyer of any such circumstance. If the buyer
fails to submit a written repair order within 6 weeks after
noti cation, MUSIC Group will return the unit C.O.D. with
a separate invoice for freight and packing. Such costs will
also be invoiced separately when the buyer has sent in a
written repair order.
Authorized BEHRINGER dealers do not sell new (10)
products directly in online auctions. Purchases made
through an online auction are on a “buyer beware” basis.
Online auction con rmations or sales receipts are not
accepted for warranty veri cation and MUSIC Group will
not repair or replace any product purchased through an
online auction.
Warranty transferability§ 5
This limited warranty is extended exclusively to the
original buyer (customer of authorized retail dealer) and
is not transferable to anyone who may subsequently
purchase this product. No other person (retail dealer, etc.)
shall be entitled to give any warranty promise on behalf
of MUSIC Group.
Claim for damage§ 6
Subject only to the operation of mandatory applicable
local laws, MUSIC Group shall have no liability to the buyer
under this warranty for any consequential or indirect
loss or damage of any kind. In no event shall the liability
of MUSIC Group under this limited warranty exceed the
invoiced value of the product.
Limitation of liability§ 7
This limited warranty is the complete and exclusive
warranty between you and MUSIC Group. It supersedes
all other written or oral communications related to this
product. MUSIC Group provides no other warranties for
this product.
Other warranty rights and § 8
national law
This limited warranty does not exclude or limit the (1)
buyer’s statutory rights as a consumer in any way.
The limited warranty regulations mentioned herein (2)
are applicable unless they constitute an infringement of
applicable mandatory local laws.
This warranty does not detract from the seller’s (3)
obligations in regard to any lack of conformity of the
product and any hidden defect.
Amendment§ 9
Warranty service conditions are subject to change without
notice. For the latest warranty terms and conditions
and additional information regarding MUSIC Group’s
limited warranty, please see complete details online at
behringer. com.
* MUSIC Group Macao Commercial Off shore Limited of
Rue de Pequim No. 202-A, Macau Finance Centre 9/J, Macau,
including all MUSIC Group companies
Page 5

5 EUROLIVE B2520 PRO/B1800X PRO/B1520 PRO/B1220 PRO User Manual
1-
2-
2+
1+
1-
2-
2+
1+
front view rear view
Professional speaker connector
(compatible with Neutrik Speakon connectors)
Introduction1.
Thanks to its numerous features, the EUROLIVE PROFESSIONAL SERIES is the
ideal PA loudspeaker system: it is equally well-suited both for small gigs and
large stages. We have brought it to life in order to oer you a complete range
of loudspeaker choices. In doing so, we have left open all the options for
expanding your PA system. All loudspeakers feature professional inputs and
outputs (compatible to Neutrik Speakon), letting you exibly expand your setup
whenever you need to.
The following instructions are intended to familiarize you with the ◊
specialized terminology used throughout this user’s manual, so that
you can master all the functions. After having thoroughly read the
user’s manual, store it in a safe place for future reference.
Before you get started1.1
Shipment1.1.1
Your EUROLIVE speakers were carefully packed at the assembly plant to assure
secure transpor t. Should the condition of the cardboard box suggest that damage
may have taken place, please inspect the unit immediately and look for physical
indications of damage.
Damaged units should NEVER be sent directly to us. Please inform the ◊
dealer from whom you acquired the unit immediately as well as the
transportation company from which you took delivery of the unit.
Otherwise, all claims for replacement/repair may be rendered invalid.
Fig. 1.2: Subwoo fer connector p anel (B1800X PRO)
The EUROLIVE PROFESSIONAL SERIES features professional speaker connectors
(compatible to Neutrik Speakon) that assure problem-free operation.
The Speakon connector was developed for loudspeakers with high power ratings.
If it is connected into the corresponding plug, it locks into place and cannot
accidentally be disconnec ted. It protects against electric shock and assures
correct polarity. Each of the plugs only carries the assigned individual signal
(see table 4.1/Fig. 1.3 and the insignia on the back of the unit).
Please always use the original packaging to avoid damage due to ◊
storage or shipping.
Never let unsupervised children play with the EUROLIVE speakers or ◊
their packaging.
Please dispose of all packaging materials in an environmentally ◊
friendly fashion.
Initial operation1.1.2
Your EUROLIVE speakers are connected to a power amplier using the speaker
connectors located in the back. Please read ch. 5, “Additional Considerations”
and ch. 6, “Application Examples” to get important technical information and
practical suggestions about use.
Always make sure to mute your power amplifier before connecting ◊
the speakers.
Fig. 1.1: B1520 PR O connector pan el (B2520PRO/B1220 PRO’s are similar)
Fig. 1.3: Speakon con nector
Please only use the commercially available Speakon cables (type NL4FC)
to connect your loudspeakers to the power amp. Verify the pin assignment
of your loudspeakers and cables depending on the loudspeaker output you
are using.
Online registration1.1.3
Please register your new BEHRINGER equipment right after your purchase
by visiting http://behringer.com and read the terms and conditions of our
warranty carefully.
Should your BEHRINGER product malfunction, it is our intention to have it
repaired as quickly as possible. To arrange for warranty service, please contact
the BEHRINGER retailer from whom the equipment was purchased. Should your
BEHRINGER dealer not be located in your vicinity, you may directly contact
one of our subsidiaries. Corresponding contact information is included in the
original equipment packaging (Global Contact Information/European Contact
Information). Should your country not be listed, please contact the distributor
nearest you. A list of distributors can be found in the support area of our website
(http://behringer.com).
Registering your purchase and equipment with us helps us process your repair
claims more quickly and eciently.
Thank you for your cooperation!
Page 6

6 EUROLIVE B2520 PRO/B1800X PRO/B1520 PRO/B1220 PRO User Manual
User manual1.2
This user’s manual is structured in such a way to give you an overview about the
application options of your EUROLIVE PROFESSIONAL speakers, giving you at the
same time important information about optimizing your PA system. Should you
require detailed explanations about specic subjects, please visit us on the
internet at behringer.com.
Optimal Operation2.
We have developed the EUROLIVE PROFESSIONAL SERIES for use in a wide range
of possible applications. Of course, the sound of your loudspeakers depends on
the acoustic characteristics of the room/space in which they are being used.
The following chapters of this manual will give you information about getting
the most out of your EUROLIVE speakers.
HF drivers2.1
High frequencies are the segment of the audio spectrum responsible for clarity
and speech intelligibility. These frequencies are the easiest ones to locate,
but at the same time they are also the easiest ones to “obstruct.” Therefore,
we recommend positioning your speakers so that the HF drivers are located
slightly above the height of the audience. This guarantees the best possible
dispersion of high frequencies and a considerably higher intelligibility.
Directional pattern of asymmetrical HF drivers2 .1.1
An outstanding feature of the B1220 PRO, B1520 PRO and the B2520 PRO
are their asymmetrically formed horns (“Asymmetrical Dispersion Constant
Directivity Horn”). By turning the horns 90°, you can optimize the directional
pattern for both vertical and horizontal speaker positioning. The default
horn setting is the “front of house” vertical conguration, whereby the wide
dispersion side (100°) is pointed downward and the narrow dispersion side (50°)
is pointed upward. If you want to position your speaker horizontally (as a “oor”
monitor), you can modify the horn position to assure optimal dispersion
(turning the horn by 90°). Please do the following:
Remove the speaker cover by carefully and uniformly pulling o the (1)
steel grill.
Unfasten the four screws with which the horn is mounted.(2)
Turn the horn 90°, so that the wide dispersion side (100°) points upward (3)
when the loudspeaker is lying horizontally on its side.
Mount the horn back into its place with the four previously (4)
unfastened screws.
Set the grill back into its place and press gently until it snaps into position.(5)
No warranty claim is valid for damage caused by incorrect handling ◊
or flawed and/or careless use.
How to prevent feedback2.2
Always place the “front of house” speakers ahead of the microphones
(from the audience’s perspective), and never behind. Use professional oor
monitors (e.g. B1220 PRO, B1520 PRO or B2520 PRO) or an in-ear monitoring
system to hear the stage performers.
How to avoid feedback when working with 2.3
record players (DJ Applications)
In applications with record players, bass feedback can occur. Bass feedback
occurs when low frequencies get back to the pickup and are re-reproduced on
the speakers. The most common causes for this are: speakers located too closely
to the record player, a room with a wooden oor, or presence of a podium or a
platform. In such cases, it is best to move the speakers away from the record
player and “banish” them from the stage, so that they are located on rm
ground. Another option is to use raised stands, which prevent the speakers from
having a direct contact with the ground.
Loudspeaker protection by using 2.4
a low-cut lter
Try to prevent damage to your speakers caused by extreme oscillation of the
bass membrane due to subsonic noise and extremely deep frequencies. Use an
equalizer to cut o those frequencies that fall below your speakers’ frequency
range, or use a low-cut/high-pass lter. Most equalizers and sound-improvement
systems oer a low-cut function, like the BEHRINGER ULTRAGRAPH DIGITAL
DEQ1024, for example.
Using a low-cut lter in your signal path is particularly recommended if you
use record players or CD players as your signal source. CD players often produce
extremely deep frequencies, which can lead to extreme excursions of the
bass membrane.
Operating Modes3.
BI-AMPING and PASSIVE operation 3.1
(B1800X PRO)
The EUROLIVE PROFESSIONAL SERIES subwoofer can run in two ways: in PASSIVE
and BI-AMPING mode. The B1800X PRO can be switched from BI-AMPING
to PASSIVE by using the switch located in the back. For all applications,
your EUROLIVE speakers are connected using the speaker inputs.
Never switch the operating mode if your EUROLIVE speakers are wired ◊
to an active signal source.
The subwoofer features an internal crossover. Running the B1800X PRO in passive
mode makes it ideally suited for working together with the 2-way B1220 PRO,
B1520 PRO and B2520 PRO systems. This way, you achieve an absolutely balanced
sound characteristic. However, if you select the BI-AMPING mode, your subwoofer
can be combined with other EUROLIVE 2-way systems. The BI-AMPING operating
mode oers several primary advantages: lower distortion, greater exibility of
signal transmission as well as an improved overall performance of your system.
The PASSIVE operating mode has the advantage of requiring no additional
crossovers in order to keep the subwoofer’s frequency range within its limits.
If you are using an external crossover, e.g. the BEHRINGER ULTRADRIVE PRO
DCX2496, pay attention to chapter 8, “Specications.” There, you will nd
information about the recommended crossover frequency range. We recommend
a slope rate of at least 12 dB, whereby a higher value guarantees the best
possible performance. A slope rate of 24 dB is ideal.
Our recommendations are only examples of possible interactions between
dierent EUROLIVE speakers. Depending on your own personal sound
requirements and the genre of the music being played, other combinations are
of course possible.
Looping through the subwoofer signal 3.2
(B1800X PRO)
The B1800X PRO subwoofer from the EUROLIVE PROFESSIONAL SERIES features
two speaker connectors. In BI-AMPING mode, the PINS 2-/2+ of the input are
connected directly with the speaker. PINS 1-/1+ of the input are connected to
the PINS 1-/1+ of the output and the signal can be simply looped through. To this
end, please adhere to the specications given in chapter 4.
Please keep in mind that when you switch the B1800X PRO subwoofer ◊
to BI-AMPING mode, the input signal is routed to PINS 2-/2+. In this
case, PINS 1-/1+ merely serve to loop the signal through!
Page 7

7 EUROLIVE B2520 PRO/B1800X PRO/B1520 PRO/B1220 PRO User Manual
XENYX 1202FX
2 x EUROLIVE PROFESSIONAL B1220 PRO
EUROPOWER EP2000
L R
PARALLEL Input (B1220 PRO, B1520 PRO 3.3
and B2520 PRO)
The EUROLIVE B1220 PRO, B1520 PRO and B2520 PRO loudspeakers feature two
speaker inputs laid out in parallel. You can alternatively connect one of the
connectors to the output on your power amp and tap into the signal from the
amp once again on the second connector, in order to, for example, feed this
signal into an additional loudspeaker. This way, you can create stacks consisting
of speakers with dierent impedance values.
ATTENTION: Never connect the output signals of different power ◊
amps to both parallel inputs at the same time. This may permanently
damage your setup.
Pin Assignment (B1800X PRO)4.
Subwoof er B1800X PRO
PINS 1-/1+ PINS 2-/2+
PASSIVE
BI-AMPING Signal loo p Subwoofe r input
Tab. 4.1: P in assignment
Subwoofer (PASSIVE)4.1
Feed the full-range signal to the input PINS 1-/1+. The high-pass signal •
can be tapped into at the output PINS 1-/1+. PINS 2-/2+ serve as a signal
loop through.
Subwoofer (BI-AMPING)4.2
INPUT: Full-rang e input
OUTPUT: highpas s output
Signal loo p
Fuses5.3
We do not recommend the use of fuses with audio applications. Damage to
loudspeakers can be the result of high peak signals and high output power.
However, fuses can only oer protection from one of these two factors, and never
from both. Additionally, fuse resistors are sometimes nonlinear, leading to
distortion and unpredictable overdriving.
Protecting your equipment5.3.1
Always try to nd the optimal signal level. Try to avoid overdriving your amp.•
keep in mind the physical limitations of your PA system.•
Use a limiter to restrict the output signal level. Place the limiter between the •
mixing console and the power amp. For this purpose, our proven AUTOCOM
PRO-XL MDX1600, COMPOSER PRO-XL MDX2600 and MULTICOM PRO-XL
MDX4600 compressors oer an outstanding solution. All models can be used
as a limiter: the audio signal doesn’t overdrive any more, and unpleasant
“peaks” are eectively avoided.
Our ULTRADRIVE PRO DCX2496 and SUPER-X CX3400/CX2310 crossovers ◊
are particularly well-suited for protecting your equipment: for each
output, they have independent limiters.
Application Examples6.
Full-range stereo operation6.1
In the following example, the main stereo output signal of a mixing console
is connected to a stereo power amplier. A B1220 PRO is connected to each of
the amp outputs, and these speakers reproduce the entire frequenc y range
(full range).
Connect the subwoofer signal to PINS 2-/2+.•
PINS 1-/1+ of the input are connected to PINS 1-/1+ of the output, and can •
be used to loop the signal through.
In general, when in BI-AMPING mode, PINS 1-/1+ and PINS 2-/2+ are •
looped through.
Additional Considerations5.
Length and diameter of loudspeaker cables5.1
Loudspeaker cables whose diameter is too small can limit the power amp
performance considerably. The longer the cable, the greater the problem. As a
result, musicians of ten simply “turn up” the amp, which can lead to loudspeaker
damage. Therefore, don’t use cables longer than 15 m (45 ft.). For most applications,
this will not be necessar y. Cable diameter should be at least 2.5 - 4.0 mm2.
Selecting the right amp can turn out to be rather dicult. Therefore, stick to the
following rule of thumb: the power rating of your amp should be roughly twice
the speaker load capacity. A speaker rated at 400 Watts continuous performance
can easily be powered by an amp rated at 800 Watts output power. An optimal
addition to your speaker system would be the BEHRINGER EUROPOWER EP2500
power amp, for example.
Power amp rating5.2
Fig. 6.1:Full-range st ereo operation
Page 8

8 EUROLIVE B2520 PRO/B1800X PRO/B1520 PRO/B1220 PRO User Manual
XENYX 1202FX
EP2000
MonoSubwoofer
Output
2 x EUROLIVE PROFESSIONAL
B1520 PRO
EUROLIVE PROFESSIONAL
B1800X PRO
SUPER-X PRO
CX2310
L R
L R
EP2000
Monitor
EUROLIVE
PROFESSIONAL
B1220 PRO
2 x EUROLIVE PROFESSIONAL
B1520 PRO
EUROLIVE PROFESSIONAL
B1800X PRO
MonoSubwoofer
Output
Aux
Send
EURODESK SX2442FX
L R
Stereo operation with a subwoofer6.2
Using a crossover, the main stereo output signal of a mixing console is split
into a stereo signal and a mono signal, whereby the mono signal covers the
lower frequency range and the stereo signal carries the rest of the frequencies.
Then, the stereo signal is connected to a stereo power amplier. A B1520 PRO is
connected to each of the amp’s outputs. The mono subwoofer signal is connected
to one channel of an additional power amplier, which is powering one
B1800X PRO subwoofer.
Stereo operation with a parallel stage 6.3
monitoring system and a subwoofer
This example shows the use of two B1520 PROs as FOH loudspeakers and one
B1220 PRO used as a oor monitor on stage. The FOH loudspeakers reproduce
the main stereo output signal from the mixing console, while the stage monitor
is fed an independent monitor mix through a mono monitor send (Aux Send).
A separate subwoofer output feeds a B1800X PRO subwoofer with the bass
signal. Two stereo power amps are required for this application, whereby one
amp reproduces the main stereo signal, and the other one reproduces both mono
signals (subwoofer and monitor signal).
Fig. 6.2: Ster eo operation wit h a subwoofer
Fig. 6.3: Stereo o peration with a p arallel stage mon itoring system a nd subwoofer
Page 9

9 EUROLIVE B2520 PRO/B1800X PRO/B1520 PRO/B1220 PRO User Manual
Troubleshooting7.
No signal when loudspeaker is connected7.1
Make sure that your mixing console is indeed carrying a signal (is the master •
fader raised? Are channels ac tive?) and that the gain control on your amp is
turned up.
When using a crossover, make sure that the relevant channels are active.•
Check if the cable connection is interrupted/damaged somewhere in •
your setup.
To test your conguration, connect another amp. If you now get a signal, •
the power amp is the culprit.
To test your conguration, connect another speaker. If you now get a signal, •
the fault lies within the speaker.
Signal present only on one channel7.2
Make sure that your mixing console is working properly (is the signal present •
on both outputs (L/R)?).
If using a crossover, check if the relevant channel is active.•
Check if the cable connection to the silent channel and to the corresponding •
speakers is interrupted/damaged somewhere along the path.
Connect the silent loudspeaker onto the amp channel that works properly. •
If you now get a signal, it is the amp channel that is at fault. If you still
can not hear anything, the fault lies either within the loudspeaker or the
cables used.
Treble signal too low7.4
Check the EQ settings on your mixing console or on an external EQ, •
if applicable.
Make sure that the tweeters on your loudspeakers are positioned at the •
same height as the ears of the people in the audience. If not, please modify
the speaker position.
The internal tweeter fuse may have opened. In this case, please contact a •
BEHRINGER service branch oce near you.
Bass signal too low7.5
Check the EQ settings on your mixing console or on an external EQ, •
if applicable.
Check the speaker cable pin assignment (see g. 1.3). Incorrect pin •
assignment can cause phase cancellation and the frequency incursions
related to it.
Poor sound characteristics7.6
Check the speaker cable pin assignment (see g. 1.3). Incorrect pin •
assignment can cause phase cancellation and the frequency incursions
related to it.
Check if large objects (e.g. eect racks and similar equipment) are placed •
in front of the loudspeakers. They too can negatively inuence
sound dispersion.
Check the sound quality of the input signal by listening to it on a set •
of headphones.
Signal distorted7.3
Make sure that all signals on the mixing console have been set to optimal •
levels in order to avoid distortion.
If using a crossover, check if all signals have been set to correct levels.•
Make sure that the power amp channels are not overdriving. If so, turn the •
gain control down a little. However, it could also be the case that your power
amp doesn’t have enough power headroom, so that the required volume can
not be generated without starting to distort.
Make sure that the level of the signal getting into the speakers is not too •
high, causing distortion.
Check your EQ settings. Excessively increasing the frequencies can result •
in distortion.
If distortion is still occurring despite everything you have tried to eliminate •
it, try connec ting a dierent power amp. If you no longer hear distortion,
its cause was with the power amp.
As a test, connect another speaker. If you no longer hear distortion, its cause •
was with the loudspeaker (perhaps a defective loudspeaker).
Check if the cable connection is interrupted/defective somewhere along •
the path.
Also see the instructions in the chapters 7.3, 7.4 and 7.5.•
Page 10

10 EUROLIVE B2520 PRO/B1800X PRO/B1520 PRO/B1220 PRO User Manual
Specications8.
B2520 PRO
System Data
Type 2 ½-way full-range speaker
(2 x 15" + 1.75")
Frequency response (-10 dB) 50 Hz - 18 kHz
Continuous Power (IEC268-5)
1
550 W
Peak Power 2200 W
Impedance 4
Sound pressure level (1 W @ 1 m) 99 dB (Full Space)
Dispersion 100° (50°) x 50°
Crossover frequency 200 Hz / 1.8 kHz
Components
HF driver 44T30A8
Woofer 2 x 15W250A8
Dimensions/Weight
Dimensions (W x H x D) approx. 18 ⁄ x 46 ⁄ x 19"
approx. 465 x 1185 x 482 mm
Weight approx. 105 lbs / 47.5 kg
BI-Amp Operation
Recommended crossover frequency —
(external crossover network)
Power rating/impedance woofer —
B1800X PRO
System Data
Type Subwoofer (18")
Frequency response (-10 dB) 40 Hz - 300 Hz
Continuous Power (IEC268-5)
1
450 W
Peak Power 1800 W
Impedance 8
Sound pressure level (1 W @ 1 m) 100 dB (Half Space)
Dispersion —
Crossover frequency —
Components
HF driver —
Woofer 18SW400D8
Dimensions/Weight
Dimensions (W x H x D) approx. 21 ½ x 27 ⁄ x 21 ¾"
approx. 547 x 700 x 553 mm
Weight approx. 77 ⁄ lbs / 35 kg
BI-Amp Operation
Recommended crossover frequency 175 Hz
(external crossover network)
Power rating/impedance woofer 450/1800 W IEC/8
Page 11

11 EUROLIVE B2520 PRO/B1800X PRO/B1520 PRO/B1220 PRO User Manual
B1520 PRO
System Data
Type 2-way full-range speaker
(15" + 1.75")
Frequency response (-10 dB) 50 Hz - 18 kHz
Continuous Power (IEC268-5)
1
300 W
Peak Power 1200 W
Impedance 8
Sound pressure level (1 W @ 1 m) 96 dB (Full Space)
Dispersion 100° (50°) x 50°
Crossover frequency 1.8 kHz
Components
HF driver 44T30A8
Woofer 15W250A8
Dimensions/Weight
Dimensions (W x H x D) approx. 18 ⁄ x 27 ⁄ x 19"
approx. 465 x 700 x 482 mm
Weight approx. 59 ½ lbs / 27 kg
B1220 PRO
System Data
Type 2-way full-range speaker
(12" + 1.75")
Frequency response (-10 dB) 55 Hz - 18 kHz
Continuous Power (IEC268-5)
1
300 W
Peak Power 1200 W
Impedance 8
Sound pressure level (1 W @ 1 m) 95 dB (Full Space)
Dispersion 100° (50°) x 50°
Crossover frequency 2.5 kHz
Components
HF driver 44T30A8
Woofer 12W250B8
Dimensions/Weight
Dimensions (W x H x D) approx. 15 ⁄ x 25 ⁄ x 16"
approx. 397 x 638 x 406 mm
Weight approx. 52 ⁄ lbs / 24 kg
BI-Amp Operation
Recommended crossover frequency —
(external crossover network)
Power rating/impedance woofer —
BI-Amp Operation
Recommended crossover frequency —
(external crossover network)
Power rating/impedance woofer —
1
Average value ove r bandwidth 100 Hz - 2 kH z (multi-way system s) und 100 Hz - 250 Hz (subwoofe r)
according to IEC 26 8-5.
BEHRINGER is constantly striving to maintain the highest professional standards. As a result of these efforts,
modifications may be made from time to time to existing products without prior notice. Specifications and
appearance m ay differ from thos e listed or illustr ated.
Page 12

We Hear You
 Loading...