

Bang and Olufsen Beosound 2 Owners manual

BeoSound 2
Guide
CAUTION: To reduce the risk of
electric shock, do not remove
cover (or back).
No User-serviceable parts
inside. Refer servicing to
qualified service personnel.
WARNING: To prevent fire or electric
shock, do not expose this appliance to
rain or moisture.
This symbol indicates that a
dangerous voltage
constituting a risk of electric
shock is present within this
unit.
This symbol indicates that
there are important
operating and maintenance
instructions in the literature
accompanying this unit.
This class B digital apparatus meets all requirements of
the Canadian Interference-Causing Equipment
Regulations.
NOTE: This device complies with part 15 of the FCC
Rules. Operation is subject to the following two
conditions: (1) This device may not cause harmful
interference, and (2) this device must accept any
interference received, including interference that may
cause undesired operation.
This equipment generates, uses and can radiate radio
frequency energy and, if not installed and used in
accordance with the instructions, may cause harmful
interference to radio communications. However, there is
no guarantee that interference will not occur in a
particular installation. If this equipment does cause
harmful interference to radio or television reception,
which can be determined by turning the equipment off
and on, the user is encouraged to try to correct the
interference by one or more of the following measures:
– Reorient or relocate the receiving antenna
– Increase the separation between the equipment and
receiver
– Connect the equipment into an outlet on a circuit
different from that to which the receiver is connected
– Consult the retailer or an experienced radio/TV
technician for help
This product fulfills the conditions stated in the EEU
directives 89/336 and 73/23.
For your safety: Keep the BeoSound 2 player and
docking station away from water and do not place items
on top of them. BeoSound 2 is developed for use in dry
environments only, and for use within a temperature
range of 5–45° C (41–113° F).
Technical specifications, features and the use
thereof are subject to change without notice!

3
Acknowledgements and liability
Product names mentioned in this guide may be
trademarks or registered trademarks of other
companies.
Portions utilize Microsoft Windows Media
Technologies. Copyright © 1999-2002 Microsoft
Corporation. All rights reserved. Microsoft, Windows
Media and the Windows Logo are registered
trademarks of Microsoft Corporation in the United
States and/or other countries.
MicroOS Operating System
(U.S. Patent #5,787,445)
Please note that Bang & Olufsen will, in no event, be
liable for any consequential, incidental or indirect
damages arising out of the use or inability to use the
software.
Mac, the Mac logo and iTunes are trademarks of
Apple Computer, Inc., registered in the U.S. and
other countries.
System requirements – PC
• One free USB port
If you connect the BeoSound 2 docking station to
this port via an external HUB, make sure that your
HUB supports Full Speed Devices.
• 10 MB of available disk space
• Windows 98/ME/2000/XP
You must have administrator privileges on
Windows 2000/XP to install the BeoSound 2
firmware.
System requirements – Macintosh
• One free USB port - 1.1
If you connect the BeoSound 2 docking station to
this port via an external HUB, make sure that your
HUB supports Full Speed Devices.
• MAC OS 9.x and OS X compatible
• iTunes 2 (and newer) compatible
Supported file formats
• MP3
Sampling frequencies: 8, 11.025, 12, 16, 22.05,
24, 32, 44.1, and 48 kHz
Constant or variable bit rates: 8, 16, 24, 32, 40,
48, 56, 64, 80, 96, 112, 128, 160, 192, 256 and
320 Kbps
• WMA
Sampling frequencies: 8, 11.025, 16, 22.050, 32,
44.1 and 48 kHz
Bit rates: 64, 80, 96, 128, 160 and 192 Kbps
• Note that the WMA format is not supported by
iTunes.
Check www.beoplayer.com to see whether new file
formats are supported by BeoSound 2. Updated
BeoSound 2 firmware will also be available on this
website.

4
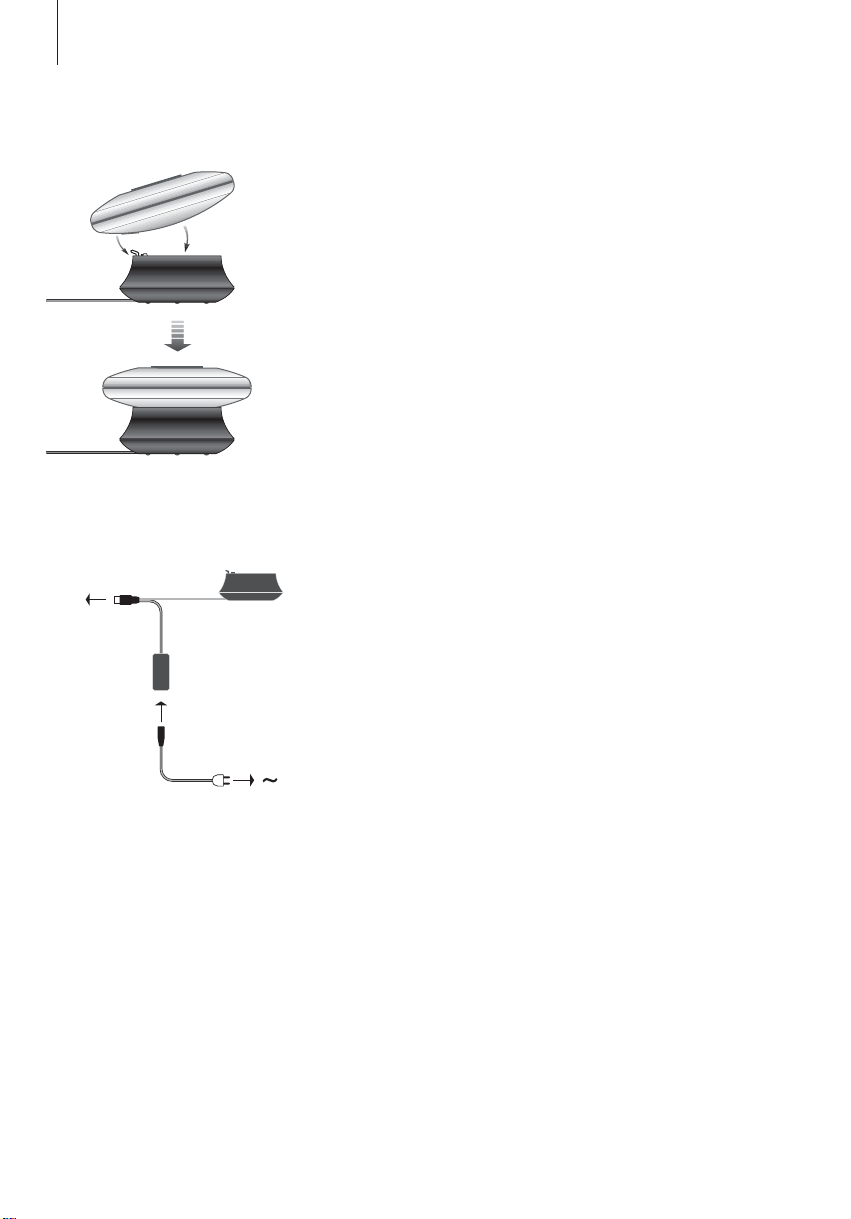
B
A
Place BeoSound 2 on its docking
station as shown above.
USB
English
Setting up BeoSound 2
Follow the sequence below corresponding to your setup, PC or
Macintosh. If your computer is a PC, do not connect the USB cable until
you are specifically prompted to do so on the screen! If you have a
Macintosh computer, it is essential that you change mode, in the exact
fashion and sequence as described below.
Installation and connection (PC use)
1 Insert the included memory card into BeoSound 2.
2 Insert the CD-rom in your computer’s CD drive. If the Setup program starts
automatically, proceed to 5. Otherwise, go to 3.
3 Select your CD drive.
4 Double-click the ‘Setup’ file.
5 Follow the on-screen instructions...
6 When prompted on the screen, connect the USB cable to your computer.
Installation and connection (Macintosh use)
1 Insert the included memory card into BeoSound 2.
2 As BeoSound 2 is in BeoPlayer mode per default, you must change this
setting. Make sure that BeoSound 2 is paused and that the Earphones are
∧
connected. Press and hold
go of the first two buttons. You will receive audible feedback. Your
BeoSound 2 is now in iTunes mode.
3 Connect the USB cable to your computer.
4 Insert the CD-rom in your computer’s CD drive.
5 Select the appropriate folder for your operating system, OS 9 or OS X.
6 Select the install file, and follow the on-screen instructions…
and ss. Then press GO twice, without letting
Connect the USB cable – if your
computer is a PC, wait until you are
prompted.
Configuration and formatting (BeoPlayer use only)
Before you copy music to your BeoSound 2 from BeoPlayer, you may want to
set the copying quality or make other adjustments to the default settings. This
is all done by clicking SETUP on the BeoPlayer on-screen control bar, then
CONFIG – and a configuration menu appears where you can make your
changes. The configuration menu is also where you format a memory card.
Explore the configuration menu for yourself, or access the On-screen Guide
for an in-depth explanation.

5
Get started
Once you have connected and installed BeoSound 2 to your computer,
you can begin using it. To find out how BeoSound 2 works with your
computer and music player, simply proceed to the section on the
following pages, describing the setup you have. Available options are
listed below.
BeoPlayer or BeoLink PC 2 (PC use only)
We recommend using BeoSound 2 with Bang & Olufsen’s own music players:
BeoPlayer or BeoLink PC 2. This Guide describes the basic use on the
following pages. To learn more about advanced use of BeoSound 2 with
BeoPlayer or BeoLink PC 2, refer to the On-screen Guide located at the
bottom of the on-screen control bar in both of these players. Find out for
example how to:
– Move or rename tracks and playlists in BeoSound 2.
– View and edit track INFO.
– Find out more about CDDB music information.
– Alter Configuration settings for a personalised touch.
– Format a memory card.
All future reference to BeoPlayer includes BeoLink PC 2 use, as these two
players work similarly regarding Beosound 2.
iTunes (Macintosh use only)
To learn more about using iTunes, refer to ‘BeoSound 2 with iTunes’ in this
Guide. For further information on iTunes, refer to the iTunes help function.
Other players
It is possible to use other players than the above mentioned with BeoSound 2.
Examples can be found in ‘other players and options’ on the last page of this
Guide.
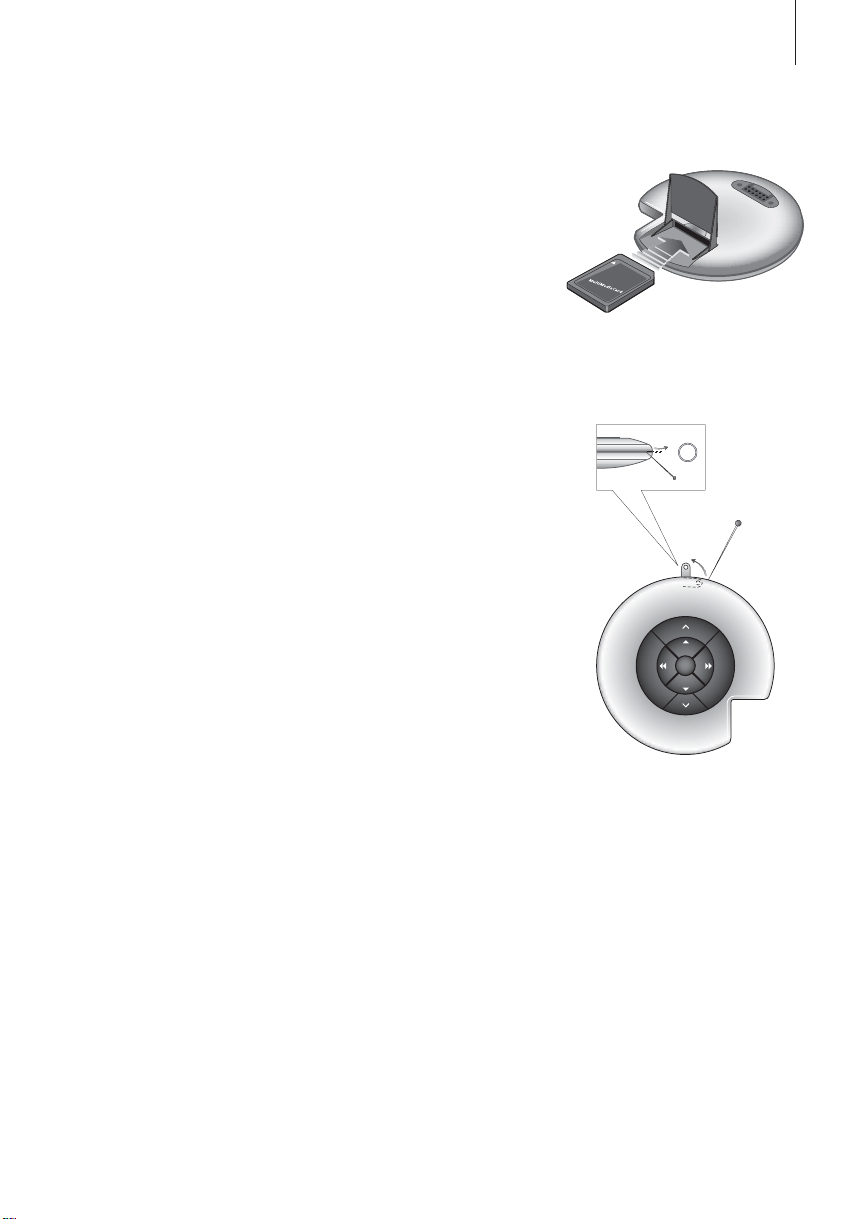
Open the small compartment on the
back of BeoSound 2 to insert the
memory card.
Use a needle to access the key ring
attachment.
GO

6
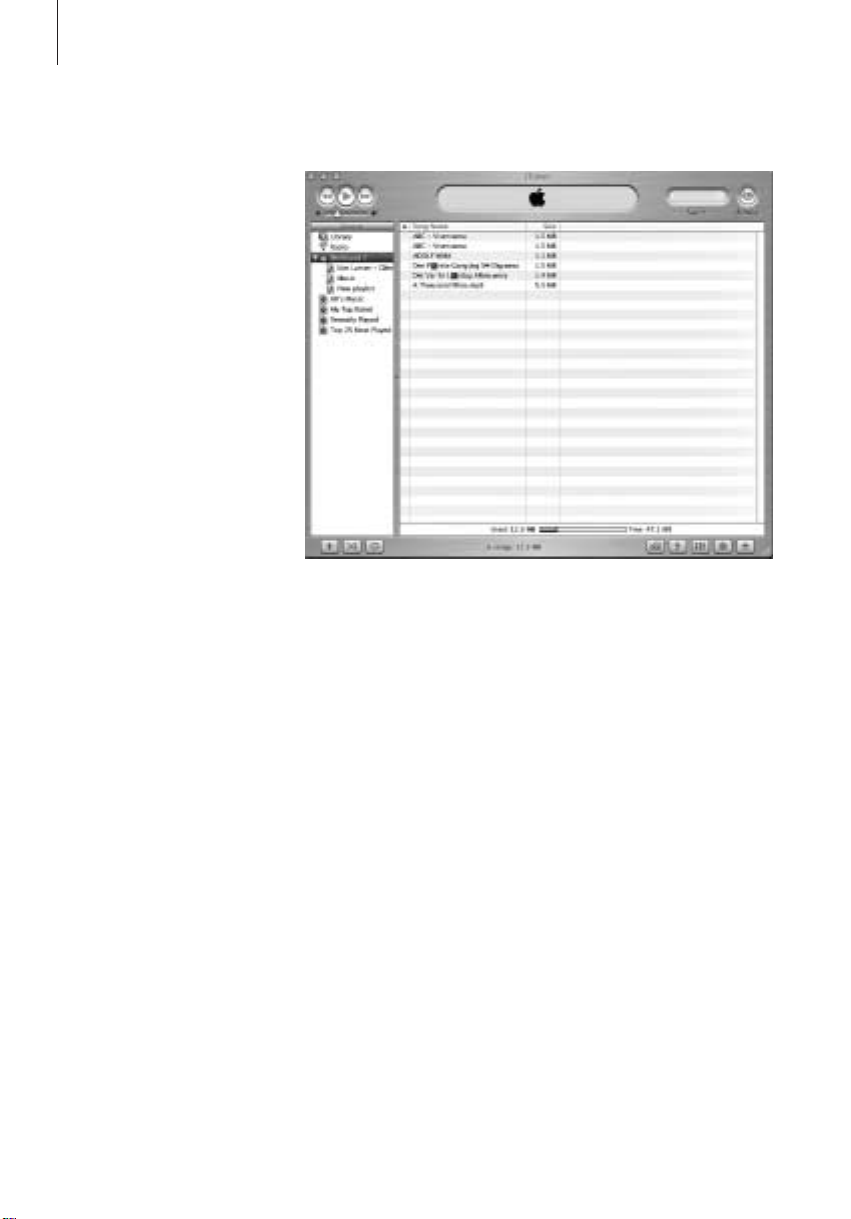
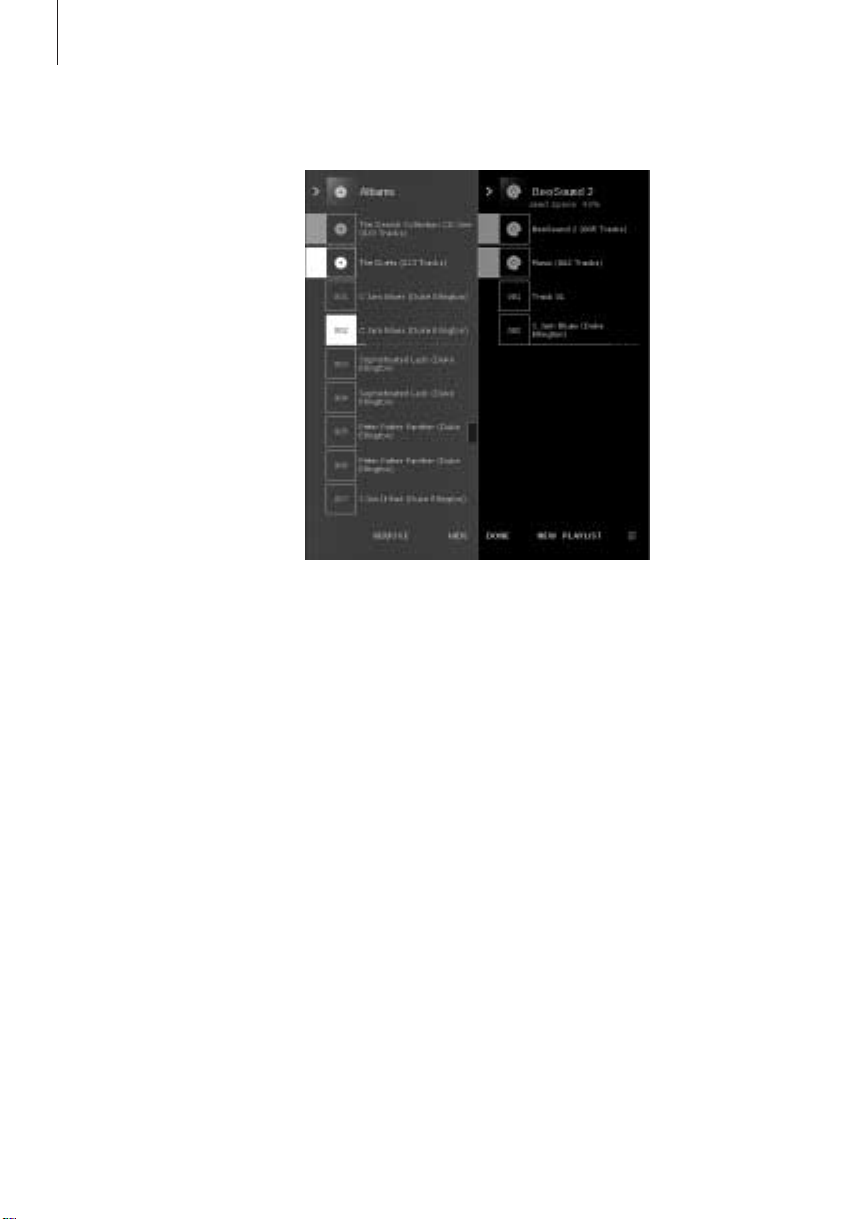
The BeoSound 2 Playlist is open and
a track is being copied from an
Album list to BeoSound 2. Wait for
the progress indicator under the
track to be filled out completely,
before your copy is finished.
>> English
BeoSound 2 with BeoPlayer
About BeoPlayer
A music organiser – N.MUSIC, and a
CD player – PC CD, are some of the
most important features of the
BeoPlayer. On these pages you can
read about basic use of these
features with the BeoSound 2
portable player. To know more about
your options, we recommend that
you access the BeoPlayer On-screen
Guide.
Copy music files to BeoSound 2
The N.MUSIC organiser in BeoPlayer automatically sorts your music tracks by
Genre, Album, Title, Artists and Playlists. If you already have music stored in
N.MUSIC, you can start copying tracks to BeoSound 2.
> Place BeoSound 2 on the docking station.
The docking station must be in USB mode (indicated by red light from the
docking station). If the docking station light is not red, press and hold GO
for 2 seconds to change it, then;
> Access BeoPlayer.
> Click N.MUSIC twice to access your playlists and tracks.
> Click COPY to access the music content on BeoSound 2. A BeoSound 2
Playlist opens containing an overview of music already stored on
BeoSound 2.
> To copy tracks from your lists to BeoSound 2, simply drag and drop a track
from a list to the BeoSound 2 Playlist. An progress indicator below the track
name shows the status of the copying progress.
> To cancel a copy, select the track and delete it, either by dragging it to the
waste basket – or by pressing the DELETE button on your keyboard. A copy
will also be cancelled if you exit BeoPlayer completely, or if you unplug
BeoSound 2.

7
Copy from an audio CD to BeoSound 2
You can copy music directly from an audio CD to BeoSound 2. This is useful
if, for example, you haven’t got any music stored in your BeoPlayer, and you
want to get started playing music on BeoSound 2.
> Insert an audio CD into your PC CD-rom drive.
> Click PC CD to access the PC CD list.
BeoPlayer uses your Internet connection to connect to CDDB in order to
receive information about the CD tracks*.
> Click COPY to gain access to the destination lists, and select the option
‘BeoSound 2’. A BeoSound 2 Playlist opens.
> You can now drag and drop the track or tracks you wish to copy from the
PC CD list into the BeoSound 2 list.
You can use the control bar while copying, but your copying will be disrupted
if you exit the player completely.
*In order to be able to receive CDDB information, you must be registered to
BeoPlayer, the function must be enabled in the Configuration menu (it is as
per default) and your computer must be on-line. If there is no information
available after approximately 10 seconds, your tracks will simply be registered
as ‘unknown’. Refer to the BeoPlayer On-screen Guide for further information
about CDDB.
About audio CD copying
Once a track is copied from a CD
directly to your portable player, it is
stored on your memory card, but not
on your PC. Therefore, if you
subsequently format your card, it will
erase your copy of the track.
Firmware update
Bang & Olufsen firmware updates
can be downloaded from
www.beoplayer.com. Select
‘BeoSound 2 download’ and follow
the on-screen instructions.
8
If you have a Macintosh
computer, you can use
BeoSound 2 with the iTunes
program.
>> English
BeoSound 2 with iTunes
Organising tracks and playlists
iTunes allows you to sort your tracks
by different sorting criteria: Size,
Title, Rating etc. To display the
playback order of BeoSound 2, press
the small arrow on the top-left side
of the list. For further assistance in
the use of iTunes, refer to the help
function.
Get started
Once you have set BeoSound 2 to iTunes mode, as described in the setup
section, you can begin using iTunes:
> Place BeoSound 2 on the docking station.
The docking station must be in USB mode (indicated by red light from the
docking station). If the docking station light is not red, press and hold GO
for 2 seconds to change it, then;
> Access iTunes.
After a few seconds, iTunes detects BeoSound 2. This is shown in the
playlist view and a disc icon appears on your desktop.
> You can now drag and drop tracks from your playlists on to the
BeoSound 2 icon.
It is not possible to place tracks directly into playlists. iTunes creates a
playlist: ‘music’ containing all the tracks you copy. To place a track in
another playlist, you must create a new playlist and move the track after
you have finished copying.
Note that the disc icon must be ejected from the desktop before you either
press GO to playback the music, or remove BeoSound 2 from the docking
station.

9
Other functions
Once you have connected BeoSound 2, iTunes adds on features that were not
previously available. These new features can be found behind buttons located
at the bottom of the playlist, as illustrated to the right.
Create playlists
To create a playlist in BeoSound 2, select the BeoSound 2 icon and click the
button marked [+] shown to the right. For daily BeoSound 2 use, having
multiple playlists is practical. It allows you to easily locate your sorted tracks,
using the next/previous playlist feature, as described on the following page.
Firmware update
Bang & Olufsen firmware updates can be downloaded from
www.beoplayer.com.
– Click the update button shown to the right.
The button appears in the lower right corner of iTunes – only when
BeoSound 2 is on its docking station.
– Click the ‘update firmware’ button, locate the firmware file and select it.
Await on-screen instructions. When you have followed the instructions
on-screen, an audible feedback from your BeoSound 2 will inform you that
the firmware update is completed.
IMPORTANT: BeoSound 2 returns to BeoPlayer mode, after a firmware
update. You must change the mode back, if you want to continue in iTunes
mode. Read more about changing mode on the following pages.
This button gives you access to
erase your memory card.
Create a new playlist by
clicking this button.
This button has a three-fold
purpose: See which firmware
version you currently have,
update your firmware, and
personalise BeoSound 2 by
changing the name at will. –
The button differs in OS 9 and
OS X. The upper button is the
OS X version, the lower the OS
9 version.
10
>> English
Daily use
Keypad functions
Play: Press GO to start playback.
GO
Volume:
Next track: Press
Previous track: Press
Random on/off: To play tracks in random order, press and hold
∧
and ∨adjusts volume.
▲
to step to the next track in a playlist.
▼
to go to the previous track in a playlist.
▲
▼
and
simultaneously for two seconds. Repeat to restore sequential playback.
Pause: To pause playback, press GO a second time.
Next playlist: Press
Previous playlist: Press
Cue: To cue through your tracks, press and hold
tt
to step to the next playlist.
ss
to step to the previous playlist.
ss
or tt. Cueing is not
possible for tracks in the WMA format.
Lock/unlock: To lock or unlock the keypad, press and hold ssand
tt
simultaneously for two seconds.
Standby: To switch BeoSound 2 to standby, press and hold GO for two
seconds.
BeoSound 2 switches to standby after 30 seconds in pause mode.
Format card: BeoSound 2 must be paused and the Earphones connected.
∧
Press and hold
feedback. When the audible feedback stops press and hold
and tt. Then press GO twice. You will get audible
∧
and tt. Then
press GO twice again. You will get audible feedback again.

11
Switch between playback and download: BeoSound 2 must be placed on
the docking station. Press GO to start playback, or press and hold GO for 2
seconds to connect to the computer – enabling you to download to
BeoSound 2. The docking station light changes colour accordingly.
Change mode: Switch between BeoPlayer and iTunes mode. BeoSound 2 is
in BeoPlayer mode per default. To change this setting, make sure that
BeoSound 2 is paused, and that the Earphones are connected.
BeoSound 2 feedback
Audible feedback: BeoSound 2 gives you audible feedback for example
when:
– Battery power is low (beep repeated every 30 seconds)
– Error occurs (beep repeated every 5 seconds)
– Firmware update is completed
– A memory card is formatted
Docking station light feedback: When BeoSound 2 is placed on the
docking station, the docking station lights up to indicate its current status:
Green… Track playback or pause, not connected to the computer.
Red… Download mode, connected to the computer.
Orange… Resetting – continuous orange light feedback indicates error.
Flashing light (red or green)… Battery charging.
Flashing red and green, followed by orange, then red… Updating Firmware.
Go to iTunes mode:
Press and hold
∧
and ss.
Then press GO twice, without
letting go of the first two
buttons. Audible feedback
informs you that BeoSound 2 has
changed to iTunes mode.
Go to BeoPlayer mode:
Press and hold
∨
and ss.
Then press GO twice, without
letting go of the first two
buttons. Audible feedback
informs you that BeoSound 2 has
changed to BeoPlayer mode.
12
>> English
Maintenance, etc.
Recharge battery
When the built-in battery requires recharging, a beep, repeated every 30
seconds, sounds from BeoSound 2. You can silence this signal by pressing GO
on the keypad once.
Place BeoSound 2 on the docking station. Recharging begins. You can leave
BeoSound 2 on the docking station without risk of overcharging the battery.
An 80% battery charge is reached after approximately one and a half hours,
and a full charge is reached after approximately two and a half hours.
Starting from a fully-charged state, the battery in BeoSound 2 will provide
approximately 8 hours of use.
Reset BeoSound 2
∧
If BeoSound 2 doesn’t respond, you can reset it. Press and hold
Then press GO for two seconds. This resets BeoSound 2. No data is lost.
Update BeoSound 2 Firmware
Updates for BeoSound 2 will be available for download via
www.beoplayer.com. Go to the previous pages for instructions.
and ∨.
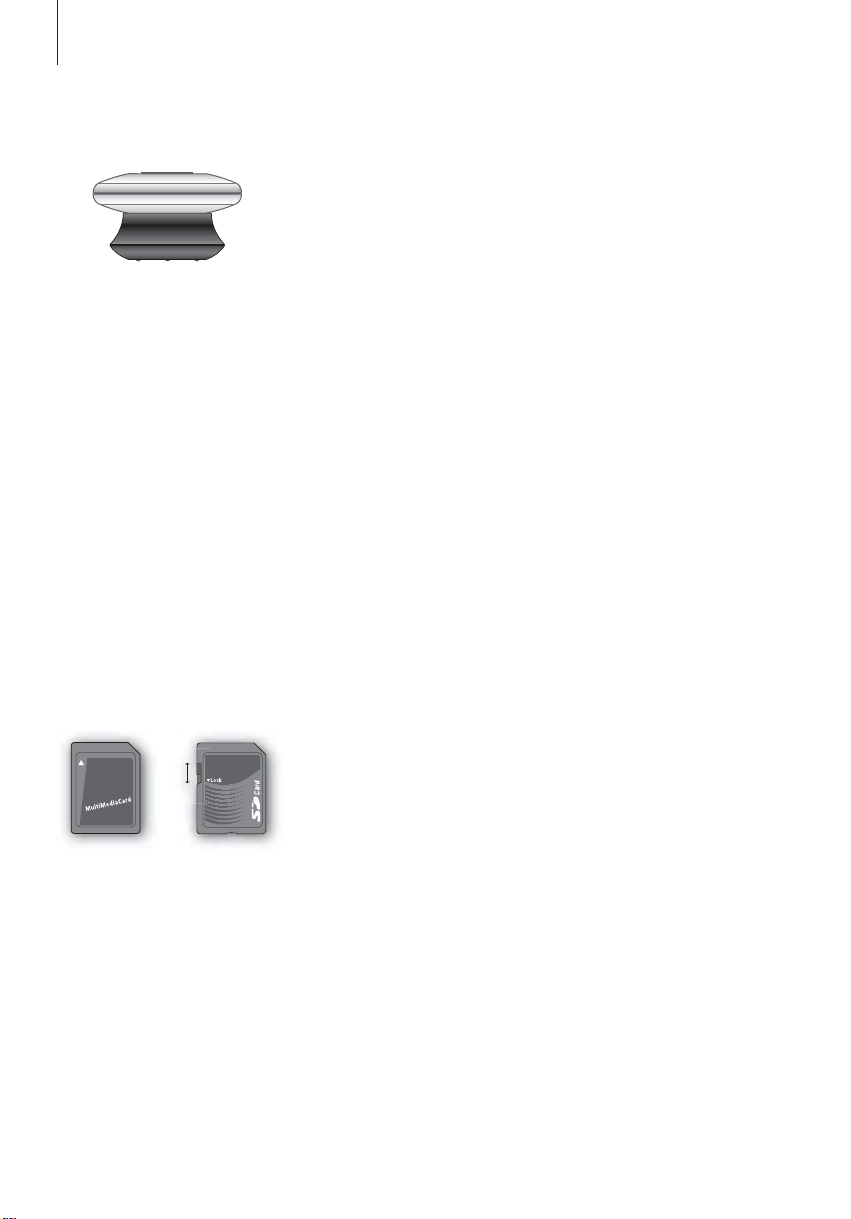
MultiMedia (MMC) and Secure
Digital (SD) cards from SanDisk and
similar products are compatible. You
can write-protect an SD card by
moving the slider down.
Cleaning BeoSound 2
Wipe dust off the surfaces using a dry, soft cloth. Remove grease stains or dirt
with a lint-free, firmly wrung cloth, dipped in a solution of water containing
only a few drops of mild detergent, such as washing-up liquid.
Memory card
To ensure a long lifetime, memory cards must be handled with care. Always
keep the card inside the BeoSound 2, or in the cartridge supplied with the
card. Please note that formatting will not be possible if you have
write-protected the card (formatting will erase all content on the card).
13
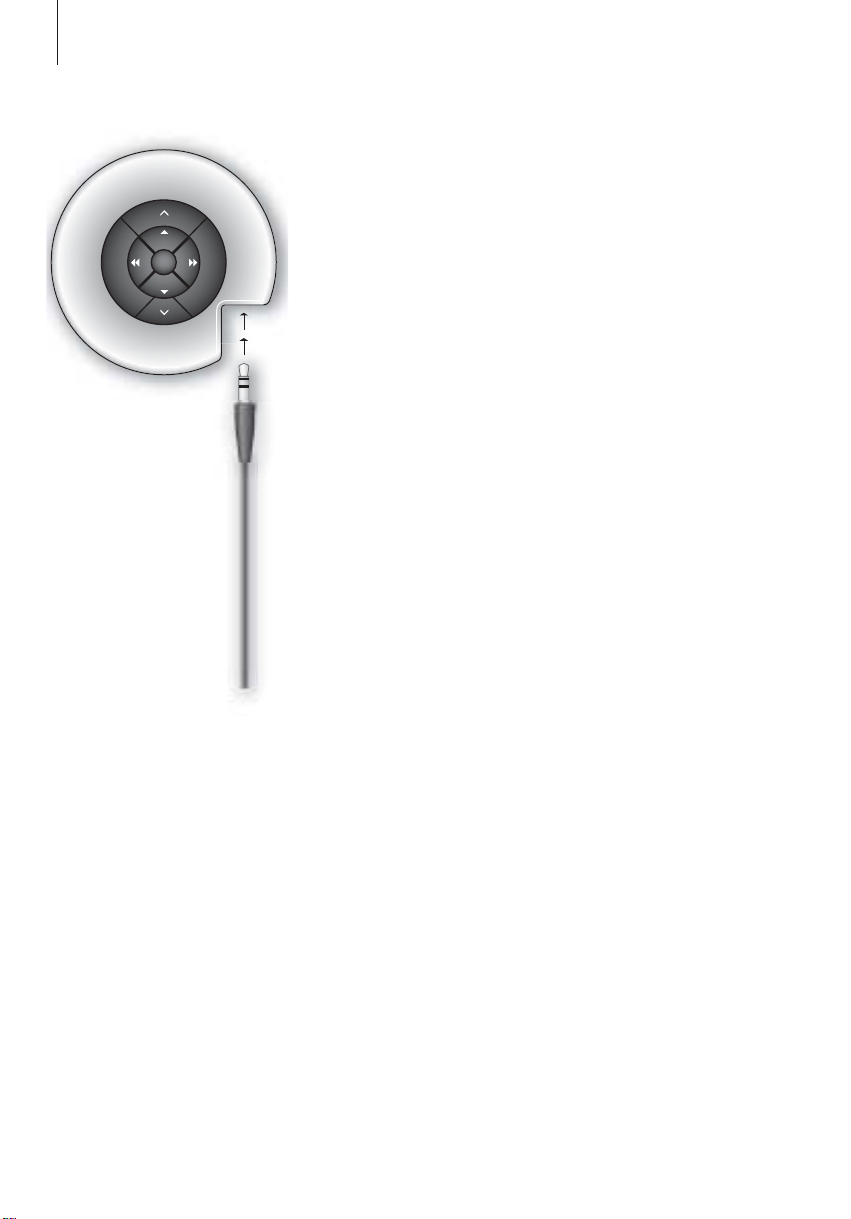
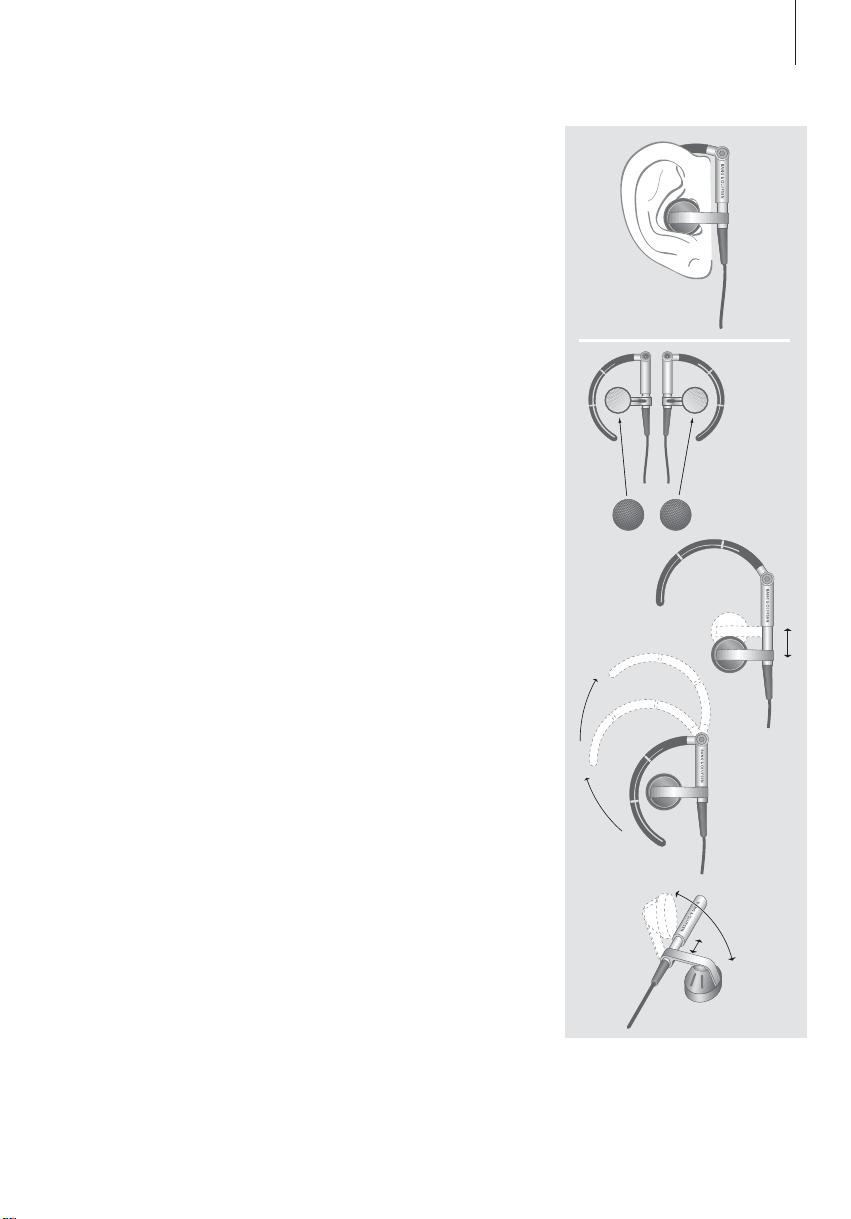
Earphones
For maximum sound quality, assemble, place and adjust the Earphones as
illustrated to the right. BeoSound 2 switches to standby if you disconnect the
Earphones.
WARNING! Prolonged use at high volume may cause hearing damage!
Other players and options
Windows Media Player 7.0 or newer can also be used with BeoSound 2. Refer
to the Windows Media Player help function for further details on device use.
Mass Storage device mode
When BeoSound 2 is in iTunes mode, it will actually work and act as a Mass
Storage device. The Mass Storage device mode will make your BeoSound 2
act as an extra drive on your computer. This allows you to use, for example,
your file explorer to organise your music.
Note that you can only place music in folders when using file explorer. You
cannot use the root or subfolders. Furthermore, to be able to change
between folders as if they were playlists, you must create new folders
yourself.
14
B
A
Sitúe BeoSound 2 en su módulo de
conexiones como se muestra más
arriba.
USB
Español
Configuración de BeoSound 2
Siga los pasos más abajo correspondientes a su configuración, PC o
Macintosh. ¡Si su ordenador es un PC, no conecte el cable USB hasta
que se indique en la pantalla que lo haga! Si tiene un ordenador
Macintosh, deberá cambiar de modo, en la forma y orden que se
describe a continuación.
Instalación y conexión (con PC)
1 Inserte la tarjeta de memoria incluida en BeoSound 2.
2 Introduzca el CD-ROM en la unidad de CD del ordenador. Si el programa de
configuración (Setup) se inicia automáticamente, vaya al paso 5. Si no, vaya
al paso 3.
3 Seleccione su unidad de CD.
4 Haga doble clic en el archivo “Setup”.
5 Siga las instrucciones de la pantalla...
6 Cuando se le indique, conecte el cable USB en el ordenador.
Instalación y conexión (con Macintosh)
1 Inserte la tarjeta de memoria incluida en BeoSound 2.
2 Por defecto, BeoSound 2 está configurado en modo BeoPlayer, así que
deberá cambiar este parámetro. Asegúrese de que BeoSound 2 esté en
∧
pausa y con los auriculares conectados. Mantenga pulsados
Después pulse dos veces GO, sin soltar los otros dos botones. Sonará una
señal acústica. Ahora, su BeoSound 2 está en el modo iTunes.
3 Conecte el cable USB en el ordenador.
4 Introduzca el CD-ROM en la unidad de CD del ordenador.
5 Seleccione la carpeta adecuada para su sistema operativo, OS 9 u OS X.
6 Seleccione el archivo de instalación y siga las instrucciones de la pantalla...
y ss.
Conecte el cable USB – si su
ordenador es un PC, espere hasta
que se le indique.
Configuración y formateo (sólo para BeoPlayer)
Antes de copiar música en BeoSound 2 desde BeoPlayer, quizás quiera definir
la calidad de la copia o realizar otros ajustes en la configuración
predeterminada. Para hacerlo haga clic en SETUP en la barra de control de la
pantalla de BeoPlayer y luego en CONFIG – aparecerá un menú de
configuración donde podrá realizar los cambios. Desde este menú también
puede formatear una tarjeta de memoria. Explore usted mismo el menú de
configuración o acceda a la Guía en pantalla para obtener una explicación
más detallada.
15
Inicio de la operación
Una vez que ha conectado e instalado BeoSound 2 en el ordenador,
puede comenzar a usarlo. Para saber cómo funciona BeoSound 2 con
su ordenador y con su reproductor de audio, consulte la sección
siguiente en la que se describe la configuración del equipo. A
continuación se enumeran las opciones disponibles.
BeoPlayer o BeoLink PC 2 (sólo con PC)
Recomendamos el uso de BeoSound 2 con reproductores de música de
Bang & Olufsen: BeoPlayer o BeoLink PC 2. En las páginas siguientes de esta
Guía se describen las funciones básicas. Para saber más sobre las funciones
avanzadas de BeoSound 2 con BeoPlayer o BeoLink PC 2, consulte la Guía
que aparece en la parte inferior de la barra de control de la pantalla en ambos
reproductores. Sepa, por ejemplo, cómo:
– Trasladar o renombrar las pistas y listas de reproducción de BeoSound 2.
– Consultar y modificar INFO de las pistas.
– Saber más acerca de la información musical de CDDB.
– Modificar los parámetros de configuración con un toque personalizado.
– Formatear una tarjeta de memoria.
Las referencias futuras a BeoPlayer incluyen el uso de BeoLink PC 2, ya que
estos dos reproductores funcionan de forma similar en relación con
BeoSound 2.
iTunes (sólo con Macintosh)
Para saber más acerca de iTunes, consulte “BeoSound 2 con iTunes” en esta
Guía. Si desea más información sobre iTunes, consulte su función de ayuda.
Otros reproductores
Con BeoSound 2 se pueden utilizar otros reproductores que no sean los
mencionados anteriormente.
Abra el pequeño compartimento
situado en la parte trasera de
BeoSound 2 para introducir la tarjeta
de memoria.
Use un alfiler para acceder a la
fijación del llavero.
GO
16
Se abre la lista de reproducción de
BeoSound 2 y se copia una pista
desde una lista Álbum a
BeoSound 2. Para asegurarse de que
la copia ha finalizado, espere a que
el indicador de progreso situado
debajo de la pista esté
completamente lleno.
>> Español
BeoSound 2 con BeoPlayer
Acerca de BeoPlayer
Un organizador de música –
N.MUSIC, y un reproductor de CD –
PC CD, son algunas de las
prestaciones más importantes de
BeoPlayer. En las páginas siguientes
se describe el uso básico de estas
funciones con el reproductor portátil
BeoSound 2. Si desea más
información sobre las opciones, le
recomendamos que acceda a la Guía
en pantalla de BeoPlayer.
Copia de ficheros de música a BeoSound 2
El organizador de música de BeoPlayer, N.MUSIC, clasifica automáticamente
sus pistas de música por Género, Álbum, Título, Artistas y Listas de
reproducción. Si ya tiene música almacenada en N.MUSIC, puede empezar a
copiar pistas a BeoSound 2.
> Sitúe BeoSound 2 en el módulo de conexiones.
El módulo de conexiones debe estar en modo USB (se indica con la luz roja
del módulo). Si el indicador del módulo de conexiones no está iluminado en
rojo, mantenga pulsado GO durante 2 segundos para cambiar de modo;
> Acceda a BeoPlayer.
> Haga doble clic en N.MUSIC para acceder a sus listas de reproducción y
pistas.
> Haga clic en COPY para acceder al contenido musical de BeoSound 2. Se
abrirá una lista de reproducción de BeoSound 2 que contiene una vista
general de la música almacenada en BeoSound 2.
> Para copiar pistas de sus listas a BeoSound 2, simplemente arrastre y suelte
la pista desde su lista a la lista de reproducción de BeoSound 2. Un
indicador situado debajo del nombre de la pista muestra el progreso de la
copia.
> Para cancelar una copia, seleccione la pista y bórrela, arrastrándola a la
papelera – o pulsando el botón DELETE del teclado. También puede
cancelar la copia si sale completamente de BeoPlayer o desconecta
BeoSound 2.

17
Copia desde un CD de audio a BeoSound 2
Puede copiar música directamente desde un CD de audio a BeoSound 2. Esto
es útil si, por ejemplo, no tiene música almacenada en BeoPlayer y quiere
empezar a reproducir música en BeoSound 2.
> Introduzca un CD de audio en la unidad de CD-ROM de su PC.
> Haga clic en PC CD para acceder a la lista PC CD.
BeoPlayer utiliza su conexión a Internet para conectarse a CDDB y recibir
información relativa a las pistas del CD*.
> Haga clic en COPY para acceder a las listas de destino y seleccione la
opción “BeoSound 2”. Se abrirá una lista de reproducción de BeoSound 2.
> Puede arrastrar y colocar la pista o pistas que desee copiar de la lista PC CD
a la lista de BeoSound 2.
Puede usar la barra de control mientras realiza la copia, pero el proceso se
interrumpirá si sale totalmente del reproductor.
*Para poder recibir información de CDDB, debe registrarse en BeoPlayer;
dicha función debe estar activada (opción predeterminada) en el menú
Configuration y el ordenador debe estar conectado. Si transcurridos unos
10 segundos no se encuentra información, las pistas se registrarán como
“unknown” (desconocida). Consulte la Guía en pantalla de BeoPlayer para
obtener más información sobre CDDB.
Acerca de la copia de CDs de
audio
Una vez que una pista se copia
directamente desde un CD al
reproductor portátil, se almacena en
su tarjeta de memoria, pero no en el
PC. Por lo tanto, si formatea
posteriormente la tarjeta, se borrará
la copia de la pista.
Actualización del programa
Puede descargar actualizaciones de
los programas de Bang & Olufsen en
la página www.beoplayer.com.
Seleccione “BeoSound 2 download”
y siga las instrucciones de la pantalla.
 Loading...