

Page 1
Wireless N USB Adapter
Page 2

User Manual
2011 © All rights reserved. Version 1.0
No part of this document may be reproduced, republished, or retransmitted in any form or by any means
whatsoever, whether electronically or mechanically, including, but not limited to, by way of photocopying,
recording, information recording, or through retrieval systems without the express written permission. We
reserve the right to revise this document at any time without the obligation to notify any person and/or
entity. All other company or product names mentioned are used for identification purposes only and may
be trademarks of their respective owners.
LIMITATION OF LIABILITY AND DAMAGES
THE PRODUCT AND THE SOFTWARES WITHIN ARE PROVIDED "AS IS," BASIS. THE MANUFACTURER AND
MANUFACTURER’S RESELLERS (COLLECTIVELY REFERRED TO AS “THE SELLERS”) DISCLAIM ALL WARRANTIES,
EXPRESS, IMPLIED OR STATUTORY, INCLUDING WITHOUT LIMITATION THE IMPLIED WARRANTIES OF NONINFRINGEMENT, MERCHANTABILITY OR FITNESS FOR A PARTICULAR PURPOSE, OR ANY WARRANTIES
ARISING FROM COURSE OF DEALING, COURSE OF PERFORMANCE, OR USAGE OF TRADE. IN NO EVENT WILL
THE SELLERS BE LIABLE FOR DAMAGES OR LOSS, INCLUDING BUT NOT LIMITED TO DIRECT, INDIRECT,
SPECIAL WILLFUL, PUNITIVE, INCIDENTAL, EXEMPLARY, OR CONSEQUENTIAL, DAMAGES, DAMAGES FOR
LOSS OF BUSINESS PROFITS, OR DAMAGES FOR LOSS OF BUSINESS OF ANY CUSTOMER OR ANY THIRD
PARTY ARISING OUT OF THE USE OR THE INABILITY TO USE THE PRODUCT OR THE SOFTWARES, INCLUDING
BUT NOT LIMITED TO THOSE RESULTING FROM DEFECTS IN THE PRODUCT OR SOFTWARE OR
DOCUMENTATION, OR LOSS OR INACCURACY OF DATA OF ANY KIND, WHETHER BASED ON CONTRACT,
TORT OR ANY OTHER LEGAL THEORY, EVEN IF THE PARTIES HAVE BEEN ADVISED OF THE POSSIBILITY OF
SUCH DAMAGES. THE ENTIRE RISK AS TO THE RESULTS AND PERFORMANCE OF THE PRODUCT OR ITS
SOFTWARE IS ASSUMED BY CUSTOMER. BECAUSE SOME STATES DO NOT ALLOW THE EXCLUSION OR
LIMITATION OF LIABILITY FOR DAMAGES, THE ABOVE LIMITATION MAY NOT APPLY TO THE PARTIES. IN NO
EVENT WILL THE SELLERS’ TOTAL CUMULATIVE LIABILITY OF EACH AND EVERY KIND IN RELATION TO THE
PRODUCT OR ITS SOFTWARE EXCEED THE AMOUNT PAID BY CUSTOMER FOR THE PRODUCT.
Page 2 of 43
Page 3

User Manual
Contents
About the Product ...................................................................................................... 5
Getting Started ........................................................................................................... 6
Check Package Contents .............................................................................. 7
Using the USB Extension .............................................................................................. 7
Remove or Disable Conflicts ........................................................................ 7
Internet Sharing, Proxy, and Security Applications .................................................. 8
Configuring Internet Properties ................................................................................... 8
Removing Temporary Internet Files ........................................................................... 8
Installation ................................................................................................................. 9
Configuration ........................................................................................................... 15
Connecting to non-Secured Wireless AP .................................................... 15
Connecting to WEP-Secured Wireless AP ................................................... 16
Connecting to WPA-PSK-Secured Wireless AP ............................................ 17
About WL562USB Utility ........................................................................................... 18
Network Tab .............................................................................................. 18
Button Section ............................................................................................................. 19
Function Section .......................................................................................................... 19
Profile ........................................................................................................ 22
Definition of each field: ............................................................................................. 22
Icons and buttons: ...................................................................................................... 23
Add/Edit Profile .......................................................................................................... 23
Network .................................................................................................... 27
Definition of each field .............................................................................................. 28
Icons and buttons ....................................................................................................... 28
Connected network .................................................................................................... 29
Advanced ................................................................................................... 30
Definition of each field .............................................................................................. 31
Link Status ................................................................................................. 31
Throughput .................................................................................................................. 32
Statistics ....................................................................................................................... 32
Transmit Statistics ....................................................................................................... 33
Page 3 of 43
Page 4

User Manual
Received Statistics ...................................................................................................... 34
WPS ........................................................................................................... 34
Definition of each field .............................................................................................. 35
Security...................................................................................................... 37
Auth./Encry. Setting - WEP/TKIP/AES ...................................................................... 37
802.1x Setting ............................................................................................................. 38
Page 4 of 43
Page 5

User Manual
About the Product
WL562USB provides wireless connectivity to desktop and notebook computers. The
device performs the function of a radio broadcaster and receiver to communicate with a
wireless network. This gives the computer connected with WL562USB the capability to
communicate with other devices and use the Internet service available in the wireless
network.
WL562USB is capable of connecting with wireless networks that utilize the Wireless N
protocol. This device also supports connection to other wireless network standards like
Wireless G or Wireless B. WL562USB is easy to setup - install the necessary driver
software, connect it to an available USB slot, and then connect to a wireless network. The
device comes with a Windows-based software called WL562USB Utility that can be used
to connect to wireless networks and create profiles which remembers the configuration
details for a wireless network.
Note:
Note: Wireless connection speed is not correlated to Internet access speed. Internet
Note:Note:
access speed from popular broadband DSL or cable Internet services normally
provides up to 3 Mbps connection, which can be easily handled even by the slower
Wireless B protocol.
Page 5 of 43
Page 6
User Manual
Contents
Getting Started
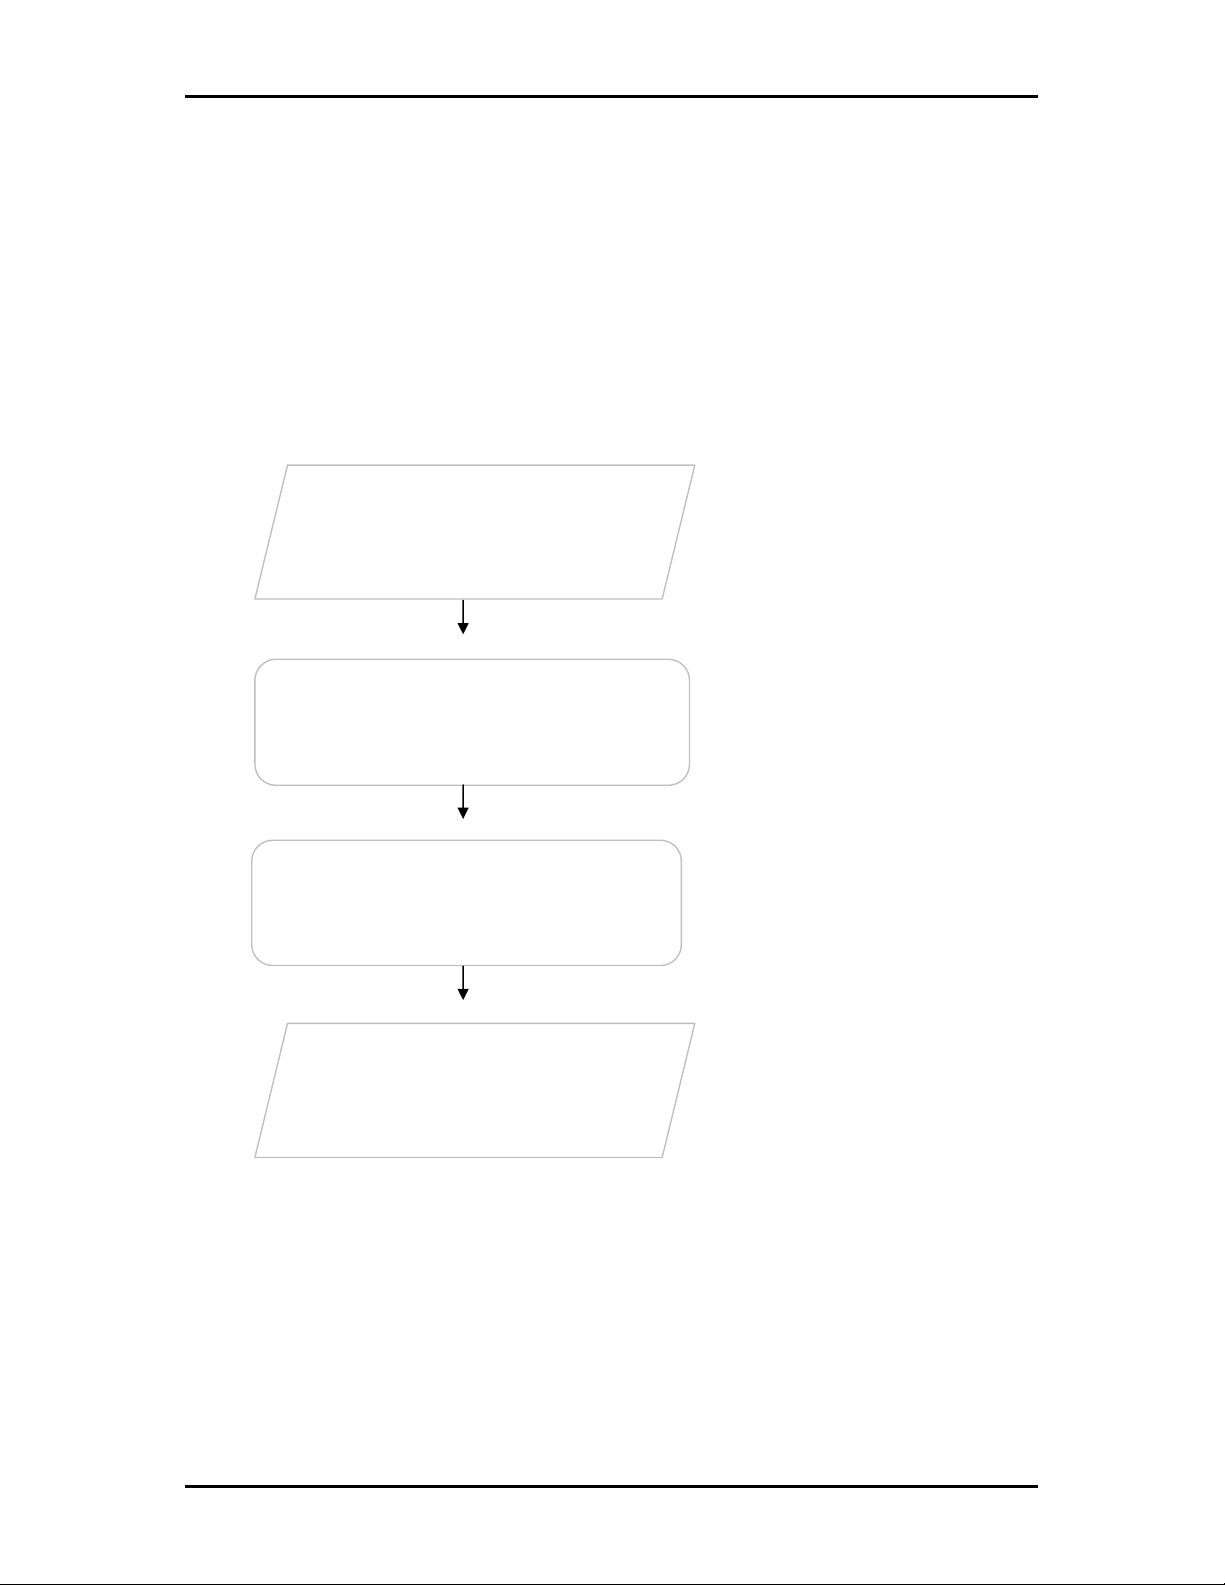
Setting up the device is easy. The flowchart below provides an outline of the steps
needed to complete the installation. Brief descriptions appear beside each step. Detailed
instructions are provided in the subsequent pages.
The package includes the Wireless
Check Package
N USB Adapter, Easy Start Guide,
Resource CD and USB Extension.
Check proxy application, TCP/IP
Remove/Disable
Conflicts
Install the Device
Settings, Internet Properties, and
remove temporary Internet files.
Install the device and then connect
to a wireless network.
Ready to Use
Page 6 of 43
Page 7

User Manual
Check Package Contents
Make sure that you have the following items. If any of the items is damaged or missing,
please contact your dealer immediately.
WL562USB
Easy Start Guide
Resource CD – contains WL562 Utility installer, and User Manual
USB Cable
Using the USB Extension
The USB Extension helps you place the device to a more prominent location and to
achieve a better reception of the wireless network. It is most useful for desktop
computers with USB 2.0 ports placed behind the computer casing. USB ports placed in the
front of the computer are usually the slower USB 1.0 variant.
To use the USB Extension, connect one end to a USB 2.0 port in your computer, and then
attach the WL562USB at the other end.
Remove or Disable Conflicts
To make sure the device installation moves on smoothly, you need to remove or disable
conflicts that may interfere the installation. Probable conflicts may include:
Internet sharing applications
Proxy software
Security software
Internet properties
Temporary Internet files
Page 7 of 43
Page 8

User Manual
Internet Sharing, Proxy, and Security Applications
Internet sharing, proxy software, and firewall applications may interfere with the
installation. These should be removed or disabled before start the installation.
If you have any of the following or similar applications installed on your computer,
remove or disable them according to the manufacturer’s instructions.
Internet Sharing Applications
Internet Sharing Applications Proxy Software
Internet Sharing ApplicationsInternet Sharing Applications
Microsoft Internet Sharing WinGate Symantec
WinProxy Zone Alarm
Proxy Software Security Software
Proxy SoftwareProxy Software
Security Software
Security SoftwareSecurity Software
Configuring Internet Properties
To set the Internet Properties:
1. Click the Start button, and then click Run. This opens the Run dialog box.
2. Type control inetcpl.cpl, and then click OK. This opens Internet Properties.
3. Click Connections tab.
4. In Dial-up and Virtual Private Network settings, check Never dial a connection.
5. To close Internet Properties, click OK.
Removing Temporary Internet Files
Temporary Internet files are files from Web sites that are stored in your computer. Delete
these files to clean the cache and remove footprints left by the Web pages you visited.
To remove temporary Internet files:
1. Click the Start button, and then click Run. This opens the Run dialog box.
2. Type control, and then click OK. This opens Control Panel.
3. Double-click Internet Options. This opens Internet Options.
4. In the Temporary Internet Files pane, click Delete Cookies.
5. Click Delete Files.
6. To close Internet Properties, click OK.
Page 8 of 43
Page 9

User Manual
Installation
Here are the instructions on how to install the driver software for Windows 2000, XP,
Vista and Windows 7.
Note:
Note: Do not connect the device until the Utility is completely installed.
Note: Note:
To install the driver software:
1. Insert the Resource CD to the CD-ROM. This opens the WL562USB Utility Setup. If
the Utility does not open automatically, click the Start button, and then click Run.
Enter d:\setup.exe, where d is the CD-ROM drive.
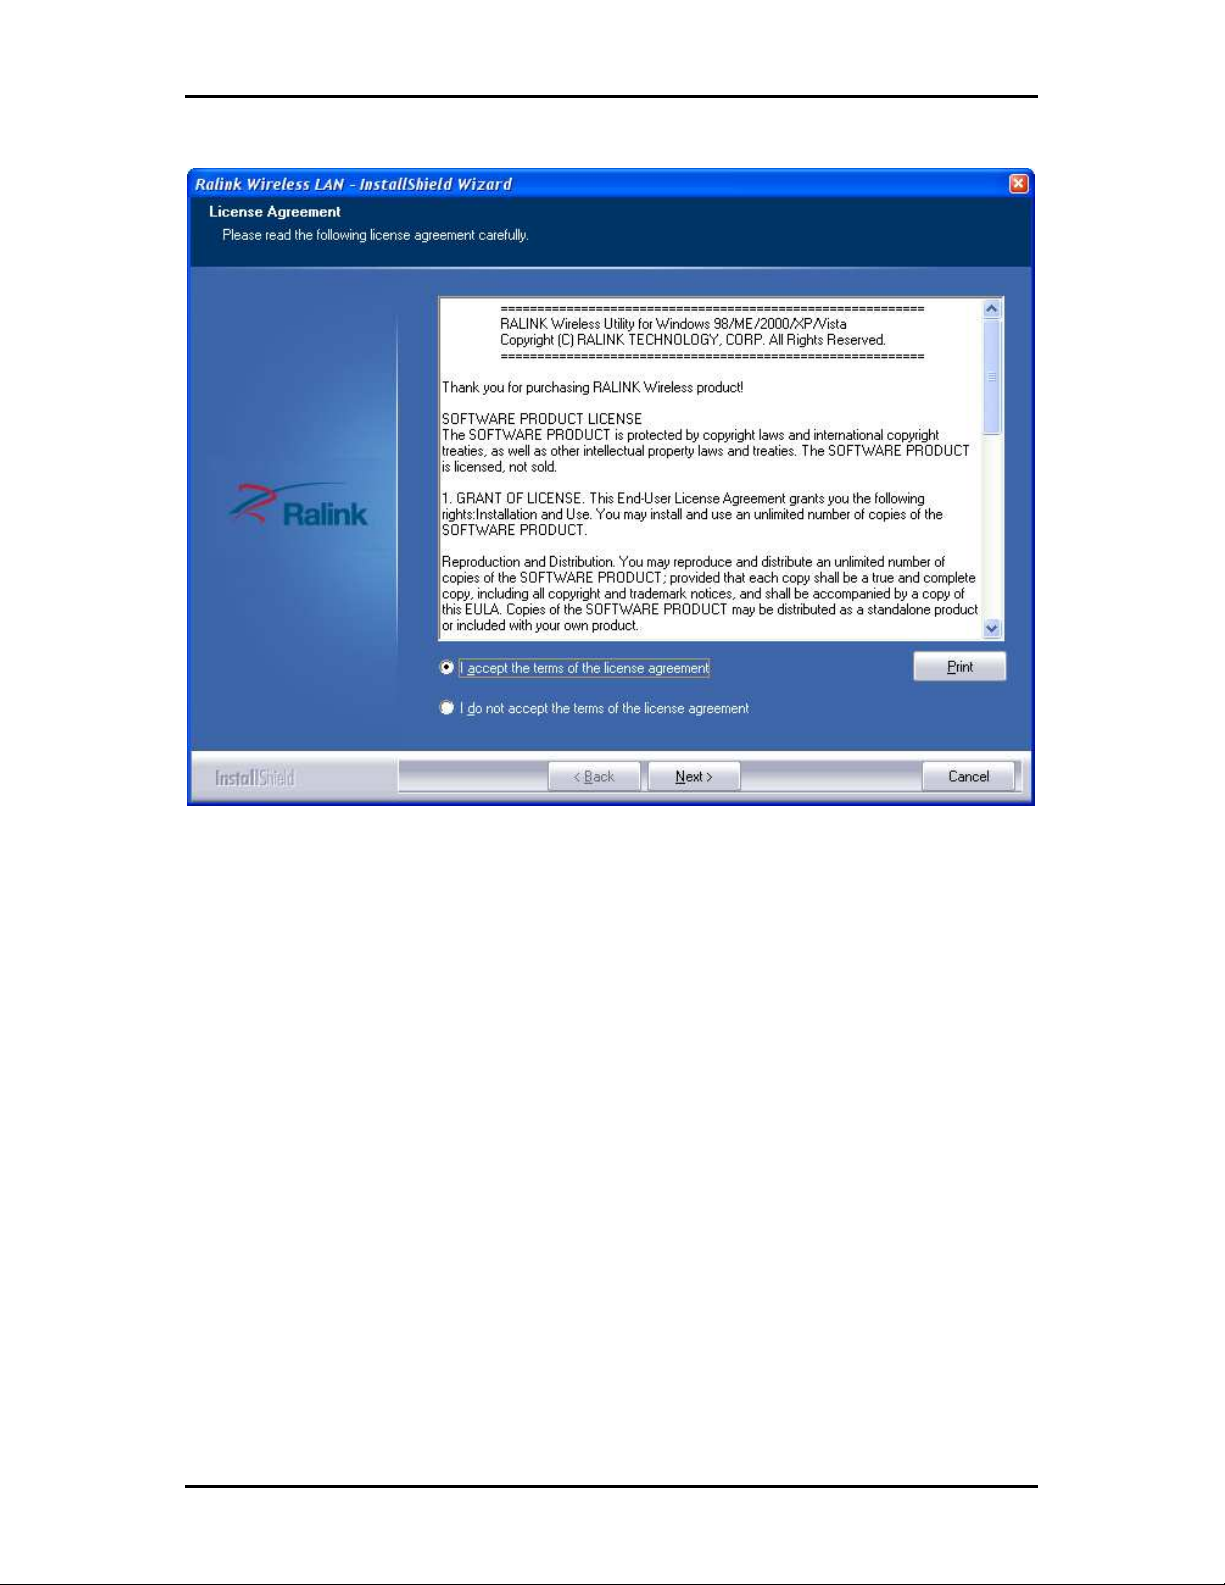
2. Wizard will now move to next step for license agreement, check the option ‘I
accept the terms of the license agreement’
Page 9 of 43
Page 10
User Manual
3. Click Next.
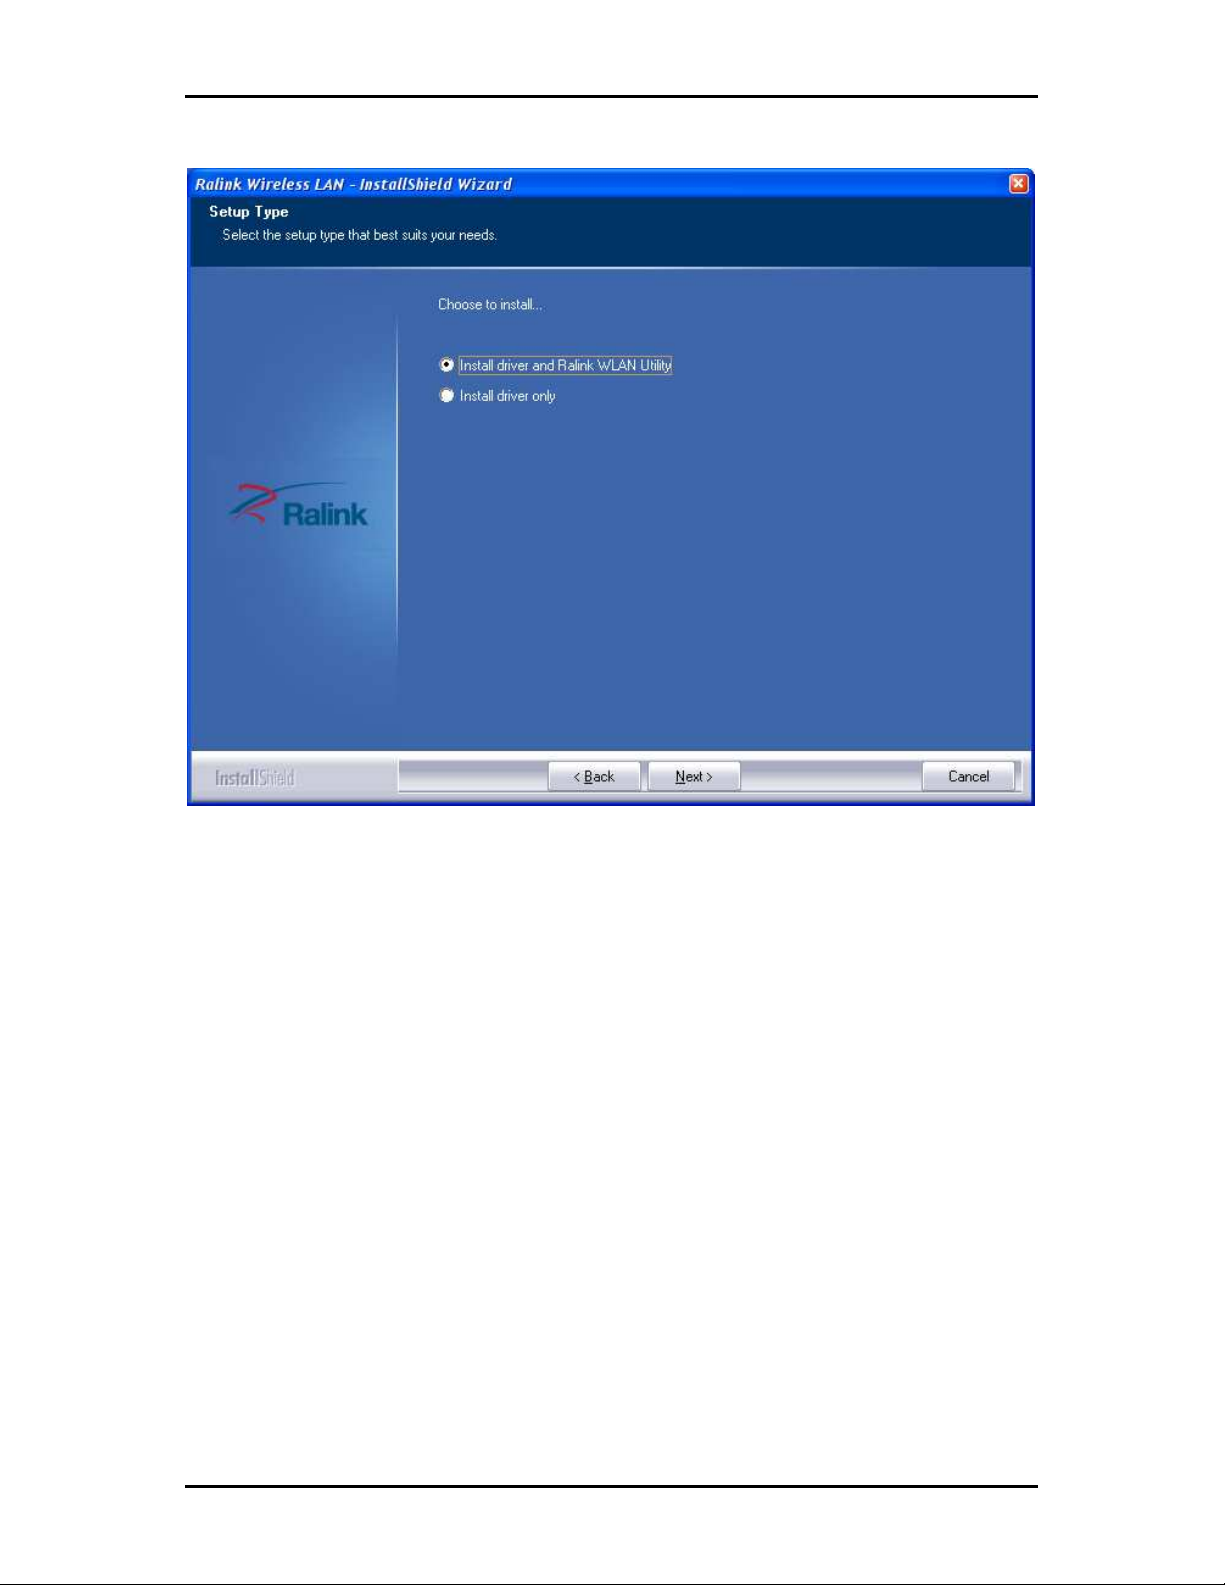
4. Select either of the options available:
a. Install driver and Ralink WLAN Utility, this will install driver for the adaptor, and
the wireless utility
b. Install driver only, this will install only the driver for the adaptor.
Page 10 of 43
Page 11
User Manual
5. Click Next.
6. If you selected the first option, please select either one of the options available:
a. Ralink Configuration Tool
b. Microsoft Zero Configuration Tool
Page 11 of 43
Page 12

User Manual
7. Click Next.
8. Click Install, required driver/utility is now being installed into the PC
Page 12 of 43
Page 13

User Manual
9. Click Finish to exit the wizard, installation is now complete.
Page 13 of 43
Page 14

User Manual
Page 14 of 43
Page 15

User Manual
Configuration
This chapter describes how to configure WL562USB to get connected to your WLAN
router.
The adaptor’s configuration in windows XP is similar with windows 2000 and windows
Vista. This user guide describes the configuration for windows XP.
After installing the adaptor, the adaptor’s tray icon will appear in your system tray. It
appears at the right hand side bottom of the screen. The icon will change color to reflect
current wireless network connection status. The status is shown as follows:
: Indicates the connected and signal strength is good.
: Indicates the connected and signal strength is normal.
: Indicates that it is not yet connected.
: Indicates that a wireless NIC can not be detected.
: Indicates that the connection and signal strength is weak.
Connecting to non-Secured Wireless AP
1. Click Site Survey icon then select the AP desired.
Page 15 of 43
Page 16

User Manual
2. Click Connect button to connect to the desired AP.
Connecting to WEP-Secured Wireless AP
1. Select an AP with WEP encryption and click "Connect".
2. The Authentication and Encryption window will appear as below
3. Select the Default Key and Key format set on the AP then enter the WEP key on
the required field. Click Next to connect to the desired AP.
Page 16 of 43
Page 17

User Manual
Connecting to WPA-PSK-Secured Wireless AP
1. Select an AP with WPA-PSK encryption and click Connect.
2. The Authentication and Encryption window will appear as below. Select WPA-PSK
as the Authentication Type then select TKIP or AES encryption on the drop down
box and click Next.
3. Enter the WPA Preshared Key on the required field. Click Next to connect to the
desired AP.
Page 17 of 43
Page 18

User Manual
About WL562USB Utility
WL562USB Utility is a software application used in tandem with the device to connect to
a wireless network and to configure the device settings. WL562USB Utility can be
installed on computers running Windows 2000, XP, or Vista.
To connect to a wireless network:
1. Connect Wireless N USB adapter to a USB port.
2. When your device is detected, a new icon appears in the System tray .
Double-click this icon to open WL562USB Utility.
Network Tab
When starting RaUI, the system will connect to the AP with best signal strength without
setting a profile or matching a profile setting. When starting RaUI, it will issue a scan
command to a wireless NIC. After two seconds, the AP list will be updated with the
results of a BSS list scan. The AP list includes most used fields, such as SSID, network
type, channel used, wireless mode, security status and the signal percentage. The Check
icon indicates the connected BSS or IBSS network. The dialog box is shown in the below
figure.
Page 18 of 43
Page 19

User Manual
There are three sections to the RaUI dialog box. These sections are briefly described as
follow.
Button Section
Includes buttons for the Site Survey, Link Information, Profile page, Advanced page, the
About button, Help and Radio On/Off button
Function Section
Appears to present information and options related to the button.
Link Information Page
Page 19 of 43
Page 20

User Manual
Profile page
Page 20 of 43
Network page
Page 21

User Manual
Advanced page
About page
Page 21 of 43
Page 22

User Manual
Profile
The Profile List keeps a record of your favorite wireless settings at home, office, and
other public hot-spots. You can save multiple profiles, and activate the correct one at
your preference. Picture below shows the basic profile section.
Definition of each field:
1. Profile Name: Name of profile, preset to PROF* (* indicate 1, 2, 3...).
2. SSID: The access point or Ad-hoc name.
3. Network Type: Indicates the networks type, including infrastructure and Ad-Hoc.
4. Authentication: Indicates the authentication mode used.
5. Encryption: Indicates the encryption Type used.
6. Use 802.1x: Shows if the 802.1x feature is used or not.
7. Cannel: Channel in use for Ad-Hoc mode.
8. Power Save Mode: Choose from CAM (Constantly Awake Mode) or Power Saving
Mode.
9. Tx Power: Transmitting power, the amount of power used by a radio transceiver
to send the signal out.
10. RTS Threshold: Users can adjust the RTS threshold number by sliding the bar or
keying in the value directly.
Page 22 of 43
Page 23

User Manual
11. Fragment Threshold: The user can adjust the Fragment threshold number by
sliding the bar or key in the value directly.
Icons and buttons:
: Indicates if a connection made from the currently activated profile.
: Indicates if the connection has failed on a currently activated profile.
: Indicates the network type is infrastructure mode.
: Indicates the network type is in Ad-hoc mode.
: Indicates if the network is security-enabled.
: Click to add a new profile.
: Click to edit an existing profile.
: Deletes an existing profile.
: Import an existing profile.
: Export an existing profile.
: Activates the selected profile.
Add/Edit Profile
There are three methods to open the Profile Editor dialog box.
1. You can open it by clicking the "Add to Profile" button in the Site Survey tab.
2. You can open it by clicking the "Add" button in the Profile tab.
3. You can open it by clicking the "Edit" button on the Profile tab.
Page 23 of 43
Page 24

User Manual
: Next Button.
: Back Button.
Add a new Profile
: Cancel Button.
Parameter definitions
1. Profile Name: The user can chose any name for this profile, or use the default
name defined by system.
2. SSID: The user can key in the intended SSID name or select one of the available
APs from the drop-down list.
3. Network Type: There are two types, infrastructure and 802.11 Ad-hoc mode.
Under Ad-hoc mode, user can also choose the preamble type. The available
preamble type includes auto and long. In addition, the channel field will be
available for setup in Ad-hoc mode.
Page 24 of 43
Page 25

User Manual
4. Authentication Type: There are 7 type of authentication modes supported by RaUI.
They are open, Shared, LEAP, WPA and WPA-PSK, WPA2 and WPA2-PSK.
5. Encryption Type: For Open authentication mode, the selection of available
encryption type are None and WEP. For Shared and 802.1x authentication mode,
the selection of available encryption is WEP. For WPA, WPA2, WPA-PSK and WPA2-
PSK authentication mode, both TKIP and AES encryption is available. For WAPI-PSK
and WAPI-CA authentication mode, only SMS4 encryption is available.
6. WEP Key: Only valid when using WEP encryption algorithms. The key must be
identical to the AP's key. There are several formats to enter the keys as listed
below:
a. Hexadecimal - 40bits : 10 Hex characters.
b. Hexadecimal - 128bits : 26Hex characters.
c. ASCII - 40bits : 5 ASCII characters.
d. ASCII - 128bits : 13 ASCII characters.
Page 25 of 43
Page 26

User Manual
7. Pre-shared Key: This is the key shared between the AP and STA. For WPA-PSK and
WPA2-PSK authentication mode, this field must be filled with a key between 8
and 32 characters in length.
8. 802.1x Setting: This is introduced in the topic of "Section 3-2 : 802.1x Setting".
Page 26 of 43
Page 27

User Manual
9. Power Save Mode: Choose CAM (Constantly Awake Mode) or Power Saving Mode.
10. Channel: Only available for setting under Ad-hoc mode. Users can choose the
channel frequency to start their Ad-hoc network.
11. RTS Threshold: User can adjust the RTS threshold number by sliding the bar, or key
in the value directly. The default value is 2347.
12. Fragment Threshold: User can adjust the Fragment threshold number by sliding
the bar or key in the value directly. The default value is 2346.
Network
The system will display the information of local APs from the last scan result as part of
the Network section. The Listed information includes the SSID, BSSID, Signal, Channel,
Encryption algorithm, Authentication and Network type as shown below.
Page 27 of 43
Page 28

User Manual
Network function
Definition of each field
1. SSID: Name of BSS or IBSS network.
2. Network Type: Network type in use, Infrastructure for BSS, Ad-Hoc for IBSS
network.
3. Channel: Channel in use.
4. Wireless Mode: AP support wireless mode. It may support 802.11a, 802.11b,
802.11g or 802.11n wireless mode.
5. Security-Enable: Indicates if the AP provides a security-enabled wireless network.
6. Signal: Receive signal strength of the specified network.
Icons and buttons
Page 28 of 43
Page 29

: Indicates that the connection is successful.
: Indicates the network type is in infrastructure mode.
: Indicates the network type is in Ad-hoc mode.
: Indicates that the wireless network is security-enabled.
: Indicates 802.11a wireless mode.
: Indicates 802.11b wireless mode.
: Indicates 802.11g wireless mode.
: Indicates 802.11n wireless mode.
User Manual
: Indicates that the AP list is sorted by SSID, Channel or Signal.
: Button to connect to the selected network.
: Adds the selected AP to the Profile setting. It will bring up a profile page and
save the user's setting to a new profile.
: Connect button
Connected network
1. When utility first runs, it will select the best AP to connect to automatically.
2. If the user wants to use another AP, they can click "Connect" for the intended AP
to make a connection.
3. If the intended network uses encryption other than "Not Use," RaUI will bring up
the security page and let the user input the appropriate information to make the
connection. Please refer to the example on how to fill in the security information.
When you double click an AP, you can see detailed information about that AP.
Page 29 of 43
Page 30

User Manual
The detailed AP information is divided into three parts. They are General, WPS, CCX
information and 802.11n (The 802.11n button only exists for APs supporting N mode.)
The introduction is as follows:
1. General information contains the AP's SSID, MAC address, authentication type, and
encryption type.
Advanced
The following shows the Advance functions of the utility.
Page 30 of 43
Page 31

User Manual
Definition of each field
1. Wireless mode: Select wireless mode.
2. Select Your Country Region Code: There are eight countries to choose from in the
country channel list
Apply the above changes.
Link Status
The link status page displays detailed information about the current connection.
Page 31 of 43
Page 32

User Manual
1. Status: Current connection status. If no connection, if will show Disconnected.
Otherwise, the SSID and BSSID will show here.
2. Extra Info: Display link status in use.
3. Channel: Display current channel in use.
4. Authentication: Authentication mode in use
5. Encryption: Encryption type in use
6. Network Type: Network type in use.
Throughput
The throughput page displays detailed information about the current connection
1. Link Speed: Show current transmit rate and receive rate.
2. Throughput: Display transmits and receive throughput in unit of Mbps.
3. Link Quality: Display connection quality based on signal strength and TX/RX packet
error rate.
4. Signal Strength 1 : Receive signal strength 1, user can choose to display as
percentage or dBm format.
Statistics
The Statistics page displays detailed counter information based on 802.11 MIB counters.
This page translates that MIB counters into a format easier for the user to understand.
Page 32 of 43
Page 33

Transmit Statistics
User Manual
1. Frames Transmitted Successfully: Frames successfully sent.
2. Frames Fail To Receive ACK After All Retries: Frames failed transmit after hitting
retry limit.
3. RTS Frames Successfully Receive CTS: Successfully receive CTS after sending RTS
frame.
4. RTS Frames Fail To Receive CTS: Failed to receive CTS after sending RTS.
5. Frames Retransmitted Successfully: Successfully retransmitted frames numbers.
6. Reset counters to zero.
Page 33 of 43
Page 34

User Manual
Received Statistics
1. Frames Received Successfully: The number of frames successfully received.
2. Frames Received With CRC Error: The number of frames received with a CRC error.
3. Frames Dropped Due To Out-of-Resource: The number of frames dropped due to a
resource issue.
4. Duplicate Frames Received: The number of duplicate frames received.
5. Reset all the counters to zero.
WPS
The following shows the WPS functions.
Page 34 of 43
Page 35

User Manual
Definition of each field
1. WPS Configuration: The primary goal of Wi-Fi Protected Setup (Wi-Fi Simple
Configuration) is to simplify the security setup and management of Wi-Fi
networks. Ralink STA supports the configuration and setup using a PIN
configuration method or a PBC configuration method through an internal or
external Registrar.
2. WPS AP List: Displays the SSID of the surrounding APs with WPS IE from the last
scan result.
3. PIN: Start to add to Registrar using PIN configuration method. If STA Registrar,
remember that enter PIN Code read from your Enrollee before starting PIN.
4. Auto: Starts to add to AP by using to select the AP automatically in PIN method.
Page 35 of 43
Page 36

User Manual
5. PIN Code: The user is required to enter an 8-digit PIN Code into Registrar. When an
STA is the Enrollee, you can click "Renew" to re-generate a new PIN Code.
6. Config Mode: The station serving as an Enrollee or an external Registrar.
7. PBC: Start to add to AP using PBC configuration method.
Page 36 of 43
Page 37

8. Progress Bar: Displays the rate of progress from Start to Connected.
User Manual
Security
Auth./Encry. Setting - WEP/TKIP/AES
Page 37 of 43
Page 38

User Manual
Definition of each field
1. Authentication Type: There are 7 authentication modes supported by the utility.
They are open, Shared, LEAP, WPA and WPA-PSK, WPA2 and WPA2-PSK.
2. Encryption Type: For open and shared authentication mode, the available
encryption types are None and WEP. For WPA, WPA2, WPA-PSK and WPA2-PSK
authentication mode, the encryption type supports both TKIP and AES.
3. 8021X
4. Pre-shared Key: This is the shared key between the AP and STA. If operating in
WPA-PSK and WPA2-PSK authentication mode, this field must be filled with a key
between 8 and 32 characters in length.
5. WEP Key: Only valid when using WEP encryption algorithm. The key must match
the AP's key. There are several formats to enter the keys.
6. Hexadecimal - 40bits: 10 Hex characters.
7. Hexadecimal - 128bits: 32Hex characters.
8. ASCII - 40bits: 5 ASCII characters.
9. ASCII - 128bits: 13 ASCII characters.
802.1x Setting
802.1x is used for authentication of the "WPA" and "WPA2" certificate by the server.
Page 38 of 43
Page 39

User Manual
Authentication type:
1. PEAP: Protect Extensible Authentication Protocol. PEAP transport securely
authenticates data by using tunneling between PEAP clients and an authentication
server. PEAP can authenticate wireless LAN clients using only server-side
certificates, thus simplifying the implementation and administration of a secure
wireless LAN.
2. TLS/Smart Card: Transport Layer Security. Provides for certificate-based and
mutual authentication of the client and the network. It relies on client-side and
server-side certificates to perform authentication and can be used to dynamically
generate user-based and session-based WEP keys to secure subsequent
communications between the WLAN client and the access point.
3. TTLS: Tunneled Transport Layer Security. This security method provides for
certificate-based, mutual authentication of the client and network through an
encrypted channel. Unlike EAP-TLS, EAP-TTLS requires only server-side certificates.
4. EAP-FAST: Flexible Authentication via Secure Tunneling. It was developed by Cisco.
Instead of using a certificate, mutual authentication is achieved by means of a
PAC (Protected Access Credential) which can be managed dynamically by the
authentication server. The PAC can be supplied (distributed one time) to the client
either manually or automatically. Manually, it is delivered to the client via disk or
a secured network distribution method. Automatically, it is supplied as an in-band,
over the air, distribution. For tunnel authentication, only support "Generic Token
Card" authentication.
5. LEAP: Light Extensible Authentication Protocol is an EAP authentication type used
primarily by Cisco Aironet WLANs. It encrypts data transmissions using dynamically
generated WEP keys, and supports mutual authentication.
6. MD5-Challenge: Message Digest Challenge. Challenge is an EAP authentication
type that provides base-level EAP support. It provides for only one-way
authentication - there is no mutual authentication of wireless client and the
network.
Page 39 of 43
Page 40

User Manual
Session Resumption
User can choose to "Disable" and "Enable".
Tunnel Authentication
1. Protocol: Tunnel protocol, List information include "EAP-MSCHAP v2", "EAP-
TLS/Smart card", "Generic Token Card", "CHAP", "MS-CHAP", "MS-CHAP-V2", "PAP"
and "EAP-MD5".
2. Tunnel Identity: Identity for tunnel.
3. Tunnel Password: Password for tunnel.
ID / PASSWORD
1. Authentication ID/Password: The identity, password and domain name for server.
Only "EAP-FAST" and "LEAP" authentication can key in domain name. Domain
names can be keyed in the blank space.
2. Tunnel ID/Password: Identity and Password for the server.
Client Certification
Use Client certificate: Client certificate for server authentication.
Page 40 of 43
Page 41

User Manual
EAP Fast
Allow unauthenticated provision mode: During the PAC can be provisioned (distributed
one time) to the client automatically. It only supported "Allow unauthenticated provision
mode" and use "EAP-MSCHAP v2" authentication to authenticate now. It causes to
continue with the establishment of the inner tunnel even though it is made with an
unknown server.
Use protected authentication credential: Using PAC, the certificate can be provided to the
client manually via disk or a secured network distribution method.
Server Certification
1. Certificate issuer: Select the server that issues the certificate.
Page 41 of 43
Page 42

User Manual
2. Allow intermediate certificates: It must be in the server certificate chain between
the server certificate and the server specified in the "certificate issuer must be"
field.
3. Server name: Enter an authentication sever root.
Page 42 of 43
Page 43

User Manual
Safety Warnings
For your safety, be sure to read and follow all warning notices and instructions.
Do not open the device. Opening or removing the device can expose you to
dangerous voltage points or other risks. Only qualified service personnel can
service the device. Please contact your vendor for further information.
Do not use your device during a thunderstorm. There may be a risk of electric
shock brought about by lightning.
Do not expose your device to dust or corrosive liquids.
Do not use this product near water sources.
Do not obstruct the ventilation slots.
Page 43 of 43
 Loading...