

Axis 205 Quick Installation Manual
AXIS 205 Quick Installation Guide Page 1 of 6
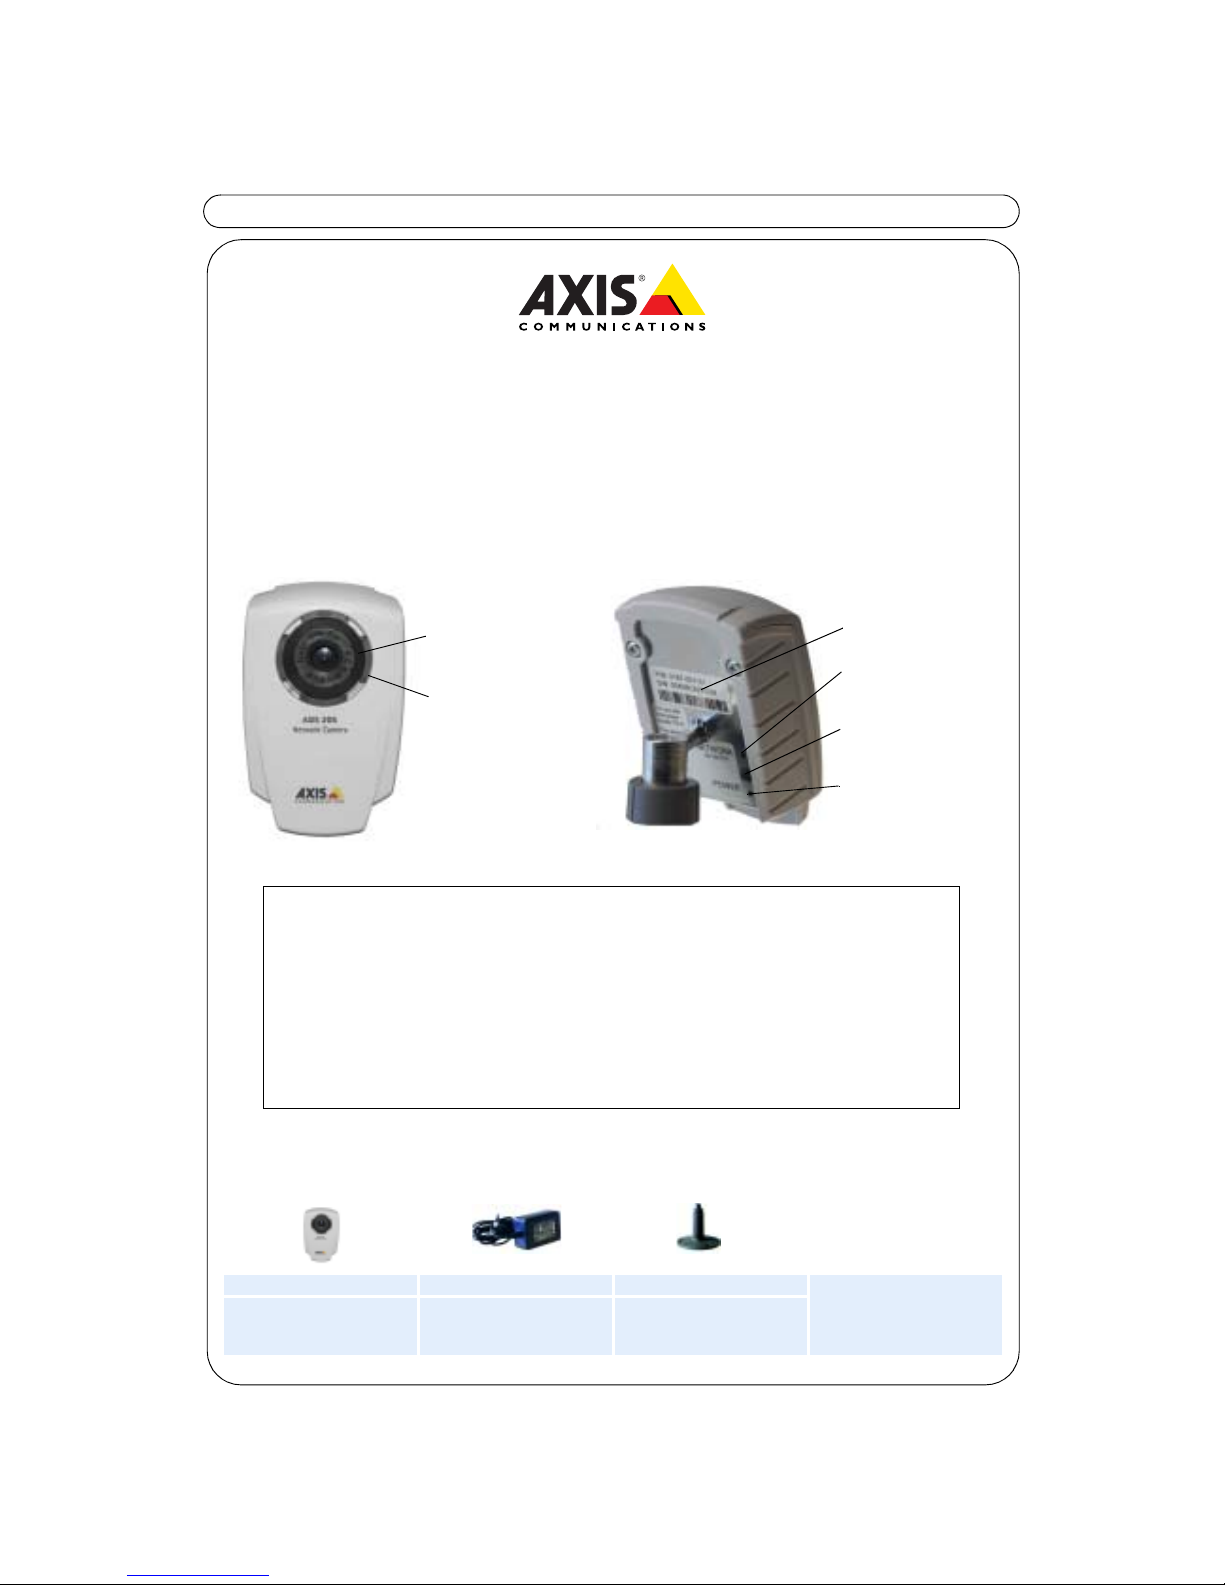
AXIS 205 Network Camera
Quick Installation Guide
Package Contents:
Printed Material
AXIS 205 Network Camera Power adapter Stand + 3 mounting screws AXIS 205 Network Camera
Quick Installation Guide
Axis Warranty Document
Ready assembled with lock
washer, swivel joint and lock
ring
Country-specific. Please
ensure that the correct
adapter is used
Stand and extension section
ready assembled.
Serial number
Network Indicator
Control Button
Power Indicator
Focus Ring
Status
Indicator
(surrounding
the focus ring)
Follow these steps to install your AXIS 205 on your local network (LAN):
1. Familiarize yourself with the AXIS 205 Network Camera - (this page)
2. Connect the camera - Hardware Installation, on page 2
3. See live video - One-click Installation, on page 3
- alternatively See live video - Manual Installation using AXIS IP Utility, on page 4
For additional information please refer to the Axis Web si te at www.axis.com
AXIS 205 Quick Installation Guide Page 2 of 6
Hardware Installation
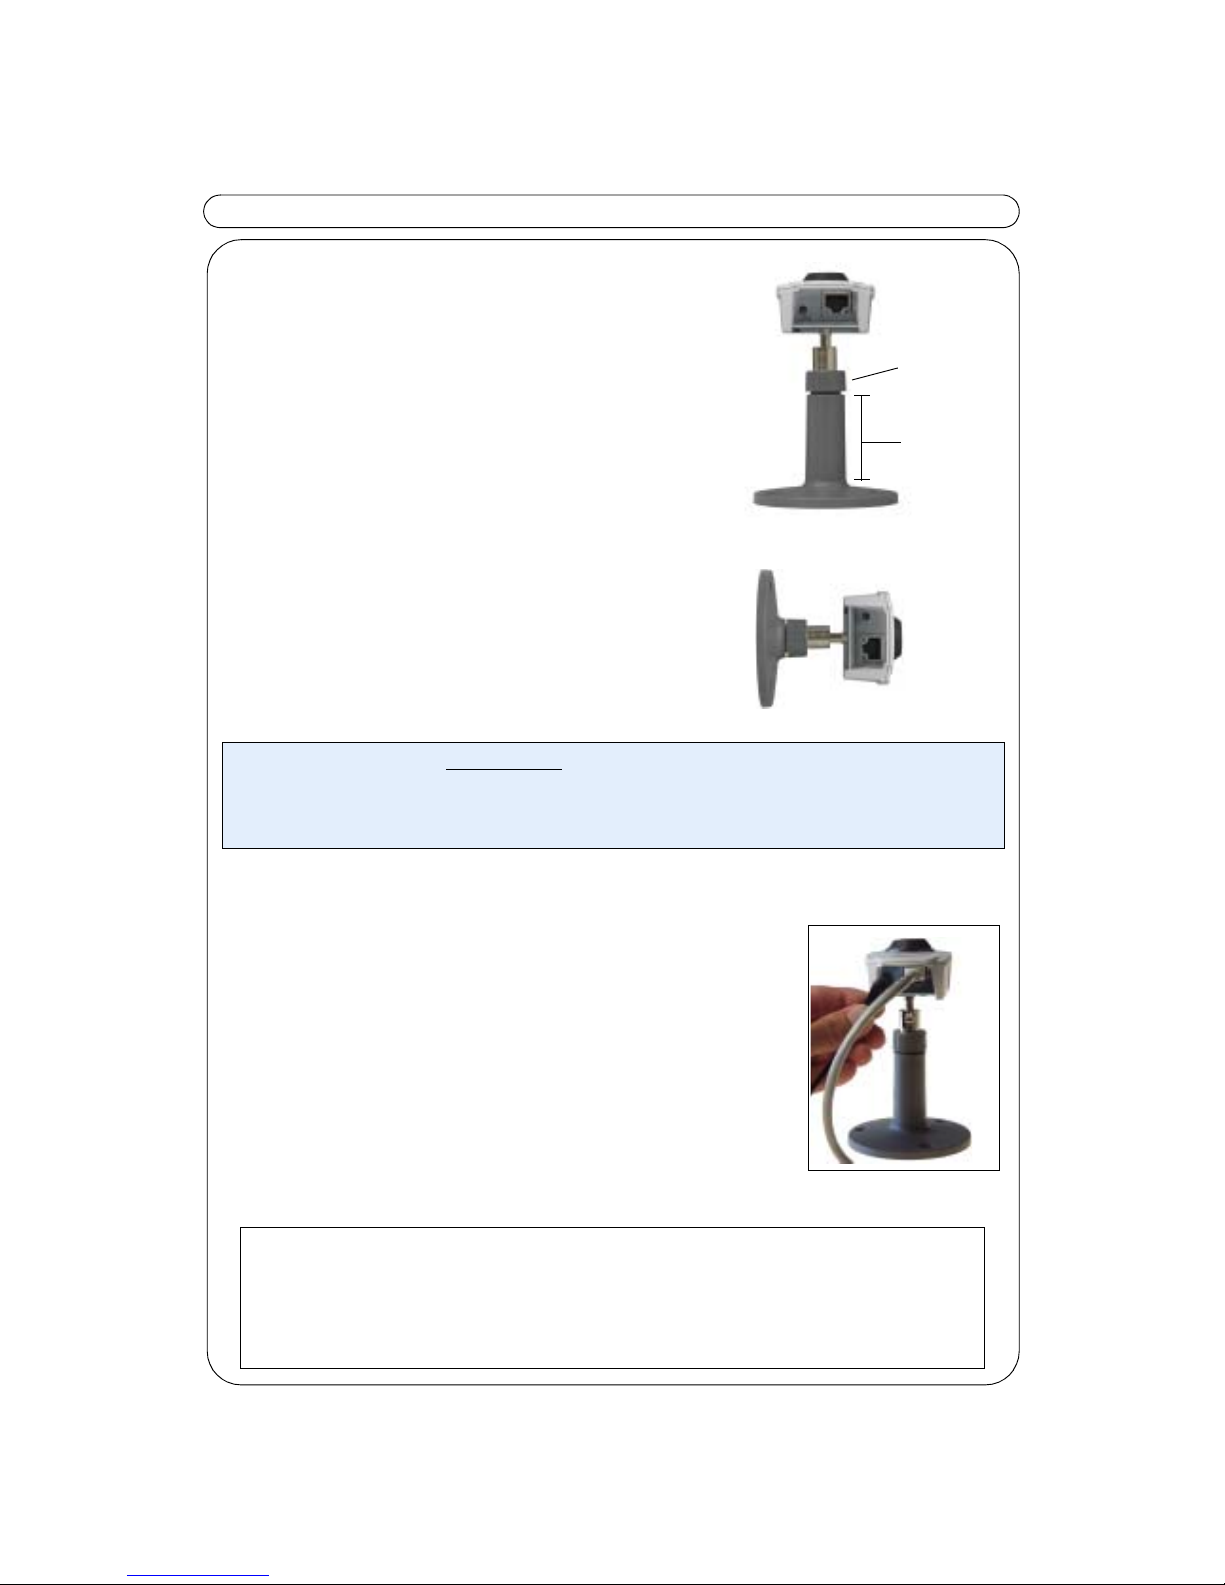
Mounting on a Horizontal Surface
1. Attach the camera to the stand
2. Adjust the angle of the camera
3. Gently tighten the lock ring
Mounting on a Vertical Surface
1. Remove the stand extension.
2. Angle and fasten the camera as described above.
Important!
Connecting the Network and Power Cables
1. Connect the AXIS 205 to your network using a standard
RJ-45 network cable.
2. Connect the power to the camera.
3. The AXIS 205 is designed for installation on an Ethernet
network. This involves assigning an IP address to the
network camera, either automatically (e.g. DHCP) or
manually.
4. See One-click Installation, on page 3
- alternatively -
Manual Installation using AXIS IP Utility, on page 4
The AXIS 205 is designed for ind oor u se on ly, and must always be positioned where it is not exposed to
direct sunlight or strong halogen light. Exposure to direct sunlight or halogen light may cause permanent damage to the image sensor in the AXIS 205.
Damage as a result of exposure to strong light is not covered by the Axis warranty.
Stand
extension
Lock Ring
Please consult your network administrator or refer to the user documentation of
your network to check if you should select automatic or manual IP address
assignment.
For additional information on this and other issues, please refer to the Axis Web site
at www.axis.com
 Loading...