

Page 1
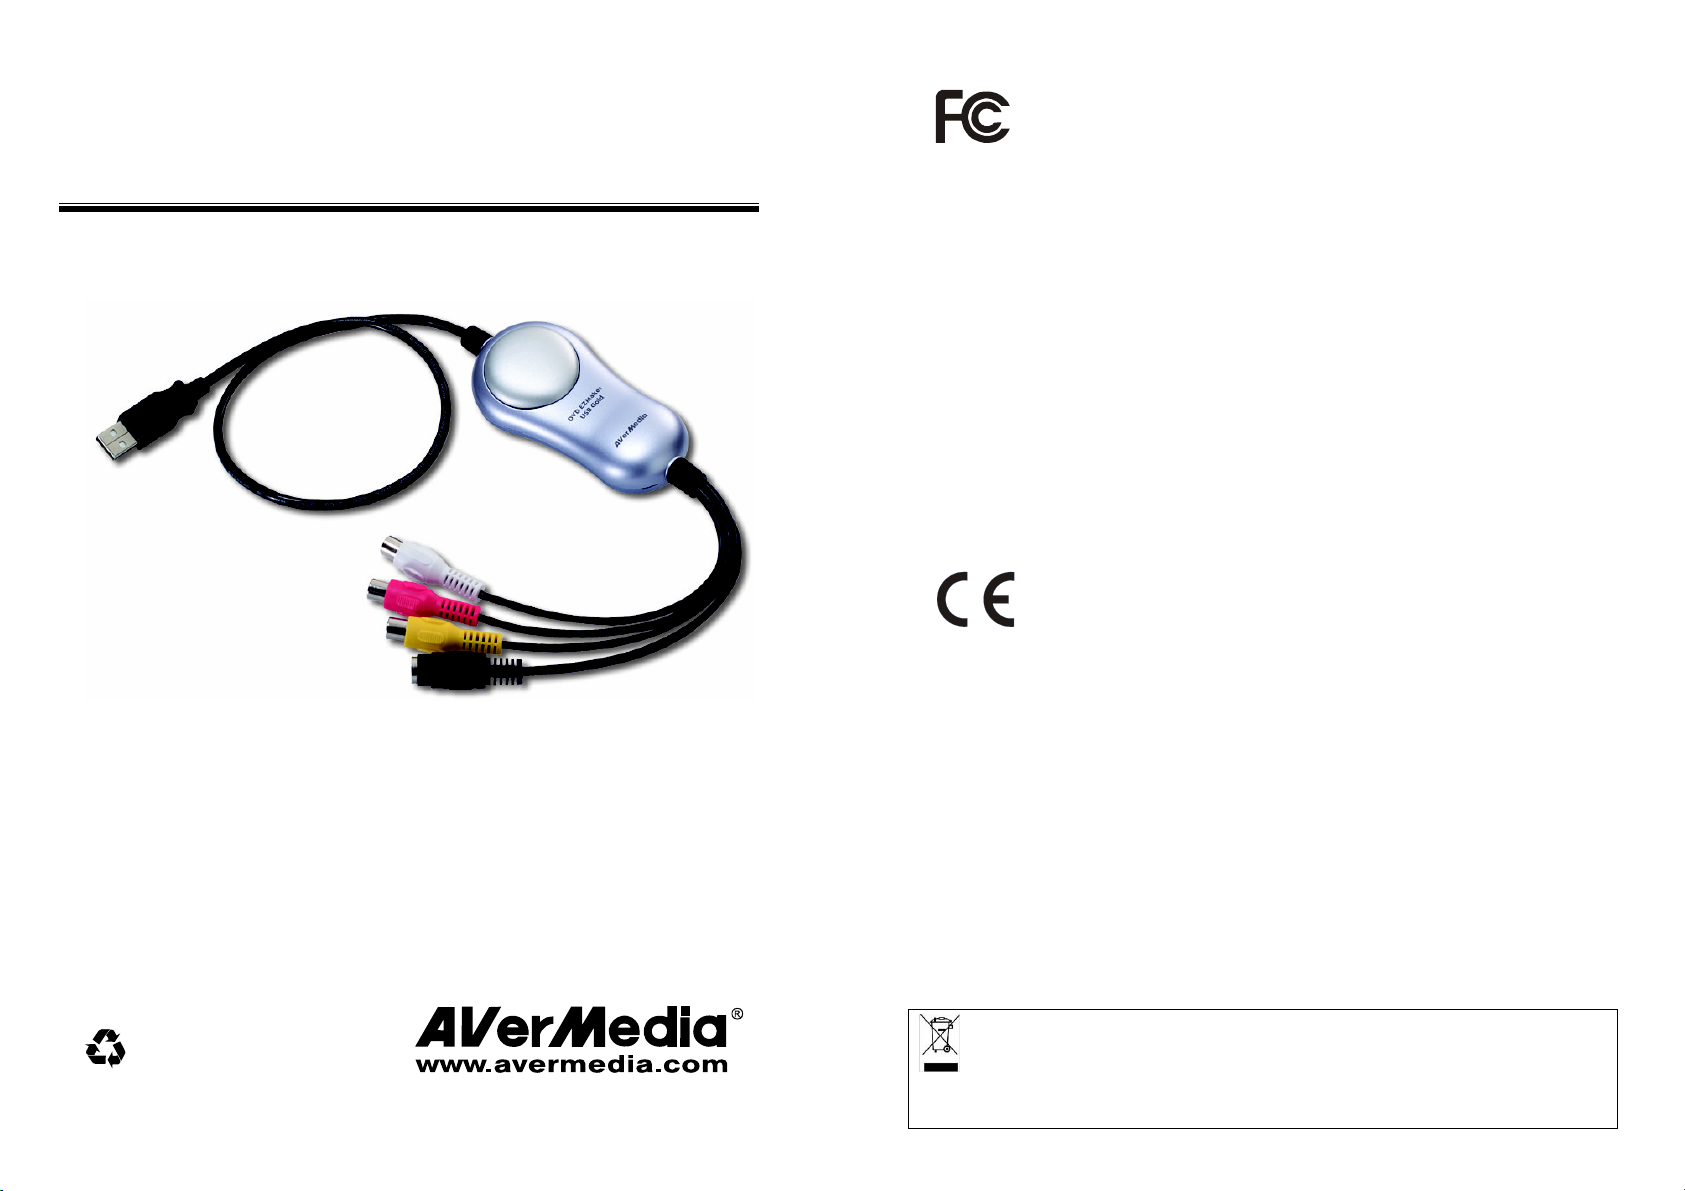
AVerMedia® DVD EZMaker USB Gold
Quick Installation Guide
English
Deutsch
Français
Italiano
Español
Português
Nederlands
P/N 300AC038-CLD
Made in Taiwan
FCC NOTICE (Class B)
This device complies with Part 15 of the FCC Rules. Operation is subject to
the following two conditions: (1) this device may not cause harmful
interference, and (2) this device must accept any interference received,
including interference that may cause undesired operation.
Federal Communications Commission Statement
NOTE- This equipment has been tested and found to comply with the limits for a Class B
digital device, pursuant to Part 15 of the FCC Rules. These limits are designed to provide
reasonable protection against harmful interference in a residential installation. This
equipment generates, uses and can radiate radio frequency energy and, if not installed
and used in accordance with the instructions, may cause harmful interference to radio
communications. However, there is no guarantee that interference will not occur in a
particular installation. If this equipment does cause harmful interference to radio or
television reception, which can be determined by tuning the equipment off and on, the
user is encouraged to try to correct the interference by one or more of the following
measures:
‧ Reorient or relocate the receiving antenna.
‧ Increase the separation between the equipment and receiver.
‧ Connect the equipment into an outlet on a circuit different from that to which the receiver is connected.
‧ Consult the dealer or an experienced radio/television technician for help.
CAUTION ON MODIFICATIONS
To comply with the limits for the Class B digital device, pursuant to Part 15 of the FCC
Rules, this device must be installed in computer equipment certified to comply with the
Class B limits. All cables used to connect the computer and peripherals must be shielded
and grounded. Operation with non-certified computers or non-shielded cables may result
in interference to radio or television reception.
Changes and modifications not expressly approved by the manufacturer could void the
user’s authority to operate this equipment.
European Community Compliance Statement
Class B
This product is herewith confirmed to comply with the requirements set out in
the Council Directives on the Approximation of the laws of the Member States
relating to Electromagnetic Compatibility Directive 2004/108/EC.
DISCLAIMER
No warranty or representation, either expressed or implied, is made with respect to the
contents of this documentation, its quality, performance, merchantability, or fitness for a
particular purpose. Information presented in this documentation has been carefully
checked for reliability; however, no responsibility is assumed for inaccuracies. The
information contained in this documentation is subject to change without notice.
In no event will AVerMedia be liable for direct, indirect, special, incidental, or
consequential damages arising out of the use or inability to use this product or
documentation, even if advised of the possibility of such damages.
TRADEM ARKS
AVerMedia is registered trademarks of AVerMedia TECHNOLOGIES, Inc. IBM PC is a
registered trademark of International Business Machines Corporation. Macintosh is a
registered trademark of Apple Computer, Inc. Microsoft is a registered trademark and
Windows is a trademark of Microsoft Corporation. All other products or corporate names
mentioned in this documentation are for identification and explanation purposes only, and
may be trademarks or registered trademarks of their respective owners.
COPYRIGHT
© 2007 by AVerMedia TECHNOLOGIES, Inc. All rights reserved. No part of this
publication may be reproduced, transmitted, transcribed, stored in a retrieval system, or
translated into any language in any form by any means without the written permission of
AVerMedia TECHNOLOGIES, Inc.
INFORMATION ABOUT WHERE TO DROP OFF YOUR WASTE EQUIPMENT FOR RECYCLING, PLEASE
CONTACT YOUR HOUSEHOLD WASTE DISPOSAL SERVICE OR THE SHOP WHERE YOU PURCHASED
THE PRODUCT.
THE MARK OF CROSSED-OUT WHEELED BIN INDICATES THAT THIS PRODUCT MUST NOT BE
DISPOSED OF WITH YOUR OTHER HOUSEHOLD WASTE. INSTEAD, YOU NEED TO DISPOSE
OF THE WASTE EQUIPMENT BY HANDING IT OVER TO A DESIGNATED COLLECTION POINT
FOR THE RECYCLING OF WASTE ELECTRICAL AND ELECTRONIC EQUIPMENT. FOR MORE
Page 2

English Deutsch Français Italiano Español Português Nederlands
What’s in the
Package
AVerMedia
DVD EZMaker USB Gold
Installation CD Installations-CD CD d’installation CD di installazione CD de instalación CD de instalação Installatie CD
CyberLink DVD Suite CD CyberLink DVD Suite CD CyberLink DVD Suite CD CyberLink DVD Suite CD CyberLink DVD Suite CD CyberLink DVD Suite CD CyberLink DVD Suite CD
Quick Installation Guide Schnellinstallationsanleitu
• Intel® Pentium® 4,
System
Requirements
2.4 GHz or higher or
equivalent AMD
processor.
• 512 MB RAM or above
• USB 2.0 port
• Sound card
• Graphic card with 8
MB of memory
• CD / DVD burner
• 1 GB for VCD/ 5 GB
for DVD or higher of
available hard disk
space
• Windows 2000
SP4/Windows XP
SP2/Windows Vista
• Web browsers:
Internet Explorer 5.5
or above
Was sich im
Paket befindet
AVerMedia
DVD EZMaker USB Gold
ng
Systemanforder
ungen
• Intel® Pentium® 4, 2.4
GHz oder höherer
gleichwertiger AMD
Prozessor
• 512MB RAM oder mehr
• USB 2.0-Eingang
• Soundkarte mit
Line-in-Anschluß
• AGP-Grafikkarte mit
8 MB Speicher
• CD- oder DVD-Brenner
• Benötigter Speicherplatz
auf Festplatte: 1 GB für
VCD / mindestens 5 GB
für DVD
• Windows 2000 SP4 /
Windows XP
SP2/Windows Vista
• Webbrowser: Internet
Explorer ab Version
5.5
Contenu de
l’emballage
AVerMedia
DVD EZMaker USB Gold
Guide d’installation rapide Guida di installazione
Configuration
minimale
Contenuto della
confezione
AVerMedia
DVD EZMaker USB Gold
rapida
Requisiti di
sistema
requise
• Intel® Pentium® 4,
2.4 GHz ou supérieur
ou processeur AMD
équivalent.
• 512Mo RAM ou plus
• Port USB 2.0
• Carte son
• Carte graphique AGP
avec 8 MB de mémoire
• Graveur de CD / DVD
• 1 Go pour VCD/ 5 Go
pour DVD ou Gold
• Windows 2000 SP4 /
Windows XP
SP2/Windows Vista
• Navigateurs Web:
Internet Explorer 5.5
ou supérieur
• Processore Intel®
Pentium® 4, 2,4 GHz
o superiore, o
equivalente
processore AMD.
• 512MB RAM oder mehr
• Porta USB 2.0
• Scheda audio
• Scheda grafica con 8
MB di memoria
• Masterizzatore CD/DVD
• 1 GB per VCD/ 5 GB
per DVD o superiore
di spazio disponbile
su disco rigido
• Windows 2000 SP4 /
Windows XP
SP2/Windows Vista
• Browser: Internet
Explorer 5.5 o superiore.
1
Contenido del
Paquete
AVerMedia
DVD EZMaker USB Gold
Guía de instalación rápida Guia de Instalação Rápida Snelle
Requisitos del
Sistema
• Intel® Pentium® 4,
2.4 GHz o superior o
procesador AMD
equivalente.
• 512 MB de RAM o
superior.
• Puerto USB 2.0
• Tarjeta de sonido
• Tarjeta gráfica AGP
con 8 MB de memoria
• Grabadora de
CD/DVD
• 1 GB para VCD/ 5 GB
para DVD o más de
espacio disponible en
disco duro
• Windows 2000 SP4 /
Windows XP
SP2/Windows Vista
• Exploradores Web:
Internet Explorer 5.5
o posterior
Componentes
do sistema
AVerMedia
DVD EZMaker USB Gold
Requisitos do
sistema:
• Processador Intel®
Pentium® 4, 2,4 GHz
ou superior ou AMD
equivalente.
• 512 MB ou mais de
RAM
• Porta USB 2.0
• Placa de som
• Placa gráfica AGP
com 8 MB de
memória
• Gravador de CD/DVD
• 1 GB para VCD/ 5 GB
para DVD ou superior
de espaço disponível
no disco rígido
• Windows 2000 SP4 /
Windows XP
SP2/Windows Vista
• Pesquisadores de
Internet: Internet
Explorer 5.5 ou
superior
Che cosa c’è
nella confezione
AVerMedia
DVD EZMaker USB Gold
installatiehandleiding
Systeemvereist
en
• Intel® Pentium® 4,
2.4 GHz or higher of
equivalent AMD
processor.
• 512 MB RAM of meer
• USB 2.0 poort
• Geluidskaart
• Grafische kaart met
8MB geheugen
• CD / DVD-brander
• 1 GB voor VCD/ 5 GB
voor DVD of meer
beschikbare harde
schijfruimte
• Windows 2000
SP4/Windows XP
SP2/Windows Vista
• Webbrowsers: Internet
Explorer 5,5 of hoger
Page 3
English Deutsch Français Italiano Español Português Nederlands
Installing the
Driver
After you have properly
installed your
AVerMedia
DVD EZMaker USB
Gold, turn on your
computer. The system
will automatically detect
the newly installed
device on the first time
you reboot your
computer. Simply skip
the wizard, and insert the
accompanying
installation CD to install
the driver.
Important notice :
BEFORE installing
the driver, make
sure your system
has DirectX 9.0c or
above installed. You
can find the latest
version of DirectX
on CD in the folder
DirectX9c.
The CyberLink
DVD Suite software
must be installed
only AFTER the
drivers are
completely
installed.
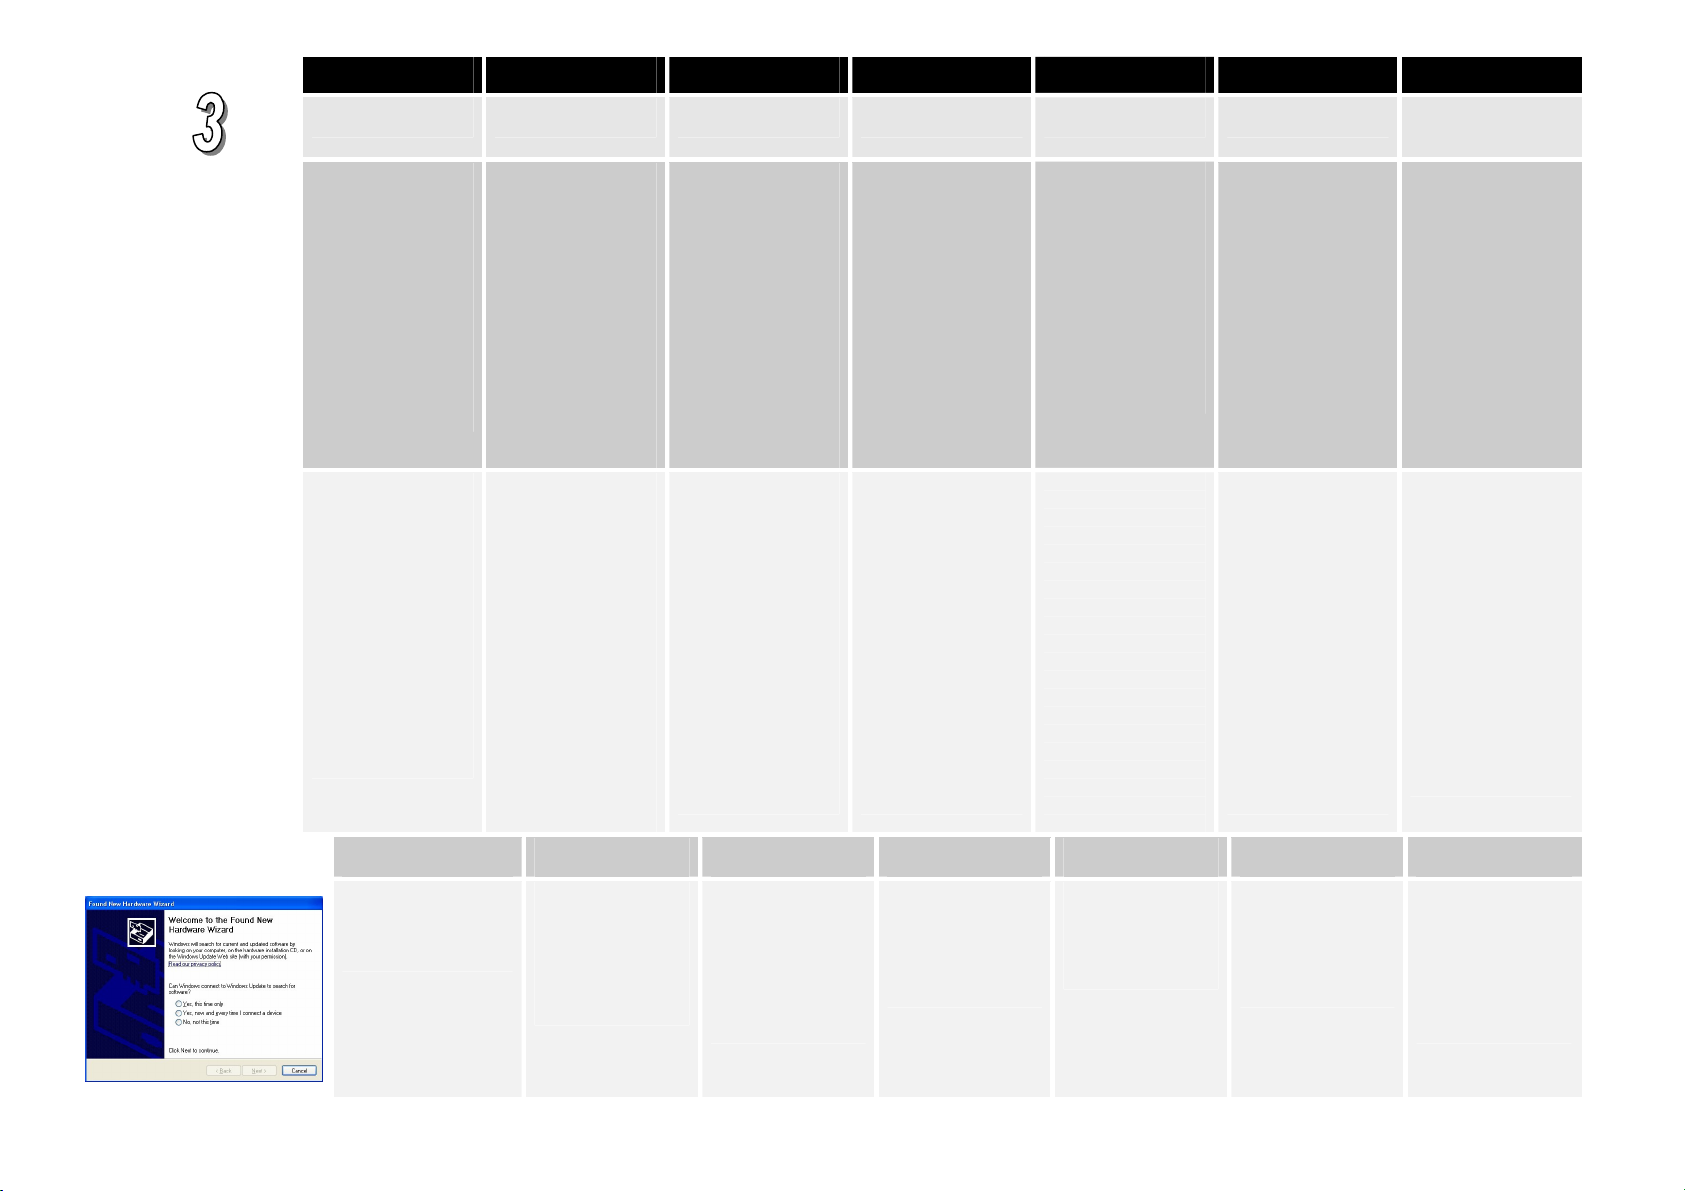
Windows® XP &
2000
The “Found New
Hardware Wizard” dialog
box will appear. Just click
Cancel to skip the Wizard
installation procedures.
Installation
des Treibers
Nachdem Sie den
AVerMedia DVD
EZMaker USB Gold
installiert haben, starten
Sie Ihren Rechner. Das
System sucht
automatisch nach dem
neu installierten Gerät
wenn Sie das erste Mal
Ihren Computer
hochfahren.
Überspringen Sie
einfach den
Hilfsassistenten und
legen Sie die beiliegende
CD ein, um den Treiber
zu installieren.
WICHTIGER HINWEIS:
BEVOR Sie die
Treibersoftware
installieren, muss
DirectX 9.0c oder
höher installiert
sein. Die neueste
Version von
DirectX finden Sie
auf der CD im
Verzeichnis
DirectX9c.
Bitte installieren
Sie die “CyberLink
DVD Suite”
Software erst,
nachdem die
Treiber komplett
installiert worden
sind.
Windows® XP
& 2000
Die Dialogbox
“Assistent für das
Suchen neuer
Hardware” erscheint.
Klicken Sie auf
Abbrechen, um den
Installationsassistenten
zu beenden.
Installation du
pilote
Après avoir installé
correctement votre
AVerMedia DVD
EZMaker USB Gold,
allumez votre ordinateur.
Le système détecte
automatiquement le
périphérique
nouvellement installé la
première fois que vous
réinitialisez votre
ordinateur. Passez
l’assistant d’installation
et insérez directement le
CD d’installation
accompagnant le produit
pour installer le pilote.
Important :
AVANT d’installer
le pilote,
assurez-vous que
DirectX 9.0c ou
supérieur est installé
sur votre système.
Vous pouvez
trouver la dernière
version de DirectX
sur le CD, dans le
dossier DirectX9c.
La suite logicielle
Cyberlink DVD ne
doit être installée
qu’après
l’installation
complète des pilotes
du produit.
Windows® XP
& 2000
La boîte de dialogue
“Assistant du nouveau
matériel trouvé”
apparaît. Cliquez
simplement sur
Annuler pour passer
les procédures
d’installation de
l’assistant.
Installazione
del driver
Dopo avere installato in
modo appropriato
AVerMedia DVD
EZMaker USB Gold,
accendere il computer.
Al primo riavvio, il
sistema rileverà
automaticamente la
nuova periferica appena
installata. Ignorare la
procedura guidata ed
inserire il CD
d’installazione fornito in
dotazione per installare
il driver.
AVVISO Important:
PRIMA di
installare il driver,
verificare che sul
sistema sia installato
DirectX 9.0c o
superiore. Potrete
trovare la versione
più recente di
DirectX sul CD,
nella cartella
DirectX9c.
Il software
CyberLink DVD
Suite deve essere
installato solo
DOPO avere
installato in modo
completo i driver.
Windows® XP
& 2000
Appare la finestra di
dialogo “Installazione
guidata nuovo
hardware”. Basta fare
clic su Annulla per
ignorare le procedure di
installazione guidate.
Instalación del
Controlador
Antes de encender el
ordenador conecte el
dispositivo AVerMedia
DVD EZMaker USB
Gold. El sistema
detectará
automáticamente el
dispositivo recién
instalado cuando reinicie
el ordenador. Para
instalar el controlador,
simplemente cancele el
asistente e inserte el CD
de instalación.
AVISO Importante:
ANTES de instalar
el controlador,
asegúrese de que su
sistema tenga
instalado DirectX
9.0c o superior.
Puede encontrar la
última versión de
DirectX en el CD,
en la carpeta
DirectX9c.
El software
CyberLink DVD
Suite debe ser
instalado solamente
DESPUES de que
los controladores se
hayan instalado
completamente.
Windows® XP
& 2000
Aparecerá el “Asistente
de Nuevo Hardware
encontrado”.
Simplemente presione
Cancelar para omitir el
asistente de instalación.
Instalação do
controlador
Após instalar
correctamente o
AVerMedia DVD
EZMaker USB Gold,
ligue o computador. O
sistema detecta
automaticamente o novo
hardware instalado
aquando do arranque do
computador. Salte o
Assistente de Instalação
e insira o CD de
instalação para instalar o
controlador.
NOTA IMPORTANTE:
ANTES de instalar
o controlador,
certifique-se de que
o seu sistema tem o
DirectX 9.0c ou
acima instalado.
Pode encontrar a
versão mais recente
do DirectX no CD,
na pasta DirectX9c.
O software
CyberLink DVD
Suite só pode ser
instalado DEPOIS
dos controladores
terem sido
completamente
instalados.
Windows® XP
& 2000
Aparecerá a caixa de
diálogo “Assistente
para adicionar novo
hardware”. Clique em
Cancelar para ignorar
o assistente de
instalação.
Stuurprogram
ma’s
installeren
Na u aansluiting van
AVerMedia DVD
EZMaker USB Gold,
start u PC opnieuw. Het
systeem zal het nieuw
geïnstalleerde apparaat
automatisch detecteren
wanneer u de pc voor de
eerste keer opnieuw
opstart. Negeer de
wizard , Open de
installatie CD en install
de driver.
Belangrijk notitie:
Controleer of
DirectX 9,0c of
hoger op uw
systeem is
geïnstalleerd
VOORDAT u het
stuurprogramma
installeert. U vindt
de nieuwste versie
van DirectX op de
cd in de map
DirectX9c.
De Cyberlink DVD
software moet pas
installeren alleen na
dat de driver is al
geinstallerd
Windows® XP
& 2000
Het dialoogvenster
“Wizard Nieuw
hardware gevonden”
verschijnt. Klik op
Cancel (Annuleren)
om de
installatieprocedures
van de wizard over te
slaan.
2
Page 4

Place the Installation CD
into your CD-ROM drive.
The installation main
screen will appear.
Click Install Driver. The
InstallShield Wizard will
install Drivers for
AVerMedia
DVD EZMaker USB
Gold on your computer.
If you are instructed to
restart your computer,
select Ye s.
Click Browse CD to
access the content of
the CD.
Click Exit to close the
installation main
screen.
Windows®
Vista
The “Found New
Hardware Wizard”
dialog box will appear.
Just click Cancel to
skip the Wizard
installation procedures.
Legen Sie die
Installations-CD in Ihr
CD-ROM-Laufwerk
ein. Dann erscheint die
Installationsoberfläche.
Klicken Sie auf
Treiber installieren.
Der
Installationsassistent
installiert die Treiber
für Ihre AVerMedia
DVD EZMaker USB
Gold in Ihren
Computer.
Starten Sie Ihren
Computer neu, sobald
Sie danach gefragt
werden.
Klicken Sie auf CD
durchsuchen, um den
Inhalt der CD
anzusehen.
Klicken Sie auf
Beenden, um den
Hauptbildschirm der
Installation zu
schließen.
Windows®
Vista
Die Dialogbox
“Assistent für das
Suchen neuer
Hardware” erscheint.
Klicken Sie auf
Abbrechen, um den
Installationsassistenten
zu beenden.
Placez le CD
d’installation dans votre
lecteur CD-ROM.
L’écran principal de
l’installation s’affiche.
Cliquer sur Installer le
pilote. L’assistant
InstallShield va
installer les pilotes pour
AVerMedia
DVD EZMaker USB
Gold sur votre
ordinateur.
Si vous avez choisi de
rédémarrer votre
ordinateur, sélectionnez
Oui.
Cliquez sur Parcourir
le CD pour accéder au
contenu du Cédérom.
Cliquez sur Quitter
pour fermer l’écran
principal du programme
d’installation.
Windows®
Vista
La boîte de dialogue
“Assistant du nouveau
matériel trouvé”
apparaît. Cliquez
simplement sur
Annuler pour passer
les procédures
d’installation de
l’assistant.
Inserite il CD di
installazione nell’unità
CD-ROM. Compare la
schermata principale di
installazione.
Fare clic su Install
Driver (Installa
driver). InstallShield
Wizard installerà I
driver di AVerMedia
DVD EZMaker USB
Gold sul computer.
Se è richiesto di
riavviare il computer,
selezionare Sì.
Fare clic su Sfoglia CD
per accedere al
contenuto del CD.
Fare clic su Esci per
chiudere la finestra di
installazione principale.
Windows®
Vista
Appare la finestra di
dialogo “Installazione
guidata nuovo
hardware”. Basta fare
clic su Annulla per
ignorare le procedure di
installazione guidate.
Ponga el CD de
instalación en su unidad
de CD-ROM.
Aparecerá la pantalla
principal de instalación.
Haga clic en Install
Driver (Instalar
controlador). El
Asistente InstallShield
instalará los
controladores para
AVerMedia
DVD EZMaker USB
Gold en su equipo.
Si le pregunta si desea
reiniciar el sistema,
seleccione “Yes” (Si).
Haga clic en Browse
CD para acceder al
contenido del CD.
Haga clic en Exit para
cerrar la pantalla de
instalación.
Windows®
Vista
Aparecerá el “Asistente
de Nuevo Hardware
encontrado”.
Simplemente presione
Cancelar para omitir el
asistente de instalación.
Coloque o CD de
instalação na unidade
do CD-ROM.
Aparecerá o ecrã
principal de instalação.
Clique em Install
Driver (Instalar
controlador). O
Assistente InstallShield
irá instalar os
controladores da
AVerMedia
DVD EZMaker USB
Gold no computador.
Se receber instruções
para reiniciar o
computador, seleccione
Yes (Sim).
Clique em Pesquisar
CD para aceder ao
conteúdo do CD.
Clique em Sair para
fechar o ecrã principal
de instalação.
Windows®
Vista
Aparecerá a caixa de
diálogo “Assistente
para adicionar novo
hardware”. Clique em
Cancelar para ignorar
o assistente de
instalação.
Plaats de installatie CD
in het CD-ROM station.
Het hoofdscherm voor
de installatie wordt
weergegeven.
Klik op Install Driver
(Stuurprogramma
installeren). De
InstallShield Wizard zal
de stuurprogramma's
van AVerMedia
DVD EZMaker USB
Gold op uw computer
installeren.
Als u aangeraden word
u PC opnieuw te
starten ,select Ja.
Klik op Browse CD om
toegang te krijgen tot de
inhoud van de CD.
Klik op Exit om de
Installatie
Hoofdscherm te
sluiten.
Windows®
Vista
Het dialoogvenster
“Wizard Nieuw
hardware gevonden”
verschijnt. Klik op
Cancel (Annuleren)
om de
installatieprocedures
van de wizard over te
slaan.
Place the installation
CD into the CD-ROM
drive.
Geben Sie die
Installations-CD in das
CD-ROM-Laufwerk
ein.
Placez le cédérom
d’installation dans le
lecteur de CD-ROM.
Inserire il CD di
installazione nell’unità
CD-ROM.
Inserte el CD de
instalación en la unidad
de CD-ROM.
Coloque o CD de
instalação no CD-ROM.
Plaats de installatie-CD
in het CD-ROM station.
3
Page 5

English Deutsch Français Italiano Español Português Nederlands
When the “AutoPlay”
dialog box appears,
select Run
Autorun.exe.
When the installation
main screen appears,
choose Install Driver.
If the “User Account
Control” dialog box
appears, select Allow
to continue the
process.
Installing
CyberLink
PowerDirector
and CyberLink
PowerProducer
After you have
completed installing the
driver, you can install
CyberLink
PowerDirector to edit
the video or install
CyberLink
PowerProducer to make
movie disc.
Eject the installation
CD from your
CD-ROM drive and
insert the CyberLink
DVD Suite CD. The
installation main screen
will appear.
Wenn die “AutoPlay”
Anwendung erscheint,
wählen Sie Run
Autorun.exe.
Wenn das
Installationsfenster
erscheint, wählen Sie
Install Driver.
Wenn das “Nutzer
Zugangskontrolle”
Fenster erscheint,
wählen Sie
„Zulassen“ um fort zu
fahren.
Installieren von
CyberLink
PowerDirector
und CyberLink
PowerProducer
Wenn die Treiber
erfogreich installiert
wurden, können Sie
CyberLink
PowerDirector zur
Videobearbeitung oder
CyberLink
PowerProducer zur
Erstellung von
Film-CDs bzw. DVDs
installieren.
Entnehmen Sie die
Installations CD aus
Ihrem CD Laufwerk
und legen Sie die
“CyberLink DVD
Suite” ein. Die
Installationsoberfläche
erscheint.
Lorsque la boîte de
dialogue “AutoPlay”
apparaît, sélectionnez
Run Autorun.exe.
Lorsque l’écran
d’installation apparaît,
choisissez Install
Driver.
Si la boîte de dialogue
“Paramètres du Compte
Utilisateur” apparaît,
choissisez “Autoriser”
pour continuer la
procedure.
Installer
CyberLink
PowerDirector
et CyberLink
PowerProducer
Après avoir terminé
l’installation du pilote,
vous pouvez installer
CyberLink
PowerDirector pour
éditer des fichiers vidéo
ou installer CyberLink
PowerProducer pour
créer des films sur
disque.
Ejectez le CD-ROM
d’installation depuis
votre lecteur de
CD-ROM et insérez le
CD de la suite logicielle
Cyberlink DVD.
L’écran principal
d’installation s’affiche.
Quando appare la
finestra di dialogo
“AutoPlay”
(Esecuzione
automatica),
selezionare Run
Autorun.exe (Esegui
Autorun.exe).
Quando lo schermo
principale
dell'installazione
compare, scelga Install
Driver.
Se appare la finestra di
dialogo “User Account
Control” (Controllo
account utente),
selezionare Allow
(Consenti) per
continuare la
procedura.
Installazione di
CyberLink
PowerDirector
e CyberLink
PowerProducer
Al termine
dell’installazione del
driver, potrete installare
CyberLink
PowerDirector pere
montare il video o
installare CyberLink
PowerProducer e creare
un disco del film.
Estrarre il CD
d’installazione
dall’unità CD-ROM ed
inserire il CD
CyberLink DVD Suite.
Compare la schermata
principale
dell’installazione.
Cuando aparezca el
cuadro de diálogo de
“reproducción
automática”
(“Autoplay”),
seleccione ejecutar
Autorun.exe.
Cuando la pantalla
principal de instalación
aparezca, elija Install
Driver.
Si el cuadro de diálogo
“control de cuentas de
usuario” aparece,
seleccione Permitir
para continuar el
proceso.
Instalación de
CyberLink
PowerDirector
y CyberLink
PowerProducer
Cuando haya terminado
de instalar el
controlador, puede
instalar CyberLink
PowerDirector para
editar los videos o
instalar CyberLink
PowerProducer para
crear discos de video.
Extraiga el CD de
instalación del
CD-ROM e inserte el
CD CyberLink DVD
Suite. Aparecerá la
pantalla principal de
instalación.
Quando surgir a caixa
de diálogo “AutoPlay”
seleccione Run
Autorun.exe.
Quando visualizar o
ecrã principal, escolha
Install Driver.
Caso surja a caixa de
diálogo “User Account
Control” (“Controlar
Conta de Utilizador”),
seleccione Allow
(Permitir) para
continuar o processo.
Instalação do
CyberLink
PowerDirector
e do CyberLink
PowerProducer
Após concluir a
instalação do
controlador, poderá
instalar o CyberLink
PowerDirector para
editar vídeo ou instalar
o CyberLink
PowerProducer para
criar discos de filmes.
Retire o CD de
instalação da unidade
de CD- ROM e insira o
CD com o software
CyberLink DVD Suite.
Aparecerá o ecrã
principal de instalação.
Waneer de “AutoPlay”
verschijnt, select Run
Autorun.exe.
Wanneer de installatie
hoofd scherm
verschijnt,kies Install
Driver.
Als de “User Account
Control” verschijnt,
select volgende om
verder te gaan
CyberLink
PowerDirector
en CyberLink
PowerProducer
installeren
Nadat u de installatie
van het stuurprogramma
hebt voltooid, kunt u
CyberLink
PowerDirector
installeren om de video
te bewerken of
CyberLink
PowerProducer
installeren om de
filmschijf te maken.
Eject de installatie CD
van u CD-Rom drive en
insert de Cyberlink
DVD suit CD . Het
hoofdscherm voor de
installatie wordt
weergegeven.
4
Page 6

English Deutsch Français Italiano Español Português Nederlands
Click on the Install
Now and follow the on
screen instruction to
install the softwares.
For more detailed
information regarding
editing please refer to
the Cyberlink
instruction
Connecting
AVerMedia
DVD EZMaker
USB Gold
Use the figure below to
connect your
AVerMedia DVD
EZMaker USB Gold.
To record video with
sound, you need to
specify the audio input
source. To do this,
double-click the yellow
speaker volume icon on
the taskbar or click
Start, point to Programs
> Accessories >
Entertainment and then
click Volume Control.
Refer to the Volume
Control Help Contents
and look for “Adjust the
recording volume” for
more information.
Klicken Sie auf Jetzt
installieren und folgen
Sie den Anweisungen,
um die Software zu
installieren.
Für weitere
Informationen
bezüglich des Editieren
sehen Sie unter der
Cyberlink Anleitung
nach.
Anschließen
des DVD
EZMaker USB
Gold
Schließen Sie den
AVerMedia DVD
EZMaker USB Gold
entsprechend der
folgenden Abbildung
an. Wenn Sie Video mit
Ton aufnehmen wollen,
müssen Sie die
Audio-Eingabequelle
angeben. Hierzu gehen
Sie mit Doppelklick auf
das gelbe
Lautsprechericon der
Taskleiste oder klicken
auf Start, zeigen auf
Programme > Zubehör
> Unterhaltungsmedien
und klicken dann auf
Lautstärkeregelung.
Informationen finden
Sie in der
Lautstärkeregelung-Hilf
edatei unter “Regeln
der
Aufnahmelautstärke ”.
Cliquez sur Installer
Maintenant et suivez
les instructions sur
l’écran pour installer les
logiciels.
Pour plus de details à
propos du montage
video, veuillez vous
réfèrer aux instructions
de Cyberlink.
Connecter
AVerMedia
DVD EZMaker
USB Gold
Suivez le schéma
ci-dessous pour
connecter votre
AVerMedia DVD
EZMaker USB Gold.
Pour enregistrer de la
vidéo avec son, vous
devez spécifier la
source d’entrée audio.
Pour cela,
double-cliquez sur
l’icône jaune du volume
haut-parleur, dans la
barre des tâches, ou
cliquez sur Démarrer,
pointez sur Programmes
> Accessoires >
Divertissement, puis
cliquez sur Réglage du
son. Se référer au
contenu de l’aide
Réglage du son et
rechercher dans
“Ajuster le volume pour
Enregistrement” pour
de Gold amples détails.
Fare clic su Install
Now (Installa adesso)
e seguire le istruzioni su
schermo per installare i
software.
Fare riferimento alle
istruzioni Cyberlink per
alte informazioni
dettagliate
sull’elaborazione.
Collegamento
di AVerMedia
DVD EZMaker
USB Gold
Per collegare
AVerMedia DVD
EZMaker USB Gold
consultare
l’illustrazione in basso.
Per registrare un video
con audio, dovrete
specificare la sorgente
audio in ingresso. Fate
doppio clic sull’icona
dell’altoparlante giallo
dalla barra delle
applicazioni o fate clic
su avvio, scegliete
programmi >
accessori> svago e
quindi fate clic su
comandi volume.
Consultate la guida sui
comandi volume e
cercate “Adjust the
recording volume”
(regola volume di
registrazione) per
maggiori informazioni.
Pulse en “Install Now”
(instalar ahora) y siga
las instrucciones para
instalar el software.
Para más información
sobre edición de video
siga las instrucciones de
CyberLink
Conectar
AVerMedia
DVD EZMaker
USB Gold
Utilice la imagen
siguiente para conectar
su AVerMedia DVD
EZMaker USB Gold.
Para grabar video y
sonido, deberá
especificar la fuente de
entrada de audio. Para
hacerlo, pulse dos veces
en el icono del altavoz
de la barra de tareas o
pulse Inicio, vaya a
Programas > Accesorios
> Entretenimiento y
pulse Control de
volumen. Diríjase a la
Ayuda del Control de
Volumen y busque
“Ajustar el volumen de
grabación” para más
información.
Clique em Install Now
(Instalar já) e siga as
instruções no ecrã para
instalação do software.
Para obter informação
mais detalhada sobre a
edição consulte as
instruções Cyberlink.
Ligação do
AVerMedia
DVD EZMaker
USB Gold
Utilize a figura em
baixo para ligar o
AVerMedia DVD
EZMaker USB Gold.
Para a gravação de
vídeo com som, é
preciso especificar a
fonte da entrada de
áudio. Para o efeito,
clique duas vezes no
ícone do altifalante
amarelo da barra de
tarefas ou clique em
Iniciar, aponte para
Programas>Acessórios
>Entretenimento e
depois clique em
Controlo do volume.
Para mais informação,
consulte os Índices de
ajuda do Controlo do
volume e procure mais
informações em
“Regular o volume de
gravação”.
Klik op de install now
en volg de scherm
instructie en install de
softwares.
Voor meer detail
informatie betreft de
bewerking .S.v.p neem
de referentie van
Cyberlink instructie.
Connect
AVerMedia
DVD EZMaker
USB Gold
Gebruik de figuur hier
onder en sluit u
AVerMedia DVD
EZMaker usb gold aan.
Video opnemen met
geluid , U moet de
audioinvoerbron
specificeren. Om dit te
doen,dubble klik de
gele speaker volum
icon op de taskbar of
klik start,wijs naar de
programma >
Accessoires>Entertain
ment>en dan klik
volume control. Refere
naar de volum control
help inhou en kijk bij
“Adjust the recording
volume” voor meer
informatie
5
Page 7

English Deutsch Français Italiano Español Português Nederlands
1. Example:
2. Television
3. Camcorder
4. VCR
5. AV Output Port
6. RCA to SCART Cable
(not supplied)
7. RCA Cable (not supplied)
8. RCA Cable (not supplied)
9. RCA Cable (not supplied)
10. S-Video Cable (not
supplied)
11. (Yellow)
12. (Red)
13. (White)
14. USB Connector
15. USB Port
16. Computer
1. Beispiel:
2. Fernseher
3. Camcorder
4. Videorekorder
5. AV Ausgang
6. Cinch-zu-SCART Kabel
(Nicht im Lieferumfang
enthalten)
7. Cinch-Kabel (Nicht im
Lieferumfang enthalten)
8. Cinch-Kabel (Nicht im
Lieferumfang enthalten)
9. Cinch-Kabel (Nicht im
Lieferumfang enthalten)
10. S-Video-Kabel(Nicht im
Lieferumfang enthalten)
11. (Gelb)
12. (Rot)
13. (Weiss)
14. USB-Anschluß
15. USB 2.0-Anschluß
16. Computer
1. Exemple :
2. Télévision
3. Caméscope
4. Magnétoscope
5. Sortie AV
6. Câble RCA – SCART
(Non fourni)
7. Câble RCA (Non fourni)
8. Câble RCA (Non fourni)
9. Câble RCA (Non fourni)
10. Câble S-Vidéo (Non
fourni)
11. (Jaune)
12. (Rouge)
13. (Blanc)
14. Connecteur USB
15. Port USB 2.0
16. Ordinateur
1. Esempio:
2. Televisione
3. Videocamera
4. VCR
5. Porta output AV
6. RCA a Cavo SCART
(Non fornito)
7. Cavo RCA (Non
fornito)
8. Cavo RCA (Non
fornito)
9. Cavo RCA (Non
fornito)
10. Cavo S-Video (Non
fornito)
11. (Giallo)
12. (Rosso)
13. (Bianco)
14. Connettore USB
15. Porta USB 2.0
16. Computer
1. Ejemplo:
2. Telev iso r
3. Videograbadora
4. Reproductor de Video
5. Salida AV
6. Cable RCA a SCART
(no incluido)
7. Cable RCA (no
incluido)
8. Cable RCA (no
incluido)
9. Cable RCA (no
incluido)
10. Cable S-Video (no
incluido)
11. (Amarillo)
12. (Rojo)
13. (Blanco)
14. Conector USB
15. Puerto USB 2.0
16. Ordenador
1. Exemplo:
2. Televisão
3. Câmara de vídeo
portátil
4. VCR
5. Porto AV de saída
6. Cabo RCA para SCART
(não fornecido)
7. Cabo RCA (não fornecido)
8. Cabo RCA (não fornecido)
9. Cabo RCA (não fornecido)
10. Cabo S-Vídeo (não
fornecido)
11. (Amarelo)
12. (Encarnado)
13. (Branco)
14. Conector USB
15. Porto USB 2.0
16. Computador
1. Voorbeeld:
2. Tel evis ie
3. Camcorder
4. VIDEORECORDER
5. AV uitgang
6. RCA naar SCART
kabel (niet bijgesloten)
7. RCA kabel (niet
bijgesloten)
8. RCA kabel (niet
bijgesloten)
9. RCA kabel (niet
bijgesloten)
10. S-Video kabel (niet
bijgesloten)
11. (Geel)
12. (Rood)
13. (Wit)
14. USB aansluiting
15. USB Poort
16. Computer
6
Page 8

English Deutsch Français Italiano Español Português Nederlands
Uninstalling
the Driver
Windows
®
XP
& 2000
Click Start, point to
Settings, and then click
Control Panel.
Double-click Add /
Remove Programs
icon.
In the add/remove
programs list, select
AVerMedia C038 USB
Capture Card and then
click on the
Change/Remove or
Add/Remove button.
Note: AVerMedia
DVD EZMaker USB
Gold requires the
system to support
isochronous transfer. At
present, VIA KT400,
KT333 and K266A
chipset motherboards
are not supported; VIA
8235 and VT6202
chipsets can only
operate on Windows®
XP & 2000.
Windows
Vista
1. Click on the START
2. Double-click
3. Select AVerMedia
button and go to
Control Panel.
Programs and
Features icon.
C038 USB Capture
Card and click on
the
Uninstall/Change
button.
Deinstallation des
Treibers
Windows® XP &
2000
Klicken Sie auf Start, zeigen
auf Einstellungen und
klicken dann auf die
Systemsteuerung.
Doppelklicken Sie den
Software Icon.
Wählen Sie in der Liste
Programme hinzufügen/
entfernen AVerMedia C038
USB Capture Card und
klicken dann auf die
Schaltfläche Ändern/
Entfernen oder Hinzufügen /
Entfernen.
Hinweis: Für die AVerMedia
DVD EZMaker USB Gold
muss Ihr System isochronen
Transfer unterstützen. Zur
Zeit werden Mainboards mit
den Chipsätzen VIA KT400,
KT333 und K266A nicht
unterstützt, Mainboards mit
VIA 8235 oder
VT6202-Chipsatz können nur
unter Windows® XP & 2000
betrieben werden.
Désinstallation
du pilote
Windows® XP &
2000
Cliquez sur Démarrer,
pointez sur Paramètres,
puis cliquez sur Panneau de
configuration.
Double-cliquez sur
Ajout/Suppression de
programmes.
Dans la liste ajout / suppression
de programmes, sélectionnez
AVerMedia C038 USB
Capture Card et cliquez sur le
bouton Changer/Supprimer
ou Ajouter/Supprimer.
Remarque: AVerMedia
DVD EZMaker USB Gold
exige un système qui
supporte le transfert
isochronique. A l’heure
actuelle, les cartes-mères à
base de chipset VIA KT400,
KT333 et K266A ne sont
pas supportées; les chipsets
VIA 8235 et VT6202
peuvent fonctionner mais
sur Windows® XP & 2000
seulement.
Rimozione del
driver
Windows® XP
& 2000
Fare clic su Start,
posizionare il puntatore
del mouse su
Impostazioni, quindi
fare clic su Pannello di
controllo.
Fare doppio clic sull’icona
Installazione
applicazioni.
Nell’elenco visualizzato
selezionare AVe r M e d i a
C038 USB Capture
Card quindi fare clic sul
pulsante
Cambia/Rimuovi o
Aggiungi/Rimuovi
Nota: AVerMedia DVD
EZMaker USB Gold
richiede che il sistema
supporti il trasferimento
sincronizzato. Al
momento i chipset VIA
KT400, KT333 ed
K266A non sono
supportate; solo I chipset
VIA 8235 e VT6202
possono funzionare con
Windows® XP e 2000.
Desinstalación
del controlador
Windows® XP &
2000
Haga clic en Inicio >
Panel de Control.
Doble-clic en el icono
Agregar o Quitar
Programas
En la lista de añadir o
quitar programas,
seleccione AVerMedia
C038 USB Capture Card
y luego haga clic en el
botón Cambiar o Quitar.
Nota: AVerMedia DVD
EZMaker USB Gold
requiere que el sistema
admita transferencias
sincrónicas. Por el
momento, no se admiten
las placas base de los
conjuntos de chips VIA
KT400, KT333 y K266A;
los conjuntos de chips VIA
8235 y VT6202 solamente
funcionan en Windows®
XP y 2000.
Desinstalação do
controlador
Windows® XP &
2000
Clique em Iniciar, aponte
para Configurações e
depois clique em Painel de
controlo.
Clique duas vezes no ícone de
Adicionar / Remover
Programas
Na lista de ‘adicionar / remover
programas’, seleccione o
controlador AVerMedia C038
USB Capture Card e a
seguir clique no botão de
Mudar/Remover ou no botão de
Adicionar / Remover
Nota: O AVerMedia DVD
EZMaker USB Gold exige que o
sistema suporte transferências
isócronas. Presentemente,
não são suportadas as
placas-mães dos conjuntos
de chips VIA KT400, KT333
e K266A; os conjuntos de
chips VIA 8235 e VT6202
só funcionam nos sistemas
operativos Windows® XP &
2000.
De-Installatie van
de Driver
Windows® XP &
2000
Klik op Start, selecteer Settings
(Instellingen) en klik vervolgens
op Control Panel
(Configuratiescherm).
Dubbelklik op het pictogram
Software.
Selecteer AVerMedia C038
USB Capture Card in de lijst
Programma's
toevoegen/verwijderen en klik
vervolgens op de knop
Change/Remove
(Wijzigen/Verwijderen) of
Add/Remove
(Toevoegen/Verwijderen).
Opmerking : AVerMedia DVD
EZMaker USB Gold heeft de
systeem vereist isochronous
transfer te ondersteunen. VIA
KT 400,KT333 en K266A
chipset moederbord word niet
ondersteunt. VIA 8235 en
VT6202 chipset werkt allen op
windows xp &2000
Windows Vista Windows Vista Windows Vista Windows Vista Windows Vista Windows Vista
1. Klicken Sie auf die
Schaltfläche START und
öffnen Sie die Control
Panel (Systemsteuerung).
2. Doppelklicken Sie auf das
Symbol Programs and
Features (Programme
und Funktionen).
3. Wählen Sie AVe r M e d i a
C038 USB Capture Card
und klicken Sie dann auf
die Schaltfläche
Uninstall/Change
(Deinstallieren/Ändern).
1. Cliquez sur le bouton
DEMARRER et aller au
Panneau de
configuration.
2. Double-cliquez sur
l’icône Programmes et
fonctions.
3. Sélectionnez AVerMedia
C038 USB Capture
Card et cliquez sur le
bouton
Désinstaller/Changer.
1. Fare clic sul tasto
START ed andare al
Control Panel
(Pannello di
controllo).
2. Fare doppio clic
sull’icona click
Programs and
Features (Programmi
e funzioni).
3. Selezionare
AVerMedia C038
USB Capture Card e
fare clic sul pulsante
Uninstall/Change
(Rimuovi/Cambia).
1. Haga clic en el botón
START (INICIO) y
entre después en
Control Panel (Panel
de control).
2. Haga doble clic en el
icono de Programs and
Features (Programas y
Características).
3. Seleccione AVe r M e d i a
C038 USB Capture
Card y haga clic en el
botón
Uninstall/Change
(Desinstalar /
Cambiar).
1. Clique no botão START
(Iniciar) e vá até ao
Control Panel (Painel de
controlo).
2. Faça um duplo clique
sobre o ícone Programs
and Features
(Programas e
funcionalidades).
3. Seleccione a opção
AVerMedia C038 USB
Capture Card e clique no
botão Uninstall/Change
(Desinstalar/Alterar).
1. Klik op de knop START en
ga naar Control Panel
(Configuratiescherm)
2. Dubbelklik op het pictogram
Programs and Features
(Programma’s en
kenmerken).
3. Selecteer AVerMedia C038
USB Capture Card en klik
op de knop
Uninstall/Changes
(Verwijderen/Wijzigen).
7
 Loading...