

Page 1

AVer Viewer
iOS & Android System
User Guide
V2.1.1.2
Page 2

COPYRIGHT
© 2014 AVer Information Inc. All rights reserved.
All rights of this object belong to AVer Information Inc. Reproduced or transmitted in any form or by any
means without the prior written permission of AVer Information Inc. is prohibited. All information or
specifications are subject to change without prior notice.
TRADEMARKS
“AVer” is a trademark owned by AVer Information Inc. Other trademarks used herein for description
purpose only belong to each of their companies.
NOTICE
SPECIFICATIONS ARE SUBJECT TO CHANGE WITHOUT PRIOR NOTICE.
THE INFORMATION CONTAINED HEREIN IS TO BE CONSIDERED FOR REFERENCE ONLY.
WARNING
TO REDUCE RISK OF FIRE OR ELECTRIC SHOCK. DO NOT EXPOSE THIS APPLIANCE TO RAIN
OR MOISTURE.
WARRANTY VOID FOR ANY UNAUTHORIZED PRODUCT MODIFICATION.
Page 3

Contents
I. Introduction .......................................................................................................... 1
II. Function Supported List ....................................................................................... 1
III. Install the AVer Viewer on iPhone/iPad ................................................................ 2
IV. Install the AVer Viewer on Android Mobile/Tablet ................................................. 3
V. Connect to the DVR/NVR Server ......................................................................... 4
Manual ............................................................................................................. 4
Auto Search ..................................................................................................... 7
VI. View the Live Video of DVR/NVR Server ............................................................. 9
VII. Connect to the IP Camera ................................................................................. 12
Manual ........................................................................................................... 12
Auto Search ................................................................................................... 14
VIII. Palyback Recorded Video of DVR/NVR Server ................................................. 16
Playback by Time .......................................................................................... 16
Playback by Event ......................................................................................... 18
Playback for NV/IWH/EH series DVR ............................................................ 20
IX. Using the PTZ Function ..................................................................................... 22
X. View the Sensor and Rely Status of DVR/NVR Server ...................................... 23
XI. Using e-PTZ Function ........................................................................................ 25
Page 4
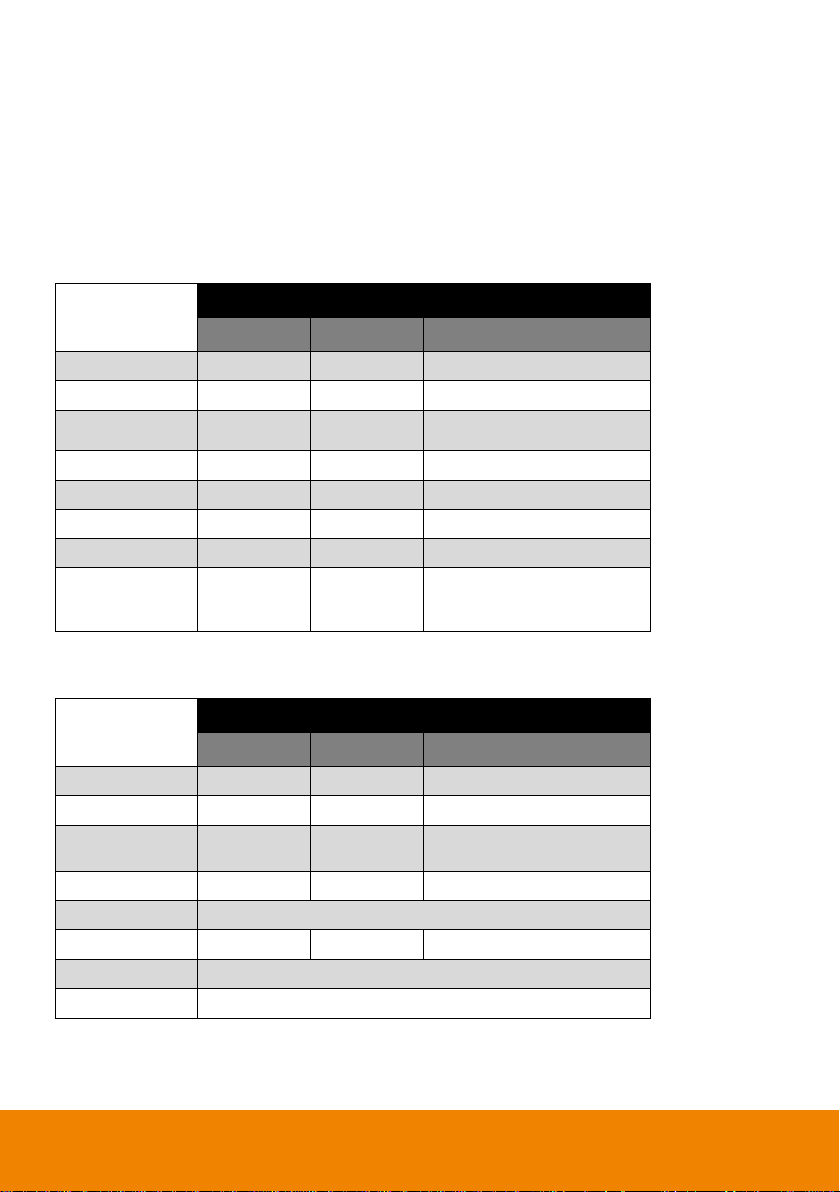
I. Introduction
NVR Live
NVR Playback
1CH
4CH
1CH
Snapshot
Yes
Yes
Yes
Relay
Yes
Yes
No
2-way audio
for E5016 &
E5016H
for E5016 &
E5016H
No
PTZ
Yes
No
No
NVR status
Yes
Yes
No
E-PTZ
Yes
No
Yes
Event search
No
No
Yes
POS
Yes
No
Yes
(Event playback is not
supported)
NVR Live
NVR Playback
1CH
4CH
1CH
Snapshot
Yes
Yes
Yes
Relay
Yes
Yes
No
2-way audio
for IWH3216
only
for IWH3216
only
No
PTZ
Yes
No
No
NVR status
No
E-PTZ
Yes
No
Yes
Event search
No
POS
No
The AVer Viewer provides users remote access to monitor videos from AVer DVRs/NVRs or IP
cameras (network cameras) via an iPhone, iPad, Android mobile phone, or Android tablet. Users can
remotely view live videos anytime and anywhere on a mobile phone or pad, and their privacy is highly
protected through an authorization mechanism.
II. Function Supported List
For E5016/E5016HE1008/E1008H
For NV /IWH/EH series
1
Page 5
III. Install the AVer Viewer on iPhone/iPad
To use this feature, it is required to download the AVer Viewer application to your iPhone or iPad.
Please follow the below steps to download the AVer Viewer.
1. Please make sure your iPhone or iPad connect to the Internet.
2. Select App Store from iPhone or iPad.
3. Select Search and enter the keyword “AVer” to search.
4. In search result list, select the AVer iViewer. User will see a brief introduction of the AVer Viewer.
Select the Free button, the button will change to the Install button. Select Install to download the
application.
5. Enter your iTune account’s password to download if it is required.
6. After download completed, go back to iPhone or iPad main screen and user should see AVer
Viewer icon ( ). Select it to run the application.
2
Page 6
IV. Install the AVer Viewer on Android Mobile/Tablet
To use this feature, it is required to download the AVer Viewer application to your Android mobile or
tablet. Please follow the below steps to download the AVer Viewer.
1. Please make sure your Android mobile or tablet connects to the Internet.
2. Select Play Market from your Android mobile or tablet.
3. Select Search and enter the keyword “AVer” to search.
4. In search result list, select the Android Viewer. User will see a brief introduction of the AVer
Viewer. Select Install to download the application.
5. Enter your Play Market account’s password to download if it is required.
6. After download completed, go back to iPhone or iPad main screen and user should see AVer
Viewer icon ( ). Select it to run the application.
3
Page 7
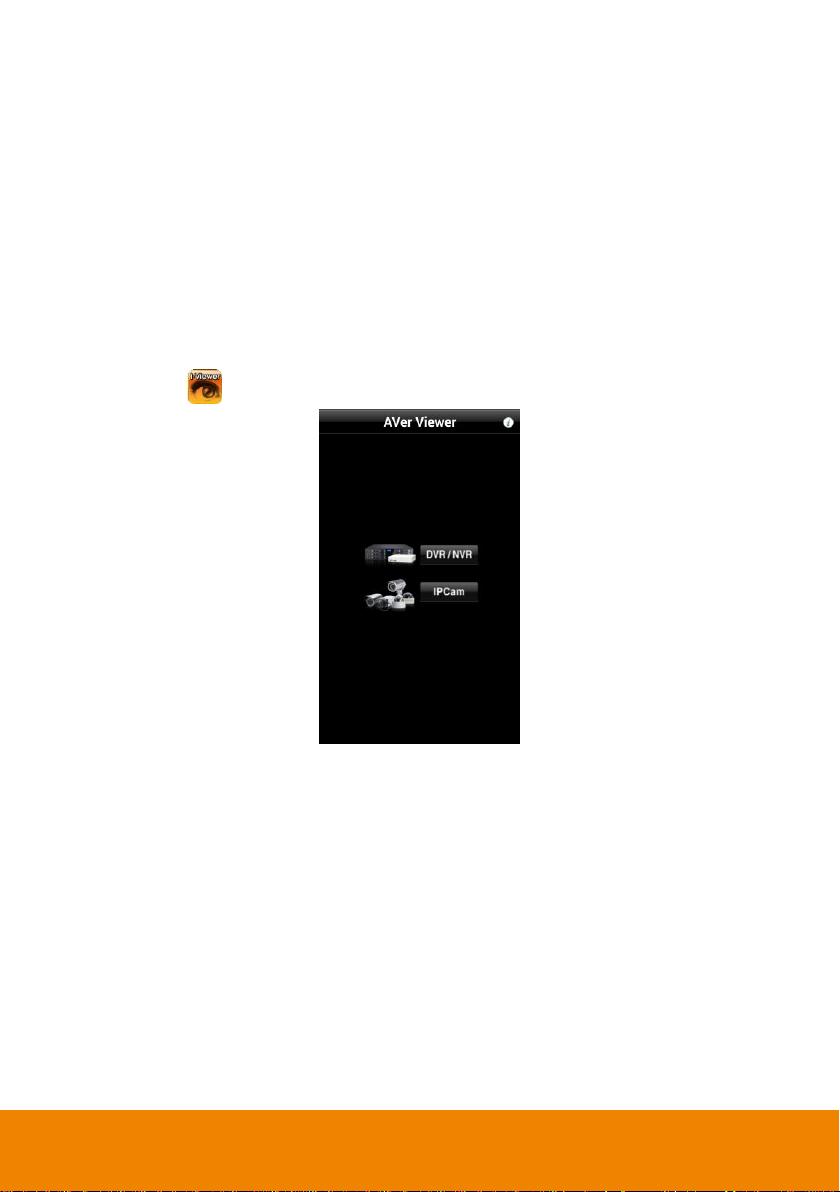
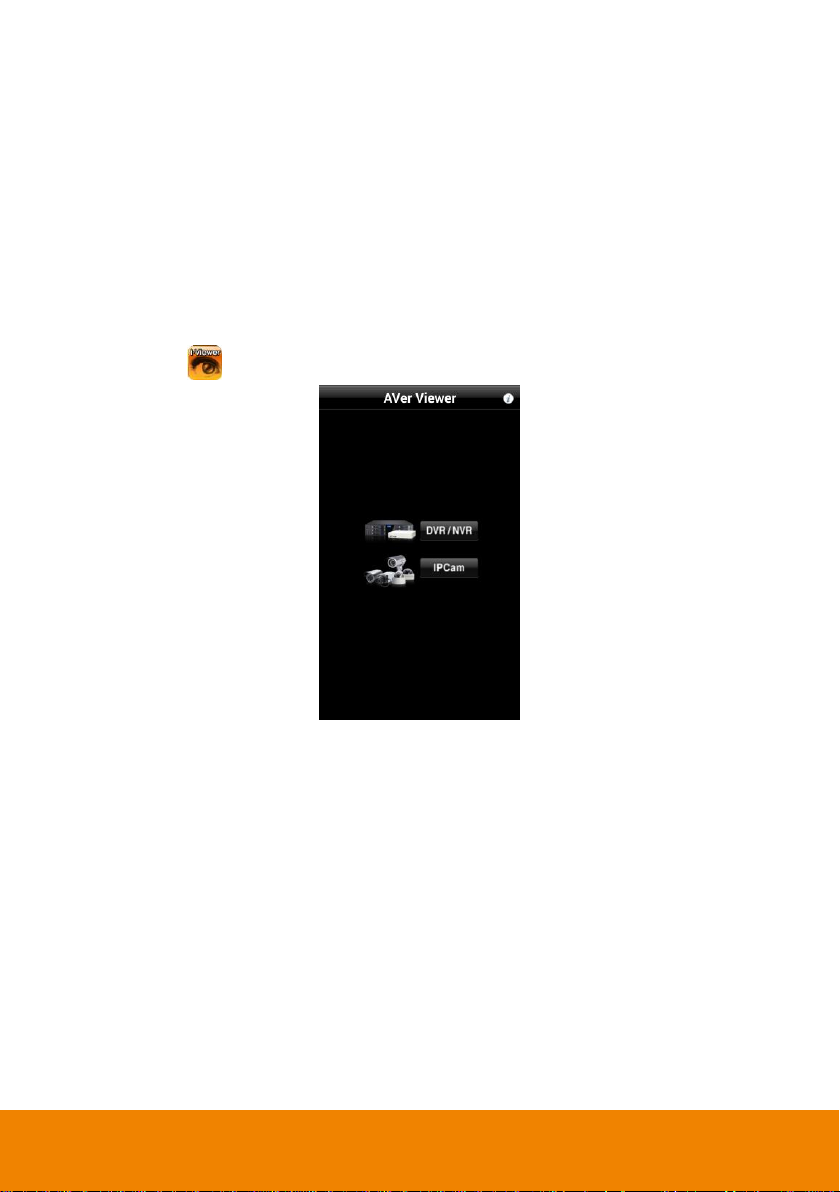
V. Connect to the DVR/NVR Server
Manual
1. Run AVer Viewer.
2. Select icon can view the information of AVer Viewer firmware.
3. In main screen, select DVR/NVR button.
4. In NVR List page, select button.
4
Page 8
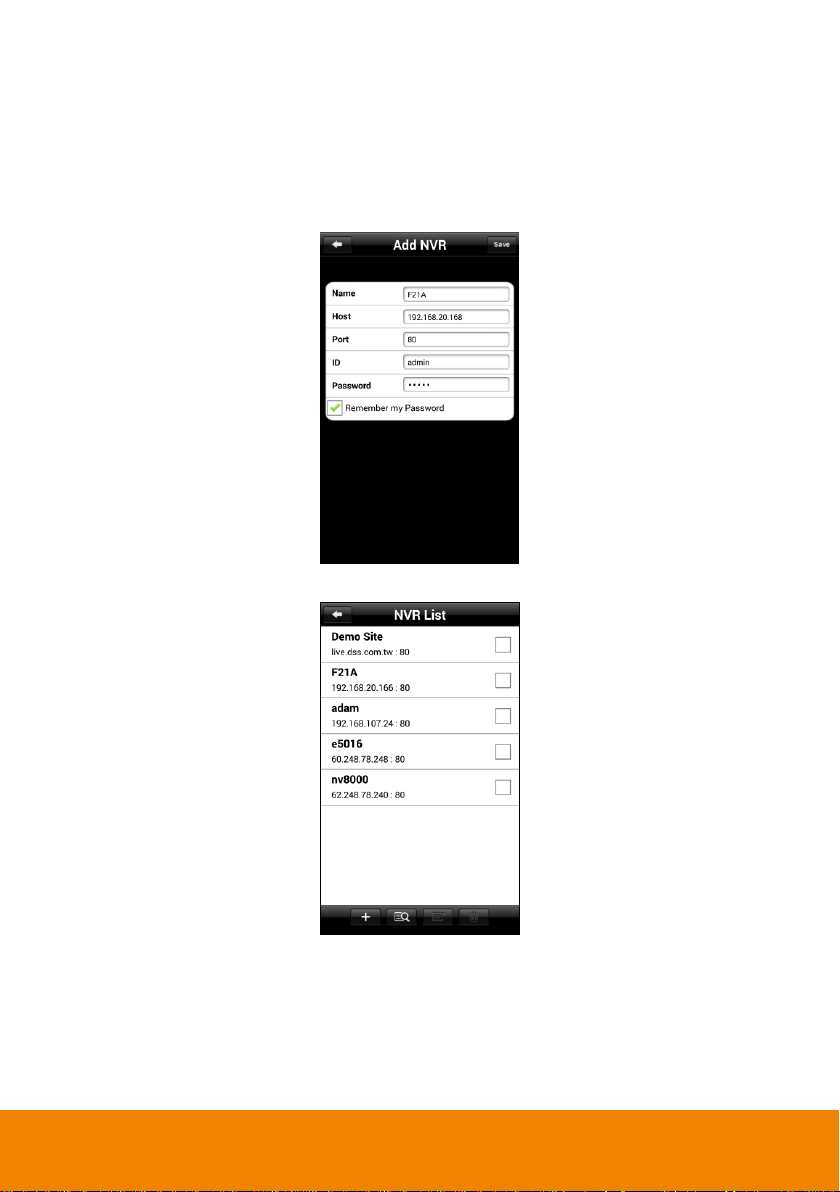
5. Next, enter the following information in ADD NVR page.
Name: Give a name for the NVR/DVR server for easy to recognize or manage.
Host: IP address of the DVR/NVR server.
Port: The connection port of the remote DVR/NVR server. The default port number is 80.
ID: The user account to login the remote DVR/NVR server.
Password: The password for login authentication.
Remember Password: Mark it to memorize the password of DVR/NVR server.
6. After entering all information, select Save to save to the NVR List.
5
Page 9
7. In NVR List page, select the DVR/NVR server to make a connection.
This function button
( or )
supported is depended on
the DVR/NVR model that
user has connected.
8. When the connection is successful, user will see the live video.
9. Select to switch back to NVR List page.
10. To edit or modify DVR/NVR server, mark the check box of DVR/NVR server in NVR List page.
Then, select button. To return to NVR List page, select icon.
11. To delete the DVR/NVR server, mark the check box of DVR/NVR server in NVR List page and
select button.
6
Page 10

Auto Search
1. Run AVer Viewer.
2. In main screen, select DVR/NVR. Then, select button.
[Note] The mobile phone and NVR/DVR server must at the same LAN network in order to use auto
search to find the NVR/DVR server on LAN.
3. The search result will list out in NVR Search page. Mark the NVR/DVR that wants to add and
select button.
[Note] User can select more than one NVR/DVR servers to add at the same time.
7
Page 11

4. Next, enter the login ID and password of NVR/DVR server and select button to save. The
This function button
( or )
supported is depended on
the DVR/NVR model that
you have connected.
added NVR/DVR server is listed in NVR List page.
5. In NVR List page, select the DVR/NVR server to make a connection.
6. When the connection is successful, user will see the live video.
7. Select to switch back to NVR List page.
8. To edit or modify DVR/NVR server, mark the check box of DVR/NVR server in NVR List page. Then,
select button. To return to NVR List page, select icon.
9. To delete the DVR/NVR server, mark the check box of DVR/NVR server in NVR List page and
select button.
8
Page 12

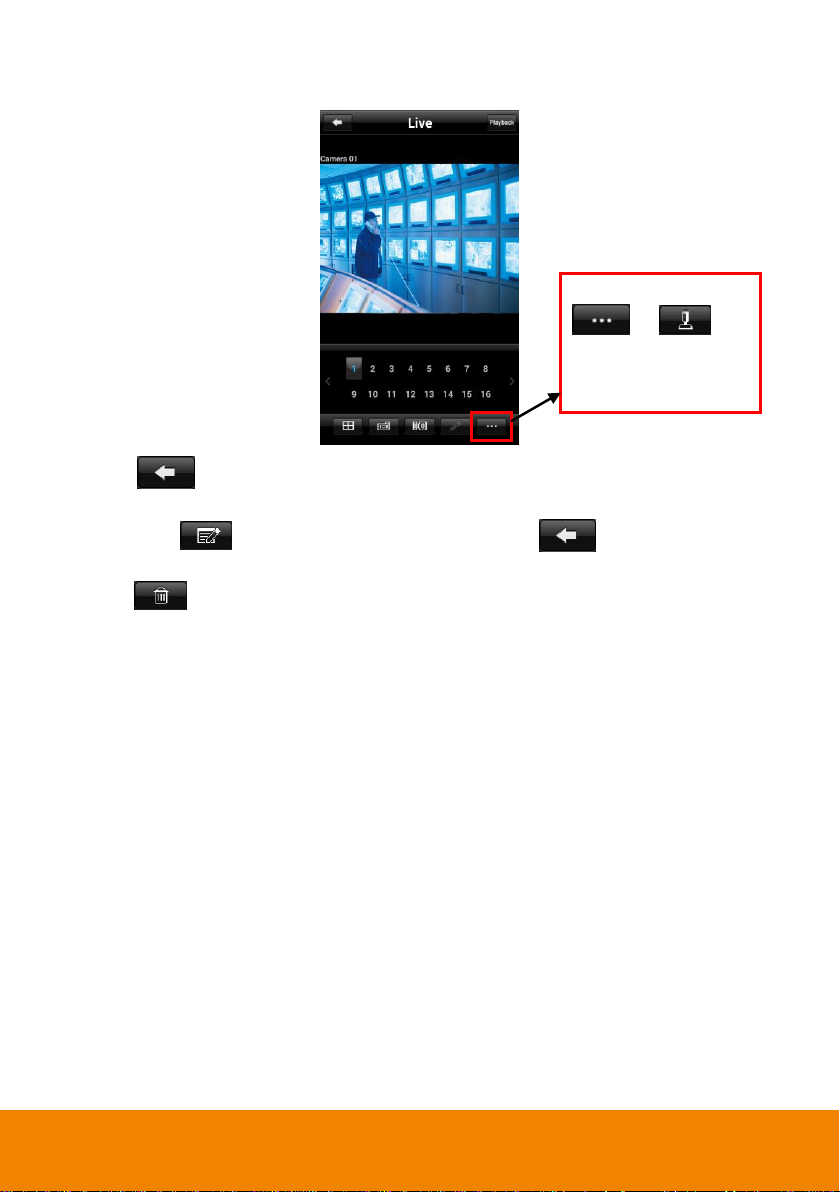
VI. View the Live Video of DVR/NVR Server
1. After connecting the DVR/NVR server, user will see live video of DVR/NVR server.
[Note] The horizontal screen display is supported.
2. There are several functions that user can operate in Live mode.
& : Switch the channel display between 1 and 4-split channels screen. In 4-
split screen mode, click the channel group(1~4 or 5~8..etc.) can switch to view different group
channel. In single screen mode, click channel button (1,2,3…etc.) to view the channel.
4-split screen 1 channel screen
9
Page 13

Select < or > to go back previous page or next page of channels.
Go to next page if
channels are over 16
channels
: Snapshot the current video screen and save on your mobile phone.
: Switch to senor/relay page. User can view sensor status and change relay status (see
also View the Sensor and Rely Status of DVR/NVR Server).
: Enable/disable 2-way audio function. This function allows the client and server to talk
via internet using MIC. Make sure your microphone and speakers work before using this
function. If the NVR/DVR server Talk to web-client setting is disabled, you won’t be able to
hear from the other side.
[Note] The 2-way audio function supports for IWH3216, E5016, and E5016H DVR server.
: Select the PTZ camera channel and click button to switch to PTZ operation
mode (see Using PTZ Function).
PTZ mode
10
Page 14

: select to expand the more function buttons -- , , and .
: To view the NVR/DVR status – Server Name, Firmware Version, IPCam Version,
Received Bandwidth, Sent Bandwidth, and Temperature.
: Enable POS information to display on channel screen.
: Select it to switch to playback mode (see also Playback Recorded Video of
NVR/DVR Server).
3. To return to NVR List page, select button.
11
Page 15

VII. Connect to the IP Camera
SF2121H-R
SF2121H-BHR
SF2121H-DVR
SF2012H
SF2012H-B
SF2012H-C
SF2012H-D
SF2012H-DV
SF2111H-BR
SF2111H-DR
SF2111H-DVR
SF2111H-R,
FB2027-1
FB2027-2
FB2027-3
FB3027
FB2028-T1
FB2028-T2
FB2028-TM
FV2028-T
FV2028-TM
FB3028-RT1
FB3028-RT2,
FB3028-RTM
FD2020
FD2020-M
FD3020
FD3020-M
FV3028
FV3028-RT
FV3028-RTM
FV2028
FV1306
FV2006
FC1320-P
FC1320-PW
FC2020-P
FC2020-PW
SD1306
FX2000
FX3000-R
The supported camera list as following:
Manual
1. Run AVer Viewer.
2. In main screen, select the IPCam. Then, in IPCam List page, select button.
3. Next , in Add Camera page, enter the following information:
Model: select the model of IP camera that user wants to connect it.
Name: Give a name for this IP camera connection; ex: TPECam_01.
Host: IP address of IP camera.
Port: the port number that uses to connect IP camera; refer to RTSP port number of IP
camera. The default port number is 554.
12
Page 16

ID: IP camera’s login ID.
Password: IP camera’s login password.
4. After entering all necessary data, select Save to save the camera to Camera List.
5. Select the camera from IPCam List to make a connection. After connecting, user will see the live
video of IP camera.
6. To edit or modify camera, mark the check box of IP camera in IPCam List page. Then, select
button. To return to IPCam List page, select button.
7. To delete the camera, mark the check box of IP camera in IPCam List page and select
button.
8. Select button can snapshot the current video screen and save on your mobile phone.
13
Page 17

Auto Search
1. Run the AVer Viewer.
2. In main screen, select the IPCam. Then, select button.
[Note] The mobile phone and IP camera must at the same LAN network in order to use auto search to
find the IP camera on LAN.
3. The search result will list in IP cam search page. Select the IP camera that wants to add and
select button.
[Note] User can select more than one IP camera to add at the same time.
14
Page 18

4. Next, enter the login ID and password of IP camera and select button to save. The
added IP camera is listed in IPCam List page.
9. Select the camera from IPCam List to make a connection. After connecting, user will see the live
video of IP camera.
10. To edit or modify camera, mark the check box of IP camera in IPCam List page. Then, select
button. To return to IPCam List page, select button.
11. To delete the camera, mark the check box of IP camera in IPCam List page and select
button.
12. Select button can snapshot the current video screen and save on your mobile phone.
15
Page 19

VIII. Palyback Recorded Video of DVR/NVR Server
Playback by Time
1. Run AVer Viewer.
2. In main screen, select DVR/NVR.
3. Select the NVR/DVR server to connect it.
4. After connecting to DVR/NVR server, select button and select button.
16
Page 20

5. The screen will switch to playback screen. Select the Date, Time, and Camera that user wants to
playback.
[Note] The AVer Viewer supports the date before and after 10 years from present year. For example:
present date is 03/08/2014, then, user can select the date range from 01/01/2004 to 12/31/2024.
6. After selected the Date, Time, and Camera, select button to start playback. The playback
time is 3 minutes for each time. If the “No record data” message is displayed that means the
date, time or camera user has selected is no recorded video for playback. Then, please select
OK and select another date, time, or camera.
[Note] The Playback mode support horizontal screen display, too.
7. Select button to stop playback.
8. Select button to move to the end of the video.
9. Select to move to beginning of the video.
17
Page 21

10. Select button can snapshot the current video screen and save on your mobile phone.
11. Select button will return to Live mode.
12. Select button to display POS information on channel screen.
Playback by Event
1. Run AVer Viewer.
2. In main screen, select DVR/NVR.
3. Select the NVR/DVR server to connect it.
13. After connecting to DVR/NVR server, select button and select button.
18
Page 22

4. The screen will switch to playback screen. Select the Date, Time, and Camera that user wants to
search event.
[Note] The AVer Viewer supports the date before and after 10 years from present year. For example:
present date is 03/08/2014, then, user can select the date range from 01/01/2004 to 12/31/2024.
5. After selected the Date, Time, and Camera, select button to start searching.
6. The search result will list in Event List page. Select the event that wants to playback.
7. Select button to stop playback.
8. Select button to move to the end of the video.
9. Select to move to beginning of the video.
10. Select button can snapshot the current video screen and save on your mobile phone.
11. Select button will return to Live mode.
19
Page 23

Playback for NV/IWH/EH series DVR
1. Run AVer Viewer.
2. In main screen, select DVR/NVR.
3. Select the NVR/DVR server to connect it.
4. After connecting to DVR/NVR server, select button to switch to playback mode.
Live mode Playback mode
20
Page 24

5. Select the Date, Time, and Camera that user wants to playback.
[Note] The AVer Viewer supports the date before and after 10 years from present year. For example:
present date is 03/08/2014, then, user can select the date range from 01/01/2004 to 12/31/2024.
6. After selected the Date, Time, and Camera, select button to start playback. If the “No
record data” message is displayed that means the date, time or camera user has selected is no
recorded video for playback. Then, please select OK and select another date, time, or camera.
[Note] The Playback mode support horizontal screen display, too.
7. Select button to stop playback.
8. Select button to move to the end of the video.
9. Select to move to beginning of the video.
10. Select button can snapshot the current video screen and save on your mobile phone.
11. Select button will return to Live mode.
21
Page 25

IX. Using the PTZ Function
Button
Description
Click direction button to move lens of PTZ camera. The directions are
depends on the PTZ camera has supported.
/
Zoom in and out the image.
/
Adjust the focus manually to produce clear image.
Move the PTZ camera to the preset point. Select the preset point position
and select GO button. To leave the preset point position selection, select
Exit.
/
Adjust the moving speed of PTZ camera.
1. Run the AVer Viewer.
2. In main screen, select the DVR/NVR.
3. Then, select the DVR/NVR server in NVR List and connect to the DVR/NVR server.
4. In Live mode, select the PTZ camera channel and click > or button to
switch to PTZ operation mode. To close PTZ function mode, click button again.
[Note] PTZ operation mode supports in horizontal screen display, too.
The following table describes the function buttons in the PTZ mode.
22
Page 26

X. View the Sensor and Rely Status of DVR/NVR Server
User can view sensor and relay status and the change relay status on AVer Viewer.
1. In login screen, select the DVR/NVR.
2. Then, connecting to the DVR/NVR server (see also III. Connecting to DVR/NVR Server).
3. In Live mode, select button to switch to Relay IO List page.
23
Page 27

4. In Relay IO List page, user can select the relay and change relay status. In Relay Check page,
user can change relay status to ON, OFF, or Trigger. After select the status, select Set button to
confirm and back to Relay IO List page. Select button will return to Relay IO List page
and doesn’t save the change.
Greed color: Relay status is OFF.
Red color: Relay status is ON or Trigger.
5. In Relay IO List page, select button can switch to Sensor IO List screen.
6. In Sensor IO List page, user can view the current sensors status only. Select the button to
switch to Relay IO List screen. Select button will return to Live mode.
Greed color: Sensor status is low.
Red color: Sensor status is high.
24
Page 28

XI. Using e-PTZ Function
The e-PTZ function allows user to use finger to zoom screen view. In live and playback mode, switch
to the channel that user wants to view and uses finger to zoom.
25
 Loading...