

Avaya MultiMedia Module Administrator's Manual

MultiMedia Module
Administrator's Manual
40DHB0002USEB – Issue 1a (05/29/2003)

Page 2 - Contents
Contents
Introduction........................................................................................................... 4
Use of this Manual ................................................................................................................. 4
Resource Manager User's Guide ........................................................................ 5
How it works ..........................................................................................................................5
How the guide is organized .......................................................................................................... 6
Resource Manager Navigation .............................................................................................. 7
Getting Started ...................................................................................................................... 8
Starting and Ending Resource Manager....................................................................................... 8
Synchronizing User Information.................................................................................................... 9
Setting Media Priorities................................................................................................................. 9
Resource Manager iServer Settings........................................................................................... 10
Services...................................................................................................................................... 12
Multimedia Queue Administration........................................................................................ 13
Viewing Multimedia Queues .......................................................................................................14
Adding a new Multimedia Queue................................................................................................ 14
Interaction Result Administration ......................................................................................... 21
Domain Administration......................................................................................................... 22
Configuring New User and Mailbox Setup ........................................................................... 26
User Setup.................................................................................................................................. 26
Mailbox Setup ............................................................................................................................. 27
Proactive Manager User's Guide....................................................................... 28
Overview.............................................................................................................................. 28
Who should use this guide.......................................................................................................... 28
Proactive List Manager Interface ......................................................................................... 29
Overview..................................................................................................................................... 29
Navigation Bars .......................................................................................................................... 29
Getting started ..................................................................................................................... 32
Overview..................................................................................................................................... 32
Draft Lists ............................................................................................................................33
Overview..................................................................................................................................... 33
Viewing an Existing List.............................................................................................................. 33
Importing/Loading a list............................................................................................................... 34
Selecting Fields to Import/Load .................................................................................................. 37
Defining Data Type ..................................................................................................................... 38
Deleting a Draft List .................................................................................................................... 38
Proactive Campaigns........................................................................................................... 39
Overview..................................................................................................................................... 39
Viewing the Campaign Information Window ............................................................................... 40
Viewing Proactive Campaign Lists ............................................................................................. 41
Attaching and Detaching Lists .................................................................................................... 42
Running Campaigns ................................................................................................................... 43
Account Update Wizard ....................................................................................................... 44
Overview..................................................................................................................................... 44
Selecting and Importing data source types................................................................................. 44
Selecting desired data fields to import........................................................................................ 46
Mapping Fields ........................................................................................................................... 47
Field Verification ......................................................................................................................... 50
Duplicate Records ...................................................................................................................... 50
Confirmation Window.................................................................................................................. 51
Final Confirmation Window......................................................................................................... 51
Page 2 - Contents MultiMedia Module Administrator's Manual
40DHB0002USEB – Issue 1a (05/29/2003)

Contents - Page 3
Contents (Cont.)
Rules Wizard User’s Guide................................................................................ 52
Processes You Can Automate with Rules Wizard ............................................................... 53
Overview.............................................................................................................................. 53
Getting Started .................................................................................................................... 54
Starting the Program................................................................................................................... 54
Exiting the Program .................................................................................................................... 54
Email Rules Wizard .............................................................................................................55
Chat Rules Wizard...............................................................................................................59
Introduction................................................................................................................................. 59
Chat Call Flow ............................................................................................................................ 60
HTML Page Preparation ............................................................................................................. 60
Creating Chat Rules ................................................................................................................... 61
Web Callback Rules Wizard ................................................................................................ 65
Web Callback Call Flow.............................................................................................................. 66
HTML Page Preparation ............................................................................................................. 67
Building a Rule Set ..................................................................................................................... 68
Editing a Rule Set....................................................................................................................... 78
Exiting Web Callback Rules Wizard ........................................................................................... 78
Implementing a Rule Set ............................................................................................................ 78
Outlook Rules Wizard .......................................................................................................... 79
Setting Up a Mailbox and Profile in NT....................................................................................... 80
Creating Auto-Reply Rules in Outlook ........................................................................................ 80
Glossary .............................................................................................................. 81
Index .................................................................................................................... 83
MultiMedia Module Administrator's Manual Contents - Page 3
40DHB0002USEB – Issue 1a (05/29/2003)

Page 4 - Use of this Manual Introduction
Introduction
This MultiMedia Module Administrator's Manual is divided into three chapters.
• Resource Manager User's Guide
This User's Guide provides the administrator with powerful tools for
maintaining and updating the Multimedia Module. It furnishes the information
required to enable users to utilize the various communications functions
resident in the iContact desktop communications terminal including
Telephone, e-mail, chat and Web contact responses.
• Proactive Manager User's Guide
This User's Guide provides the administrator with the knowledge to manage
outbound Proactive Campaign Lists. It describes the steps required to create
draft calling lists, attach them to campaigns and run the campaigns. This
module is designed to work as a companion to the Resource Manager
support module. For information on the Resource Manager support module,
refer to Resource Manager User's Guide.
• Rules Wizard User's Guide
This User's Guide is for administrators and supervisors who are responsible
for managing the multimedia customer interaction center.
The Interaction Rules Wizard applies pre-defined business rules to Web,
Email, Chat and telephone incoming media contacts. Rules are a
combination of conditions and actions that process and organize interactions.
Each rule consists of two elements: one or more conditions that specify what
the rules apply to; and one or more actions that specify what should be done
with the qualifying interactions.
Use of this Manual
This manual covers administration of Avaya's MultiMedia Module (MMM) at
software Level 2.1+. on an the following communications platforms:
• INDeX operating Software Level 10.0+
• IP Office operating Software Level 1.4+
This guide is intended for use by administrators who are familiar with the
relevant communications platform and have successfully completed the
appropriate training courses.
Ensure that you have read and understood this Guide before beginning
administration.
Page 4 - Introduction MultiMedia Module Administrator's Manual
Use of this Manual 40DHB0002USEB – Issue 1a (05/29/2003)

Resource Manager User's Guide How it works - Page 5
Resource Manager User's Guide
Welcome to the Resource Manager User's Guide. This user's guide provides
the administrator with powerful tools for maintaining and updating the
Multimedia Module. It furnishes the information required to enable users to
utilize the various communications functions resident in the iContact desktop
communications terminal including Telephone, e-mail, chat and Web contact
responses.
How it works
A business can be organized into multiple divisions. Some divisions may focus
primarily on administrative functions like purchasing or billing. Others may be
responsible for managing internal assets like IT, while another department or
division may be involved in the creation or manufacturing of the company’s
products and services. And other groups may interface with the company’s
customer base as in sales or customer service. The Resource Manager enables
each of these groups to automate the management of their internal and external
interactions according to predefined rules for contact handling. Some groups
may only be assigned to handle e-mail contacts, while others may be tasked
with web contact, e-mail, chat, and telephone responsibilities, based on their job
functions and skill sets. Within groups, users can be assigned different priorities
for contact handling. Furthermore, users can be defined as to how they receive
contacts, whether they can preview before responding and whether they can
select contacts at their discretion.
How does it work? Resource Manager consists of several components that
enable you to add queues, define interaction results, define media priority,
assign human resources to those queues and assign properties to users, all
from a single, unified console.
There are two ways to view the Resource Manager interface: in the standard
Windows view and in the Windows browser view. The two may be viewed
together or each one separately. Either one gives you flexibility to view different
items or jump back and forth between different tasks.
In setting up the Resource Manager for the first time, you would begin by
defining your Multimedia Queues from the list of media types supported by the
system. Typically, a company might have different phone numbers for general
inquiries, sales and tech support. In addition, they could have 2 e-mail
addresses, one for sales and one for tech support. Each of these would have its
own media queue in Resource Manager. After creating these media accesses,
the company would need to assign staff to handle responses to all of them.
These assignments would be based on workgroup assignments A group, like
Order Entry, could be assigned to handle telephone and e-mail inquiries related
to sales. The company’s service technicians could be mapped to both e-mail
and telephone support queues.
For each media type, Interaction Result codes would be designated to track the
outcome of each contact transaction. A technician could then assign a Problem
Resolved or Escalated result before completing the contact. And if follow-up is
required, the staff could reschedule another contact with a customer.
MultiMedia Module Administrator's Manual Resource Manager User's Guide - Page 5
40DHB0002USEB – Issue 1a (05/29/2003) How it works

Page 6 - How it works Resource Manager User's Guide
How the guide is organized
The Resource Manager guide has been divided into six sections.
• Resource Manager Navigation
This chapter introduces the Resource Manager interface including menu
commands and windows utilized in operating Resource Manager.
• Getting Started
This chapter shows you how to start the application, synchronize data and
modify database settings.
• Multimedia Queue Administration
This chapter facilitates the creation and assignment of media queues to
groups of users. Media supported include inbound telephone, chat, Web
callback, e-mail and preview dialing. This chapter describes the steps to
create and run outbound media campaigns.
• Interaction Result Administration
This chapter supports the creation and maintenance of Interaction Results
associated with various multimedia types. Interaction Results are used to
track the outcomes interactions and are media independent.
• Domain Administration
This chapter pertains to all information related to user, group and domain
assignments and facilitates the assignment of User Rights to individual users.
The module also supports that mapping of Multimedia Queues to Groups.
For adding and disabling Users and Groups, refer to your documentation on
User and Group setup in Microsoft NT.
Who should use this guide
This guide is for administrators and supervisors who are responsible for
managing the multimedia customer interaction center.
Document symbols and conventions
To help you locate and interpret information easily, this manual uses Microsoft
set of Standard Windows terminology such as icon, window, text box and menu.
Following are some specific symbols and conventions standard throughout the
manual:
Conventions Descriptions
Bold
Used to designate menu selections, buttons and commands to
enter.
Initial Capitals Names of applications, programs, files, servers, and named
windows; and directory names and paths.
Italic
Information you need to provide.
Page 6 - Resource Manager User's Guide MultiMedia Module Administrator's Manual
How it works 40DHB0002USEB – Issue 1a (05/29/2003)

Resource Manager User's Guide Resource Manager Navigation - Page 7
Resource Manager Navigation
The Resource Manager is designed to enable the supervisor/administrator to
effectively manage the resources of the enterprise through a menu driven or
browser driven application. A typical Resource Manager menu is as follows:
Menu Bar
The Menu Bar displays program commands and menus. Click to dropdown
menu options to modify, view and enter information as requested.
Item Description/Function
File Contains commands to add new Queues, Interaction Results, and Exit.
Preferences Provides shortcuts to iServer Settings, User Properties, Synchronize and Set
Media Priorities.
View Allows you to show/ hide the view List and view Tree through check boxes.
Help Provides access to on line help files and information about the program.
Vertical Icon Bar
The Icon Bar provides shortcuts to Resource Manager modules and indicates
the total number of list items available in each module. For example, the
number (7) under the Multimedia queues icon denotes that there are 7
Multimedia queues that are currently active and available for assignment to
groups.
Icon Description/Function
Multimedia
Queues
Displays the number of Multimedia Queues. Clicking the icon brings you to
Multimedia queues.
Interaction
Results
Displays the number of Interaction Results. Clicking the icon brings you to the
Interaction Results.
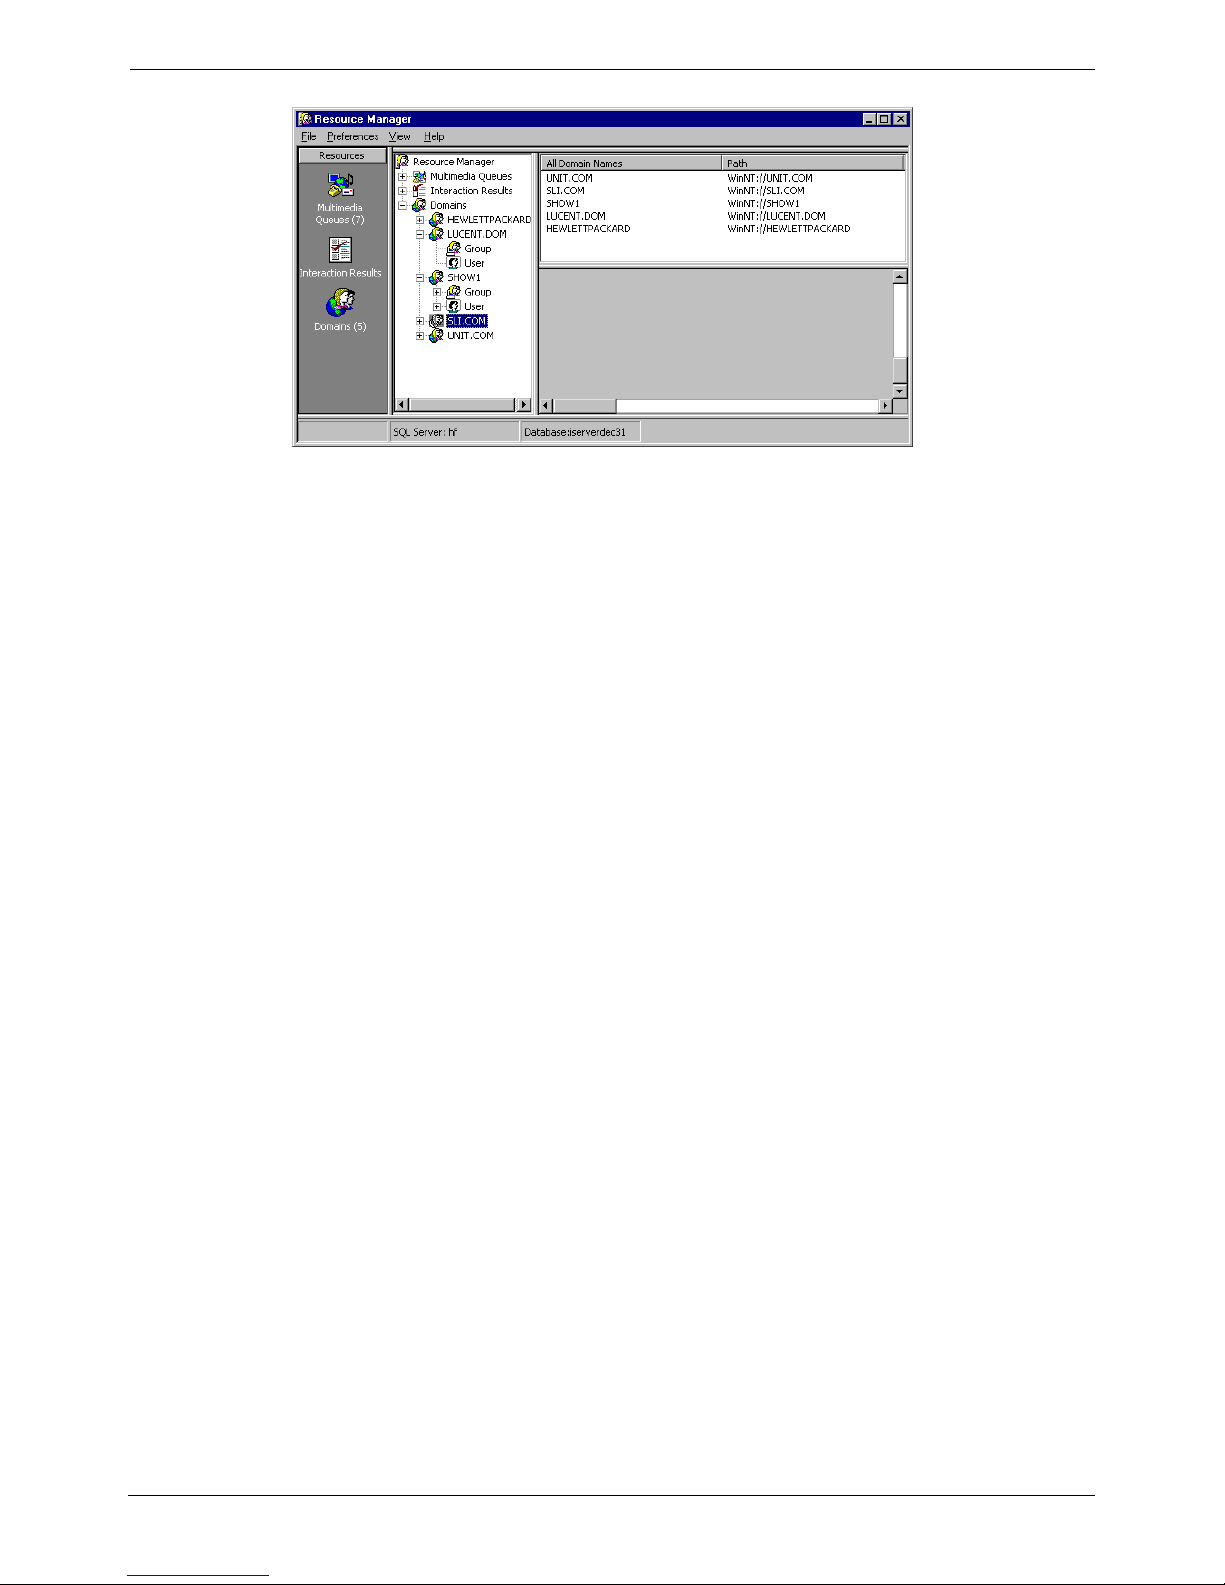
Domain Displays the number of Domains. Clicking on domain allows you to view domains.
Tree
The Tree provides a graphical representation of the different Resource Manager
modules and can be used to access any of them. To expand the Tree, click on
the icons or the (+) sign in the box beside each icon. To collapse the tree, click
on the (-) sign in the box beside each icon.
Status Bar
The status bar displays information about how many items are under the
selected group, which SQL server and which database is in use.
Label Description/Function
Items Displays the total number of items associated with the currently selected window.
SQL Server The name or type of server in use.
Database The name of database.
MultiMedia Module Administrator's Manual Resource Manager User's Guide - Page 7
40DHB0002USEB – Issue 1a (05/29/2003) Resource Manager Navigation
Page 8 - Getting Started Resource Manager User's Guide
Getting Started
Before you can add or modify Resources in Resource Manager, there are prerequisites to satisfy. All user setup is handled in accordance with setting up
users in your local area network. Refer to Microsoft NT manuals for all
information regarding User setup. You will also need to configure the servers.
This Chapter will cover the following topics.
• iServer Settings (see page 10)
• Starting and Ending the program
• Synchronizing the Data
• Setting Media Priorities
• Services
Starting and Ending Resource Manager
Starting the Resource manager depends on the operating software being used.
• INDeX operating software:
Select the Resource Manager from Windows Start menu under Programs |
CCM | Avaya MultiMedia Module | Resource Manager.
• IP Office operating software:
Select the Resource Manager from Windows Start menu under Programs |
CCC | Avaya MultiMedia Module | Resource Manager
To exit the program, choose Exit on the file menu, or click the Close icon in the
top right corner.
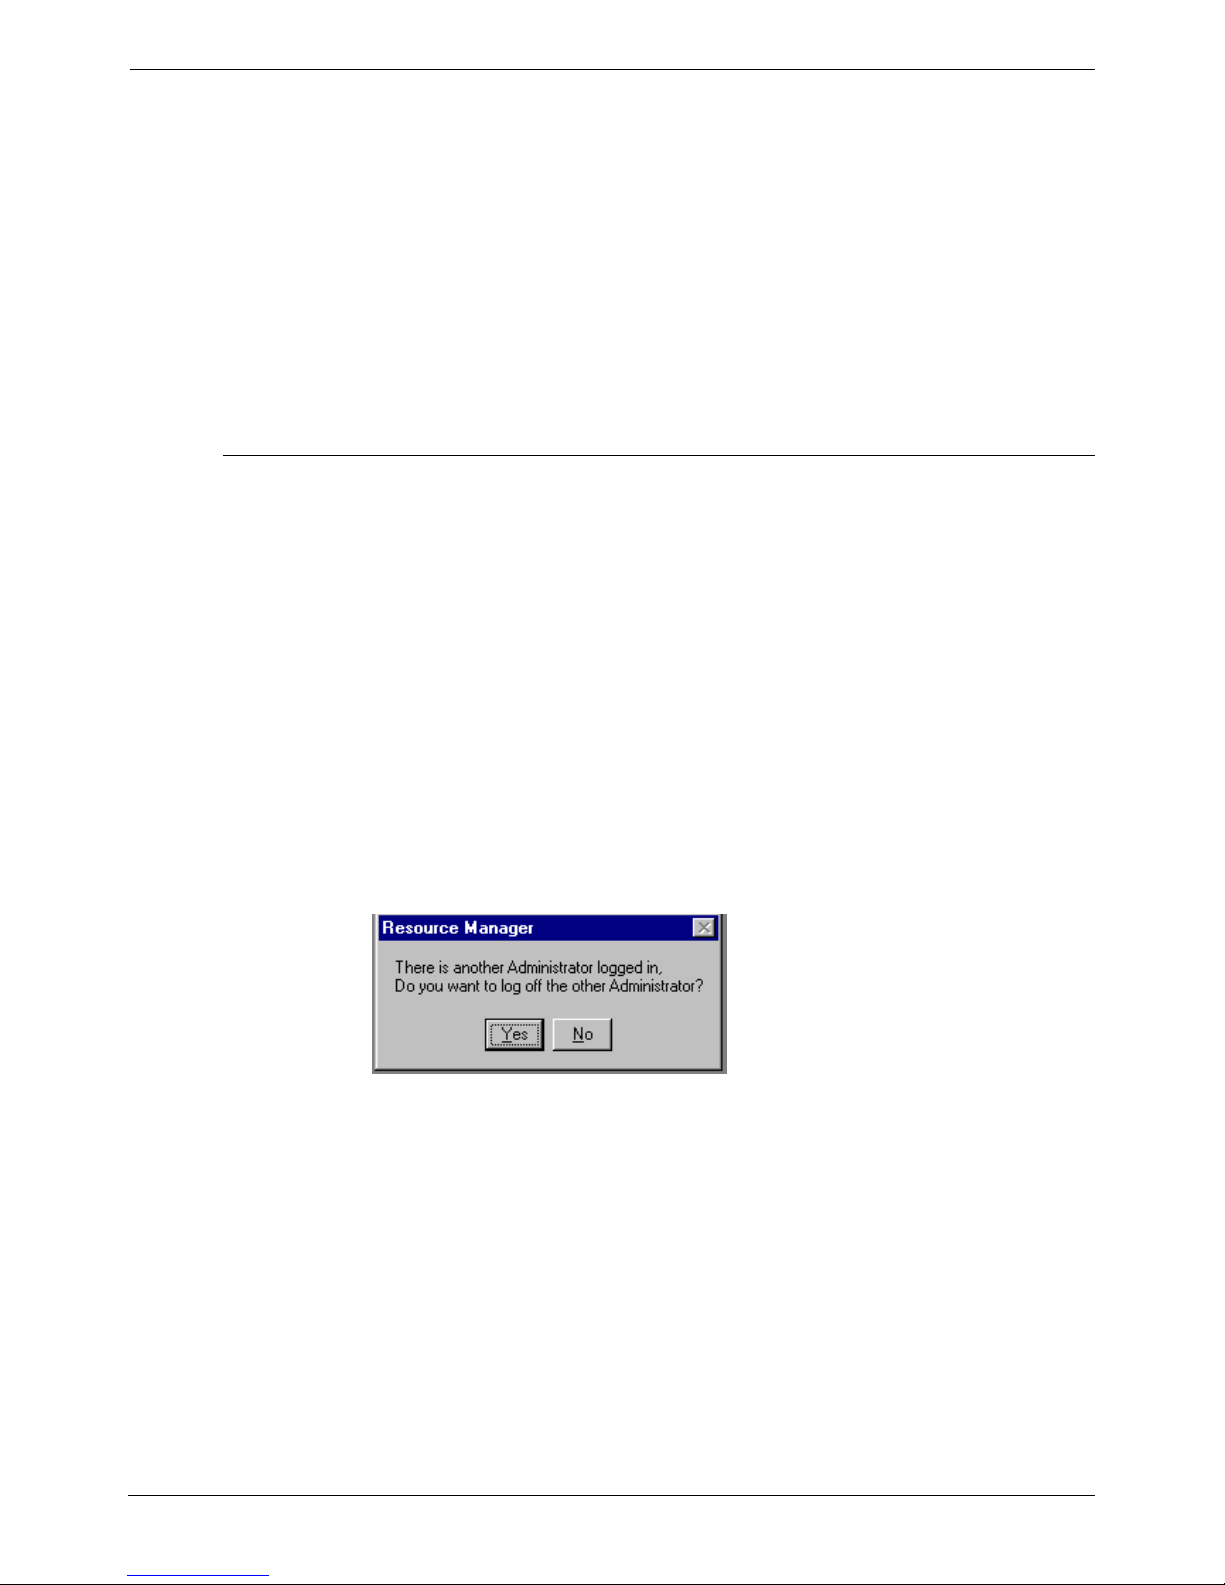
Note: Only one Administrator can be logged on at a time. The system can
detect multiple users who are logged on possessing administrative
rights. It will notify you and the other user signed on as Administrator of
the duplication. You may need to log off the other administrator to start
your own session.
Page 8 - Resource Manager User's Guide MultiMedia Module Administrator's Manual
Getting Started 40DHB0002USEB – Issue 1a (05/29/2003)
Resource Manager User's Guide Getting Started - Page 9
Synchronizing User Information
Whenever you make changes to the Domains, Groups or Users (add, modify or
delete) it is necessary to synchronize data between the iServer and the NT
server.
Note: If you are using Resource Manager for the first time, you must
synchronize before attempting to run iService.
1. Select the Preferences Menu.
2. Click Synchronize.
3. Select Domain from the pop-up menu.
4. Click Synchronize.
The system will inform you that the process will take a few minutes.
5. When the process is complete, click Close.
Note: Whenever you make changes to the Domains, Groups or Users in
Windows NT (add, modify or delete) it is necessary to synchronize the
domain in Resource Manager.
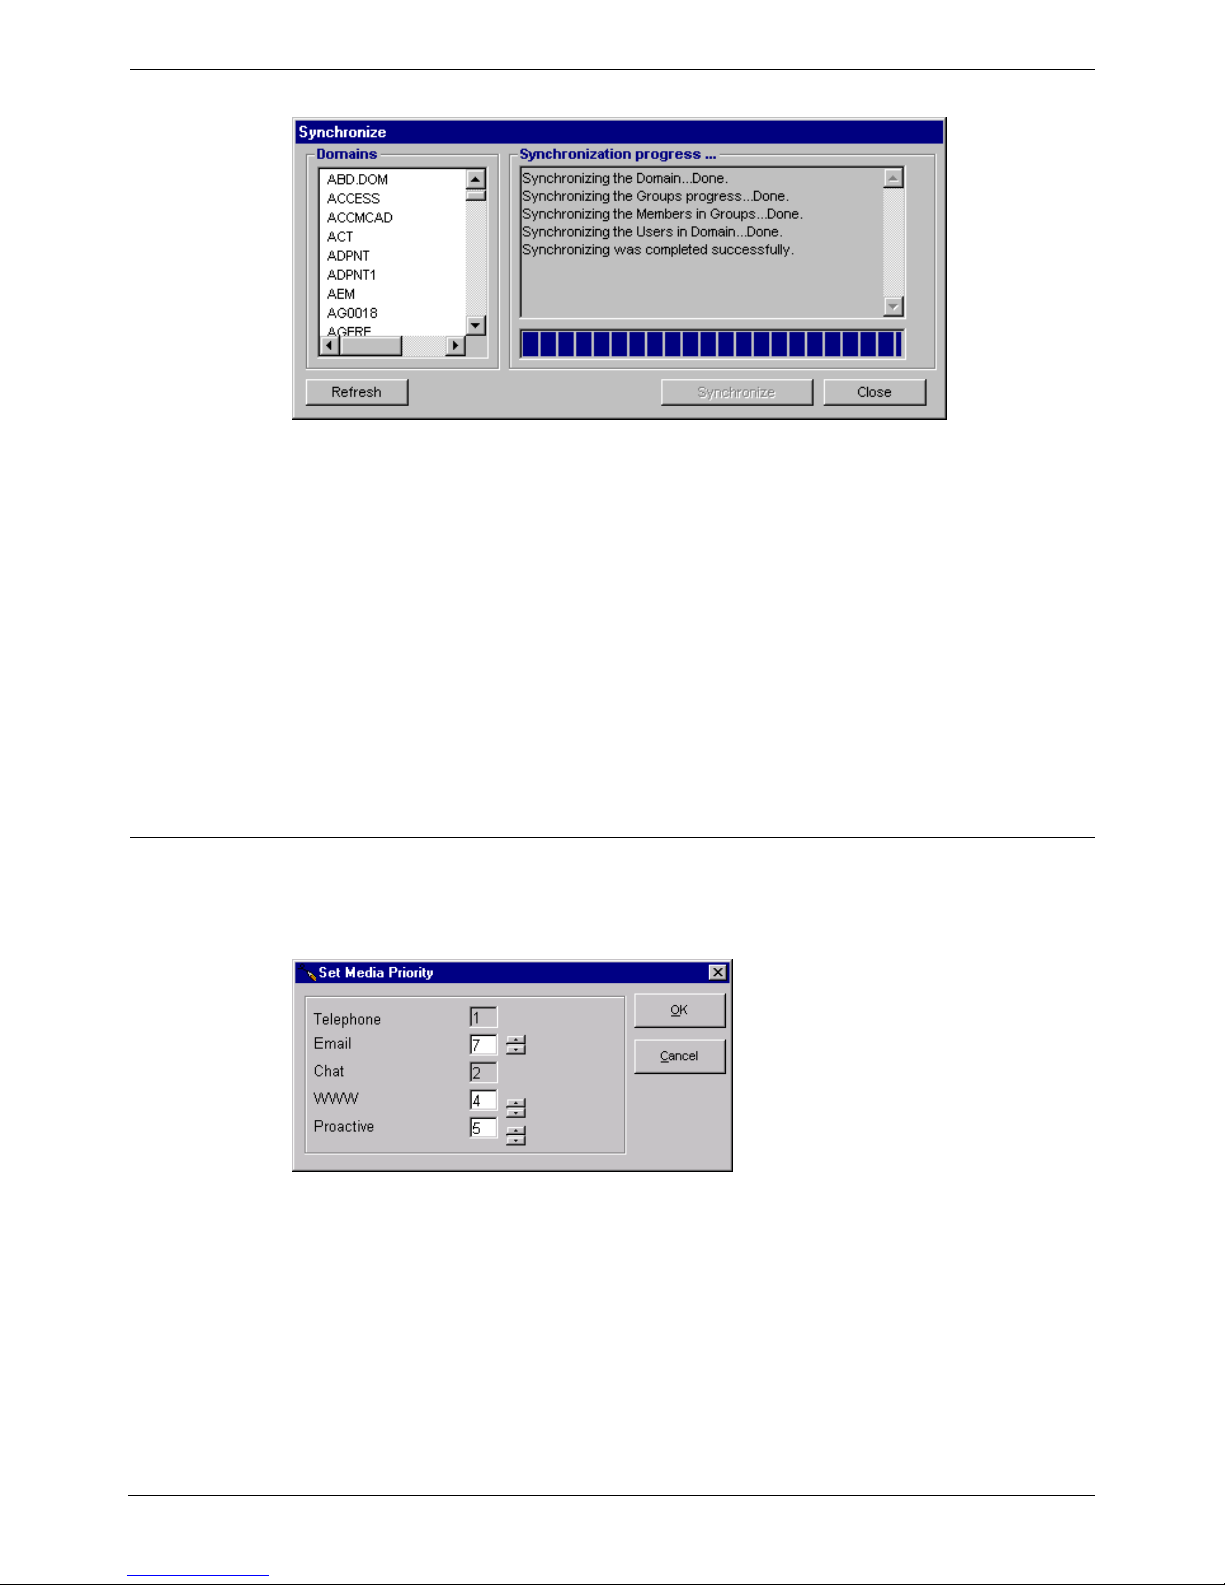
Setting Media Priorities
You are able to change the priority given to any media type except for
Telephone and Chat. Media priority is set to determine the order in which the
various media types are delivered to the desktop by the server.
Each media type can have a priority range between 3 and 8 (Telephone is set
at 1 and Chat is set at 2). The grayed out media will be implemented in future
releases. More than one media type can have the same priority level. If several
media types are set to the same priority level, the iServer will deliver the
contacts to the iContact in the order in which they arrived. Telephone must
always retain the highest priority of any media type.
1. Click setting Media Priorities from the Preferences menu.
2. Use the up and down arrows to change the priority given to the different
media types; where 1 is the highest.
3. Click OK to Close.
MultiMedia Module Administrator's Manual Resource Manager User's Guide - Page 9
40DHB0002USEB – Issue 1a (05/29/2003) Getting Started
Page 10 - Getting Started Resource Manager User's Guide
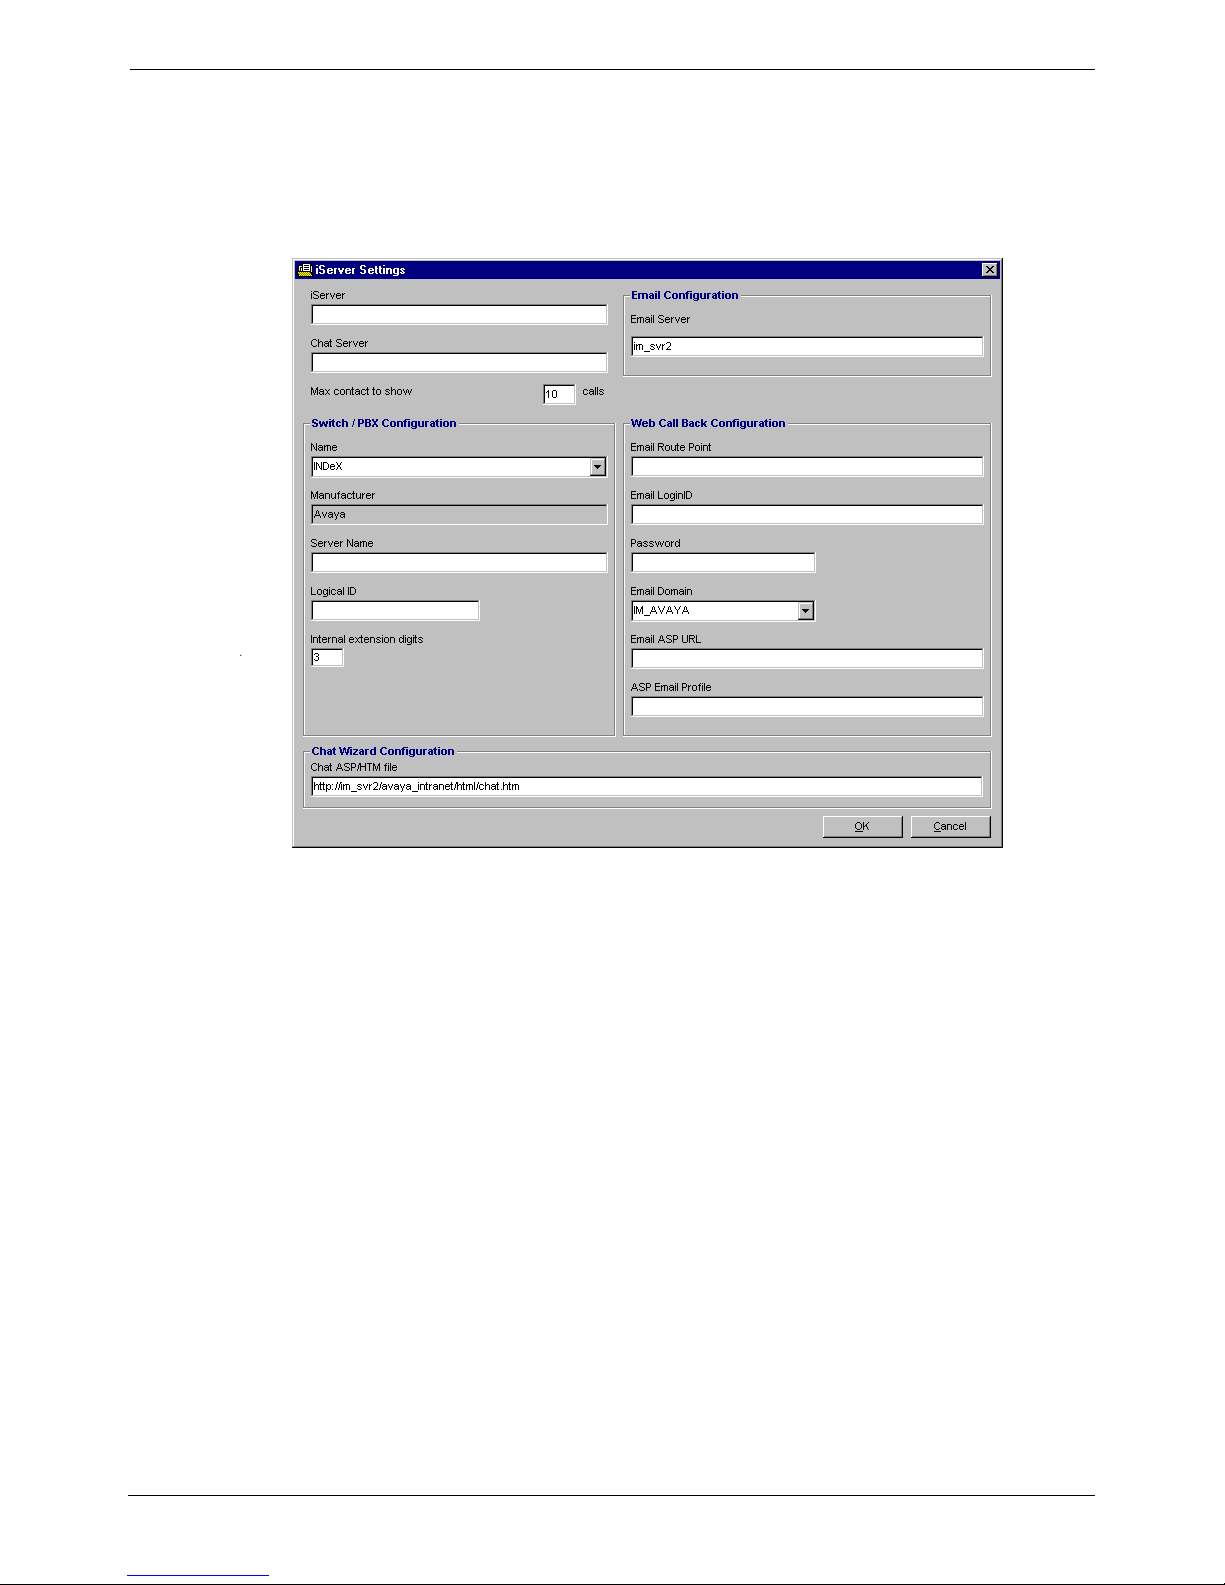
Resource Manager iServer Settings
The iServer Settings sets the defaults for the iServer and Telephony platform.
1. To open the iServer Settings, select iServer Settings from the
Preferences menu.
2. Make your changes; click OK to save the changes or Cancel to undo.
Note: It is not necessary to enter a Chat ASP URL until you are ready to
implement a Chat popup window.
Page 10 - Resource Manager User's Guide MultiMedia Module Administrator's Manual
Getting Started 40DHB0002USEB – Issue 1a (05/29/2003)

Resource Manager User's Guide Getting Started - Page 11
Interaction Server Values Location Description/Function
Default Server Server on which iServer is installed The server that the iContact and
other Services modules automatically
connects to.
Chat Server Server on which MS Exchange is
installed
The server where the Chat Service is
running.
Max Contact to Show Default value: 10 contacts Sets the number of contacts the
iContact module displays in the Inbox
at a time.
Chat Wizard Configuration
Chat ASP URL e.g.
http:\\iServername\iCosmchat\Chat.a
sp
The location of the ASP file that is
used to handle Chat pages set up by
the Chat Wizard.
Switch PBX Configuration
Name Name of the Switch/PBX supported
by iServer to be selected from the
dropdown menu.
Manufacturer Supplied by entering switch
selection.
Server Name Where the switch and driver are
installed
Name of the server.
Logical ID Dependent on the switching fabric.
Set by switch administrator
Either, TSAPI, CT-Connect, CSTA or
TAPI.
Internal Extension Digits The number of digits used for internal
extensions.
Web Callback Configuration
Email Route Point
The e-mail address of a symbolic
user created for this purpose: e.g.
www.email@somewhere.com
The e-mail address that Web
Callback requests are sent to.
Password
Password of the symbolic user
created for Web Callback
The password for this e-mail account
per Exchange.
Email LoginID Login ID of the symbolic user e.g.
wwwemail
The login ID for this e-mail account
per Exchange.
Email Domain Select from the dropdown list The domain this e-mail account
belongs to.
Email ASP URL
http://iServername/webcallback/cdom
ail.asp
The location of the ASP file
(CDOmail.asp) that is used to handle
Web Callbacks. This file is part of the
installation package and is copied to
your IIS server during the installation
process.
ASP e-mail profile
The e-mail address of the symbolic
user created as the sender of Web
Callback
The external e-mail address that
Web Callback requests are sent to.
Email Configuration
Exchange Server The name of the Exchange Server.
MultiMedia Module Administrator's Manual Resource Manager User's Guide - Page 11
40DHB0002USEB – Issue 1a (05/29/2003) Getting Started

Page 12 - Getting Started Resource Manager User's Guide
Services
When the iServer service is interrupted, it is necessary stop and start the NT
services. Have all users exit from iContact. Starting services takes 50 seconds.
After waiting 50 seconds, users may log back into the iContact application and
resume normal operations.
Stop/Restart
1. Log out all iContact users.
2. Go to Control Panel.
3. Select Services.
4. Select iService and click Stop.
5. Wait. Click Start.
6. Repeat steps for iPhone, iE-mail and iChat services.
7. Close Services.
Page 12 - Resource Manager User's Guide MultiMedia Module Administrator's Manual
Getting Started 40DHB0002USEB – Issue 1a (05/29/2003)
Resource Manager User's Guide Multimedia Queue Administration - Page 13
Multimedia Queue Administration
When contacts in any media form come into the Multimedia Interaction Server,
they are separated and dispersed for routing based on criteria defined in
Resource Manager.
Contact routing and priority assignments are based on contact sensitive
business rules. Each media contact is classified according to its media type,
source and content. Resource Manager facilitates the creation and assignment
of media queues for distribution to the User desktop. This section covers the
following information:
• Viewing Multimedia Queues
• Adding Multimedia Queues
• Editing Multimedia Queues
• Deleting Multimedia Queues
• Assignment of Media Queues to Groups of Users
MultiMedia Module Administrator's Manual Resource Manager User's Guide - Page 13
40DHB0002USEB – Issue 1a (05/29/2003) Multimedia Queue Administration

Page 14 - Multimedia Queue Administration Resource Manager User's Guide
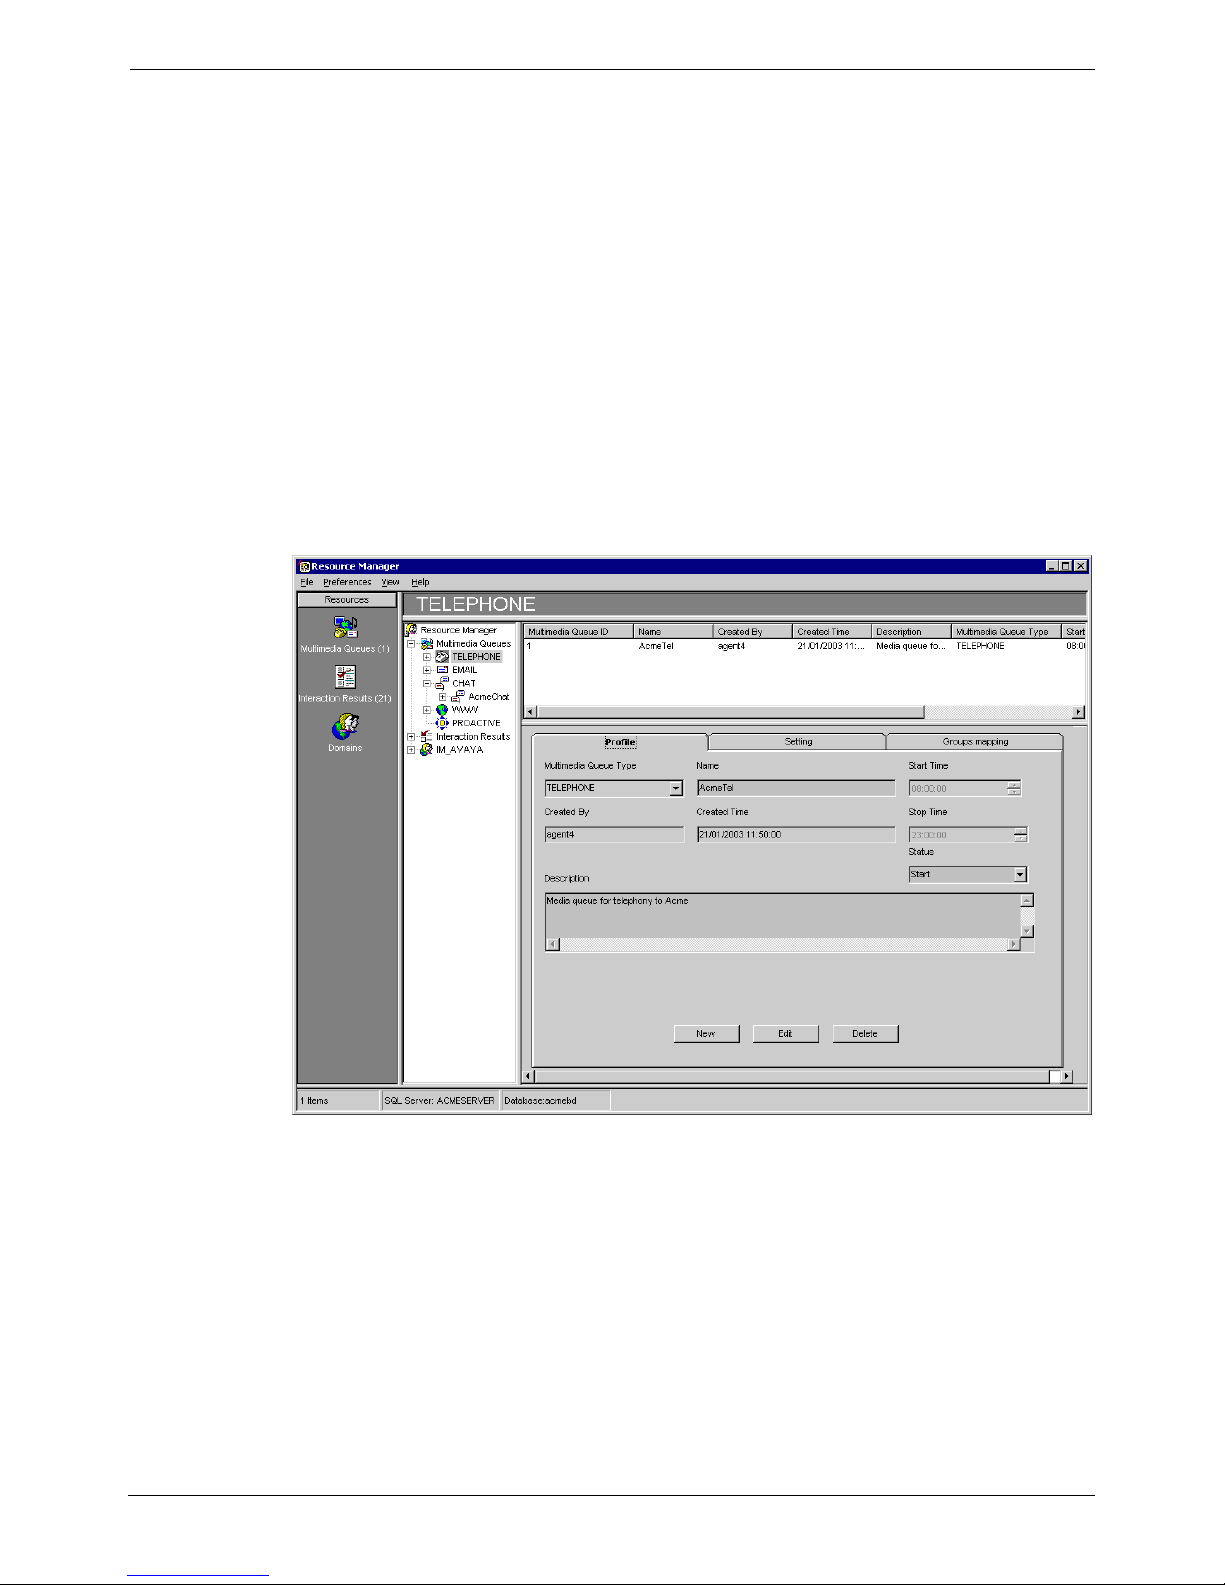
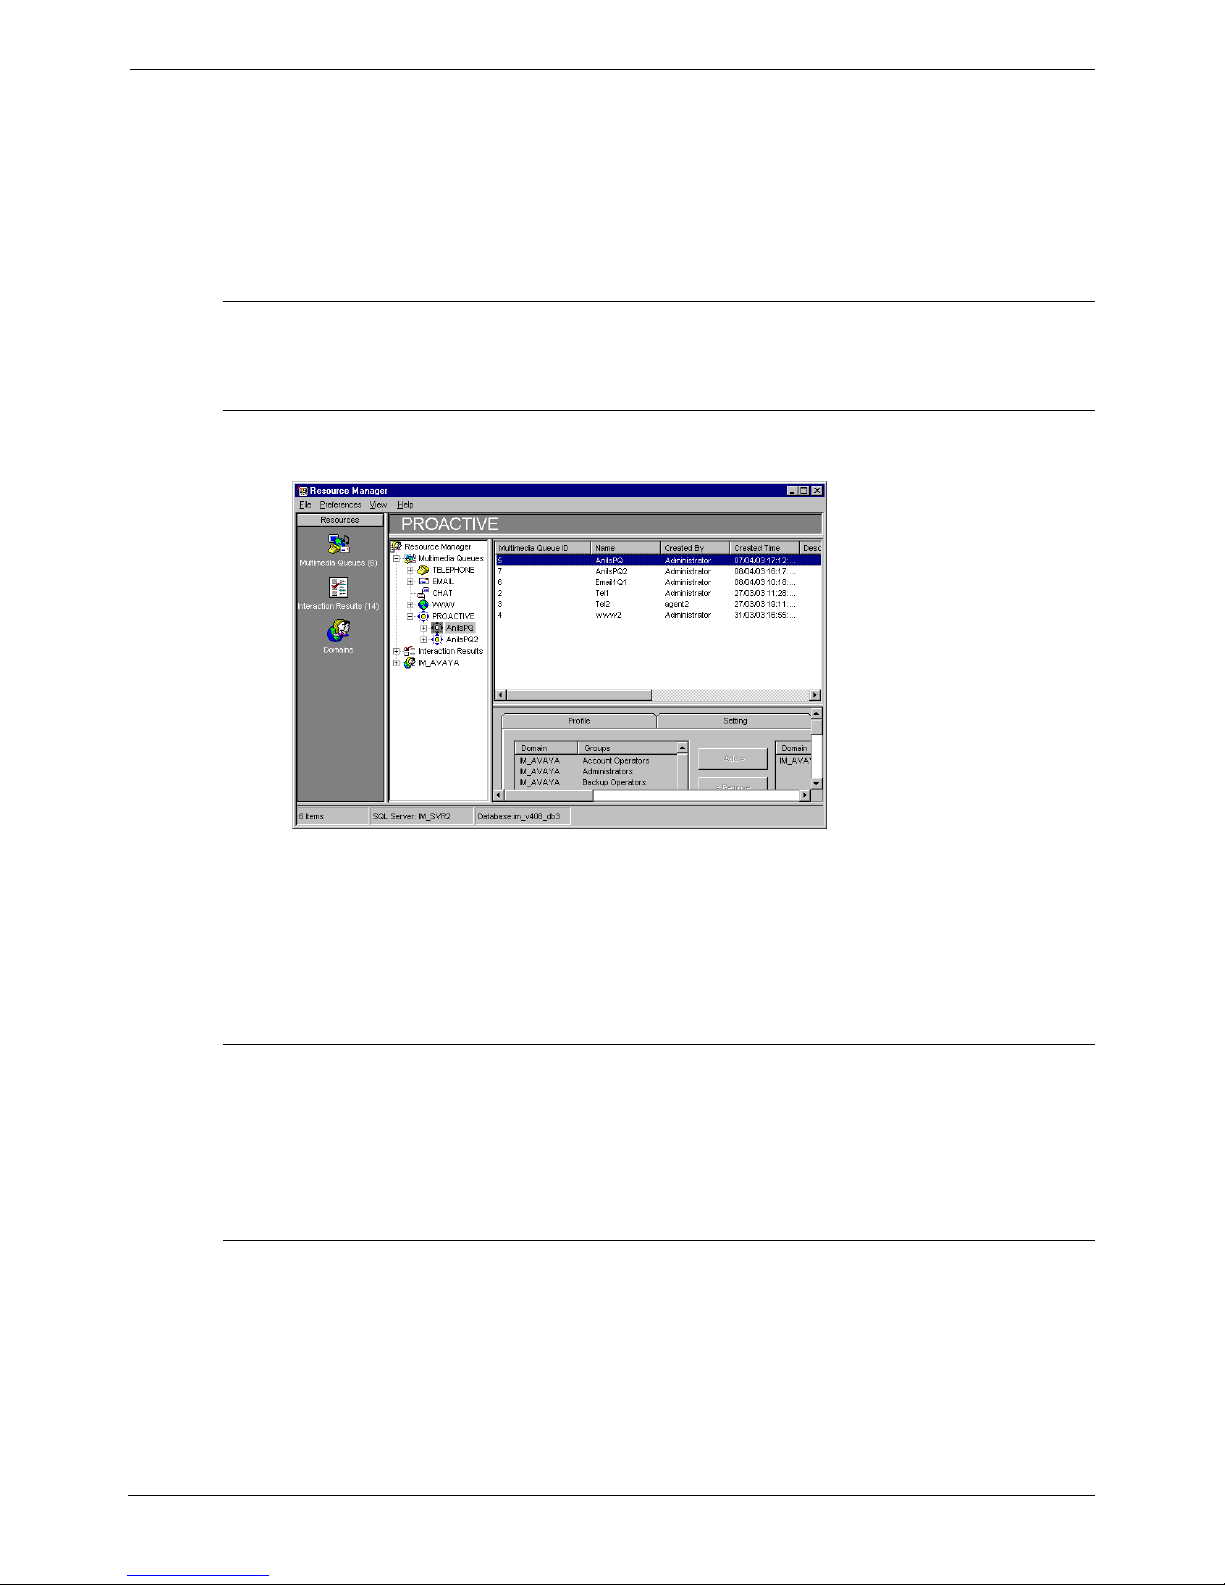
Viewing Multimedia Queues
To see the list of Multimedia Queues, their attendant properties and the groups
that have been assigned, do the following:
1. Select Multimedia Queues from the Vertical Icon Bar or click Multimedia
on the Tree View. This will open Multimedia Queue List Window. The List
Window displays Queue ID, Name, Created By, Created Time, Description,
Multimedia Queue Type, Start Time, Stop Time and Status. You can use
the horizontal scroll bar to view all fields.
2. Click the (+) or double click the Multimedia Queue icon to expand the Tree
View’s list of Multimedia Queues. Click the icon of the Multimedia Queue
type you wish to view.
3. Select a Queue from the List or Tree to view the Queue Profile, Settings
and Group Mappings.
Media Type Description/Function
Telephone Voice contacts originating from the PSTN.
E-mail E-mail contact requests.
Chat Requests of live chat sessions.
WWW WWW contact request.
Proactive Outbound calling list media queues.
Adding a new Multimedia Queue
Adding a new Multimedia Queue is a three-stage process.
1. Adding a Media Profile
This remains constant for all multimedia types. This stage involves defining
and describing the media type e.g. “e-mail technical support”, determining
when the queue will be active and assigning a status.
2. Settings
These are unique to each media type. Therefore, the information you are
required to supply will vary from one media type to another. For example,
for telephone queues, you would supply information regarding the
telephone-switching platform. For e-mail, you would supply domain and
address information. Settings also ask you to compose messages that are
sent to confirm the receipt of e-mails, Web Callback requests and Chat
requests. These are automatic responses a sender or caller would receive
acknowledging receipt of his contact request.
No settings are required for the WWW Profile.
3. Group Mapping
Selecting a Group or Groups of users to which the queue will be mapped.
Page 14 - Resource Manager User's Guide MultiMedia Module Administrator's Manual
Multimedia Queue Administration 40DHB0002USEB – Issue 1a (05/29/2003)
Resource Manager User's Guide Multimedia Queue Administration - Page 15
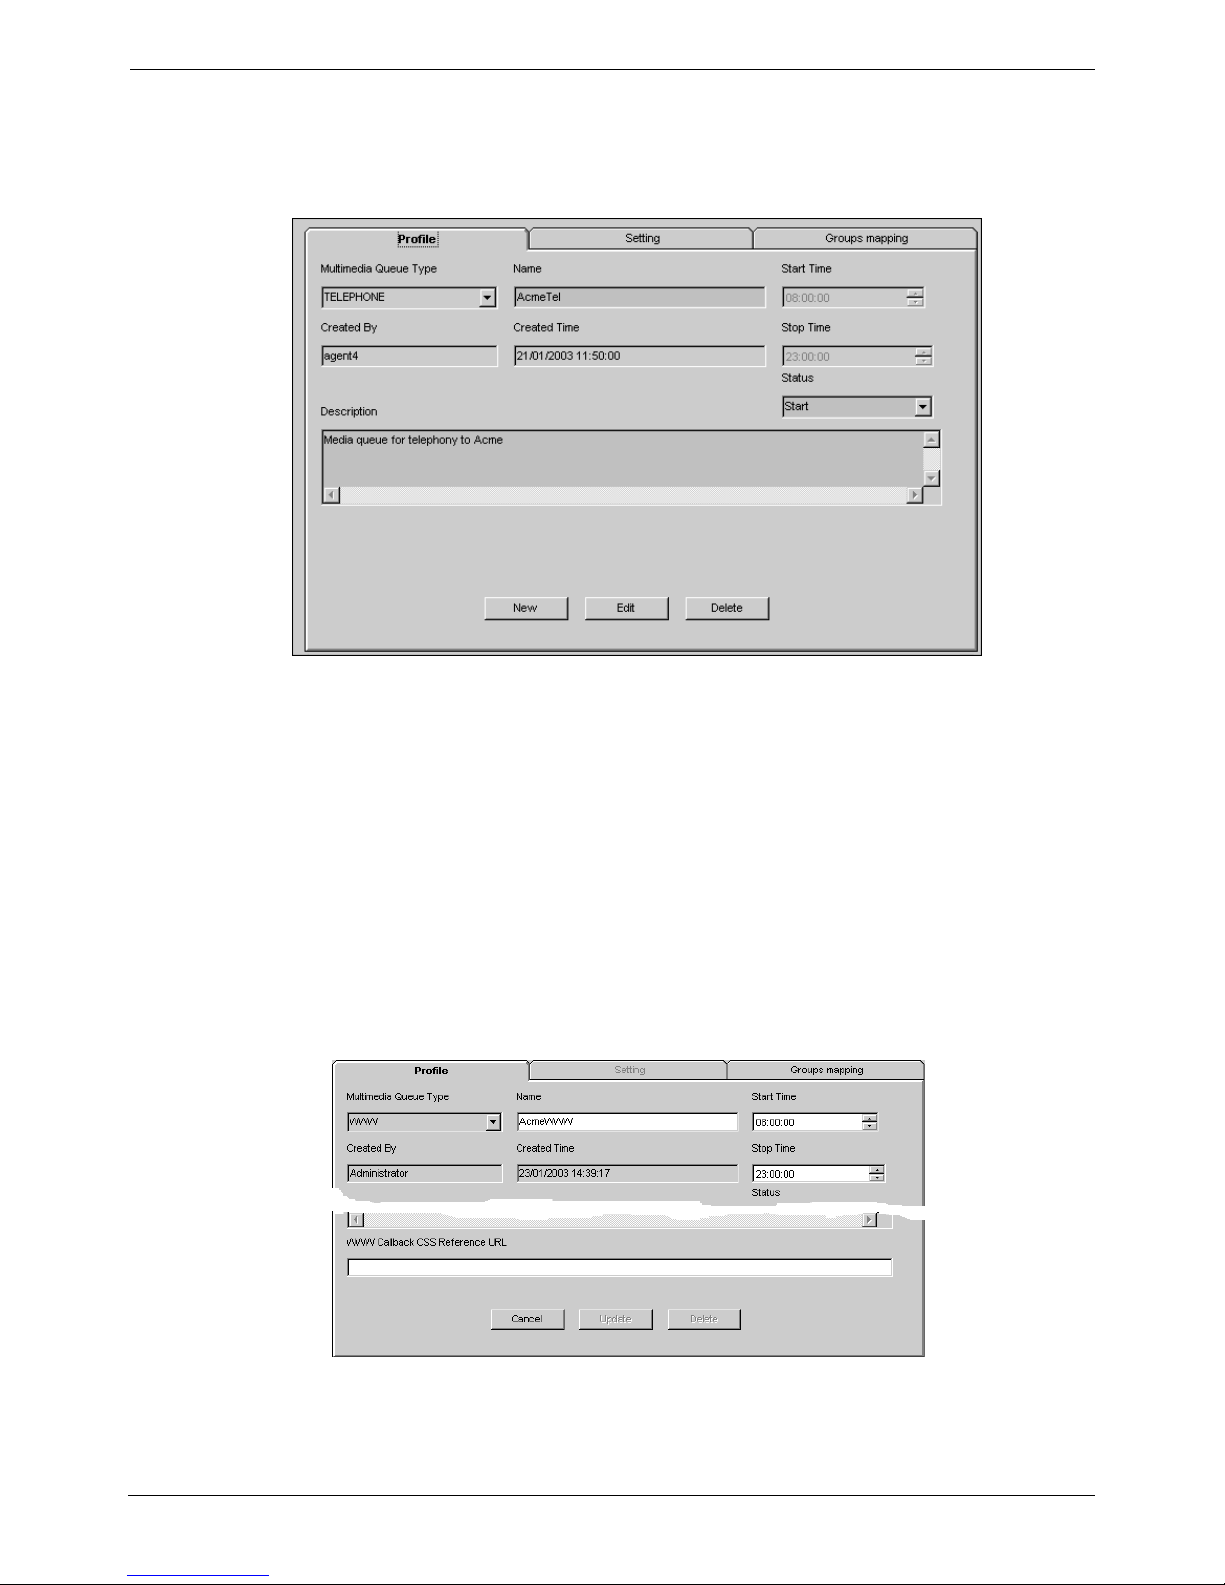
Stage 1 - Adding a Media Profile
With the resource Manager opened, right-click the Multimedia Queues Icon in
the tree and select New Multimedia Queue from the pop up menu, or click New
Multimedia Queue from the File menu. The Profile tab fields will open. These
are similar for Telephone, Email, Chat and Proactive as show below:
1. Click Edit and select the Multimedia Queue Type from the dropdown menu.
2. Enter the Multimedia Queue Name.
3. Created By and Created Date and Time are automatically inserted by the
system.
4. Enter a Description, giving a brief description of the new Multimedia Queue.
5. Enter Start Time, setting the time when the queue will be in operation.
6. Enter Stop Time, setting the time for the queue to close operations.
7. Select the 'Start' option for Status to begin the flow of contacts to the users’
desktops. The 'Pause' and 'Stop' options are both used to close the queue.
'Stop' terminates all contacts in progress. 'Pause' allows users to complete
the contacts in which they are engaged before closing the application.
8. The Profile field tab for WWW is shown below. Enter the URL in WWW
Callback CSS Reference URL.
9. When all information is entered, click the Add and open the Settings
Window. Proceed from Stage 2 - Settings.
MultiMedia Module Administrator's Manual Resource Manager User's Guide - Page 15
40DHB0002USEB – Issue 1a (05/29/2003) Multimedia Queue Administration
Page 16 - Multimedia Queue Administration Resource Manager User's Guide
Stage 2 - Settings
The various media settings are described in the following paragraphs:
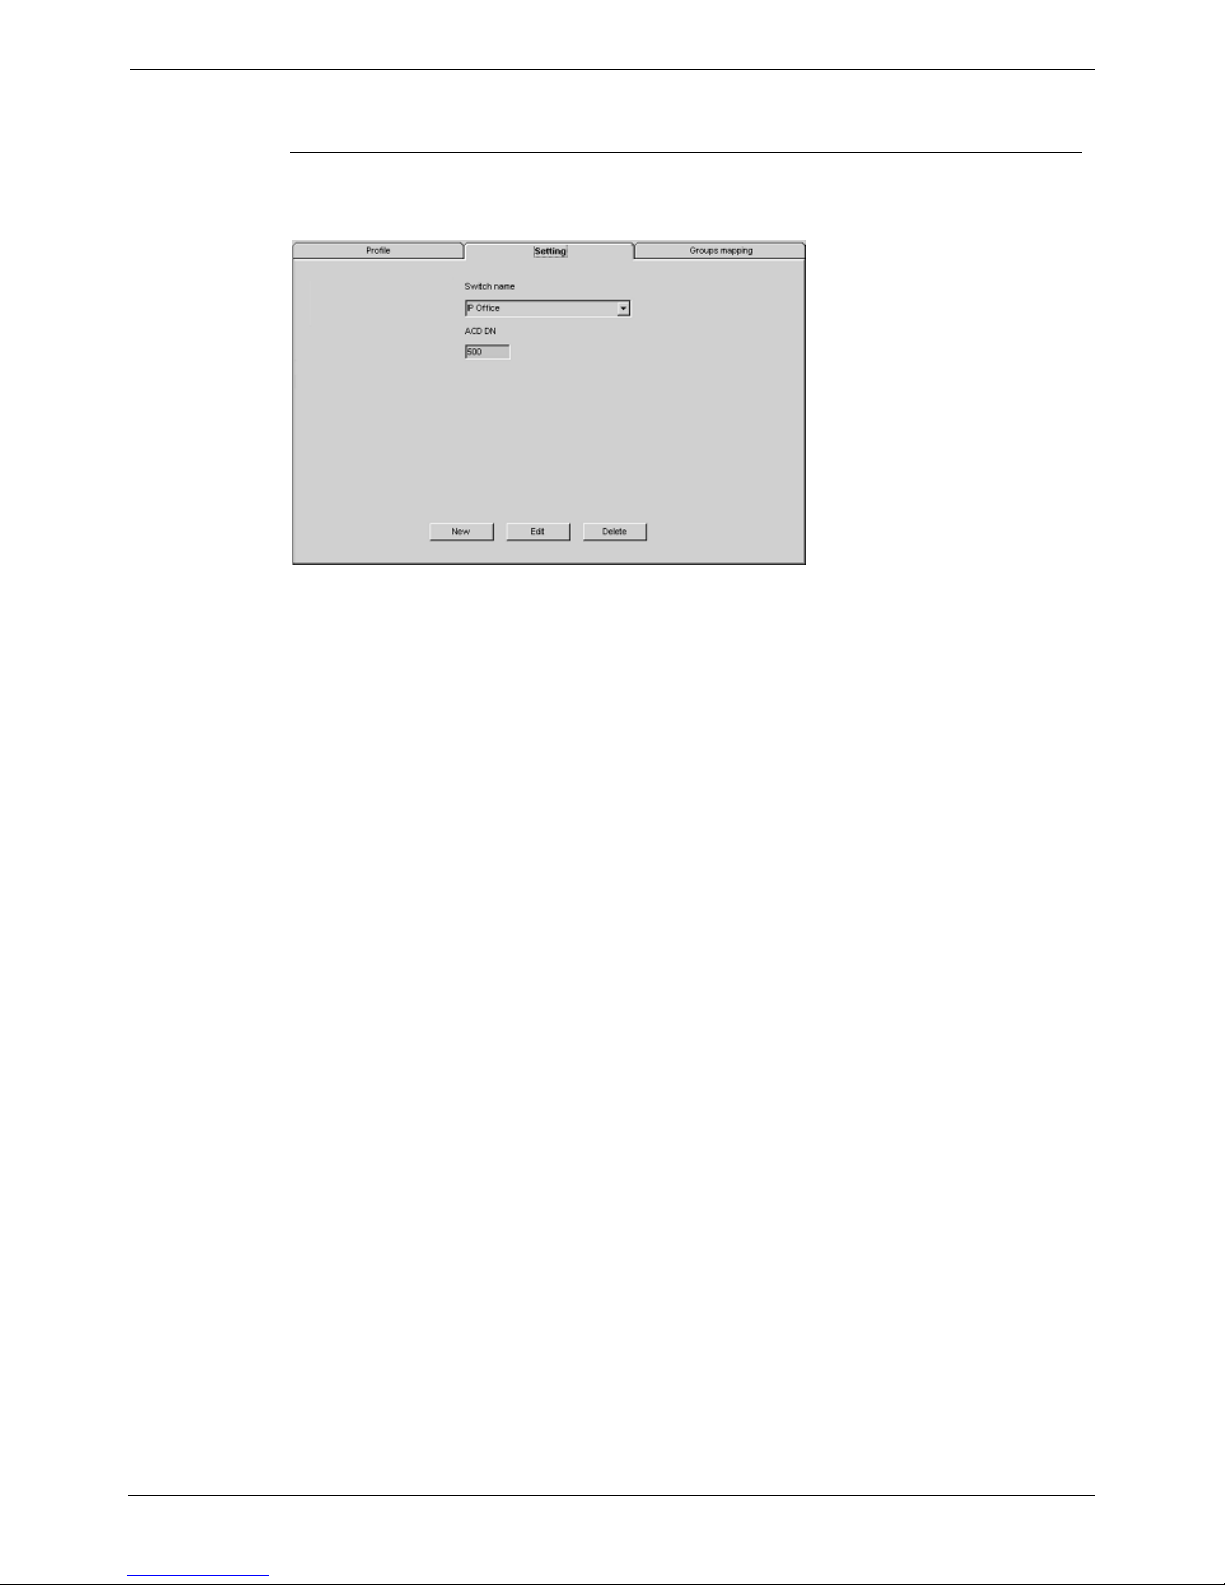
Telephone Settings
The defaults (as set during installation of the Multimedia Module) are shown. To
change theses default settings, click either Edit or New.
1. Enter the Switch Name.
2. Enter the ACD: the Automatic Call Distribution Number.
3. Add the CDN: Control Directory Number (if the telephone switch requires).
4. Click Add. The new queue will be added to the Multimedia Queue List.
Note: The ACD numbers are switch dependent variables. Consult with
whoever is responsible for installing, programming or maintaining the
telephony platform or enter a valid extension if known.
Page 16 - Resource Manager User's Guide MultiMedia Module Administrator's Manual
Multimedia Queue Administration 40DHB0002USEB – Issue 1a (05/29/2003)
Resource Manager User's Guide Multimedia Queue Administration - Page 17
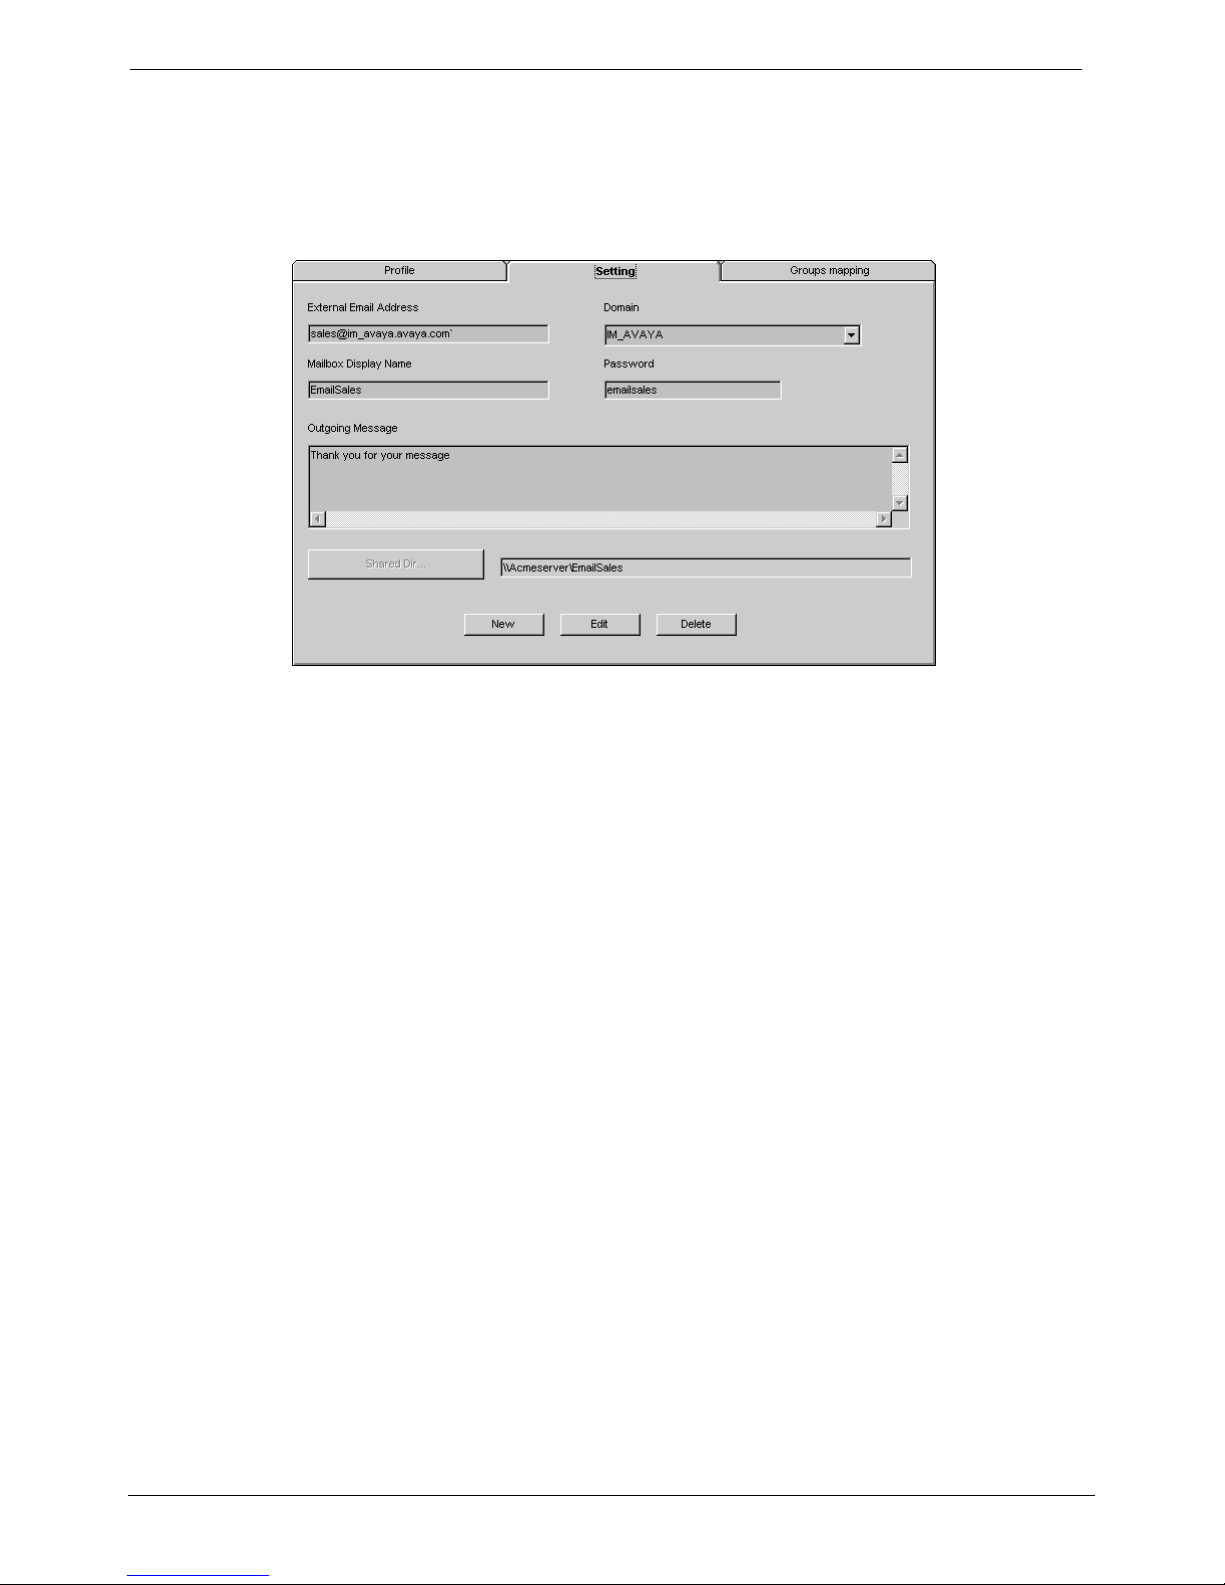
E-Mail Settings
Setting up an e-mail queue requires that an external e-mail address be created
as a virtual user. Before entering the required information in the settings fields,
you must go to the User Manager in NT and create a new user and mailbox.
Once that step is completed, you may enter the external e-mail address,
Display Name and PW.
Note: Before defining the settings for e-mail you must create a User Mailbox
and Profile, see page 26. Also refer to the separate MultiMedia Module
Installation Manual for details.
1. Enter the external e-mail Address
2. Enter the Display Name as it appears in
MS/Exchange/Recipients/Properties/General Display
3. Enter Password: Sets the host password. (User password in the General
Tab)
4. The Domain is automatically inserted (the currently synchronized Domain)
5. Enter an Outgoing Message. Type in a message, which will confirm receipt
of the e-mail
6. Click the Shared Directory button.
7. A pop up window “Browse for Folder” appears.
8. Select a folder to use as the shared directory and click OK.
Note: Confirm that each workstation’s shared directory contents are the
same for all workgroup members. The shared directory should be
selected from Network Neighbourhood.
9. Click Add. The new queue will be added to the Multimedia Queue List.
Note: Refer to the Rules Wizard User’s Guide (see page 52) for applying
Outlook Inbox Assistant capability for enhanced e-mail routing and
auto-reply.
MultiMedia Module Administrator's Manual Resource Manager User's Guide - Page 17
40DHB0002USEB – Issue 1a (05/29/2003) Multimedia Queue Administration
Page 18 - Multimedia Queue Administration Resource Manager User's Guide
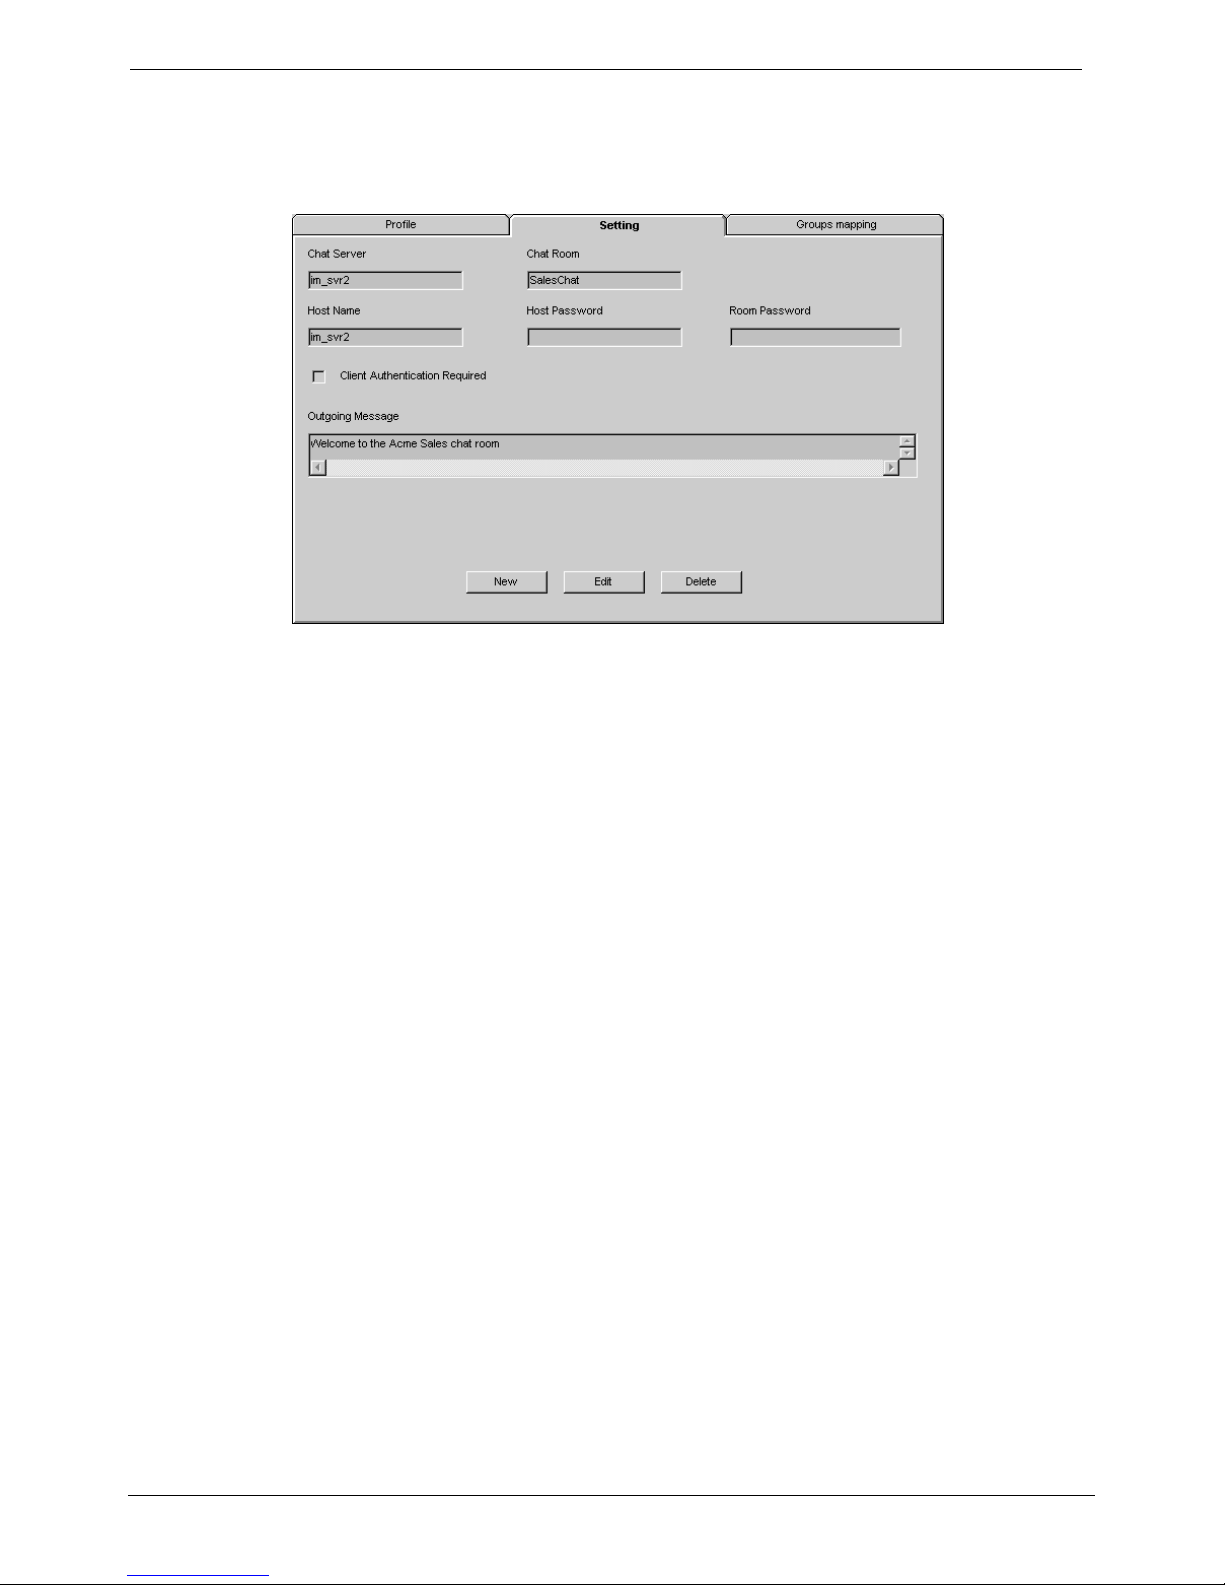
Chat Settings
The name of the Chat Server is automatically inserted from the name defined
as the Chat Server that has been defined in the iServer Setting.
Note: Do not put any space in fields.
1. Enter the Chat Room: The name of the chat room.
2. Enter the Host Name: The name of the server that hosts the MS Chat
service.
3. Enter the Host Password : The password for the host named above.
4. Add Client Authentication Required: If this box is checked, the client is
required to enter a password before being let in to the chat room.
5. Enter Room Password: Enter client password if Authentication box is
checked.
6. Enter an Outgoing Message: Type in a courtesy message that will be
displayed to the sender if all users are busy when a client is requesting a
chat.
7. Click Add. The new queue will be added to the Multimedia Queue List.
Page 18 - Resource Manager User's Guide MultiMedia Module Administrator's Manual
Multimedia Queue Administration 40DHB0002USEB – Issue 1a (05/29/2003)
Resource Manager User's Guide Multimedia Queue Administration - Page 19
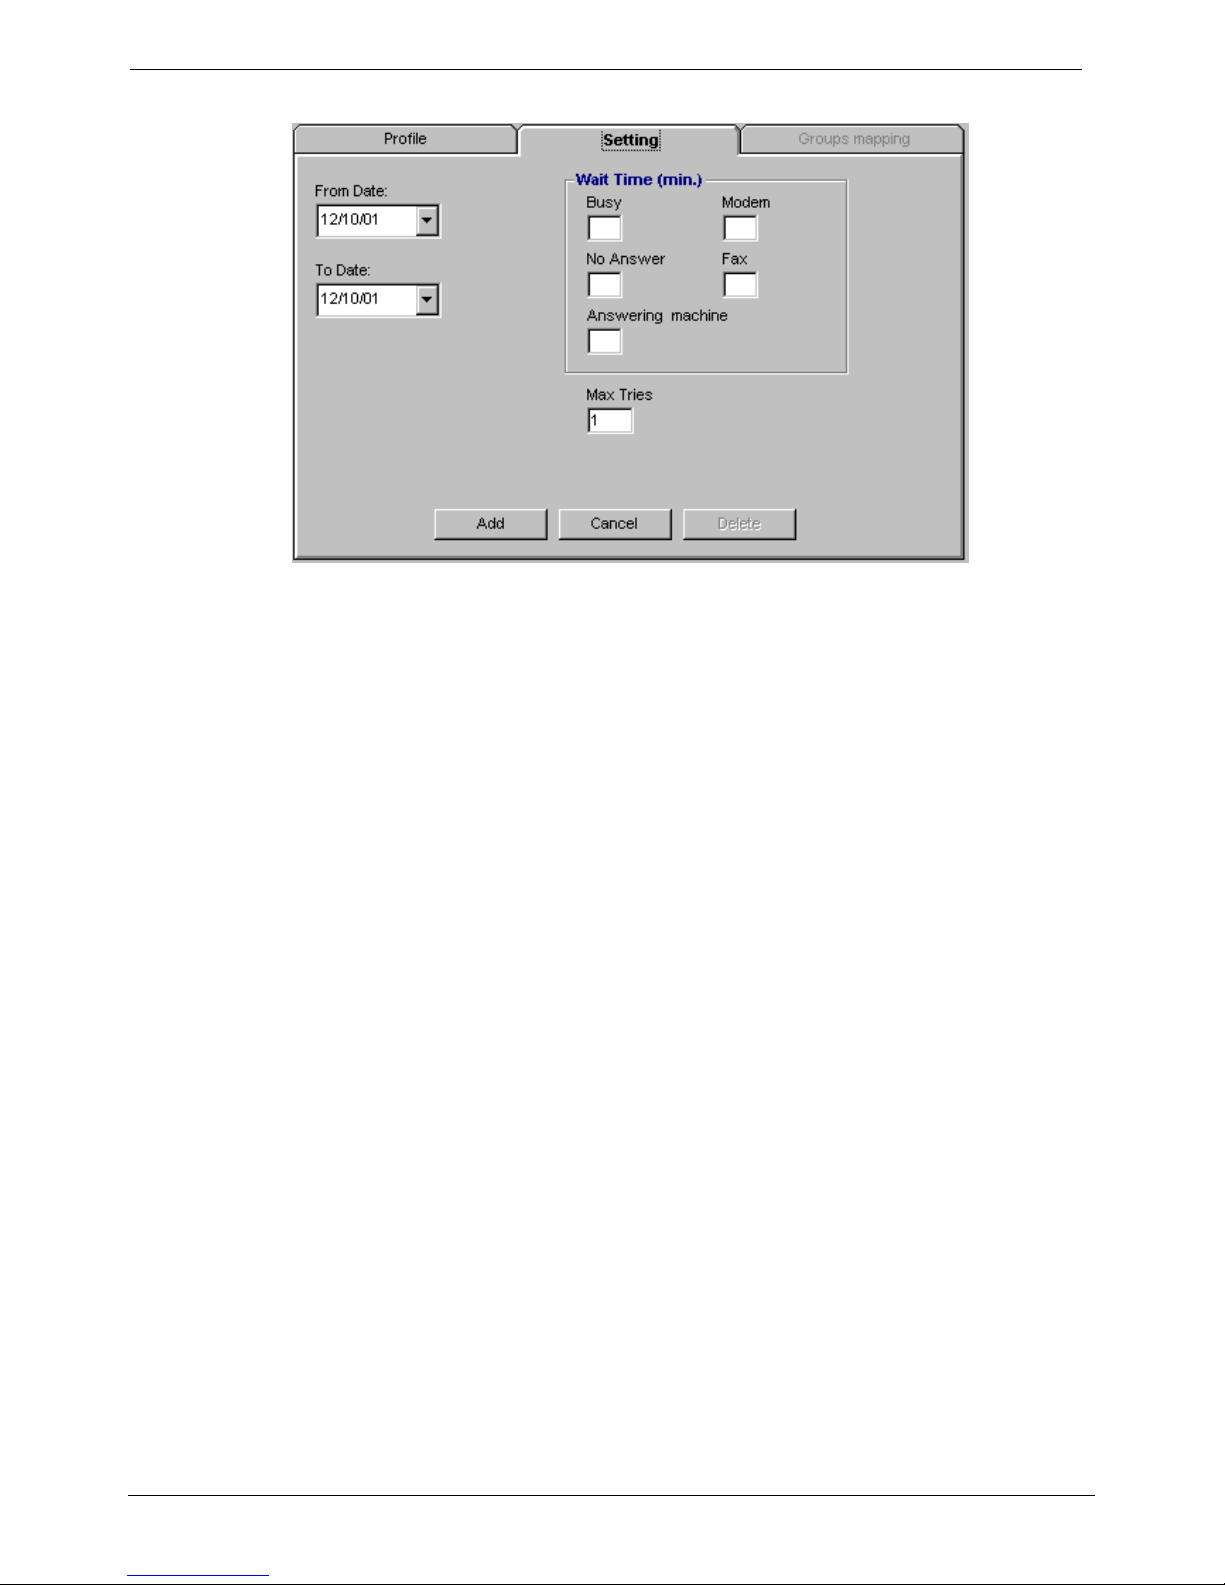
Proactive Settings
1. Enter the From Date: The date the Proactive Campaign is to commence.
2. Enter the To Date: The date the Proactive is scheduled to terminate.
3. Enter Wait Time (Min): Busy, No Answer, Modem , Fax and Answering
Machine. These Interaction Result codes set the thresholds for automatic
redialing for each outcome.
4. Enter Max Tries: Denotes the number of times the system will re-offer a
proactive record where the Busy, No Answer, Modem, Fax or Answering
Interaction Result has been accessed by the iContact user. Once the Max
Tries threshold has been reached, the call will be cancelled.
5. Click Add.
Note: The default status of Proactive queues is Stopped. After you have
created your Draft list and attached it to the queue in the Proactive List
Manager, you must change the status to Start.
MultiMedia Module Administrator's Manual Resource Manager User's Guide - Page 19
40DHB0002USEB – Issue 1a (05/29/2003) Multimedia Queue Administration
Page 20 - Multimedia Queue Administration Resource Manager User's Guide
Stage 3 – Group Mapping
When you have completed the Queue Profile and Settings you can map the
queues to one or more Groups. You may edit Group Mapping at any time to add
or delete Groups assigned to the queue.
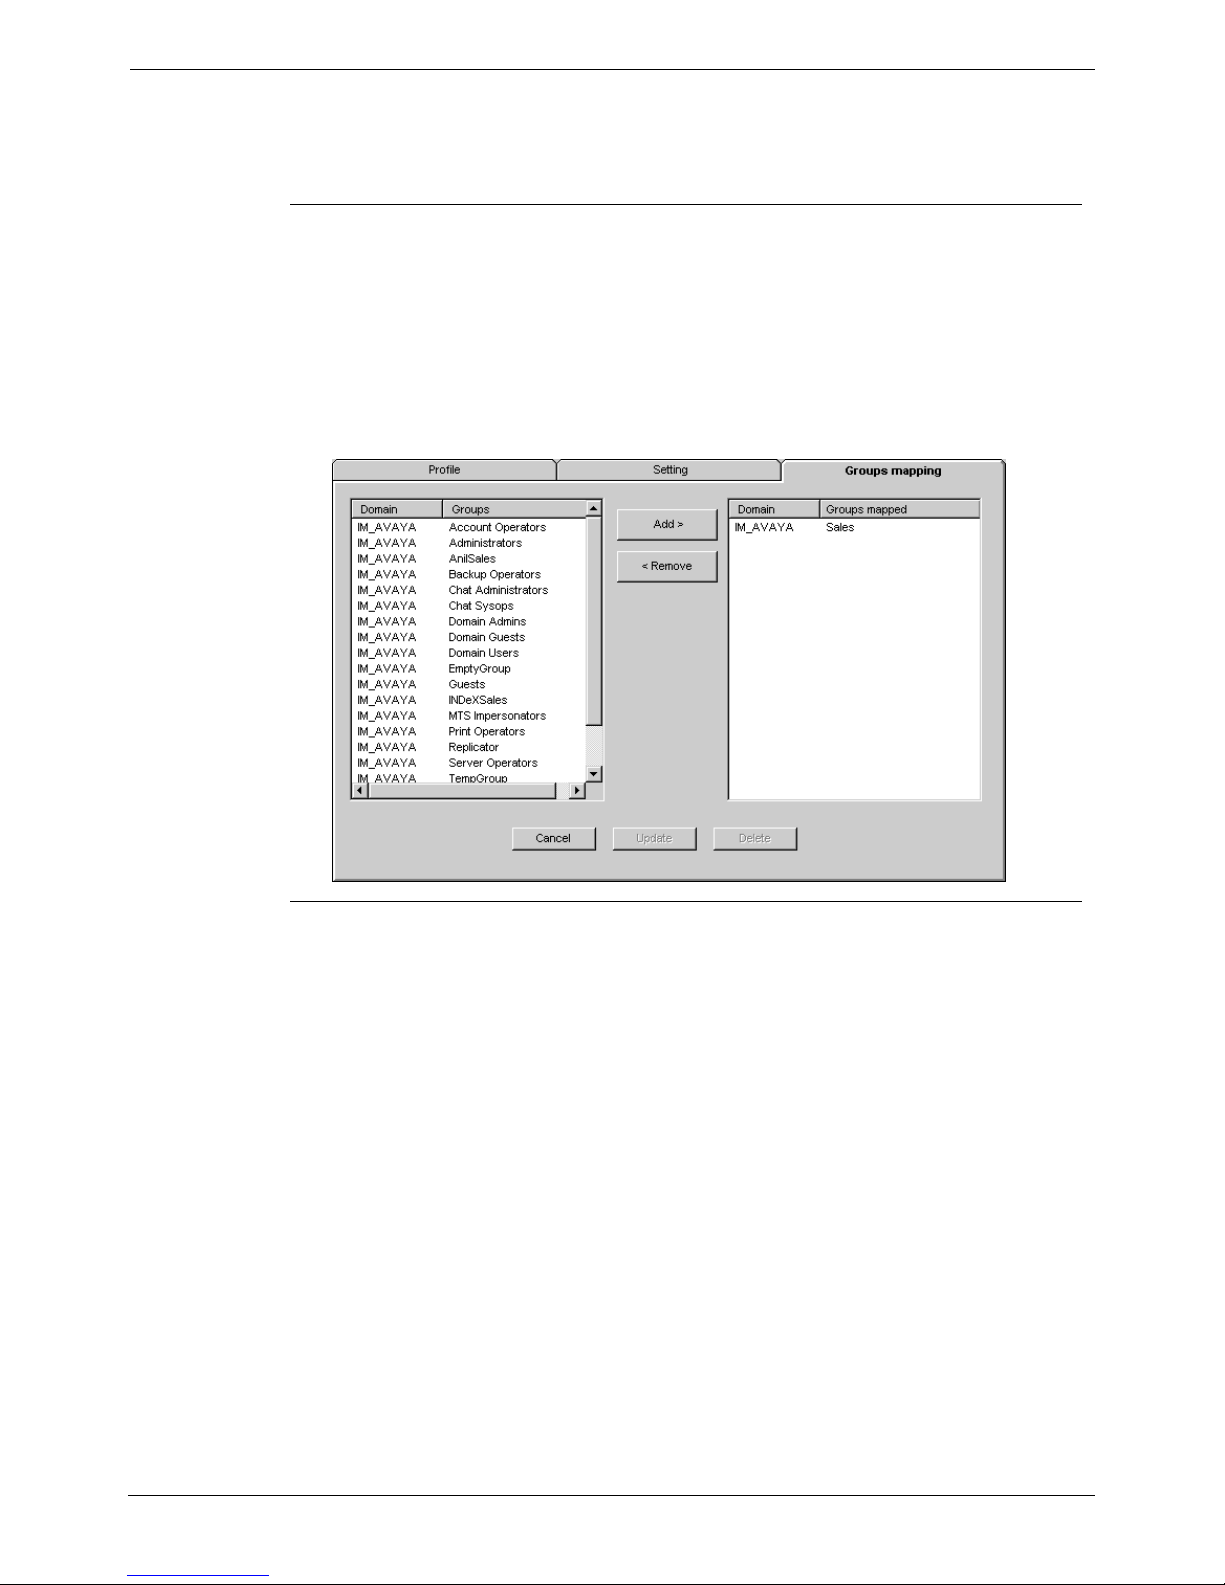
Viewing Current Group Mapping
To view Groups currently mapped to a Multimedia Queue, you can view current
mappings in the Multimedia Queue Mapping Tab.
1. Double click Multimedia Queues from the Vertical Icon Bar or Tree.
2. Select the Multimedia Queue to be viewed.
3. Select the Group mapping tab. A dialog box appears containing list of
available Groups in the Groups List. The Groups that are currently mapped
to that queue are listed in the Groups Mapped List.
Adding and Removing a Group to a Multimedia Queue
1. Select the Groups Mapping tab.
2. Click Edit.
3. Select a Group from the Domain-Groups list. Click the Add > button to add
a group.
4. Click the Remove < button to remove a group.
5. Click the Update button when finished.
Page 20 - Resource Manager User's Guide MultiMedia Module Administrator's Manual
Multimedia Queue Administration 40DHB0002USEB – Issue 1a (05/29/2003)
Resource Manager User's Guide Interaction Result Administration - Page 21
Interaction Result Administration
Before completing any interaction in iContact, the User must provide input
regarding the end result of the contact or contact attempt. Interaction Results
can be associated with a single media type or with all media types. There are
Interaction Results that have been configured in the system specific to
telephony. This section provides information on how to add, edit Interaction
Results and how to delete those that you have created.
Viewing Current Interaction Results
1. Double click on Interaction Results Tree.
2. Select an Interaction Result from the List or the Tree.
Adding a New Interaction Result
A new Interaction Result can be added in one of two ways:
1. Either, click New on the Resource Manager menu (shown above)
Or
From the File menu, click New Interaction Result.
2. Enter a brief description of the result in the Description text box.
3. Select the Multimedia Queue Type from the drop-down list.
4. After completing the form, click Add.
Editing an Interaction Result
1. Select the Interaction Result you want to edit.
2. Click the Edit button.
3. Enter changes and click Update
Note: Predefined Telephone Interaction Codes are protected and cannot be
deleted.
Deleting an Interaction Result
1. Select the Interaction Result you want to delete.
2. Click the Delete button.
3. A pop-up menu will ask whether you want to continue to delete the
Interaction Result. Click Yes.
4. Click Yes again. The Interaction Result will disappear from the lists.
Note: Predefined Telephone Interaction codes are protected and cannot be
deleted.
MultiMedia Module Administrator's Manual Resource Manager User's Guide - Page 21
40DHB0002USEB – Issue 1a (05/29/2003) Interaction Result Administration
Page 22 - Domain Administration Resource Manager User's Guide
Domain Administration
The Domain Administration Module provides the administrator with information
regarding the human resources assigned to the MultiMedia Module Server. All
Users are assigned to Groups as part of their setup in Windows 2000/NT.
These Group assignments provide the basis for assigning contact media
handling duties.
Viewing Group Profiles
Users are assigned to Groups in Windows. Groups are assigned to Media
queues in Resource Manager. To view the current mapping:
1. Double Click the Domains icon or click (+) beside the Domains icon to open
the Tree View.
2. Click the (+) sign beside or double click the Domain you wish to view. The
Group Icon and User Icons will appear.
3. Double click the Group icon. Groups and users in the synchronized
domains will be available. The Users within that Group appear in the Tree
View. In the Group List Window the Group ID, Name, and Domain are
displayed.
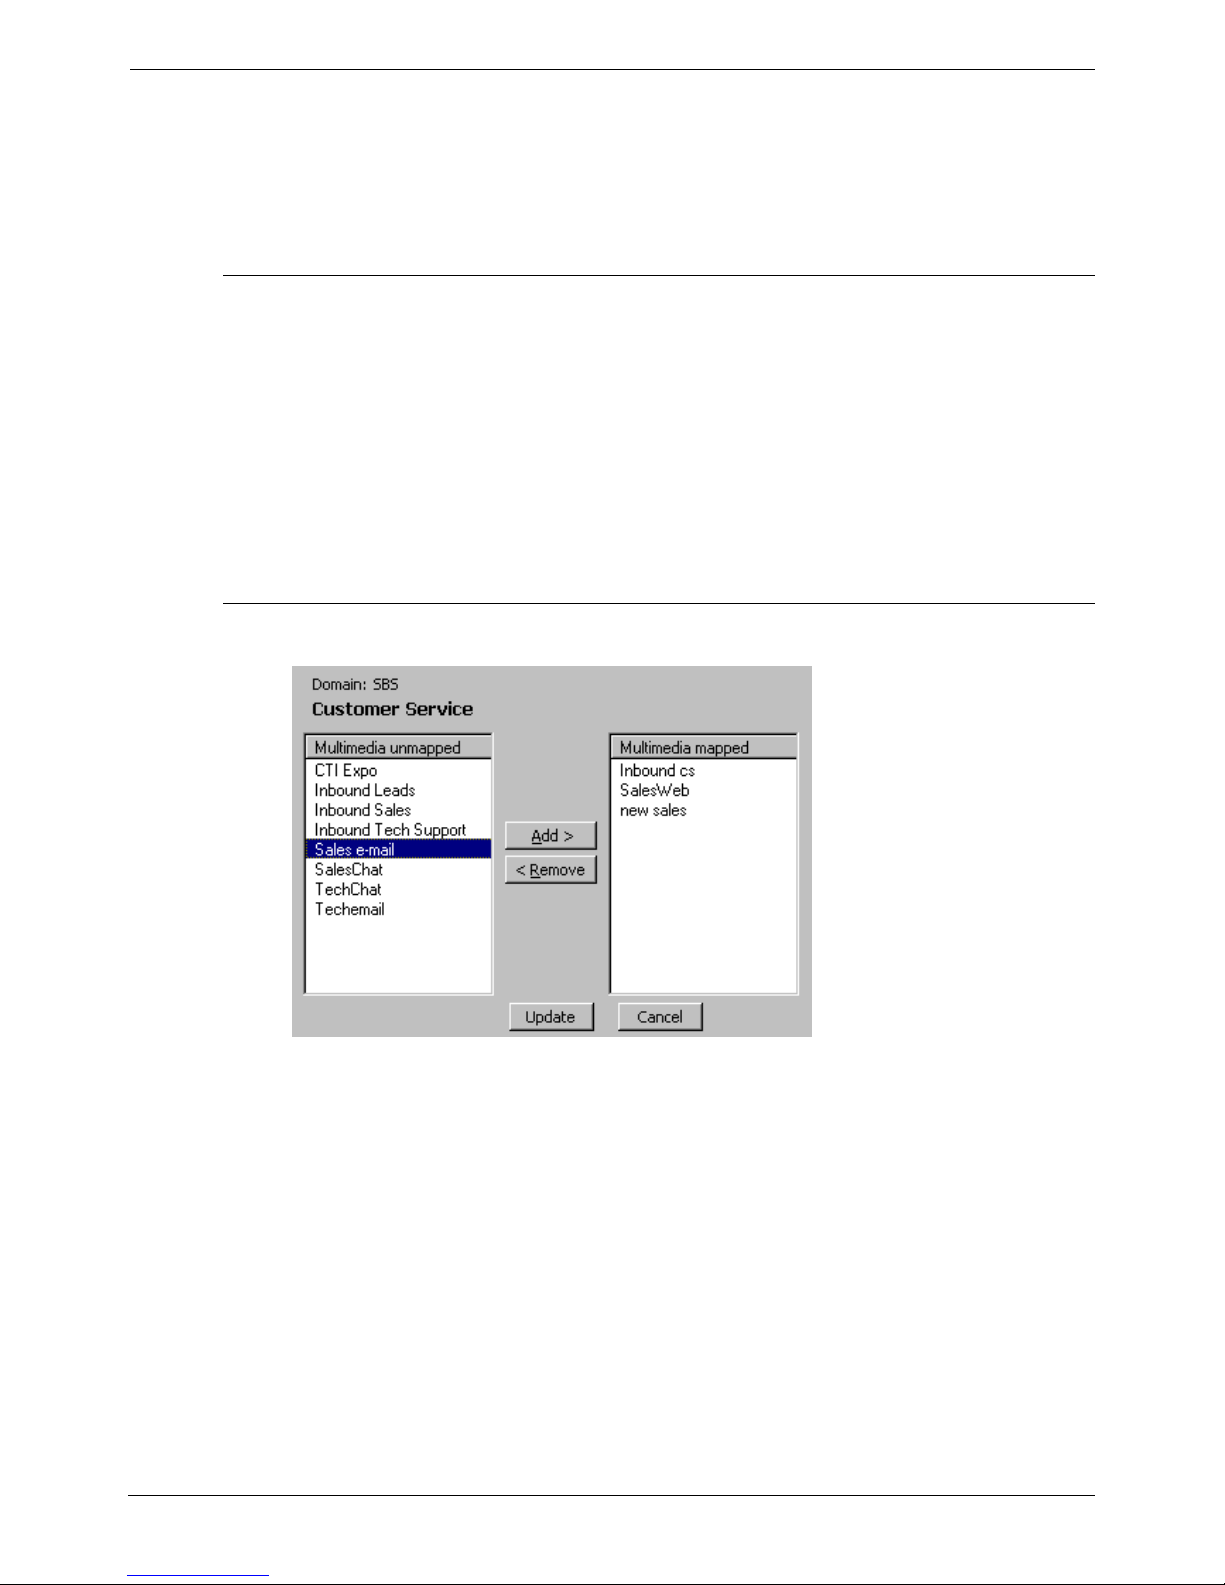
Adding, Editing, Removing Group Multimedia Mapping
1. Select the Group Icon from the Tree to open the Group List Window and
Group Tree. The Group Window will display all Groups belonging to the
Domain.
2. To add a Group to a Queue, click Add arrow.
3. To remove a Queue from a Group, click Remove arrow.
4. Click Update.
Page 22 - Resource Manager User's Guide MultiMedia Module Administrator's Manual
Domain Administration 40DHB0002USEB – Issue 1a (05/29/2003)
Resource Manager User's Guide Domain Administration - Page 23
Viewing User Profiles
1. Click the (+) sign beside or double click the Domain you wish to view. The
Group Icon and User Icons will appear.
2. Double click the User icon. The Users within that Domain appear
simultaneously in the Tree View and in the User List Window. The User’s
ID, Telephone Login (if applicable), name, full name and account status are
displayed.
3. Users who have been disabled in NT will be designated by the number 1
under the Account Status field and identified by the label “Account
Disabled”. Disabled Users appear as blue in the User tree.
4. Users who have been deleted in NT will be designated by the number 2
under the Account Status field and identified by the label “Deleted”. Deleted
Users appear as red in the User tree.
5. To select another User, highlight the User’s name in the User List or click
the User’s icon.
MultiMedia Module Administrator's Manual Resource Manager User's Guide - Page 23
40DHB0002USEB – Issue 1a (05/29/2003) Domain Administration
Page 24 - Domain Administration Resource Manager User's Guide
Setting User Properties
User Properties provides a range of flexibility in determining how Users interact
with their iContact interface. Features can be applied to individual Users or to
entire Groups. This facilitates individualization in Properties assignment
according to job function or contact media responsibility.
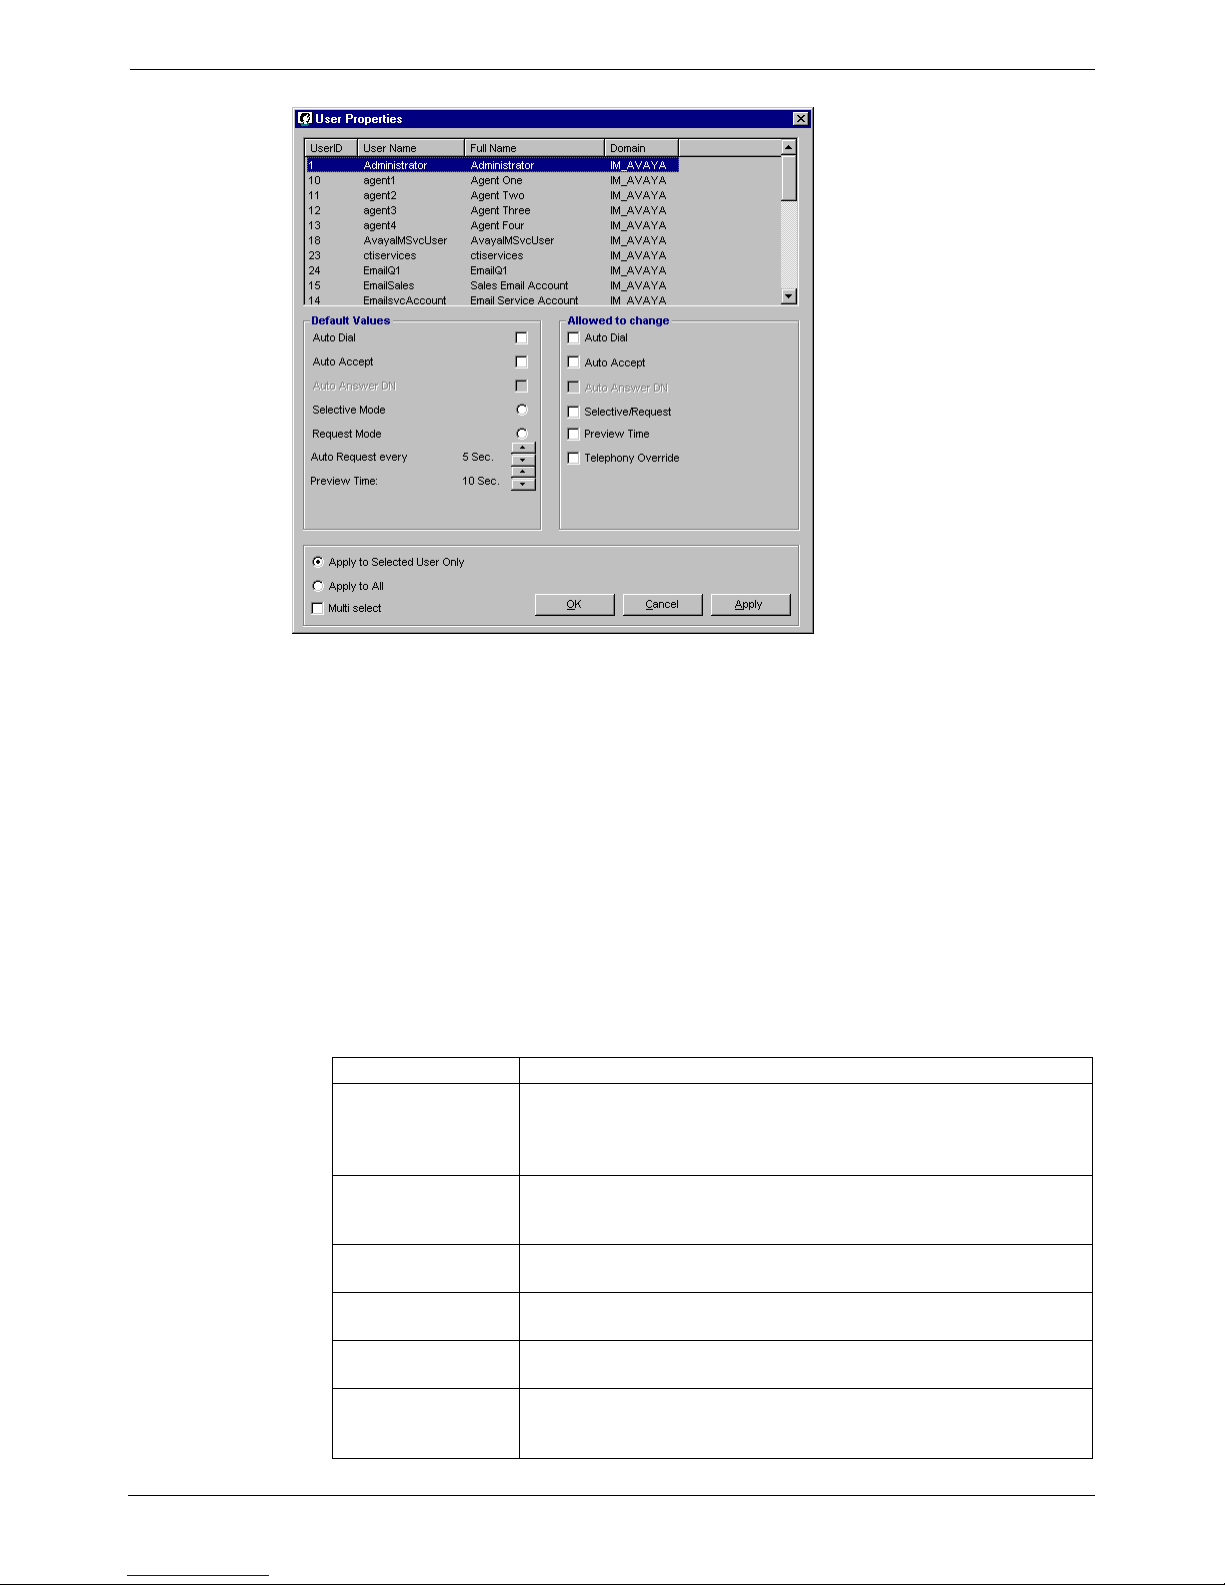
1. Select the User whose settings you wish to view from the list by highlighting
the name of the User in the User Window List Box or from the User Tree.
2. Select User Properties from the Preferences Menu or click the Properties
button on the User Window.
3. Each Property’s check box indicates the current setting for that User in the
Default Value section. If the Default Value can be changed by the User, a
check mark appears beside it in the Allowed to Change section.
4. To make changes to the setup of an individual user, check the Apply to
Selected User Only radio button. Or select the Apply to All or the Multi
select radio button to change setup for an group of users.
5. Click Apply and then OK.
Property Description/Function
Enable AutoDial The system auto-dials a phone number for the contact that the
User has selected. The phone number appears in the dial box on
the toolbar. If this preference is not checked, a manual click of the
Dial button is required to place an outbound call.
Auto Accept Media In Auto Accept mode, an audible tone signals connection to
outside caller. If this box is not checked, incoming calls are
answered by clicking the Answer icon.
Auto Answer DN Applies Auto Answer/Non-Auto Answer rules to contacts on a
secondary incoming telephone line.
Selective Mode Allows the user to review requests from any Media queue before
selecting a contact for treatment.
Request Mode Requires the user to respond to the contact that is presented by
the system.
Preview Time Displays the time permitted to review a contact request before
accepting it. If enabled, the user can increase or decrease the
Preview Time interval.
Page 24 - Resource Manager User's Guide MultiMedia Module Administrator's Manual
Domain Administration 40DHB0002USEB – Issue 1a (05/29/2003)
Resource Manager User's Guide Domain Administration - Page 25
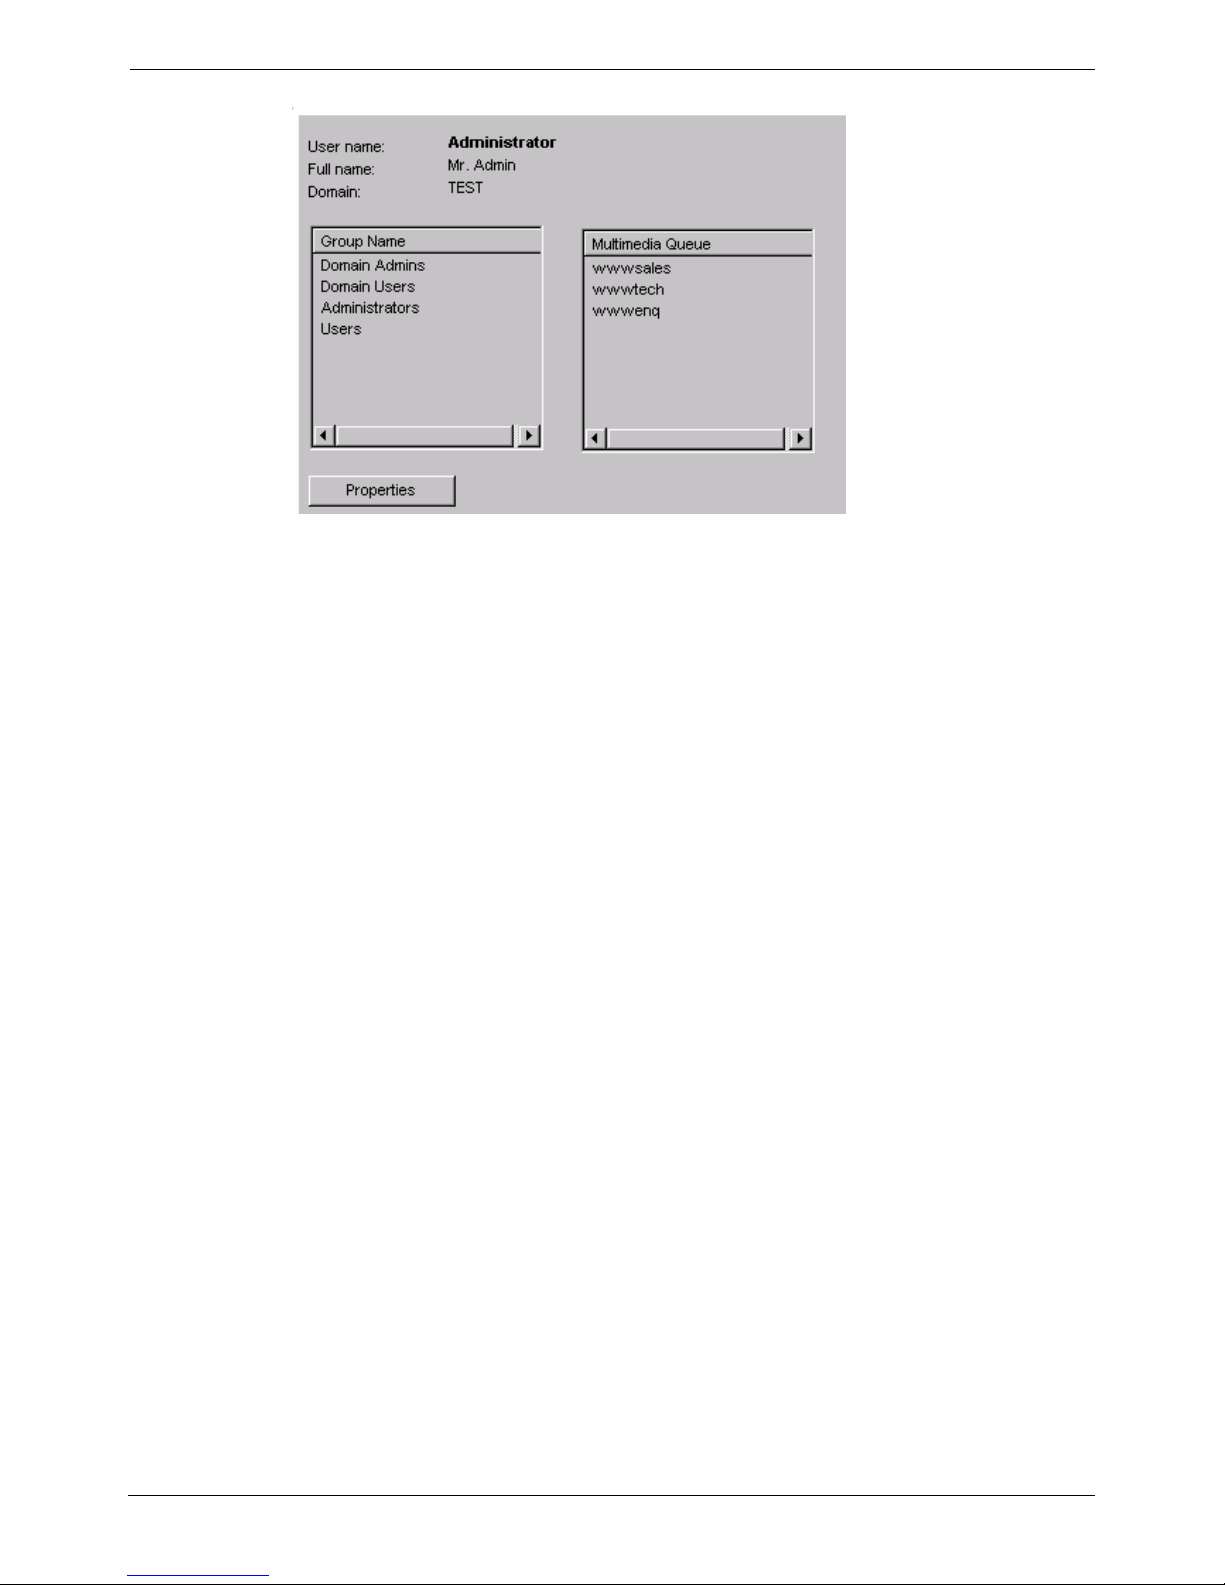
Viewing a User’s Group/Multimedia Assignments
1. Open the Domain Tree and select your Domain Name.
2. Open the Domain Tree selected.
3. Open the User Tree and select the user you want to view.
4. Click on user icon to view Group/Media Assignments of the selected user. A
text box will appear that lists the Groups the highlighted User belongs to on
the left and the Media queues to which the Groups are mapped, on the
right.
MultiMedia Module Administrator's Manual Resource Manager User's Guide - Page 25
40DHB0002USEB – Issue 1a (05/29/2003) Domain Administration

Page 26 - Configuring New User and Mailbox Setup Resource Manager User's Guide
Configuring New User and Mailbox Setup
When creating a new e-mail queue it is necessary to set up the queue as a user
in NT. In order to be able to receive an e-mail and route it to iContact, iEmail
needs a user account in Exchange. This section provides directions for
configuring a new user in NT.
User Setup
1. Return to the MS Server(s) where MS Exchange is installed.
2. Log in as Administrator.
3. To start Mailbox Setup, from the task bar Click Programs | Administrative
Tools | User Manager for Domains.
4. Select New User from User on menu bar.
5. Enter the Username. The name should be the same as the name of the
email queue, for example, “marketing email”. An optional Full Name may
also be entered.
6. Enter the Password.
7. Confirm Password.
8. Check the “User Cannot Change Password” option.
9. Check the “Password Never Expires” option.
10. Click Add.
Page 26 - Resource Manager User's Guide MultiMedia Module Administrator's Manual
Configuring New User and Mailbox Setup 40DHB0002USEB – Issue 1a (05/29/2003)
 Loading...