

Page 1

Title page
Nortel Communication Server 1000
IP Phone 1165E
Call Center User Guide
Page 2

Page 3

Revision history
April 2010
Standard 01.02. This document is up-issued to support
Communication Server 1000 Release 5.5 and
CS 1000 Release 6.0 with UNIStim 4.1.
October 2009
Standard 01.01. This document issued to support the IP Phone
1165E.
Revision history
3
Page 4

Revision history
4
Page 5

Contents
Basic features . . . . . . . . . . . . . . . . . . . . . . . . . . . . . . . . . . . . . . 7
Telephone controls . . . . . . . . . . . . . . . . . . . . . . . . . . . . . . . . . 10
Telephone display . . . . . . . . . . . . . . . . . . . . . . . . . . . . . . . . . 15
USB support . . . . . . . . . . . . . . . . . . . . . . . . . . . . . . . . . . . . . . 17
Call features and Flexible Feature Codes . . . . . . . . . . . . . . . 18
Security features . . . . . . . . . . . . . . . . . . . . . . . . . . . . . . . . . . . 18
Encrypted calling . . . . . . . . . . . . . . . . . . . . . . . . . . . . . . . 18
Station Control Password (SCPW) . . . . . . . . . . . . . . . . . 18
Logging in without Agent ID (for basic ACD) . . . . . . . . . . . . . 21
Logging in with Agent ID (for Basic
ACD or Contact Center Manager) . . . . . . . . . . . . . . . . . . . . . 21
Logging in using Multiple Queue
Assignments (for Basic ACD) . . . . . . . . . . . . . . . . . . . . . . . . . 23
Logging in with an Agent ID and MQA login options . . . . 23
Using Default Login . . . . . . . . . . . . . . . . . . . . . . . . . . . . . 25
Contents
Logging out . . . . . . . . . . . . . . . . . . . . . . . . . . . . . . . . . . . . . . . 26
Answering ACD calls . . . . . . . . . . . . . . . . . . . . . . . . . . . . . . . 27
Using Call Forcing . . . . . . . . . . . . . . . . . . . . . . . . . . . . . . . . . 28
Using Return to Queue on No Answer . . . . . . . . . . . . . . . . . . 29
Using Activity code . . . . . . . . . . . . . . . . . . . . . . . . . . . . . . . . . 29
Using Emergency . . . . . . . . . . . . . . . . . . . . . . . . . . . . . . . . . . 30
Using Not Ready . . . . . . . . . . . . . . . . . . . . . . . . . . . . . . . . . . 31
Placing or answering non-ACD calls . . . . . . . . . . . . . . . . . . . 31
Contacting your supervisor . . . . . . . . . . . . . . . . . . . . . . . . . . . 32
Using Answer Agent . . . . . . . . . . . . . . . . . . . . . . . . . . . . . . . . 35
Using the Agent key . . . . . . . . . . . . . . . . . . . . . . . . . . . . . . . . 36
Using Answer Emergency . . . . . . . . . . . . . . . . . . . . . . . . . . . 36
5
Page 6

Contents
Using Call Agent . . . . . . . . . . . . . . . . . . . . . . . . . . . . . . . . . . . 37
Using Interflow . . . . . . . . . . . . . . . . . . . . . . . . . . . . . . . . . . . . 38
Using Night Service . . . . . . . . . . . . . . . . . . . . . . . . . . . . . . . . 38
Observing a call . . . . . . . . . . . . . . . . . . . . . . . . . . . . . . . . . . . 40
Displaying the queue . . . . . . . . . . . . . . . . . . . . . . . . . . . . . . . 41
Displaying agent status . . . . . . . . . . . . . . . . . . . . . . . . . . . . . 43
6
Page 7

About the Nortel IP Phone 1165E
About the Nortel IP Phone 1165E
The IP Phone 1165E builds on the award-winning IP Phone 1100 Series
industrial design and offers a beautiful high resolution color display which
includes new graphical user interface elements that vastly improve the
quality of the user experience. The IP Phone 1165E provides easy
access to multiple lines and call processing features. It supports
converged (voice and data) application s t hr ou gh Exte rn a l Applic atio n
Server APIs to provide productivity enhancing applications and to enr ich
user experience with advanced multimedia interaction. (see Note 1).
Users can fully experience the display capabilities by personalizing the
background image of the IP Phone 1165E display, and loading digital
pictures into the IP Phone to view a Digital Pictu re Slideshow when the IP
Phone is idle. The audio experience is enhanced through engineered
audio tuning, and supports wideband (see Note 2) with a newly-stylized
handset that has been softly contoured for additional comfort when using
the handset.
Note 1: This feature requires an External Application Server.
Note 2: Wideband has dependencies on Nortel Communication
Platform support, including Communication Server 1000 and is
minimum-release dependent.
Your Nortel IP Phone 1165E brings voice and data to the desktop by
connecting directly to a Local Area Network (LAN) thro ug h an Ethe rne t
connection.
For more information about the IP Phone 1165E, see the IP Phone
1165E User Guide (NN43101-102).
Basic features
Your IP Phone 1165E supports the following features:
• up to sixteen line/feature keys with indicators, using the Shift feature
• four soft keys to provide easy access to features and call control
• high resolution color display
7
Page 8

About the Nortel IP Phone 1165E
• high-quality handsfree speakerphone
• wideband audio support for handset, headset, speaker, and
handsfree microphone
• volume control keys for adjusting ringer, handsfree, handset, and
headset volume
• seven specialized feature keys
—Quit
— Directory
— Message/Inbox
— Shift/Outbox
— Services
—Copy
— Expand
• five call-handling keys:
—Mute
— Handsfree
— Goodbye
— Headset
—Hold
• two Gigabit Ethernet ports–for LAN and PC connections
• integrated headset support for wired and wireless options including
USB and Bluetooth Wireless Technology
• IEEE 802.3af Class 2 PoE or local AC power options
• Hearing aid compatibility
• USB port for connecting USB mouse, USB keyboard, USB headset,
USB flash drive and powered hubs
• USB access control (USB lock) that controls how the USB port on the
IP Phone 1165E can be used
8
Page 9

About the Nortel IP Phone 1165E
• support for Graphical External Application Server (GXAS) protocol
that enables External Application Server APIs to provide feature
functionality
• support for IP Phone 1100 Series Expansion Module to add keys
For information about using the Expansion Module, see the Expansion
Module for IP Phone 1100 Series User Guide (NN43130-101).
9
Page 10

About the Nortel IP Phone 1165E
Telephone controls
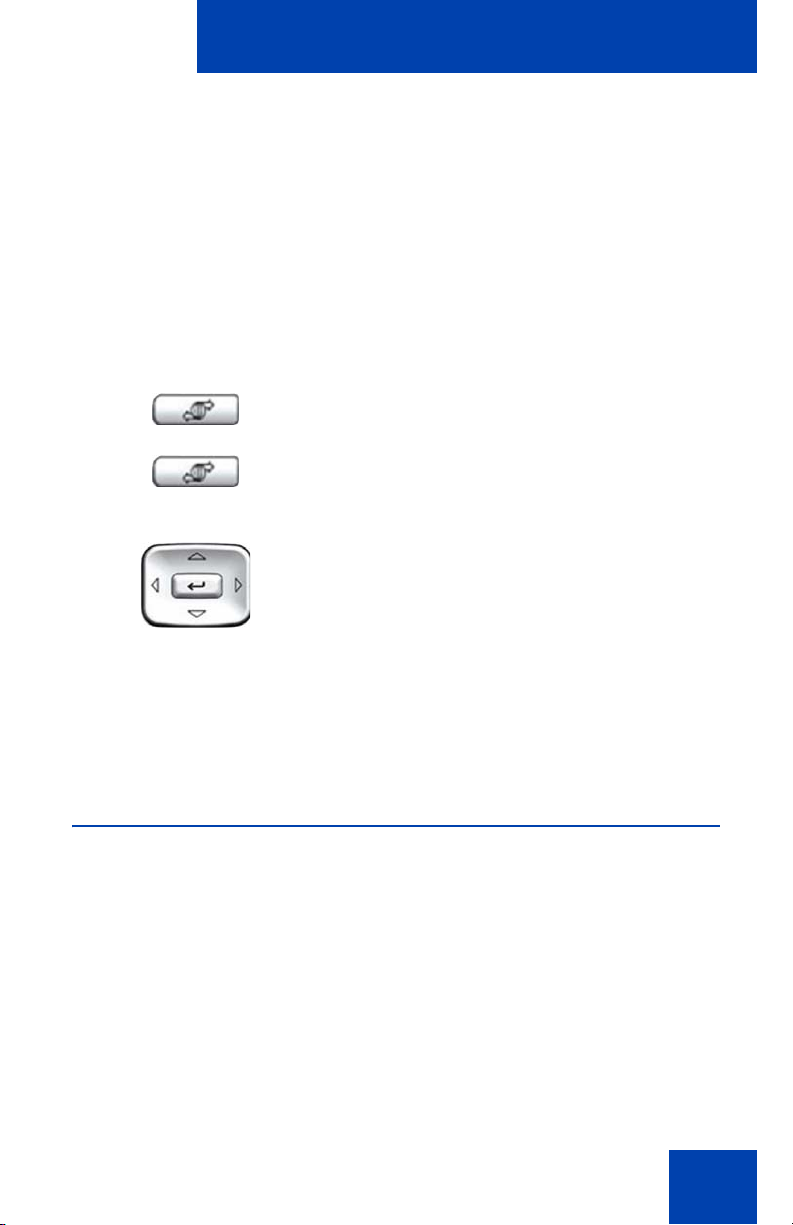
Figure 1 on page 10 shows the IP Phone 1165E.
Figure 1: IP Phone 1165E
This section describes the controls on your IP Phone 1165E.
Context-sensitive soft keys are located
below the display area. The LCD label above
each key changes based on the active
feature. These keys are referred to as Soft
keys throughout this document.
When a triangle appears before a soft key
label the feature is active.
10
Page 11

About the Nortel IP Phone 1165E
Press the More... key to access the next layer
of soft keys (self-labeled).
The keys on either side of the LCD display
area are self-labeled line/programmable
feature keys, with labels on the LCD. These
keys also function as line (DN) keys. These
keys are referred to as Line/ feature keys
throughout the remainder of this guide .
A steady LCD icon beside a line (DN) key
indicates that the line is active. A flashing
LCD indicates the line is on hold or the
feature is being programmed.
A steady LCD icon beside a feature key
indicates that the feature is active. A flashing
LCD icon indicates that the feature is being
programmed.
(Volume +)
(Volume -)
(Mute)
Use the Volume control buttons to adjust the
volume of the ringer, handset, headset,
speaker, and the Handsfree feature. Press
the top button to increase the volume, and
press the bottom button to decrease volume.
Press the Mute key to listen to the receiving
party without transmitting. Press the Mute key
again to return to two-way conversation. The
Mute key applies to handsfree, handset, and
headset microphones.
The Mute LED indicator, located on the Mute
key, flashes to indicate that the microphone is
muted.
11
Page 12

About the Nortel IP Phone 1165E
Press the Handsfree key to make or answer
(Handsfree)
a call using the two way speakerphone.
The Handsfree LED indicator, located on the
Handsfree key, lights to indicate when
handsfree is active.
Use the Navigation keys to scroll through
menus and lists appearing on the LCD display
screen.
Use Up and Down to scroll up and down in
lists.
Use the Enter key, at the center of the
Navigation key cluster, to confirm menu
selections.
In most menus, you can use the Enter key
instead of the Select soft key.
Press the Hold key to put an active call on
hold. Tap the flashing line key to return to the
(Hold)
caller on hold.
12
(Expand)
(Headset)
Use the Expand key to access applications
managed through an external server.
Note: This feature requires an Extern al
Application Server.
Press the Headset key to answer a call using
the headset or to switch a call from the
handset or handsfree to the headset.
The Headset LED indicator, located on the
Headset key, lights to indicate that the
headset is in use.
Page 13

(Headset)
(Headset)
(Goodbye)
About the Nortel IP Phone 1165E
Press the Headset key twice to open the
Bluetooth Setup menu.
If Bluetooth wireless technology is not
enabled on your phone, this menu is not
available.
Use the Goodbye key to terminate an active
call.
When a message is waiting, the red Visual
Alerter/Message Waiting indicator lights.
Also, when the ringer sounds, this indicator
flashes.
When your IP Phone 1165E firmware is being
updated, the blue Feature Status Lamp
indicator flashes.
(Copy)
(Quit)
Note: To find out if additional features are
supported for this lamp, contact your
system administrator.
Press the Copy key to copy entries to your
Personal Directory from other lists, such as
the Caller List, Redial List, and Corporate
Directory.
Press the Quit/Stop key to exit an active
menu or dialog. Pressing the Quit/Stop key
does not affect the status of active calls.
13
Page 14

About the Nortel IP Phone 1165E
Press the Shift/Outbox key to toggle
(Shift/Outbox)
between two feature key pages and to access
an additional six lines/features.
Note: This function is not available on all
phones; consult your system
administrator.
Press the Message/Inbox key to access your
(Msg/Inbox)
voice mailbox.
Note: This function is not available on all
phones; consult your system
administrator.
Press the Directory key to access directory
(Directory)
services.
Press the Services key, and use the
(Services)(Services)
navigation keys to access the following items:
• Telephone Options:
— Volume adjustment...
— Contrast adjustment
— Language...
— Date/Time
— Display diagnostics
— Local Dialpad Tone
— Set Info
— Diagnostics
— Call Log Options
— Ring type...
— Call Timer
— On hook default path
— Change Feature Key Label
— Name Display Format
— LiveDial Pad
14
Page 15
(Services)(Services)
(Services)(Services)
Navigation keys
About the Nortel IP Phone 1165E
• Password Admin:
— Station Control Password
The Password Admin menu is not
available on all IP Phone 1165E sets.
Consult your system administrator.
• Virtual Office Login and Virtual Office
Logout (if Virtual Office is configured)
Press the Services ke y to exit from any menu
or menu item.
Press the Services key twice to access the
Local Tools menu, and then use the Left /
Right navigation keys to access the following
items:
• Preferences
• Diagnostics
• Configuration
• Locks
If you attempt to access the Local Tools menu
and a dialog box appears prompting you for a
password, contact your system administrator.
Your system administrator can establish a
password for the Local Tools menu.
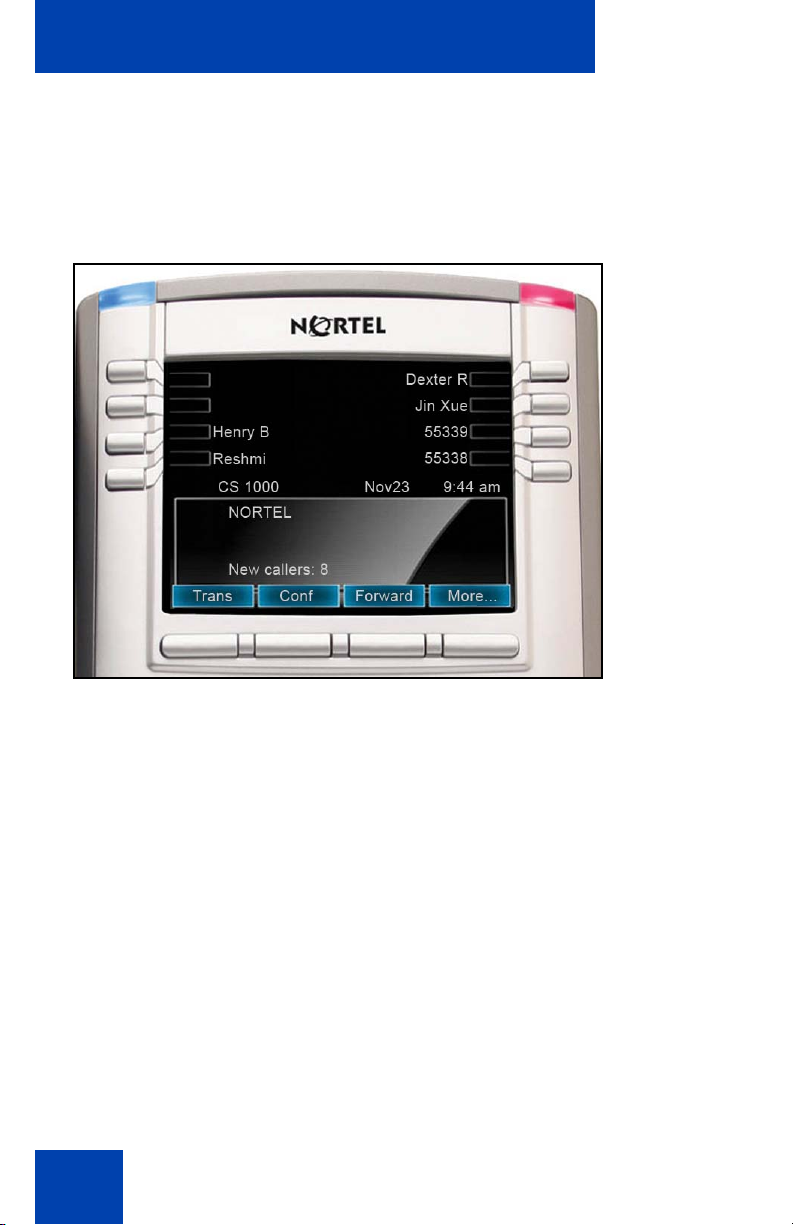
Telephone display
The IP Phone 1165E has a 4.1 inch (diagonal measured) color QVGA
TFT display, capable of displaying a QVGA 320 x 240 (H x W) image. The
graphics controller supports 24 bit color (16 million colors).
The IP Phone 1165E has three display areas:
• The upper display area provides labels for the eight line feature key
labels.
• The middle display area contains information for items such as caller
number, caller name, Call Timer, feature prompt strings, user-entered
digits, date and time information, and IP Phone information.
15
Page 16
About the Nortel IP Phone 1165E
• The lower display area provides labels for the four soft keys.
Following figure shows the IP Phone 1165E display area, including the
line/feature keys and soft keys.
Figure 2: IP Phone 1165E display area
Self-labeled line/programmable feature key labels appear beside the line
keys, and context-sensitive soft key labels appear directly above the soft
keys. Self-labeled means that the label next to the line/feature key is
presented from the call server automatically if a feature is programmed,
and can also be edited and changed by the user. Context-sensitive
means that the labels that appear above the soft keys present the
features that are available to the user at that time. The soft key labels
change depending on the active feature or the state of the call.
Self-labeled line/programmable feature keys are referred to as line/
feature keys and context sensitive soft keys are referred to as soft keys
throughout this document.
16
Page 17

About the Nortel IP Phone 1165E
Figure 3 on page 17 shows an idle LCD screen.
Figure 3: IP Phone 1165E LCD display screen
USB support
The IP Phone 1165E has a USB port for connecting a USB keyboard,
USB mouse, USB headset, and USB flash drive. The IP Phone 1165E
supports powered downstream 1.1-compliant USB hubs, including USB
2.0 hubs, if they offer USB 1.1-backwards compliancy. There are two
levels of power for the USB port.
• When you power the IP Phone 1165E through Ethernet POE, the IP
Phone 1165E provides up to 100 mA at 5 volts for the USB port.
• When you power the IP Phone 1165E through local AC powe r, the IP
Phone 1165E provides up to 500 mA at 5 volts on the USB port.
Note: Current limiting can obstruct the working of complex devices
such as USB keyboards with built-in hubs. If a hub is involved, use
external power.
You can plug a USB flash drive into the USB Port of the IP Phone 1165E
or on a powered hub connected to the IP Phone, and transfer file s to an d
from the IP Phone.
17
Page 18

About the Nortel IP Phone 1165E
Call features and Flexible Feature Codes
Some features are not available on all IP Phones. Call features and
Flexible Feature Codes (FFC) must be assigned to your IP Phone 1165E,
and supported by system software. Contact your system administrator to
configure these features and codes on your IP Phone 1165E.
Security features
The following security features are available on your IP Phone 1165E:
• Encrypted calling
• Station Control Password (SCPW)
Encrypted calling
Your IP Phone 1165E supports secure communication using SRTP
media encryption. If the feature is enabled, a security icon ( q) appears on
the screen when your call is secured using SRTP media encryption.
Contact your system administrator to find out if this feature is available for
your use.
Station Control Password (SCPW)
Your Station Control Password (SCPW) enables the following security
features:
• Electronic Lock to prevent others from making calls from your IP
Phone
• password-protected IP Phone features (for example, Personal
Directory, Redial List, and Callers List)
Your system administrator defines your initial SCPW. Contact your
system administrator for detailed inform ation.
18
Page 19

To change your SCPW:
(Services)
About the Nortel IP Phone 1165E
1. Press the Services key once.
2. Press the Up/Down keys to scroll, and
then highlight Password Admin.
3. Press Enter.
4. Use the dialpad to enter your password
at the prompt.
5. Press the Up/Down keys to scroll and
highlight New Password.
6. Press Enter.
7. Use the dialpad to enter the new
password.
Select
8. Press the Select soft key to accept the
new password.
If you are locked out of your
IP Phone 1165E, or if you forget your
SCPW, contact your system
administrator.
Note: The default configuration for Password Protection is off.
19
Page 20

About the Nortel IP Phone 1165E
To turn Password Protection on or off:
1. Press the Directory key.
(Directory)
2. Press the Up/Down navigation keys to
scroll and highlight Change Protection
Mode.
3. Use the dialpad to enter your password
(if Password Protection is enabled).
Enter
Yes No
or
Done
4. Press the Enter soft key.
5. Press the Up/Down navigation keys to
scroll and highlight one of the following:
— Enable Password Protection
— Disable Password Protection
6. Choose one of the following soft keys:
— Yes to accept the selection
— No to return to the Directory menu
7. Press the Done soft key.
20
Page 21

Agent and supervisor features
Agent and supervisor features
This section describes login features that are common to the Call Center
agent and supervisor. Depending on your system configuration, choose
from the following methods of logging in and out:
• “Logging in without Agent ID (for basic ACD)” on page 21
• “Logging in with Agent ID (for Basic ACD or Contact Center
Manager)” on page 21
• “Logging in using Multiple Queue Assignments (for Basic ACD)” on
page 23
• “Logging out” on page 26
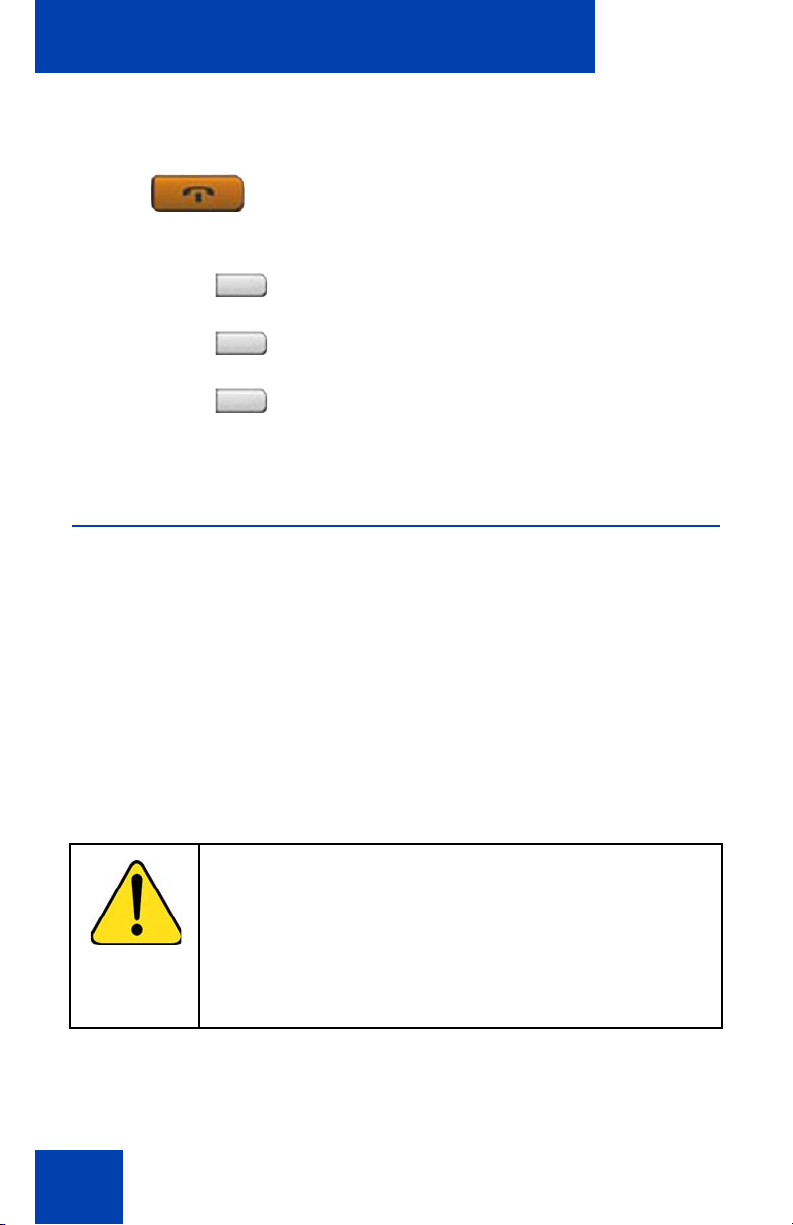
CAUTION
When logged on, you are placed into the queue for
incoming calls. If you are unavailable or away from your
phone, activate Make Set Busy or Not Ready to prevent
callers from being directed to your phone.
Logging in without Agent ID (for basic ACD)
If your ACD configuration does not rely on Agent ID, which is often the
case if you do not share your phone with another person, use the
following procedure to log in to an Automatic Call Distribution (ACD)
queue.
MakeSetBsy
8. Press the Make Set Busy key.
Logging in with Agent ID (for Basic ACD or Contact Center Manager)
If your ACD configuration uses Agent ID, which is often the case if you
share your phone with another person, use the following procedure to log
in to an Automatic Call Distribution (ACD) queue. If an Agent ID is
21
Page 22
Agent and supervisor features
assigned to you, the display screen prompts you to enter a four-digit
code.
Note: The following procedure applies if you are working in a Basic
ACD environment or a Nortel Contact Center Manager environment.
For more information about Nortel Contact Center Manager, visit
www.nortel.com.
To log in as an agent:
1. Lift the handset.
2260
2260
NotReady
or
2. Press the In-Calls key.
3. If “Enter Agent ID” appears on the
screen, use the dialpad to enter your ID.
4. Press the # key. The phone goes into a
Not Ready state.
5. To join the ACD queue, choose one of
the following:
— Press the In-Calls key.
— Press the NotReady key.
22
Page 23

Agent and supervisor features
6. If you use a headset and Handset OnHook Means Log out (HOML) is
configured to No by your administrator,
then do the following:
a. Press the Headset key and replace
(Headset)
(Services)
the handset in the cradle to receive
calls on your headset.
b. Press the Services key. Change the
On-hook default path to Headset
Enabled.
Note: If HOML is configured to Yes,
replace the handset to log out of the
queue.
Logging in using Multiple Queue Assignments (for Basic ACD)
If your configuration uses Multiple Queue Assignment (MQA), use the
following procedure. MQA login involves entering a four-digit Agent ID
and up to five ACD Directory Numbers (DN), with the option of adding a
Supervisor ID and up to five Priority values.
Choose one of the following login procedures:
• “Logging in with an Agent ID and MQA login options” on page 23
• “Using Default Login” on page 25
Logging in with an Agent ID and MQA login options
To enter ACD queues, use an Agent ID login with one of the MQA login
options described on page 24.
Note: A supervisor logging in to accept ACD ca lls is prevented by th e
system from entering a Supervisor ID (including logins where agents
must enter a Supervisor ID).
23
Page 24

Agent and supervisor features
The login options require the following entries in sequential order:
1. a four-digit Agent ID
2. a Supervisor ID (if your queue requires one)
3. up to five ACD DNs and Priority values (if Priority values are being
used) terminated by # #
To log in:
2260
No Supervisor ID, No Priority
Supervisor ID, No Priority
No Supervisor ID, With Priority
Supervisor ID, With Priority
1. Press the In-Calls key.
2. Choose one of the following four login
options:
— For No Supervisor ID, No Priority,
dial your Agent ID # ACD DN 1 #
ACD DN 2 # ACD DN 3 # ACD DN 4
# ACD DN 5 # #.
— For Supervisor ID, No Priority, dial
your Agent ID # Supervisor ID #
ACD DN 1 # ACD DN 2 #
ACD DN 3 # ACD DN 4 #
ACD DN 5 # #.
— For No Supervisor ID, With Priority,
dial your Agent ID # ACD DN 1 #
Priority 1 # ACD DN 2 # Priority 2 #
ACD DN 3 # Priority 3 # ACD DN 4 #
Priority 4 # ACD DN 5 Priority 5 # #.
— For Supervisor ID, With Priority, dial
your Agent ID # Supervisor ID #
ACD DN 1 # Priority 1 # ACD DN 2 #
Priority # 2 ACD DN 3 # Priority 3 #
ACD DN 4 # Priority 4 #
ACD DN 5 # Priority 5 # #.
24
Note: To choose the default Priority
value or Supervisor ID, enter #.
Page 25
Agent and supervisor features
3. Choose one of the following:
2260
or
NotReady
— Press the In-Calls key.
—Press the NotReady key to enter the
ACD queue.
Using Default Login
If you normally use the same IP Phone, use the Default Login to log in
just one time at the beginning of a shift. The Default Login uses your
previous shift’s login to place you in the same ACD queues with the same
supervisor.
To use Default Login:
1. Lift the handset.
2260
2. Press the In-Calls key.
3. When “Enter Agent ID” appears on the
screen, use the dialpad to enter your ID.
4. Choose one of the following:
— If your queue requires a Supervisor
ID, press the # key three times.
— If your queue does not require a
Supervisor ID, press the # key two
times.
25
Page 26

Agent and supervisor features
5. To join the ACD queue, choose one of
2260
or
NotReady
the following:
— Press the In-Calls key.
— Press the NotReady key.
Logging out
You can log out of the system completely or temporarily (Not Ready
state).
To log out:
Choose one of the following:
MakeSetBusy
or
NotReady
— To log out completely, press the
MakeSetBusy key.
— To log out temporarily, press the
NotReady key.
Note: If you press the MakeSetBusy
key while on an ACD call, you log out
automatically when the call finishes.
26
Page 27

Agent features
Agent features
The following sections describe features that are available to agents:
• “Answering ACD calls” on page 27
• “Using Call Forcing” on page 28
• “Using Return to Queue on No Answer” on page 29
• “Using Activity code” on page 29
• “Using Emergency” on page 30
• “Using Not Ready” on page 31
• “Placing or answering non-ACD calls” on page 31
• “Contacting your supervisor” on page 32
Answering ACD calls
Use the In-Calls key to answer the next queued ACD call on the primary
DN. The In-Calls key is located in the lower right area of the self-labeled
line/programmable feature keys.
To answer the call:
2260
When the LCD next to the In-Calls key
flashes, press the In-Calls key.
Note: The LCD remains lit as long as
you are on the call.
27
Page 28
Agent features
To terminate the call:
Choose one of the following:
— Press the Goodbye key.
(Goodbye)
or
2260
or
2498
or
Not Ready
— Press the In-Calls key.
— Press the individual DN line key (this
removes you from the queue).
— Press the Not Ready key (this
removes you from the queue but
keeps you logged in as an agent
position) or wait for the caller to
terminate the call.
Using Call Forcing
Use the Call Forcing feature to automatically connect an incoming ACD
call. A time interval is configured by your system administrator between
each incoming call.
Note: You cannot use both Call Forcing and Return To Queue on
No Answer at the same time.
A short tone indicates a new incoming call. The In-Calls indicator lights
continuously, and the ACD call automatically goes to your agent position.
Pressing the In-Calls key while call forcing (Auto Answer) is active
disconnects an active ACD call.
CAUTION
If you are away from your phone and Call Forcing is
enabled, remember to log out or activate Not Ready.
Otherwise, callers continue to be connected to your
phone. Because you are not at your desk, callers hear
only the background noise in your work space, until they
hang up.
28
Page 29

Agent features
To enable Call Forcing for headset users:
1. Log in.
2. Replace the handset.
3. Press the Services key. Configure the
(Services)
On-hook default path to Headset
Enabled.
Using Return to Queue on No Answer
If a call is not answered, the call is sent back to the ACD queue, and the
your IP Phone is automatically placed in Not Ready state. To return to the
ACD queue, log in, or press the NotReady key.
Using Activity code
Use Activity code to record the types of activities you are pe rf or m ing .
To record activities:
Activity
1. When the Activity LCD indicator is
flashing, press the Activity key.
2. Use the dialpad to enter the Activity
code.
29
Page 30

Agent features
Activity
3. Press the Activity key.
If you are performing multiple tasks,
repeat steps 1 and 2.
Note: If configured, you can enter
Activity Codes while in the Not Ready
state and run Not Ready Reason Codes
by Agent report in Contact Center
Manager Administration to track Not
Ready time.
Using Emergency
Use the Emergency feature to contact your supervisor immediately in an
emergency situation.
To use Emergency:
Emergency
1. During an active call, press the
Emergency key.
Note: The Emergency LCD remains lit
as long as the feature is active.
30
Emergency
When the supervisor answers, a threeway call commences with you, your
supervisor, and the caller.
2. Press the Emergency key again to
transfer the caller to the supervisor and
terminate your access to the caller and
supervisor.
Page 31

Agent features
Using Not Ready
Use the Not Ready feature to take your IP Phone out of the call queue
while completing post-call work.
Note: If you don't activate Make Set Busy or Not Ready, callers will
continue to be directed to your phone.
To use Not Ready:
NotReady
2260
or
NotReady
1. Press the NotReady key to temporarily
log out of the system.
Note: The NotReady LCD remains lit as
long as the feature is active.
2. To return to the queue, choose one of
the following:
— Press the In-Calls key
— Press the NotReady key.
Placing or answering non-ACD calls
Use this feature to place and receive calls on your indiv idu al line .
To place a call:
2498
1. Press your individual DN key.
2. Use the dialpad to dial the phone
number.
Note: The LCD remains lit as long as
you are on the call.
31
Page 32

Agent features
To answer a call:
When the LCD next to your individual
2498
DN key flashes, press the DN key.
Note: The LCD remains lit as long as
you are on the call.
Contacting your supervisor
•Use the Supervisor feature to talk to your supervisor in the following
ways:
• “To answer a call from your supervisor:” on page 32
• “To answer a call from your supervisor while on another call:” on
page 32
• “To place a call to your supervisor:” on page 33
• “To conference in your supervisor during a call in progress:” on
page 33
• “To transfer a call to your supervisor during a call in progress:” on
page 34
To answer a call from your supervisor:
Supervisor
To answer a call from your supervisor while on another call:
Supervisor
32
When the LCD next to the Supervisor key
flashes, press the Supervisor key.
Note: The LCD remains lit as long as
you are on the call.
The LCD next to the Supervisor key flashes
and a buzzer sounds.
Page 33
(Hold)
Agent features
1. Press the Hold key to put the current call
on hold.
Supervisor
2. Press the Supervisor key.
Press the line (DN) key beside the
flashing LED indicator to return to the
caller on hold.
To place a call to your supervisor:
Supervisor
Press the Supervisor key.
Note: Calls are automaticall y put on hold
when you use the Supervisor key.
To return to the ACD call:
2260
Press the In-Calls key.
To conference in your supervisor during a call in progress:
Supervisor
1. Press the Supervisor key to talk
privately with your supervisor.
Supervisor
2. Press the Supervisor key again for a
conference call with you, your
supervisor, and the other caller.
33
Page 34

Agent features
To transfer a call to your supervisor during a call in progress:
Supervisor
Supervisor
(Goodbye)
1. Press the Supervisor key.
2. When your supervisor answers, press
the Supervisor key again.
3. Press the Goodbye key to terminate
your access to the call.
34
Page 35

Supervisor features
Supervisor features
The following sections describe features available to the s upe rvis or :
• “Using Answer Agent” on page 35
• “Using the Agent key” on page 36
• “Using Answer Emergency” on page 36
• “Using Call Agent” on page 37
• “Using Interflow” on page 38
• “Using Night Service” on page 38
• “Observing a call” on page 40
• “Displaying the queue” on page 41
• “Displaying agent status” on page 43
Using Answer Agent
Use the Answer Agent feature to receive calls from agents in a nonemergency situation.
To use Answer Agent:
AnsAgent
1. When the LCD next to the Answer Agent
key flashes, press the Answer Agent
key.
Note 1: The Agent ID of the person
contacting you displays on your IP
Phone.
Note 2: The LCD remains lit as long as
you are on the call, and your status is
displayed as NotReady. If configured,
your status is displayed as Not Ready in
Contact Center Manager Administration
Real Time Display.
35
Page 36

Supervisor features
2. Press the Goodbye key to end the call.
(Goodbye)
Using the Agent key
Use the Agent feature to connect, observe, or monitor the status of each
agent position. Each Agent key links to a particular agent position and
can be used along with the Call Agent or Observe Agent keys.
Table 1 lists the four states of the LCD indicator.
Table 1: Agent’s status
LCD display Description
Off Agent is not logged in.
On Agent is logged in but is either NotReady or on a
call.
Slow Flashing Agent is waiting for an ACD call.
Fast Flashing Agent is on a non-ACD call.
Using Answer Emergency
Use the Answer Emergency feature to receive calls from agents in an
emergency situation.
Note: If Contact Center Manager Administration is in use, and if
multiple Agents have pressed Emergency, the connected PC displays
a list of Agents who have pressed Emergency.
36
Page 37

To use Answer Emergency:
Supervisor features
AnsEmerg
(Goodbye)
1. When the LCD next to the Answer
Emergency key flashes, press the
Answer Emergency key.
Note 1: The Agent ID of the person
contacting you displays on your IP
Phone.
Note 2: The LCD remains lit as long as
you are on the call and your status is
displayed as Not Ready.
2. Press the Goodbye key to end the call.
Using Call Agent
Use the Call Agent feature to contact an Agent.
To use Call Agent:
CallAgt
AgentKey
or
1. Press the Call Agent key.
2. Choose one of the following:
— Press a selected Agent key.
— Dial the agent’s Position ID.
37
Page 38

Supervisor features
3. Press the Goodbye key to end the call.
(Goodbye)
Using Interflow
Use the Interflow feature to redirect calls when the backlog or wait time
exceeds a pre-defined threshold.
To use Interflow:
Interflow
Interflow
1. Press the Interflow key.
Note: The Interflow LCD flashes while
the feature is active.
2. Press the Interflow key again to
deactivate the feature and resume
normal call flow.
Using Night Service
Use the Night Service feature to define how calls are handled outside of
business hours.
To activate Night Service:
NightSvc
1. Press the Night Service key.
38
Page 39

2. Press the 6 key (6 = N for Night) to go
To transition to Night Service:
Supervisor features
into Night Service.
The Night Service LCD lights
continuously. All calls in the queue and
new calls receive night service.
NightSvc
To deactivate Night Service:
NightSvc
1. Press the Night Service key.
2. Press the 8 key (8 = T for Transition) to
activate Transition mode.
The Night Service LCD flashes. All calls
in the queue remain in the queue and
new calls receive Night Service.
1. Press the Night Service key.
2. Press the 3 key (3 = D for Day) to
resume Day mode.
The Night Service LCD flashes. New
calls enter the queue.
39
Page 40
Supervisor features
Observing a call
Use the Observe feature to monitor an agent in a call.
Note: Use this feature to listen to a conversation between an Agent
and a Customer, or to create a three-party conference with the
Supervisor, Agent and Customer.
To observe a call:.
Observe
Agentkey
or
RAG
CallAgt
Observe
1. Press the Observe key.
2. Choose one of the following:
— Press a selected Agent key.
— Dial the agent’s Position ID.
3. Choose one of the following:
—Press the Ring Agent key creating a
three party call, so that you can
break in to the call, and speak to
both the caller and the agent.
— Press the Call Agent key to talk to
the agent you are monitoring.
— Proceed to step 4.
4. Press the Observe key to terminate the
observation.
40
Page 41

Supervisor features
Displaying the queue
Use the Display Queue feature to access the status of calls in an
ACD queue. The information displayed includes the following:
• number of calls waiting in the queue
• number of agent positions occupied for the queue
• the length of time that the oldest call has waited in the queue
• the number of calls that have been overflowed into the queue
To display information on your ACD queue:
DisplayQue
Figure 4 on page 42 shows the ACD queue status.
Press the Display Queue key.
Information on your current ACD queue
appears on the display.
41
Page 42

Supervisor features
Figure 4: Current status of ACD queue
Calls waiting
Number of
manned positions
Calls time
overflowed
into this queue
Length of time
first call has
waited
The LCD indicator beside the Display Queue key gives you a visual
indication of the number of calls in the ACD queue. Table 2 lists the four
states for this LCD indicator.
Table 2: States of LCD indicator (Part 1 of 2)
Indicator Queue status Description
Off Light There are few or no
calls waiting.
On Normal An acceptable
number of calls are
waiting.
Slow flashing Busy Calls are backing up
in the queue. Calls
overflowing to this
queue will not be
accepted.
42
Page 43

Supervisor features
Table 2: States of LCD indicator (Part 2 of 2)
Indicator Queue status Description
Fast flashing Overloaded There are too many
calls in this queue.
New calls are being
overflowed to another
queue.
Displaying agent status
Use the Display Agent feature to view a summary of current status for all
agents who have an agent Position ID key assigned on the Supervisor’s
IP Phone.
To display agent status:
DisplayAgt
Press the Display Agent key. The summary
information displays for twelve seconds or
until another feature key is pressed, as
shown in Figure 5 on page 44.
Agent positions in the Not Ready state are
counted as busy on either ACD calls or nonACD calls, as specified by your system
administrator.
43
Page 44

Supervisor features
Figure 5: Current status of agents
Positions busy
on ACD calls
Positions waiting
for ACD calls
Vacant agent
positions
Positions busy
on non-ACD
calls
44
Page 45

Terms you should know
Terms you should know
Attendant
A telephone operator in your organization.
AutoDial
A telephone number programmed on the AutoDial key for onetouch dialing.
Calling Party Name Display
Information appearing on the LCD display screen, such as the
caller’s name and telephone number. The system must have
CPND enabled.
Category 5 (Cat5)
Cable and associated connecting hardware capable of
transmitting at speeds up to 100 MHz, used by 10BaseT,
100BaseT4, 100BaseTX.
Category 5e (Cat5e)
Most Cat5 cable manufactured after 1996 also supports
1000BaseT (GigE) installations, and is designate d Cat 5e. Ca t5e
cable normally has four pairs of copper wire.
Category 6 (Cat6)
Cable and associated connecting hardware capable of
transmitting at speeds up to 200 MHz. Designed specifically to
support 1000BaseT (Gig Ethernet (GigE)), it is also compatible
with 10BaseT, 100BaseT4, and 100BaseTX installations. The
cable normally has four pairs of copper wire.
Communication Server 1000
Your office communication system.
45
Page 46

Terms you should know
Contact Center Manager
Nortel Contact Center Manager offers a scalable solution for
dynamic contact center environments, providing skill-based
routing, call treatment flexibility, real time displays, multimedia
routing, comprehensive management and reporting tools, an d a
rich scripting language. For more information, visit
www.nortel.com.
Context-sensitive soft keys
A group of keys programmed by your system administrator.
These four keys, located directly below the display area, have
four programmable layers. These keys are also used to configure
parameters in the Telephone Options menu.
Date/time display
The current date and time when the telephone is in an idle state.
Directory Number (DN)
A number consisting of one to seven digits for a telephone, and
also known as an extension number.
Feature display
An area that shows status information about the feature in use. It
also displays the name and status of the active session.
Feature Status Lamp indicator
An LCD or an LED that indicates a data message, contact, or
feature status by a flash, wink, steady on, or off.
Fixed key
The hard-labeled keys on your telephone.
Flexible Feature Codes (FFCs)
Specialized co des e nter ed using the dialpad that enable features
(for example, Ring Again).
46
Page 47

Goodbye key
A fixed key used to end an active call.
Indicator
An LCD or an LED that indicates the status of a feature by the
flash, wink, steady on, or off.
Information display
Any display of call activity, list s, prompts, and status of calls. If the
text message exceeds the display area, a scroll arrow icon
indicates that you must use the scroll keys to view the remaining
text.
Interrupted dial tone
A broken or pulsed dial tone that sounds when you access some
features on your telephone.
Message/Inbox
Terms you should know
A fixed key on your IP Phone 1140E that connects to your voice
messaging system when the key is pressed.
Navigation keys
Keys used to scroll through menus and lists appearing on the
LCD display screen.
Off-hook
Any line selected to make a call or receive an incoming call.
The term off-hook is applied whether (a) the end user lifts up the
handset, (b) the end user presses a line key, (c) the call is
automatically answered at the telephone, or (d) a line is
automatically selected for an outgoing call.
Paging tone
A special tone (two beeps followed by dial tone) that sounds
when you use the Radio Paging feature.
47
Page 48

Terms you should know
Return to Queue on No Answer
If a call is not answered by the agent, the call is sent back to the
ACD queue and the agent’s telephone is automatically placed in
the Not Ready state.
Ringback/ring tone
A sound indicating that a call you have made is ringing at its
destination.
Services key
A fixed key used to access options such as Telephone Options,
Password Admin, Virtual Office Login, Virtual Office Logout, Test
Local Mode, and Resume Normal Mode.
Shared Directory Number
A DN (extension) that is shared by two or more persons.
Special Prefix code (SPRE)
Special code s entered using the dialpad, followed by a two-digit
access code, that enable features (for example, Call Forward All
Calls requires entry of SPRE code + 74).
Special dial tone
The three consecutive tones followed by dial tone that you hear
when accessing telephone features.
Station Control Password (SCPW)
Enables security features on your phone to prevent others from
making calls from your telephone and to prevent access to
protected features (for example, Rem ot e Call F or wa rd ).
Status Messages
A message displayed to inform the user of important information.
A right arrow appears if more than one Status Message is
present. Examples of Status Messages include: Message
48
Page 49

Waiting, All Lines Forwarded to: 6453, Do Not Disturb On, Ring
Again active, and Ringer is OFF.
System or Switch
Your office communication system.
Switchhook
A button on which the handset presses down, disconnectin g your
call when you replace the handset. The handset (when lifted)
releases the switchhook, and you either answer an incoming call
or you receive a dial tone to make a call.
User interface
Screen displays that interact with the end user as a result of an
action or event.
Visual Alerter/Message Waiting indicator
An LCD or an LED that flashes to indicate that a message is
waiting or when the ringer is on.
Terms you should know
49
Page 50

Terms you should know
50
Page 51

A
About the IP Phone 1140E 7
Activity code 29
Agent and MQA login options 23
Agent and Supervisor features 21
Agent features 27
Agent key 36
Agent login 21
Answer ACD calls 27
Answer Agent 35
Answer Emergency 36
Attendant 45
AutoDial 45
B
Basic features 7
C
Call Agent 37
Call features 18
Contact your supervisor 32
Context-sensitive soft keys 10
Copy key 13
D
Date/time display 46
Default login 25
Directory key 14
Directory Number 46
DN 46
E
Emergency 30
Encrypted calling 18
1
Page 52

Expand key 12
F
Feature display 46
Fixed key 46
Flexible Feature Code (FFC) 46
Flexible Feature Codes 18
G
Goodbye key 13, 47
H
Headset key 12, 13
Hold key 12
I
Indicator status 47
Information display 47
Interflow 38
Interrupted dial tone 47
L
Line (DN) key 11
Local Area Network 7
Login with Agent ID and MQA 23
M
Message (Inbox) key 14
Message key 47
Message waiting indicator 13, 49
More key 11
Mute key 11
2
Page 53

N
Navigation keys 12, 47
Night Service 38
Not Ready 31
O
Observe 40
Off-hook 47
P
Paging tone 47
Place or answer non-ACD calls 31
Q
Quit/Stop key 13
R
Ringback/ring tone 48
S
Security features 18
Self-labeled line/programmable feature keys 11
Services key 14, 48
Shared Directory Numbers 48
Shift/Outbox key 14
Speaker key 12
Special dial tone 48
Special Prefix code (SPRE) 48
Station Control Password (SCPW) 18, 48
Status Messages 48
Supervisor features 35
Switchhook 49
System or Switch 49
3
Page 54

T
Telephone controls 15
Telephone display 15
U
User Interface 49
V
Volume control 11
Volume control bar 11
4
Page 55

Page 56

Nortel Communication Server 1000
IP Phone 1165E
Call Center User Guide
Copyright © 2009-2010, Nortel Networks. All Rights Reserved
LEGAL NOTICE
While the information in this document is believed to be accurate and
reliable, except as otherwise expressly agreed to in writing, NORTEL
PROVIDES THIS DOCUMENT “AS IS” WITHOUT WARRANTY OR
CONDITION OF ANY KIND EITHER EXPRESS OR IMPLIED. The
information and/or products described in this document are subject to
change without notice.
Nortel, Nortel Networks, the Nortel logo, and the Globemark are
trademarks of Nortel Networks.
The Bluetooth word mark and logos are owned by the Bluetooth SIG, Inc.
and any use of such marks by Nortel Networks is under license.
All other trademarks are the property of their respective owners.
Publication Number: NN43101-104
Document Release: Standard 01.02
Date: April 2010
Sourced in Canada
To provide feedback or report a problem in this document,
go to www.nortel.com/documentfeedback.
www.nortel.com
 Loading...