

Page 1

Installing and Maintaining Avaya E129
SIP Deskphone
Release 1.1
Issue 1
March 2015
Page 2

©
2015 Avaya Inc.
All Rights Reserved.
Notice
While reasonable efforts have been made to ensure that the
information in this document is complete and accurate at the time of
printing, Avaya assumes no liability for any errors. Avaya reserves
the right to make changes and corrections to the information in this
document without the obligation to notify any person or organization
of such changes.
Documentation disclaimer
“Documentation” means information published by Avaya in varying
mediums which may include product information, operating
instructions and performance specifications that Avaya may generally
make available to users of its products and Hosted Services.
Documentation does not include marketing materials. Avaya shall not
be responsible for any modifications, additions, or deletions to the
original published version of documentation unless such
modifications, additions, or deletions were performed by Avaya. End
User agrees to indemnify and hold harmless Avaya, Avaya's agents,
servants and employees against all claims, lawsuits, demands and
judgments arising out of, or in connection with, subsequent
modifications, additions or deletions to this documentation, to the
extent made by End User.
Link disclaimer
Avaya is not responsible for the contents or reliability of any linked
websites referenced within this site or documentation provided by
Avaya. Avaya is not responsible for the accuracy of any information,
statement or content provided on these sites and does not
necessarily endorse the products, services, or information described
or offered within them. Avaya does not guarantee that these links will
work all the time and has no control over the availability of the linked
pages.
Warranty
Avaya provides a limited warranty on Avaya hardware and software.
Refer to your sales agreement to establish the terms of the limited
warranty. In addition, Avaya’s standard warranty language, as well as
information regarding support for this product while under warranty is
available to Avaya customers and other parties through the Avaya
Support website:
http://support.avaya.com or such successor site as
designated by Avaya. Please note that if You acquired the product(s)
from an authorized Avaya Channel Partner outside of the United
States and Canada, the warranty is provided to You by said Avaya
Channel Partner and not by Avaya.
Licenses
THE SOFTWARE LICENSE TERMS AVAILABLE ON THE AVAYA
WEBSITE,
HTTP://SUPPORT.AVAYA.COM/LICENSEINFO OR
SUCH SUCCESSOR SITE AS DESIGNATED BY AVAYA, ARE
APPLICABLE TO ANYONE WHO DOWNLOADS, USES AND/OR
INSTALLS AVAYA SOFTWARE, PURCHASED FROM AVAYA INC.,
ANY AVAYA AFFILIATE, OR AN AVAYA CHANNEL PARTNER (AS
APPLICABLE) UNDER A COMMERCIAL AGREEMENT WITH
AVAYA OR AN AVAYA CHANNEL PARTNER. UNLESS
OTHERWISE AGREED TO BY AVAYA IN WRITING, AVAYA DOES
NOT EXTEND THIS LICENSE IF THE SOFTWARE WAS
OBTAINED FROM ANYONE OTHER THAN AVAYA, AN AVAYA
AFFILIATE OR AN AVAYA CHANNEL PARTNER; AVAYA
RESERVES THE RIGHT TO TAKE LEGAL ACTION AGAINST YOU
AND ANYONE ELSE USING OR SELLING THE SOFTWARE
WITHOUT A LICENSE. BY INSTALLING, DOWNLOADING OR
USING THE SOFTWARE, OR AUTHORIZING OTHERS TO DO SO,
YOU, ON BEHALF OF YOURSELF AND THE ENTITY FOR WHOM
YOU ARE INSTALLING, DOWNLOADING OR USING THE
SOFTWARE (HEREINAFTER REFERRED TO
INTERCHANGEABLY AS “YOU” AND “END USER”), AGREE TO
THESE TERMS AND CONDITIONS AND CREATE A BINDING
CONTRACT BETWEEN YOU AND AVAYA INC. OR THE
APPLICABLE AVAYA AFFILIATE (“AVAYA”).
Avaya grants You a license within the scope of the license types
described below, with the exception of Heritage Nortel Software, for
which the scope of the license is detailed below. Where the order
documentation does not expressly identify a license type, the
applicable license will be a Designated System License. The
applicable number of licenses and units of capacity for which the
license is granted will be one (1), unless a different number of
licenses or units of capacity is specified in the documentation or other
materials available to You. “Software” means computer programs in
object code, provided by Avaya or an Avaya Channel Partner,
whether as stand-alone products, pre-installed on hardware products,
and any upgrades, updates, patches, bug fixes, or modified versions
thereto. “Designated Processor” means a single stand-alone
computing device. “Server” means a Designated Processor that
hosts a software application to be accessed by multiple users.
“Instance” means a single copy of the Software executing at a
particular time: (i) on one physical machine; or (ii) on one deployed
software virtual machine (“VM”) or similar deployment.
License types
Designated System(s) License (DS). End User may install and use
each copy or an Instance of the Software only on a number of
Designated Processors up to the number indicated in the order.
Avaya may require the Designated Processor(s) to be identified in
the order by type, serial number, feature key, Instance, location or
other specific designation, or to be provided by End User to Avaya
through electronic means established by Avaya specifically for this
purpose.
Shrinkwrap License (SR). You may install and use the Software in
accordance with the terms and conditions of the applicable license
agreements, such as “shrinkwrap” or “clickthrough” license
accompanying or applicable to the Software (“Shrinkwrap License”).
Copyright
Except where expressly stated otherwise, no use should be made of
materials on this site, the Documentation, Software, Hosted Service,
or hardware provided by Avaya. All content on this site, the
documentation, Hosted Service, and the product provided by Avaya
including the selection, arrangement and design of the content is
owned either by Avaya or its licensors and is protected by copyright
and other intellectual property laws including the sui generis rights
relating to the protection of databases. You may not modify, copy,
reproduce, republish, upload, post, transmit or distribute in any way
any content, in whole or in part, including any code and software
unless expressly authorized by Avaya. Unauthorized reproduction,
transmission, dissemination, storage, and or use without the express
written consent of Avaya can be a criminal, as well as a civil offense
under the applicable law.
Third Party Components
“Third Party Components” mean certain software programs or
portions thereof included in the Software or Hosted Service may
contain software (including open source software) distributed under
third party agreements (“Third Party Components”), which contain
terms regarding the rights to use certain portions of the Software
(“Third Party Terms”). As required, information regarding distributed
Linux OS source code (for those products that have distributed Linux
OS source code) and identifying the copyright holders of the Third
Party Components and the Third Party Terms that apply is available
in the products, Documentation or on Avaya’s website at:
http://
support.avaya.com/Copyright or such successor site as designated
by Avaya. You agree to the Third Party Terms for any such Third
Party Components.
Preventing Toll Fraud
“Toll Fraud” is the unauthorized use of your telecommunications
system by an unauthorized party (for example, a person who is not a
corporate employee, agent, subcontractor, or is not working on your
company's behalf). Be aware that there can be a risk of Toll Fraud
associated with your system and that, if Toll Fraud occurs, it can
result in substantial additional charges for your telecommunications
services.
Avaya Toll Fraud intervention
If You suspect that You are being victimized by Toll Fraud and You
need technical assistance or support, call Technical Service Center
Toll Fraud Intervention Hotline at +1-800-643-2353 for the United
States and Canada. For additional support telephone numbers, see
the Avaya Support website:
http://support.avaya.com or such
successor site as designated by Avaya. Suspected security
vulnerabilities with Avaya products should be reported to Avaya by
sending mail to: securityalerts@avaya.com.
Page 3
Trademarks
The trademarks, logos and service marks (“Marks”) displayed in this
site, the Documentation, Hosted Service(s), and product(s) provided
by Avaya are the registered or unregistered Marks of Avaya, its
affiliates, or other third parties. Users are not permitted to use such
Marks without prior written consent from Avaya or such third party
which may own the Mark. Nothing contained in this site, the
Documentation, Hosted Service(s) and product(s) should be
construed as granting, by implication, estoppel, or otherwise, any
license or right in and to the Marks without the express written
permission of Avaya or the applicable third party.
Avaya is a registered trademark of Avaya Inc.
All non-Avaya trademarks are the property of their respective owners.
Linux® is the registered trademark of Linus Torvalds in the U.S. and
other countries.
Downloading Documentation
For the most current versions of Documentation, see the Avaya
Support website:
designated by Avaya.
Contact Avaya Support
See the Avaya Support website: http://support.avaya.com for product
or Hosted Service notices and articles, or to report a problem with
your Avaya product or Hosted Service. For a list of support telephone
numbers and contact addresses, go to the Avaya Support website:
http://support.avaya.com (or such successor site as designated by
Avaya), scroll to the bottom of the page, and select Contact Avaya
Support.
Federal Communications Commission (FCC) Interference
Statement
This equipment has been tested and found to comply with the limits
for a Class B digital device, pursuant to Part 15 of the FCC rules.
These limits are designed to provide reasonable protection against
harmful interference in a residential installation. This equipment
generates, uses, and can radiate radio frequency energy and, if not
installed and used in accordance with the instructions, may cause
harmful interference to radio communications. However, there is no
guarantee that interference will not occur in a particular installation. If
this equipment does cause harmful interference to radio or television
reception, which can be determined by turning the equipment off and
on, the user is encouraged to try to correct the interference by one of
the following measures:
• Reorient or relocate the receiving antenna.
• Increase the separation between the equipment and receiver.
• Connect the equipment into an outlet on a circuit different from
that to which the receiver is connected.
• Consult the dealer or an experienced radio/TV technician for
help.
This device complies with Part 15 of the FCC Rules. Operation is
subject to the following two conditions: (1) This device may not cause
harmful interference, and (2) this device must accept any interference
received, including interference that may cause undesired operation.
FCC Caution: Any changes or modifications not expressly approved
by the party responsible for compliance could void the user's
authority to operate this equipment.
FCC/Industry Canada Radiation Exposure Statement
This device complies with the FCC's and Industry Canada's RF
radiation exposure limits set forth for the general population
(uncontrolled environment) and must not be co-located or operated in
conjunction with any other antenna or transmitter.
US/Canada
Hearing Aid Compatibility (HAC) as per FCC Part 68 This equipment
complies with the CE Marking requirements.
Canada
This Class B digital apparatus complies with Canadian ICES-003.
Cet appareil numérique de la classe B est conforme à la norme
NMB-003 du Canada.
http://support.avaya.com, or such successor site as
Australia Warning
The handset receiver contains magnetic devices that can attract
small metallic objects. Care should be taken to avoid personal injury.
EU Countries
This device complies with the essential requirements and other
relevant provisions of Directive 1999/5/EC. A copy of the Declaration
may be obtained from http://support.avaya.com or Avaya Inc., 211
Mt. Airy Road, Basking Ridge, NJ 07920 USA.
Japan VCCI-Class B statement
This is a Class B product based on the standard of the VCCI Council.
If this is used near a radio or television receiver in a domestic
environment, it may cause radio interference. Install and use the
equipment according to the instruction manual.
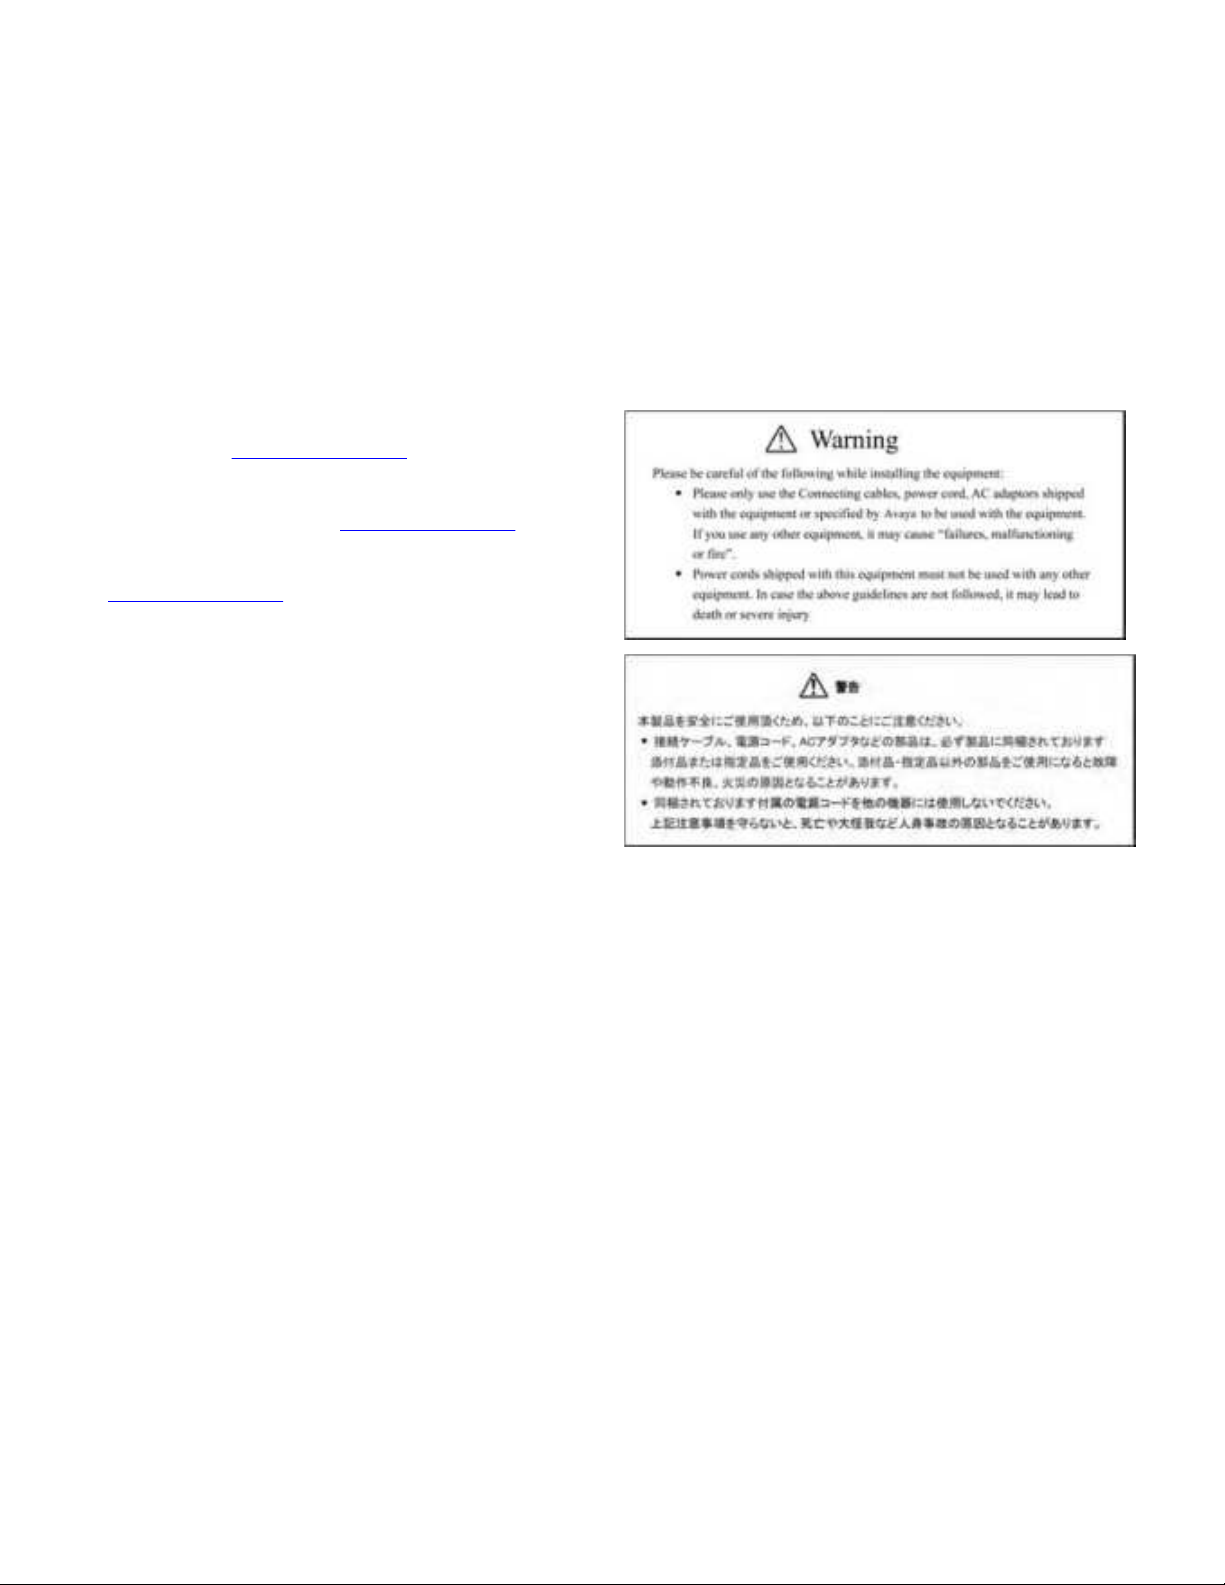
DenAn Power Cord Regulatory Notice for Japan
Warning
The handset receiver contains magnetic devices that can attract
small metallic objects. Care should be taken to avoid personal injury.
The service related to human safety is not allowed because this
device may have the possibility of radio interference.
Power over Ethernet (PoE) warning
This equipment must be connected to PoE networks without routing
to the outside plant.
Page 4

Contents
Chapter 1: Introduction............................................................................................................ 6
Purpose.................................................................................................................................. 6
Intended audience................................................................................................................... 6
Related resources................................................................................................................... 6
Documentation.................................................................................................................. 6
Support............................................................................................................................ 7
Chapter 2: Getting started........................................................................................................ 8
Feature description.................................................................................................................. 8
Packaged components............................................................................................................ 8
Connection ports..................................................................................................................... 9
Deskphone stand.............................................................................................................. 9
Chapter 3: Deskphone installation in the IP Office environment....................................... 11
Installation methods............................................................................................................... 11
Configuration 1 checklist........................................................................................................ 11
Configuration 2 checklist........................................................................................................ 12
Configuration 3 checklist........................................................................................................ 12
Configuration 4 checklist........................................................................................................ 13
Preinstallation requirements................................................................................................... 14
IP Office requirements..................................................................................................... 14
Telephone power requirements........................................................................................ 15
DHCP server requirements.............................................................................................. 15
File server requirements.................................................................................................. 15
Avaya IP endpoint licenses requirements.......................................................................... 15
Create deskphone users........................................................................................................ 16
Adding and configuring deskphone users.......................................................................... 16
Configuring user extensions............................................................................................. 16
Licenses............................................................................................................................... 17
Checking the IP Office serial number................................................................................ 17
Adding licenses............................................................................................................... 18
Preparing the IP Office system for SIP telephony..................................................................... 18
Enabling the SIP telephones support................................................................................ 18
SIP telephones support field descriptions.......................................................................... 20
Enabling DHCP on the IP Office system.................................................................................. 20
Setting the DHCP option 66................................................................................................... 21
Providing IP details to the deskphone..................................................................................... 21
Providing firmware and configuration server details to the deskphone........................................ 22
Connecting deskphones to the system.................................................................................... 22
Chapter 4: Deskphone installation in the Avaya Aura environment.................................. 24
Preinstallation checklist.......................................................................................................... 24
4 Installing and Maintaining Avaya E129 SIP Deskphone March 2015
Comments? infodev@avaya.com
Page 5

Contents
Preinstallation requirements................................................................................................... 24
DHCP server configuration..................................................................................................... 25
Setting the DHCP server.................................................................................................. 25
DHCP options................................................................................................................. 26
Creating deskphone users..................................................................................................... 26
Connecting deskphones to the system.................................................................................... 27
Chapter 5: Secure deskphone administration control........................................................ 28
Administration control through the configuration file.................................................................. 28
Administration control through the Web GUI............................................................................ 29
Obtaining the deskphone IP address................................................................................. 29
Changing the web access password................................................................................. 29
Hiding the deskphone configuration menus....................................................................... 30
Deskphone configuration menus field descriptions............................................................. 30
Chapter 6: Upgrading the deskphone................................................................................... 32
Automatic upgrade................................................................................................................ 32
Manual upgrade.................................................................................................................... 32
Downloading the firmware................................................................................................ 32
Upgrading deskphones.................................................................................................... 33
Upgrading a deskphone through the deskphone interface................................................... 33
Upgrading a deskphone through the Web GUI................................................................... 34
Upgrading and provisioning settings field descriptions........................................................ 34
Chapter 7: Troubleshooting................................................................................................... 37
Prerequisites......................................................................................................................... 37
Installing deskphones through the Web GUI............................................................................ 38
March 2015 Installing and Maintaining Avaya E129 SIP Deskphone 5
Comments? infodev@avaya.com
Page 6
Chapter 1: Introduction
Purpose
This document provides installation instructions for Avaya E129 SIP Deskphone. The document also
describes the initial configuration for the deskphone.
Intended audience
The primary audience for this document is anyone who is installing and configuring the Avaya E129
SIP deskphone. These people can include implementation engineers, Avaya BusinessPartners,
solution providers, and sometimes the customers themselves.
Related resources
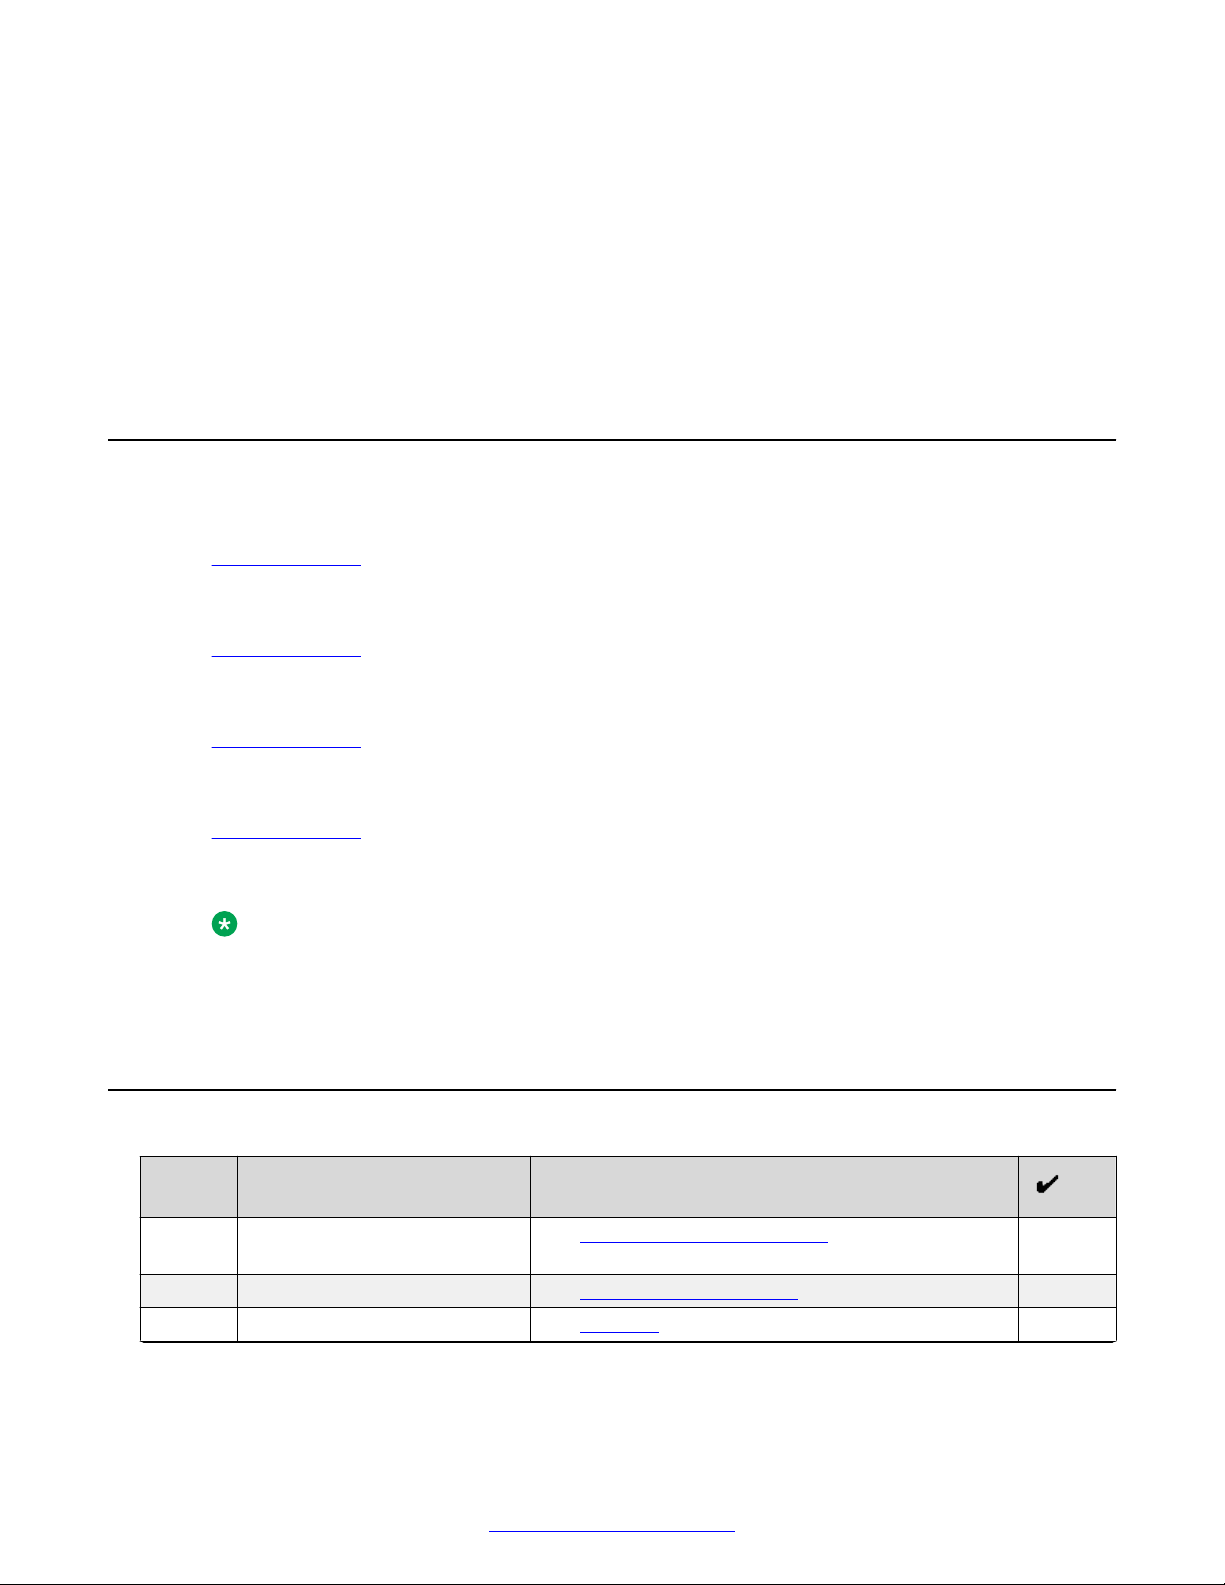
Documentation
Document
number
Using
16–604369 Administering Avaya E129 SIP
16–604368 Using Avaya E129 SIP
16–604373 Avaya E129 SIP Deskphone
Title Use this document to: Audience
Deskphone
Deskphone
Quick Reference
Administer configurations and
settings for the Avaya E129 SIP
Deskphone.
See the capabilities of Avaya E129
SIP deskphone and to learn about
how various features work.
See frequently used tasks. Users and
Administrators
Users and
administrators
administrators
6 Installing and Maintaining Avaya E129 SIP Deskphone March 2015
Comments? infodev@avaya.com
Page 7

Support
Related resources
Go to the Avaya Support website at
documentation, product notices, and knowledge articles. You can also search for release notes,
downloads, and resolutions to issues. Use the online service request system to create a service
request. Chat with live agents to get answers to questions, or request an agent to connect you to a
support team if an issue requires additional expertise.
http://support.avaya.com for the most up-to-date
March 2015 Installing and Maintaining Avaya E129 SIP Deskphone 7
Comments? infodev@avaya.com
Page 8

Chapter 2: Getting started
Feature description
Avaya E129 SIP Deskphone is a SIP-based IP phone that small-to-medium businesses can use for
communication.
Physical specifications
• Two call appearances
• A 128 x 40 graphical LCD
• Three softkeys
• Dual network ports with integrated Power over Ethernet (PoE)
• Electronic Hook Switch (EHS) with a Plantronics headset
Feature specifications
• Call forwarding
• Call transferring
• Three-way conferencing
• Voice mail
• Deskphone customization
• Do not Disturb
Packaged components
The deskphone comes with one each of the following parts that you must assemble before you
begin the installation:
•
• A handset
• A deskphone cord
• An Ethernet cable
• A deskphone stand
8 Installing and Maintaining Avaya E129 SIP Deskphone March 2015
Comments? infodev@avaya.com
Page 9
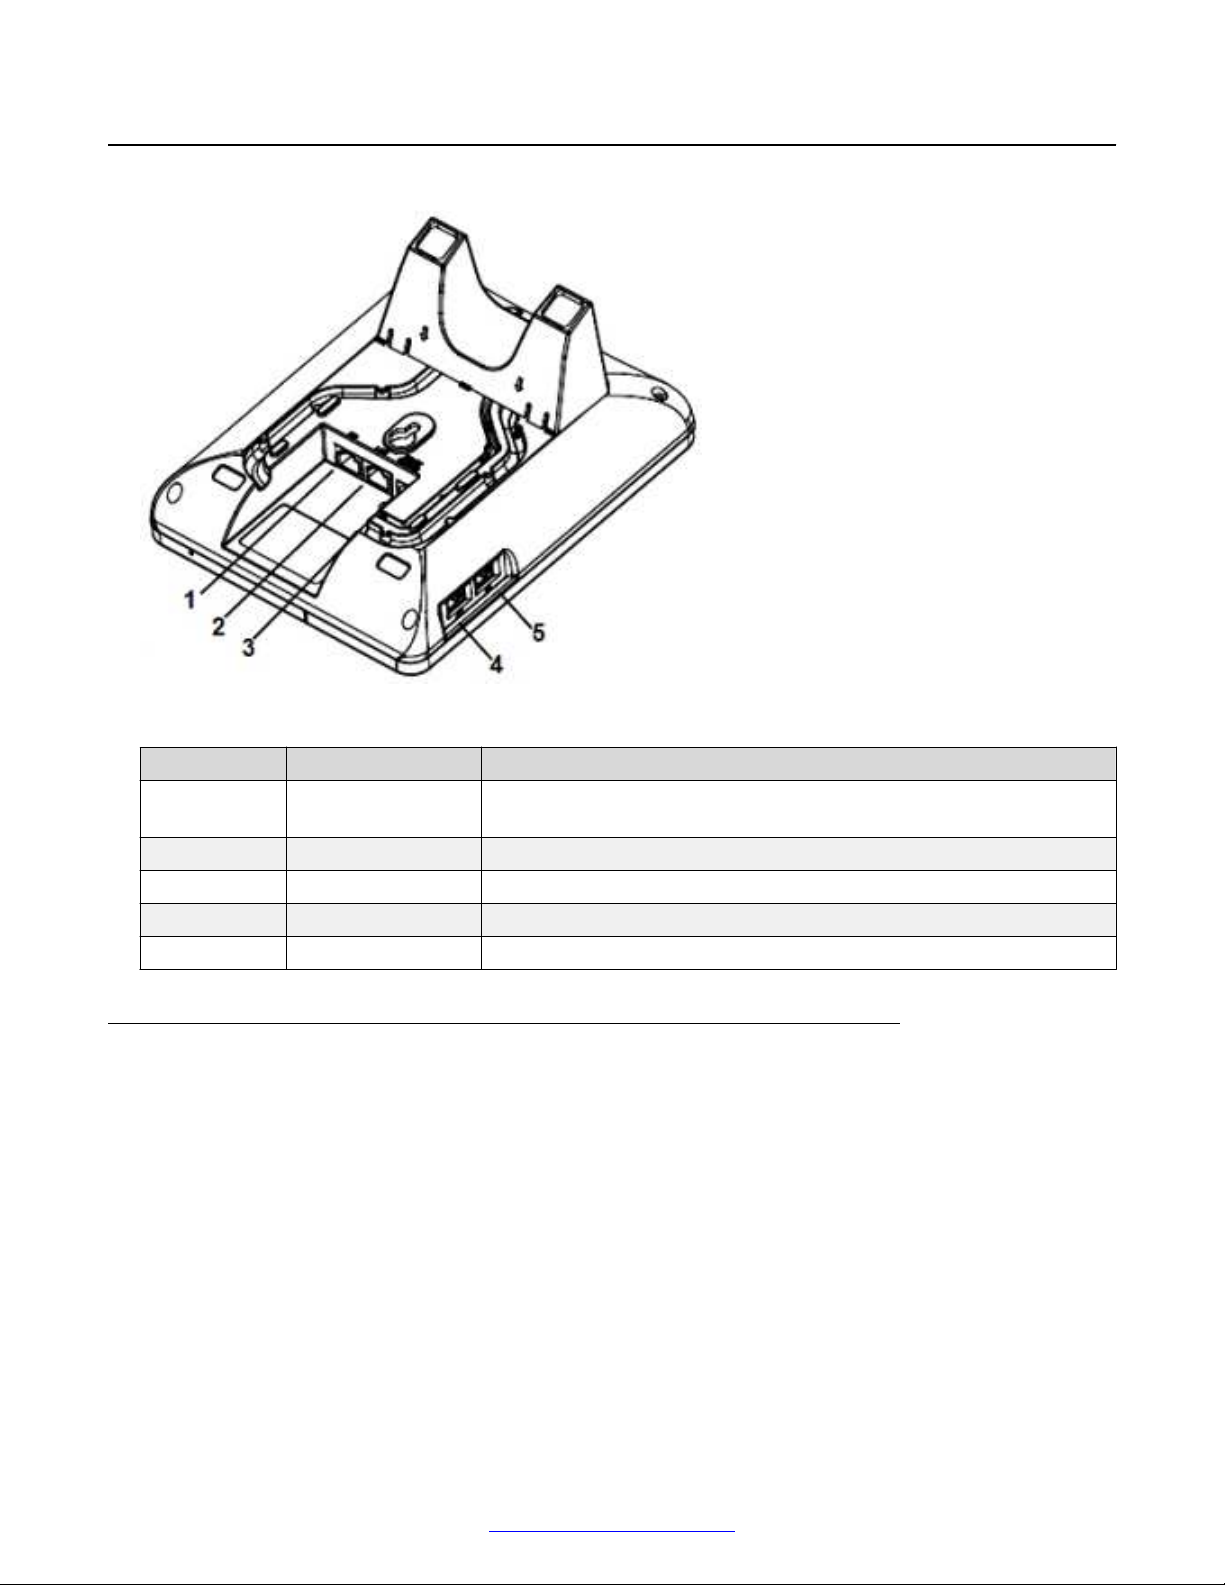
Connection ports
Connection ports
Figure 1: Connection ports at the back of the deskphone
Number Port name Description
1 PC A 10/100–Mbps RJ45 port to connect to a personal computer or a
mobile computer
2 LAN A 10/100–Mbps RJ45 port to connect to PoE-supported Ethernet
3 Power A 5–V DC port to connect to the power supply
4 Handset An RJ9 port to connect the handset
5 Headset An EHS-suported RJ9 port to connect to a Plantronics headset
Deskphone stand
You can either wall mount your deskphone or attach the stand that Avaya provides.
The stand includes four hooks that fit into four slots in the rear of the deskphone.
March 2015 Installing and Maintaining Avaya E129 SIP Deskphone 9
Comments? infodev@avaya.com
Page 10
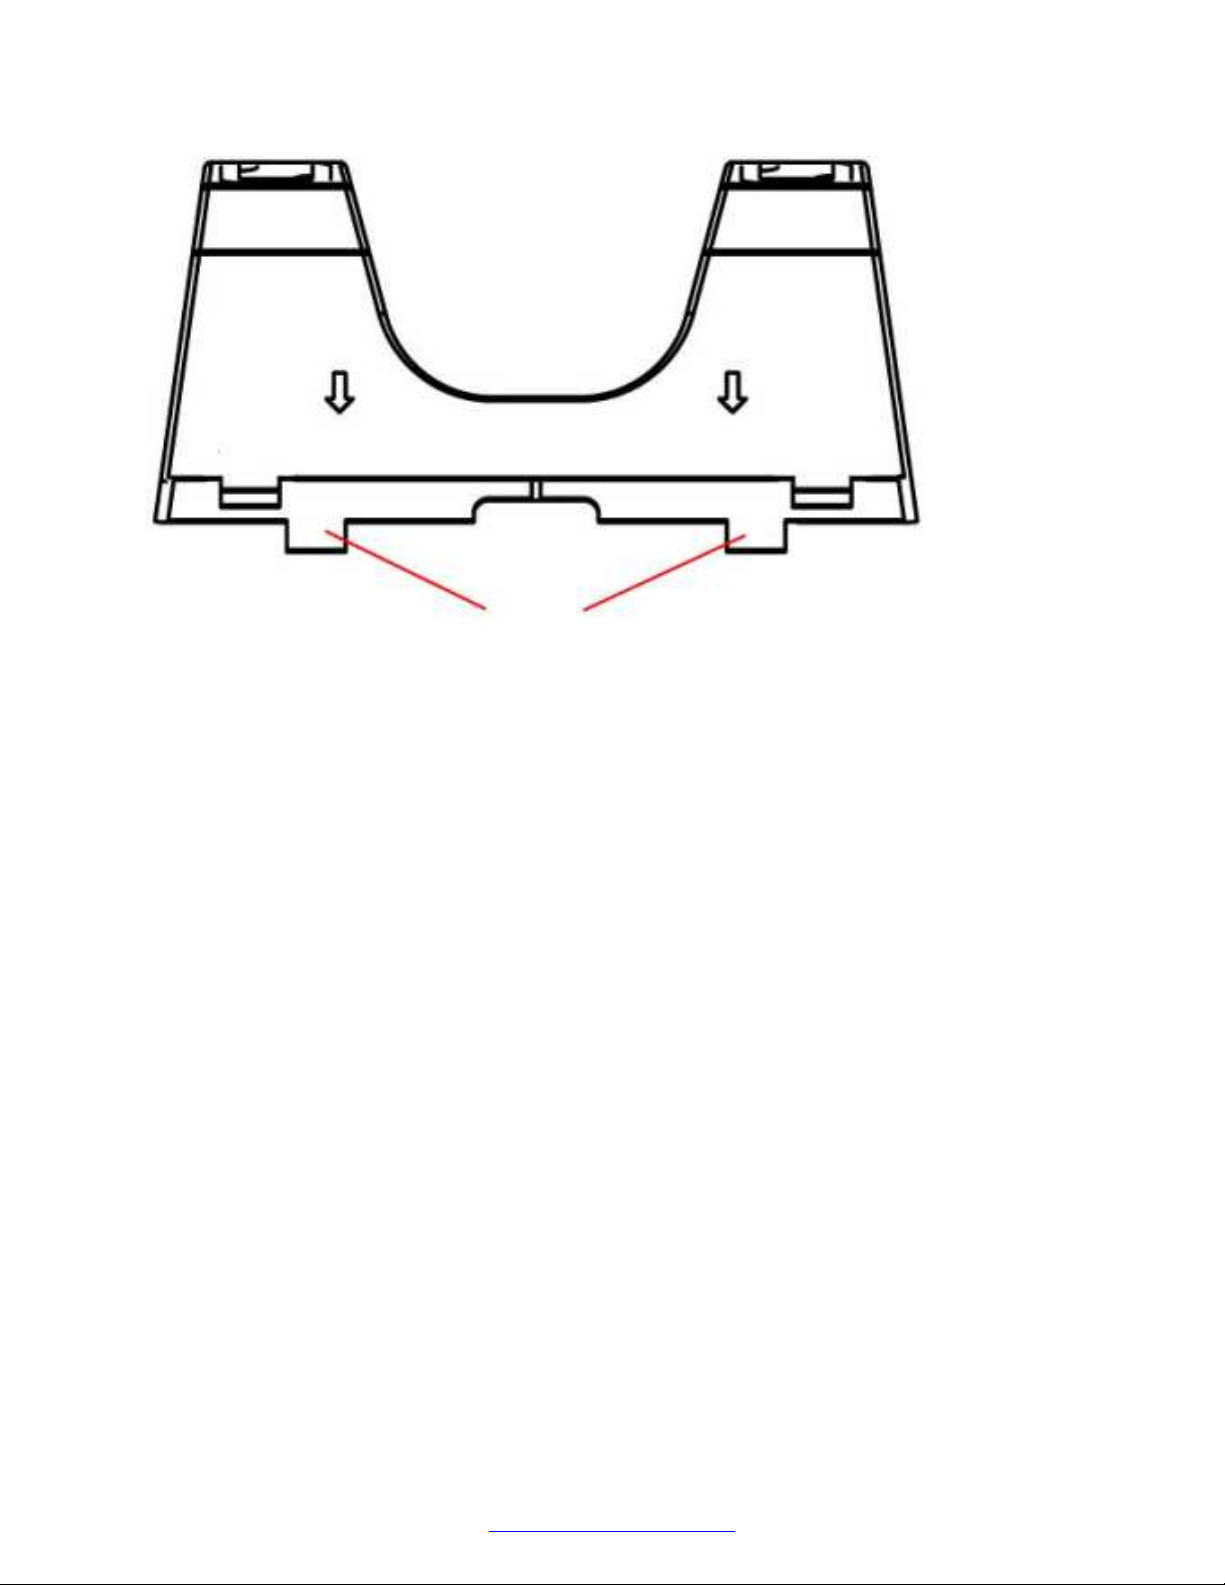
Hooks
Getting started
Attaching the stand
Procedure
1. Hold the stand with the arrows facing down and towards the side of the LAN and PC ports.
2. Insert the hooks on the side that does not have arrow marks into the upper two slots.
3. On the arrow-marked side, press the hooks and push down into the lower two slots.
The stand fits into the back of the deskphone.
Detaching the stand
Procedure
On the arrow-marked side, press the hooks, and pull up from the lower two slots.
The hooks in the upper two slots detach simultaneously.
10 Installing and Maintaining Avaya E129 SIP Deskphone March 2015
Comments? infodev@avaya.com
Page 11
Chapter 3: Deskphone installation in the IP
Office environment
Installation methods
To install Avaya E129 SIP Deskphone, you can select any of the following methods:
1. Configuration 1 on page 11 - DHCP server on IP Office: You can enable the DHCP server
on IP Office. The DHCP server returns the DHCP option 66 to Avaya E129 SIP Deskphone
that provides the firmware and configuration server details to the deskphone.
2. Configuration 2 on page 12 - Third-party DHCP server configured with the DHCP option
66: You can use a third-party DHCP server and configure the DHCP option 66. The DHCP
option 66 provides the firmware and configuration server details to deskphones.
3.
Configuration 3 on page 12 - Third-party DHCP server without configuring the DHCP
option 66: You can use a third-party DHCP server and provide the firmware and
configuration server details to the deskphone through the deskphone interface.
4.
Configuration 4 on page 13 - Static IP configuration: You can configure all the IP
parameters and the firmware and configuration server details through the deskphone
interface.
Note:
When you configure the VLAN ID by using LLDP on the switch and the phone, the
supported method for getting the VLAN ID is the standard LLDP-MED.
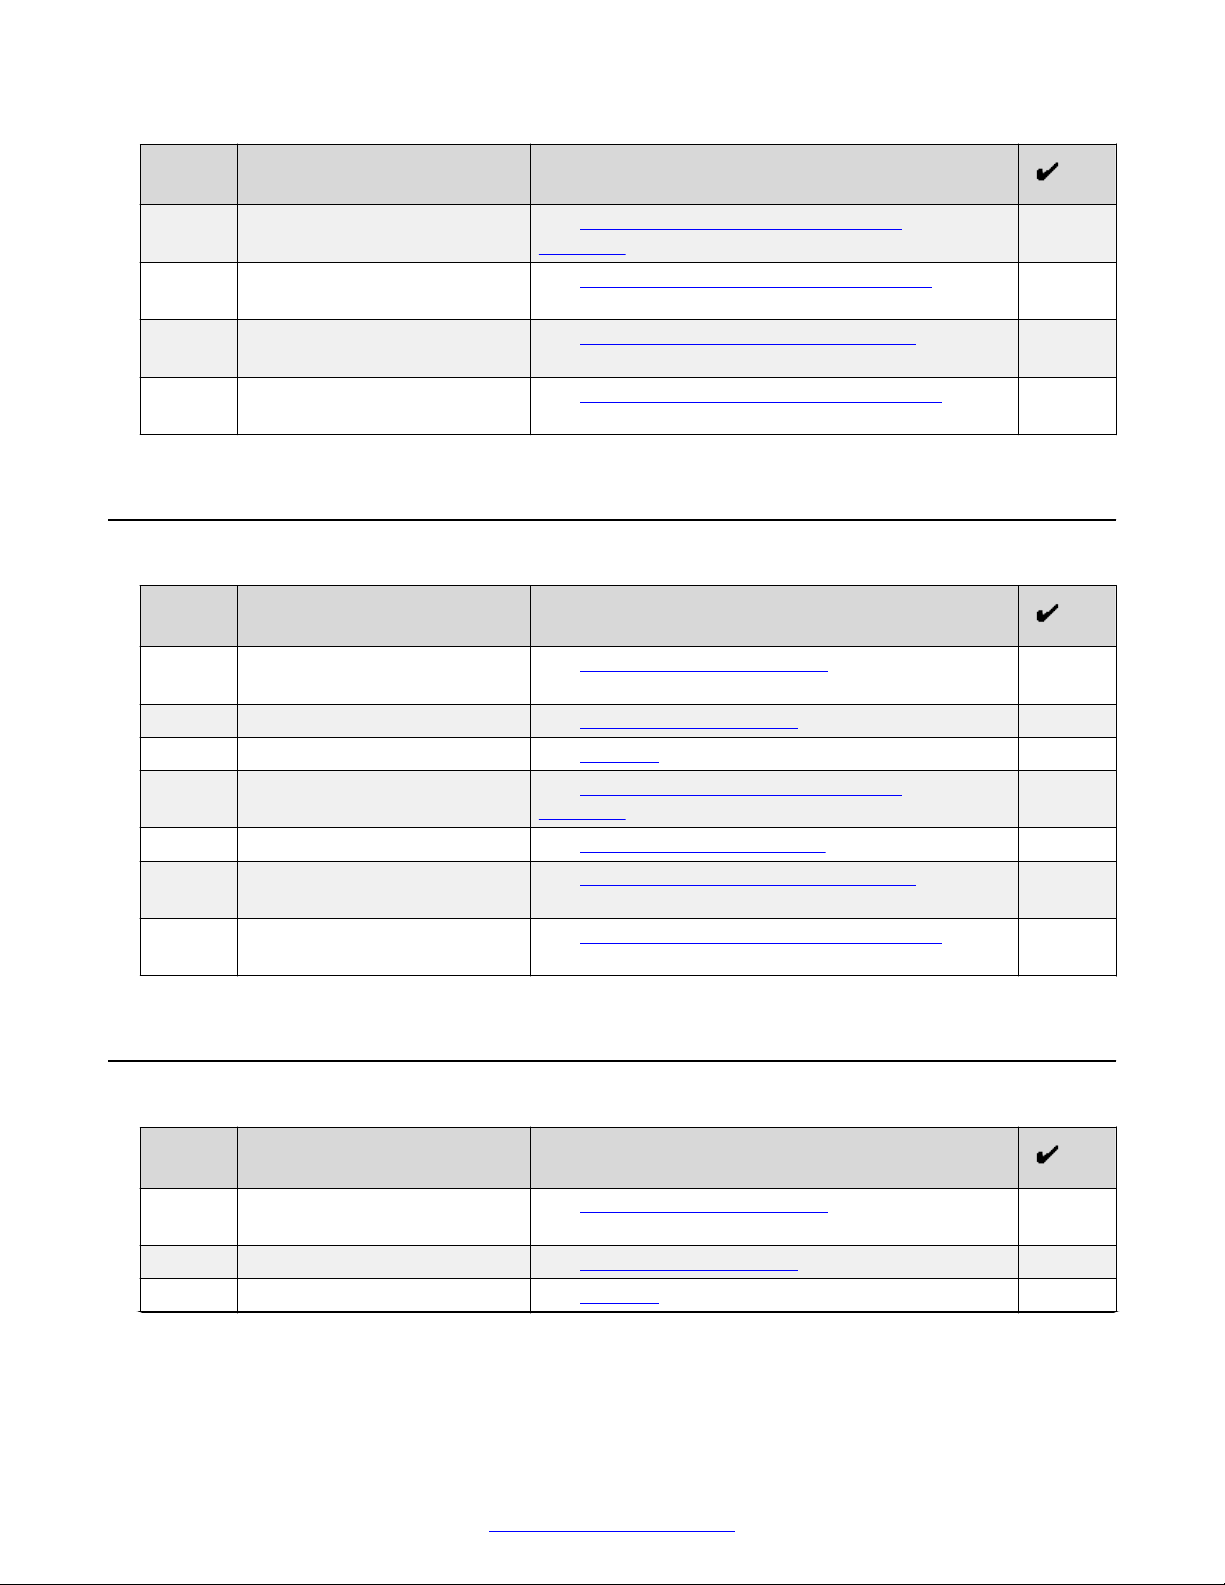
Configuration 1 checklist
No.
1. Check preinstallation
2. Create deskphone users. See Create deskphone users on page 16.
3. Check the required licenses. See Licenses on page 17.
Task Reference
See Preinstallation requirements on page 14.
requirements.
Table continues…
March 2015 Installing and Maintaining Avaya E129 SIP Deskphone 11
Comments? infodev@avaya.com
Page 12
Deskphone installation in the IP Office environment
No. Task Reference
4. Prepare the IP Office system
for SIP telephony.
5. Enable DHCP on IP Office
server.
6. Connect deskphone to the
network.
7. Secure deskphone
administration control.
See Prepare the IP Office system for SIP
telephony on page 18.
See Enabling DHCP on the IP Office system on
page 20.
See Connecting deskphone to the network on
page 22.
See Secure deskphone administration control on
page 28.
Configuration 2 checklist
No. Task Reference
1. Check preinstallation
requirements.
2. Create deskphone users. See Create deskphone users on page 16.
3. Check the required licenses. See Licenses on page 17.
4. Prepare the IP Office system
for SIP telephony.
5. Set the DHCP option 66. See Setting the DHCP option 66 on page 21
6. Connect deskphone to the
network.
7. Secure deskphone
administration control.
See Preinstallation requirements on page 14.
See Prepare the IP Office system for SIP
telephony on page 18.
See Connecting deskphone to the network on
page 22.
See Secure deskphone administration control on
page 28.
Configuration 3 checklist
No.
1. Check preinstallation
2. Create deskphone users. See Create deskphone users on page 16.
3. Check the required licenses. See Licenses on page 17.
12 Installing and Maintaining Avaya E129 SIP Deskphone March 2015
Task Reference
See Preinstallation requirements on page 14.
requirements.
Table continues…
Comments? infodev@avaya.com
Page 13

No. Task Reference
Configuration 4 checklist
4. Prepare the IP Office system
for SIP telephony.
5. Provide power to the
deskphone without connecting
the deskphone to the network
and let the deskphone start.
6. Provide firmware and
configuration server details to
the deskphone.
7. Connect deskphone to the
network.
8. Secure deskphone
administration control.
See Prepare the IP Office system for SIP
telephony on page 18.
See Providing firmware and configuration server
details to the deskphone on page 22.
See Connecting deskphone to the network on
page 22.
See Secure deskphone administration control on
page 28.
Configuration 4 checklist
No.
1. Check preinstallation
2. Create deskphone users. See Create deskphone users on page 16.
3. Check the required licenses. See Licenses on page 17.
4. Prepare the IP Office system
5. Provide power to the
6. Provide IP details to the
7. Provide firmware and
8. Connect deskphone to the
9. Secure deskphone
Task Reference
See Preinstallation requirements on page 14.
requirements.
See Prepare the IP Office system for SIP
for SIP telephony.
deskphone without connecting
the deskphone to the network
and let the deskphone start.
deskphone.
configuration server details to
the deskphone.
network.
administration control.
telephony on page 18.
See Providing IP details to the deskphone on
page 21.
See Providing firmware and configuration server
details to the deskphone on page 22.
See Connecting deskphone to the network on
page 22.
See Secure deskphone administration control on
page 28.
March 2015 Installing and Maintaining Avaya E129 SIP Deskphone 13
Comments? infodev@avaya.com
Page 14

Deskphone installation in the IP Office environment
Preinstallation requirements
To install the Avaya E129 SIP Deskphone in an IP Office environment, ensure that you have the
following provisions:
• IP Office system on page 14
• Telephone power on page 15
• DHCP server on page 15
File server on page 15
•
• Avaya IP endpoint licenses on page 15
IP Office requirements
The IP Office system must:
• Be upgraded to IP Office Release 9.0.3 or later.
• Be running in any IP Office mode other than Basic Edition.
• Include unused Avaya IP endpoint licenses.
• Have Voice Compression Modules (VCM) in the control unit of IP500 and IP500 V2 based
systems.
The IP Office system must have voice compression channels, also known as VCM channels. VCM
is required:
• During incoming or outgoing call setup with the system.
• During any call to or from a non-IP trunk or phone.
• During any call to or from an IP trunk or phone that is using a different codec than the
telephone.
For IP500 and IP500 V2 systems, you can add VCM to the system through a combination of the
following options.
• IP500 VCM Base Cards: For IP500 and IP500v2 systems, installation of up to 2 IP500 VCM
base cards. There are 2 types of card are available, the IP500 VCM 32 and the IP500 VCM 64,
each providing 32 and 64 VCM channels respectively. Note that each IP500 VCM card also
enables 12 Avaya IP endpoints without requiring licenses
• IP500 Combination Cards: For IP500v2 systems only, installation of up to 2 IP500 Combination
cards. These cards provide a mix of digital extension ports, analog trunk ports and trunk ports.
Each card also provides 10 voice compression channels. These cards do not enable any
unlicensed Avaya IP endpoints.
• IP400 VCM Cards: For IP500 and IP500v2 systems, installation of up to 2 legacy IP400 VCM
cards using an IP500 Legacy Card Carrier. The IP400 VCM cards supported 4, 8, 16, 24, or 30
voice compression channels.
For Linux based IP Office systems no additional hardware is required.
14 Installing and Maintaining Avaya E129 SIP Deskphone March 2015
Comments? infodev@avaya.com
Page 15

Preinstallation requirements
Telephone power requirements
Each Avaya E129 SIP Deskphone requires a power supply. You can provide the power through:
• A PoE (Power over Ethernet) network.
• A 5V DC power supply unit that requires each phone to have access to a mains power outlet.
DHCP server requirements
Avaya recommends using a DHCP server because of the ease that the DHCP server provides for
installation and maintenance procedures. The DHCP server provides following information to the
deskphone:
• The IP address of the deskphone
• The IP address of the file server where the firmware and the configuration files reside.
You can provide DHCP support in two ways:
• DHCP on IP Office : You can enable DHCP on an IP Officesystem. In this case you need not
configure the DHCP option 66 because the IP Office system provides the firmware and the
configuration server details to the deskphone.
• Third-party DHCP: You can configure a separate server as a DHCP server and configure the
DHCP option 66 to provide the firmware and the configuration server details to the deskphone.
File server requirements
The IP Office system performs the role of a file server to provide the configuration and firmware files
that the deskphone requires.
To operate with the IP Office system, the Avaya E129 SIP Deskphone must download specific
firmware and configuration files at the time of start-up. The deskphone requests the firmware and
configuration files from a file server. The deskphone uses the HTTP file server address to request
for the files.
Avaya IP endpoint licenses requirements
Each IP endpoint that the telephone system supports requires a license, either an Avaya IP
Endpoint license or a third-party IP Endpoint license. Avaya E129 SIP Deskphone uses the Avaya
IP Endpoint licenses.
The system automatically assigns the licenses to deskphones in order of deskphone registration.
However, you can configure existing extensions to reserve a license. The license reservation
ensures that the deskphones do not become unlicensed when newly added extensions manage to
register first following a system reboot.
March 2015 Installing and Maintaining Avaya E129 SIP Deskphone 15
Comments? infodev@avaya.com
Page 16

Deskphone installation in the IP Office environment
For IP500 and IP500 V2 systems, each IP500 VCM 32 and IP500 VCM 64 card installed in the
system supports 12 Avaya IP endpoints without licenses.
Create deskphone users
For each deskphone, you must create a user entry and an extension entry in the system
configuration.
You must create users and extensions prior to connecting the deskphones to the network.
Adding and configuring deskphone users
Procedure
1. Receive the configuration from the system through IP Office Manager.
2.
Select User.
3.
Click
4. Select the User tab.
5. In the Name field, enter the account name.
6. In the Extension field, enter an extension number. It is the user name that the deskphone
requests when the deskphone connects to the IP Office system.
7. Select the Telephony > Supervisor Settings tab.
8. In the Login Code field, enter a login code of at least 4 digits. It is the password that the
deskphone requests when the deskphone connects to the IP Office system.
9. Click OK.
10. If IP Office Manager prompts to create an extension, select SIP Extension, and click OK.
11. Repeat Step 1 to Step 10 to add more users.
Create a New Record and select User.
Next steps
Add user extensions in the IP Office configuration.
Configuring user extensions
About this task
You must create a matching extension entry for each user that you create in the system
16 Installing and Maintaining Avaya E129 SIP Deskphone March 2015
Comments? infodev@avaya.com
Page 17

Procedure
1. Using IP Office Manager, receive the configuration from the system.
2.
Select Extensions.
3.
Locate the SIP extension that you created for the user. Otherwise, click Create a New
Record and select Extension.
4. Select the Extn tab.
5. In the Base Extension field, enter the base extension. This should match the Extension
setting of the SIP user.
6. Set the Force Authorization field to on. This setting forces the phone registration to be
validated against the IP Office user setting.
7. Select the VoIP tab.
8. In the Codec Selection field, click the codec. If the Codec Selection is System Default, the
extension uses the system codec preferences. In most cases this is preferred and any
changes required should be made at the system level to ensure consistency for all IP trunks
and extensions. However, if required, the Codec Selection of each individual trunk and
extension can be adjusted to differ from the system defaults.
Licenses
9. In the Reserve License field, enter the reserve license. Each non-Avaya IP phones requires
an Avaya IP Endpoint license. Normally the available licenses are issued in the order that
devices register. This option allows an extension to be pre-licensed before the device has
registered by selecting the option Reserve Avaya IP endpoint license.
10. Repeat Step 1 to Step 9 for each user that you created.
Licenses
All IP telephones connecting to the IP Office system require a license. The type of license varies
depending on the type of phone. Each Avaya E129 SIP Deskphone uses an Avaya IP Endpoint
license.
Checking the IP Office serial number
About this task
Licenses are issued against a unique feature key or dongle serial number. For IP500 V2 control
units that number is unique to the System SD card fitted to the system. For IP500 control units that
number is unique to the smart media card inserted in the back of the control unit.
Procedure
1. Using IP Office Manager, receive the configuration from the telephone system.
March 2015 Installing and Maintaining Avaya E129 SIP Deskphone 17
Comments? infodev@avaya.com
Page 18

Deskphone installation in the IP Office environment
2.
Select System.
3. Select the System tab.
4. For IP500 and IP500 v2 systems, the feature key serial number is shown by the Dongle
Serial Number field. For Server Edition systems, the feature key serial number is shown by
the System Identification field
Adding licenses
About this task
Multiple licenses can be added for a cumulative number of license instances.
Procedure
1. Using IP Office Manager, receive the configuration from the telephone system.
2.
Select License.
The system displays the current licenses.
3. To add a license, click Add.
4. Select ADI, and click OK.
5. Enter your license, and click OK.
6. The system displays the type of the license but with its License Status set to Unknown. If
the system does not recognize the License Type, check that you entered the license
correctly.
7. Save the configuration back to the system and then receive the configuration from the
system again.
8. The License Status should now show Valid.
Preparing the IP Office system for SIP telephony
You must prepare the IP Office system to support the SIP telephony.
Enabling the SIP telephones support
Before you begin
IP Office support for SIP extensions is enabled.
18 Installing and Maintaining Avaya E129 SIP Deskphone March 2015
Comments? infodev@avaya.com
Page 19

Preparing the IP Office system for SIP telephony
About this task
IP Office system has two LAN interfaces, LAN1 and LAN2. On IP500 and IP500 V2 systems these
match the LAN and WAN ports respectively on the back of the control units. You can use both LAN1
and LAN2 to support SIP telephones.
Procedure
1. Receive the configuration from the system through IP Office Manager.
2.
Select
3. Select the LAN1 or LAN2 tab depending on which of the LAN interfaces you want to use to
support SIP extensions. Note the IP Address settings for the LAN.
4. Select the VoIP tab.
System.
5. Enter the required details and click OK.
March 2015 Installing and Maintaining Avaya E129 SIP Deskphone 19
Comments? infodev@avaya.com
Page 20

Deskphone installation in the IP Office environment
SIP telephones support field descriptions
Name Description
SIP Registrar
Enable
Domain Name The local SIP registrar domain name that SIP devices use to register with IP Office. If
Layer 4 Protocol The transport protocol for SIP traffic between the IP Office and SIP extension devices.
TCP Port The SIP port to use if you select TCP.
UDP Port The UDP port to use if you select UDP.
Challenge Expiry
Time (sec)
Enables the SIP registrar. You must enable this option.
this field is blank, the SIP devices use the LAN IP address to register.
The default value is blank.
You can use both TCP and UDP.
The default value is both TCP and UDP.
The default value is 5060.
The default value is 5060.
The challenge expiry time that is used during SIP extension registration. When a
device registers, the IP Office SIP Registrar sends a challenge back to the device and
waits for an appropriate response. If the response is not received within this timeout
the registration fails.
The default value is 10.
Auto-create Extn/
User
When this option is selected, the IP Office can automatically create new user and
extension entries in its configuration when a SIP phone registers with the system. If
this method is used for installation, it is important to check that the settings created
match the SIP device. It is also important to deselect this option after installation of the
SIP extension devices.
The default value is off.
Enabling DHCP on the IP Office system
About this task
You can configure theIP Office system to be used as the DHCP server.
Procedure
1. Receive the configuration from the system throughIP Office Manager.
2.
Select System.
3. Select the LAN1 or LAN2 tab based on the system LAN interface that you want to use for
supporting SIP extensions.
20 Installing and Maintaining Avaya E129 SIP Deskphone March 2015
Comments? infodev@avaya.com
Page 21

4. Change the DHCP Mode to Server.
5. Click Advanced. The DHCP Pools tab displays the start address and number of IP
addresses , the pool size, that the IP Office system will issue. If required, click Edit to adjust
these settings.
6. Click OK.
7. If you have made any changes, click OK and save the configuration back to the system.
Setting the DHCP option 66
Before you begin
You must have the IP address of the IP Office server.
Procedure
Set the option 66 to the IP address of the IP Office server.
Provide the IP address in the dotted decimal format along with the string http://.
Setting the DHCP option 66
Providing IP details to the deskphone
Procedure
1. Press Menu > Network Config > IP Setting and provide the IP details.
2. Select Static IP and press Menu.
The deskphone gets set to use a static IP address.
3. Select IP and press Menu.
4. Enter the deskphone IP address and press the OK softkey.
5. Select Netmask and press Menu.
6. Enter the subnet mask and press the OK softkey.
7. Select Gateway and press Menu.
8. Enter the network default gateway address and press the OK softkey.
9. Select the Back softkey and press Menu.
The deskphone displays the prompt to reboot.
10. Press the No softkey.
March 2015 Installing and Maintaining Avaya E129 SIP Deskphone 21
Comments? infodev@avaya.com
Page 22

Deskphone installation in the IP Office environment
Providing firmware and configuration server details to the deskphone
Before you begin
You must obtain the IP address of the IP Office server.
Procedure
1. Press Menu > Config > Upgrade > Firmware Server.
2. Enter the URL of the IP Office IP address.
3. Press OK.
4. When the deskphone displays a prompt to reboot, press the No softkey .
5. Select Config Server and press Menu.
6. Enter the URL of the IP Office IP address.
7. Press OK.
The deskphone displays the prompt to reboot.
8. Press the Yes softkey .
Connecting deskphones to the system
Procedure
1. Connect the handset and the main case with the deskphone cord.
2. Connect the LAN port of the deskphone to the RJ45 socket of a hub, a switch, or a router
with the Ethernet cable and press the cable in the groove.
3. Attach the deskphone stand to the back of the deskphone.
4. If the switch to which you connected the deskphone is not a PoE switch, connect the 5-V DC
output plug to the power port on the deskphone and plug the power adapter into an electrical
outlet.
The deskphone screen displays various messages as the deskphone starts.
5. When the deskphone displays Username, enter the user name that you created, and press
OK.
6. When the deskphone displays Password, enter the password for the user, press OK.
The deskphone displays Processing login message.
7. If the details are correct, the deskphone displays the normal idle display with NextScr and
Headset buttons.
22 Installing and Maintaining Avaya E129 SIP Deskphone March 2015
Comments? infodev@avaya.com
Page 23

Connecting deskphones to the system
If the deskphone does not recognize the details, the deskphone displays login failed
message and displays the Login screen again.
Next steps
When installation and testing of the deskphone is complete, you must restrict the configuration
options to prevent users from making changes that can affect the deskphone operation.
Related Links
Secure deskphone administration control on page 28
March 2015 Installing and Maintaining Avaya E129 SIP Deskphone 23
Comments? infodev@avaya.com
Page 24

Chapter 4: Deskphone installation in the
Avaya Aura environment
Preinstallation checklist
No. Task References
1. Check the prerequisites See Prerequisites on page 24
2. Configure the DHCP server See DHCP server configuration on
page 25
3. Create the deskphone users See Creating the deskphone users on
page 26
4. Connect all the deskphones See Connecting deskphones to the
system on page 27
5. Secure the deskphone administration
control
See Secure deskphone administration
control on page 28
Preinstallation requirements
Software requirements
The Avaya E129 SIP Deskphone is supported on:
• Avaya Aura® Communication Manager 6.3.2 or later with Avaya Aura® Session Manager 6.3.2
or later and with Avaya Aura® System Manager 6.3.2 or later
• Avaya Aura® Conferencing 7.2 or later (supports only MeetMe conference)
• Avaya Aura® Messaging 6.2 or later
• Avaya Session Border Controller for Enterprise 6.2 is the minimum version to support remote
E129 SIP Deskphones
• Avaya Aura® Solution for Midsize Enterprise 6.2 or later
Ensure that you own licenses to use the Dynamic Host Configuration Protocol (DHCP) and HTTP or
HTTPS server software. You can install the DHCP and HTTP or HTTPS server software on the
same machine.
24 Installing and Maintaining Avaya E129 SIP Deskphone March 2015
Comments? infodev@avaya.com
Page 25

DHCP server configuration
DHCP server configuration
DHCP minimizes maintenance for Avaya E129 SIP Deskphone by removing the need to individually
assign and maintain IP addresses and other parameters for each deskphone on the network.
Depending on administration, the DHCP server provides the following information to the
deskphones:
• IP address of the deskphone
• IP address of the HTTP or HTTPS file server where the firmware and the configuration files
reside.
• IP address of the subnet mask
• IP address of the router
• IP address of DNS
Administer the LAN so that each SIP deskphone can access a DHCP server that contains the IP
addresses and subnet mask.
The IP address reuse capability allows the deskphone to reuse its previous IP address and
parameter settings even if the DHCP server is temporarily unavailable. A user can manually assign
a different IP address to an IP deskphone. If the user assigns the IP address manually, the
deskphone does not search for a DHCP server unless the static IP address is, subsequently,
unassigned manually.
Since manual entry of an IP address is an error-prone process, you must ensure the following:
• A minimum of two DHCP servers are available for reliability.
• A DHCP server is available when the IP deskphone reboots.
• A DHCP server is available at remote sites if WAN failures isolate IP deskphones from the
central site DHCP servers.
We can provide the configuration file that the deskphone require through an HTTP or HTTPS file
server.
Setting the DHCP server
About this task
This section is limited to describing a generic administration that works with Avaya E129 SIP
Deskphone. The following DHCP software alternatives are common to Windows operating systems:
• Windows NT® 4.0 DHCP Server
• Windows 2000® DHCP Server
• Windows 2003® DHCP Server
• Windows 2008® DHCP Server
• Windows 2012® DHCP Server
March 2015 Installing and Maintaining Avaya E129 SIP Deskphone 25
Comments? infodev@avaya.com
Page 26

Deskphone installation in the Avaya Aura environment
Procedure
1. Install the DHCP server software according to the vendor instructions.
2. Configure the range of IP address available to the deskphones.
3. Configure the DHCP options.
DHCP options
DHCP option Description
Option 3 Specifies the gateway or router IP addresses. If using more than one address, the
total list can contain up to 127 total ASCII characters. You must separate IP
Addresses with commas with no intervening spaces.
Option 6 Specifies the DNS servers address list. If using more than one address, the total list
can contain up to 255 total ASCII characters. You must separate IP Addresses with
commas with no intervening spaces. At least one address in Option 6 must be a valid,
nonzero, dotted decimal address.
Option 15 Specifies the DNS domain name. This string contains the domain name to be used
when DNS names in system parameters are resolved into IP addresses. This domain
name is appended to the DNS name before the deskphones attempt to resolve the
DNS address. Option 15 is necessary if you want to use a DNS name for the HTTP
server.
Option 66 Specifies the TFTP, HTTP, or HTTPS server link. You must provide the IP address in
a dotted decimal format along with the string http://. For example, http://
148.147.171.196. Ensure that:
• The firmware and configuration files are on the specified IP address.
• The configuration file must not contain the IP address of the TFTP, HTTP, or
HTTPS server or the firmware server.
• The configuration file must contain the IP address of SIP proxy server and other
parameters.
Creating deskphone users
Procedure
1. In a Web browser, enter the System Manager IP address and press Enter.
2. Log in to the application with your credentials.
3. Click User Management > Manage Users.
4. Click New.
5. On the Identity tab, enter the user details.
26 Installing and Maintaining Avaya E129 SIP Deskphone March 2015
Comments? infodev@avaya.com
Page 27

6. Click the Communication Profile tab.
7. Enter details for Communication Address, Session Manager Profile, CM Endpoint
Profile, and Messaging Profile. Configure the phone type as 9640SIP or 9641SIP, such
that the default template is Default_9640SIP_CM_6_3 or Default_9641SIP_CM_6_3.
8. Press Commit & Continue.
Connecting deskphones to the system
Procedure
1. Connect the handset and the main case with the deskphone cord.
2. Connect the LAN port of the deskphone to the RJ45 socket of a hub, a switch, or a router
with the Ethernet cable and press the cable in the groove.
3. Attach the deskphone stand to the back of the deskphone.
4. If the switch to which you connected the deskphone is not a PoE switch, connect the 5-V DC
output plug to the power port on the deskphone and plug the power adapter into an electrical
outlet.
Connecting deskphones to the system
The deskphone screen displays various messages as the deskphone starts.
5. When the deskphone displays Username, enter the user name that you created, and press
OK.
6. When the deskphone displays Password, enter the password for the user, press OK.
The deskphone displays Processing login message.
7. If the details are correct, the deskphone displays the normal idle display with NextScr and
Headset buttons.
If the deskphone does not recognize the details, the deskphone displays login failed
message and displays the Login screen again.
Next steps
When installation and testing of the deskphone is complete, secure the deskphone administration
control.
March 2015 Installing and Maintaining Avaya E129 SIP Deskphone 27
Comments? infodev@avaya.com
Page 28

Chapter 5: Secure deskphone
administration control
After you installed the deskphone, you must restrict the configuration options to prevent users from
making changes that can affect the deskphone operation.
You can secure the deskphone administration control through:
• The configuration file parameters
• The Web GUI
Related Links
Administration control through the configuration file on page 28
Administration control through the configuration file
You can administer control of the deskphone centrally through the configuration file that Avaya
provides with E129 deskphones. The configuration file resides on the configuration server and is a
binary or an XML file that contains configuration parameters. Each parameter corresponds to a
feature that you configure through the Web interface. To configure a feature, you can assign the
required value to the parameter of that feature.
When the deskphone starts or restarts, the deskphone makes a TFTP, HTTP, or HTTPS request to
the configuration server for configuration files. The deskphone requests for an XML file named
cfgxxxxxxxxxxxx.xml followed by a file named cfgxxxxxxxxxxxx, where xxxxxxxxxxxx is the MAC
address of the deskphone. For example, cfg000b820102ab.xml and cfg000b820102ab. If these files
are unavailable, the deskphone downloads a generic configuration file, cfg.xml. The configuration
file name must be in lowercase.
Set the following parameters in the configuration file.
Parameter Default value Description
P196 - Specifies user password.
P2 - Specifies administrator password.
Table continues…
28 Installing and Maintaining Avaya E129 SIP Deskphone March 2015
Comments? infodev@avaya.com
Page 29

Administration control through the Web GUI
Parameter Default value Description
P1357 0 Specifies the access control for keypad Menu settings. Assign any of the
following values:
• 0: Unrestricted. Displays all menu options on the deskphone.
• 1: Basic settings only. Hides the Config menu option on the deskphone.
• 2: Constraint mode. Hides the Config, Factory Functions, and Network
Config menu options on the deskphone. You can view these menu
options on the deskphones if you login using the Admin Login option
that the deskphone displays in this mode.
Related Links
Secure deskphone administration control on page 28
Administration control through the Web GUI
Obtaining the deskphone IP address
Procedure
1. On the Home screen, press NextScr.
The deskphone displays the current IP address. Note this IP address to gain access to the
deskphone Web GUI.
2. Press NextScr again. The deskphone displays the account name.
3. Press NextScr again to return the Home screen.
Related Links
Secure deskphone administration control on page 28
Changing the web access password
About this task
There are two levels of browser access to the deskphone, user access and full administrator
access. You must change the administrator password to prevent users from making administration
related changes to the deskphone.
Procedure
1. Enter the IP address of the deskphone in a browser to gain access to the deskphone web
GUI.
March 2015 Installing and Maintaining Avaya E129 SIP Deskphone 29
Comments? infodev@avaya.com
Page 30

Secure deskphone administration control
2. On the Login page, enter the deskphone current password for full administration access. The
default password is admin for full administration access.
3. Click Maintenance > Web Access.
4. Under the Admin Password label, enter and confirm the new password that the
administrator must use.
5. Click Save and Apply.
Related Links
Secure deskphone administration control on page 28
Hiding the deskphone configuration menus
About this task
You can hide the menus on the deskphone that relate to the deskphone configuration.
Procedure
1. Enter the IP address of the deskphone in a browser to gain access to the deskphone web
GUI.
2. On the Login page, enter the deskphone current password for full administration access. The
default password is admin for full administration access.
3. Click Maintenance > Security.
4. In the Configuration via Keypad Menu field, click to select the level of configuration access
that should be allowed from the deskphone.
5. Click Save and Apply.
Related Links
Secure deskphone administration control on page 28
Deskphone configuration menus field descriptions
The Configuration via Keypad Menu field provides the following options for different access levels
for menu on the deskphone.
Name
Unrestricted Displays all menu options on the deskphone.
Basic settings
only
Constraint Mode Hides the Config , Network Config, and Factory Functions menu options on the
Description
Hides the Config menu option on the deskphone.
deskphone. You can view these menu options on the deskphones if you login using
the Admin Login option that the deskphone displays in this mode.
30 Installing and Maintaining Avaya E129 SIP Deskphone March 2015
Comments? infodev@avaya.com
Page 31

Related Links
Secure deskphone administration control on page 28
Administration control through the Web GUI
March 2015 Installing and Maintaining Avaya E129 SIP Deskphone 31
Comments? infodev@avaya.com
Page 32

Chapter 6: Upgrading the deskphone
Automatic upgrade
You can choose to automatically upgrade the deskphone by setting the option from the Web GUI.
During automatic upgrade:
• The deskphone restarts three times. It takes close to 15 minutes for the process to complete.
• You must not power down the deskphone, disconnect the deskphone from the network or
restart the deskphone from SSA.
• In some very rare circumstances if the deskphone is reset and disconnected from the network
during the upgrade procedure, the deskphone might fail to upgrade even after subsequent
resets. In this case, to recover the deskphone and allow the upgrade to proceed, you must set
the deskphone to factory settings.
Manual upgrade
Downloading the firmware
Procedure
1. Go to the
2. In the Enter Your Product Here field, enter E129.
3. In the Choose Release field, click the required release number.
4. Select Downloads.
5. Press Enter.
The system displays a list of software that you can download.
6. Click the required version.
The system displays the Downloads & Documents page.
7. In the File field, click the zipped file and save the file on your system.
8. Unzip the file that you downloaded at the appropriate location on the firmware server.
Avaya Support website.
32 Installing and Maintaining Avaya E129 SIP Deskphone March 2015
Comments? infodev@avaya.com
Page 33

Manual upgrade
Release 1.1 software distribution packages in zip format also contain a signatures directory
containing signature files and a certificate file to be used by the Avaya file server application
on the Utility server. Customers using their own (non-Avaya) HTTP server can ignore or
delete this directory.
Upgrading deskphones
Before you begin
Ensure that you have the latest version of the firmware on the file server.
About this task
Use the following procedure to perform bulk upgrade of the deskphones. During the upgrade, if the
deskphone receives a call, the deskphone starts ringing. If the user does not answer the call, the
deskphone continues to ring till the upgrade completes. Therefore, you must plan the upgrade
during the off hours.
Procedure
1. Set the DHCP option 66 to the file server that contains the latest firmware.
2. Reboot the deskphones.
Upgrading a deskphone through the deskphone interface
Before you begin
Ensure that you have the latest version of the firmware on the file server.
Procedure
1. Press Menu > Config > Upgrade > Upgrade Via.
2. Select one of the following options:
• TFTP
• HTTP
• HTTPS
3. Press Firmware Server.
4. Enter the URL or IP address of the firmware server.
5. Press OK.
The deskphone displays the prompt to reboot.
6. Press the Yes softkey.
The deskphone screen displays the firmware upgrade information.
March 2015 Installing and Maintaining Avaya E129 SIP Deskphone 33
Comments? infodev@avaya.com
Page 34

Upgrading the deskphone
Upgrading a deskphone through the Web GUI
Before you begin
Ensure that you have the latest version of the firmware on the file server.
Procedure
1. Enter the IP address of the deskphone in a browser, and press Enter.
The system displays the Login page of the Web GUI.
2. Login to the Web GUI.
3. Click Maintenance > Upgrade and Provisioning.
The system displays the Upgrade and Provisioning page.
4. Enter the required details for each field.
5. Click Save.
6. Click Reboot at the upper-right corner of the Web GUI.
Related Links
Upgrading and provisioning settings field descriptions on page 34
Upgrading and provisioning settings field descriptions
Name
Firmware Upgrade and Provisioning Specifies whether the deskphone checks and installs
XML Config File Password Specifies the password that the deskphone uses to
HTTP/HTTPS User Name Specifies the user name to login to the HTTP and
HTTP/HTTPS Password Specifies the password to login to the HTTP and
Description
a new firmware every time the deskphone boots up:
The options are:
• Always Check for New Firmware: The
deskphone always checks for a new firmware.
• Check New Firmware Only When F/W pre/suffix
Changes: The deskphone always checks for a
change in the prefix or suffix of the firmware file.
• Always Skip the Firmware Check: The
deskphone does not check for a new firmware.
decrypt the encrypted XML configuration file.
HTTPS server.
HTTPS server.
Table continues…
34 Installing and Maintaining Avaya E129 SIP Deskphone March 2015
Comments? infodev@avaya.com
Page 35

Manual upgrade
Name Description
Upgrade via Specifies the firmware upgrade method. The options
are:
• TFTP
• HTTP
• HTTPS
Firmware Server Path Specifies the server path for the firmware.
Config Server Path Specifies the sever path for the configuration file.
Firmware File Prefix Specifies the prefix for the firmware file. The
deskphone downloads the firmware file only if the
prefix matches the one that you specified.
Firmware File Postfix Specifies the postfix for the firmware file. The
deskphone downloads the configuration file only if
the postfix matches the one that you specified.
Config File Prefix Specifies the prefix for the configuration file. The
deskphone downloads the configuration file only if
the prefix matches the one that you specified.
Config File Postfix Specifies the postfix for configuration file. The
deskphone downloads the configuration file only if
the postfix matches the one that you specified.
Allow DHCP Option 43 and Option 66 to Override
Server
Specifies whether the DHCP option 66 overrides the
configuration server. If you enable the DHCP option
66, the system can redirect the HTTP/TFTP server.
The options are:
• No
• Yes
Allow DHCP Option 120 to Override SIP Server Specifies whether the DHCP Option 120 from local
server overrides the SIP server. The options are:
• No
• Yes
Note:
You must use the configuration file to enter the
SIP server list as the DHCP Option 120 has
certain limitations.
Automatic Upgrade Specifies whether the deskphone checks and installs
a new firmware. The options are:
• No: The deskphone does not check for a new
firmware.
Table continues…
March 2015 Installing and Maintaining Avaya E129 SIP Deskphone 35
Comments? infodev@avaya.com
Page 36

Upgrading the deskphone
Name Description
• Yes, check for upgrade every x minute(s): The
deskphone checks for a new firmware after every x
minutes.
• Yes, check for upgrade every day: The
deskphone checks for a new firmware every day.
• Yes, check for upgrade every week: The
deskphone checks for a new firmware every week.
Enabling the automatic upgrade is a preferred option
as the deskphone gets a firmware upgrade without
you rebooting the deskphone for an upgrade.
Hour of the Day(0-23) Specifies the hour of the day when the deskphone
checks the HTTP/TFTP server for a firmware
upgrade or configuration file changes.
Day of the Week (0-6) Specifies the day of the week when the deskphone
checks the HTTP/TFTP server for a firmware
upgrade or configuration file changes.
Authenticate Conf File Specifies whether the deskphone authenticates the
configuration file before accepting the file. The
options are:
• No
• Yes
36 Installing and Maintaining Avaya E129 SIP Deskphone March 2015
Comments? infodev@avaya.com
Page 37

Chapter 7: Troubleshooting
You can install a deskphone through the Web GUI if you face issues while providing firmware and
configuration server details through the deskphone interface. You can also use the Web GUI to
override the settings provided by the IP Office system.
Related Links
Prerequisites on page 37
Installing deskphones through the Web GUI on page 38
Prerequisites
To install the deskphone through the Web GUI, obtain the following information.
Requirement
User login extension and
password
IP address for the deskphone —
Subnet mask —
Gateway address —
SIP outbound proxy server IP
address
SIP user ID —
SIP authentication ID —
SIP password —
SIP transport protocol —
Firmware server IP address The IP address of the HTTP server where the
Configuration file server IP
address
Value Notes
See the following:
• For the IP Office environment : Adding and
configuring deskphone users on page 16 and
Adding user extensions on page 16
• For the Avaya Aura environment: Creating
deskphone users on page 26
—
firmware is located.
The IP address and the directory of the server where
the configuration file is located.
March 2015 Installing and Maintaining Avaya E129 SIP Deskphone 37
Comments? infodev@avaya.com
Page 38

Troubleshooting
Related Links
Troubleshooting on page 37
Installing deskphones through the Web GUI
Procedure
1. Connect the handset and the main case with the deskphone cord.
2. Connect the LAN port of the deskphone to the RJ45 socket of a hub, a switch, or a router
with the Ethernet cable and press the cable in the groove.
3. Attach the deskphone stand to the back of the deskphone.
4. If the switch to which you connected the deskphone is not a PoE switch, connect the 5-V DC
output plug to the power port on the deskphone and plug the power adapter into an electrical
outlet.
The deskphone screen displays various messages as the deskphone starts.
5. Press Menu > Network Config when the deskphone displays the Network Down message
and provide the IP details. For more information about providing IP details, see
details to the deskphone on page 21.
6. When the deskphone displays the prompt to reboot, press the Yes softkey.
The deskphone displays Username.
7. Press Conference and note the IP address that the deskphone displays.
8. Enter the IP address of the deskphone in a web browser and press Enter.
9. Enter the administration password and click Login.
10. Click Maintenance > Upgrade and Provisioning.
11. Enter appropriate values for the Firmware Server Path and Config Server Path fields.
12. Click Save and Apply.
Result
The deskphone restarts and displays various messages.
Next steps
Make a test call to another extension.
Related Links
Troubleshooting on page 37
Providing IP
38 Installing and Maintaining Avaya E129 SIP Deskphone March 2015
Comments? infodev@avaya.com
Page 39

Index
A
Adding and configuring deskphone users ............................16
adding licenses ....................................................................
adding user extensions ........................................................16
administration control through the configuration file ............ 28
automatic upgrade ............................................................... 32
Avaya Aura
installation requirements ...............................................24
Avaya Aura installation requirements .................................. 24
Avaya Aura preinstallation checklist ....................................
Avaya IP endpoint licenses requirements ............................15
18
24
B
bulk upgrade ........................................................................ 33
C
Changing the web access password ................................... 29
Checking IP Office serial number ........................................ 17
Checking licenses ................................................................17
checklist
configuration 1 .............................................................. 11
configuration 2 .............................................................. 12
configuration 3 .............................................................. 12
configuration 4 .............................................................. 13
Configuration 1 checklist ......................................................11
Configuration 2 checklist ......................................................12
Configuration 3 checklist ......................................................12
Configuration 4 checklist ......................................................
configuration details through the Web GUI ..........................37
configuration server details ..................................................22
Configuring DHCP server .................................................... 25
Connecting deskphones to the system ..........................22, 27
connection ports ....................................................................
create deskphone users for IP Office .................................. 16
create users
IP Office ........................................................................16
create users for IP Office ..................................................... 16
Creating the deskphone users .............................................26
13
D
deskphone installation without DHCP server
Web GUI .......................................................................38
deskphone stand ................................................................... 9
attaching ....................................................................... 10
detaching ...................................................................... 10
deskphone upgrade ............................................................. 34
deskphone upgrading ..........................................................
DHCP option 66 ...................................................................21
34
DHCP options ......................................................................
DHCP requirements .............................................................15
DHCP server
enabling on IP Office .................................................... 20
document purpose ................................................................. 6
downloading firmware ..........................................................32
E
E129
feature specifications ......................................................8
overview ......................................................................... 8
physical specifications .................................................... 8
E129 features ........................................................................ 8
E129 specifications ................................................................8
Enable DHCP on IP Office ...................................................20
enabling SIP phone support ................................................
F
field descriptions
deskphone configuration menus ...................................30
SIP telephones support ................................................ 20
upgrading and provisioning .......................................... 34
file server requirements ....................................................... 15
firmware ............................................................................... 32
firmware and configuration server details ............................
firmware server details .........................................................22
H
Hiding deskphone configuration menus ...............................30
I
9
installation methods for IP Office .........................................
installation requirements
Avaya Aura ................................................................... 24
IP Office ........................................................................14
installation requirements for Avaya Aura ............................. 24
installation requirements for IP Office ..................................14
installation without DHCP server .........................................
intended audience ................................................................. 6
IP details .............................................................................. 21
IP Office
create deskphone users ............................................... 16
installation methods ......................................................11
installation requirements ...............................................14
IP Office configuration methods ...........................................11
IP Office installation requirements ....................................... 14
IP Office requirements ......................................................... 14
26
18
22
11
38
March 2015 Installing and Maintaining Avaya E129 SIP Deskphone 39
Comments? infodev@avaya.com
Page 40

Index
L
legal notices .............................................................................
O
Obtaining deskphone IP address .........................................29
P
packaged components ...........................................................8
preinstallation checklist
Avaya Aura ................................................................... 24
Preparing IP Office system .................................................. 18
prerequisites
installing deskphone through the Web GUI .................. 37
R
related documentation ...........................................................
requirement
file server ...................................................................... 15
requirements
Avaya IP endpoint licenses .......................................... 15
IP Office ........................................................................14
telephone power ........................................................... 15
V
VCM requirements ...............................................................14
Voice Compression Modules ...............................................
W
web GUI
upgrading and provisioning .......................................... 34
6
14
S
Securing deskphone administration control .........................28
server details
firmware ............................................................................
configuration ..........................................................22
setting DHCP option 66 ....................................................... 21
Setting DHCP server ........................................................... 25
SIP telephones support field descriptions ............................
stand ...................................................................................... 9
support ...................................................................................7
20
T
telephone power requirements ............................................ 15
troubleshooting .................................................................... 37
U
upgrading .............................................................................34
through deskphone .......................................................33
through Web GUI ..........................................................34
upgrading and provisioning ..................................................34
upgrading deskphone .......................................................... 34
upgrading deskphones ........................................................ 33
Using Web GUI ....................................................................
37
40 Installing and Maintaining Avaya E129 SIP Deskphone March 2015
Comments? infodev@avaya.com
 Loading...