

Autopage RS-777 Owner's Manual

2013/05/29
RS-777 OP REV 1D
1
MODEL NO. RS-777
REMOTE ENGINE STARTER
WITH ALARM SYSTEM
OWNER’S MANUAL
2013/05/29
RS-777 OP REV 1D
2
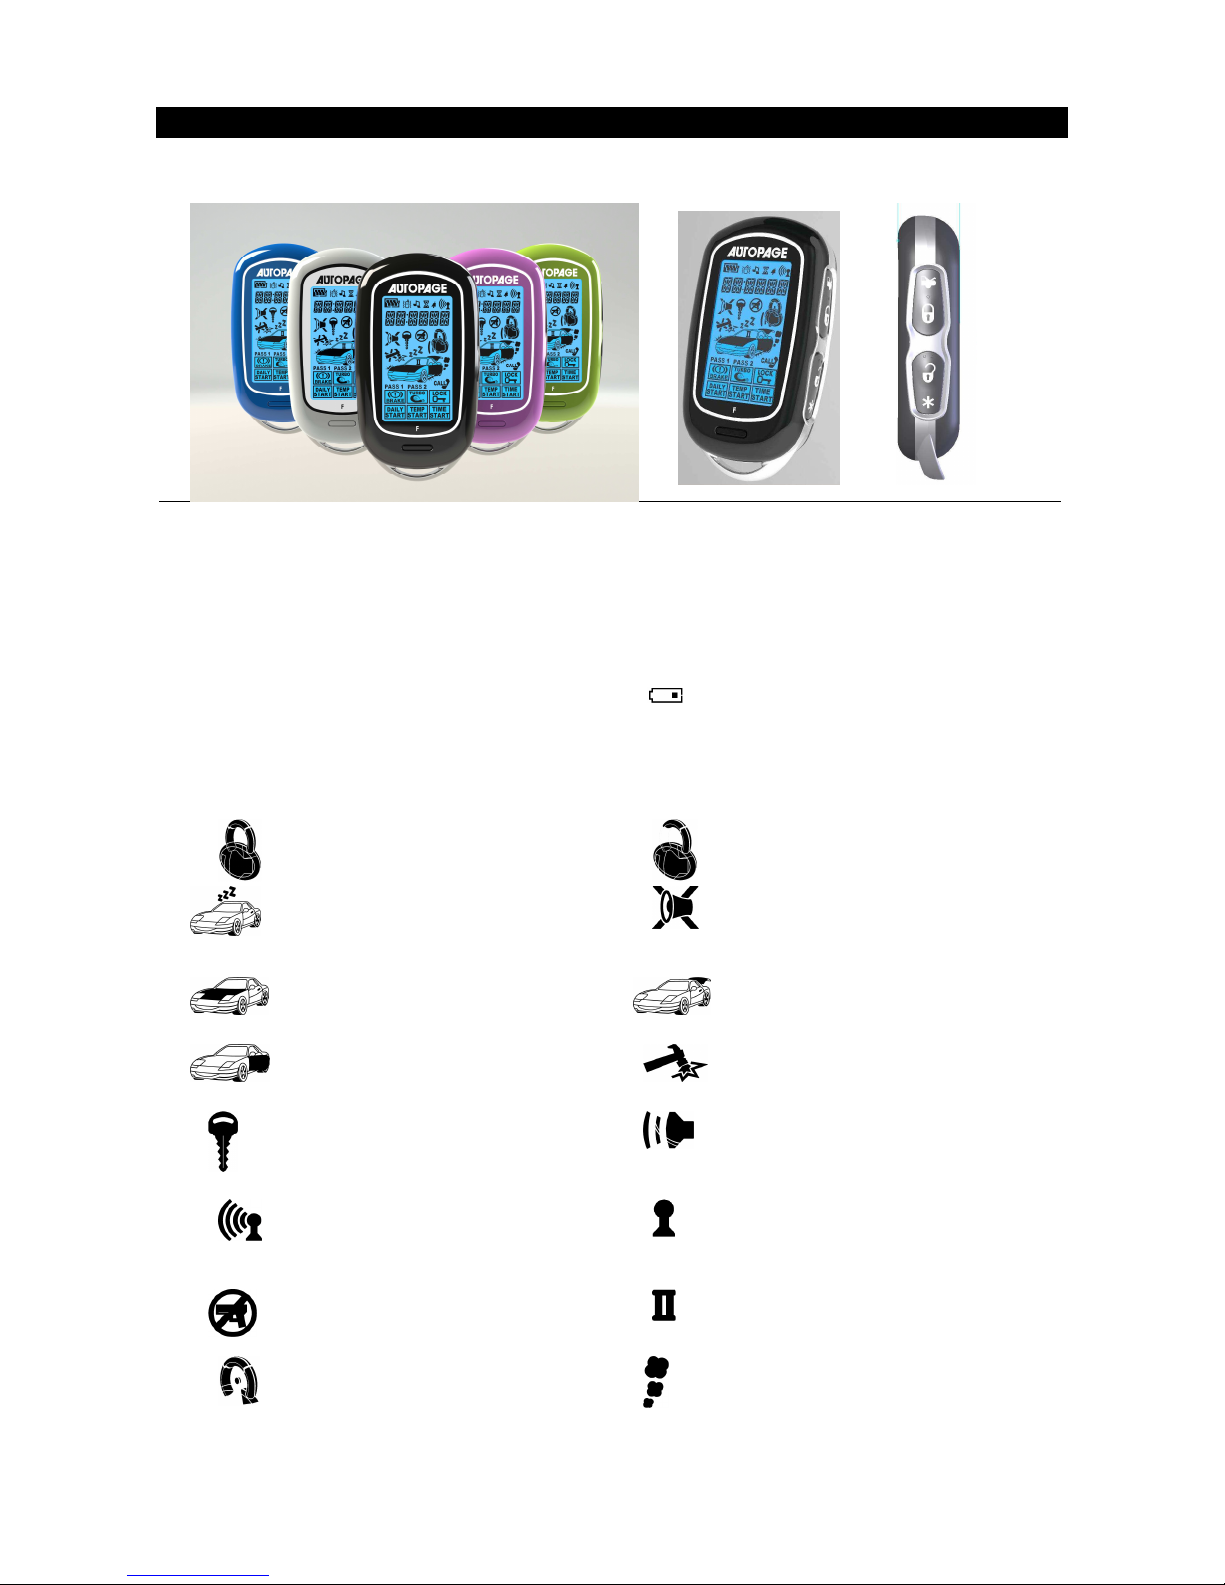
LCD REMOTE CONTROL TRANSCEIVER
:
A. BATTERY REPLACEMENT:
This system needs no specific maintenance beyond remote control battery replacement. The 2-way
remote is powered by a 1.5V AAA battery. The 1-way remote is powered by a 3V, CR2032 battery
Battery Level Indicator (2-way remote)
The Battery Level indicator has three level indicators that serve as a visual indication of battery charge.
When the battery reaches a low charge level that requires replacement, the remote control will generate a
single notification chirp, and the Battery Level indicator will flash continuously.
Gently pull the end of the battery door away from the top of the remote control then slide the door up to
expose the battery and remove the expired battery. Place the new battery into the remote. When power is
returned the remote control will display all icons in the LCD and generate all beeper tones once. Press any
button on the remote to terminate the beeper tone review.
B. STANDARD LCD ICON CONFIGURATIONS:
The lock icon will be displayed when
the door locked.
The unlock icon will be displayed when
the door unlock
Valet Mode
Remote start and alarm functions shall
be temporarily on hold.
Hidden Alarm Mode
The security system arm with hidden
alarm function
Hood Trigger
Hood is illegally opened (Zone 1)
Trunk Trigger
Trunk is illegally opened (Zone 2)
Door Open Warning
Doors are illegally opened (Zone 3)
Sensor Trigger
Trigger on Sensor 1 (Zone 4)
Ignition Trigger
Ignition switch is illegally turned on
(Zone 5)
System trigger
Remote Transmission
You are transmitting the signal to
control unit
In – Range Indicator
Your are within the remote control
range.
Anti Car-Jack Mode
Activate the anti car-jacking mode
2nd Car Operation
Engine Cranking
Your vehicle engine Cranking by
remote control
Engine Running
Your vehicle's engine is running
2013/05/29
RS-777 OP REV 1D
3
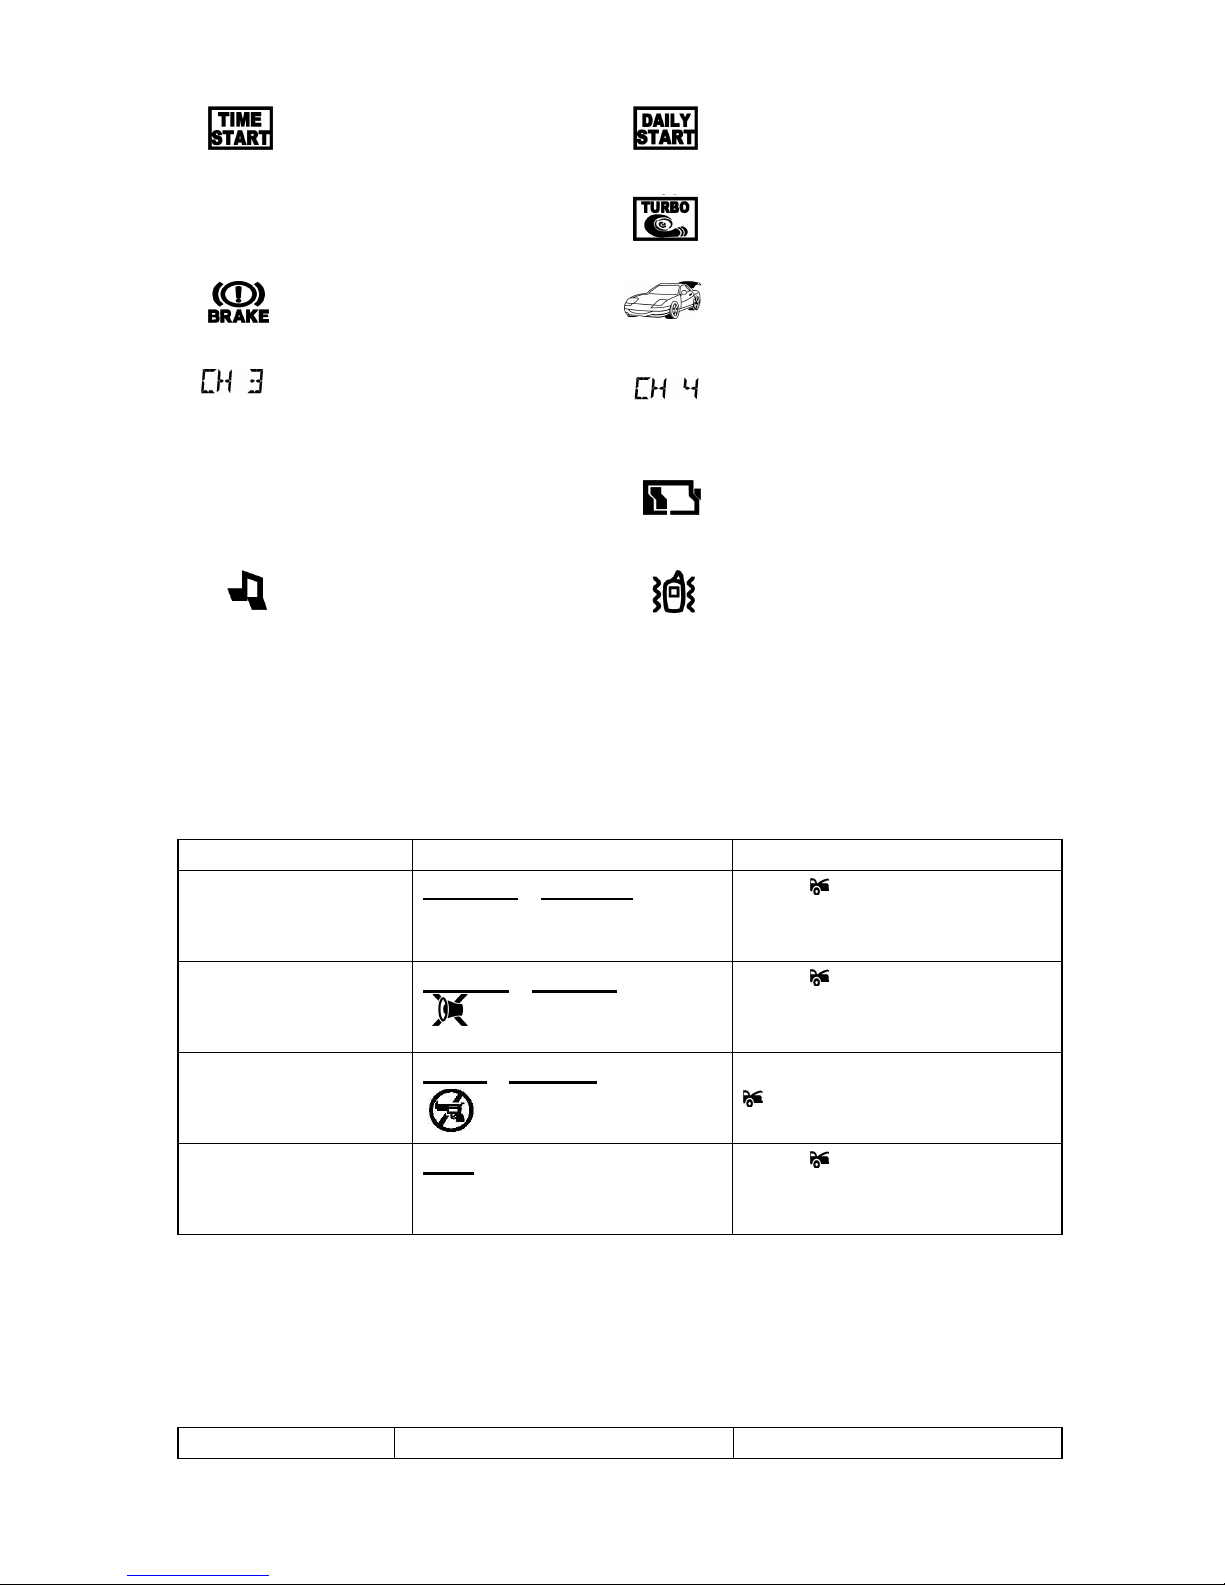
Timer Control Start
Engine start automatically every 2 or
3 hours.
Daily Start
Engine start automatically at the same
time next day
PASS 1
Sensor Bypass
Sensor 1bypass under Arm mode
Turbo Timer
Turbo timer was set up
Manual Gear
Engine S
tart Memorizing for the car
with manual gear was set up
Activate Channel 3 (Trunk Release).
Activate Channel 3
Activate Channel 4
12:00
Time Monitor
12:00
Alarm Clock
You have set morning call alarm
0:10 P
Parking Meter
Reminder when time is up for parking
Low Battery
You have to replace the battery of
remote control.
Melody Mode
Remote Control alert user through
melody sound
Vibration Mode
Remote Control vibrates when the
system is triggered
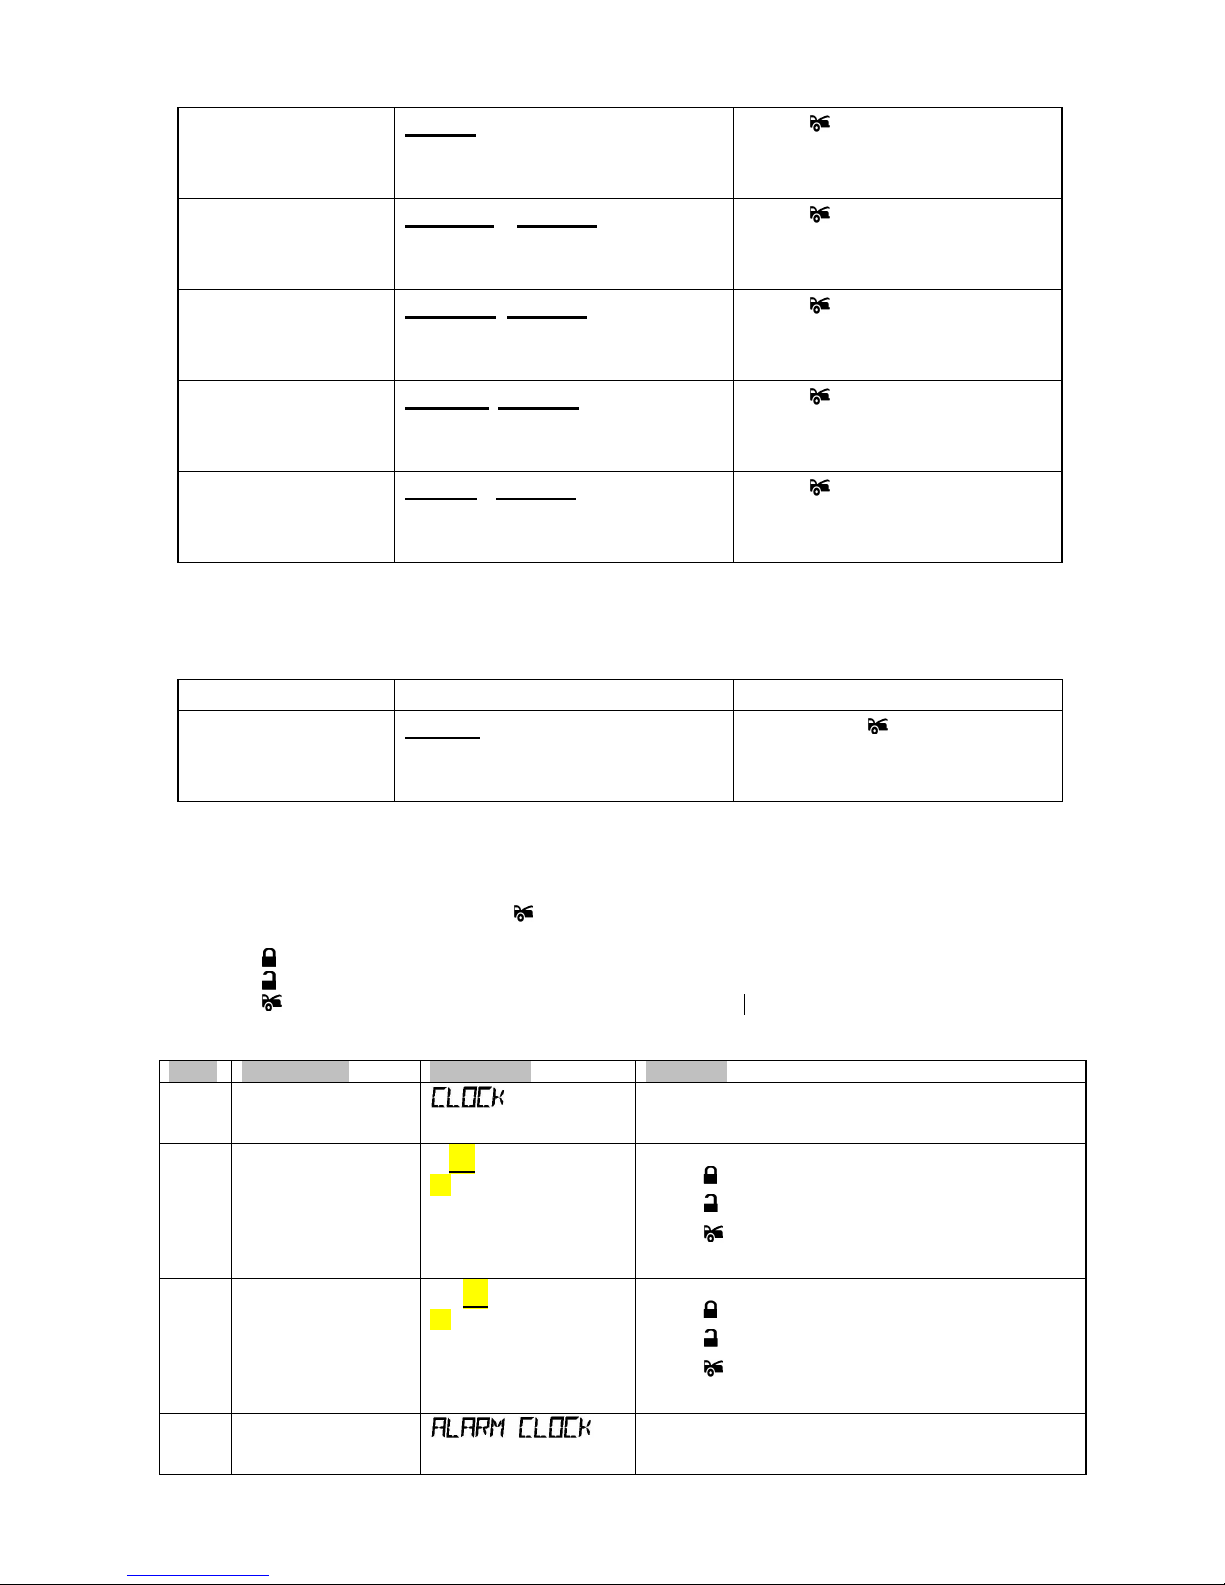
C. 2-way LCD REMOTE CONTROL TRANSCEIVER OPERATION:
Table 1:
Enter : Press & hold “ F “ button until one beep, release F-button and continue press
F button within 5 sec. to move forward to feature option you want to program.
EXIT: Press & hold " F " button for 2 sec. or do nothing wait for 5 sec. automatic exit
2-way LCD (1 beep) => Confirm Exit.
F
Button LCD Display Button
Press and hold the
F
Button until 1 beeps
sound
SENSOR BYPASS
and
PASS 1 icon On
Press button Enable to arm the
alarm and bypass sensor 1.
Press F Button 2nd time
(HHU 1 beep) within 5
seconds
HIDDEN ALARM
and
icon On
Press button Enable to arm
system and with Hidden Alarm
Function.
Press F Button 3rd time
(HHU 1 beep) within 5
seconds
ANTI- HIJACK
and
icon On
Under ignition in "on" position Press
button Enable to activate anti car
jacking functions.
Press F Button 4th time
(HHU 1 beep) within 5
seconds
CH 4 flashing
Press button Enable CH#4
output
Note :
Press and release F Button 2-way LCD Backlight turns on for 5 seconds
Table 2 :
Enter : Press & hold “ F “ button until 2 beeps heard, release F-button.
Continue press F button within 5 sec. to move forward to feature option
you want to program.
EXIT: Press & hold " F " button for 2 sec. or do nothing wait for 5 sec. automatic exit
2-way LCD (1 beep) => Confirm Exit.
F
Button LCD display Button
2013/05/29
RS-777 OP REV 1D
4
Press and hold the
F
Button until 2 beeps
sounded
MENU
flashing Press button to enter 2-way
HHU menu mode
Press F Button 2nd
time (HHU 1 beep)
within 5 seconds
STATUS CHECK
Press button Enable to check
the vehicle’s status.
Press F Button 3rd
times (HHU 1 beep)
within 5 seconds
ALARM CHECK
Press button Enable to check
vehicle’s trigger status.
Press F Button 4th
times (HHU 1 beep)
within 5 seconds
VOLTS
CHECK
Press button Enable to check
vehicle’s Voltage.
Press F Button 5th
time (HHU 1 beep)
within 5 seconds
TEMP
CHECK
Press button Enable to check
temp. status
Table 4 : Return 2-way HHU to default setting
Enter : Press & hold “ F “ button until 4 beeps heard, release F-button.
EXIT: Press & release " F " button or do nothing wait for 5 sec. automatic exit
2-way LCD (1 beep) => Confirm Exit.
F
Button LCD display Button
Press and hold the F
Button until 4 beeps
sounded
RESET
flashing Press & hold button for 2
seconds to back to default setting
and 1 chip for confirm
D. PROGRAMMING 2-way LCD HHU (
Select and Adjusting Table-2-Menu options):
Enter:
1. Press and hold F button until 2 beeps heard then release the F button.
2. The Matrix show MENU flash, press button to enter HHU menu mode.
(LCD display show Hours of current time set up, set up hour(s) first.)
3. Press button to increase value, or Enable the selected feature.
4. Press button to decrease value, or Disable the selected feature .
5. Press button to confirm its selection, move to the next option.
EXIT: Press & hold " F " button or do nothing wait for 15 sec. automatic exit
2-way LCD (1 beep) => Confirm Exit.
Order Menu Option LCD display Functions
1 Current time set
up
Default is 12:00
Adjust clock hours
from 0 to 12
12
: 00
12 is flashing
Press button = (+) or
Press button = (-)
Press button confirm its selection, move to next
option.
Adjust clock
minutes from 0 to
59
12: 00
00 is flashing
Press button = (+) or
Press button = (-)
Press button confirm its selection, move to next
option.
2 Alarm Clock set
up
Default is OFF
2013/05/29
RS-777 OP REV 1D
5
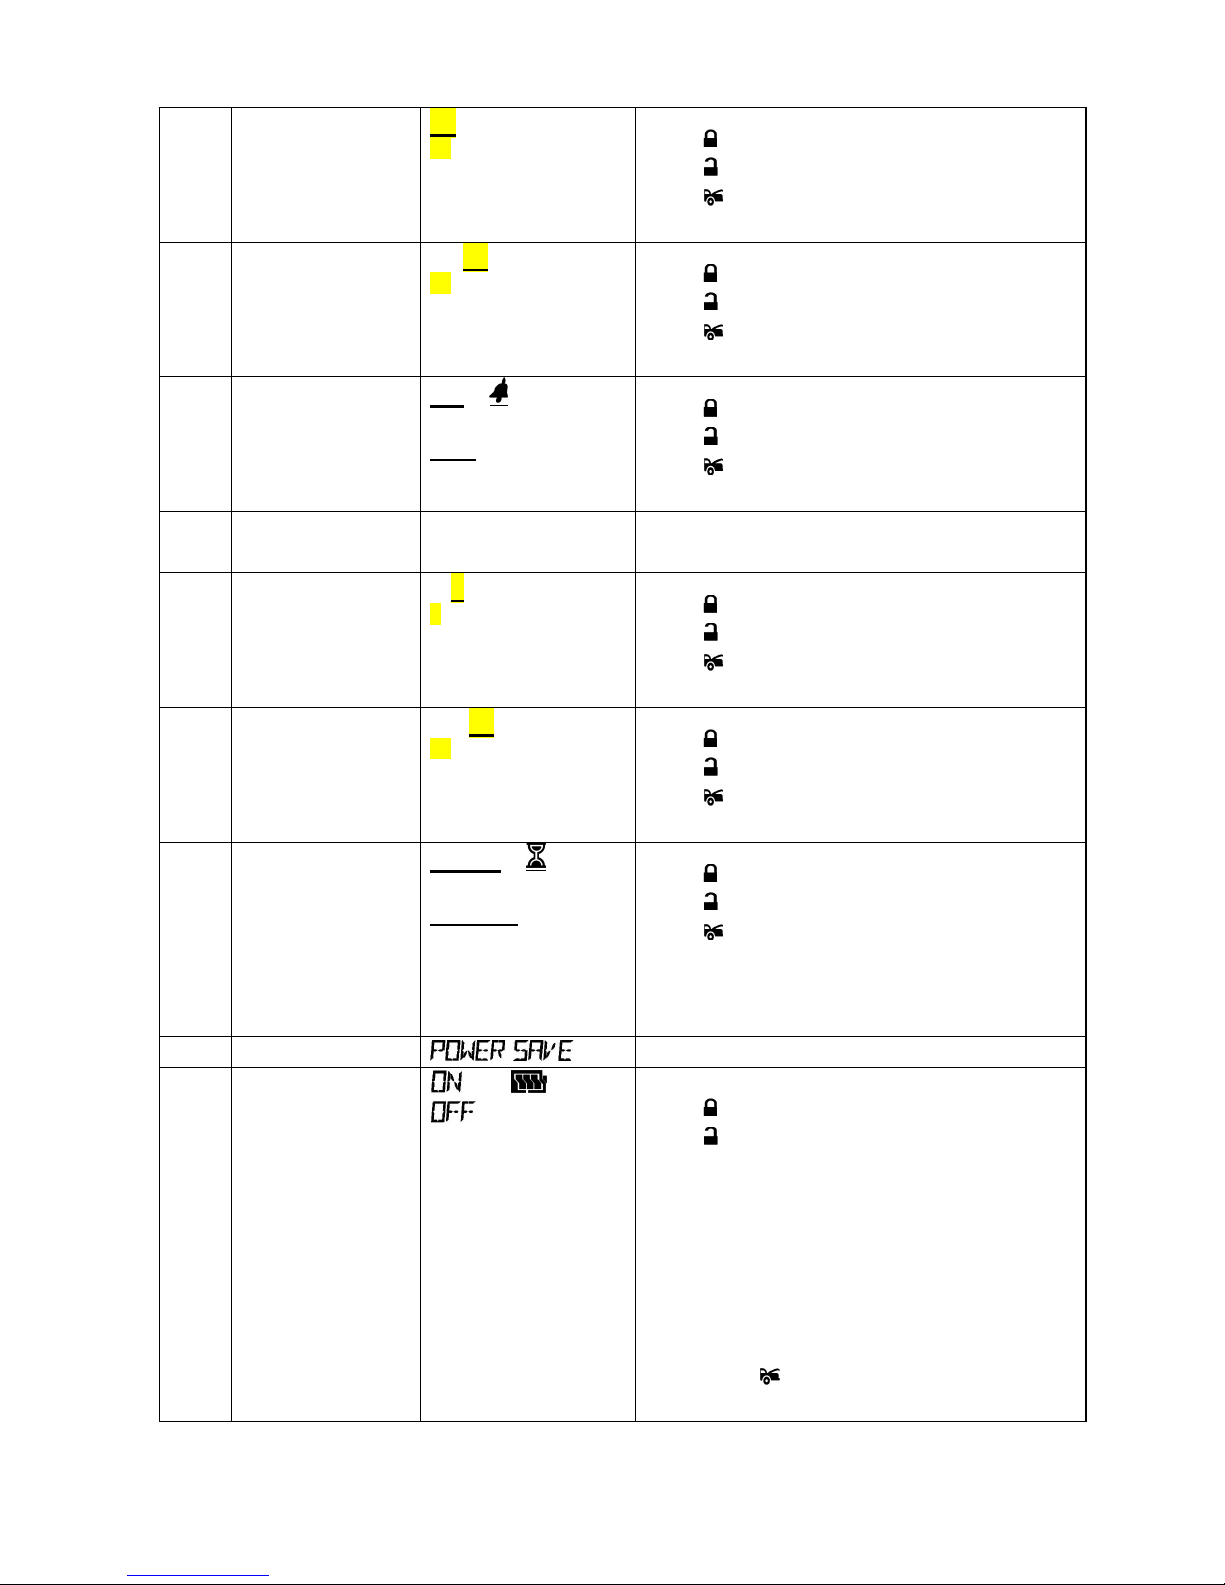
Adjust Alarm Clock
hours from 0 to 12
12
:00
12 is flashing
Press button = (+) or
Press button = (-)
Press button confirm its selection, move to next
option.
Adjust Alarm Clock
minutes from 0 to
59
12: 00
00 is flashing
Press button = (+) or
Press button = (-)
Press button confirm its selection, move to next
option.
Select Alarm Clock
Enable or Disable
ON
+ or
OFF
Press button = Enable or
Press button = Disable
Press button confirm its selection, move to next
option.
3 Parking Meter
countdown
PARK METER Default is OFF
Adjust Parking
Meter countdown
hours from 0 to 2
0
:00 P
0 is flashing
Press button = (+) or
Press button = (-)
Press button confirm its selection, move to next
option.
Adjust Parking
Meter countdown
minutes from 0 to
59.
0 :
30 P
30 is flashing
Press button = (+) or
Press button = (-)
Press button confirm its selection, move to next
option.
Select Parking
meter countdown
Enable or Disable
P-- ON
+ or
P -- OFF
Press button = Enable or
Press button = Disable
Press button confirm its selection, move to next
option.
There is a beep sound at 5 min. before Parking
countdown reach 0.
4 Power Save Default is OFF
Select Power Save
Enable or Disable
+ or
Press button = Enable or
Press button = Disable
When power save enable, the LCD remote
transceiver uses “0” current to save the battery
power. LCD show “Save” on text area
Exit: Press any button of the LCD remote
transmitter to exit the “Power Save Mode”.
Press button confirm its selection, move
to next option.
 Loading...