

Page 1

Installation Manual
AudioCodes One Voice for Microsoft® Skype for Business
cX-UM Connector
Installation Manual
Version 0.1.4
Page 2

Page 3

Installation Manual Contents
Table of Contents
1 Introduction ......................................................................................................... 9
2 cX-UM Data Flow ............................................................................................... 11
3 Azure Notification Handler App Service and Service Bus ............................. 13
4 SIP Interface ...................................................................................................... 15
4.1 Unsolicited MWI ..................................................................................................... 15
4.1.1 Backup SIP Hosts .................................................................................................... 15
4.2 Subscribe-Based MWI ........................................................................................... 15
5 cX-UM Connector System Requirements ........................................................ 17
6 Users Configuration .......................................................................................... 19
6.1 CSV File ................................................................................................................. 19
6.2 Users Modification .................................................................................................. 19
6.3 CSV file Location .................................................................................................... 19
6.3.1 Local Storage ........................................................................................................... 19
6.3.2 Azure Blob Storage .................................................................................................. 19
7 High Availability ................................................................................................ 21
7.1 Enabling High Availability ....................................................................................... 21
7.2 High Availability Operation ..................................................................................... 21
7.2.1 Azure Users Blob Change ....................................................................................... 21
7.2.2 Server Up/Down ...................................................................................................... 21
7.2.3 Users Distribution .................................................................................................... 21
8 License ............................................................................................................... 23
8.1 License Generation ................................................................................................ 23
8.2 Trial License ........................................................................................................... 23
9 Installation and Configuration ......................................................................... 25
9.1 Prerequisites .......................................................................................................... 25
9.1.1 UCMA 5 Runtime ..................................................................................................... 25
9.1.2 Azure CLI on Windows ............................................................................................ 26
10 Azure Setup ....................................................................................................... 27
10.1 Resource Group ..................................................................................................... 27
10.2 Service Bus ............................................................................................................ 27
10.3 Notification Handler Web App ................................................................................ 27
10.4 Azure Application ................................................................................................... 28
11 cX-UM ....................................................................... Error! Bookmark not defined.
12 cX-UM Configuration ......................................................................................... 33
12.1 Start cX-UM ............................................................................................................ 33
12.2 Configure cX-UM .................................................................................................... 33
12.2.1 cX-UM config-only Mode ......................................................................................... 33
12.2.2 cX-UM Swagger Configuration ................................................................................ 33
12.3 Testing cX-UM Configuration ................................................................................. 34
12.4 Run cX-UM as Windows Service ........................................................................... 34
Version 0.1.4 3 cX-UM Connector
Page 4

cX-UM Connector
12.4.1 Syslog Viewer Configuration ................................................................................... 34
12.4.2 Start cX-UM Windows Service ................................................................................ 35
13 Users Configuration .......................................................................................... 37
13.1 CSV File ................................................................................................................. 37
13.2 Users Modification .................................................................................................. 37
13.3 CSV File Download and Upload ............................................................................. 37
14 License ............................................................................................................... 39
14.1 Trial License ........................................................................................................... 39
14.2 Production License ................................................................................................. 39
15 cX-UM High Availability Configuration ............................................................ 41
15.1 Azure Blobs Storage .............................................................................................. 41
15.1.1 Users Blob File ........................................................................................................ 41
15.1.2 User Blob Change Event ......................................................................................... 41
15.1.2.1 Service Bus Topic ....................................................................................42
15.1.2.2 Storage Change Event .............................................................................42
15.2 cX-UM Configuration .............................................................................................. 42
15.3 HA Verification ....................................................................................................... 43
A HA – SIP Message Redirection ........................................................................ 47
A.1.1 Incoming Messages Redirection ............................................................................. 47
B XUM Limitations ................................................................................................ 49
C Known Issues .................................................................................................... 51
C.1 Working with Internet Explorer ............................................................................... 51
D Sample Messages ............................................................................................. 53
D.1 Unsolicited MWI ..................................................................................................... 53
D.2 Subscribe Based MWI ............................................................................................ 53
Installation Manual 4 Document #: LTRT-40732
Page 5

Installation Manual Contents
List of Figures
Figure 9-1: UCMA 5.0 Setup .................................................................................................................. 25
Figure 9-2:Installation Complete ............................................................................................................ 26
Version 0.1.4 5 cX-UM Connector
Page 6

cX-UM Connector
List of Tables
Table 5-1: cX-UM Connector System Requirements ............................................................................. 17
Table 6-1: CSV File ................................................................................................................................ 19
Table 7-1: Server Up/Down .................................................................................................................... 21
Table 12-1: Swagger Configuration ........................................................................................................ 34
Table 13-1: Mandatory User Configuration ............................................................................................ 37
Table 15-1: All cX-UM Configuration Parameters .................................................................................. 43
Installation Manual 6 Document #: LTRT-40732
Page 7

Installation Manual Notices
Notice
Information contained in this document is believed to be accurate and reliable at the time of
printing. However, due to ongoing product improvements and revisions, AudioCodes cannot
guarantee accuracy of printed material after the Date Published nor can it accept responsibility
for errors or omissions. Updates to this document can be downloaded from
https://www.audiocodes.com/library/technical-documents.
This document is subject to change without notice.
Date Published: July-15-2020
WEEE EU Directive
Pursuant to the WEEE EU Directive, electronic and electrical waste must not be disposed of
with unsorted waste. Please contact your local recycling authority for disposal of this product.
Customer Support
Customer technical support and services are provided by AudioCodes or by an authorized
AudioCodes Service Partner. For more information on how to buy technical support for
AudioCodes products and for contact information, please visit our Web site at
https://www.audiocodes.com/services-support/maintenance-and-support
.
Software Download
https://downloads-audiocodes.s3.eu-central-1.amazonaws.com/Download/AC_cX-UM_IW.html
Stay in the Loop with AudioCodes
Abbreviations and Terminology
Each abbreviation, unless widely used, is spelled out in full when first used.
Version 0.1.4 7 cX-UM Connector
Page 8

cX-UM Connector
Related Documentation
Document Name
Document Revision Record
LTRT Description
40732 Initial document release for Version 0.1.4
Documentation Feedback
AudioCodes continually strives to produce high quality documentation. If you have any
comments (suggestions or errors) regarding this document, please fill out the
Documentation Feedback form on our Web site at
http://online.audiocodes.com/documentation-feedback
.
Software Revision Record
The following table lists the software versions released in Version 0.1.4.
Table 1-1: Software Revision Record
Software Version Date
0.1.4 Mar 2020
Note: The latest software versions can be downloaded from:
https://downloads-audiocodes.s3.eu-central-1.amazonaws.com/Download/AC_cXUM_IW.html
Pay attention to download the cX-UM platform version (SfB Online/Teams)
Unzip the file to a temporary directory.
Installation Manual 8 Document #: LTRT-40732
Page 9
Installation Manual 1. Introduction
1 Introduction
Office 365™ Microsoft Exchange Online Unified Messaging (UM) has reached End-ofSupport as of February 28, 2020.
cX-UM (Cloud X-UM) provides MWI notifications for Cloud VoiceMails. The application is
useful for users using non-MS telephony systems (e.g. Cisco), and at the same time using
Microsoft Cloud Voicemail as their voicemail systems. These users can use cX-UM to receive
standard SIP MWI notifications for any change in their voicemail status (new voicemail
deposited, voicemail read or voicemail deleted).
To allow telephony (PBX) equipment to communicate securely with the Office 365 network,
customers are required to deploy AudioCodes' Mediant Session Border Controllers (SBCs)
with CCE for SfB Online or SBCs with Direct Routing for Teams Users.
This document details the installation procedure for cX-UM Connector as a standalone
server. For Skype for Business 2015 and Skype for Business 2019 for X-UM Standard
based on CloudBond Standard Plus, refer to LTRT-26791 AudioCodes X-UM
Configuration Ver.0.1) or for X-UM Connector Installation, refer to LTRT-40729 AudioCodes
X-UM Standard Installation Ver. 0.1.
Note: This document describes MWI notifications for Cloud VoiceMails; however, it does
not describe Microsoft Direct Routing functionality which is handled by AudioCodes SBC
devices.
Version 0.1.4 9 cX-UM Connector
Page 10

cX-UM Connector
This page is intentionally left blank.
Installation Manual 10 Document #: LTRT-40732
Page 11

Installation Manual 2. cX-UM Data Flow
2 cX-UM Data Flow
This section summarizes the steps for the cX-UM Data Flow:
1. cX-UM uses Graph API change notifications
voicemail folder.
2. The subscription requires a publicly open https webhook, that is called upon a change.
3. Since the cX-UM application is located on the customer premises behind a firewall, and
cannot be reached from outside, a dedicated Azure App Service notification handler is
configured as the notification webhook.
4. Cloud Voicemail sends notifications to the notification handler.
5. The notification handler pushes the notification to an Azure Service Bus queue.
6. The cX-UM application listens to the Azure Service Bus queue and recieves the
notifications.
7. cX-UM sends a corresponding SIP MWI notification.
to subscribe changes to each user’s
Version 0.1.4 11 cX-UM Connector
Page 12

cX-UM Connector
This page is intentionally left blank.
Installation Manual 12 Document #: LTRT-40732
Page 13

Installation Manual 3. Azure Notification Handler App Service and Service Bus
3 Azure Notification Handler App Service
and Service Bus
Graph API change notifications can only be sent to publically open HTTPS servers. Since
the cX-UM application is located on customer premises behind a firewall and cannot be
reached from outside, a dedicated Azure App Service receives the notifications and forwards
them to cX-UM. The notification handler is a very basic application that simply receives the
HTTPS notification and pushes it to an Azure Service Bus queue. Each cX-UM server listens
to a single service bus queue with the hostname of the cX-UM server. The queue is
automatically created by cX-UM upon startup, if required. While there may be multiple cXUM servers per customer, only a single App service is required per customer.The App service
pushes the notification to the correct queue, based on the URL which called it.
For example:
1. cX-UM server1 registers for change notification with webhook:
https://notif-handler.azurewebsites.net/api/ExchNotif/server1
2. App service listens to:
https://notif-handler.azurewebsites.net/api/ExchNotif/{serverName}
3. A notification is sent to:
https://notif-handler.azurewebsites.net/api/ExchNotif/server1
4. App service pushes the notification to queue ‘server1’ based on URL suffix.
5. cX-UM server1 receives the notification.
Version 0.1.4 13 cX-UM Connector
Page 14

cX-UM Connector
This page is intentionally left blank.
Installation Manual 14 Document #: LTRT-40732
Page 15
Installation Manual 4. SIP Interface
4 SIP Interface
cX-UM provides SIP interfaces only for receiving message-waiting indicators (MWI)
notifications. It does not support phone registration and calling. cX-UM provides two
methods for sending MWI:
unsolicited MWI
subscribe-based MWI
Note: cX-UM SIP interface supports TCP transport only. It does not support UDP.
4.1 Unsolicited MWI
cX-UM sends unsolicited MWI for all users who do not subscribe for MWI events. All
unsolicited MWIs for all these users are sent to the same SIP host. See an example for
Unsolicited MWI in Section D.1.
4.1.1 Backup SIP Hosts
cX-UM supports an optional configuration for multiple backup hosts, where notifications are
sent to the first available backup host. Once the primary host is up again, cX-UM resumes
sending the notifications. Availability is determined by periodically sending SIP Options
messages.
4.2 Subscribe-Based MWI
cX-UM supports subscribe-based MWI to which phones subscribe for MWI events. When cXUM needs to send an MWI, it sends it directly to the phone within the subscription session.
See example Subscribe-Based MWI message in Section D.2.
Version 0.1.4 15 cX-UM Connector
Page 16

cX-UM Connector
This page is intentionally left blank.
Installation Manual 16 Document #: LTRT-40732
Page 17

Installation Manual 5. cX-UM Connector System Requirements
5 cX-UM Connector System Requirements
The X-UM Connector's minimum requirements are described in the table below:
Table 5-1: cX-UM Connector System Requirements
System Requirements
Operation System Windows 2012 R2/2016 standard
Processor 4 Core
Memory 6 GB
Disk size Minimum 50 Gb. We recommend 80 Gb.
Version 0.1.4 17 cX-UM Connector
Page 18

cX-UM Connector
This page is intentionally left blank.
Installation Manual 18 Document #: LTRT-40732
Page 19

Installation Manual 6. Users Configuration
Optional. List of extensions.
6 Users Configuration
This chapter describes the configuration of cX-UM users.
6.1 CSV File
Users are defined in a CSV file. It is recommended to use Excel for creating and editing the
CSV file. The table below describes the CSV file definition.
Table 6-1: CSV File
System Requirements Extensions
Mandatory. User Principal Name
6.2 Users Modification
cX-UM monitors the CSV for change notifications. Whenever the file changes, cX-UM
reloads the file immediately and adds, deletes or modifies users accordingly.
6.3 CSV file Location
cX-UM supports CSV file monitoring in two locations:
Backup Hosts (see Section Error! Reference source not found.)
Azure Blob Storage (see Section 6.3.2)
6.3.1 Local Storage
A local CSV file is appropriate for a single cX-UM server. cX-UM monitors the CSV for
changes using the filesystem API.
A user can identify themselves by one or more
extensions separated by ‘|’.
Unsolicited MWIs are only sent to the first extension.
Sample value: ‘4001|4002’.standard
6.3.2 Azure Blob Storage
cX-UM supports a CSV file stored in Azure Blob storage. This configuration is appropriate
for a high-availability system with multiple cX-UM servers, each serving a distinct subset of
the users. For more information, see Chapter 7.
Version 0.1.4 19 cX-UM Connector
Note: cX-UM also supports CSV Azure Blob change notifications by configuring the blob
to send a change notification event to a service bus topic to which the cX-UM listens.
Page 20

cX-UM Connector
This page is intentionally left blank.
Installation Manual 20 Document #: LTRT-40732
Page 21

Installation Manual 7. High Availability
7 High Availability
cX-UM supports high availability for which multiple cX-UM servers share the same users CSV
file, and automatically distribute user load balancing.
7.1 Enabling High Availability
High availability is automatically enabled by configuring all cX-UM servers to read the same
CSV users file from Azure Blob storage (cX-UM assumes that every file location startsi with
https:// is on Azure blob storage).
7.2 High Availability Operation
There are two aspects for High Availability operations for cX-UM HA:
User Blob file change (see Section 7.2.1)
Server up/down (see Section 7.2.2)
7.2.1 Azure Users Blob Change
Azure Blob is configured to send change notifications to a service bus topic. A topic, unlike a
queue, can send the message to multiple subscribers.All cX-UM servers subscribe to the
same topic, with the server name defined as the subscription name. The topic and
subscriptions are automatically created by cX-UM, if required. When the users CSV blob is
changed, all cX-UM servers receive the event and read the blob containing the updated list
of users. Each server then re-distributes the users as described in Section 7.2.3.
7.2.2 Server Up/Down
The list of all HA servers is maintained at the same blob for all servers in the format shown
in the table below:
Server Name Timestamp
Server1 Timestamp1
Server2 Timestamp2
All HA cX-UM servers periodically perform a read-modify-write operation to the same blob.
Each server updates its timestamp. Each server also searches for servers that haven’t
updated their timestamps for a preconfigured period of time (default 60 seconds) and can be
changed, and removes them from the list.
The read-modify-write operation is guaranteed to be atomic using the HTTP etag
precondition. In the end, all servers read from the same list of active servers.Each server redistributes the users as described in Section 7.2.3.
7.2.3 Users Distribution
Using a shared hashing function to sort a list of servers, all servers also distribute the users
using the following formula:
ServerIndex = Hash(UserUpn) Modulo NumServers
Each server then hosts only users according to the server index formula i.e. at any point in
time, each user is managed by one server.
Table 7-1: Server Up/Down
Version 0.1.4 21 cX-UM Connector
Page 22

cX-UM Connector
This page is intentionally left blank.
Installation Manual 22 Document #: LTRT-40732
Page 23

Installation Manual 8. License
8 License
cX-UM uses a license that is valid to itself only. The license is associated to the server
hardware and software.The license includes the following parameters:
Maximum number of users
Expiration date
8.1 License Generation
License generation involves the following steps:
1. Obtaining the server ID string from cX-UM server, using a Swagger API.
2. Obtaining a license from AudioCodes iActivate site according to the mail you activation
mail that you recieved.
3. Install the license token on the server, using a Swagger API.
8.2 Trial License
Note: If a license is not installed, then cX-UM can be used with a trial license that is valid
for a maximum of three users and expires in 10 years.
Version 0.1.4 23 cX-UM Connector
Page 24

cX-UM Connector
This page is intentionally left blank.
Installation Manual 24 Document #: LTRT-40732
Page 25

Installation Manual 9. Installation and Configuration
9 Installation and Configuration
This Chapter describes the cX-UM installation and configuration.
9.1 Prerequisites
This section describes the installation prerequisites.
9.1.1 UCMA 5 Runtime
This section describes the UCMA 5 Runtime requirements.
To install UCMA:
1. Log on to the cX-UM Connector and install UCMA.
2. Download UCMA 5 from:
https://www.microsoft.com/en-us/download/details.aspx?id=47344
3. Run the UCMA UcmaRuntimeSetup.exe setup file as the Administrator.
Figure 9-1: UCMA 5.0 Setup
Version 0.1.4 25 cX-UM Connector
Page 26
cX-UM Connector
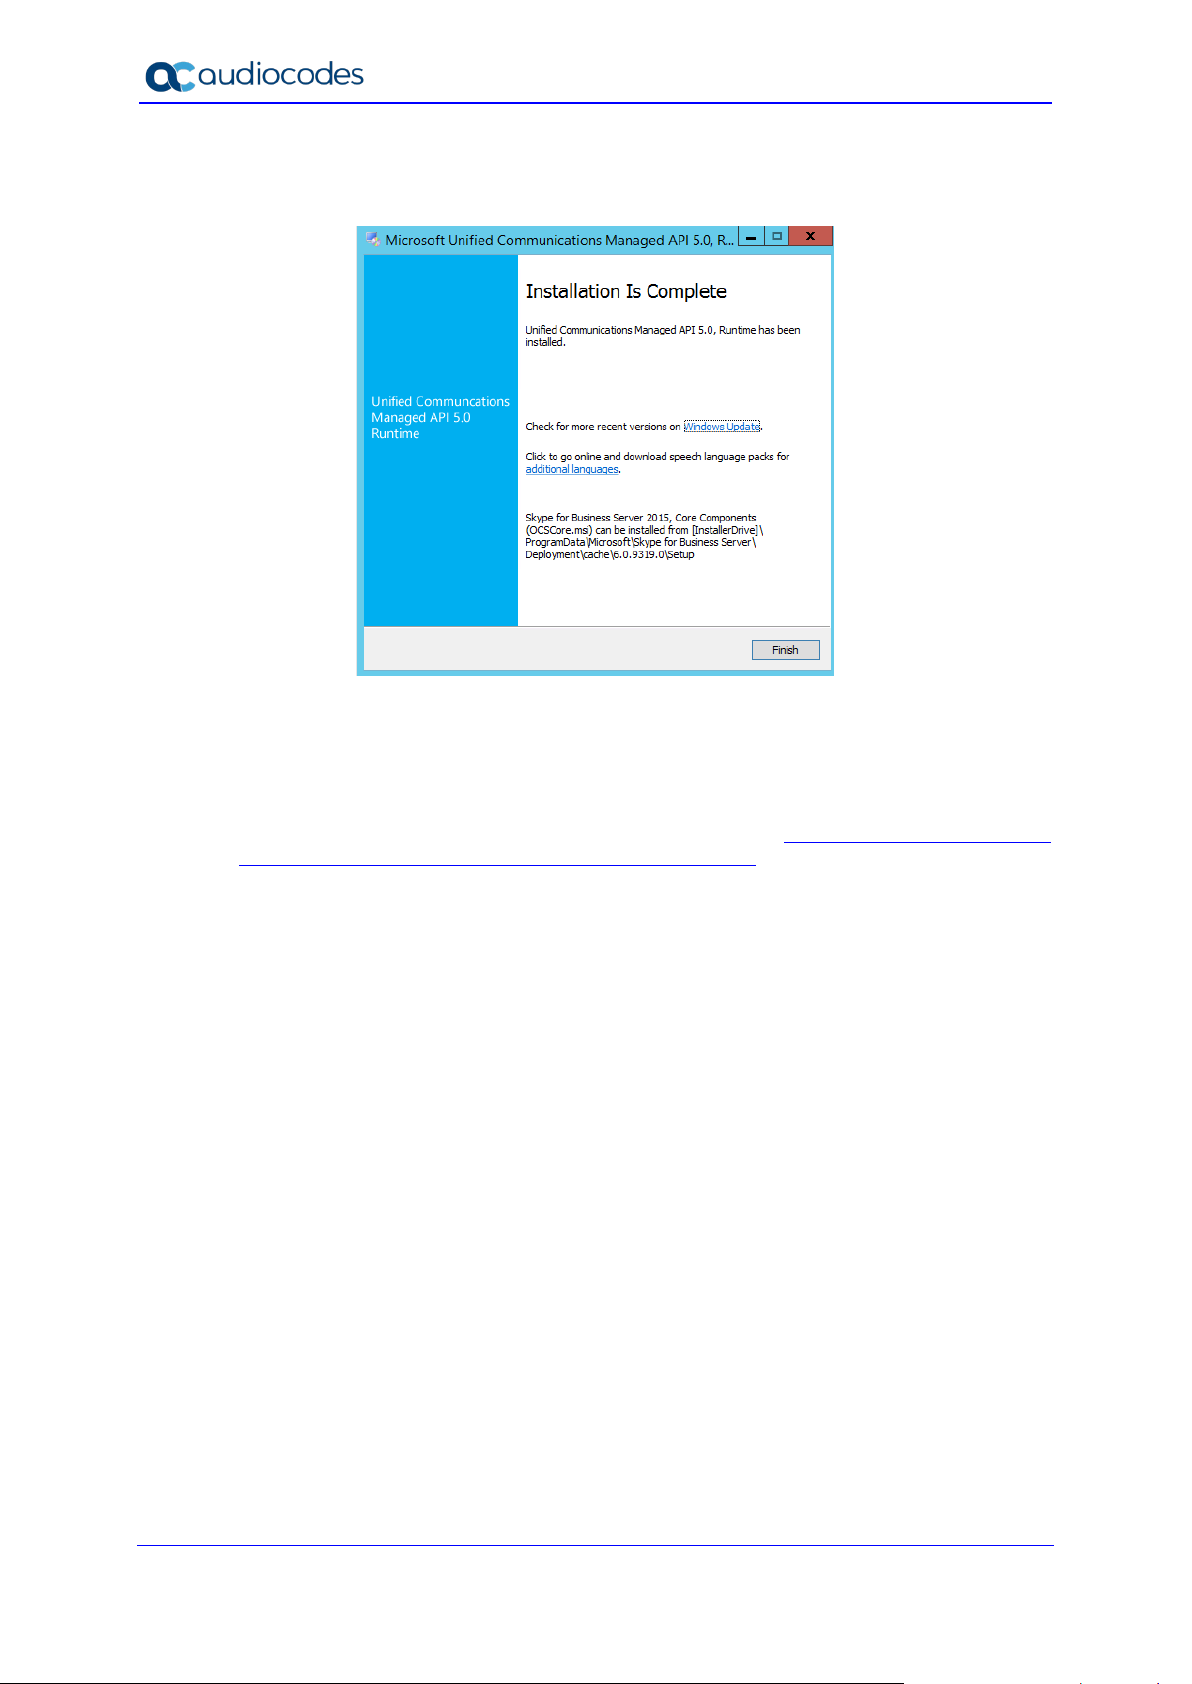
4. When the installation has completed, the following screen is displayed:
Figure 9-2:Installation Complete
5. Click Finish.
9.1.2 Azure CLI on Windows
To install Azure CLI on Windows, refer to Microsoft: https://docs.microsoft.com/en-
us/cli/azure/install-azure-cli-windows?view=azure-cli-latest
Installation Manual 26 Document #: LTRT-40732
Page 27
Installation Manual 10. Azure Setup
10 Azure Setup
Several Azure resources need to created and deployed. It is highly recommended to create
a common resource group for these resources.
Note: You must have “tenant admin” permissions to perform some of the actions
described in this section.
10.1 Resource Group
This section describes how to create a resource group.
To create a resource group:
1. Login to Azure portal.
2. Create a new resource group named cX-UM-rg (or any other name) in your region.
3. Open the new resource group.
10.2 Service Bus
This section describes how to connect to the service bus.
To create a service bus:
1. Create Azure Service Bus:
• Open Resource Group > Add Service Bus > Create.
• Set name to <your-prefix>-cX-UM-ServiceBus, or similar
2. In pricing tier:
• Select Basic for a single standalone cX-UM server.
• Select Standard for multiple cX-UM high availability system. Note: HA cX-UM
requires topics, that are not included in the basic pricing tier.
3. Select your region:
• Click Create.
• Open the service bus resource when deployment is complete.
• Shared access policies > RootManageSharedAccessKey > Copy and save
Primary connection string as it is required in several other configurations.
10.3 Notification Handler Web App
This section describes how to create a notification Web App.
To create a Notification Handler Web App:
1. Create Azure Web App (Resource Group > Add Web App > Create):
• Name: <your-prefix>-cX-UM-NotifHandler, or similar
• Runtime stack: .Net Core 3.0
• Operating System: Windows
• Select your region and preferred size
Version 0.1.4 27 cX-UM Connector
Page 28

cX-UM Connector
• Optionally enable Application Insights
• Click Create.
2. Open resource when complete.
3. Deploy cX-UM notification handler to the created Web App:
• Open CMD prompt
• Run az login
• Sign in with your Azure account credentials
• Run az account show
4. Check the resultant "name" output. If the name doesn't match your subscription account
used for creating the Web App and resource group, do the following:
a. run 'az account list' then 'az account set --subscription "<your-subscription>"'
where <your-subscription> is the subscription name from the 'az account list'
output.
b. Verify by running 'az account show' again.
5. Deploy Function App by running the following commands in the command line:
a. cd “C:\Program Files\Audiocodes\cX-UM\AzureAppServiceDeploy”
b. az webapp deployment source config-zip --resource-group <group-name> --name
<app-name> --src ExchNotifHandler.zip.
c. Replace <app_name> with the Web App name and replace <resource_group>
with the name of your resource group.
d. If successful, you should see several output lines, including:
"message": "Created via a push deployment".
6. Return to Azure portal and open the Web App and do the following:
a. Configuration > Connection strings > New connection string
b. Name: ServiceBusConnectionString
c. Value: <Value of service bus connection string created above>
d. Type: Custom
e. Click OK
f. Click Save
g. Select Overview, copy and save the URL value. This value will be required for
other configurations.
10.4 Azure Application
This section describes how to create an Azure application.
To create an Azure Application:
1. In the Azure portal, from the top-left menu, select Azure Active Directory > App
Registrations.
2. Create a new registration:
a. Name: cX-UM
b. Select ‘Accounts in this organizational directory only’
c. Register
3. For the created application, copy and save the following values that will be required in
other configurations:
a. Application (client) ID
b. Directory (tenant) ID
4. In Certificates and Secrets > New client secret, and set the following:
a. Description: ‘Never expires’
Installation Manual 28 Document #: LTRT-40732
Page 29

Installation Manual 10. Azure Setup
b. Select Expires: Never
c. Click Add.
d. Copy the secret value it will be needed in other configurations. Note: The secret
value will only be shown once. Make sure to copy it.
5. Select API Permissions.
6. Add a permission and then Select Microsoft Graph.
a. Select Application Permissions.
b. Expand ‘Mail’ and then select Mail.Read.
c. Expand ‘User’ and then select User.Read.All.
d. Click Add Permissions
7. In API Permissions, select Grant Admin consent for <your tenant>, and confirm.
Note: You must be a tenant admin to grant consent.
Version 0.1.4 29 cX-UM Connector
Page 30

cX-UM Connector
This page is intentionally left blank.
Installation Manual 30 Document #: LTRT-40732
Page 31

Installation Manual 11. cX-UM
11 cX-UM
Run cX-UM install file. The default install directory is C:\Program Files\Audiocodes\cX-
UM.
Note: It is highly recommended to install Notepad++ on cX-UM server to edit files.
Version 0.1.4 31 cX-UM Connector
Page 32

cX-UM Connector
This page is intentionally left blank.
Installation Manual 32 Document #: LTRT-40732
Page 33

Installation Manual 12. cX-UM Configuration
12 cX-UM Configuration
This chapter describes the cX-UM configuration using the Swagger REST API local Web
GUI.
12.1 Start cX-UM
Start cX-UM as administrator in console mode using one of the following methods:
Start > Select ‘Run cX-UM in console mode’ > Right-click > More > Run as
administrator
OR
Windows Start button > cmd > Right-click > Run as administrator.
Cd "C:\Program Files\Audiocodes\cX-UM "
cX-UM
12.2 Configure cX-UM
All cX-UM configuration is performed using Swagger in a manually opened browser at
http://localhost:8889/swagger
.
12.2.1 cX-UM config-only Mode
When the configuration is invalid, cX-UM runs is config-only mode. In this mode, cX-
UM runs Swagger only and allows only configuration-related operations.
After a valid configuration is performed, cX-UM must be restarted to enable full functionality.
Note: The initial cX-UM configuration is invalid because it is missing specific mandatory
Azure configuration values.
12.2.2 cX-UM Swagger Configuration
This section describes how to configure cX-UM via Swagger.
To configure via Swagger:
1. Open cX-UM swagger at http://localhost:8889/swagger
There are several available operations under AppConfig.
For initial configuration, it is recommended to download the full json configuration file,
and edit it with the minimal mandatory configuration values:
Enter the Swagger URL:
AppConfig/api/config/download
2. Select “download file” after Execute.
3. Edit the downloaded file with minimal configuration as shown in the table below:
Version 0.1.4 33 cX-UM Connector
Page 34

cX-UM Connector
Table 12-1: Swagger Configuration
Configuration Setting Value
Sip.OutboundHost Name or IP address of the host to
receive SIP notifications.
Sip.OutboundPort Port of the host to receive SIP
notifications.
Azure.AppId Azure application ID from Azure
Application (see Section 10.4).
Azure.AppSecret Azure application secret from Azure
Application
_Azure_Application: (see
Section 10.4).
Azure.TenantId Azure tenant ID from Azure Application
(see Section 10.4).
Azure.NotifBaseUrl
App service URL from Notification
Handler Web App (see Section 10.3)
Azure.ServiceBusConnectionString Service bus connection string from
Service Bus (see Section 10.2).
4. Upload the file using the following Swagger URL:
AppConfig/api/config/upload
5. Select file and execute.
6. Verify no errors are returned.
7. Verify the configuration using the following Swagger api > config URL.
8. Verify that all values set above are returned.
12.3 Testing cX-UM Configuration
This section describes how to test the cX-UM configuration.
To test the cX-UM configuration:
1. Restart cX-UM in console mode.
This time cX-UM should start normally, and not in config-only mode because
configuration is valid.
2. Test the cX-UM configuration using the Swagger config > AzureTest URL.
3. Run all tests in order to verify all Azure settings are configured correctly. The tests
include various Azure resources test (Web App, Graph API permissions, Service Bus,
etc.).
12.4 Run cX-UM as Windows Service
Before running as a Windows service, it is highly recommended to install and enable
AudioCodes Syslog viewer.
12.4.1 Syslog Viewer Configuration
This section describes how to configure the Syslog Viewer.
Installation Manual 34 Document #: LTRT-40732
Page 35

Installation Manual 12. cX-UM Configuration
Do the following:
1. Download install and start syslog viewer
2. Run cX-UM in console mode, if it not already running by specifying the Swagger config
> syslog URl.
3. Set “IsEnabled” to true, and set host and port (by default UDP port 514).
4. Execute.
5. Restart the cX-UM in console mode.
6. On the Syslog Viewer toolbar, use the Resume button or from the File menu, choose
Resume to start capturing data; on the status bar, you notice that the Syslog Listener
status changes to “UDP” or “TCP”. For more information, refer to the Syslog Viewer
User’s Guide.
12.4.2 Start cX-UM Windows Service
Start service cX-UM service using one of the following methods:
• Windows Start button > Select ‘Start cX-UM service’ > Right Click > More > Run as
administrator
OR
• From services, start service cX-UM.
.
Version 0.1.4 35 cX-UM Connector
Page 36

cX-UM Connector
This page is intentionally left blank.
Installation Manual 36 Document #: LTRT-40732
Page 37

Installation Manual 13. Users Configuration
13 Users Configuration
This chapter describes users configuration.
13.1 CSV File
Users are defined in a CSV file. It is recommended to use Excel for creating and editing the
CSV file. The following columns are defined in the CSV file:
Table 13-1: Mandatory User Configuration
Upn Extensions
Mandatory. User Principal Name Optional. List of extensions.
A user can identify itself by one or more
extensions separated by ‘|’.
Unsolicited MWIs are sent to first extension
only.
Sample value: ‘4001|4002’.
The following shows an example of a basic sample CSV file:
Upn,Extensions
ron@audiocode.biz,4001
user-wo-extension@audiocode.biz,
The default users file path is: "C:\Program Files\Audiocodes\cX-UM\Users\users.csv". The
location is configurable.
13.2 Users Modification
cX-UM monitors the CSV for change notifications. Whenever the file changes, cX-UM
immediately reloads the file and adds, deletes or modifies users accordingly.
Important: Do not use Excel to modify the users file used directly by cX-UM, because
Excel locks the file and, as a result cX-UM will fail to read it. Instead, edit a local copy of
the file and override the file in use.
13.3 CSV File Download and Upload
cX-UM supports the downloading and uploading of the users file via Swagger. This applies
to both when the users file is stored locally and when its stored in Azure blobs.
Version 0.1.4 37 cX-UM Connector
Page 38

cX-UM Connector
This page is intentionally left blank.
Installation Manual 38 Document #: LTRT-40732
Page 39

Installation Manual 14. License
14 License
cX-UM uses a license that is only valid for a specific host.
14.1 Trial License
Initially, no license is installed and cX-UM uses a trial license that is valid for three users.
14.2 Production License
The following describes the production license installation process:
1. The Customer sends AudioCodes the server ID by using the following the Swagger URL:
POST AppConfig/api/license/serverId
Or
Uses the iActivate web site to create the license automatically according to the product
key that was sent by mail to the customer.
2. AudioCodes generates a license for the specified server ID containing a maximum
number of allowed users and an expiration date. The license string is sent to the
customer.
3. The customer installs the license using the following Swagger URL:
POST AppConfig/api/license/token
4. cX-UM is restarted.
Version 0.1.4 39 cX-UM Connector
Page 40

cX-UM Connector
This page is intentionally left blank.
Installation Manual 40 Document #: LTRT-40732
Page 41

Installation Manual 15. cX-UM High Availability Configuration
15 cX-UM High Availability Configuration
cX-UM supports high availability where multiple servers automatically distribute the load of
all users. In case a server connection is lost, or a new server is added, all cX-UM servers redistribute all users automatically. cX-UM is based on the configuration of all servers to use
the same users file stored in Azure blobs storage, and to receive events whenever the file is
modified.
The same Azure blobs storage is also used for keep-alive communication between cX-UM
servers.
15.1 Azure Blobs Storage
An Azure blobs storage resource is required.
To define an Azure Blob:
1. In the Azure portal, select the resource group (Add > Storage account - blob, file, table,
queue).
2. Click Create.
3. Define a Storage account name: your-prefix.cX-UM
4. Set the Access tier: cool
5. Accept all other defaults.
6. Review and Create.
7. When the deployment is complete, open the resource.
8. On left menu, select Settings Access Keys.
9. Copy key1 connection string. This string will be required in other configurations.
15.1.1 Users Blob File
This section describes how to define a users Blob.
To define a user’s Blob file:
1. On the left menu, select Blob service containers.
2. Add container with the following settings:
• Name: cX-UM-ha
• Public Access level: private
• OK
3. Select the created container.
4. Click Upload to upload the users file.
5. Select the uploaded users file; copy and save the URL. This file will be required in other
configurations.
15.1.2 User Blob Change Event
A blob change event is required to monitor any change in the users file. The change event
pushes an entry to a Service bus topic to which all CX-UM servers subscribe.
Version 0.1.4 41 cX-UM Connector
Page 42

cX-UM Connector
15.1.2.1 Service Bus Topic
This section describes how to create a service bus topic.
To create the service bus topic:
1. Select your resource group > Service bus namespace > Create a topic:
Name: blob-changed-topic
Message time to live: 5 Minutes
2. Click Create.
•
Note:
• The Service bus topic is not available in the Basic service bus pricing tier. Make
sure that the pricing tier is Standard: Select your resource group > Service bus
namespace > Overview > Pricing > Standard.
• The service bus topic name must be defined identically to the blob-changed-topic
and is not configurable.
15.1.2.2 Storage Change Event
This section describes how to create a change event.
To create a Storage Change Event:
1. Select your resource group (Storage account > Events > Create Event Subscription).
2. Define a Name: user-blob-change-event.
3. Define an Event type: Select only ‘Blob-created’.
4. Define an Endpoint type: Service bus topic.
5. Endpoint: Select your Resource Group and Service Bus Namespace.
6. The Service Bus Topic should display “blob-changed-topic”
7. Confirm selection.
8. Click Create.
9. Select Event Subscriptions > user-blob-change-event.
10. Select Filter > Check ‘enable subject filtering’ > Subject ends with > .csv
15.2 cX-UM Configuration
This section describes how to configure cX-UM.
To configure cX-UM:
1. Enter the following Swagger URL:
POST /api/config/flat/{path}
Where:
• path: General.UsersFileName
• value: <Path to users blob from Users blob file
2. Execute.
3. Enter the Swagger URL:
POST /api/config/flat/{path}
Where:
>
Installation Manual 42 Document #: LTRT-40732
Page 43

Installation Manual 15. cX-UM High Availability Configuration
• path: AzureBlobsHa.HaBlobsConnectionString
• value: <Path to Azure blobs storage connection string from Azure Blobs Storage
4. Execute.
5. Upload the users file to Azure: enter Swagger URL: POST /api/usersManager/upload.
6. Verify configuration.
7. Restart cX-UM.
>
15.3 HA Verification
This section describes HA verification using dedicated Swagger API operations.
To perform HA verification:
1. After the cX-UM service has restarted (see Section 15.2 above), verify cX-UM loads
users from users blob.
2. Upload a modified users blob. Verify cX-UM restarts upon change and reloads users.
3. Configure another cX-UM with an identical configuration. Verify users are distributed
between servers (Use dedicated Swagger HA operations).
4. Start and stop servers and verify that other servers are aware of this operation.
Following is the list of all cX-UM configuration parameters:
Table 15-1: All cX-UM Configuration Parameters
Key Default Value Description
General.UsersFileName "Users\\users.csv" Users CSV file
location.
For HA
systems, the
value can be
an Azure blob
URL
General.WebListenUrl "http://127.0.0.1:8889/"
The web
server
listening URL.
By default,
open from
localhost only.
To enable
access from
everywhere,
set to
"http://+:8889/"
Sip.OutboundHost INVALID The outbound
host where
unsolicited
MWI
notifications
are sent.
Sip.OutboundPort 5060 Outbound
port.
Version 0.1.4 43 cX-UM Connector
Page 44

cX-UM Connector
Sip.NotificationInSubscribe’
false
If true, then
notification info
Azure.AppId
INVALID
Azure
application ID.
Azure.AppSecret
INVALID
Azure
secret.
Azure.TenantId
INVALID
Azure tenant
ID.
Azure.NotifBaseUrl
INVALID
The based
event.
Azure.NotifExpirationMinutes
4230
The expiration
notification.
Key Default Value Description
Sip.ListenPort 5070 The SIP
listening port
for MWI
subscriptions.
Sip.BackupOutboundHostsList null List of backup
outbound
hosts, in
format of
"host:port"
Sip.ProxyCheckSeconds 60
ResponseSupported
(all in one word)
Period in
seconds of
primary and
backup
outbound
hosts check
subscribe
response will
contain the
notification
info.
If false, then
an additional
notify message
will be sent
containing the
application
Installation Manual 44 Document #: LTRT-40732
URL of the
Web App to
receive the
voicemail
changed
time, in
minutes, of the
Exchange
voicemail
Page 45

Installation Manual 15. cX-UM High Availability Configuration
Azure.ServiceBusConnectionString
INVALID
The Azure
notifications.
Syslog.IsEnabled
false
Enables
syslog.
Syslog.SyslogServer
"localhost"
Syslog server.
Syslog.SyslogPort
514
Syslog port.
AzureBlobsHa.HaBlobsConnectionString
null
Azure blobs
HA.
AzureBlobsHa.HaManagers’
60
The period in
disable.
Key Default Value Description
service bus
connection
string, used for
the
connection
string used for
UpdatePeriodSeconds
(in one word)
seconds that
each server
reports itself
and checks the
other servers.
Set to zero to
Version 0.1.4 45 cX-UM Connector
Page 46

cX-UM Connector
This page is intentionally left blank.
Installation Manual 46 Document #: LTRT-40732
Page 47

Installation Manual A. HA – SIP Message Redirection
A HA – SIP Message Redirection
cX-UM provides automatic HA for users by distributing the users between cX-UM servers.
Each user is automatically assigned a unique X-UM server. If one server fails, then another
server takes over responsibility for this user.
cX-UM HA is implemented without any manual configuration.
There is no limit to the number of cX-UM servers that can be configured in the HA setup. All
servers in the HA configuration are active (there is no standby server), and load for all users
are distributed evenly between the servers.
A.1.1 Incoming Messages Redirection
In a HA environment, incoming messages from the proxy side (SBC/gateway) should reach
the HA user owner server. This is relevant for the following example scenario:
User MWI subscribe session
Since the proxy server is not aware of the current user owner server, X-UM replies with a
SIP redirect response to the HA user owner server. The redirect address is taken from the
ExtraData field sent by each server.
Important: The redirect messages destination is the server FQDN, not the IP address.
As a result, the proxy SBC must be configured to use a DNS that can resolve the cXUM host names.
An example contact header of a redirect message is:
CONTACT: <sip:ron-devel-02.lync2013.net:5070;transport=Tcp>
Version 0.1.4 47 cX-UM Connector
Page 48

cX-UM Connector
This page is intentionally left blank.
Installation Manual 48 Document #: LTRT-40732
Page 49

Installation Manual B. XUM Limitations
B XUM Limitations
The following is a list of cX-UM limitations:
Up to ~5K users are supported per cX-UM.
Only use the Google Chrome browser to work with Swagger.
cX-UM has no SNMP or other monitoring capabilities. Monitoring of the service status
can only be done using a third-party tool.
If all SBCs down, new MWI messages are lost. On the next mailbox change or SIP
Subscribe, the PBX is synchronized with the MWI status.
Version 0.1.4 49 cX-UM Connector
Page 50

cX-UM Connector
This page is intentionally left blank.
Installation Manual 50 Document #: LTRT-40732
Page 51

Installation Manual C. Known Issues
C Known Issues
C.1 Working with Internet Explorer
When working with the Swagger management interface, it is mandatory to work with Google
Chrome (instead of Internet Explorer IE) for full Swagger support.
Version 0.1.4 51 cX-UM Connector
Page 52

cX-UM Connector
This page is intentionally left blank.
Installation Manual 52 Document #: LTRT-40732
Page 53

Installation Manual D. Sample Messages
D Sample Messages
This section shows sample SIP messages.
D.1 Unsolicited MWI
Below is a sample unsolicited MWI sent by cX-UM:
NOTIFY sip:4001@audiocode.biz;user=phone SIP/2.0
FROM:
<sip:4001@audiocode.biz;user=phone>;epid=1A6F48764F;tag=c0806ac29f
TO: <sip:4001@audiocode.biz;user=phone>
CSEQ: 3 NOTIFY
CALL-ID: fae7217b6c354c1682b004196b3a373c
MAX-FORWARDS: 70
VIA: SIP/2.0/TCP 127.0.0.1:60103;branch=z9hG4bK1b3498f
CONTACT: <sip:IL-RONAPC.corp.audiocodes.com:5071;transport=Tcp;maddr=127.0.0.1;msopaque=65b13b27a81e29f8>;automata;actor="attendant";text;audio;vid
eo;image;application
CONTENT-LENGTH: 103
EVENT: message-summary
SUBSCRIPTION-STATE: terminated
USER-AGENT: RTCC/6.0.0.0 Audiocodes cX-UM (0.1.1.14)
CONTENT-TYPE: application/simple-message-summary
Messages-Waiting: yes
Message-Account: sip:4001@audiocode.biz;user=phone
Voice-Message: 7/0 (0/0)
D.2 Subscribe Based MWI
Phone subscription:
SUBSCRIBE sip:4001@dummy.org SIP/2.0
FROM: <sip:4001@dummy.org:23456;transport=Tcp;msopaque=daab015eaea13cfd>;epid=239FC94943;tag=67ae306221
TO: <sip:4001@dummy.org>
CSEQ: 1 SUBSCRIBE
CALL-ID: a15de141929f4c31876fc5195c02eeb2
MAX-FORWARDS: 70
VIA: SIP/2.0/TCP 10.13.2.29:60471;branch=z9hG4bK7f7051df
CONTACT: <sip:IL-RONAPC.corp.audiocodes.com:23456;transport=Tcp;maddr=10.13.2.29;msopaque=daab015eaea13cfd>;automata;actor="attendant";text;audio;vid
eo;image;application
CONTENT-LENGTH: 0
EVENT: message-summary
SUPPORTED: com.microsoft.autoextend
SUPPORTED: ms-piggyback-first-notify
USER-AGENT: RTCC/6.0.0.0 MwiLoad
(OK omitted)
cX-UM Notify:
NOTIFY sip:IL-RONA-
PC.corp.audiocodes.com:23456;transport=Tcp;maddr=10.13.2.29;msopaque=daab015eaea13cfd SIP/2.0
FROM: <sip:4001@dummy.org>;tag=aba9f22f21
Version 0.1.4 53 cX-UM Connector
Page 54

cX-UM Connector
TO: <sip:4001@dummy.org:23456;transport=Tcp;msopaque=daab015eaea13cfd>;epid=239FC94943;tag=67ae306221
CSEQ: 2 NOTIFY
CALL-ID: a15de141929f4c31876fc5195c02eeb2
MAX-FORWARDS: 70
VIA: SIP/2.0/TCP 10.13.2.29:60472;branch=z9hG4bK68eb6723
CONTACT: <sip:IL-RONAPC.corp.audiocodes.com:5071;transport=Tcp;maddr=10.13.2.29;msopaque=9cdd2dd80377fabe>;automata;actor="attendant";text;audio;vid
eo;image;application
CONTENT-LENGTH: 88
EVENT: message-summary
SUBSCRIPTION-STATE: active
USER-AGENT: RTCC/6.0.0.0 Audiocodes cX-UM (0.1.1.14)
CONTENT-TYPE: application/simple-message-summary
Messages-Waiting: yes
Message-Account: sip:4001@dummy.org
Voice-Message: 7/0 (0/0)
Installation Manual 54 Document #: LTRT-40732
Page 55

Installation Manual D. Sample Messages
This page is intentionally left blank.
Version 0.1.4 55 cX-UM Connector
Page 56

International Headquarters
1 Hayarden Street,
Airport City
Lod 7019900, Israel
Tel: +972-3-976-4000
Fax: +972-3-976-4040
AudioCodes Inc.
200 Cottontail Lane
Suite A101E
Somerset NJ 08873
Tel: +1-732-469-0880
Fax: +1-732-469-2298
Contact us
:
https://www.audiocodes.com/corporate/offices-worldwide
Website: https://www.audiocodes.com/
©2020 AudioCodes Ltd. All rights reserved. AudioCodes, AC, HD VoIP, HD VoIP Sounds Better, IPmedia, Mediant,
MediaPack, What’s Inside Matters, OSN, SmartTAP, User Management Pack, VMAS, VoIPerfect, VoIPerfectHD, Your
Gateway To VoIP, 3GX, VocaNom, AudioCodes One Voice, AudioCodes Meeting Insights, AudioCodes Room
Experience and CloudBond are trademarks or registered trademarks of AudioCodes Limited. All other products or
trademarks are property of their respective owners. Product specifications are subject to change without notice.
Document #: LTRT-40732
 Loading...