

Page 1
AT&T
Integrated Services Digital Network (ISDN)
COMCODE 106733702
AT&T 555-021-735
Issue 1, September 1992
AT&T
ISDN
Voice
8510T
Terminal
Feature Package 3
Quick Reference Guide
Page 2

©1992 AT&T
All Rights Reserved
Printed in USA
Contents
Your ISDN 8510T Voice Terminal
1
While reasonable effort was made to ensure that the information in this
document was complete and accurate at the time of printing, AT&T cannot
assume responsibility for any errors. Changes and/or corrections to the
information contained in this document may be incorporated into future
issues.
ORDERING INFORMATION
Call:
Write:
Order:
Published by
BCS Product Documentation Development Group
AT&T Bell Laboratories
AT&T Customer Information Center at 1 800 432-6600
in Canada call 1 800 255-1242
AT&T Customer Information Center
2855 North Franklin Road
P.O. Box 19901
Indianapolis, IN 46219-1385
Document No. AT&T 555-021-735
Issue 1, September 1992
Answering and Placing a Call
How to Use the Softkeys
The Features Accessed with the Softkeys
Using the Display Control and Exit Buttons
Getting Started
Setting the Clock
Setting the Speakerphone
Adding Entries to the Directory
Viewing Directory Entries
Using the Dir Button to Place a Call
Retrieving Unanswered Incoming Calls from Call Log
Retrieving Incoming Answered and Outgoing Calls
Locking the Directory, Call Log, or All Softkeys 10
Using the Options
Using the Option Screens
2
3
3
3
4
4
5
6
7
7
8
9
11
11
A Flowchart of the Softkeys
12
Page 3

Your ISDN 8510T Voice Terminal
Listed and explained below are the major voice features that you can
access with the buttons on the voice terminal.
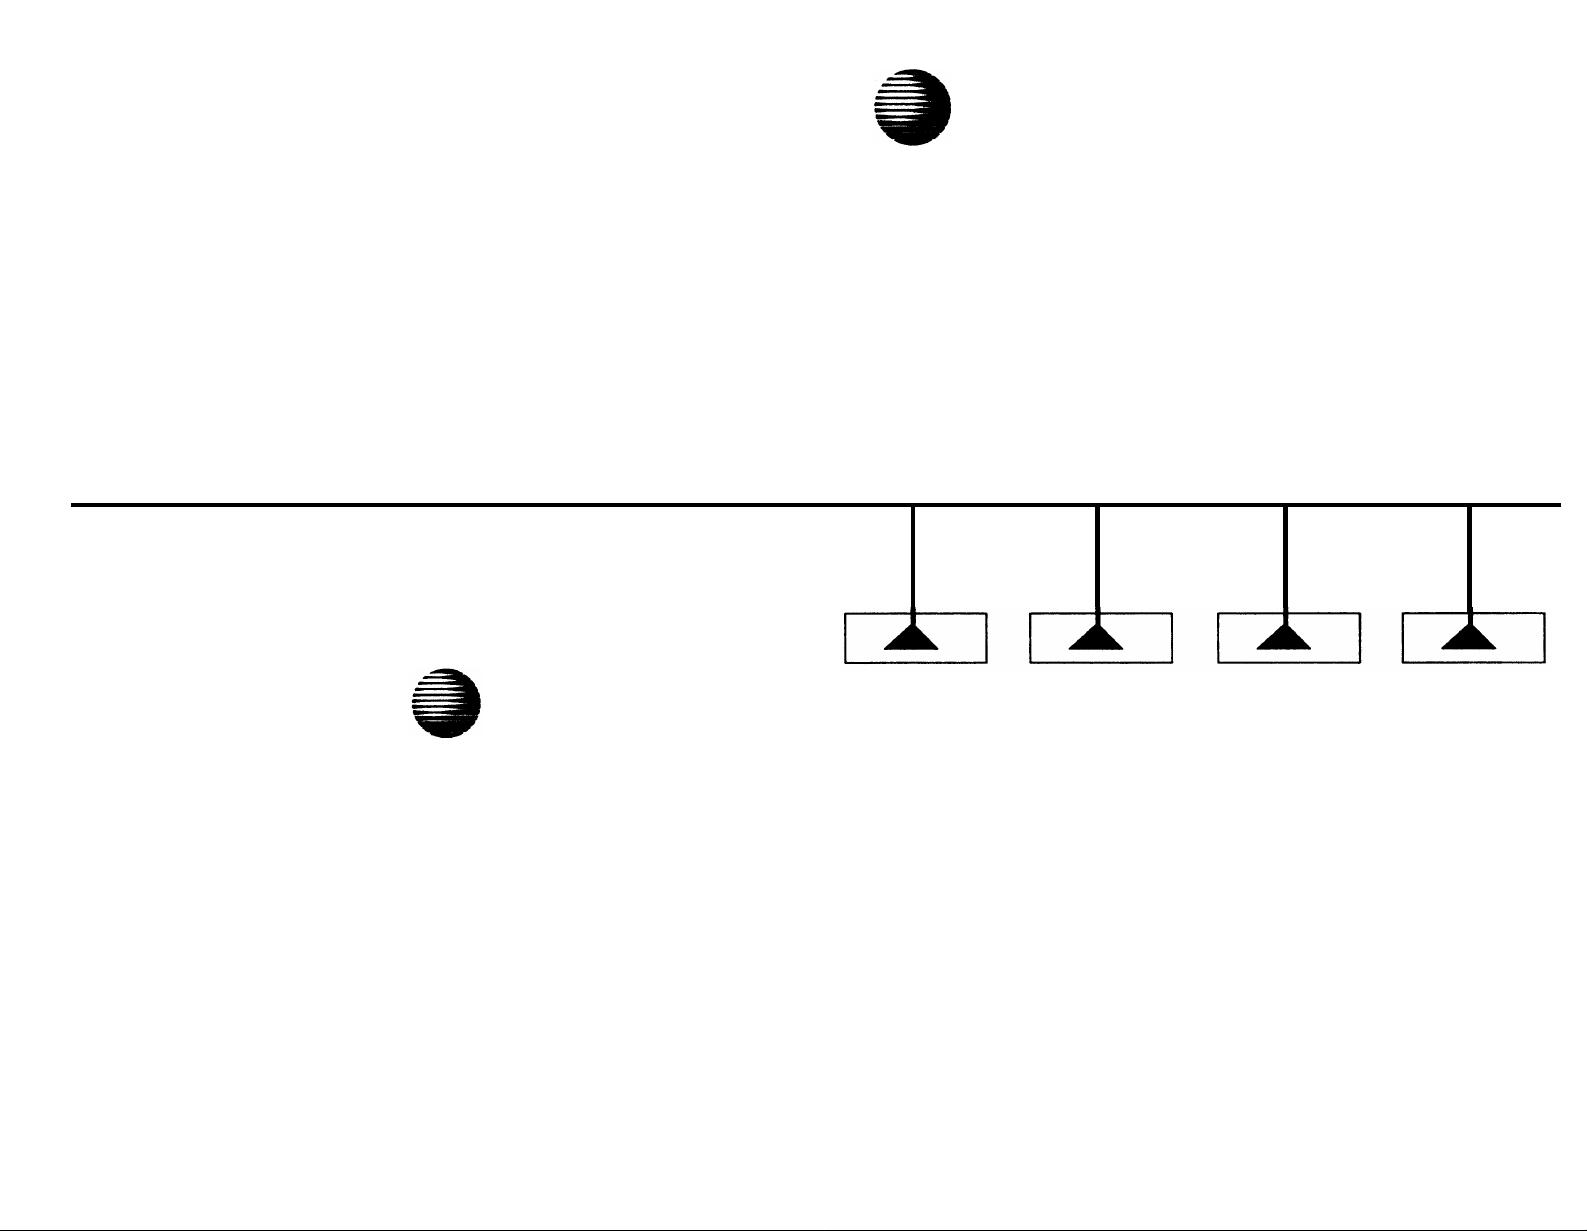
Call appearance/feature buttons These 10 buttons are devoted either to handling incoming and outgoing calls (call appearances) and are labeled with the exchange (numbers) and extension number or they can be used as feature buttons to access voice features and are
labeled with a feature name. Each of these 10 call appearance/
feature buttons has a red light, which indicates the selected line and
a green light which indicates the status of that line or feature.
Conference button For setting up conference calls with an additional party.
Drop button For disconnecting from a call or dropping the last party added to a conference call.
Hold button A red button for putting a call on hold. Message light A red light which goes on steadily when a message
has been left for you.
Mute button For turning on or off the microphone of the handset
or the speakerphone so the other person on the call cannot hear
you.
Redial button For automatically redialing the last number that you dialed from the dial pad.
Transfer button For transferring a call to another voice terminal.
1
Page 4

Volume control button When on a call, used to increase or decrease the receive volume of the handset or the Speakerphone or listen only Speaker feature. When you are not on a call, the Volume control button is used to increase or decrease the ringer volume or tones.
Answering and Placing a Call
To answer a call
1
Lift the handset.
■
The green light (below the red light) goes on steadily at the
selected call appearance button.
NOTE: If you are not connected immediately, press the call
appearance button next to the flashing green light.
To place a call
1
Lift the handset.
■
The green light (below the red light) goes on steadily at the
selected call appearance button.
Listen for the dial tone and dial the number you want to call.
2
To end (or drop) a call
1
Hang up the handset or press the [ Drop ] button
NOTE: If you use the [ Drop ] button, you will hear a dial tone and
your voice terminal is ready for another call.
How to Use the Softkeys
The softkeys on the 8510T voice terminal are the buttons labeled
with arrows, located below the display.
The Features Accessed with the Display and Softkeys
In order to access the features or names on the second line of the
display screen, you must press the softkey below the appropriate
feature or person's name. The Main Menu, shown below, allows
you to view and modify 3 different types of menu choices:
MENU
Directory CallLog Option
■
Directory - create and edit a personal directory of up to 30 extensions or outside numbers.
■
Call Log - initially set to list the 10 most recent incoming unanswered calls only. An option is provided so you may also choose to access the 10 most recent answered calls, the 10 most recent calls placed from your voice terminal, or choose not to log.any calls.
■
Options - use to access such features as setting the clock and
speakerphone, locking the Directory, Call Log, and all softkeys,
selecting the display contrast, personalized ringing pattern, and
the rate at which display messages are shown, and turning on or
off confirmation and error tones.
Using the Display Control and Exit Buttons
There are 4 Display Control buttons located below the softkeys:
[
Menu ], [ Dir ], [ <Prev ], and [ Next> ]. Lower down on the voice
terminal is an [
Exit ] button.
>
2
3
Page 5

These five buttons can be used in the following ways:
Menu - Enter Softkey mode or return to the Main Menu screen. Dir - Enter your Directory in order to quickly place a call. Prev - If there is a "<" at the top left of the screen, you can press
[
<Prev ] to move back a screen on that level.
Next - If there is a ">" at the top right of the screen, you can press [
Next> ] to see the next set of menu selections.
EXIT - Press [
Exit ] to exit display features, abandon any softkey
function in progress, and return to normal call-handling mode.
Getting Started
Use the following procedures to set the clock, set the speakerphone,
add, view, and use the Directory, view your Call Log, and lock the
Directory, Call Log, or all softkey functions.
Setting the Clock
Procedure
1
When you see this screen:
PRESS Menu THEN Option
TO SET THE CLOCK
The Resulting Display
3
Press the softkey below Clock.
4
Press -, +, or a dial pad key to set the clock.
5
Press [ Next> ] to go to the next field, such as "Sept." to "24."
6
Press the softkey below Done when the correct month, day,
Sep 24, 1992 10:00 AM
- +
hour, and minute appears on the screen.
Setting the Speakerphone
1
When you see this screen:
READY TO SET THE SPKR
Begin Cancel
press the softkey below
■
You hear a set of rising tones as the speakerphone adjusts itself
to the surrounding acoustical environment.
Begin.
Quit
press [ Menu ].
2
Press the softkey below Option.
MENU
Directory CallLog Option
OPTIONS
Spkr Clock Lock Done
4
>
>
5
Page 6
Adding Entries to the Directory
Procedure
1
Press [ Menu ].
2
Press the softkey below
Directory.
3
Press the softkey below
Add/Del.
4
Press the softkey below Add.
5
Enter the telephone number (up to 24 digits). You can enter a
pause between an access code and the telephone number. It
appears as a comma on the screen.
6
Press the softkey below Done
when the number is correctly
shown and complete.
7
Use the dial pad to enter a name up to 5 characters. You may
need to press the dial pad key more than once for the desired
character. For example, press the [
"B" or three times to enter a "C."
Press [
8
Press the softkey below Done when the name is correct and
Next> ] to go to the next character.
complete.
The Resulting Display
MENU
Directory CallLog Option
DIRECTORY
Call View Add/Del Done
ADD/DEL DIRECTORY
Add Delete Edit Done
ENTER PHONE #:_
Pause
ENTER 5-CHAR NAME:_
2 ] dial pad key twice to enter a
>
Quit
Quit
Viewing Directory Entries
Procedure
1
Press [ Menu ].
2
Press the softkey below
Directory.
3
Press the softkey below
4
Press [
Press [
Next>
] to page forward through the names in the Directory.
<Prev
] to page backwards through the names in the
View.
Directory.
5
Press the softkey below the name in the Directory you want
to view.
The Resulting Display
MENU >
Directory CallLog Option
DIRECTORY
Call View Add/Del Done
< PRESS TO VIEW >
HarvW Kathy Sandy Quit
Using the Dir Button to Place a Call
Procedure The Resulting Display
1
Press [ Dir ] to enter your
Directory.
2
When the Directoy entry of the person whom you wish to call
appears on the display screen, press the softkey below that name.
NOTE: The voice terminal dials the call immediately.
<
HarvW Kathy Sandy Quit
CALL >
6
7
Page 7

Retrieving Unanswered Incoming Calls from Call Log
Procedure
1
Press [ Menu ].
2
Press the softkey below
CallLog.
3 Press the softkey below New or 555.1235
Old according to the type of
unanswered incoming calls you
wish to view.
4
If you want to see the time at which the call rang at your voice
terminal, press the softkey below Time.
5
If you want to remove this call from your Unanswered Call Log,
press the softkey below Delete.
6
If you want to see information on the next or previous
unanswered call in the Call Log, press the softkey below More or
press [
7
When you have finished viewing each of the unanswered calls in
Next> ] or [ <Prev ].
the Call Log, press the softkey below More until you reach the
end of that list. Then press the softkey below Done.
The Resulting Display
MENU >
Directory CallLog Option
UNANSWERED CALL LOG
New
Old
Time Delete
Done
K. Smith >
More
Retrieving Incoming Answered and Outgoing Calls
NOTE:
1
2
3
For further details on using Time or More to view or delete calls,
see Steps 4, 6, and 7 under "Retrieving Unanswered Incoming Calls
from Call Log." If you want to remove this call from your Answered
Call Log, press the softkey below Delete.
Use this procedure when the Call Log is set for "All Calls."
Procedure
Press [ Menu ].
Press the softkey below
Call Log.
The Resulting Display
MENU
Directory CallLog Option
(New) CALL LOG
Incoming Outgoing Done
Do one of the following:
■
To view the Outgoing calls,
press the softkey below
9, 1-800-555-1236
Time Call Save More
Outgoing.
To view Incoming Answered
■
or Unanswered calls, press
(New) INCOMING
Unanswered Answered Done
the softkey below Incoming.
Press the softkey below the
type of incoming call you
555-1235
Time Delete
K. Smith >
want to view.
>
>
More
8
9
Page 8

Locking the Directory, Call Log, or All Softkeys
1
Press [ Menu ].
Procedure The Resulting Display
MENU
Directory CallLog Option
Using the Options
Using the Option Screens
>
Use the following softkey screens and softkeys to access these
features:
2
Press the softkey below
3
Press the softkey below Lock.
Press the softkey below
4
Option.
Select-Item.
NOTE:
If you want to lock
the softkeys, press [ Next> ]
to see the next "Select-Item"
screen.
5
Press the softkey below
Directory, CallLog, or
Softkeys according to which
one you want to lock.
6
Press the softkey below Yes.
or
Enter or create your 3-digit password.
7
OPTIONS
Spkr Clock Lock Done
LOCK
Select-Item
SELECT ITEM TO LOCK >
CallLog
< SELECT lTEM TO LOCK
Softkeys
Yes
ENTER 3-Digit PSWD:_
CREATE 3-Digit PSWD:_
10
Directory
LOCK DIRECTORY?
No
>
Done
Done
Done
Explain
Done
Done
OPTIONS
Clock
Spkr
➀
1
Set or reset the speakerphone.
Set the clock.
2
Lock the Directory, Call Log, and all softkeys.
3
NOTE: In order to lock these functions, you must create and enter
Lock
➁ ➂
>
Done
<
Tones CallLog
➆
OPTIONS
➇
Names
➈
<
Cntrast
➃
Done
OPTIONS
Ring Screen Done
➄
➅
a 3-digit password.
4
Select contrast for display screen.
Select a personalized ringing pattern from 1 through 8.
5
Set the rate at which you view the screens.
6
Activate or deactivate confirmation and error tones.
7
Set the Call Log option either to Off, or to Incoming Unanswered
8
Calls logged only, or to log All Calls.
Set the number of names (3 names + QUIT or 4 names) on a
9
Directory page.
11
>
Page 9
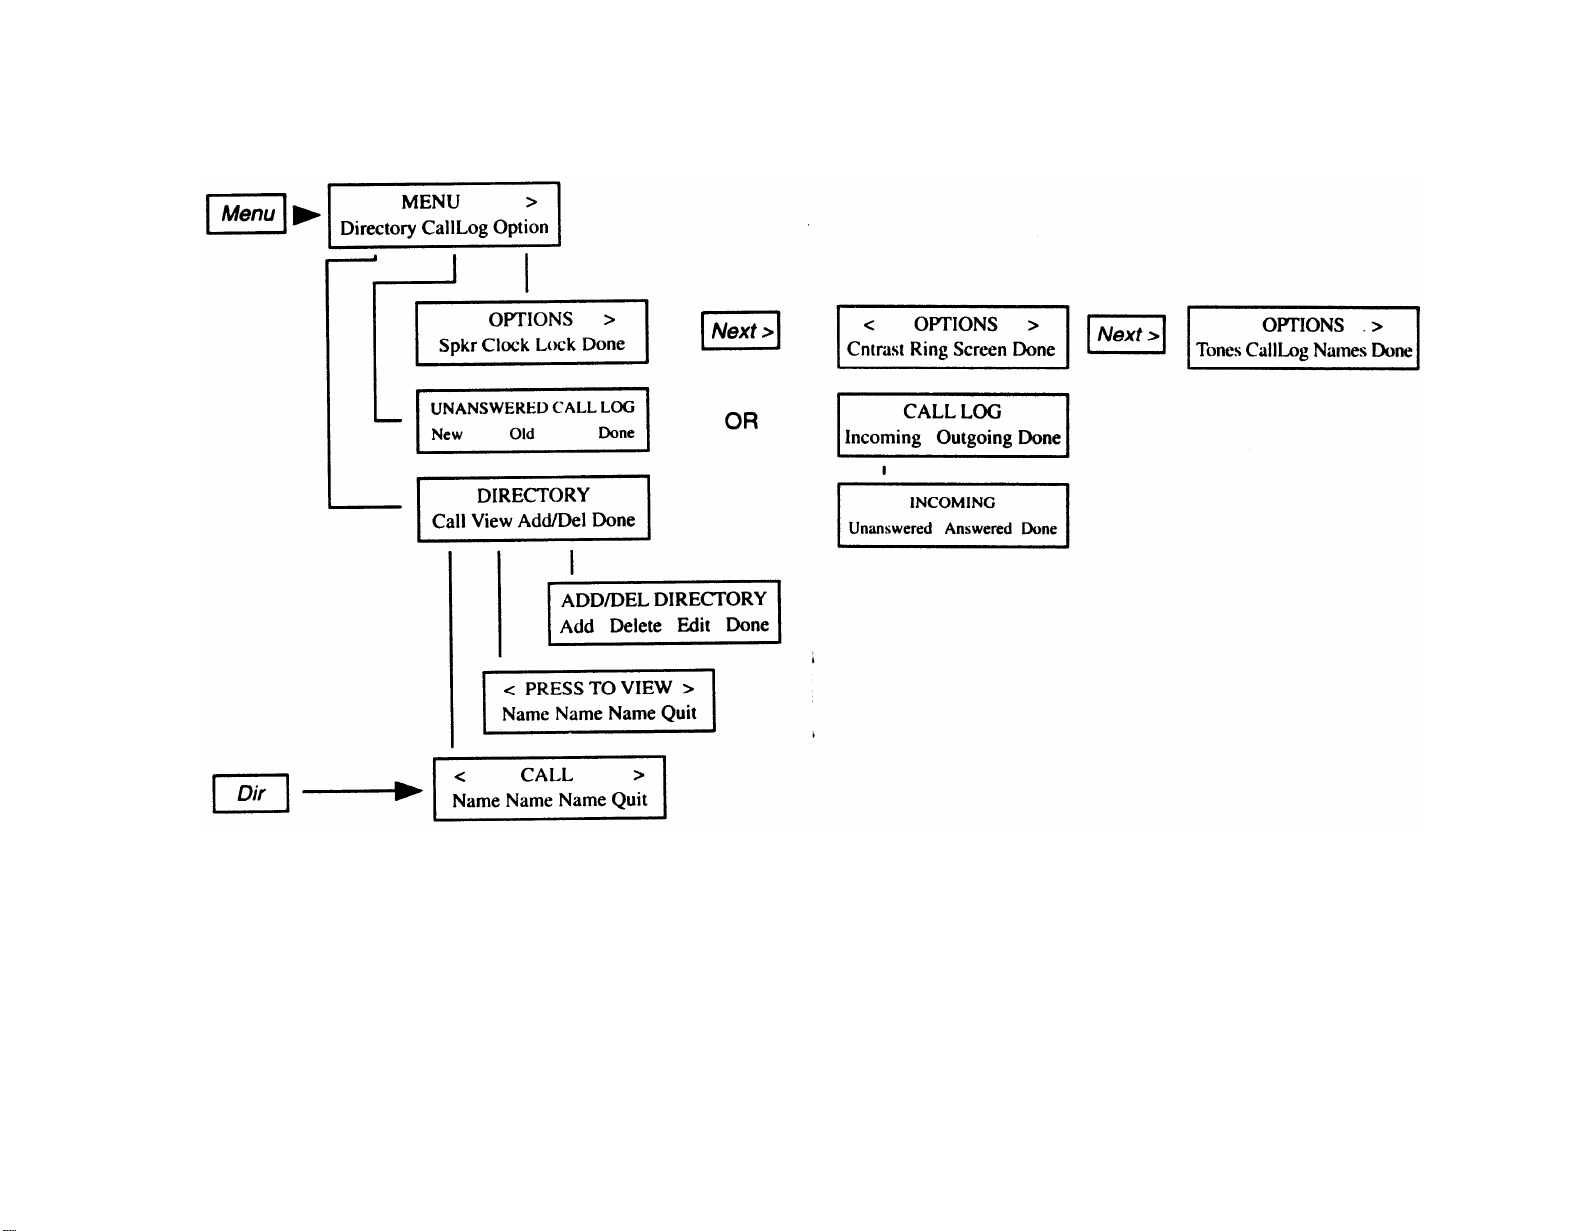
A Flowchart of the Softkeys
Use the softkey feature flowchart below when you wish to review a
feature's relation to the Main Menu or one of its main features.
12
 Loading...