

Page 1

®
PCI-L3C920
Network Interface Card
User’s Guide
E785
Manual Revision 1.01
Published June 2001
Page 2

No part of this documentation, including the products and software described in it, may be reproduced, transmitted, transcribed,
stored in a retrieval system, or translated into any language in any form or by any means, except documentation kept by the
purchaser for backup purposes, without the express written permission of ASUSTeK COMPUTER INC. (“ASUS”).
ASUS PROVIDES THIS DOCUMENT A TION “AS IS” WITHOUT WARRANTY OF ANY KIND, EITHER EXPRESS OR IMPLIED,
INCLUDING BUT NOT LIMITED TO THE IMPLIED WARRANTIES OR CONDITIONS OF MERCHANTABILITY OR FITNESS
FOR A PARTICULAR PURPOSE. IN NO EVENT SHALL ASUS, ITS DIRECTORS, OFFICERS, EMPLOYEES OR AGENTS BE
LIABLE FOR ANY INDIRECT, SPECIAL, INCIDENTAL, OR CONSEQUENTIAL DAMAGES (INCLUDING DAMAGES FOR
LOSS OF PROFITS, LOSS OF BUSINESS, LOSS OF USE OR DAT A, INTERRUPTION OF BUSINESS AND THE LIKE), EVEN
IF ASUS HAS BEEN ADVISED OF THE POSSIBILITY OF SUCH DAMAGES ARISING FROM ANY DEFECT OR ERROR IN
THIS DOCUMENTATION OR PRODUCT.
Product warranty or service will not be extended if: (1) the product is repaired, modified or altered, unless such repair, modification
of alteration is authorized in writing by ASUS; or (2) the serial number of the product is defaced or missing.
Products and corporate names appearing in this documentation may or may not be registered trademarks or copyrights of their
respective companies, and are used only for identification or explanation and to the owners’ benefit, without intent to infringe.
For documentation updates, visit the ASUS website at www.asus.com.tw.
The specifications and information contained in this documentation are furnished for informational use only, and are subject to
change at any time without notice, and should not be construed as a commitment by ASUS. ASUS assumes no responsibility or
liability for any errors or inaccuracies that may appear in this documentation, including the products and the software described
in it.
Copyright © 2001 ASUSTeK COMPUTER INC. All Rights Reserved.
2 ASUS PCI-L3C920 User’s Guide
Page 3

Introduction
Thank you for buying the ASUS PCI-L3C920 Network Interface Card (NIC)!
This user’s guide tells you how to install and configure the card. It is assumed that you
have adequate knowledge on PCs and some familiarity with Ethernet networks.
Package Contents
Check the following items if present in your package. If you discover damaged or missing
items, contact your retailer.
(1) ASUS PCI-L3C920 Network Interface Card
(1) Support CD
(1) User Guide
ASUS PCI-L3C920 User’s Guide 3
Page 4
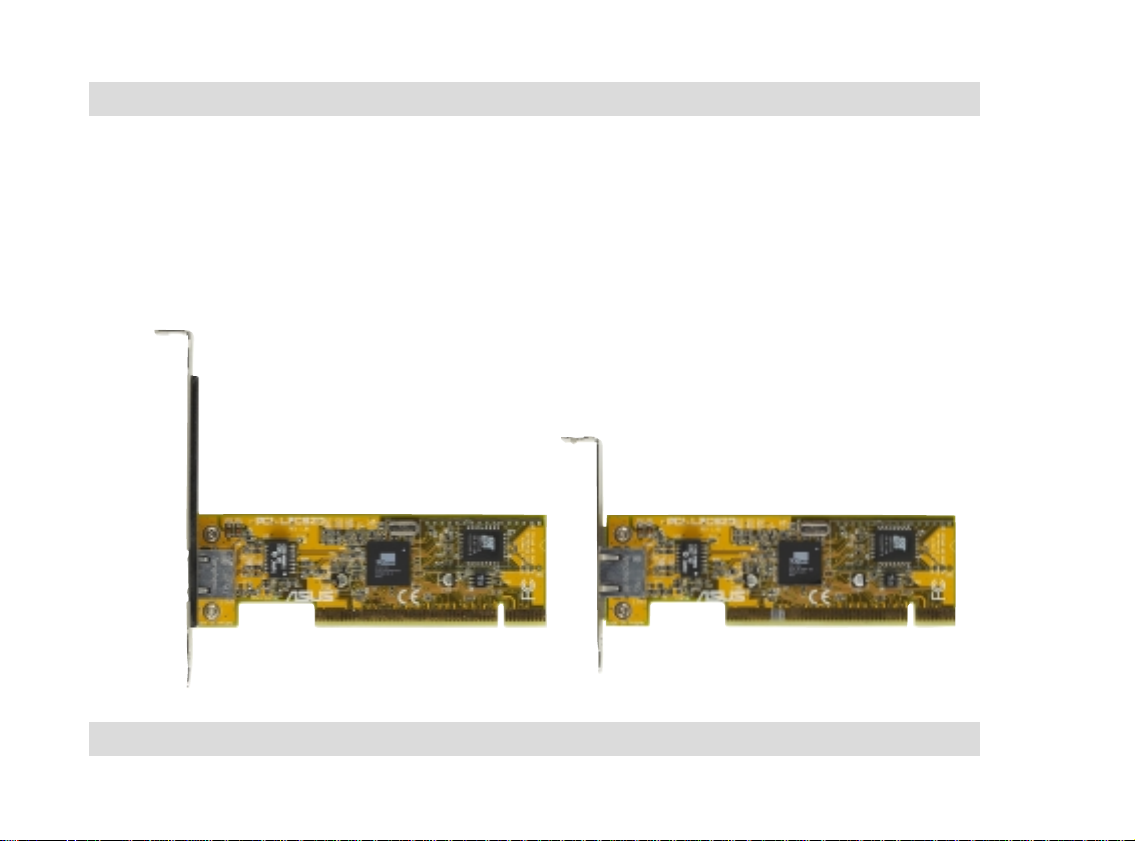
Models
The ASUS PCI-L3C920 network interface card comes in two models, one with a standard
bracket for regular PCs and one with a low profile bracket for small book PCs. Both
models have the same card components.
Standard Model Low Profile Model
4 ASUS PCI-L3C920 User’s Guide
Page 5
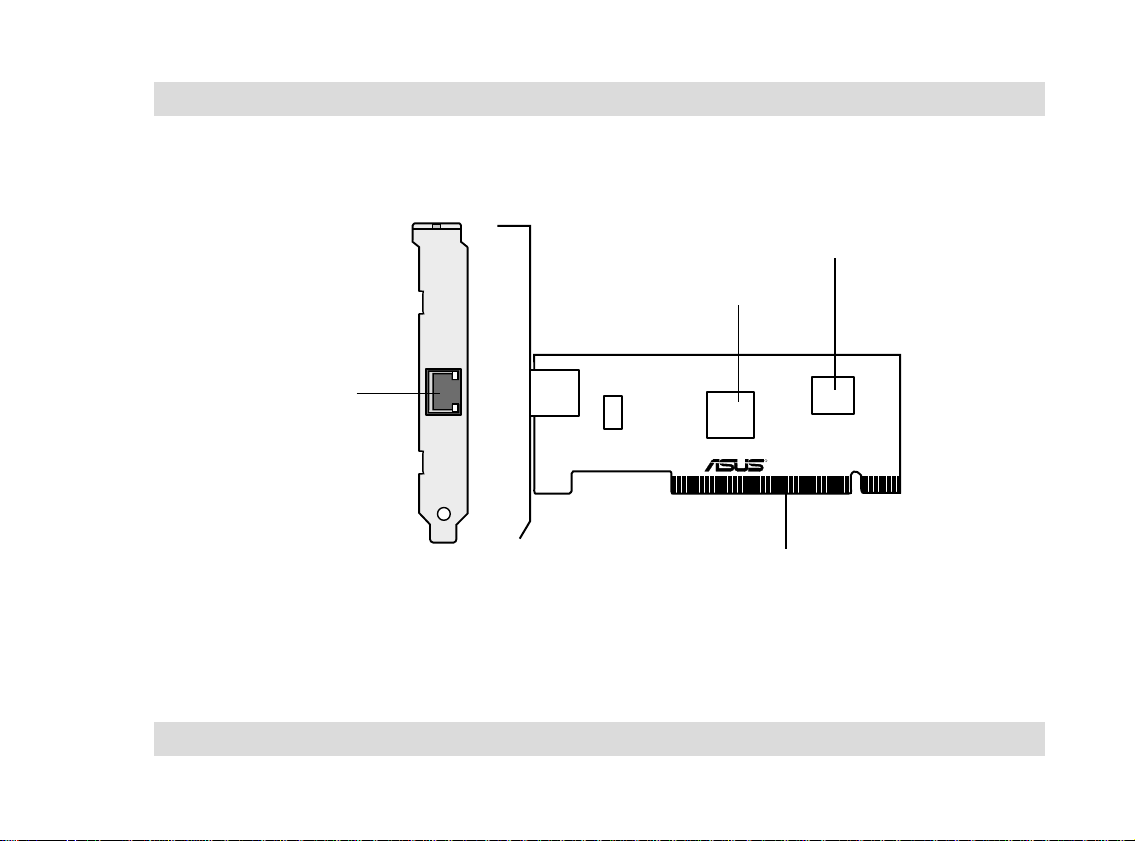
Layout
Boot ROM
(optional)
LAN Controller
ACT
RJ-45 LAN Port
LINK
PCI-L3C920
3Com
3C920
Ethernet
Controller
R
PCI Interface
NOTE: The Boot ROM chip is an optional item. If your card did not come
with this chip, an empty socket is provided in case you wish to install a Boot
ROM at a later time.
ASUS PCI-L3C920 User’s Guide 5
Page 6

Features
PCI Interface
• Full 32-bit (33 MHz) PCI bus
interface (Rev2.2 compliant)
• Zero wait-state bus master data
bursts
• PCI 5V bus support
Boot ROM Interface (optional)
• Supports 64KB/128KB, byte-wide
Flash ROM devices
Network Interface
• 3Com EtherLink® 10BASE-T/
100BASE-TX controller
• 32-bit PCI host interface
• RJ-45 LAN port
6 ASUS PCI-L3C920 User’s Guide
Page 7

System Requirements
Your PC or server should meet the following system requirements before installing the
ASUS PCI-L3C920 network interface card:
• ASUS motherboard
• Pentium processor
• Minimum 640K memory
• Available bus-mastering PCI slot
NOTE: The ASUS PCI-L3C920 network interface card must be installed in
an ASUS motherboard.
ASUS PCI-L3C920 User’s Guide 7
Page 8

Running the Preinstallation Program
Before installing the network card in your PC, run the preinstallation program to properly
set up the system to the environment and prevent conflicts between the card and your
operating system. DO NOT install the card at this time.
Follow these steps to run the installation program.
1. Turn on your PC and start Windows.
2. Quit any open applications and disable any anti-virus software.
3. Insert the Support CD in the CD-ROM drive.
The Welcome screen appears. If the Welcome screen does not appear, type
the following from the Run option of the Windows Start menu:
d:\installs\setup.exe
d:\ represents the CD-ROM drive. You may change it if you assigned a different
letter to your CD-ROM drive.
See next page for an image of the Welcome screen.
8 ASUS PCI-L3C920 User’s Guide
Page 9

Welcome Screen
ASUS PCI-L3C920 User’s Guide 9
Page 10

4. From the Welcome screen, click
5. Click
NIC Drivers and Diagnostics
NIC Software
, then
Install NIC Driver
.
.
• To install the network driver and the 3Com NIC Diagnostics program, click
Install with Diagnostic Program
• To install the network driver only, click
.
Install without Diagnostic Program
.
6. Take note of the message on the box that appears, then click OK.
7. Select your operating system from the list that appears.
8. Click
Done
on the Completing NIC Installation screen.
9. Exit the installation program, shut down Windows, and turn off the PC. Do not
remove the Support CD from the CD-ROM drive.
10. Proceed to the next section “Installing the Network Card.”
10 ASUS PCI-L3C920 User’s Guide
Page 11

Installing the Network Card
Follow these steps to install the card into your PC.
CAUTION! Before handling the network card, touch a bare metal portion of
your PC to discharge static electricity from your body. Wear a wrist strap
grounded to the PC chassis when handling the card.
1. Make sure that the PC is turned off. Unplug the power cord from the electrical
socket.
2. Remove the PC cover.
3. Locate an empty, non-shared bus-mastering PCI slot and remove its slot cover.
Save the screw for later use.
IMPORTANT! Do not install the network card in a shared PCI slot. Check your
PC documentation to ensure that you install the card into the correct slot.
4. Carefully insert the card into the PCI slot.
5. Secure the card with the screw that you removed earlier.
6. Replace the PC cover and plug in the power cord.
ASUS PCI-L3C920 User’s Guide 11
Page 12

Connecting to the Network
Follow these steps to connect the card to the network.
NOTE: The RJ-45 port on the network card provides a 10 Mbps or 100 Mbps
connection, depending on the speed of the connected hub or switch.
1. Plug the RJ-45 connector of the twisted-pair network cable into the RJ-45 port
on the card backplate.
2. Connect the other end of the network cable to an active network port.
3. Turn on the PC.
4. Proceed to the next section “Installing the Network Driver.”
12 ASUS PCI-L3C920 User’s Guide
Page 13

Installing the Network Driver
IMPORTANT: Before installing the network driver, make sure that:
• You have run the preinstallation program
• You have installed the card in the PC and connected to the network
• You have the Windows installation files (for Windows 95/98 only).
(These files may have been already copied to your hard drive when you
installed Windows).
The network driver installation procedures vary depending on your operating system.
1. Windows 95/98/2000 automatically detects the presence of the network card
and prompts you to insert the Support CD for the network driver. Follow the
screen instructions. Restart the PC after completing the driver installation.
2. For Windows NT 3.51 and 4.0, install the driver by double-clicking the Control
Panel icon, then the Network icon. Insert the Support CD when prompted.
Restart the PC after completing the driver installation.
Refer to the online User Guide in the Support CD for detailed installation procedure of
each operating system.
ASUS PCI-L3C920 User’s Guide 13
Page 14

Notes
14 ASUS PCI-L3C920 User’s Guide
Page 15

Notes
ASUS PCI-L3C920 User’s Guide 15
Page 16

ASUSTeK COMPUTER INC. (Asia-Pacific)
Marketing
Address: 150 Li-Te Road
Peitou, Taipei, Taiwan 112
Telephone: +886-2-2894-3447
Fax: +886-2-2894-3449
Email: info@asus.com.tw
Technical Support
MB/Others (Tel): +886-2-2890-7121 (English)
Notebook (Tel): +886-2-2890-7122 (English)
Desktop/Server (Tel): +886-2-2890-7123 (English)
Fax: +886-2-2893-7775
Email: tsd@asus.com.tw WWW: www.asus.com.tw
FTP: ftp.asus.com.tw/pub/ASUS
ASUS COMPUTER INTERNATIONAL (America)
Marketing
Address: 6737 Mowry Avenue
Mowry Business Center, Building 2
Newark, CA 94560, USA
Fax: +1-510-608-4555
Email: tmd1@asus.com
Technical Support
Fax: +1-510-608-4555
Email: tsd@asus.com
WWW: www.asus.com
FTP: ftp.asus.com/Pub/ASUS
ASUS COMPUTER GmbH (Europe)
Marketing
Address: Harkortstr. 25
40880 Ratingen, BRD, Germany
Fax: +49-2102-442066
Email: sales@asuscom.de
(for marketing requests only)
Technical Support
Hotline: MB/Others: +49-2102-9599-0
Fax: +49-2102-9599-11
Support (Email): www.asuscom.de/de/support
WWW: www.asuscom.de
FTP: ftp.asuscom.de/pub/ASUSCOM
Notebook: +49-2102-9599-10
15-061068000
 Loading...