

Asus ES5000-P User Manual

Contents
English...............................................................1
Italiano.............................................................36
Português........................................................72
Polski.............................................................106
Česky.............................................................140
Book 1.indb 1 9/24/08 5:03:46 PM

Essentio
ES5000/ES5000-P
ASUS Desktop PC
User Manual
®
Book 1.indb 1 9/24/08 5:03:48 PM

2
English
Copyright © 2008 ASUSTeK COMPUTER INC. All Rights Reserved.
No part of this manual, including the products and software described in it, may be reproduced,
transmitted, transcribed, stored in a retrieval system, or translated into any language in any form or by any
means, except documentation kept by the purchaser for backup purposes, without the express written
permission of ASUSTeK COMPUTER INC. (“ASUS”).
Product warranty or service will not be extended if: (1) the product is repaired, modied or altered, unless
such repair, modication of alteration is authorized in writing by ASUS; or (2) the serial number of the
product is defaced or missing.
ASUS PROVIDES THIS MANUAL “AS IS” WITHOUT WARRANTY OF ANY KIND, EITHER EXPRESS
OR IMPLIED, INCLUDING BUT NOT LIMITED TO THE IMPLIED WARRANTIES OR CONDITIONS OF
MERCHANTABILITY OR FITNESS FOR A PARTICULAR PURPOSE. IN NO EVENT SHALL ASUS, ITS
DIRECTORS, OFFICERS, EMPLOYEES OR AGENTS BE LIABLE FOR ANY INDIRECT, SPECIAL,
INCIDENTAL, OR CONSEQUENTIAL DAMAGES (INCLUDING DAMAGES FOR LOSS OF PROFITS,
LOSS OF BUSINESS, LOSS OF USE OR DATA, INTERRUPTION OF BUSINESS AND THE LIKE),
EVEN IF ASUS HAS BEEN ADVISED OF THE POSSIBILITY OF SUCH DAMAGES ARISING FROM ANY
DEFECT OR ERROR IN THIS MANUAL OR PRODUCT.
SPECIFICATIONS AND INFORMATION CONTAINED IN THIS MANUAL ARE FURNISHED FOR
INFORMATIONAL USE ONLY, AND ARE SUBJECT TO CHANGE AT ANY TIME WITHOUT NOTICE,
AND SHOULD NOT BE CONSTRUED AS A COMMITMENT BY ASUS. ASUS ASSUMES NO
RESPONSIBILITY OR LIABILITY FOR ANY ERRORS OR INACCURACIES THAT MAY APPEAR IN THIS
MANUAL, INCLUDING THE PRODUCTS AND SOFTWARE DESCRIBED IN IT.
Products and corporate names appearing in this manual may or may not be registered trademarks or
copyrights of their respective companies, and are used only for identication or explanation and to the
owners’ benet, without intent to infringe.
E3812
First Edition V1
September 2008
Book 1.indb 2 9/24/08 5:03:48 PM

3
English
ASUS contact information
ASUSTeK COMPUTER INC.
Address 15 Li-Te Road, Peitou, Taipei, Taiwan 11259
Telephone +886-2-2894-3447
Fax +886-2-2890-7798
E-mail info@asus.com.tw
Web site www.asus.com.tw
Technical Support
Telephone +86-21-38429911
Online support support.asus.com
ASUS COMPUTER INTERNATIONAL (America)
Address 800 Corporate Way, Fremont, California 94539, USA
TEL 001-510-739-3777
Fax +1-510-608-4555
Web site usa.asus.com
Technical Support
Telephone +1-812-282-2787
Support fax +1-812-284-0883
Online support support.asus.com
ASUS COMPUTER GmbH (Germany and Austria)
Address Harkortstr. 21-23, 40880 Ratingen, Germany
Telephone +49-01805-010923
Fax +49-02102-9599-11
Web site www.asus.de
Online contact www.asus.de/sales
Technical Support
Telephone +49-01805-010923
Support Fax +49-02102-9599-11
Online support support.asus.com
Book 1.indb 3 9/24/08 5:03:49 PM
4
English
Notices
Federal Communications Commission Statement
This device complies with Part 15 of the FCC Rules. Operation is subject to the
following two conditions:
•
This device may not cause harmful interference, and
•
This device must accept any interference received including interference that
may cause undesired operation.
This equipment has been tested and found to comply with the limits for a
Class B digital device, pursuant to Part 15 of the FCC Rules. These limits are
designed to provide reasonable protection against harmful interference in a
residential installation. This equipment generates, uses and can radiate radio
frequency energy and, if not installed and used in accordance with manufacturer’s
instructions, may cause harmful interference to radio communications. However,
there is no guarantee that interference will not occur in a particular installation. If
this equipment does cause harmful interference to radio or television reception,
which can be determined by turning the equipment off and on, the user is
encouraged to try to correct the interference by one or more of the following
measures:
•
Reorient or relocate the receiving antenna.
•
Increase the separation between the equipment and receiver.
•
Connect the equipment to an outlet on a circuit different from that to which the
receiver is connected.
•
Consult the dealer or an experienced radio/TV technician for help.
Canadian Department of Communications Statement
This digital apparatus does not exceed the Class B limits for radio noise emissions
from digital apparatus set out in the Radio Interference Regulations of the
Canadian Department of Communications.
This class B digital apparatus complies with Canadian ICES-003.
The use of shielded cables for connection of the monitor to the graphics card is
required to assure compliance with FCC regulations. Changes or modications
to this unit not expressly approved by the party responsible for compliance
could void the user’s authority to operate this equipment.
Book 1.indb 4 9/24/08 5:03:49 PM

5
English
Safety information
Electrical safety
•
To prevent electrical shock hazard, disconnect the power cable from the
electrical outlet before relocating the system.
• When adding or removing any devices to or from the system, contact a
qualied service technician or your retailer for help. Ensure that all the power
cables are disconnected before any device is added or removed to or from the
system.
•
If the power supply is broken, do not try to x it by yourself. Contact a qualied
service technician or your retailer.
Lithium-Ion Battery Warning
CAUTION: Danger of explosion if battery is incorrectly replaced. Replace
only with the same or equivalent type recommended by the manufacturer.
Dispose of used batteries according to the manufacturer’s instructions.
VORSICHT: Explosionsgetahr bei unsachgemäßen Austausch der Batterie.
Ersatz nur durch denselben oder einem vom Hersteller empfohlenem
ähnljchen Typ. Entsorgung gebrauchter Batterien nach Angaben des
Herstellers.
LASER PRODUCT WARNING
CLASS 1 LASER PRODUCT
Operation safety
• Before installing devices into the system, carefully read all the documentation
that came with the package.
• Before using the product, ensure that all cables are correctly connected and
the power cables are not damaged. If you detect any damage, contact your
dealer immediately.
• To avoid short circuits, keep paper clips, screws, and staples away from
connectors, slots, sockets, and circuitry.
• Avoid dust, humidity, and extreme temperatures. Do not place the product in
any area where it may become wet. Place the product on a stable surface.
• When using the product, do not block any air inlet/outlet in the chassis.
• The maximum environmental temperature is 35ºC.
• If you encounter technical problems with the product, contact a qualied
service technician or your retailer.
Book 1.indb 5 9/24/08 5:03:50 PM

6
English
General precautions
Before using the ASUS Essentio ES5000/ES5000-P Desktop PC, carefully read
the general precautions below. Improper operation could lead to personal injury or
damage to the product.
• Before using the product, ensure that all components are correctly installed
and all cables are correctly connected. If you detect any damage, contact your
dealer immediately.
• Avoid dust and extreme temperatures. Do not place the product in any area
where it may receive direct sunlight.
• Keep the product in a dry place. Raindrops, moisture, and liquids may contain
minerals and damage the circuitry.
• Leave enough space around the product to provide adequate ventilation.
Otherwise, it may overheat.
• Before turning on the system, check if all the peripherals are correctly
connected.
• Avoid eating while using the computer. It may contaminate the components
and cause the system to malfunction.
• To avoid short circuits, keep scraps, screws, and threads away from
connectors, slots, sockets, and circuitry.
• Do not stuff anything into the components. Otherwise, it may cause a short
circuit or damage the circuitry.
• If the computer has been used for a long time, avoid direct contact with the
heatsinks and the surfaces of IC as they may become very warm and hot.
Check if the system receives adequate ventilation.
• Before you add or remove a peripheral device to or from the system, ensure
that you unplugged the power cables.
• If the power supply is broken, do not try to x it by yourself. Contact a qualied
service technician or your retailer.
• Though the system casing is elaborately designed to protect users from
scratches, be careful with those sharp tips and edges. Put on a pair of gloves
before you remove or replace the system cover.
• When you do not need to use your computer for a long time, shut it down and
unplug the power cables.
• It is suggested that you use this product when the temperature is no higher
than 35ºC.
• Warning: Ensure that you replace the battery with a correct type otherwise it
may cause an explosion hazard.
Book 1.indb 6 9/24/08 5:03:50 PM
7
English
About this guide
How this guide is organized
This guide contains the following parts:
1. Chapter 1: System introduction
This chapter gives a general description of ASUS Essentio
ES5000/ES5000-P Desktop PC. The chapter lists the system features,
including introduction on the front and rear panels.
2. Chapter 2: Getting started
This chapter helps you power up the system and install drivers and utilities
from the support DVD.
Audience
This guide provides general information about ASUS Essentio ES5000/ES5000-P
Desktop PC and instructions on how to use the Support DVD that comes with the
system package. This guide is intended for experienced users and integrators with
hardware knowledge of personal computers.
Book 1.indb 7 9/24/08 5:03:50 PM
8
English
Conventions used in this guide
To ensure that you perform certain tasks properly, take note of the following
symbols used throughout this guide.
WARNING: Information to prevent injury to yourself when trying to
complete a task.
CAUTION: Information to prevent damage to the components when
trying to complete a task.
IMPORTANT: Instructions that you MUST follow to complete a task.
NOTE: Tips and additional information to aid in completing a task.
Where to nd more information
Refer to the following sources for additional information and for product and
software updates.
1. ASUS Websites
The ASUS websites worldwide provide updated information on ASUS
hardware and software products. Refer to the ASUS contact information.
2. Optional Documentation
Your product package may include optional documentation, such as warranty
yers, that may have been added by your dealer. These documents are not
part of the standard package.
Book 1.indb 8 9/24/08 5:03:53 PM
9
English
System package contents
Check your Essentio ES5000/ES5000-P system package for the following items.
Standard items
1. ASUS Essentio ES5000/ES5000-P Desktop PC with
• ASUS Desktop PC x 1
• Foot stand x 1
• Mouse x 1
• Keyboard x 1
2. Cables
• AC power cord x 1
3. Accessories
• AC power adapter x 1
• Mouse pad x 1
4. Support DVD x 1
5. User Manual x 1
6. Warranty card x 1
• If any of the items is damaged or missing, contact your retailer immediately.
• Specications are subject to the desktop PC you purchased. Check with
your supplier for exact offers.
Book 1.indb 9 9/24/08 5:03:54 PM
10
English
Book 1.indb 10 9/24/08 5:03:54 PM
Chapter 1
System introduction
This chapter gives a general
description of the desktop PC. The
chapter lists the system features
including introduction on the front and
rear panels.
Book 1.indb 11 9/24/08 5:03:55 PM

12 Chapter 1: System introduction
English
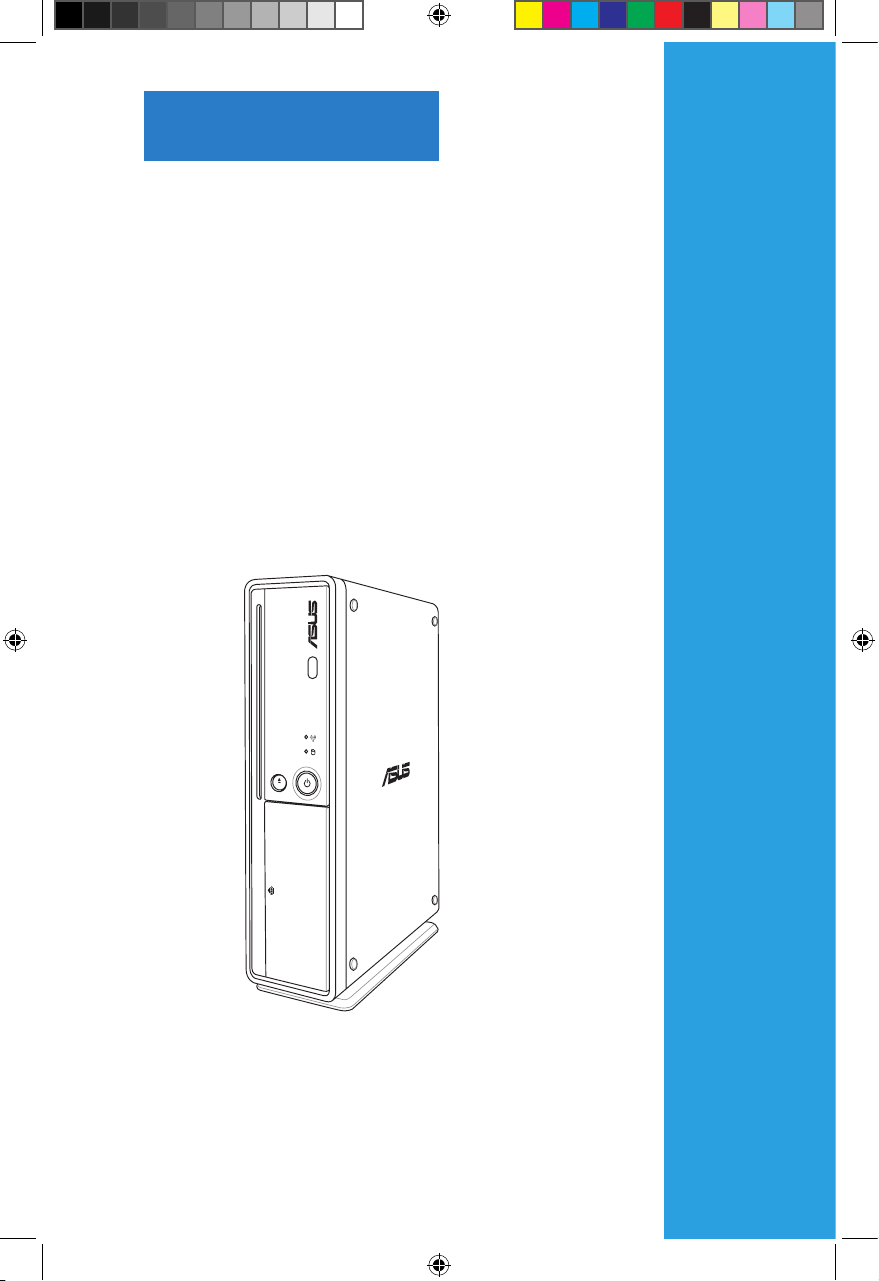
1.1 Front panel
The ASUS Essentio ES5000/ES5000-P Desktop PC includes an ASUS
motherboard, a power supply unit, a front panel, and a rear panel. All of these
components are integrated in a system casing elaborately designed by ASUS.
The illustrations below show the front panel and the components on it.
5
3
1
4
2
6
E-SATA
9
10
8
7
Close
Open
1. Slot-in optical disk drive (ODD). Insert an optical disk into the slot with the
label side facing your left.
2. Optical disk eject button . Press this button to eject an optical disk.
3. Front panel cover . Pull outward to open the front panel cover. Inside
are two USB 2.0 ports, one E-SATA port, one Microphone port, and one
Headphone port.
4. Network LED . This LED lights up when a wireless/wired network
connection is established on the system.
5. Hard disk drive (HDD) LED . This LED lights up when data is being read
from or written to the hard disk drive.
6. Power button . Press this button to turn the system on.
7. USB 2.0 ports
2.0
. These Universal Serial Bus 2.0 (USB 2.0) ports are
available for connecting USB 2.0 devices such as a mouse, printer, scanner,
camera, PDA, and others.
8. E-SATA port
E-SATA
. This port connects an external Serial ATA hard disk
drive.
Book 1.indb 12 9/24/08 5:03:58 PM

13ASUS Essentio ES5000/ES5000-P
English
1.2 Rear panel
The system rear panel includes the power input port and several I/O ports that
allow convenient connection of devices.
The illustration below shows the rear panel and the components on it.
1. Air vents. These vents allow air ventilation.
3
1
2
5
4
6
7
9
10
8
12
11
DO NOT block the air vents on the top and rear panels of the system chassis.
The components inside the chassis may overheat and be damaged without
adequate ventilation.
2. Optical S/PDIF Out port. This port connects an external audio output device
via an optical S/PDIF cable.
3. PS/2 keyboard port . This port is for a PS/2 keyboard.
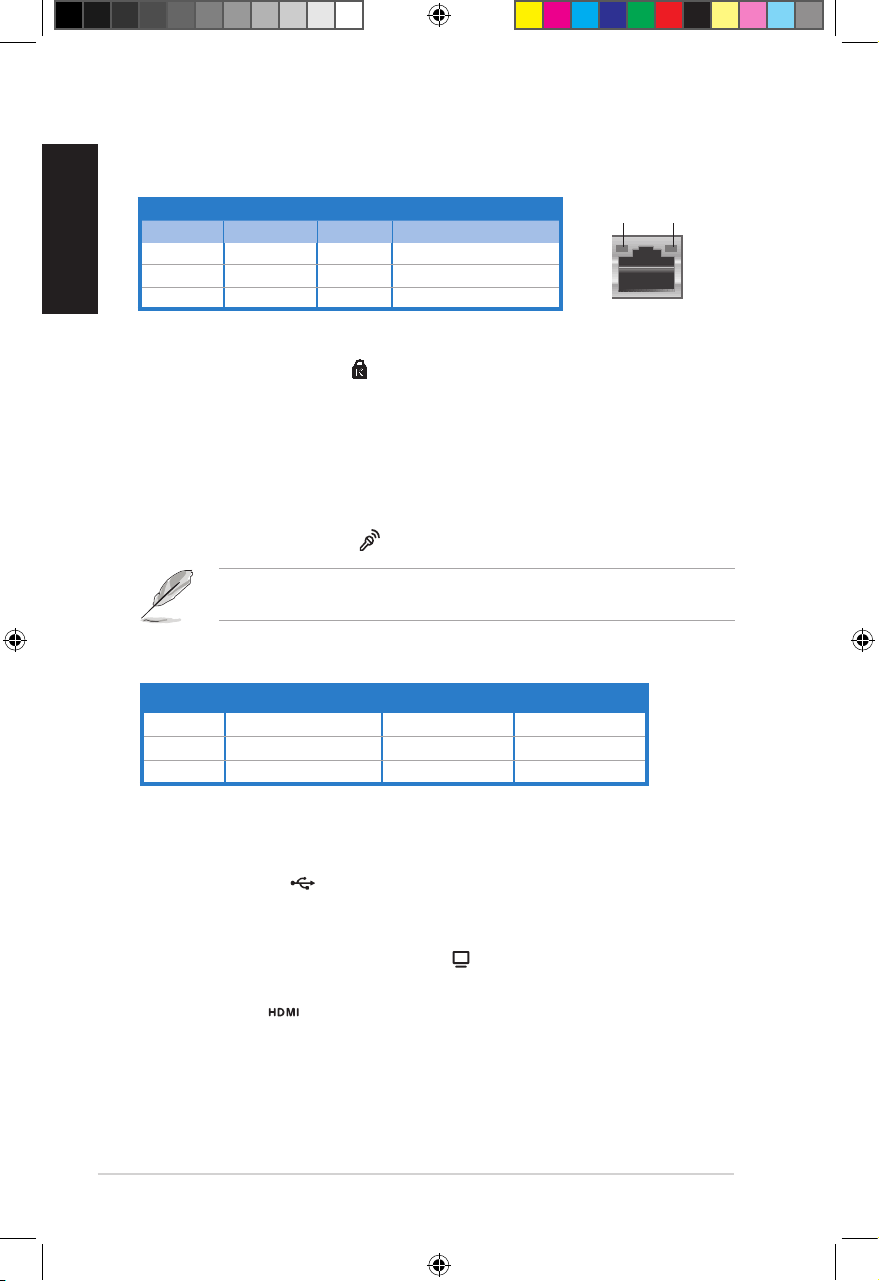
4. LAN (RJ-45) port. This port allows Fast Ethernet connection to a Local Area
Network (LAN) through a network hub.
9. Headphone port (lime) . This port connects a headphone.
10. Microphone port (pink) . This port connects a microphone.
Book 1.indb 13 9/24/08 5:04:01 PM
14 Chapter 1: System introduction
English
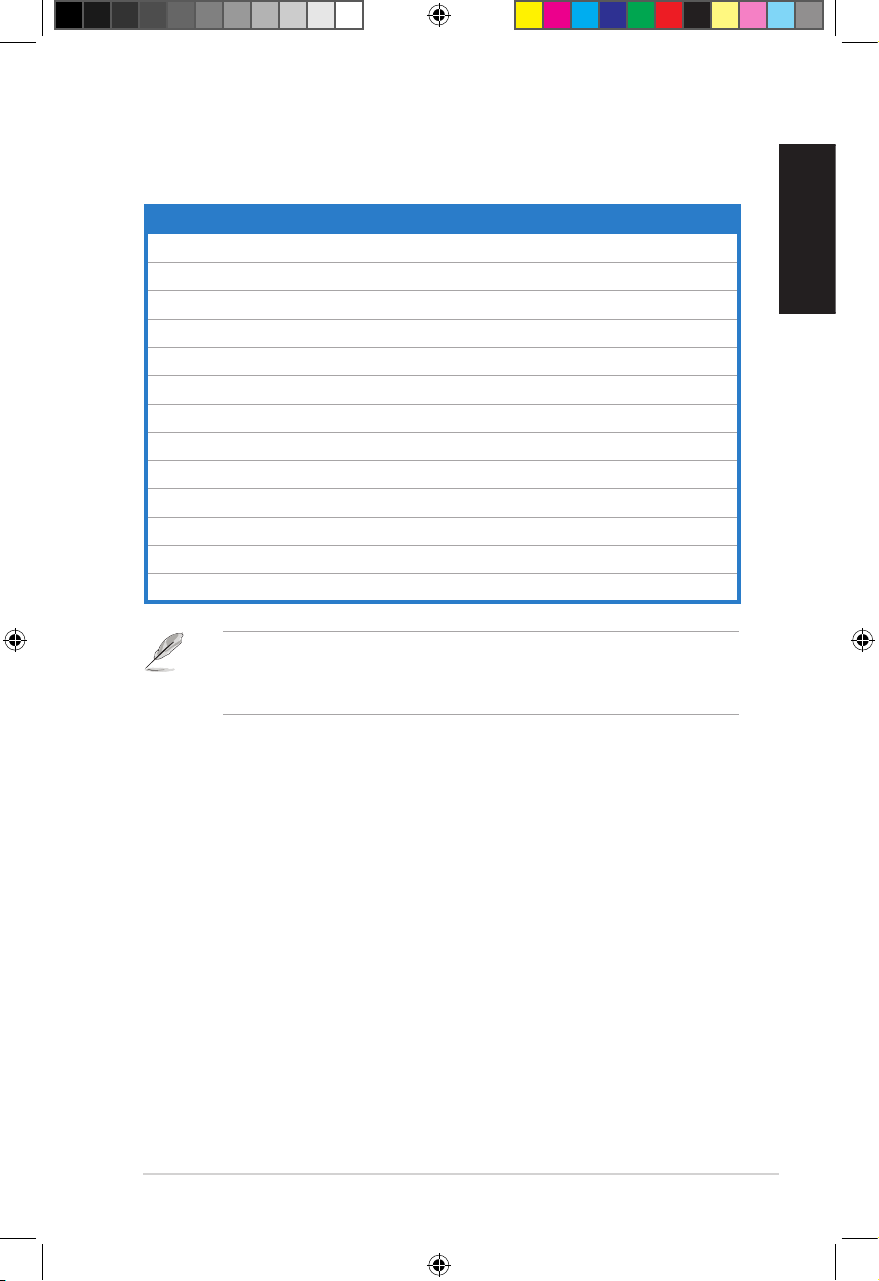
Audio 2, 4, or 6-channel conguration
Port Headset 2-channel 4-channel 6-channel
Light Blue Line In Rear Speaker Out
Rear Speaker Out
Lime Line Out Front Speaker Out Front Speaker Out
Pink Mic In Mic In
Bass/Center
5. Kensington® lock port . This port allows the PC to be secured to a xed
object using Kensington®.compatible security products.
6. Line In port (light blue). This port connects a tape, CD, DVD player, or other
audio sources.
7. Line Out port (lime). This port connects a headphone or a speaker. In
4-channel or 6-channel conguration, the function of this port becomes Front
Speaker Out.
8. Microphone port (pink) . This port connects a microphone.
Refer to the audio conguration table below for the function of the audio ports in
2, 4, or 6-channel conguration.
9. DC IN input port. This port connects the DC output plug of an AC power
adapter.
10. USB 2.0 ports
2.0
. These Universal Serial Bus 2.0 (USB 2.0) ports are
available for connecting USB 2.0 devices such as a mouse, printer, scanner,
camera, PDA, and others.
11. Video Graphics adapter (VGA) port . This port connects a VGA monitor
or other VGA-compatible devices.
12. HDMI port . This port is for a High-Denition Multimedia Interface
(HDMI) connector, and is HDCP compliant allowing playback of HD DVD,
Blu-Ray and other protected content.
LAN port LED indications
LAN port
SPEED
LED
ACT/LINK
LED
Activity/Link LED Speed LED
Status Description Status Description
OFF No link OFF 10 Mbps connection
ORANGE Linked ORANGE 100 Mbps connection
BLINKING Data activity GREEN 1 Gbps connection
Book 1.indb 14 9/24/08 5:04:04 PM

15ASUS Essentio ES5000/ES5000-P
English
1.3 Placement options
1.3.1 Horizontal placement
Place your desktop PC horizontally.
1.3.2 Vertical placement
Install the foot stand supplied in the system package. Place your desktop PC
vertically.
To install the foot stand:
1. Locate the screw hole on the bottom of your desktop PC.
2. Secure the foot stand to your desktop PC with the supplied screw.
Book 1.indb 15 9/24/08 5:04:05 PM

16 Chapter 1: System introduction
English
1.4 Connecting to the keyboard and the
mouse
The ASUS Essentio ES5000/ES5000-P Desktop PC is equipped with a PS/2
keyboard and a USB mouse. Connect the PS/2 keyboard to the PS/2 keyboard
port at the rear panel. Connect the USB mouse to a USB port either at the rear or
front panel.
1.5 Connecting to other peripheral devices
The ASUS Essentio ES5000/ES5000-P Desktop PC is equipped with a number of
I/O ports at the rear and front panels where you can connect peripheral devices to
the system.
Refer to the illustration below for details.
Before you connect a peripheral device to the system, refer to the
documentation that comes with the device or contact your supplier directly for
information on how to install it.
Power jack
USB
VGA
HDMI
Microphone
Line Out
Line In
RJ-45
PS/2 keyboard
S/PDIF Out
If you are using a wireless USB keyboard or mouse, refer to the documentation
that comes with the device or contact your supplier directly for information on
how to congure it.
Book 1.indb 16 9/24/08 5:04:14 PM

Chapter 2
Getting started
This chapter helps you to power up the
system and install drivers and utilities
from the support DVD.
Book 1.indb 17 9/24/08 5:04:16 PM

18 Chapter 2: Getting started
English
2.1 Installing an operating system
This motherboard supports Windows® XP / Vista operating systems (OS). Always
install the latest OS version and the corresponding updates to maximize the
features of your hardware. When you start the system for the rst time, the system
automatically detects the built-in audio and graphics chips and attempts to install
the drivers that come with the OS. Select NO when a window appears asking if
you want to restart the system. Install drivers according to the instructions in the
following sections.
2.2 Powering your system
Press the Power button to power up the system.
• To ensure that the OS works properly, install the drivers bundled in the
Support DVD.
• Motherboard settings and hardware options vary. Use the setup
procedures presented in this chapter for reference only. Refer to your OS
documentation for detailed information.
Press to turn ON the system
Book 1.indb 18 9/24/08 5:04:18 PM
ASUS Essentio ES5000/ES5000-P 19
English
If Autorun is NOT enabled on your computer, browse the contents of the
Support DVD to locate the le ASSETUP.EXE from the BIN folder. Double-click
the ASSETUP.EXE to run the DVD.
Click an item to install
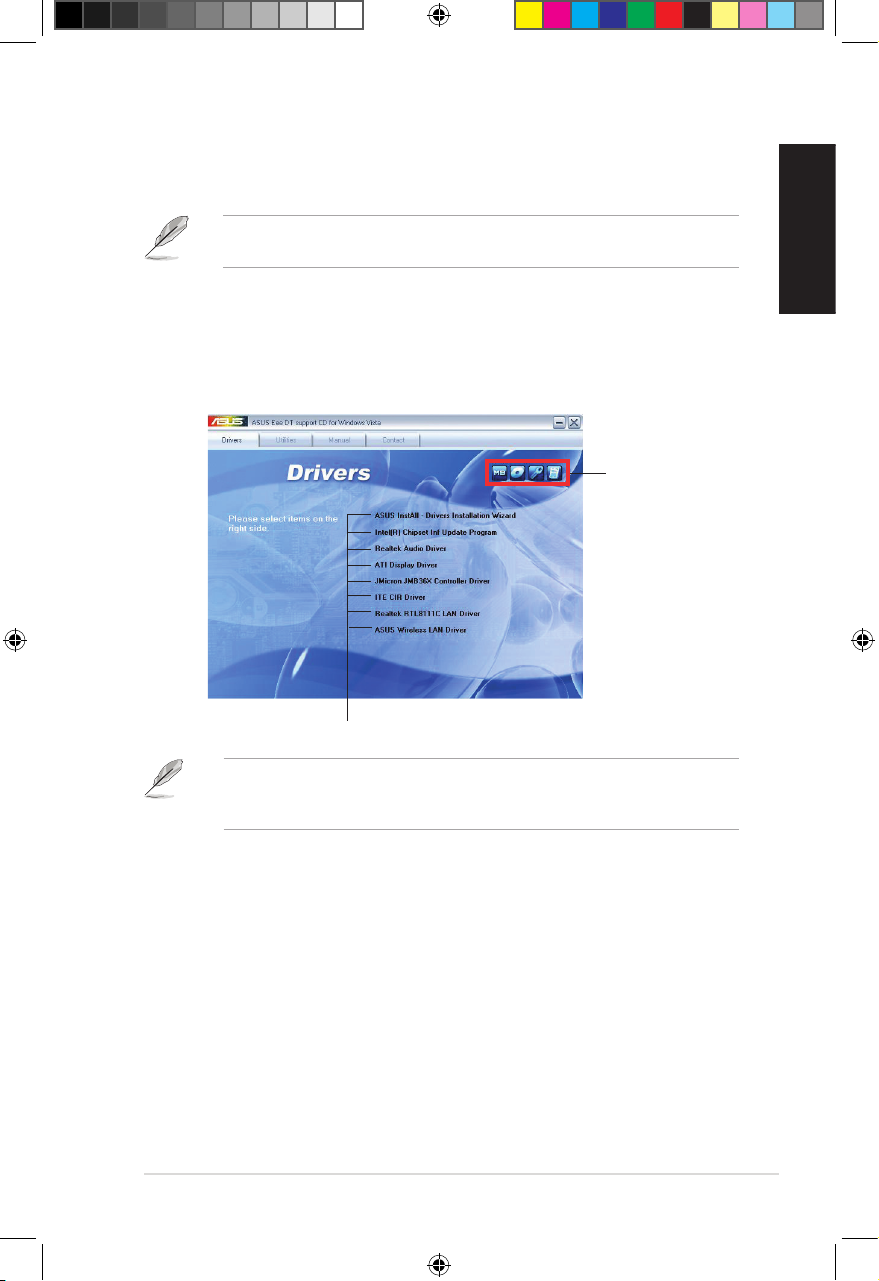
2.3.1 Running the Support DVD
Place the Support DVD into the optical drive. The DVD automatically displays the
Drivers menu if Autorun is enabled on your computer.
Click an icon
to display
Support DVD/
motherboard
information
2.3 Support DVD information
The Support DVD that comes with the system package contains the drivers,
software applications, and utilities that you can install to avail all system features.
The contents of the Support DVD are subject to change at any time without
notice. Visit the ASUS website at www.asus.com for updates.
Book 1.indb 19 9/24/08 5:04:19 PM

20 Chapter 2: Getting started
English
2.3.2 Drivers menu
The Drivers menu shows the available device drivers if the system detects
installed devices. Install the necessary drivers to activate the devices.
ASUS InstAll - Drivers Installation Wizard
Installs the ASUS InstAll-Drivers Installation Wizard.
Intel(R) Chipset Inf Update Program
Installs the Intel® chipset Inf update program.
Realtek Audio Driver
Installs the Realtek® audio driver and application.
ATI Display Driver
Installs the ATI display driver.
JMicron JMB36X Controller Driver
Installs the JMicron JMB36X controller driver.
ITE CIR Driver
Installs the ITE CIR driver.
Realtek RTL8111C LAN Driver
Installs the Realtek RTL8111C LAN driver.
ASUS Wireless LAN Driver
Installs the ASUS wireless LAN driver.
Book 1.indb 20 9/24/08 5:04:19 PM

ASUS Essentio ES5000/ES5000-P 21
English
2.3.3 Utilities menu
The Utilities menu shows the applications and other software that the
motherboard supports. Tap an item from the screen to install.
ASUS InstAll - Installation Wizard for Utilities
Installs all of the utilities through the Installation Wizard.
ASUS Update
Allows you to download the latest version of BIOS from the ASUS website.
ASUS AI Manager
Installs the ASUS AI Manager where you can launch AI Disk, AI Security, and AI
Probe easily.
Adobe Acrobat Reader 8
Installs the Adobe Acrobat Reader 8. The manuals in the Support DVD are in PDF
(Portable Document Format) format, which can be opened with Adobe Acrobat
Reader.
Before using the ASUS Update, ensure that you have an Internet connection so
that you can connect to the ASUS website.
Book 1.indb 21 9/24/08 5:04:20 PM

22 Chapter 2: Getting started
English
2.3.4 Manuals menu
The Support DVD includes the manual of Realtek HD Audio.
The manual is in PDF format. To open it, install the Adobe Acrobat Reader from
the Utilities menu.
2.3.5 ASUS contact information
Click the Contact tab to display the ASUS contact information.
Book 1.indb 22 9/24/08 5:04:21 PM

ASUS Essentio ES5000/ES5000-P 23
English
2.3.6 Other information
The icons on the top right corner of the screen give additional information on the
motherboard and the contents of the Support DVD. Click an icon to display the
specied information.
Browse this DVD
Displays the Support DVD contents in graphical format.
Motherboard Info
Displays the general specications of the motherboard.
Book 1.indb 23 9/24/08 5:04:23 PM

24 Chapter 2: Getting started
English
Technical support Form
Displays the ASUS Technical Support Request Form that you have to ll out when
requesting technical support.
Filelist
Displays the contents of the Support DVD and a brief description of each in text
format.
Book 1.indb 24 9/24/08 5:04:24 PM

ASUS Essentio ES5000/ES5000-P 25
English
2.4 ASUS AI Manager
ASUS AI Manager allows you to launch AI Disk, AI Security, and AI Probe easily.
2.4.1 Installing AI Manager
To install AI Manager on your computer:
1. Place the Support DVD into the optical drive. The DVD automatically displays
the Drivers menu if Autorun is enabled on your computer.
If Autorun is NOT enabled on your computer, browse the contents of the
Support DVD to locate the le ASSETUP.EXE from the BIN folder. Double-click
the ASSETUP.EXE to run the DVD.
2. Click the Utilities tab, then click ASUS AI Manager.
3. Follow the screen instructions to complete the installation.
2.4.2 Launching AI Manager
You can launch AI Manager right after installation or anytime from the Windows®
desktop.
To launch AI Manager from the Windows® desktop, click Start > All Programs >
ASUS > AI Manager > AI Manager v1.xx.xx. The AI Manager Quick Bar appears.
After launching the application, the AI Manager icon appears in the Windows®
taskbar. Right-click this icon for more options.
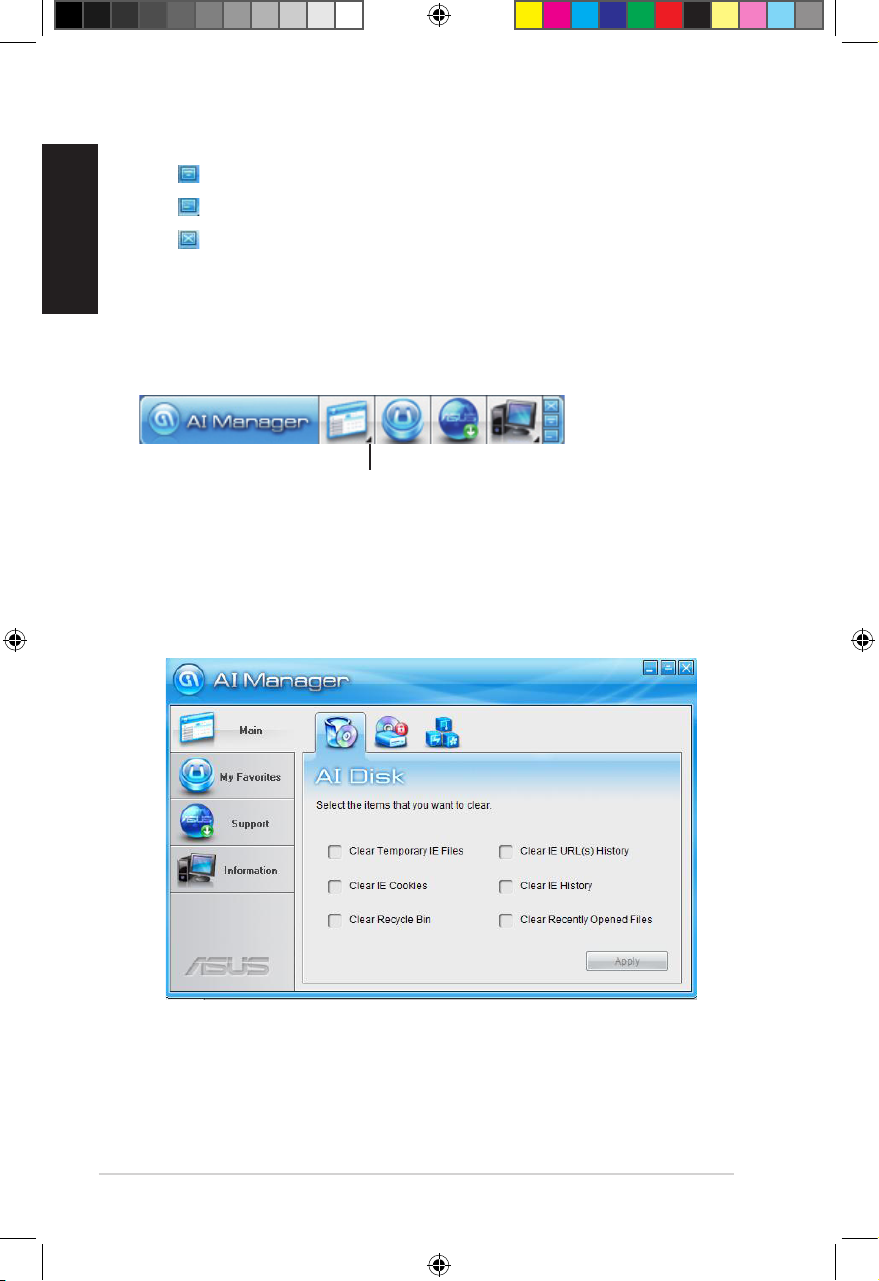
2.4.3 AI Manager Quick Bar
Click the Main, My favorites, Support, or Information icon from the Quick Bar to
show the corresponding menu.
Main
My Favorites
Support
Information
Close
Maximize/Resume
Minimize
Book 1.indb 25 9/24/08 5:04:25 PM
26 Chapter 2: Getting started
English
Click to switch between a full-screen AI Manager window and the Quick bar.
Click to keep AI Manager in the taskbar.
Click to close AI Manager.
2.4.4 Main
Launch AI Disk, AI Security, or AI Probe from the Main menu. Click the small
triangle to open or close the Main menu.
Click to open/close the Main menu
AI Disk
AI Disk allows you to easily clear the temporary IE les, IE URLs, IE cookies, IE
history list, Recycle Bin, and recently opened les list. Select the item that you
want to clear, then click Apply.
Book 1.indb 26 9/24/08 5:04:25 PM
ASUS Essentio ES5000/ES5000-P 27
English
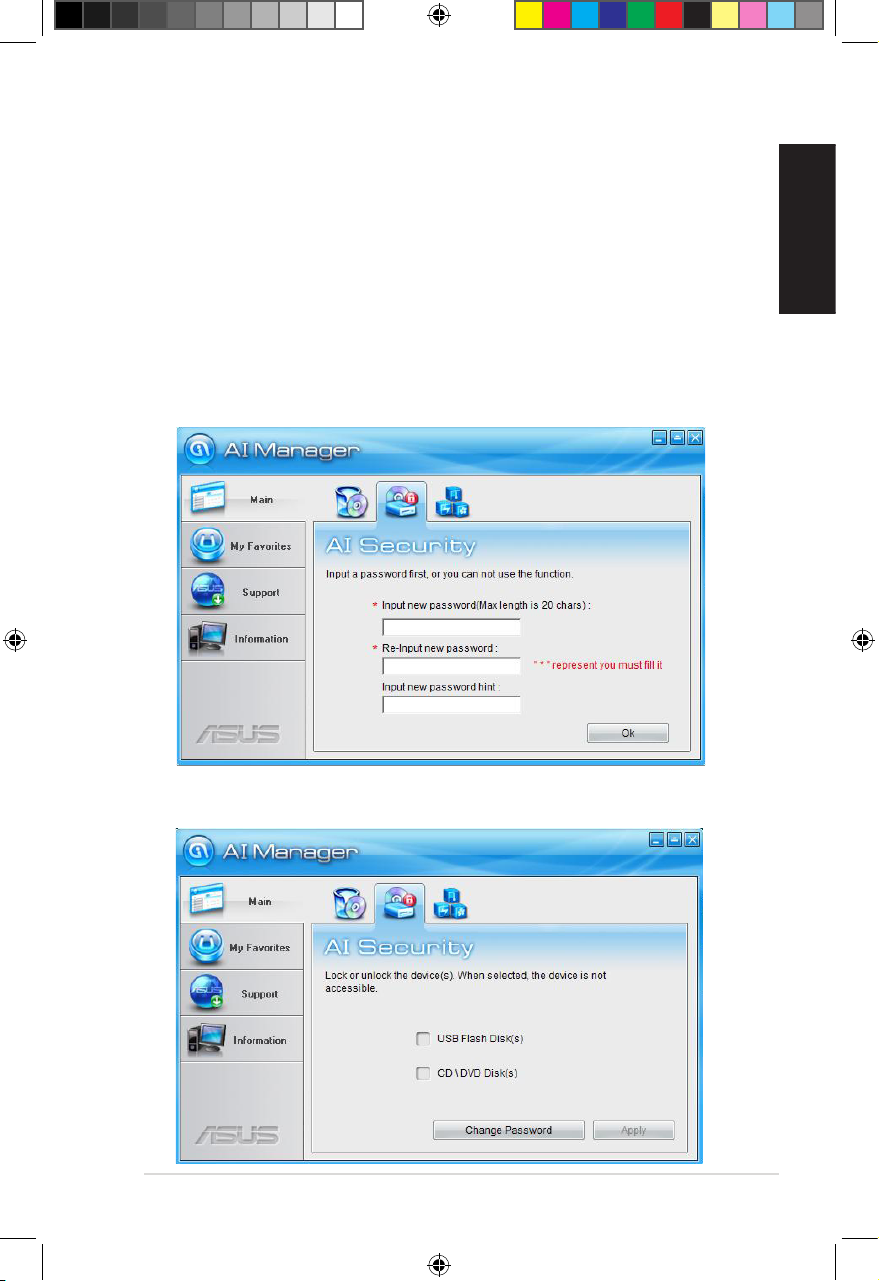
AI Security
AI Security allows you to set passwords to lock your removable storage devices
such as a USB ash disk and a CD/DVD disk, which ensures more security for
your data.
To lock a device:
1. If you are using AI Security for the rst time, key in a password that consists
of no more than 20 letters, numbers, or symbols.
2 Conrm your password.
3. Key in your password hint (optional).
4. Click OK.
5. Select the device you want to lock, then click Apply.
Book 1.indb 27 9/24/08 5:04:26 PM

28 Chapter 2: Getting started
English
6. Key in your password, then click OK. The device you selected cannot be
accessed without the password.
To unlock a device:
1. Deselect the device you locked, then click Apply.
2. Key in your password, then click OK.
To change your password, click Change Password and follow the screen
instructions.
AI Probe
AI Probe automatically detects the motherboard and CPU temperatures, CPU fan
speed, and CPU voltage. It also allows you to adjust these values manually.
Book 1.indb 28 9/24/08 5:04:26 PM

ASUS Essentio ES5000/ES5000-P 29
English
2.4.5 My favorites
Add your favorite applications to the My Favorites menu.
To add an application:
1. Click Add and then select from the succeeding screen the application you
want to add to the My Favorites menu.
2. Click Open. The application you selected is added and its icon appears.
Right-click an icon in the My Favorites menu to open, delete, or rename the
corresponding application.
Double-click an icon to open the corresponding application.
Book 1.indb 29 9/24/08 5:04:26 PM
 Loading...