

Page 1
Contents
English...............................................................1
Italiano.............................................................36
Português........................................................72
Polski.............................................................106
Česky.............................................................140
Book 1.indb 1 9/24/08 5:03:46 PM
Page 2
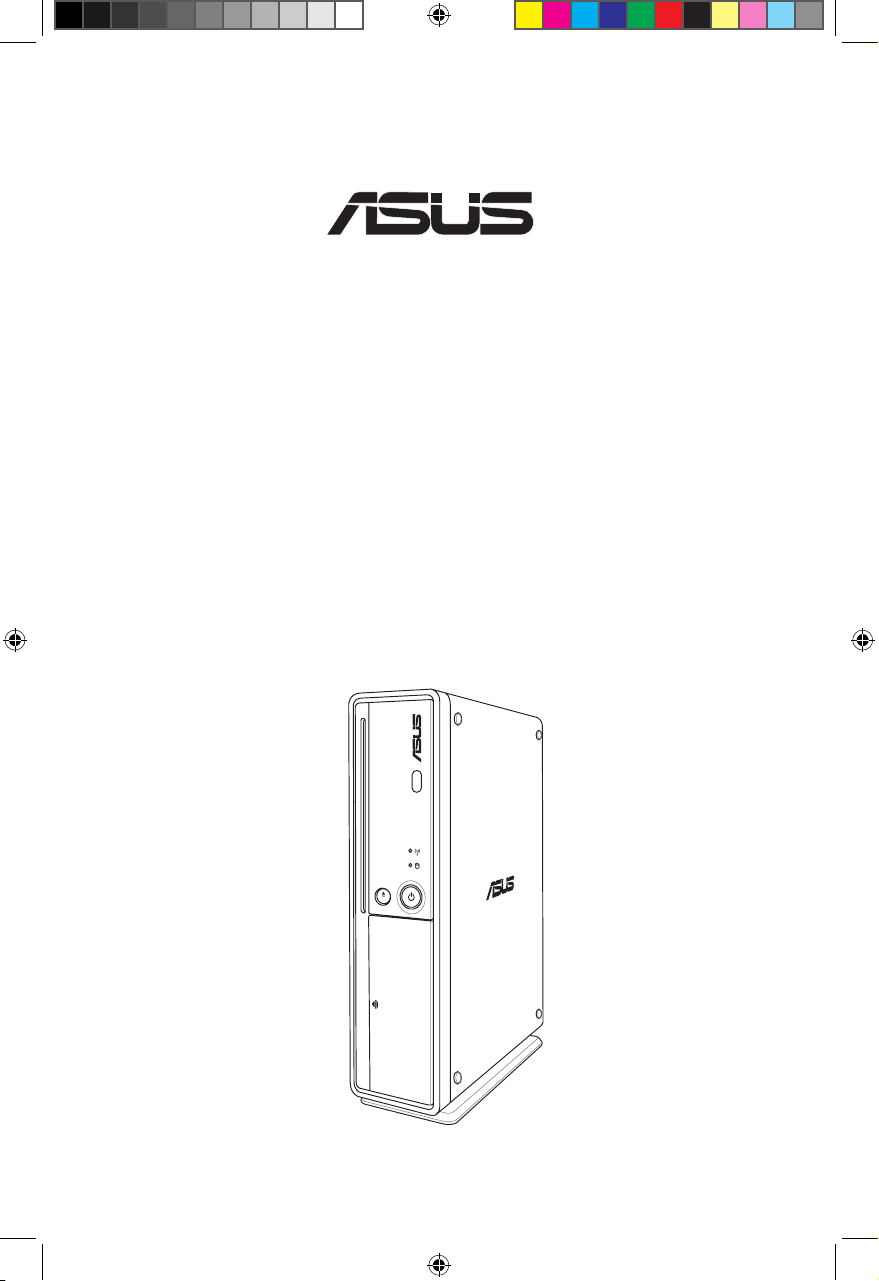
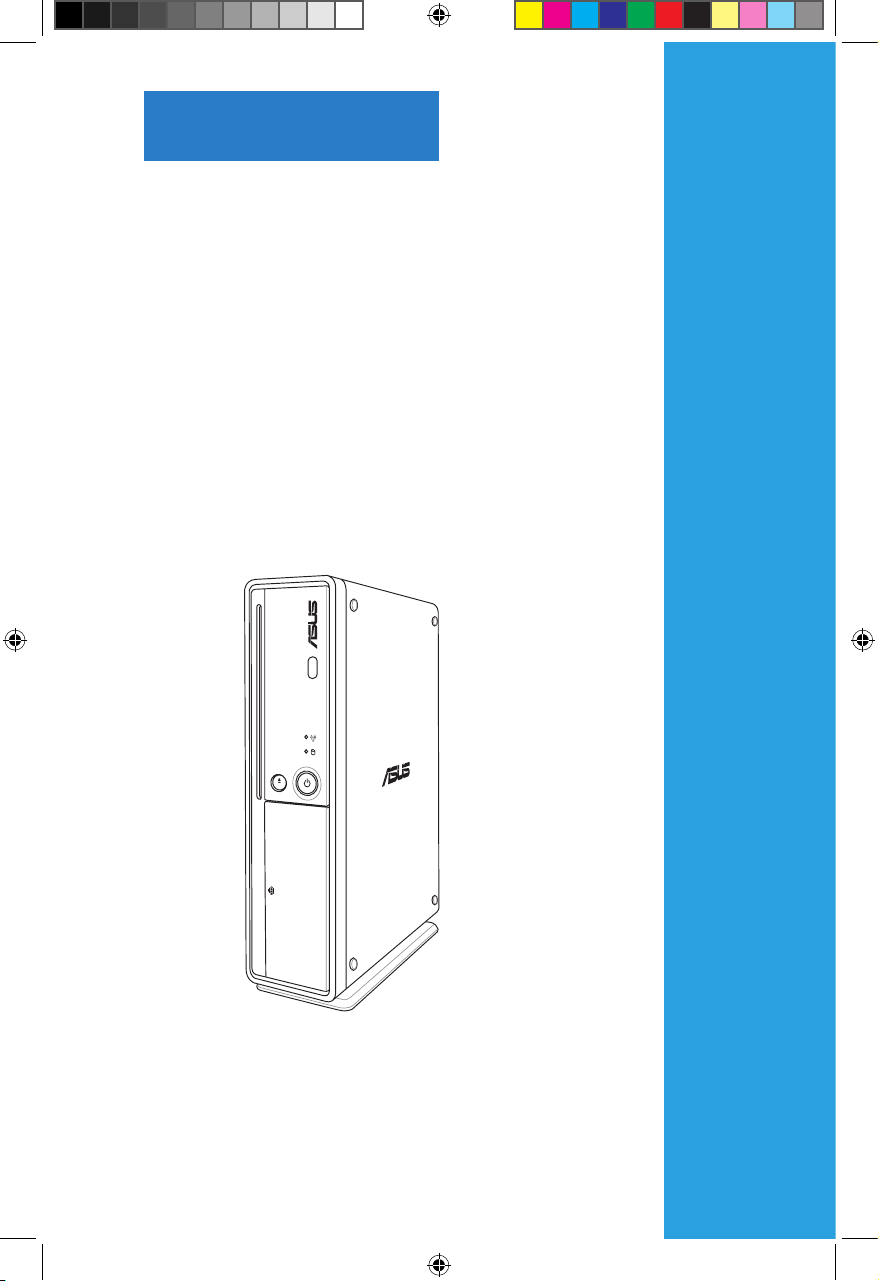
Essentio
ES5000/ES5000-P
ASUS Desktop PC
User Manual
®
Book 1.indb 1 9/24/08 5:03:48 PM
Page 3
2
English
Copyright © 2008 ASUSTeK COMPUTER INC. All Rights Reserved.
No part of this manual, including the products and software described in it, may be reproduced,
transmitted, transcribed, stored in a retrieval system, or translated into any language in any form or by any
means, except documentation kept by the purchaser for backup purposes, without the express written
permission of ASUSTeK COMPUTER INC. (“ASUS”).
Product warranty or service will not be extended if: (1) the product is repaired, modied or altered, unless
such repair, modication of alteration is authorized in writing by ASUS; or (2) the serial number of the
product is defaced or missing.
ASUS PROVIDES THIS MANUAL “AS IS” WITHOUT WARRANTY OF ANY KIND, EITHER EXPRESS
OR IMPLIED, INCLUDING BUT NOT LIMITED TO THE IMPLIED WARRANTIES OR CONDITIONS OF
MERCHANTABILITY OR FITNESS FOR A PARTICULAR PURPOSE. IN NO EVENT SHALL ASUS, ITS
DIRECTORS, OFFICERS, EMPLOYEES OR AGENTS BE LIABLE FOR ANY INDIRECT, SPECIAL,
INCIDENTAL, OR CONSEQUENTIAL DAMAGES (INCLUDING DAMAGES FOR LOSS OF PROFITS,
LOSS OF BUSINESS, LOSS OF USE OR DATA, INTERRUPTION OF BUSINESS AND THE LIKE),
EVEN IF ASUS HAS BEEN ADVISED OF THE POSSIBILITY OF SUCH DAMAGES ARISING FROM ANY
DEFECT OR ERROR IN THIS MANUAL OR PRODUCT.
SPECIFICATIONS AND INFORMATION CONTAINED IN THIS MANUAL ARE FURNISHED FOR
INFORMATIONAL USE ONLY, AND ARE SUBJECT TO CHANGE AT ANY TIME WITHOUT NOTICE,
AND SHOULD NOT BE CONSTRUED AS A COMMITMENT BY ASUS. ASUS ASSUMES NO
RESPONSIBILITY OR LIABILITY FOR ANY ERRORS OR INACCURACIES THAT MAY APPEAR IN THIS
MANUAL, INCLUDING THE PRODUCTS AND SOFTWARE DESCRIBED IN IT.
Products and corporate names appearing in this manual may or may not be registered trademarks or
copyrights of their respective companies, and are used only for identication or explanation and to the
owners’ benet, without intent to infringe.
E3812
First Edition V1
September 2008
Book 1.indb 2 9/24/08 5:03:48 PM
Page 4

3
English
ASUS contact information
ASUSTeK COMPUTER INC.
Address 15 Li-Te Road, Peitou, Taipei, Taiwan 11259
Telephone +886-2-2894-3447
Fax +886-2-2890-7798
E-mail info@asus.com.tw
Web site www.asus.com.tw
Technical Support
Telephone +86-21-38429911
Online support support.asus.com
ASUS COMPUTER INTERNATIONAL (America)
Address 800 Corporate Way, Fremont, California 94539, USA
TEL 001-510-739-3777
Fax +1-510-608-4555
Web site usa.asus.com
Technical Support
Telephone +1-812-282-2787
Support fax +1-812-284-0883
Online support support.asus.com
ASUS COMPUTER GmbH (Germany and Austria)
Address Harkortstr. 21-23, 40880 Ratingen, Germany
Telephone +49-01805-010923
Fax +49-02102-9599-11
Web site www.asus.de
Online contact www.asus.de/sales
Technical Support
Telephone +49-01805-010923
Support Fax +49-02102-9599-11
Online support support.asus.com
Book 1.indb 3 9/24/08 5:03:49 PM
Page 5
4
English
Notices
Federal Communications Commission Statement
This device complies with Part 15 of the FCC Rules. Operation is subject to the
following two conditions:
•
This device may not cause harmful interference, and
•
This device must accept any interference received including interference that
may cause undesired operation.
This equipment has been tested and found to comply with the limits for a
Class B digital device, pursuant to Part 15 of the FCC Rules. These limits are
designed to provide reasonable protection against harmful interference in a
residential installation. This equipment generates, uses and can radiate radio
frequency energy and, if not installed and used in accordance with manufacturer’s
instructions, may cause harmful interference to radio communications. However,
there is no guarantee that interference will not occur in a particular installation. If
this equipment does cause harmful interference to radio or television reception,
which can be determined by turning the equipment off and on, the user is
encouraged to try to correct the interference by one or more of the following
measures:
•
Reorient or relocate the receiving antenna.
•
Increase the separation between the equipment and receiver.
•
Connect the equipment to an outlet on a circuit different from that to which the
receiver is connected.
•
Consult the dealer or an experienced radio/TV technician for help.
Canadian Department of Communications Statement
This digital apparatus does not exceed the Class B limits for radio noise emissions
from digital apparatus set out in the Radio Interference Regulations of the
Canadian Department of Communications.
This class B digital apparatus complies with Canadian ICES-003.
The use of shielded cables for connection of the monitor to the graphics card is
required to assure compliance with FCC regulations. Changes or modications
to this unit not expressly approved by the party responsible for compliance
could void the user’s authority to operate this equipment.
Book 1.indb 4 9/24/08 5:03:49 PM
Page 6
5
English
Safety information
Electrical safety
•
To prevent electrical shock hazard, disconnect the power cable from the
electrical outlet before relocating the system.
• When adding or removing any devices to or from the system, contact a
qualied service technician or your retailer for help. Ensure that all the power
cables are disconnected before any device is added or removed to or from the
system.
•
If the power supply is broken, do not try to x it by yourself. Contact a qualied
service technician or your retailer.
Lithium-Ion Battery Warning
CAUTION: Danger of explosion if battery is incorrectly replaced. Replace
only with the same or equivalent type recommended by the manufacturer.
Dispose of used batteries according to the manufacturer’s instructions.
VORSICHT: Explosionsgetahr bei unsachgemäßen Austausch der Batterie.
Ersatz nur durch denselben oder einem vom Hersteller empfohlenem
ähnljchen Typ. Entsorgung gebrauchter Batterien nach Angaben des
Herstellers.
LASER PRODUCT WARNING
CLASS 1 LASER PRODUCT
Operation safety
• Before installing devices into the system, carefully read all the documentation
that came with the package.
• Before using the product, ensure that all cables are correctly connected and
the power cables are not damaged. If you detect any damage, contact your
dealer immediately.
• To avoid short circuits, keep paper clips, screws, and staples away from
connectors, slots, sockets, and circuitry.
• Avoid dust, humidity, and extreme temperatures. Do not place the product in
any area where it may become wet. Place the product on a stable surface.
• When using the product, do not block any air inlet/outlet in the chassis.
• The maximum environmental temperature is 35ºC.
• If you encounter technical problems with the product, contact a qualied
service technician or your retailer.
Book 1.indb 5 9/24/08 5:03:50 PM
Page 7

6
English
General precautions
Before using the ASUS Essentio ES5000/ES5000-P Desktop PC, carefully read
the general precautions below. Improper operation could lead to personal injury or
damage to the product.
• Before using the product, ensure that all components are correctly installed
and all cables are correctly connected. If you detect any damage, contact your
dealer immediately.
• Avoid dust and extreme temperatures. Do not place the product in any area
where it may receive direct sunlight.
• Keep the product in a dry place. Raindrops, moisture, and liquids may contain
minerals and damage the circuitry.
• Leave enough space around the product to provide adequate ventilation.
Otherwise, it may overheat.
• Before turning on the system, check if all the peripherals are correctly
connected.
• Avoid eating while using the computer. It may contaminate the components
and cause the system to malfunction.
• To avoid short circuits, keep scraps, screws, and threads away from
connectors, slots, sockets, and circuitry.
• Do not stuff anything into the components. Otherwise, it may cause a short
circuit or damage the circuitry.
• If the computer has been used for a long time, avoid direct contact with the
heatsinks and the surfaces of IC as they may become very warm and hot.
Check if the system receives adequate ventilation.
• Before you add or remove a peripheral device to or from the system, ensure
that you unplugged the power cables.
• If the power supply is broken, do not try to x it by yourself. Contact a qualied
service technician or your retailer.
• Though the system casing is elaborately designed to protect users from
scratches, be careful with those sharp tips and edges. Put on a pair of gloves
before you remove or replace the system cover.
• When you do not need to use your computer for a long time, shut it down and
unplug the power cables.
• It is suggested that you use this product when the temperature is no higher
than 35ºC.
• Warning: Ensure that you replace the battery with a correct type otherwise it
may cause an explosion hazard.
Book 1.indb 6 9/24/08 5:03:50 PM
Page 8
7
English
About this guide
How this guide is organized
This guide contains the following parts:
1. Chapter 1: System introduction
This chapter gives a general description of ASUS Essentio
ES5000/ES5000-P Desktop PC. The chapter lists the system features,
including introduction on the front and rear panels.
2. Chapter 2: Getting started
This chapter helps you power up the system and install drivers and utilities
from the support DVD.
Audience
This guide provides general information about ASUS Essentio ES5000/ES5000-P
Desktop PC and instructions on how to use the Support DVD that comes with the
system package. This guide is intended for experienced users and integrators with
hardware knowledge of personal computers.
Book 1.indb 7 9/24/08 5:03:50 PM
Page 9
8
English
Conventions used in this guide
To ensure that you perform certain tasks properly, take note of the following
symbols used throughout this guide.
WARNING: Information to prevent injury to yourself when trying to
complete a task.
CAUTION: Information to prevent damage to the components when
trying to complete a task.
IMPORTANT: Instructions that you MUST follow to complete a task.
NOTE: Tips and additional information to aid in completing a task.
Where to nd more information
Refer to the following sources for additional information and for product and
software updates.
1. ASUS Websites
The ASUS websites worldwide provide updated information on ASUS
hardware and software products. Refer to the ASUS contact information.
2. Optional Documentation
Your product package may include optional documentation, such as warranty
yers, that may have been added by your dealer. These documents are not
part of the standard package.
Book 1.indb 8 9/24/08 5:03:53 PM
Page 10
9
English
System package contents
Check your Essentio ES5000/ES5000-P system package for the following items.
Standard items
1. ASUS Essentio ES5000/ES5000-P Desktop PC with
• ASUS Desktop PC x 1
• Foot stand x 1
• Mouse x 1
• Keyboard x 1
2. Cables
• AC power cord x 1
3. Accessories
• AC power adapter x 1
• Mouse pad x 1
4. Support DVD x 1
5. User Manual x 1
6. Warranty card x 1
• If any of the items is damaged or missing, contact your retailer immediately.
• Specications are subject to the desktop PC you purchased. Check with
your supplier for exact offers.
Book 1.indb 9 9/24/08 5:03:54 PM
Page 11

10
English
Book 1.indb 10 9/24/08 5:03:54 PM
Page 12
Chapter 1
System introduction
This chapter gives a general
description of the desktop PC. The
chapter lists the system features
including introduction on the front and
rear panels.
Book 1.indb 11 9/24/08 5:03:55 PM
Page 13
12 Chapter 1: System introduction
English
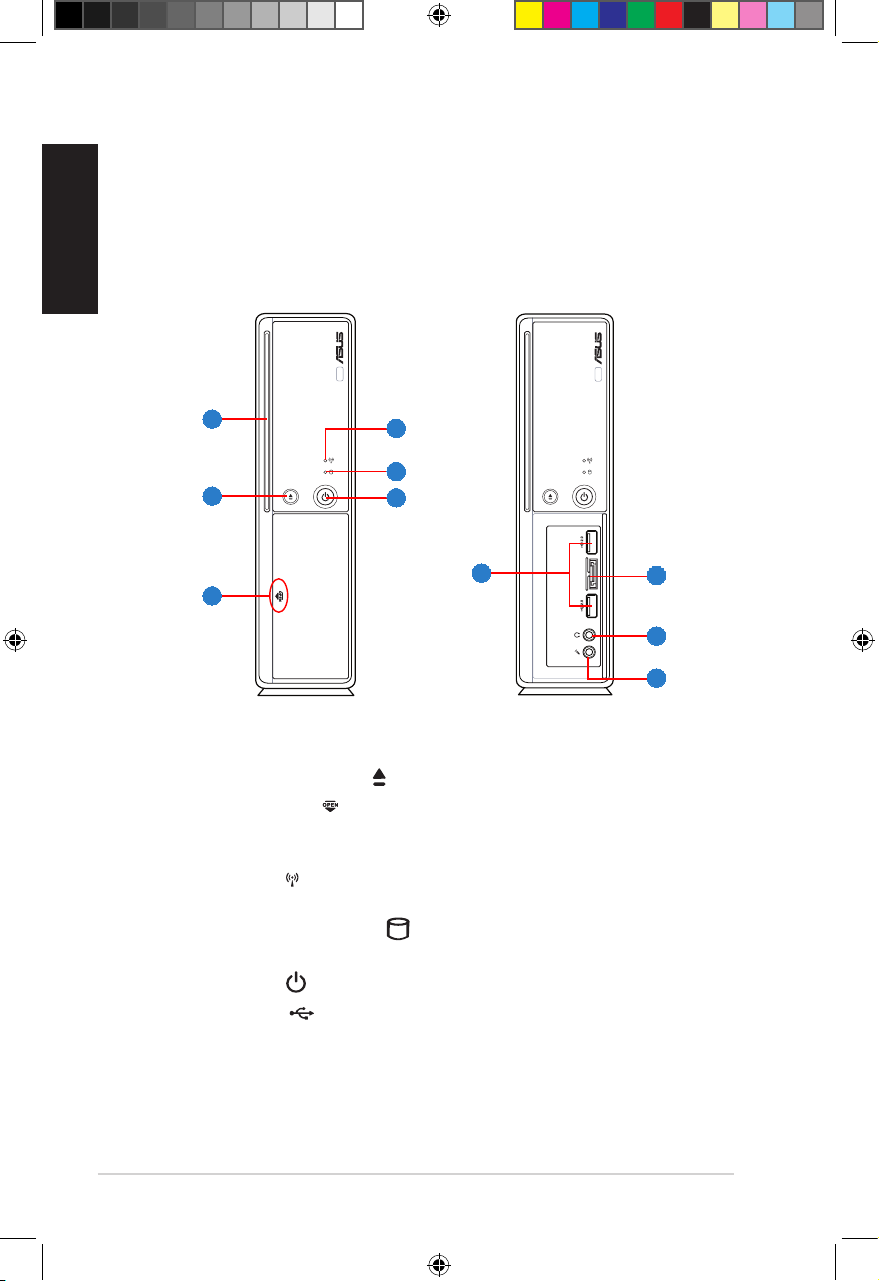
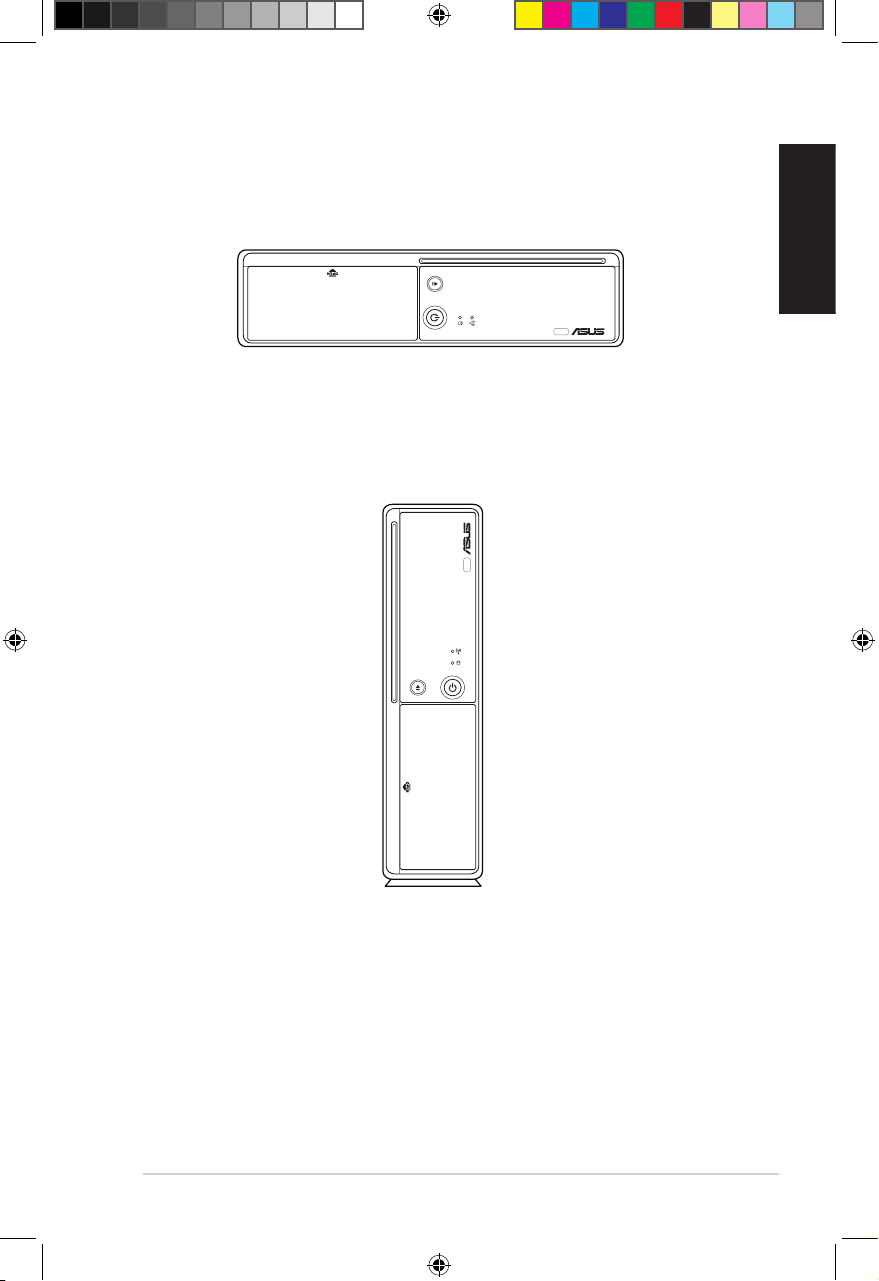
1.1 Front panel
The ASUS Essentio ES5000/ES5000-P Desktop PC includes an ASUS
motherboard, a power supply unit, a front panel, and a rear panel. All of these
components are integrated in a system casing elaborately designed by ASUS.
The illustrations below show the front panel and the components on it.
5
3
1
4
2
6
E-SATA
9
10
8
7
Close
Open
1. Slot-in optical disk drive (ODD). Insert an optical disk into the slot with the
label side facing your left.
2. Optical disk eject button . Press this button to eject an optical disk.
3. Front panel cover . Pull outward to open the front panel cover. Inside
are two USB 2.0 ports, one E-SATA port, one Microphone port, and one
Headphone port.
4. Network LED . This LED lights up when a wireless/wired network
connection is established on the system.
5. Hard disk drive (HDD) LED . This LED lights up when data is being read
from or written to the hard disk drive.
6. Power button . Press this button to turn the system on.
7. USB 2.0 ports
2.0
. These Universal Serial Bus 2.0 (USB 2.0) ports are
available for connecting USB 2.0 devices such as a mouse, printer, scanner,
camera, PDA, and others.
8. E-SATA port
E-SATA
. This port connects an external Serial ATA hard disk
drive.
Book 1.indb 12 9/24/08 5:03:58 PM
Page 14
13ASUS Essentio ES5000/ES5000-P
English
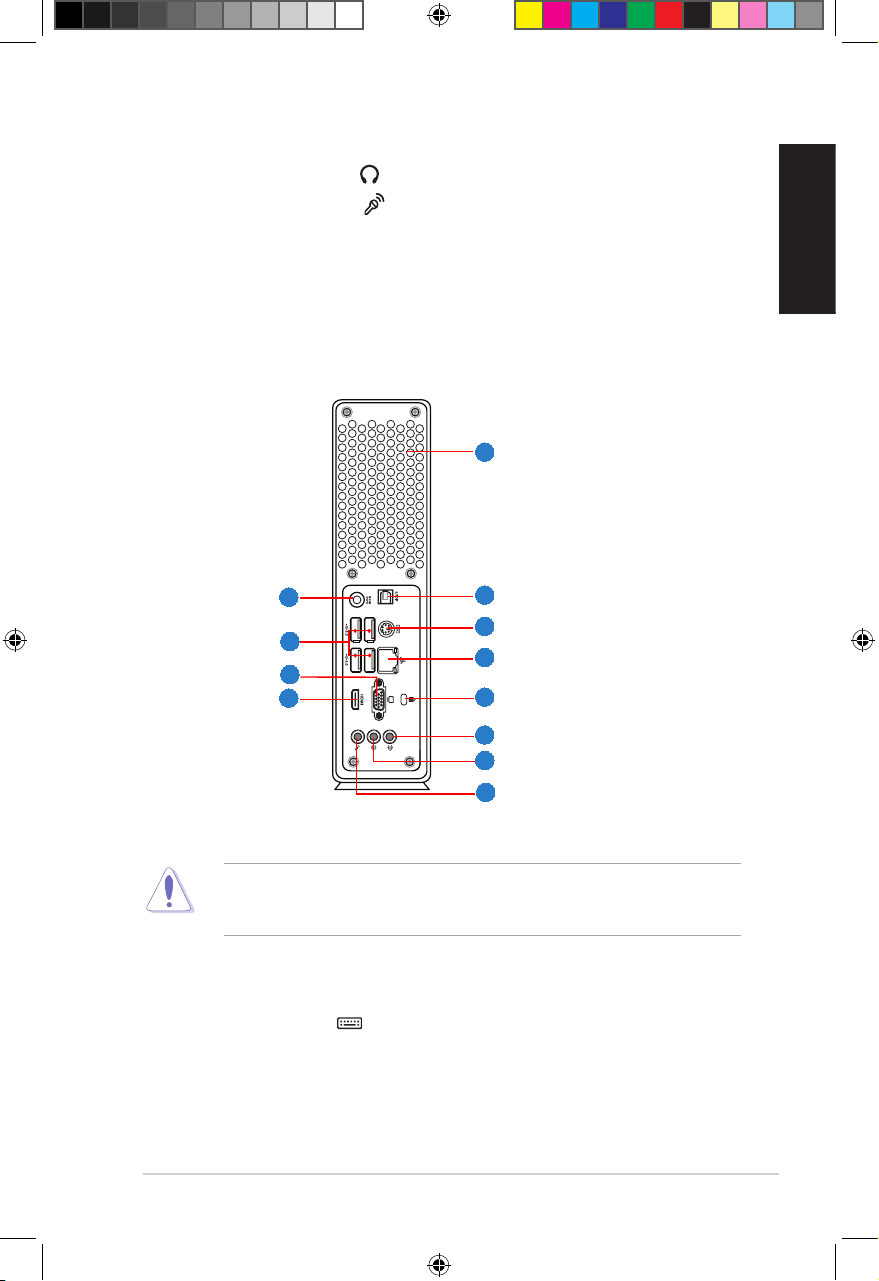
1.2 Rear panel
The system rear panel includes the power input port and several I/O ports that
allow convenient connection of devices.
The illustration below shows the rear panel and the components on it.
1. Air vents. These vents allow air ventilation.
3
1
2
5
4
6
7
9
10
8
12
11
DO NOT block the air vents on the top and rear panels of the system chassis.
The components inside the chassis may overheat and be damaged without
adequate ventilation.
2. Optical S/PDIF Out port. This port connects an external audio output device
via an optical S/PDIF cable.
3. PS/2 keyboard port . This port is for a PS/2 keyboard.
4. LAN (RJ-45) port. This port allows Fast Ethernet connection to a Local Area
Network (LAN) through a network hub.
9. Headphone port (lime) . This port connects a headphone.
10. Microphone port (pink) . This port connects a microphone.
Book 1.indb 13 9/24/08 5:04:01 PM
Page 15
14 Chapter 1: System introduction
English
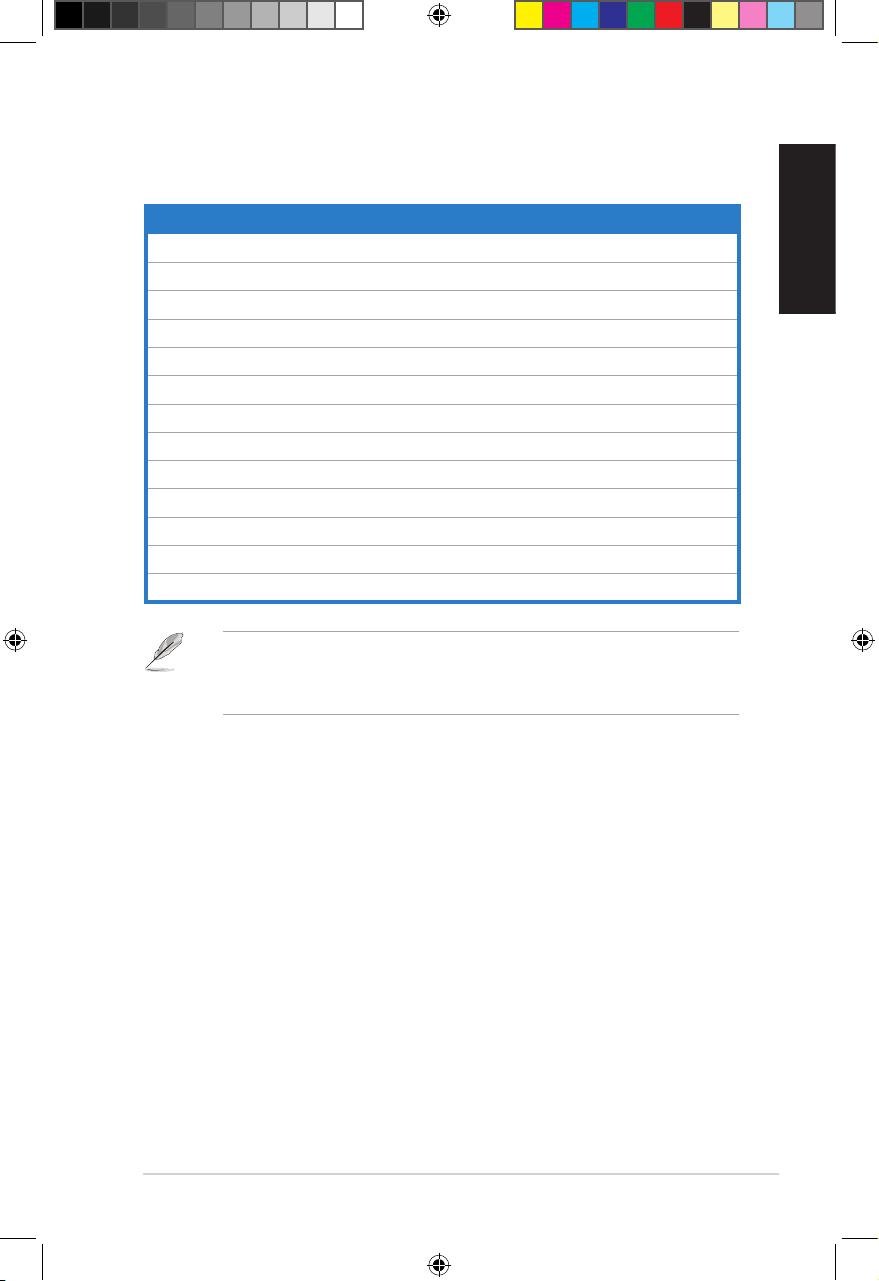
Audio 2, 4, or 6-channel conguration
Port Headset 2-channel 4-channel 6-channel
Light Blue Line In Rear Speaker Out
Rear Speaker Out
Lime Line Out Front Speaker Out Front Speaker Out
Pink Mic In Mic In
Bass/Center
5. Kensington® lock port . This port allows the PC to be secured to a xed
object using Kensington®.compatible security products.
6. Line In port (light blue). This port connects a tape, CD, DVD player, or other
audio sources.
7. Line Out port (lime). This port connects a headphone or a speaker. In
4-channel or 6-channel conguration, the function of this port becomes Front
Speaker Out.
8. Microphone port (pink) . This port connects a microphone.
Refer to the audio conguration table below for the function of the audio ports in
2, 4, or 6-channel conguration.
9. DC IN input port. This port connects the DC output plug of an AC power
adapter.
10. USB 2.0 ports
2.0
. These Universal Serial Bus 2.0 (USB 2.0) ports are
available for connecting USB 2.0 devices such as a mouse, printer, scanner,
camera, PDA, and others.
11. Video Graphics adapter (VGA) port . This port connects a VGA monitor
or other VGA-compatible devices.
12. HDMI port . This port is for a High-Denition Multimedia Interface
(HDMI) connector, and is HDCP compliant allowing playback of HD DVD,
Blu-Ray and other protected content.
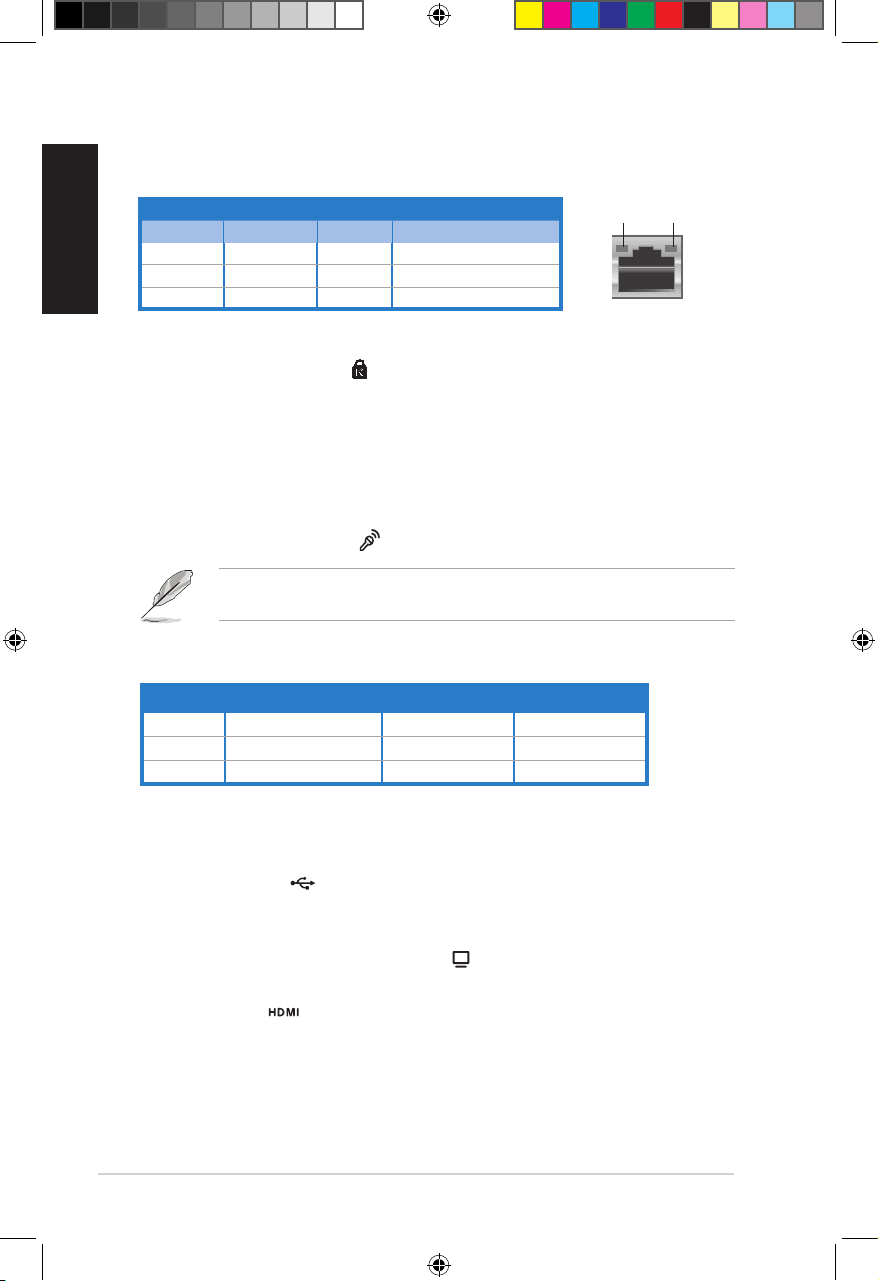
LAN port LED indications
LAN port
SPEED
LED
ACT/LINK
LED
Activity/Link LED Speed LED
Status Description Status Description
OFF No link OFF 10 Mbps connection
ORANGE Linked ORANGE 100 Mbps connection
BLINKING Data activity GREEN 1 Gbps connection
Book 1.indb 14 9/24/08 5:04:04 PM
Page 16
15ASUS Essentio ES5000/ES5000-P
English
1.3 Placement options
1.3.1 Horizontal placement
Place your desktop PC horizontally.
1.3.2 Vertical placement
Install the foot stand supplied in the system package. Place your desktop PC
vertically.
To install the foot stand:
1. Locate the screw hole on the bottom of your desktop PC.
2. Secure the foot stand to your desktop PC with the supplied screw.
Book 1.indb 15 9/24/08 5:04:05 PM
Page 17
16 Chapter 1: System introduction
English
1.4 Connecting to the keyboard and the
mouse
The ASUS Essentio ES5000/ES5000-P Desktop PC is equipped with a PS/2
keyboard and a USB mouse. Connect the PS/2 keyboard to the PS/2 keyboard
port at the rear panel. Connect the USB mouse to a USB port either at the rear or
front panel.
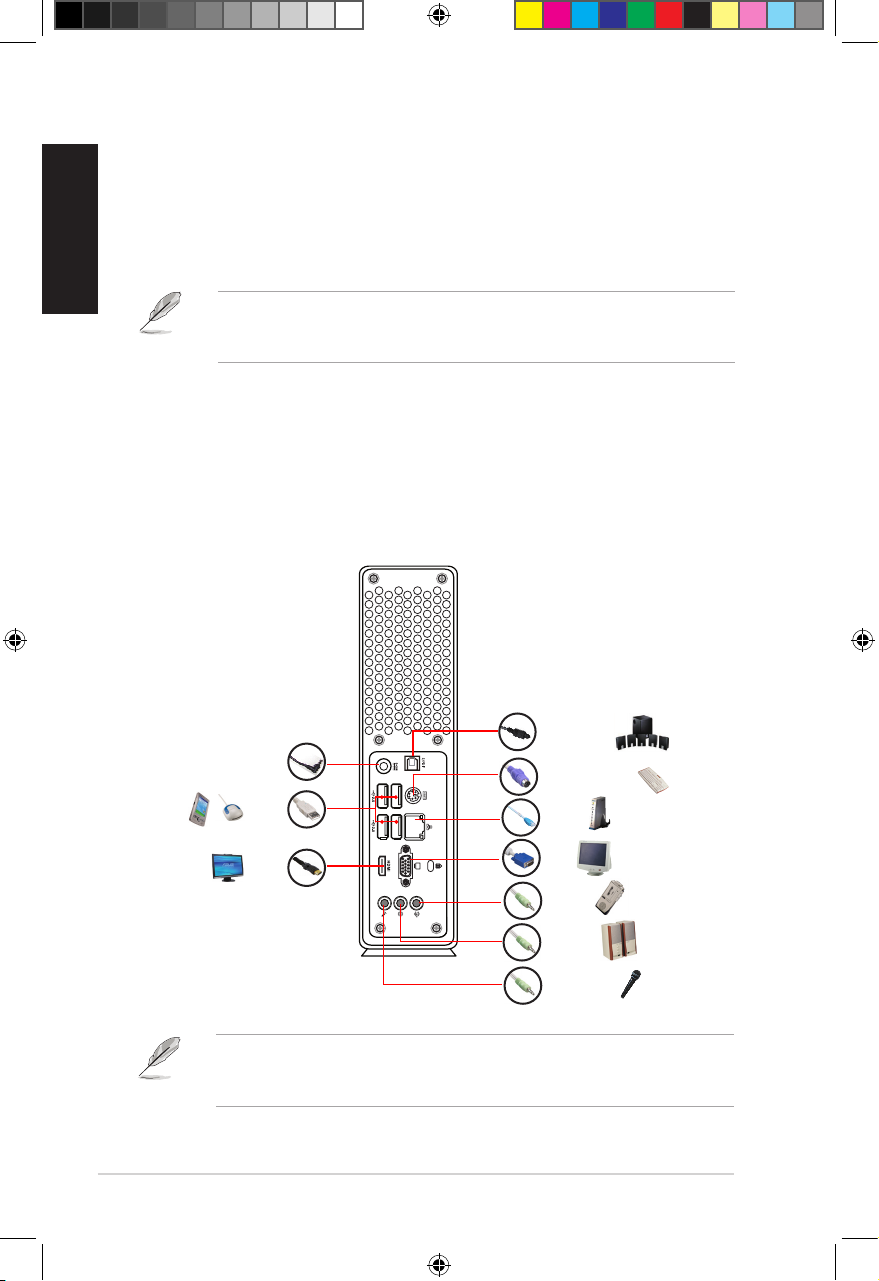
1.5 Connecting to other peripheral devices
The ASUS Essentio ES5000/ES5000-P Desktop PC is equipped with a number of
I/O ports at the rear and front panels where you can connect peripheral devices to
the system.
Refer to the illustration below for details.
Before you connect a peripheral device to the system, refer to the
documentation that comes with the device or contact your supplier directly for
information on how to install it.
Power jack
USB
VGA
HDMI
Microphone
Line Out
Line In
RJ-45
PS/2 keyboard
S/PDIF Out
If you are using a wireless USB keyboard or mouse, refer to the documentation
that comes with the device or contact your supplier directly for information on
how to congure it.
Book 1.indb 16 9/24/08 5:04:14 PM
Page 18
Chapter 2
Getting started
This chapter helps you to power up the
system and install drivers and utilities
from the support DVD.
Book 1.indb 17 9/24/08 5:04:16 PM
Page 19
18 Chapter 2: Getting started
English
2.1 Installing an operating system
This motherboard supports Windows® XP / Vista operating systems (OS). Always
install the latest OS version and the corresponding updates to maximize the
features of your hardware. When you start the system for the rst time, the system
automatically detects the built-in audio and graphics chips and attempts to install
the drivers that come with the OS. Select NO when a window appears asking if
you want to restart the system. Install drivers according to the instructions in the
following sections.
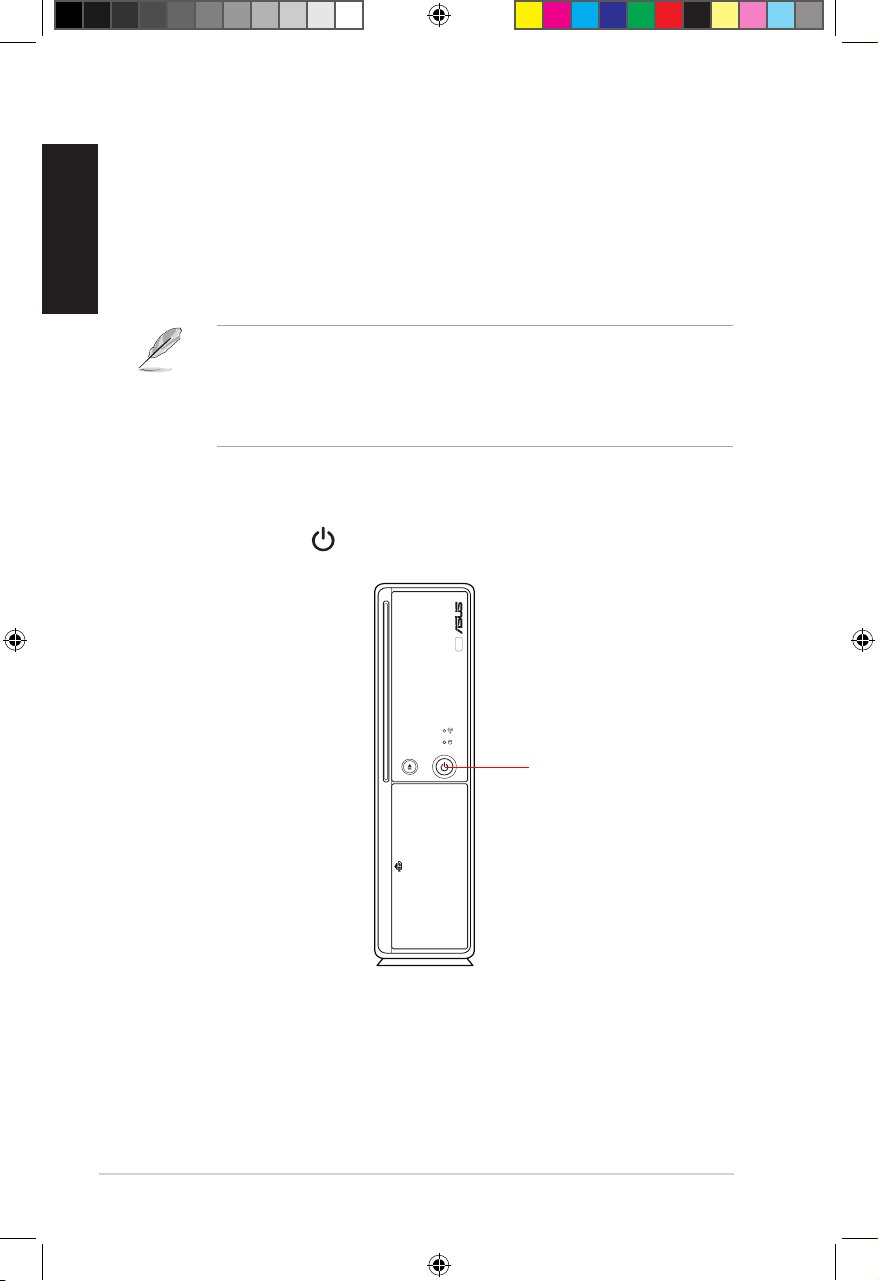
2.2 Powering your system
Press the Power button to power up the system.
• To ensure that the OS works properly, install the drivers bundled in the
Support DVD.
• Motherboard settings and hardware options vary. Use the setup
procedures presented in this chapter for reference only. Refer to your OS
documentation for detailed information.
Press to turn ON the system
Book 1.indb 18 9/24/08 5:04:18 PM
Page 20
ASUS Essentio ES5000/ES5000-P 19
English
If Autorun is NOT enabled on your computer, browse the contents of the
Support DVD to locate the le ASSETUP.EXE from the BIN folder. Double-click
the ASSETUP.EXE to run the DVD.
Click an item to install
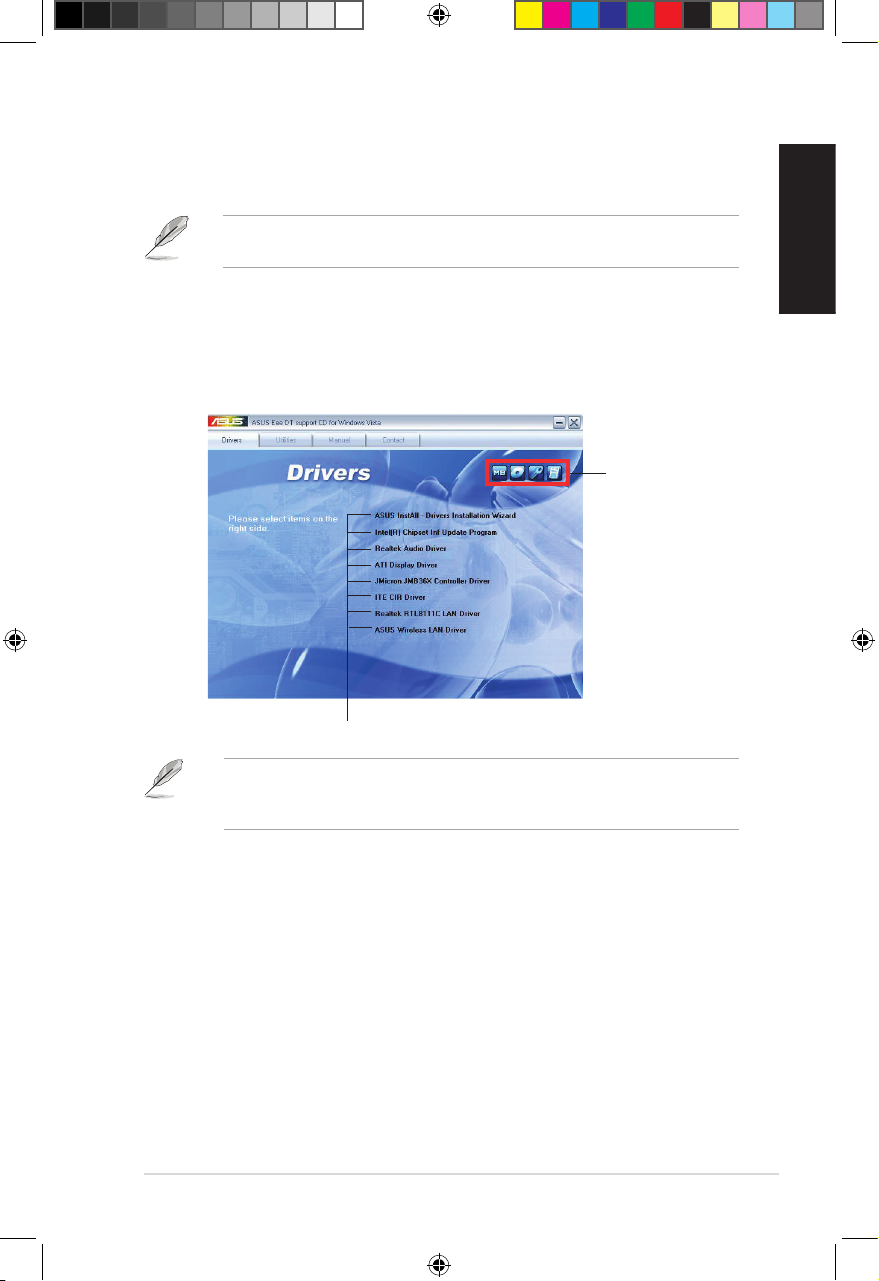
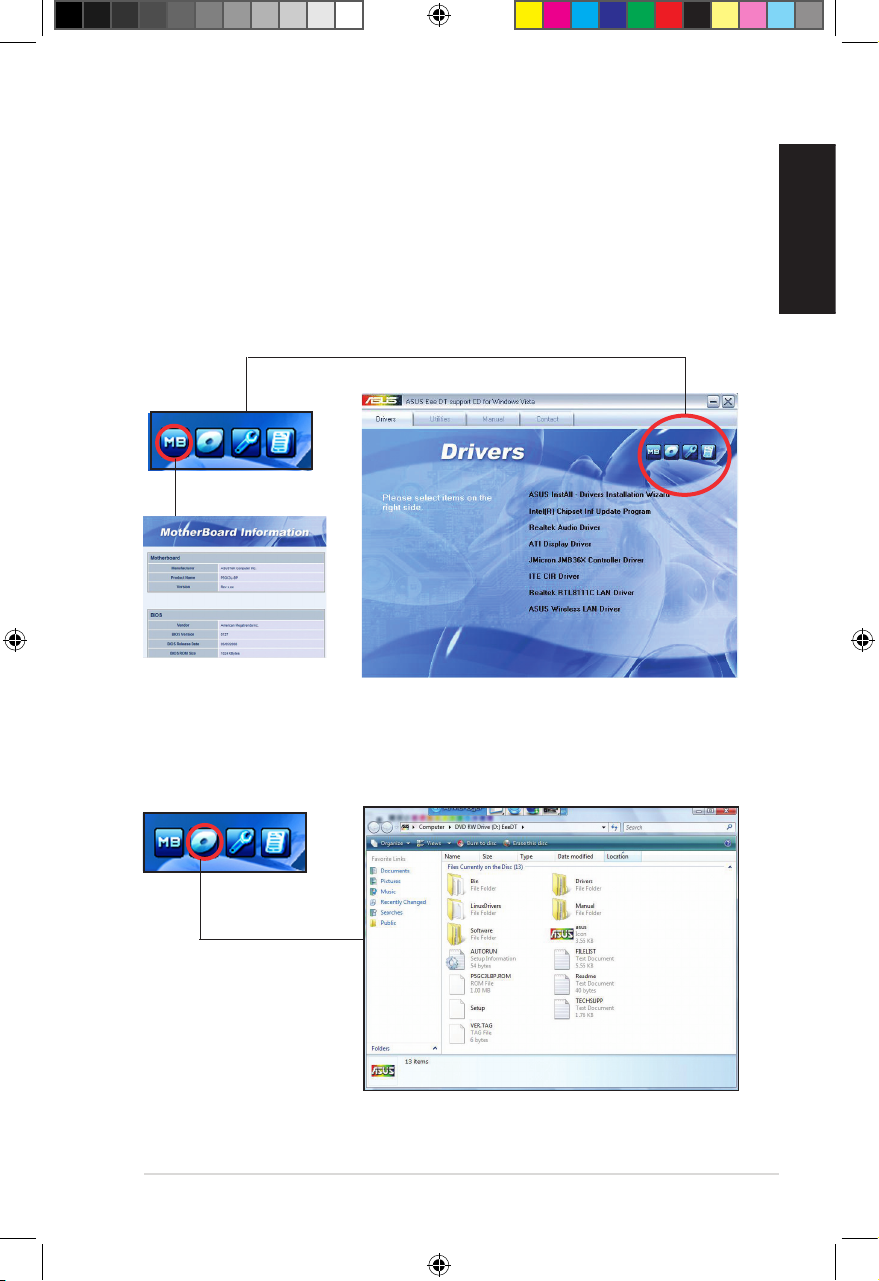
2.3.1 Running the Support DVD
Place the Support DVD into the optical drive. The DVD automatically displays the
Drivers menu if Autorun is enabled on your computer.
Click an icon
to display
Support DVD/
motherboard
information
2.3 Support DVD information
The Support DVD that comes with the system package contains the drivers,
software applications, and utilities that you can install to avail all system features.
The contents of the Support DVD are subject to change at any time without
notice. Visit the ASUS website at www.asus.com for updates.
Book 1.indb 19 9/24/08 5:04:19 PM
Page 21
20 Chapter 2: Getting started
English
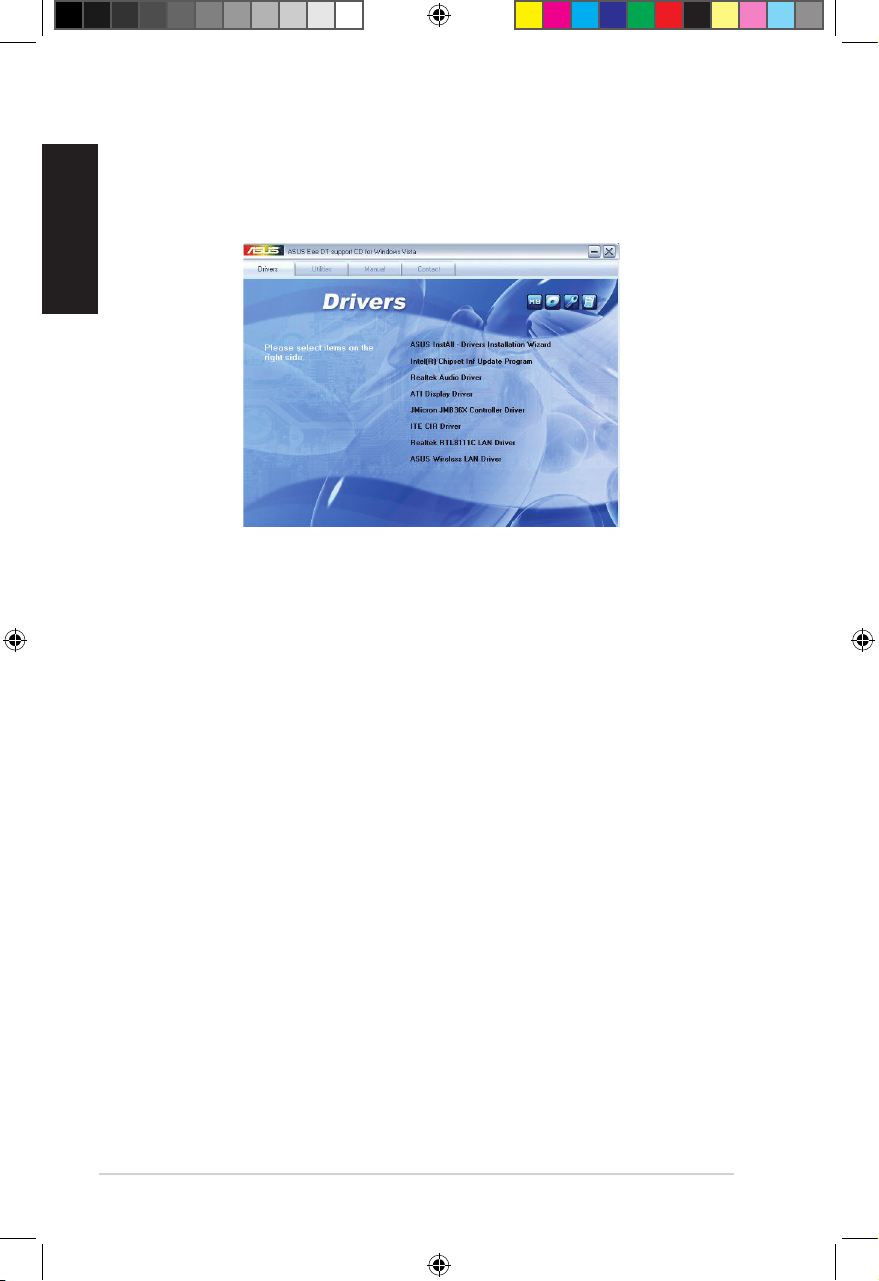
2.3.2 Drivers menu
The Drivers menu shows the available device drivers if the system detects
installed devices. Install the necessary drivers to activate the devices.
ASUS InstAll - Drivers Installation Wizard
Installs the ASUS InstAll-Drivers Installation Wizard.
Intel(R) Chipset Inf Update Program
Installs the Intel® chipset Inf update program.
Realtek Audio Driver
Installs the Realtek® audio driver and application.
ATI Display Driver
Installs the ATI display driver.
JMicron JMB36X Controller Driver
Installs the JMicron JMB36X controller driver.
ITE CIR Driver
Installs the ITE CIR driver.
Realtek RTL8111C LAN Driver
Installs the Realtek RTL8111C LAN driver.
ASUS Wireless LAN Driver
Installs the ASUS wireless LAN driver.
Book 1.indb 20 9/24/08 5:04:19 PM
Page 22
ASUS Essentio ES5000/ES5000-P 21
English
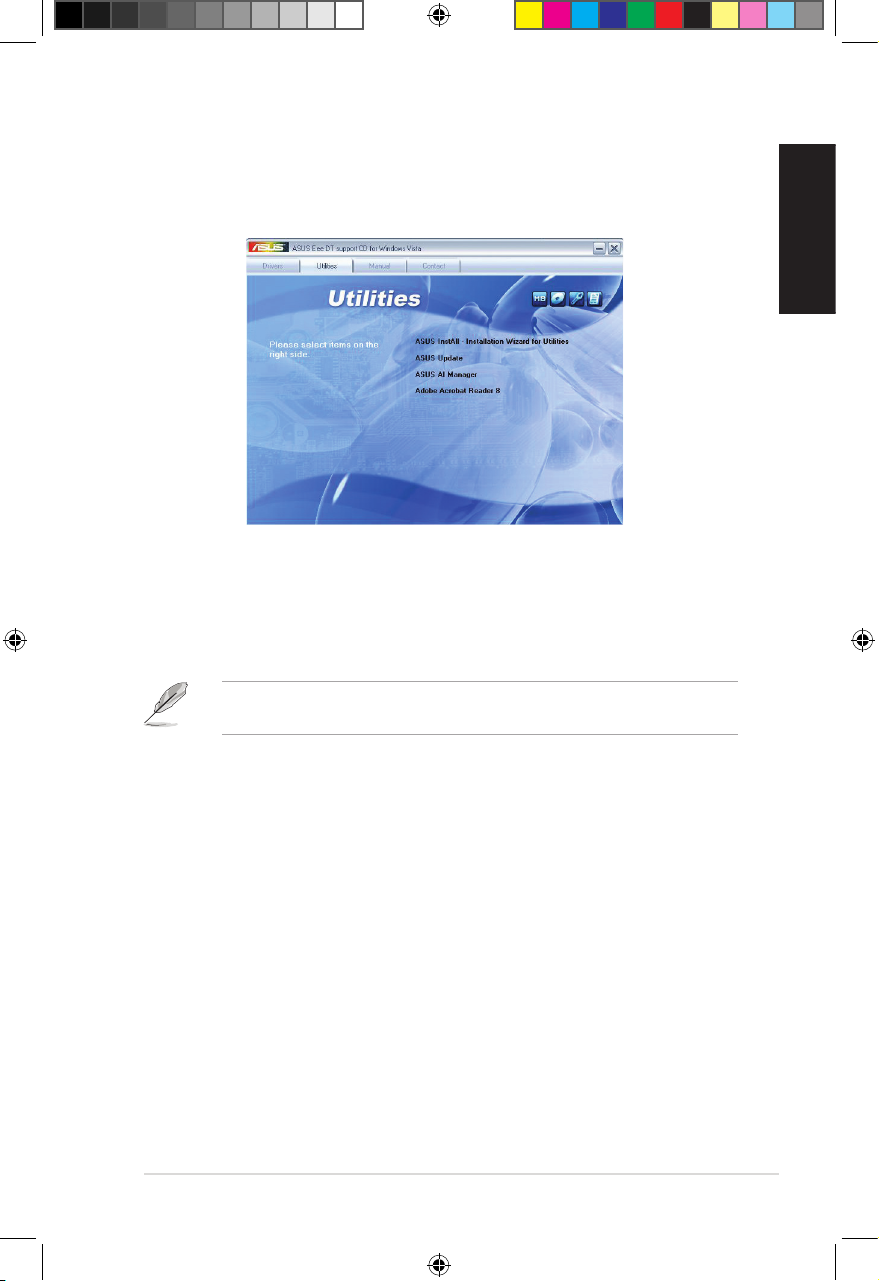
2.3.3 Utilities menu
The Utilities menu shows the applications and other software that the
motherboard supports. Tap an item from the screen to install.
ASUS InstAll - Installation Wizard for Utilities
Installs all of the utilities through the Installation Wizard.
ASUS Update
Allows you to download the latest version of BIOS from the ASUS website.
ASUS AI Manager
Installs the ASUS AI Manager where you can launch AI Disk, AI Security, and AI
Probe easily.
Adobe Acrobat Reader 8
Installs the Adobe Acrobat Reader 8. The manuals in the Support DVD are in PDF
(Portable Document Format) format, which can be opened with Adobe Acrobat
Reader.
Before using the ASUS Update, ensure that you have an Internet connection so
that you can connect to the ASUS website.
Book 1.indb 21 9/24/08 5:04:20 PM
Page 23
22 Chapter 2: Getting started
English
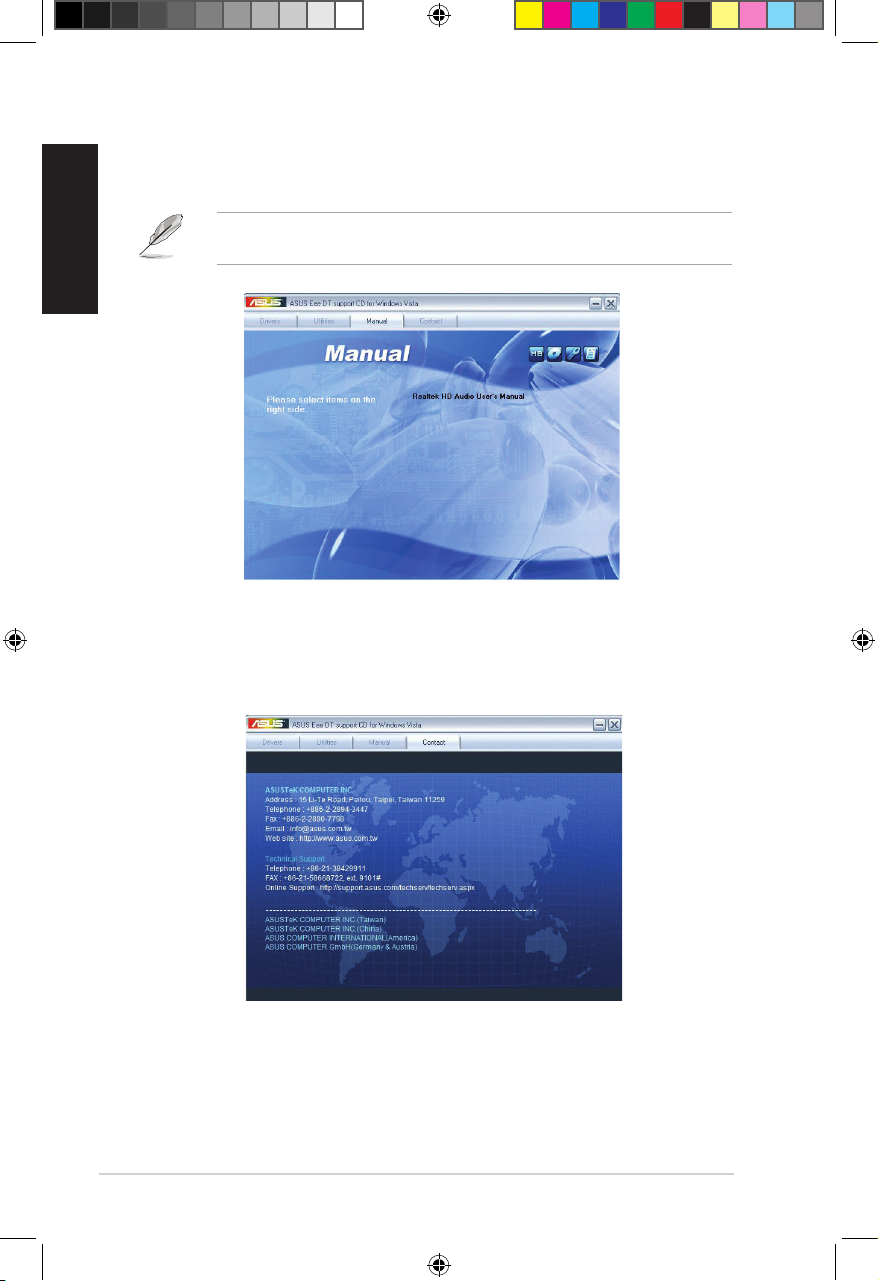
2.3.4 Manuals menu
The Support DVD includes the manual of Realtek HD Audio.
The manual is in PDF format. To open it, install the Adobe Acrobat Reader from
the Utilities menu.
2.3.5 ASUS contact information
Click the Contact tab to display the ASUS contact information.
Book 1.indb 22 9/24/08 5:04:21 PM
Page 24
ASUS Essentio ES5000/ES5000-P 23
English
2.3.6 Other information
The icons on the top right corner of the screen give additional information on the
motherboard and the contents of the Support DVD. Click an icon to display the
specied information.
Browse this DVD
Displays the Support DVD contents in graphical format.
Motherboard Info
Displays the general specications of the motherboard.
Book 1.indb 23 9/24/08 5:04:23 PM
Page 25
24 Chapter 2: Getting started
English
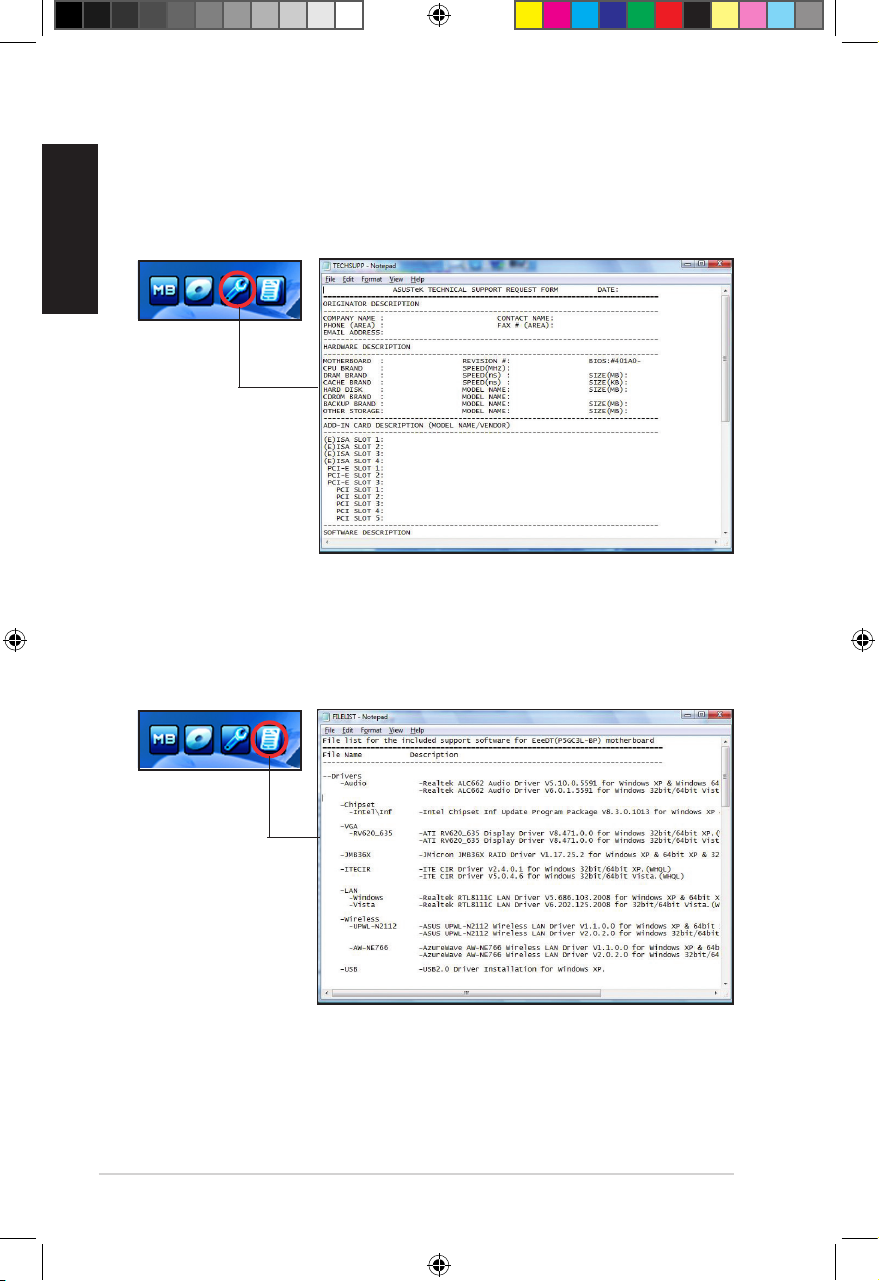
Technical support Form
Displays the ASUS Technical Support Request Form that you have to ll out when
requesting technical support.
Filelist
Displays the contents of the Support DVD and a brief description of each in text
format.
Book 1.indb 24 9/24/08 5:04:24 PM
Page 26
ASUS Essentio ES5000/ES5000-P 25
English
2.4 ASUS AI Manager
ASUS AI Manager allows you to launch AI Disk, AI Security, and AI Probe easily.
2.4.1 Installing AI Manager
To install AI Manager on your computer:
1. Place the Support DVD into the optical drive. The DVD automatically displays
the Drivers menu if Autorun is enabled on your computer.
If Autorun is NOT enabled on your computer, browse the contents of the
Support DVD to locate the le ASSETUP.EXE from the BIN folder. Double-click
the ASSETUP.EXE to run the DVD.
2. Click the Utilities tab, then click ASUS AI Manager.
3. Follow the screen instructions to complete the installation.
2.4.2 Launching AI Manager
You can launch AI Manager right after installation or anytime from the Windows®
desktop.
To launch AI Manager from the Windows® desktop, click Start > All Programs >
ASUS > AI Manager > AI Manager v1.xx.xx. The AI Manager Quick Bar appears.
After launching the application, the AI Manager icon appears in the Windows®
taskbar. Right-click this icon for more options.
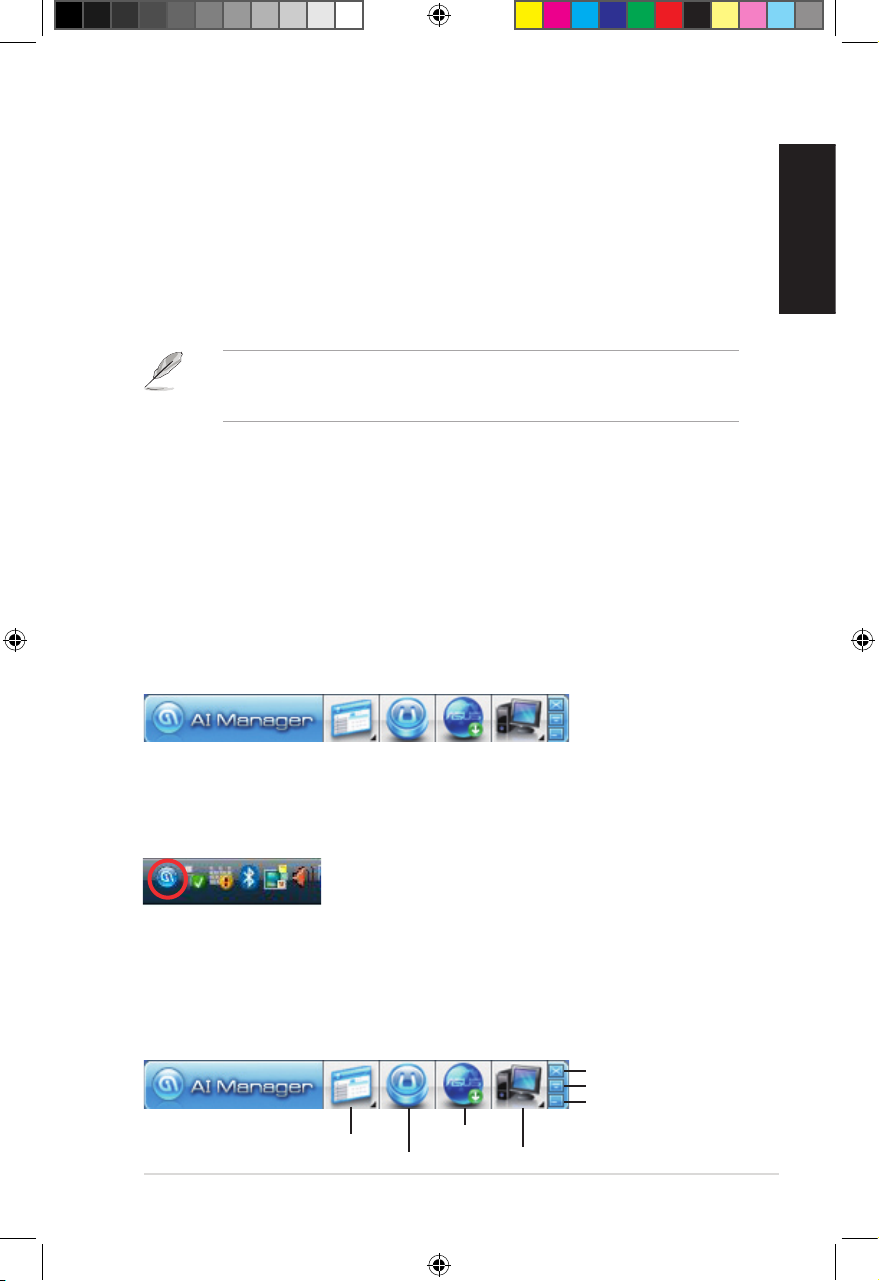
2.4.3 AI Manager Quick Bar
Click the Main, My favorites, Support, or Information icon from the Quick Bar to
show the corresponding menu.
Main
My Favorites
Support
Information
Close
Maximize/Resume
Minimize
Book 1.indb 25 9/24/08 5:04:25 PM
Page 27
26 Chapter 2: Getting started
English
Click to switch between a full-screen AI Manager window and the Quick bar.
Click to keep AI Manager in the taskbar.
Click to close AI Manager.
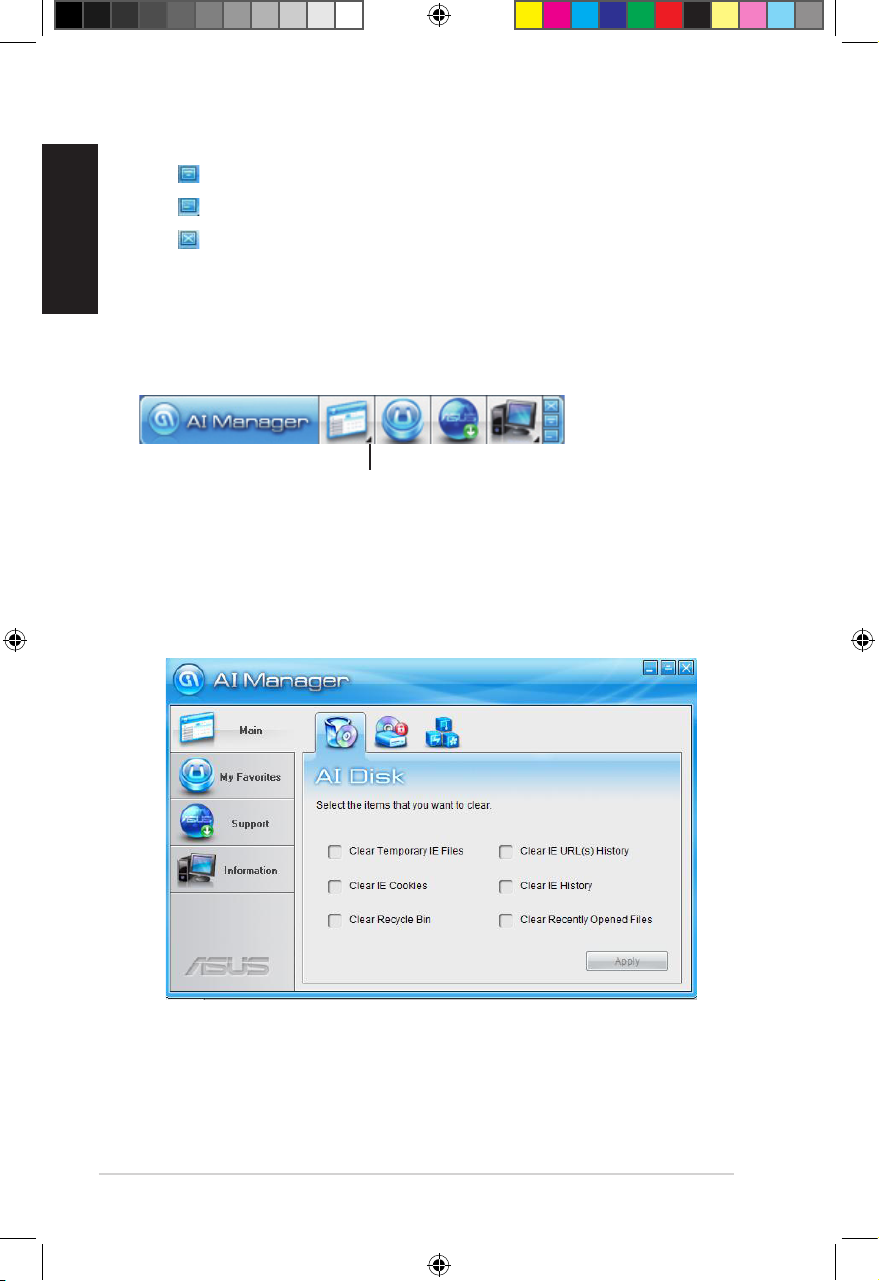
2.4.4 Main
Launch AI Disk, AI Security, or AI Probe from the Main menu. Click the small
triangle to open or close the Main menu.
Click to open/close the Main menu
AI Disk
AI Disk allows you to easily clear the temporary IE les, IE URLs, IE cookies, IE
history list, Recycle Bin, and recently opened les list. Select the item that you
want to clear, then click Apply.
Book 1.indb 26 9/24/08 5:04:25 PM
Page 28
ASUS Essentio ES5000/ES5000-P 27
English
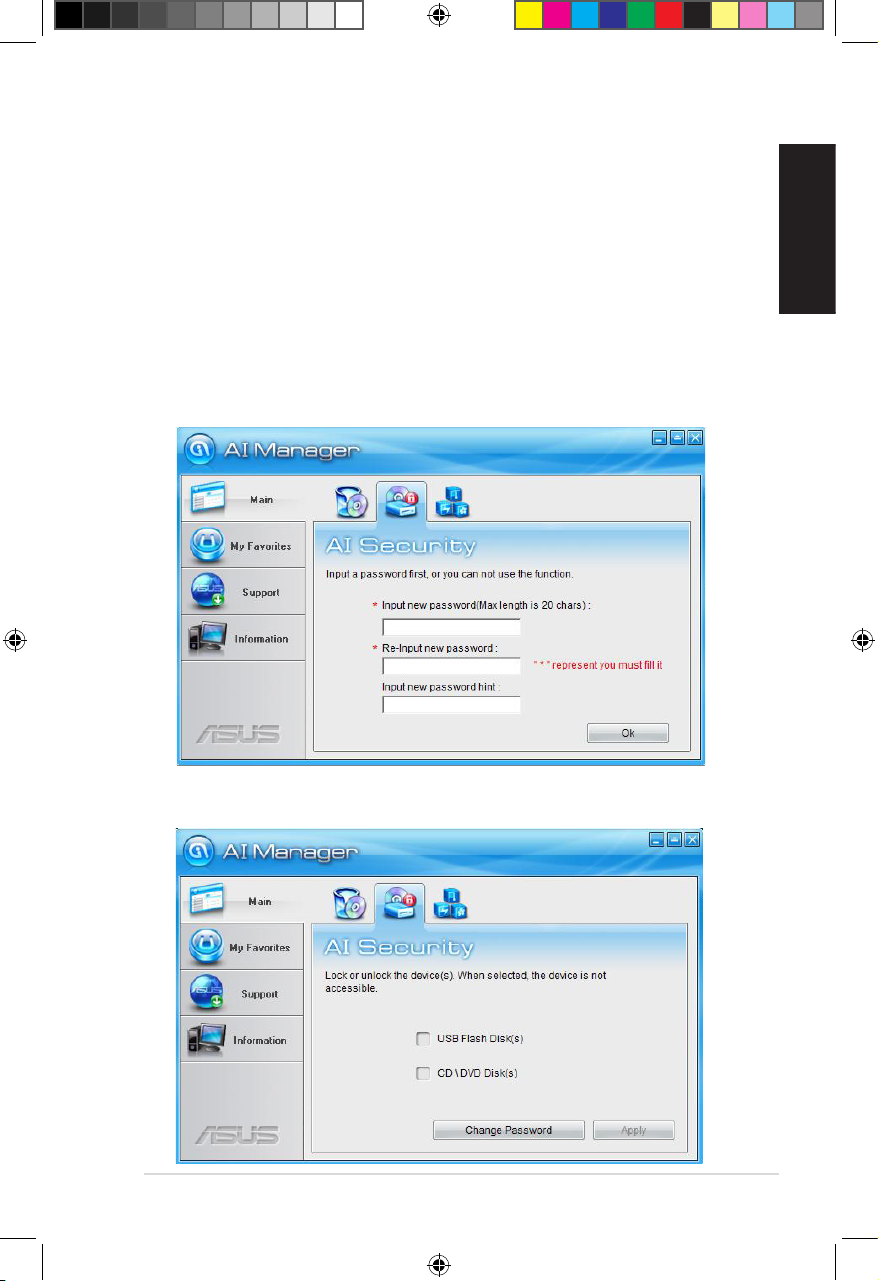
AI Security
AI Security allows you to set passwords to lock your removable storage devices
such as a USB ash disk and a CD/DVD disk, which ensures more security for
your data.
To lock a device:
1. If you are using AI Security for the rst time, key in a password that consists
of no more than 20 letters, numbers, or symbols.
2 Conrm your password.
3. Key in your password hint (optional).
4. Click OK.
5. Select the device you want to lock, then click Apply.
Book 1.indb 27 9/24/08 5:04:26 PM
Page 29
28 Chapter 2: Getting started
English
6. Key in your password, then click OK. The device you selected cannot be
accessed without the password.
To unlock a device:
1. Deselect the device you locked, then click Apply.
2. Key in your password, then click OK.
To change your password, click Change Password and follow the screen
instructions.
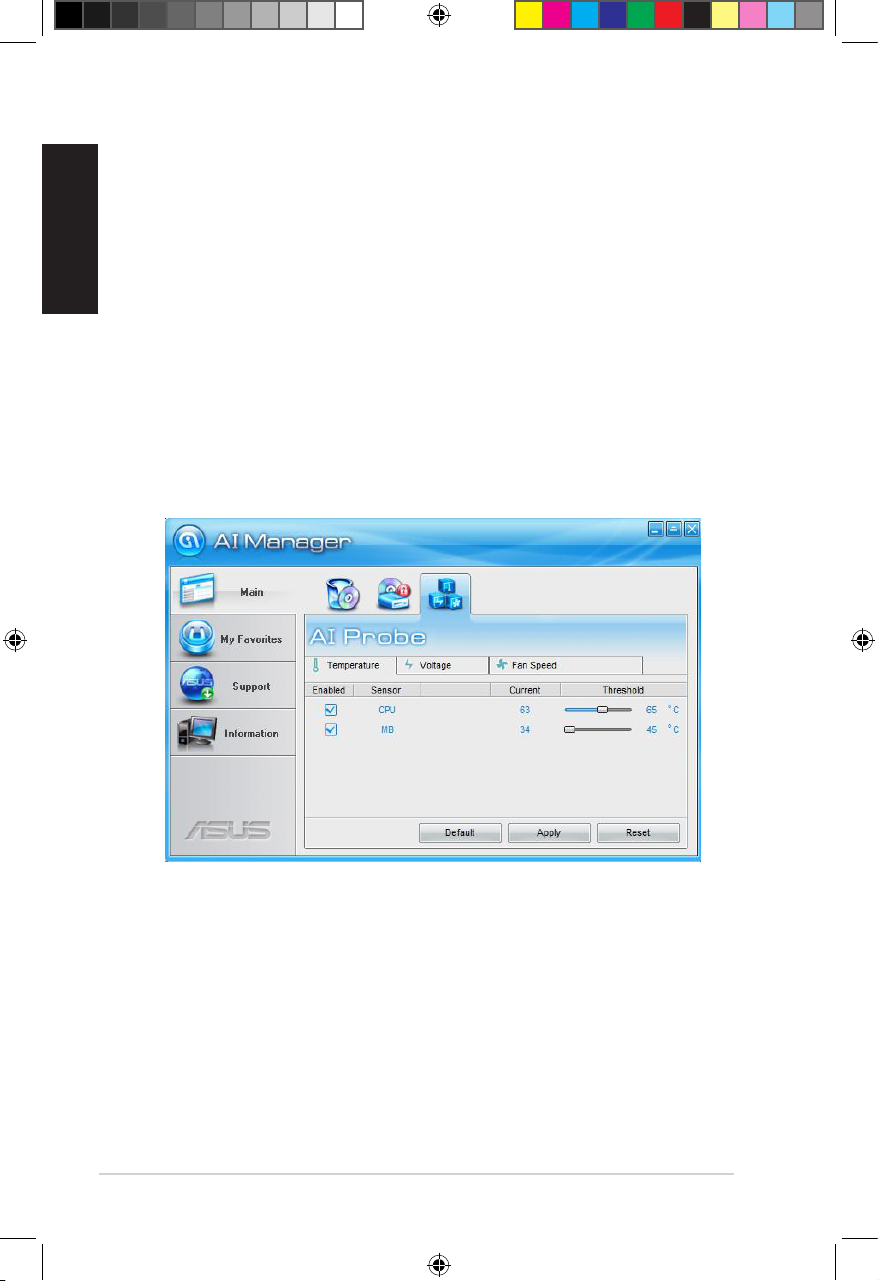
AI Probe
AI Probe automatically detects the motherboard and CPU temperatures, CPU fan
speed, and CPU voltage. It also allows you to adjust these values manually.
Book 1.indb 28 9/24/08 5:04:26 PM
Page 30
ASUS Essentio ES5000/ES5000-P 29
English
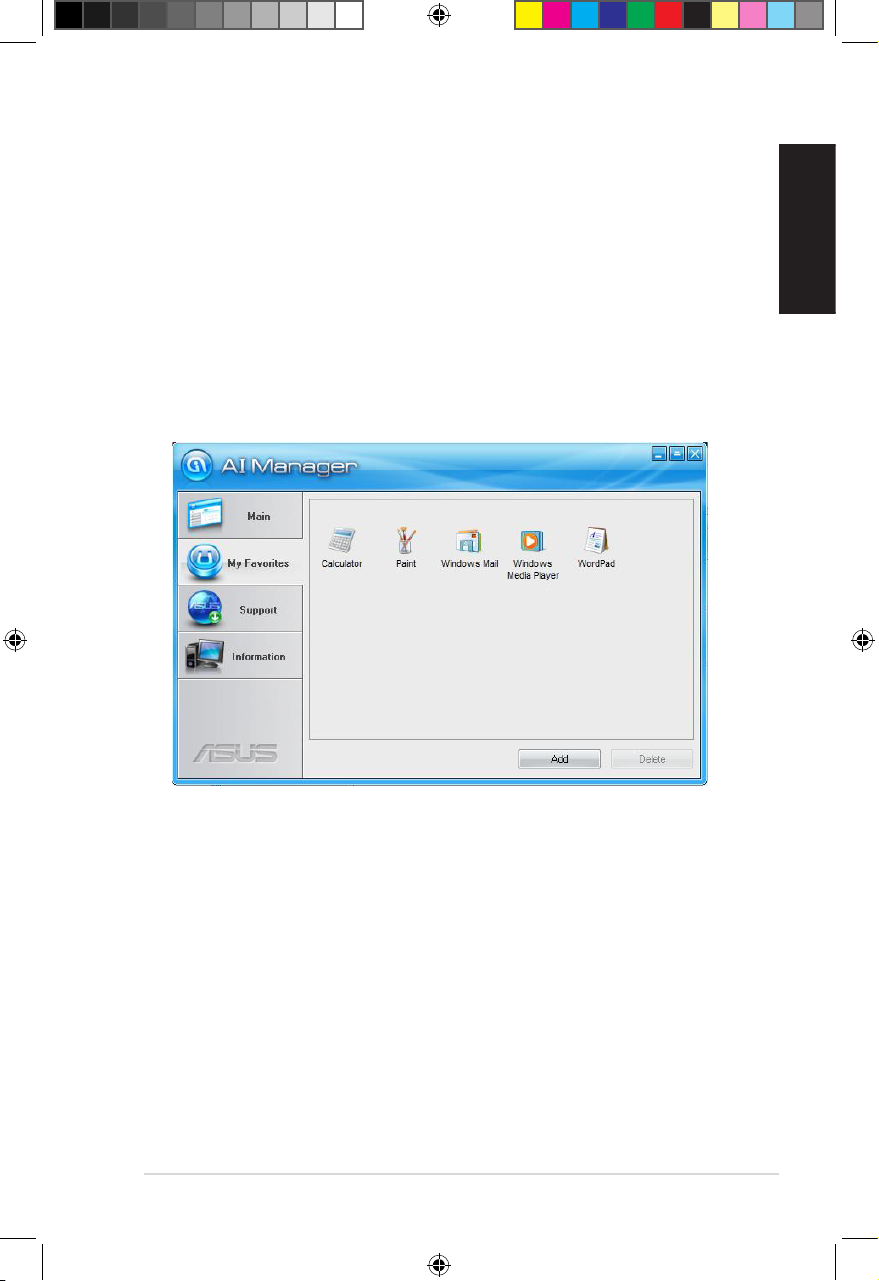
2.4.5 My favorites
Add your favorite applications to the My Favorites menu.
To add an application:
1. Click Add and then select from the succeeding screen the application you
want to add to the My Favorites menu.
2. Click Open. The application you selected is added and its icon appears.
Right-click an icon in the My Favorites menu to open, delete, or rename the
corresponding application.
Double-click an icon to open the corresponding application.
Book 1.indb 29 9/24/08 5:04:26 PM
Page 31

30 Chapter 2: Getting started
English
2.4.6 Support
The Support menu displays links to the ASUS international website, online
technical support website, online download support website, and contact
information website.
2.4.7 Information
The Information menu displays the general information of your system,
motherboard, CPU, BIOS, memory, and other devices installed.
Book 1.indb 30 9/24/08 5:04:27 PM
Page 32

ASUS Essentio ES5000/ES5000-P 31
English
2.6 Recovery CD (optional)
The ASUS PC Recovery CD assists you in reinstalling the OS and restoring it to its
original working state. Before using the recovery CD, copy your data les to a USB
ash disk or to a network drive and make note of any customized conguration
settings such as network settings.
The ASUS PC Recovery CD is for ASUS Desktop PC only. DO NOT use it on
other systems. Visit the ASUS website at www.asus.com for any updates.
2.6.1 Recovering a Windows® XP OS
To recover a Windows XP OS:
1. Insert the rst Recovery CD into the optical disk drive. Press <F8> when the
ASUS logo appears . Select the optical drive as the boot device.
2. Select Recover system to a partition or Recovery system to entire HD.
Click Next.
3. A conrmation screen pops up. Click Next to conrm.
4. Check I accept from the succeeding screen and click Next.
5. A list displays the contents you are going to recover. Click Yes to conrm.
The recovery process starts.
6. Insert the second Recovery CD, then click OK.
7. Insert the Support DVD, then click OK. The system restarts.
8. After the system reboots, the Windows XP will begin system congurations.
Follow the onscreen instructions to complete the process, and then restarts
the system. Adjust the screen to a suitable display resolution.
2.5 Loading the initial OS default settings
If you want to load the initial default settings for your system, press <F3> during the
Power-On Self-Test (Post).
The availability of the ASUS PC Recovery CD depends on the desktop PC you
purchased. Check with your supplier for exact offers.
Book 1.indb 31 9/24/08 5:04:27 PM
Page 33

32 Chapter 2: Getting started
English
The ASUS PC Recovery CD is for ASUS Desktop PC only. DO NOT use it on
other systems. Visit the ASUS website at www.asus.com for any updates.
2.6.2 Recovering a Windows® Vista OS
To recover a Windows Vista OS:
1. Turn on your ASUS Desktop PC and press F8 when the ASUS logo appears.
2. Insert the recovery CD into the optical drive when a Please select boot
device menu appears. Select the optical drive as the boot device and then
press Enter to continue.
3. After the system reboots, an ASUS Preload window appears. Press Next to
continue.
4. Select where to install a new system. Options are:
Recover Windows to rst partition only:
This option deletes only the rst partition, allows you to keep other
partitions, and creates a new system partition as drive “C”.
Recover Windows to entire HD:
This option deletes all partitions from your hard disk and creates a new
system partition as drive “C”.
Recover Windows to entire HD with 2 partitions:
This option deletes all partitions from your hard disk and creates two new
system partitions. The rst partition takes up 60% of the whole hard disk
size and the second partition takes up 40%. The new system is installed in
the rst partition. You can back up your data in the second partition.
5. When a window appears querying Are you sure you want to recover now,
click Finish. The process percentage is displayed on the screen.
6. When Recovery nish message appears, click OK and the system restarts.
After it restarts, follow the onscreen instructions to complete the system
congurations.
If you want to recover the system from the hidden partition, press F9 when the
ASUS logo appears. Then follow the instructions 3-6 below.
Book 1.indb 32 9/24/08 5:04:28 PM
Page 34

ASUS Essentio ES5000/ES5000-P 33
English
2.7 Easy DVB-T Tuner (Optional)
Connecting the device
The Easy DVB-T Tuner receives the Digital Video Broadcasting-Terrestrial (DVB-T)
channels carried at the Very High Frequency (VHF) and the Ultra High Frequency
(UHF) bands according to the ofcial technical standard applied to most countries
where the DVB-T is broadcasted.
The type of connection to use depends on the type of adapter used. The following
two basic connections are for ordinary conditions. Consult your dealer for the right
adapter.
Using the outdoor antenna
1. Connect the antenna cable’s terminal to the MCX-to-IEC adapter’s IEC
terminal.
2. Connect the adapter’s MCX terminal to the antenna port at the bottom of the
Easy DVB-T Tuner.
3. Connect the Easy DVB-T Tuner to the USB port on your desktop PC or
laptop.
DCIN
S/PDIF
HDMI
2.0 2.0
US B 2. 0
1
2
3
Book 1.indb 33 9/24/08 5:04:35 PM
Page 35

34 Chapter 2: Getting started
English
Installing the device driver
To install the device driver:
1. Connect the Easy DVB-T Tuner to the USB port of your desktop PC or
laptop.
2. Your computer system automatically
detects the connected device. Click
Cancel from the pop-up message.
Using the indoor antenna
1. Connect the indoor antenna to the antenna port at the bottom of the Easy
DVB-T Tuner.
2. Connect the Easy DVB-T Tuner to the USB port of your desktop PC or
laptop.
For some conditions, the TV signal may be blocked off by buildings. To get a
better signal reception, put the antenna near the window or towards an area
with a skyline, or in the direction pointing to the transmitter if its position is
already known. The antenna base is made of magnetic material. Placing the
antenna base on a metallic material can also improve the reception.
DCIN
S/PDIF
HDMI
2.0 2.0
US B 2. 0
1
2
Book 1.indb 34 9/24/08 5:04:37 PM
Page 36

ASUS Essentio ES5000/ES5000-P 35
English
3. Insert the bundled support CD into the optical drive. When the setup screen
appears, click Install the Tuner Driver.
4. Follow the Installation Wizard to complete the installation process. A progress
bar or the driver installing message pops up to indicate the installation
progress.
5. Click Finish when the installation is completed.
Ensure that the Easy DVB-T Tuner is connected to your computer when
installing the driver.
Book 1.indb 35 9/24/08 5:04:37 PM
Page 37

Italiano
Essentio
ES5000/ES5000-P
ASUS Desktop PC
Manuale Utente
®
Book 1.indb 36 9/24/08 5:04:39 PM
Page 38

37
Italiano
Copyright © 2008 ASUSTeK COMPUTER INC. Tutti i Diritti Riservati.
Alcuna parte di questo manuale, compresi i prodotti e i software in esso descritti, può essere
riprodotta,trasmessa, trascritta, archiviata in un sistema di recupero o tradotta in alcuna lingua, in alcuna
forma e in alcun modo, fatta eccezione per la documentazione conservata dall’ acquirente a scopi di backup,
senza l’ espressa autorizzazione scritta di ASUSTeK COMPUTER INC. (“ASUS”).
L’assistenza o la garanzia del prodotto non sarà valida nei seguenti casi: (1) il prodotto è stato riparato,
modicato o alterato, salvo che tale riparazione,modica o alterazione non sia autorizzata per iscritto da
ASUS; o (2) il numero di serie del prodotto manchi o sia stato reso illeggibile.
ASUS FORNISCE QUESTO MANUALE ”COSI’ COM’E’ ”, SENZA GARANZIA DI ALCUN TIPO, ESPLICITA
O IMPLICITA, INCLUDENDO SENZA LIMITAZIONE LE GARANZIE O CONDIZIONI IMPLICITE DI
COMMERCIABILITA’ O IDONEITA’ A UN PARTICOLARE SCOPO. IN NESSUN CASO ASUS, I SUOI
DIRIGENTI, FUNZIONARI, IMPIEGATI O DISTRIBUTORI SONO RESPONSABILI PER QUALSIASI DANNO
INDIRETTO, PARTICOLARE, ACCIDENTALE O CONSEGUENTE (COMPRESI DANNI DERIVANTI DA
PERDITA DI PROFITTO, PERDITA DI CONTRATTI,PERDITA D’USO O DI DATI, INTERRUZIONE DELL’
ATTIVITA’ E SIMILI), ANCHE SE ASUS E’ STATA AVVISATA DELLA POSSIBILITA’ CHE TALI DANNI SI
POSSANO VERIFICARE IN SEGUITO A QUALSIASI DIFETTO O ERRORE NEL PRESENTE MANUALE
O NEL PRODOTTO .
LE SPECIFICHE E LE INFORMAZIONI CONTENUTE IN QUESTO MANUALE SONO FORNITE A SOLO USO
INFORMATIVO E SONO SOGGETTE A CAMBIAMENTI IN QUALSIASI MOMENTO, SENZA PREAVVISO,
E NON POSSONO ESSERE INTERPRETATE COME UN IMPEGNO DA PARTE DI ASUS. ASUS NON SI
ASSUME ALCUNA RESPONSABILITA’ E NON SI FA CARICO DI NESSUN ERRORE O INESATTEZZA CHE
POSSA COMPARIRE IN QUESTO MANUALE, COMPRESI I PRODOTTI E I SOFTWARE CONTENUTI AL
SUO INTERNO.
I prodotti e nomi delle aziende che compaiono in questo manuale possono o meno essere marchi registrati
o diritti d’ autore delle rispettive aziende, e sono usati solo a scopo identicativo o illustrativo a benecio
dell’ utente, senza alcuna intenzione di violazione dei diritti di alcuno.
I3812
Prima Edizione V1
Agosto 2008
Book 1.indb 37 9/24/08 5:04:39 PM
Page 39

38
Italiano
Condizioni e Limiti di Copertura
della Garanzia sul Prodotto
Le condizioni di garanzia variano a seconda del tipo di prodotto e sono specicatamente
indicate nel Certicato di Garanzia allegato, cui si fa espresso rinvio.
Inoltre la presente garanzia non è valida in caso di danni o difetti dovuti ai seguenti
fattori: (a) uso non idoneo, funzionamento o manutenzione improprio, incluso
senza limitazioni l’ utilizzo del prodotto con una nalità diversa da quella conforme
alle istruzioni di ASUSTeK COMPUTER INC. in merito all’ idoneità di utilizzo e alla
manutenzione; (b) installazione o utilizzo del prodotto in modo non conforme aglli
standard tecnici o di sicurezza vigenti nell’ Area Economica Europea e in Svizzera;
(c) collegamento a rete di alimentazione con tensione non corretta; (d) utilizzo del
prodotto con accessori di terzi, prodotti o dispositivi ausiliari o periferiche; (e) tentativo
di riparazione effettuato da una qualunque terza parte diversa dai centri di assistenza
ASUSTeK COMPUTER INC. autorizzati; (f) incidenti,fulmini,acqua, incendio o
qualsiasi altra causa il cui controllo non dipende da ASUSTeK COMPUTER INC.;
abuso, negligenza o uso commerciale.
La presente Garanzia non è valida per l’ assistenza tecnica o il supporto per l’
utilizzo del prodotto, compreso l’ utilizzo dell’ hardware o del software. L’ assistenza
e il supporto disponibili (se previsti), nonchè le spese e gli altri termini relativi all’
assistenza e al supporto (se previsti) verranno specicati nella documentazione
destinata al cliente fornita a corredo con il Prodotto.
E’ responsabilità dell’ utente, prima ancora di richiedere l’ assistenza, effettuare il
backup dei contenuti presenti sul Prodotto, inclusi i dati archiviati o il software installato
nel prodotto. ASUSTeK COMPUTER INC. non è in alcun modo responsabile per
qualsiasi danno, perdita di programmi, dati o altre informazioni archiviate su qualsiasi
supporto o parte del prodotto per il quale viene richiesta l’ assistenza; ASUSTeK
COMPUTER INC.non è in alcun modo responsabile delle conseguenze di tali danni
o perdite, incluse quelle di attività, in caso di malfunzionamento di sistema, errori di
programmi o perdita di dati.
E’ responsabilità dell’ utente, prima ancora di richiedere l’ assistenza, eliminare
eventuali funzioni, componenti, opzioni, modiche e allegati non coperti dalla presente
Garanzia, prima di far pervenire il prodotto a un centro servizi ASUSTeK COMPUTER
INC. ASUSTeK COMPUTER INC. non è in alcun modo responsabile di qualsiasi
perdita o danno ai componenti sopra descritti.
ASUSTeK COMPUTER INC. non è in alcun modo responsabile di eliminazioni,
modiche o alterazioni ai contenuti presenti sul Prodotto compresi eventuali dati o
applicazioni prodottesi durante le procedure di riparazione del Prodotto stesso. Il
Prodotto verrà restituito all’ utente con la congurazione originale di vendita, in base
alle disponibilità di software a magazzino.
Book 1.indb 38 9/24/08 5:04:39 PM
Page 40

39
Italiano
Licenza Software
I prodotti ASUS possono essere corredati da software, secondo la tipologia del
prodotto. I software, abbinati ai prodotti, sono in versione “OEM”: il software OEM
viene concesso in licenza all’ utente nale, come parte integrante del prodotto; ciò
signica che non può essere trasferito ad altri sistemi hardware e che, in caso di
rottura, di furto o in ogni altra situazione che lo renda inutilizzabile, anche la possibilità
di utilizzare il prodotto OEM viene compromessa.
Chiunque acquisti, unitamente al prodotto, un software OEM, è tenuto ad osservare i
termini e le condizioni del contratto di licenza tra il proprietario del software e l’ utente
nale, denominato “EULA” (End User Licence Agreement), visualizzato a video,
durante la fase di installazione del software stesso. Si avvisa che l’ accettazione, da
parte dell’ utente, delle condizioni dell’ EULA, ha luogo al momento dell’ installazione
del software stesso.
Book 1.indb 39 9/24/08 5:04:39 PM
Page 41

40
Italiano
Contatti ASUS
ASUSTeK COMPUTER INC.
Indirizzo 15 Li-Te Road, Peitou, Taipei, Taiwan 11259
Telefono +886-2-2894-3447
Fax +886-2-2890-7798
E-mail info@asus.com.tw
Sito Web www.asus.com.tw
Supporto Tecnico
Telefono +86-21-38429911
Supporto Online support.asus.com
ASUS COMPUTER INTERNATIONAL (America)
Indirizzo 800 Corporate Way, Fremont, California 94539, USA
Telefono 001-510-739-3777
Fax +1-510-608-4555
Sito Web usa.asus.com
Supporto Tecnico
Indirizzo +1-812-282-2787
Fax di Supporto +1-812-284-0883
Supporto Online support.asus.com
ASUS COMPUTER GmbH (Germania e Austria)
Indirizzo Harkortstr. 21-23, 40880 Ratingen, Germany
Telefono +49-01805-010923
Fax +49-02102-9599-11
Sito Web www.asus.de
Contatto Online www.asus.de/sales
Supporto Tecnico
Telefono +49-01805-010923
Fax di Supporto +49-02102-9599-11
Supporto Online support.asus.com
ASUS ITALY S.r.l (Italia)
Indirizzo: Centro Direzionale Villa Fiorita Palazzo B
Via Piero Gobetti 2/B; 20063 Cernusco sul Naviglio (MI)
Helpdesk Commerciale 199-400089
Indirizzo Web www.asus.it
Email Informazioni info@asus.it
Supporto Tecnico
Helpdesk e Supporto 199-400089
Supporto Online http://vip.asus.com/eservice/techserv.aspx
Fax di Supporto +39-02-20240555
Book 1.indb 40 9/24/08 5:04:40 PM
Page 42

41
Italiano
Comunicazioni
Federal Communications Commission Statement
This device complies with Part 15 of the FCC Rules. Operation is subject to the
following two conditions:
•
This device may not cause harmful interference, and
•
This device must accept any interference received including interference that
may cause undesired operation.
This equipment has been tested and found to comply with the limits for a Class B
digital device, pursuant to Part 15 of the FCC Rules. These limits are designed to
provide reasonable protection against harmful interference in a residential installation.
This equipment generates, uses and can radiate radio frequency energy and, if not
installed and used in accordance with manufacturer’s instructions, may cause harmful
interference to radio communications. However, there is no guarantee that interference
will not occur in a particular installation. If this equipment does cause harmful
interference to radio or television reception, which can be determined by turning the
equipment off and on, the user is encouraged to try to correct the interference by one
or more of the following measures:
•
Reorient or relocate the receiving antenna.
•
Increase the separation between the equipment and receiver.
•
Connect the equipment to an outlet on a circuit different from that to which the
receiver is connected.
•
Consult the dealer or an experienced radio/TV technician for help.
Canadian Department of Communications Statement
This digital apparatus does not exceed the Class B limits for radio noise emissions
from digital apparatus set out in the Radio Interference Regulations of the Canadian
Department of Communications.
This class B digital apparatus complies with Canadian ICES-003.
The use of shielded cables for connection of the monitor to the graphics card is
required to assure compliance with FCC regulations. Changes or modications
to this unit not expressly approved by the party responsible for compliance could
void the user’s authority to operate this equipment.
Book 1.indb 41 9/24/08 5:04:41 PM
Page 43

42
Italiano
Informazioni in materia di Sicurezza
Sicurezza Elettrica
•
Prima di spostare il sistema, scollegare il cavo di alimentazione dalla presa
elettrica, per evitare il rischio di scosse elettriche.
• Durante l’ aggiunta o la rimozione di periferiche al o dal sistema, contattare un
tecnico qualicato o il rivenditore per assistenza. Prima di aggiungere o rimuovere
un dispositivo al/dal sistema, assicurarsi che tutti i cavi di alimetazione siano stati
scollegati.
•
In caso di guasto al cavo di alimentazione, non tentare di ripararlo da sè. Contattare
un tecnico qualicato o il rivenditore.
Avvertenza Batteria Ioni-Litio
ATTENZIONE: Pericolo di esplosione se la batteria non è stata sostituita in
modo corretto. Sostituire soltanto con un tipo uguale o equivalente a quello
raccomandato dal produttore. Eliminare le batterie usate nel rispetto delle
disposizioni del produttore.
VORSICHT: Explosionsgetahr bei unsachgemäßen Austausch der Batterie.
Ersatz nur durch denselben oder einem vom Hersteller empfohlenem
ähnljchen Typ. Entsorgung gebrauchter Batterien nach Angaben des
Herstellers.
AVVERTENZA PER PRODOTTI LASER
PRODOTTO LASER DI CLASSE 1
Sicurezza Operativa
• Prima di installare dispositivi sulla scheda madre, leggere con attenzione il
manuale presente nella confezione.
• Prima di utilizzare il prodotto, assicurarsi che tutti i cavi siano collegati correttamente
e che i cavi di alimentazione non siano danneggiati. In caso contrario, contattare
immediatamente il rivenditore.
• Per evitare corto circuiti, tenere graffette, viti e chiodi lontani da connettori, slot,
prese e circuiti.
• Evitare polvere, umidità e temperature estreme.Non mettere il prodotto dove
potrebbe venire a contatto con acqua.Collocare il prodotto su una supercie
stabile.
• Durante l’ utilizzo del prodotto, non ostruire i fori di aerazione del telaio.
• Temperatura ambiente max.: 35ºC.
• In caso di problemi tecnici con il prodotto, contattare personale tecnico qualicato
o il rivenditore.
Book 1.indb 42 9/24/08 5:04:41 PM
Page 44

43
Italiano
Precauzioni Generali
Prima di utilizzare ASUS Essentio ES5000/ES5000-P Desktop PC, leggere
attentamente le precauzini generali indicate di seguito. Un utilizzo non corretto
potrebbe causare lesioni siche o danneggiare il prodotto.
• Prima di utilizzare il prodotto, assicurarsi che tutti i componenti siano stati
correttamente installati e tutti i cavi sino correttamente collegati.
In caso di danni,contattare immediatamente il rivenditore.
• Evitare polvere e temperature estreme. Non collocare il prodotto in aree dove
potrebbe essere esposto alla luce diretta del sole.
• Tenere il prodotto in un luogo asciutto. Gocce d’acqua, umidità e sostenza liquide
potrevvero contenere minerali e danneggiare il circuito.
• Lasciare spazio sufficiente intorno al prodotto, per fornire un’ adeguata
ventilazione.Altrimenti, potrebbe surriscaldarsi.
• Prima di accendere il sistema, controllare che tutte le periferiche siano state
correttamente collegate..
• Evitare di mangiare quando si è al computer. Il cibo potrebbe contaminare i
componenti e causare il malfunzionamento del sistema.
• Per evitare corto circuiti, tenere ferraglia, viti e li lontani da connettori, slot, prese
e circuiti.
• Non mettere niente all’ interno dei componenti. Altrimenti, potrebbero vericarsi
corto circuiti o danni al circuito.
• Se il computer è stato utilizzato per un lungo tempo, evitare il contatto diretto con i
dissipatori e le superci di IC, poichè potrebbero diventare molto calde. Vericare
che il sistema abbia un’ adeguata ventilazione.
• Prima di aggiungere o rimuovere una periferica al/dal sistema, assicurarsi di aver
disinserito i cavi di alimentazione.
• Se l’ unità di alimentazione è guasta, non tentare di ripararla da soli. Contattare
un tecnico qualicato o il rivenditore.
• Anche se l’ intelaiatura del sistema è stata realizzata in modo elaborato per
proteggere dai graf, fare attenzione con i bordi e le estremità appuntite. Indossare
un paio di guanti prima di rimuovere o sostituire la copertura del sistema.
• Quando non è necessario utilizzare il computer per molto tempo, arrestare il
sistema e disinserire i cavi di alimentazione.
• E’ consigliabile utilizzare il prodotto a temperature non superiori a 35ºC.
• Avvertenza: Assicurarsi di sostituire la batteria con un tipo corretto, per evitare
il rischio di esplosione.
Book 1.indb 43 9/24/08 5:04:41 PM
Page 45

44
Italiano
Informazioni sul Manuale
Come è organizzato il manuale
Il manuale è suddiviso nelle seguenti parti:
1. Capitolo 1: Introduzione del Sistema
Questo capitolo fornisce una descrizione generale del desktop PC ASUS
Essentio ES5000/ES5000-P Desktop PC e delle caratteristiche del sistema,
compreso il pannello frontale e posteriore.
2. Capitolo 2: Installazione e Utilizzo
Questo capitolo illustra le modalità di accensione del sistema e di installazione
di driver e utilità dal DVD di Supporto.
Questo manuale fornisce informazioni generali su ASUS Essentio ES5000/ES5000P Desktop PC e le istruzioni su come utilizzare il DVD di Supporto, compreso nella
confezione del sistema. Il manuale si rivolge ad utenti esperti con una conoscenza
dell’ hardware dei personal computer.
Book 1.indb 44 9/24/08 5:04:41 PM
Page 46

45
Italiano
Simboli Convenzionali Utilizzati nel Manuale
Per essere sicuri di svolgere correttamente determinate operazioni, ricordare i seguenti
simboli, ricorrenti nel manuale.
AVVERTENZA: Informazioni per evitare di farsi male, nel
tentativo di completare un’ operazione.
ATTENZIONE: Informazioni per evitare danni ai componenti nel
tentativo di completare un’ operazione.
IMPORTANTE: Istruzioni da seguire OBBLIGATORIAMENTE per
completare un’ operazione.
NOTA: Suggerimenti e informazioni aggiuntive utili per completare un’
operazione.
Ulteriori Approfondimenti
Riferirsi alle seguenti fonti per informazioni aggiuntive e per gli aggiornamenti per
prodotti e software.
1. Siti Web ASUS
Il sito web ASUS fornisce informazioni aggiornate su hardware e software ASUS.
Riferirsi alla sezione Contatti ASUS.
2. Documentazione Opzionale
Nella confezione del prodotto può essere inserita della documentazione
opzionale aggiunta dal rivenditore.Tale documentazione non fa parte della
confezione standard.
Book 1.indb 45 9/24/08 5:04:43 PM
Page 47

46
Italiano
Contenuto della Confezione del Sistema
Controllare che nella confezione del sistema Essentio ES5000/ES5000-P siano
contenuti i seguenti articoli:
Articoli Standard
1. ASUS Essentio ES5000/ES5000-P Desktop PC con
• ASUS Desktop PC x 1
• Piedistallo x 1
• Mouse x 1
• Tastiera x 1
2. Cavi
• Cavo di alimentazione AC x 1
3. Accessori
• Adattatore di corrente AC x 1
• Tappetino per il Mouse x 1
4. DVD di Supporto x 1
5. Manuale Utente x 1
6. Certicato di Garanzia x 1
• In caso di articoli danneggiati o mancanti, contattare immediatamente il
rivenditore.
• Le speciche dipendono dal desktop PC acquistato. Controllare l’ esatta
tipologia con il rivenditore.
Book 1.indb 46 9/24/08 5:04:44 PM
Page 48

Capitolo 1
Introduzione del Sistema
Questo capitolo fornisce una descrizione
gen e rale del des ktop PC e del le
caratteristiche del sistema, compreso il
pannello frontale e posteriore.
Book 1.indb 47 9/24/08 5:04:45 PM
Page 49

48 Capitolo 1: Introduzione del Sistema
Italiano
1.1 Pannello Frontale
ASUS Essentio ES5000/ES5000-P Desktop PC comprende una scheda madre
ASUS, un’ unità di alimentazione, un pannello frontale ed un pannello posteriore.
Tutti questi componenti sono integrati in un’ elaborata intelaiatura del sistema,
progettata da ASUS.
Le illustrazioni sottostanti mostrano il pannello frontale con i rispettivi componenti.
5
3
1
4
2
6
E-SATA
9
10
8
7
Chiuso
Aperto
1. Unità Ottica Slot-in (ODD). Inserire il disco ottico nello slot con il lato dell’
etichetta rivolto verso sinistra.
2. Pulsante di Espulsione del Disco Ottico . Premere questo pulsante per
espellere un disco ottico.
3. Copertura del Pannello Frontale . Tirare verso l’ esterno per aprire la
copertura del pannello frontale. Al suo interno si trovano due porte USB 2.0,
una porta E-SATA, una porta per il microfono ed una porta per le cufe.
4. LED di Rete . Questo LED si illumina quando si stabilisce una connessione
di rete via cavo/senza cavo nel sistema.
5. LED Disco Rigido (HDD) . Questo LED si illumina in fase di lettura o scrittura
dati sul dico rigido.
6. Pulsante di Accensione . Premere questo pulsante per attivare il sistema.
7. Porte USB 2.0
2.0
. Queste porte USB 2.0 (Universal Serial Bus 2.0) sono
predisposte per la connessione con dispositivi USB 2.0, quali mouse, stampanti,
scanner, fotocamere, PDA ed altri ancora.
8. Porta E-SATA
E-SATA
. Porta per la connessione di un disco rigido esterno
Serial ATA.
Book 1.indb 48 9/24/08 5:04:49 PM
Page 50

49ASUS Essentio ES5000/ES5000-P
Italiano
1.2 Pannello Posteriore
Il pannello posteriore del sistema comprende una porta per l’ ingresso dell’
alimentazione e numerose porte I/O, che consentono di collegare facilmente vari
dispositivi.
L’ illustrazione sottostante mostra il pannello posteriore e i rispettivi componenti.
1. Fori per la ventilazione.
3
1
2
5
4
6
7
9
10
8
12
11
NON ostruire i fori per la ventilazione sul pannello superiore e posteriore del telaio
del sistema. In mancanza di un’ adeguata ventilazione, i componenti all’ interno
del telaio potrebbero surriscaldarsi e guastarsi.
2. Porta S/PDIF Out Ottica. Porta per la connessione di un dispositivo esterno
per l’ uscita audio, mediante un cavo ottico S/PDIF.
3. Porta Tastiera PS/2 . Porta per una tastiera PS/2.
4. Porta LAN (RJ-45) . Porta per la connessione Fast Ethernet ad una LAN (Local
Area NetworK) tramite hub di rete.
9. Porta Cufe (lime) . Porta per la connessione delle cufe.
10. Porta Microfono (rosa) . Porta per la connessione di un microfono.
Book 1.indb 49 9/24/08 5:04:52 PM
Page 51

50 Capitolo 1: Introduzione del Sistema
Italiano
Congurazione Audio a 2, 4 o 6 Canali
Porta Cufe 2-canali 4-canali 6-canali
Blu Chiaro
Line In Uscita Altop. Posteriore Uscita Altop. Posteriore
Lime
Line Out Uscita Altop. Frontale Uscita Altop. Frontale
Rosa
Mic In Mic In Basso/Centrale
5. Porta per Lucchetto Kensington® . Questa porta permette di ssare il PC
ad un oggetto, tramite prodotti di sicurezza compatibili Kensington
®
.
6. Porta Line In (blu chiaro). Porta per la connessione con registratori, lettori
CD/DVD o altre sorgenti audio.
7. Porta Line Out (lime). Porta per la connessione di cufe o altoparlanti. In una
congurazione a 4 o a 6 canali, questa porta funziona da Uscita Altoparlante
Frontale.
8. Porta Microfono (rosa) . Porta per la connessione di un microfono.
Fare riferimento alla sottostante tabella per la funzione delle porte audio in
congurazioni a 2, 4 o 6 canali.
9. Porta ingresso DC IN. Porta per la connessione di una spina per l’ uscita DC
di un adattatore di corrente AC.
10. Porte USB 2.0
2.0
. Queste porte USB 2.0 (Universal Serial Bus 2.0) sono
predisposte per la connessione con dispositivi USB 2.0, quali mouse, stampanti,
scanner, fotocamere, PDA ed altri ancora.
11. Porta VGA (Video Graphics adapter) . Porta per la connessione di un
monitor VGA o di altri dispositivi compatibili VGA.
12. Porta HDMI . Porta per connettore HDMI (High-Denition Multimedia
Interface).Compatibile con HDCP, per la riproduzione di HD DVD, Blu-Ray e
altro contenuto protetto.
Indicazioni LED della Porta LAN
Porta LAN
VEL.
LED
ACT/LINK
LED
LED Attività/Collegamento Velocità LED
Stato Descrizione Stato Descrizione
SPENTO
No collegam
SPENTO
Connessione 10 Mbps
ARANCIONE
Collegato
ARANCIONE
Connessione 100 Mbps
LAMPEGG.
Attività dati
VERDE
Connessione 1 Gbps
Book 1.indb 50 9/24/08 5:04:54 PM
Page 52

51ASUS Essentio ES5000/ES5000-P
Italiano
1.3 Opzioni di Posizionamento
1.3.1 Posizionamento Orizzontale
Porre il desktop PC in senso orizzontale.
1.3.2 Posizionamento Verticale
Installare il piedistallo fornito nella confezione del sistema e porre il desktop PC in
senso verticale.
Per installare il piedistallo:
1. Individuare il foro per la vite sul lato inferiore del desktop PC.
2. Fissare il piedistallo al desktop PC con la vite in dotazione.
Book 1.indb 51 9/24/08 5:04:55 PM
Page 53

52 Capitolo 1: Introduzione del Sistema
Italiano
1.4 Connessione con Tastiera e Mouse
ASUS Essentio ES5000/ES5000-P Desktop PC è provvisto di una tastiera PS/2 e di
un mouse USB. Collegare la tastiera PS/2 all’ apposita porta sul pannello posteriore.
Collegare il mouse alla porta USB sul pannello frontale o posteriore.
1.5 Connessione con Altre Periferiche
ASUS Essentio ES5000/ES5000-P Desktop PC è provvisto di un certo numero di porte
I/O sul pannello frontale e posteriore, dove collegare le periferiche al sistema.
Fare riferimento all’ illustrazione sottostante per i particolari.
Prima di collegare una periferica al sistema, consultare la documentazione fornita
con il dispositivo, o direttamente il fornitore, per informazioni sulle modalità di
installazione.
Jack alimentazione
USB
VGA
HDMI
Microfono
Line Out
Line In
RJ-45
Tastiera PS/2
S/PDIF Out
Con tastiera o mouse wireless USB, fare riferimento alla documentazione fornita
con il dispositivo o contattare direttamente il fornitore per informazioni sulle modalità
di congurazione.
Book 1.indb 52 9/24/08 5:05:08 PM
Page 54

Capitolo 2
Installazione e Utilizzo
Questo capitolo illustra le modalità di
accensione del sistema e di installazione
di driver e utilità dal DVD di Supporto.
Book 1.indb 53 9/24/08 5:05:09 PM
Page 55

54 Capitolo 2: Installazione e Utilizzo
Italiano
2.1 Installazione di un Sistema Operativo
Questa scheda madre supporta i sistemi operativi Windows® XP/Vista. Installare
sempre la versione più recente del sistema operativo ed i relativi aggiornamenti
per massimizzare le funzionalità dell’ hardware. Quando si avvia per la prima
volta, il sistema rileva automaticamente il chip audio e graco e tenta di installare
i driver forniti con il sistema operativo. Selezionare NO all’ apparire del messaggio
di richiesta di riavvio del sistema. Installare i driver, attenendosi alle istruzioni dei
paragra seguenti.
2.2 Accensione del Sistema
Per accendere il sistema, premere il pulsante di accensione .
• Per essere sicuri che il sistema operativo funzioni correttamente, installare i
driver contenuti nel DVD di Supporto.
• Le impostazioni della scheda madre e le opzioni hardware possono subire
variazioni.Attenersi alla procedura di installazione descritta in questo
capitolo solo come riferimento. Per informazioni dettagliate, consultare la
documentazione del sistema operativo.
Premere qui per ACCENDERE
il sistema
Book 1.indb 54 9/24/08 5:05:12 PM
Page 56

ASUS Essentio ES5000/ES5000-P 55
Italiano
Se nel computer NON è attivata la funzione di esecuzione automatica, sfogliare il
contenuto del DVD di Supporto per individuare il le ASSETUP.EXE dalla cartella
BIN. Cliccare due volte ASSETUP.EXE per eseguire il DVD.
Cliccare sull’ elemento da installare
2.3.1 Esecuzione del DVD di Supporto
Porre il DVD di Supporto nell’ unità ottica. Se nel computer è attivata la funzione di
esecuzione automatica, il DVD visualizza automaticamente il menu Drivers.
Cliccare su un’ icona
per visualizzare
informazioni sulla
scheda madre/ DVD
di Supporto
2.3 Informazioni sul DVD di Supporto
Nel DVD di Supporto, contenuto nella confezione del sistema, si trovano i driver, le
applicazioni software e le utilità da installare per beneciare di tutte le funzionalità
del sistema.
Il contenuto del DVD di Supporto è soggetto a modiche in qualsiasi momento,
senza obbligo di preavviso. Visitare il sito web ASUS www.asus.com per gli
aggiornamenti.
Book 1.indb 55 9/24/08 5:05:13 PM
Page 57

56 Capitolo 2: Installazione e Utilizzo
Italiano
2.3.2 Menu Drivers
Il menu Drivers mostra i driver disponibili, in caso di rilevazione dei dispositivi
installati. Installare i driver necessari per attivare i dispositivi.
ASUS InstAll - Drivers Installation Wizard
Installa ASUS InstAll-Drivers Installation Wizard.
Intel(R) Chipset Inf Update Program
Installa il programma di aggiornamento Intel® Chipset Inf Update Program.
Realtek Audio Driver
Installa il driver e l’ applicazione audio Realtek®.
ATI Display Driver
Installa il driver di visualizzazione ATI.
JMicron JMB36X Controller Driver
Installa il driver del Controller JMicron JMB36X.
ITE CIR Driver
Installa il driver ITE CIR.
Realtek RTL8111C LAN Driver
Installa il driver di Realtek RTL8111C LAN.
ASUS Wireless LAN Driver
Installa il driver di ASUS wireless LAN.
Book 1.indb 56 9/24/08 5:05:13 PM
Page 58

ASUS Essentio ES5000/ES5000-P 57
Italiano
2.3.3 Menu Utilità
Il menu Utilities (Utilità) mostra le applicazioni ed altri software supportati dalla scheda
madre. Cliccare su un elemento sullo schermo per procedere all’ installazione.
ASUS InstAll - Installation Wizard for Utilities
Installa tutte le utilità, mediante il programma di installazione guidata.
ASUS Update
Consente di scaricare la versione più aggiornata del BIOS dal sito web ASUS.
ASUS AI Manager
Installa ASUS AI Manager, da cui è possibile avviare facilmente AI Disk, AI Security
e AI Probe.
Adobe Acrobat Reader 8
Installa Adobe Acrobat Reader 8. I manuali nel DVD di Supporto sono in formato
PDF (Portable Document Format), da aprire con Adobe Acrobat Reader.
Prima di utilizzare ASUS Update, assicurarsi di avere stabilito la connessione a
Internet , in modo da poter visitare il sito web ASUS.
Book 1.indb 57 9/24/08 5:05:14 PM
Page 59

58 Capitolo 2: Installazione e Utilizzo
Italiano
2.3.4 Menu del Manuale
Nel DVD di Supporto è contenuto il manuale di Realtek HD Audio.
Il manuale è in formato PDF. Per aprirlo, installare Adobe Acrobat Reader dal
menu Utilities (Utilità).
2.3.5 Contatti ASUS
Cliccare sulla scheda Contact (Contatti) per visualizzare i contatti ASUS.
Book 1.indb 58 9/24/08 5:05:15 PM
Page 60

ASUS Essentio ES5000/ES5000-P 59
Italiano
2.3.6 Altre Informazioni
Le icone, nell’ angolo in alto a destra dello schermo, forniscono informazioni aggiuntive
sulla scheda madre e sul contenuto del DVD di Supporto. Cliccare su un’ icona per
visualizzare speciche informazioni.
Esplorazione del Contenuto del DVD
Visualizza il contenuto del DVD di Supporto in formato graco.
Informazioni sulla Scheda Madre
Visualizza le speciche della scheda madre.
Book 1.indb 59 9/24/08 5:05:16 PM
Page 61

60 Capitolo 2: Installazione e Utilizzo
Italiano
Scheda per Supporto Tecnico
Visualizza ASUS Technical Support Request Form, da compilare per richiedere l’
assistenza tecnica.
Elenco File
Visualizza il contenuto del DVD di Supporto e fornisce una breve descrizione di
ciascuno, in formato testo.
Book 1.indb 60 9/24/08 5:05:17 PM
Page 62

ASUS Essentio ES5000/ES5000-P 61
Italiano
2.4 ASUS AI Manager
ASUS AI Manager consente di avviare con facilità AI Disk, AI Security e AI Probe.
2.4.1 Installazione di AI Manager
Per installare AI Manager nel computer:
1. Porre il DVD di Supporto nell’ unità ottica. Se nel computer è attivata la funzione di
Esecuzione automatica, il DVD visualizza immediatamente il menu Drivers.
Se nel computer NON è attivata la funzione di esecuzione automatica, sfogliare il
contenuto del DVD di Supporto per individuare il le ASSETUP.EXE dalla cartella
BIN. Cliccare due volte ASSETUP.EXE per eseguire il DVD.
2. Cliccare sulla scheda Utilities e poi su ASUS AI Manager.
3. Seguire le istruzioni sullo schermo, per completare l’ installazione.
2.4.2 Avvio di AI Manager
AI Manager può essere avviato subito dopo l’ installazione o in qualsiasi momento
dal desktop Windows®.
Per avviare AI Manager dal desktop Windows®, cliccare Start > Tutti i Programmi
> ASUS > AI Manager > AI Manager v1.xx.xx. Appare la barra di accesso rapido
AI Manager.
Dopo aver avviato l’ applicazione, sulla barra delle applicazioni di Windows® appare
l’ icona AI Manager. Per ulteriori opzioni, cliccare sull’ icona con il tasto di destra del
mouse.
2.4.3 Barra di Accesso Rapido AI Manager
Cliccare sull’ icona Principale, I Miei Preferiti, Supporto o Informazioni perPrincipale, I Miei Preferiti, Supporto o Informazioni per
visualizzare i relativi menu.
Principale
I Miei Preferiti
Supporto
Informazioni
Chiudi
Ingrandisci/Ripristina
Riduci a icona
Book 1.indb 61 9/24/08 5:05:18 PM
Page 63

62 Capitolo 2: Installazione e Utilizzo
Italiano
Cliccare per passare fra la modalità a schermo intero AI Managere la barra di
accesso rapido.
Cliccare per mantenere AI Manager sulla barra delle applicazioni.
Cliccare per chiudere AI Manager.
2.4.4 Main (Principale)
Avviare AI Disk, AI Security, o AI Probe dal menu Main (Principale). Cliccare sul
triangolo piccolo per aprire o chiudere il menu.
Cliccare qui per aprire/chiudere il menu Principale
AI Disk
AI Disk permette di cancellare con facilità le temporanei IE, cookies IE, URL IE,
cronologia IE, l’ elenco dei le aperti di recente o di svuotare il cestino. Selezionare
l’ elemento da cancella re e cliccare Apply (Applica).
Book 1.indb 62 9/24/08 5:05:19 PM
Page 64

ASUS Essentio ES5000/ES5000-P 63
Italiano
AI Security
AI Security consente di impostare una password per bloccare l’ accesso a dispositiviconsente di impostare una password per bloccare l’ accesso a dispositivi
di archiviazione removibili, come ash disk USB eCD/DVD, e garantire una maggioreash disk USB e CD/DVD, e garantire una maggiore
protezione dei dati.
Per bloccare un dispositivo:
1. Quando si usa AI Security per la prima volta, si richiede l’ impostazione di una
password di max. 20 lettere, numeri o simboli.
2 Confermare la password.
3. Digitare il suggerimento per la password (opzionale).
4. Cliccare OK.
5. Selezionare il dispositivo da bloccare e cliccare Apply (Applica).
Book 1.indb 63 9/24/08 5:05:19 PM
Page 65

64 Capitolo 2: Installazione e Utilizzo
Italiano
6. Digitare la password e premere OK. In mancanza della password, non è
possibile accedere al dispositivo selezionato.
Per sbloccare un dispositivo:
1. Deselezionare il dispositivo bloccato e cliccare Apply (Applica).
2. Digitare la password e premere OK.
Per modicare la password, cliccare Change Password (Cambia Password) e
seguire le istruzioni sullo schermo.
AI Probe
AI Probe rileva automaticamente la temperatura della scheda madre e della CPU,
la velocità della ventola e il voltaggio della CPU. E’ inoltre possibile regolare i valori
manualmente.
Book 1.indb 64 9/24/08 5:05:20 PM
Page 66

ASUS Essentio ES5000/ES5000-P 65
Italiano
2.4.5 My favorites (I Miei Preferiti)
Aggiungi le applicazioni preferite al menu My Favorites (I Miei Preferiti).
Per aggiungere un’ applicazione:
1. Cliccare Add (Aggiungi) e selezionare dalla schermata successiva l’
applicazione da aggiungere al menu My Favorites.
2. Cliccare Open (Apri). Con l’ aggiunta dell’ applicazione selezionata, apparirà
anche l’ icona corrispondente.
Con il tasto di destra, cliccare su un’ icona del menu My Favorites per aprire, eliminare
o rinominare l’ applicazione corrispondente.
Cliccare due volte su un’ icona per aprire la relativa applicazione.
Book 1.indb 65 9/24/08 5:05:20 PM
Page 67

66 Capitolo 2: Installazione e Utilizzo
Italiano
2.4.6 Support (Supporto)
Il menu Support (Supporto) visualizza i collegamenti con il sito web internazionale
ASUS, con il sito per il supporto tecnico online, per il supporto download online e la
pagina con le informazioni sui contatti ASUS.
2.4.7 Information (Informazioni)
Il menu Information visualizza le informazioni generali su sistema, scheda madre,
CPU, BIOS, memoria e altri dispositivi installati.
Book 1.indb 66 9/24/08 5:05:20 PM
Page 68

ASUS Essentio ES5000/ES5000-P 67
Italiano
2.6 CD di Ripristino (Opzionale)
ASUS PC Recovery CD assiste nella reistallazione del sistema operativo e lo riporta
allo stato operativo originario. Prima di utilizzare il CD di Ripristino, copiare i le dati su
un ash disk USB o su un disco di rete e trascrivere le impostazioni di congurazione
personalizzate, come le impostazioni di rete.
ASUS PC Recovery CD è utilizzabile solo con ASUS Desktop PC. NON farne uso
su altri sistemi. Visitare il sito ASUS www.asus.com per aggiornamenti.
2.6.1 Ripristino del Sistema Operativo Windows® XP
Per ripristinare il sistema operativo Windows XP:
1. Inserire il primo CD di Ripristino nell’ unità ottica. Quando appare il logo ASUS,
premere <F8>. Selezionare l’ unità ottica come dispositivo di avvio.
2. Selezionare Recover system to a partition o Recovery system to entire HD.
Cliccare Next.
3. Appare un messaggio di conferma. Cliccare Next per confermare.
4. Selezionare I accept dalla schermata successiva e cliccare Next.
5. Sono visualizzati a elenco i contenuti da ripristinare. Cliccare Yes per confermare.
Ha inizio il processo di ripristino.
6. Inserire il secondo CD di Ripristino e cliccare OK.
7. Inserire il DVD di Supporto e cliccare OK. Il sistema sarà riavviato.
8. Dopo il riavvio del sistema, Windows XP inizia le congurazioni del sistema.
Seguire le istruzioni sullo schermo per completare il processo e poi riavviare il
sistema. Regolare lo schermo sulla risoluzione più adatta.
2.5 CaricamentoImpostazioniPredenite
Per caricare le impostazioni predenite per il sistema, premere <F3>, in fase di Post
(Power-On Self-Test).
La disponibilità di ASUS PC Recovery CD dipende dal desktop PC acquistato.
Vericare la tipologia con il rivenditore.
Book 1.indb 67 9/24/08 5:05:21 PM
Page 69

68 Capitolo 2: Installazione e Utilizzo
Italiano
ASUS PC Recovery CD è utilizzabile solo con ASUS Desktop PC. NON farne
uso su altri sistemi. Visitare il sito ASUS www.asus.com per aggiornamenti.
2.6.2 Ripristino del Sistema Operativo Windows® Vista
Per ripristinare il sistema operativo Windows Vista:
1. Accendere ASUS Desktop PC e premere F8, qunado appare il logo ASUS.
2. Inserire il primo CD di Ripristino nell’ unità ottica, quando appare Please select
boot device. Selezionare l’ unità ottica come dispositivo di avvio e premere
Enter per continuare.
3. Dopo il riavvio del sistema, appare una nestra ASUS Preload. Premere Next
per continuare.
4. Selezionare dove installare un nuovo sistema. Le opzioni sono le seguenti:
Recover Windows to rst partition only:
Questa opzione eliminerà soltanto la prima partizione, consentendo di
mantenere le altre partizioni, e creare una nuova partizione del sistema,
come il disco “C”.
Recover Windows to entire HD:
Questa opzione eliminerà tutte le partizioni dall’ unità disco rigido e creerà
una nuova partizione del sistema, come il disco “C”.
Recover Windows to entire HD with 2 partitions:
Questa opzione eliminerà tutte le partizioni dall’ unità disco rigido e creerà
due nuove partizioni del sistema. La prima partizione contiene sino al 60%
dell’ intero disco rigido, mentre la seconda sino al 40%.Il nuovo sistema è
installato nella prima partizione. I dati possono essere salvati in una copia di
riserva nella seconda partizione.
5. All’ apparire di una nestra richiedente Are you sure you want to recover now,
cliccare Finish. Il procedere dell’ operazione è indicato da una percentuale
visualizzata sullo schermo.
6. Quando compare il messaggio Recovery nish, cliccare OK e sarà riavviato
il sistema. Dopo il riavvio, seguire le istruzioni sullo schermo per completare le
congurazioni del sistema.
Per ripristinare il sistema da una partizione nascosta, premere F9 all’ apparire del
logo ASUS. Quindi seguire le istrzioni sottostanti dal punto 3 al punto 6.
Book 1.indb 68 9/24/08 5:05:21 PM
Page 70

ASUS Essentio ES5000/ES5000-P 69
Italiano
2.7 Sintonizzatore Easy DVB-T (Opzionale)
Connessione del Dispositivo
Il Sintonizzatore Easy DVB-T riceve i canali DVB-T (Digital Video Broadcasting-
Terrestrial), trasportati sulle bande VHF (Very High Frequency) e UHF (Ultra High
Frequency), in base allo standard tecnico ufciale applicato alla maggior parte dei
paesi, dove si trasmette il DVB-T.
Il tipo di connessione dipende dal tipo di adattatore utilizzato.Le seguenti due
connessioni di base si applicano in condizioni normali. Rivolgersi al rivenditore per
sapere quale sia l’ adattatore corretto.
Tramite Antenna Esterna
1. Collegare il terminale del cavo dell’ antenna al terminale IEC dell’ adattatore da
MCX-a-IEC.
2. Collegare il terminale MCX dell’ adattatore alla porta per l’ antenna, sul lato
inferiore del sintonizzatore Easy DVB-T.
3. Collegare il sintonizzatore Easy DVB-T alla porta USB sul desktop PC o sul
portatile.
DCIN
S/PDIF
HDMI
2.0 2.0
US B 2. 0
1
2
3
Book 1.indb 69 9/24/08 5:05:23 PM
Page 71

70 Capitolo 2: Installazione e Utilizzo
Italiano
Installazione del Driver del dispositivo
Per installare il driver del dispositivo:
1. Collegare il sintonizzatore Easy DVB-T alla porta USB di un desktop PC o di
un portatile.
2. Il sistema del computer rileva
automaticamente il dispositivo
collegato. Cliccare Cancel (Annulla)
dal messaggio a comparsa.
Tramite Antenna Interna
1. Collegare l’ antenna interna alla porta per l’ antenna sul lato inferiore del
sintonizzatore Easy DVB-T.
2. Collegare il sintonizzatore Easy DVB-T alla porta USB del desktop PC o di un
portatile.
In determinate condizioni, il segnale TV potrebbe rimanere bloccato all’ esterno
degli edici. Per una migliore ricezione del segnale, collocare l’ antenna in
prossimità di una nestra o rivolta verso una zona con l’ orizzonte, oppure in
direzione del trasmettitore, se ne è già nota la posizione. La base dell’antenna
è costituita di materiale magnetico. Porre la base dell’ antenna su un materiale
metallico può contribuire a migliorare la ricezione.
DCIN
S/PDIF
HDMI
2.0 2.0
US B 2. 0
1
2
Book 1.indb 70 9/24/08 5:05:25 PM
Page 72

ASUS Essentio ES5000/ES5000-P 71
Italiano
3. Inserire il CD di supporto in dotazione all’ interno dell’ unità ottica. Al comparire
della schermata di installazione, cliccare Install the Tuner Driver (Installa il
driver del sintonizzatore).
4. Seguire il programma di installazione guidata per completare il processo.
Apparirà una barra progressiva oppure un messaggio di installazione del driver
per indicare il procedere dell’ operazione.
5. Al termine, cliccare Finish (Fine).
Durante l’ installazione del driver, assicurarsi che il sintonizzatore Easy DVB-T
sia collegato al computer.
Book 1.indb 71 9/24/08 5:05:25 PM
Page 73

Português
Essentio
ES5000/ES5000-P
ASUS Desktop PC
Manual do utilizador
®
Book 1.indb 72 9/24/08 5:05:26 PM
Page 74

73
Português
PG3812
Primeira Edição V1
Agosto 2008 2008
Copyright © 2008 ASUSTeK COMPUTER INC. Reservados todos os direitos.
Nenhuma parte deste manual, incluindo os produtos e software aqui descritos,
pode ser reproduzida, transmitida, transcrita, armazenada num sistema
de recuperação, ou traduzida para outro idioma por qualquer forma ou por
quaisquer meios, excepto a documentação mantida pelo comprador como
cópia de segurança, sem o consentimento expresso e por escrito da ASUSTeK
COMPUTER INC. (“ASUS”).
A garantia do produto ou a manutenção não será alargada se: (1) o produto for
reparado, modicado ou alterado, a não ser que tal reparação, modicação ou
alteração seja autorizada por escrito pela ASUS; ou (2) caso o número de série do
produto tenha sido apagado ou esteja em falta.
A ASUS FORNECE ESTE MANUAL “TAL COMO ESTÁ” SEM QUALQUER
TIPO DE GARANTIA QUER EXPRESSA QUER IMPLÍCITA, INCLUINDO
MAS NÃO LIMITADA ÀS GARANTIAS IMPLÍCITAS OU CONDIÇÕES DE
PRÁTICAS COMERCIAIS OU ADEQUABILIDADE PARA UM DETERMINADO
FIM. EM CIRCUNSTÂNCIA ALGUMA PODE A ASUS, SEUS DIRECTORES,
OFICIAIS, EMPREGADOS OU AGENTES SER RESPONSABILIZADA
POR QUAISQUER DANOS INDIRECTOS, ESPECIAIS, ACIDENTAIS OU
CONSEQUENTES.(INCLUINDO DANOS PELA PERDA DE LUCROS, PERDA
DE NEGÓCIO, PERDA DE UTILIZAÇÃO OU DE DADOS, INTERRUPÇÃO DA
ACTIVIDADE, ETC.) MESMO QUE A ASUS TENHA SIDO ALERTADA PARA
A POSSIBILIDADE DE OCORRÊNCIA DE TAIS DANOS, RESULTANTES DE
QUALQUER DEFEITO OU ERRO NESTE MANUAL OU NO PRODUTO.
AS ESPECIFICAÇÕES E INFORMAÇÕES CONTIDAS NESTE MANUAL SÃO
FORNECIDAS APENAS PARA FINS INFORMATIVOS E ESTÃO SUJEITAS
A ALTERAÇÃO EM QUALQUER ALTURA SEM AVISO PRÉVIO, NÃO
CONSTITUINDO QUALQUER OBRIGAÇÃO POR PARTE DA ASUS. A ASUS
NÃO ASSUME QUALQUER RESPONSABILIDADE POR QUAISQUER ERROS
OU IMPRECISÕES QUE POSSAM APARECER NESTE MANUAL, INCLUINDO
OS PRODUTOS E SOFTWARE NELE DESCRITOS.
Microsoft, Activesync, Outlook, Pocket Outlook, Windows e o logótipo Windows
são marcas registadas da Microsoft Corporation nos Estados Unidos e noutros
países. Os produtos Microsoft estão licenciados para OEMs pela Microsoft
Lincensing, Inc., uma empresa subsidiária da Microsoft Corporation.
Book 1.indb 73 9/24/08 5:05:27 PM
Page 75

74
Português
Informação de Contactos ASUS
ASUSTeK COMPUTER INC.
Endereço 15 Li-Te Road, Peitou, Taipei, Taiwan 11259
Telefone +886-2-2894-3447
Fax +886-2-2890-7798
E-mail info@asus.com.tw
Site Web www.asus.com.tw
Assistência técnica
Telefone +86-21-38429911
Assistência online support.asus.com
ASUS COMPUTER INTERNATIONAL (América)
Endereço 800 Corporate Way, Fremont, CA 94539,USA
Telefone 001-510-739-3777
Fax +1-510-608-4555
Site Web usa.asus.com
Assistência técnica
Telefone +1-812-282-2787
Fax da Assistência +1-812-284-0883
Assistência online support.asus.com
ASUS COMPUTER GmbH (Alemanha e Áustria)
Endereço Harkortstr. 21-23, 40880 Ratingen, Germany
Telefone +49-01805-010923
Fax +49-02102-9599-11
Site Web www.asus.de
Contacto online www.asus.de/sales
Assistência técnica
Telefone +49-01805-010923
Fax de Assistência +49-02102-9599-11
Assistência online support.asus.com
Book 1.indb 74 9/24/08 5:05:27 PM
Page 76

75
Português
Notices
Federal Communications Commission Statement
This device complies with Part 15 of the FCC Rules. Operation is subject to the
following two conditions:
•
This device may not cause harmful interference, and
•
This device must accept any interference received including interference that
may cause undesired operation.
This equipment has been tested and found to comply with the limits for a
Class B digital device, pursuant to Part 15 of the FCC Rules. These limits are
designed to provide reasonable protection against harmful interference in a
residential installation. This equipment generates, uses and can radiate radio
frequency energy and, if not installed and used in accordance with manufacturer’s
instructions, may cause harmful interference to radio communications. However,
there is no guarantee that interference will not occur in a particular installation. If
this equipment does cause harmful interference to radio or television reception,
which can be determined by turning the equipment off and on, the user is
encouraged to try to correct the interference by one or more of the following
measures:
•
Reorient or relocate the receiving antenna.
•
Increase the separation between the equipment and receiver.
•
Connect the equipment to an outlet on a circuit different from that to which the
receiver is connected.
•
Consult the dealer or an experienced radio/TV technician for help.
Canadian Department of Communications Statement
This digital apparatus does not exceed the Class B limits for radio noise emissions
from digital apparatus set out in the Radio Interference Regulations of the
Canadian Department of Communications.
This class B digital apparatus complies with Canadian ICES-003.
A utilização de cabos blindados, para ligação do monitor à placa gráca,
é necessária, para assegurar o cumprimento dos regulamentos FCC. As
alterações ou modicações feitas a esta unidade e que não tenham sido
expressamente aprovadas pela parte responsável no que respeita ao
cumprimento, podem invalidar a autoridade do utilizador para utilizar este
equipamento.
Book 1.indb 75 9/24/08 5:05:28 PM
Page 77

76
Português
Informação de Segurança
Segurança eléctrica
•
Para evitar o perigo de electrocussão, desligue o cabo de alimentação da
saída eléctrica, antes de mudar o sistema de lugar.
• Quando adicionar ou remover quaisquer dispositivos ao/do sistema, contacte
um técnico de serviço qualicado ou o seu revendedor, para o auxiliar.
Certique-se de que todos os cabos de alimentação estão desligados, antes
de adicionar ou remover qualquer dispositivo ao/do sistema.
•
Se a alimentação eléctrica está danicada, não tente arranjá-la sozinho.
Contacte um técnico de serviço qualicado ou o seu revendedor.
Lithium-Ion Battery Warning
CAUTION: Danger of explosion if battery is incorrectly replaced. Replace
only with the same or equivalent type recommended by the manufacturer.
Dispose of used batteries according to the manufacturer’s instructions.
VORSICHT: Explosionsgetahr bei unsachgemäßen Austausch der Batterie.
Ersatz nur durch denselben oder einem vom Hersteller empfohlenem
ähnljchen Typ. Entsorgung gebrauchter Batterien nach Angaben des
Herstellers.
AVISO relativo à segurança da unidade de CD-ROM
PRODUTO LASER CLASSE 1
Segurança do funcionamento
• Antes de instalar dispositivos no sistema, leia atentamente toda a
documentação que veio com o pacote.
• Antes de utilizar o produto, certique-se de que todos os cabos estão
correctamente ligados e os cabos de alimentação não estão danicados. Se
detectar qualquer dano, contacte o seu revendedor de imediato.
• Para evitar curto-circuitos, mantenha os clips, parafusos e agrafos afastados
dos conectores, ranhuras, tomadas e circuitos eléctricos.
• Evite o pó, a humidade e as temperaturas extremas. Não coloque o produto
em áreas que se possam tornar húmidas. Coloque o produto numa superfície
estável.
• Ao utilizar o produto, não bloqueie nenhuma entrada/saída de ar no chassis.
• A máxima temperatura ambiental é de 35oC.
• Se tiver problemas técnicos com o produto, contacte um técnico de serviço
qualicado ou o seu revendedor.
Book 1.indb 76 9/24/08 5:05:28 PM
Page 78

77
Português
Precauções gerais
Antes de utilizar o PC de Secretária ASUS Essentio ES5000/ES5000-P, leia
cuidadosamente as precauções gerais descritas abaixo. O funcionamento
impróprio pode causar lesões pessoais ou danos no produto.
• Antes de utilizar o produto, certique-se de que todos os componentes estão
correctamente instalados e todos os cabos estão correctamente ligados. Se
detectar qualquer dano, contacte o seu revendedor de imediato.
• Evite o pó, a humidade e as temperaturas extremas. Não coloque o produto
em áreas onde possa receber luz directa do Sol.
• Mantenha o produto em local seco. As gotas da chuva, a humidade e os
líquidos podem conter minerais e danicar os circuitos eléctricos.
• Deixe espaço suciente à volta do interruptor, para uma ventilação adequada.
Caso contrário, pode sobreaquecer.
• Antes de ligar o sistema, verique se todos os periféricos estão correctamente
ligados.
• Evite comer ao mesmo tempo que utiliza o computador. Pode contaminar os
componentes e provocar o mau funcionamento do sistema.
• Para evitar curto-circuitos, mantenha os restos de papel, parafusos e eixos
afastados dos conectores, ranhuras, tomadas e circuitos eléctricos.
• Não introduza nada dentro dos componentes. Caso contrário, poderá causar
um curto-circuito ou danicar os circuitos eléctricos.
• Se o computador foi utilizado durante muito tempo, evite o contacto directo
com os dissipadores de calor e com as superfícies do circuito integrado, pois
podem tornar-se mesmo muito quentes. Verique se o sistema recebe a
ventilação adequada.
• Antes de adicionar ou remover um dispositivo periférico ao/do sistema,
certique-se de que desligou os cabos de alimentação.
• Se a alimentação eléctrica está danicada, não tente arranjá-la sozinho.
Contacte um técnico de serviço qualicado ou o seu revendedor.
• Embora o invólucro do sistema tenha sido concebido de forma elaborada, para
proteger os utilizadores de arranhões, tenha cuidado com as pontas e arestas
aadas. Antes de remover ou substituir a cobertura do sistema, vista um par
de luvas.
• Quando não precisar de utilizar o seu computador durante muito tempo,
desligue-o e retire os cabos de alimentação.
• Sugere-se que utilize este produto quando a temperatura não for superior a
35oC.
• Aviso: Certique-se de que substitui a bateria por uma do tipo correcto, caso
contrário poderá representar perigo de explosão.
Book 1.indb 77 9/24/08 5:05:28 PM
Page 79

78
Português
Sobre este guia
Como este guia é organizado
Este guia contém as seguintes partes:
1. Capítulo 1: Introdução ao sistema
Este capítulo dá uma descrição geral do ASUS Essentio
PC de Secretária ES5000/ES5000-P. O capítulo enuncia as funcionalidades
do sistema, incluindo a introdução aos painéis frontal e traseiro.
2. Capítulo 2: Primeiros passos
Este capítulo ajuda-o a ligar o sistema e instalar controladores e utilitários a
partir do DVD de Apoio.
Público
Este guia faculta informação geral sobre o PC de Secretária ASUS Essentio
ES5000/ES5000-P, bem como instruções sobre como utilizar o DVD de Apoio
que vem incluído no pacote de sistema. Este guia é destinado a utilizadores
experientes e integradores com conhecimento de hardware de computadores
pessoais.
Book 1.indb 78 9/24/08 5:05:28 PM
Page 80

79
Português
Convenções usadas neste guia
Para se certicar de que executa devidamente certas tarefas, anote os seguintes
símbolos utilizados ao longo deste guia.
AVISO: Informação que se destina a evitar que sofra lesões ao tentar
concluir uma tarefa.
CUIDADO: Informação que se destina a evitar que danique os
componentes ao tentar concluir uma tarefa.
IMPORTANTE: Instruções que DEVE seguir para concluir uma tarefa.
NOTA: Dicas e informações adicionais para o ajudar a concluir uma
tarefa.
Onde encontrar mais informação
Para obter mais informações e para actualizações de produtos e de software,
queira consultar as seguintes fontes.
1. Sites da ASUS
Os sites da ASUS, por todo o mundo, fornecem informações actualizadas
sobre o hardware e produtos de software ASUS. Consulte as informações de
contacto da ASUS.
2. Documentação Opcional
O pacote do seu produto pode incluir documentação opcional, como por
exemplo, folhetos de garantia que podem ter sido adicionados pelo seu
revendedor. Estes documentos não fazem parte do pacote standard.
Book 1.indb 79 9/24/08 5:05:30 PM
Page 81

80
Português
Conteúdos do pacote de sistema
Verique se o seu pacote de sistema Essentio ES5000/ES5000-P contém os
seguintes itens.
Itens standard
1. PC de Secretária ASUS Essentio ES5000/ES5000-P com
• 1 PC de Secretária ASUS
• 1 Suporte
• 1 Rato
• 1 Teclado
2. Cabos
• 1 Cabo de alimentação AC
3. Acessórios
• 1 Adaptador eléctrico AC
• 1 Tapete para rato
4. 1 DVD de Apoio
5. 1 Manual do Utilizador
6. 1 Cartão de garantia
• Se qualquer um dos itens acima referidos estiver danicado ou em falta,
queira contactar o seu revendedor.
• As especicações são de acordo com o PC de Secretária que comprou.
Para saber quais as ofertas exactas, consulte o seu fornecedor.
Book 1.indb 80 9/24/08 5:05:31 PM
Page 82

Capítulo 1
Introdução ao sistema
Este capítulo dá uma descrição geral
do PC de Secretária. O capítulo
enuncia as funcionalidades do sistema,
incluindo a introdução aos painéis
frontal e traseiro.
Book 1.indb 81 9/24/08 5:05:32 PM
Page 83

82
Capítulo 1: Introdução ao sistema
Português
1.1 Painel frontal
O PC de Secretária ASUS Essentio ES5000/ES5000-P inclui uma motherboard
ASUS, uma unidade de alimentação eléctrica, um painel frontal e um painel
traseiro. Todos estes componentes estão integrados num invólucro de sistema
desenhado de forma elaborada pela ASUS.
As ilustrações abaixo mostram o painel frontal e seus componentes.
5
3
1
4
2
6
E-SATA
9
10
8
7
Fechar
Abrir
1. Insira na ranhura a unidade de disco óptico (ODD). Insira o disco óptico
na ranhura, com o lado da etiqueta voltado para a sua esquerda.
2. Botão de ejectar o disco óptico . Prima este botão para ejectar um disco
óptico.
3. Tampa do painel frontal . Puxe para fora, para abrir a tampa do painel
frontal. Dentro estão duas portas USB 2.0, uma porta E-SATA, uma porta de
Microfone e uma porta de Auscultadores.
4. LED de Rede . Este LED acende quando é estabelecida uma ligação de
rede sem os/cablada no sistema.
5. LED da unidade de disco rígido (HDD) . Este LED acende quando os
dados estão a ser lidos a partir da unidade de disco rígido, ou escritos na
mesma.
6. Botão de energia . Prima este botão para ligar o sistema.
7. Portas USB 2.0
2.0
. Estas portas "Universal Serial Bus 2.0" (USB 2.0)
estão disponíveis para ligar dispositivos USB 2.0, tais como um rato, uma
impressora, um scanner, uma câmara, um PDA e outros.
8. Porta E-SATA
E-SATA
. Esta porta liga uma unidade de disco rígido externa
de série ATA.
Book 1.indb 82 9/24/08 5:05:35 PM
Page 84

83
ASUS Essentio ES5000/ES5000-P
Português
1.2 Painel traseiro
O painel traseiro do sistema inclui a porta de entrada de energia e várias portas de
entrada/saída que permitem a ligação conveniente de dispositivos.
A ilustração abaixo mostra o painel traseiro e seus componentes.
1. Saídas de ar. Estas saídas permitem a ventilação de ar.
3
1
2
5
4
6
7
9
10
8
12
11
NÃO bloqueie as saídas de ar nos painéis superior e traseiro do chassis do
sistema. Sem a ventilação adequada, os componentes dentro do chassis
podem sobreaquecer e ser danicados.
2. Porta de Saída Óptica S/PDIF. Esta porta liga um dispositivo de saída de
áudio externo, através de um cabo óptico S/PDIF.
3. Porta de teclado PS/2 . Esta porta é para um teclado PS/2.
4. Porta LAN (RJ-45). Esta porta permite uma ligação rápida de Ethernet a
uma Rede de Área Local (LAN), através de uma hub de rede.
9. Porta dos auscultadores (verde limão) . Esta porta liga os
auscultadores.
10. Porta do microfone (rosa) . Esta porta liga um microfone.
Book 1.indb 83 9/24/08 5:05:38 PM
Page 85

84
Capítulo 1: Introdução ao sistema
Português
Conguração áudio de 2, 4 ou 6 canais
Porta
Auscultadores 2
canais
4 canais 6 canais
Azul Claro Entrada de Linha Saída de Altifalante
Traseiro
Saída de Altifalante
Traseiro
Verde limão Saída de Linha Saída de Altifalante
Frontal
Saída de Altifalante
Frontal
Rosa Entrada de Microfone Entrada de Microfone
Graves/Centro
5. Porta de bloqueio Kensington® . Esta porta permite que o PC seja
preso a um objecto xo, utilizando os produtos de segurança compatíveis da
Kensington®.
6. Porta de entrada de linha (azul claro). Esta porta liga um leitor de
cassetes, CD's e DVD's ou outras fontes de áudio.
7. Porta de saída de linha (verde limão). Esta porta liga um auscultador ou
um altifalante. Na conguração de 4 ou 6 canais, a função desta porta torna- conguração de 4 ou 6 canais, a função desta porta torna-conguração de 4 ou 6 canais, a função desta porta torna-
se na saída do altifalante frontal.
8. Porta do microfone (rosa) . Esta porta liga um microfone.
Para saber a função das portas áudio na conguração de 2, 4 ou 6 canais,
consulte a tabela de conguração áudio.
9. Porta de entrada DC. Esta porta liga a cha de saída DC de um adaptador
eléctrico AC.
10. Portas USB 2.0
2.0
. Estas portas "Universal Serial Bus 2.0" (USB 2.0)
estão disponíveis para ligar dispositivos USB 2.0, tais como um rato, uma
impressora, um scanner, uma câmara, um PDA e outros.
11. Porta do adaptador de grácos de vídeo (VGA) . Esta porta liga um
monitor VGA ou outros dispositivos compatíveis com VGA.
12. Porta HDMI . Esta porta é para o conector de um Interface Multimédia
de Alta Denição (HDMI) e é conforme ao HDCP, permitindo a reprodução
de HD DVD, Blu-Ray e de outros conteúdos protegidos.
Indicações LED da porta LAN
Porta LAN
LED DE
VELOCIDADE
LED DE
ACTIVIDADE/
LIGAÇÃO
LED de Actividade/Ligação LED de Velocidade
Estado Descrição Estado Descrição
DESLIGADO Sem ligação DESLIGADO Ligação a 10 Mbps
LARANJA Ligado LARANJA Ligação a 100 Mbps
A PISCAR Actividade de dados VERDE LIgação a 1 Gbps
Book 1.indb 84 9/24/08 5:05:41 PM
Page 86

85
ASUS Essentio ES5000/ES5000-P
Português
1.3 Opções de colocação
1.3.1 Colocação horizontal
Coloque o seu PC de Secretária na horizontal.
1.3.2 Colocação vertical
Instale o suporte fornecido no pacote de sistema. Coloque o seu PC de Secretária
na vertical.
Para instalar o suporte:
1. Localize o orifício do parafuso na parte inferior do seu PC de Secretária.
2. Fixe o suporte ao seu PC de Secretária com o parafuso fornecido.
Book 1.indb 85 9/24/08 5:05:41 PM
Page 87

86
Capítulo 1: Introdução ao sistema
Português
1.4 Ligar ao teclado e ao rato
O PC de Secretária ASUS Essentio ES5000/ES5000-P está equipado com um
teclado PS/2 e um rato USB. Ligue o teclado PS/2 à porta do mesmo, situada no
painel traseiro. Ligue o rato USB à porta USB, no painel traseiro ou no frontal.
1.5 Ligar a outros dispositivos periféricos
O PC de Secretária ASUS Essentio ES5000/ES5000-P está equipado com várias
portas de entrada/saída, nos painéis frontal e traseiro, onde pode ligar dispositivos
periféricos ao sistema.
Para mais detalhes, consulte a ilustração abaixo.
Antes de ligar um dispositivo periférico ao sistema, consulte a documentação
incluída no dispositivo ou contacte directamente o seu fornecedor para
informações sobre como instalá-lo.
Tomada eléctrica
USB
VGA
HDMI
Microfone
Saída de
Linha
Entrada de
Linha
RJ-45
Teclado PS/2
Saída de
S/PDIF
Se está a utilizar um teclado ou rato USB sem os, consulte a documentação
que vem com o dispositivo ou contacte directamente o seu fornecedor para
mais informações sobre como congurá-los.
Book 1.indb 86 9/24/08 5:05:50 PM
Page 88

Capítulo 2
Primeiros passos
Este capítulo ajuda-o a ligar o sistema
e instalar controladores e utilitários a
partir do CD de Apoio.
Book 1.indb 87 9/24/08 5:05:51 PM
Page 89

88
Capítulo 2: Primeiros passos
Português
2.1 Instalar um sistema operativo
Esta motherboard suporta os sistemas operativos (SO) Windows
®
XP / Vista.
Instale sempre a última versão de SO e as actualizações correspondentes, para
maximizar as funcionalidades do seu hardware. Quando arranca o sistema pela
primeira vez, este detecta automaticamente o áudio e os chips grácos integrados
e tenta instalar os controladores que vêm com o SO. Seleccione NO (NÃO)
quando surgir uma janela a perguntar se quer reiniciar o sistema. Instale os
controladores de acordo com as instruções referidas nas secções seguintes.
2.2 Ligar o seu sistema
Prima o botão de energia para ligar o sistema.
• Para se certicar de que o sistema operatico funciona bem, instale os
controladores incluídos no DVD de Apoio.
• As opções das denições da motherboard e de hardware variam. Utilize os
procedimentos de conguração apresentados neste capítulo apenas como
referência. Para informação mais detalhada, consulte a documentação do
seu sistema operativo.
Prima para ligar o sistema
Book 1.indb 88 9/24/08 5:05:54 PM
Page 90

ASUS Essentio ES5000/ES5000-P
89
Português
Se o Autorun (Execução automática) NÃO estiver activado no seu computador,
pesquise nos conteúdos do DVD de Apoio para localizar o cheiro ASSETUP.
EXE a partir da pasta BIN. Dê um duplo clique em ASSETUP.EXE para
executar o DVD.
Clique num item para instalar
2.3.1 Executar o DVD de Apoio
Coloque o DVD de Apoio na unidade óptica. O DVD mostra automaticamente
o menu Drivers (Controladores) se o Autorun (Execução automática) estiver
activado no seu computador.
Clique num ícone
para mostrar a
informação do
DVD de Apoio/
motherboard
2.3 Informação do DVD de Apoio
O DVD de Apoio incluído no pacote de sistema contém os controladores, as
aplicações de software e os utilitários que pode instalar para beneciar de todas
as funcionalidades do sistema.
Os conteúdos do DVD de Apoio estão sujeitos a alterações, a qualquer
momento, sem aviso prévio. Para actualizações, visite o site da ASUS em
www.asus.com.
Book 1.indb 89 9/24/08 5:05:55 PM
Page 91

90
Capítulo 2: Primeiros passos
Português
2.3.2 Menu de Controladores
O menu Drivers (Controladores) mostra os controladores do dispositivo
disponíveis se o sistema detectar dispositivos instalados. Instale os controladores
necessários para activar os dispositivos.
ASUS InstAll - Assistente de Instalação de Controladores
Instala o ASUS InstAll - Assistente de Instalação de Controladores.
Programa de Actualização do Chipset Inf. Intel(R)
Instala o programa de actualização informática do Chipset Inf. Intel
®
.
Controlador de Áudio Realtek
Instala o controlador de áudio Realtek® e a aplicação.
Controlador do Visor ATI
Instala o controlador do visor ATI.
Controlador JMicron JMB36X
Instala o controlador JMicron JMB36X.
Controlador ITE CIR
Instala o controlador ITE CIR.
Controlador LAN Realtek RTL8111C
Instala o controlador LAN Realtek RTL8111C.
Controlador LAN Sem Fios ASUS
Instala o controlador LAN sem os ASUS.
Book 1.indb 90 9/24/08 5:05:55 PM
Page 92

ASUS Essentio ES5000/ES5000-P
91
Português
2.3.3 Menu Utilitários
O menu Utilities (Utilitários) mostra as aplicações e outro software que a
motherboard suporte. No menu, toque num item para instalar.
ASUS InstAll - Assistente de Instalação para Utilitários
Instala todos os utilitários através do Assistente de Instalação.
ASUS Update (Actualização ASUS)
Permite-lhe descarregar a última versão da BIOS a partir do site da ASUS.
ASUS AI Manager (Gestor AI ASUS)
Instala facilmente o ASUS AI Manager (Gestor AI ASUS), onde pode executar o AI
Disk (Disco AI), o AI Security (Segurança AI) e o AI Probe (Teste AI).
Adobe Acrobat Reader 8
Instala o Adobe Acrobat Reader 8. Os manuais contidos no DVD de Apoio estão
no formato PDF (Formato de Documento Portátil) que pode ser aberto com o
Adobe Acrobat Reader.
Antes de utilizar o ASUS Update (Actualização ASUS), certique-se de que
possui uma ligação à Internet, para que se possa ligar ao site da ASUS.
Book 1.indb 91 9/24/08 5:05:56 PM
Page 93

92
Capítulo 2: Primeiros passos
Português
2.3.4 Menu de Manuais
O DVD de Apoio inclui o manual do Realtek HD Audio.
O manual está em formato PDF. Para o abrir, instale o Adobe Acrobat Reader a
partir do menu Utilities (Utilitários) .
2.3.5 Informação de Contactos ASUS
Clique no separador Contact (Contacto) para mostrar a informação de contactos
Book 1.indb 92 9/24/08 5:05:56 PM
Page 94

ASUS Essentio ES5000/ES5000-P
93
Português
2.3.6 Outras informações
Os ícones no canto superior direito fornecem informação adicional sobre a
motherboard e os conteúdos do DVD de Apoio. Clique num ícone para mostrar a
informação especicada.
Pesquisar neste DVD
Mostra os conteúdos do DVD de Apoio em formato gráco.
Informações sobre a motherboard
Mostra as especicações gerais da motherboard.
Book 1.indb 93 9/24/08 5:05:58 PM
Page 95

94
Capítulo 2: Primeiros passos
Português
Formulário de assistência técnica
Mostra o Formulário de Pedido de Assistência Técnica da ASUS, o qual terá de
preencher quando solicitar assistência técnica.
Lista de cheiros
Mostra os conteúdos do DVD de Apoio e uma breve descrição de cada um, em
formato de texto.
Book 1.indb 94 9/24/08 5:05:59 PM
Page 96

ASUS Essentio ES5000/ES5000-P
95
Português
2.4 ASUS AI Manager (Gestor AI ASUS)
O ASUS AI Manager (Gestor AI ASUS) permite-lhe executar facilmente o AI Disk
(Disco AI), o AI Security (Segurança AI) e o AI Probe (Teste AI).
2.4.1 Instalar o AI Manager (Gestor AI)
Para instalar o AI Manager (Gestor AI) no seu computador:
1. Coloque o DVD de Apoio na unidade óptica. O DVD mostra automaticamente
o menu Drivers (Controladores) se o Autorun (Execução automática)
estiver activado no seu computador.
Se o Autorun (Execução automática) NÃO estiver activado no seu computador,
pesquise nos conteúdos do DVD de Apoio para localizar o cheiro ASSETUP.
EXE a partir da pasta BIN. Dê um duplo clique em ASSETUP.EXE para
executar o DVD.
2. Clique no separador Utilities (Utilitários) e depois clique em ASUS AI
Manager (Gestor AI ASUS).
3. Siga as instruções no ecrã para concluir a instalação.
2.4.2 Executar o AI Manager (Gestor AI)
Pode executar o AI Manager (Gestor AI) logo após a instalação ou a qualquer
momento, a partir do Ambiente de Trabalho do Windows® .
Para executar o AI Manager (Gestor AI) a partir do Ambiente de Trabalho do
Windows® , clique em Start (Iniciar) > All Programs (Todos os Programas) >
ASUS > AI Manager (Gestor AI) > AI Manager (Gestor AI) v1.xx.xx. Surge a
Barra Rápida do AI Manager (Gestor AI).
Após executar a aplicação, o ícone do AI Manager (Gestor AI) aparece na barra de
tarefas do Windows® . Para mais opções, clique com o lado direito do rato sobre
este ícone.
2.4.3 Barra Rápida do AI Manager (Gestor AI)
Clique no ícone Main (Principal), My favorites (Os Meus Favoritos), Support
(Assistência) ou Information (Informação) a partir da Barra Rápida para mostrar o
menu correspondente.
Principal
Os Meus
Favoritos
Assistência
Informação
Fechar
Maximizar/Retomar
Minimizar
Book 1.indb 95 9/24/08 5:06:00 PM
Page 97

96
Capítulo 2: Primeiros passos
Português
Clique em para alternar a janela em ecrã inteiro do AI Manager (Gestor AI) e a
barra rápida.
Clique em para manter o AI Manager (Gestor AI) na barra de tarefas.
Clique em para fechar o AI Manager (Gestor AI).
2.4.4 Menu Principal
Execute o AI Disk (Disco AI), AI Security (Segurança AI) ou o AI Probe (Teste
AI) a partir do menu principal. Clique no triângulo pequeno para abrir ou fechar o
menu principal.
Clique para abrir/fechar o menu principal
AI Disk (Disco AI)
O AI Disk (Disco AI) permite-lhe limpar facilmente os cheiros temporários do IE,
os URL's do IE, os cookies do IE, a lista de histórico do IE, a Reciclagem e a lista
de cheiros recentemente abertos. Seleccione o item que quer limpar e clique em
Apply (Aplicar).
Book 1.indb 96 9/24/08 5:06:01 PM
Page 98

ASUS Essentio ES5000/ES5000-P
97
Português
AI Security (Segurança AI)
A AI Security (Segurança AI) permite-lhe denir palavras-passe para bloquear os
seus dispositivos de armazenamento amovível, tais como uma memória portátil
USB e um disco de CD/DVD, o que lhe garante mais segurança para os seus
dados.
Para bloquear um dispositivo:
1. Se está a utilizar o AI Security (Segurança AI) pela primeira vez, digite uma
palavra-passe que consista em não mais de 20 letras, números ou símbolos.
2 Conrme a sua palavra-passe.
3. Digite a dica para a sua palavra-passe (opcional).
4. Clique em OK.
5. Seleccione o dispositivo que quer bloquear e clique em Apply (Aplicar).
Book 1.indb 97 9/24/08 5:06:01 PM
Page 99

98
Capítulo 2: Primeiros passos
Português
6. Digite a sua palavra-passe e clique em OK. O dispositivo que seleccionou
não pode ser acedido sem a palavra-passe.
Para desbloquear um dispositivo:
1. Desmarque o dispositivo que bloqueou e clique em Apply (Aplicar).
2. Digite a sua palavra-passe e clique em OK.
Para alterar a sua palavra-passe, clique em Change Password (Alterar
Palavra-Passe) e siga as instruções no ecrã.
AI Probe (Teste AI)
O AI Probe (Teste AI) detecta e exibe automaticamente as temperaturas da
placa-mãe e do CPU, a velocidade do ventilador do CPU e a voltagem do mesmo.
Permite-lhe também ajustar manualmente estes valores.
Book 1.indb 98 9/24/08 5:06:01 PM
Page 100

ASUS Essentio ES5000/ES5000-P
99
Português
2.4.5 Os Meus Favoritos
Adicione as suas aplicações preferidas ao menu My Favorites (Os Meus
Favoritos) .
Para adicionar uma aplicação:
1. Clique em Add (Adicionar) e depois seleccione a partir do ecrã seguinte a
aplicação que quer adicionar ao menu My Favorites (Os Meus Favoritos) .
2. Clique em Open (Abrir). A aplicação que seleccionou foi adicionada e o seu
ícone está presente.
Clique com o lado direito do rato sobre um ícone no menu My Favorites (Os
Meus Favoritos)para abrir, apagar ou mudar o nome à aplicação correspondente.
Clique com o lado direito do rato num ícone para abrir a aplicação correspondente.
Book 1.indb 99 9/24/08 5:06:02 PM
 Loading...