

Page 1
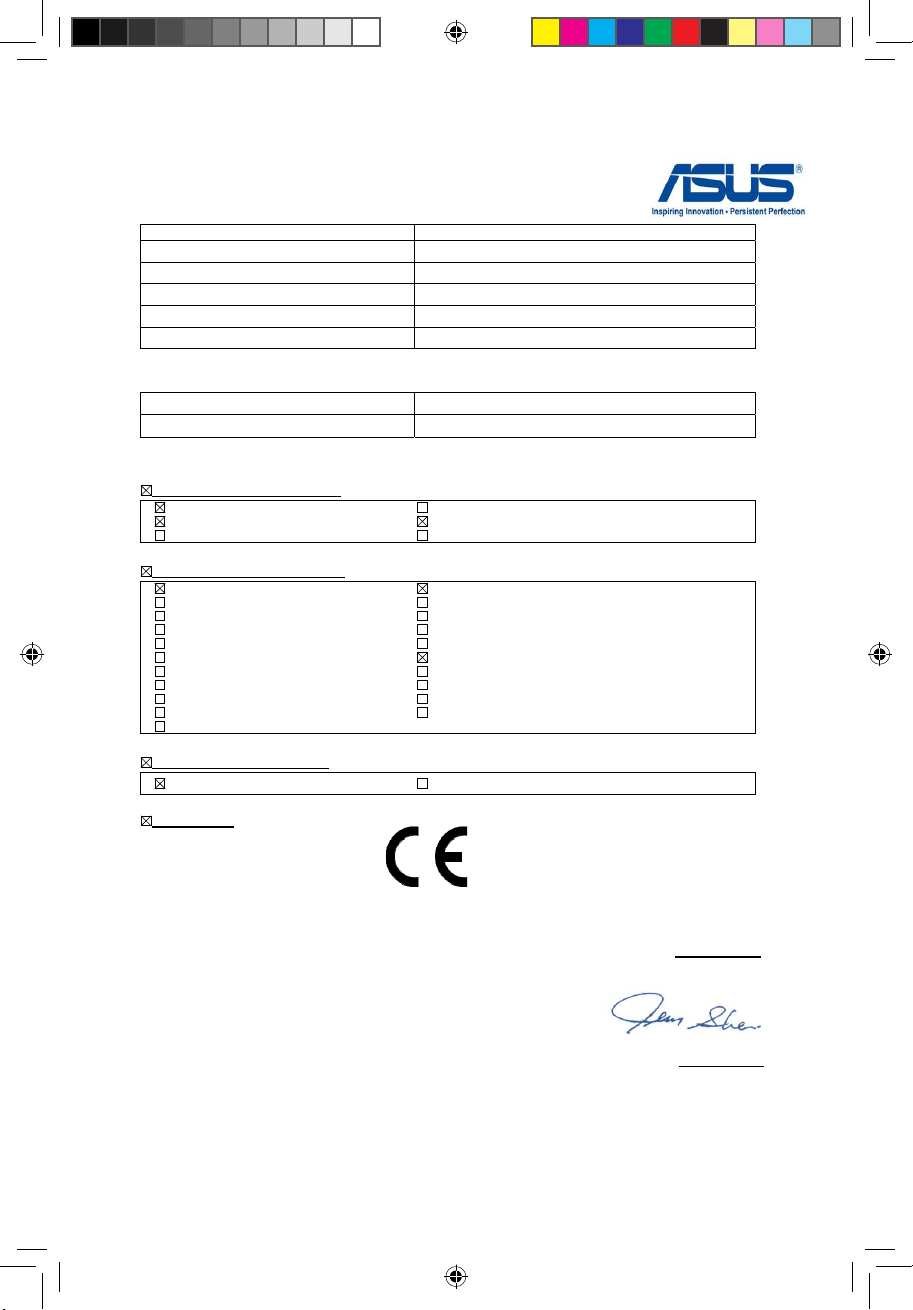
EC Declaration of Conformity
We, the undersigned,
Manufacturer:
ASUSTek COMPUTER INC.
Address, City:
No. 150, LI-TE RD., PEITOU, TAIPEI 112, TAIWAN R.O.C.
Country:
TAIWAN
Authorized representative in Europe:
ASUS COMPUTER GmbH
Address, City: HARKORT STR. 21-23, 40880 RATINGEN
Country:
GERMANY
declare the following apparatus:
Product name:
11n Wireless ADSL modem router
Model name:
DSL-N11
conform with the essential requirements of the following directives:
2004/108/EC-EMC Directive
EN 55022:2006+A1:2007
EN 61000-3-2:2006
EN 55013:2001+A1:2003+A2:2006
EN 55024:1998+A1:2001+A2:2003
EN 61000-3-3:1995+A1:2001+A2:2005
EN 55020:2007
1999/5/EC-R &TTE Directive
EN 300 328 V1.7.1(2006-10)
EN 300 440-1 V1.4.1(2008-05)
EN 300 440-2 V1.2.1(2008-03)
EN 301 511 V9.0.2(2003-03)
EN 301 908-1 V3.2.1(2007-05)
EN 301 908-2 V3.2.1(2007-05)
EN 301 893 V1.4.1(2005-03)
EN 50360:2001
EN 50371:2002
EN 62311:2008
EN 50385:2002
EN 301 489-1 V1.8.1(2008-04)
EN 301 489-3 V1.4.1(2002-08)
EN 301 489-4 V1.3.1(2002-08)
EN 301 489-7 V1.3.1(2005-11)
EN 301 489-9 V1.4.1(2007-11)
EN 301 489-17 V1.3.2(2008-04)
EN 301 489-24 V1.4.1(2007-09)
EN 302 326-2 V1.2.2(2007-06)
EN 302 326-3 V1.3.1(2007-09)
EN 301 357-2 V1.3.1(2006-05)
2006/95/EC-LVD Directive
EN 60950-1:2006 EN60065:2002+A1:2006
CE marking
Declaration Date: Apr. 14, 2009
Year to begin affixing CE marking:2009
Position : CEO
Name : Jerry Shen
Signature :
__________
(EC conformity marking)
Book 1.indb 1 5/11/09 3:49:11 PM
Page 2
Appendices
Notices
Federal Communications Commission Statement
This device complies with Part 15 of the FCC Rules. Operation is subject to the
following two conditions:
• This device may not cause harmful interference.
• This device must accept any interference received, including interference that
may cause undesired operation.
This equipment has been tested and found to comply with the limits for a class
B digital device, pursuant to part 15 of the FCC Rules. These limits are designed
to provide reasonable protection against harmful interference in a residential
installation.
This equipment generates, uses and can radiate radio frequency energy and, if
not installed and used in accordance with the instructions, may cause harmful
interference to radio communications. However, there is no guarantee that
interference will not occur in a particular installation. If this equipment does cause
harmful interference to radio or television reception, which can be determined
by turning the equipment off and on, the user is encouraged to try to correct the
interference by one or more of the following measures:
• Reorient or relocate the receiving antenna.
• Increase the separation between the equipment and receiver.
• Connect the equipment into an outlet on a circuit different from that to which the
receiver is connected.
• Consult the dealer or an experienced radio/TV technician for help.
Caution: Any changes or modications not expressly approved by the party responsible for
compliance could void the user’s authority to operate the equipment.
FCC Radiation Exposure Statement
This equipment complies with FCC radiation exposure limits set forth for an uncontrolled
environment. This equipment should be installed and operated with minimum distance
20cm between the radiator & your body.
This transmitter must not be co-located or operating in conjunction with any other
antenna or transmitter. 2.4GHz operation of this product in the U.S.A. is rmware-limited
to channels 1 through 11.
Book 1.indb 2 5/11/09 3:49:11 PM
Page 3

FCC Part 68 REQUIREMENTS
This equipment complies with Part 68 of the FCC rules and the requirements
adopted by the ACTA. On the bottom of this equipment is a label that contains,
among other information, a product identier in the format US: ASUDL01BDSLN11.
If requested, this number must be provided to the telephone company.
The REN is used to determine the number of devices that may be connected to a
telephone line. Excessive RENs on a telephone line may result in the devices not
ringing in response to an incoming call. In most but not all areas, the sum of RENs
should not exceed ve (5.0). To be certain of the number of devices that may be
connected to a line, as determined by the total RENs, contact the local telephone
company. For products approved after July 23, 2001, the REN for this product is
part of the product identier that has the format US: ASUDL01BDSLN11. The digits
represented by 01are the REN without a decimal point (e.g., 03 is a REN of 0.3).
For earlier products, the REN is separately shown on the label.
A plug and jack used to connect this equipment to the premises wiring and
telephone network must comply with the applicable FCC Part 68 rules and
requirements adopted by the ACTA. A compliant telephone cord and modular
plug is provided with this product. It is designed to be connected to a compatible
modular jack that is also compliant. See installation instructions for details.
If your equipment causes harm to the telephone network, the telephone company
may discontinue your service temporarily. If possible, they will notify you in
advance. But if advance notice is not practical, you will be notied as soon as
possible. You will be informed of your right to le a complaint with the FCC. Your
telephone company may make changes in it is facilities, equipment, operations or
procedures that could affect the proper functioning of your equipment. If they do,
you will be notied in advance to give you an opportunity to maintain uninterrupted
telephone service.
If you experience trouble with this telephone equipment, Please contact the
following address and phone number for information on obtaining service or
repairs.
The telephone company may ask that you disconnect this equipment from the
network until the problem has been corrected or until you are sure that the
equipment is not malfunctioning.
This equipment may not be used on coin service provided by the telephone
company. Connection to party lines is subject to state tariffs.
COMPANY: ASUS Computer International
ADDRESS: 44370 Nobel Drive, Fremount, CA 94536 USA
TEL NO: 510-739-3777 ext.4530
Book 1.indb 3 5/11/09 3:49:12 PM
Page 4

IC (Canada)
1. 2.4GHz Mobile device (ex. 11b/g/n AP/Router) with xed antenna:
( Industry Canada Statement )
This device complies with RSS-210 of the Industry Canada Rules.
Operation is subject to the following two conditions:
1) this device may not cause interference and
2) this device must accept any interference, including interference that may cause
undesired operation of the device
This Class A digital apparatus complies with Canadian ICES-003.
Cet appareil numerique de la class A est conforme a la norme NMB-003 du
Canada.
IC Radiation Exposure Statement
This equipment complies with Canada radiation exposure limits set forth for
uncontrolled environments. This equipment should be installed and operated with
minimum distance 20cm between the radiator & your body.
This transmitter must not be co-located or operating in conjunction with any other
antenna or transmitter.
2.4GHz operation of this product in Canada is rmware-limited to channels 1
through
11.
CE (Europe)
WLAN 2.4GHz device:
This device can be operated in the EU without restrictions indoor.
However, operated outdoors in France is restricted to 2400 ~ 2454 MHz
(Channel 1 ~ 7).
Safety
1. For apply CSA not control power adapter:
This unit is to be used with an external power adaptor of a Class 2 or level 3 type
and Approved type suitable for use in the North America of equipment installation,
having an output voltage rating of 15 V dc, and output current rating of 1 A or
equivalent.
The external AC adapter must be complied with the requirements of LPS (Limited
Power Sources).
Power Supply
OEM
EU: AA-151ABN
UK: AA-151AD
AU: AA-151AE
Book 1.indb 4 5/11/09 3:49:12 PM
Page 5
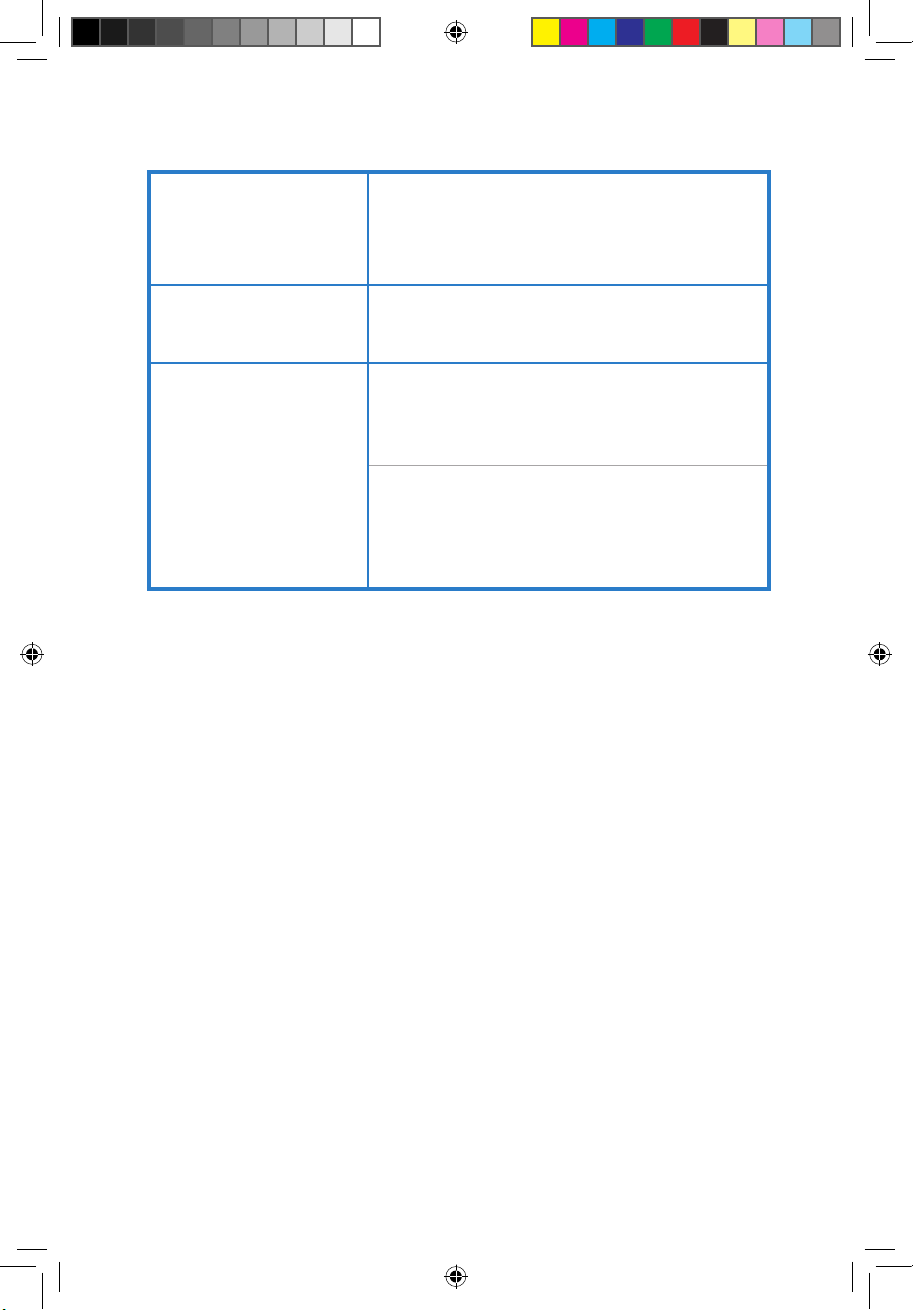
Manufacturer:
ASUSTeK Computer Inc.
Tel: +886-2-2894-3447
Address: No. 150, LI-DE RD., PEITOU, TAIPEI 112,
TAIWAN
Authorised representative
in Europe:
ASUS Computer GmbH
Address: HARKORT STR. 21-23, 40880 RATINGEN,
GERMANY
Authorised distributors
in Turkey:
BOGAZICI BIL GISAYAR SAN. VE TIC. A.S.
Tel: +90 212 3311000
Address: AYAZAGA MAH. KEMERBURGAZ CAD.
NO.10 AYAZAGA/ISTANBUL
INDEX BILGISAYAR SISTEMLERI MUHENDISLIK
SAN. VE TIC. A.S.
Tel: +90 212 3312121
Address: AYAZAGA MAH: CENDERE YOLU NO:9
AYAZAGA/ISTANBUL
REACH
Complying with the REACH (Registration, Evaluation, Authorisation, and
Restriction of Chemicals) regulatory framework, we published the chemical
substances in our products at ASUS REACH website at http://green.asus.com/
english/REACH.htm
Book 1.indb 5 5/11/09 3:49:12 PM
Page 6
Index
1. English ................................................................................1
2. Dansk .................................................................................5
3. Nederlands .........................................................................8
4. Français ............................................................................11
5. Suomi ...............................................................................14
6. Ελληνικά ..........................................................................17
7. Italiano ..............................................................................20
8. Português .........................................................................23
9. Español .............................................................................26
10. Svenska
29
Book 1.indb 6 5/11/09 3:49:12 PM
Page 7
Quick Start Guide
DSL-N11
11n Wireless ADSL modem Router
(For ASUS EZ UI)
E4550 March 2009
®
DSL-N11
ADSL
POWER Sync Data WLAN WPS 1 2 3 4
R
LAN
Book 1.indb 7 5/11/09 3:49:13 PM
Page 8
DSL-N11 Wireless Router Quick Start Guide
2
DSL-N11
ADSL
POWERSyncDataWLAN WPS1 23 4
R
LAN
English
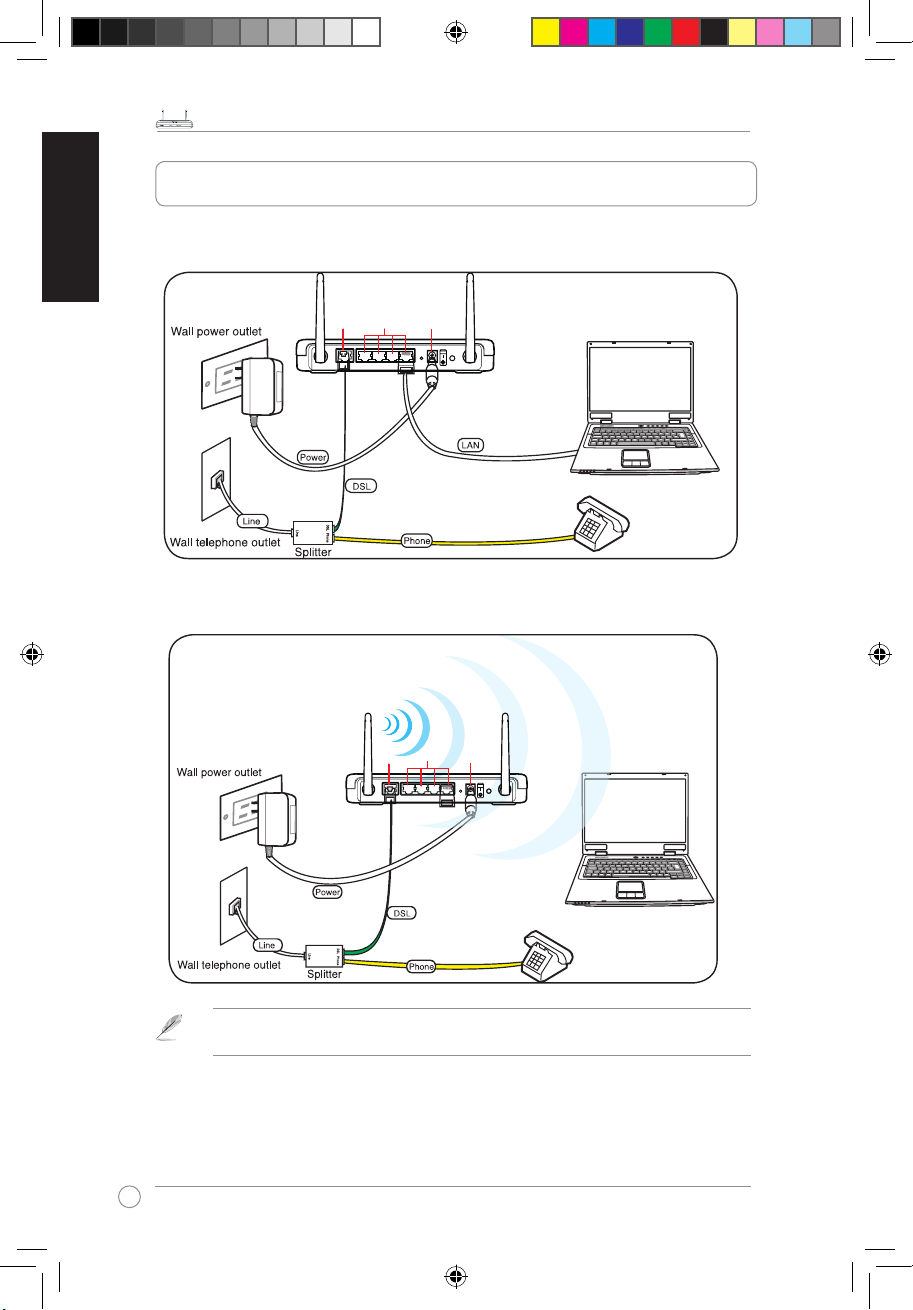
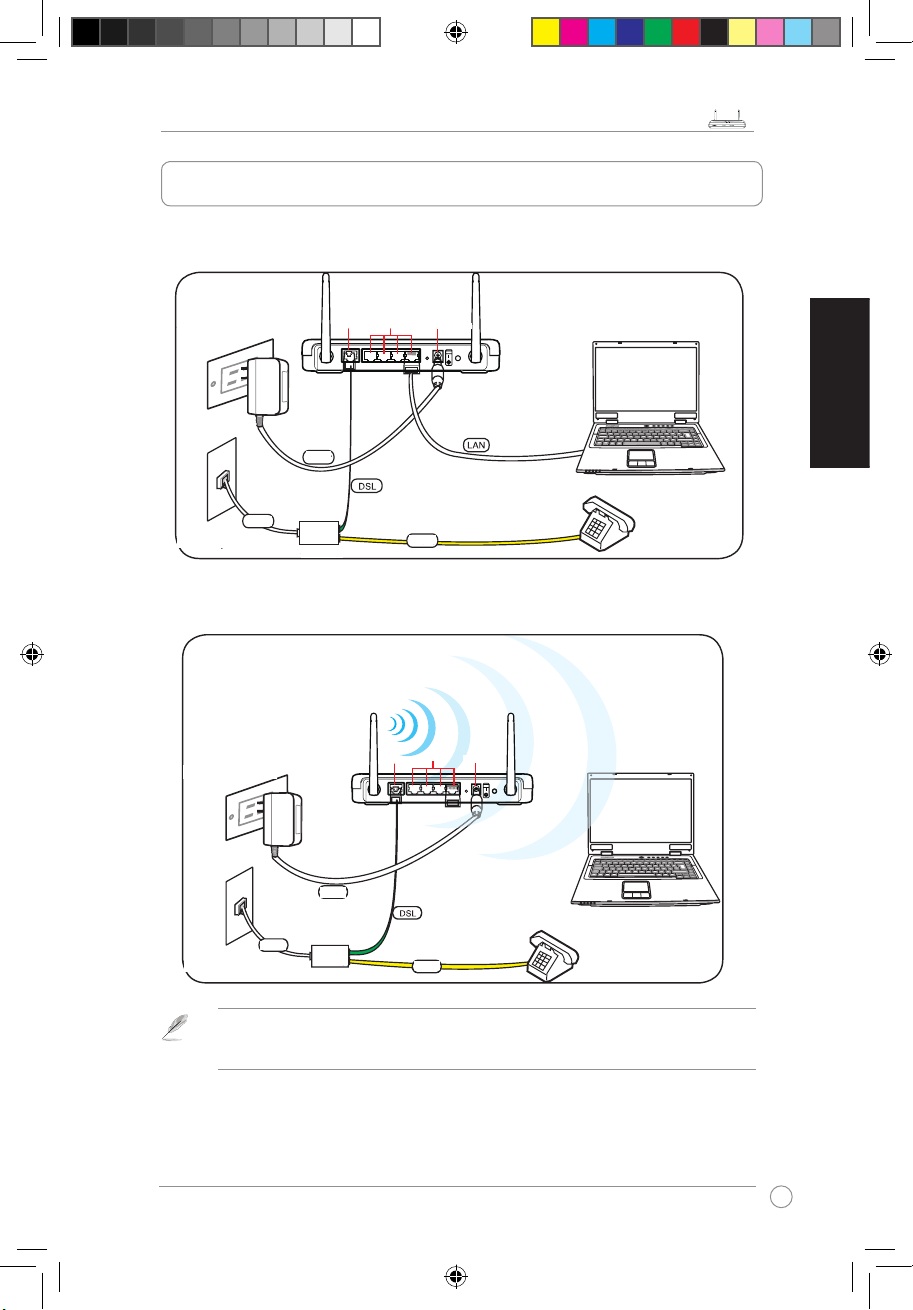
1. Setting up the hardware
Wired connection
Wireless connection
ADSL
DC In
LAN1-4
ADSL
DC In
LAN1-4
For establishing a wireless connection, use an IEEE 802.11b/g/n compatible WLAN card. Refer
to your WLAN card/adapter user manual for wireless connection procedures.
Book 1.indb 2 5/11/09 3:49:15 PM
Page 9
DSL-N11 Wireless Router Quick Start Guide
3
DSL-N11
ADSL
POWERSyncDataWLAN WPS1 23 4
R
LAN
English
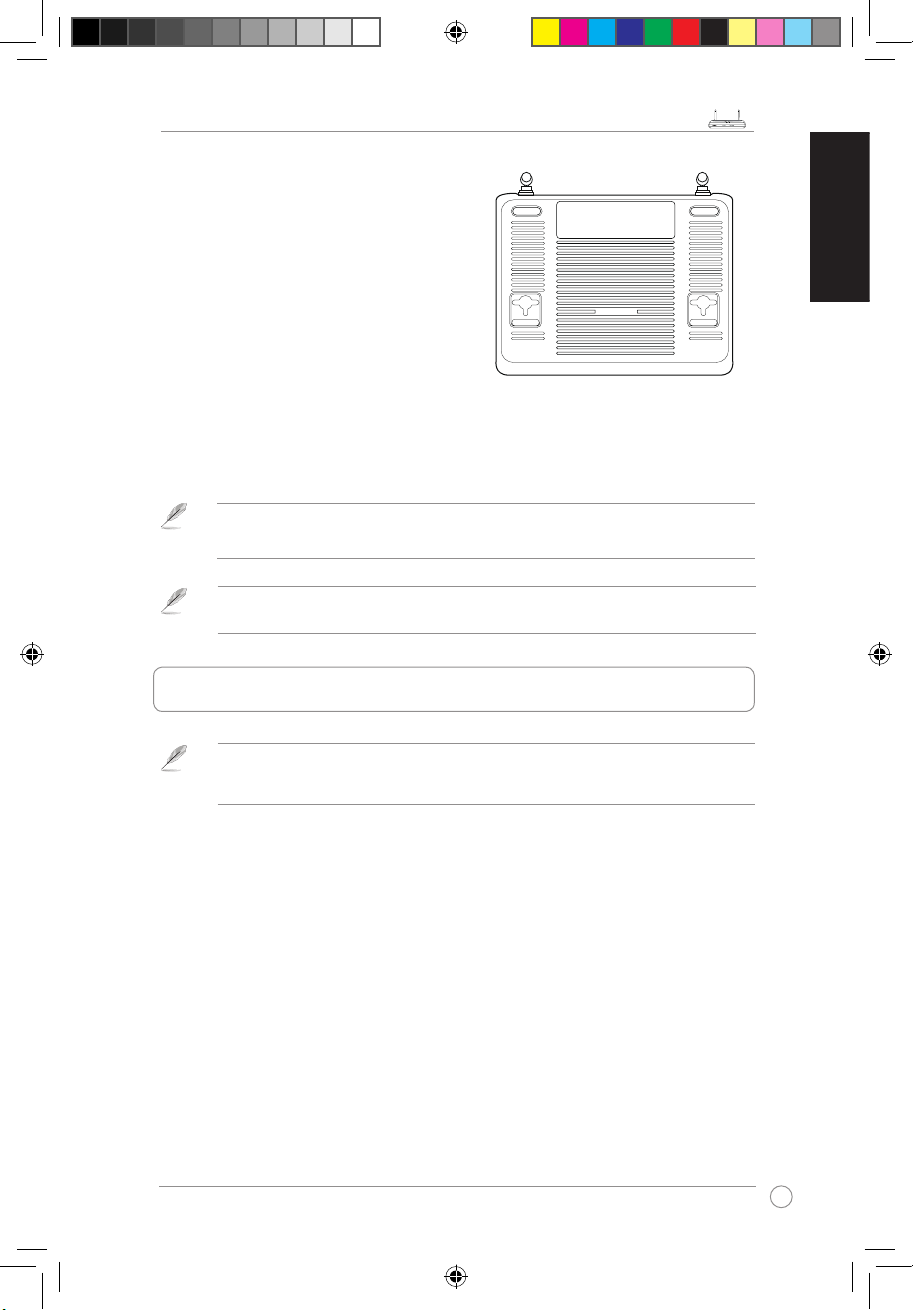
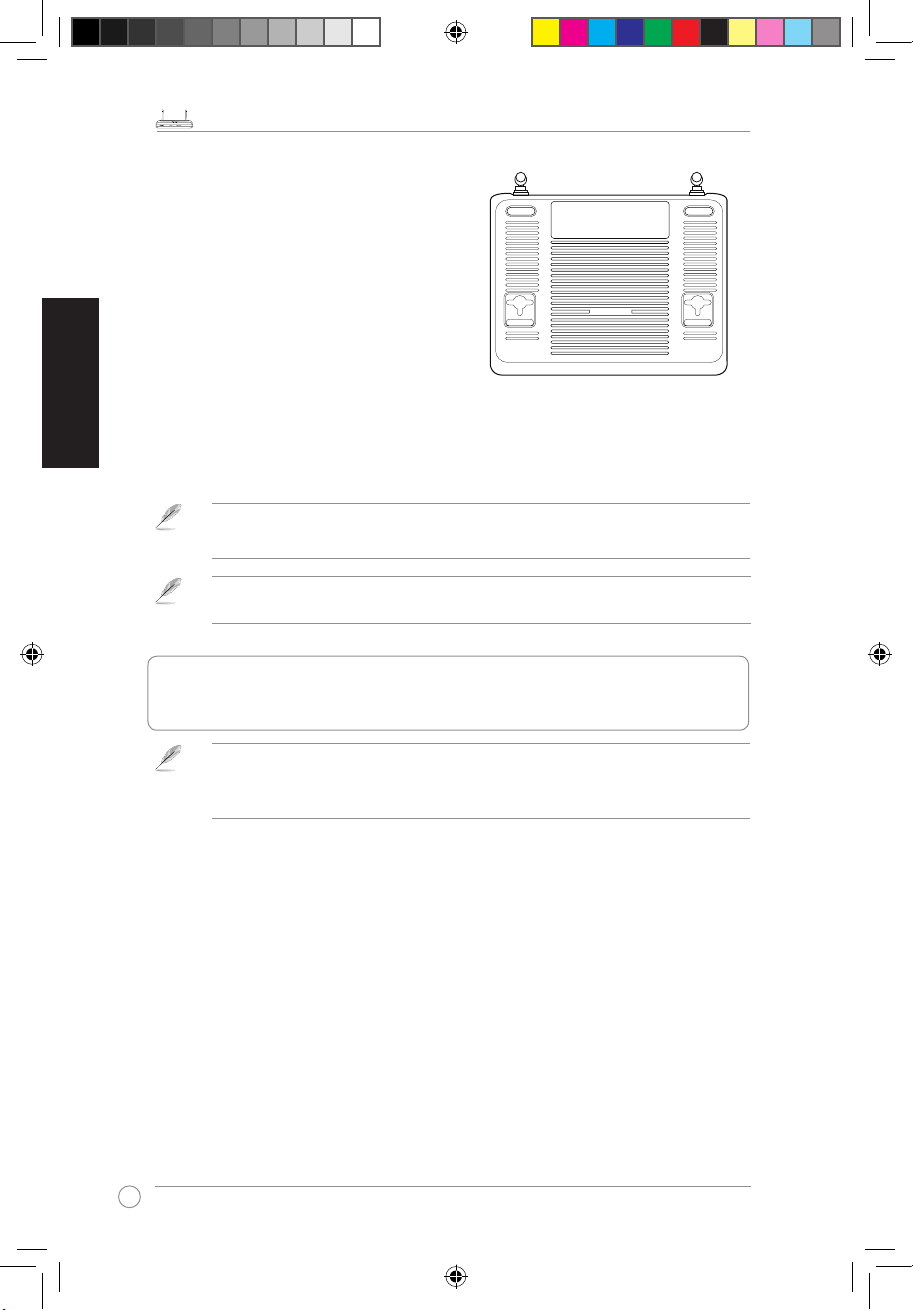
Mounting options
Ou t of the b ox, t he ASUS Wireless
Router is designed to sit on a raised
at surface like a le cabinet or a book
shelf. The unit may also be converted
for mounting to a wall or ceiling.
To mount the ASUS Wireless Router:
1. Look on the underside for the two
mounting hooks.
2. Mark two upper holes on a wall or on
a raised at surface.
3. Tighten two screws until only 1/4'' is showing.
4. Latch the hooks of the ASUS Wireless Router onto the screws.
Note:
Re-adjust the screws if you cannot latch the ASUS Wireless Router onto the screws or if it
is too loose.
2. Using the ASUS Quick Internet Setup (QIS)
By default, there is no security encryption for the ASUS Wireless Router. To protect your network
from malicious attacks or unauthorized access, click
Advanced Setting
>
Wireless
on the web
GUI. For more details, refer to the user manual included in the support CD.
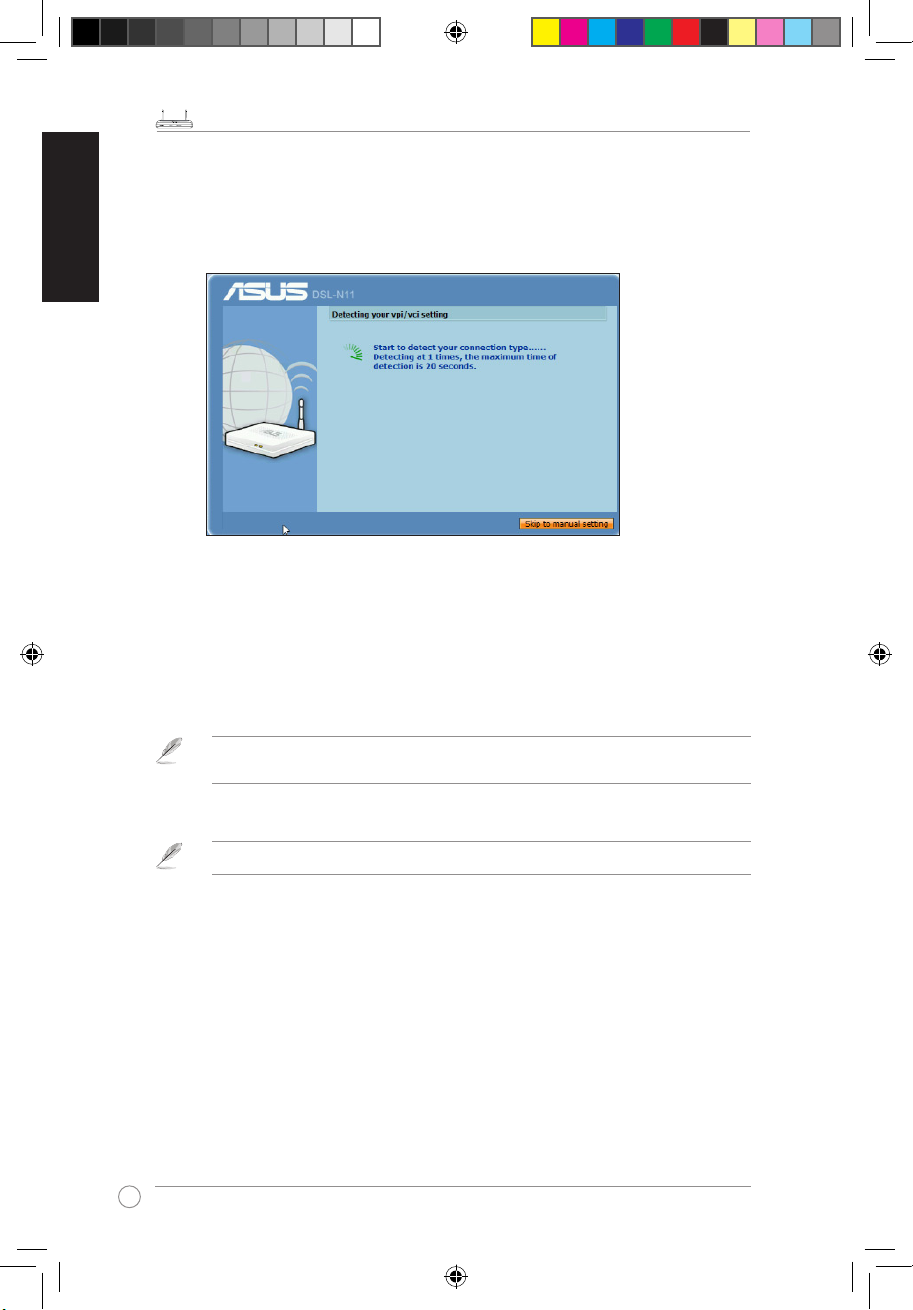
The ASUS Quick Internet Setup (QIS) function automatically detects your Internet
connection settings. If the ASUS Wireless Router cannot automatically detect
your Internet connection type, you may need to manually set up your Internet
connection settings.
To use the ASUS Quick Internet Setup (QIS):
1. Launch the web browser. Wait for about 20 seconds for QIS to automatically
detect your Internet connection type.
2. Key in your connection type’s username and password, then click
Apply
.
3, After the Internet connection type setup is completed, select any of these
options:
Going to Internet
: Click to surf the Internet.
Simply Wireless Security Setting
: Click to congure the wireless security settings.
When mounting on the wall, ensure that the ASUS Wireless Router is located near a
power outlet.
Book 1.indb 3 5/11/09 3:49:16 PM
Page 10
DSL-N11 Wireless Router Quick Start Guide
4
DSL-N11
ADSL
POWERSyncDataWLAN WPS1 23 4
R
LAN
English
Manually setting up your Internet connection
To manually set up your Internet connection:
1. If ASUS QIS cannot automatically detect your Internet connection type, click
Skip to manual settings
.
2. Select your
Country
and
ISP
, then click
Next
. If your country and ISP are not
on the list, select
Not list
and key in your VPI and VCI then click
Next
. You may
ask your ISP for VPI/VCI values.
3. On the login page, key in the default user name (
admin
) and password (
admin
).
4. The router supports these connection types: PPP over ATM (PPPoA), PPP over
Ethernet (PPPoE), MAC Encapsulation Routing (MER), IP over ATM (IPoA),
and Bridging. Select your connection type and follow the onscreen instructions.
Obtain the required information about your Internet connection type from your Internet Service
Provider (ISP).
5. When done, click
Save/Reboot
.
For more details on ASUS QIS, refer to the user manual included in the support CD.
Book 1.indb 4 5/11/09 3:49:17 PM
Page 11
Qick-start vejledning for DSL-N11 Trådløs Ruter
5
DSL-N11
ADSL
POWERSyncDataWLAN WPS1 23 4
R
LAN
Dansk
1. Installation af hardware
Ledningsført forbindelse
Trådløs forbindelse
Til oprettelse af en trådløs forbindelse, skal du bruge et IEEE 802.11b/g/n kompatibelt WLAN
kort. Vedrørende procedurer for trådløs forbindelse, se brugervejledningen for WLAN kort/
adapter.
DSL telefon
ADSL
DC In
LAN1-4
Strøm
DC ind
Ledning
Stikkontakt
Telefonstik på væg
Telefon
Ledning
ADSL
DC In
LAN1-4
Telefon
DSL telefon
Splitter
Stikkontakt
Telefonstik på væg
Strøm
Ledning
Splitter
Ledning
DSL telefon
DC ind
Book 1.indb 5 5/11/09 3:49:19 PM
Page 12
Qick-start vejledning for DSL-N11 Trådløs Ruter
6
DSL-N11
ADSL
POWERSyncDataWLAN WPS1 23 4
R
LAN
Dansk
Anbringelsesmuligheder
ASU S t rådl øs rute r e r be reg net til
anbringelse på en høj overlade som
f. eks. ovenp å et arkivskab ell er en
boghylde. Ruteren kan også anbringes
på væggen eller i loftet.
Sådan monteres ASUS Trådløs Ruter:
1. Find de to monteringskroge på
undersiden.
2. Afmærk to huller på væggen eller på
en ad overade.
3. Stram to skruer, indtil kun cirka 6 mm ses.
4. Anbring krogene på ASUS Trådløs Ruter på skruerne.
Bemærk:
Drej skruerne, hvis du ikke kan anbringe ASUS Trådløs Ruter på skruerne eller, hvis
den hænger for løst.
2. Sådan bruges ASUS Quick Internet
Installation (Quick Internet Setup, QIS)
ASUS Trådløs Ruter har som standard ingen sikkerhedskodning. For at beskytte dit netværk
mod ondartede angreb eller uautoriseret adgang, skal du klikke på
Advanced Setting (Avanceret
indstilling) > Wireless (Trådløs)
på web GUI. For yderligere oplysninger, se brugervejledningen
på hjælpe-cd’en.
ASUS Quick Internet Installation (QIS) funktionen nder automatisk dine
internetforbindelse-indstillinger. Hvis ASUS Trådløs Ruter ikke kan nde din
internet-forbindelsestype automatisk, skal du foretage dine internetforbindelseindstillinger manuelt.
Sådan bruges ASUS Quick Internet Installation (QIS):
1. Start web-browseren. Vent cirka 20 sekunder, indtil QIS automatisk har fundet
din internetforbindelsestype.
2. Indtast forbindelsestypens brugernavn og adgangskode og klik derefter på
Apply (Anvend)
.
3, Når installationen af internetforbindelsestypen er udført, skal du vælge en af
disse muligheder:
Går til Internet:
Klik for at surfe på internettet.
Simpel trådløs sikkerhedsindstilling:
Klik for at kongurere de trådløse
sikkerhedsindstillinger.
Når du monterer ASUS Trådløs Ruter på væggen, skal du sikre dig, at det er nær en
stikkontakt.
Book 1.indb 6 5/11/09 3:49:20 PM
Page 13

Qick-start vejledning for DSL-N11 Trådløs Ruter
7
DSL-N11
ADSL
POWERSyncDataWLAN WPS1 23 4
R
LAN
Dansk
Manuel installation af internetforbindelsen
Sådan installeres din internetforbindelse manuelt:
1. Hvis ASUS QIS ikke kan nde din internetforbindelsestype automatisk, skal du
klikke på
Skip to manual settings (Gå til manuel indstilling).
2. Vælg dit
Country (land)
og
ISP
og klik derefter på
Next (Næste)
. Hvia dit land
og din ISP ikke er på listen, skal du vælge
Not list (Ikke liste)
, indtaste VPI og
VCI og derefter klikke på
Next (Næste)
. Du kan få VPI/VCI værdierne oplyst
hos din ISP.
3. På log-ind siden, indtast standardbrugernavnet
(admin)
og -adgangskoden
(admin)
.
4. Ruteren understøtter følgende forbindelsestyper: PPP over ATM (PPPoA), PPP
over Ethernet (PPPoE), MAC Encapsulation Routing (Indkapslings-rutning)
(MER), IP over ATM (IPoA) og Bridging. Vælg din forbindelsestype og følg
instruktionerne på skærmen.
Få de nødvendige oplysninger om din internetforbindelsestype hos din internetudbyder (ISP).
5. Når dette er gjort, skal du klikke på
Save/Reboot (Gem/Genstart)
.
For yderligere oplysninger om ASUS QIS, se brugervejledningen på hjælpe-cd’en.
Book 1.indb 7 5/11/09 3:49:20 PM
Page 14

Snelstartgids DSL-N11 draadloze router
8
DSL-N11
ADSL
POWERSyncDataWLAN WPS1 23 4
R
LAN
Nederlands
1. De hardware installeren
Bekabelde verbinding
Draadloze verbinding
ADSL
DC In
LAN1-4
ADSL
DC In
LAN1-4
Om een draadloze verbinding te maken, moet u een IEEE 802.11b/g/n-compatibele WLAN-kaart
gebruiken. Raadpleeg de handleiding van uw draadloze adapter voor informatie over het maken
van een draadloze verbinding.
Stopcontact
Telefoonaansluiting
Voeding
Lijn
Splitter
Telefoon
Telefoon
Splitter
Telefoonaansluiting
Lijn
Voeding
Stopcontact
Book 1.indb 8 5/11/09 3:49:22 PM
Page 15

Snelstartgids DSL-N11 draadloze router
9
DSL-N11
ADSL
POWERSyncDataWLAN WPS1 23 4
R
LAN
Nederlands
Montageopties
De ASUS WL-520GU draadloze router is
bij de levering ingesteld voor installatie
op een verhoogd plat oppervlak zoals
een dossierkast of een boekenplank. Het
apparaat kan ook worden omgevormd om
te worden gemonteerd tegen een muur of
aan het plafond.
De ASUS WL-520GU monteren:
1. Zoek de twee montagehaken aan de
onderzijde.
2. Markeer de twee bovenste gaten op een muur of op een verhoogd plat
oppervlak.
3. Maak de twee schroeven vast tot u 1/4'' kunt zien.
4. Klik de haken van de ASUS WL-520GU op de schroeven.
Opmerking:
pas de schroeven opnieuw aan als u de draadlo ze ASUS-router niet op de
schroeven kunt haken of als ze te los zijn.
2. De snelle internetinstelling van ASUS (QIS
(Quick Internet Setup)) gebruiken
Er is standaard geen beveiligingscodering voor de draadloze ASUS-router. Om uw netwerk
te beschermen tegen boosaardige aanvallen of onbevoegde toegang, kikt u op de grasche
webinterface op
Advanced Setting (Geavanceerde instelling) > Wireless (Draadloos)
.
Raadpleeg de handleiding die op de ondersteunings-cd is geleverd voor meer informatie.
De functie QIS (Quick Internet Setup) van ASUS detecteert automatisch de
instellingen voor de internetverbinding. Als de draadloze ASUS-router niet
automatisch het type van uw internetverbinding detecteert, zult u mogelijk de
instellingen voor uw internetverbinding handmatig moeten instellen.
ASUS Quick Internet Setup (QIS) gebruiken:
1. Start de webbrowser. Wacht 20 seconden tot QIS het type van uw
internetverbinding automatisch heeft gedetecteerd.
2. Voer de gebruikersnaam en het wachtwoord in voor het verbindingstype en klik
vervolgens op
Apply (Toepassen)
.
3. Selecteer een van de volgende opties nadat het instellen van het
internetverbindingstype is voltooid:
Naar internet gaan:
klik om te surfen op internet.
Eenvoudige draadloze beveiligingsinstelling:
klik om de draadloze beveiligingsinstellingen
te congureren.
Wanneer u de router aan de muur bevestigt, moet u ervoor zorgen dat de draadloze ASUSrouter zich in de buurt van een stopcontact bevindt.
Book 1.indb 9 5/11/09 3:49:23 PM
Page 16

Snelstartgids DSL-N11 draadloze router
10
DSL-N11
ADSL
POWERSyncDataWLAN WPS1 23 4
R
LAN
Nederlands
Uw internetverbinding handmatig instellen
Uw internetverbinding handmatig instellen:
1. Als ASUS QIS uw internetverbindingstype niet automatisch kan detecteren, klikt
u op
Skip to manual settings (Naar handmatige instellingen schakelen
).
2. Selecteer uw Country (Land) en ISP en klik daarna op Next (Volgende). Als uw
land en ISP niet in de lijst voorkomen, selecteert u Not list (Niet in lijst) en voert
u uw VPI en VCI in. Klik daarna op Next (Volgende). U kunt uw ISP vragen
naar de VPI/VCI-waarden.
3. Voer de standaard gebruikersnaam (
admin
) en het wachtwoord (
admin
) in op
de aanmeldingspagina.
4. De router ondersteunt de volgende verbindingstypen: PPP over ATM (PPPoA),
PPP over Ethernet (PPPoE), MAC Encapsulation Routing (MER), IP over ATM
(IPoA) en Bridging. Selecteer uw verbindingstype en volg de instructies op het
scherm.
Vraag uw Internet-provider (ISP) naar de vereiste informatie over uw internetverbindingstype.
5. Klik op
Save/Reboot (Opslaan/Opnieuw opstarten)
wanneer u klaar bent.
Raadpleeg de handleiding die op de ondersteunings-cd is geleverd voor meer informatie over QIS.
Book 1.indb 10 5/11/09 3:49:24 PM
Page 17

Guide de démarrage rapide du routeur sans l DSL-N11
11
DSL-N11
ADSL
POWERSyncDataWLAN WPS1 23 4
R
LAN
Français
1. Installer le matériel
Connexion Ethernet
Connexion sans l
ADSL
DC In
LAN1-4
ADSL
DC In
LAN1-4
Pour établir une connexion sans l, utilisez une carte réseau sans l IEEE 802.11b/g/n
compatible. Référez-vous au mode d’emploi de votre carte / adaptateur réseau sans l pour les
procédures de connexion.
Prise de courant murale
Prise téléphonique murale
Alimentation
Ligne
Séparateur
Téléphone
Téléphone
Prise téléphonique murale
Linha
Alimentation
Prise de courant murale
Séparateur
Book 1.indb 11 5/11/09 3:49:26 PM
Page 18

Guide de démarrage rapide du routeur sans l DSL-N11
12
DSL-N11
ADSL
POWERSyncDataWLAN WPS1 23 4
R
LAN
Français
Options de montage
Une fois sorti de son emballage, le
routeur sans l ASUS est conçu pour
être installé sur une surface plane
comme un meuble ou une étagère.
L'unité peut également être xée à un
mur ou au plafond.
Pour monter le routeur sans l ASUS :
1. Localisez les deux crochets
de xation situés sur le dessous
du routeur.
2. Dénissez deux trous sur un mur ou sur une autre surface plane.
3. Serrez les deux vis jusqu'à ce qu'un quart seulement soit visible.
4. Faites passer puis posez les crochets du routeur sans l ASUS sur les vis.
Note : réajustez les vis si vous ne pouvez pas installer le routeur sans l ASUS sur les vis ou si
l'installation est instable.
2. Utiliser ASUS Quick Internet Setup (QIS)
Par défaut, aucun cryptage n'est adopté par le routeur sans fil ASUS. Pour protéger votre
réseau des attaques ou accès non autorisés, cliquez sur
Paramètres avancés
>
Sans l
dans
l'utilitaire de conguration en ligne. Pour plus de détails, référez-vous au manuel de l'utilisateur
inclut dans le CD de support.
La fonction ASUS Quick Internet Setup (QIS) détecte automatiquement les
paramètres de votre connexion Internet. Si le routeur sans l ASUS n’arrive pas
à détecter votre type de connexion, vous devez congurer manuellement les
paramètres de votre connexion à Internet.
Pour utiliser ASUS Quick Internet Setup (QIS):
1. Lancez votre explorateur web. Patientez environ 20 secondes le temps que
QIS détecte votre type de connexion à Internet.
2. Saisissez votre nom d’utilisateur et mot de passe, puis cliquez sur
Apply
(Appliquer)
.
3, Une fois la conguration du type de connexion effectuée, sélectionnez une des
options suivantes :
Going to Internet (Surfer sur Internet)
: Cliquez sur cette option pour lancer Internet.
Simply Wireless Security Setting (Congurer les paramètres de sécurité)
: cliquez sur
cette option pour congurer les paramètres de sécurité.
Pour une installation murale, assurez-vous que le routeur sans l ASUS soit situé près
d'une prise de courant.
Book 1.indb 12 5/11/09 3:49:27 PM
Page 19

Guide de démarrage rapide du routeur sans l DSL-N11
13
DSL-N11
ADSL
POWERSyncDataWLAN WPS1 23 4
R
LAN
Français
Congurer manuellement votre connexion à Internet
Pour Congurer manuellement votre connexion à Internet :
1. Si ASUS n’arrive pas à détecter votre type de connexion, cliquez sur
Skip to
manual settings (Passer en réglage manuel)
.
2. Sélectionnez votre pays et fournisseur d'accès à Internet puis cliquez sur
Suivant
. Si votre pays et fournisseur d'accès ne figurent pas dans la liste,
sélectionnez
Pas dans la liste
puis saisissez votre VPI et VCI puis cliquez sur
Suivant
. Contacter votre fournisseur d'accès pour obtenir les valeurs VPI/VCI.
3. Dans la fenêtre de connexion, saisissez le nom d'utilisateur par défaut (
admin
)
et le mot de passe (
admin
).
4. Le routeur supporte les types de connexion suivants : PPP over ATM (PPPoA),
PPP over Ethernet (PPPoE), MAC Encapsulation Routing (MER), IP over
ATM (IPoA), et Bridging. Sélectionnez votre type de connexion puis suivez les
instructions à l'écran.
Obtenez les informations relatives à votre type de connexion Internet auprès de votre fournisseur
d'accès à Internet.
5. Une fois terminé, cliquez sur
Sauvegarder/Redémarrer
.
Pour plus de détails sur ASUS QIS, référez-vous au manuel de l'utilisateur contenu sur le CD de
support.
Book 1.indb 13 5/11/09 3:49:27 PM
Page 20

14
DSL-N11
ADSL
POWERSyncDataWLAN WPS1 23 4
R
LAN
DSL-N11 langattoman reitittimen pika-aloitusopas
Suomi
1. Laitteiston asentaminen
Langallinen yhteys
Langaton yhteys
ADSL
DC In
LAN1-4
ADSL
DC In
LAN1-4
Muodosta langaton yhteys IEEE 802.11b/g/n -yhteensopivalla WLAN-kortilla. Katso langattoman
sovittimesi käyttöohjeesta neuvoja langattoman yhteyden muodostamiseen.
Pistorasia
Puhelinpistoke
Virta
Linja
Jakaja
Puhelin
Puhelin
Jakaja
Puhelinpistoke
Linja
Virta
Pistorasia
Book 1.indb 14 5/11/09 3:49:29 PM
Page 21

15
DSL-N11
ADSL
POWERSyncDataWLAN WPS1 23 4
R
LAN
DSL-N11 langattoman reitittimen pika-aloitusopas
Suomi
Asennusvaihtoehdot
Kun ASUS WL-520GU langaton reititin ei
ole pakkauksessaan, se on suunniteltu
asetettavaksi tasaiselle, korotetulle
pinnalle, kuten arkistokaapin päälle tai
kirjahyllyyn. Yksikkö voidaan muuntaa
myös seinälle tai kattoon asennettavaksi.
ASUS WL-520GU: n asentaminen:
1. Etsi kaksi kiinnityskoukkua laitteen
pohjasta.
2. Merkitse kaksi reiän kohtaa seinään tai korotettuun, tasaiseen pintaan.
3. Kiristä ruuveja, kunnes vain 1/4'' niistä on näkyvillä.
4. Kiinnitä ASUS WL-520GU:n koukut ruuveihin.
Huomautus:
Jos et saa kiinnitettyä ASUS langatonta reititintä ruuveihin tai kiinnitys on liian
löysä, säädä ruuvejä uudelleen.
2. ASUS Quick Internet Setup (QIS (Internetpika-asennus)) -toiminnon käyttö
Ole tuk sen a lan gattomassa ASUS-reitittimessä ei ol e turvasalausta. Voit suoj ata verk on
pahantahtoisilta hyökkäyksiltä ja valtuuttamattomalta käytöltä napsauttamalla
Advanced Setting
(Lisäasetukset) > Wireless (Langaton)
verkkokäyttöliittymästä. Voit katsoa tarkempia tietoja
tuki-CD-levyllä olevasta käyttöoppaasta.
ASUS QIS -toiminto tunnistaa automaattisesti Internet-yhteysasetukset. Jos
langaton ASUS-reititin ei automaattisesti tunnista Internet-yhteyden tyyppiä, sinun
on ehkä annettava Internet-yhteysasetukset manuaalisesti.
Voit käyttää ASUS QIS -toimintoa seuraavasti:
1. Käynnistä verkkoselain. Odota noin 20 sekuntia, että QIS tunnistaa
automaattisesti Internet-yhteystyypin.
2. Kirjoita yhteystyypin käyttäjänimi ja salasana ja napsauta sitten
Apply (Käytä)
.
3. Kun Internet-yhteystyypin asetus on valmis, valitse jokin näistä vaihtoehdoista:
Mene Internetiin:
Siirry selaamaan Internetiä.
Yksinkertaiset langattomat turva-asetukset:
Määritä langattomat turva-asetukset.
Varmista seinään kiinnitettäessä, että langaton ASUS-reititin on lähellä pistorasiaa.
Book 1.indb 15 5/11/09 3:49:30 PM
Page 22

16
DSL-N11
ADSL
POWERSyncDataWLAN WPS1 23 4
R
LAN
DSL-N11 langattoman reitittimen pika-aloitusopas
Suomi
Internet-yhteyden asettaminen manuaalisesti
Voit asettaa Internet-yhteyden manuaalisesti seuraavalla tavalla:
1. Jos ASUS QIS ei automaattisesti tunnista Internet-yhteystyyppiä, napsauta
Skip to manual settings (Siirry manuaalisiin asetuksiin)
.
2. Valitse Coun try (Maa) ja ISP (Palveluntarjoaja) ja napsauta sitten Next
(Seuraava). Jos maatasi ja palveluntarjoajaasi ei ole luettelossa, valitse Not list
(Ei luettelossa). Anna sitten VPI- ja VCI-arvosi ja napsauta Next (Seuraava).
Voit joutua kysymään palveluntarjoajalta VPI/VCI-arvot.
3. Anna sisäänkirjautumissivulla oletuskäyttäjänimi (
admin
) ja -salasana (
admin
).
4. Reititin tukee näitä yhteystyyppejä: PPP ATM:n yli (PPPoA), PPP Ethernetin yli
(PPPoE), MAC-kapsulointireititys (MER), IP ATM:n yli (IPoA) ja siltaus. Valitse
yhteystyyppi ja noudata ruudun ohjeita.
Selvitä tarvittavat tiedot Internet-yhteyden tyypistä Internet-palveluntarjoajaltasi (ISP).
5. Kun olet valmis, napsauta
Save/Reboot (Tallenna/Käynnistä uudelleen)
.
Lisätietoja QIS-toiminnosta löydät tuki-CD:n käyttöohjeesta.
Book 1.indb 16 5/11/09 3:49:30 PM
Page 23

Ασύρματος Δρομολογητής DSL-N11 Σύντομος οδηγός ξεκινήματος
17
DSL-N11
ADSL
POWERSyncDataWLAN WPS1 23 4
R
LAN
DeutschΕλληνικά
1. Εγκατάσταση του υλικού
Ενσύρματη σύνδεση
Ασύρματη σύνδεση
ADSL
DC In
LAN1-4
ADSL
DC In
LAN1-4
Για τη δημιουργία ασύρματης σύνδεσης, χρησιμοποιήστε μια κάρτα WLAN συμβατή με
το πρότυπο IEEE 802.11b/g/n. Ανατρέξτε στις οδηγίες χρήσης της ασύρματης κάρτας σας
για τη διαδικασία ασύρματης σύνδεσης.
Μόντεμ
Μόντεμ
Επιτοίχια πρίζα
Επιτοίχια πρίζα τηλεφώνου
Μόντεμ
Γραμμή
Διαιρέτης
Τηλέφωνο
Τηλέφωνο
Επιτοίχια πρίζα τηλεφώνου
Γραμμή
Μόντεμ
Επιτοίχια πρίζα
Διαιρέτης
Book 1.indb 17 5/11/09 3:49:33 PM
Page 24

Ασύρματος Δρομολογητής DSL-N11 Σύντομος οδηγός ξεκινήματος
18
DSL-N11
ADSL
POWERSyncDataWLAN WPS1 23 4
R
LAN
DeutschΕλληνικά
Επιλογές προσάρτησης
Όταν τον βγάλετε από τη συσκευασία
του, ο Ασύρματος δρομολογητής
ASUS DSL-N11 είναι σχεδιασμένος για
να κάθεται σε μια σηκωμένη επίπεδη
επιφάνεια όπως μια αρχειοθήκη ή
ένα ράφι. Η μονάδα μπορεί επίσης να
υποστεί μετατροπή για τοποθέτηση σε
τοίχο ή οροφή.
Για προσάρτηση του ASUS DSL-N11:
1. Δείτε στο κάτω μέρος για δύο
γάντζους προσάρτησης.
2. Σημειώστε δύο πάνω τρύπες σε ένα τοίχο ή σε μια ανυψωμένη επιφάνεια.
3. Σφίξτε τις δύο βίδες μέχρι να φαίνεται μόνο 1/4''.
4. Κλειδώστε τους γάντζους του ASUS WL-520GU στις βίδες.
Σημείωση:
Ρυθμίστε ξανά τις βίδες αν δεν μπορείτε να κλειδώσετε τον Α σύρματο
Δρομολογητή της ASUS στις βίδες ή αν είναι πολύ χαλαρός.
2. Χρήση της Γρήγορης Ρύθμισης Internet (QIS) της ASUS
Από πρ οεπ ιλο γή, δε ν υπ άρχ ει κρυ πτο γρά φ ησ η ασ φαλ εία ς γι α τ ον Ασ ύρμα το
Δρομολογητή ASUS. Για να προστατεύσετε το δίκτυό σας από κακόβουλες επιθέσεις
ή μη εξουσιοδοτημένη πρόσβαση, κάντε κλικ στο
Advanced Setting (Προχωρημένες
ρυ θμίσεις) > Wi reless (Α σύ ρμ ατο δίκτυο)
στ η διαδικτ υα κή διε παφή χρήσ τη . Γι α
περισσότερες λεπτομέρειες, ανατρέξτε στο εγχειρίδιο χρήστη που περιλαμβάνεται στο
CD υποστήριξης.
Η λειτουργία Γρήγορης Ρύθμισης Internet (QIS) της ASUS ανιχνεύει αυτόματα
τις ρυθμίσεις της σύνδεσής σας στο Internet. Αν ο Ασύρματος Δρομολογητής
ASUS δεν μπορεί να ανιχνεύσει τον τύπο της σύνδεσής σας στο Internet, μπορεί
να χρειαστεί να ρυθμίσετε χειροκίνητα τις ρυθμίσεις σύνδεσης στο Internet.
Για να χρησιμοποιήσετε τη Γρήγορη Ρύθμιση Internet (QIS) της ASUS:
1. Εκκινήστε το πρόγραμμα πλοήγησης στο διαδίκτυο. Περιμένετε περίπου
20 δευ τερ όλε πτα ώστ ε τ ο QIS ν α α νιχ νεύσει αυτ όμα τα τον τύπ ο
σύνδεσης στο Internet.
2. Πληκτρολογήστε το όνομα χρήστη και τον κωδι κό πρόσβαση ς της
σύνδεσής σας και κάντε κλικ στο Apply (Εφαρμογή).
3, Αφού ολοκληρωθεί η ρύθμιση του τύπου σύνδεσης στο Internet, επιλέξτε
ένα από τα ακόλουθα:
Μετάβαση στο Internet:
Κάντε κλικ για πλοήγηση στο Internet.
Απλά ρύθμιση ασύρματης ασφαλείας:
Κάντε κλικ για να διαμορφώσετε τις ρυθμίσεις
ασύρματης ασφάλειας.
Κατά την επιτοίχια τοποθέτηση, σιγουρευτείτε ότι ο Ασύρματος Δρομολογητής ASUS
βρίσκεται κοντά σε πρίζα ρεύματος.
Book 1.indb 18 5/11/09 3:49:33 PM
Page 25

Ασύρματος Δρομολογητής DSL-N11 Σύντομος οδηγός ξεκινήματος
19
DSL-N11
ADSL
POWERSyncDataWLAN WPS1 23 4
R
LAN
DeutschΕλληνικά
Μη αυτόματη ρύθμιση της σύνδεσης στο Internet
Για να ρυθμίσετε τη σύνδεση στο Internet με μη αυτόματο τρόπο:
1. Αν το ASUS QIS δεν μπορεί να ανιχνεύσει αυτόματα τον τύπο της
σύνδεσής σας στο Internet, κάντε κλικ στο
Skip to manual settings
(Μετάβαση στη μη αυτόματη ρύθμιση)
.
2. Επιλέξτε
Country (Χώρα)
και
ISP (Πάροχος διαδικτυακών υπηρεσιών)
και
κάντε κλικ στο
Next (Επόμενο)
. Εάν η χώρα και ο ISP σας δεν βρίσκονται
στη λίστα, επιλέξτε
Not list (Εκτός λίστας)
και πληκτρολογήστε τα VPI και
VCI στη συνέχεια κάντε κλικ στο
Next (Επόμενο)
. Μπορείτε να ζητήσετε
τις τιμές VPI/VCI από τον ISP σας.
3. Στη σελίδα σύνδεσης, πληκτρολογήστε το προεπιλεγμένο όνομα χρήστη
(
admin
) και τον προεπιλεγμένο κωδικό πρόσβασης (
admin
).
4. Ο δρομολογητής υποστηρίζει τους εξής τύπους σύνδεσης: PPP πάνω
απ ό ATM (PPPoA ), PPP πάνω α πό Ethernet (PPPoE ), Δρομο λόγ ηση
Ενθυλάκωσης MAC (MER), IP πάνω από ATM (IPoA), και Γεφύρωση.
Επιλέξτε τον τύπο της σύνδεσής σας και ακολουθήστε τις οδηγίες που
εμφανίζονται στην οθόνη.
Μπορείτε να λάβετε τις απαιτούμενες πληροφορίες σχετικά με τον τύπο της σύνδεσής
σας στο Internet από τον Πάροχο διαδικτυακών υπηρεσιών (ISP).
5. Όταν τελειώσετε, κάντε κλικ στο
Save/Reboot (Αποθήκευση
Επανεκκίνηση)
.
Για περισσότερες λεπτομέρειες σχετικά με το QIS, ανατρέξτε στις οδηγίες χρήσης που
περιλαμβάνονται στο CD υποστήριξης.
Book 1.indb 19 5/11/09 3:49:34 PM
Page 26

Router Wireless DSL-N11 - Guida Rapida
20
DSL-N11
ADSL
POWERSyncDataWLAN WPS1 23 4
R
LAN
Italiano
1. Installazione Hardware
Connessione via Cavo
Connessione Senza Cavo (Wireless)
ADSL
DC In
LAN1-4
ADSL
DC In
LAN1-4
Per stabilire una connessione senza cavo,utilizzare una scheda WLAN compatibile con IEEE
802.11b/g/n. Per le modalità di connessione wireless, consultare il Manuale Utente della scheda/
adattatore WLAN.
Presa di corrente a muro
Presa telefonica a muro
Alimentazione
Linja
Sdoppiatore
Telefono
Telefono
Sdoppiatore
Presa telefonica a muro
Linea
Alimentazione
Presa di corrente a muro
Book 1.indb 20 5/11/09 3:49:36 PM
Page 27

Router Wireless DSL-N11 - Guida Rapida
21
DSL-N11
ADSL
POWERSyncDataWLAN WPS1 23 4
R
LAN
Italiano
Opzioni di Montaggio
Dopo e sse re s tat o pr ele vato da lla
confezione, il Router Wireless ASUS
è stato progettato per essere posto su
di una supercie piana rialzata, come
un armadietto per documen ti o una
mensola. Il dispositivo dovrebbe anche
essere adattato al montaggio su parete
o softto.
Per montare il Router Wireless ASUS:
1. Lo c a l i z z a r e i d u e g a n c i p e r il
montaggio,sul lato inferiore dell'apparecchio.
2. Segnare i due fori superiori su una parete o una supercie piana rialzata.
3. Stringere le due viti, sino a quando restano esposte solo per 1/4''.
4. Fissare i ganci del Router Wireless ASUS alle viti.
Nota:
Se il Router Wireless ASUS non è ben ssato o troppo allentato, regolare nuovamente le
viti.
2. Utilizzo di ASUS Quick Internet Setup (QIS)
In base alle impostazioni predenite, non c'è alcuna crittograa di protezione del Router Wireless
ASUS.Per proteggere la rete da attacchi di hacker o da accesso non autorizzato,cliccare
Advanced Setting (Impostazioni Avanzate)
>
Wireless
sull'interfaccia utente web. Per
maggiori dettagli, consultare il Manuale Utente nel CD di Supporto.
La funzione ASUS Quick Internet Setup (QIS) rileva automaticamente le impostazioni
di connessione a Internet.Se il Router Wireless ASUS non è in grado di operare in
questo modo, potrebbe essere necessario congurare manualmente le impostazioni
di connessione.
Per utilizzare ASUS Quick Internet Setup (QIS):
1. Avviare il browser web. Attendere circa 20 secondi afnchè la funzione QIS
rilevi automaticamente il tipo di connessione a Internet.
2. Digitare nome utente e password del tipo di connessione e poi cliccare
Apply
(Applica)
.
3, Dopo aver completato la configurazione del tipo di connessione,selezionare
una delle seguenti opzioni:
Going to Internet
: Cliccare qui per navigare in Internet.
Simply Wireless Security Setting
: Cliccare qui per congurare le impostazioni di protezione
wireless.
Quando si installa sulla parete il Router Wireless ASUS, assicurarsi che sia collocato
vicino ad una presa di corrente.
Book 1.indb 21 5/11/09 3:49:37 PM
Page 28

Router Wireless DSL-N11 - Guida Rapida
22
DSL-N11
ADSL
POWERSyncDataWLAN WPS1 23 4
R
LAN
Italiano
Congurazione Manuale della Connessione a Internet
Per congurare manualmente la connessione a Internet:
1. Se ASUS QIS non è in grado di rilevare automaticamente il tipo di connessione
a Internet, cliccare
Skip to manual settings (Passa alle impostazioni
manuali)
.
2. Selezionare
Country (Paese)
e
ISP
, quindi cliccare
Next (Avanti)
.Se il
proprio paese e ISP non sono nell'elenco, selezionare
Not list (Fuori Elenco)
e digitare il proprio VPI e VCI,quindi cliccare
Next (Avanti)
.I valori VPI/VCI
possono essere richiesti all' ISP.
3. Alla pagina di login, digitare il nome utente predenito (
admin
) e la password
predenita (
admin
).
4. Il router supporta i seguenti tipi di connessione: PPP over ATM (PPPoA), PPP
over Ethernet (PPPoE), MAC Encapsulation Routing (MER), IP over ATM (IPoA),
e Bridging. Selezionare il tipo di connessione e seguire le istruzioni sullo
schermo.
Richiedere all' ISP (Internet Service Provider) le informazioni necessarie sul tipo di connessione
a internet.
5. Al termine, cliccare
Save/Reboot (Salva/Riavvia)
.
Per approfondimenti su ASUS QIS, consultare il Manuale Utente nel CD di Supporto.
Book 1.indb 22 5/11/09 3:49:37 PM
Page 29

23
Guia Rápido de Iniciação do Router Sem Fios DSL-N11
DSL-N11
ADSL
POWERSyncDataWLAN WPS1 23 4
R
LAN
Português
1. Congurar o hardware
Ligação cablada
Ligação sem os
ADSL
DC In
LAN1-4
ADSL
DC In
LAN1-4
Para establecer uma ligação sem os, utilize um cartão WLAN compatível com IEEE 802.11b/g/n.
Consulte o manual do utilizador do seu adaptador sem os para procedimentos de ligação sem os.
Tomada eléctrica
Tomada de telefone
Alimentação
Linha
Derivador
Telefone
Telefone
Derivador
Tomada de telefone
Linha
Alimentação
Tomada eléctrica
Book 1.indb 23 5/11/09 3:49:39 PM
Page 30

24
Guia Rápido de Iniciação do Router Sem Fios DSL-N11
DSL-N11
ADSL
POWERSyncDataWLAN WPS1 23 4
R
LAN
Português
Opções de montagem
Fora da caixa, o Router Sem Fios WL-
520GU ASUS é concebido para estar
numa superfície plana e elevada, como
um arquivo de cheiros ou uma estante
de livros. A unidade também pode ser
convertida para montagem numa parede
ou tecto.
Para montar o WL-520GU ASUS:
1. Procure dois ganchos de montagem
na parte inferior.
2. Marque dois orifícios superiores numa parede ou numa superfície plana e
elevada.
3. Aperte dois parafusos até que apenas esteja visível 1/4".
4. Prenda os ganchos do WL-520GU ASUS aos parafusos.
Nota:
Reajuste os parafusos se não conseguir prender o Router Sem Fios ASUS aos parafusos
ou se estiver muito solto.
2. Utilizar a Conguração Rápida de Internet
ASUS (QIS)
Por predenição, a encriptação de segurança do Router Sem Fios ASUS não está activada.
Para proteger a su a rede de ataques maliciosos ou acessos não autor izados, clique em
Advanced Setting (Conguração avançada) > Wireless (Sem os)
na interface Web. Para
mais detalhes, consulte o manual do utilizador incluído no CD de suporte.
A função de Conguração Rápida de Internet (QIS) detecta automaticamente as
suas denições de ligação à Internet. Se o Router Sem Fios ASUS não detectar
automaticamente o seu tipo de ligação à Internet, será necessário congurar
manualmente as suas denições de ligação à Internet.
Para utilizar a Conguração Rápida de Internet ASUS (QIS):
1. Inicie o navegador Web. Aguarde cerca de 20 segundos para que a função de
QIS detecte o seu tipo de ligação à Internet.
2. Introduza o nome de utilizador e palavra-passe do seu tipo de ligação à
Internet, depois clique em Apply (Aplicar).
3, Quando a conguração do tipo de ligação à Internet estiver concluída,
seleccione uma das seguintes opções:
Aceder à Internet:
Clique para navegar na Internet.
Congurar apenas as denições de segurança da rede sem os:
Clique para congurar
as denições de segurança da rede sem os.
Ao montar na parede, assegure-se que o Router Sem Fios ASUS se encontra perto de
uma tomada eléctrica.
Book 1.indb 24 5/11/09 3:49:40 PM
Page 31

25
Guia Rápido de Iniciação do Router Sem Fios DSL-N11
DSL-N11
ADSL
POWERSyncDataWLAN WPS1 23 4
R
LAN
Português
Congurar manualmente a sua ligação à Internet
Para congurar manualmente a sua ligação à Internet:
1. Se a função ASUS QIS não detectar automaticamente o seu tipo de ligação à
Internet, clique em
Skip to manual settings (Avançar para a conguração
manual)
.
2. Seleccione o
Country (País) e ISP
, depois clique em
Next (Seguinte)
. Se
o seu país e ISP não estiverem na lista, seleccione
Not list (Não listado)
e
introduza os seus valores de VPI e VCI, depois clique em
Next (Seguinte)
.
Pode contactar o seu ISP para saber os valores de VPI/VCI.
3. On the login page, key in the default user name (
admin
) and password (
admin
).
4. O router suporta os seguintes tipos de ligação: PPP por ATM (PPPoA), PPP
por Ethernet (PPPoE), Encapsulamento de encaminhamento MAC (MER),
IP por ATM (IPoA), e Bridging. Seleccione o seu tipo de ligação e siga as
instruções exibidas no ecrã.
Co ntacte o se u Fornece do r de Serviç os de In ternet (I SP), para o bt er as informa çõ es
necessárias relativas ao seu tipo de ligação à Internet.
5. Quando terminar, clique em
Save/Reboot (Guardar/Reiniciar)
.
Para mais detalhes sobre a QIS, consulte o manual do utilizador incluído no CD de suporte.
Book 1.indb 25 5/11/09 3:49:41 PM
Page 32

26
Guía de inicio rápido del router inalámbrico DSL-N11
Español
DSL-N11
ADSL
POWERSyncDataWLAN WPS1 23 4
R
LAN
1. Instalar el hardware
Conexión con cable
Conexión inalámbrica
ADSL
DC In
LAN1-4
ADSL
DC In
LAN1-4
Para establecer una conexión inalámbrica, utilice una tarjeta WLAN compatible con IEEE
802.11 b/g/n. Consulte el manual de usuario de su adaptador inalámbrico para conocer el
procedimiento de conexión inalámbrica.
Toma de suministro eléctrico
Toma de conexión telefónica
Alimentación
Línea
Divisor
Teléfono
Teléfono
Divisor
Toma de conexión telefónica
Línea
Alimentación
Toma de suministro eléctrico
Book 1.indb 26 5/11/09 3:49:43 PM
Page 33

27
Guía de inicio rápido del router inalámbrico DSL-N11
Español
DSL-N11
ADSL
POWERSyncDataWLAN WPS1 23 4
R
LAN
Opciones de montaje
El router inalámbrico ASUS WL-520GU
ha sido diseñado para colocarlo sobre
una supercie plana, como un archivador
o una estantería. El equipo puede
convertirse también para poder montarlo
en una pared o techo.
Para montar el router ASUS WL-520GU:
1. Busque los dos oricios de montaje
situados en la parte inferior.
2. Marque los dos oricios superiores en una pared o supercie elevada.
3. Enrosque dos tornillos hasta que solamente sobresalga 1/4".
4. Introduzca los tornillos en los ganchos del router ASUS WL-520GU.
Nota:
vuelva a ajustar los torn illos si no puede intr oducirlos en los gancho s del router
inalámbrico ASUS o si queda demasiado separado de la pared.
2. Uso de la función Quick Internet Setup (QIS
(Conguración rápida de Internet)) de ASUS
De forma predeterminada, su router inalámbrico ASUS no ofrece ningún cifrado de seguridad.
Si desea proteger su red frente ataques maliciosos o accesos no autorizados, haga clic en
Advanced Setting (Conguración avanzada) > Wireless (Red inalámbrica)
en la interfaz
GUI web. Si desea obtener más información, consulte el manual de usuario que se incluye en el
CD de soporte.
La función Quick Internet Setup (QIS (Conguración rápida de Internet)) detecta
automáticamente la conguración de su conexión a Internet. Si el router inalámbrico
ASUS no es capaz de detectar automáticamente su tipo de conexión a Internet, es
posible que necesite congurar manualmente los parámetros de su conexión a Internet.
Para utilizar la función Quick Internet Setup (QIS (Conguración rápida de
Internet)) de ASUS:
1. Abra el explorador web. Espere unos 20 segundos hasta que la función QIS
detecte automáticamente su tipo de conexión a Internet.
2. Introduzca el nombre de usuario y la contraseña correspondientes a su tipo de
conexión y haga clic en Apply (Aplicar).
3. Una vez nalizada la conguración del tipo de conexión a Internet, seleccione
alguna de las siguientes opciones:
Acceder a Internet:
Haga clic aquí para navegar por Internet.
Configuración de seguridad inalámbrica sencilla:
Haga clic aquí para configurar los
parámetros de seguridad inalámbrica.
Si desea montar el dispositivo en una pared, asegúrese de que el router inalámbrico
ASUS se ubique cerca de una toma de suministro eléctrico.
Book 1.indb 27 5/11/09 3:49:44 PM
Page 34

28
Guía de inicio rápido del router inalámbrico DSL-N11
Español
DSL-N11
ADSL
POWERSyncDataWLAN WPS1 23 4
R
LAN
Congurar manualmente su conexión a Internet
Para congurar manualmente su conexión a Internet:
1. Si la función QIS de ASUS no es capaz de detectar automáticamente su
tipo de conexión a Internet, haga clic en Skip to manual settings (Pasar a
2. Seleccione los valores correspondientes en los campos Country (País) e ISP
(Proveedor de servicios de Internet) y haga clic en Next (Siguiente). Si su
país o proveedor de servicios de Internet no aparece en la lista, seleccione la
opción Not list (No está en la lista) e introduzca sus parámetros VPI y VCI. A
continuación, haga clic en Next (Siguiente). Puede solicitar a su proveedor de
servicios de Internet el valor de los parámetros VPI/VCI.
3. En la página de inicio de sesión, introduzca el nombre de usuario (
admin
) y la
contraseña (
admin
) predeterminados.
4. El router admite los siguientes tipos de conexión: PPP over ATM (PPPoA
(PPP sobre ATM)), PPP over Ethernet (PPPoE (PPP sobre Ethernet)), MAC
Encapsulation Routing (MER (Enrutamiento con encapsulado MAC)), IP
over ATM (IPoA (IP sobre ATM)), y Bridging (Puente). Seleccione su tipo de
conexión y siga las instrucciones que aparecerán en la pantalla.
Solicite a su proveedor de servicios de Internet (ISP) la información necesaria acerca de su tipo
de conexión a Internet.
5. Una vez que haya nalizado, haga clic en
Save/Reboot (Guardar/Reiniciar)
.
Para más información acerca de QIS, consulte el manual de usuario incluido en el CD de
soporte.
Book 1.indb 28 5/11/09 3:49:44 PM
Page 35

DSL-N11 Trådlös router snabbstartguide
29
DSL-N11
ADSL
POWERSyncDataWLAN WPS1 23 4
R
LAN
Svenska
ADSL
DC In
LAN1-4
1. Inställning av hårdvaran
Trådanslutning
Trådlös anslutning
För etablering av en trådlös anslutning använd ett IEEE 802.11b/g/n kompatibelt WLAN kort. Se
din WLAN kort/adapters bruksanvisning för trådlös anslutningsprocedur.
DSL telefon
Ström
Likström IN
Linje
Telefon
Linje
ADSL
DC In
LAN1-4
Ström
Likström IN
DSL telefon
Linje
Vägguttag el
Telefon
Linje
DSL telefon
Vägguttag el
Vägguttag telefon
Vägguttag telefon
Splitter
Splitter
Book 1.indb 29 5/11/09 3:49:46 PM
Page 36

DSL-N11 Trådlös router snabbstartguide
30
DSL-N11
ADSL
POWERSyncDataWLAN WPS1 23 4
R
LAN
Svenska
Monteringsalternativ
ASUS trådlösa router är konstruerad
för att direkt från lådan placeras på en
upphöjd plan yta såsom ett arkivskåp
eller en bokhylla. Enheten kan också
konverteras för montering på en vägg
eller i taket.
Montering av ASUS trådlösa router:
1. Leta på undersidan efter två
monteringskrokar.
2. Markera två övre hål på en vägg eller
på en upphöjd plan yta.
3. Dra åt två skruvar till endast 6 mm visas.
4. Haka fast krokarna på ASUS trådlösa router på skruvarna.
Notera:
Justera skruvarna om du inte kan haka fast ASUS trådlösa router på skruvarna eller om
den sitter för löst.
2. Använda ASUS Quick Internet Setup (QIS/
snabb internetinställning)
Som standard nns det ingen säkerhetskryptering för ASUS trådlösa router. För att skydda ditt
nätverk från ondskefulla attacker eller obehörig åtkomst klicka på
Advanced Setting (inställning)
> Wireless (trådlös)
på webb GUI. För mer detaljer se bruksanvisningen som medföljer på
support-CD-skivan.
ASUS Quick Internet Setup (QIS) funktionen upptäcker automatiskt dina
inställningar för internetanslutning. Om ASUS trådlösa router inte automatiskt kan
upptäcka din typ av internetanslutning kan du behöva ställa in inställningarna för
internetanslutningen manuellt.
Använda ASUS Quick Internet Setup (QIS/snabb internetinställning):
1. Starta webbläsaren. Vänta ungefär 20 sekunder för QIS att automatiskt
upptäcka din anslutningstyp för internet.
2. Knappa in din anslutningstyps användarnamn o0ch lösenord och klicka sedan
på
Apply (använd)
.
3, Efter att inställningen för anslutningstyp för internet är fullföljd, välj ett av
följande alternativ:
Gå till Internet:
Klicka för att surfa på Internet.
Enkel trådlös säkerhetsinställning:
Klicka för att kongurera de trådlösa säkerhetsinställnin
garna.
Vid montering på väggen, se till att ASUS trådlösa router placeras nära ett eluttag.
Book 1.indb 30 5/11/09 3:49:48 PM
Page 37

DSL-N11 Trådlös router snabbstartguide
31
DSL-N11
ADSL
POWERSyncDataWLAN WPS1 23 4
R
LAN
Svenska
Manuell inställning av din internetanslutning
Manuell inställning av din internetanslutning:
1. Om ASUS QIS inte automatiskt kan upptäcka din anslutningstyp för internet
klicka på
Skip to manual settings (hoppa till manuell inställning).
2. Välj ditt
Country (land)
och
ISP (internetleverantör)
, klicka sedan på
Next
(nästa)
. Om ditt land och ISP inte nns i listan välj
Not list (inte listad)
och
knappa in din VPI och VCI klicka sedan på
Next (nästa)
. Du kan fråga din ISP
efter VPI/VCI värden.
3. På inloggningssidan knappa in standardanvändarnamnet
(admin)
och
lösenordet
(admin)
.
4. Routern stödjer dessa anslutningstyper: PPP over ATM (PPPoA), PPP over
Ethernet (PPPoE), MAC Encapsulation Routing (MER), IP over ATM (IPoA)
och Bridging. Ställ in din anslutningstyp och följ instruktionerna på skärmen.
Skaffa informationen som krävs för din anslutningstyp till internet från din Internet Service
Provider (ISP)(internetleverantör).
5. När du är klar, klicka på
Save/Reboot (spara/starta om)
.
För mer detaljer om ASUS QIS, se bruksanvisningen som medföljer på support-CD-skivan.
Book 1.indb 31 5/11/09 3:49:48 PM
 Loading...