

Page 1
AXE580DS QUICK START GUIDE
complete user manual availiable at www.AstroDrums.com
www.AstroDrums.com
TEM PO/T A P
PA D A SS IG NKITS
UTI
L I TY
VOI
C E DRU M O FF
SON G ST AR T /STO P
AXE580 DS Included Parts List
1-AXE800DM - Drum Module
5-AXE500DTP - Single Zone Drum Pads
3-AXE-12CT - Single Zone Cymbal Pads
1-AXE580RSA – Drum Rack Stand
6- Long Steel Rack Pipes
3- Short Steel Rack Pipes
4- Tom Arms
3- Cymbal Arms
1- Bass Drum Pad Mount
9- AXE B7 Rack “T” Clamp
9- AXE B8 Rack “Multi/Pad” Clamp
1-AXE Cable Snake
1-AXE HFP Hi Hat Foot Pedal
5-DH08DE Mesh Heads
Page 2
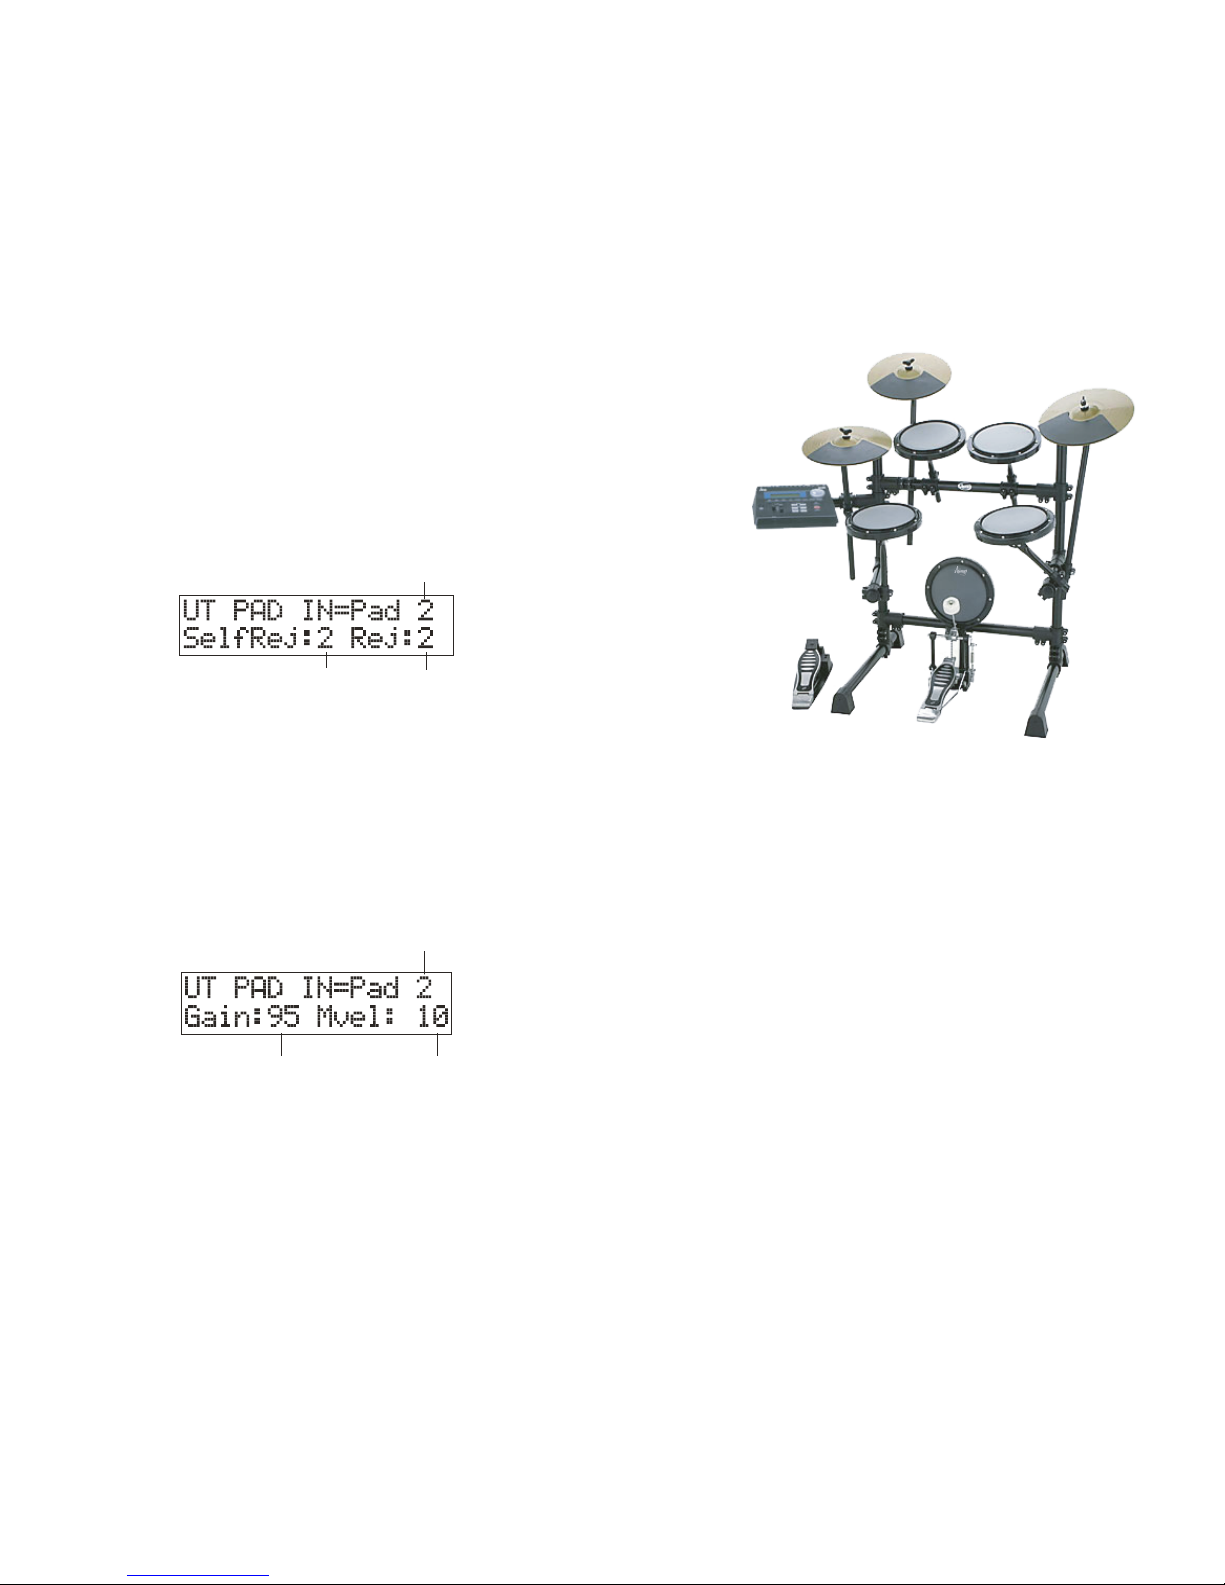
Self Rejection
Drum pad number
Rejection
Gain Level
Drum pad number
Minimum Velocity Level
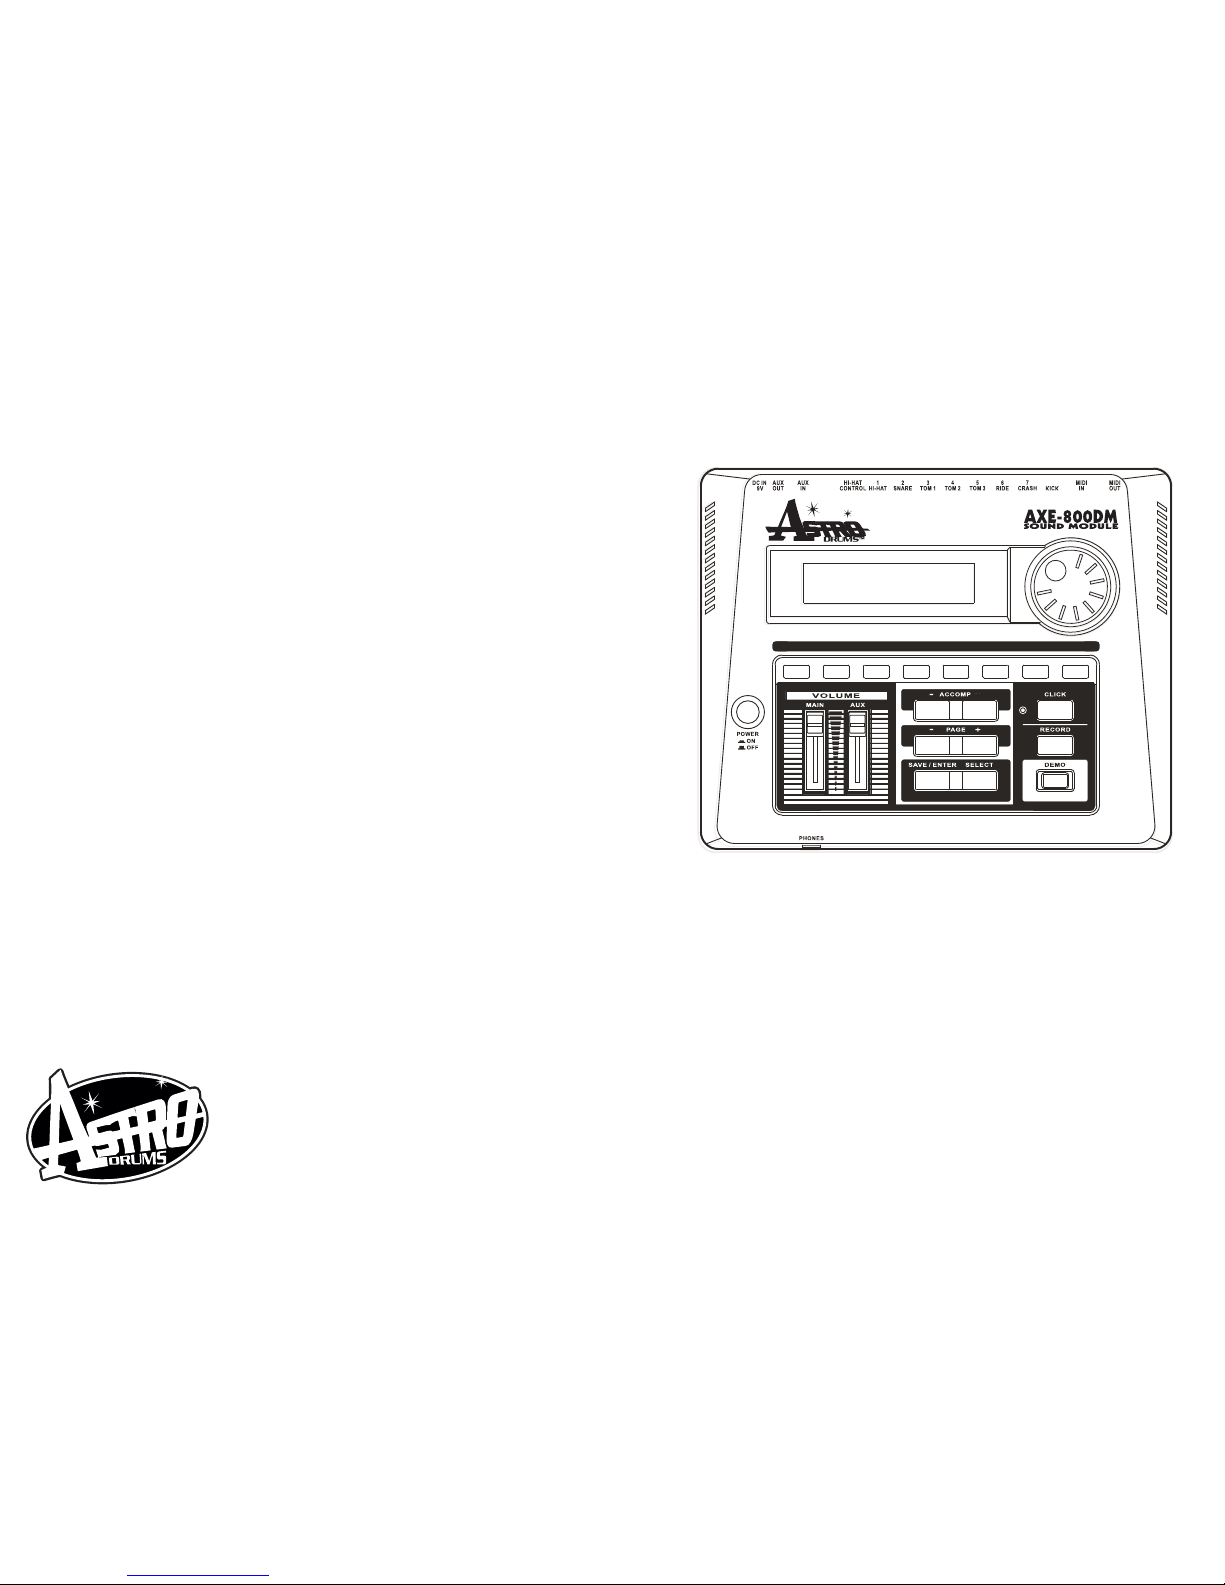
AXE580DS Quick Start Guide
DOWNLOAD complete user manual online at www.AstroDrums.com
This Quick Start Guide is designed to assist you in quickly setting up your electronic
drum module. It contains basic settings and definitions for key functions that you
will need to adjust, to improve the output performance of your new electronic drum kit.
1. Self Rejection, Rejection
These functions are used to prevent double triggering and cross talk
(mixed input signals between the jacks) for each pad.
1. Press the [UTILITY] button to enter the Utility Mode, indicated by UT on top left of the
display. By pressing the [SELECT] button, move the flashing cursor to PAD IN. Here,
you may select the pad input to be edited by either striking the pad or using the rotary
jog dial
2. Once you have selected the pad you wish to edit, press the [SELECT] button, to move
the flashing cursor to SelfRej. Using the dial, set the SelfRej between 0-9 (1-3
recommended for first time users).
3. Press the [SELECT] button again to move the flashing cursor to Rej. Using the
rotary dial, set the Rej between 0-9 (5-6 recommended for first time users).
2. Gain, Minimum Velocity
These functions set the input sensitivity (Gain) and dynamic range
(Minimum Velocity) for each pad.
1. In the Utility Mode, press the [PAGE +] button to select the Gain/Velocity settings page.
By pressing the [SELECT] button, move the flashing cursor to PAD IN. Here, you may
select the pad input to be edited by either striking the pad or using the rotary dial.
2. Once you have selected the pad you wish to edit, press the [SELECT] button, to move
the flashing cursor to Gain. Use the rotary dial, to set the gain level between
(0-99), for fine tuning the pads input sensitivity. Entering a larger value here allows low
input signals to sound the voice.
3. Press the [SELECT] button again to move the flashing cursor to Mvel. Use the rotary
jog dial to set the minimum velocity level (1-127). This will be typically set at 10 for
all of the pads, to provide an consistent output volume level.
Self Rejection (SelfRej)
Rejection (Rej)
UT PAD IN
Displays the current pad number being edited..
Gain
Adjusts the input gain level for the pad assigned in UT PAD IN. Entering a
larger value here allows smaller input levels to sound the voice.
Minimum Velocity (Mvel)
Key Terms :
Prevents double triggers from occuring on the pad assigned in UT PAD
IN. After an event is detected, further events will be automatically muted
for a certain length of time. The larger the value, the longer the delay.
Prevents cross talk from occuring on the pad assigned in UT PAD IN.
Events triggered by other pads that are of a lower input value than what is
set here will not be delivered for a set length of time.
Sets the MIDI Velocity that is transmitted when the pad is hit the weakest.
Large values will producea high volume level even if the pad is hit softly.
However, this can result in a narrow volume range making it difficult to
adequately produce wider dynamic levels.
UT PAD IN
Displays the current pad number being edited.
*bass pedal sold seperatly
 Loading...