

ASTRO A712 Quick Start Manual
Internet Tablet
Quick Start Guide
Please read carefully before use
A712

Page 2 Table Of Contents
English
THANK YOU ...................................................3
Package Contents ........................................................3
Features..........................................................................4
GETTING TO KNOW THE INTERNET TABLET
5
About the Touchscreen ...............................................8
Protective Film ........................................................8
Touchscreen Actions..............................................8
About the Orientation Sensor .....................................9
Charging the Tablet ...................................................10
Inserting a Memory Card ..........................................10
Resetting the Tablet .................................................... 11
GETTING STARTED ..................................... 12
Turning the Tablet On and Off .................................12
Turning the Screen On and Off (Standby) .......13
Unlocking the Screen ..........................................13
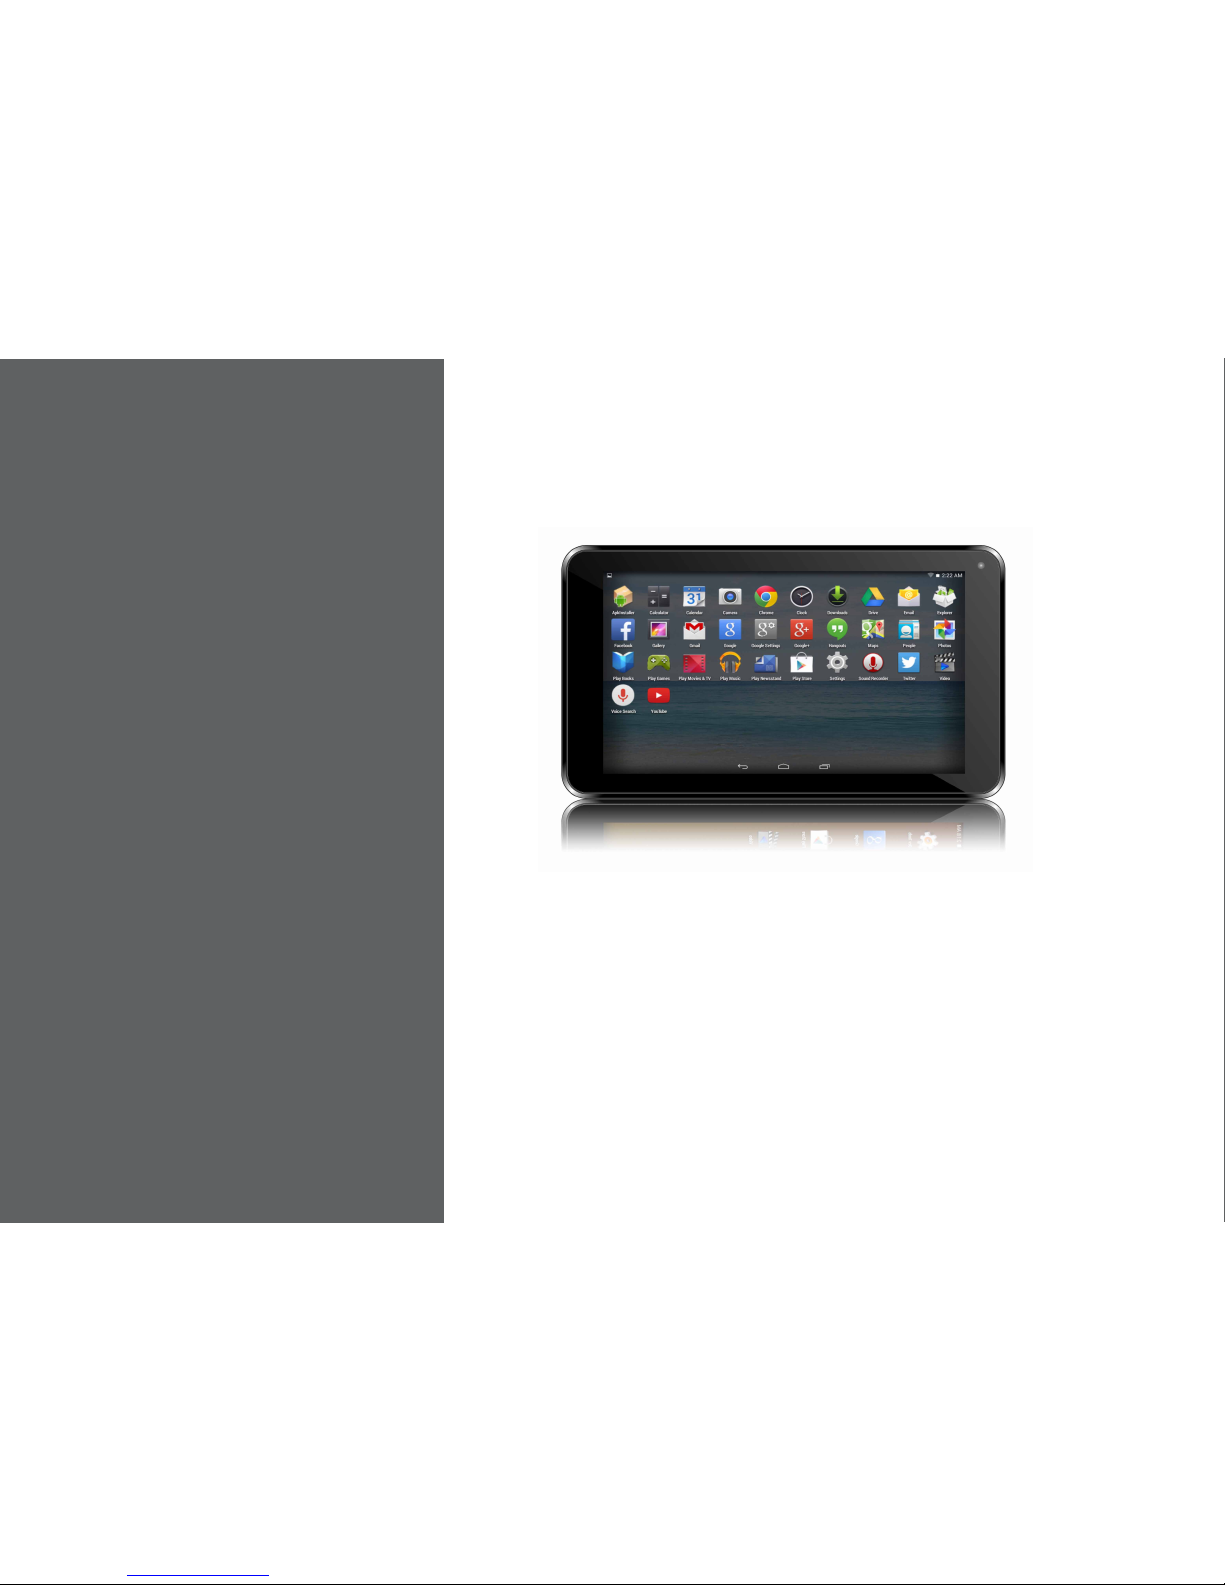
Home Screen at a Glance ........................................ 14
About Applications ....................................................15
Preinstalled Applications .....................................15
Installing Applications .........................................17
About Widgets .......................................................... 17
About Notications ..................................................... 18
CONNECTING TO THE INTERNET ............. 19
Requirements ..............................................................19
Connect to a Wi-Fi Network ..................................... 20
BROWSING THE WEB ................................. 22
OPTIONAL CONNECTIONS ........................ 26
Connecting to a Computer ......................................26
Connecting Headphones .........................................27
Using the USB Full-Size Adapter..................................28
Connecting a Keyboard......................................28
Connecting a Storage Device............................28
SETTING THE SYSTEM OPTIONS .............. 29
SPECIFICATIONS ......................................... 30
SAFETY NOTICES ....................................... 31
WARRANTY...................................................35
 Table of Contents
Page 3 Thank You
English
 Thank You
Congratulations on your purchase of the Internet Tablet.
This guide is provided to help you get started quickly with
your tablet; please read it carefully and save it for future
reference.
To view PDF documents, download and install
the free Adobe Acrobat reader from the Adobe
website at www.adobe.com.
Package Contents
Please make sure that the items shown below are
included in the package. Should an item be missing,
please contact the local retailer from whom purchased
this product.
Internet Tablet
USB cable
USB host/keyboard
adapter
Power adapter

Page 4 Thank You
English
Features
Browse the Web.
Visit your favourite websites
Check your e-mail
Keep in touch with friends and family
Watch YouTube™ videos
Browse the world’s most popular video-sharing
community
Discover thousands of apps for Android™
Games, applications and more with the installed
marketplace
Connect to the Internet wirelessly
High-speed Wi-Fi 802.11 b/g/n networking
Enjoy your media library anywhere
Portable powerhouse plays popular music, video and
photo formats
MicroSD memory card reader
Increase your storage capacity (up to 32 GB sup-
ported)
Built-in camera
Convenient front-facing camera
Automatic orientation detection
Read any way you want; the display adjusts
automatically!

Page 5 Getting To Know The Internet Tablet
English
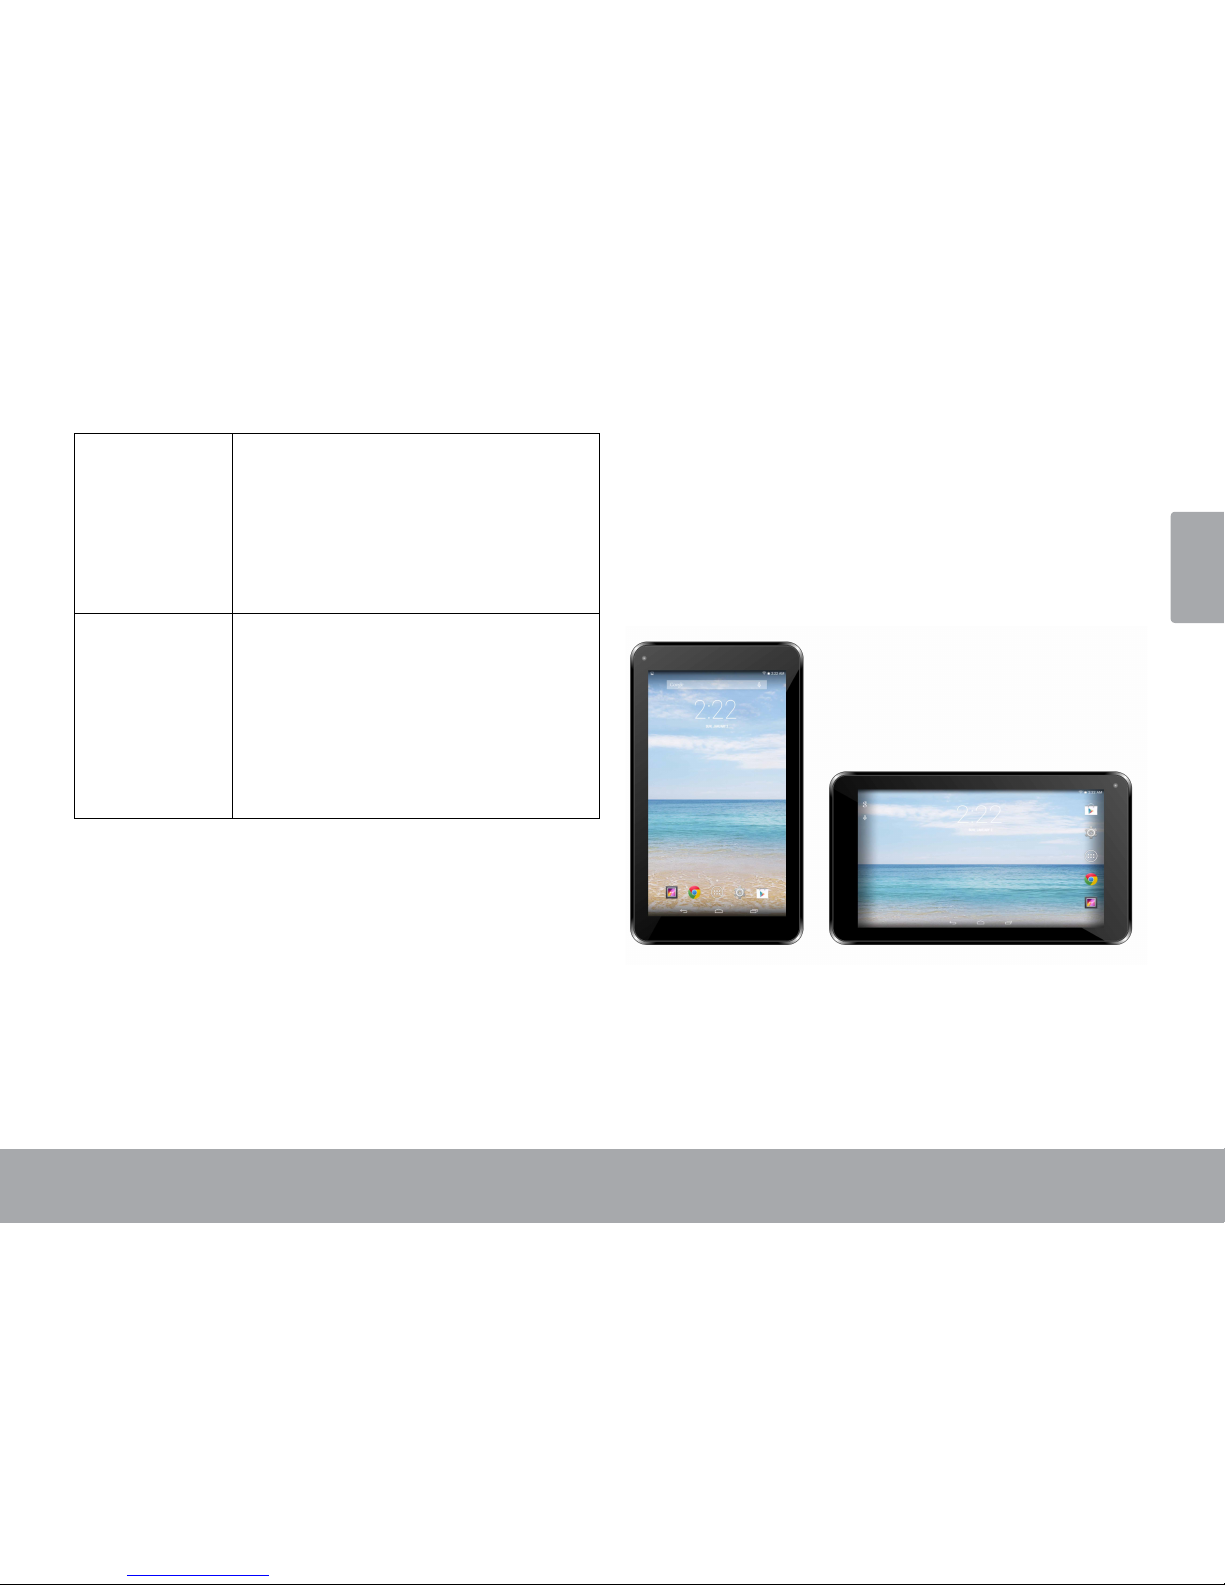
 Getting to Know the Internet Tablet
Unit at a Glance
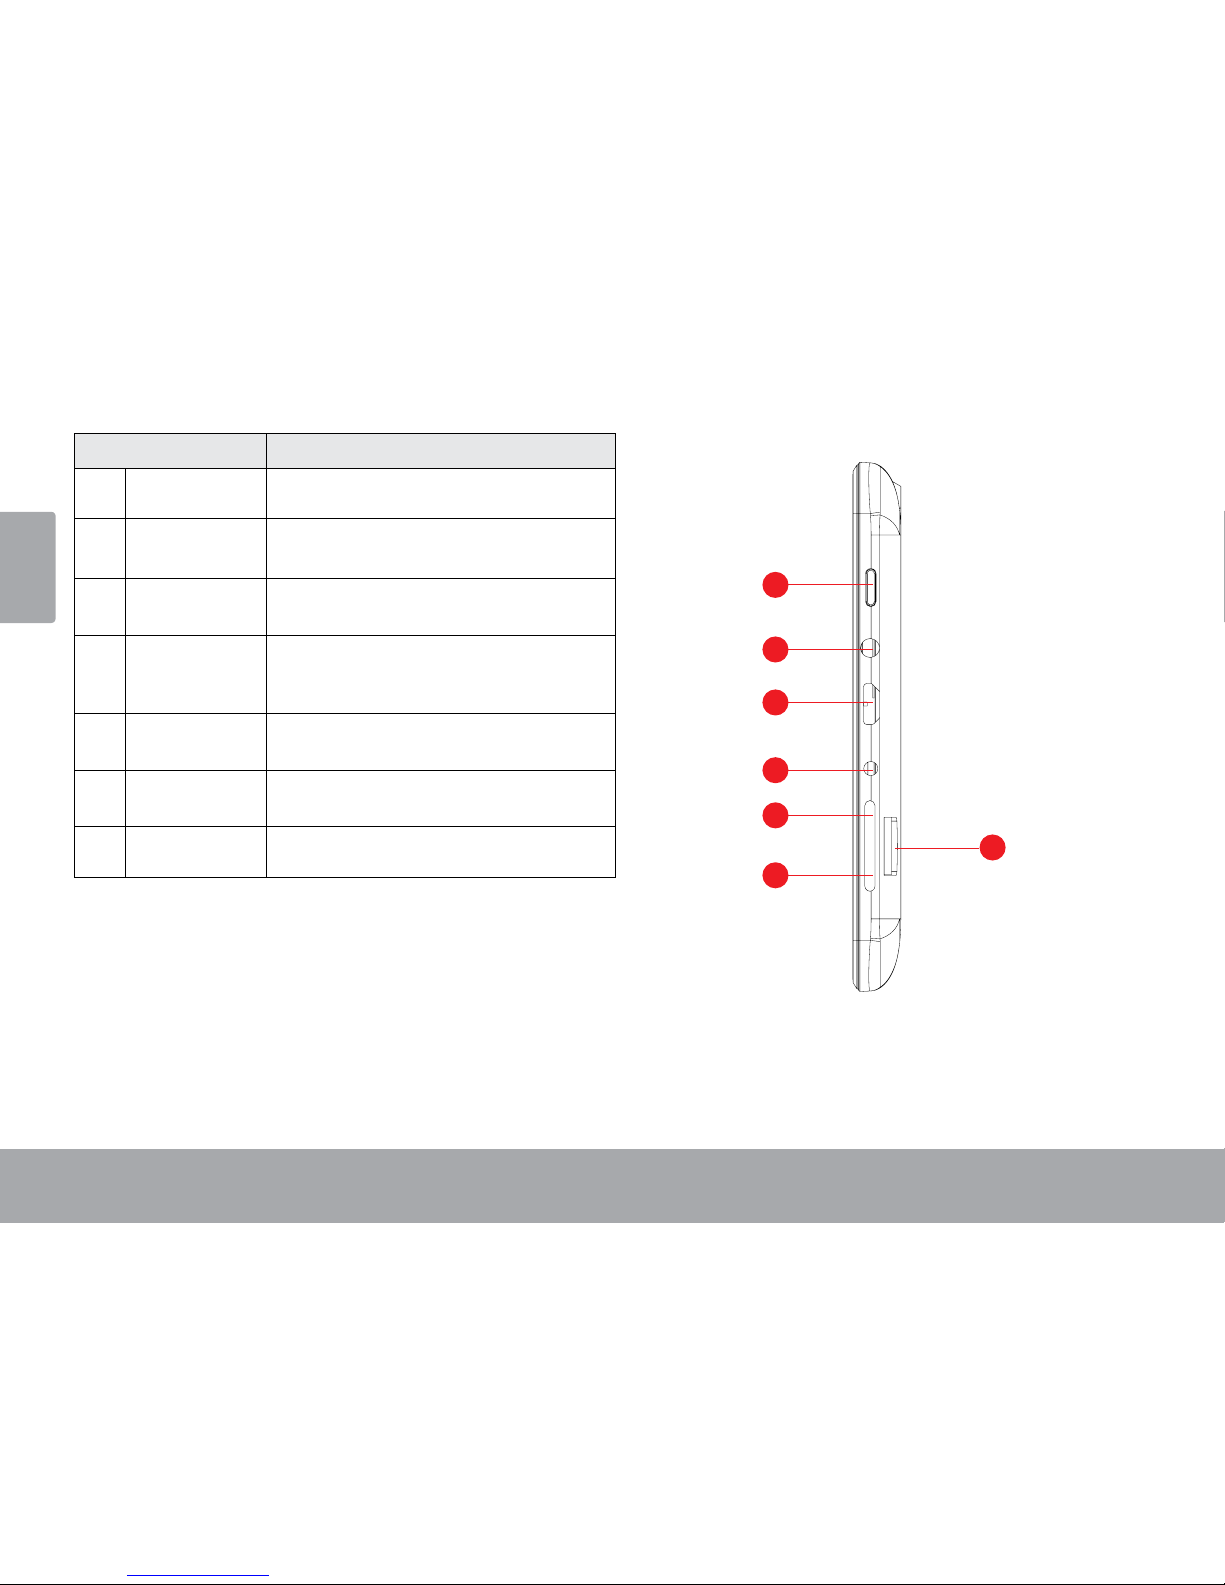
Name Description
1 Camera Front-facing camera
1
Page 6 Getting To Know The Internet Tablet
English
Name Description
2 Power Key Press to turn the unit on, or to
turn the screen on and off.
3 Headphone
jack
Audio output connection for
head-phones.
4 USB Host Connect a storage device to the
tablet.
5 Power jack
(DC input)
Charge and power the tablet
with the included power adapt-
er.
6 Volume +
key
Press to increase the volume
level.
7 Volume -
key
Press to decrease the volume
level.
8 SD Card slot Load external microSD memory
cards here.
2
3
4
5
6
7
8
Page 7 Getting To Know The Internet Tablet
English
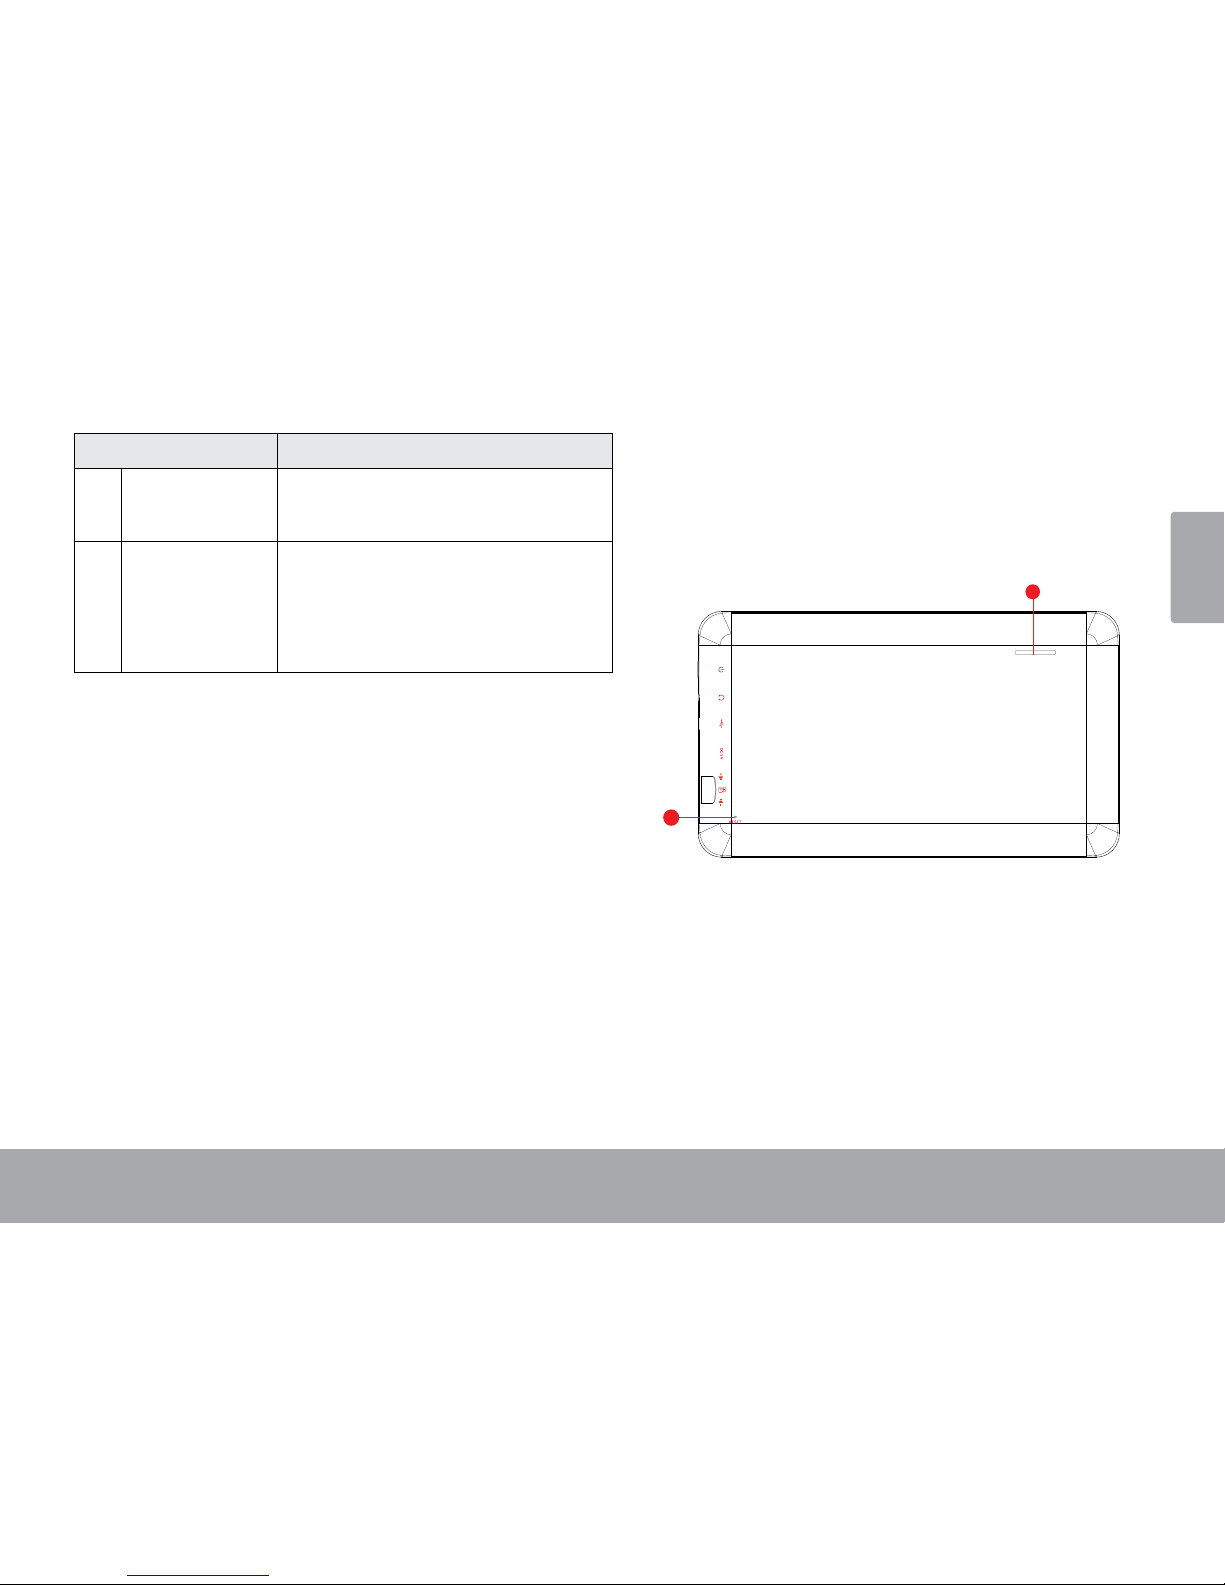
Name Description
9 Speaker Speaker output is automati-
cally muted when using headphone jack.
10 Reset Press to reset the tablet if it
freezes or other wise behaves
abnormally. (Use a paperclip
or other small object to gently
press this key.)
9
10
Page 8 Getting To Know The Internet Tablet
English
About the Touchscreen
Your tablet comes equipped with an easy-to-use touchscreen.
Our capacitive multi-touchscreen requires gentle ngertip
touch on the glass screen to activate tablet’s functions.
Multiple ngers may be used to perform gestures (e.g.
2-nger picture zoom).
To avoid damaging the screen, do not touch it
with excessive force or with any object other
than your nger. For best response, make sure
your hands are clean before using the touchscreen controls.
Protective Film
A thin lm has been applied to the touchscreen to protect
it during shipping. The protective lm should be removed
before use. To remove it, simply take a corner of the lm
and peel it away from the screen.
Touchscreen Actions
You can control the functions of the tablet by using
the touchscreen in combination with the three touch
keys located on the bezel. To control the tablet with the
touchscreen, use your ngertip to manipulate icons,
buttons, menu items, the on-screen keyboard and other
items displayed on the screen.
You can perform the following actions on the touchscreen
using your ngertip.
Touch: To activate an on-screen item (e.g.,
application icons, buttons, menu
items and the letter/symbols of the onscreen keyboard), simply touch them
with your ngertip.
Touch and
Hold:
Some on-screen items have an
alternate action if you touch and
hold them (e.g., opening an alternate
menu, or activating the drag function).
To touch and hold an item, touch the
item and do not lift your ngertip until
the action occurs.
Drag: Drag an on-screen item to change its
position (e.g., an application icon on
the home screen).
To drag an item, touch and hold it for
a moment, then without lifting your
ngertip, move your ngertip on the
screen until the item reaches its target
destination.
Page 9 Getting To Know The Internet Tablet
English
Swipe: To swipe, touch the screen and then
quickly move your ngertip across the
screen without lifting your ngertip.
Do not pause on the screen with your
ngertip at the initial point of contact
or you may accidentally drag an item
instead.
Double-tap: Quickly tap the screen twice on a
webpage or other application screen
to zoom (the application must support
the double-tap/zoom function). Within
the browser, double-tapping a webpage section will cause the browser to
zoom and t that section to the width
of the screen.
About the Orientation Sensor
The tablet contains a sensor that will automatically
change the orientation of most screens as you rotate the
tablet. The sensor works best when the tablet is rotated
perpendicular to the ground (i.e., when the tablet is held
upright and not at on its back).
The orientation sensor can be turned on and off in the
Accessibility settings menu.
Page 10 Getting To Know The Internet Tablet
English
Charging the Tablet
The current battery status will be always displayed in the
top right of the screen in the system information bar.The
battery icon will change in accordance with the battery
status.
When connected to the DC charger, the status area on
the top bar will display the charging icon. Note the
lightning symbol inside the battery icon.
To charge the battery:
1. Plug one end of the included power adapter into an
AC 100-240V outlet.
2. Plug the other end of the included power adapter into
the power jack on the tablet.
3. Disconnect the power adapter when the tablet is fully
charged.
The battery used in this device may cause a re
or chemical burn if mis treated. Do not disassemble,
incinerate or heat the device. Do not leave the
device in direct sunlight, or in a car with its
windows closed. Do not connect the device to a
power source other than that which is indicated
here or on the label as this may result in a re or
electric shock.
Bat tery protection and low battery may cause your
tablet fail to boot,please charge the battery.
Inserting a Memory Card
The tablet accepts microSD memory cards. Insert a
memory card into the microSD card slot to:
Increase the memory capacity of your tablet
Play media les stored on the memory card (e.g.,
music, video or photo les).
To insert a memory card:
1. Align the memory card with the card slot. The metal
contacts of the memory card should face down away
from the LCD screen.
2. Slide the card into the spring-loaded slot. Push the
card in until it clicks into place.
Do not attempt to insert objects other than a
microSD memory card into the card slot. A
compatible memory card should t easily into
the card slot. If you encounter resistance, check
the alignment of the card. Do not attempt to
force the card in.
Avoid touching the gold contacts of the memory
card.
Page 11 Getting To Know The Internet Tablet
English
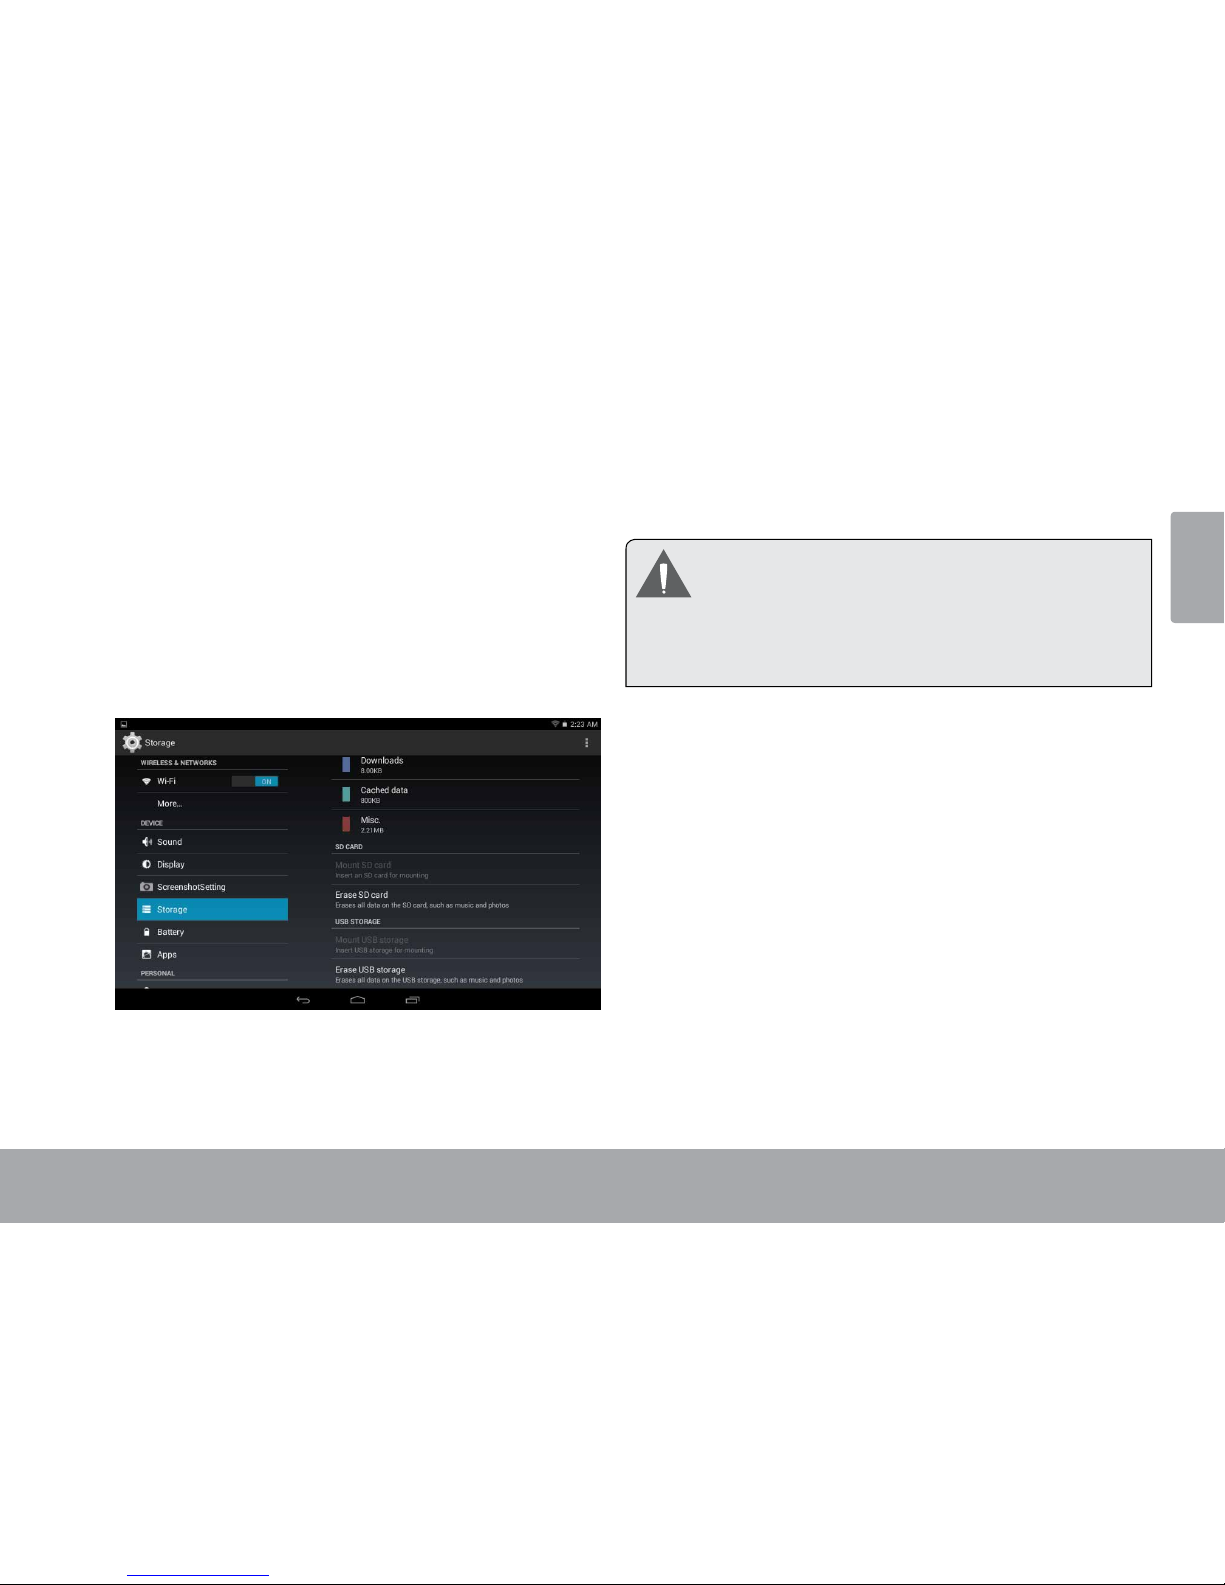
To release and remove a memory card:
1. UNMOUNT the memory card.
a. From the home screen, tap the Launcher Tab,
and then touch Settings to show the settings
menu.
b. Touch Storage to show the storage settings.
c. Touch Unmount SD card to prepare the memory
card for safe removal.
2. Push the card further into the slot until you hear a
click. The card will spring out of the slot.
3. Grasp the card by its edge to remove it.
To avoid damage and data corruption, do not
remove a memory card while data is being
written to or read from the card. For example,
do not remove a card while playing a music le
stored on the card.
Resetting the Tablet
Reset the tablet if it should freeze, and not respond or
otherwise malfunction.
1. Disconnect your tablet if it is connected to a compu ter.
2. Use a paper clip to gently press the <RESET> button
located on the back of the tablet.
 Loading...