

Page 1

MINI WEATHER STATION
Model AH-1975
OPERATION MANUAL
Thank you for purchasing the new generation color weather station. Designed and engineered with the
state-of-art technology and components, this instrument will provide accurate and reliable measurement
of barometric pressure, weather forecast, in/out humidity, temperature, heat index, dew point as well as alarm
clock. Read this manual carefully to fully explore the features and functions of the new product.
NAME AND FUNCTIONS OF BUTTONS:
Press Functions Hold 3 seconds
[CLOCK]
[ALARM]
[ Up]
[ Down]
[CHANNEL/
SEARCH]
Read time, calendar
and day-of-week
Read alarm time;
enable/disable alarm
1 step forward in
setting
1 step backward in
setting
Select indoor, Channel
1,2,3, auto scroll
Set Clock &
Calendar
Alarm time
setting
Fast advance
Fast backward
Search for remote
sensor
[MEMORY]
[HEAT INDEX/
DEW POINT]
[PRESSURE]
[SNOOZE/
LIGHT]
[ZONE]
[C/F] Toggle degree C & F
Slide Switch
[BACKLIGHT
(AUTO/ HIGH /
LOW / OFF)]
Read max/min
temperatures &
humidity
Read Heat Index & Dew
Point
Toggle pressure unit
hPa, inHg & mb
Trigger snooze alarm &
extend backlight
Toggle Home time &
Zone time
Display brightness
setting (AUTO mode
is recommended to
adjust the brightness
automatically)
Clear memory
record
Altitude setting
Zone time setting
BATTERY & ADAPTER INSTALLATION
Home Receiver Unit:
Main Power Source: Plug in the 6.0V adapter into the
adapter socket at the back for basic operation and continuous backlight.
Backup Power: Lift o the battery cover, install 3 pieces of AAA backup batteries according to the polarity indicated, close the battery cover.
Remote Sensor:
Loosen the screws on the battery door with a small
screwdriver, insert 2 pieces of AAA batteries according
to the polarity indicated. Replace the cover and tighten
the screws.
ALTITUDE SETTING
After inserting batteries or adapter, the main unit
will enter altitude setting mode directly. Press [] or
[] to select pressure unit in hPa, mb or in Hg. Press
[PRESSURE] to conrm. Then press [] or [] to enter
your current altitude in meter or feet. Press [PRESSURE]
to conrm and exit the setting. This allows the unit to
english
– 1 –
english
provide a more accurate barometric pressure & weather
forecast reading. (For more information, see “WEATHER
FORECAST & BAROMETRIC PRESSURE” section)
SETTING UP THE WIRELESS THERMOHYGROMETER
1. For the rst installation, always turn on the home
unit and then the remote sensor. Set Channel 1 for the
rst remote sensor. Set channel 2 and channel 3 for the
nd
and 3rd sensor.
2
2. Press and hold [CHANNEL/SEARCH] button on
main unit until a beep is sound to search for remote sensor.
3. Press the [Tx ] button on the back of remote sensor
to transmit RF signal.
4. When RF connection is established, the respective
temperature & humidity of the selected channel will appear on the main unit.
WEATHER FORECAST & BAROMETRIC PRESSURE
The unit predicts weather condition of the next 12 –
24 hours based on the change of atmospheric pressure.
The coverage area is around 30 – 50km. The weather
english
– 5 –
english
english
– 2 –
english
forecast is based on atmospheric pressure change and is
about 70-75% correct. As weather conditions cannot be
100% correctly forecasted, we cannot be responsible for
any loss caused by an incorrect forecast.
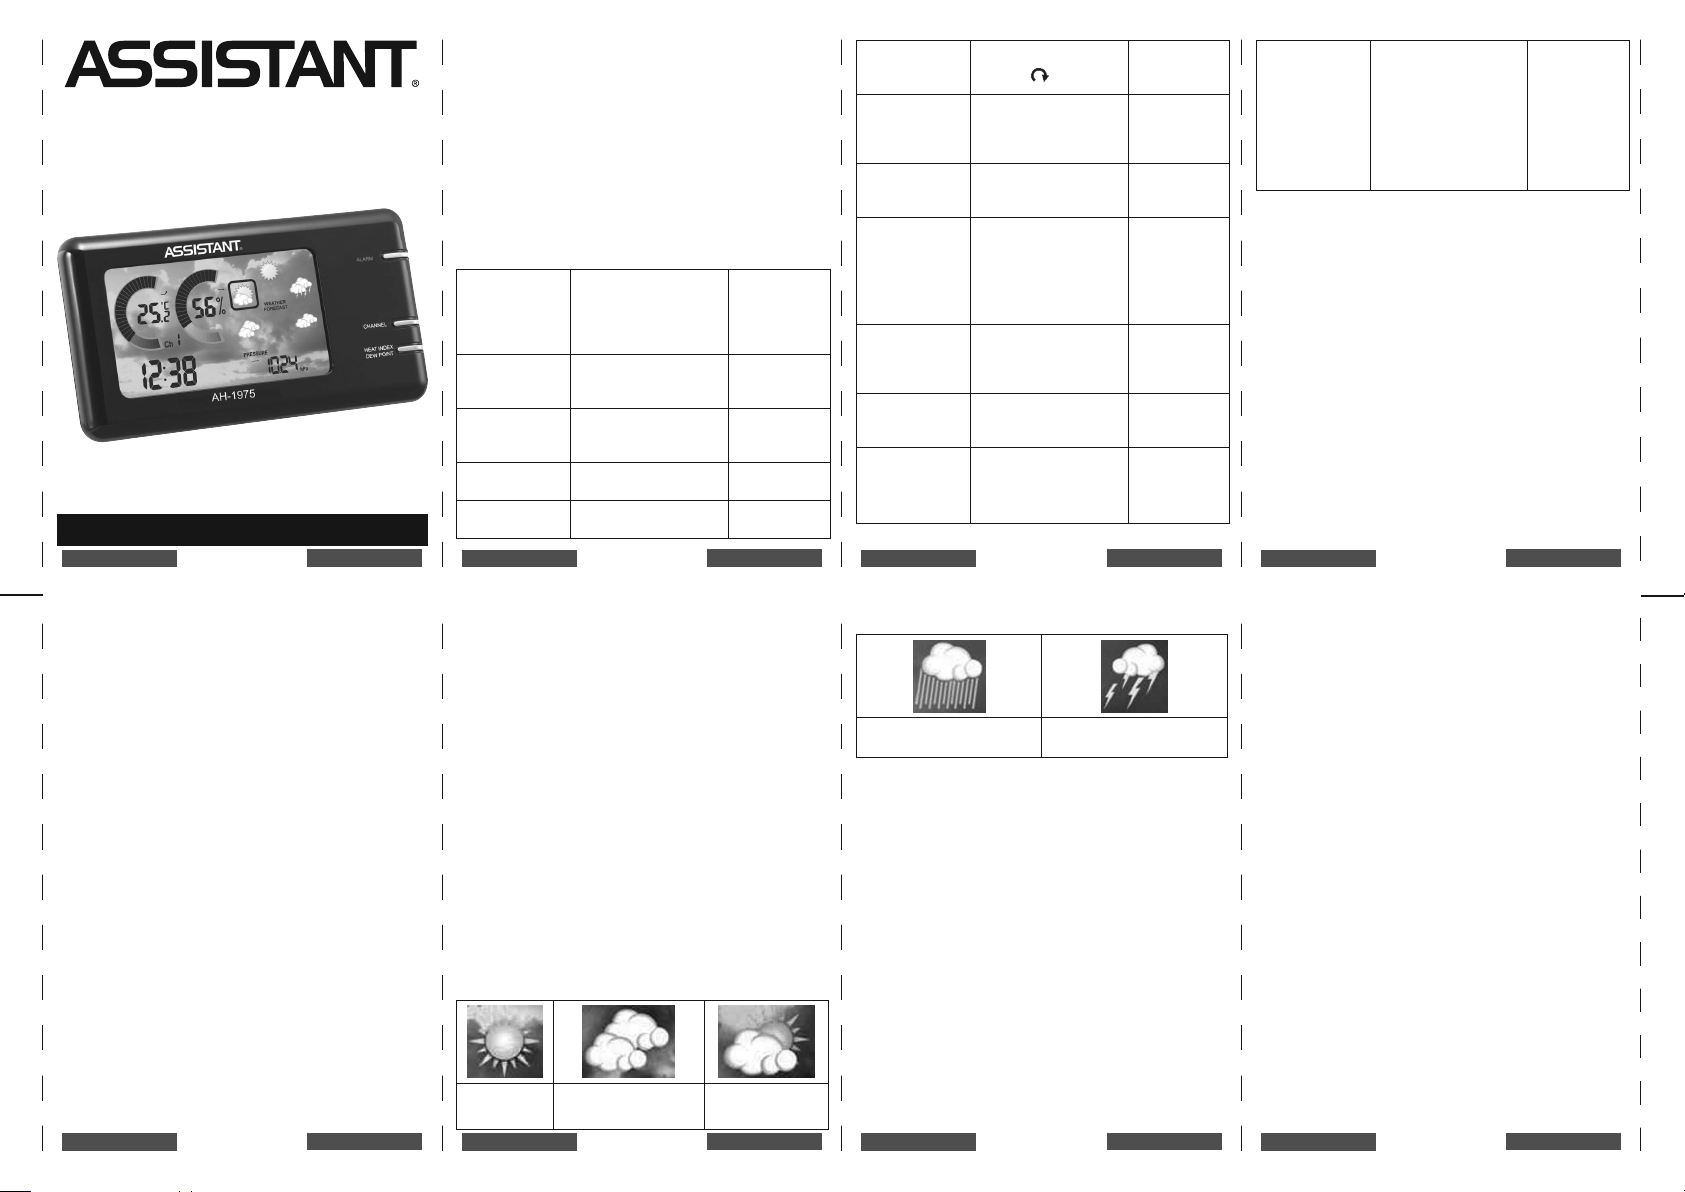
Sunny Slightly cloudy Cloudy
Rainy Stormy
The current weather forecast is the one highlighted
by a black-outlined square box.
To obtain an accurate weather forecast & barometric pressure reading, you need to input your current altitude. After the reset of the unit, it will enter altitude
setting mode. Press [] or [] to set the pressure
english
– 6 –
english
english
– 3 –
english
unit in hPa, mb or in Hg. Press [PRESSURE] to conrm.
Then enter your current altitude in meter or feet. Press
[PRESSURE] to conrm and exit the setting. You can also
hold [PRESSURE] button to enter altitude setting mode
during normal use.
Press [PRESSURE] button to select pressure unit be-
tween hPa, in Hg & mb.
IMPORTANT NOTE:
Dierent geographical location such as inland area
or coastal region has dierent weather forecasting response. In case your weather forecast always show rainy
or stormy over a long period of time and does not reect the actual weather condition, it is necessary to follow below procedure for ne tuning the weather forecast’s accuracy.
1. Check the current weather condition outdoor.
2. Enter altitude setting mode and adjust altitude accordingly. Increase or decrease altitude setting by 20m
(or 60ft) each time and exit. Repeat this step until the
weather forecast icon matches with the current outdoor
weather condition.
english
– 7 –
english
english
– 4 –
english
(E.g. If the current outdoor weather is partly cloudy,
increase or decrease altitude setting until weather forecast icon becomes partly cloudy)
Increase altitude
Decrease altitude
Increase altitude
Decrease altitude
english
– 8 –
english
Page 2
WWW.TIWELL.COM
WWW.ASSISTANT.UA
IN/OUT TEMPERATURE & HUMIDITY
Temperature reading is located on the upper left of the
display and humidity is on the right of the temperature.
Press [C/F] button to select temperature unit C/F.
Press [CHANNEL/SEARCH] button to select indoor, Ch1,
Ch2, Ch3 and auto-channel scrolling
display modes.
IN/OUT HEAT INDEX
Heat Index combines the eects of heat and humidity.
It is the apparent temperature of how hot the heat-humidity combination makes it feels.
Press [Heat Index/Dew Point] button once to show
the respective indoor or outdoor heat index on the upper left display. “HEAT INDEX” icon will appear.
HEAT INDEX ALERT INDICATOR
During conditions indicating a high heat index, a Heat
Index Alert Indicator will appear on screen.
Caution Exercise more fatiguing than usual
Extreme caution Heat cramps, exhaustion possible
Danger Heat exhaustion likely
Extreme danger Heat stroke imminent
english
– 9 –
english
IN/OUT DEW POINT
Dew point is the saturation point of the air, or the temperature to which the air has to be cooled in order to get
condensation.
In normal mode, press [HEAT INDEX / DEW POINT]
button twice to show the respective indoor or outdoor dew point reading on the upper left display. “DEW
POINT” icon will appear.
IN/OUT COMFORT LEVEL
In/Out Comfort indicator combines the eect of temperature & humidity and displays in 3 levels:
COMF
WET Contain excess moisture
DRY Contain inadequate moisture
Comfortable level, ideal range for both
temperature & humidity
ANIMATED COLOR GRAPHS
The circular color graphs are designed as an intuitive way to gauge the weather at a glance. The left color graph represents the respective In/Out temperature,
english
– 10 – – 11 – – 12 –
english
heat index or dew point of the current display mode. The
right graph represents the respective In/Out humidity.
The higher the temperature & humidity, the more color
portion of the color graph appears. Lower temperature
& humidity show less color portion of the color graph.
MAXIMUM / MINIMUM MEMORY
Press [MEMORY] button repeatedly to view the maxi-
mum & minimum values of temperature, humidity, heat
index or dew point readings. To clear the memory record, hold [MEMORY] button while the respective values
are displaying on screen.
TEMPERATURE & HUMIDITY TREND INDICATOR
The icons will indicate Rising, Steady, Falling if the
temperature or humidity change is more than 1 degree
C (or 2 degree F) within an hour.
CLOCK & CALENDAR
Press [CLOCK] to toggle display between time, calendar and day of the week.
english
english
Hold [CLOCK] button to enter clock setting mode.
Using []or [] to adjust and “CLOCK” to conrm, the
following values can be set in sequence:
12/24hr format → Hr → Min → Yr → D/M or M/D for-
mat → Month → Date → EXIT
HOME TIME, WORLD ZONE TIME
Hold [ZONE] to enter world (zone) time setting mode.
Press []or [] to enter the desired hour oset value
from –12 to +12 hours. Press [ZONE] to conrm each set-
ting.
Press [ZONE] button to toggle between home time
and world (zone) time. “ZONE” icon appears when world
(zone) time is selected. When zone time is not used, set
zone time to “0”.
ALARM SETTING
Press [ALARM] to show alarm time and “AL.” icon will
appear. Press again to enable or disable the alarm. Bell
icon “
“ appears when alarm is enabled.
english
english
Hold [ALARM] to enter alarm time setting mode.
Press [] or [] to enter the desired Hr/ Min values and
press [ALARM] to conrm setting.
SNOOZE & BACKLIGHT
When alarm is going o, press [SNOOZE/ LIGHT] to
trigger snooze alarm and “Zz” icon will appear. To stop
alarm for one day, press [ALARM] key. Press [SNOOZE/
LIGHT] for an extended backlight if adapter is not connected.
DISPLAY BRIGHTNESS CONTROL
Select display brightness mode with the slide switch
on the back casing.
AUTO:
Display brightness is adjusted automatically according to the surrounding brightness detected by the light
sensor located on the left of the Snooze/Light button.
In a bright environment, display brightness will increase.
As the environment turns dark, display brightness will
reduce.
english
– 13 – – 15 –– 14 –
english
Note: Auto mode is recommended for power saving,
display lifetime and convenient purpose.
Important: Avoid having obstacle above the light
sensor window for an accurate light sensing result.
Otherwise the display will turn dim even in bright environment.
High Turn to high brightness mode
Low Turn to low brightness mode
O Turn o display backlight
LOW BATTERY INDICATION
Low battery indication is available for the home unit itself and all of the 3 remote channels. Replace the batteries
and follow the setup procedure in this instruction manual.
BATTERY DISPOSAL
Replace only with the same or equivalent type recommended by the manufacturer.
Please disposal of old, defective batteries in an environmentally friendly manner in accordance with the relevant legislation.
english
english
SPECIFICATIONS
Indoor
Temperature
In/Out Humidity 20% - 99% RH
Remote sensor -20 C to +60 C (-4 F to +140 F)
Channel max. 3 remote sensors
Transmission
Resolution
Power
0 C to + 50 C (+32 F to +122 F)
up to 75M (246 ft.) in open area, RF434
MHz
0.1 degree C for temperature, 1% for
humidity
6.0V adapter & AAA x 3 pcs for main unit
AAA x 2 pcs for remote sensor
Made in China
english
english
Page 3
MINIWETTERSTATION
BETRIEBSANLEITUNG
geRMAn
1
Modell-1975
DeUTsCh
Wir danken Ihnen für den Einkauf der
Farbminiwetterwarte der neun Generation. Mit Hilfe
dieses Gerätes, das mit Verwendung der modernen
Technologien und neusten Komponente entwickelt
wurde, können Sie präzis und sicher Luftdruck, Innen/
Aussentemperatur, Hitzeindex, Taupunkt messen und
auch Wettervorhersage erhalten. Ausserdem können
Sie die Vorrichtung als Uhr mit dem Wecker benutzen. Lesen Sie diese Betriebsanleitung, um sich mit den
Charakteristiken und Funktionen dieser Vorrichtung bekannt zu machen.
BEZEICHNUNGEN UND FUNKTIONEN DER KNÖPFE:
Beim Drücken
und Halten
im Laufe von
3 Sekunden
gedrückt
Einstellung der
Zeit und des
Kalenders
Einstellung
der Zeit des
Weckers
Schnelles
Voranrollen
Schnelles
Rückrollen
DeUTsCh
[CLOCK]
[ALARM]
[Up]
[Down]
geRMAn
Beim Drücken
Durchsicht der Zeit,
des Kalenders und des
Wochentages
Durchsicht der Zeit
des Weckers; Ein/
Ausschalten des Weckers
1 Schritt voran in der
Einstellungen
1 Schritt zurück in der
Einstellungen
– 2 – – 3 – – 4 –
[CHANNEL/
SEARCH]
[MEMORY]
[HEAT INDEX/
DEW POINT]
[PRESSURE]
[SNOOZE/
LIGHT]
[ZONE]
[C/F]
geRMAn
Kanalauswahl 1, 2, 3,
Autorollen
Durchsicht der
Grenzwerte der
Temperatur und
Feuchtigkeit
Durchsicht des
Hitzeindexes und des
Taupunktes
Umschalten zwischen
der Messeinheiten
des Luftdruckes hPa
(Hektopascal), Hg (mm
des Quecksilberfaden)
und mb (Millibar)
Aktivierung der Funktion
der gestundeten
Klingel, Ausleuchtung
einschalten
Umschalten zwischen
der Ortszeit und
Zonenzeit
Umschalten zwischen
den Skalen der Messung
der Temperatur nach
Celsius oder Fahrenheit
Suchen des
entfernten
Sensors
Reinigung des
Speichers
Einstellung des
Höhewertes
über das
Meeresspiegel
Einstellung der
Zonenzeit
DeUTsCh
Ermöglicht Regulung
der Helligkeit der
Gleitumschalter
BACKLIGHT
(AUTO/HIGH/
LOW/OFF)]
Ausleuchtung des
Bildschirmes mit
Versetzung des
Umschalters in
bestimmte Position (bei
der Position AUTO ist
Regulung automatisch)
EINSTELLUNG DER SPEISEELEMENTE
UND ANSCHLUSS DES ADAPTERS
Grundempfänger:
Grundstromguelle: Schliessen Sie Adapter 6,0V zum
Adaptersitz auf der Rückplatte der Vorrichtung an, um
Grundfunktionen und ständige Ausleuchtung zu aktivieren.
Reservestromguelle: nehmen Sie Zelledeckel ab, le-
gen 3 Speiseelemente Typ AAA ein, beachten Sie dabei
die Polarität. Schliessen Sie Zelledeckel.
Ferngeber:
Mit dem kleinen Schraubenzieher schrauben Sie los
und nehmen Sie Zelledeckel ab, legen 2 Speiseelemente
Typ AAA ein, beachten Sie dabei die Polarität. Schliessen
Sie Zelledeckel und schrauben Sie fest.
geRMAn
DeUTsCh
EINSTELLUNG DES HÖHEWERTES
ÜBER MEERESSPIEGEL
Nach dem Einlegen der Speiseelemente oder
Anschluss des Adapters, geht der Hauptempfänger
in den Betrieb der Einstellung des Höheswertes über
Meeresspiegel ein.
Mit Drücken der Knöpfe [] und [] wählen Sie
die Messeinheit des Luftdruckes hPa (Hektopascal),
Hg (mm des Quecksilberfadens) und mb (Millibare).
Drücken Sie den Knopf [PRESSURE] für Bestätigung.
Mit Drücken der Knöpfe [] und [] geben Sie den
laufenden Höheswert über Meeresspiegel in m oder in
foot. Drücken Sie noch einmal den Knopf [PRESSURE]
für Bestätigung der durchgeführten Änderungen und
Ausgang. Das ermöglicht präzise Luftdruckmessung
auszuführen und mehr ausführliche Wettervorhersage
zu erhalten. Für ausführlichere Information lesen Sie
Abschnitt “Wettervorhersage und Luftdruckmessung”.
EINSTELLUNG DES DRAHTLO
SEN TERMOHYGROMETERS
• Beim ersten Einstellung schalten Sie zuerst den
Grundempfänger, nur dann den Ferngeber ein. Geben
Sie Kanal 1 für den ersten Ferngeber vor. Geben Sie
Kanal 2 und 3 für den zweiten und dritten Geber vor.
• Drücken Sie und halten Sie gedrückt den Knopf
[CHANNEL/SEARCH] auf dem Grundempfänger bis
geRMAn
– 5 – – 7 – – 8 –
DeUTsCh
Lautsignal ertönt, um das Suchen des Ferngebers zu beginnen.
• Drücken Sie den Knopf [Tx] auf der Rückseite des
Gebers für Sendung des Rundfunksignals.
• Nachdem Funkverbindung eingestellt wird, erscheinen auf dem Bildschirm des Grundempfängers entsprechende Temperatur- und Feuchtigkeitswerte des ausgewählten Kanals.
WETTERVORHERSAGE UND BAROMETER
Die Vorrichtung sagt die Wettervorhersage auf
die nächsten 12 – 24 Stunden voraus und ist auf
der Änderung des Luftdruckes gegründet. Der
Aktionsbereich der Wettervorhersage ist ungefähr im Radius 30 – 50 km. Die Wettervorhersage ist
auf der Änderung des Luftdruckes gegründet. Ihre
Zuverlässigkeit beträgt 70-75 %. Wir haften nicht für
Verluste wegen der falschen Wettervorhersage, weil
man Wetterbedingungen mit hundertprozentigen
Präzision nicht voraussagen kann.
Sunny
(sonnig)
geRMAn
Slightly cloudy
(wechselgewölbung)
– 6 –
Cloudy (trübe)
DeUTsCh
Rainy (regen) Stormy (gewitter)
Das Bild der laufenden Wettervorhersage wird mit
schwarzem Quadratrahmen ausgesondert. Für Erhalten der
präzisen Angaben des Barometers und Wettervorhersage
sollen Sie den laufenden Höheswert über Meeresspiegel
eingeben. Nach der Umladung geht die Vorrichtung automatisch in den Betrieb der Einstellung des Höheswertes
über Meeresspiegel ein.
Mit Drücken der Knöpfe [] und [] wählen Sie
die Messeinheit des Luftdruckes hPa (Hektopascal),
Hg (mm des Quecksilberfadens) und mb (Millibare).
Drücken Sie den Knopf [PRESSURE] für Bestätigung.
Mit Drücken der Knöpfe [] und [] geben Sie
den laufenden Höheswert über Meeresspiegel in
Meter oder in foot. Drücken Sie noch einmal den
Knopf [PRESSURE] für Bestätigung der durchgeführten Änderungen und Ausgang. Sie können auch in
den Betrieb der Einstellung des Höheswertes über
Meeresspiegel im Normalbetrieb der Vorrichtung
haltend gedrückt den Knopf [PRESSURE] eingehen.
geRMAn
DeUTsCh
Mit Drücken den Knopf [PRESSURE] wählen Sie die
Messeinheit des Luftdruckes hPa (Hektopascal), Hg
(mm des Quecksilberfadens) und mb (Millibare).
ACHTUNG:
Gegende, die verschiedene geografische Lage haben, solche wie küstennahe oder küstenentfernte
Gegende, haben verschiedene Wetterbedingungen.
Falls Ihre Miniwetterwarte im Laufe der dauernden Zeitspanne ständig regnerisches oder stürmisches Wetter prognosiert, das den echten
Wetterbedingungen nicht entspricht, erfüllt man folgende Einstellung für Regulung der Genauigkeit der
Wettervorhersage.
1. Prüfen Sie laufende Wetterbedingungen.
2. Gehen Sie in den Betrieb der Einstellung des
Höheswertes über Meeresspiegel ein und ändern Sie
diesen Wert. Jeder Druck verringert oder vergrössert den
Höheswert über Meeresspiegel auf 20 m (oder 60 foot)
und kehrt Sie in den Normalbetrieb der Vorrichtung zurück. Wiederholen Sie diesen Vorgang solange bis Ikone
der Wettervorhersage das wirkliche Wetter darzustellen
beginnt.
(Zum Beispiel, wenn das Wetter mit
Wechselbewölkerung ist, vergrössern oder verringern
Sie den Höheswert über Meeresspiegel solange bis
Wetterwarte Ikone der Wechselbewölkerung zeigt).
geRMAn
DeUTsCh
Page 4

Vergrössern Sie den Höheswert über Meeresspiegel
Verringern Sie den Höheswert über Meeresspiegel
Vergrössern Sie den Höheswert über Meeresspiegel
Verringern Sie den Höheswert über Meeresspiegel
TEMPERATUR UND FEUCHTIGKEIT INNEN
UND AUSSEN DES RAUMES
Man kann Temperaturdaten im unteren linken Teil des
Bildschirmes, und Feuchtigkeitsdaten im unteren rechten Teil durchsehen.
Drücken Sie den Knopf [C/F] für Umschalten zwischen
Temperaturmessskalen nach Celsius und Fahrenheit.
geRMAn
– 9 –
DeUTsCh
Drücken Sie den Knopf [CHANNEL/SEARCH] für
Umschalten zwischen den folgenden Bildschirmbetriebe:
innere, Ch1 (Kanal 1 ), Ch2 (Kanal 2 ), Ch3 (Kanal 3 ) und
Autorollen der Kanale
.
HITZEINDEX INNEN UND AUSSEN DES RAUMES
Hitzeindex vereinigt in sich Werte der Hitze und Feuchtigkeit.
Das ist Temperatur, die bestimmte Kombination der Hitze und
Feuchtigkeit fühlen lässt.
Drücken Sie einmal den Knopf [HEAT INDEX/DEW
POINT] für Durchsicht des inneren und äusseren
Hitzeindexes im oberen linken Teil des Bildschirmes.
Ikone “HEAT INDEX” erscheint.
SIGNALINDIKATOR DES HITZEINDEXES INNEN
UND AUSSEN DES RAUMES
Signalindikatore des Hitzeindexes der entsprechenden inneren und äusseren Kanäle
Caution (vorsichtig)
Extreme caution
(äusserst vorsichtig)
Danger (gefährlich) Hitzeerschöpfung ist möglich
Extreme danger
(äusserst gefährlich)
geRMAn
Physikalische Belastungen sind
mehr erschöpfend als gewöhnlich
Hitzekrämpfe und Erschöpfung
sind möglich
Hitzeschock ist unvermeidlich
– 10 – – 11 – – 12 –
DeUTsCh
TAUPUNKT INNEN UND AUSSEN DES RAUMES
Taupunkt ist Punkt der Luftsättigung oder Temperatur,
bis welche Luft kühlen muss, um Feuchtigkeitsniedersch
lag zu beginnen kann.
Im Normalbetrieb drücken Sie zweimal den Knopf
[HEAT INDEX/DEW POINT] für Durchsicht des inneren oder äusseren Taupunktes im oberen linken Teil des
Bildschirmes. Ikone “DEW POINT” erscheint.
INDIKATOR DES KOMFORTGRADES INNEN
UND AUSSEN DES RAUMES
Indikator des Komfortgrades innen und aussen des
Raumes vereinigt in sich der Einuss der Temperatur
und Feuchtigkeit. Indikator kann 3 Varianten der Werte
darstellen
COMF
WET übermässige Feuchtigkeit der Luft
DRY unzureichende Feuchtigkeit der Luft
Komfortsgrad, ideale Kombination der
Feuchtigkeit und der Temperatur
WENDETE FARBSKALEN
Farbskalen sind auf solche Weise projiziert, dass man
Temperatur und andere Angaben vom ersten Blick bestimmen kann.
Linke Farbskala stellt entsprechend Innen/
Aussentemperatur, Hitzeindex oder Taupunkt im laufenden Betrieb des Bildschirmes dar. Rechte Farbskala
geRMAn
DeUTsCh
stellt entsprechend Innen/Aussenfeuchtigkeit dar. Bei
der Änderung der Angaben verändert sich automatisch
Ausleuchtung der Skalen, je höher sind die Angaben desto grösser ist Skala und umgekehrt.
SPEICHER DER GRENZWERTE
Drücken Sie den Knopf [MEMORY] für Durchsicht der
Grenzwerte der Feuchtigkeit, des Hitzeindexes und des
Taupunktes. Für Rücksetzen des Speichers halten Sie gedrückt den Knopf [MEMORY] in jenem Moment, wenn
entschprechende Werte auf dem Bildschirm dargestellt
werden.
INDIKATOR DER TENDENZ DER ÄNDERUNG
DER TEMPERATUR UND FEUCHTIGKEIT
Ikonen stellen Rising (Aufstieg), Steady (Stabilität) und
Falling (Senkung) dar, wenn Änderung der Temperatur
und Feuchtigkeit schritt 1 Grag nach Celsium (2 Grad nach
Fahrenheit) im Laufe einer Stunde über.
UHR UND KALENDER
Drücken Sie den Knopf [CLOCK] für Umschalten zwischen den Darstellungsbetrieben der Zeit, des Kalenders
und des Wochentages.
Drücken Sie und halten Sie gedrückt den Knopf [CLOCK],
für den Eingang in den Einstimmungsbetrieb der Uhr. Man
kann der Reihe nach folgende Werte mit den Knöpfen []
geRMAn
DeUTsCh
oder [] für Einstimmung und dem Knopf [CLOCK] für
Speichern der durchgeführten Änderungen eingeben:
12/24 format (12/24-Stundenformat) → Hr
(Stunden) → Min (Minuten) → Yr (Jahr) → D/M or M/D
format (Format der Datumdarstellung Tag/Monat oder
Monat/Tag) → Month (Monat) → Date (Tag) → Weather
Forecast (Wettervorhersage) → EXIT (Ausgang).
ORTSZEIT, WELTZEIT ZONENZEIT
Drücken Sie und halten Sie gedrückt den Knopf
[ZONE] für den Eingang in den Einstimmungsbetrieb
der Weltzeit (Zonenzeit). Mit den Knöpfen [] und [],
geben Sie den nötigen Dierenzwert der Zeit von -12
bis +12 Stunden. Drücken Sie den Knopf [ZONE] für
Speichern jeder Einstimmung.
Für Umschalten zwischen der Ortszeit und Weltzeit
(Zonenzeit) drücken Sie den Knopf [ZONE]. Beim
Auswahl der Weltzeit (Zonenzeit) erscheint Ikone “ZONE”.
Wenn Sie Die Funktion der Zonenzeit nicht benutzen,
geben Sie Zeitdierenz „0“ vor.
INSTALLATION DES WECKERS
Für Durchsicht der Zeit, auf die der Wecker eingestellt
ist, drücken Sie den Knopf [ALARM]. Auf dem Bildschirm
erscheint Ikone “AL.”. Drücken Sie diesen Knopf noch einmal für Ein/Ausschalten des Weckers. Beim Einschalten
des Weckers erscheint auf dem Bildschirm Ikone “
geRMAn
– 13 – – 15 – – 16 –– 14 –
DeUTsCh
”.
Für Einstimmung der Zeit des Weckers drücken Sie
und halten Sie gedrückt den Knopf [ALARM]. Mit den
Knöpfen [] und [] geben Sie den gewünschten Wert
Hr (Stunden)/Min (Minuten) ein, und dann drücken Sie
den Knopf [ALARM] für Speichern der durchgeführten
Änderungen .
GESTUNDETE WECKERKLINGEL/AUSLEUCHTUNG
DES BILDSCHIRMES
Beim Weckersignal drücken Sie den Knopf [SNOOZE/
LIGHT] für Aktivierung der Funktion der gestundeten
Klingel. Auf dem Bildschirm erscheint Ikone “Zz”. Für
Stoppen des Signals für einen Tag drücken Sie den Knopf
[ALARM]. Drücken Sie den Knopf [SNOOZE/LIGHT] für
Einschalten der Ausleuchtung, wenn kein Adapter angeschlossen ist.
PRÜFUNG DER HELLIGKEIT DER AUSLEUCHTUNG
DES BILDSCHIRMES
Mit dem Gleitumschalter auf der Rückseite der
Vorrichtung wählen Sie den Betrieb der Helligkeit der
Ausleuchtung des Bildschirmes aus.
Position „AUTO“:
Automatischer Auswahl der Helligkeit der
Ausleuchtung des Bildschirmes in Übereinstimmung
mit der Beleuchtung des Raumes, die mit dem lichtempndlichen Sensor links vom Knopf [SNOOZE/LIGHT] be-
geRMAn
DeUTsCh
stimmt wird. Bei der guten Beleuchtung vergrössert sich
Helligkeit der Ausleuchtung des Bildschirmes. Wenn in
dem Raum dunkel wird, verringert sich Helligkeit der
Ausleuchtung des Bildschirmes.
(Anmerkung: den automatischen Betrieb empfehlt
man für rationelle Verwendung der elektrischen Energie,
für Verlängerung der Laufzeit des Bildschirmes und für
Bequemlichkeit bei der Benutzung der Vorrichtung).
(Wichtig: für Normalbetrieb des lichtempndlichen
Sensors verhindert man für ihn Licht nicht. Sonst bleibt
Bildschirm trübe sogar bei der guten Beleuchtung).
Position «HIGH»
Position «LOW»
Position «OFF»
Schaltet den Betrieb der hohen Helligkeit
der Ausleuchtung des Bildschirmes ein
Schaltet den Betrieb der niedrigen
Helligkeit der Ausleuchtung des
Bildschirmes ein
Schaltet die Ausleuchtung des
Bildschirmes ein
INDIKATION DER NIEDRIGEN LADUNG DER
SPEISEELEMENTE
Indikation der niedrigen Ladung der Speiseelemente
ist wie für Grundempfänger so auch für 3 Ferngeber vorgesehen. Wechseln Sie Speiseelemente aus und erzeugen Sie die Einstellung laut der Anweisung.
geRMAn
DeUTsCh
VERWERTUNG DER SPEISEELEMENTE
Tauschen Sie Speiseelemente nur auf Elemente
des gleichen oder gleichwertigen Types aus, das vom
Hersteller empfohlen wurde. Verwerten Sie bitte die veralteten Speiseelemente laut der Gesetzgebung ohne
Beschädigung der Umwelt.
SPEZIFIKATIONEN:
Bereich der
Messtemperature für
Innengeber
Innenfeuchtigkeit/
Relativfeuchtigkeit
Ferngeber -20° C bis + 60° C (-4° F bis +140° F)
Kanal Max. 3 Ferngeber
Weite der Sendung
Skalapräzision
Speisung
geRMAn
0° C bis + 50° C (+32° F bis +122° F)
20%-99% RH (Relativfeuchtigkeit )
bis 75 m (246 foot) im freien Gelände,
Funkfrequenz 434 МHz.
0,1 Grad für Temperatur, 1% für
Feuchtigkeit
Adapter 6,0 V und 3 Speiseelemente
Typ ААА für Grundempfänger
2 Speiseelemente Typ ААА für
Ferngeber.
DeUTsCh
Page 5

МИНИ-МЕТЕОСТАНЦИЯ
Модель АН-1975
РУКОВОДСТВО
ПО ЭКСПЛУАТАЦИИ
RUssiAn
– 1 –
Русский
Благодарим Вас за покупку цветной метеостанции нового поколения. При помощи этого прибора,
разработанного с применением современных технологий и использованием новейших компонентов,
вы сможете точно и надежно измерить атмосферное
давление, внутреннюю/наружную влажность, температуру, индекс жары, точку росы, получать прогноз
погоды, а также использовать устройство как обычные часы с будильником. Внимательно прочтите эту
инструкцию по эксплуатации и ознакомьтесь со всеми характеристиками и функциями нашего нового
товара.
НАЗВАНИЯ И ФУНКЦИИ КНОПОК:
При нажатии
и удерживании
в течение
3 секунд
Установка времени и календаря
Установка времени
будильника
Быстрая прокрутка
вперед
Русский
[CLOCK]
[ALARM]
[ Up]
RUssiAn
При нажатии
Просмотр времени, календаря и дня недели
Просмотр времени будильника; включение/
выключение будильника
1 шаг вперед в установках
– 2 – – 3 – – 4 –
[ Down]
[CHANNEL/
SEARCH]
[MEMORY]
[HEAT
INDEX/DEW
POINT]
[PRESSURE]
[SNOOZE/
LIGHT]
[ZONE]
[C/F]
RUssiAn
1 шаг назад в установках
Выбор канала 1, 2, 3, автопрокрутка
Просмотр граничных
значений температуры и
влажности
Просмотр индекса жары
и точки росы
Переключение между
единицами измерения
давления hPa (гектопаскали), Hg (миллиметры
ртутного столбика) и mb
(миллибары)
Активация функции отсроченного звонка,
включить подсветку
Переключение между
местным и поясным временем
Переключение между
шкалами измерения температуры по Цельсию
или по Фаренгейту
Быстрая прокрутка назад
Поиск дистанционного сенсора
Очистка памяти
Установка значения уровня высоты над уровнем моря
Установка поясного времени
Русский
Скользящий
переключатель
[BACKLIGHT
(AUTO/
HIGH/LOW/
OFF)]
Позволяет регулировать
яркость подсветки дисплея, путем установки переключателя в определенное положение (рекомендуем положение
AUTO, когда яркость подсветки регулируется автоматически)
УСТАНОВКА ЭЛЕМЕНТОВ ПИТАНИЯ
И ПОДКЛЮЧЕНИЕ АДАПТЕРА
Внутренний принимающий прибор:
Основной источник энергии: подключите адап-
тер на 6,0В в соответствующее гнездо для адаптера
на задней панели устройства, чтобы активизировать
основные функции и постоянную подсветку.
Резервный источник энергии: снимите крышку
отсека питания, установите 3 элемента питания типа
AAA, соблюдая полярность. Закройте крышку отсека
питания.
Дистанционный датчик:
Воспользуйтесь небольшой отверткой, чтобы раскрутить винты и снять крышку отсека питания, установите 2 элемента питания типа AAA, соблюдая полярность. Закройте крышку отсека питания и закрутите винты.
RUssiAn
Русский
УСТАНОВКА ЗНАЧЕНИЯ ВЫСОТЫ
НАД УРОВНЕМ МОРЯ
После установки элементов питания, или подключения адаптера, основное устройство автоматически войдет в режим установки значения высоты над
уровнем моря. Нажимая кнопки [] и [] выберите единицу измерения давления hPa (гектопаскали), Hg (миллиметры ртутного столбика) и mb (миллибары). Нажмите кнопку [PRESSURE] для подтверждения. Затем, нажимая кнопки [] и [] введите текущее значение высоты над уровнем моря в метрах
или в футах. Еще раз нажмите кнопку [PRESSURE] для
подтверждения сделанных изменений и выхода. Это
позволит миниметеостанции производить точные
измерения давления и давать более точный прогноз
погоды. Для более полной информации ознакомьтесь с разделом «ПРОГНОЗ ПОГОДЫ И ИЗМЕРЕНИЕ
ДАВЛЕНИЯ»
УСТАНОВКА БЕСПРОВОДНОГО
ТЕРМОГИГРОМЕТРА
• Во время первой установки всегда включайте
сначала основной приемник, а потом дистанционный датчик. Задайте канал 1 для первого дистанционного датчика. Задайте канал 2 и 3 для второго и третьего датчиков соответственно.
RUssiAn
– 5 – – 7 – – 8 –
Русский
• Чтобы начать поиск дистанционного датчика, нажми-
те и удерживайте кнопку [CHANNEL/SEARCH] на основном приемнике до тех пор, пока не услышите сигнал.
• Нажмите кнопку [Tx] на задней панели датчика
для передачи радиосигнала.
• После того, как радиосвязь будет установлена, на
дисплее основного приемника появятся соответствующие значения температуры и влажности для выбранного канала.
ПРОГНОЗ ПОГОДЫ И БАРОМЕТР
Данное устройство осуществляет прогноз погодных
условий на с ледующие 12-24 часа, основанный на изменении атмосферного давления. Зона покрытия составляет 30-50км. Прогноз погоды основывается на отслеживании изменения атмосферного давления, при этом точность прогноза составляет 70-75 %. Поскольку погодные
условия нельзя предсказать с точностью до 100 %, мы не
можем нести ответственности за какой-либо ущерб, полученный вследствие неверного прогноза погоды.
Sunny
(солнечно)
RUssiAn
Slightly cloudy (переменная облачность)
– 6 –
Cloudy
(пасмурно)
Русский
Rainy (дождь) Stormy (гроза)
Картинка текущего прогноза погоды выделяется
черным квадратным ободком.
Для получения более точных показаний барометра и прогноза погоды, вам необходимо установить
текущее значение высоты над уровнем моря. После
перезагрузки (повторного включения) устройство
автоматически войдет в режим установки значения
высоты над уровнем моря. Нажимая кнопки [] и
[] выберите единицу измерения давления hPa (гектопаскали), Hg (миллиметры ртутного столбика) и mb
(миллибары). Нажмите кнопку [PRESSURE] для подтверждения. Затем, нажимая кнопки [] и [] введите текущее значение высоты над уровнем моря в метрах или в футах. Еще раз нажмите кнопку [PRESSURE]
для подтверждения сделанных изменений и выхода. Вы также можете войти в режим установки значения высоты над уровнем моря в нормальном режиме работы устройства, нажав и удерживая кнопку
[PRESSURE].
RUssiAn
Русский
Нажмите кнопку [PRESSURE], чтобы выбрать еди-
ницу измерения давления hPa (гектопаскали), Hg
(миллиметры ртутного столбика) и mb (миллибары).
ВНИМАНИЕ:
Разница географического положения, например
расположение в глубине материка или в прибрежной зоне также влияет на точность прогноза погоды.
Если ваша миниметостанция в течение долгого времени прогнозирует дождь или грозу, и при этом прогноз не сбывается, в этом случае необходимо произвести следующие действия, для точной настройки
прогноза погоды.
1. Проверьте текущее состояние погоды.
2. Войдите в режим установки значения высоты
над уровнем моря и измените это значение. Каждое
нажатие уменьшает или увеличивает значение высоты над уровнем моря на 20м (или 60 футов) и возвращает вас в нормальный режим работы устройства.
Повторяйте это действие, пока иконка прогноза погоды метеостанции не начнет отображать реальную
погоду.
(Например, если погода сейчас с переменной облачностью, то увеличивайте или уменьшайте значение высоты над уровнем моря, пока метеостанция не
начнет показывать значок переменной облачности.)
RUssiAn
Русский
Page 6

Увеличивайте значение уровня высоты над уровнем моря
Уменьшайте значение уровня высоты над уровнем моря
Увеличивайте значение уровня высоты над уровнем моря
Уменьшайте значение уровня высоты над уровнем моря
ТЕМПЕРАТУРА И ВЛАЖНОСТЬ
ВНУТРИ И ВНЕ ПОМЕЩЕНИЯ
Данные о температуре помещены в верхнем левом
углу дисплея, а данные о влажности – справа от данных температуры.
Нажмите кнопку [C/F] для переключения между
шкалами измерения температуры по Цельсию или по
RUssiAn
– 9 –
Русский
Фаренгейту. Нажимайте кнопку [CHANNEL/SEARCH]
для переключения между следующими режимами:
внутренний, Ch1 (первый канал), Ch2 (второй канал),
Ch3 (третий канал) и
автопрокрутка каналов.
ИНДЕКС ЖАРЫ ВНУТРИ И ВНЕ ПОМЕЩЕНИЯ
Индекс жары объединяет в себе значения жары
и влажности. Это та температура, которую заставляет ощущать определенная комбинация жары и влажности.
Нажмите кнопку [HEAT INDEX/DEW POINT] один
раз для просмотра внутреннего и наружного индекса
жары в верхней левой части дисплея. Появится иконка «HEAT INDEX».
СИГНАЛЬНЫЙ ИНДИКАТОР ИНДЕКСА ЖАРЫ
ВНУТРИ И ВНЕ ПОМЕЩЕНИЯ
Сигнальные индикаторы индекса жары соответствующих внутренних или внешних каналов
Caution (Осторожно)
Extreme caution
(Чрезвычайно осторожно)
Danger (Опасно) Вероятно тепловое истощение
Extreme danger
(Чрезвычайно опасно)
RUssiAn
Физические нагрузки более
изнурительны, нежели обычно
Возможны тепловые судороги,
а также истощение
Неминуем тепловой удар
– 10 – – 11 – – 12 –
Русский
ТОЧКА РОСЫ ВНУТРИ И ВНЕ ПОМЕЩЕНИЯ
Точка росы представляет собой такую степень насыщения воздуха влагой, или ту температуру, до которой необходимо охладить воздух, чтобы началась
конденсация влаги.
В обычном режиме дважды нажмите кнопку [HEAT
INDEX/DEW POINT] для просмотра соответственно
внутренней или наружной точки росы в верхней левой части дисплея. Появится иконка «DEW POINT».
ИНДИКАТОР УРОВНЯ КОМФОРТНОСТИ
ВНУТРИ И ВНЕ ПОМЕЩЕНИЯ
Индикатор уровня комфортности внутри и вне помещения совмещает в себе воздействие температуры и влажности. Индикатор может отображать три
варианта значения:
COMF
WET Чрезмерная влажность воздуха
DRY Недостаточная влажность воздуха
Уровень комфортности, идеальное сочетание
влажности и температуры
ИЗМЕНЯЮЩИЕСЯ ЦВЕТОВЫЕ ШКАЛЫ
Меняющие цвет шкалы спроектированы таким образом, чтобы температуру и прочие показания можно было определить с первого взгляда.
Левая цветовая шкала представляет соответственно внутреннюю/внешнюю температуру, индекс жары
RUssiAn
Русский
или точку росы в текущем режиме дисплея. Правая
шкала представляет соответственно внутреннюю/
внешнюю влажность.
По мере изменения показаний подсветка шкал меняется: чем выше показания, тем ярче становится
представляющая их шкала, и наоборот.
ПАМЯТЬ ГРАНИЧНЫХ ЗНАЧЕНИЙ
Нажимайте кнопку [MEMORY] для просмотра граничных значений температуры, влажности, индекса
жары или точки росы. Для очистки памяти удерживайте нажатой кнопку [MEMORY] в тот момент, ког-
да соответствующие значения отображаются на дисплее.
ИНДИКАТОР ТЕНДЕНЦИИ ИЗМЕНЕНИЯ
ТЕМПЕРАТУРЫ И ВЛАЖНОСТИ
Иконки отобразят Rising (Подъем), Steady (Стабильность)
и Falling (Снижение), ес ли изменение температуры или
влажности на протяжении часа превышает 1 градус по
шкале Цельсия (2 градуса по шкале Фаренгейта).
ЧАСЫ И КАЛЕНДАРЬ
Нажимайте кнопку [CLOCK] для переключения
между режимами отображения времени, календаря
и дня недели.
Нажмите и удерживайте кнопку [CLOCK], чтобы
зайти в режим настройки часов. Пользуясь кнопками
[] или [] для настройки и кнопкой [CLOCK] для
RUssiAn
Русский
сохранения сделанных изменений, можно последовательно задать следующие значения:
12/24 format (12/24-часовой формат) → Hr (Часы) →
Min (Минуты) → Yr (Год) → D/M or M/D format (формат
отображения даты День/Месяц или Месяц/День) →
Month (Месяц) → Date (День) → EXIT (Выход).
ДОМАШНЕЕ ВРЕМЯ, МИРОВОЕ
ПОЯСНОЕ ВРЕМЯ
Нажмите и удерживайте кнопку [ZONE], чтобы зайти в режим настройки мирового (поясного) времени.
Пользуясь кнопками [] или [], задайте желаемое значе-
ние разницы во времени от –12 до +12 часов. Нажимайте
кнопку [ZONE] для сохранения каждой настройки.
Для переключения между домашним временем
и мировым (поясным) временем нажимайте кнопку [ZONE]. При выборе мирового (поясного) времени появится иконка «ZONE». Если вы не используете
функцию поясного времени, задайте разницу во времени «0».
УСТАНОВКА БУДИЛЬНИКА
Для просмотра времени, на которое установлен
будильник, нажмите кнопку [ALARM]. На дисплее
появится иконка «AL.».Нажмите кнопку еще раз для
включения/отключения будильника. При включении
будильника на дисплее появится иконка «
RUssiAn
– 13 – – 15 – – 16 –
».
Русский
Для настройки времени будильника нажмите и
удерживайте кнопку [ALARM]. Используя кнопки []
или [], задайте желаемое значение Hr (часы) /Min
(минуты), а затем нажмите кнопку [ALARM] для со-
хранения сделанных изменений.
ОТЛОЖЕННЫЙ СИГНАЛ БУДИЛЬНИКА/
ПОДСВЕТКА ДИСПЛЕЯ
Когда звучит сигнал будильника, нажмите кнопку
[SNOOZE/LIGHT] для активации функции отложенного
сигнала будильника. На дисплее появится иконка «Zz».
Для остановки сигнала на один день, нажмите кнопку
[ALARM]. Если адаптер не подключен, нажимайте кнопку [SNOOZE/LIGHT] для включения подсветки.
КОНТРОЛЬ ЯРКОСТИ ПОДСВЕТКИ ДИСПЛЕЯ
С помощью скользящего переключателя сзади уст-
ройства выберите режим яркости подсветки дисплея.
Положение «AUTO»:
Автоматический выбор яркости подсветки дисплея, в соответствии с освещенностью помещения,
которая определяется с помощью светочувствительного сенсора, расположенного слева от кнопки
[SNOOZE/LIGHT]. В условиях хорошей освещенности, яркость подсветки дисплея будет увеличиваться.
Если в помещении становиться темнее, яркость подсветки дисплея уменьшается.
RUssiAn
– 14 –
Русский
Примечание: автоматический режим рекомен-
дуется для рационального использования электроэнергии устройством, для продления срока службы
дисплея и удобства использования устройства.
Важно: Для нормальной работы светочувствитель-
ного сенсора не закрывайте его от света. В противном случае дисплей будет оставаться тусклым даже
в условиях хорошей освещенности.
Положение
«HIGH»
Положение «LOW»
Положение «OFF» Выключает подсветку дисплея
Включает режим высокой яркости
подсветки дисплея
Включает режим низкой яркости подсветки дисплея
ИНДИКАЦИЯ НИЗКОГО ЗАРЯДА
ЭЛЕМЕНТОВ ПИТАНИЯ
Индикация низкого заряда элементов питания
предусмотрена как для основного приемника, так и
для трех дистанционных датчиков. Замените элементы питания и произведите процедуру установки, описанную в данной инструкции.
УТИЛИЗАЦИЯ ЭЛЕМЕНТОВ ПИТАНИЯ
Производите замену элементов питания только на элементы питания такого же или эквивалентного типа, рекомендованного производителем. Пожалуйста, утилизируй-
RUssiAn
Русский
те отслужившие элементы питания в соответствии с законодательством, не причиняя вреда окружающей среде.
СПЕЦИФИКАЦИИ
Диапазон измеряемых температур для внутреннего
датчика:
Внутренняя влажность/
Относительная влажность
Дистанционный датчик:
Канал
Дальность передачи:
Точность шкалы:
Питание:
RUssiAn
0° C до + 50° C (+32° F до
+122° F)
20 %-99 %RH
-20° C до + 60° C (-4° F до
+140° F)
Макс. 3 дистанционных датчика
До 75 метров (246 футов) на
открытой местности, радиочастота 434 МГц.
0,1 градуса для температуры,
1 % для влажности
Адаптер на 6,0 В и 3 элемента
питания типа ААА для основного приемника, 2 элемента питания типа ААА для дистанционного датчика.
Русский
Page 7

МІНІ-МЕТЕОСТАНЦІЯ
Модель АН-1975
ІНСТРУКЦІЯ З ЕКСПЛУАТАЦІЇ
UKRAiniAn
– 1 –
укРАЇНсЬкА
Дякуємо Вам за покупку кольорової метеостанції нового покоління. За допомогою цього приладу,
розробленого із застосуванням сучасних технологій
і використанням новітніх компонентів, ви зможете
точно і надійно зміряти атмосферний тиск, внутрішню/зовнішню вологість, температуру, індекс спеки,
точку роси, отримувати прогноз погоди, та також використовувати пристрій в якості звичайного годинника з будильником. Уважно прочитайте даний посібник з експлуатації і ознайомтеся зі всіма характеристиками і функціями нашого нового товару.
НАЗВА І ФУНКЦІЇ КНОПОК
При натисненні
і утримуванні
протягом 3 се-
кунд
Установка часу
і календаря
Установка часу
будильника
Швидка прокрутка вперед
Швидка прокрутка назад
укРАЇНсЬкА
[CLOCK]
[ALARM]
[ Up]
[ Down]
UKRAiniAn
При натисненні
Проглядання часу, календаря і дня тижня
Проглядання часу будильника; включення/
виключення будильника
1 крок вперед в налаштуваннях
1 крок назад в налаштуваннях
– 2 – – 3 – – 4 –
[CHANNEL/
SEARCH]
[MEMORY]
[HEAT
INDEX/DEW
POINT]
[PRESSURE]
[SNOOZE/
LIGHT]
[ZONE]
[C/F]
UKRAiniAn
Вибір каналу 1, 2, 3, автопрокрутка
Проглядання граничних
значень температури і
вологості
Проглядання індексу
спеки і точки роси
Перемикання між одиницями вимірювання тиску hPa (гектопаскалі),
Hg (міліметри ртутного
стовпчика) та mb (мілібари)
Активація функції відстроченого дзвінка,
включити підсвічування
Перемикання між домашнім і поясним часом
Перемикання між шкалами вимірювання температури за Цельсієм або
за Фаренгейтом
Пошук дистанційного сенсора
Очищення
пам’яті
Встановлення
значення висоти над рівнем
моря
Установка поясного часу
укРАЇНсЬкА
Дозволяє регулювати
Перемикач,
що ковзає
[BACKLIGHT
(AUTO/
HIGH/ LOW/
OFF)]
яскравість підсвічування
дисплею шляхом пересування перемикача в певне положення (рекомендовано положення AUTO,
тоді яскравість підсвічування регулюється автоматично)
УСТАНОВКА ЕЛЕМЕНТІВ ЖИВЛЕННЯ І АДАПТЕРА
Внутрішній приймаючий прилад:
Основне джерело енергії: підключіть адаптер на
6,0В у відповідний роз’єм для адаптера на задній панелі пристрою, щоб активізувати основні функції і
постійне підсвічування.
Резервне джерело енергії: зніміть кришку відсі-
ку живлення, встановіть 3 елементи живлення типа
AAA, дотримуючи полярність. Закрийте кришку відсіку живлення.
Дистанційний датчик:
Скористайтеся невеликою викруткою, щоб розкрутити гвинти і зняти кришку відсіку живлення, встановіть 2 елементи живлення типа AAA, дотримуючи
полярність. Закрийте кришку відсіку живлення і закрутіть гвинти.
UKRAiniAn
укРАЇНсЬкА
ВСТАНОВЛЕННЯ ЗНАЧЕННЯ
ВИСОТИ НАД РІВНЕМ МОРЯ
Після встановлення елементів живлення, або підключення адаптера, основний пристрій автоматично увійде в режим встановлення значення висоти над рівнем
моря. Натискаючи кнопки [] і [] виберіть одиницю
вимірювання тиску hPa (гектопаскалі), Hg (міліметри
ртутного стовпчика) та mb (мілібари). Натисніть кнопку [PRESSURE] для підтвердження. Потім, натискуючи кнопки [] та [] введіть поточне значення висоти
над рівнем моря в метрах або в футах.Ще раз натисніть
кнопку [PRESSURE] для підтвердження внесених змін та
виходу. Це дозволить мініметеостанції виконувати точні виміри тиску та давати більш точний прогноз погоди. Для детальнішої інформації ознайомтеся з розділом
«ПРОГНОЗ ПОГОДИ ТА ВИМІРЮВАННЯ ТИСКУ».
УСТАНОВКА БЕЗДРОТОВОГО ТЕРМОГІГРОМЕТРА
• Під час першої установки завжди вмикайте спочатку основний приймач, а потім дистанційний датчик. Задайте канал 1 для першого дистанційного
датчика. Задайте канали 2 і 3 для другого і третього
датчиків відповідно.
• Щоб почати пошук дистанційного датчика
натисніть і утримуйте кнопку [CHANNEL/SEARCH] на
основному приймачі доки не почуєте сигнал.
UKRAiniAn
– 5 – – 7 – – 8 –
укРАЇНсЬкА
• Натисніть кнопку [Tx] на задній панелі датчика
для передачі радіосигналу.
• Після того, як радіозв’язок буде встановлений, на
дисплеї основного приймача з’являться відповідні
значення температури і вологості для вибраного каналу.
ПРОГНОЗ ПОГОДИ ТА ВИМІРЮВАННЯ ТИСКУ
Даний пристрій здійснює прогноз погодних умов
на наступні 12-24 години, оснований на вимірюванні атмосферного тиску. Зона покриття становить 3050км. Прогноз погоди базується на відсліжуванні змін
атмосферного тиску, при цьому точність прогнозу
складає 70-75 %. Оскільки погодні умови неможливо
передбачити з точністью до 100 %, ми не можемо нести відповідальність за будь які збитки, отримані в результаті невірного прогнозу погоди.
Sunny (сонячно)
UKRAiniAn
Slightly cloudy
(перемінна
хмарність)
– 6 –
Cloudy (пасмурно)
укРАЇНсЬкА
Rainy (дощ) Stormy (гроза)
Малюнок поточного прогнозу погоди виділяється
чорним квадратним обідком.
Щоб отримати більш точні показники барометра та
прогноза погоди, необхідно задати поточне значення
висоти над рівнем моря. Після перезапуску (повторного включення) пристрій автоматично увійде в режим встановлення значення висоти над рівнем моря.
Натискаючи кнопки [] і [] виберіть одиницю
вимірювання тиску hPa (гектопаскалі), Hg (міліметри
ртутного стовпчика) та mb (мілібари). Натисніть кнопку [PRESSURE] для підтвердження. Потім, натискуючи
кнопки [] та [] введіть поточне значення висоти
над рівнем моря в метрах або в футах.Ще раз натисніть кнопку [PRESSURE] для підтвердження внесених
змін та виходу. Ви також можете увійти в режим встановлення значення висоти над рівнем моря в нормальному режимі роботи пристрою, натиснувши та
утримуючи кнопку [PRESSURE].
UKRAiniAn
укРАЇНсЬкА
УВАГА:
Різниця географічного положення, наприклад
розташування в глибині материка або в прибережній зоні також впливає на точність прогнозу погоди. Якщо ваша мініметеостанція протягом тривалого часу прогнозує дощ, або грозу, але при цьому прогноз не справджується, в такому разі неохідно виконати наступні дії для точного настроювання прогнозу погоди.
1. Перевірте поточний стан погоди.
2. Увійдіть в режим встановлення значення висоти над рівнем моря та змініть це значення. Кожне
натискання зменшує або збільшує значення висоти
над рівнем моря на 20 метрів (або 60 футів) та повертає вас до нормального режиму роботи пристрою.
Повторюйте цю дію, доки іконка прогнозу погоди не
почне відображати дійсну погоду.
(Наприклад, якщо погода зараз з перемінною
хмарністю, збільшуйте або зменшуйте значення висоти над рівнем моря, доки мініметеостанція не почне
показувати значок з перемінною хмарністю.)
UKRAiniAn
укРАЇНсЬкА
Page 8

Збільшуйте значення висоти над рівнем моря
Зменшуйте значення висоти над рівнем моря
Збільшуйте значення висоти над рівнем моря
Зменшуйте значення висоти над рівнем моря
ТЕМПЕРАТУРА І ВОЛОГІСТЬ УСЕРЕДИНІ
І ПОЗА ПРИМІЩЕННЯМ
Дані про температуру поміщені в верхньому лівому кутку дисплея, а дані про вологість – справа від даних температури.
Натисніть кнопку [C/F] для перемикання між шка-
лами вимірювання температури за Цельсієм або за
Фаренгейтом.
Натискайте кнопку [CHANNEL/SEARCH] для пере-
микання між наступними режимами: внутрішній, Ch1
(перший канал), Ch2 (другий канал), Ch3 (третій канал) і автопрокрутка
каналів.
ІНДЕКС СПЕКИ УСЕРЕДИНІ І
ПОЗА ПРИМІЩЕННЯМ
Індекс спеки об’єднує в собі значення спеки та вологості.Це та температура, яку примушує відчувати
певна комбінація спеки і вологості.
Натисніть кнопку [HEAT INDEX/DEW POINT] один
раз для проглядання внутрішнього і зовнішнього індексу спеки в верхній лівій частині дисплея. З’явиться
іконка «HEAT INDEX».
СИГНАЛЬНИЙ ІНДИКАТОР ІНДЕКСУ СПЕКИ
УСЕРЕДИНІ І ПОЗА ПРИМІЩЕННЯМ
Сигнальні індикатори індексу спеки відповідних
внутрішніх або зовнішніх каналів
Caution (Обережно)
Extreme caution
(Надзвичайно обережно)
Фізичні навантаження більш виснажливі, ніж зазвичай
Можливі теплові судоми, а також
виснаження
Danger
(Небезпечно)
Extreme danger
(Надзвичайно небезпечно)
Вірогідне теплове виснаження
Неминучий тепловий удар
ТОЧКА РОСИ УСЕРЕДИНІ І ПОЗА ПРИМІЩЕННЯМ
Точка роси є точкою насичення повітря або температурою, до якої необхідно охолодити повітря, щоб
почалася конденсація вологи.
У звичайному режимі двічі натисніть кнопку [HEAT
INDEX/DEW POINT] для проглядання відповідно
внутрішньої або зовнішньої точки роси в верхньому
лівому кутку дисплея. З’явиться іконка «DEW POINT».
ІНДИКАТОР РІВНЯ КОМФОРТНОСТІ
УСЕРЕДИНІ І ПОЗА ПРИМІЩЕННЯМ
Індикатор рівня комфортності усередині і поза
приміщенням поєднує в собі дію температури і вологості. Індикатор може відображати три варіанти значення:
COMF
WET Надмірна вологість повітря
DRY Недостатня вологість повітря
Рівень комфортності, ідеальне поєднання
вологості і температури
КОЛЬОРОВІ ШКАЛИ, ЩО ЗМІНЮЮТЬ КОЛІР
Кольорові шкали спроектовані так, щоб температуру та інші показники можна було визначити з першого погляду.
Ліва кольорова шкала відображає відповідно
внутрішню/зовнішню температуру, індекс спеки
або точку роси в поточному режимі дисплея. Права
шкала представляє відповідно внутрішню/зовнішню вологість. По мірі змінювання показників підсвічування шкал змінюється: чим вище показники,
тим яскравішою стає шкала, що відображує іх, і навпаки.
ПАМ’ЯТЬ ГРАНИЧНИХ ЗНАЧЕНЬ
Натискайте кнопку [MEMORY] для проглядання
граничних значень температури, вологості, індексу
спеки або точки роси. Для очищення пам’яті утримуйте натиснутою кнопку [MEMORY] в той момент, коли
відповідні значення відображаються на дисплеї.
ІНДИКАТОР ТЕНДЕНЦІЇ ЗМІНИ
ТЕМПЕРАТУРИ І ВОЛОГОСТІ
Іконки відобразять Rising (Підйом), Steady
(Стабільність) і Falling (Зниження), якщо зміна температури або вологості протягом години перевищує 1 градус за шкалою Цельсія (2 градуси за шкалою
Фаренгейта).
UKRAiniAn
– 9 –
укРАЇНсЬкА
ГОДИННИК І КАЛЕНДАР
Натискайте кнопку [CLOCK] для перемикання між
режимами відображення часу, календаря і дня тижня.
Натисніть і утримуйте кнопку [CLOCK], щоб зай-
ти в режим налаштування годинника. Користуючись
кнопками []або [] для налаштування і кнопкою
[CLOCK] для збереження зроблених змін, можна послідовно задати наступні значення:
12/24 format (12/24-часовой формат) → Hr (Години)
→Min (Хвилини) → Yr (Рік) → D/M or M/D format (формат відображення дати День/Місяць або Місяць/День)
→ Month (Місяць) → Date (День) → EXIT (Вихід)
МІСЦЕВИЙ ЧАС, СВІТОВИЙ ПОЯСНИЙ ЧАС
Натисніть і утримуйте кнопку [ZONE], щоб увійти в режим настройки світового (поясного) часу. Користуючись
кнопками [] або [], задайте бажане значення різниці в часі від –12 до +12 годин. Натискайте кнопку [ZONE]
для збереження кожної настройки. Для перемикання
між місцевим часом і світовим (поясним) часом натискайте кнопку [ZONE]. При виборі світового (поясного)
часу з’явиться ікона «ZONE».Якщо ви не користуєтесь
функцією поясного часу, задайте різницю в часі «0».
УСТАНОВКА БУДИЛЬНИКА
Для проглядання часу, на який встановлений будильник, натисніть кнопку [ALARM]. На дисплеї
UKRAiniAn
– 13 – – 15 – – 16 –– 14 –
укРАЇНсЬкА
UKRAiniAn
– 10 – – 11 – – 12 –
укРАЇНсЬкА
з’явиться ікона «AL.».Натисніть кнопку ще раз для
включення/відключення будильника. При включенні
будильника на дисплеї з’явиться ікона «
».
Для налаштування часу будильника натисніть і ут-
римуйте кнопку [ALARM]. Користуючись кнопками
[] або [], задайте бажане значення Hr (години) /
Min (хвилини), а потім натисніть кнопку [ALARM] для
збереження зроблених змін.
ВІДКЛАДЕНИЙ СИГНАЛ БУДИЛЬНИКА/
ПІДСВІЧУВАННЯ ДИСПЛЕЮ
Коли звучить сигнал будильника, натисніть кнопку
[SNOOZE/LIGHT] для активування функції відкладеного дзвінка. На дисплеї з’явиться ікона «Zz». Для зупинки
сигналу на один день, натисніть кнопку [ALARM]. Якщо
адаптер не підключено, натисніть кнопку [SNOOZE/
LIGHT] для вмикання підсвічування.
КОНТРОЛЬ ЯСКРАВОСТІ
ПІДСВІЧУВАННЯ ДИСПЛЕЯ
За допомогою ковзаючого перемикача, що знаходиться позаду пристрою оберіть режим яскравості
підсвічування дисплея.
Положення «AUTO»:
Автоматичний вибір яскравості підсвічування дисплея, в залежності від освітлення приміщення, яка
UKRAiniAn
укРАЇНсЬкА
UKRAiniAn
укРАЇНсЬкА
визначається за допомогою світлочутливого сенсора, розміщеного зліва від кнопки [SNOOZE/LIGHT] .
В умовах хорошого освітлення, яскравіть підсвічування дисплея буде зростати. Якщо у приміщенні темнішає, яскравість підсвічування дисплею зменшується.
Примітка: автоматичний режим рекомендуєть-
ся для раціонального використання електроенергії
приладом, а також для подовження строку служби
дисплея та зручності використання пристрою.
Важливо: для нормальної роботи світлочутливого
сенсора не закривайте його від світла. Інакше дисплей буде залишатися тмяним навіть в умовах хорошого освітлення.
Положення «HIGH»
Положення «LOW»
Положення «OFF» Вимикає підсвічування дисплея
Вмикає режим високої яскравості
підсвічування дисплея
Вмикає режим низької яскравості
підсвічування дисплея
ІНДІКАЦІЯ НИЗЬКОГО ЗАРЯДА
ЕЛЕМЕНТІВ ЖИВЛЕННЯ
Індікація низького заряда елементів живлення передбачена як для основного приймача, так і для трьох дистанційних датчиків. Замініть елементи живлення та виконайте
процедуру установки, надану в даній інструкції.
UKRAiniAn
укРАЇНсЬкА
UKRAiniAn
укРАЇНсЬкА
УТИЛІЗАЦІЯ ЕЛЕМЕНТІВ ЖИВЛЕННЯ
Замінюйте використані елементи живлення тільки елементами живлення такого ж або еквівалентного
типу, рекомендованого виробником. Будь ласка, утилізуйте використані елементи живлення, відповідно до
законодавства, не заподіюючи шкоди навколишньому
середовищу.
СПЕЦИФІКАЦІЇ
Діапазон вимірюваних температур для
внутрішнього датчика:
Внутрішня вологість:
Відносна вологість
Дистанційний датчик: -20° C до + 60° C (-4° F до +140° F)
Канал: Макс. 3 дистанційні датчики
Дальність передачі:
Точність шкали:
Живлення:
UKRAiniAn
0° C до + 50° C (+32° F до +122° F)
20 %-99 %
До 75 метрів (246 футів) на відкритій місцевості, радіочастота
434 Мгц.
0,1 градуси для температури, 1 %
для вологості
Адаптер на 6,0 В і 3 елементи живлення типу ААА для основного
приймача, 2 елементи живлення
типа ААА для дистанційного датчика.
укРАЇНсЬкА
 Loading...