How it Works
Log In / Sign Up
Buy Points
How it Works
FAQ
Contact Us
Questions and Suggestions
Users
ARISTON
Loading...
T
TZ 751 S K-HA
2
TZ751SNALU-HA
TZ 751 S N-HA
2
U
UA8 F1C W
5
UA8 F1D X AG
6
UA8 F2D XI SA
4
UNO
UNOBLOC G 38 RI
UNOBLOC G 45 RI
UNOBLOC G PV 24 RI
UNOBLOC G PV 31 RI
Unvented Hot Water Storage Cylinders
UP1521
UP1721
UP1746
UP 350 FI-FE
UPA352
UPS 1701 T F
UPS 1701 T F (AG)
UPS 1701 T F (IL)
UPSI 1702 T F (EX)
UT 103ESC -HA
UT 103ESC X -HA
UT 104C -HA
UT 104C X -HA
UT 63 C-HA S
UT 63 C X-HA S
UT 89EC.20 -HA S
UT 89EC.20 X-HA S
V
V042 S
V04 S
V04S.1
VELIS INOX 100
Velis Inox 50 3623265
Velis Wifi O-100V 3626296 1.5 kW
Velis Wifi O-50V 3626294 1.5 kW
Velis Wifi O-80 3626295 1.5 kW
VLS EVO 45
VLS EVO 45 WiFi
VLS EVO 50 PW O
VLS EVO 80
VLS EVO 80 WiFi
VLS EVO DRY 80
VLS EVO INOX 50 PW O
VTF129EU
W
WDD 8640
WDD8640B
WDG862
WDG8629BAUS
WDG 8629 B AUS.1
WDG 8640
WDG8640B
WDG 8640S EX
WH VRSF 80
WMD 10219
WMD 11419
WMD702B
WMD842B
WMD 9218
WMF7080B
WMF720B
WMF 729
WMG 10437BS EX
WMG 10437S EX
WMG700B
WMG 700 EX 60HZ.M
2
WMG705B
WMG720B
WMG 721S EX
WMG825B
WMG 829
WMG 829 B AUS
WMG 9018
WMG 9437S EX
WML700
WML 700 EX
WML705
WML708
WML7080
WMSD600B
WMSD601B
WMSD621B
WMSD 7103
WMSD 7105 B
WMSD 7125
WMSD7126B
WMSD723B
WMSD 723B EU
WMSD 8215
WMSD 8219
WMSF 603
WMSF605B
WMSF 6080B
WMSG600B
WMSG605B
WMSG 7103
WMSG 7105
WMSG 7106
WMSG 7125
WMSG 8018
Loading...
Loading...
Nothing found
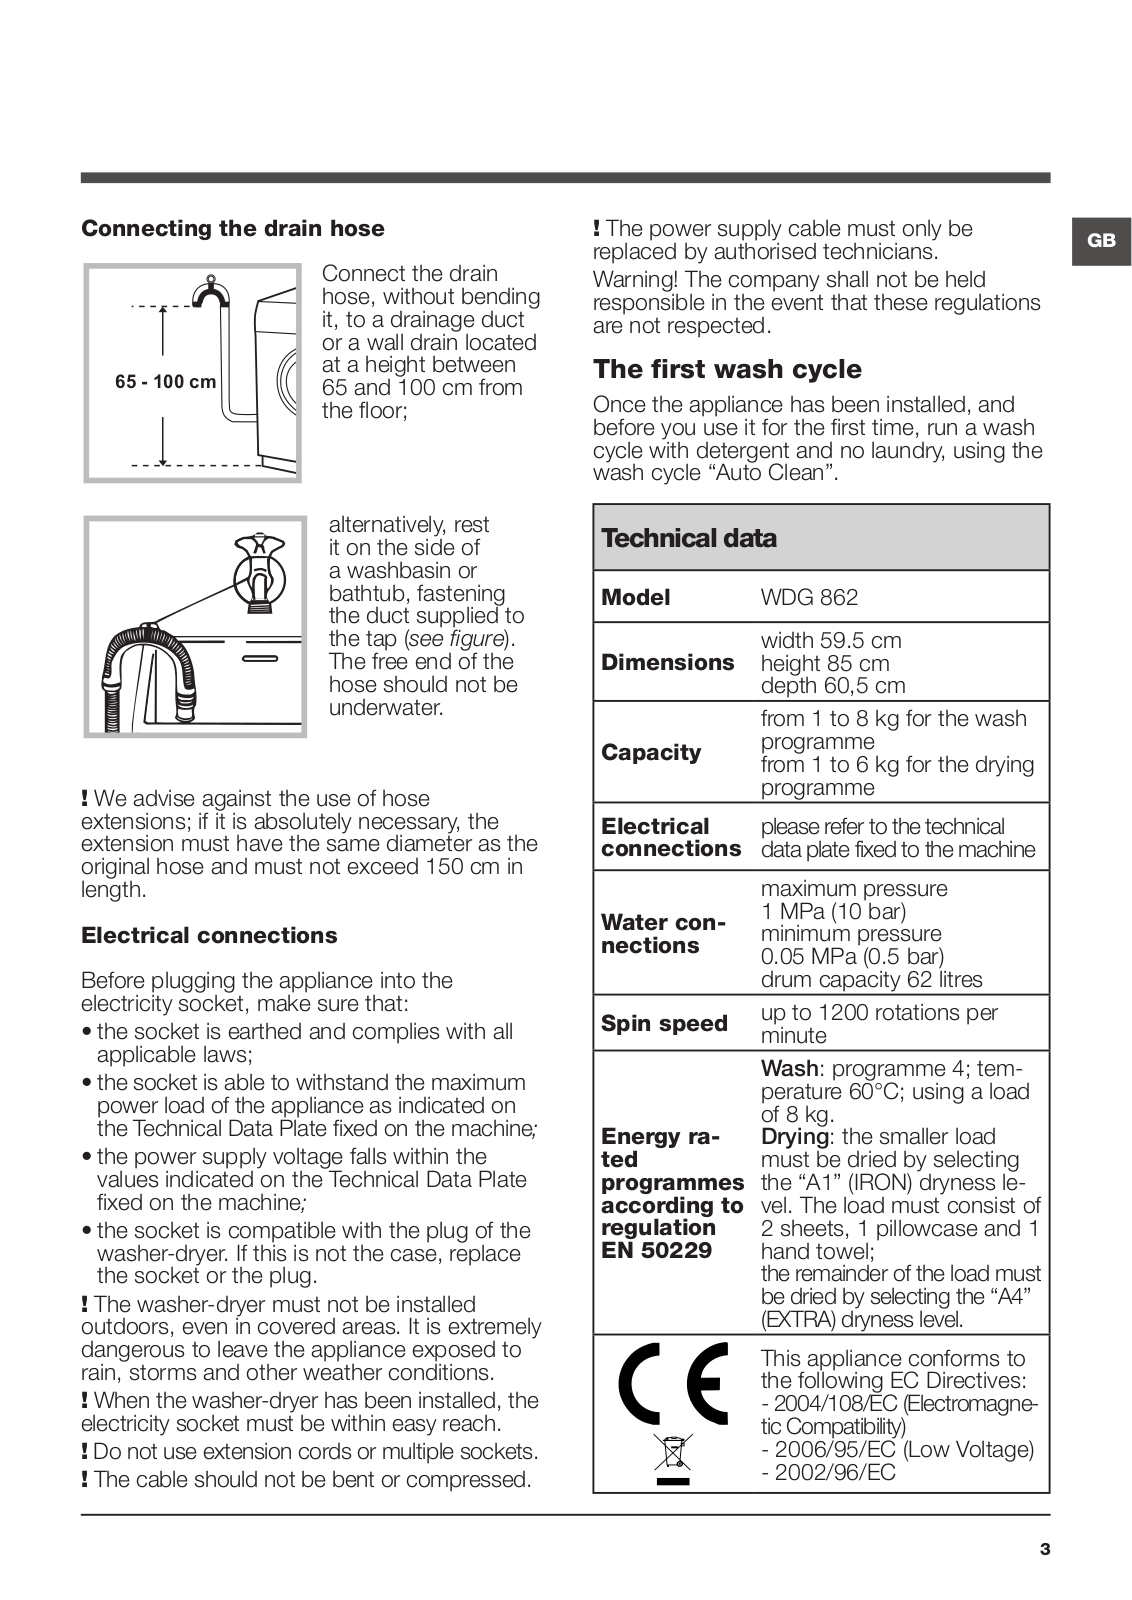
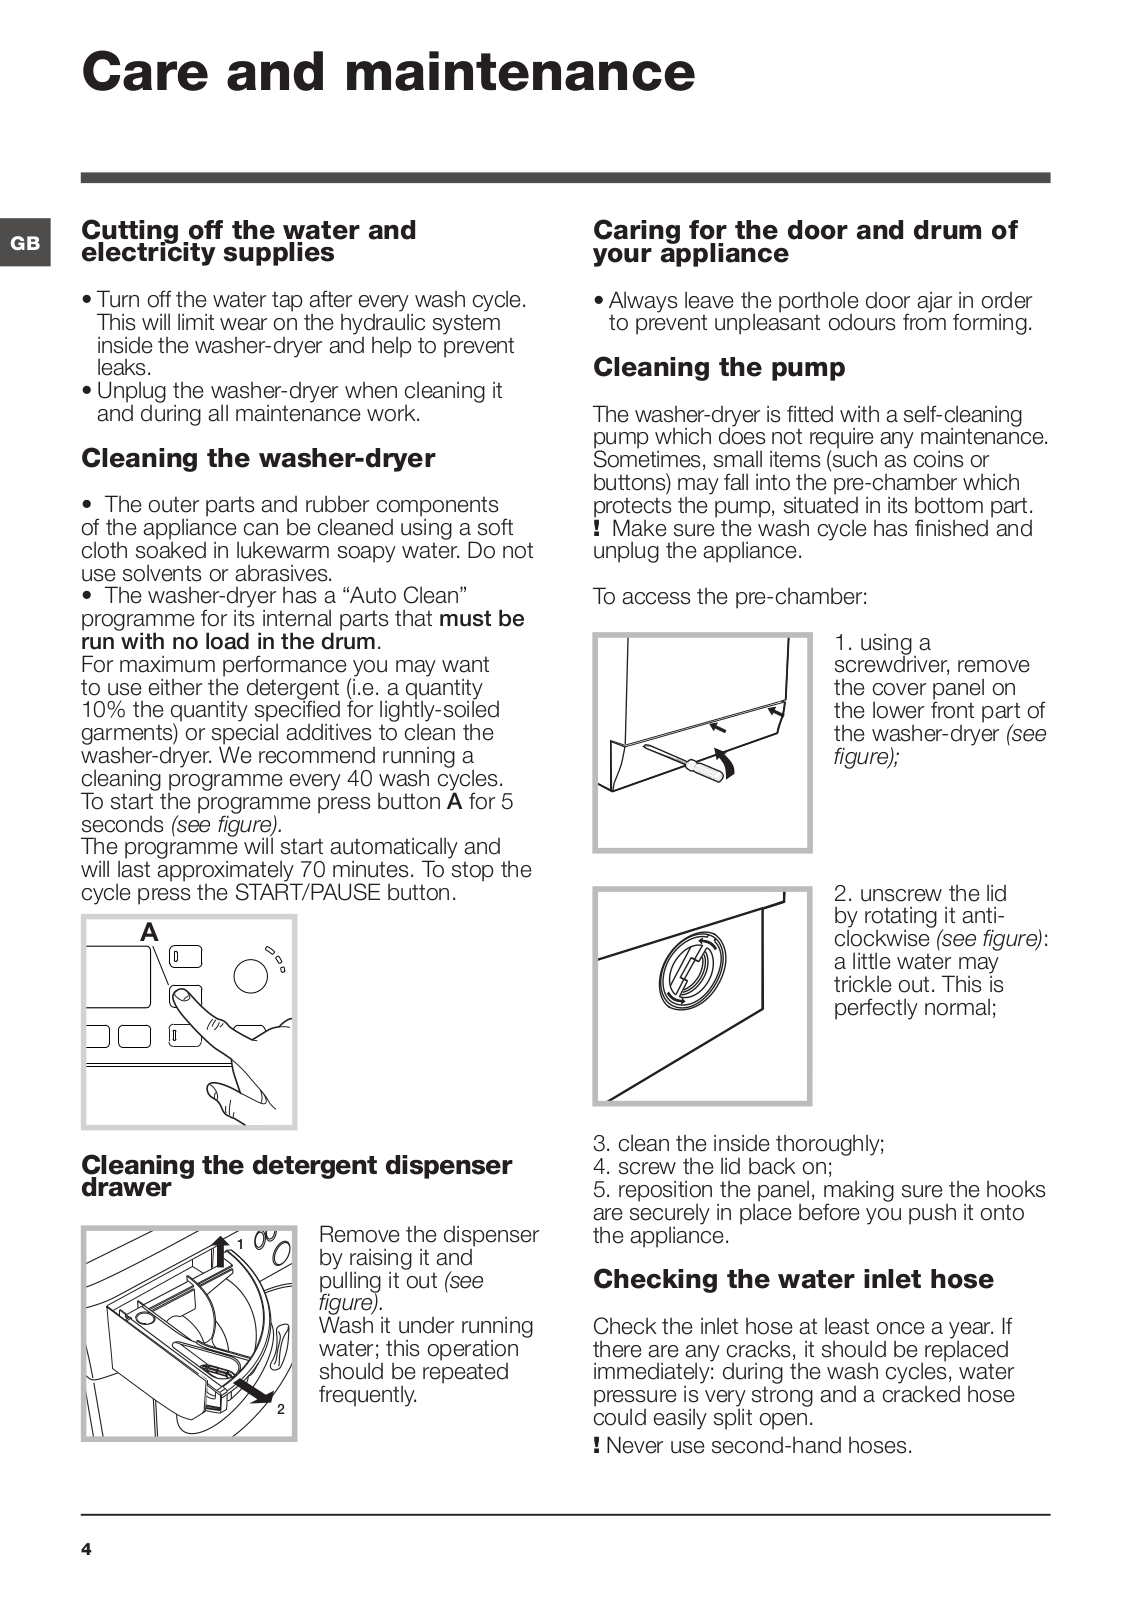
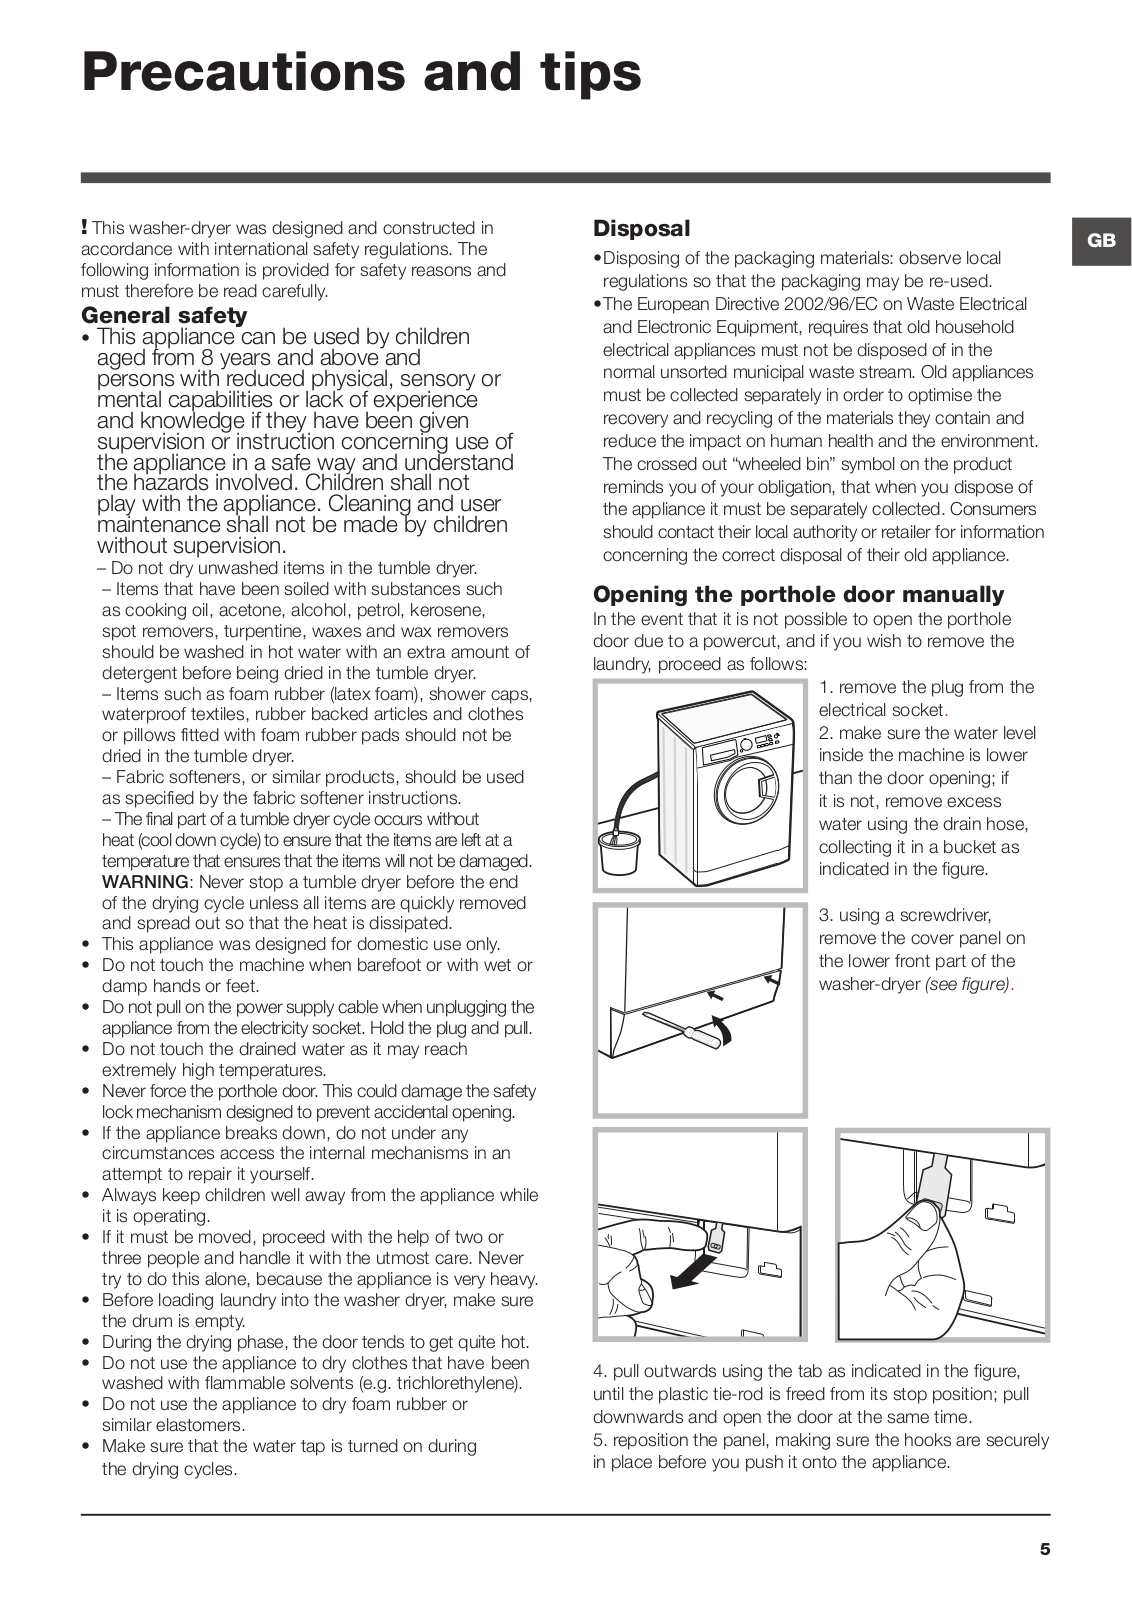
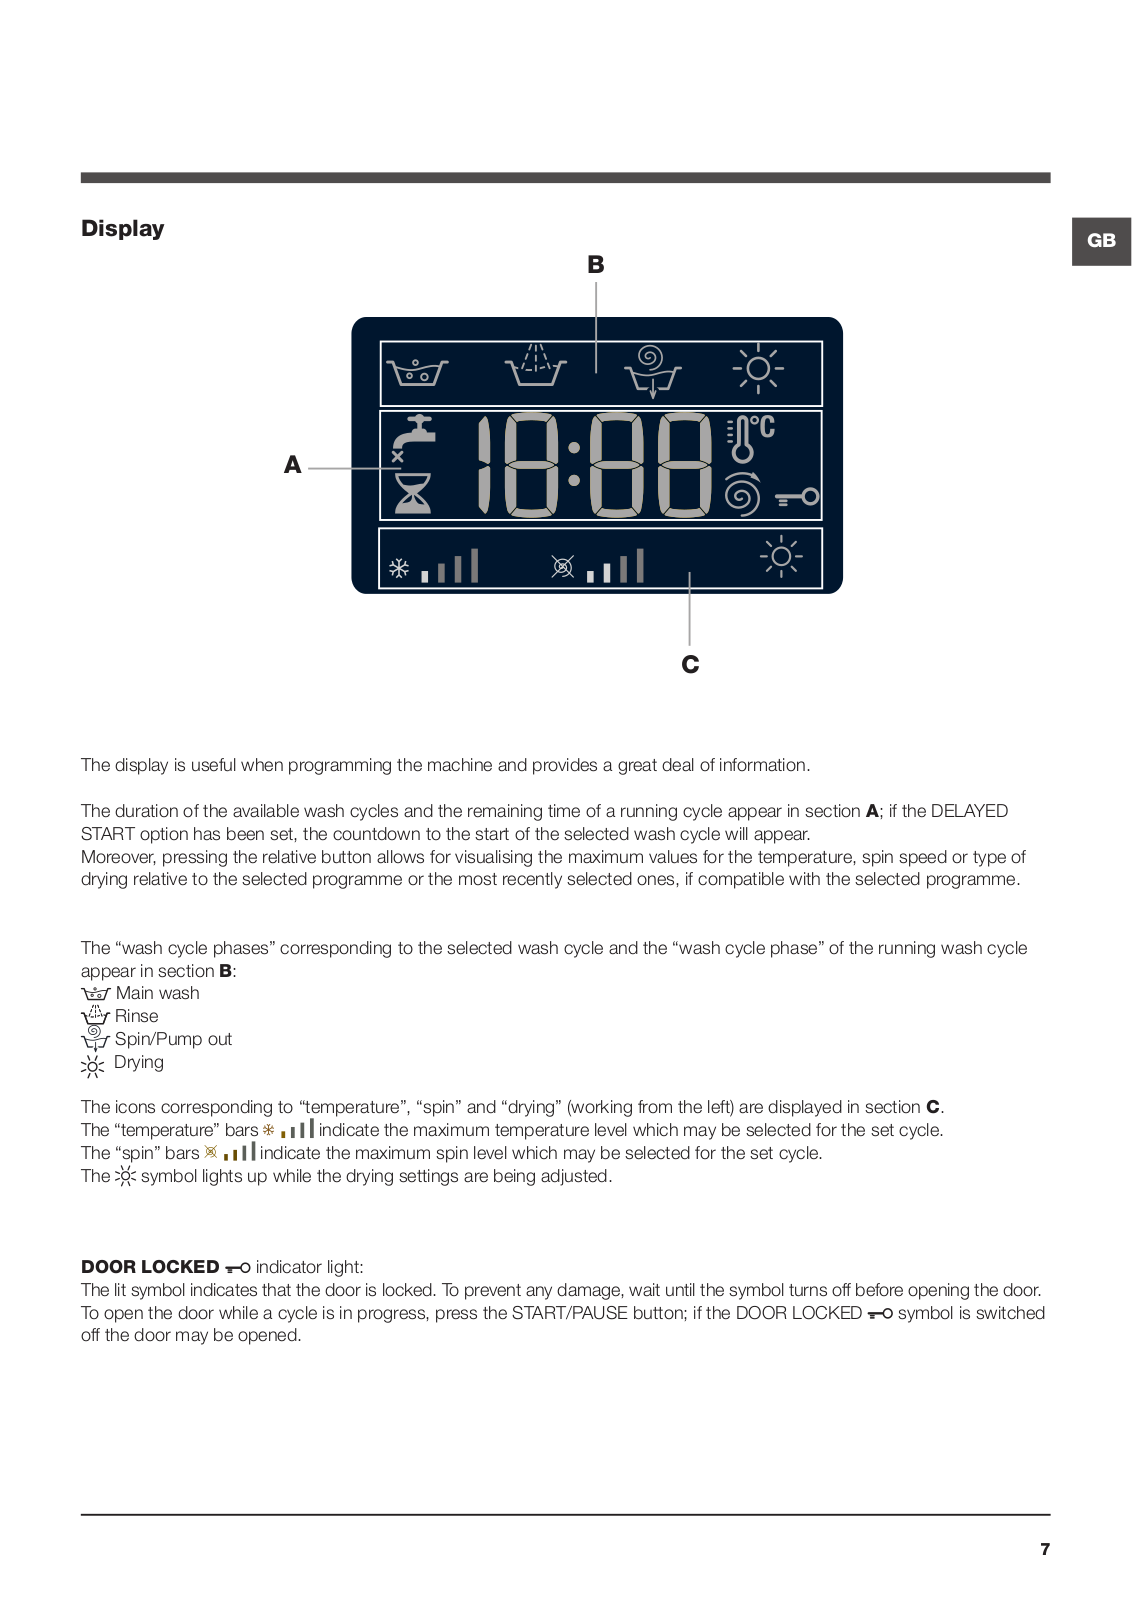
WDG862
User Manual [ru]
84 pgs
4.81 Mb
1
Table of contents
Loading...
ARISTON WDG862 User Manual [ru]
...
ARISTON User Manual [ru]
Download
Specifications and Main Features
Frequently Asked Questions
User Manual
Download
Loading...
+
hidden pages
Unhide
You need points to download manuals.
1 point = 1 manual.
You can buy points or you can get point for every manual you upload.
Buy points
Upload your manuals
 Loading...