


IIssttrruuzziioonnii ppeerr ll''uussoo
IT
GB FR
ES
PT NL
IT
Italiano, 1 English, 10 Français, 19
Español, 28 Portoguês, 37 Nederlands, 46
Sommario
All’attenzione dell’utente, 2
All’attenzione dell’utente, 3
Installazione dell’apparecchio, 4
Presentazione, Il ripiano ripiegabile *, 5
Utilizzazione, 6
Tabella funzione / Utilizzo, 7
La funzione gril / la funzione microonde
+ gril *, 8
Manutenzione ordinaria, 9
Leggete attentamente il presente manuale d'uso e manutenzione: vi fornirà importanti consigli per la sicurezza, l'installazione e l'utilizzazione del vostro apparecchio.
FORNO A MICROONDE
* secondo il modello

Importante:
Conserva queste istruzioni insieme
all’apparecchio. Se l’apparecchio dovesse essere
venduto o ceduto ad altre persone, assicurarsi
che sia accompagnato dalle sue istruzioni. Ti
invitiamo a leggere attentamente questi consigli
prima di installare e utilizzare l’apparecchio.
Sono stati redatti per la sicurezza tua e di chi ti
sta vicino.
• NORME DI SICUREZZA
Questo apparecchio è destinato esclusivamente ad
un utilizzo domestico per cuocere, riscaldare o
scongelare alimenti. Il costruttore si svincola da
qualsiasi responsabilità in caso di utilizzo non
conforme.
Controlla che gli utensili siano idonei per l’uso in
forno a microonde.
Per non deteriorare l’apparecchio, non farlo
funzionare a vuoto o senza platea.
Non intervenire nei fori della serratura posta sul
frontale; rischi di danneggiare l’apparecchio con
conseguente necessario intervento.
La guarnizione e il telaio della porta vanno
ispezionati periodicamente per assicurarsi che non
siano deteriorati. Se queste zone sono danneggiate,
non utilizzare più l’apparecchio e fallo controllare da
un tecnico specializzato.
Durante il riscaldamento di derrate alimentari in
contenitori di plastica o di carta, abbi il forno
sott’occhio per via dei possibili rischi
d’infiammazione.
In funzione microonde e microonde + calore
ventilato, si sconsiglia di utilizzare recipienti
metallici, forchette, cucchiai, coltelli e punti metallici
utilizzati nei sacchetti per congelamento.
Il contenuto dei biberon e degli omogeneizzati per
neonati va agitato e la temperatura va controllata
prima del consumo, onde evitare ustioni.
Non riscaldare i biberon con il ciuccio (rischio di
esplosione).
Lascia che i bambini utilizzino il forno non
sorvegliati solo dopo avere dato loro le debite
istruzioni affinché possano utilizzare il forno in modo
sicuro e capiscano i pericoli incorsi in caso di
utilizzo improprio.
Utilizza sempre guanti isolanti per togliere le vivande
dal forno. Alcune teglie assorbono il calore degli
alimenti e diventano molto calde.
I liquidi e altri alimenti non vanno riscaldati in
recipienti ermetici giacché rischiano di esplodere.
Si consiglia di non riscaldare le uova nel guscio o le
uova sode intere nel forno a microonde giacché
rischiano di esplodere, anche dopo la fine cottura.
Riscaldare bevande con il forno a microonde può
provocare un’improvvisa fuoriuscita ritardata del
liquido in ebollizione, quindi vanno prese le debite
precauzioni mentre si manipola il recipiente.
In caso di piccole quantità (una salsiccia, un
cornetto, ecc...) mettere un bicchiere d’acqua
accanto all’alimento.
Tempi troppo lunghi rischiano di essiccare l’alimento
e di carbonizzarlo. Per evitare questi incidenti, non
utilizzare i tempi consigliati per la cottura in forno
tradizionale.
Se appare del fumo, spegni o scollega il forno e
mantieni chiusa la porta per soffocare le eventuali
fiamme.
AAllll’’aatttteennzziioonnee ddeellll’’uutteennttee
2
IT

• CRITERIO FUNZIONALE
Le microonde utilizzate per la cottura sono onde
elettromagnetiche. Esistono comunemente
nell’ambiente così come le onde radioelettriche, la
luce, o i raggi infrarossi.
La frequenza delle microonde sta nella banda dei
2450 MHz.
Il loro comportamento:
• Vengono riflesse dai metalli.
• Attraversano qualsiasi altro materiale.
• Vengono assorbite dalle molecole d’acqua, di
grasso e di zucchero.
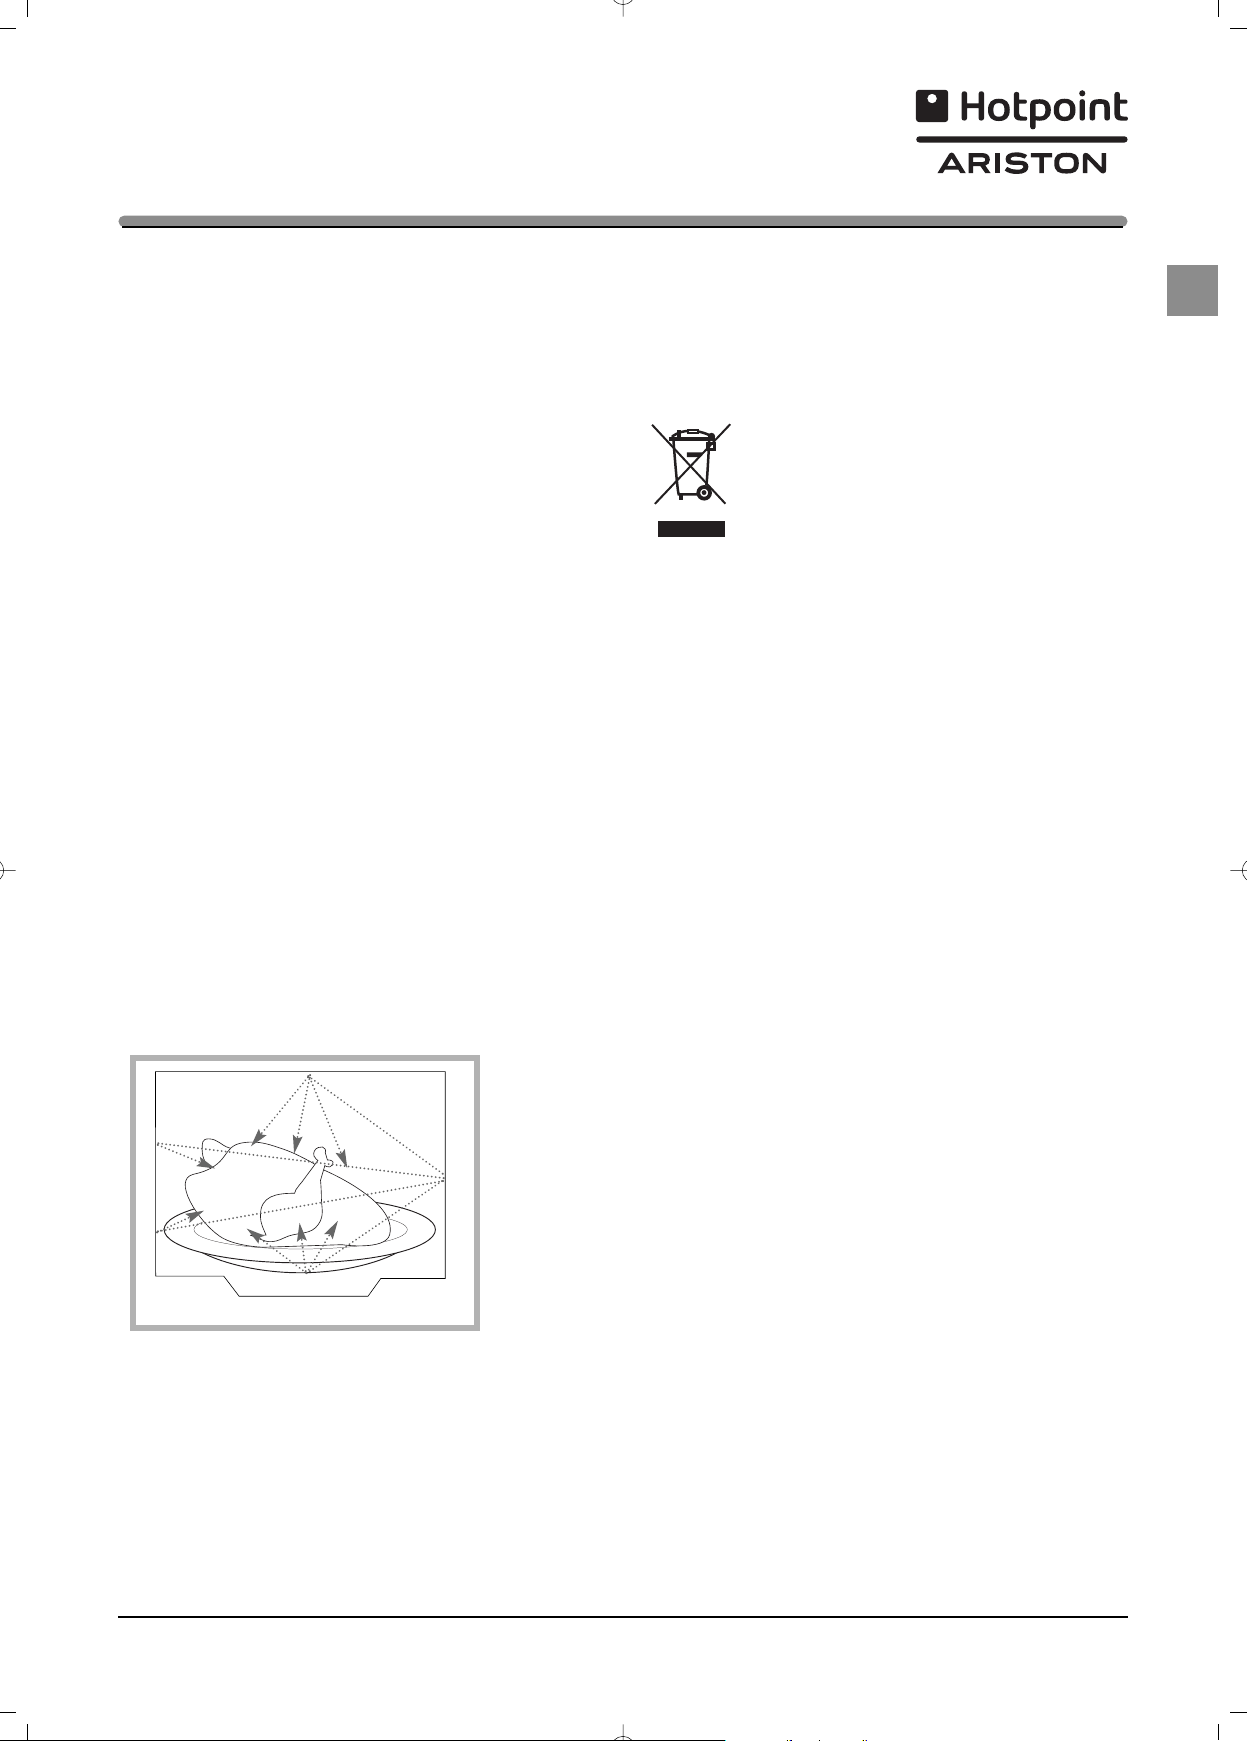
Quando un alimento viene esposto alle microonde,
ne consegue una rapida agitazione delle molecole e
questo induce il riscaldamento.
La profondità di penetrazione delle onde
nell’alimento è di circa 2,5 cm, se l’alimento è più
spesso, la cottura al centro avverrà mediante
conduzione come nella cottura tradizionale.
È opportuno sapere che le microonde provocano
nell’alimento un semplice fenomeno termico e non
sono nocive per la salute.
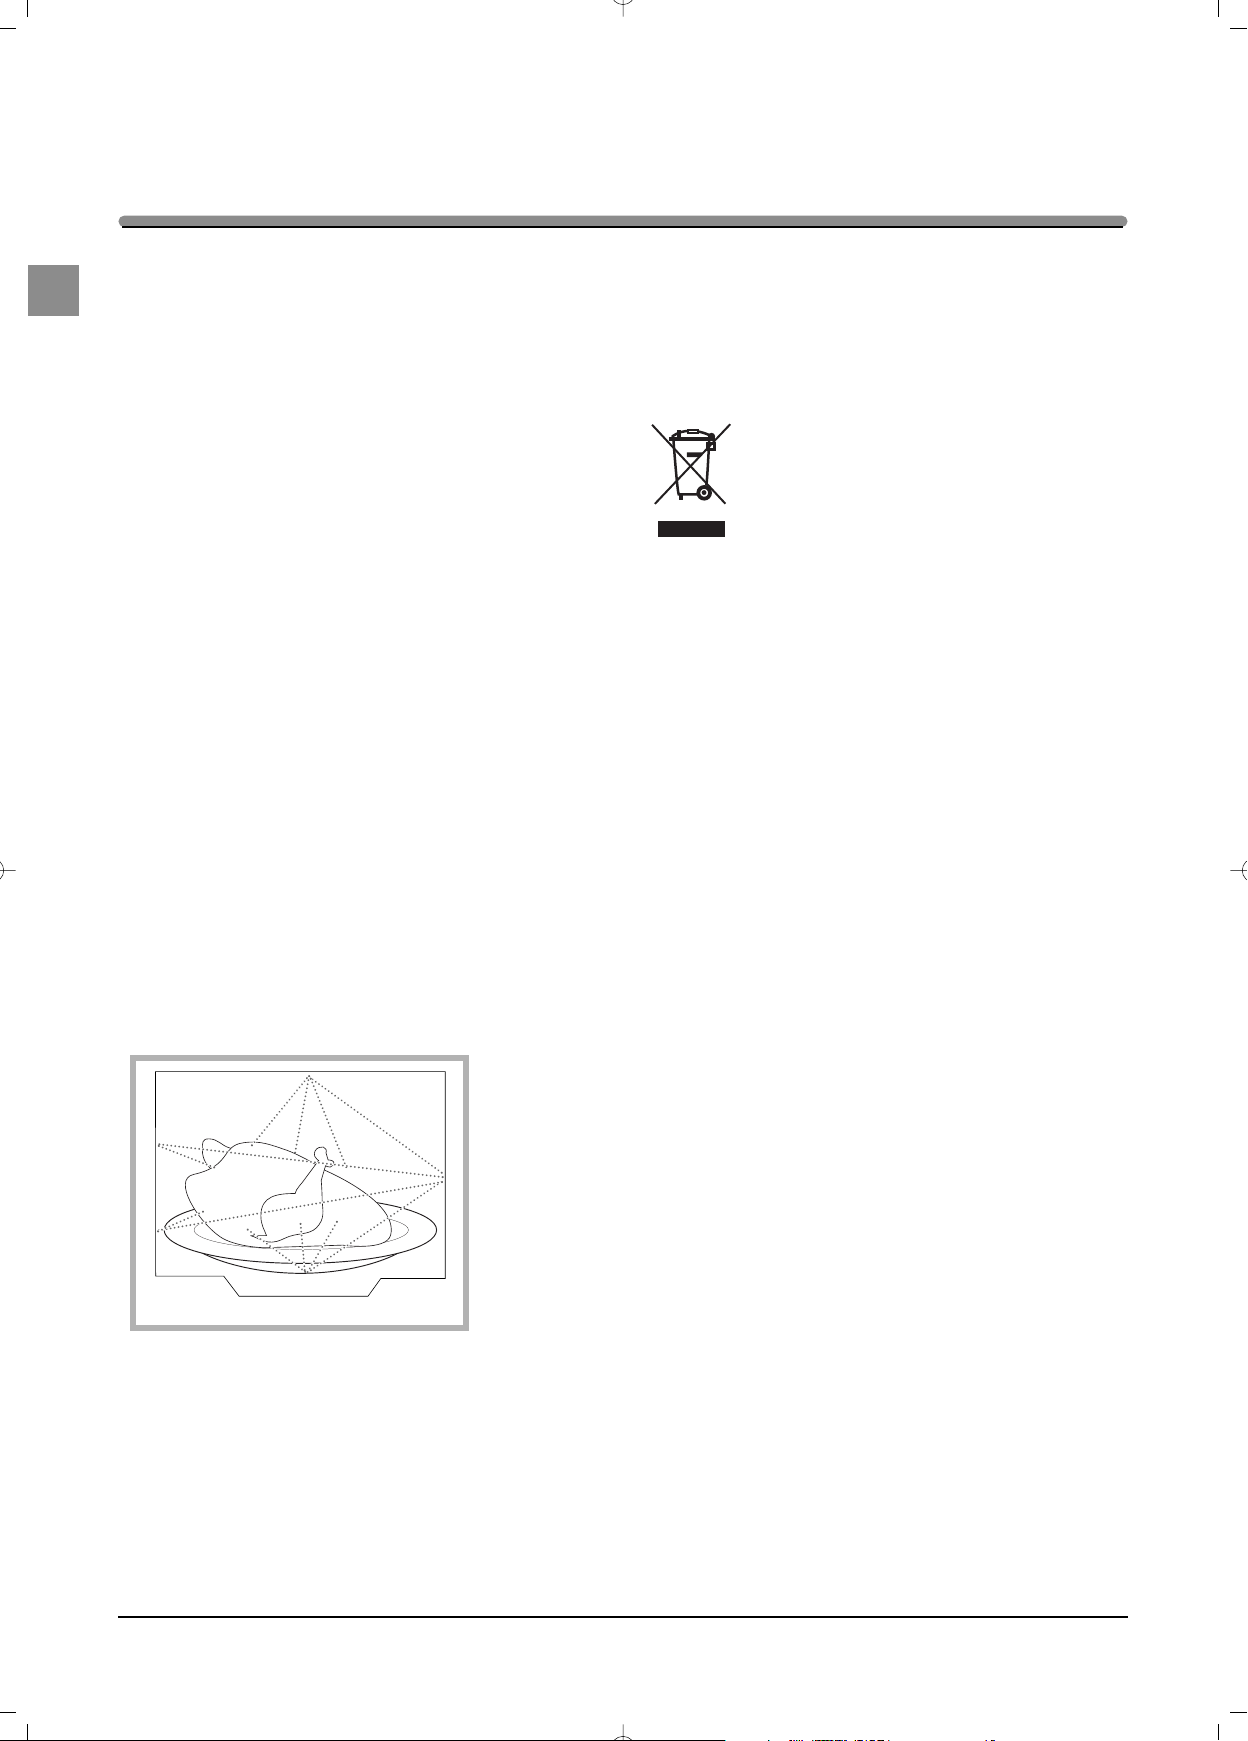
• TUTELA DELL’AMBIENTE
Il materiale d’imballaggio di questo apparecchio è
riciclabile. Partecipa al riciclaggio e contribuisci alla
tutela dell’ambiente gettando l’imballaggio negli
appositi contenitori messi a disposizione dal tuo
comune.
Questo apparecchio contiene anche altri
materiali riciclabili. Pertanto reca questo
logo a indicare che gli apparecchi usurati
non vanno confusi con altri rifiuti. Così
facendo, il riciclaggio degli apparecchi
organizzato dal costruttore avverrà nelle
migliori condizioni, conformemente alla direttiva
europea 2002/96/CE relativa alla dispersione di
impianti elettrici ed elettronici. Rivolgiti al tuo
comune o al tuo rivenditore per conoscere i punti di
raccolta per apparecchi usati più vicini a casa tua.
Ti ringraziamo per la tua collaborazione alla tutela
dell’ambiente.
AAllll’’aatttteennzziioonnee ddeellll’’uutteennttee
3
IT
Fig.01
• PRIMA DI COLLEGARE
Attenzione:
Controlla che l’apparecchio non abbia subito
avarie durante il trasporto (porta o guarnizione
deformate, ecc...). Se riscontri un qualsiasi
danno , prima di utilizzare l’apparecchio, contatta
il tuo rivenditore.
Per ritrovare facilmente in futuro il codice
prodotto del tuo apparecchio, ti consigliamo di
annotarli nella pagina “Servizio post-vendita e
relazioni consumatori”.
• COLLEGAMENTO ELETTRICO
Controlla che:
- la potenza dell’impianto sia sufficiente.
- i cavi di alimentazione siano in buono stato
- il diametro dei fili sia conforme alle normative
dell’impianto.
- il tuo impianto deve essere dotato di protezione
termica a 16 Ampère.
In caso di dubbio, consulta il tuo
elettricista/impiantista.
L’allacciamento elettrico va effettuato prima della
collocazione dell’apparecchio nel mobile.
La sicurezza elettrica va garantita mediante un
incasso correttamente eseguito. Durante
l’installazione e le fasi di manutenzione
l’apparecchio deve essere scollegato e i fusibili
devono essere interrotti o staccati.
L’apparecchio va collegato mediante cavo di
alimentazione (standard) a 3 conduttori da 1,5 mm2
(1 fase + 1N + terra) che vanno allacciati a rete 220240 V ~ monofase mediante presa di corrente 1 fase
+ 1N + terra standard a norma CEI 60083 o
conforme alle norme dell’impianto. Il filo di
protezione (verde-giallo) è collegato alla boccola
dell’apparecchio e va allacciato alla terra dell
impianto.
In caso di collegamento con presa di alimentazione
elettrica, questa deve rimanere accessibile dopo
l’installazione del forno.
Il neutro del forno (filo blu) deve essere collegato al
neutro della rete.
Predisponi nell’impianto elettrico un dispositivo
accessibile all’utente il quale deve potere separare
l’apparecchio dalla rete e avere apertura di contatto
di almeno 3 mm per tutti i poli.
Se il cavo di alimentazione è danneggiato, va
sostituito dal costruttore, dal suo servizio di
assistenza o da una persona qualificata onde evitare
pericoli.
Attenzione:
In caso di incidente conseguente al mancato
collegamento alla terra la nostra responsabilità
non è coinvolta.
Se il forno presenta una qualsiasi anomalia,
scollegalo o togli il fusibile corrispondente alla
linea di collegamento del forno..
IInnssttaallllaazziioonnee ddeellll’’aappppaarreecccchhiioo
4
IT

5
IT
z
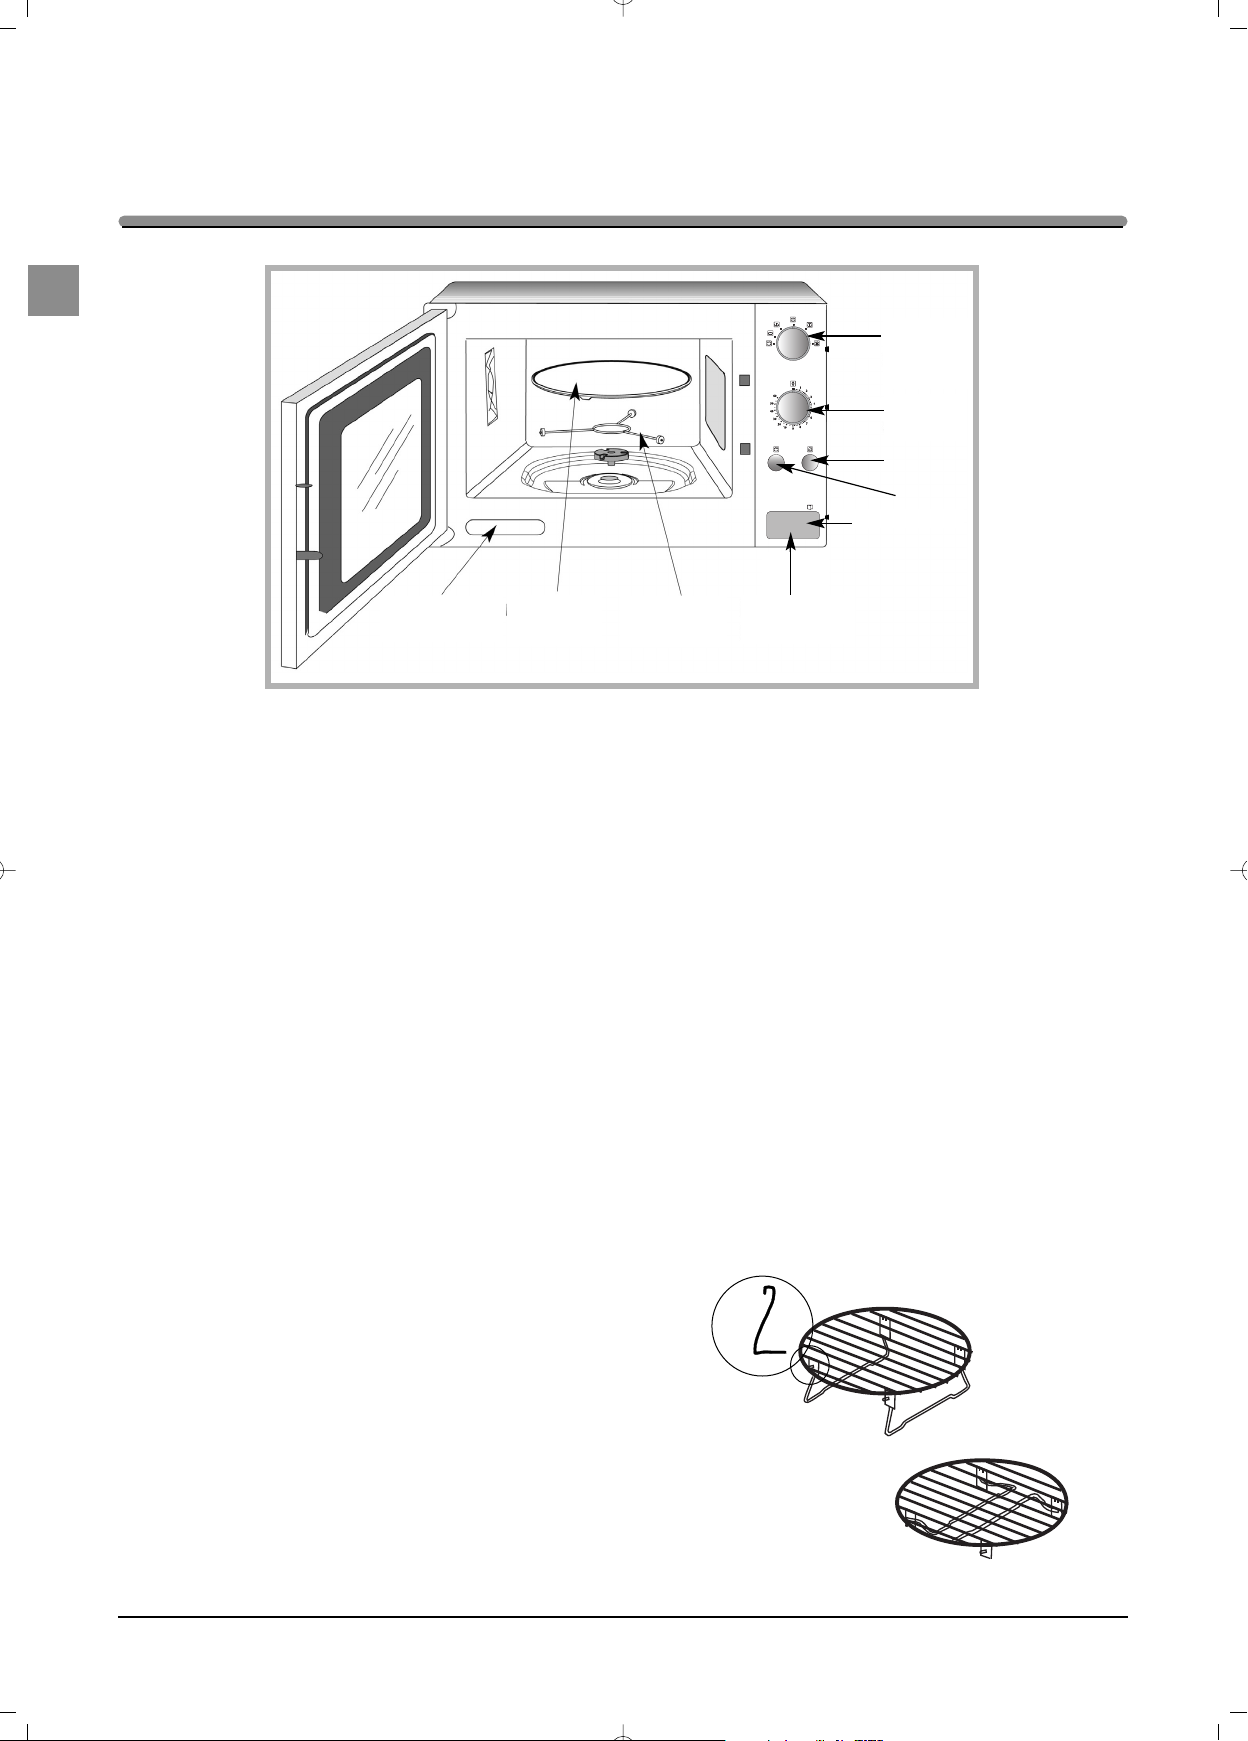
Il PIATTO GIREVOLE :
consente di cuocere l’alimento in modo
omogeneo senza dover intervenire.
- Nella rotazione, il piatto è guidato dal perno di
trasmissione e dal supporto a rotelle.
- Ruota indifferentemente nei due sensi.
- Se non ruota, verificare che tutti gli elementi
siano ben posizionati.
- Può essere utilizzato c ome piano di cottura.
z
IL SUPPORTO A ROTELLE :
- Non cercate di ruotare il piatto girevole
manualmente poiché si potrebbe danneggiare
il sistema di guida. Nel caso non girasse
facilmente, assicuratevi che sia perfettamente
sgombro spazio sottostante il piatto girevole.
z POTENZA IN USCITA MICROONDE : 900 W
• IL GRILL : *
consente di dorare e grigliare gli alimenti.
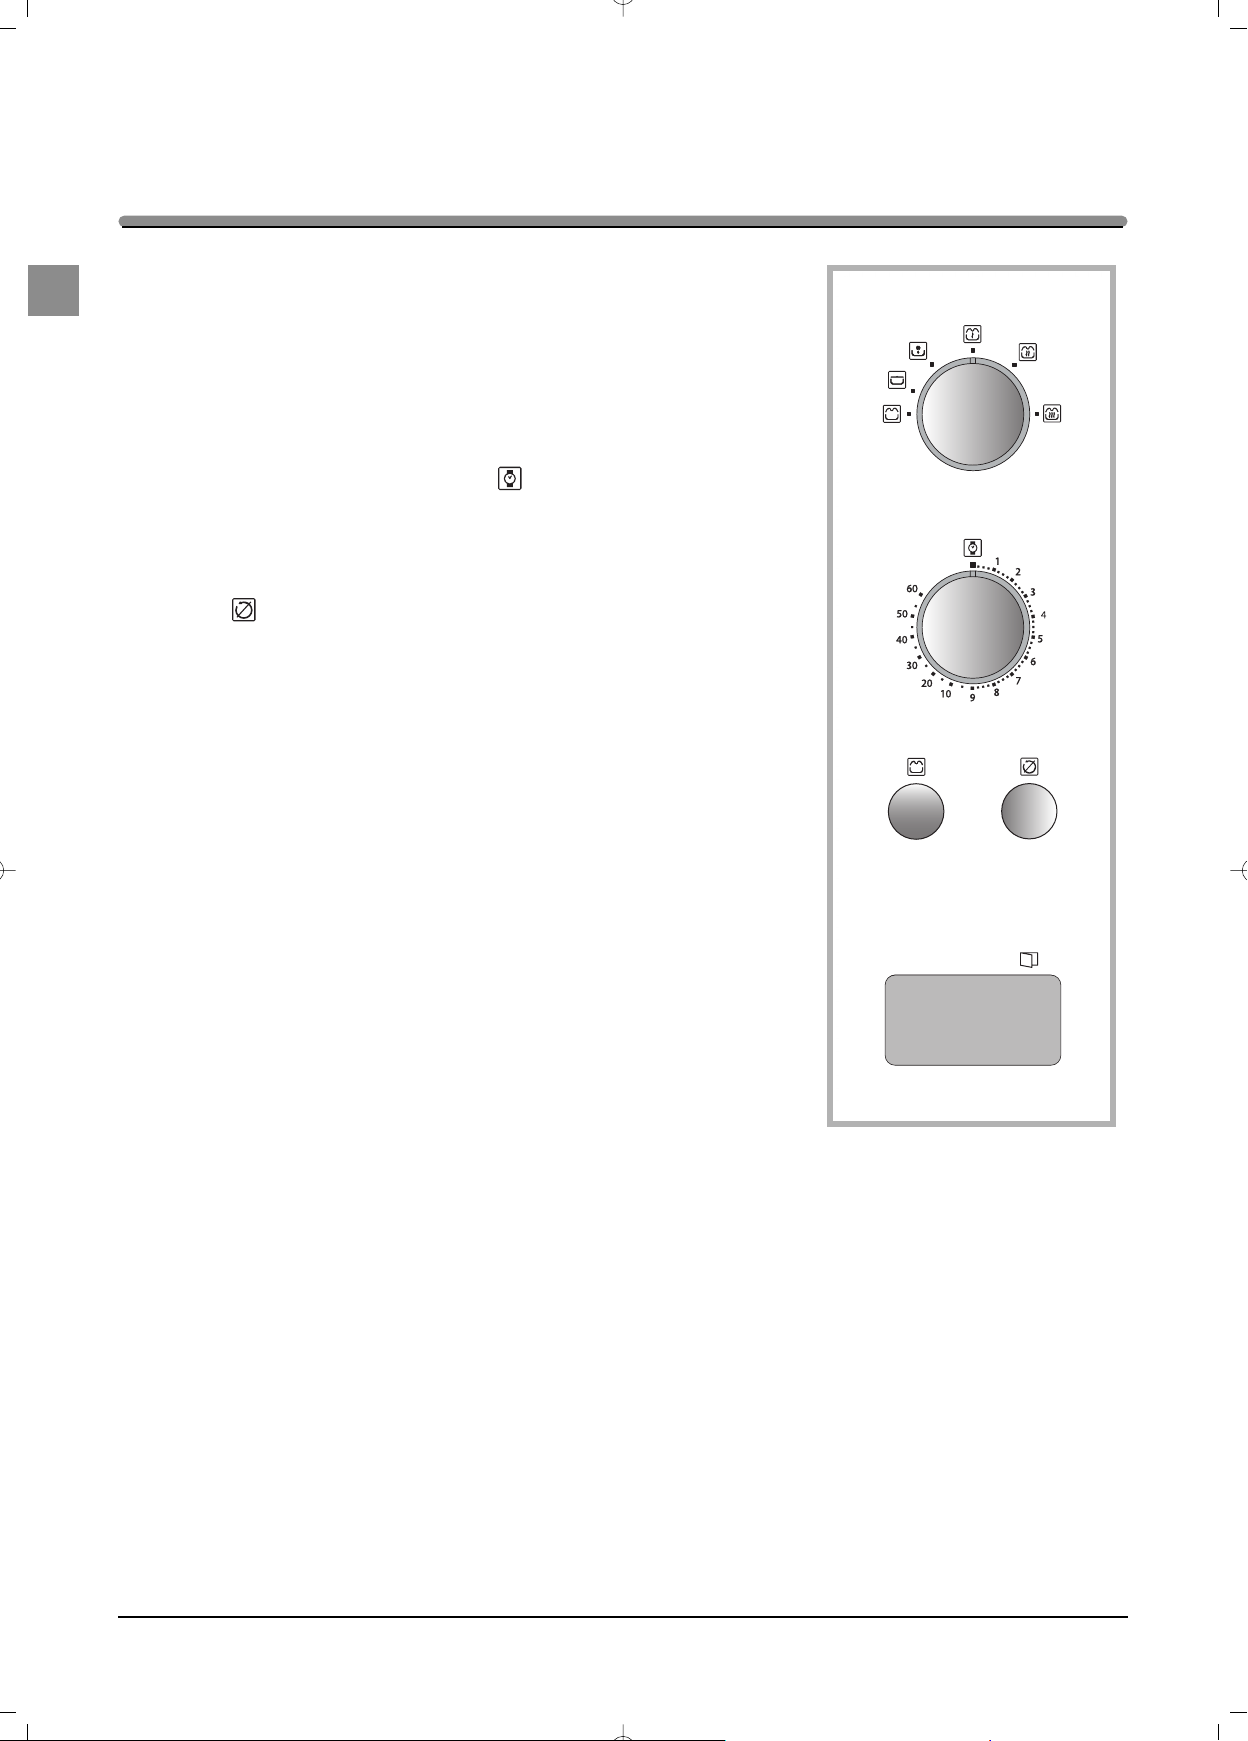
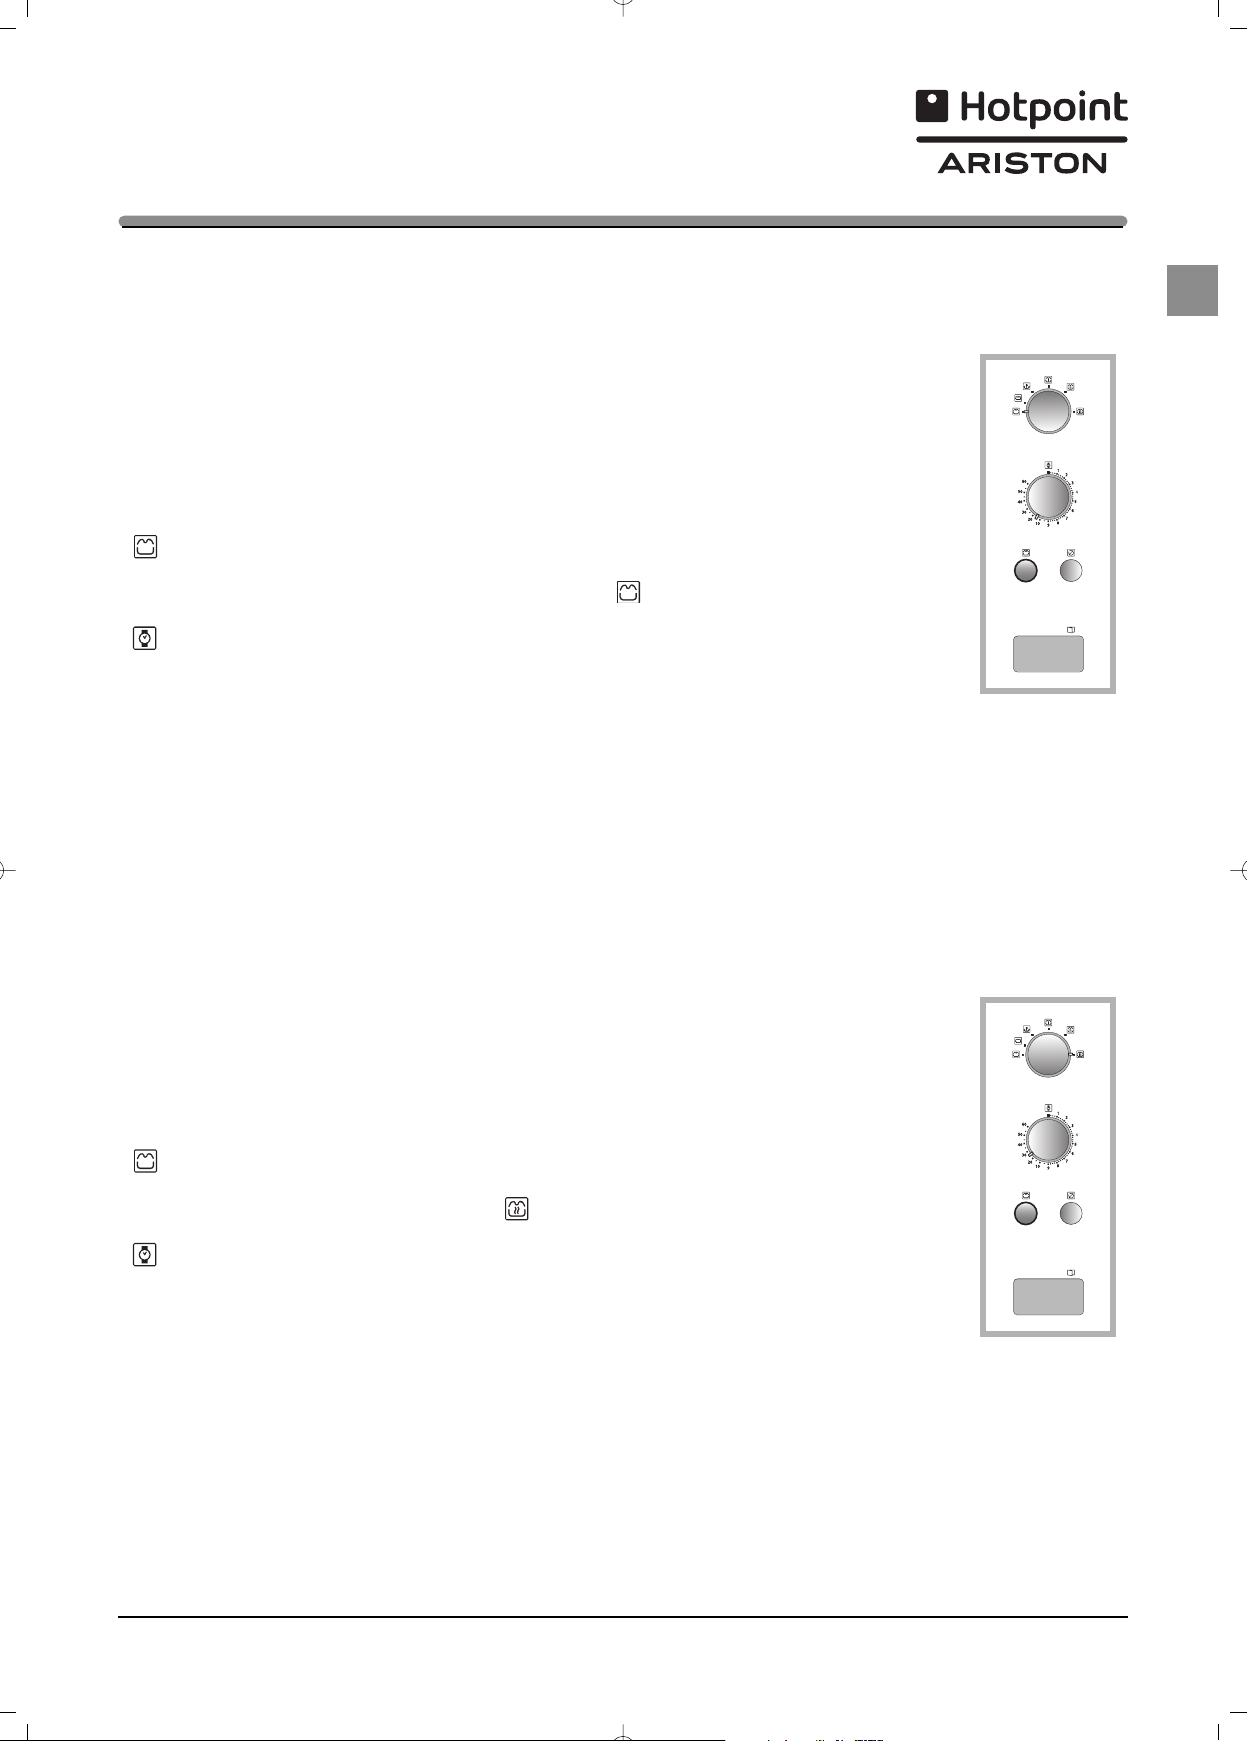
PPrreesseennttaazziioonnee
* secondo il modello
Tasto grill
Durante la cottura, il ripiano deve essere sempre correttamente centrato sul piatto girevole.
il ripiano non può, in nessun caso, essere utilizzato a contatto con altri recipienti metallici, in funzione
microonde, grill + microonde o calore girevole + microonde.
Tuttavia, potete scaldare un alimento in un contenitore di alluminio, isolandolo dal ripiano con un piatto.
il ripiano ripiegabile :
Per ripiegare in posizione "bassa":
spingere i ganci verso l'interno e ribaltare i piedini.
in funzione Grill o Grill + microonde :
scegliere la posizione, a seconda del tipo di piatto da dorare
- in posizione alta per dorare gli alimenti
- di altezza ridotta
- in posizione bassa per gli altri alimenti.
in funzione calore girevole o calore girevole + microonde :
posate sempre il piatto sul ripiano in posizione bassa.
posizione
bassa
(piedini
ribaltati)
Æ
Æ
Æ
il ripiano a 2 posizioni
posizione
alta
Il rripiano rripiegabile *
6
IT
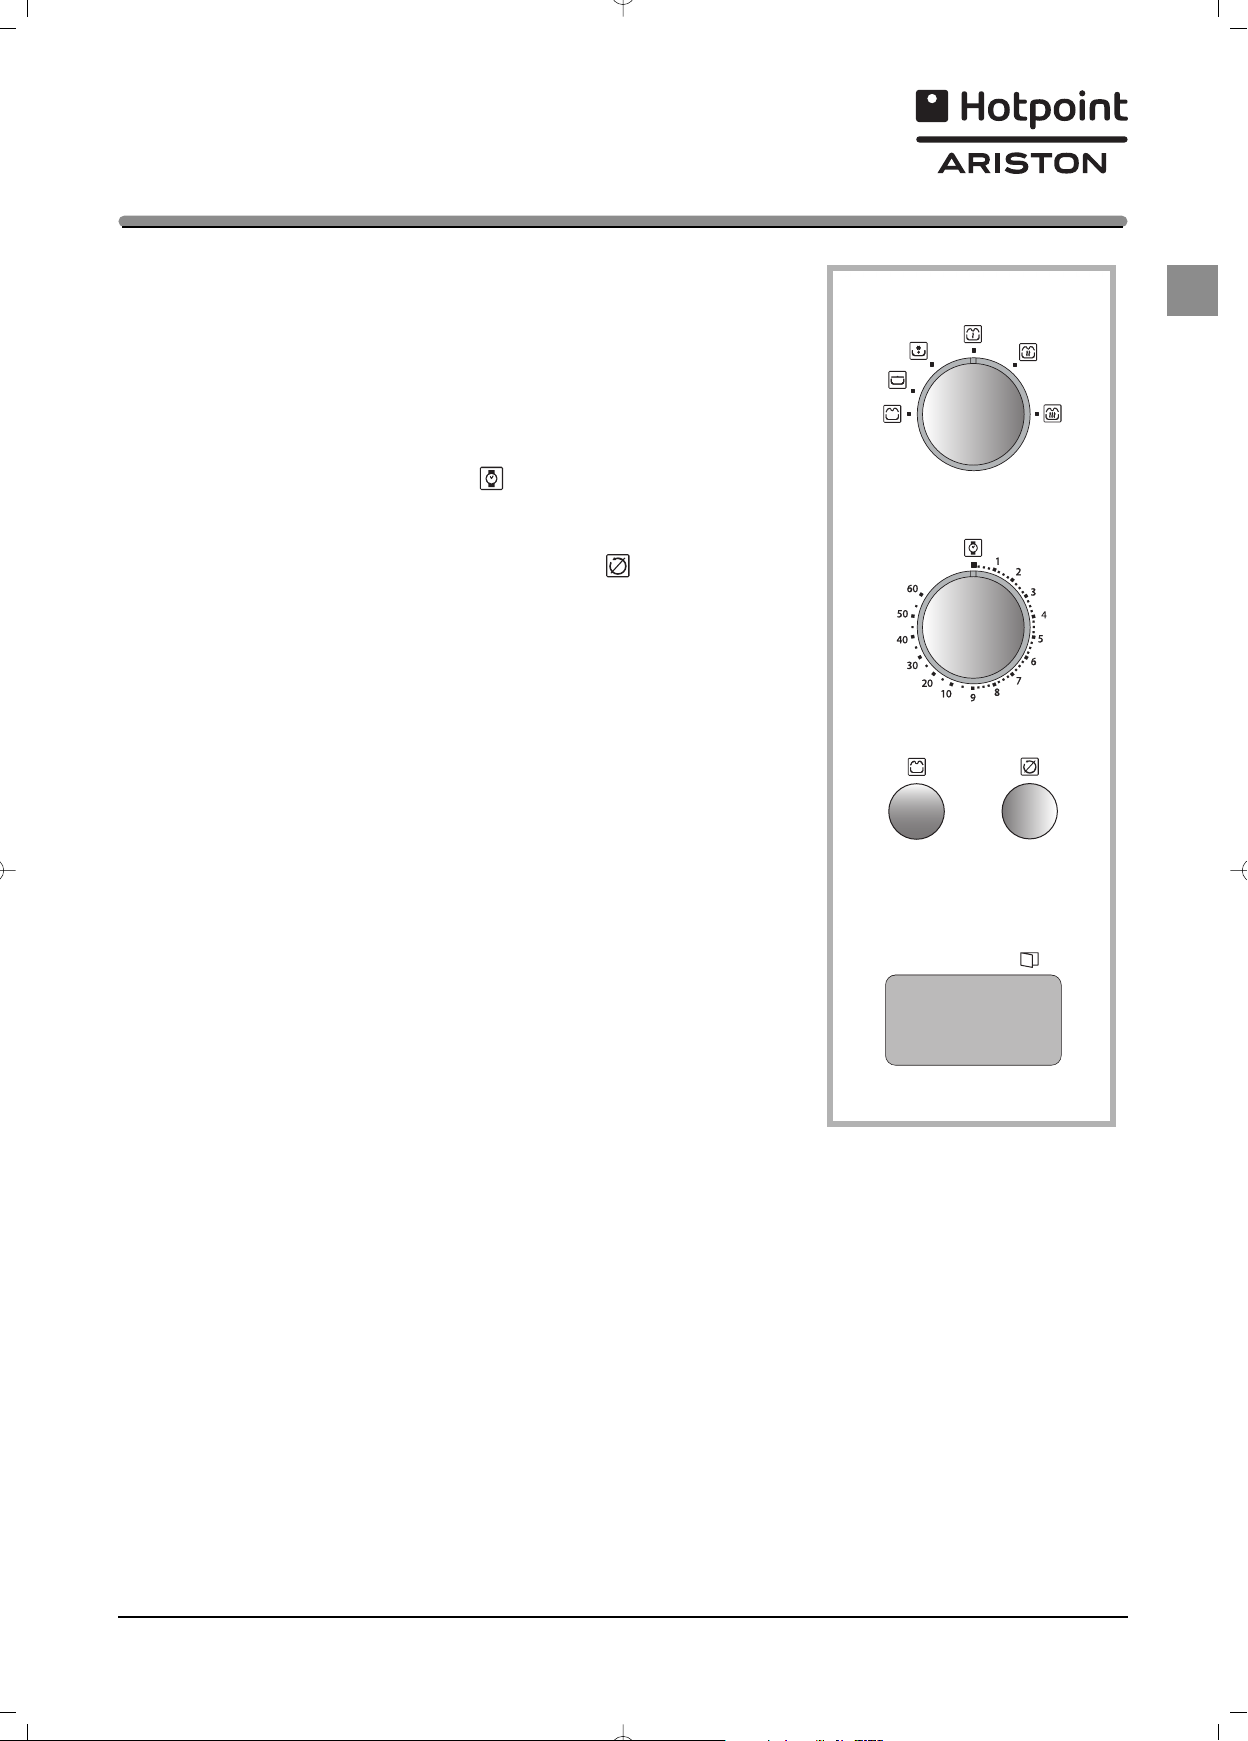
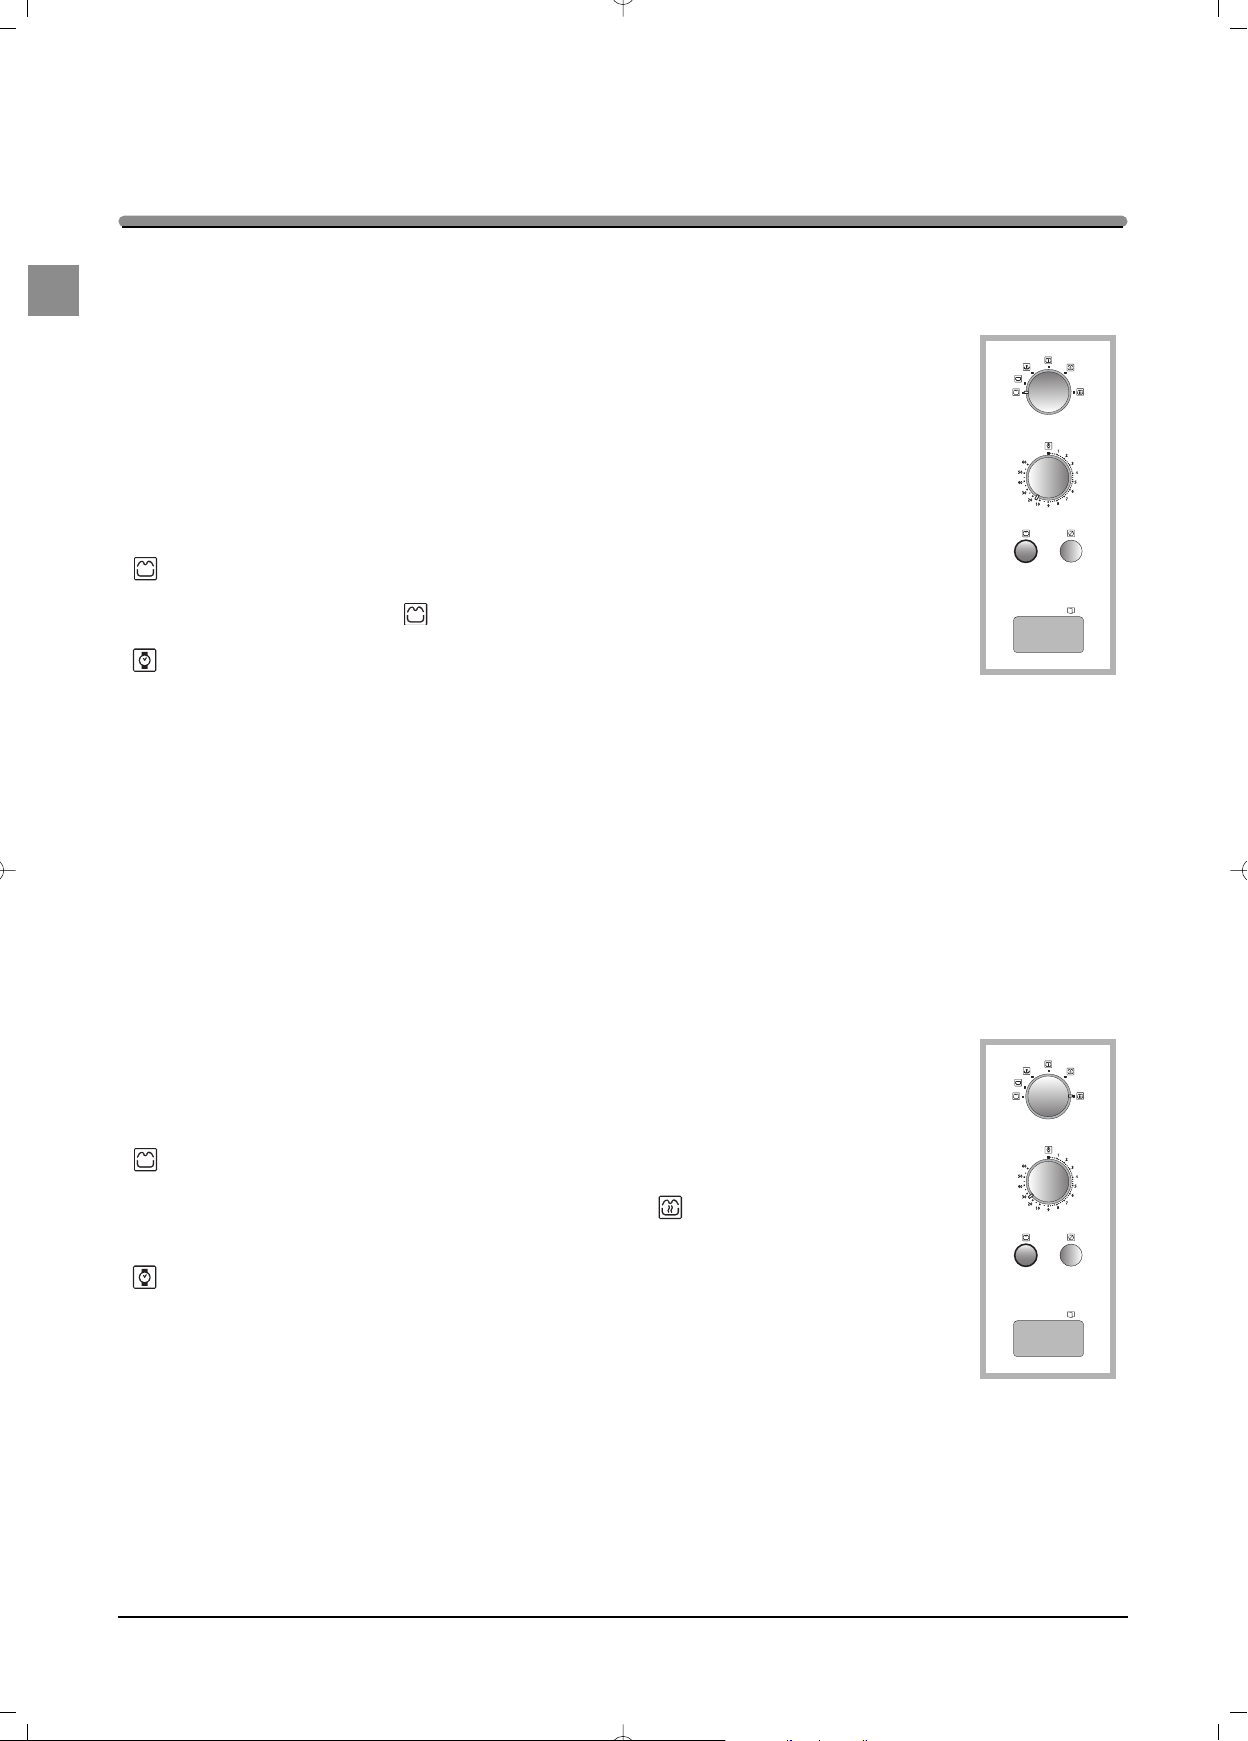
La programmazione della funzione microonde si ottiene agendo sul
selettore modalità micro-onde que regola la variazione di potenza e
il timer-avvio.
Dope aver collegato il forno:
- Aprire lo sportello, introdurvi l'alimento.(verificare che lo sportello
sia ben chiuso, altrimenti il forno non funziona).
- Selezion are la potenza mediante il selettore modalità microonde.
- Selezionare il tempo con il timer-avvio
- Quando il tempo desiderato è inferiore a due minuti, ruotare il
timer-avvio oltre i due minuti, quindi riportarlo, ruotandolo
indietro,sul tempo desiderato
- Se si utilizza un piatto grande, premere il tasto arresto piatto
girevole .
- In questo caso, è necessario ruotare il piatto o mescolarne il
contenuto a metà cottura. Alle fine del programma, ricordarsi di
rilasciare questo tasto.
- Chiudere lo sportello. Il piatto girevole ruota, il forno si illumina
ed entra in funzione. La fine della cottura viene segnalata da una
suoneria. Il forno si arresta automaticamente e l'illuminazione si
spegne.
- Aprire lo sportello. Auando si apre lo sportello prima della fine
del programma :
se l'alimento è pronto, riportare il timer-avvio sulla posizione 0
prima di richiudere lo sportello; altrimenti chiudere sportello e il
timer proseguirà il conto alla rovescia.
Non azionare mai il forno a vuoto.
UUttiilliizzzzaazziioonnee

7
IT
QUALCHE PROBLEMA ! CHE FARE ?
Il forno è rumoroso
z
Pulire le rotelle e la zona di rotazione sotto il piatto girevole.
l piatto non gira correttamente
Con il programma microonde l'alimento
z
Verificare che gli utensili siano adatti ai forni a microonde.
non si scalda
L'apparecchio produce scintille
z
Verificare che il perno di trasmissione e il sup-porto a rotelle
siano correttamente posizionati.
Pulire bene l'apparecchio: eliminare il grasso e le particelle di
cottura…
Alontanare ogni elemento metallico dalle pareti del forno.
Non utilizzare mai elementi metallici con la griglia.
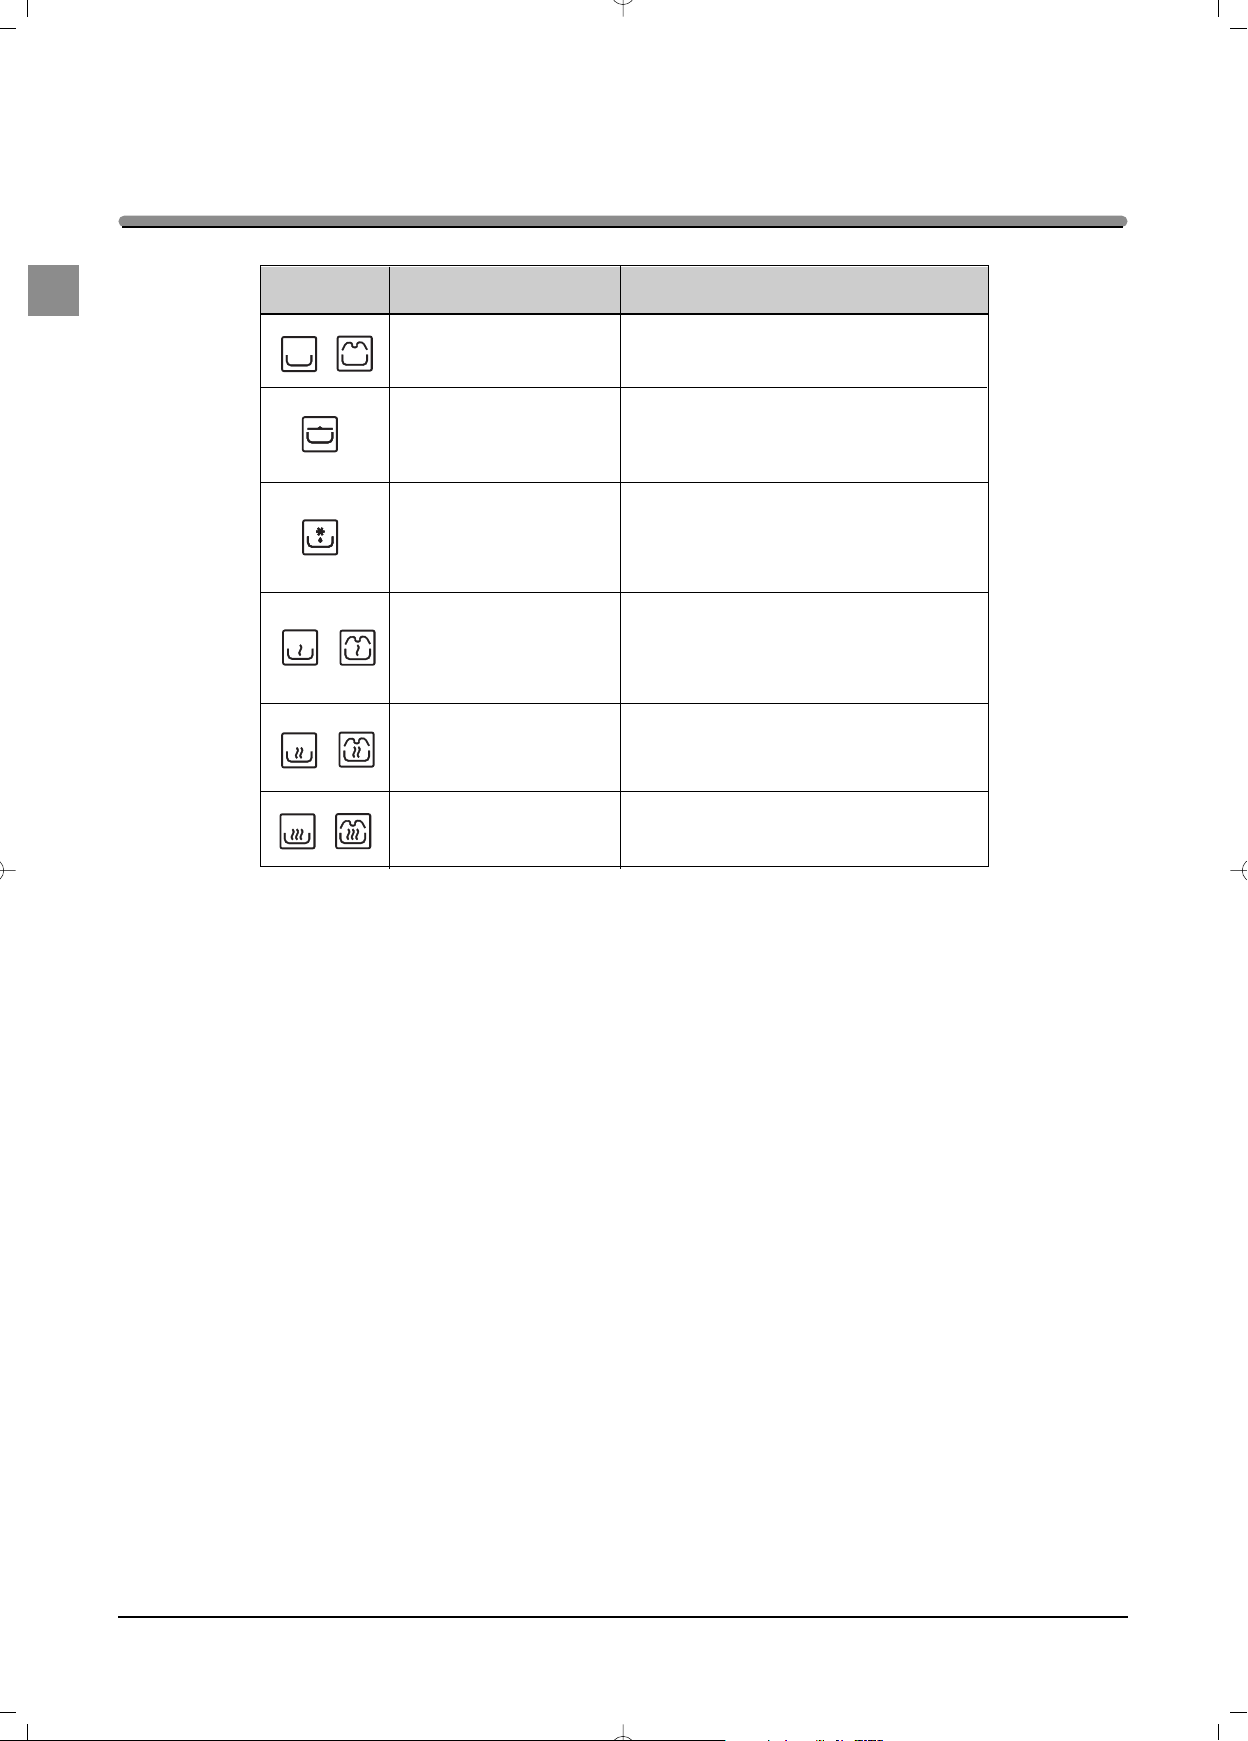
TTaabbeellllaa ffuunnzziioonnee // UUttiilliizzzzoo
Potenze Utilizzo
TIMER
MANTENIMENTO
150 W
SCONGELAMENTO
o COTTURA
MOLTO LENTA
300 W
COTTURA A FUOCO
LENTO
500 W
COTTURA MODERATA
700 W
COTTURA FORTE
900 W
Mettere il pulsante di selezione in questa posizione
per utilizzare la funzione "timer" (senza cottura).
Per mantenere al caldo o scongelare burro, panna,
formaggio, gelato o qualsiasi altro alimento delicato.
Per scongelare qualsiasi alimento.
Utile inoltre, per portare a termine cotture delicate
o per cuocere molto lentamente.
Per cuocere pesci e volatili.
Per portare a termine le preparazioni già avviate
con COTTURA FORTE, come nel caso di fagioli,
lenticchie, latticini.
Per riscaldare tutte le preparazioni liquide o solide,
tutti i vostri piatti cucinati, freschi o congelati.
Per cuocere legumi, e minestre.
*
*
*
*
* secondo il modello

Questa funzione consente di dorare alimenti quali pesci, carni, ecc.
Per l’utilizzo del grill, è necessario proteggersi le mani per estrarre i piatti ed utilizzare
recipienti che sopportino le alte temperature, come vetro da fuoco o ceramica.
AVVERTENZA: Nellí eserizio grill l'apparecchio si riscalda, perció teneto lontano bambini
piccoli dell'apparecchio.
E’ necessario lasciar raffreddare il grill per 25 minuti dopo l’utilizzo prima di toccarlo.
Esempio :
SARDINE 6-8
- Disporre il pesce sulla griglia.
Premere il tasto grill.
Posizionare il selettore modalità microonde su gril .
Selezionare il tempo, 16/18, con il timer-avvio.
- Chiudere lo spertello. Ilpiatto girevole ruota, il forno si illumina ed entra in funzione.
LLaa ffuunnzziioonnee ggrriill
8
IT
LLaa ffuunnzziioonnee mmiiccrroooonnddee ++ ggrriill **
Questa funzione consente di utilizzare simultaneamente la funzione microonde e grill,
consentendo cosìuna una cottura più rapida.
Esempio :
CONTROFILETTO (800 g)
- Disporre l’alimento in un piatto per arrosti da poggiare sul piatto girevole.
Premere il tasto grill.
Posizionare il selettore modalità microonde su cottura moderata mediante il selettore
modalità microonde.
Selezionare il tempo, 25/35, con il timer-avvio..
- Chiudere lo spertello. Ilpiatto girevole ruota, il forno si illumina ed entra in funzione.
* secondo il modello
9
IT
z
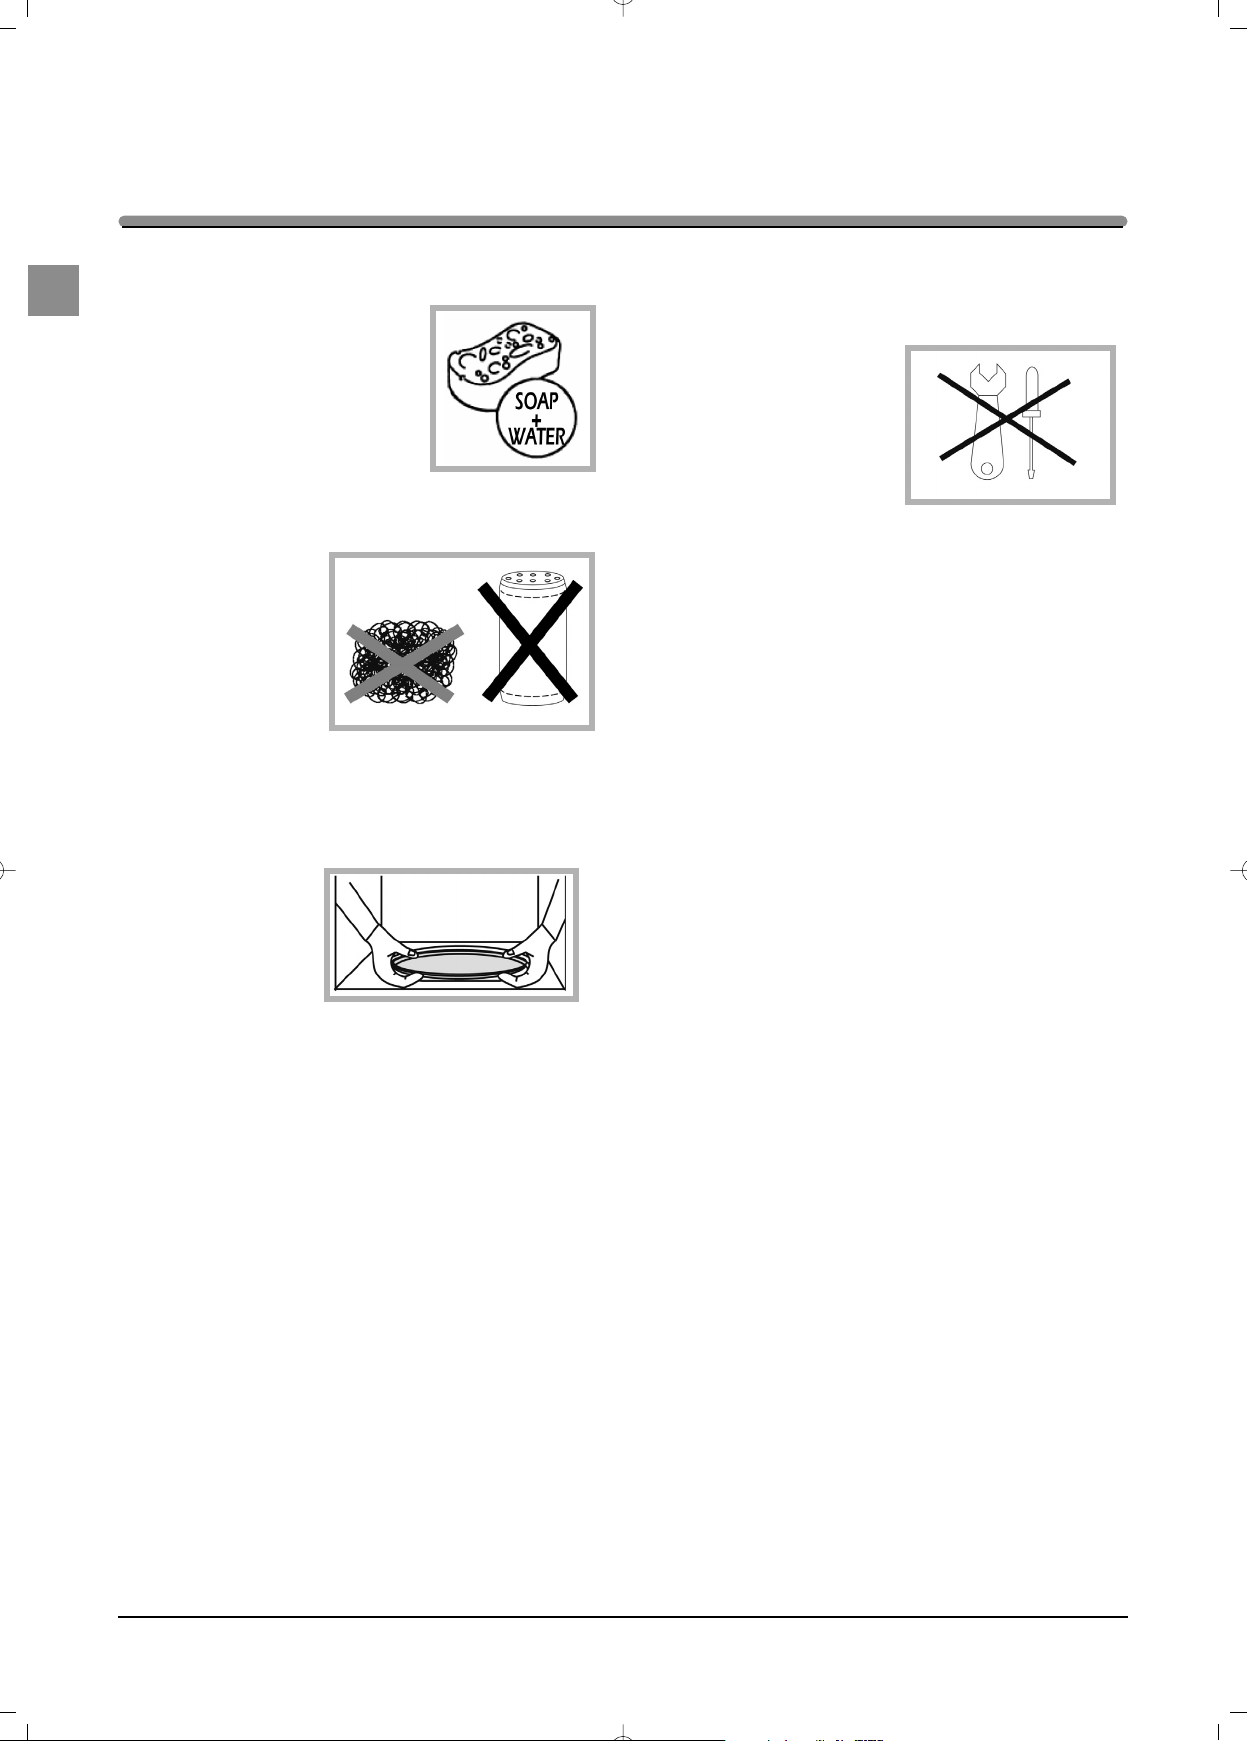
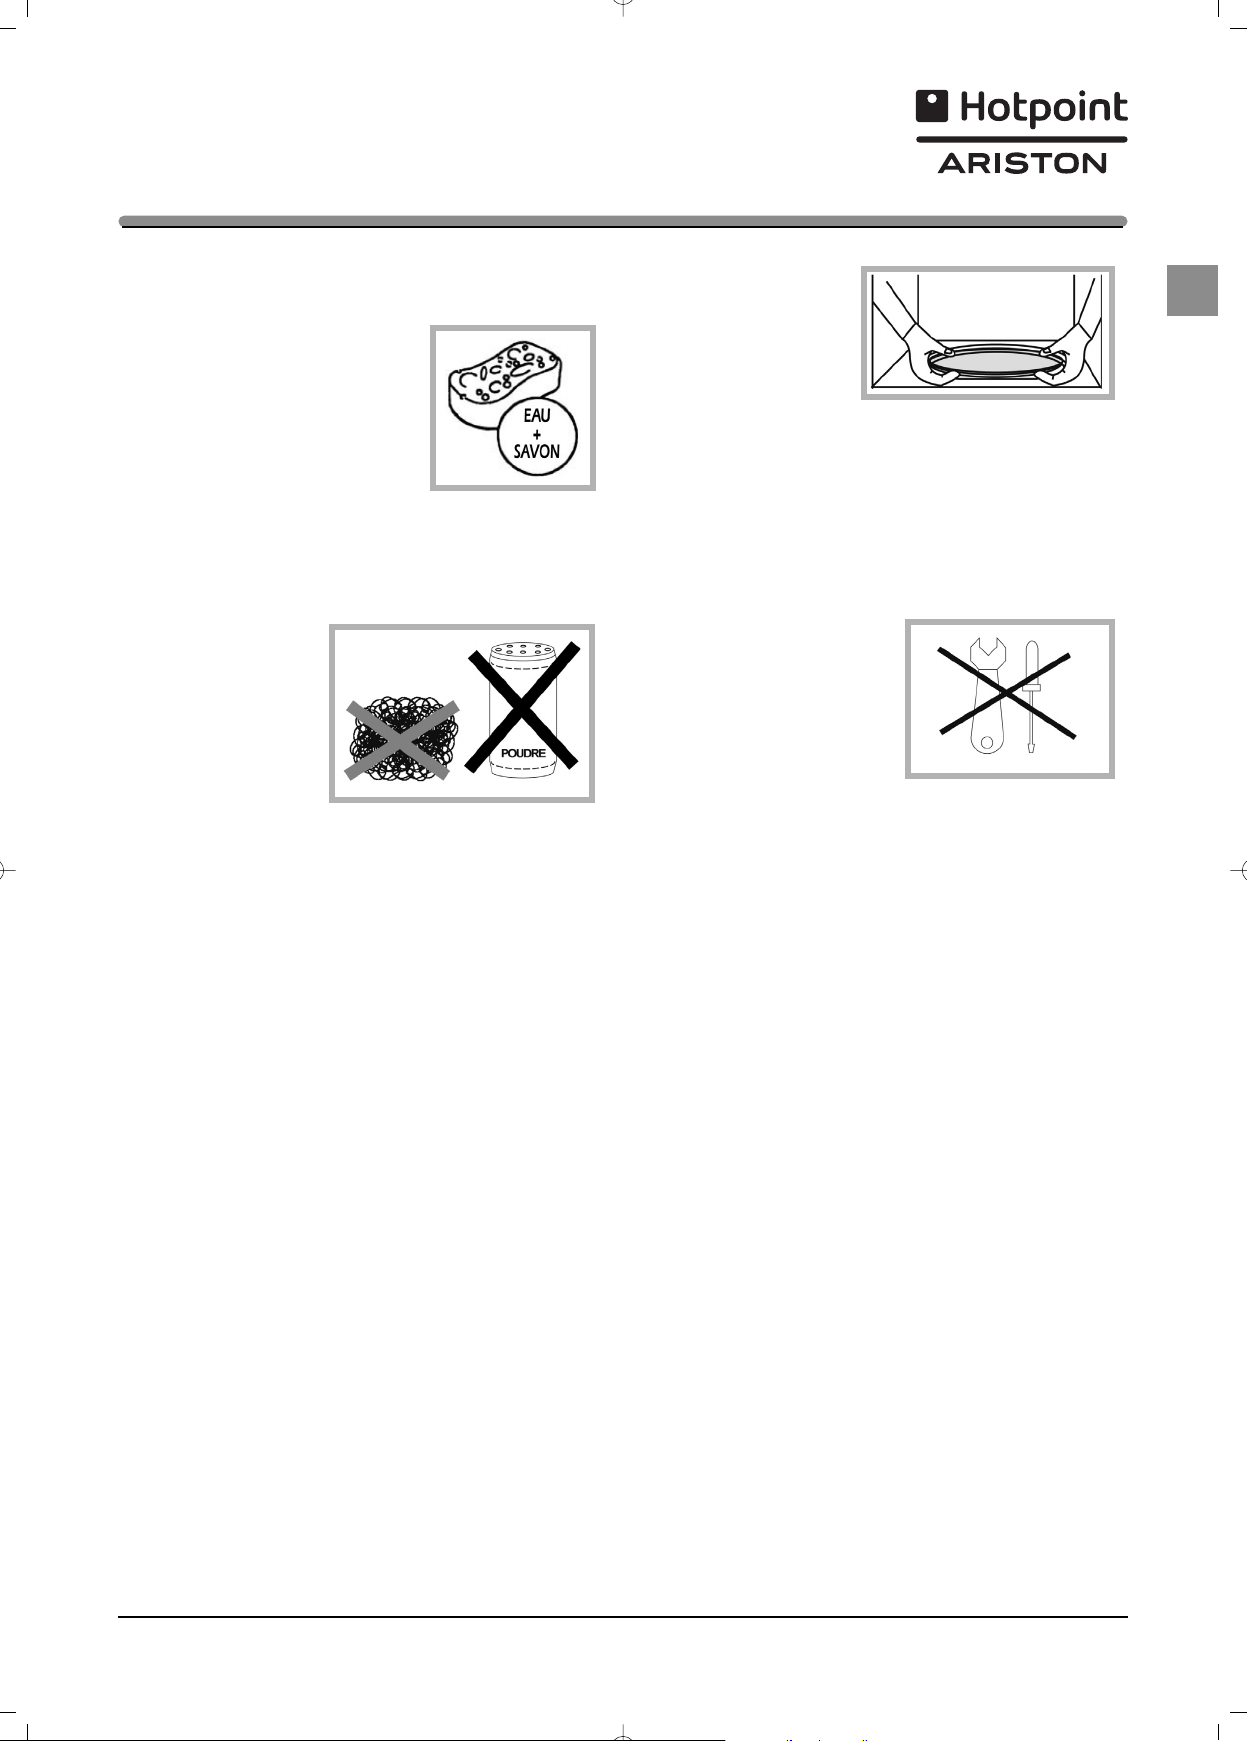
La regolare manutenzione del forno vi permetterà
di conservarlo in buono stato. Per evitare di
sporcare internamente l’apparecchio, è
necessario, nella maggior parte dei casi, coprire i
contenitori.
z
Verificate che il piano di lavoro su cui è posato il
vostro forno sia sempre pulito: l'aspirazione dello
sporco intorno al forno potrebbe danneggiare
l'apparecchio.
z
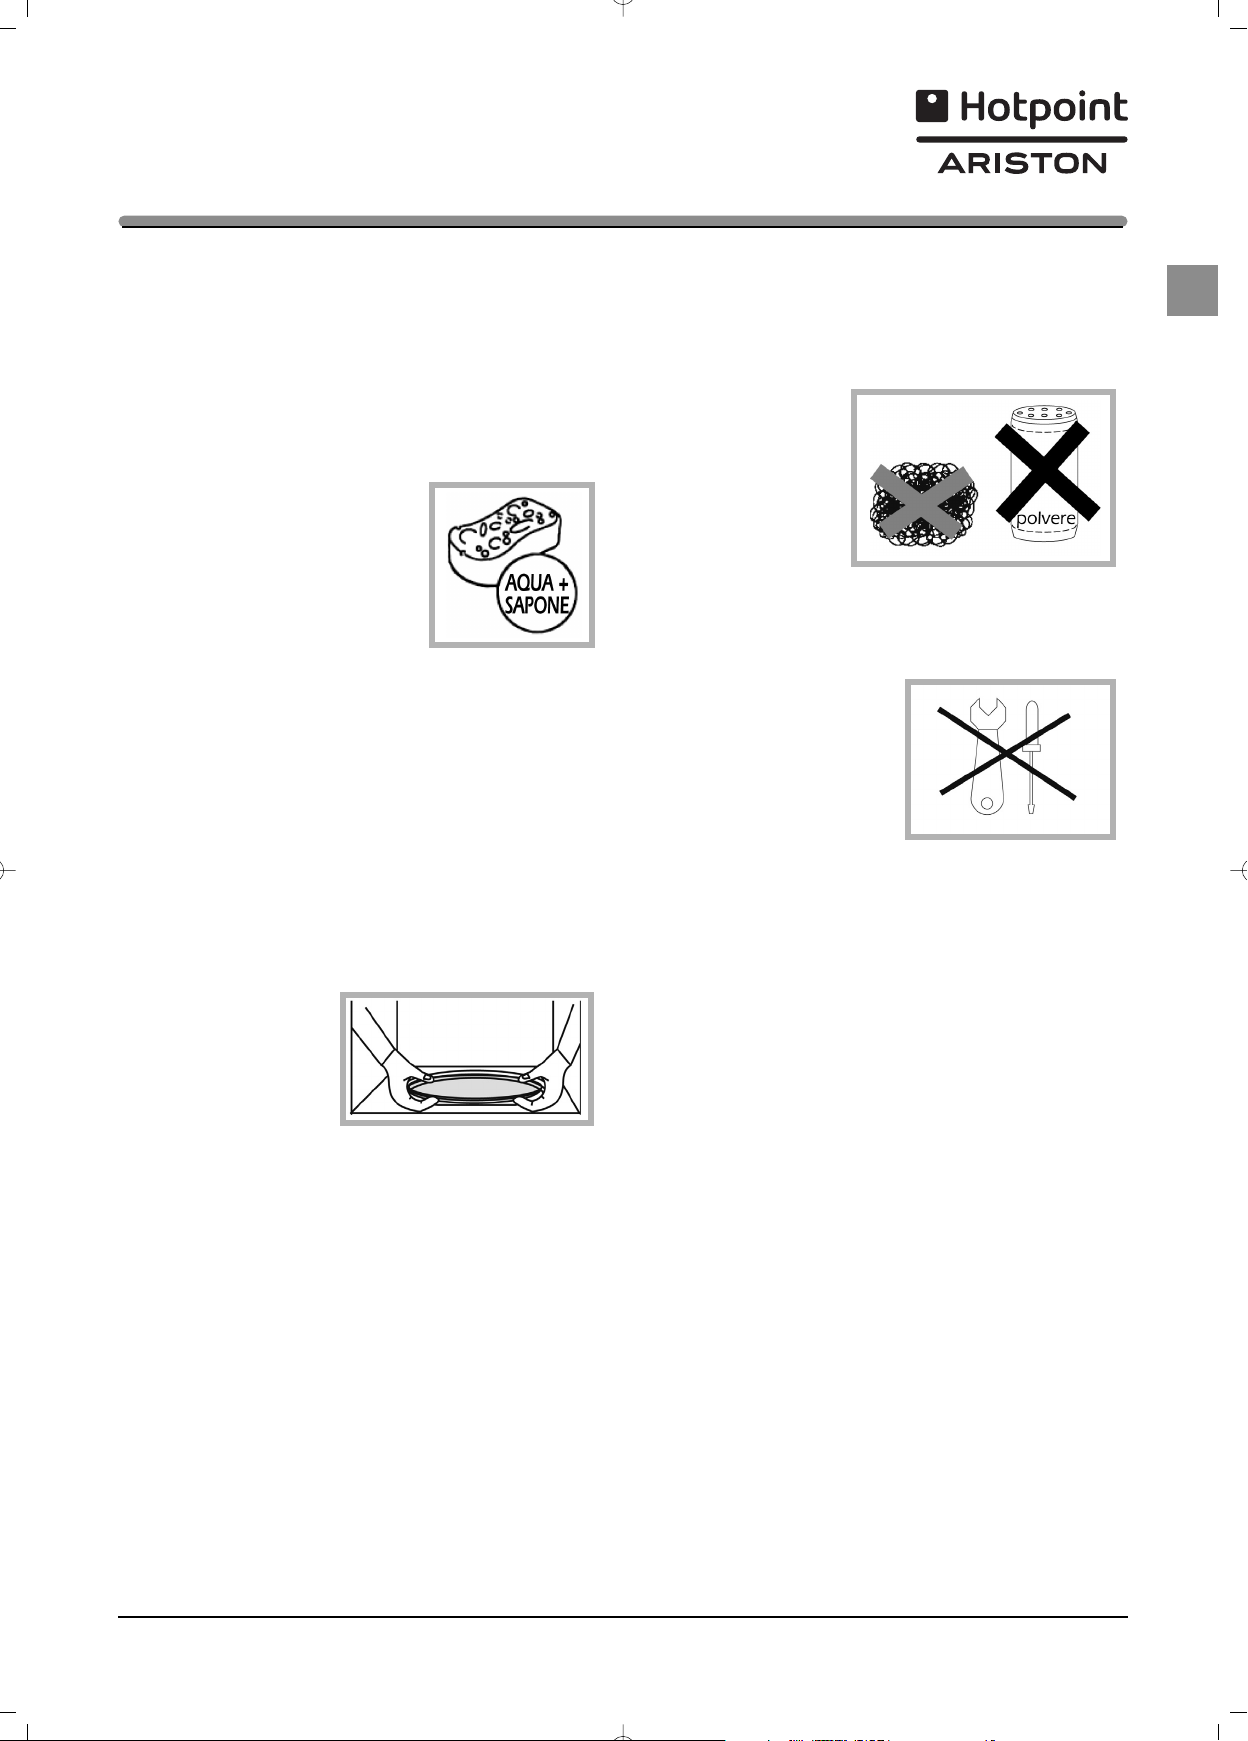
La pulizia esterna ed interna
del forni con la sola funzione
microonde si effettua per
mezzo di una spugna umida
ed insaponata.
z
In caso di odori o di forno
incrostato, fate bollire in una tazza dell’acqua con
limone e aceto per 2 minuti e poi pulite le pareti
con detergente per stoviglie.
z
Negli apparecchi muniti di funzione grill o calore
girevole, la parte superiore e le uscite d’aria
posteriori, sono molto calde. Porre particolare
attenzione a non toccarle dopo l’uso. Procedere
alla pulitura dell’interno del forno quando è
ancora tiepido, utilizzando una paglietta fine in
lana d’acciaio imbevuta di detergente.
z
Il piatto può essere tolto per agevolare la pulizia.
Per toglierlo, utilizzare la apposite zone di
accesso.
Se levate il perno
di trasmissione,
evitate di far
penetrare acqua
nel foro dell’asse
motore.
Non dimenticate di
rimettere il perno di trasmissione,
il supporto a rotelle e il piatto girevole.
z
I bord i di contatto dello sportello e del telaio
devono sempre essere puliti. Se queste superfici,
a causa di incrostazioni, fossero danneggiate,
rivolgeteri ad un tecnico specializzato prima di
utilizzare il forno.
z
L’utilizzo di
prodotti abrasivi,
alcool e diluenti è
sconsigliato,
in quanto potrebbero
deteriorare il forno.
z
Se l’apparecchio
ha subito un
danno:
- Verificate che lo sportello non sia deformato.
z
Se l’apparecchio non
funziona, prima di
chiamare l’assistenza:
- Verificare
l’alimentazione
elettrica
- Verificare la chiusura
dello sportello
- Verificare la
programmazione.
ATTENZIONE: non cercate mai di intervenire da
soli.
Avvertenza: è pericoloso per ogni persona non
qualificata, effettuare operazioni di manutenzione o
di riparazione que richiedono la rimozione del
coperchio di protezione contro l'esposizione alle
microonde.
MMaannuutteennzziioonnee oorrddiinnaarriiaa
IT
GB FR
ES
PT NL
Italiano, 1 English, 10 Français, 19
Español, 28 Portoguês, 37 Nederlands, 46
GB
OOppeerraattiinngg aanndd
iinnssttaalllliinngg iinnssttrruuccttiioonnss
Contents
Notices to the user, 11
Notices to the user, 12
Installing your appliance, 13
General Description, The grilling rack *, 14
Using your microwave oven, 15
Microwave power settings, 16
The grill function / The microwave +
grill function *, 17
Care & Cleaning, 18
Important safety instructions.
Read carefully and keep for future reference.
MICROWAVE OVEN
* for certain models

11
GB
Important:
Keep this user guide with your appliance. If the
appliance is ever sold or transferred to another
person, ensure that the new owner receives the user
guide. Please become familiar with these
recommendations before installing and using your
appliance. They were written for your safety and the
safety of others.
• SAFETY RECOMMENDATIONS
Your appliance is designed for standard household
use for cooking, reheating and defrosting foods. The
manufacturer declines any responsibility in the case
of inappropriate use.
The appliance is not intended to be used by
persons (including children) with reduced physical,
sensory or mental abilities, or persons lacking
experience or awareness, unless using it with the
help of a person responsible for their safety, or
under supervision and with prior instruction in its
use.
Ensure that the cookware is suitable for use in a
microwave oven.
To avoid damaging your appliance, never operate it
while empty or without the turntable.
Do not interfere with the openings on the lock on
the front of the appliance; this could cause damage
to your appliance that would require a service call.
The seal and frame of the door must be regularly
examined to ensure that they have not deteriorated.
If these areas are damaged, discontinue use of the
appliance and have a specialised technician check
it.
While heating food items in plastic or paper
containers, monitor the microwave’s contents for
there is a risk of spontaneous combustion.
For the microwave and microwave + fan heating
functions, the use of metallic cookware, forks,
spoons, knives or metal staples or fasteners for
frozen foods is not recommended.
The contents of baby bottles and baby food jars
should be shaken or stirred and their temperature
checked before consumption to avoid burns.
Never heat a baby bottle with the nipple on (risk of
explosion).
Make sure children do not play with the appliance.
Do not allow children to use the microwave oven
without supervision, unless appropriate instructions
have been given so that the child can use the oven
safely and understands the dangers of incorrect
operation.
Always use oven mitts to remove dishes from the
oven. Some dishes absorb the heat of foods and,
therefore, are very hot.
Liquids and other foods should not be heated in
sealed containers because they may explode.
It is recommended that you avoid heating eggs in
their shells and whole hard-boiled eggs in the
microwave oven because they run the risk of
explosion, even after cooking is complete.
Heating beverages in the microwave oven can
cause sudden and/or delayed splattering of boiling
liquid, so precautions must be taken when handling
their containers.
In the case of small quantities (a sausage, a
croissant, etc.) place a glass of water next to the
food.
Excessive cooking times may dry out foods and
carbonise them. To avoid such incidents, never use
the same times recommended for cooking in a
traditional oven.
If smoke appears, stop or unplug the oven and
leave the door closed to smother any flames that
may appear.
NNoottiicceess ttoo tthhee uusseerr
12
GB
• OPERATING PRINCIPLE
The microwaves used for cooking are electromagnetic waves. They are commonly found in our
environment in the form of radio-electric waves,
light or infrared rays.
Their frequency is in the 2450 MHz range.
Their behaviour:
• They are reflected by metals.
• They travel through all other materials.
• They are absorbed by water, fat and sugar
molecules.
When food is exposed to microwaves, its molecules
begin moving rapidly, which causes heating.
The penetration depth of waves into the food is
approximately 2.5 cm; if the food is thicker, the core
of the food will be cooked by conduction, as in
traditional cooking.
It is valuable to note that the microwaves trigger
within the food a simple thermal phenomenon and
that they are not harmful to one’s health.
• PROTECTING THE ENVIRONMENT
This appliance’s packing materials are recyclable.
Recycle them and play a role in protecting the
environment by disposing of them in municipal
containers provided for this purpose.
Your appliance also contains various
recyclable materials. Thus it is stamped
with this logo to indicate to you that used
appliances should be mixed with other
waste. The recycling of appliances
organised by your manufacturer will take
place under the best conditions, in compliance with
European directive 2002/96/CE concerning electrical
and electronic equipment waste. Consult your city
hall or your retailer to find the drop-off points for
used appliances that is nearest to your home. We
thank you for your help in protecting the
environment.
NNoottiicceess ttoo tthhee uusseerr
Fig.01
13
GB
••
BEFORE HOOK-UP
Warning:
Ensure that your appliance has not suffered
any damage during transport (deformed seal or
door, etc...). If you see any kind of damage,
before doing anything else, contact your retailer.
In order to easily locate the reference information
for your appliance, we recommend that you note
these data on the “After-Sales Service
Department and Customer Relations” page.
• ELECTRICAL CONNECTION
Ensure that:
- The electrical installation has sufficient voltage.
- The electrical wires are in good condition.
- The dia meter of the wires complies with the
installation requirements.
- Your electrical installation is equipped with 16-
ampere thermal-sensitive protection.
In case of doubt, consult your electrician-installer.
The electrical connections are made before the
appliance is installed in its housing.
Electrical safety must be provided by a correct
build-in. During installation and maintenance
operations, the appliance must be unplugged from
the electrical grid; fuses must be cut off or removed.
The oven must be connected with a power cable
(standardized) with three 1.5 mm2 conductors (1 ph
+ 1 N + ground) that must be connected to a
monophase 220-240 V network via a CEI 60083
standardised receptacle (1 ph + 1 N + ground lead)
or in accordance with installation rules. The safety
wire (green-yellow) is connected to the appliance’s
terminal and must be connected to the ground
lead of the electrical set-up.
In the case of connections with an electric
receptacle, it must remain accessible after
installation of the appliance.
The oven’s neutral conductor (blue wire) must be
connected to the network’s neutral conductor.
In your electrical installation, allow for a useraccessible device that must be able to separate the
appliance from the main power supply and whose
contact opening is at least 3 mm above all the
terminals.
If the power cable is damaged, it should be
replaced by the manufacturer, its after-sales service
department or by a qua lified person to avoid
danger.
Warning:
We cannot be held responsible for any
accident resulting from an inexistent, defective
or incorrect ground lead.
If the oven malfunctions in any way, unplug the
appliance or remove the relevant fuse at the
oven’s connection lead-in.
IInnssttaalllliinngg yyoouurr aapppplliiaannccee
14
GB
z
THE TURNTABLE :
ensures equal cooking of food throughout with no
need to intervene.
- It may be used as a cooking dish.
- Rotation is controlled by the drive shaft and
the wheel support.
- The turntable rotates in both directions.
- If it does not turn, verify that all components
are properly positioned.
z
THE WHEEL SUPPORT :
- Do not try to rotate the roller ring manually, as
you could damage the drive system. If it does
not turn smoothly, make sure that there is
nothing in the well beneath the turntable.
z
MICROWAVE OUTPUT POWER : 900 W
• The GRILL : *
may be used for browning foods such as gratin
dishes or meat.
GGeenneerraall ddeessccrriippttiioonn
* for certain models
Turntable
off button
Grill
Identification
label
Turntable
Wheel
support
Function
selector
knob
Start-
Timer
Door
open button
Make sure that the rack is always well centered on the turntable.
Never use any metal dish with the rack with the microwave, grill + microwave or fan + microwave functions.
Nevertheless you may heat up food in an aluminium tray if you place a plate between the tray and the rack.
The folding rack :
To fold down the rack :
push in on the protruding hooks
and fold in the stands
with the Grill or Grill + Microwave functions :
choose the rack level according to the dish
you wish to grill
- high position to brown dishes which are rather flat
- low position as required for other dishes.
with the fan or fan + microwave functions :
always set your dishes on the rack folded down
to the low position.
The 2 level rack
low
position
(folded)
Æ
Æ
Æ
high
position
The ggrilling rrack *
15
GB
UUssiinngg yyoouurr mmiiccrroowwaavvee oovveenn
Program your microwave oven using the function selector knob,
together with the start-timer.
After connecting your microwave oven:
- Open the door, place the food to be cooked inside the
microwave oven and close the door. Make sure the door is
properly closed otherwise the oven will not operate.
- Select the power setting with the function selector knob.
- Select the time using the start-timer .
When you wish to program less than two minutes, turn the timer
beyond 2, then come back to the desired setting.
- If using a large dish, press the turntable off button .
When off, remember to turn the recipient or stir the contents.
After use, remember to press again to unlock the turntable.
- Close the door, the turntable revolves, the oven light comes on,
the program begins. The end of the program is indicated by a
bell. The oven stops, the light goes off.
- If you open the door before the end of a program :
if the dish is ready, turn the start-timer back to the “0” position
before closing the door. Otherwise, close the door if you wish
the program to continue.
Never operate the oven when empty.
16
GB
TROUBLESHOOTING GUIDE
The microwave oven is noisy when operating
z
Clean the wheels and the well area beneath the turntable.
The turntable does not revolve correctly
The food is not heated up
z
Make sure that you use only containers which are
adapted to microwave cooking.
The appliance produces sparks
z
Check whether the wheel support is correctly positioned.
Thoroughly clean the appliance : remove any greasy
deposits, cooking residue, etc...
Move any metal objects away from the oven walls.
MMiiccrroowwaavvee ppoowweerr sseettttiinnggss
Symbol Function Application
TIMER
KEEP WARM
150 W
DEFROST
or
VERY LOW COOK
300 W
SIMMER
500 W
LOW COOK
700 W
HIGH COOK
900 W
Set the function selector knob to this position to
use the timer function (sans cuisson).
To keep dishes warm, bring butter, cream, cheese,
ice cream, or any other delicate food to the right
temperature, or defrost it.
To defrost all frozen food, to top off cooking of delicate dishes or to cook very slowly.
To cook fish or poultry. To finish programs begun
with the HIGH COOK power setting, for instance beans, lentils, or dairy products.
To heat up all liquids and all fresh or frozen
pre-cooked dishes.
To cook vegetables and soup.
*
*
*
*
* for certain models
This function enables you to brown dishes such as fish or meat.
After grilling, make sure to use an oven mitt to handle dishes, and remember to use only
ovenproof cookware such as ceramic dishes or heat-resistant glass.
WARNING : Do not allow children near the oven when the grill is in use as certain exposed
parts may become hot.
After use, allow the grill to cool down for 25 minutes before touching it.
Example :
SARDINES 6-8
- Place the sardines on the rack.
Press the grill key.
Set the function selector knob to the grill position .
Set the grill time, 16 / 18 min, with the timer.
- Close the door, the turntable revolves, the oven light comes on, the programme begins.
TThhee ggrriillll ffuunnccttiioonn
17
GB
TThhee mmiiccrroowwaavvee ++ ggrriillll ffuunnccttiioonn **
This function enables you to use the microwaves and grill simultaneously, for rapid
cooking.
Example :
SIRLOIN STEAK (800 g)
- Place the dish in a roasting pan on the turntable.
Press the grill key.
Select the LOW COOK power setting with the function selector knob.
Set the time, 25 / 30 min, with the timer.
- Close the door, the turntable revolves, the oven light comes on, the programme begins.
* for certain models
18
GB
CCaarree && cclleeaanniinngg
z
WARNING : It is recomended to clear the oven
regularly and to take any food
deposit inside and outside
the appliance.
Use a soapy and
wet cloth. If the appliance is not
kept clean, its surface could
deteriorat and adversely affect
its life and possibly result in a
hazardous situation. If the door
or door seals are damaged, the
oven must not be operated until it has been repaired
by a competent person.
z
A steam cleaner is
not to be used.
z
Do not use
abrasives, alcohol
or solvents as
they are liable to
damage the oven.
z
On the event of unsavory odors or caked-on dirt,
boil water containing lemon juice or vinegar in a
cup for 2 minutes and clean the walls with a little
dishwashing liquid.
z
The turntable can
be removed for
cleaning. Wells
are provided on
both sides for
easy access. If
you remove the
drive shaft, do not allow water to enter the motor
shaft hole. Be sure to put the turntable, the drive
shaft and the wheel support back in their proper
place.
z
If the equipment has sustained any damage :
- Check that the door is not deformed.
z
If the oven does not
operate, before calling
the repairman
:
- Check the electrical
supply.
- Check that the door
is properly closed.
- Check your
programming.
CAUTION : never attempt to repair your oven
yourself.
WARNING : it is dangerous for anyone other than
qualified personnel to make any repairs requiring
removal of the cover providing protection from
exposure to microwave energy.
Only a specially trained technician is qualified to
repair your microwave oven.

MMooddee dd’’eemmppllooii
IT
GB FR
ES
PT NL
FR
Italiano, 1 English, 10 Français, 19
Español, 28 Portoguês, 37 Nederlands, 46
FOUR À MICRO-ONDES
Sommaire
L’attention de l’utilisateur, 20
L’attention de l’utilisateur, 21
Installation de votre appareil, 22
Présentation, La clayette repliable *, 23
Utilisation, 24
Equivalences des puissances, 25
La fonction gril / La fonction
micro-ondes + gril *, 26
Entretien et nettoyage, 27
Instruction de sécurité importantes.
Lire avec attention et garder pour les futures utilisations.
* selon modèle

20
FR
Important :
Conservez cette notice d’utilisation avec
votre appareil. Si l’appareil devait être vendu ou
cédé à une autre personne, assurez-vous que la
notice d’utilisation l’accompagne. Merci de
prendre connaissance de ces conseils avant
d’installer et d’utiliser votre appareil. Ils ont été
rédigés pour votre sécurité et celle d’autrui.
• CONSIGNES DE SECURITE
Votre appareil est exclusivement destiné à un usage
domestique pour la cuisson, le réchauffage ou la
décongélation des aliments. Le fabricant se dégage
de toute responsabilité en cas d’utilisations non
conformes.
Cet appareil n’est pas prévu pour être utilisé par
des personnes (y compris les enfants) dont les
capacités physiques, sensorielles ou mentales sont
réduites, ou des personnes dénuées d’expérience
ou de connaissance, sauf si elles ont pu bénéficier,
par l’intermédiaire d’une personne responsable de
leur sécurité, d’une surveillance ou d’instructions
préalables concernant l’utilisation de l’appareil.
Vérifiez que les ustensiles sont appropriés à l’usage
dans un four à micro-ondes. Ne pas laisser
d’accessoire dans votre four lorsqu’il est à
l’arrêt.Pour ne pas détériorer votre appareil, ne
jamais le faire fonctionner à vide ou sans plateau.
N’intervenez pas dans les orifices de la serrure en
face avant vous pourriez créer des dommages sur
votre appareil qui nécessiteraient une
intervention.Le joint et l’encadrement de la porte
doivent être inspectés régulièrement pour s’assurer
qu’ils ne sont pas détériorés. Si ces zones étaient
endommagées, n’utilisez plus l’appareil et faites-le
contrôler par un technicien spécialisé.
Pendant le chauffage de denrées alimentaires dans
des contenants en plastique ou en papier, gardez un
œil sur le four en raison de la possibilité
d’inflammation.
En fonction micro-ondes et micro-ondes + chaleur
tournante, il est déconseillé d’utiliser des récipients
métalliques, des fourchettes, des cuillères, des
couteaux ainsi que des liens et agrafes en métal
pour sachets de congélation.
Le contenu des biberons et des pots d’aliments
pour bébés doit être remué ou agité et la
température doit être vérifiée avant consommation,
afin d’éviter les brûlures.Ne chauffez jamais un
biberon avec sa tétine (risque d’explosion).
Il convient de surveiller les enfants pour s’assurer
qu’ils ne jouent pas avec l’appareil.Ne laissez pas
les enfants utiliser le four sans surveillance sauf si
des instructions appropriées ont été données afin
que l’enfant puisse utiliser le four de façon sûre et
comprenne les dangers d’un usage incorrect.
Utilisez toujours des gants isolants pour retirer les
plats du four. Certains plats absorbent la chaleur
des aliments, et sont donc très chauds.
Les liquides ou autres aliments ne doivent pas être
chauffés dans des récipients hermétiques car ils
risquent d’exploser.Il est recommandé de ne pas
chauffer les œufs dans leur coquille et les œufs durs
en-tiers dans un four micro-ondes car ils risquent
d’exploser, même après la fin de la cuisson.
Le chauffage de boissons par micro-ondes peut
provoquer un jaillissement brusque et différé de
liquide en ébullition, aussi des précautions doivent
être prises lorsqu’on manipule le récipient.
Dans le cas de petites quantités (une saucisse, un
croissant, etc...) posez un verre d’eau à côté de
l’aliment.Des temps trop longs peuvent dessécher
l’aliment et le carboniser. Pour éviter de tels
incidents, n’utilisez jamais les mêmes temps
préconisés pour une cuisson au four traditionnel.
Si de la fumée apparaît, arrêtez ou débranchez le
four et gardez la porte fermée pour étouffer les
flammes éventuelles.
LL’’aatttteennttiioonn ddee ll’’uuttiilliissaatteeuurr

21
FR
LL’’aatttteennttiioonn ddee ll’’uuttiilliissaatteeuurr
• PRINCIPE DE FONCTIONNEMENT
Les micro-ondes utilisées pour la cuisson sont des
ondes électro-magnétiques. Elles existent
couramment dans notre environnement comme les
ondes radio-électriques, la lumière, ou bien les
rayonnements infrarouges.
Leur fréquence se situe dans la bande des 2450 MHz.
Leur comportement :
• Elles sont réfléchies par les métaux.
• Elles traversent tous les autres matériaux.
• Elles sont absorbées par les molécules d’eau,
de graisse et de sucre.
Lorsqu’un aliment est exposé aux micro-ondes il
s’ensuit une agitation rapide des molécules, ce qui
provoque un échauffement.
La profondeur de pénétration des ondes dans
l’aliment est d’environ 2,5 cm, si l’aliment est plus
épais, la cuisson à cœur se fera par conduction
comme en cuisson traditionnelle.
Il est bon de savoir que les micro-ondes provoquent
à l’intérieur de l’aliment un simple phénomène
thermique et qu’elles ne sont pas nocives pour la
santé.
• PROTECTION DE L’ENVIRONNEMENT
Les matériaux d'emballage de cet appareil sont
recyclables. Participez à leur recyclage et contribuez
ainsi à la protection de l'environnement en les
déposant dans les conteneurs municipaux prévus à
cet effet.
Votre appareil contient également de
nombreux matériaux recyclables. Il est
donc marqué de ce logo afin de vous
indiquer que les appareils usagés ne
doivent pas être mélangés avec d'autres
déchets. Le recyclage des appareils
qu'organise votre fabricant sera ainsi réalisé dans
les meilleures conditions, conformément à la
directive européenne 2002/96/CE sur les déchets
d'équipements électriques et électroniques.
Adressez vous à votre mairie ou à votre revendeur
pour connaître les points de collecte des appareils
usagés les plus proches de votre domicile. Nous
vous remercions pour votre collaboration à la
protection de l'environnement.
Fig.01

22
FR
• AVANT LE BRANCHEMENT
Attention :
Vérifier que votre appareil n’ait subi aucune
avarie lors du transport (porte ou joint déformé,
etc...). Si vous constatez un dommage
quelconque, avant toute utilisation, contactez
votre revendeur.
Afin de retrouver aisément à l’avenir les
références de votre appareil, nous vous
conseillons de les noter en page « Service après
vente et relations consommateur».
• LE RACCORDEMENT ELECTRIQUE
Vérifier que :
- la puissance de l’installation est suffisante.
- les lignes d’alimentation sont en état.
- le diamètre des fils est conforme aux règles
d’installation.
- votre installation est équipée d’une protection
thermique de 16 ampères.
En cas de doute, veuillez consulter votre installateur électricien.
Le raccordement électrique est à réaliser avant la
mise en place de l’appareil dans le meuble.
La sécurité électrique doit être assurée par un
encastrement correct. Lors de l’encastrement et des
opérations d’entretien, l’appareil doit être débranché
du réseau électrique, les fusibles doivent être
coupés ou retirés.
L’appareil doit être branché avec un câble
d’alimentation (normalisé) à 3 conducteurs de 1,5 mm²
(1 ph + 1N + terre) qui doivent être raccordés sur le
réseau 220-240 V ~ monophasé par l’intermédiaire
d’une prise de courant 1 ph + 1N + terre normalisée
CEI 60083 ou conformément aux règles
d’installation. Le fil de protection (vert-jaune) est
relié à la borne de l’appareil et doit être relié à la
terre de l’installation.
Dans le cas d’un branchement avec fiche de
courant, celle-ci doit rester accessible après
l’installation de l’appareil.
Le neutre du four (fil bleu) doit être raccordé au
neutre du réseau.
Prévoyez dans votre installation électrique un
dispositif accessible par l’utilisateur qui doit être en
mesure de séparer l’appareil du secteur et dont
l’ouverture de contact est au moins 3 mm au niveau
de tous les pôles.
Si le câble d’alimentation est endommagé, il doit
être remplacé par le fabricant, son service après
vente, ou une personne de qualification similaire afin
d’éviter un danger.
Attention :
Notre responsabilité ne saurait être engagée
en cas d’accident ou d’incident consécutif à une
mise à la terre inexistante, défectueuse ou
incorrecte.
Si le four présente une quelconque anomalie,
débranchez l’appareil ou enlevez le fusible
correspondant à la ligne de branchement du four.
IInnssttaallllaattiioonn ddee vvoottrree aappppaarreeiill

PPrréésseennttaattiioonn
z
Le PLATEAU TOURNANT :
permet une cuisson homogène de l’aliment sans
manipulation.
- Il peut être utilisé comme plat de cuisson.
- Il est guidé dans sa rotation par l’entraîneur et
le support à roulettes.
- Il tourne indifféremment dans les 2 sens.
- S’il ne tourne pas, vérifiez que tous les
éléments soient bien positionnés.
z
Le SUPPORT A ROULETTES :
- Ne cherchez pas à faire tourner manuellement
le support à roulettes, vous risqueriez de
détériorer le système d’entraînement. En cas
de mauvaise rotation, assurez-vous de
l’absence de corps étrangers sous le plateau.
z
PUISSANCE RESTITUÉE : 900 W
z
Le GRIL : *
permet de dorer et de griller les aliments tels que
gratin, viandes ...
23
FR
Touche
gril
* selon modèle
Lors de son utilisation, la clayette doit obligatoirement être bien centrée sur le plateau tournant.
La clayette ne doit en aucun cas être utilisée avec d’autres récipients métalliques en fonction micro-ondes, gril
+ micro-ondes ou chaleur tournante + micro-ondes.
Toutefois, vous pouvez réchauffer un aliment dans une barquette en aluminium en l’isolant de la clayette à
l’aide d’une assiette.
La clayette rabattable :
Pour rabattre en position basse :
pousser les crochets vers
l'intérieur et replier les pieds
en fonction Gril ou Gril + M.O. :
choisir le niveau selon le plat à griller
- en position haute pour dorer les aliments de faible épaisseur
- en position basse pour les autres aliments.
en fonction chaleur tournante seule ou chaleur tournante + M.O.:
Poser votre plat toujours sur la clayette repliée.
La clayette 2 positions
position
basse
(repliée)
Æ
Æ
Æ
position
haute
La cclayette rrepliable *

24
FR
UUttiilliissaattiioonn
La programmation se fait à l’aide du bouton de sélection des
fonctions, qui permet de régler la puissance micro-ondes, et la
minuterie-départ.
Après avoir branché votre appareil :
- Ouvrez la porte, placez l’aliment dans l’appareil, fermez la porte.
Assurez-vous que la porte soit bien fermée; sinon, le four ne
fonctionnera pas.
- Sélectionnez la puissance micro-ondes à l’aide du bouton de
sélection des fonctions.
- Programmez le temps à l’aide de la minuterie-départ .
Lorsque le temps désiré est inférieur à deux minutes, tournez
la minuterie au-delà de 2 minutes puis revenez en arrière sur
la position choisie.
- Dans le cas d’utilisation d’un plat ne permettant pas la rotation
du plateau tournant, sélectionnez la touche arrêt plateau .
Il est nécessaire de tourner le récipient ou de mélanger son
contenu à mi-programme lorsque le plateau est arrêté. En fin de
programme, veillez à déverrouiller cette touche.
- Fermez la porte, le plateau tourne, l’éclairage intérieur du four
s’allume, l’appareil fonctionne. La fin de la cuisson est signalée
par une sonnerie, le four s’arrête, l’éclairage s’éteint.
- Si vous ouvrez la porte avant la fin du programme :
dans le cas où l’aliment est prêt, ramenez la minuterie-départ
sur la position 0 min avant de refermer la porte. Sinon, refermez
la porte et la minuterie continuera son décompte.
Ne jamais faire fonctionner le four à vide.

25
FR
ÉÉqquuiivvaalleennccee
ddeess ppuuiissssaanncceess
UN PETIT PROBLÈME ! QUE FAIRE ?
Le plateau ne tourne pas correctement
z
Nettoyer les roulettes et la zone de roulement sous le plateau
tournant.
L’aliment n’est pas chauffé
z
Vérifier que les ustensiles conviennent aux fours à micro-ondes.
L’appareil produit des étincelles
z
Bien nettoyer l‘appareil : retirer graisses, particules de cuisson;
éloigner tout élément métallique des parois du four.
Symbole Fonction Utilisation
Régler le bouton de sélection sur cette position afin
d'utiliser la fonction "minuterie" (sans cuisson).
Pour maintenir au chaud. Pour mettre à température
ou décongeler du beurre, de la crème, du
fromage, de la glace ou tout autre aliment délicat.
Pour décongeler tous les aliments.
Pour terminer des cuissons délicates ou pour cuire
très lentement.
Pour cuire poisson et volaille.
Pour terminer les préparations commencées
en CUISSON FORTE, telles que haricots, lentilles,
laitages.
Pour réchauffer tous les aliments liquides ou solides,
ainsi que les plats préparés frais ou surgelés.
Pour cuire légumes et potages.
MINUTERIE
MAINTIEN
AU CHAUD
150 W
DÉCONGÉLATION
ou CUISSON
TRÈS DOUCE
300 W
MIJOTAGE
500 W
CUISSON DOUCE
700 W
CUISSON FORTE
900 W
*
*
*
*
* selon modèle
Cette fonction permet de dorer les aliments tels que poissons, viandes...
Lors de l’utilisation du gril, il est nécessaire de se protéger les mains pour sortir les plats et
d’utiliser des récipients qui supportent des températures élevées, tels que le verre à feu ou la
céramique.
MISE EN GARDE : Les parties accessibles peuvent devenir chaudes quand le gril est utilisé.Il
y a lieu d'éloigner les jeunes enfants.
Laisser refroidir le gril 25 minutes après utilisation avant de le toucher.
Exemple :
SARDINES 6-8
- Poser le poisson sur la clayette.
Appuyez sur la touche gril.
Choisissez la position gril avec le bouton de sélection des fonctions.
Sélectionnez le temps, 16 / 18 min, àl’aide de la minuterie-départ.
- Fermez la porte, le plateau tourne, l’éclairage intérieur du four s’allume, le gril fonctionne.
LLaa ffoonnccttiioonn ggrriill
26
FR
LLaa ffoonnccttiioonn mmiiccrroo-oonnddeess ++ ggrriill **
Cette fonction donne la possibilité d’utiliser en simultané les fonctions micro-ondes et
gril, ce qui permet une cuisson rapide.
Exemple :
FAUX FILET
(800 g)
- Posez l’aliment dans un plat à rôtir sur le plateau.
Appuyez sur la touche gril.
Sélectionnez la puissance micro-ondes cuisson douce à l’aide du bouton de
sélection des fonctions.
Sélectionnez le temps, 25 / 30 min, à l’aide de la minuterie-départ.
- Fermez la porte, le plateau tourne, l’éclairage intérieur du four s’allume, l’appareil
fonctionne.
* selon modèle
27
FR
EEnnttrreettiieenn eett
NNeettttooyyaaggee
zz
MISE EN GARDE : Il est recommandé de nettoyer
le four régulièrement et d’enlever tout dépôt
alimentaire à l’intérieur et à
l’extérieur de l’appareil.
Utilisez une éponge humide
et savonneuse. Si l’appareil
n’est pas maintenu dans un
état de propreté, sa surface
pourrait se dégrader et
affecter de façon inexorable
sa durée de vie et conduire à
une situation dangereuse. Si la porte ou le joint
de porte est endommagé, le four ne doit pas être
utilisé avant d’avoir été remis en état par une
personne compétente.
z
Ne pas nettoyer
l’appareil avec un
nettoyeur vapeur.
z
L'emploi de
produits abrasifs,
d'alcool ou de
diluant est
déconseillé ; ils
sont susceptibles de détériorer l'appareil.
z
En cas d'odeur ou de four encrassé, faites bouillir
de l'eau additionnée de jus de citron ou de
vinaigre dans une tasse pendant 2 min et
nettoyez les parois avec un peu de liquide
vaisselle.
z
Le plateau peut
être retiré pour
faciliter le
nettoyage. Pour ce
faire, prenez-le par
les zones d’accès
prévues à cet effet.
Si vous enlevez l'entraîneur, évitez de faire
pénétrer de l'eau dans le trou de l'axe moteur.
N'oubliez pas de remettre l’entraîneur, le support
à roulettes et le plateau tournant.
z
Si l’appareil a subi une avarie quelconque :
- Vérifiez que la porte n'est pas déformée.
z
Si l’appareil ne
fonctionne pas, avant
d’appeler le réparateur :
- Vérifiez l’alimentation
électrique.
- Vérifiez la bonne
fermeture de la porte.
- Vérifiez votre
programmation.
ATTENTION : ne cherchez jamais à intervenir
vous-même.
MISE EN GARDE : il est dangereux pour quiconque
autre qu’une personne formée, d’effectuer une
opération de maintenance ou une réparation qui
nécessite le retrait d’un couvercle protégeant contre
l’exposition à l’énergie des micro-ondes.

IT
GB FR
ES
PT NL
Italiano, 1 English, 10 Français, 19
Español, 28 Portoguês, 37 Nederlands, 46
ES
GGuuííaa ddee iinnssttrruucccciioonneess
Sumario
A la atención del usuario, 29
A la atención del usuario, 30
Instalación del aparato, 31
Descripción general, La rejilla abatible *, 32
Funcionamiento, 33
Equivalencia de las potencias, 34
La funcion grill / La funcion microondas
+ grill *, 35
Mantenimiento & limpeza, 36
Instrucciones de seguridad importantes. Léalas atentamente y consérvelas para futuras utilizaciones.
HORNO MICROONDAS
* según modelo

29
Importante:
Conserve este manual de uso con su
aparato. Si el aparato debiera ser vendido o
cedido a otra persona, asegúrese de que vaya
acompañado del manual de uso. Por favor, lea
estos consejos antes de instalar y utilizar el
aparato. Han sido redactados para su seguridad
y la de los demás.
• NORMAS DE SEGURIDAD
Este aparato está exclusivamente destinado a uso
doméstico para la cocción, el calentamiento o la
descongelación de alimentos. El fabricante no se
hace responsable en caso de utilización
inadecuada.
Compruebe que los utensilios sean adecuados para
usarlos en un horno microondas. No deje ningún
accesorio dentro del horno cuando esté apagado.
Para no deteriorar el aparato, no lo ponga nunca en
funcionamiento en vacío o sin bandeja.
No intervenga en los orificios de la cerradura de la
cara delantera, ya que podría provocar daños en el
aparato que requerirían una intervención.
La junta y el marco de la puerta deben ser
regularmente inspeccionados para asegurarse de
que no estén deteriorados. Si estas zonas están
dañadas, deje de utilizar el aparato y haga que lo
controle un técnico especializado.
Mientras calienta alimentos en recipientes de
plástico o papel, vigile el horno ya que podrían
prender fuego.
En función microondas y microondas + convección,
se desaconseja utilizar recipientes metálicos,
tenedores, cucharas, cuchillos, así como tiras y
grapas metálicas para bolsas de congelación.
El contenido de los biberones y potitos para bebés
debe ser removido o agitado y se debe comprobar
la temperatura antes de consumirlos, para evitar
quemaduras.
No caliente nunca un biberón con su tetina (peligro
de explosión).
No deje a los niños utilizar el horno sin vigilancia,
salvo si se le han dado instrucciones adecuadas al
niño para que pueda utilizar el horno de forma
segura y comprenda los peligros de una utilización
incorrecta.
Utilice siempre guantes aislantes para sacar las
fuentes del horno. Algunas fuentes absorben el
calor de los alimentos, por lo que se calientan
mucho.
Los líquidos u otros alimentos no deben ser
calentados en recipientes herméticos ya que
podrían explotar.
Se recomienda no calentar los huevos con cáscara
y los huevos duros enteros en horno microondas, ya
que pueden explotar, incluso tras la cocción.
El calentamiento de bebidas por microondas puede
hacer que el líquido en ebullición se desparrame de
forma brusca y diferida, por lo que también se han
que tomar precauciones al manipular el recipiente.
En caso de cantidades pequeñas (una salchicha ,
un croissant, etc...) coloque un vaso de agua junto
al alimento.
Si se programan tiempos demasiado largos, el
alimento se puede secar y carbonizar. Para evitar
estos incidentes, no utilice nunca los mismos
tiempos que se recomiendan para la cocción en
horno tradicional.
Si aparece humo, apague o desconecte el horno y
mantenga la puerta cerrada para ahogar posibles
llamas.
AA llaa aatteenncciióónn ddeell uussuuaarriioo
ES

30
ES
• PRINCIPIO DE FUNCIONAMIENTO
Las microondas utilizadas para la cocción son
ondas electromagnéticas. Existen habitualmente en
nuestro entorno, al igual que las ondas
radioeléctricas, la luz o los rayos infrarrojos.
Su frecuencia se sitúa en la banda de los 2450 MHz.
Su comportamiento:
• Son reflejadas por los metales.
• Atraviesan todos los demás materiales.
• Son absorbidas por las moléculas de agua,
grasa y azúcar.
Cuando un alimento es expuesto a microondas, se
produce una agitación rápida de las moléculas, que
provoca el calentamiento.
La profundidad de penetración de las ondas en el
alimento es de unos 2,5 cm; si el alimento es más
grueso, la cocción del núcleo se realizará por
conducción, al igual que en la cocción tradicional.
Conviene saber que las microondas provocan
dentro del alimento un sencillo fenómeno térmico y
que no son nocivas para la salud.
• PROTECCIÓN DEL MEDIO AMBIENTE
Los materiales utilizados para el embalaje de este
aparato son reciclables. Participe en su reciclaje y
contribuya así a conservar el medio ambiente
tirándolos a los contenedores municipales previstos
para ellos.
Su aparato también contiene materiales
reciclables, por lo que está marcado con
este logotipo que le indica que los
aparatos desechados no deben
mezclarse con otros residuos. Actuando
así, el reciclaje de los aparatos que
organiza su fabricante se efectuará en las mejores
condiciones posibles, de acuerdo con la directiva
europea 2002/96/CE sobre los residuos de equipos
eléctricos y electrónicos. Consulte en su
ayuntamiento o a su vendedor para conocer dónde
se encuentran los puntos de recogida de aparatos
desechados más cercanos a su domicilio.
Le damos las gracias por su colaboración en la
protección del medio ambiente.
AA llaa aatteenncciióónn ddeell uussuuaarriioo
Fig.01
31
• ANTES DE CONECTARLO
Atención:
Compruebe que el aparato no haya sufrido
ninguna avería durante el transporte (puerta o
junta deformada, etc.). Si observa algún daño
póngase en contacto con su distribuidor antes
de utilizarlo.
Para encontrar fácilmente en el futuro las
referencias de su aparato, le aconsejamos que
las anote en la página “Servicio posventa y
relación con el consumidor”.
• LA CONEXIÓN ELÉCTRICA
Compruebe que:
- la potencia de la instalación sea suficiente.
- las líneas de alimentación estén en buen estado.
- el diámetro de los hilos sea conforme a las reglas
de instalación.
- la instalación esté equipada con una protección
térmica de 16 amperios.
En caso de duda, consulte a su instalador
electricista.
La conexión eléctrica se debe efectuar antes de
colocar el aparato en el mueble.
Se debe garantizar la seguridad eléctrica mediante
un encastramiento correcto. Cuando encastre el
aparato y realice operaciones de mantenimiento, el
aparato debe estar desconectado de la red
eléctrica, y se deben cortar o retirar los fusibles.
El aparato debe estar conectado con un cable de
alimentación (normalizado) de 3 conductores de
1,5 mm² (1 ph + 1N + tierra) que deben estar
conectados a la red 220-240 V ~ monofásica a
través de una toma de corriente 1 ph + 1N + tierra
normalizada CEI 60083 o de acuerdo con las reglas
de instalación. El hilo de protección (verde-amarillo)
va conectado al terminal del aparato y debe
estar conectado a la tierra de la instalación.
En caso de que se conecte con una ficha de
corriente, ésta debe permanecer accesible una vez
instalado el aparato.
El neutro del horno (hilo azul) debe conectarse al
neutro de la red.
Prevea en la instalación eléctrica un dispositivo
accesible por el usuario, que debe ser capaz de
separar el aparato del sector, y cuya apertura de
contacto esté al menos a 3 mm al nivel de todos los
polos.
Si el cable de alimentación está dañado, debe ser
sustituido por el fabricante, su servicio posventa, o
una persona de cualificación similar para evitar
riesgos.
Atención:
No asumimos ningún tipo de
responsabilidad en caso de accidente o
incidente debido a una falta de conexión de toma
de tierra o a una conexión defectuosa o
incorrecta.
Si el horno presenta alguna anomalía,
desconecte el aparato o quite el fusible
correspondiente a la línea de conexión del
horno.
IInnssttaallaacciióónn ddeell aappaarraattoo
ES

32
ES
z
EL PLATO GIRATORIO :
permite una cocción homogénea del alimento sin
tenerelo que voltear.
- Es guiada en su rotacíon por el eje de
accionamiento y el soporte de ruedecillas, gira
indistin tatemente en los dos sentidos.
- Se não girar, verifique que todos los elementos
están bien posicionados.
- Se puede utilizar como bandeja de cocción.
z
EL SOPORTE DE RUEDECILLAS :
-
No intentar dar vueltas manualmente al suporte de
ruedecillas, ya que esso podría deteriorar el sistema de
arrastre. En casa de mala rotación asegúrese de la
ausencia de cuerpos extraños bajo el plato.
z
POTENCIA RESTITUIDA : 900 W
• GRILL : *
el grill es apto para dorar alimentos tales como
carnes pasta etc.
DDeessccrriippcciióónn ggeenneerraall
* según modelo
Tecla grill
Cuando se utiliza en función microondas, debe estar bien posicionada sobre la bandeja de vidrio.
En ningún caso se debe utilizar con recipientes metálicos en función microondas, parrilla + microondas o calor
giratorio + microondas.
No obstante, puede calentar un alimento en un barquilla de aluminio aislándola de la rejilla con un plato.
La rejilla abatible :
Para doblar en posición baja :
Echar los corchetes hacia adentro y doblar las patas.
En función Parrilla o Parrilla + Microondas:
elegir el nivel según el plato a asar
- en posición alta para dorar los alimentos poco espesos
- en posición baja para los demás alimentos.
en función Calor Giratorio solo o Calor Giratorio + Microondas:
Coloque siempre su plato sobre la rejilla doblada.
Posición
alta
Posición
baja
(doblada)
Æ
Æ
Æ
La rejilla 2 posiciones
La rrejilla aabatible *

33
ES
La programación se hace con el botón de selección de funciones,
que permite ajustar la potencia microondas, y el minutero-inicio.
Después de haber conectar su aparato :
- Abra la puerta. Coloque el alimento a cocinar en el aparato,
cierre la puerta. Cerciórese que la puerta esté bien cerrada, en el
caso contrario el horno no funcionará.
- Seleccione el programa por medio del botón de selección de
potencia.
- Programe el tiempo con el botón minuteroinicio .
- Cuando el tiempo deseado es inferior a 2 minutos, haga girar el
minutero más allá de 2 minutos y a continuación vuelva a la
posición deseada.
- Si usted desea utilizar un recipiente mayor que dicho plato y por
lo tanto no podría girar dentro del horno, se puede desconectar
el plato giratorio .
- En este caso, es necesario hacer girar la bandeja o mezclar su
contenido a mitad de la cocción.
- Cierra la puerta. El plato gira, el horno se ilumina. El fin de la
cocción se indica por una señal sonora, el horno se para
automáticamente, la iluminación se apaga.
- Abra la puerta. Si usted abra la puerta antes del fin de programa :
para continuar, cierre la puerta, o si desea para antes de que
llegue el tiempo a 0, lleve a 0 el minutero-inicio y cierre la puerta.
Nunca haga funcionar su aparato vacio.
FFuunncciioonnaammiieennttoo

34
ES
QUE HACER CUANDO ?
El horno hace ruido
z
Limpiar las ruedecillas de la zona de rodamiento bajo el plato giratorio.
El plato no gira correctamente
El alimento no se calienta
z
Verificar que los utensilios convienen a los hornos microondas.
en programa microondas
El aparato produce chispas
z
Verificar que el soporte de ruedecillas y el arrastrador estén bien
posicionados. Limpiar bien el aparato: retirar grasas, partículas de
cocción, etc. Alejar todo elemento metálico de las paredes del horno.
EEqquuiivvaalleenncciiaa
ddee llaass ppootteenncciiaass
Symbole Potencia Utilización
MINUTERO
MANTIENIMIENTO
150 W
DESCONGELADO
o COCCION
MUY LENTA
300 W
COCCION LENTA
500 W
COCCION
MODERADA
700 W
COCCION FUERTE
900 W
Ajuste el botón de selección en esta posición para
utilizar la función "minutero" (sin cocción alguna).
Para mantener en caliente, Para poner a tempera-tura o descongelar la mantequilla, la crema,
el queso, el helado, el vino o cualquier otro alimento frágil.
Para descongelar todos los alimentos.
Para terminar cocciones delicadas o para cocinar
muy lentamente.
Para cocinar pescados y aves.
Para terminar las preparaciones comenzadas en
COCCION FUERTE, tales como frijoles, lentejas,
productos lácteos.
Para calentar todos los líquidos.
Para calentar todos los platos cocinados frescos
o congelados.
Para cocinar las hortalizas y sopas.
*
*
*
*
* según modelo

Esta función permite dorar los alimentos tales como gratines, carnes...
Al utilizar el grill, es necesario protegerse las manos para sacar os alimentos y utilizar
recipientes que soporten temperaturas altas, tales como vidrio refractario o cerámica.
ADVERTENCIA: El horno microondas se calienta mucho durante le proceso de gratinado, por
lo tanto mantenga a los niños alejados del aparato.
Hay que esperar 25 minutos después de la utilización antes de tocar el grill.
Ejemplo:
SARDINAS 6-8
- Colocar las sardinas sobre la rejilla.
Pulse la tecla grill.
Seleccione el programa gril por medio del botón de selección de potencia.
Programe el tiempo, 16 / 18 min, con el botón minutero-inicio.
- Cierra la puerta. El plato gira, el horno se ilumina, el grill funciona.
LLaa ffuunncciioonn ggrriillll
35
ES
LLaa ffuunncciioonn mmiiccrroooonnddaass ++ ggrriillll **
Esta función permita utilizar los microondas y el gril de manera simultánea, facilitando
así una cocción rápida.
Ejemplo :
FAUX FILET 800g
- Coloque la fuente sobre el plato giratorio.
Pulse la tecla gril.
Seleccione el programa cocción moderada por medio del botón de selección de
potencia.
Programe el tiempo, 25 / 30 min, con el botón minutero-inicio.
- Cierra la puerta. El plato gira, el horno se ilumina,el aparato funciona.
* según modelo

36
ES
z
ADVERTENCIA: Se recomienda limpiar el horno
periódicamente y retirar todos los depósitos de
alimentos que pueda haber
en el interior y el exterior del
aparato. Utilizar una esponja
húmeda con jabón. Si el
aparato no se mantiene en un
estado de limpieza correcto,
la superficie podría
deteriorarse y afectar de
forma inexorable a su
duración y conducir a una
situación peligrosa. Si la puerta o la junta de la
puerta estuvieran dañadas, no se deberá utilizar
el horno antes de hacerlo reparar por una
persona competente.
z
No limpiar el
interior del
aparato con un
limpiador a vapor.
z
Se desaconseja la
utilización de
productos
abrasivos, alcohol
o disolventes, ya
que podrían estropear el aparato.
z
En caso de malos olores o de suciedad en el
horno, haga hervir agua con zumo de limón o
vinagre en una taza durante 2 minutos y limpie
las paredes con un poco de limpiavajillas.
z
El plato se puede retirar fácilmente para poder
limpiarlo.
Para ello, cójalo
por las zonas de
acceso previstas
para ello.
Si retira el sistema
de arrastre, evite
que penetre agua
en el orificio del eje motor.
No se olvide de volver a colocar el sistema de
arrastre, el soporte con ruedas y el plato giratorio.
z
Si el aparato hubiera sufrido una avería:
- compruebe que la puerta no esté
deformada.
z
Si el aparato no
funciona, antes de
llamar al técnico:
- compruebe la
alimentación
eléctrica.
- compruebe que la
puerta cierra bien.
- compruebe su programación.
ATENCIÓN: no intente nunca hacer reparación
usted mismo.
ADVERTENCIA: Es peligroso para cualquier persona
que no sea la autorizada, llevar a cabo una
operación de mantenimiento o una reparación que
requiera extraer una tapa que protege contra la
exposición a la energía del microondas.
Toda intervención que sea necesario efectuar en
su aparato, deberá hacerla un profesional
cualificado autorizado por la marca.
MMaanntteenniimmiieennttoo && lliimmppeezzaa

IT
GB FR
ES
PT NL
PT
Italiano, 1 English, 10 Français, 19
Español, 28 Portoguês, 37 Nederlands, 46
MMaannuuaall ddee iinnssttrruuççõõeess
Índice
A informaçôes destinadas ao utilizador, 38
A informaçôes destinadas ao utilizador, 39
Instalação do seu aparelho, 40
Apresentação do aparelho,
Manuel de instruções *, 41
Utilização, 42
Equivalência das potências, 43
O função grelhador / O função
micro-ondas + grelhador *, 44
Limpeza, 45
Instruções de segurança importantes.
Ler atentamente e conservar para futuras utilizações.
FORNO MICRO-ONDAS
* conforme o modelo

38
PT
Importante :
Guarde este guia de utilização juntamente
com o aparelho. Se o aparelho for vendido ou
cedido a outra pessoa, tenha o cuidado de
entregar igualmente o guia de utilização. Antes
de instalar e de utilizar o aparelho, tome
conhecimento dos presentes conselhos, pois
estes foram elaborados para a sua segurança e a
das outras pessoas.
• INSTRUÇÕES DE SEGURANÇA
O seu aparelho destina-se exclusivamente para uma
utilização doméstica de cozedura, o aquecimento
ou a descongelação dos alimentos. O fabricante
rejeita qualquer responsabilidade em casos de
utilizações não conformes.
Este aparelho não foi criado para ser utilizado por
pessoas (incluindo crianças) cujas capacidades
fisicas, sensoriais ou mentais sejam reduzidas, ou
por pessoas com falta de experiência ou
conhecimento, excepto se estas tiverem a ajuda de
uma pessoa responsável pela segurança,
supervisão, ou instruções acerca da utilização do
aparelho.
Verifique que os utensílios são adequados para uma
utilização no forno microondas. Para não deteriorar
o seu aparelho, nunca o coloque a funcionar vazio
ou sem o prato.
Não mexa nos orifícios da fechadura à sua frente,
poderia provocar danos no seu aparelho que
implicariam uma intervenção.
A junta e o encastramento da porta devem ser
inspeccionados regularmente para verificar que não
estão deteriorados. Se estas zonas estiverem
danificadas, não utilize mais o aparelho e mande-o
controlar por um técnico especializado.
Durante o aquecimento dos géneros alimentares em
recipientes plásticos ou de papel, esteja atento ao
forno devido à possibilidade de inflamação.
Em função microondas e microondas + calor
ventilado, é aconselhado não utilizar recipientes
metálicos, garfos, colheres, facas bem como que
atilhos e agrafes metálicos para sacos de
congelação.
O conteúdo dos biberões e boiões de alimentos
para bebés deve ser mexido ou agitado e a
temperatura deve ser verificada antes de consumir,
para evitar queimaduras.
Nunca aqueça um biberão com a sua tetina (risco
de explosão).
Convém supervisionar as crianças, para se certificar
que estas não brincam com o aparelho.Não deixe
crianças utilizar o forno sem vigilância excepto se
tiverem sido dadas instruções adequadas para que
a criança possa utilizar o forno de forma segura e
compreenda os perigos da utilização incorrecta.
Utilize sempre luvas isolantes para retirar os pratos
do forno. Alguns pratos absorvem o calor dos
alimentos, e ficam por conseguinte muito quentes.
Os líquidos ou outros alimentos não devem ser
aquecidos em recipientes herméticos porque
riscariam explodir.
É recomendado aquecer os ovos na sua casca e os
ovos duros inteiros num forno microondas porque
riscam de explodir, mesmo após o fim da cozedura.
O aquecimento de bebidas com o microondas pode
provocar uma projecção bruscas e diferida de
líquido em ebulição, por isso devem ser tomadas
precauções quando se manipula o recipiente.
No caso de pequenas quantidades (uma salsicha,
um croissant, etc...) coloque um copo de água ao
lado do alimento.Tempos demasiados longos
podem secar o alimento e carbonizá-lo. Para evitar
estes incidentes, nunca utilize os mesmos tempos
recomendados para uma cozedura no forno
tradicional.
Se aparecer fumo, pare ou desligue o forno e
mantenha a pega fechada para abafar as eventuais
chamas.
AA iinnffoorrmmaaççôôeess
ddeessttiinnaaddaass aaoo uuttiilliizzaaddoorr
39
PT
• PRINCÍPIOS DE FUNCIONAMENTO
As microondas utilizadas para a cozedura são
ondas electromagnéticas. Elas existem
correntemente no nosso ambiente tal como as
ondas radioeléctricas, a luz, ou os raios
infravermelhos.
A sua frequência situa-se na faixa dos 2450 MHz.
O seu comportamento:
• São reflectidas pelos metais.
• Atravessam todos os outros materiais.
• São absorvidas pelas moléculas de água,
gordura e açúcar.
Quando um alimento é exposto às microondas,
ocorre uma agitação rápida das moléculas, o que
provoca um aquecimento.
A profundidade de penetração das ondas no
alimento é aproximadamente 2,5 cm, se o alimento
for mais espesso, a cozedura no centro será feita
por condução como em cozedura tradicional.
Deve saber que as microondas provocam no
interior do alimento um simples fenómeno térmico e
que são nefastas para a saúde.
• RESPEITO PELO MEIO AMBIENTE
Os materiais que constituem esta embalagem são
recicláveis. Por isso, participe à sua reciclagem e
coloque-os nos contentores municipais previstos
para o efeito.
Este aparelho também contém vários
materiais recicláveis. A presença deste
símbolo indica-lhe que os aparelhos
usados não devem ser misturados com
os outros resíduos. A reciclagem dos
aparelhos organizada pelo seu fabricante
realizar-se-á assim nas melhores condições, em
conformidade com a directiva europeia 2002/96/CE
relativa aos resíduos de equipamentos eléctricos e
electrónicos. Dirija-se junto da sua junta de
freguesia ou do seu revendedor para conhecer os
pontos de recolha dos aparelhos usados mais
próximos do seu domicílio. Obrigado pela sua
colaboração na protecção do meio ambiente..
AA iinnffoorrmmaaççôôeess
ddeessttiinnaaddaass aaoo uuttiilliizzaaddoorr
Fig.01

40
PT
• ANTES DE PROCEDER À LIGAÇÃO
Atenção:
Verifique o seu aparelho não sofreu
nenhuma avaria durante o transporte (porta ou
junta deformada, etc...). Se constatar qualquer
danificação , antes de qualquer utilização,
contacte o seu revendedor.
Para no futuro encontrar facilmente as
referências do aparelho, aconselhamos a que as
aponte na página “Serviço pós-venda e relações
com o consumidor”.
• A LIGAÇÃO ELÉCTRICA
Certificar-se de que:
- a instalação tem uma potência suficiente.
- as linhas de alimentação estão em bom estado,
- o diâmetro dos fios está em conformidade com as
regras de instalação.
- a sua instalação deve estar equipada com uma
protecção térmica de 16 amperes.
Em caso de dúvida, consulte o seu instalador
electricista.
A ligação eléctrica deve ser efectuada antes da
colocação do aparelho no móvel.
A segurança eléctrica deve ser assegurada por um
encastramento correcto. Durante o encastramento e
as operações de manutenção, o microondas deve
ser desligado da corrente eléctrica e os fusíveis
devem ser desligados ou retirados.
O microondas deve ser ligado com um cabo de
alimentação (normalizado) de 3 condutores de
1,5 mm² (1 ph + 1N + terra) e devem ser ligados à
rede 220-240 V ~ monofásica através de uma
tomada de corrente 1 ph + 1N + terra normalizada
CEI 60083 ou de conformidade com as regras de
instalação. O fio de protecção (verde/amarelo) é
ligado ao terminal do aparelho e deve ser ligado
à terra da instalação.
Em caso de ligação com uma tomada de corrente,
esta deverá manter-se acessível após a instalação
do aparelho.
O neutro do forno (fio azul) deve ser ligado ao
neutro da rede.
Preveja na sua instalação eléctrica um dispositivo
acessível pelo utilizador que deve permitir separar o
aparelho da tomada e com uma abertura de
contacto de pelo menos 3 mm ao nível de todos os
pólos.
Se o cabo de alimentação estiver danificado, deve
ser substituído pelo fabricante, o seu serviço pósvenda ou uma pessoa igualmente habilitada de
modo a evitar qualquer perigo.
Atenção:
Não nos responsabilizaremos em caso de
acidente ou incidente resultante de uma ligação
à terra inexistente, defeituosa ou incorrecta.
Se o forno apresentar qualquer anomalia,
desligue o aparelho ou retire o fusível
correspondente à linha de ligação do mesmo.
IInnssttaallaaççããoo ddoo sseeuu aappaarreellhhoo
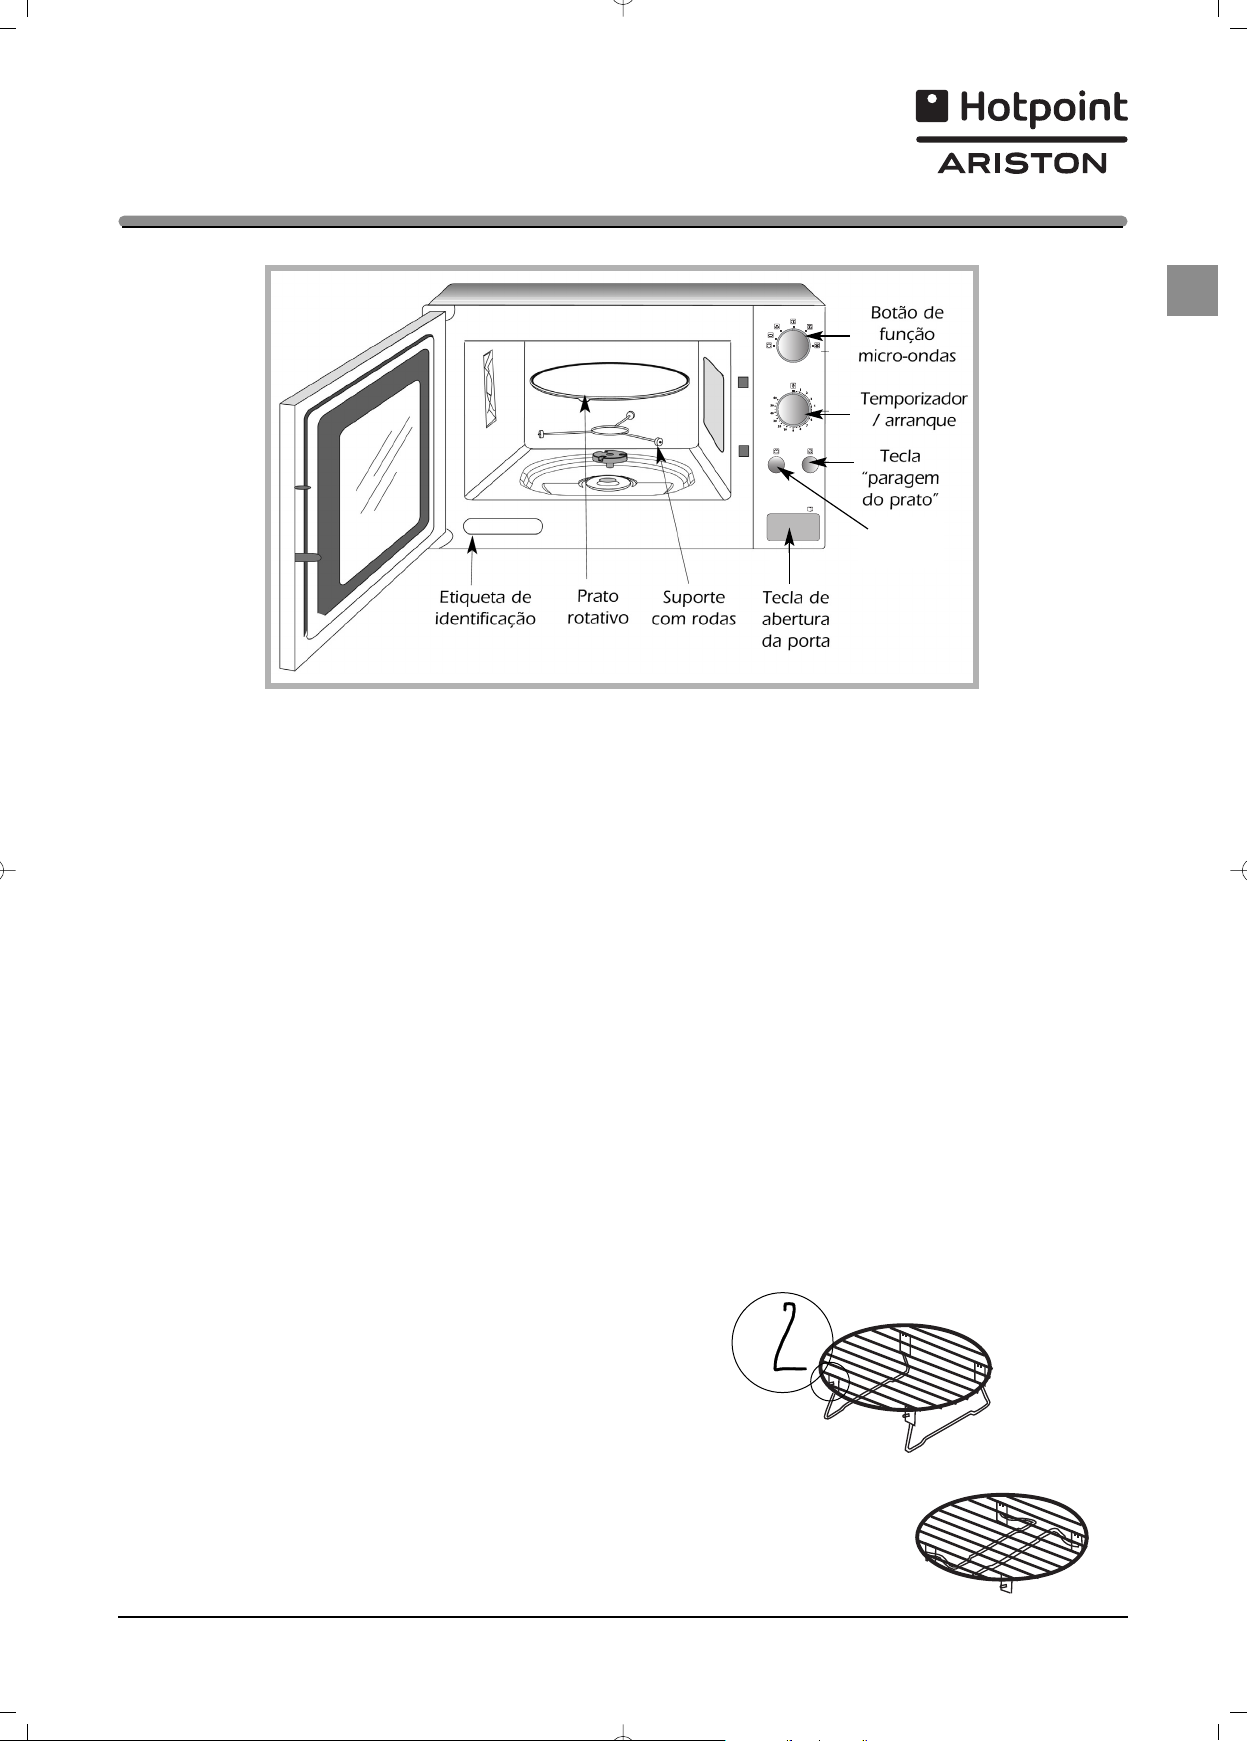
z
PRATO GIRATORIO :
permite cozer os alimentos de forma homogénea
e sem necessidade de manipulação.
- Na sua rotação é guiado pelo eixo de
accionamento e o suporte com roletos gira em
ambos os sentidos.
- Se o prato não girar, verificar se todos os
componentes estão bem instalados.
- Pode ser utilizado como tabuleiro.
z
SUPORTE DE ROLETOS :
Não tente rodar manualmente o suporte de
roletos, pois, pode danificar o forno. Em caso
de deficiente rotação, assegure-se de que não
existem corpos estranhos debaixo do prato.
z
POTÊNCIA RESTITUÍDA : 900 W
• GRELHADOR : *
permite dourar os alimentos como gratinados,
carnes ...
AApprreesseennttaaççããoo ddoo aappaarreellhhoo
41
PT
* conforme o modelo
Tecla
grelhador
Aquando da sua utilização a grelha deve obrigatoriamente estar bem centrada sobre o prato rotativo.
A grelha não deve em nenhum caso ser utilizada com outros recipientes metálicos em função micro-ondas,
grelhador + micro-ondas ou calor circulante + micro-ondas.
No entanto, pode aquecer um alimento num recipiente de alumínio isolando a grelha
com a ajuda dum prato.
A grelha de fechar :
Para fechar em posição baixa :
puxar os ganchos para o interior e fechar os pés
em função grelhador ou grelhador + micro-ondas :
escolher o nível conforme o prato para grelhar
- em posição alta para alourar os alimentos de fraca espessura
- em posição baixa para os outros alimentos.
em função calor circulante ou calor circulante + micro-ondas :
coloque o prato sempre sobre a grelha fechada.
A grelha 2 posições
posição
baixa
(fechada)
Æ
Æ
Æ
posição
alta
Manuel dde iinstruções *

42
PT
O forno é programado com o auxílio do selector de funções (que
permite também regular a potência de micro-ondas) e do
temporizador (que acciona também o arranque do aparelho).
Depois de ligar o aparelho à corrente eléctrica:
- Abrir a porta, colocar o alimento para cozinhar dentro do forno e
fechar a porta. Verificar se esta ficou bem fechada, pois, caso
contrário, o forno não funciona.
- Seleccionar a potência de micro-ondas com o selector de
funções.
- Programar o tempo com o temporizador
Quando o tempo desejado for inferior a dois minutos, rodar o
selector para além dos dois minutos e, depois, retroceder até à
posição desejada.
- Se usar uma assadeira grande, seleccione a tecla "Paragem
Prato" .
Nesse caso, é necessário fazer rodar o prato ou misturar o
conteúdo a meio do tempo do cozinhado. No final do cozinhado
desbloquear esta tecla.
- Fechar a porta. O prato começa a girar e o forno fica iluminado.
No final do cozinhado, actua um aviso acústico, o forno pára
automaticamente e a luz apaga.
- Abrir a porta.
- Se abrir a porta antes do final do programa e se o alimento já
estiver pronto, retroceder com o temporizador para a posição 0
antes de fechar a porta.
Caso contrário, voltar a fechar a porta e o programa prossegue
até ao final do tempo programado.
Nunca pôr o forno a funcionar em vazio.
UUttiilliizzaaççããoo

43
PT
UM PEQUENO PROBLEMA ! QUE FAZER?
O forno faz demasiado ruído
z
Ajustar o pé regulável. Limpar os rolamentos e as suas zonas
debaixo do prato rotativo.
O prato não gira correctamente
z
Limpar as rolas e as sua zona de rolamenta baixo do prato
rotativo.
O alimento não aquece
z
Limpar a grelha de aspiração debaixo do
em programa micro-ondas aparelho.Verificar se os utensílios convêm ao forno micro-
ondas.
O aparelho produz faíscas
z
Verificar se o sistema de tracção e o suporte de rodas está
bem posicionado. Limpar bem o aparelho: as gorduras e as
partículas de coze dura. Afastar qualquer elemento metálico
das paredes do forno.
EEqquuiivvaallêênncciiaa ddaass ppoottêênncciiaass
Simbolo Potência Utilização
MINUTARIA
CONSERVAÇÃO
150 W
DESCONGELAÇÃO
ou cozedura
muito suave
300 W
APURAR
500 W
Cozedura lenta
700 W
Cozedura FORTE
900 W
Regular o botão de selecção nesta posição
para utilizar a função "minutaria" (sem cozedura).
Para manutenção de quente e para descongelar
manteiga, natas, queijo, gelados ou qualquer
tipo de alimentos delicados.
Para descongelar todos os tipos de alimentos,
para terminar as cozeduras delicadas, ou para
cozer lentamente.
Para cozinhar peixes e aves.
Para terminar as preparações começadas
em COZEDURA tais como feijões, lentilhas,
doces de leite.
Para aquecer todos os alimentos liquidos ou
sólidos, bem como alimentos frescos já confeccionados ou congelados.
Para cozinhar legumes e sopas.
*
*
*
*
* conforme o modelo

Utilização da função grelhador
Esta função permite alourar os alimentos como peixe e carne...
E necessário proteger as mãos para tirar os pratos e utilizar recipientes que suportam as
temperaturas elevadas, como os de vidro ou de cerâmica.
ATENÇAO: Aquando da utilização do grelhador, o aparelho fica quente. Afaste, por isso, as
crianças pequenas do aparelho.
É necessário esperar 25 minutos depois de utilizar antes de tocar no grelhador.
Exemplo :
SARDINHAS 6-8
- Pôr o peixe no prato giratório.
Premir a tecla grelhador.
Seleccionar el grelhador com o batão de selecção.
Seleccionar o tempo, 16 / 18 min, com o programadorarranque.
- Fechar a porta, o prato gira, o forno acende, o aparelho funcione.
OO ffuunnççããoo ggrreellhhaaddoorr
44
PT
OO ffuunnççããoo mmiiccrroo-oonnddaass ++ ggrreellhhaaddoorr **
Esta função dá a possibilidade de utilizar simultáneamente as micro-ondas e o grelhador,
permitindo assim uma cozedura rápida.
Exemplo :
MIOLEIRA DE CORDEIRA
(800 g)
- Pôr a mioleira no prato giratório.
Premir a tecla grelhador.
Seleccionar a pôtencia micro-ondas COCÇÃO LENTA com o botão de selecção das
funções.
Seleccionar o tempo, 25 / 30 min, com o programadorarranque.
- Fechar a porta, o prato gira, o forno acende, o aparelho funcione.
* conforme o modelo

45
PT
z
ADVERTÊNCIA: Recomenda-se que limpe o
aparelho regularmente e que
retire qualquer depósito
alimentar no interior e no
exterior do aparelho. Utilizar
uma esponja húmida e água
com sabão. Se a limpeza do
aparelho não for correcta, a
sua superfície degrada-se e
afecta de maneira inexorável
a duração de vida do
aparelho, criando assim uma situação de perigo.
Se a porta ou a junta de porta estiver estragada,
o forno não deve ser utilizado antes de ele ter
sido reparado por um técnico competente.
z
Nunca limpar o
aparelho com um
produto de
limpeza a vapor.
z
É desaconselhada
a utilização de
produtos
abrasivos, de
álcool ou de diluente.
z
Em caso de cheiros desagradáveis ou de forno
sujo, faça ferver água adicionada de sumo de
limão ou de vinagre numa chávena durante 2
minutos e limpe as paredes com um pouco de
detergente para a loiça.
z
O prato pode ser retirado para facilitar a limpeza.
Pa ra tal, segure nele pegando-lhe nas zonas de
acesso previstas
para este efeito. Se
retirar o sistema de
tracção, evite que a
água penetre nos
orifícios do eixo do
motor.
Não se esqueça de voltar a colocar o sistema de
tracção, o suporte de rodinhas e o prato
giratório.
z
Se o aparelho sofrer uma avaria qualquer :
- Verificar se a porta não está deformada.
z
Se o aparelho não funcionar, antes de chamar o
reparador :
- Verificar o fio
eléctrico.
- Verificar se a porta foi
fechada
correctamente.
- Verificar a sua
programação.
ATENÇÃO: nunca tente fazer qualquer reparação.
ADVERTÊNCIA: É perigoso para uma pessoa que
não é especialista efectuar qualquer operação de
manutenção ou de reparação que implique a
retirada do tampo que protege contra a exposição à
energia dos microondas.
Qualquer intervenção no seu aparelho deve ser
efectuada por um profissional especializado
depositário da marca.
LLiimmppeezzaa
IT
GB FR
ES
PT NL
Italiano, 1 English, 10 Français, 19
Español, 28 Portoguês, 37 Nederlands, 46
NL
GGeebbrruuiikkssaaaannwwiijjzziinngg
Overzicht
Bestemd voor de gebruiker, 47
Bestemd voor de gebruiker, 48
Installatie van het apparaat, 49
Presentatie, Het inklapbaar rekje *, 50
Gebruik, 51
Vermogens en overeenkomstig gebruik, 52
De grill functie / Magnetron +
grill functie *, 53
Onderhoud en reiniging, 54
Belangrijke veiligheidsaanwijzingen.
Lees ze aandachtig en bewaar ze voor later gebruik.
MAGNETRON
* volgens model

47
NL
Belangrijk:
Bewaar deze gebruiksaanwijzing in de
nabijheid van het apparaat. Indien het apparaat
aan een ander persoon wordt verkocht of
gegeven, dient u de gebruiksaanwijzing hierbij
niet te vergeten. Wij vragen u kennis te nemen
van de aanwijzingen alvorens het apparaat te
installeren en te gebruiken. Zij zijn voor uw
veiligheid en die van anderen opgesteld.
• VEILIGHEIDSAANWIJZINGEN
Het apparaat is uitsluitend bestemd voor
huishoudelijk gebruik, voor het koken en bakken,
het opwarmen of ontdooien van voedingsmiddelen.
De fabrikant is niet aansprakelijk in geval van onjuist
gebruik.
Dit apparaat is niet bestemd voor gebruik door
personen (kinderen inbegrepen) waarvan de
lichamelijke, sensoriële of mentale capaciteiten
beperkt zijn, of personen zonder ervaring of kennis,
behalve onder toezicht van een persoon die instaat
voor hun veiligheid of vooraftgaande instructies over
het gebruik van het apparat.
Controleer of het keukengerei geschikt is voor
gebruik in een magnetronoven.
Om het apparaat niet te beschadigen dient u het
nooit leeg of zonder draaiplateau te laten werken.
Kom niet aan de slotopening aan de voorkant: dit
zou tot beschadiging en dus reparatie van het
apparaat kunnen leiden.
U dient de afdichting en de lijst van de deur
regelmatig na te kijken om u ervan te verzekeren dat
zij niet beschadigd zijn. Indien deze zones
beschadigd zijn dient u het apparaat niet langer te
gebruiken en het te laten controleren door een
vakman.
Houd bij het opwarmen van voedings-middelen in
plastic of papieren verpakkingen, de magnetronoven
in de gaten vanwege eventueel brandgevaar.
Bij de microgolven en microgolven + hete lucht
functie wordt het afgeraden om metalen bakjes,
vorken, lepels, messen alsmede metalen strippen en
nietjes voor diepvries-zakjes te gebruiken.
De inhoud van zuigflessen en potjesvoeding voor
baby’s moet eerst worden geschud of geroerd en de
temperatuur moet voor consumptie worden
gecontroleerd om verbranding te voorkomen.
Verwarm een zuigfles nooit met de speen erop
(explosiegevaar).
Kinderen dienen verhinderd te worden met het
apparaat te spelen.Laat kinderen de magnetronoven
nooit gebruiken zonder toezicht behalve als hiervoor
aangepaste instructies zijn gegeven zodat zij de
magnetronoven op veilige wijze kunnen gebruiken
en de gevaren van verkeerd gebruik kunnen
begrijpen.
Gebruik altijd ovenwanten wanneer u schalen uit de
magnetronoven haalt. Sommige schalen absorberen
de warmte van de gerechten en zijn dus heet.
Vloeistoffen en andere voedingsmiddelen moeten
niet worden opgewarmd in afgesloten schalen
vanwege het explosiegevaar.
Het wordt afgeraden om eieren in de schaal en hele
harde eieren in een magnetronoven te verwarmen
omdat deze uit elkaar kunnen spatten, zelfs na het
koken.
Het opwarmen van dranken in de magnetronoven
kan het plotseling opspuiten van de kokende
vloeistof veroorzaken. Wees voorzichtig bij het uit de
magnetronoven halen.Wanneer u kleine
hoeveelheden opwarmt (een worstje, een croissant,
enz.) zet er dan een glas water naast.Wanneer het te
lang in de magnetronoven blijft kan het
voedingsmiddel uitdrogen en verbranden. Om dit
soort incidenten te vermijden dient u nooit dezelfde
tijd te gebruiken die voor een traditionele oven
wordt voorgeschreven.
Bij rook de magnetronoven stopzetten of de stekker
uit het stopcontact halen en de deur dicht laten
opdat eventuele vlammen worden gedoofd.
BBeesstteemmdd vvoooorr ddee ggeebbrruuiikkeerr
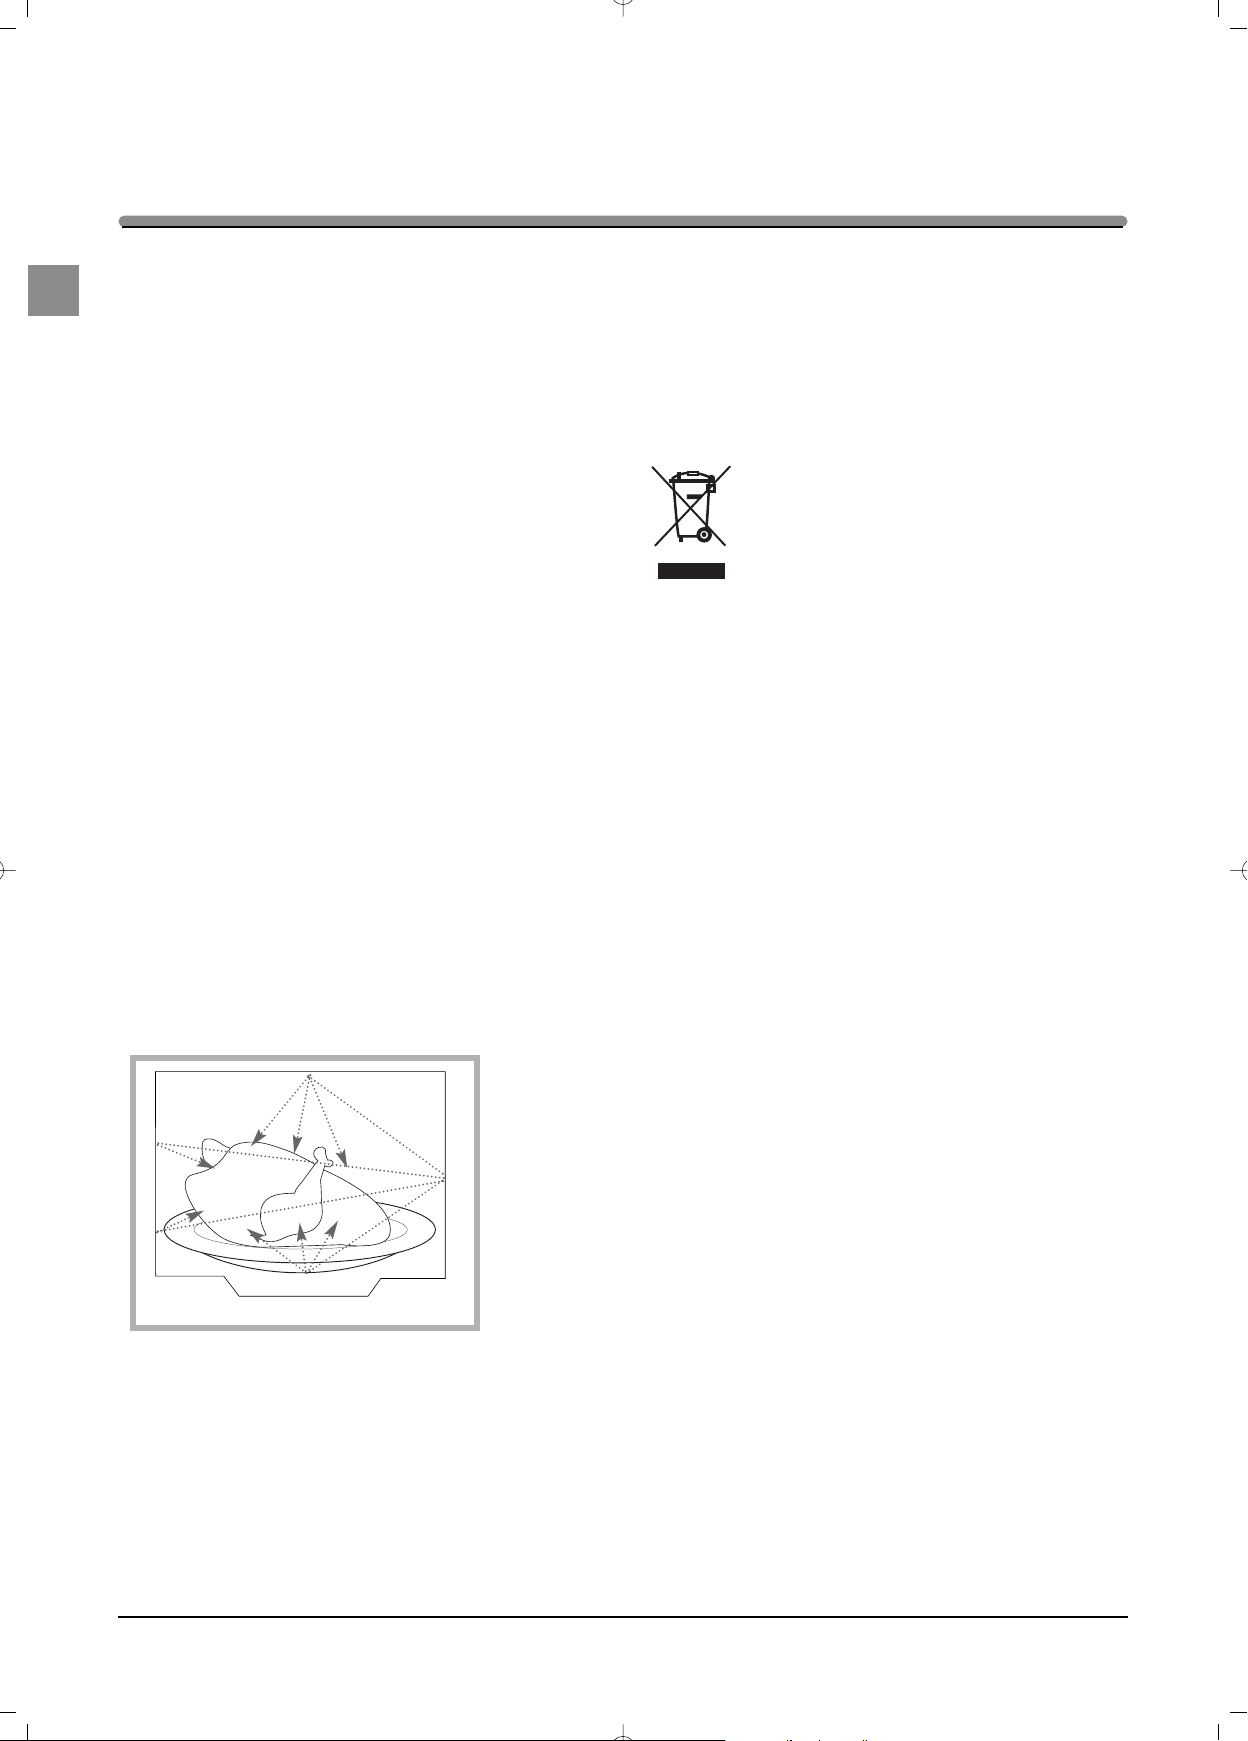
48
NL
• WERKINGSPRINCIPE
De microgolven die voor het koken worden gebruikt
zijn elektromagnetische golven. Deze zijn aanwezig
in ons dagelijks leven, zoals radiogolven, licht of
infraroodstraling.
Hun frequentie bevindt zich in de 2450 MHz band.
Kenmerken:
• Zij worden teruggekaatst door metaal.
• Zij doordringen alle andere materialen.
• Zij worden door watermoleculen, vet en suiker
geabsorbeerd.
Het voedingsmiddel wordt aan microgolven
blootgesteld. Deze brengen de moleculen in
beweging wat verwarming veroorzaakt.
De golven komen tot ongeveer 2,5 cm in het
voedingsmiddel. Indien het voedingsmiddel dikker is
wordt het doorbakken door geleiding, zoals bij
traditioneel koken.
Het is goed om te weten dat microgolven alleen een
thermisch (opwarmend) effect hebben op het
voedingsmiddel en dat dit niet schadelijk is voor de
gezondheid.
• MILIEUBESCHERMING
Het verpakkingsmateriaal van dit apparaat is
recyclebaar. Doe mee aan de recycling en draag bij
aan de bescherming van het milieu door dit
materiaal in de hiervoor bestemde
gemeentecontainers te deponeren.
Uw apparaat bevat tevens vele
recyclebare materialen. Daarom is het
voorzien van dit logo wat aangeeft dat de
gebruikte apparaten van ander afval
dienen te worden gescheiden. De
recycling van de apparaten die door uw
fabrikant wordt georganiseerd wordt op deze manier
onder de beste omstandigheden uitgevoerd,
overeenkomstig de Europese richtlijn 2002/96/CE
betreffende elektrisch en elektronisch afval.
Informeer bij uw gemeente of bij uw verkoper naar
de dichtstbijzijnde inzamelplaats voor uw oude
apparaten. Wij danken u voor uw bijdrage aan de
bescherming van het milieu.
BBeesstteemmdd vvoooorr ddee ggeebbrruuiikkeerr
Fig.01

49
NL
• VOOR DE AANSLUITING
Let op:
Controleer of het apparaat geen schade heeft
ondervonden tijdens het vervoer (deur of
afdichting vervormd, enz...). Mocht u voor het
eerste gebruik schade aan het apparaat
constateren, neem dan contact op met de
verkoper.
Om de referenties van het apparaat in de
toekomst makkelijk terug te vinden raden wij u
aan deze op de pagina “Servicedienst en
Klantenrelaties” te schrijven.
• DE ELEKTRISCHE AANSLUITING
Controleer of:
- Het vermogen van de installatie voldoende is,
- De voedingskabels in goede staat zijn.
- De diameter van de kabels overeenkomstig de
installatieregels is.
- Uw installatie is uitgerust met een zekering van 16
ampère.
Raadpleeg bij twijfel uw elektrotechnicus.
Voer de elektrische aansluiting uit alvorens de oven
in het meubel in te bouwen.
De elektrische veiligheid dient te worden verzekerd
door een goede inbouw. De stekker uit het
stopcontact halen bij installatie of onderhoud van
het apparaat, de zekeringen afsluiten of verwijderen.
Het apparaat moet aangesloten zijn met een
voedingskabel (genormaliseerd) met 3 geleiders met
een doorsnede van 1,5 mm² (1 fasedraad
+ 1 nulleider + aarding). Deze geleiders worden
aangesloten op een elektriciteitsnet van 220-240 V
~ monofasig via een genormaliseerd stopcontact 1
fasedraad + 1 nulleider + aarding overeenkomstig de
norm CEI 60083 of overeenkomstig de
installatievoorschriften. De beschermings-draad
(groen/geel) is verbonden met de aansluitklem
van het apparaat en moet worden verbonden met
de aarding van de installatie.
In geval van aansluiting met een aansluits-tekker,
dient deze toegankelijk te blijven na de installatie
van het apparaat.
De nulleider van de oven (blauwe draad) moet met
de nulleider van het elektriciteitsnet verbonden
worden.
Zorg er bij uw elektrische installatie voor dat de
schakelaar toegankelijk is voor de gebruiker zodat
deze het apparaat van het elektriciteitsnet kan
afsluiten. De contact-opening dient tenminste 3 mm
voor alle polen te bedragen.
Indien de voedingskabel is beschadigd, moet deze
door de fabrikant, de servicedienst of een ander
gekwalificeerd persoon veiligheidshalve worden
vervangen.
Let op:
Onze aansprakelijkheid vervalt bij een
ongeval ten gevolge van een afwezige of foute
aarding.
Indien de magnetronoven een willekeurig
probleem vertoont trek dan de stekker uit het
stopcontact of verwijder de zekering die
overeenkomt met de aansluitingskabel van de
magnetron.
IInnssttaallllaattiiee vvaann hheett aappppaarraaaatt

50
NL
z
Het DRAAIPLATEAU :
Zorgt voor het volledig automatisch en homogeen
bereiden van een schotel.
- Het plateau wordt door de aandrijving en de
steun met wieltjes geleid in zijn beweging.
- Het draait onwillekeurig in twee richtingen.
- Controleer of de onderdelen goed op hun
plaats staan als het niet draait.
- Het kan als kookplaat gebruikt worden.
z
De STEUN MET WIELTJES :
- Tracht niet de draaischotelsteun handmatig te
doen draaien, u riskeert het aandrijvingssysteem te beschadigen. Controleer in geval
van slechte rotatie dat er zich geen vreemde
voorwerpen onder het plateau bevinden.
z
NUTTIG VERMOGEN : 900 W
• GRILLEN:*
Met deze functie kan u gerechten zoals gratins en
viees mooi bruinen.
PPrreesseennttaattiiee
* volgens model
Stop
Draaiplateau
Deutoets
Grill
Functies
Bij gebruik ervan bij de grill / magnetron + grill functie moet u erop letten dat het rekje goed in het midden van
het draaiplateau staat.
Het rekje mag in geen geval worden gebruikt met andere metalen schotels in de functies magnetron, grill +
magnetron of hetelucht + magnetron.
U kunt echter wel etenswaar in een aluminium bakje opwarmen, mits u dit van het rekje scheidt d.m.v. een
bordje.
Om in lage stand te klappen :
Druk de haakjes naar binnen en vouw de poten terug
Gril of Magnetron + Gril functie :
de hoogte selecteren naar gelang het te bereiden gerecht :
- hoog om een goudbruin korstje te verkrijgen
- laag voor de overige schotels
Heteluchtcirculatie of heteluchtcirculatie + magnetron functie :
De schotel altijd plaatsen op het ingeklapte rooster.
Æ
Æ
Æ
Het rekje 2-posities
Lage stand
(ingeklapt)
Hoge
stand
Het iinklapbaar rrekje *

51
NL
De programmering wordt gedaan met behulp van de
functiekeuzeknop, waarmee het vermogen van de magne-tron en
de tijdschakelaar kunnen worden ingesteld.
Nadat de stekker in het stopcontact is gedaan:
- Open de deur. Plaats de etenswaar in de oven en sluit de deur.
Als de deur niet goed gesloten werd, zal het apparaat niet
werken.
- Selecteer het vermogen van de magnetron met behulp van de
functiekeuzeknop.
- Programmeer de tijd met behulp van de start-tijdschakelaar
Kies de tijd met behulp van de knop van de tiJdklok. Bij een
gewenste tijd van minder dan 2 minuten, moet de knop verder
dan 2 minuten worden gedraaid en weer terug worden gezet in
de gewenste stand.
- Bij gebruikmaking van een grote schotel waardoor het
draaiplateau niet kan ronddraaien drukt u op de stilstaand
plateau toets .
In dat geval is het noodzakelijk het gerecht halverwege de
bereidingstijd te keren of te roeren. Let op dat aan het einde van
het programma deze functie weer wordt uitgezet.
- Deur sluiten, het plateau begint te draaien en de
binnenverlichting van de oven gaat branden, het apparaat werkt.
Het einde van de bereiding wordt aangegeven door een bel, de
oven stopt automatisch en de binnenverlichting dooft.
- Indien de deur wordt geopend voordat het programma is
beëindigd:
Zet in de gevallen waarin het eten klaar is de tijdschakelaar weer
op stand 0 min alvorens de deur te sluiten. Zo niet, sluit dan de
deur weer, de tijdschakelaar loopt dan verder af.
Laat de oven nooit leeg werken.
GGeebbrruuiikk

52
NL
PROBLEMEN ! VERHELPEN ?
Het plateau draait niet correct.
z
Reinig de wieltjes en het draaivlak onder het
draaiplateau.
De etenswaar is niet warm op magnetron-functie.
z
Controleer of het keukengerei geschikt is voor de
magnetron-oven.
Het apparaat slaat vonken uit.
z
Het apparaat goed reinigen : ontvetten,
etensrestjes verwijderen.
Haal metalen stukken bij de wanden van de oven
weg.
VVeerrmmooggeennss eenn
oovveerreeeennkkoommssttiigg ggeebbrruuiikk
Symbolen FUNCTIE GEBRUIK
TIJDSCHAKELAAR
WARM
HOUDEN
150 W
ONTDOOIEN of
HEEL ZACHTJES
VERWARMEN
300 W
SUDDEREN
500 W
OPWARMEN
700 W
KOKEN
900 W
Voor het warm houden.
Voor het op temperatuur brengen of ontdooien van
boter, creme, kaas, ijs of elk ander teer gerecht.
Voor het ontdooien van alle soorten etenswaar of voor
het beëindigen van kwetsbare bereidingsprocessen.
Voor het koken van vis en gevogelte.
Voor het beëindigen van bereidingen die in de
stand KOKEN zijn begonnen zoals sperziebonen,
linzen, melkprodukten.
Voor het opwarmen van alle vloeibare of vaste
etenswaar, alsook verse of diepgevroren kant-enklaargerechten.
Voor het koken van groenten, en soep.
Zet de keuzeknop op deze stand om de functie
'tijdschakelaar' te gebruiken (zonder bereiding).
*
*
*
*
* volgens model

Met deze functie geeft u een goudbruine kleur aan vis, vlees...
Bij gebruik van de grill dient u uw handen te beschermen bij het uit de oven halen van uw
gerechten en schalen te gebruiken die bestand zijn tegen hoge temperaturen, zoals vuurvast
glas of aardewerk.
WAARSCHUWING: De toegankelijke gedeelten kunnen warm worden bij gebruik van de grill.
Verwijder jonge kinderen.
Laat de grill na gebruik 25 minuten afkoelen alvorens het aan te raken.
Voorbeeld:
SARDINES 6-8
- Leg de vis op het rooster.
Druk op de toets grill.
- Zet de oven op de grillstand met behulp van de selectieknop.
Selecteer de baktijd, 16/18 min, met behulp van de schakelklok - begin.
- Doe de ovendeur dicht, het plateau draait, het licht gaat aan, de grill werkt.
DDee ggrriillll ffuunnccttiiee
53
NL
MMaaggnneettrroonn ++ ggrriillll ffuunnccttiiee **
Met deze functie kunnen de magnetron en grill functies gelijktijdig worden gebruikt
waardoor de baktijd wordt verkort.
Voorbeeld:
LENDESTUK (800 g)
- Leg het vlees in een braadschaal op het plateau.
Druk op de toets grill.
- Selecteer het magnetronvermogen langzaam bakken met behulp van de selectieknop.
Selecteer de baktijd, 25/30 min, met behulp van de schakelklok - begin.
- Doe de ovendeur dicht, het plateau draait, het licht gaat aan, het apparaat werkt.
* volgens model

54
NL
• Regelmatig onderhoud van het apparaat zorgt
ervoor dat dit in goede conditie blijft. Wij bevelen
aan om in de meeste gevallen de te verwarmen
schotels af te dekken om te grote vervuiling tegen
te gaan.
• Let erop dat het aanrecht waarop de oven wordt
geplaatst, steeds proper is ; uw apparaat zou
door het opzuigen van vuil rondom de oven
schade kunnen oplopen.
• Apparaten die alleen de
magnetron-functie hebben
reinigt u met een vochtige
spons met afwasmiddel,
zowel aan debinnen- als aan
de buitenzijde. Reinig de
binnenkant wanneer die nog
wat warm is. Gebruik hiervoor
een zeep spons met heel fijn ijzergaren.
• Bij een bepaalde geur of bij een sterk vervuild
apparaat, moet een kop water waarin citroensap
of azijn is opgelost, 2 minuten worden gekookt,
waarna de wanden met een beetje vloeibaar
afwasmiddel moeten worden gereinigd.
• Het plateau kan worden verwijderd om het
schoonmaken te vergemakkelijken. Neem het
plateau vast aan de
hiervoorspeciaal
voorziene grepen.
Let erop dat er
geen water in het
gat van de
aandrijfas komt als
de aandrijving
wordt verwijderd. Vergeet niet de aandrijving, de
steun met wieltjes en het draaiplateau terug te
plaatsen.
z
De sluitrand van de deur moet altijd goed schoon
zijn. Indien deze oppervlakken beschadigd zijn
door een te grote vervuiling, dan moet voordat
het apparaat wordt gebruikt, beroep gedaan
worden op een gespecialiseerde technicus.
z
Het gebruik van
schurende
produkten, alcohol
of oplosmiddelen
wordt afgeraden,
deze kunnen het
apparaat
beschadigen.
z
Indien het apparaat een stoot of dergelijke heeft
ondergaan :
- Controleer of de deur niet vervormd is.
z
Indien het apparaat niet werkt en vooraleer een
reparateur op te roepen :
- Controleer de
stroomtoevoer.
- Controleer of de deur
goed gesloten is.
- Controleer de
programmering.
ATTENTIE : probeer nooit het apparaat zelf te
repareren.
WAARSCHUWING : reparaties of vervangingen
waarvoor de bescherming tegen de blootstelling van
magnetronenergie moet worden verwijderd, zijn
gevaarlijk en dan ook uitsluitend werk voor
deskundigen.
OOnnddeerrhhoouudd eenn rreeiinniiggiinngg
 Loading...