How it Works
Log In / Sign Up
Buy Points
How it Works
FAQ
Contact Us
Questions and Suggestions
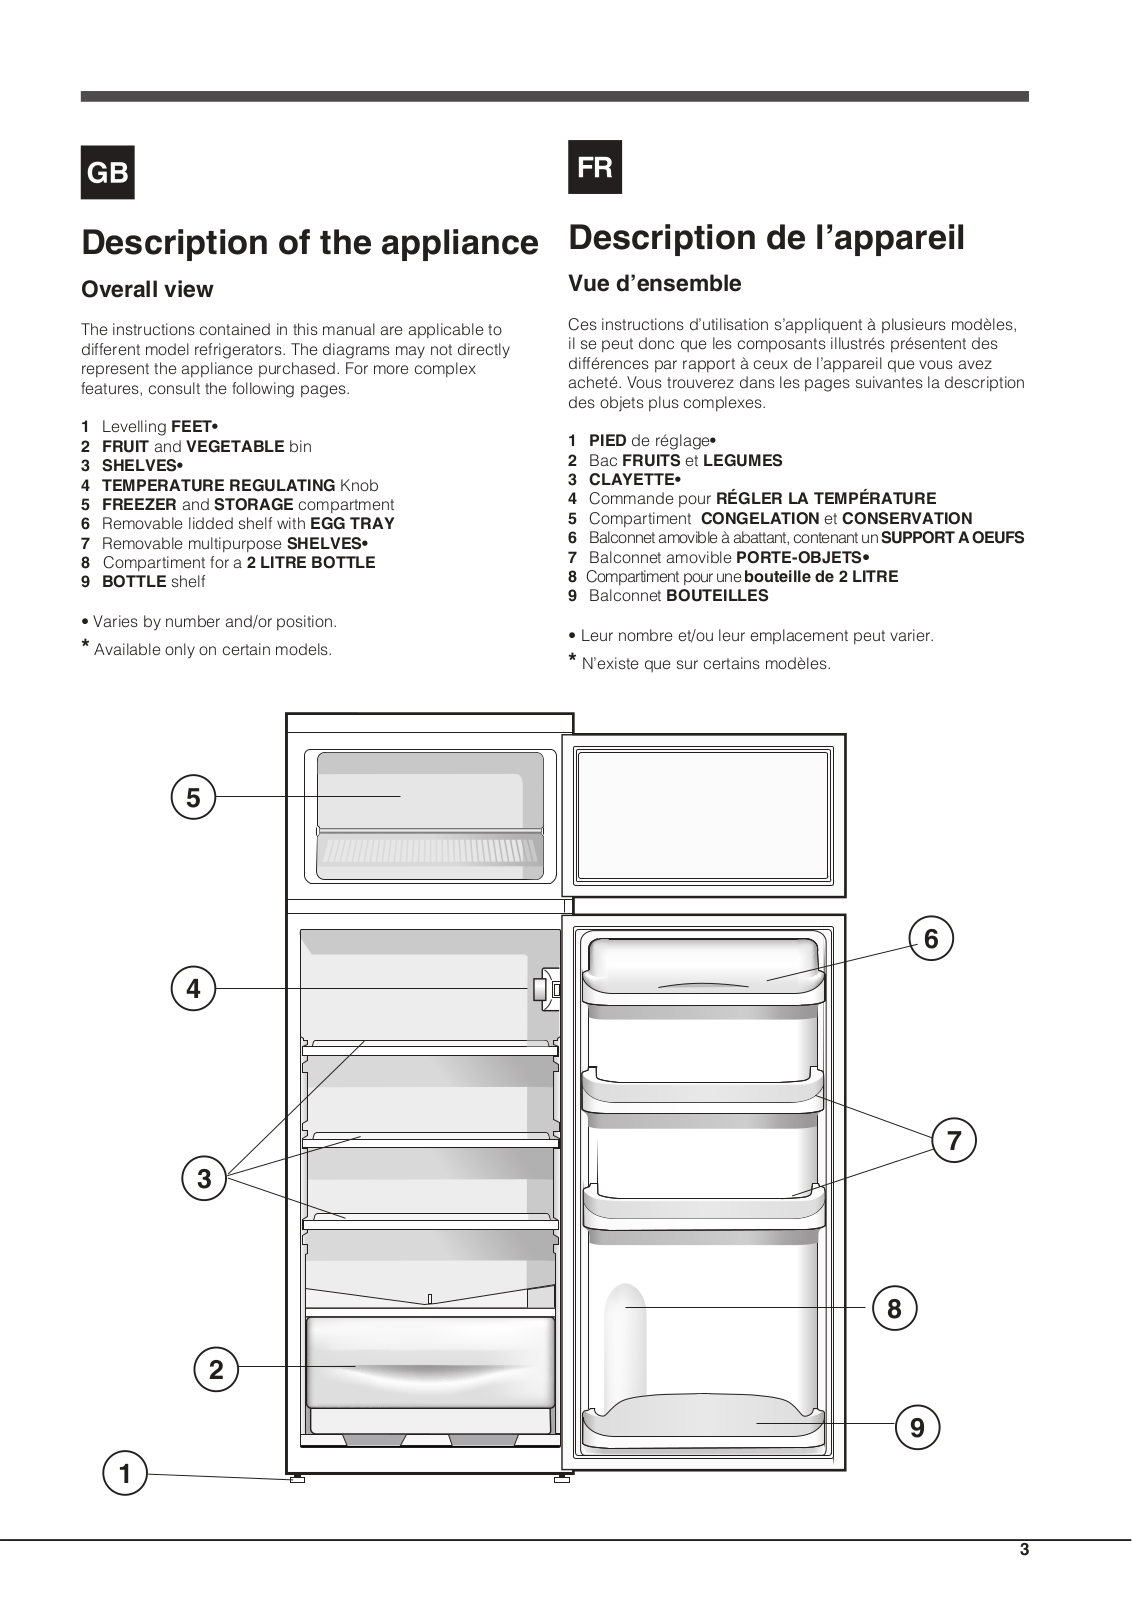
Users
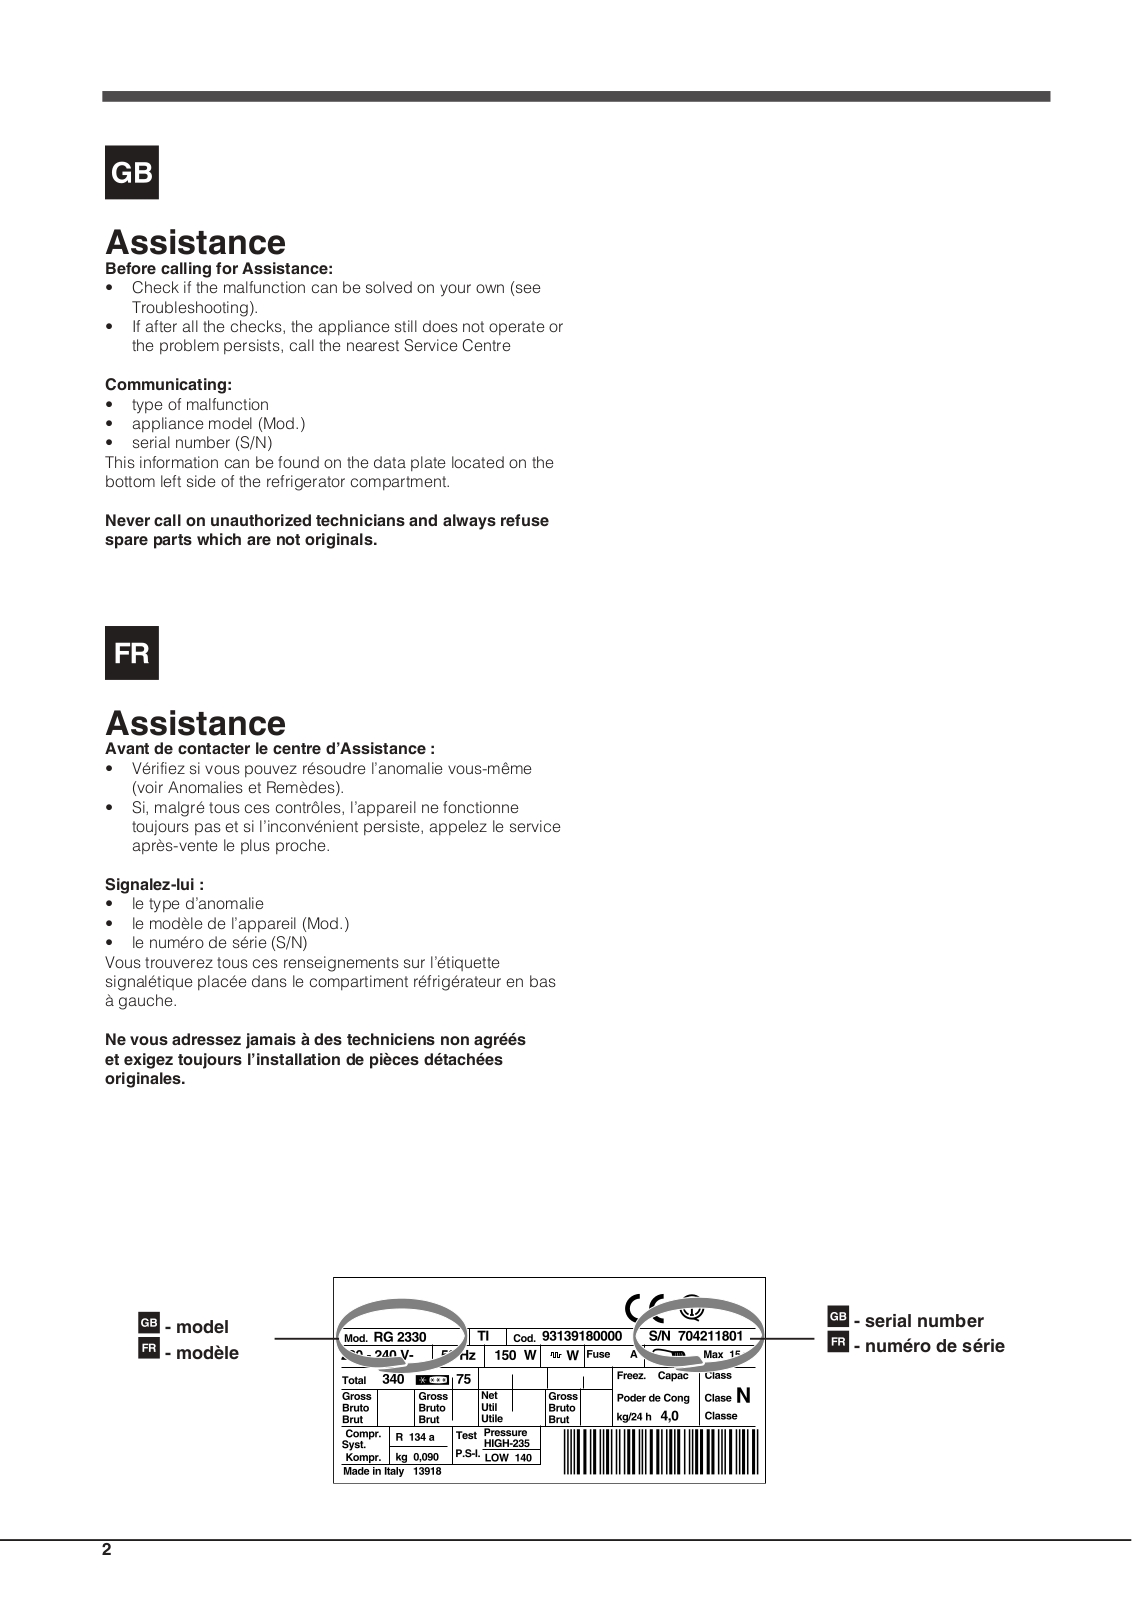
ARISTON
Loading...
M
microSYSTEM
4
MicroSystem 10 RFFI
MKG5 23 (IX)
3
ML 91 IX A
2
ML 99 IX AUS
MM74T
MN 313 BL A
MN 313 IX A
9
MN 413 IX A
7
Mobis 10 Plus
Mobis 8
Mobis 9
MP 454 IX A
7
MP 464 IX A
7
MP 476 IX A
7
MP 764 IX A CN
2
MP 776 IX A
10
MP 796 IX A 60HZ
6
MP 796 IX A (EX)
2
MP-85 X
MS 11
MS 467 IX A
7
MS5 734 IX A
MS5 744 IX A
6
MS 767 IX A CN
2
MS798 IX A
MS 798 IX A 60HZ
MS 798 IX A (EX)
2
MSA31
MSA41
MSAA 33
MSAA46
MSK 103 X HA
MSKA 103 X S
10
MSZ 701 NF HB
MSZ 701 NF HB T
MSZ 701 NF T
MSZ 702 NF
MSZ 702 NF HB
MSZ 702 NF HB T
MSZ 702 NF T
MSZ 802 D
3
MSZ 902 DF (AG)
MTA 1167
MTA 1167 X
MTA 1185
MTA 1185 X
MTA 295 V
MTA3
MTA4611
MTAA 24S (MA)
MTAA 291
MTAA 293 V
MTAA 333 V
MTAA461
MTB4011
MTB 4511 NF
2
MTB 4711 NF
MTB4712
MTM1521
MTM1522
MTM1621
MTM1622
MTM 1711
2
MTM 1711 FF
MTM 1711 HA
MTM1712
MTM1714
MTM1721
MTM1722
MTM1811
MTM1812
MTM 1901
MTM1911
MTM1912
MTM 1921
2
MTM1922
MTP 1911 F/HA
MTP 1912 F/HA
MTZ 521 NF
MTZ 522 NF
MTZ 551 NF
MTZ 552 NF
MTZ 631 NF
MTZ 632 NF
MU13F
MUAA31
MUAA46
MULTI 80-120-160
MVB7125S
MVC7105S
MVE7129X
MVSB6125S
MVSB7105S
MVSB7105X
MVSB 8010
MVSC6105S
MVSE 7125
MVSE 8210
MW 323 BK
Loading...
Loading...
Nothing found
MTAA 24S (MA)
Use & Care [fr]
16 pgs
621.42 Kb
0
Table of contents
Loading...
ARISTON MTAA 24S (MA) Use & Care [fr]
...
ARISTON Use & Care [fr]
Download
Text View
Picture View
Page 1
Page 2
Page 3
Page 4
Page 5
Page 6
Page 7
Page 8
Page 9
Page 10
Page 11
Page 12
Page 13
Page 14
Page 15
Page 16
Loading...
+
hidden pages
Unhide
You need points to download manuals.
1 point = 1 manual.
You can buy points or you can get point for every manual you upload.
Buy points
Upload your manuals
 Loading...

 Use & Care")