How it Works
Log In / Sign Up
Buy Points
How it Works
FAQ
Contact Us
Questions and Suggestions
Users
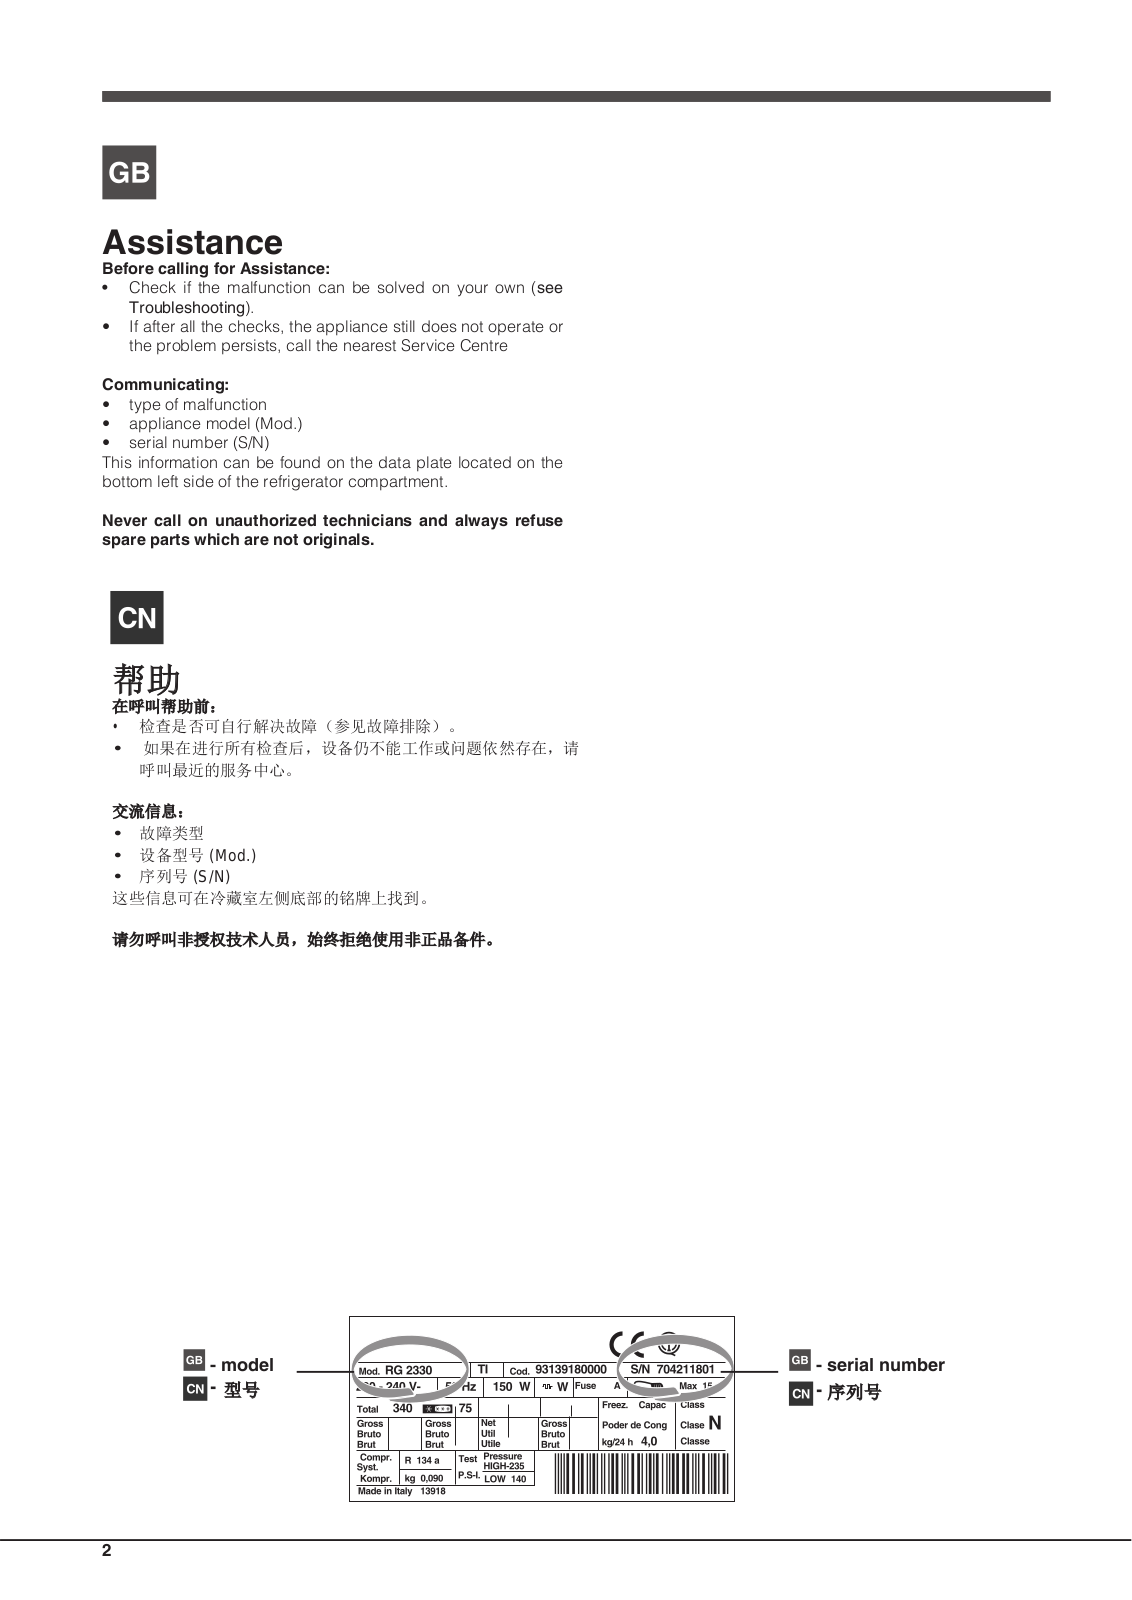
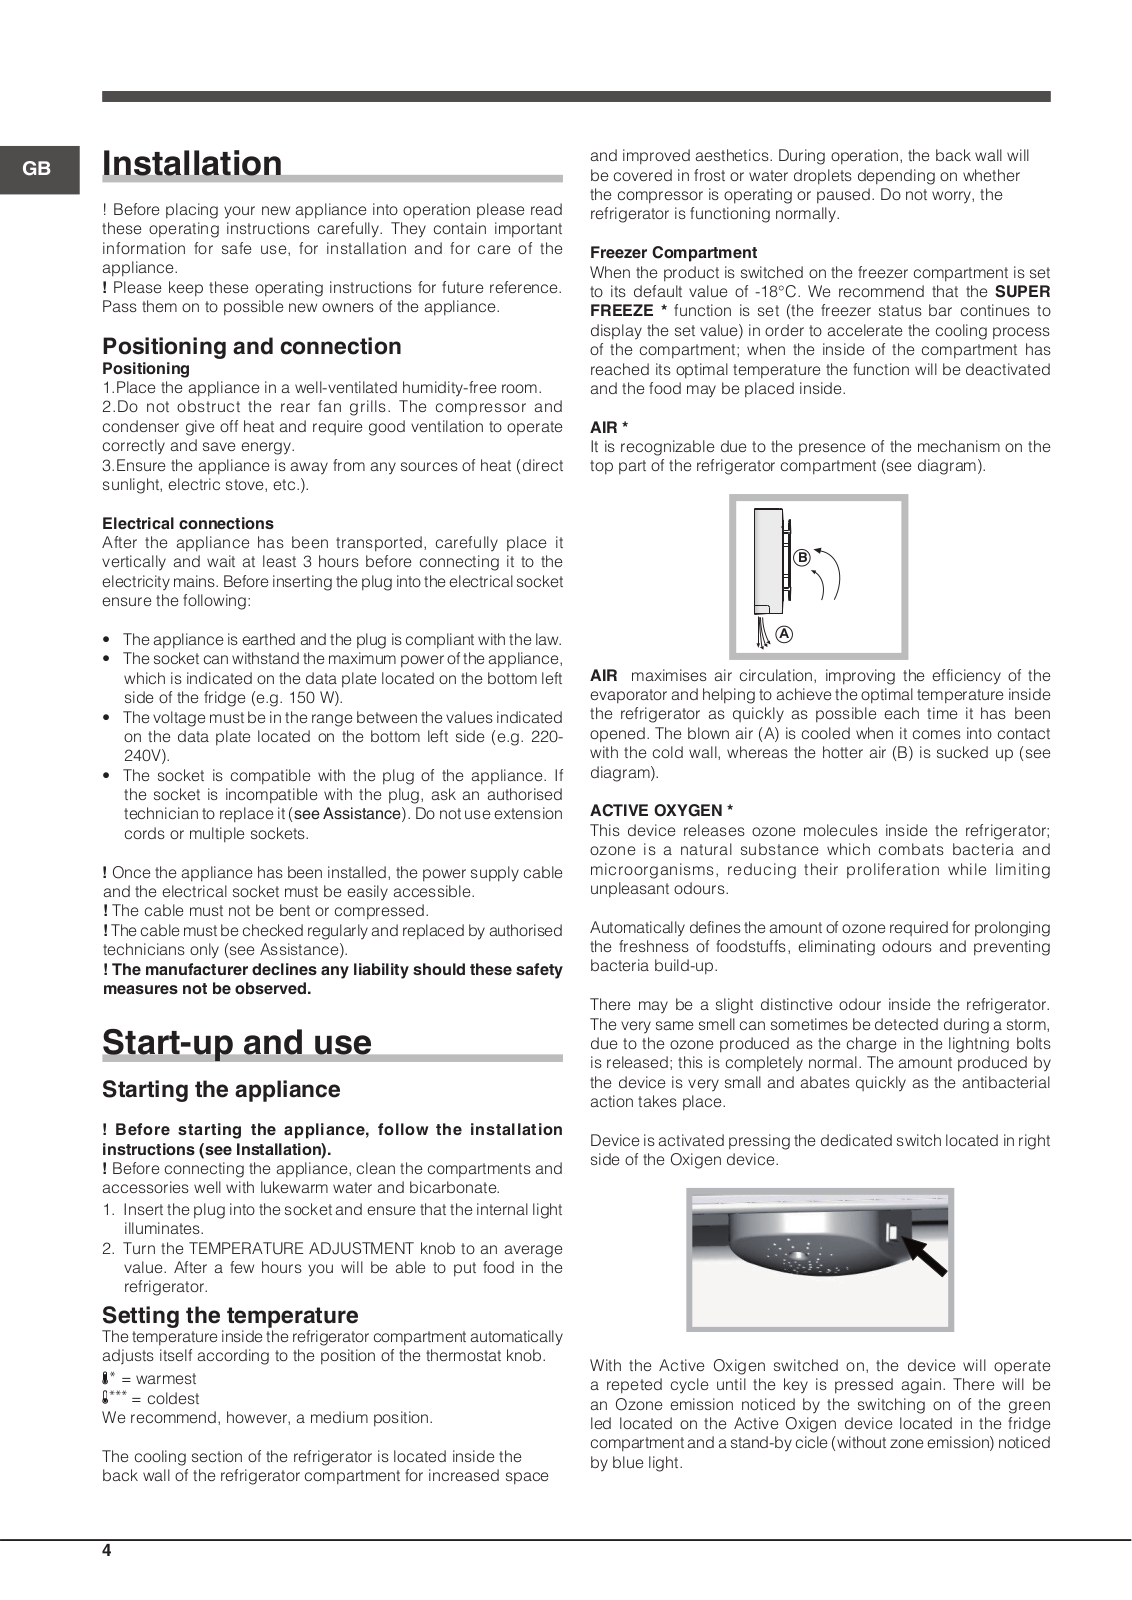
ARISTON
Loading...
A
AWD 12
awd121
AWD716W TW
3
AWM 108
AWM 1297
AXD 100
AZIMUT 20 M FFI
B
B 450
B 450 V
BAI
BASE 100
BASE30
BASE 50
BASE 80
BASIC 23/27 M R - BASIC 23/27 R R
BASIC 23 M
BASIC 23 MFFI
BASIC 23 MFFI R
BC1S
BC1S 200/300/450
BC1S 200L
2
BC1S 300L
2
BC1S 450L
2
BC24
BC2S
BC2S 200/300/450
BC2S 200L
2
BC2S 300L
2
BC2S 450L
2
BC 311 I
BC312
BCB 172137
BCB 173337 V E
BCB 182137
BCB 183337 FF
BCB 183337 V C
BCB 311
BCB 311 AI IT
BCB 311 AI IT S
BCB 311 IT
BCB 311S
BCB 312 AAI
2
BCB 312 AAI S
BCB 312 AI
2
BCB 312 AI S
2
BCB 312 AVI
BCB 313 A WE I
BCB 31 A F (EX)
BCB 31 A T (EX)
BCB 332 AAI
BCB 332 AAI S
BCB 332 AI
BCB 333 AA VE I
BCB 333 A VE I
BCB 33 A (CN)
BCB 33 AF
BCB 33 A F (AUS)
BCB 33 A F (TW)
BCB33AVEIFF
BCB 7030 AA CN
5
BCB 7030 D EX
BCB 7030 F 60HZ
BCB 7030 F AUS
2
BCB 7030 F EX
BCB 7030 F TW
3
BCH
BCH 120L
BCH 160L
BCH 200L
BCH 80L
BCO 35 A VE
2
BCO-M40 IX
2
BCQ 35 A VE
BCR
BCS 311
BCS 311 S
BCS 312 A
BCS 312 AI EU
BCS 312 A S
BCS 313 A VE I
2
BCS 313 V
2
BCS332 A
2
BCS332 Al
BCS 332 A LI
BCS 332 A S
BCS 333 A VE I
2
BCS 333 GE
2
BCS 333 GE S
BCS 333 S
BCZ 35 A VE
2
BCZM400
BCZ M 400 IX
BCZ M40 IX
2
BD 241
BD 241 S
BD 2420
BD 2420 S
BD 2421 S-HA
BD 2421 S-HA 1
B GE
2
Loading...
Loading...
Nothing found
BCB 33 A (CN)
User Manual
12 pgs
2.24 Mb
0
Table of contents
Loading...
ARISTON BCB 33 A (CN) User Manual
...
ARISTON User Manual
Download
Specifications and Main Features
Frequently Asked Questions
User Manual
Download
Page 1
Page 2
Page 3
Page 4
Page 5
Page 6
Page 7
Page 8
Page 9
Page 10
Page 11
Page 12
Loading...
+
hidden pages
Unhide
You need points to download manuals.
1 point = 1 manual.
You can buy points or you can get point for every manual you upload.
Buy points
Upload your manuals
 Loading...

 User Manual")