

Page 1

A45V
TUMBLE DRYER
Use and Care & Installation Instructions
SteCHOIR A TAMBOUR
Utilisation et Entretien et Notice D'lnstallation
SECADORA
Instrucciones et Instalaci6n, Uso y
Mantenimiento
Page 2
English
Page 3
Contents
Important Safety Instructions 3-4
Grounding Instructions 4
Features - Get to know the main parts of your Dryer 5-6
How to use your Dryer 7
The Controls 8-9
Easy Iron Program 10
Sorting your laundry 11
Wash Care Labels 12
Items not suitable for tumble drying 12
Items requiring special attention 13
Guide to Drying Times 14
Caring for your Dryer 15
If something goes wrong 16
Installation Instructions 17
RetentionofthisInstructionBook
This Instruction Book must be kept handy for reference as it contains important details on
the safe and proper use of the appliance.
If you sell or pass the appliance to someone else, or move house and leave it behind, make
sure this Book is also provided so the new owner can become familiar with the appliance
and safety warnings.
Page 4
Important Safety Instructions
Using your Tumble Dryer is easy.
To reduce the risk of fire, electric shock or injury to persons when using
your app ance ! fo ow the bas € precaut °ns nclud ng thefo ow ng!
1. Read all the instructions before using the appliance.
2. Do not dry articles that have previously been cleaned in, washed in, soaked in
or spotted with gasoline, dry-cleaning solvents or other flammable or explosive
substances, as they give off vapours that could ignite or explode.
3. Do not allow children to play on or in the appliance. Close supervision of
children is necessary when the appliance is used near children.
4. Before the appliance is removed from service or discarded, remove the door to
the drying compartment.
5. Do not reach into the appliance if the drum is moving.
6. Do not install or store this appliance where it will be exposed to the weather.
7. Do not tamper with the controls.
8. Do not repair or replace any part of the appliance or attempt any servicing
unless specifically recommended in the user-maintenance instructions.
9. Do not use fabric softener or products to eliminate static unless recommended
by the manufacturer of the fabric softener or product.
10. Do not use heat to dry articles containing foam rubber or similarly textured
rubber-like materials.
11. Clean the lint filter before and after each load.
12. Keep the area around the exhaust opening and adjacent surroundings free
from the accumulation of lint, dust and dirt.
13. The interior of the appliance and exhaust duct should be cleaned periodically
by qualified service personnel.
14. Do not place items exposed to cooking oils in your dryer. Items contaminated
with cooking oils may contribute to a chemical reaction that could cause a load
to catch fire.
SAVE THESE INSTRUCTIONS
IMPORTANT:
A CHILD COULD CLIMB INTO OR TAMPER WITH AN UNATTENDED
TUMBLE DRYER.
WHEN THE MACHINE IS NOT IN USE TURN IT OFF, REMOVE THE PLUG AND
CLOSE THE DOOR.
Page 5
For your safety
ALWAYS •
ALWAYS •
ALWAYS •
ALWAYS •
ALWAYS •
ALWAYS •
When the dryer is not in use, switch off and close the door.
Comply with the specified electrical requirements.
Ensure that your dryer is installed correctly and has adequate
ventilation. (see, "Installation Instructions")
Finish every programme with the cool tumble cycle provided.
Clean the filter, it is essential that the filter is kept clear of lint at all
times.
Observe the rules for drying garments.
CAUTION:
Avoid touching the rear of the dryer when it is
in use, as it may be hot!
Grounding Instructions
Improper connection of the equipment-grounding conductor
can result in a risk of electric shock, Check with a qualified
electrician or service representative or personnel if you are
in doubt as to whether the appliance is properly grounded!
In the event of malfunction or breakdown, grounding will reduce the
risk of electric shock by providing a path of least resistance for electric
current. This appliance is equipped with a cord having an equipment-
grounding conductor and a grounding plug. The plug must be plugged
into an appropriate outlet that is properly installed and grounded in
accordance with all local codes and ordinances.
DO NOT modify the plug provided with the appliance. If it will not fit
the outlet, have a proper outlet installed by a qualified electrician or
exchange the cord with an appropriate one rated for the dryer.
REFER TO THE RATING PLATE FOR VOLTAGE AND CURRENT
REQUIREMENTS (see diagram for location.)
The dryer should be connected to the power source via a suitable
socket which is accessible after installing your dryer.
This dryer must be connected to 30A INDIVIDUAL BRANCH
CIRCUIT.
For full details see 'Installation Instructions' section of this book.
NOTE: IF IN DOUBT ABOUT ANY OFTHE ABOVE CONSULT
A QUALIFIED ELECTRICIAN.
Page 6
Features-Gettoknowthemainpartsofyourdryer
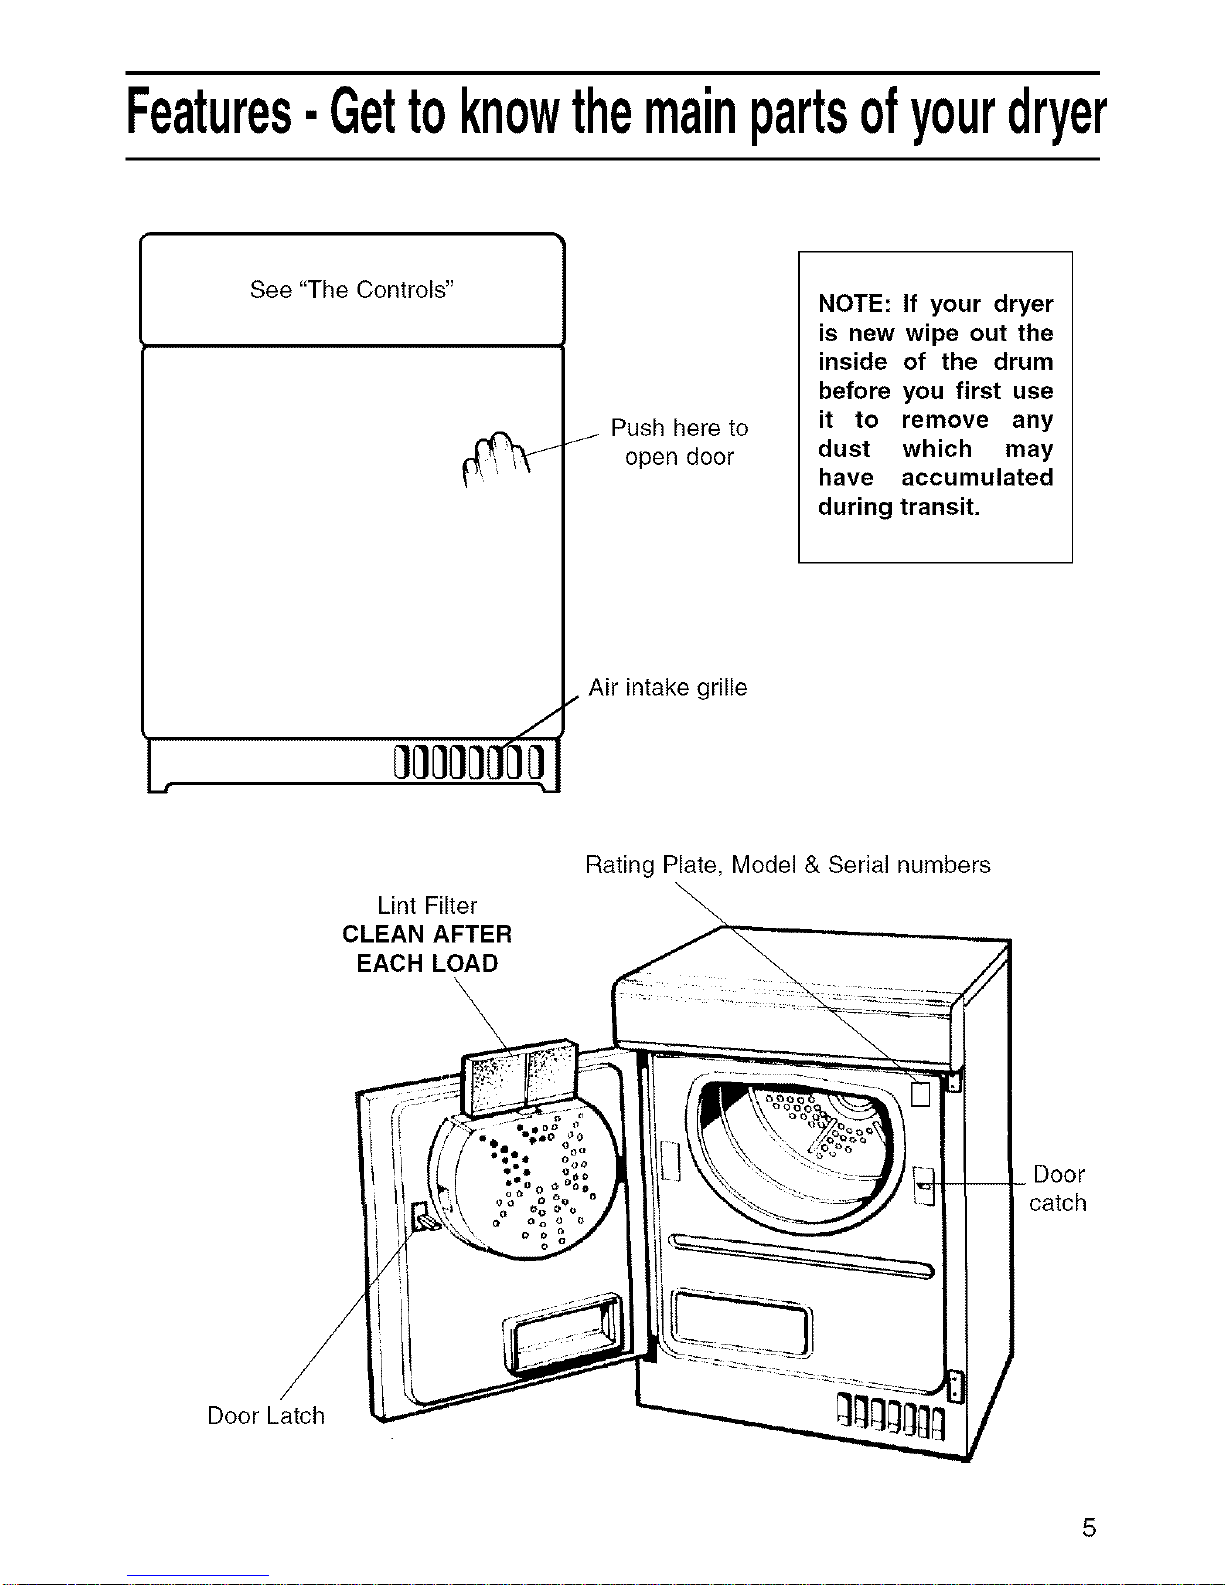
See "The Controls"
f
Push here to
open door
Air intake grille
NOTE: If your dryer
is new wipe out the
inside of the drum
before you first use
it to remove any
dust which may
have accumulated
during transit.
Lint Filter
CLEAN AFTER
EACH LOAD
Rating Plate, Model & Serial numbers
Door
catch
Door Latch
Page 7
Features-Gettoknowthemainpartsofyourdryer
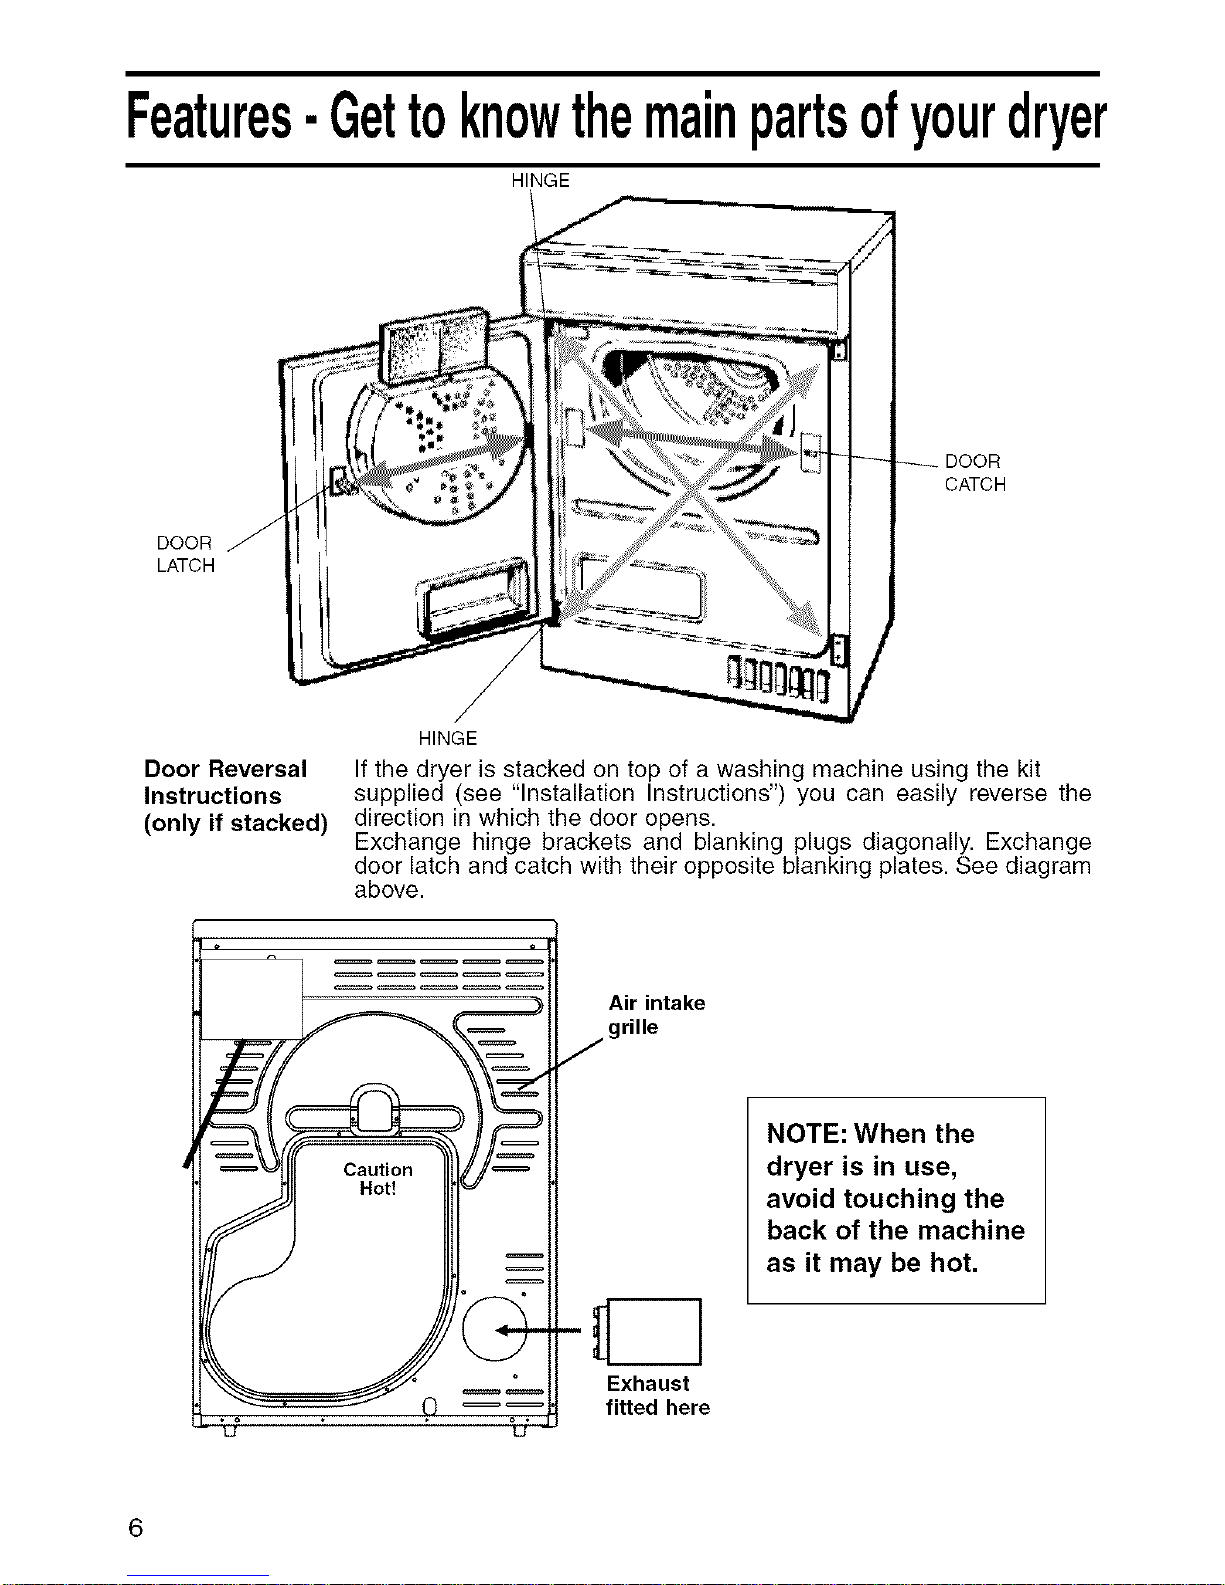
HINGE
DOOR
LATC H
Door Reversal
Instructions
(only if stacked)
DOOR
CATCH
HINGE
If the dryer is stacked on top of a washing machine using the kit
supplied (see "Installation Instructions") you can easily reverse the
direction in which the door opens.
Exchange hinge brackets and blanking plugs diagonally. Exchange
door latch and catch with their opposite blanking plates. See diagram
above.
Air intake
grille
C1
Exhaust
fitted here
NOTE: When the
dryer is in use,
avoid touching the
back of the machine
as it may be hot.
Page 8
Howto useyourdryer
WARNING I
To reduce the risk of fire, electric shock or injury to persons, read the IMPORTANT SAFETY
NSTRUCT ONS before operat ng th s app ance.
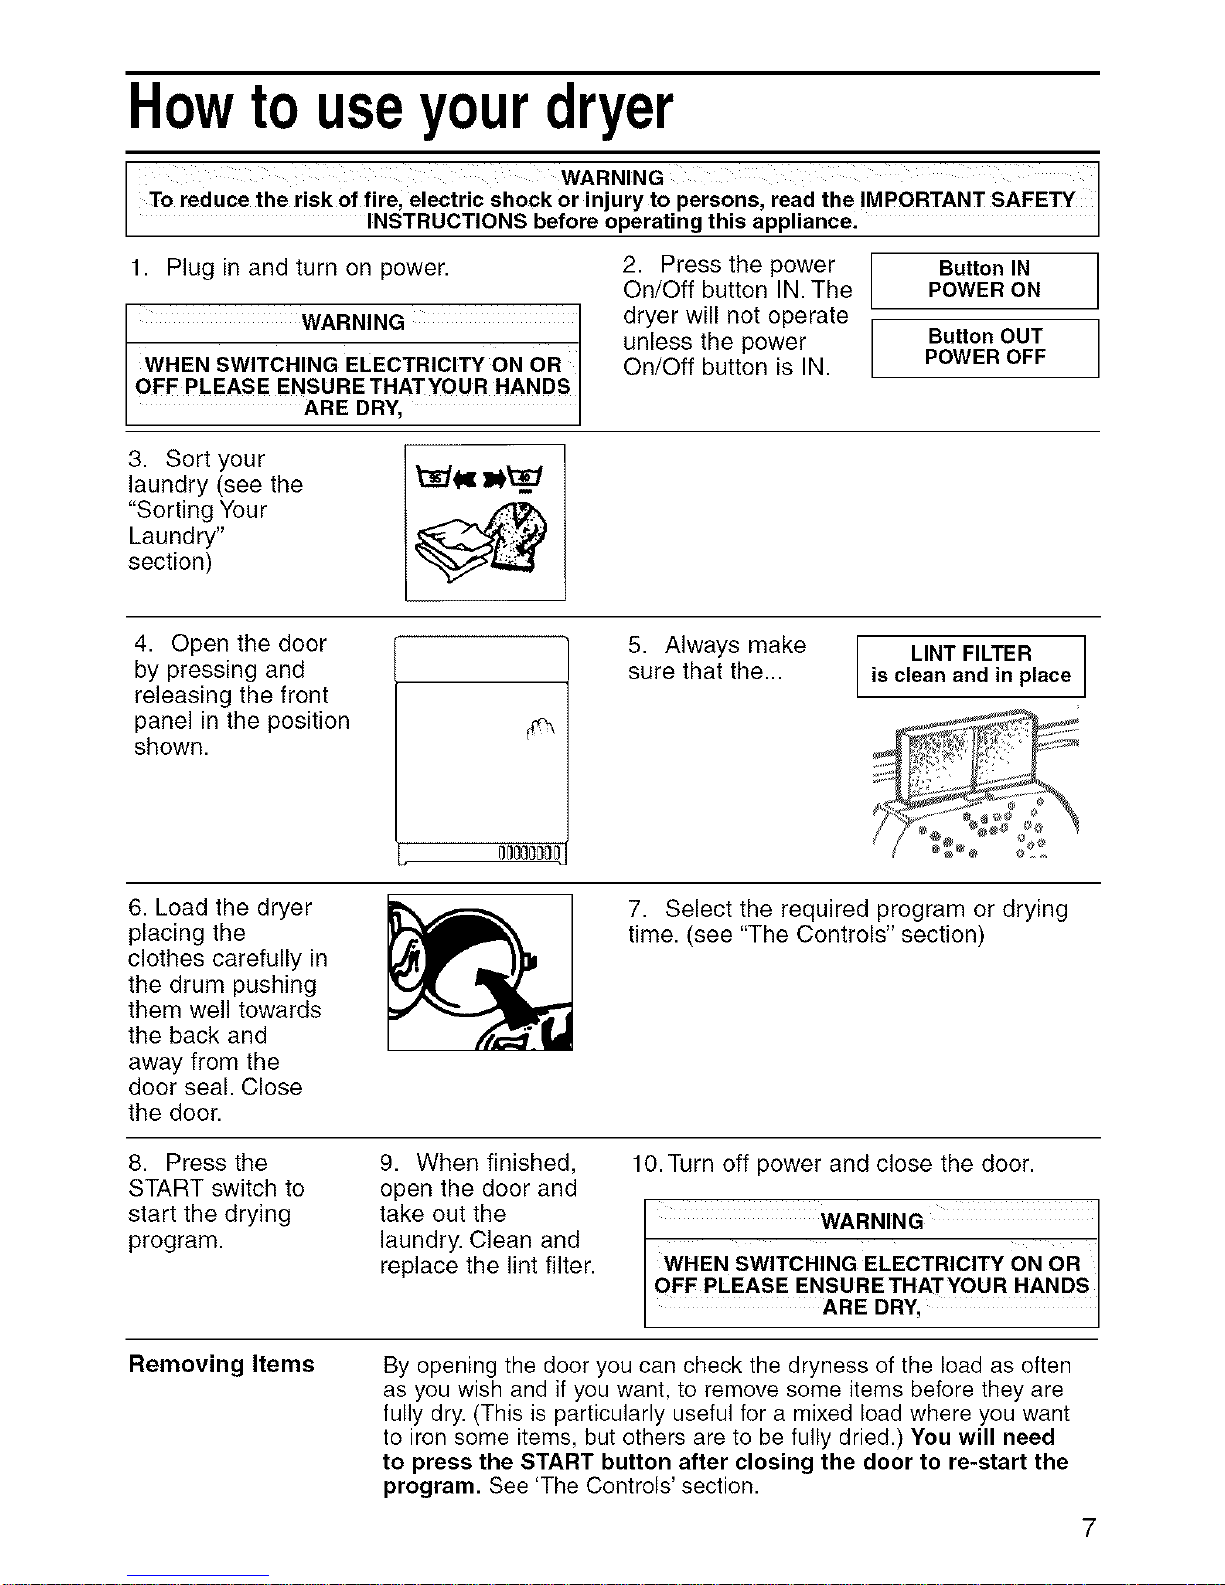
1. Plug in and turn on power.
WARNING
WHEN SWITCHING ELECTRICITY ON OR I
OFF PLEASE ENSURE THATYOUR HANDS
ARE DRY,
2. Press the power ButtonIN
On/Off button IN.The POWERON
dryer will not operate
unless the power Button OUT
On/Off button is IN. POWEROFF
3. Sort your
laundry (see the
"Sorting Your
Laundry"
section)
4. Open the door
by pressing and
releasing the front
panel in the position
shown.
5. Always make
sure that the...
LINT FILTER ]is clean and in place
6. Load the dryer
placing the
clothes carefully in
the drum pushing
them well towards
the back and
away from the
door seal. Close
the door.
7. Select the required program or drying
time. (see "The Controls" section)
8. Press the
START switch to
start the drying
program.
Removing Items
9. When finished,
open the door and
take out the
laundry. Clean and
replace the lint filter.
10. Turn off power and close the door.
WARN,NG
WHEN SWITCHING ELECTRICITY ON OR I
OF F PLEASE ENSURETHATYOUR HANDS I
ARE DRY, I
By opening the door you can check the dryness of the load as often
as you wish and if you want, to remove some items before they are
fully dry. (This is particularly useful for a mixed load where you want
to iron some items, but others are to be fully dried.) You will need
to press the START button after closing the door to re-start the
program. See 'The Controls' section.
Page 9
TheControls
_ A_STON
...............
Power Switch
ON/OFF
Setting the
Program
Program
Options
Starting the Dryer
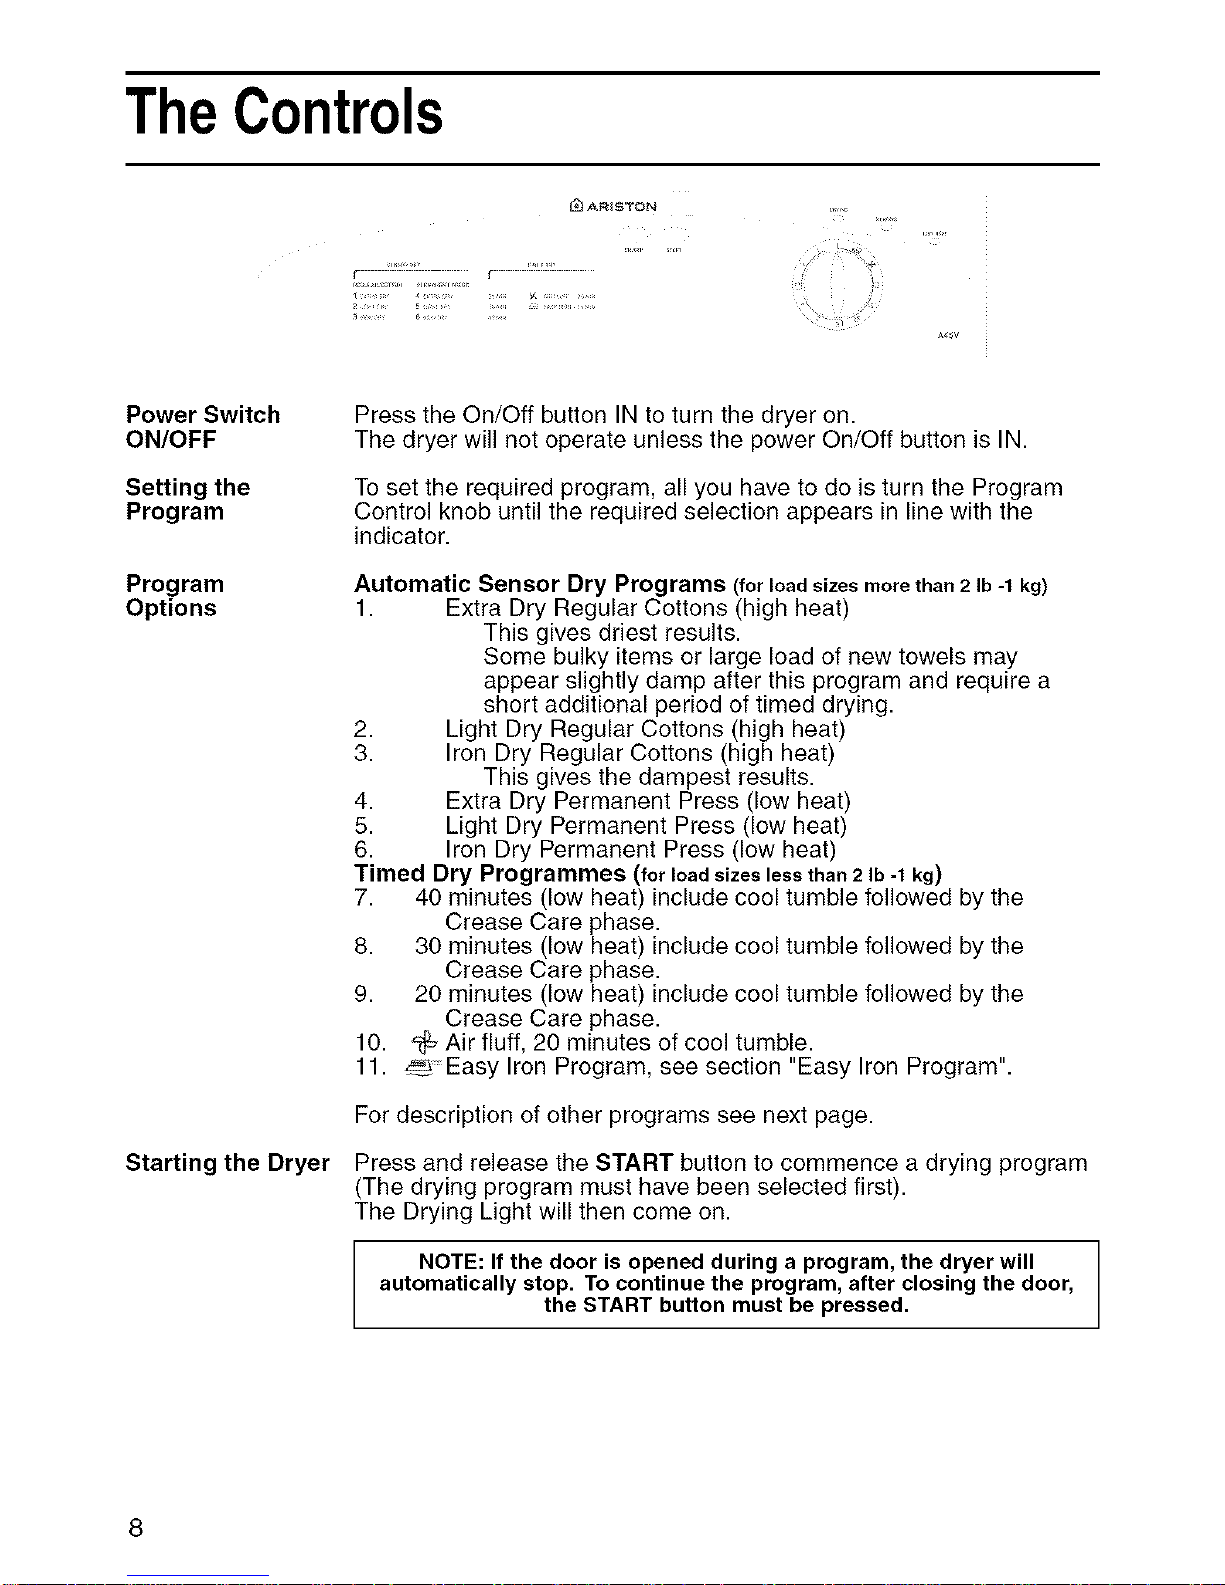
Press the On/Off button IN to turn the dryer on.
The dryer will not operate unless the power On/Off button is IN.
Toset the required program, all you have to do is turn the Program
Control knob until the required selection appears in line with the
indicator.
Automatic Sensor Dry Programs (for load sizes more than 2 Ib -1 kg)
1. Extra Dry Regular Cottons (high heat)
This gives driest results.
Some bulky items or large load of new towels may
appear slightly damp after this program and require a
short additional period of timed drying.
2. Light Dry Regular Cottons (high heat)
3. Iron Dry Regular Cottons (high heat)
This gives the dampest results.
4. Extra Dry Permanent Press (low heat)
5. Light Dry Permanent Press (low heat)
6. Iron Dry Permanent Press (low heat)
Timed Dry Programmes (for load sizes less than 2 Ib -1 kg)
7. 40 minutes (low heat) include cool tumble followed by the
Crease Care phase.
8. 30 minutes (low heat) include cool tumble followed by the
Crease Care phase.
9. 20 minutes (low heat) include cool tumble followed by the
Crease Care phase.
10. fi_ Air fluff, 20 minutes of cool tumble.
11. _ Easy Iron Program, see section "Easy Iron Program".
For description of other programs see next page.
Press and release the START button to commence a drying program
(The drying program must have been selected first).
The Drying Light will then come on.
NOTE: If the door is opened during a program, the dryer will
automatically stop. To continue the program, after closing the door,
the START button must be pressed.
Page 10
TheControls
Drying Light
Heating Light
Low Heat Light
Air Fluff phase
Crease Care
phase
This light will come on whenever a program is active (running).
If this light flashes it means that an automatic programme has
exceeded 180 minutes. For safety reasons this being the maximum
drying time available.
Should this occur, the causes may be:
• The load is too big, or bulky.
• The filter is blocked.
• A cotton load was spun at LOW speed.
• There may be a fault.
Turn the dryer Off, check through the first three causes, and then try
again.
This light comes on during the drying part of the program, except for
the short periods during the drum reverse action.
This light comes on to indicate that the dryer is running on the low
heat setting.
About 10 minutes before the program is completed, the heating
elements will be turned off and the program enters the final 'Air Fluff'
phase. During this phase, the fabric is cooled. You should always
allow the dryer to complete this phase.
By opening the door, you can check the dryness of the load as often
as you wish and if you want, remove some items before they are fully
dry. (This is particularly useful for a mixed load where you want to iron
some items, but others to be fully dried.)
You will need to press the START button after closing the door to
re-start the program. See previous page.
At the end of the drying program it may not be convenient to take out
the clothes immediately. Do not worry, the dryer will protect your
clothes from creasing by gently turning them over occasionally with a
few revolutions of the drum. At the same time a warning buzzer will
sound intermittently to remind you that the clothes are ready to take
out.
Page 11
EasyIr0nProgram
When to use
'Easy Iron'
Important!
'Easy Iron' provides a short program consisting of approximately 8
minutes of heat with a cool tumble period of approximately 2 minutes.
Itis a short conditioning program that softens the fibers, allowing them
to relax and making handling and ironing easier and less time
consuming.
However items are dried, outside on the clothesline, inside on a
radiator, hung around the home or using a tumble dryer, once dry they
usually get left in the same position/place for a long period of time. This
tends to cause garment fiber stiffness which can make the handling of
garments difficult and therefore the ironing time longer. Items dried in
any of the ways described above and left will benefit from the 'Easy
Iron' program.
• The 'Easy Iron' cycle is not a drying program. It has been
designed to condition/soften items that have already been dried
and left unattended in this state for a period of time.
• All materials do not behave in exactly the same way when heated.
For instance, our testing has shown that materials such as
Tencel® and Acrylics are not relaxed quite as effectively by
applying the 'Easy Iron' cycle as we found on the more traditional
Cottons and Polyester-cotton blends.
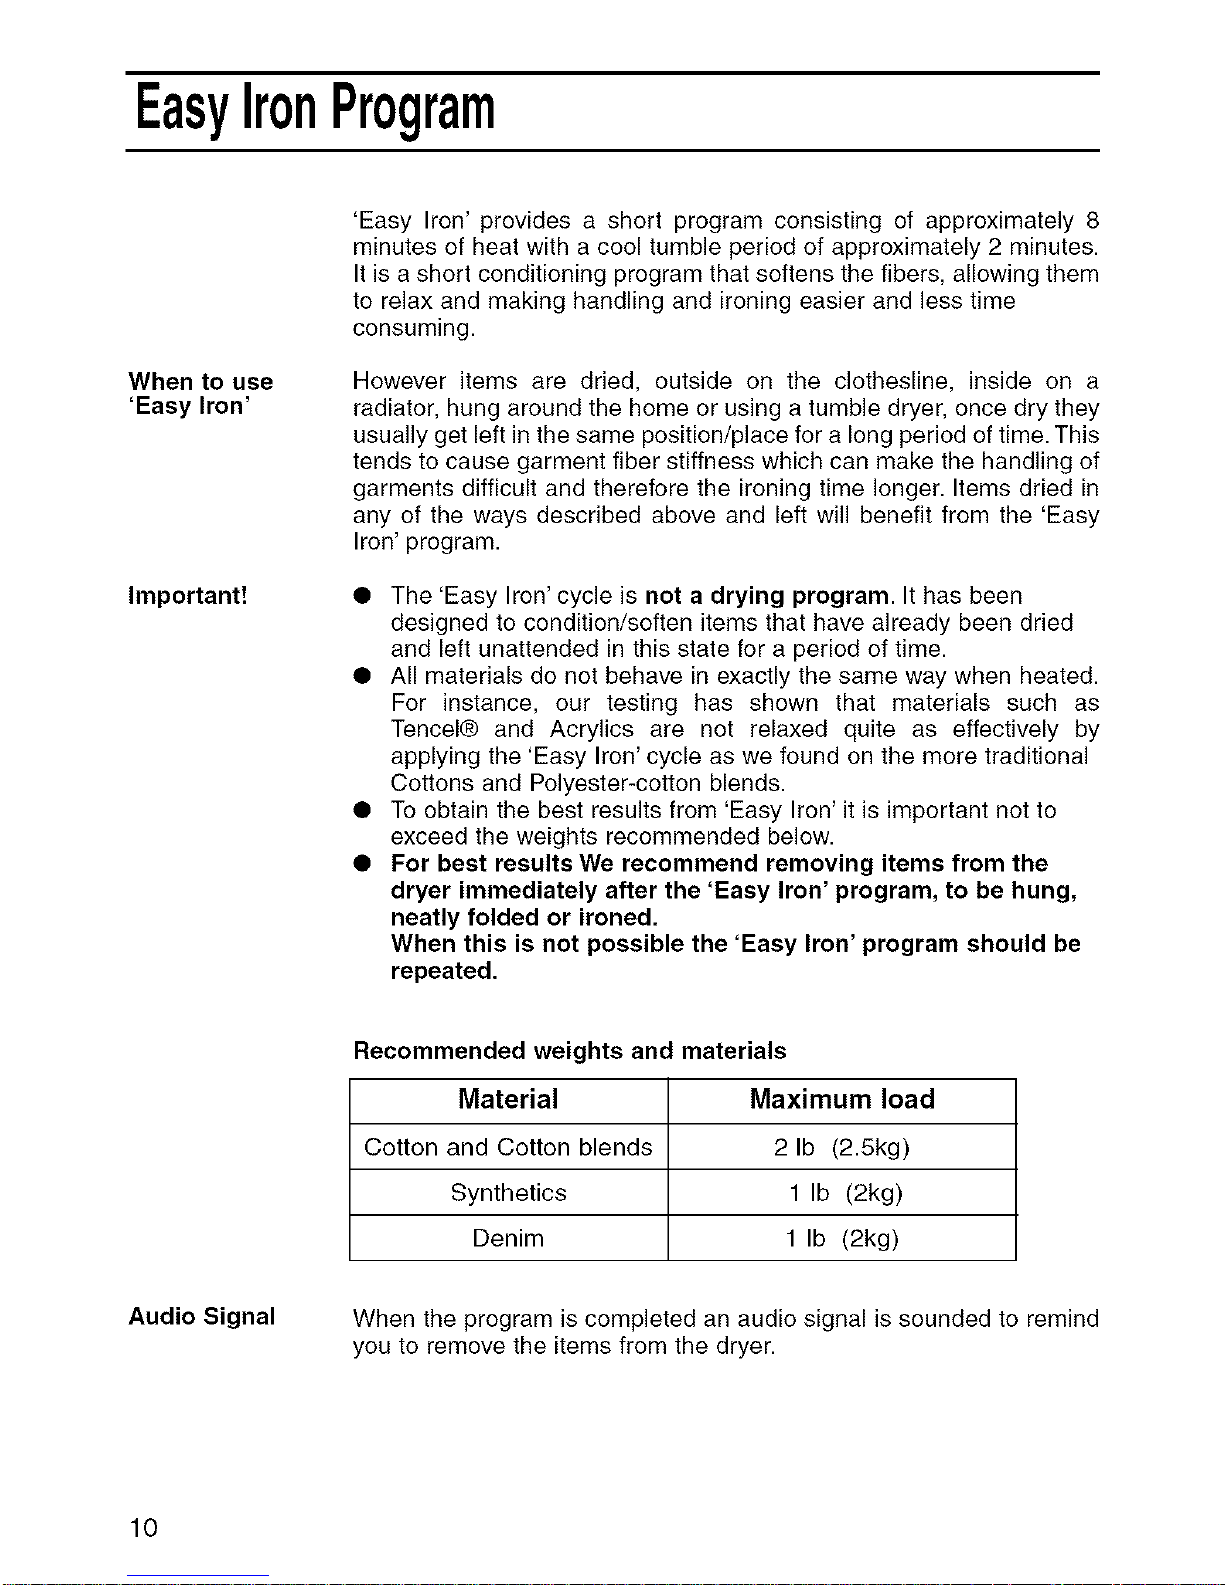
• To obtain the best results from 'Easy Iron' it is important not to
exceed the weights recommended below.
• For best results We recommend removing items from the
dryer immediately after the 'Easy Iron' program, to be hung,
neatly folded or ironed.
When this is not possible the 'Easy Iron' program should be
repeated.
Recommended weights and materials
Material Maximum load
Cotton and Cotton blends 2 Ib (2.5kg)
Synthetics 1 Ib (2kg)
Denim 1 Ib (2kg)
Audio Signal
When the program is completed an audio signal is sounded to remind
you to remove the items from the dryer.
10
Page 12
Sortingyourlaundry
1. Always separate laundry into the correct fabric groups before
washing and drying.
2. See that all zips are closed, hooks and eyes are fastened and
belt, strings etc. are tied loosely in bows. You will normally have
done this for each item before the washing stage.
3. It is important to extract as much water as possible from each
item before drying. This saves you time and money.
WARNING:
CLOTHES SHOULD NEVER BE LOADED DR PP NG WET
4. Make sure that the items to be dried are suitable for tumble
drying, or are not of a type requiring 'special attention' (see the
"Wash Care Labels" section).
Maximum
load size
Typical load
Your dryer will hold a load of 131bs (6kg) dry weight of natural fabrics.
if you are drying items of man-made fibers (synthetics or acrylics), the
maximum load should not exceed 6.61bs (3kg) dry weight.
This difference is that man-made fibers require more space to tumble-
dry without creasing.
wARNING:
DO NOT OVERLOAD ASTHIS COULD RESULT IN REDUCED
DRy NG PERFORMANCE AND A Poss BLE F RE HAZARD.
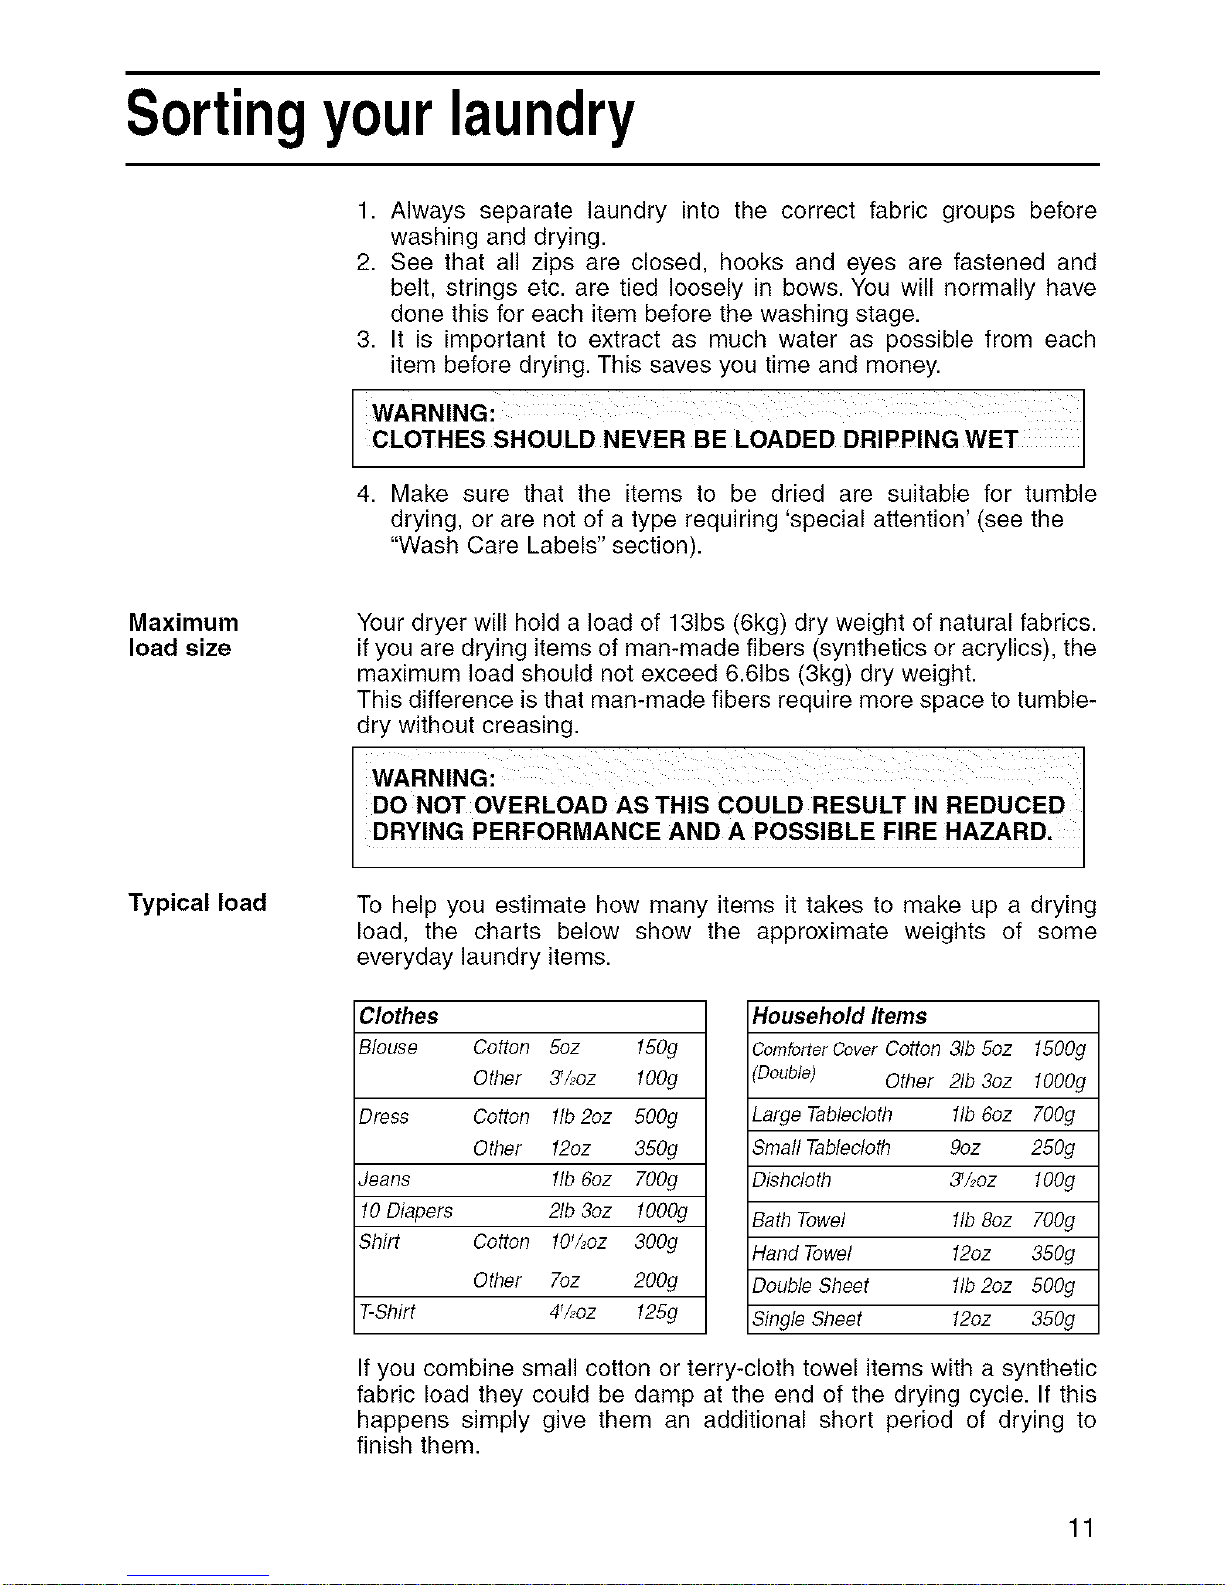
To help you estimate how many items it takes to make up a drying
load, the charts below show the approximate weights of some
everyday laundry items.
Clothes
Blouse Cotton 5oz 150g
Other 3_/2oz lOOg
Dress Cotton lib 2oz 500g
Other 12oz 350g
Jeans lib 6oz 700g
10Diapers 2Ib 3oz lO00g
Shirt Cotton 10'/2oz 300g
Other 7oz 200g
T-Shirt 4_/2oz 125g
Household Items
ComforterCoverCotton 31b5oz 1500g
(Double) Other 2Ib 3oz lO00g
Large Tablecloth lib 6oz 700g
Small Tablecloth 9oz 250g
Dbhcloth 3_/2oz lOOg
Bath Towel lib 8oz 700g
Hand Towel 12oz 350g
Double Sheet lib 2oz 500g
Single Sheet 12oz 350g
If you combine small cotton or terry-cloth towel items with a synthetic
fabric load they could be damp at the end of the drying cycle. If this
happens simply give them an additional short period of drying to
finish them.
11
Page 13
WashCareLabels
Most of today's fabrics can be tumble dried in your Dryer with no
problem, but there are certain fabric finishes which should be dried
away from direct heat.
The majority of garments now have wash-care labels on them, giving
full washing and drying instructions. These should always be followed
carefully especially when you are drying something for the first time.
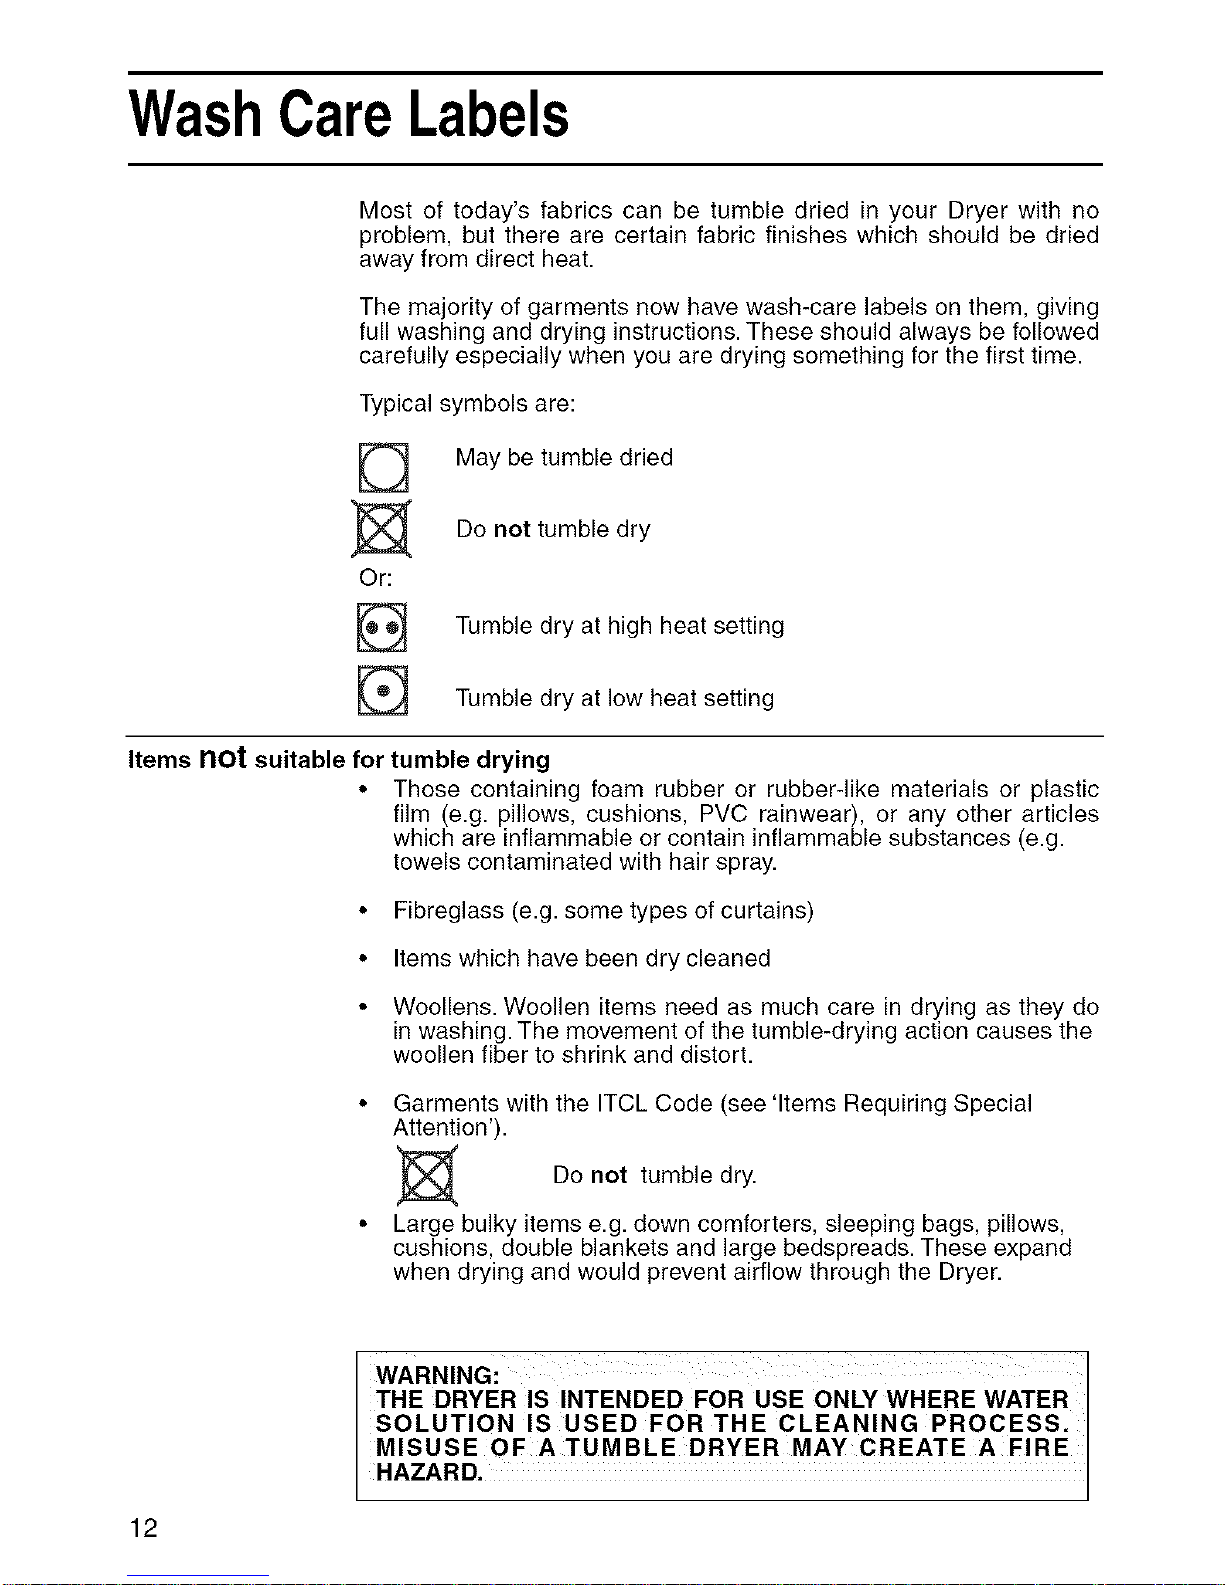
Typical symbols are:
D
Or:
@
May be tumble dried
Do not tumble dry
Tumble dry at high heat setting
Tumble dry at low heat setting
Items not suitable
for tumble drying
• Those containing foam rubber or rubber-like materials or plastic
film (e.g. pillows, cushions, PVC rainwear), or any other articles
which are inflammable or contain inflammable substances (e.g.
towels contaminated with hair spray.
• Fibreglass (e.g. some types of curtains)
• Items which have been dry cleaned
• Woollens. Woollen items need as much care in drying as they do
in washing. The movement of the tumble-drying action causes the
woollen fiber to shrink and distort.
• Garments with the ITCL Code (see 'Items Requiring Special
Attention').
Do not tumble
dry.
• Large bulky items e.g. down comforters, sleeping bags, pillows,
cushions, double blankets and large bedspreads. These expand
when drying and would prevent airflow through the Dryer.
12
WARNING: I
THE DRYER IS INTENDED FOR USE ONLY WHERE WATER I
SOLUTION IS USED FOR THE CLEANING PROCESS, I
MISUSE OF ATUMBLE DRYER MAYCREATE A FIRE
HAZARD. I
I
Page 14
Itemsrequiringspecialattention
Blankets and
Bedspreads
The drying requirements of blankets and bedspreads will, of course,
vary tremendously according to size and weight. Some, however are
simply too big. if you have difficulty getting them into the dryer, the
machine will have difficulty drying them properly. Blankets (and
garments) made from Acrylic fibres (e.g. Acilan, Courtelle, Orion and
Dralon) must be dried with special care on Low heat setting. Over-
drying should be avoided to make sure heat creasing does not occur.
Permanently Your dryer will cope with such clothes very well, but you should
pleated or creased always read the manufacturer's drying instructions attached to the
garments garment before you begin.
Starched articles
Starched articles should be dried together in the same load to avoid
getting starch on non-starched items. You should use a slightly
heavier starch solution than you would when drying the items on the
clothesline. Make sure that as much of the solution is removed from
the load as possible before placing it in the dryer.
Remove the items from the dryer as soon as they reach ironing
dampness. If they are over-dried the starch will powder, leaving the
fabric limp.
Fabric conditioner
Home Dry
Cleaning
To make sure all your tumble-dried clothes come out really fresh and
soft, we recommend you use a liquid fabric conditioner in the final
rinse cycle of your wash. A liquid fabric conditioner restores bounce
and softness and helps eliminate static cling.
WARNING: ]
NEVER ADD LIQUID FABRIC CONDITIONER TO THE DRYER /
ITSELF. 1
Garments with the ITCL Code _ may be cleaned using one of the
Home Dry Cleaning Kits available.
The instructions supplied with the Home Dry Cleaning Kit must be
strictly followed.
13
Page 15
Guideto dryingtimes
Please note that the drying times stated below and on the appliance
control panel are a GUIDE only and drying times are affected by:-
The amount of
water remaining
in the clothes
after spinning
Items such as towels retain a lot of water after spinning, also the
suggested wash programme for small items such as T-Shirts may
sometimes include a low spin speed which has the same effect.
The type of
fabric
Your drying load may contain the same type of fabric but of different
thicknesses. Thinner items will take less time to dry. Some fabrics,
such as those used for jeans are of denser texture than others and
although light when dry will be heavy after washing and spinning.
The quantity of
clothes to be
dried
Single articles of clothing or small loads may take longer to dry. It is
more energy efficient to dry larger loads.
How dry you
want the
clothes
Since it takes longer to fully dry clothes than to have them ready for
ironing, you may wish to remove some clothes when they are slightly
damp and ready for ironing and then continue to dry the remainder
until they are fully dry.
The heat setting The label on the garment should tell you the correct heat setting to
you have select. See the 'Wash Care Labels' section.
selected
The temperature If the dryer is located in a cold room, your clothes will take longer to
of the room dry than if the room is warm.
Bulky items Some bulky items such as padded jackets can be dried, with care, but
we recommend removing these items several times, shaking them
and putting them back in the dryer.
THERE ARE HOWEVER SOME ITEMS THAT WE DO NOT ADVISE
YOU TO DRY. SEE 'ITEMS NOT SUITABLE FOR TUMBLE
DRYING'
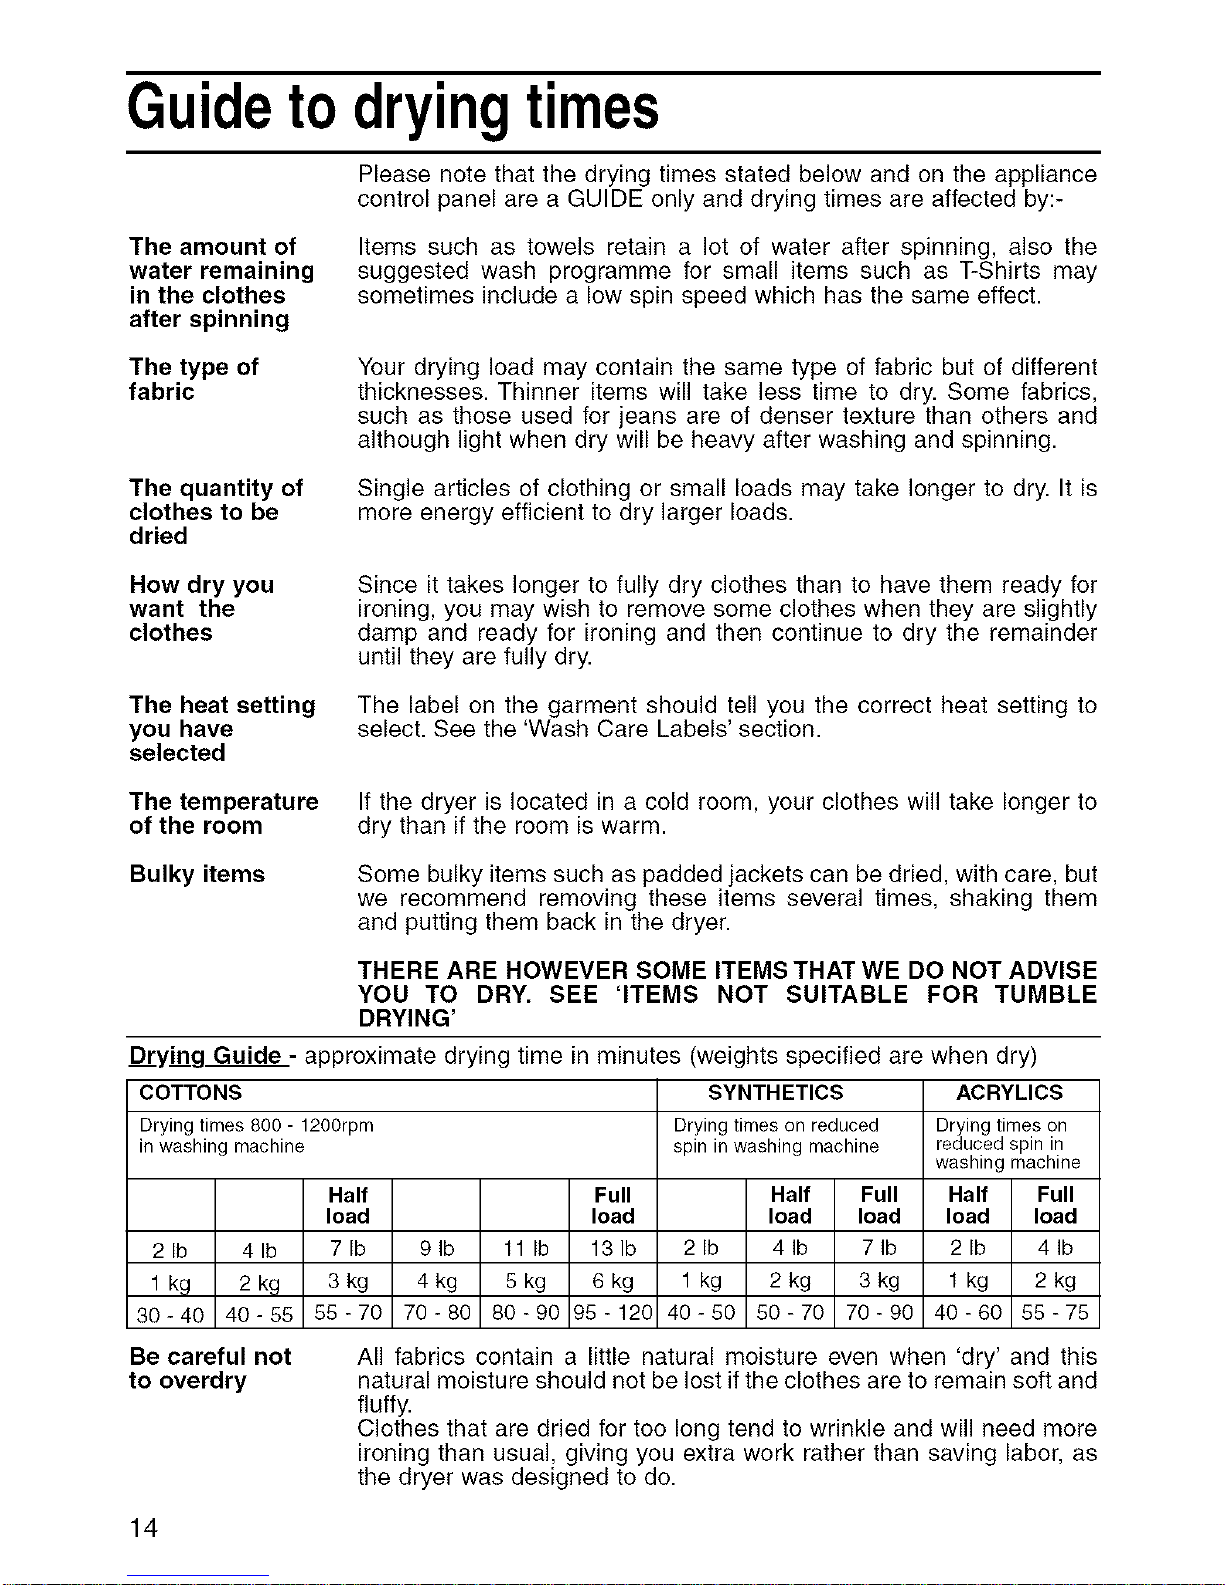
Drying Guide - approximate drying time in minutes (weights specified are when dry)
COTTONS
Drying times 800 - 1200rpm
in washing machine
Half Full
load load
21b 41b 71b 91b 11 Ib 131b
1 kg 2kg 3kg 4kg 5kg 6kg
30-40 40-55 55-70 70-80 80-90 95-120
SYNTHETICS
Drying times on reduced
spin in washing machine
Half Full
load load
2 Ib 4 Ib 7 Ib
1 kg 2 kg 3 kg
40-50 50-70 70-90
ACRYLICS
Drying times on
reduced spin in
washing machine
Half Full
load load
2 Ib 4 Ib
1 kg 2 kg
40-60 55-75
Be careful not
to overdry
All fabrics contain a little natural moisture even when 'dry' and this
natural moisture should not be lost if the clothes are to remain soft and
fluffy.
Clothes that are dried for too long tend to wrinkle and will need more
ironing than usual, giving you extra work rather than saving labor, as
the dryer was designed to do.
14
Page 16
Caringfor yourDryer
When finished
After each load
Every Week
Cleaning
Do not use
Lubrication
Your Tumble Dryer needs very little attention. The following simple
steps will keep it performing well.
Turn the dryer off.
Always clean the filter.
Turn the dryer by hand to check that small items like handkerchiefs do
not get missed.
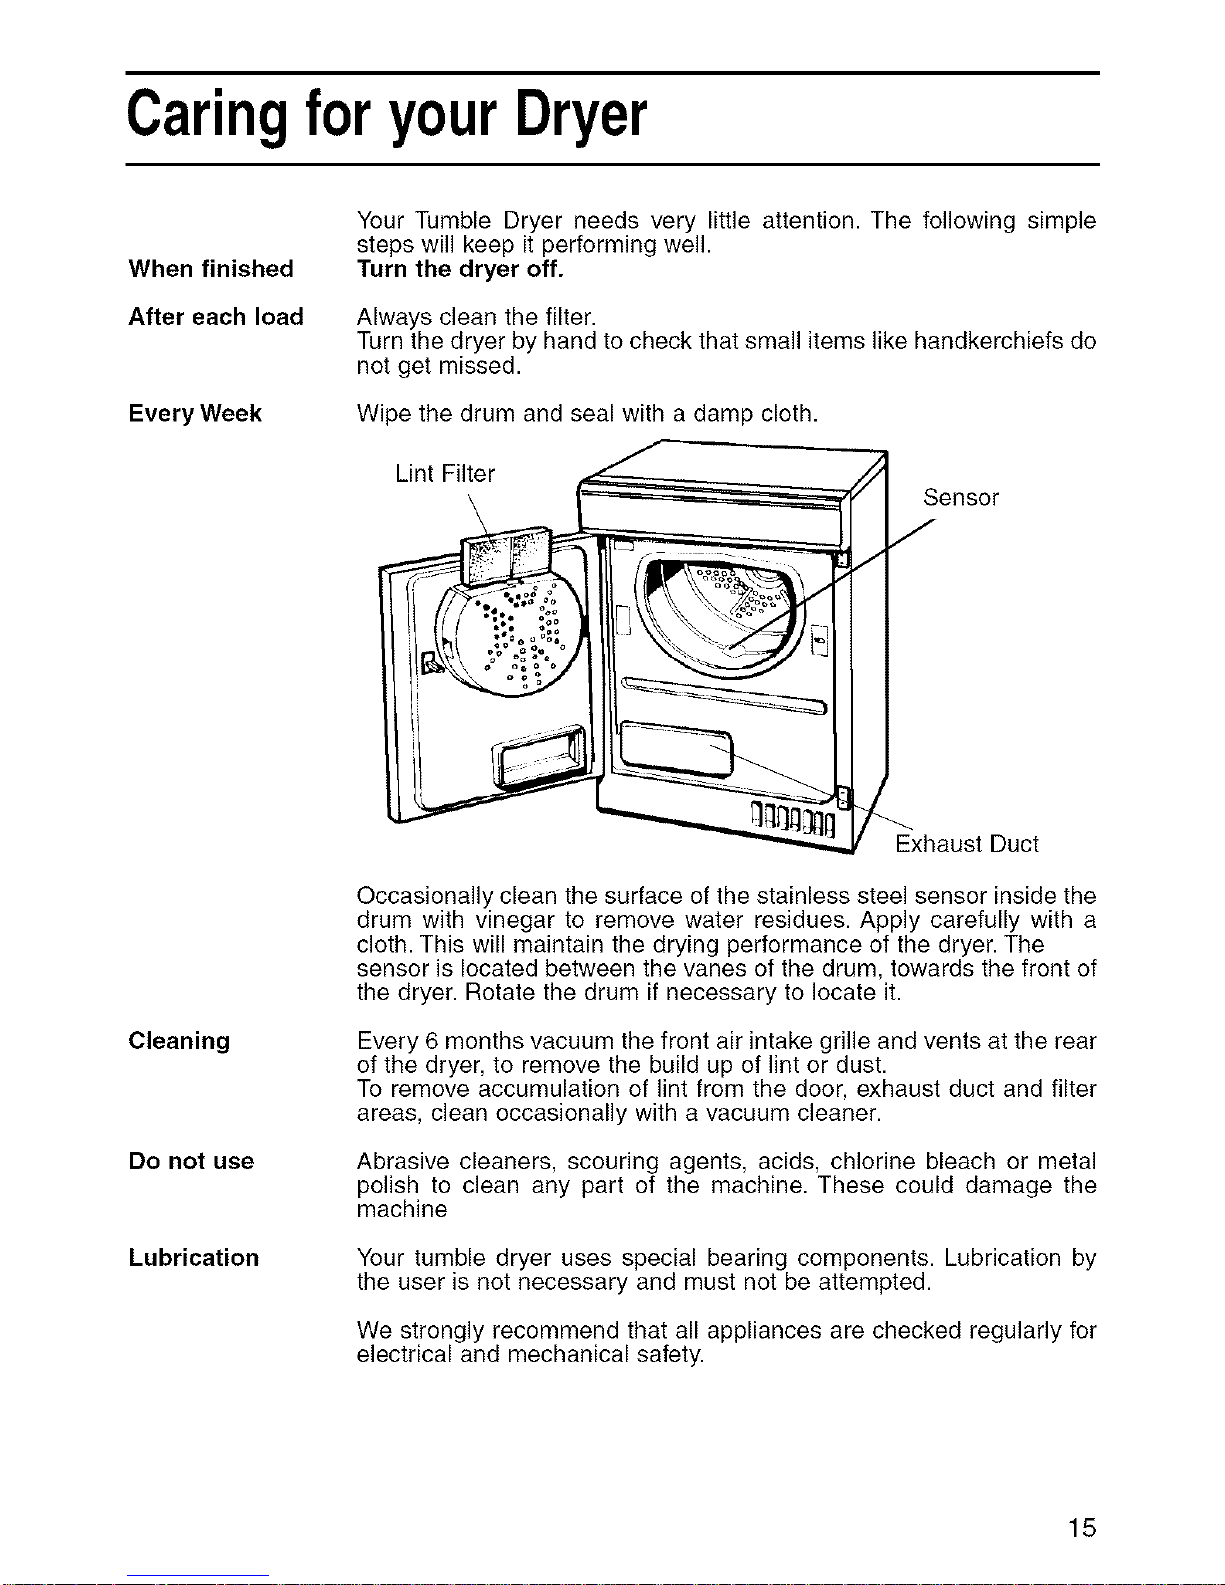
Wipe the drum and seal with a damp cloth.
Lint Filter
Sensor
/
Exhaust Duct
Occasionally clean the surface of the stainless steel sensor inside the
drum with vinegar to remove water residues. Apply carefully with a
cloth. This will maintain the drying performance of the dryer. The
sensor is located between the vanes of the drum, towards the front of
the dryer. Rotate the drum if necessary to locate it.
Every 6 months vacuum the front air intake grille and vents at the rear
of the dryer, to remove the build up of lint or dust.
To remove accumulation of lint from the door, exhaust duct and filter
areas, clean occasionally with a vacuum cleaner.
Abrasive cleaners, scouring agents, acids, chlorine bleach or metal
polish to clean any part of the machine. These could damage the
machine
Your tumble dryer uses special bearing components. Lubrication by
the user is not necessary and must not be attempted.
We strongly recommend that all appliances are checked regularly for
electrical and mechanical safety.
15
Page 17
Ifsomethinggoeswrong
First, don't panic! There may be nothing wrong at all. Look for your
problem below, then check the things we suggest. More often than
not, this will give you the answer to your problem, and you'll be able
to continue without having to telephone your Service Office.
If after this you still cannot get your machine to work, follow the
advice given on the next page.
Problem
'It won't start'
Check these things first
1. Is the machine plugged in and turned on at the socket?
2. Is the Program Control set to required time?
3. Is the door securely closed?
4. Has the start button been pressed hard enough? Try pressing the
start button again.
5. Has the fuse blown or circuit breaker tripped? (Try plugging in
another appliance to check)
6. Are you using an extension cord? Many are not suitable. Try
plugging the dryer directly into a socket to check.
'It is taking a long
time to dry'
1. Have you forgotten to clean the filter? It should be cleaned after
each load.
2. Have you selected the correct Program setting for the type of
fabric you are drying?
3. Is the flexible Vent Hose blocked or kinked? Check it for foreign
objects or condensate (water).
4. Have the air intake grille or rear vents of the Dryer been
obstructed?
5. Permanent venting - is flap on the storm cover obstructed?
6. Were the clothes 'excessively wet' when they were put in?
7. Was the correct time/program selected?
8. Have you overloaded the dryer?
'The Dryer is This is perfectly normal - it means that the Dryer is on 'Crease Care'
tumbling and has reached the end of the drying cycle and the clothes are
occasionally' ready to take out.
'The dryer keeps This is perfectly normal, the dryer is on 'Crease Care' as above...
bleeping' Open the door and the bleeping will stop.
Drying Light is See "The Controls" section, this indicates a possible malfunction.
flashing
'The dryer keeps This is perfectly normal, the dryer has finished its program.
buzzing' Open the door and the bleeping will stop.
Any other Have you re-read this instruction book?
problem
If you still have a problem call our Customer Care Department.
16
Page 18
Installation Instructions
Read these instructions with care.
These instructions are provided for use by qualified installers, in addition, the installation
must comply with:
• In the United States, in accordance with the National Electric Code
ANSl/NFPA70 - latest edition and any State, Municipal or local codes.
• In Canada, in accordance with the Canadian Electric Code C22.1 - latest
edition and any Provincial, Municipal or local codes.
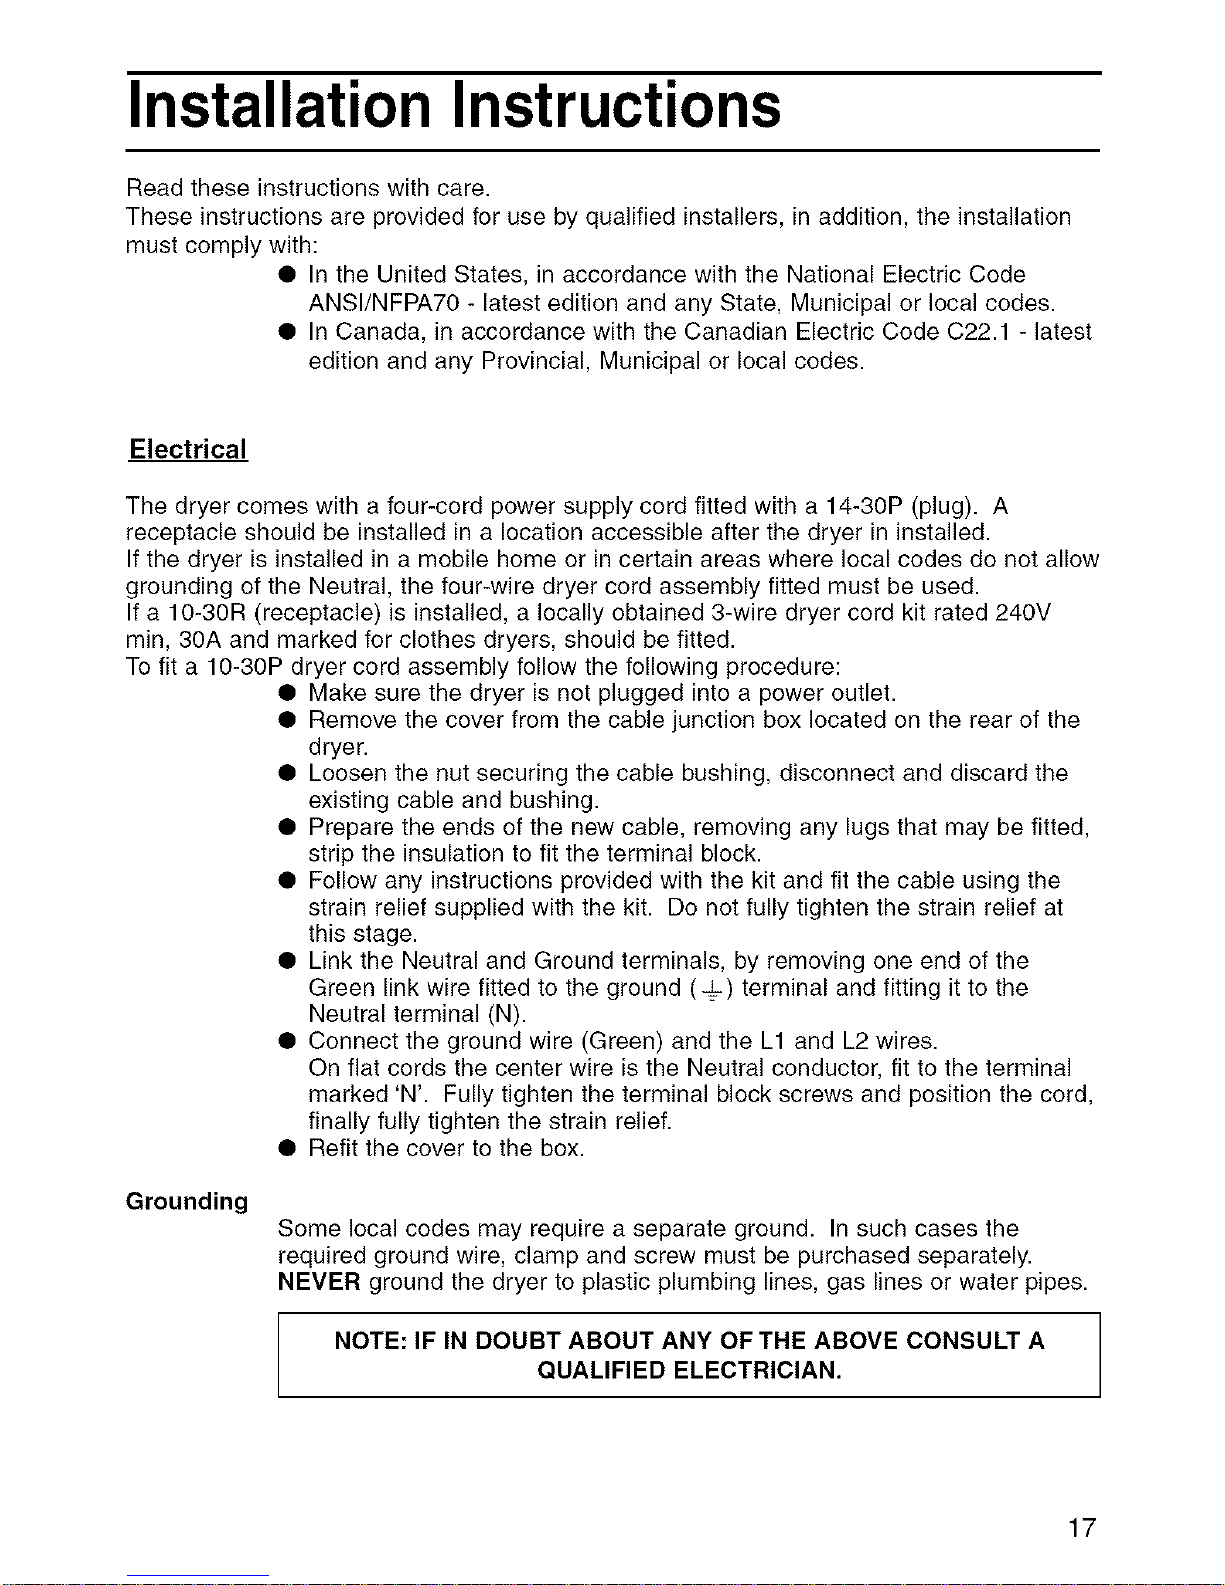
Electrical
The dryer comes with a four-cord power supply cord fitted with a 14-30P (plug). A
receptacle should be installed in a location accessible after the dryer in installed.
If the dryer is installed in a mobile home or in certain areas where local codes do not allow
grounding of the Neutral, the four-wire dryer cord assembly fitted must be used.
If a 10-30R (receptacle) is installed, a locally obtained 3-wire dryer cord kit rated 240V
rain, 30A and marked for clothes dryers, should be fitted.
To fit a 10-30P dryer cord assembly follow the following procedure:
• Make sure the dryer is not plugged into a power outlet.
• Remove the cover from the cable junction box located on the rear of the
dryer.
• Loosen the nut securing the cable bushing, disconnect and discard the
existing cable and bushing.
• Prepare the ends of the new cable, removing any lugs that may be fitted,
strip the insulation to fit the terminal block.
• Follow any instructions provided with the kit and fit the cable using the
strain relief supplied with the kit. Do not fully tighten the strain relief at
this stage.
• Link the Neutral and Ground terminals, by removing one end of the
Green link wire fitted to the ground (+) terminal and fitting it to the
Neutral terminal (N).
• Connect the ground wire (Green) and the L1 and L2 wires.
On flat cords the center wire is the Neutral conductor, fit to the terminal
marked 'N'. Fully tighten the terminal block screws and position the cord,
finally fully tighten the strain relief.
• Refit the cover to the box.
Grounding
Some local codes may require a separate ground. In such cases the
required ground wire, clamp and screw must be purchased separately.
NEVER ground the dryer to plastic plumbing lines, gas lines or water pipes.
NOTE: IF IN DOUBT ABOUT ANY OFTHE ABOVE CONSULT A
QUALIFIED ELECTRICIAN.
17
Page 19
Installation Instructions
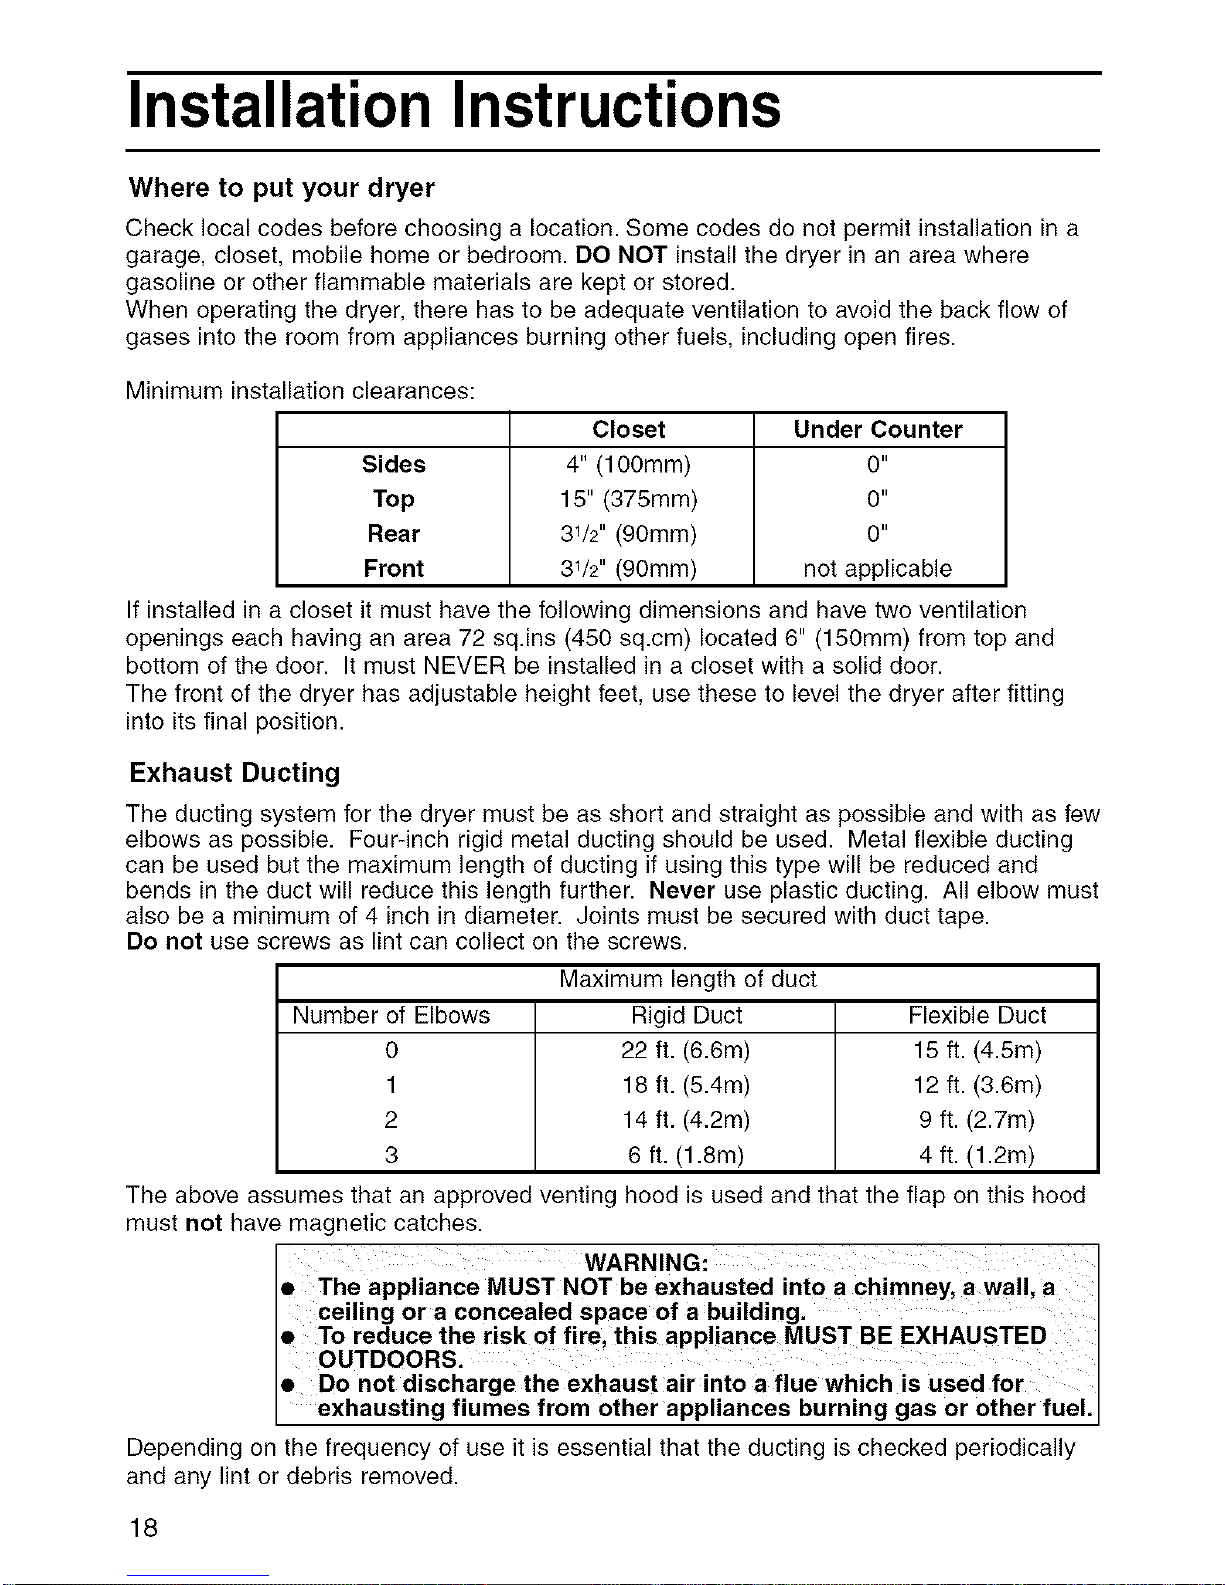
Where to put your dryer
Check local codes before choosing a location. Some codes do not permit installation in a
garage, closet, mobile home or bedroom. DO NOT install the dryer in an area where
gasoline or other flammable materials are kept or stored.
When operating the dryer, there has to be adequate ventilation to avoid the back flow of
gases into the room from appliances burning other fuels, including open fires.
Minimum installation clearances:
Sides
Top
Rear
Front
Closet
4" (100mm)
15" (375mm)
31/2'' (90mm)
31/2'' (90mm)
Under Counter
0"
0"
0"
not applicable
If installed in a closet it must have the following dimensions and have two ventilation
openings each having an area 72 sq.ins (450 sq.cm) located 6" (150mm) from top and
bottom of the door. It must NEVER be installed in a closet with a solid door.
The front of the dryer has adjustable height feet, use these to level the dryer after fitting
into its final position.
Exhaust Ducting
The ducting system for the dryer must be as short and straight as possible and with as few
elbows as possible. Four-inch rigid metal ducting should be used. Metal flexible ducting
can be used but the maximum length of ducting if using this type will be reduced and
bends in the duct will reduce this length further. Never use plastic ducting. All elbow must
also be a minimum of 4 inch in diameter. Joints must be secured with duct tape.
Do not use screws as lint can collect on the screws.
Maximum length of duct
Number of Elbows Rigid Duct Flexible Duct
0 22 ft. (6.6m) 15 ft. (4.5m)
1 18 ft. (5.4m) 12 ft. (3.6m)
2 14 ft. (4.2m) 9 ft. (2.7m)
3 6 ft. (1.8m) 4 ft. (1.2m)
The above assumes that an approved venting hood is used and that the flap on this hood
must not have magnetic catches.
WARNING:
• The appliance MUST NOT be exhausted into a chimneY, a wall, a
ceiling or a concealed space of a building.
• To reduce the risk of fire this applianc e MUST BE EXHAUSTED
OUTDOORS.
• Do not discharge the exhaust air into a flue which is used for
exhaust ng f umes from other app ances burn ng gas or other fue.
Depending on the frequency of use it is essential that the ducting is checked periodically
and any lint or debris removed.
18
Page 20

Installation Instructions
Stacking Kit
The dryer is provided with a stacking kit which allows the dryer to be fitted to the top of an
Ariston washing machine•
Type W1024 (model AW120NA) use bracket A
Type W1026CO (models AW121NA or AW122NA) use bracket B
The kit contains, 2 brackets A and B, 2 self drilling screws•
Tools needed:- No.2 Philips Screwdriver•
SAFETY
For personal safety, DO NOT try to fit the dryer on top of the washing machine
on your own. A second person should help to lift the tumble dryer onto the
washer and to relocate the stacked washer and dryer.
• You will need to get at the back of the washing machine to fit the stacking kit and
dryer• If necessary pull the machine away from its location to get at the back of the
machine to fit the stacking kit and dryer•
2. Remove the two screws located one either side at the bottom back plate on the
tumble dryer• Retain the screws, as they will be reused• Screw the front adjustable
feet as far as possible into the base.
3. With the help of a second person, lift the tumble dryer into position on top of the
washing machine• Place the appropriate stacking kit bracket (A or B) onto the rear of
the dryer and fit with the screws removed in step 2.
4. Reposition the dryer so that the bracket lines up with the top trim of the washing
machine and ensure that the dryer is positioned in the center of the washing machine•
5. Secure the bracket to the washing machine, using the two self drilling screws provided•
Bracket A Bracket B
6. The stacking of the appliances is now complete and the machines can be positioned
and connected to the electrical source, using a separate socket for each appliance•
19
Page 21

STATEMENTOFWARRANTIES
ARISTONClothesDryer
The warranties provided by (Ariston) in this statement of warranties apply only to Ariston
Clothes Dryer sold to the first using purchaser by Ariston or its authorized distributors,
dealers, retailers or service centers in the United States or Canada. The Warranties
provided herein are not transferable.
Lenqth of Warranty
2 Years Full Limited Warranty from the date of installation*
Ariston will repair or replace, free of charge, any component part that proves defective in
conditions of normal home use. Shipping and labor costs included. Warranty repair
service must be performed by an authorized Ariston service center.
3rd - 5thYear limited Warranty on Electronics from the date of installation*
Ariston will repair or replace, free of charge, any microprocessor or circuit board that
proves defective under conditions of normal home use 3rdyear through 5thyear from the
date of original installation, labor charges excluded.
3rd - 5thYear limited Warranty on Motor from the date of installation*
Ariston will repair or replace, free of charge, any motor or component part of the motor that
proves defective under conditions of normal home use, 3rd year through 5thyear, from the
date of original installation, labor charges excluded.
Lifetime Limited Warranty against Stainless Steel Rust Through from the date of
installation*
Ariston will replace your Clothes Dryer, free of charge, with the same model or a current
model that is equivalent or better in functionality if the dryer drum should rust through
under conditions of normal home use, labor, shipping and installation charges excluded.
10 day warranty after purchase on cosmetic damages detected
Ariston will replace any cosmetic parts, free of charge - including service call, which are
detected damaged within 10 days after purchase. Any damages deemed caused by
improper handling, shipping or installation will not be covered under this clause.
* Date of installation shall refer to the earlier of the date the Clothes Dryer is installed or
ten business days after delivery date.
Exclusions:
This warranty does not cover repair or service calls to correct the installation, to provide
instructions on the use of your product, to replace house fuses or correct plumbing or the
electric wiring in your home. In addition any repair to the products that's use was in a
manner other than what is normal for home use is void of any warranty claim. The
warranties exclude any defects or damage arising from accident, alteration, misuse, abuse,
improper installation, unauthorized service work, or external forces beyond Ariston control,
such as fire, flood and other acts of God, or installation not in accordance with local
electric or plumbing codes. Labor, shipping and installation charges incurred in the repair
or replacement of any product after a period of one year from the date of installation shall
not be covered by this warranty. Any and all replaced or repaired parts shall assume the
identity of the original for the purposes of the applicable warranty period. To the extent
permitted by law, this warranty is in lieu of all other express and implied warranties,
including the implied warranties of merchantability and fitness for a particular purpose.
Ariston does not assume any responsibility for incidental or consequential damages.
To obtain warranty services call 1-888-426-0825, or write to:
Ultra 8 International, 2505 Anthem Village Drive, Suite E - Box 562, Henderson Nevada 89052
Be sure to provide: model number, serial number, purchase date and the sellers name and
address.
2O
Page 22

Fran(_ais
Page 23

Sommaire
Instructions importantes de securite 3-4
Instructions de mise & la terre 4
Caracteristiques - Prenez connaissance des principales parties de votre secheuse 5-6
Comment utiliser le secheuse 7
Les Commandes 8-9
Programme "Repassage facile" 10
Separation des v6tements 11
Etiquettes de precautions de lavage 12
Articles ne convenant pas & la secheuse & culbutage 12
Articles qui requierent une attention speciale 13
Guide de la duree de sechage 14
Entretien de la secheuse 15
Si un probl_me se pose 16
Instructions d'installation 17
Conservationdece livret
Ce livret de consignes doit 6tre garde & portee de main car il contient des details
importants sur I'utilisation correcte et en toute
securite de cette machine.
Si vous vendez ou donnez cette machine & quelqu'un d'autre, ou si vous dem6nagez et la
laissez, veillez & ce que ce livret reste avec la machine afin que le nouveau proprietaire
puisse se familiariser avec la machine et les consignes de securit&
Page 24

Instructions importantes de sdcuritd
Votre secheuse est facile &utiliser.
I , ATTENTION:
Afin de reduire le risque d incendie, choc electrique ou blessure personnelle Iors I
du fonctionnement de votre appareil, veuillez suivre les precautions debase
suivantes :
1. Lisez toutes les instructions avant d'utiliser I'appareil.
2. Ne faites pas secher des articles ayant ete nettoyes ou impregnes par endroits
d'essence, de solvants de nettoyage & sec ou autres substances inflammables ou
explosives car elles degagent des vapeurs pouvant s'enflammer ou exploser.
3. Ne permettez pas aux enfants de jouer autour ou dans la secheuse. II faut surveiller
les enfants de pres lots du fonctionnement de la secheuse.
4. Lors de la mise au rebut de I'appareil retirez la porte de la secheuse.
5. Ne mettez pas les mains darts I'appareil si le tambour est en train de tourner.
6. N'installez pas et ne conservez pas cet appareil dans un endroit expose aux
intemperies.
7. Ne modifiez pas les commandes.
8. Ne reparez et ne remplacez aucune piece de I'appareil et ne tentez pas de fake
I'entretien de la machine & moins que ce soit specifiquement recommande darts les
instructions de I'entretien de I'utilisateur.
9. N'utilisez pas d'assouplissant de tissus pour eliminer I'electricite statique & moins
que ce soit recommande par le fabricant de I'assouplissant de tissus.
10. N'utilisez pas un programme de sechage & chaleur pour faire secher des articles en
caoutchouc ou materiel semblable.
11. Nettoyez le filtre & charpie avant et apres chaque usage..
12. Gardez propre I'orifice d'evacuation et ne laissez pas s'y accumuler la charpie, la
poussiere et la salet&
13. I'interieur de I'appareil et du conduit de ventilation doivent 6tre nettoyes & I'occasion
par un technicien qualifi&
14. Ne placez pas d'articles exposes & I'huile de cuisson dans votre secheuse. Ces
articles peuvent contribuer & une reaction chimique pouvant entrafner un incendie.
CONSERVEZ CESINSTRUCTIONS
I
UN ENFANT PEUT MONTER DANS LA SI_CHEUSE OU LE DI_REGLER SI I
L'APPAREIL E.ST LA.ISSI_ SANS SURVEILLANCE. QUAND LA MACHINE N'EST PAS
I
UTILiSEE, L'ETEINDRE, RETiRER LA FICHE ET FERMER LA PORTE.
Page 25

Pour votre sdcuritd
TOUJOURS • Eteindre I'appareil et fermer la porte de la machine quand elle
n'est pas utilisee.
TOUJOURS • Se conformer aux exigences electriques specifiees.
TOUJOURS • S'assurer que le sechoir est correctement installe et jouit d'une
aeration adequate (voir, "Instructions d'installation").
TOUJOURS • Terminer chaque programme par un cycle a I'air frais disponible.
TOUJOURS • Nettoyer le filtre, il est essentiel que le filtre soit libre de charpie
en tous temps.
TOUJOURS • Observer les regles de sechage des v6tements.
,_ ATTENTION:
en cours d'utilisation du s_che-linge, _viter de toucher
I'arri_re de I'appareil car il risque d'etre tr_s chaud!
Instructions de mise a la terre
ATTENTION:
Cet appareil doit _tre mise b la terre !
La mauvaise Connexion du conducteur b la terre peut entrainer !e risque de I
choc _lectrique. Consultez un _lectr!cien qualifie ou le service d entre t en S!
vous n _tes pas certain que I appareil soit bien mis b la terre ! J
En cas de defaillance la raise _.la terre reduira le risque de choc electrique en
offrant I'espace de moindre resistance au courant electrique. Cet appareil est
equipe d'un cordon ayant un conducteur de terre et une plaquette de terre. La
fiche dolt _tre branchee dans une prise adequate correctement installee et mise
la terre conforme aux codes Iocaux.
NE PAS modifier la fiche fournie avec I'appareil. Si elle ne correspond pas & la
prise, faites installer une prise adequate par un electricien qualifie ou echangez
le cordon pour un aqtre specifie pour la sec.heuse.
REPORTEZ-VOUS A LA PLAQUE DE SPECIFICATIONS POUR CONNA|TRE
LA TENSION ET LES EXlGENCES ACTUELLES
(voir schema pour emplacement.)
La secheuse dolt _tre branchee au secteur gr&ce a une prise qui demeure
accessible apres I'installation de la secheuse..
Cette secheuse dolt 6tre branchee a un circuit 30A individuel.
Pour de plus amples details voir la section ,< Instructions d'installation _>de ce
livre.
REMARQUE : EN CAS DE DOUTE AU SUJET DES POINT.S PRI_CFtDENTS,
CONSULTEZ UN FtLECTRICIEN QUALIFIE
Page 26

Caracteristiques- Prenezc0nnaissancedes
principalespartiesdev0tresecheuse
Voir ,, Les commandes _
/
I]l]l]l]l]I]l]l]
•Appuyer ici
pour ouvrir
la porte
REMARQUE :
Si votre secheuse est
neuve, essuyer I'interieur
du tambour avant de
I'utiliser la premiere fois
afin d'en retirer la
poussiere accumulee
durant le transport.
Grille
d'entree
d'air
Plaque du constructeur, n° mod_le et de s_rie
Filtre & charpie
NETTOYER APRES _/ \ /,,t
CHAQU I
:;°o ....
_,_----JY ':JHq ,oquet
de la
_.,._3_0°/ I Ih_ _ II | porte
du / Q[ 0°
Ouvertureloquet
Page 27

Caracteristiques- Prenezc0nnaissancedes
principalespartiesdev0tresecheuse
CHARNIERE
L°_E_
Pour inverser la
position de la
porte
(seulement si la
laveuse est
superposee)
OUVERTURE
DU LOQUET
CHARNIERE
Si la secheuse est superposee sur une laveuse & I'aide de la trousse fournie
(voir ,, Instructions d'installation ,,) vous pouvez facilement inverser la position
de la porte.
Inversez diagonalement la position des fixations de charnieres et des fiches de
couverture. Inversez le Ioquet et I'ouverture du Ioquet de la porte avec les
fiches de couverture correspondantes. Voir I'illustration c6dessus.
Grille
d'entr_e d'air
I_vacuation
REMARQUE :
Iorsque la sdcheuse
fonctionne, dvitez de
toucher rarribre de
I'appareil, qui peut
_tre trbs chaud.
Page 28

Commentutiliserlas cheuse
ATTENTION:
Afin de r_duire le risque d'incendie, choc _lectrique ou blessures personnelles, lisez les
INSTRUCTIONS IMPORTANTES DE SECURITE avant de faire fonctionner I'appareil. I
1. Branchez et alimentez I'electricit& 2. Appuyer sur le bouton Bouton ENFONCI_
de marche/arr6t de telle MARCHE
sorte qu'il soit
ENFONCE. Bouton RESSORTI
Le seche-linge ne ^
fonctionnera pas si le ARRET
bouton de marche/arr6t
n'est pas en position
ENFONCEE.
ATTENTION:
LORSQUEVOUSALLUMEZOU ETEIGNEZ I
L'ApPARE!L,S!ASSURERD!AVO!RLES MAINS I
SECHES. I
3. Separer la _....j.__,_....,
charge de v_tements _
(voir section
,,Separation des
v6tements_).
4. Ouvrir la porte
en appuyant sur le
panneau avant et
en le rel&chant &
I'endroit indiqu&
6. Charger le secheusse,
placer soigneusement les
v_tements darts le
tambour en les poussant
vers le fond et en
s'assurant qu'ils
n'encombrent pas la
fermeture de la porte.
Fermer la porte.
8. Appuyer sur
I'interrupteur de
demarrage (START)
pour amorcer le
programme de
sechage.
Pour retirer les
v_tements
5. Verifier &
chaque fois que
le...
filtre a charpie
est propre et en p aceJ
7. Selectionner le programme ou la duree
de sechage appropri&
(voir section ,,Les commandes_)
9. Lorsque termine,
ouvrir la porte et
retirer les v_tements.
Nettoyer le filtre
charpie et le
remettre & sa place.
10. Fermer I'electricite et fermer la porte.
ATTENT'0N:
, LORSQUEVOUSALLUMEZOU ETEIGNEZ I
LApPARE!L ,S ASSURERD AVOIRLES MAINS
SECHES.
Ouvrir la porte aussi souvent que vous le desirez, afin de verifier si les
v_tements sont suffisamment secs, ou retirer certains articles avant qu'ils
ne soient trop secs. (Ceci est particulierement utile avec des v_tements
de textiles differents. Vous pourrez ainsi repasser certains articles et
laisser completement secher les autres).
Apres avoir referme la porte, il faut & nouveau appuyer sur I'interrupteur
de d_marrage (START) afin de poursuivre le programme.
(voir section ,,Les commandes,,)
Page 29

Lescommandes
_ A_STON
...............
Interrupteur
ON/OFF
Reglage du
programme
Options du
programme
Demarrage de la
secheuse
ENFONCEZ le bouton On/Off pour mettre la secheuse en marche.
La secheuse ne fonctionne que si le bouton On/Off est ENFONCE.
Pour regler le programme desire, vous n'avez qu'& tourner le bouton
Program Control jusqu'a ce que la selection voulue soit alignee
I'indicateur.
Cycles automatiques (poids du linge sup_rieur a 2 Ib -1 kg)
1. Coton regulier extra sec (Temperature elevee)
Pour les resultats les plus secs.
Certains gros articles ou une grosse charge de serviettes
neuves peuvent sembler un peu humides apres ce cycle
et demandent une courte periode de sechage minute.
2. Coton regulier leg6rement sec (Temperature elevee)
3. Coton regulier repassage facile (Temperature elevee)
Pour les resultats les plus humides.
4. Tissus infroissables extra sec (Basse temperature)
5. Tissus infroissables legerement sec (Basse temperature)
6. Tissus infroissables repassage facile (Basse temperature)
Programmes minutes (poids du linge inf_.rieur a 2 Ib -1 kg)
7. 40 minutes (Basse temperature) comprend brassage a froid
suivi d'une phase anti-froissage.
8. 30 minutes (Basse temperature) comprend brassage &froid
suivi d'une phase anti-froissage.
9. 20 minutes (Basse temperature) comprend brassage &froid
suivi d'une phase anti-froissage.
10. _ Duvetage, 20 minutes de brassage a froid.
11. _Anti-froissage, voir "Programme de repassage facile".
Pour la description des autres programmes, voir la page suivante.
Appuyez sur I'interrupteur de demarrage (START), puis rel&chez-le pour
amorcer le programme de sechage. (11faut au prealable avoir selectionne
le programme de sechage). Le voyant Sechage en cours s'allume.
REMARQUE : Si la porte est ouverte pendant un programme, la
secheuse s'interrompt automatiquement. Pour poursuivre le
programme, il suffit apres avoir referme la porte, d'appuyer sur
I'interrupteur de demarrage (START).
Page 30

Lescommandes
Voyant Sechage
Voyant chauffage
Voyant basse
temperature
Cycle de duvetage
Phase anti-
froissage
Ce voyant s'allume si un programme est en cours.
Si ce voyant clignote, cela indique que le programme a depasse un
delai de 180 minutes. Par souci de securite, ce delai correspond & la
duree de sechage maximum.
Si le voyant clignote, cela peut 6tre dQaux causes suivantes :
• Le linge est trop Iourd ou trop encombrant.
• Le filtre est colmate.
• Le linge en coton est brasse & PETITE vitesse.
• II peut y avoir un defaut.
Mettez la secheuse hors tension, verifiez qu'il ne s'agit pas des trois
premieres causes indiquees, puis remettez la secheuse en marche.
Ce voyant s'allume pendant la partie Sechage du programme, sauf
pendant les brefs instants oQ le tambour tourne en sens inverse.
Ce voyant s'allume pour indiquer que la secheuse fonctionne sur le
reglage basse temperature.
Environ 10 minutes avant la fin du programme, les elements de
chauffage sont eteints, et le programme commence le cycle de
duvetage. Pendant cette phase, les textiles sont refroidis. II est
conseille de toujours attendre que la secheuse ait termine cette
phase.
Pour verifier si le linge est assez sec, vous pouvez ouvrir la porte
autant de fois que necessaire, et retirer certains articles avant qu'ils
ne soient trop secs. (Ceci est particulierement utile avec des
v6tements de textiles differents. Vous pourrez ainsi repasser certains
articles et laisser completement secher les autres).
Apres avoir referme la porte, il faut a nouveau appuyer sur
I'interrupteur de demarrage (START) afin de poursuivre le
programme. Voir page prec6dente.
/_ la fin du programme de sechage, si vous ne pouvez pas retirer le
linge immediatement, pas de probleme. La secheuse emp6che votre
linge de se froisser. II suffit de le faire tourner de temps & autre de
quelques tours darts le tambour. Par ailleurs, I'alarme retentit
intervalles reguliers pour vous rappeler qu'il faut sortir votre linge de
la secheuse.
Page 31

Programme"Repassagefacile"
Conseils
d'utilisation du
programme
"Repassage
facile"'
Important!
Le programme "Repassage facile" correspond & un court programme
compose d'environ 8 minutes de chaleur, suivi d'environ 2 minutes
de brassage & froid. II s'agit d'un court programme de
conditionnement qui adoucit les fibres et leur permet de s'assouplir
afin de faciliter le rangement et le repassage, ce qui reduit le temps
necessaire.
Quel que soit le moyen utilise pour secher le linge (etendu en plein
air, sur un radiateur & I'interieur, suspendu dans votre foyer ou dans
la secheuse), une fois sec, il reste gen@alement dans la meme
position ou au m_me endroit pendant assez Iongtemps. Cela
entrafne une certaine raideur des fibres qui rendent le rangement
plus difficile, et qui prolonge donc le repassage. Les v_tements
seches dans I'une des conditions decrites ci-dessus, puis laisses en
attente beneficieront d'un passage dans le programme "Repassage
facile".
• Le cycle "Repassage facile" n'est pas un programme de
sechage. II est con_u pour conditionner / adoucir les v_tements
qui sont dej& seches et qui ont ete laisses en attente pendant un
certain temps.
• Tous les textiles ne se comportent pas de la m6me maniere
Iorsqu'ils sont soumis & la chaleur. Exemple : nos essais ont
montre que des textiles tels que Tencel® et les acryliques ne sont
pas assouplis aussi efficacement par le cycle "Repassage facile"
que les cotons et polycotons traditionnels.
• Pour optimiser les resultats du programme "Repassage facile", il
est important de ne pas depasser les poids recommandes
ci-dessous.
• Pour optimiser les resultats, nous recommandons de retirer
les v6tements de la secheuse apres le programme
"Repassage facile" et de les pendre, de les plier avec soin ou
de les repasser immediatement.
Si vous ne pouvez pas prendre cette precaution, il est
preconise de recommencer le programme "Repassage
facile".
Poids recommandes selon les textiles
Mati_res textiles Poids maximum
Coton et metis 2 Ib (2.5kg)
Synthetiques 1 Ib (2kg)
Denim 1 Ib (2kg)
Signal sonore
A la fin de ce programme, un signal sonore retentit pour vous
rappeler de sortir les v6tements de la secheuse.
10
Page 32

S parationdesv tements
Charge maximale
Charge normale
1. Toujours separer les v_tements en fonction du type de tissu avant de
les laver et de les secher.
2. Assurez-vous que routes les fermetures eclair sont fermees, que les
crochets et boutonnieres sont attaches et que les ceintures, les
cordons etc. forment une boucle. II faut effectuer ces pr@aratifs pour
chaque article avant le lavage.
3. II est important d'eliminer le maximum d'eau de chaque article avant
de le secher. Cette mesure vous fera economiser du temps et de
I'argent.
ATTENTION :
LES VETEMENTS NE DOIVEN T JAMAIS ETRE CHARGES I
[S LS GOUTTENT.
4. Assurez-vous que les articles & secher conviennent a la secheuse &
cu!butage et ne requierent pas d',,attention speciale,,. (Voir la section
,, Etiquettes de precautions de lavage ,,).
Votre secheuse peut contenir une charge de 6 kg (13 Ib) de linge sec de
tissues naturels. Si vous sechez des articles de tissu artificiel
(synthetique ou acrylique) la charge maximale ne dolt pas d@asser 3
kg (6.6 Ib) de linge sec.
La difference tient au fair que les fibres artificielles prennent plus de
place dans la secheuse & culbutage sans se froisser.
ATTENTION:
NE PAS SURCHARGER LA SECHEUSE, CECI POURRAIT
REDUIRE LA PERFORMANCE DE SECHAGE ET CONSTITUER I
/UN R SQUE D NCEND E.
L
Pour vous aider & evaluer le nombre d'articles convenant & une charge
de sechage, les tableaux suivants indiquent le poids approximatif de
certains articles courants.
Articles domestiques
Couverture Coton 1500g
de couette(Double) Autre lO00g
V#tements
Chemisier Coton 15@ 5oz
Autre 10@ 31/2oz
Robe Coton 50@ 1 Ib2oz
Autre 35@ 12oz
Jeans 700g 1Ib 6oz
10 Couches de b#be !00@ 2 Ib 3oz
Chemise Coton 300g 101/2oz
Autre 20@ 7oz
T-Shirt 125g 4%oz
3 Ib 5oz
2 Ib 3oz
Grande nappe 700g 1 lb 6oz
Petite nappe 250g 9oz
Torchon a vaisselle 100g 31/2oz
Serviette de bain 700g ! Ib 8oz
Serviette essuie-mains 350g 12oz
Drap double 500g 1Ib 2oz
Drap simple 350g 12oz
Si vous placez de petits articles en coton ou en tissu-eponge avec une
charge de tissus synthetiques, ils peuvent _tre encore mouilles & la fin
du sechage. Si cela se produit, faites-les secher une courte periode
supplementaire.
11
Page 33

Etiquettesde precautionsde lavage
De nos jours, la plupart des tissus peuvent _tre seches sans
probleme dans la secheuse & culbutage, mais certaines finitions de
tissu ne doivent pas _tre sechees & la chaleur directe.
La majorite des v_tements possedent des etiquettes de precautions
de lavage qui fournissent des instructions de lavage et de sechage. II
faut toujours suivre attentivement ces instructions, en particulier la
premiere fois que vous sechez un article.
Les symboles les plus connus sont les suivants :
D eut _tre seche darts une secheuse a culbutage
}_ Ne secher dans une secheuse & culbutage
pas
Ou:
@
D
Regler la secheuse & culbutage & temperature elevGe
Regler la secheuse & culbutage & temperature basse
Articles ne convenant
pas a la secheuse a culbutage
Ceux qui contiennent du caoutchouc mousse, des matieres
semblables au caoutchouc, du film plastique (par exemple, les
oreillers, les coussins, les impermeables en PVC) et tous autres
articles inflammables ou contenant des substances inflammables
(par exemple des serviettes imbibees de laque pour cheveux).
Fibre de verre (certains types de rideaux par exemple)
Articles qui ont et6 nettoyes & sec
Lainages. Les article en lainage requierent autant de soin pour le
sechage que pour le lavage. Le mouvement du tambour de la
secheuse a culbutage peuvent rapetisser ou deformer la fibre de
laine.
• VGtements comportant le Code ITCL (voir,'Articles qui requierent
une attention speciale').
Ne pas secher dans la secheuse & culbutage
• Les gros articles encombrants, par exemple les edredons, les sacs
de couchage, les oreillers, les coussins, les couvertures doubles et
les couvre-lits epais. Ces articles s'elargissent Iors du sechage et
emp_chent la circulation d'air darts la secheuse.
ATTENTION :
LA SECHEUSE EST CON(}UE POUR USAGE AVEC DES
ARTICLES LAVES DANS UNE SOLUTION A L'EAU. UNE
MAUVAISE UTILISATION DE LA SECHEUSE A CULBUTAGE
PEUT ENTRA NER DES R SQUES D NCEND E.
12
Page 34

Articlesquirequibrentuneattentionspeciale
Couvertures et
couvre-lits
II est evident que les conditions de sechage des couvertures et des
couvre-lits varient enormement selon leur taille et leur poids.
Certains sont tout simplement trop gros. Si vous avez de la difficulte
les charger dans la secheuse, la machine aura de la difficulte ales
secher correctement. Les couvertures (et les v_tements) en fibres
d'acrylique (par exemple Acilan, Courtelle, Orion et Dralon) doivent
6tre sechees avec precaution a basse temperature. II faut eviter de
trop secher pour emp_cher le plissage dQ & la chaleur.
V6tements plisses Votre secheuse traitera tres bien ces v6tements, mais il faut toujours
et plies de fa£on lire les instructions de sechage du fabricant attachees aux
permanente v_tements avant de commencer.
Articles empeses
Les articles empeses doivent _tre seches ensemble dans la m6me
charge pour eviter que I'empois se repande sur des articles non
empeses. II faut utiliser une solution d'empois un peu plus dense
que celle utilisee pour les articles seches sur la corde & linge.
S'assurer que le maximum de solution soit retire de la charge avant
de la placer darts la secheuse.
Enlever les articles de la secheuse des qu'ils atteignent I'humidite
requise pour le repassage. S'ils sont trop seches, I'empois se
transforme en poudre et le tissu se ramollit.
Conditionneur de
tissu
Nettoyage a sec
maison
Pour s'assurer que les v6tements seches dans la secheuse &
culbutage soient frais et souples, nous recommandons d'utiliser un
conditionneur de tissu liquide dans le dernier tin,age du lavage. Un
conditionneur de tissu liquide restaure le rebond et la douceur et
elimine I'electricit6 statique.
ATTENTION : I
EN AUCUN CAS DOlT-ON METTRE. UN COND!TIONNEUR I
LIQUIDE DANS LA SECHEUSE. J
Les v_tements portant le code ITCL _ peuvent _tre nettoyes en
utilisant Fun des trousses de nettoyage & sec maison disponibles.
Les instructions fournies avec la trousse de nettoyage a sec maison
doivent _tre strictement suivies.
13
Page 35

Guidede la dur e des chage
La quantite d'eau
retenue dans les
v_tements apres
ressorage
Veuillez rioter que les durees de sechage indiquees ci-dessous et sur le
panneau de commande de I'appareil ne le sont qu'& titre INDICATIF et
que la duree de sechage est influencee par :
Veuillez noter que les durees de sechage indiquees ci-dessous et sur le
panneau de commande de I'appareil ne le sont qu'a titre INDICATIF et
que la duree de sechage est influencee par :
Le type de tissu
La quantite de
v_tements
secher
Le degre de
sechage requis
Le reglage de
temperature choisi
Votre charge de sechage peut comprendre des tissus de m_me type,
mais d'epaisseur differente. Les articles plus minces prennent moins de
temps pour secher. Certains tissus, comme ceux utilises pour les jeans
sont d'une texture plus dense et, bien que legers Iorsqu'ils sont secs,
seront plus Iourds apres le lavage et I'essorage.
Les articles de v_tements seches seuls ou les petites charges peuvent,
de fagon, prendre plus de temps & secher. II est plus economique de
secher de plus grosses charges.
Comme il faut plus de temps pour completement secher des v_tements
pouvant _tre immediatement portes que des v_tements pour le
repassage, il est possible de retirer certains v_tements Iorsqu'ils sont
legerement humides, pr_ts pour le repassage, puis de continuer le
sechage avec les autres articles jusqu'a, ce qu'ils soient entierement
secs.
I'etiquette sur le v_tement devrait indiquer la bonne temperature de
sechage requise. Voir la section ,, etiquettes de precautions de lavage,,.
La temp_,rature de la Si la piece ou se trouve la secheuse est froide, vos v_tements prendront
piece ou se trouve la
s_cheuse plus de temps & secher que si elle est chaude.
Articles
encombrants
CONVENANT PAS _. LA SECHEUSE A CULBUTAGE _.
Guide de s_chaqe - la dur_e de s_chage approxirnativeest indiqu_e en minutes
Certains articles encombrants comme les vestons matelasses peuvent
_tre seches avec precaution, et nous recommandons de retirer ces
articles plusieurs fois, de les secouer et de les remettre dans la
secheuse.
ILY A CEPENDANT CERTAINS ARTICLES QUE NOUS
RECOMMANDONS DE NE PAS SECHER. VOIR <<ARTICLES NE
(les poids indiques sent pour le linge sec)
COTON
Dur_ede s6chage800 - 1200tours/minute
dans la machine& laver
Charge
complete
91b 111b 131b
4 kg 5 kg 6 kg
70-80 80-90 95- 120
SYNTHI_TIQU E
Dur_ede s_chageavec essorage
r_duitdans la machine& laver
Demi Charge
charge cornpl_te
2 Ib 4 Ib 7 Ib
1 kg 2 kg 3 kg
40-50 50-70 70-90
Derni
charge
2 Ib 4 Ib 7 Ib
1 kg 2 kg 3 kg
30-40 40-55 55-70
ACRYLIQUE
Dur_ede s_hage avec
essorager_duitdans la
machinealaver
Derni Charge
charge cornplete
2 Ib 4 Ib
1 kg 2 kg
40-60 55-75
Attention de ne
pas trop faire
secher
14
Tousles tissus contiennent une humidite naturelle, m6me quand ils sont
juges ,,secs_> et cette humidite naturelle ne dolt pas 6tre eliminee pour
conserver la douceur et la souplesse des v_tements.
Les v_tements qui sont seches trop Iongtemps ont tendance a se plisser
et exigent plus de repassage que d'habitude, ajoutant une somme de
travail que la secheuse vise precisement a eliminer.
Page 36

Entretiendelas cheuse
Lorsque termine
Apr_s chaque
charge
Chaque semaine
Nettoyage
Ne pas utiliser
Lubrification
Votre secheuse & culbutage ne requiert que peu d'entretien. Les
procedures suivantes la maintiendront en bon etat.
Mettez la machine hors tension et retirez la fiche electrique.
Toujours nettoyer le filtre.
Faites tourner le tambour manuellement pour verifier si les petits articles
comme les mouchoirs n'y sont pas restes.
Essuyez le tambour et scellez avec un linge humide.
Filtre & charpie _ /,_6tecteur
Conduite d'echappement
A I'occasion, nettoyez avec du vinaigre la surface d'acier inoxydable du
detecteur & I'interieur du tambour pour eliminer toute contamination. Une
application soigneuse avec un linge permet de maintenir la performance
de la secheuse. Le detecteur est situe entre les aubes du tambour vers
I'avant de la secheuse. Pour le reperer, faites tourner le tambour.
Tousles six mois, passez I'aspirateur sur la grille d'entree d'air et les
ouvertures d'aeration & I'arriere pour retirer I'accumulation de charpie et
de poussiere.
Pour eliminer toute accumulation de charpie des zones de la porte, du
conduit d'echappement et du filtre, aspirez de temps & autre avec un
aspirateur.
Ne pas utiliser de nettoyants abrasifs, des produits de recurage, de I'eau
de Javel ou de la cire pour metaux pour nettoyer les diverses parties de
la machine.
Ces derniers pourraient endommager la machine.
Votre secheuse a.culbutage comporte des elements d'articulation
speciaux.
I'utilisateur n'a pas besoin de les lubrifier et ne dolt pas tenter de le
faire.
Nous recommandons fortement que tousles appareils soient
regulierement verifies pour assurer leur securite electrique et
mecanique.
15
Page 37

Si unprobl mese pose
Ne paniquez pas! II se peut qu'il n'y ait pas de probl_me du tout.
Identifiez le probleme dans la liste ci-dessus, puis essayez nos suggestions.
La plupart du temps, celles-ci offriront une solution vous permettant d'utiliser
& nouveau I'appareil sans avoir _. contacter le Centre de r_parations.
Probl_me
Si, apr_s avoir essaye ces suggestions, la machine ne fonctionne toujours
pas, suivez les recommandations & la page suivante.
Faites d'abord ces v_rifications
11ne veut pas
d_marrer'
11faut beaucoup de
temps pour le
s_chage'
1. Est-ce que la machine est branch_e et en fonction au niveau de la prise
de courant?
2. Est ce que la commande est r_gl_e & la dur_e desir_e?
3. Est-ce que la porte est bien ferm_e?
4. Avez-vous bien appuy6 sur le bouton de d6marrage? Essayer de
nouveau.
5. Est-ce que le fusible a saute? (Essayez de brancher un autre appareil
pour v6rifier).
6. Avez-vous utilise une rallonge _lectrique? Plusieurs de ces rallonges ne
conviennent pas. Essayez de brancher le sechoir directement darts la
prise 61ectrique pour verifier.
1. Avez-vous oublie de nettoyer le filtre? II faut le faire apres chaque charge.
2. Avez-vous s_lectionne le r_glage du programme appropri_ au type de
textiles que vous voulez faire secher ?
3. Est-ce que la conduite d'a_ration souple est bloquee ou entortill_e?
V_rifier si un objet obstrue la circulation ou s'il y a de la condensation
(eau)?
4. Est-ce que I'entr_e d'air ou les ouvertures d'aeration arri_res sont
bloquees?
5. Est-ce que le couvercle sur la bouche d'aeration est bloqu_ ?
6. Est-ce que les v_tements etaient ,, excessivement mouill_s ,, Iorsque
deposes dans la s_cheuse?
7. Avez-vous choisi la bonne duree/le bon programme de s_chage?
8. Est-ce que la charge _tait trop grosse?
_ Le s_che-linge C'est parfaitement normal : cela veut dire que le seche-linge effectue la phase
tourne de mani_re anti-froissage eta atteint la fin du cycle de s_chage, et que le linge est pr_t &
intermittente ,, _tre sorti.
,, Le s_che-linge Cela est parfaitement normal : il est en phase anti-froissage - voir ci-dessus.
6met constamment
des bips ,, Ouvrir la porte - Le bip s'arr_tera.
'Le voyant s6chage Voir section "Les commandes". Cela indique un defaut _ventuel.
en cours clignote'
'La s6cheuse ne C'est tout & fait normal, la secheuse a termine son programme.
cesse de sonner' Ouvrir la porte - Le hip s'arr_tera.
D'autres Avez-vous lu de nouveau ce manuel d'instructions?
probl_mes?
Si votre probleme persiste contactez notre service a la clientele.
16
Page 38

Instructions d'installation
Lisez attentivement et completement les instructions.
Ces instructions doivent 6tre suivies par un installateur qualifie. En outre, I'installation dolt
6tre conforme :
• Aux Etats-Unis, conforme au National Electric Code ANSl/NFPA70 - derniere
edition et tout code local, municipal ou d'Etat.
• Au Canada, conforme au Code canadien d'electricit6 C22.1 - derniere edition
et tout code local, municipal ou provincial.
Raccordement lectrique
La secheuse vient avec un cordon d'alimentation & quatre ills raccorde & une fiche 14-30P
(plug), un receptacle dolt 6tre installe dans un endroit accessible apres I'installation de la
secheuse. Si la secheuse est installee darts une maison mobile ou dans certaines
regions o_ les codes Iocaux ne permettent pas la mise a la terre du fil Neutre, cet
ensemble de cordon de secheuse & 4 ills dolt 6tre utilise.
Si unl0-30R (receptacle) est installe, un ensemble de cordon de secheuse a 3 ills, achete
Iocalement, d'une valeur nominale de 240V min, 30A et indique pour secheuses, dolt 6tre
utilise.
Pour I'ensemble de cordon de secheuse 10-30E effectuez la procedure suivante :
• Assurez-vous que la secheuse n'est pas branchee & I'electricite.
• Retirez le couvercle de la bofte de raccordement a I'arriere de la secheuse.
• Desserrez I'ecrou qui retient la hague de c&ble, debranchez et jetez le c&ble et
la bague.
• Preparez les bouts du nouveau c&ble, en enlevant, le cas ech6ant, les cosses,
et retirez I'isolation pour pouvoir I'ajuster au bloc de branchement.
• Suivez toutes les instructions fournies avec la trousse et emboftez le c&ble &
I'aide du serre-c&ble fourni avec la trousse. Ne pas serrer le serre-c&ble.
• Liez la borne neutre & la mise a la terre en retirant un des bouts du fil vert de
la mise a la terre (+). Raccordez ensuite ce bout & la borne neutre (N).
• Brancher le fil de terre (vert) et les ills L1 et L2.
Sur les cordons plats le fil du centre est le conducteur neutre.
Raccordez-le & la borne marquee 'N'. Serrez & fond les vis du bloc de
branchement et positionnez le cordon, finalement serrez completement
le serre-c&ble.
• Reposez le couvercle sur la bofte.
Mise _ la masse
Certains codes Iocaux peuvent necessiter une mise _.la terre separee. Si c'est le
cas le fil de raise & la terre, la bride et la vis doivent 6tre achetes separement.
NE JAMAIS utiliser de tuyaux de plomberie, conduites de gaz ou canalisations
d'eau de plastique pour la mise & la terre de la secheuse.
REMAR.QUE : EN CAS DE DOUTE AU SUJET DES POINTS
PRECEDENTS, CONSULTEZ UN ELECTRICIEN QUALIFIE
17
Page 39

Instructions d'installation
Emplacement du s_choir
Verifiez les codes Iocaux avant de choisir I'emplacement. Certains codes ne permettent
pas I'installation dans un garage, garde-robe, maison mobile or chambre & coucher. NE
PAS installer la secheuse dans un endroit o_ I'essence ou autre produit combustible sera
range ou conserve.
En faisant fonctionner la secheuse, il dolt y avoir la ventilation adequate afin d'eviter le
retour des gaz dans la piece par les appareils consommant d'autres carburants, y compris
les feux ouverts.
Degagements minimum :
36tes
Dessus
Arribre
Devant
Garde-robe
100 mm (4")
375 mm (15")
90 mm (31/2'')
90 mm (31/2'')
Sous un comptoir
0"
0"
0"
sans objet
Si la secheuse est installee dans un garde-robe celui-ci dolt presenter les dimensions
suivantes ainsi que deux orifices de ventilation de 450 cm 2 (72 po2)situes & 150mm (6
po) du haut et du bas de la porte. La secheuse ne dolt JAMAIS _tre posee dans un garde-
robe avec porte solide.
Le devant de la secheuse presente des pieds de nivellement. Utilisez-les pour niveler la
secheuse apres I'emplacement final de I'appareil.
Conduit d'_vacuation
Le systeme de ventilation de la secheuse dolt _tre aussi court et droit que possible avec le
moins de coudes possible. Utilisez un conduit de metal rigide de quatre pouces. Un
conduit de metal flexible peut _tre utilise mais la Iongueur maximum dolt alors _tre reduite
et les plis dans le conduit reduiront encore plus la Iongueur. Ne jamaie utiliser des
conduits de plastique. Tousles coudes doivent avoir un diametre de 4 pouces. Les joints
doivent 6tre couverts de ruban adhesif entoile.
Ne pae utiliser de vis car la charpie peut s'accumuler sur les vis.
Longueur maximum du conduit d'evacuation
Nombre de coudes Conduit rigide Conduit flexible
0 6,6 m (22 pi.) 4,5 m (15 pi.)
1 5,4 m (18 pi.) 3,6 m (12 pi.)
2 4,2 m (14 pi.) 2,7 m (9 pi.)
3 1,8 m (6 pi.) 1,2 m (4 pi.)
Les consignes ci-dessus supposent I'utilisation d'un event approuve et que le volet n'a pas
de Ioquet magnetique.
ATTENTION:
• Lappareil NE DOlT PAS _tre _vacu_ dans une chemin_e, un mur,Un Pafond ou
une aire cach_e de I _difice. _
• Afin de r_duire Ie danger d incendie, cet apparel! DOlT ETRE VENT!LEVERS
LEXTERIEUR.
• Ne pas d_charger I'air d'_vacuation dans une chemin_e utilis_e pour ventiler des I
I vapeurs ou fum_es d'autres appareils consommant du gaz ou autres carburants. I
Selon la frequence d'utilisation il est essentiel de verifier la ventilation a I'occasion pour
que toute charpie ou autre debris soit enleve.
18
Page 40

Instructions d'installation
Trousse de superposition
Une trousse de superposition est fournie avec la secheuse, ce qui vous permet d'installer
la secheuse par-dessus une laveuse Ariston.
Type W1024 (modele AW120NA) utilise le support A
Type W1026CO (modeles AW121NA ou AW122NA) utilise le support B
La trousse contient 2 supports A et B, 2 vis autotaraudeuses.
Outils requis : tournevis cruciforme (Philips) No2.
SI_CURITI_ D'ABORD
Afin d'eviter les blessures, NE TENTEZ PAS de superpoeer lee appareils sans aide.
Une deuxieme personne doit vous aider a soulever la secheuse pour la placer sur
la laveuse et a deplacer lee appareils superposes.
1. Vous devrez avoir acces au dos de la machine afin de superposer la secheuse. Au
besoin, deplacez la machine pour acceder au dos de la machine afin de superposer la
secheuse.
2. Retirez les deux vis situees & chaque c6te du has du panneau arriere de la secheuse.
Gardez les vis car elles vont servir plus tard. Vissez les pieds de nivellage avant jusque
dans la base.
3.
4.
Faites-vous aider pour soulever la secheuse et la placer sur la laveuse. Situez le
support de superposition approprie (A ou B) sut le dos de la secheuse et fixez-le &
I'aide des vis retirees & I'etape 2.
Repositionnez la secheuse de fagon &ce que le support soit aligne & la garniture
superieure de la laveuse et assurez-vous que la secheuse est placee au centre de la
laveuse.
5. Fixez le support & la laveuse & I'aide des deux vis autotaraudeuses fournies.
6.
suDl0ort A SUDI)ort B
La superposition des appareils est maintenant faite et les machines peuvent _tre
placees et branchees, en prenant soin de brancher les appareils darts deux prises
separees.
19
Page 41

GARANTIES
S che-lingeARISTON
Les garanties fournies par (Ariston) dans cette d6claration ne sont applicables qu'aux lave-linge
s6chants Ariston vendus au premier utilisateur qui aura achete I'appareil chez Ariston ou chez I'un de
ses distributeurs, revendeurs ou centres d'assistance agrees aux Etats-Unis ou au Canada. Les
garanties prevues par ce document ne sont pas transferables.
Dur_e de la garantie
2 annie Garantie totale limit_e & compter de la date d'installation*
Ariston s'engage & reparer ou & remplacer gratuitement tout composant qui s'av_rera defectueux,
sous reserve de conditions normales d'utilisation domestique, frais d'exp6dition et de main d'oeuvre
inclus. La r6paration sous garantie devra _tre effectuee par un centre d'assistance Ariston agre6.
Troisi_me-Cinqui_me annie Garantie limit_e aux composants Electroniques a compter de la
date d'installation*
Ariston s'engage a reparer ou a remplacer gratuitement tout microprocesseur ou carte des circuits qui
s'averera d6fectueux sous reserve de conditions normales d'utilisation domestique dans les 3-5 arts
suivant la date d'installation originale, frais de main d'oeuvre exclus.
Troisi_me-Cinqui_me annie Garantie limit_e au moteur a compter de la date d'installation*
Ariston s'engage & reparer ou & remplacer gratuitement le moteur ou tout composant du moteur qui
s'averera d_fectueux sous reserve de conditions normales d'utilisation domestique dans les 3-5 ans
suivant la date d'installation originale, frais de main d'oeuvre exclus.
Garantie a vie limit_e du produit contre la corrosion de racier inoxydable due a la rouille
compter de la date d'installation*
Ariston s'engage & fournir gratuitement un lavedinge sechant de replacement du m_me modele ou
d'un modele actuel qui soit _quivalent ou meilleur d'un point de vue fonctionnel, au cas oQ le tambour
de lavage serait attaque par de la rouille sous r6serve de conditions normales d'utilisation, frais de
main d'oeuvre, d'exp_dition et d'installation exclus.
10 jours a compter de la date d'achat Garantie d_t_riorations esth_tiques
Ariston s'engage & remplacer gratuitement toute partie esth_tique (appel au service assistance
inclus) qui s'averera abfm_e, dans les 10 jours suivant la date d'achat. Cette clause n'inclut toutefois
pas les dommages dus aux operations de transport, manutention ou installation effectu6es de facon
inappropri6e.
* La date d'installation se refer a la date d'installation du lave-linqe s6chant ou a dix jours ouvrables
suivant la date de livraison la date a retenir est celle qui correspond a la circonstance qui s'est
produite en premier.
Exclusions:
La pr6sente garantie ne couvre pas les appels d'assistance ou de r6paration effectu6s pour rectifier
I'installation, demander des instructions sur I'utilisation de I'appareil, remplacer les fusibles de
I'appartement ou corriger le c_tblage electrique ou I'installation hydraulique domestique. De plus,
toute r6paration de I'appareil qui s'averera necessaire suite & une utilisation autre qu'une utilisation
domestique normale n'est pas couverte par la garantie. Les garanties ne couvrent aucun d_faut ou
dommage caus6 par un accident, une mauvaise utilisation, un usage abusif ou acte de n_gligence,
une intervention d'assistance non autoris6e ou des forces ext6rieures hors contr61e d'Ariston, tels
qu'incendies, inondations et autres causes de force majeure, ou les installations non conformes aux
reglementations _lectriques ou hydrauliques applicables au niveau local. Les frais de main d'oeuvre,
d'expedition et d'installation support6s pour la r6paration ou le remplacement d'un appareil un an
apres la date d'installation ne seront pas couverts par la pr_sente garantie. Tous les composants
remplac6s ou repar6s seront assimil6s aux pi_ces d'origine pour ce qui est de la p6riode de garantie
applicable. Dans les limites permises par la Ioi, la presente garantie remplace toute autre garantie
expresse ou implicite, y compris les garanties implicites de commerciabilit6 et d'aptitude & un emploi
specifique. Ariston ne pourra en aucun cas _tre tenu pour responsable des dommages accessoires
ou indirects.
Pour acceder aux services de garantie, appeler les 1-888-426-0825, ou ecrivez &:
Ultra 8 International, 2505 Anthem Village Drive, Suite E - Box 562, Henderson Nevada 89052
En precisant toujours le num_ro du module, le numero de serie, la date d'achat, le nomet I'adresse
du revendeur.
20
Page 42

Espafiol
Page 43

Indice
Instrucciones de seguridad importantes 3-4
Instrucciones para la conexi6n a tierra 4
Caracteristicas - C6mo familiarizarse con las partes de la secadora 5-6
C6mo utilizar la secadora 7
Los Controles 8-9
Programa "plancha facil" 10
C6mo organizar la Lavado 11
Etiquetas con Recomendaciones para el Lavado 12
Articulos que no pueden secarse a mAquina 12
Articulos que requieren especial atenci6n 13
Gufa de Tiempo de Secado 14
El cuidado de su secadora 15
Problemas en el funcionamiento 16
Instrucciones para la instalaci6n 17
GuardeesteManualde Instrucciones
Este manual de instrucciones se ha de guardar a mano para su referencia futura, ya que
contiene informaciSn importante sobre el use seguro y correcto del aparato.
Si vende o cede el aparato a otra persona, o si se muda de casa y deja la lavadora en el
domicilio anterior, cerciSrese de que el nuevo duefio entre en posesi6n del Manual para
que se familiarice con el aparato y las advertencias de seguridad.
Page 44

Instrucciones de seguridad
importantes
Su secadora es facil de usar.
ADVERTENCIA: I
para reducir el riesgo de incendio ,descarga el_ctrica o lesiones a personas cuando usa su
artefacto, leaconsejamos que siga las precauciones b_sicas, incluyendo las siguientes:
1. Lea todas las instrucciones antes de usar el artefacto.
2. No seque artfculos que previamente hayan sido limpiados, lavados, remojados o
salpicados con gasolina, solventes para limpieza en seco u otras sustancias
explosivas o inflamables, dado que despiden vapores que podrfan inflamarse o
explotar.
3. No permita que los niSos jueguen sobre o dentro del artefacto. Cuando el artefacto
este en uso y haya niSos en las proximidades, se los debe vigilar con suma
atenci6n.
4. Antes de sacar de servicio o de desechar el artefacto, quite la puerta del
compartimiento de secado.
5. No meta la mano dentro del artefacto si el tambor esta en movimiento.
6. No instale o guarde este artefacto en lugares donde estara expuesto a la intemperie.
7. No manipule los controles indebidamente.
8. No repare ni reemplace ninguna pieza del artefacto ni intente Ilevar a cabo ningun
mantenimiento a menos que especfficamente Io recomienden las instrucciones de
mantenimiento del usuario.
9. No utilice suavizantes de tejidos o productos para eliminar la estatica salvo
indicaci6n del fabricante del suavizante o producto en cuestion.
10. No use calor para secar artfculos que contengan gomaespuma o materiales
gomosos de textura similar.
11. Limpie el filtro de pelusas antes y despues de cada uso.
12. Mantenga la zona alrededor de la abertura de escape y las zonas adyacentes libre
de la acumulacion de pelusas, polvo y suciedad.
13. El interior del artefacto y el conducto de escape deben ser limpiados periSdicamente
por personal de mantenimiento calificado.
14. No coloque objetos expuestos a aceites de cocina dentro de su secadora. Los
objetos contaminados con aceites de cocina pueden favorecer el
desencadenamiento de una reaccion qufmica que podrfa hacer que una carga se
prenda fuego.
GUARDE ESTAS INSTRUCCIONES
LOS NII_IOS PUEDEN METERSE DENTRO DE LA SECADORA O
MANIPULA.RLA SI SE LES DEJA SOLOS.
CUANDO LA MAQUINA NO ESTE EN USO, APAGUELA, DESENCHt)FELA Y CIERRE
LA PUERTA.
Page 45

Para su seguridad
SIEMPRE
SIEMPRE
SIEMPRE
SIEMPRE
SIEMPRE
SIEMPRE
• Que no utilice la secadora: apaguela y cierre la puerta.
• Cumpla los requisitos el_ctricos especificados.
• Asegt_rese de que la secadora se ha instalado correctamente y la
ventilaci6n sea la adecuada (vea las, 'lnstucciones para la instalaci6n.')
• Finalice cada programa con del ciclo en la posici6n fifo.
• Limpie el filtro. Es fundamental mantener el filtro libre de pelusas en todo
memento.
• Observe las recomendaciones de secado de las prendas.
ADVERTENCIA:
No toque la parte posterior de la secadora cuando est_ en
marcha, ipuede estar caliente!
Instrucciones para la conexibn a tierra
aparejado un riesgo de descarga el_ctrica, iConsulte con un electricista calificado o
un representante o personal del servicio de mantenimiento si no est_ seguro de que
el artefacto est_ correctamente conectado a tierrat
En caso de averia o funcionamiento defectuoso, la conexion a tierra disminuira el
riesgo de descarga electrica al proporcionar una trayectoria de mfnima
resistencia para la corriente electrica. Este artefacto esta equipado con un cable
que tiene un conductor y una placa de conexi6n a tierra. El enchufe debe
insertarse en un tomacorriente apropiado que ha sido adecuadamente instalado
y conectado a tierra de conformidad con todos los codigos y ordenanzas locales.
NO modifique el enchufe que se suministra con el artefacto. Si no encaja dentro
del tomacorriente, haga instalar un tomacorriente apropiado por un electricista
calificado o cambie el cable por uno apropiado para la secadora.
CONSULTE LA PLACA DE DATOS PARA COMPROBAR LOS REQUISITOS
DE VOLTAJE Y DE CORRIENTE (vealaubicaci6n en el diagrama.)
La secadora debe estar conectada a la red electrica con un enchufe que sea
accesible una vez se haya instalado la secadora.
Esta secadora debe estar conectada a un CIRCUITO DERIVADO INDIVIDUAL
DE 30A.
Si desea obtener informaci6n mas detallada, le aconsejamos que lea la secci6n
"lnstrucciones para la instalacion" de este manual.
NOTA: EN CASO DE CUALQUIER DUDA CONSULTE CON UN
ELECTRICISTA CALIFICADO.
Page 46

Caracteristicas.Comofamiliarizarseconlaspartesdelasecadora
Vea ,<Controles>>
- Presione aquf
para abrir la
puerta
/ Rejillas de
admisidn de
aire
NOTA: Si la secadora es
nueva, limpie el tambor
antes de utilizarla para
eliminar el polvo que
haya podido acumularse
durante su transporte.
Placaindicadoradecapacidadnominal,nQmerosde modelo y de serie
Filtro de pelusas
LIMPIESE
Seguro de la
puerta
Enganche
de cierre de
la puerta
Page 47

Caracteristicas.C0m0familiarizarseconlaspartesdelasecad0ra
BISAGRA
SEGURO
DE LA
PUERTA
BISAGRA
ENGANCHE DE
CIERRE DE LA
PUERTA
Instrucciones
para la
Reposicion
de la Puerta
(solamente si la
secadora se
instal6 sobre la
lavadora)
Si la secadora se instala sobre una lavadora per medio del kit de
uni6n suministrado (vea la secci6n "lnstrucciones para la
instalacion"), podra invertir facilmente la direcci6n de apertura de la
puerta.
Intercambie diagonalmente las abrazaderas de las bisagras con los
tapones obturadores, asi come el seguro de la puerta y el enganche de
cierre de la puerta con sus chapas de cierre opuestas. Le aconsejamos
que vea la ilustraci6n anterior.
Rejilla de entrada
de aire
Elescape se
conecta aqui
NOTA: Cuando
la secadora est_
el3 marcha, no
toque la parte
posterior del
aparato: puede
estar caliente.
Page 48

Cbmoutilizarlasecad0ra
ADVERTENCIA:
Para reducir el riesgo de incendio, descarga el_ctrica o lesiones a personas, !e aconsejamos
que lea las INSTRUCCIONES DE SEGURIDAD IMPORTANTES antes de usar este artefacto.
1. Enchufe y conecte la electricidad.
AOVE.TE.O,A:I
CUANDOENCHUFE0 I
DESENCHUFELA SECADORA,HAGALOCON LAS
MANOSSECAS. I
2. Presione el interruptor [
de encendido / apagado
[
hacia dentro. La secadora
no funcionara a menos
que el interruptor de
encendido / apagado este
hacia dentro.
Bot6n APRETADO
Encendido
Bot6n FUERA
Apagado
]
3. Clasifique la ropa
(vea la secci6n
"Come organizar el
lavado").
4. Abra la puerta
pulsando y soltando
el panel frontal en
la posicion que se
muestra
6. Cargue la
secadora colocando
la ropa con cuidado
en el tambor,
empujandola hacia
atras y alejandola
del cierre de la
puerta. Cierre la
puerta.
5. Siempre
verifique que el...
FILTRO DE PELUSAS
est_ limpio y colocado
en posici6n.
7. Seleccione el programa requerido o el
tiempo de secado (vease la seccion "Los
Controles").
8. Pulse el
interruptor START
(PUESTA EN
MARCHA) para
iniciar el programa
de secado.
Retirar las prendas
9. Cuando acabe,
abra la puerta y
saque la ropa.
Limpie y reemplace
el filtro de pelusas.
10. Corte la electricidad y cierre la puerta.
Aow.T .c, : I
CUANDOENCHUFE0 I
DESENCHUFELASECADORA,HAGALOCON LAS
MANOSSECAS.
Abriendo la puerta puede comprobar la sequedad de la ropa tan a
menudo como Io desee y si Io desea sacar alguna prenda antes de
que este totalmente seca. (Esto es particularmente Otil cuando este
secando una carga mixta y desee planchar algunas prendas, y otras
estb.n totalmente secas). Necesitara pulsar el boton de puesta en
marcha despu6s de cerrar la puerta para reiniciar el programa.
Vea la secci6n "Los controles".
Page 49

LosControles
Interruptor de
encendido
ON/OFF
Seleccion del
programa
Opciones del
programa
Puesta en marcha
de la secadora
Presione el boton On/Off (encendido/apagado) para Ilevarlo a la
posicidn IN (apretado) y asi encender la secadora. La secadora no
funcionara si el boton de encendido (On/Off) no esta en la posicidn
IN.
Para seleccionar el programa que desee, todo Io que debe hacer es
girar la perilla Program Control (Control de programas) hasta que el
programa deseado aparezca se5alado por el indicador.
Programasde secado por sensor autom&tico
(para cargas superioresa2 Ib-1kg)
1. Secado extra de algodones regulares (calor ALTO)
Este programa es el de mayor nivel de secado.
Algunos artfculos voluminosos o las grandes cargas de toallas
nuevaspueden estar ligeramente h0medas despues de este
programa y requerir un breve perfodo de secado temporizado.
2. Secado normal para algodones regulares (calor ALTO)
3. Secado para planchado de algodones regulares (calor ALTO)
Este programa es el que deja las prendas con el mayor nivel de
humedad.
4. Secado extra para planchado permanente (calor BAJO)
5. Secado normal para planchado permanente (calor BAJO)
6. Secado ligero para planchado permanente (calor BAJO)
Programas por temporizador (para cargas inferioresa 2 Ib-1 kg)
7. 40 minutos (calor BAJO) incluye secado en frio seguido
de la fase Antiarrugas.
8. 30 minutos (calor BAJO) incluye secado en frio seguido
de la fase Antiarrugas.
9. 20 minutos (calor BAJO) incluye secado en fri6 seguido
de la fase Antiarrugas.
10. _ Programa de secado en frb (Air fluff) seguido de la fase
antiarrugas.
11. _ Programa "plancha facil". Vea la seccion "Programa plancha
f_.cil".
Para ver la descripcion de los otros programas, vaya a la siguiente
pagina.
Apriete y suelte el bot6n PUESTA EN MARCHA para comenzar un
programa de secado (es necesario haber seleccionado previamente
el programa de secado). Se enciende la luz de secado.
NOTA: Si la puerta se abre durante un programa, la
eecadora se detendra automaticamente. Para continuar el
programa despues de cerrar la puerta, apriete el boton
PUESTA EN MARCHA.
Page 50

LosControles
Luz de secado
Luz de calor
Luz de baja
temperatura
Fase de secado
en frio
Fase antiarrugas
Esta iuz se enciende siempre que haya un programa en
funcionamiento.
Si la luz parpadea, significa que un programa automatico ha
superado los 180 minutes de funcionamiento. Pot razones de
seguridad, este es el maximo tiempo de secado permitido.
Las causas de este funcionamiento extendido pueden ser las
siguientes:
• La carga es demasiado grande, o demasiado voluminosa.
• El filtro esta bloqueado.
• Se sec6 una carga de algodon a BAJA velocidad.
• Posible averia mecanica.
Apague la secadora, compruebe las tres primeras causas posibles, y
vuelva a intentarlo.
Esta iuz se enciende durante la fase de secado del programa,
excepto por los cortos periodos de rotacion inversa del tambor.
Este testigo se enciende para indicar que la secadora esta
funcionamiento a baja temperatura.
Esta luz se enciende para indicar que la secadora esta funcionando
a baja temperatura.
Unos 10 minutes antes de que finalice el programa, se apagan los
elementos de caientamiento y el programa entra en la fase final de
enfriamiento. Durante esta fase se enfrfa la ropa. Nunca se debe
saitear esta fase.
AI abrir la puerta puede comprobar tantas veces como quiera si la
ropa ya esta seca y sacar las prendas que no quiera que se sequen
totalmente (esta opcion es especialmente t]til para las cargas mixtas
en las que quiera planchar algunas prendas y secar totalmente
otras).
Tiene que apretar el boton PUESTA EN MARCHA despues de
cerrar la puerta para reiniciar el programa. Remitase a la pagina
anterior.
Quiza no le convenga sacar ia ropa en cuanto finaiiza el programa
de secado. No se preocupe; la secadora impide que la ropa se
arrugue girando el tambor suavemente. AI mismo tiempo, suena una
alarma intermitente para recordarle que la ropa ya esta lista para ser
sacada.
Page 51

Programa "plancha f cil"
Cuando utilizar
'Plancha facil'
ilmportante!
El programa 'plancha facil' es un programa corto de
aproximadamente 8 minutos de calor con unos 2 minutos de secado
en frio. Es un programa corto de acondicionamiento que suaviza las
fibras, facilitando el planchado y haciendolo menos laborioso.
Independientemente de c6mo se seque la ropa -ten el tendedero,
sobre el radiador, colgada dentro de la casa o en una secadora-,
una vez seca se suele dejar en la misma posici6n o lugar durante
bastante tiempo. EIIo normalmente es la causa de que las fibras se
endurezcan, dificultando su tratamiento y prolongando el planchado.
El programa 'plancha facil' se puede utilizar con la ropa que se deje
secar de esta manera.
• El ciclo 'plancha facil' no es un programa de secado. Ha sido
dise_ado para acondicionar / suavizar la ropa que haya sido
dejada seca durante cierto tiempo.
• Distintos materiales se comportan de maneras diferentes al
calentarse. Por ejemplo, las pruebas realizadas por nosotros
indican que los materiales como Tencel® y los acrflicos no se
benefician tanto del tratamiento del ciclo 'plancha facil' como los
mas tradicionales de algod6n y poli algod6n.
• Para conseguir un resultado optimo del programa 'plancha facil',
es importante que no se excedan los pesos recomendados mas
abajo.
• Para mejores resultados, recomendamos que la ropa se saque
de la secadora inmediatamente despues de que acabe el
programa 'plancha facil' para colgarla, doblarla o
plancharla. Cuando esto no sea posible, se debera repetir el
ciclo 'plancha facil'.
Pesos y materiales recomendados:
Aviso sonoro
Material Carga maxima
Algod6n y mezclas de algod6n 2 Ib (2.5kg)
Sinteticos 1 Ib (2kg)
Vaqueros 1 Ib (2kg)
Cuando finaliza el ciclo, se oye un aviso sonoro para recordarle que
saque la ropa de la secadora.
10
Page 52

Cbmoorganizarel Lavado
1. Antes de lavar o secar, separe siempre la ropa segun el tipo de
tejido.
2. Asegurese de cerrar cada cremallera y broche, y de que los
cinturones y cintas esten atados con un lazo holgado. Debera
hacer esto con cada artfculo antes de lavarlos.
3. Es importante quitar la mayor cantidad de agua posible de los
articulos antes de introducirlos a la maquina; le ahorrara tiempo y
dinero.
ADVERTENCIA:
NO META NUNCA ROPA EMPAPADA.
4. Asegt]rese de que todos los artfculos puedan secarse a maquina,y
de que no requieran ,,atenci6n especial,, (vea la seccion
,,Etiquetas con Recomendaciones para el lavado_,).
Capacidad de
carga maxima
Carga normal
Su secadora puede aguantar una carga de 6kg (13 Ib) de tejidos
naturales secos. Si desea secar fibras sinteticas o acrflicas, la carga
maxima no debe superar los 3kg (6.6 Ib) en seco.
La diferencia consiste en que las fibras sinteticas precisan mayor
espacio para secarse sin arrugarse.
ADVERTENGIA: I
SI SOBRECARGA LA MAQUINA PUEDE REDUCIR EL
REND M ENTO DEE SECADOy PROVOCAR UN NCEND O.
Para ayudarle a calcular el nt]mero de artfculos que puede meter en
un secado, las tablas siguientes le muestran el peso aproximado de
algunos de los artfculos que se lavan a diario.
Prendas
Blusa Algod6n 15% 5oz
Otro 100g 31/20z
Vestido Algod6n 50% 1 Ib2oz
Otro 35% 12oz
Pantal6n vaquero 700g 1 Ib 6oz
10 pahales 1000g 2 Ib3oz
Camisa Algod6n 300g 101/2oz
Otro 200g 7oz
Camiseta 125g 41/20z
Ropa blanca
Funda de Algod6n 150% 3 Ib 5oz
edred6n (Doble) Otro 100% 2 Ib 3oz
Mantel grande 700g 1 Ib 6oz
Mantel pequeifio 25% 9oz
Paho de cocina 100g 31/2oz
Toalla de bane 700g 1 Ib 8oz
Toalla de mano 35% 12oz
Sabana doble 50% 1 Ib 2oz
Sabana individual 35% 12oz
Si junta tejidos de algodon angosto o de toalla de felpa con tejidos
sinteticos pueden continuar estando humedos al finalizar el ciclo de
secado. Si asf fuese, a_ada simplemente un ciclo corto de secado
para terminar de secarlos.
11
Page 53

EtiquetasconRecomendacionesparael Lavado
Su maquina puede secar practicamente cualquier tipo de tejidos sin
problema algune; aun asf existen ciertos acabados de tejidos que no
pueden secarse con calor directo.
La mayorfa de las prendas traen etiquetas con instrucciones
cempletas sobre su lavado y secade. Deben seguirse estas
instrucciones con sumo cuidado, especialmente si se esta secande
algo per primera vez.
Los sfmbolos tfpicos son:
D secarse a maquina
Puede
No seque a maquina
O_
_ ecado con aire muy caliente
Secado a baja temperatura
Articulos que no pueden secarse a maquina
• Aquellos que contienen goma espuma, asf como materiales
gomosos o envolturas de plastico (per ej. almohadas, cojines,
impermeables de plastico), o bien cualquier artfculo inflamable o
que contenga sustancias inflamables (per ej. toallas contaminadas
con laca para el pelo).
• Fibra de vidrio (por ej. algunas cortinas)
• Artfculos que se hayan limpiado en seco.
• Lana. Las prendas de lana precisan el mismo tipo de cuidades al
secarse como al lavarse. El movimiento de la secadora encoge y
deforma las fibras de lana.
• Prendas con el c6digo ITCL. (yea la seccion, 'Artfculos que
requieren especial atenci6n').
seque a maquina.
No
• Artfculos voluminosos, come per ej. edredones continentales,
sacos de dormir, almohadones, cojines, mantas dobles y colchas
grandes. Estos aumentan de tamaSo al secarse e impiden la
circulacion del aire en la secadora.
ADVERTENCIA: I
LA SECADORATAN SOLO PUEDE USARSE CUANDO SE HA I
EMPLEADO AGUA EN EL PROCESO DE LIMPIEZA. EL USO
INCORRECTO DE LA SECADORA PUEDE PROVOCAR UN
NCEND O.
12
Page 54

Articulosquerequierenespecialatenci6n
Mantas y colchas Los requisitos de secado para las mantas y colchas varfan
enormemente segt]n su tamaSo y peso, siendo algunas
simplemente demasiado grandes. Si tiene dificultad al meterlas en la
secadora, la m&quina tendra asimismo dificultad en secarlas
adecuadamente. Las mantas (y prendas) hechas con fibras acrilicas
(por ej. Acilan, Courtella, Orion y Dral6n) deben secarse con
especial cuidado, a baja temperatura. Debe evitarse que se sequen
excesivamente o, de Io contrario, el calor las puede arrugar.
Prendas
permanentemente
plisadas o
arrugadas
Articulos
almidonados
Suavizante
Limpieza en seco
en el hogar
Su maquina puede secar muy bien estas prendas, pero siempre debe
leer las instrucciones del fabricante en la etiqueta antes de empezar
el proceso de secado.
Los artfculos almidonados deben secarse juntos en un solo grupo a
fin de evitar que el almiddn se distribuya a otros artfculos no
almidonados.
Debera usar una solucidn ligeramente m_.s condensada de almiddn
que la que usarfa normalmente para secar los artfculos en un
tendedero al aire libre.
AsegQrese de quitar la mayor cantidad posible de almiddn de la
ropa antes de meterla en la secadora. Saque los artfculos de la
maquina en cuanto alcancen la humedad adecuada para
plancharlos. Si se secan excesivamente, el almiddn se convierte en
polvo.
Le recomendamos que use suavizante Ifquido en el ultimo aclarado
de su lavadora, a fin de asegurarse que todas sus prendas salgan
tersas y suaves de la secadora. Los suavizantes Ifquidos reviven las
prendas y las dejan suaves, ademas de que ayudan a eliminar la
reaccion estatica.
ADVERTENCIA:
BAJO NINGUNA CIRCUNSTANCIA DEBE ANADIRSE
SUAV ZANTE L QU DO A LA SECADORA. 1
Las prendas con el c6digo ITCL _ peuden lavarse en seco
utilizando uno de los kits de lavado en seco para uso domestico
disponibles.
Las instrucciones que se proporcionan con el kit de lavado en seco
para uso domestico, deben seguirse estrictamente.
13
Page 55

GuiadeTiempode Secado
La cantidad de
agua que
permanece en el
lavado despues
del centrifugado
Tenga en cuenta que el tiempo de secado que se indica mas
adelante, asf como en el panel de mando, es tan solo orientativo y
que los tiempos de secado pueden verse afectados por:
Los artfculos tales como toallas retienen gran cantidad de agua
despues del centrifugado. Asimismo, algunos programas de lavado
para artfculos pequeSos, tales como camisetas, pueden incluir a
veces un centrifugado de baja velocidad, produciendose el mismo
efecto.
El tipo de tejido
La cantidad de
prendas para
secar
Las prendas lavadas pueden contener el mismo tipo de tejido
aunque con diferentes grosores. Los artfculos mas finos tardan
menos en secarse. AIgunos tejidos, tales como los utilizados en
jeans, tienen una textura mas cerrada que otros y, aunque sean
ligeros cuando est_.n secos, resultan pesados despues de lavarse y
centrifugarse.
Secar una prenda o hacer lavados pequeSos puede Ilevar un tiempo
largo. Resulta m_.s econdmico secar lavados grandes.
Cuan secas
quiere las
prendas
Temperatura
que debe
seleccionar
Temperatura
ambiente
Articulos
grandee
Como secar la ropa pot completo Ileva mas tiempo que cuando se
la necesita lista para planchar, quiz& desee sacar algunas prendas
cuando esten ligeramente hQmedas y listas para planchar y
continuar secando el resto del lavado hasta que se seque del toclo.
La etiqueta de la prenda deberfa indicarle la temperatura correcta
que debe seleccionar. Vea la secci6n "Etiquetas con
recomendaciones para el lavado".
Tarda mas en secarse la ropa en una habitaci6n frfa queen una
habitaci6n caliente.
AIgunas prendas voluminosas, como por ejemplo las chaquetas con
guata, deben secarse con cuidado. Recomendamos que las saque
varias veces de la secadora, las sacuda y las vuelva a meter.
SIN EMBARGO, HAY ALGUNOS ARTiCULOS QUE ACONSEJAMOS NO
SECAR. VEA LA SECCION "ARTICULOS QUE NO PUEDEN LAVARSE A
MAQUINA".
Guia de Secado - Tiempo aproximado de secado en minutos (peso especificado con la ropa seca).
ALGODONES
Tiempo de eecado para lavadoras de
800-1200rpm
Media
car.qa
2 Ib 4 Ib 7 Ib
1 kg 2 kg 3 kg
30-40 40-55 55-70
Carga
complet_
91b 111b 131b
4 kg 5 kg 6 kg
70-80 80-90 95-12¢
FIBRAS SINTETICAS FIBRAS ACRILICAS
Tiempo de secado para
lavadoras con centrifugado
breve.
Media Carga
carga complete
2 Ib 4 Ib 7 ]b
1 kg 2 kg 3 kg
40-50 50-70 70-90
Tiempo de secado
_ara lavadoras con
centrifugado breve
Media Carga
carga completa
2 Ib 4 Ib
1 kg 2 kg
40-60 55-75
Procure no
secar en exceeo
Todos los tejidos poseen algo de humedad natural, incluso cuando
estan ,,secos-, y esta humedad natural no debe perderse si se
quiere conservar la ropa suave y sedosa. La ropa que se seca
excesivamente tiende a arrugarse y requiere plancharse mas de Io
normal, dandole mas trabajo del que supuestamente la secadora
deberfa librarlo.
14
Page 56

Elcuidadodesu secadora
AI acabar
Despues de cada
secado
Cada semana
Limpieza
No utilice
Lubricacion
Su secadora precisa poca atencidn, y si sigue los siguientes pasos
mantendra unos buenos resultados en la m_.quina.
Apague la maquina y desconecte el enchufe.
Limpie siempre el filtro.
Gire el tambor con la mano para comprobar que no se haya dejado
artfculos pequeSos, como por ej. paSuelos.
Pase un paso hQmedo per el tamber y per el cierre hermetico.
Filtro de pelusas Sensor
Conducto de Salida
kimpie de vez en cuando con vinagre la superficie del sensor de
acero inoxidable situado dentro del tambor con el fin de eliminar
cualquier contaminante de agua. Pase un paso cuidadosamente.
Esta prfictica mantendrfi los buenos resultados de la secadora. El
sensor se Iocaliza entre las paletas del tambor hacia la parte
delantera de la secadora; si es necesario, gire el tambor para
Iocalizarlo.
Cada 6 meses aspire ias rejiiias de admisi6n de aire y los conductos
de ventilacion situados en la parte posterior de la maquina a fin de
eliminar la acumulaci6n de pelusas y polvo. Para eliminar la
acumulacion de pelusas de las zonas de la puerta, conducto de
salida y filtro, limpielas de vez en cuando con una aspiradora.
No use productos de limpieza abrasives ni blanqueadores, asi come
tampoco limpiametales en ninguna parte de la secadora. Estas
sustancias podrian daSar la maquina.
Su secadora tiene componentes especiales de rodamiento. No es
necesario lubricarlos y el usuario no debe intentarlo.
Especialmente recomendamos que se revisen peri6dicamente todos
los aparatos electricos para su seguridad, en Io que se refiere a
mecanica y electricidad.
15
Page 57

Problemasenelfuncionamiento
Ante todo, ino entre el panico! En realidad es poeible que todo este
bien. Busque el problema en la siguiente pagina y a continuacidn
compruebe Io que le sugerimos. Con frecuencia, encontrara la solucion
al problema, y podra seguir sin tener que avisar al tecnico de
mantenimiento.
Si despues de esto sigue sin poder hacer que la maquina funcione,
siga los consejos que se ofrecen en la pagina siguiente.
Problema
comprobar primero
"No funciona"
1. _,Esta la maquina conectada a la red?
2. _,Ha ajustado correctamente el tiempo en el Control del
Programa?
3. _,Esta la puerta cerrada de forma segura?
4. &Ha pulsado el boton de PUESTA EN MARCHA (START)?
5. _,Se ha fundido un fusible? (Enchufe otro electrodomestico para
comprobarlo).
6. &Ha utilizado un cable de extensidn? Muchos no son adecuados.
Enchufe la secadora directamente al tomacorriente para
comprobarlo.
"Tarda mucho 1.
tiempo en secar"
2.
_,Se ha olvidado limpiar el filtro? Debe limpiarlo despues de cada
carga.
&Ha seleccionado la configuracidn del programa correcto para el
tipo de tejido que est,. secando?
3. El tubo de ventilacion, &esta bloqueado o aplastado?
Inspeccidnelo para ver si tiene algQn objeto atascado, o
condensacidn (agua).
4. _,Se ha obstruido la rejilla de entrada o las ventilaciones
posteriores de la secadora?
5. Ventilacion permanente - &esta obstruida la trampilla de la
cubierta?
6. _,Estaba la ropa demasiado mojada cuando la puso a secar?
7. _,Ha seleccionado el tiempo / programa correcto?
8. _,Ha metido demasiada ropa en la secadora?
"La eecadora eeca Esto es perfectamente normal - significa que la secadora esta en la
ocaeionalmente" fase antiarrugas y ha Ilegado al final del ciclo de secado y la ropa
est,. lista para ser sacada.
"La eecadora eigue Esto es perfectamente normal, la secadora esta en la fase
zumbando" antiarrugas, como arriba...
Abra la puerta para que deje de zumbar.
La luz de secado Vea la secci6n "Los controles", esto indica un posible fallo.
esta parpadeando
La alarrna no deja Es perfectamente normal cuando la secadora ha concluido el
de sonar programa. Abra la puerta y se detendr_, de zumbido.
Otros problemas _,Ha lefdo este manual de instrucciones?
Si todavia tiene algt)n problema, le aconsejamoe que ee comunique con nuestro
Departamento de Atencion al Cliente.
16
Page 58

Instrucciones para la instalacibn
Lea cuidadosamente estas instrucciones.
Estas instrucciones se proporcionan para que las use un instalador calificado. Ademas, la
instalacidn debera cumplir:
• En los Estados Unidos, con la ultima versidn de la norma ANSI/NFPA70 del
Cddigo Nacional de Electricidad (National Electric Code) y con los cddigos
locales, estatales y municipales.
• En CanadA, con la t]ltima version de la norma C22.1 del Cddigo Canadiense
de Electricidad (Canadian Electric Code) y con los cddigos locales,
municipales y provinciales.
Conexibn el ctrica
La secadora se suministra con un cable de alimentacidn el@ctrica de 4 conductores equipado con un
enchufe 14-30R Despu@s de instalar la secadora, es conveniente instalar un tomacorriente en un
lugar accesible.
Si la secadora esta instalada en un casa rodante o en zonas donde los cddigos locales no permiten
la conexi6n a tierra del conductor neutro (Neutral), se debe utilizar este cable el@ctrico para secadora
de 4 conductores.
Si se halle disponible un tomacorriente 10-30R, se debe instalar un cable de alimentaci6n el@ctrica
de 3 conductores, como minimo de 240 V y 30 A, especiallmente dise_ado para secadoras de ropa.
Podrdt conseguir este cable en las tiendas locales.
Para instalar un cable el@ctrico 10-30P para secadora, siga el siguiente procedimiento:
• AsegLirese de que la secadora no est@enchufada a un tomacorriente.
• Quite la cubierta de la caja de empalmes de cables ubicada en la parte posterior de la
secadora.
• Afloje la tuerca que asegura el casquillo del cable el@ctrico, desconecte y deseche el
casquillo y el cable.
• Prepare los cabos del nuevo cable el@ctrico, quite las agarraderas, si las hay, y pele el
aislante para conectar el bloque terminal.
• Siga todas las instrucciones provistas con el kit y conecte el cable el@ctrico usando el
dispositivo para alivio de tensi6n provisto con el kit. No ajuste este dispositivo
totalmente en este paso.
• Una los terminales neutro y de puesta a tierra quitando uno de los cabos del conductor
verde que est6. conectado al terminal de puesta a tierra (-J_-)y luego conectAndolo al
terminal neutro (N).
• Conecte el cable del conductor a tierra (verde) y los cables L1 y L2.
En los cables el@ctricos pianos, el conductor central es el conductor neutro,
conectado al terminal marcado con la letra 'N'. Ajuste por completo los tornillos
del bloque terminal y ubique el cable el@ctrico en la posici6n deseada.
Finalmente, ajuste por completo el dispositivo para alivio de tensi6n.
• Vuelva a colocar la cubierta de la caja de empalmes.
Conexibn a tierra
Algunos c6digos locales pueden requerir una conexi6n a tierra por separado. En tales
casos, deberA adquirir el conductor a tierra, la abrazadera y el tornillo necesarios por
separado.
NUNCA ponga la secadora a tierra conectdmdola a ca_erfas plasticas de la instalaci6n
sanitaria, tuberfas de gas o agua.
NOTA: EN CASO DE CUALQUIER DUDA CONSULTE CON UN
ELECTRICISTA CALIFICADO.
17
Page 59

Instrucciones para la instalacibn
Dbnde colocar su secadora
Verifique los cAdigos locales antes de elegir una ubicaciAn. Algunos cAdigos no permiten instalar las
secadoras en un garaje, clAset, casa rodante o dormitorio. NO instale la secadora en una zona donde
se guarde o almacene gasolina u otros materiales inflamables.
Si desea usar la secadora, es necesario que haya una adecuada ventilaciAn para evitar que ingrese
a la habitaciAn el contraflujo de gases de artefactos que queman otros combustibles, incluyendo
fuegos abiertos.
Distancias mfnimas de instalaciAn:
Laterales
Parte superior
Parte posterior
Frente
Cl6set
4" (100ram)
15" (375mm)
31/2"(90mm)
31/2'' (90mm)
Debajo de un tablero
0"
0"
0"
not applicable
Si se la instala en un clAset, Aste debe tener las siguientes dimensiones y dos aberturas para
ventilaciAn, cada una de una superficie de 450 cm 2 (72 sq in) ubicadas a 150 mm (6") de la parte
superior y de la parte inferior de la puerta. NUNCA se la debe instalar en un clAset que tenga una
puerta sAlida.
El frente de la secadora tiene patas para ajustar la altura. 0selas para nivelar la secadora despuAs
de colocarla en su posiciAn definitiva.
Conductos de escape
El sistema de conductos de la secadora debe set Io mAs corto y recto posible y tenet la menor
cantidad posible de codos. Se recomienda usar conductos rigidos de metal de cuatro pulgadas. Es
posible utilizar conductos flexibles de metal, pero en este caso se reducira la Iongitud maxima de los
conductos y las curvas reduciran ann mAs esta Iongitud. Nunca use conductos plasticos. Es
necesario que todos los codos tambiAn tengan un diametro mfnimo de 4 pulgadas. Las juntas deben
asegurarse con cinta adhesiva especial para conductos.
No use tornillos porque se pueden acumular pelusas sobre ellos.
Longitud maxima del conducto
NQmero de codos Conducto rigido Conducto flexible
22 ft. (6.6m) 15 ft. (4.5m)
0 18 ft. (5.4m) 12 ft. (3.6m)
1
2 14 ft. (4.2m) 9 ft. (2.7m)
3 6 ft. (1.8m) 4 ft. (1.2m)
Las instrucciones anteriores suponen que se utiliza una cubierta de ventilaciAn autorizada y que la
solapa de esta cubierta no tiene trabas magneticas.
ADVERTENCIA:
• El escape de este artefacto NO DEBE descargarse en una chimenea, o I
contra una pared, un cielo raso o un espacio oculto en un edificio.
• Para reducir el riesgo de incendio, e escape de este artefact 0 DEB E
DESCARGARSE EN EL EXTERIOR.
• No descargue el aire de escape dentro de un conducto usado para
descargar gases de otros artefactos que queman gas u otro combust b e.
Dependiendo de la frecuencia de uso, es fundamental revisar los conductos en forma periAdica y
quitar las pelusas o residues que se acumulen.
18
Page 60

Instrucciones para la instalacibn
Kit de unibn
La secadora viene acompaflada de un kit de conexi6n que le permitir6, unirla a la parte superior de
una maquina lavadora Ariston.
Para el tipo W1024 (modelo AW120NA) use el soporte A
Para el tipo W1026CO (modelos) AW121NA o AW122NA) use el soporte B
El kit contiene 2 soportes A y B, y 2 tornillos autoperforantes.
Herramientas necesarias: Destornillador Philips N° 2.
SEGURIDAD
Por razones de seguridad personal, NO trate de unir la secadora a la parte superior de la
lavadora sin ayuda. Otra persona debe ayudarlo a levantar la secadora, a colocarla sobre la
lavadora y a ubicar en posici6n la lavadora y la secadora una vez unidas.
1. Necesitardt tenet acceso a la parte posterior de la lavadora para conectar el kit de uni6n y la
secadora. En caso de set necesario, mueva la secadora de su posici6n actual para poder tener
acceso a la parte posterior de la mAquina y conectar el kit de uni6n y la secadora.
2. Quite los dos tomillos ubicados a ambos lados en la parte inferior de la placa posterior de la
secadora. Guarde los tornillos porque necesitardt usarlos nuevamente.
Atornille las patas ajustables delanteras de la base tanto come sea posible.
3. Con ayuda de otra persona, levante la secadora y col6quela en posici6n sobre la parte superior
de la lavadora. Coloque el soporte apropiado del kit de uni6n (A o B) en la parte posterior de la
secadora y ajListelo con los tornillos que quit6 en el paso 2.
4. Vuelva a ubicar la secadora en posici6n de modo que el soporte coincida con el borde superior
de la lavadora y asegLirese de que la secadora est@ubicada en el centro de la lavadora.
5. Asegure el soporte a la lavadora por medio de los dos tomillos autoperforantes )rovistos.
6,
so_orte A soporte B
Usted acaba de finalizar la uni6n de los artefactos. Ahora puede colocar las maquinas en
posici6n y conectarlas a la red de electricidad por medio de dos tomacorrientes por separado,
uno para cada artefacto.
19
Page 61

GARANTiAS
SecadorasARISTON
Las garantfas entregadas per (Ariston) en la presente declaraci6n son v61idas 0nicamente para las
maquinas lavasecadoras Ariston vendidas al primer usuario que ha adquirido el producto a Ariston o
a sus distribuidores, revendedores o centros de asistencia autorizados en los Estados Unidos o en
CanadA. Las garantfas previstas por el presente documento no son transferibles.
Duraci6n de la garantia
2 aho: Garantia limitada completa a partir de la fecha de instalaci6n*
Ariston reparardt o sustituirdt de forma gratuita cualquier pieza que se demuestre sea defectuosa bajo
condiciones de use dom_stico normales, incluy_ndose ademas los gastos de envfo y mano de obra.
La reparaci6n bajo garantfa deberA ser realizada pot un centro de asistencia Ariston autorizado.
Tercer-Quinto a_o: Garantia limitada a componentes electr6nicos a partir de la fecha de
instalaci6n*
Ariston reparara o sustituirdt de forma gratuita los microprocesadores o tarjetas de circuitos que se
demuestren defectuosos bajo condiciones de uso domestico normales a partir de los 3 a 5 ahos de la
fecha de instalaci6n original, excluidos los gastos de mano de obra.
Tercer-Quinto a_o: Garantia limitada al motor a partir de la fecha de instalaci6n*
Ariston reparara o sustituira de forma gratuita el motor o cualquier componente del motor que se
demuestren defectuosos bajo condiciones de uso domestico normales a partir de los 3 a 5 ahos de la
fecha de instalaci6n original, excluidos los gastos de mano de obra.
Toda la vida t_til del producto: Garantia limitada a la formaci6n de herrumbre con perforaci6n
en acero inoxidable a partir de la fecha de instalaci6n*
Ariston sustituira gratuitamente la maquina secadora con el mismo modelo o con un modelo actual
que sea equivalente o mejor desde el punto de vista funcional, en el caso que el cesto de lavado,
bajo condiciones de uso domestico normales, presente herrumbre con perforaci6n, quedan excluidos
los gastos de mano de obra, envio e instalaci6n.
Dentro de los 10 dias de la fecha de compra: Garantia por dahos a las partes est_ticas
Ariston cambiardt de forma gratuita cada parte estetica (incluida la Ilamada de asistencia) que
aparezca daSada dentro de los 10 dfas de la fecha de compra. La presente clausula, sin embargo, no
incluye los da_os causados por operaciones de transporte, desplazamiento o instalaci6n realizadas
de manera inadecuada.
* La fecha de instalaci6n se refiere a la fecha en la cual se ha instalado la maquina lavadora o a diez
d[as laborales despues de la fecha de entrega, segt_n cudd de las dos situaciones se produzca
primero.
Exclusiones:
La presente garantfa no cubre las Ilamadas de asistencia o reparaciones realizadas para efectuar
rectificaciones en la instalaci6n, para recibir instrucciones sobre el uso del producto, para sustituir
fusibles dom_sticos o corregir el cableado o la instalaciSn hidr6ulica domestica. Ademas, cualquier
reparaci6n que sea necesaria realizar al producto como consecuencia de un uso dom_stice normal
diferente, no esta cubierta per la garantfa. Las garantias excluyen los defectos o da[ios derivados de
accidentes, alteraciones, uses impropios o incorrectos, instalaciones erroneas, intervenciones de
asistencia no autorizadas o fuerzas externas ajenas al control de Ariston tales cemo: incendies,
inundaciones u otras causas de fuerza mayor como instalaciones no cenfermes con los c6digos
electricos o hidraulicos en vigor a nivel local. Los gastos de mano de obra, envio e instalaci6n
realizados para la reparaci6n e sustituci6n de un producto al finalizar el perfodo de un a[io desde la
feche se instalaci6n no ser_.n cubiertos por la presente garantfa. Todos los componentes sustituidos
o reparados reemplazardtn a los originales en relaci6n con el perfede de garantia aplicable. Dentro
de los Ifmites permitides por la ley, la presente garantia toma el lugar de cualquier otra garantfa
expl[cita e implfcita, comprendidas las garantias implfcitas de comerciabilidad e ideneidad para un
objetivo especifico. Ariston no asume ninguna responsabilidad por dahos indirectos o consecuentes.
Para acceder a los servicios de garantfa Ilamar al 1-800-426-0825 o escribir a:
Ultra 8 International, 2505 Anthem Village Drive, Suite E - Box 562, Henderson Nevada 89052
indicando siempre nQmero del modelo, n0mero de serie, fecha de compra, nombre y direcci6n del
revendedor.
20
Page 62

Merloni Elettrodomestici spa
Via Aristide Merloni 47
60044 Fabriano (AN) Italy
tel. +39 0732 6611
www.merloni.com
<
22
cl:
w
>,
o
22
cl:
° 2
c_
x
ua
C13
0 cu
_- CC
 Loading...