

Page 1
PFANTASY.200 3/14/01 10:28 AM Page 1
Contacting ArcSoft
Main:
ArcSoft,Inc. M-F 8:30AM - 5:30PM (PST)
46601 Fremont Blvd. Phone:1-510-440-9901
Fremont,CA 94538 Fax:1-510-440-1270
USA Email: feedback@arcsoft.com
Technical Support:
Phone:1-510-440-9901 M-F 8:30AM - 5:30PM (PST)
Fax:1-510-440-1270 Email: support@arcsoft.com
Websites:
www.arcsoft.com
www.photoisland.com
Internet Options:
PhotoFantasy provides you with a direct link to ArcSoft’s unique digital imaging web site at www.photoisland.com.
Visit this website to learn more about ArcSoft’s product line,make fun and exciting gifts with your digital images,
get helpful tips and technical support,and access the main ArcSoft website.Just go to your Start menu and click on
Programs/ArcSoft PhotoFantasy/Web Services. This will automatically launch your web browser,linking you
directly to these special “Web Services”options.
PhotoFantasy can also link you directly to the PhotoFantasy web page at www.arcsoft.com/pftemplates.htm.
This page offers you new fantasy backgrounds to maximize your PhotoFantasy entertainment. To access,
click on the PhotoFantasy logo in the top left corner of any program screen and click on the online button that
appears.Or,go to your Start menu and click on Programs/ArcSoft PhotoFantasy/Wild New Fantasies.
Both will automatically launch your web browser and link you to the PhotoFantasy web page.
How to Register:
Be sure to mail or fax the built-in registration form to receive technical support and information on new products
and releases. This form is available in your Start Menu under Programs/ArcSoft PhotoFantasy/Register & Upgrade.
FullVersion
© 1999 by ArcSoft, Inc. All rights reserved. ArcSoft PhotoFantasy is a trademark of ArcSoft, Inc. All other brands
and product names are trademarks or registered trademarks of their respective holders. Printed in U.S.A. 9-98
PMPF0210
Version 2.0
Page 2

PFANTASY.200 3/14/01 10:28 AM Page 3
Software Licensing Agreement
The following is a legal software license agreement between you,the software end user,and ArcSoft, Inc.
Carefully read this license agreement before using the product.Using the product indicates that you have read this
license agreement and agree to its terms.If you do not agree to the terms, promptly return the package to the place it
was purchased within 10 days of the date you acquired it for a full refund.
Grant of License.This license permits you to use one copy of the software included in this package on any single
computer.For each software licensee,the program can be in use on only one computer at any given time. The software
is in use when it is either loaded into RAM or installed into the hard disk or other permanent memory.
This product is licensed for non-commercial use only.Any use of this product or the images it contains for any
commercial purpose,including use to create any materials for sale,is strictly prohibited.The images contained on this
CD-ROM are protected by federal copyright. Unauthorized reproduction,distribution or display of these images is a
violation of the Copyright Act,17 U.S.C .ß 101, et seq.,and may subject you to criminal penalties.
Copyright. The software contained in this package is owned by ArcSoft and is protected by United States copyright
laws,international treaty provisions,and all other applicable national laws.The software must be treated like all other
copyrighted materials (e.g. books and musical recordings). This license does not allow the software to be rented or
leased,and the written materials accompanying the software (ifany) may not be copied.
Limited Warranty.ArcSoft,Inc.,warrants that the software contained herein will perform substantially in
accordance with the accompanying documentation.
No Other Warranties. ArcSoft disclaims all other warranties,either express or implied,including but not limited
to implied warranties of merchantability and fitness for a particular purpose, with respect to the Software,the
accompanying written materials,and any accompanying hardware (ifany).
No Liability for Consequential Damages. In no event shall ArcSoft or its suppliers be liable for any damages
whatsoever (including but not limited to damages for loss of business profits,business interruption,loss of business
information,or any other pecuniary loss) which results from an inability to use this software, even if ArcSoft, Inc.has
been advised of the possibility of such damages. Because some states/jurisdictions do not allow the exclusion or
limitation of consequential or incidental damages,the above limitations may not apply to you.
U.S.Government Restricted Rights.The Software and documentation are provided with Restricted Rights. Use,
duplication,or disclosure by the U.S.Government is subject to restrictions as set forth in subparagraph (c)(1)(ii) of
the Rights in Technical Data and Computer Software clause at DFARS 252.227-7013 or subparagraphs (c)(1),(2),and
(3) of the Commercial Computer Software - Restricted Rights at 48 CFR 52.227-19,as applicable,and any
amendments thereto.The manufacturer is ArcSoft, Inc.,46601 Fremont Blvd., Fremont,CA 94538.
If this product was purchased in the United States,this Agreement is governed by the laws of the state of California;
otherwise,local laws may apply.
PhotoFantasy 2000 Quick Start Guide
Table of Contents:
INTRODUCTION
Welcome to PhotoFantasy............................................................... . . . . . . . . . . ..3
System Requirements............................................................................ . . . . . ..4
Installing and Starting PhotoFantasy..........................................................4
About This Guide......................................................................... . . .. . . . . . .. . . . .5
Additional Documentation............................................................. . . . . . . . .. . . . .6
GETTING ACQUAINTED
Main Screen.................................................................................... . . . . ..........6
Get Fantasy Screen................................................................................... . . . . .10
Create Fantasy Background Screen............................................... . . . . . . . . .. . . . .14
Get Photo Screen................................................................................... . . . . . . .18
MAKING A PHOTO FANTASY(Tutorial)
A. Select Your Fantasy..................................................................................21
B.SelectYour Photo.....................................................................................22
C. Adjust Your Photo Fantasy......................................................................23
D.Save, Print or Send Your Photo Fantasy............................................. . . . .24
E. CreateYour Own Photo Fantasy Background (optional).....................24
MORE FANTASY BACKGROUNDS.............................................. . . . . . . .26
2
Page 3

PFANTASY.200 3/14/01 10:28 AM Page 5
PhotoFantasy 2000 Quick Start Guide
3
INTRODUCTION
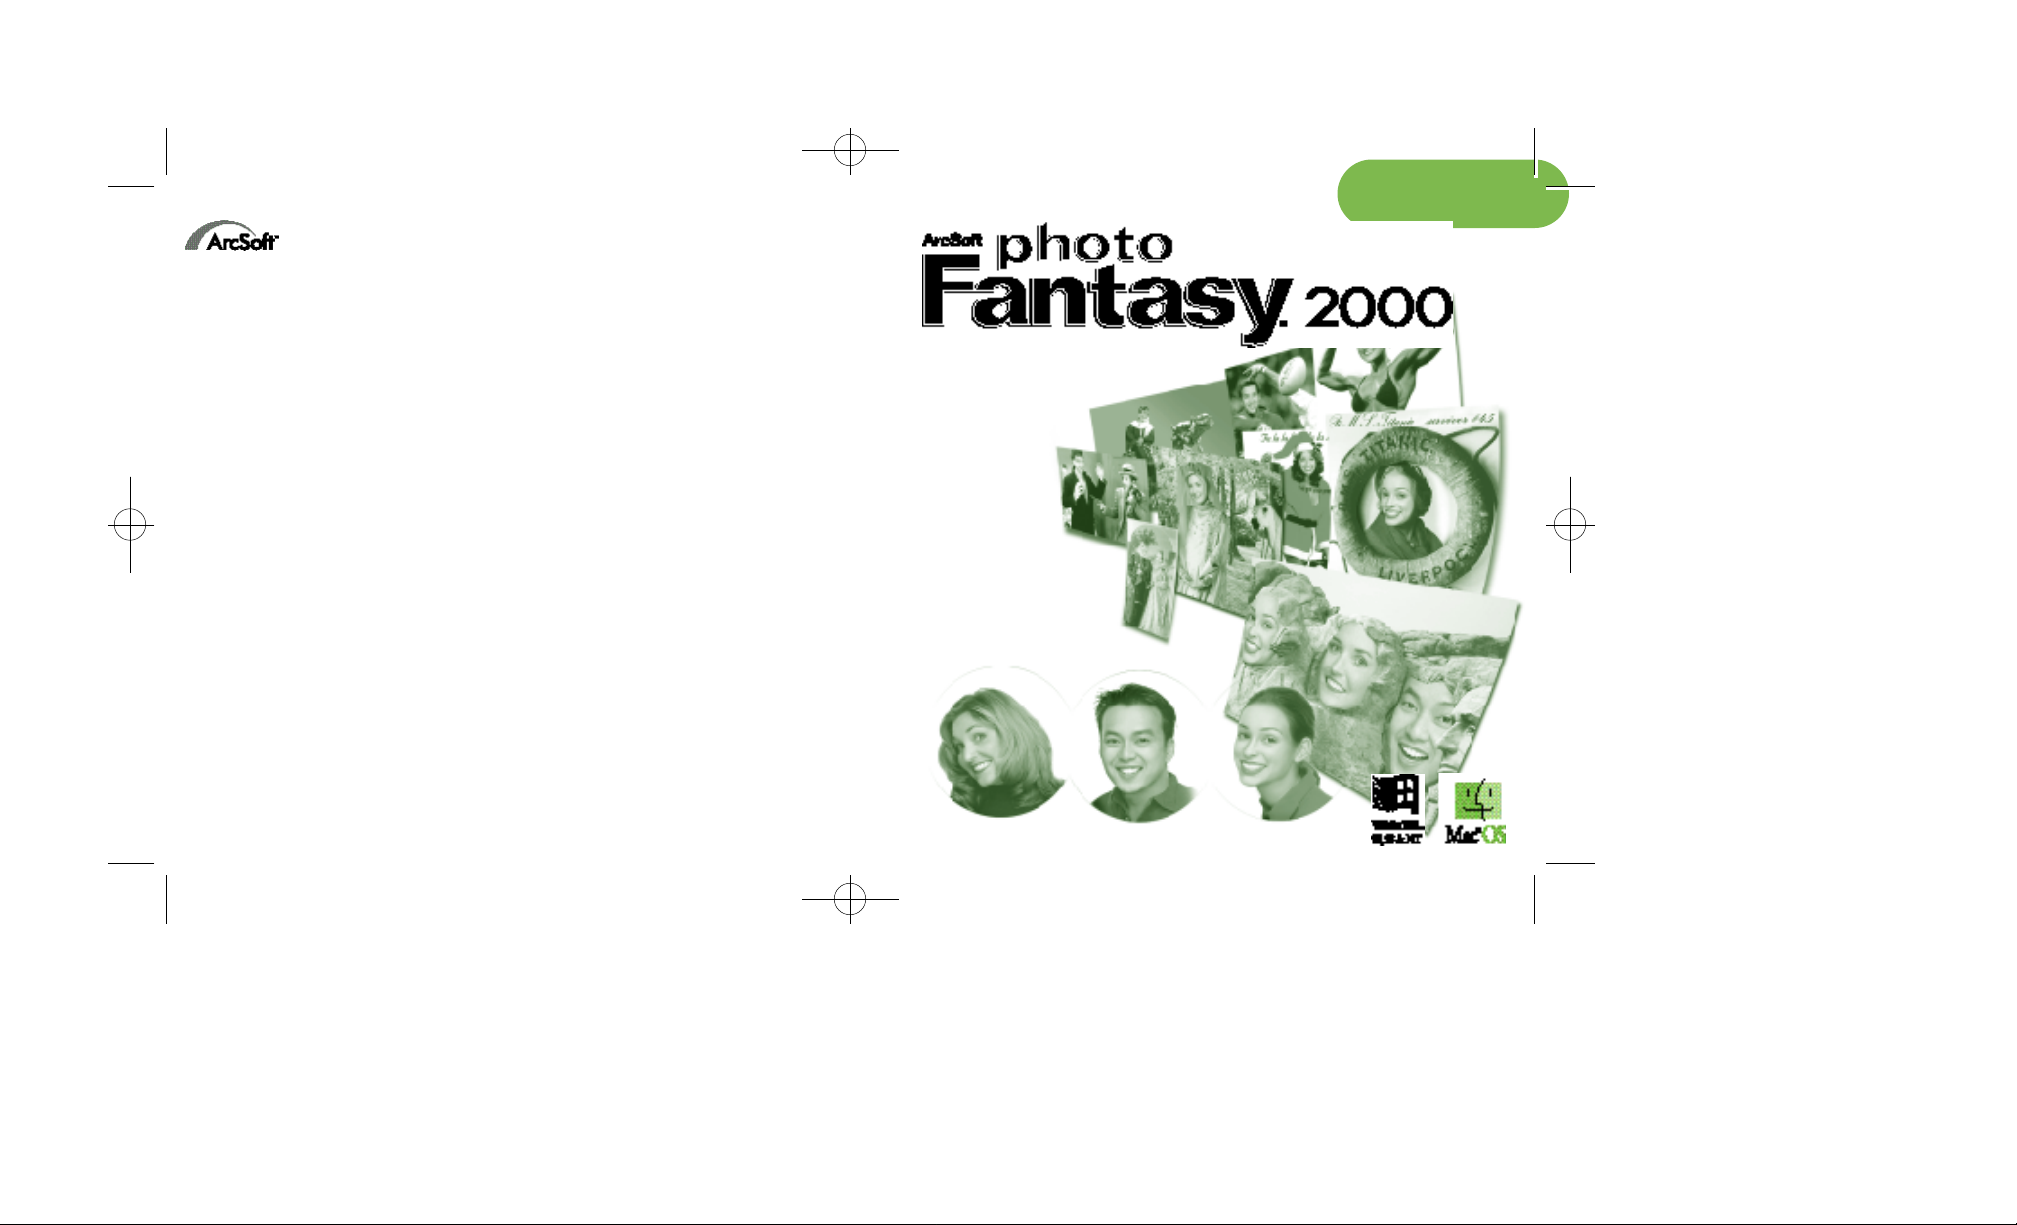
Welcome to ArcSoft PhotoFantasy 2000, the imaging entertainment application that lets
you turn your favorite photos into your wildest fantasies! This program gives you all the
tools you’ll need to send your boss on a white-water rafting adventure,place your face on
the cover of a popular magazine,and even let your kids travel back to the time of
dinosaurs.First choose your fantasy from over 200 included fantasy backgrounds. Then
pick a photo of yourself or someone else. With just a few more clicks of a button, your
chosen fantasy and photo will be combined together seamlessly.Finished photo fantasies
make entertaining greeting cards, websites,calendars, posters,invitations,signs, buttons,
banners and much more.
Special features allow you to:
•Choose from over 200 hilarious fantasy backgrounds included on your CD-ROM
•Create customized fantasy backgrounds using your personal or scanned images
•Use up to three photos in your photo fantasy
•Make adjustments to your photo fantasy using the Flip, Rotate, Move,Resize
and Zoom In/Out Tools
• Instantly match the color of your photo with that of your fantasy background
using the one-click Match Color Tool
• Adjust the brightness, contrast and saturation of your photo fantasy, in real time
•Personalize your photo fantasy by adding a title or other text caption
•Acquire images from digital cameras,scanners and other TWAIN-compliant devices
• Save your photo fantasies in popular file formats, such as BMP,TIF,JPG,GIF,PCX,
TGA,EPS (write-only) and FlashPix
•Capture live video using any video-for-Windows device including camcorders,
VCRs and digital cameras.
PhotoFantasy 2000 Quick Start Guide
PC System Requirements MAC System Requirements
•Windows 95/98/ME/2000/NT •Power PC
•Pentium-based PC or equivalent • Mac OS 7.5-9.1
•60 MB free hard disk space •25 MB free hard disk space
• 32 MB RAM • 64 MB RAM (32 MB with virtual memory)
• 16-bit (or higher) color display •16-bit (or higher) color display
•CD-ROM drive • CD-ROM drive
•Mouse •Mouse
Installing and Starting PhotoFantasy
To install,insert the PhotoFantasy CD in your CD-ROM drive. Click Start/Run and type
D:\SETUP.EXE (where“D”is your CD-ROM drive). Click OK. Follow the instructions
on the Screen. To start, go to Start/Programs/ArcSoft PhotoFantasy/PhotoFantasy.
(To uninstall, go to Start/Programs/ArcSoft PhotoFantasy/Uninstall.)
MAC users:
To install,
1. Insert the PhotoFantasy 2000 CD in your CD-ROM drive.
A PhotoFantasy 2000 CD icon automatically pops up on your screen.
2. Double-click the PhotoFantasy 2000 CD icon.
A PhotoFantasy 2000 Installation window appears.
3. Double-click the PhotoFantasy 2000 icon.A Readme File window appears. Use the
scroll bar to browse through the file. Press Print to print a hard copy of the file, click
Save As to save it, or choose Continue to open the PhotoFantasy Installation window.
4. Use the down arrow and the Switch Disk button to select a location for installing the
program. Press Install to start installation, or click Quit to abort.
4
Page 4
PFANTASY.200 3/14/01 10:28 AM Page 7
PhotoFantasy 2000 Quick Start Guide
5
5. Once the installation completes,a prompt appears onscreen. Press Quit to finish
installation, or choose Continue to install the software in a second location.
Note:Upon installation, your computer will automatically create a PhotoFantasy
2000 folder on the location you’ve specified.
To launch PhotoFantasy,
1. Double-click the Macintosh HD icon on your desktop.
2. In the Macintosh HD window,locate the PhotoFantasy 2000 folder, and double-click
to open it.
3. In the PhotoFantasy 2000 window,find the PhotoFantasy 2.0 icon and double-click it
to open the program.
4. Start working in PhotoFantasy 2000.Enjoy!
About This Guide
This guide is designed to get you quickly started in PhotoFantasy.The first section,
“Getting Acquainted”,introduces you to important terms,screens and controls. The next
section,“Making A PhotoFantasy”, is a quick tutorial that shows you how to make a
photo fantasy as well as create your own fantasy backgrounds.Step-by-step instructions,
pictures and helpful tips are provided throughout these two sections. This guide also
includes a section titled “More Fantasy Backgrounds” to offer you additional ArcSoft
fantasy collections.
PhotoFantasy 2000 Quick Start Guide
Additional Documentation
In addition to this Quick Start Guide, you can learn more about PhotoFantasy by
using online Help. Online Help provides easy-to-find information on specific
commands and features,and is most helpful when printed out. To access online Help,
click the “?”button at the top right corner of the screen.To use context-sensitive online
Help,right-click on any item on the screen and you will go directly to that particular
topic in online Help.
For important notices about the program,please review the ReadMe file. It is located in
your Start Menu under Programs/ArcSoft PhotoFantasy/ReadMe.
GETTING ACQUAINTED
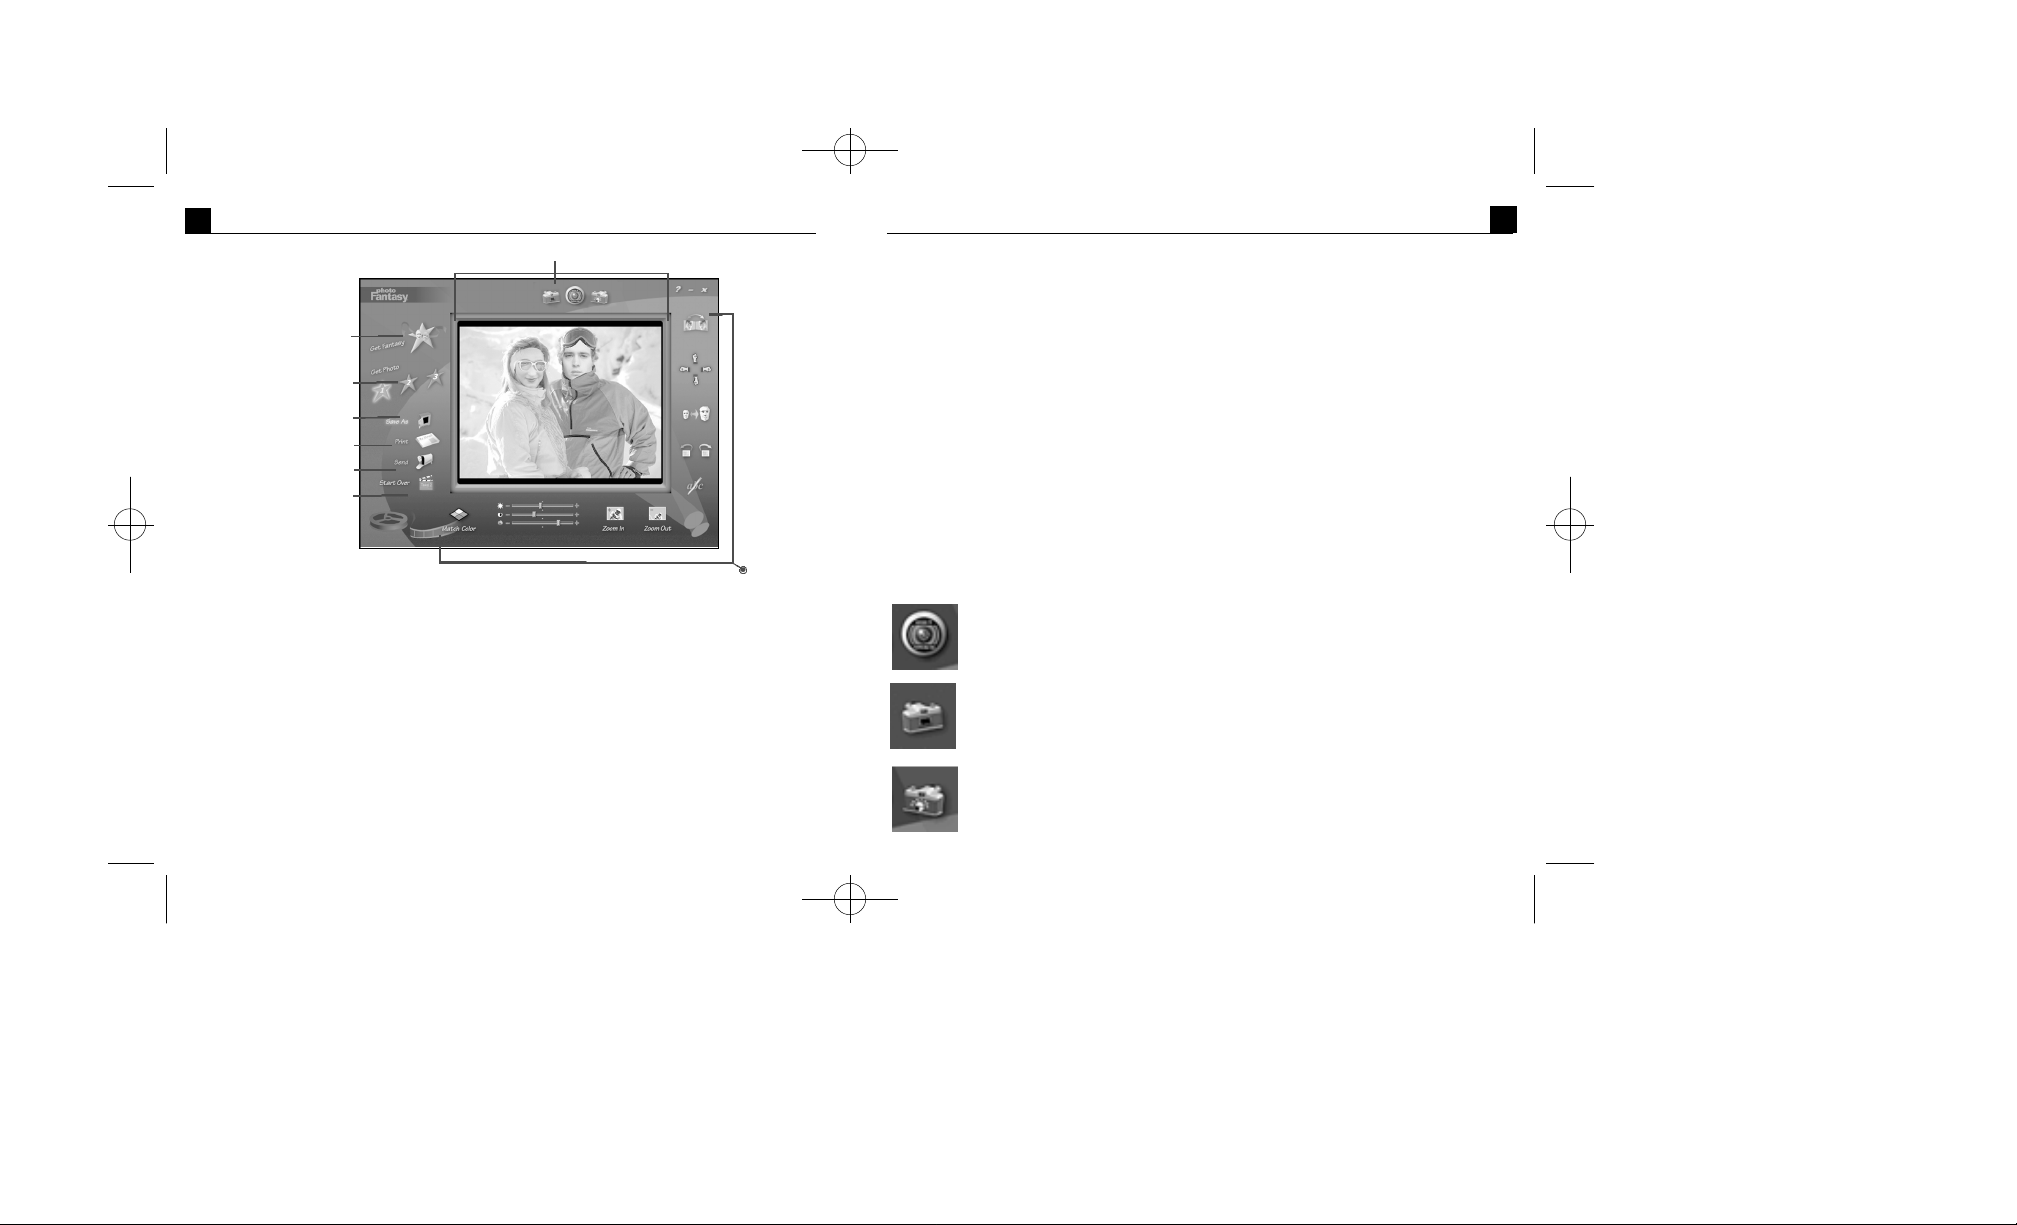
Main Screen
The Main Screen acts as your “homebase”in PhotoFantasy. It contains controls that allow
you to access the other program screens,as well as to make final adjustments and
enhancements to your photo fantasy.From the Main Screen, you can also save, print and
e-mail your finished photo fantasy.Please refer to Fig. 1 when reading this section.
Note: Upon starting PhotoFantasy,you may notice that only the Get Fantasy Button
is enabled in the Main Screen.This “start-up mode” is designed to
help guide you through the steps of creating a photo fantasy, the first step being
“Select Your Fantasy”.Once this step is completed,the Get Photo Buttons will
appear on the Main Screen,prompting you to complete the second step,“Select
Your Photo”. Once this second step is completed,the rest o f the Main Screen
options will become available.
6
Page 5
PFANTASY.200 3/14/01 10:28 AM Page 9
PhotoFantasy 2000 Quick Start Guide
7
Main Display Area
Get Fantasy Button
Get Photo Buttons
Save As Button
Print Button
Send Button
Start Over Button
Fig.1 Main Screen
AdjustmentTools
Main Display Area - provides a preview of your selected fantasy or the combined
photo fantasy.This area also allows you to view adjustments and enhancements that
you make to your photo fantasy.
Get Fantasy Button - opens the Get Fantasy Screen,so you can select the
fantasy background for your photo fantasy.From this screen,you can also create
your own fantasies.
Get Photo Button 1,2 or 3 - Each of these buttons corresponds to a particular
mask/photo in a fantasy background.(Notice the color of each button matches the color
PhotoFantasy 2000 Quick Start Guide
of its corresponding mask.) The Get Photo Buttons allow you to:
1. Open the Get Photo Screen to select the photo for your photo fantasy.To do this,
double-click on the button that corresponds to your desired mask. In the Get
Photo Screen,select your photo.You will return to the Main Display Area with your
chosen photo.
2. Specify the photo (within a photo fantasy containing 2 or 3 photos) that you want
to adjust.You will need to do this each time you adjust a different photo. To specify,
highlight (or click on) the button that corresponds to your desired photo.
A highlighted button shows you the mask/photo that is currently selected.
Tip:You may also highlight a button by clicking on the actual photo in
the Main Display Area.
LiveVideo Buttons (for Windows users only)
PhotoFantasy LiveVideo buttons allow you to capture your picture "Live" directly
into a fantasy template using a desktop video camera or other Video-for-Windows
compatible video device.
Click the Live Preview button to toggle your live video camera on or off. If the
selected fantasy allows for more than one photo, you can switch the live video feed
among them by clicking directly on the desired mask in the fantasy.
Click the Snap Photo button to capture a photo from your video camera or digital
camera.You can then use the Move buttons to position your image in the fantasy.
Click the Select Video Source button to select from available Video-for-Windows
drivers if you have more than one. You may also modify the settings for your
camera.(Consult the documentation for your camera for more information on
VFW support and drivers.)
8
Page 6

PFANTASY.200 3/14/01 10:28 AM Page 11
PhotoFantasy 2000 Quick Start Guide
9
Adjustment Tools - allow you to adjust the position,size and color of your photo to fit
your fantasy background. These tools become available when your combined photo
fantasy is displayed in the Main Display Area. Tools include:
•Flip - flips your photo horizontally so it faces the opposite direction.
•Move - moves the photo up, down,left and right. To move,you can either keep
clicking, or click and hold your mouse until you reach the desired position.
• Resize - makes the photo larger or smaller.To resize,you can either keep clicking,
or click and hold your mouse until you reach the desired size.
•Rotate - turns your photo in a clockwise or counter-clockwise direction.
To rotate, you can either keep clicking, or click and hold your mouse until you
reach the desired position.
• Add Text - opens a text box so you can add text to your photo fantasy. Once selected,
the Add Text button changes to an Edit Font Tool so you can select the font,size and
color of your text.
• Match Color - automatically adjusts the skin tone in your photo to better match
the skin tone in your selected fantasy background. To revert to the original
color,click again.
• Brightness - lets you increase or decrease the brightness in your photo. To adjust,
slide the bar to the right or left.
•Contrast - lets you increase or decrease the contrast in your photo. To adjust,
slide the bar to the right or left.
•Saturation - lets you increase or decrease the saturation (intensity of the color)
in your photo. To adjust,slide the bar to the right or left.
•Zoom In - gives you a more detailed, close-up look at the photo in your photo
fantasy.Zooming in also enables you to make more precise adjustments with
the Move,Resize and Rotate tools.
•Zoom Out - returns the photo fantasy to the original view.
PhotoFantasy 2000 Quick Start Guide
Start Over Button - clears the Main Display Area and takes you back to the “start-up
mode”(see “Note” under the term “Main Screen”).
Save As Button - opens the standardWindows Save As dialog box so you can save your
finished photo fantasy under a specific path,file name and file format. (For more
information on file formats and display quality,please refer to your ReadMe file.)
Print Button - opens the standard Windows Print Setup dialog box so you can select
your printer settings and begin printing your finished photo fantasy. (For more
information on print quality,please refer to your ReadMe file.)
Send Button - automatically launches your e-mail program so you can e-mail your
finished photo fantasy.
Note: If your email program is not MAPI-compliant, you will need to e-mail the
photo fantasy image as an attachment.(For more information on sending
attachments, please refer to the manual that came with your e-mail program.)
Get Fantasy Screen
Clicking the Get Fantasy Button in the Main Screen takes you to the
Get Fantasy Screen. Here you can select the fantasy background for your photo
fantasy and create your own fantasy backgrounds.Please refer to Fig. 2 when
reading this section.
10
Page 7

PFANTASY.200 3/14/01 10:28 AM Page 13
PhotoFantasy 2000 Quick Start Guide
11
Fantasy Display Area
Fantasy
Category
Menu
“fantasy
slides”
“My Fantasy”Buttons
Fig.2 Get Fantasy Screen
Okay Button
Cancel Button
Fantasy Display Area - displays your selected fantasy background.
Fantasy Category Menu - provides a list of available fantasy categories. This list includes
categories contained on your CD-ROM and a “My Fantasy”category for adding your
own fantasy backgrounds. To select a category from this list, click on the down arrow in
the menu,then click on the desired title.
Tip: Remember to insert your PhotoFantasy CD in your CD-ROM drive to access
the full selection of fantasy backgrounds.
PhotoFantays 2000 Quick Start Guide
“fantasy slides”- small thumbnail images of your fantasy backgrounds.Slides make it
easy for you to find and view your fantasies.To browse through the currently
displayed slides,click the up/down arrows. To select a fantasy, click on the
corresponding slide.The selected fantasy will appear in the Fantasy Display Area.
“My Fantasy”Buttons - allow you to create, edit and delete your own fantasy
backgrounds. To make these buttons available,choose “My Fantasy”from the Fantasy
Category Menu.All created fantasies will be stored in this category.
• Add Button - lets you create a fantasy background from one of your own images.
(PhotoFantasy supports BMP,TIF, JPG,GIF,PCD,PCX, TGA and FlashPix file
formats.) To do this,click the Add Button from the Get Fantasy Screen. In the Open
dialog box that appears,locate the image you want to use and click“Open”. The
Create Fantasy Background Screen will open,along with your image in the Create
Display Area.Use the Masking Tools to create your masks and enhance the brightness
and contrast.When you are done,you will return to the Get Fantasy Screen with your
newly created fantasy in the Fantasy DisplayArea.
• Scan Button - lets you create a fantasy background from a scanned or acquired image.
To do this, click the Scan Button from the Get Fantasy Screen. In the Select
Source dialog box that appears, choose the digital camera or scanner you want to use
and click“Select”. Acquiring options specific to that device will appear. (For further
instruction, consult the manual that came with the device.) Once the image is acquired,
it will automatically appear in the Create Display area in the Create Fantasy
Background Screen.Use the Masking Tools to create your masks and enhance the
brightness and contrast. When you are done, you will return to the Get Fantasy
Screen with your newly created fantasy in the Fantasy DisplayArea.
•Edit Button - opens the Create Fantasy Background Screen,so you can edit the masks
in your selected fantasy background and enhance the brightness and contrast.
12
Page 8

PFANTASY.200 3/14/01 10:28 AM Page 15
PhotoFantasy 2000 Quick Start Guide
13
•Delete Button - deletes the selected fantasy slide(s) from the “My Fantasy”category.
Tip: To select multiple sequential slides, click on the first slide,hold down your
Shift key,then click on the last slide. To select multiple non-sequential slides, click
on one of the slides,hold down your Ctrl key,then click on all other slides.
Okay Button - returns you to the Main Screen and places your selected fantasy in the
Main DisplayArea.
Cancel Button - returns you to the Main Screen, without placing the selected fantasy
in the Main Display Area.
PhotoFantasy 2000 Quick Start Guide
Create Fantasy Background Screen
Clicking the Add,Scan or Edit Button on the Get Fantasy Screen
takes you to the Create Fantasy Background Screen.Here you can
create a fantasy background from your own image or a scanned
image.You can also use this screen to edit a fantasy you had
previously created. Masking and color enhancement tools are
provided. Please refer to
Fig.3 when reading this section.
Create Display Area
Create Mask
Buttons
Masking Tools
Brightness Tool
Contrast Tool Saturation Tool
Fig.3 Create Fantasy Background Screen
14
Okay Button
Cancel Button
Zoom Out Tool
Zoom In Tool
Page 9

PFANTASY.200 3/14/01 10:28 AM Page 17
PhotoFantasy 2000 Quick Start Guide
15
Create Display Area - displays the image you want to turn into a fantasy background.
“mask”- the designated area in your fantasy background that will later contain your
chosen photo.
Create Mask Button 1,2 or 3 - lets you specify the mask (1,2 or 3) you want to create
or edit. To do this,highlight (or click on) the button that corresponds to your desired
mask.A highlighted button indicates the Masking Tools for that particular mask are
now enabled.
Note:When creating new masks, you must highlight the buttons in order from 1
to 3. For example,if you want to create two masks, you will need to click on
button 1 before you click on button 2.
Tip: Create each mask in a consistent manner. For example, by creating masks from
left to right, you will know mask #1 is always on the left,mask #2 in the middle and
mask #3 on the right. This is helpful when you are ready to use the fantasy
background and must select the appropriate photo for each mask.
Masking Tools - let you create the mask (1,2 or 3) that you specified.Once created,the
color of the mask will match the color of its corresponding Create Mask Button.
•Add - lets you “draw”your mask. To draw,click the Add Tool to turn it “on”. Position
your cursor on any point on the outline of the mask,then click once with your mouse.
A small square will appear to show you your starting point and ending point. By
imagining the outline as a dot-to-dot drawing, move your cursor from the square
and click once on the next connecting “dot”. A line will connect the dots. Continue
clicking until you reach the square again. Click on the square to close the area and
generate the mask.
PhotoFantasy 2000 Quick Start Guide
Tip: To remove the outline that you are drawing and start over,press your Esc key at
any time.
•Subtract - lets you outline the portion of the mask you want to remove.To outline,
use the same drawing technique as described under the “Add”masking tool term.
The outlined portion will automatically be removed.
Tip: To remove the outline that you are drawing and start over,press your Esc
key at any time.
Tip: To remove your entire mask, press your Delete key.
•Paint - lets you “paint”your mask,like a paintbrush. To paint, click the Paint Tool to
turn it “on”and choose your desired brush size. Position your cursor on the area you
want to mask,then click and drag the cursor.Release the mouse when you are done.
• Blur - lets you soften the edges of your mask.To blur, click the Blur Tool to turn it
“on”and click on your desired brush size. Position your cursor on the mask,then
click and drag the cursor over the edges. Release the mouse when you are done.
•Erase - lets you “erase” parts of the mask,like an eraser.To erase,click the Erase
Tool to turn it “on”and click on your desired brush size. Position your cursor on
the area you want to mask,then click and drag the cursor.Release the mouse when
you are done.
Tip: To remove your entire mask, press your Delete key.
•Brush Size - gives you different brush sizes to use in conjunction with the Paint, Blur
and Erase Tools.Small brushes allow you to do more detailed work, whereas large
brushes allow you to cover a bigger area.
Brightness Tool - lets you increase or decrease the brightness in your entire fantasy
background. To adjust,slide the bar to the right or left.
16
Page 10

PFANTASY.200 3/14/01 10:28 AM Page 19
PhotoFantasy 2000 Quick Start Guide
17
Contrast Tool- lets you increase or decrease the contrast in your entire fantasy
background. To adjust,slide the bar to the right or left.
Saturation Tool- lets you increase or decrease the saturation (intensity of the color) in
your entire fantasy background. To adjust,slide the bar to the right or left.
Zoom In Tool - gives you a more detailed, close-up look at your fantasy background.
Zooming in also gives you more precise control over the Masking Tools.
Zoom Out Tool - returns the fantasy to the original view.
Okay Button - returns you to the Get Fantasy Screen and places your newly created
fantasy in the Fantasy Display Area.
Cancel Button - returns you to the Get Fantasy Screen, without keeping your newly
created fantasy.
PhotoFantasy 2000 Quick Start Guide
Get Photo Screen
Clicking the Get Photo Button 1,2 or 3 in the Main Screen takes you to
the Get Photo Screen. Here you can choose the photos for your photo
fantasy and create new categories of photos. Please refer to Fig. 4 when
reading this section.
Photo Category
Menu
“photo slides”
18
Photo Display Area
Okay Button
Cancel Button
Delete ButtonAdd Button Acquire Button
Fig.4 Get Photo Screen
Page 11

PFANTASY.200 3/14/01 10:28 AM Page 21
PhotoFantasy 2000 Quick Start Guide
19
Photo Display Area - displays your selected photo.
Photo Category Menu - provides a list of available photo categories. The “Sample
Photos”category comes automatically installed with your program and contains sample
images for you to use. To make your own category of photos,choose the “[New]” option
from the list.A new, empty category to which you can add your own photos will be
displayed. The default name will be“Untitled-#”. To rename the category, highlight and
type over its title. To add photos to the current category,click the Add or Acquire
button.
Note:The “[New]”option will always be available so you can create new categories
at any time.
“photo slides” - small, visual representations of actual image files. The purpose of these
slides is to make it easy for you to find and view your images.By positioning your cursor
over a slide, you can see the filename of the image. By dragging and dropping a slide to a
different location within the same category,you can organize your slides. To create a new
photo slide,use the Add and Acquire buttons.To browse through the slides, click the
up/down arrows. To select a photo, just click on the corresponding slide,and the photo
will appear in the Photo Display Area.
IMPORTANT! By deleting a slide’s corresponding image file or moving the image
file to a new location, you remove the link between the file and the slide. This
means you can no longer open the file by clicking on its original slide.Likewise,if
you click on a thumbnail to open an image on a floppy, be sure the floppy is in the
drive. Otherwise, your system will give you an error message stating it cannot find
and open the image file.
PhotoFantasy 2000 Quick Start Guide
Add Button - opens the standardWindows Open dialog box so you can add your
own images to the current category.To add,select one or more images from the
Open dialog box and click “Open”. Slides of these images will be automatically added
to the current category.
Tip: To select multiple sequential images, click on the first filename,hold down
your Shift key,then click on the last filename. To select multiple non-sequential
images, click on one of the filenames,hold down your Ctrl key,then click on all other
filenames.
Acquire Button - opens the Select Source dialog box so you can acquire images into the
current category.To acquire images,select your digital camera,scanner or other TWAIN
device from the Select Source dialog box and click“Select”.Acquiring options specific to
that device will appear. (For more information, consult the manual that came with the
device.) Once the image(s) are acquired,they will be added to the current category.
Delete Button - deletes the selected photo slide(s) from the current category.
Tip: To select multiple sequential slides, click on the first slide,hold down your
Shift key,then click on the last slide. To select multiple non-sequential slides, click
on one of the slides,hold d own your Ctrl key,then click on all other slides.
Okay Button - returns you to the Main Screen and places your selected photo in the
specified mask (1,2 or 3) in the Main DisplayArea.
Cancel Button - returns you to the Main Screen,without placing the selected photo in
the Main Display Area.
20
Page 12

PFANTASY.200 3/14/01 10:28 AM Page 23
PhotoFantasy 2000 Quick Start Guide
21
MAKING A PHOTO FANTASY(Tutorial)
Once you’ve become familiar with the terms and controls in the “Getting Acquainted”
section, you’ll be ready to make your own photo fantasy like the one above! Here’s how:
A.Select Your Fantasy.
1. From the Main Screen, click the Get Fantasy Button.The Get Fantasy Screen
will open.
2. Click the down arrow in the Fantasy Category Menu to list the available fantasy
categories.Click on your desired category.The corresponding fantasy slides will
be displayed.
3. Click the up/down arrows to browse through the current slides.Once you find your
desired fantasy,click on it.
4.Click Okay to bring your selected fantasy to the Main Display Area on the Main
Screen.
PhotoFantasy 2000 Quick Start Quide
Optional:
- To access the full selection of fantasy backgrounds contained on your PhotoFantasy CD,
insert the CD into your CD-ROM drive.
- To create your own fantasy backgrounds,see section E, “Create Your Own
Fantasy Background”.
- To edit a fantasy that you have created, click the Edit Tool in the Get Fantasy Screen.
The Create Fantasy Background Screen will open, giving you access to the same Masking
Tools you used to originally create the fantasy.
B. Select Your Photo.
1. From the Main Screen, click the Get Photo Button 1 to select your first photo.
The Get Photo Screen will open.
2. Click the down arrow on the Photo Category Menu to list the available categories of
photos.Select the category titled “Sample Photos”. The corresponding photo slides
will be displayed.
3. Click the up/down arrows to browse through the current slides.Once you find your
desired photo,click on it.
4. Click Okay to bring your selected photo to the Main Display Area on the Main
Screen.Your photo will be visible through the masked area of your selected fantasy.
5.To select a second or third photo, click the Get Photo Button 2 or 3 and repeat
steps 2-4.
Capturing Live Video (for Windows users only)
1. From the Main Screen, click the Get Fantasy button to select your fantasy.Choose
from a variety of templates included in the GET FANTASY pull-down menu bar.
Browse through the current slides, once you find your desired photo, double click
on it.
22
Page 13

PFANTASY.200 3/14/01 10:28 AM Page 25
PhotoFantasy 2000 Quick Start Guide
23
2. Three LiveVideo Buttons will automatically appear across the top of the Fantasy
DisplayArea.
Click the Live Preview button to turn on your desktop video camera.A blinking
green circle appears around the button. The face mask in the fantasy template is
automatically replaced by your live video.
3. Manually aim your desktop video camera towards the face of your subject. Click
the Snap Photo button located to the left of the Preview button.This will
automatically take the photo of the subject in the Preview window and place it in
the fantasy template. Using the adjustment tools you can position and move your
photo into place for the perfect PhotoFantasy.
Optional:
- To create your own categories with your own photos,see the term “Photo Category
Menu” in the section “Getting Acquainted - Get Photo Screen”.
C. Adjust Your Photo Fantasy.
1. Highlight the Get Photo Button (1,2 or 3) for the photo you want to adjust. (To
highlight, click on the appropriate Get Photo Button,or click on the actual
photo in the Main Display Area.)
2. Use the Adjustment Tools to adjust the position,size and color of the photo within
its mask.
- To adjust the placement of the photo, position your cursor over the photo and
drag the hand cursor that appears.
- To flip the photo,click the Flip Tool.
- To move the photo in a specific direction,use the Move tools.
- To enlarge or reduce the size of the photo, use the Resize tools.
- To rotate the photo clockwise or counter-clockwise,use the Rotate tools.
- To control the precision of movements,use the Zoom In/Zoom Out tools.
PhotoFantasy 2000 Quick Start Guide
- To add text to your photo,use the Text Tool.
- To automatically match the color of your photo with your fantasy,use the
automatic Match Color Tool.
- To adjust the brightness in the entire photo fantasy, use the Brightness Tool.
- To adjust the contrast in the entire photo fantasy, use the Contrast Tool.
- To adjust the saturation in the entire photo fantasy,use the Saturation Tool.
Optional:
- For more information about the tools in step 2, see the term “Adjustment Tools”in the
section “Getting Acquainted - Main Screen”.
D.Save, Print or Send Your Photo Fantasy.
1. To save your photo fantasy, click the Save As Tool.The Save As dialog box will appear,
prompting you to select the filename,path and f ormat. Click Save when you are done.
2. To print your photo fantasy, click the Print Tool.The Print dialog box will appear,
prompting you to select your printer settings to begin printing.
3. To e-mail your photo fantasy, click the Send Tool.Your e-mail program will launch,
allowing you to automatically send your finished creation as an e-mail attachment.
E. Create Your Own Fantasy Background.(optional)
1. In the Get Fantasy Screen,click the down arrow in the Fantasy Category Menu
and choose “My Fantasy”.The “My Fantasy”Buttons will be displayed at the bottom
of the screen.
2. Select the image you want to turn into a fantasy.
•To create a fantasy from your own image, click the Add Button.The Create
Fantasy Background Screen will appear,along with an Open dialog box.
Choose the image you want to open. The image will appear in the Create
Fantasy Display Area.
24
Page 14

PFANTASY.200 3/14/01 10:28 AM Page 27
PhotoFantasy 2000 Quick Start Guide
25
•To create a fantasy from a scanned image,click the Scan Button.The Create
Fantasy Background Screen will appear,along with a Select Source dialog box
that lists all your installed TWAIN-compliant devices. Choose your desired
device. Acquiring options specific to that device will appear.(For more
information, consult the manual that came with your device.) Once the image is
acquired,it will appear in the Create Fantasy Display Area.
3. In the Create Fantasy Background Screen,specify the mask you want to create or edit
by clicking on the Create Mask Button 1,2 or 3.
4. Create or edit the mask using the Masking Tools. (For more information on these
tools, see the term“Masking Tools”under the section “Getting Acquainted - Create
Fantasy Background Screen”.)
Tip: PhotoFantasy lets you create masks containing more than one enclosed
area. This is particularly useful when the person in your fantasy is wearing an item
like sunglasses,and you want the sunglasses to show through the mask.One way to
do this is to first create a mask for the top half of the face. Then,hold down your
Shift key while creating a mask for the bottom half. When the second mask is
completed, release the Shift key. Both masks will be combined into one mask.
Another way to do this is to mask the entire face and simply erase the portions
covering the sunglasses.
5. To create a second or third mask, click the Create Mask Button 2 or 3
and repeat step 4.
6. Adjust the brightness, contrast and saturation in your entire fantasy by sliding
the Brightness, Contrast and Saturation tools.
7. Click Okay to bring the newly created fantasy background to the Fantasy
Display Area in the Get Fantasy Screen.It will automatically be saved to the
“My Fantasy”category.
PhotoFantasy 2000 Quick Start Guide
MORE FANTASY BACKGROUNDS
Add to your existing PhotoFantasy background collection! Check out our
website at www.arcsoft.com/pftemplates.htmfor hilarious new PhotoFantasy
background templates.
26
 Loading...