

Page 1

USER MANUAL
13
Page 2

44601 Fremont Blvd., Fremont, CA 94538, USA
Tel: +1.510.440.9901 • Fax: +1.510.440.1270 • www.arcsoft.
com
Copyright © 2008 ArcSoft, Inc. All rights reserved. ArcSoft,
the ArcSoft logo, and ArcSoft Media Impression are registered
trademarks of ArcSoft, Inc. in the United States. All other
product and companies named herein may be trademarks of
their respective owners.
14
Page 3

About ArcSoft
ArcSoft, Inc. is an industry leading software developer of
multimedia technologies and applications across desktop
and embedded platforms. Working closely with major OEM
manufacturers, ArcSoft offers a full line of imaging and video
solutions that enhance the features, performance, and user
experience of mobile phones, digital cameras, optical drives,
personal computers, and consumer electronics devices.
Established in 1994, ArcSoft is headquartered in Fremont,
California, with regional commercial and development facilities
in Europe and the Far East. For further details, please visit us at
our corporate web site: www.arcsoft.com.
15
Page 4

Table of Contents
About ArcSoft...............................................3
1. Introduction............................................6
1.1 Installation..................................7
1.2 System Requirements...................8
1.3 Key Features..............................10
2. Start Page.........................................13
2.1 Media Browser.............................14
3. Media Types......................................18
3.1 Pictures......................................18
3.2 Music..........................................19
3.3 Video..........................................20
3.4 All Media.....................................21
4. Actions..............................................39
Reference....................................................64
Troubleshooting..........................................66
Customer Support.......................................70
Technical Support.......................................73
Product Registration...................................74
Index..........................................................72
16
Page 5

Chapter 1: Introduction
1. Introduction
Installation
System Requirements
Key Features
This Introduction covers the installation and system
requirements and provides a list of the key features of Media
Impression. The rest of the user manual covers how to use the
user interface, how to manage and import specic media les,
and how to create a movie and use the webcam. There is also a
chapter that covers the program’s menus and commands.
1
Page 6

Chapter 1: Introduction
1.1 Installation
1. Insert the CD into your CD-ROM drive.
2. The installer should start automatically.
3. Follow the on-screen instructions to complete the
installation.
4. When prompted, enter the license key located on the
sleeve in which your software cd came in.
Take note as to where the program is installing, and where it can
be found in the Start menu.
Note: If the installer does not start automatically, you will need
to run it manually:
1. Insert the CD into your CD-ROM drive.
2. Click Start>Run.
3. In the Run dialog, type “X:/setup.exe”. (“X” is the drive
letter associated with your CD-ROM drive. This letter
will vary from system to system.)
4. Click OK.
5. Follow the on-screen instructions to complete the
installation.
2
Page 7

Chapter 1: Introduction
1.2 System Requirements
Minimum System RequirementsFor
dows:
For Windows:
OS - Windows 2000/XP/Vista
CPU - Intel Pentium 3 1 GHz or equivalent
Memory - 512 MB RAM (256 MB recommended)
Hard disk space - 300 MB available hard disk space
Display - 16-bit color monitor at 800 x 600 or higher
Other
- Apple QuickTime(R) 7.0 or higher
recommended
- Microsoft DirectX 9.0 or higher
- Microsoft Windows Media Player 9.0 or
higher
For Mac:
OS - Mac OS x 10.3, 10.4, 10.5
CPU - PowerPC G4 800 MHz processor or Intel
processor
3
Page 8

Chapter 1: Introduction
Memory - 512 MB RAM (1 GB recommended)
Hard disk space - 300 MB free hard disk space
Display - 16-bit color monitor at 800 x 600 or higher
Graphics - Apple QuickTime(R) 6.0 or higher
4
Page 9

Chapter 1: Introduction
1.3 Key Features
• Powerful Media Management
• Organize les with ratings, tags, ags, and calendar views
• Launch Google Earth, navigate to the location where you
took
• XMP Support
• Add title, subject, IPTC, rating, and tag information into
pictures
• Share information with other applications like Vista Photo
Gallery or Adobe Photoshop
• Retain photo information even if you copy, move or share
it with other people
• MUI (Multilingual User Interface) Support
• Adjust text size for easier reading
• Choose your language preference
• Simple Creative Projects and Editing Tools
• Combine pictures, video, and music in just a few clicks
• Create your own movies or photo slideshows, complete
with sound track
• Edit, enhance, and add fun creative effects to your photos
• Many Ways to Present, Publish, and Share
• View pictures and videos full screen
• Email pictures as attachments or photo pages, or inside
colorful templates
• Save photos as screen savers or desktop wallpaper
• Transfer photos to ArcSoft Print Creations software for
making greeting cards, calendars, photo books, and more
• Easy File Import and Export
5
Page 10

Chapter 1: Introduction
• Automatically detect plugging and unplugging of
memory cards and DSCs
• Automatically x red-eye, correct picture orientation, and
tag les on import
• Capture images from video les Capture video from
webcams
6
Page 11
Chapter 1: Introduction
Welcome to ArcSoft MediaImpression™, a fun and powerful
management tool for your media les. Easily create and share
projects featuring your photo, video, and music les. Edit,
enhance and add creative effects to your photos. Create your
own movies or photo slideshows, complete with soundtrack.
Upload your les easily to YouTube™! Or share them with friends
or family through simple email attachments, photo sharing sites,
or archive to a CD/DVD disc.
7
Page 12

Chapter 2: Start Page
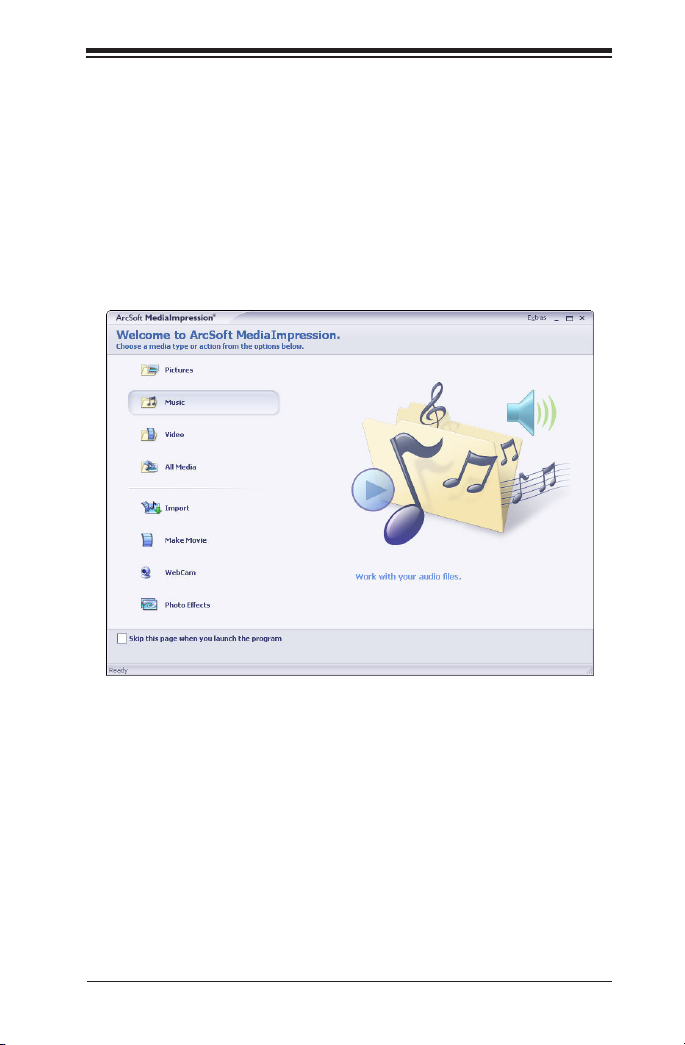
2. Start Page
This chapter covers what you will nd in the start page of
MediaImpression. For an explanation of each option on the main
screen, mouse over the option and a description will appear.
There are two ways of starting to use MediaImpression: by
Media Type or by action.
By Media Type
You can start by selecting the type of the media les you want to
view and edit. The program launches the Media Browser for this
type of media le.
By Action
You can also start by selecting the task you want to work on.
You can also Congure Start Page to show the tasks that you
want.
Check the “Skip this page when you launch the program” option
to go directly to the Media Browser next time.
8
Page 13
Chapter 2: Start Page
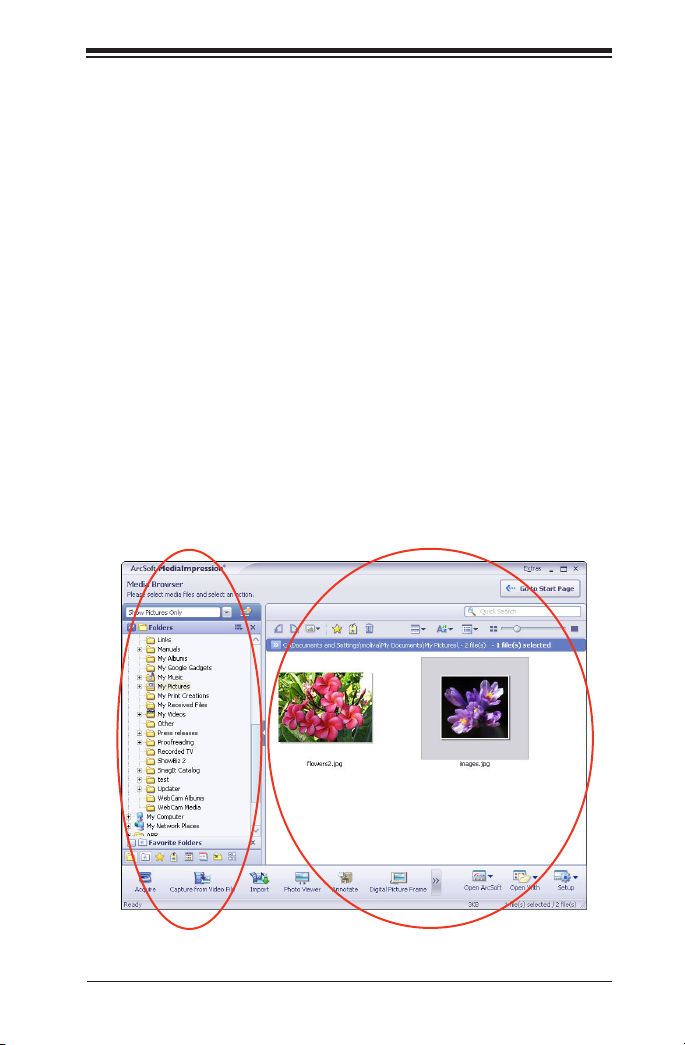
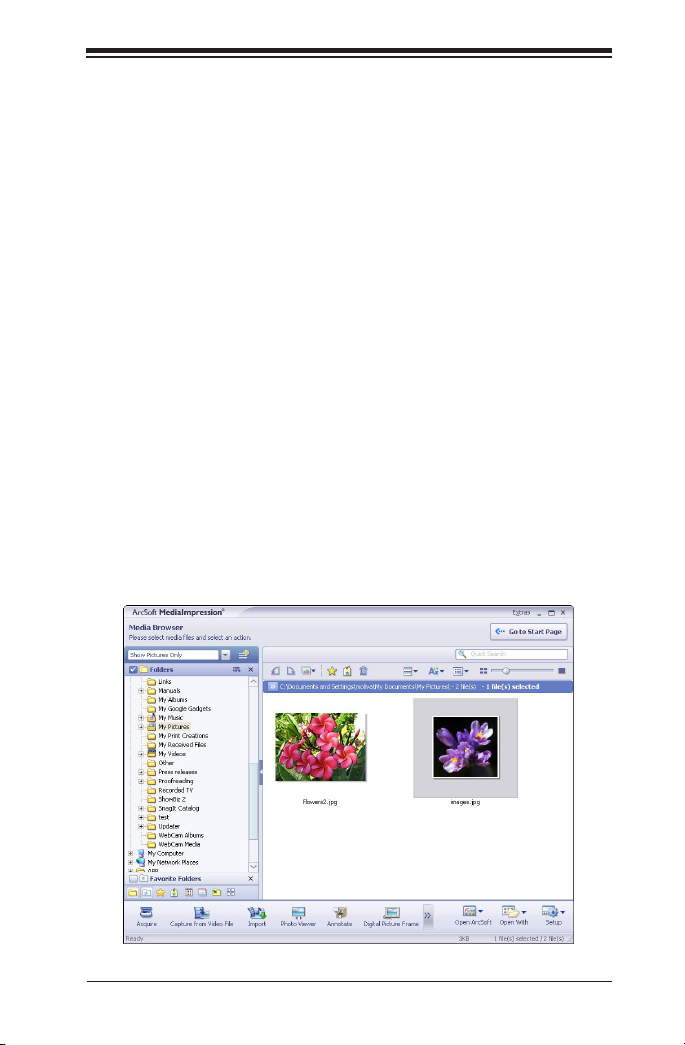
2.1 Media Browser
The Media Browser occupies the largest section of the main
screen. It consists of two sections:
2.11 Views
Appears on the left side of the Media Browser. Views provide
tools and options for you to locate, examine, and organize your
media les. The rst time you use the program, Folders is the
primary view. The Folders view displays your les based on their
location on your hard drive.
2.12 Preview Area
Appears in the center section of the Media Browser. Displays
media le thumbnails and detailed information about the les
contained in the selected folder.
Views
Preview area
9
Page 14

Chapter 2: Start Page
The Views provide tools for you to locate, examine, and organize
your media les.
The types of media les you view are determined by the
Categories drop-down list. To change the type of the media les
you want to view, select from the Categories drop-down list.
The rst time you use the program, Folders is the primary view.
At the bottom of the Folders view, click on the icons below the
folders view for more available views.
Click the icon to open the Congure Browser dialog and
select the Views you want to use. Mouse over each option for an
explanation.
Folders - browse for media les using a classic Windows style
folder tree view.
Favorite Folders - database le that contains the media les that
you use most
Rating - manage and search your media les, based on 5 levels
of ratings.
Tags - provides a list of tags that you can use to categorize your
media les
Activity History - database which can record the user’s operation
history automatically
Calendars - uses the le’s created date (shot time for EXIF
images) to organize your media les
Import History - gives you a convenient way to browse for media
les based on how and when you rst copied them to your
computer
Saved Selection Criteria - saves the set of conditions you have
selected in the other views
10
Page 15
Chapter 2: Start Page
MediaImpression is designed to be easily expandable as your
multimedia needs grow and change. In the Congure Browser
dialog, you can choose to have the program check for other
plug-ins (views, actions, etc.) that may be available. Click the
new plug-in names to learn more about them, or to download
trial versions. Click to activate the trial versions if you would like
to purchase the plug-ins from the ArcSoft eStore.
Click Congure Browser to congure the Views and Actions
differently for each category of media le.
Note: The width of the Views can be adjusted by clicking and
dragging on the bar that divides the Views from the Preview
Area. The Views can be displayed or hidden by clicking their
relevant icon at the bottom of the view area. Or click the cross
icon on the view bar to close it.
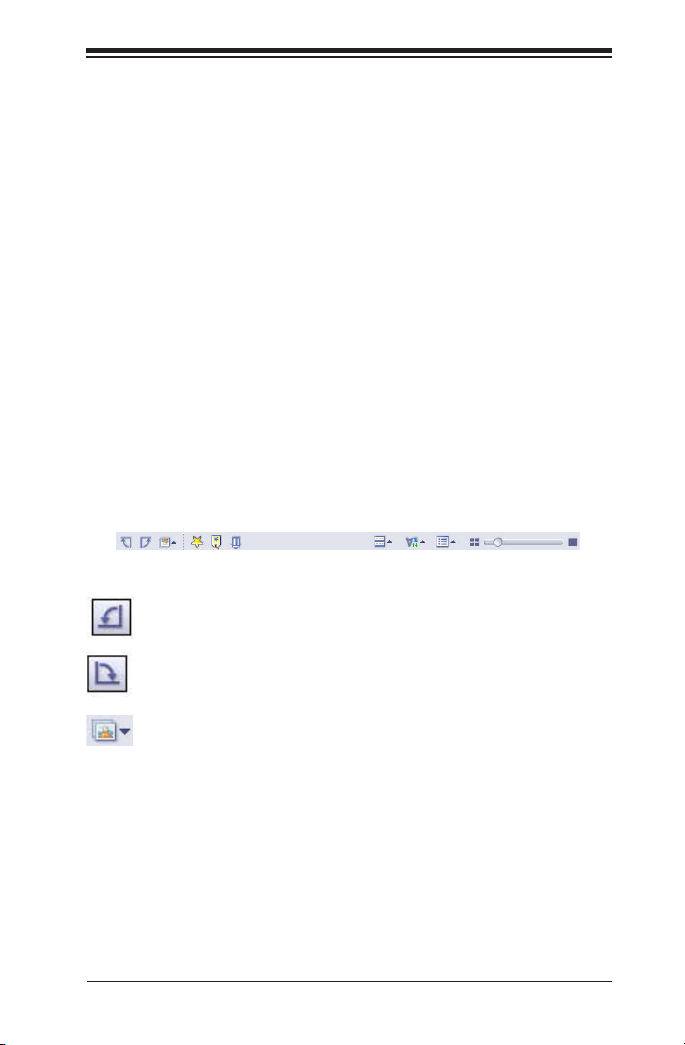
On the top of the screen you will see options on top of the
preview window.
Rotate left: Rotates the selected photos 90-degrees
counterclockwise
Rotate right: Rotates the selected photos 90-degrees
clockwise.
Batch: Presents a dropdown menu that contains the
following items:
• Batch Convert
Launches the Batch Convert File dialog box which enables
you to quickly and easily change the le format for many
media les at once.
• Batch Resize
Launches the Batch Resize dialog box which enables you to
quickly and easily resize many media les at once.
11
Page 16
Chapter 2: Start Page
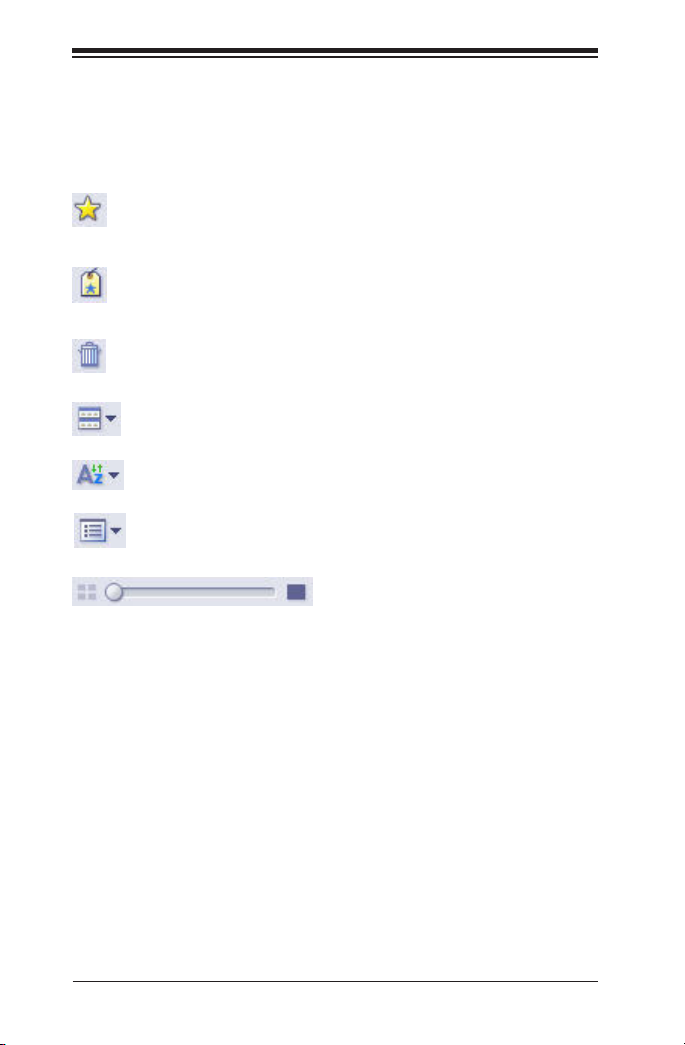
Batch Rename •
Launches the Batch Rename dialog box which enables you
to quickly and easily rename many media les at once.
Attach Rating: Enables you to attach a rating to or unrate
the selected media les in the Preview area.
Attach Tags: Enables you to attach a tag to the selected
media les in the Preview area.
Delete: Sends the selected media les to the recycle bin.
Group by: Organizes the media les into different
categories in the Preview Area.
Sort by: Sets the sort criteria for the les and folders in
the Preview Area.
View by: Allows viewing les as thumbnails and
thumbnails with details.
Smaller/Larger: Makes the thumbnails larger or smaller
within the Preview Area. Clicking the left button ts as many
thumbnails as possible into the Preview Area. Clicking the right
button makes the thumbnails as large as possible. By moving
the slider, you can adjust the thumbnail size by hand.
12
Page 17
Chapter 3: Media Types
3. Media Types
The following media types are available:
Pictures, Music, Video, and All Media.
Each media type has a views and a preview window. At
the bottom is a selection of specic actions related to that
category.
3.1 Pictures
In the Pictures window you will see the action menu on the
bottom. At anytime, you may select an action from that list.
The Program’s Action buttons appear below the Media Browser.
13
Page 18
Chapter 3: Media Types
To manage photos:
Select the picture you would like to work with from the 1.
display area.
Select the action you would like to apply to the picture from 2.
the list of icons below the display area. A pop up window
will appear for that particular action. See chapter 4 for an
explanation of each action.
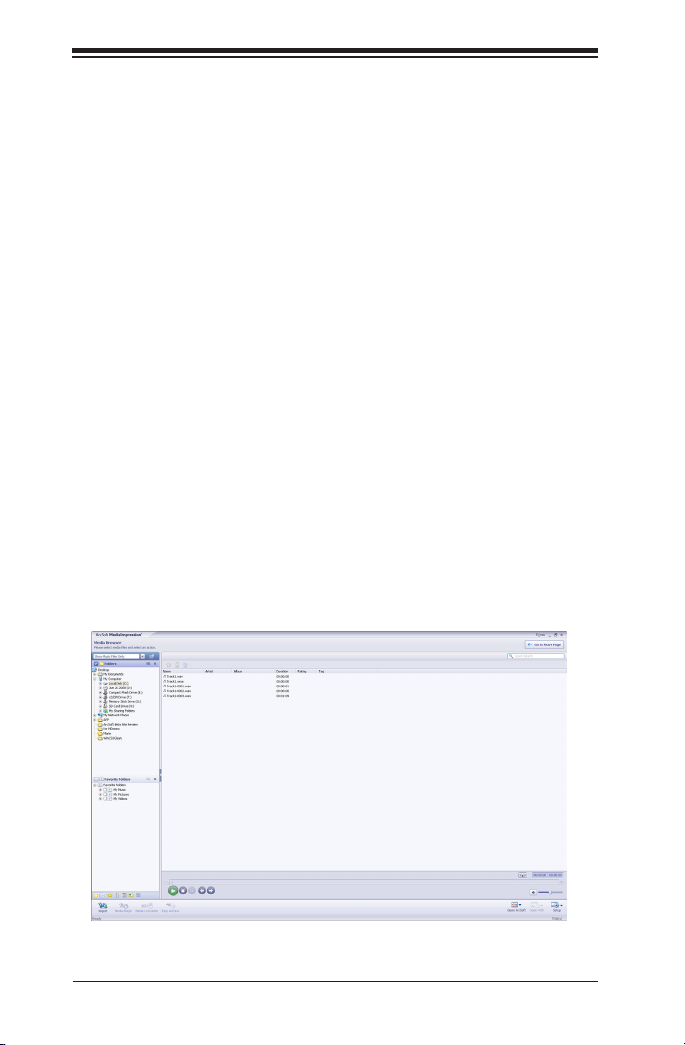
3.2 Music
To manage or play music les:
Select the music le you would like to play or manage.1.
Either select an action from the ones listed below the 2.
display area or use the buttons to play, stop, etc. your
music le.
14
Page 19

Chapter 3: Media Types
3.3 Video
To manage or play video les:
Select the video les from the display area or browse 1.
using the pull-down menu.
Select the action from the ones listed below the display 2.
area that are available.
15
Page 20

Chapter 3: Media Types
3.4 All Media
To manage or play music les:
Select the music le you would like to play or manage.1.
Either select an action from the ones listed below the 2.
display area or use the buttons to play, stop, etc. your
music le.
16
Page 21

Chapter 4: Actions
4. Actions
There are actions in MediaImpression that you may choose from
in the start page. The available actions will vary depending on
how you choose to congure these.
The available options can be found in the form of icons below
the screen as well as in the right-click menu. They differ
depending on the category of media le selected in the Media
Browser. They include:
Import
To access the import window, click on the Import icon on the
start page.
The Import action allows you to import media les to your
computer from a camera or storage device. The Import window
can be attached to the main window to let you preview and
select the imported media les in the preview area by clicking
the "Attach" button. After importing, you can delete the original
les from your device.
To import a media le:
1. Select a camera or storage device from the drop-down list.
Note: By default, all the media les in the device will be
imported to your computer. If you just want to import some of
them, please go to the Folders view and select the les you want
before importing.
2. Select a destination folder for the import media les by
clicking "Browse" (folder icon) and navigating to the folder.
3. Select a naming rule for the sub-folder.
4. Set the import options by checking the relevant checkboxes.
17
Page 22

Chapter 4: Actions
Exclude les that have already been imported - Do not •
import the les that have been imported from the device.
Rotate photo automatically - Rotate imported photo les •
automatically during the importing.
Fix red-eye automatically - Automatically nd and x all •
red-eyes.
Attach a tag - Tag each le as you import it. Select the tag •
from the list or create a new tag.
Once you have clicked importing the following window will
appear:
18
Page 23

Chapter 4: Actions
5. Click "OK" to start importing.
A similar window such as this one will appear with your own
selected les:
Make Movie
In the Make Movie module, you can quickly and easily produce
professional-looking movies featuring your own photo and video
les. Note: If the Media Browser category is set to My Pictures
or All Media Files, this action appears under the Edit module.
To make a movie:
1. Add Click and drag selected les onto the storyboard, or
select les from the Display Area and click "Add". Within the
storyboard, click and drag the les to arrange them in the order
you want. Title and credits are added automatically.
2. Edit
• Click ‘Transition’ to select the transitions to be inserted
between video clips or still images.
• Double-click a video clip in the storyboard to preview and trim
it. Double-click a picture in the storyboard to preview it.
19
Page 24

Chapter 4: Actions
• Click ‘Rotate Left/Right’ to rotate the selected photo or video
le in your movie.
• Click ‘Title & Credits’ to customize the title and credits with
your own text.
• Click ‘Add Music’ to select audio les and add background
music to your movie.
• Click ‘Add Logo’ to select a logo image and add it to your
movie.
• To delete a le from the storyboard, select it and click the
delete (trash) icon.
3. Preview, Save, and Burn to Disc
Click ‘Preview’ to view the movie with the built-in player. Click
"Save As" to save it. Click ‘Burn to Disc’ to create a VCD or DVD
featuring your movie.
4. Project
Movie project options include New, Open, Save and Save As.
5. Controls
There are many options to help manage your movie les.
Preview Video Controls
Click on the ‘Batch’ icon to make a selection to convert, resize,
and rename a batch of les. Or choose to attach a star rating by
clicking on the star shaped icon for ‘Attach Rating’. Or click on
‘Attach Tag’ to attach a special event tag. You will also nd
20
Page 25

Chapter 4: Actions
rotate left and rotate right icons and a delete icon. You can also
click on ‘Group by’ to group your les by certain criteria or click
on ‘Sort by’ to opt to sort your les and choose ‘View by’ to view
your les a specic way. The slider on the right of the screen
helps you to zoom in and out of your les.
<<Add image>>
WebCam
This module makes it easy for you to capture still images and
video directly from your webcam. Before capturing, you may
want to adjust the capture settings, webcam settings, and
snapshot/video resolution according to your requirements.
Capture a still image by clicking the "Capture" button. Capture
a group of images in burst mode by clicking the "Burst" button.
Capture a video clip by clicking "Record Video" and then "Stop
Recording."
Settings
Allows you to adjust your capture settings, such as video device,
burst number, audio device and audio input, etc.
WebCam Settings
Allows you to adjust your webcam related preferences, such as
brightness, contrast, hue and saturation, etc.
Connect
Connect your webcam. (This icon is displayed when your
webcam is not connected.)
Disconnect
Disconnect your camera. (This icon is displayed when your
webcam is connected.)
21
Page 26

Chapter 4: Actions
Once the image has been captured, it will appear in the preview
area, as seen in the following:
22
Page 27

Chapter 4: Actions
Acquire
Here you can:
Acquire images from connected TWAIN compliant devices •
such as scanners and some digital cameras.
Assign names to image les as they are acquired (using •
today’s date or a descriptive word).
How to acquire images from a TWAIN compliant device:
Select a scanner or other TWAIN device from the drop 1.
down list.
Choose the le format you want to use for the acquired 2.
images (JPG, BMP, TIF, PCX, TGA).
If you’ve selected JPG as the le format, select the image 3.
quality for the acquired images (Highest, High, Normal,
Low). The lower the quality selected, the higher the level
of compression applied.
Choose a destination folder for the photos by clicking 4.
'Browse' (folder icon) and navigating to the folder.
Choose a naming method (today’s date or description). 5.
Enter a description if applicable.
Click 'Acquire'. 6.
Capture from Video File
Here you can:
Capture a frame or a series of sequential frames from •
video les.
Save captured frames as image les. •
video les. •
Save captured frames as image les. •
23
Page 28

Chapter 4: Actions
How to capture frames from video:
Click the 'Get New Video' button to select a video le (avi, 1.
mpg, mpeg, wmv, asf, mov).
Use the Play/Pause button or the slider control to advance 2.
to the rst frame you want to capture.
Use the 'Frames per capture' control to set the number 3.
of frames (1 to 20) you want to capture each time the
Capture button is clicked.
Click 'Capture'. Thumbnails will be added to the tray 4.
below as they are captured.
To remove unwanted frames from the tray, select the 5.
thumbnail and click Remove.
Choose a destination folder for the captured frames by 6.
clicking 'Browse' (folder icon) and navigating to the folder.
Choose a naming method for the captured frames (today’s 7.
date or description). Enter a description if applicable.
Click 'OK'. 8.
Media Player
Click on the Media Player icon, whenever available, to launch
the built-in Media Player. The Media Player module enables
you to enjoy music and video les without having to launch
another program. The Media Player controls include:
Play/Pause (P) Plays and pauses the
selected video or music
le.
Back to
Beginning
Previous Goes to the preceding
Goes back to the starting
point of the selected video
or music le.
video or music le.
Next Goes to the following video
or music le.
24
Page 29

Chapter 4: Actions
Attach Rating Enables you to attach a
rating to or unrate the
selected media les. You
can also press a number
(1-5) on the keyboard to
apply a rating.
Mute Quiets the audio.
Volume Level Enables you to adjust the
volume level.
Repeat Makes the video or music
le play repeatedly.
Full Screen
(F)
Exit full
screen
Photo Viewer
The Photo Viewer module is useful for browsing
photos, playing full-screen slide shows and making
simple edits to your photos.
Displays the video or
music le in full screen
mode.
Restores the Media Player
to standard size.
25
Page 30

The Photo Viewer controls include:
Best Fit (Ctrl+B) Makes the photo t in the
Actual Size
(Ctrl+A)
Zoom Out (-) Reduces the size of the
Zoom In (+) Enlarges the active photo
Play/Pause (P) Makes the photos in the
Stop (Esc) Stops the slide show.
Chapter 4: Actions
preview screen.
Shows the photo at
100%.
active photo within the
Photo Viewer.
within the Photo Viewer.
current folder play as a
slide show.
Previous (Left
Arrow, Up
Arrow, Page Up)
Next (Space Bar,
Right Arrow,
Down Arrow,
Page Down)
Attach Rating Enables you to attach a
Slide Show
Settings
Goes to the preceding
photo le.
Goes to the following
photo le.
rating to or unrate the
selected media les. You
can also press a number
(1-5) on the keyboard to
apply a rating.
Launches the slide show
settings dialog box where
you can set the speed,
music and transition
effect for your slideshow.
26
Page 31

Chapter 4: Actions
Delete (Del) Sends the selected photo
le to the recycle bin.
Rotate Left 90
(Ctrl+L)
Rotate Right 90
(Ctrl+R)
Automatically
Remove Red-Eye
EXIF EXIF data for the
Full Screen (F) Displays the le in full
Exit full screen Restores the Photo Viewer
Rotates the active
photo 90-degrees
counterclockwise.
Rotates the active photo
90-degrees clockwise.
Automatically xes redeye. If red-eye is not
xed, use the Easy Fix.
active photo can be
found by clicking on
the EXIF button. EXIF
(Exchangeable Image
File Format) information
contains details about
the image le, camera
and camera settings
used when the photo was
taken. Note: The actual
information available will
vary according to your
camera settings.
screen mode.
to standard size.
27
Page 32

Chapter 4: Actions
Digital Picture Frame
The digital picture frame module allows you to resize and crop
your photos according to your digital-picture-frame device
quickly and easily.
Follow these steps to resize your photos:
Highlight les and click on the Add button. 1.
Select the manufacturer and the model of your device. 2.
You may edit the les, click on 'Preview' or click on 3.
'Export' once you are ready.
Easy Fix
The Easy Fix module is a step-based image editor designed
to help you x common photo problems quickly and easily.
Simply add a check mark next to each enhancement you want
to use and click 'Next'. Edit features include:
Straighten it •
Crop it •
Fix Red-Eye •
Add Brightness and Contrast •
Sharpen it •
Adjust the color •
Make the Subject Stand Out •
Each page of the Easy Fix features Reset and Undo/Redo
buttons, allowing you to test different editing choices before
moving to the next step.
When you've reached the last page, click 'Save As' to save
your edited photo. You can choose to overwrite the original
le or save a new one. If you selected multiple photos before
launching the Easy Fix Wizard, a 'Next Image' button lets you
begin again using the next photo.
28
Page 33

Chapter 4: Actions
Make Movie
In the Make Movie module, you can quickly and easily produce
professional-looking movies featuring your own photo and
video les.
Follow these steps to make a movie:
1. Add
Click and drag selected les onto the storyboard, or select les
from the Display Area and click 'Add'. Within the storyboard,
click and drag the les to arrange them in the order you want.
Title and credits are added automatically.
2. Edit
Click 'Transition & Effect' to select the transitions and effects
to be inserted between video clips or still images. Double-click
a video clip in the storyboard to preview and trim it. Doubleclick a picture in the storyboard to preview it. Click 'Rotate
Left/Right' to rotate the selected photo or video le in your
movie. Click 'Title & Credits' to customize the title and credits
with your own text. Click 'Add Music' to select audio les and
add background music to your movie. Click 'Add Logo' to
select a logo image and add it to your movie. To delete a le
from the storyboard, select it and click the delete (trash) icon.
3. Preview, Save, and Burn to Disc
Click 'Preview' to view the movie with the built-in player. Click
'Save As' to save it. Click 'Burn to Disc' to create a VCD or
DVD featuring your movie.
4. Project
Movie project options include New, Open, Save and Save As.
29
Page 34

Chapter 4: Actions
Photo Editing Tools
The Photo Editing Tools module includes a complete set photo
enhancement, editing, and retouching controls.
The window can be stretched to provide a large size view
of the active photo. Double click the module's tool bar to
maximize the window to ll the computer screen.
In addition to the large photo workspace, the Photo Editing
Tools module includes three distinct sets of controls:
Adjust •
Retouch •
Clipboard•
30
Page 35

Chapter 4: Actions
Photo Effects
The Photo Effects module includes a full set of special effects
for photos.
Most of the effect names give a good idea of how the
command will affect the image. You can also see a preview
when you select a particular command before applying it to
the image.
The window can be stretched to provide a large size view
of the active photo. Double click the module's tool bar to
maximize the window.
To apply an effect:
Select a photo. 1.
Choose an effect from the effect list. 2.
If controls appear, use the controls to change values.
The program lets you preview the effect before applying
it. You can then choose to apply the effect or cancel the
operation.
3. Press 'Esc' to abort the operation when you are in preview
or apply mode.
31
Page 36

Chapter 4: Actions
In addition to the large photo workspace, the Photo Effects
module includes two distinct sets of controls:
Toolbar •
Photo Tray•
Creativity
The Creativity project includes the following options:
Text and Clip Art - Customize your photos with colorful words
and graphics.
Frames and Edges - Apply creative frames and border effects
to your photos.
Color Effects - Apply fun and creative color effects to your
photos.
Geotag
The Geotag module which works with Google Earth lets you
locate the place where you shot a photo, add it as a Geotag,
view the photo and their shooting track in Google Earth, or
export it as the standard *.kmz le to share with your friends
and family. Note that you should install Google Earth before
using this module, and please refer to its help le for more
information.
Geotag with Google Earth•
Geotags photos by navigating to the location where you shot
it. Position the crosshairs and click 'Geotag' , or click 'Geotag
All' to geotag all the selected photos. When you nish, click
'Done'. Note that the function is just available for JPG or TIFF
32
Page 37

Chapter 4: Actions
photos.
View in Google Earth•
Views the selected photo which has already been geotaged
in Google Earth. Google Earth will locate the location where
you shot it, and display the photo as a thumbnail. Clicking the
thumbnail lets you have a big view.
View in Google Earth with Path•
Connects a group of photos which have already been geotaged
with red lines to show your travel path.
Export to Google Earth File (*.kmz) •
Exports the current Google Earth information as a .kmz le.
Slide Show
The Slide Show project includes the following options:
Play/Manage My Slide Shows - Play and manage •
previously created slide shows.
Make a New Slide Show - Create and save slide shows •
using the selected photos.
Photo Email
The Photo Email module lets you insert your photos into fun
and colorful templates before emailing them to friends and
family.
Here's how it works: •
Your selected photos are automatically added into a template.
Double-click on the window's toolbar (at the very top) to
expand the window full-screen.
To select a new template, click a thumbnail on the left.
To see more templates, select another category from the drop
down list above the thumbnails.
33
Page 38

Chapter 4: Actions
To change the text at the top of the email page and below
each photo, use your cursor to select the text then type your
new message.
Click Send to launch your email application and insert your
photo template into the body of a new email. Note that you
must have your email format set to 'HTML email.'
Send your email as you normally would.
Slow connection speeds may prevent the successful
transmission of photo email. A broadband internet connection
is recommended.
In order for recipients to see your email with the background
and photos, they must have their email format set to 'HTML
email.'
Important: Because this feature requires that the sender
use HTML email format, not all email applications/services are
supported.
Download New Photo Email Templates •
Takes you to the download section of arcsoft.com where
you can get more HTML email templates. The website offers
creative content for other areas of the program too.
Upload to YouTube
The Upload to YouTube action allows you to upload les to
your YouTube account.
If this is the rst time you are uploading les, you will be
prompted to authorize MediaImpression to upload les to
your YouTube account. YouTube requires this authorization
for security purposes. Follow the onscreen instructions for
authorization:
Please be aware that you must already have a YouTube
account in order to use this feature. If you do not have one
yet, go to www.youtube.com to register.
34
Page 39

Chapter 4: Actions
Easy Email
The Easy Email action lets you quickly and easily prepare and
email many photos.
How to prepare and email photos: •
Choose an attachment method:
Regular Photos – Traditional method for emailing photos.
Choose 'Use Original' if you want to email photos for printing.
Photo Pages – Recipients receive photos in the form of photo
page layouts - with 2, 4, 8, or 18 photos on a page.
This method is convenient for sharing photos that don't need
to be printed and is ideal for sending proof sheets.
Conrm that the Estimated Time to Send seems reasonable.
35
Page 40

Chapter 4: Actions
Select the email program you want to use to send the
attachment.
Click 'Attach to Email' to generate an email with the
attachment.
Type your message and click 'Send'.
Easy Print
The Easy Print action lets you quickly and easily print photos
in a variety of standard sizes using your desktop printer.
How to print photos using your desktop printer:
Select the photos you want to print and click Easy Print.
Choose a Page Template (photo size) from the scrollable list
on the left.
Use the Easy Print Toolbar controls (explained below) and your
cursor to zoom, pan, rotate, ip and swap photos until they
look perfect on the page.
Make sure Paper Size is correct by referring to the drop down
list at the bottom of the screen.
If you have more than one printer installed, please select the
one you want to use from the drop down list.
36
Page 41

Chapter 4: Actions
• Easy Print Toolbar:
Landscape/
Portrait
Zoom in Enlarges the selected photo
Zoom out Reduces the size of the
Auto Crop Have the program
Copy Copies a selected image into
Paste Pastes a copied image into
Rotate Left 90Rotates the selected photo
Rotate Right 90Rotates the selected photo 90
Flip Flips the selected photo
Delete Remove the selected photo
Switch between horizontal and
vertical page orientations.
within the print area.
selected photo within the print
area.
automatically crop the photo
in its current orientation
so that it lls its respective
template.
the preview area.
the preview area.
90 degrees counterclockwise
within the print area.
degrees clockwise within the
print area.
horizontally within the print
area.
from the print area.
37
Page 42

Chapter 4: Actions
If you want to adjust the quality settings for your printer, click
'Print Setup.'
Click 'Print'.
Webcam (See Chapter 2 for section on webcam)
Easy Archive
The Easy Archive action helps you quickly and easily burn a
CD or DVD disc of the selected media les.
How to • archive media les to disc:
Select the les and folders* you want to archive to disc and
click Easy Archive.
Insert a blank CD or DVD disc into the selected drive.
Enter a disc label.
Enter a folder name. All les in the archive will be added to
this folder.
Click 'Burn.'
* Note: Although folders can be selected for archiving, only
their contents are archived to the disc - folder structures are
not archived. All media les are added to one folder.
38
Page 43

Chapter 4: Actions
Print Creations
The Print Creations projects enable you to create Photo
Calendars, Half-Fold Greeting Cards, Quarter-Fold Greeting
Cards, Album Pages, and Photo Books with your pictures.
Selecting a Print Creations project launches the ArcSoft Print
Creations™ application for that project, using the selected
pictures. Some or all of the Print Creations projects may be
unavailable depending on what version of Print Creations you
have installed.
For more information, visit the ArcSoft Print Creations web page.
39
Page 44

Chapter 4: Actions
Order Photo Gifts and Prints
The Order Gifts and Prints module lets you print your photos
quickly and easily through online print services, order gifts and
photobooks.
Here's how it works:
First click on the photo you would like to use from the preview
window. Click on the next button. Then select the the country
where you are as well as a product category. Follow the onscreen instructions.
Note: Not all available options will appear on the
bottom of the preview screen. To access these,
simply click on the expandable menu icon.
40
Page 45

Reference
Reference
Open ArcSoft
Open With
Setup
Troubleshooting
Customer Support
Technical Support
Licensing Agreement
Index
41
Page 46

Reference
The following are other options available in the Action button
toolbar:
Open ArcSoft
Open other ArcSoft applications directly from within
MediaImpression, or download trial versions of ArcSoft
applications that you have not yet installed.
Open With
Opens the selected le in the chosen application.
Setup
You can customize your program in several ways. You can select
to show or hide each view and action in the start page and
browser, and you can set the order of the available actions.
Congure Start Page
Choose which actions to list on the Start Page. To move an
action up or down in the list, select it and then click the
"Move Up/Down" button to the right of that action.
Congure Actions
Set the order of the available actions. Mouse over each action
to see its description. To move an action up or down in the
list, select it and then click the "Move Up/Down" button to
the right of that action. The changes take effect after you
click OK.
MediaImpression is designed to be easily expandable as
your multimedia needs grow and change. In the Congure
Browser dialog, you can choose to have the program
check for other plug-ins (views, actions, etc.) that may be
available. Click the new plug-in names to learn more about
them, or to download trial versions. Click to activate the trial
versions if you would like to purchase the plug-ins from the
ArcSoft eStore.
Advanced
Click Advanced to congure the Views and Actions differently
for each category of media le.
42
Page 47

Reference
Troubleshooting
Question: What do I do if Media Converter does not have
my device model listed?
Answer: If your device is not listed in Media Converter, you
can still convert the media. To do so, select ‘User dened’ under ‘Manufacture’. Click the ‘Edit’ button and manually dene
photo, audio or video le specications to t the parameters
used by your device.
Note: Please contact device manufacture to obtain media le
specications and parameters.
Question: How do I organize my les in MediaImpression
using tags?
Answer: Media Impression's powerful media browser will automatically separate your media les based on tags attached to
each media le. To enable tag view, click ‘Congure Browser’
buttons and check the 'Tags' option to enable it. Click ‘OK’
when nished. (A tag must be attached to a media les before
this method of organizing media les can be used)
To set a tag for a le, select thumbnail in the Preview Area.
Click the 'Attach Tags' button at the top, or right-click on the le
and select a tag from the 'Attach Tags' sub-menu, or even drag
selected les to a tag or drag a tag to selected les. Files must
be added to the library before you can attach a tag to them.
Question: How do I set a tag for a le?
43
Page 48

Reference
Answer: To set a tag for a le, select thumbnail in the Preview
Area. Click the 'Attach Tags' button at the top, or right-click
on the le and select a tag from the 'Attach Tags' sub-menu,
or even drag selected les to a tag or drag a tag to selected
les.
Question: Can I attach multiple tags to one le?
Answer: Yes, MediaImpression allows the user to set mulitple tags
to any media le.
Question: How do I make my own tags in MediaImpression?
Answer: To make your own tag, press ‘Insert’ key on your keyboard while in tag view on the left side of your browser pane or
right-click on le thumbnail icon and select ‘Attach Tag’.
Question: How do I change a tag icon in MediaImpression?
Answer: Right-click on the tag and choose ‘Change Icon’. You can
select from list of existing default icons or use your own photo.
Question: Some tag categories in MediaImpression can not be
changed or deleted, why?
Answer:
Media Impression comes with default tag categories such as
Events, Holidays, People, Photography, Places and Seasons,
which can not be deleted or renamed. However any existing tag
under these categories can be modied.
44
Page 49

Reference
Question: How does calendar view work in MediaImpression?
Answer: The Calendar view uses the le's created date (shot time
for EXIF images) to organize your media les.In the Calendars
view, select a year, a month or a day to view all media les that
were created or last modied on a given date.
Question: What does EXIF stand for?
Answer: EXIF stands for Exchangeable Image File Format and
contains information about the image le, camera and camera settings used when the photo was taken.
Note: The actual information available will vary according to your
camera settings.
Question: How do I add/remove action buttons in MediaImpression?
Answer: Media Impression ‘Action’ buttons appear below the Media Browser. The available Actions differ depending on the category of media le selected in the Media Browser.
By customizing action buttons, you can choose to show or hide
each button on the browser and you can set the order of the available actions.
Click the ‘Setup’ button in the bottom-right corner of the media
browser and select ‘Congure Actions…’ Mouse over each action
to see its description. To move an action up or down in the list,
select the action and then click the "Move Up/Down" button to the
right of that action. Uncheck the box to remove action button from
45
Page 50

Reference
action panel. Click OK to save changes.
Note: Use ‘Advanced’ to congure the Views and Actions differently
for each category of media le.
Question: How do I view photos in the full screen mode with
MediaImpression?
Answer: If you wish to view your photos in full screen mode using
the Media Browser, you must rst double-click on the photo thumbnail to open Media Impression Photo Viewer.
Press the ‘F’ key on your keyboard or use the ‘full screen’ button in
upper-right corner to toggle to full screen. To exit full screen mode,
press ESC key on your keyboard or use the ‘X’ button in bottom-
right corner to toggle off the full screen mode.
Question: How do I add audio to my photos in MediaImpression?
Answer: Media Impression allows users to attach audio commen-
tary to a photo le. To do so, right-click on photo le thumbnail and
select ‘Exif Audio Control’, then select ‘Attach Audio’ or ‘Record
New Audio’
Note: Only JPG les allow audio attachment and only WAV les
can be attached.
46
Page 51

Reference
Licensing Agreement
PLEASE READ THE FOLLOWING TERMS ("Agreement")
CAREFULLY. USE OF THE SOFTWARE (dened below) PROVIDED
BY ARCSOFT IS PERMITTED ONLY UNDER AND IN ACCORDANCE
WITH THIS AGREEMENT. IF YOU DO NOT AGREE TO BE BOUND
BY THIS AGREEMENT, PLEASE DO NOT USE THIS SOFTWARE.
IF YOU OBTAIN THIS SOFTWARE IN FORM OF CD WITHOUT
PRINT COPY OF THIS AGREEMENT, AND YOU DO NOT HAVE
OPPORTUNITY TO READ THIS AGREEMENT, YOU MAY RECEIVE
A FULL REFUND OF THE ORIGINAL PURCHASE PRICE IF YOU
(i) DO NOT USE THIS SOFTWARE, AND (ii) RETURN IT WITH
PROOF OF PAYMENT TO THE PLACE WHERE IT WAS PURCHASED
WITHIN 30 DAYS OF THE PURCHASE DATE.
1. Grant of License. This Agreement permits you to use one
copy of the Software or the Software included in this package or
device on any single computer ("Software"). For each software
licensee, the program can be "in use" on only one computer
or hardware device at any given time. The Software is "in
use" when it is either downloaded, copied, loaded into RAM or
installed into the hard disk or other permanent memory of a
computer or other hardware device.
2. License Restrictions. YOU MAY NOT RENT, LEASE,
SUBLICENSE, SELL, ASSIGN, LOAN OR OTHERWISE TRANSFER
THE SOFTWARE OR ANY OF YOUR RIGHTS AND OBLIGATIONS
UNDER THIS AGREEMENT. You may not modify, translate,
reverse assemble, decompile, disassemble or otherwise attempt
(i) to defeat, avoid, bypass, remove, deactivate or otherwise
circumvent any software protection mechanisms in the Software,
including without limitation any such mechanism used to restrict
or control the functionality of the Software, or (ii) to derive the
source code or the underlying ideas, algorithms, structure or
organization from the Software (except to the extent that such
activities may not be prohibited under applicable law). However,
you may transfer all your right to use the Software to another
person or organization, provided that (a) the followings are also
transferred with the Software, (i) this Agreement; (ii) other
software if contained in the original package, and/or hardware
that the Software is bundled; (iii) any original or updated
version of the Software; (b) no copies including back-up and
installed in your computer or other device are at your possession
after the transfer, and (c) the recipient accepts all the terms
47
Page 52

Reference
of this Agreement. In no event shall you transfer the Software
obtained as a trial, test version, or otherwise specied as not for
resale. A special license permit from ArcSoft is required if the
program is going to be installed on a network server for the sole
purpose of distribution to other computers.
3. Copyright. The Software or the Software contained in this
package or device is protected by United States copyright laws,
international treaty provisions, and all other applicable national
laws. The Software must be treated like all other copyrighted
materials (e.g. books and musical recordings). This license does
not allow the Software to be rented or leased, and the written
materials accompanying the Software (if any) may not be
copied.
4. Ownership. Title, ownership rights, and all intellectual
property rights in and to the Software and any accompanying
documentation, and any copy of the foregoing, shall remain
the sole and exclusive property of ArcSoft and/or its third party
licensers. You agree to abide by the copyright law and all other
applicable laws. You acknowledge that the Software contains
valuable condential information and trade secrets of ArcSoft
and/or its third party licensers.
5. Warranty Disclaimer. THE SOFTWARE IS MADE AVAILABLE
TO YOU ON "AS IS" BASIS. NO WARRANTIES, EITHER EXPRESS
OR IMPLIED, ARE MADE WITH RESPECT TO THIS SOFTWARE,
INCLUDING BUT NOT LIMITED TO THE IMPLIED WARRANTIES OF
MERCHANTABILITY AND FITNESS FOR A PARTICULAR PURPOSE
AND WARRANTIES FOR NON-INFRINGEMENT OF INTELLECTUAL
PROPERTY, AND ARCSOFT EXPRESSLY DISCLAIMS ALL
WARRANTIES NOT STATED HEREIN. YOU ASSUME THE ENTIRE
RISK AS TO THE QUALITY AND PERFORMANCE OF THE
SOFTWARE. SHOULD THE SOFTWARE PROVE DEFECTIVE, YOU,
AND NOT ARCSOFT OR AN AUTHORIZED RESELLER, ASSUME
THE ENTIRE COST OF NECESSARY SERVICING, REPAIR, OR
CORRECTION. SOME STATES DO NOT ALLOW THE EXCLUSION
OF IMPLIED WARRANTIES, SO THE ABOVE EXCLUSION MAY NOT
APPLY TO YOU. THIS WARRANTY GIVES YOU SPECIFIC LEGAL
RIGHTS, AND YOU MAY ALSO HAVE OTHER RIGHTS THAT VARY
FROM STATE TO STATE. YOUR SOLE REMEDY AND THE ENTIRE
LIABILITY OF ARCSOFT ARE SET FORTH ABOVE.
6. No Liability for Consequential Damages. YOU AGREE THAT
IN NO EVENT SHALL ARCSOFT OR ITS AGENTS BE LIABLE
FOR ANY LOSS OF ANTICIPATED PROFITS, LOSS OF DATA,
LOSS OF USE, BUSINESS INTERRUPTION, COST OF COVER OR
ANY OTHER INDIRECT, INCIDENTAL, SPECIAL, PUNITIVE OR
CONSEQUENTIAL DAMAGES WHATSOEVER ARISING OUT OF
48
Page 53

Reference
THE USE OF OR INABILITY TO USE THE SOFTWARE, HOWEVER
CAUSED AND ON ANY THEORY OF LIABILITY (WHETHER FOR
BREACH OF CONTRACT, TORT (INCLUDING NEGLIGENCE)
OR OTHERWISE), EVEN IF ARCSOFT HAS BEEN ADVISED OF
THE POSSIBILITY OF SUCH DAMAGES. IN NO EVENT WILL
ARCSOFT BE LIABLE TO YOU FOR DAMAGES IN AN AMOUNT
GREATER THAN THE FEES PAID FOR THE USE THE FOREGOING
LIMITATIONS APPLY TO THE EXTENT PERMITTED BY APPLICABLE
LAWS IN YOUR JURISDICTION.
7. Export. You will not export or re-export the product
incorporating the Software without the appropriate United States
or foreign government licenses.
8. U.S. Government Restricted Rights. If you are a unit or
agency of the United States government, the Software and
related documentation are deemed to be "commercial computer
software" and "commercial computer software documentation,"
respectively, pursuant to DFAR Section 227.7202 and FAR
Section 12.212(b), as applicable. Any use, modication,
reproduction, release, performing, displaying or disclosing
of the Software and/or the related documentation by the
United States government shall be governed solely by the
terms of this Agreement and shall be prohibited except to the
extent expressly permitted by the terms of this Agreement.
Any technical data provided that is not covered by the above
provisions is deemed to be "technical data?commercial items"
pursuant to DFAR Section 227.7015(a). Any use, modication,
reproduction, release, performing, displaying or disclosing of
such technical data shall be governed by the terms of DFAR
Section 227.7015(b).
9. Termination. THIS AGREEMENT SHALL BE EFFECTIVE UPON
INSTALLATION OF THE SOFTWARE AND SHALL TERMINATE
UPON THE EARLIER OF: (i) YOUR FAILURE TO COMPLY
WITH ANY TERM OF THIS AGREEMENT; OR (ii) RETURN,
DESTRUCTION OR DELETION OF ALL COPIES OF THE SOFTWARE
IN YOUR POSSESSION. ArcSoft's rights and your obligations
shall survive the termination of this Agreement.
10. High Risk Activities. The Software is not fault-tolerant and
is not designed or intended for use in hazardous environments
requiring fail-safe performance, or any other application in which
the failure of the Software could lead directly to death, personal
injury, or severe physical or property damage (collectively,
"High Risk Activities"). ARCSOFT EXPRESSLY DISCLAIMS ANY
EXPRESS OR IMPLIED WARRANTY OF FITNESS FOR HIGH RISK
ACTIVITIES.
11. Governing Law and Jurisdiction. This Agreement will be
governed by and construed under the laws of the State of
49
Page 54

Reference
California and the United States as applied to agreements
entered into and to be performed entirely within California,
without regard to conicts of laws provisions thereof and the
parties expressly exclude the application of the United Nations
Convention on Contracts for the International Sales of Goods.
Suits or enforcement actions must be brought within, and each
party irrevocably commits to the exclusive jurisdiction of the
state and federal courts located in Santa Clara County.
50
Page 55

INDEX
Index
A
Actions 34
Acquire 40
TWAIN 40
Capture from Video File 40
Creativity 49
Digital Picture Frame 45
Easy Archive 55
archive media les 55
Easy Email 52
Easy Fix 45
Easy Print 53
Easy Print Toolbar 54
Geotag 49
Import 34
Make Movie 36, 46
Media Player 41
Order Photo Gifts and Prints 57
Photo Editing Tools 47
Photo Effects 48
Photo Email 50
Photo Viewer 42
Print Creations 56
Slide Show 50
Upload to YouTube 51
WebCam 38
C
Create Video 22
51
Page 56

D
Data 34
I
Installation 19
Introduction 18
Installation 18, 19
Key Features 18, 22
System Requirements 18, 20
K
Key Features 22
Media Browser
Attach Rating 29
Attach Tags 29
Batch 28
Batch Convert 28
Batch Resize 28
Delete 29
Group by 29
Preview Area 26
Rotate left 28
Rotate right 28
Smaller/Larger 29
Sort by 29
View by 29
Views 26
MUI (Multilingual User Interface) Support 22
Powerful Media Management 22
Simple Creative Projects and Editing Tools 22
XMP Support 22
INDEX
52
Page 57

INDEX
M
Media Types 30
All Media 33
Music 31
Pictures 30
manage photos 31
Video 32
S
Start Page 25
Media Browser 26
System Requirements 20
W
Watching BD/DVD/VCD movies 25
53
Page 58

NOTES
56
 Loading...