

Page 1

ArcSoft DVD SlideShow
© ArcSoft, Inc.
™
Page 2

Page 3

TABLE OF CONTENTS
INTRODUCTION 2
ADDING CONTENT 3
CREATING A SLIDE SHOW 4
DESIGNING MENUS 7
"PAN & ZOOM" 9
EDITING PHOTOS 10
TRIMMING VIDEOS 11
PRODUCING YOUR MOVIE 12
PROGRAM OPTIONS 13
FAQ 14
- 1 -
Page 4

INTRODUCTION
Now anyone can make their own fully customized movies on DVD (or VCD). DVD SlideShow offers you lots of
cool options and a fun interface to make your movie-making experience smooth and enjoyable. In no time you'll
be showing off your unique presentations to friends, family, coworkers, business associates, etc. You don't need
any experience in DVD authoring or video editing. Whether for work or for home, DVD SlideShow helps you get it
done.
Don't forget to utilize the built-in Help file. It covers the functionality of every button and screen.
OVERVIEW
You're probably already very familiar with commercial DVDs that you rent from a local or online video store. You
can pop them into your player and jump to various scenes or "chapters" on the disc. There are sometimes
multiple menu pages depending on how the DVDs are designed, but they're generally easy to navigate and you
can jump to almost any spot fairly quickly.
Well, now you can make your own DVDs with your own content! Include videos, PowerPoint presentations, and
customized photo slide shows (which you can create in the program). We've made it easy to combine your videos
and photos together on DVD in a completely seamless way. With DVD SlideShow, you can:
• Use personal photos for menu backgrounds
• Create your own menu titles and chapter button captions
• Customize each chapter button with a creative frame
• Arrange menu text and chapter buttons any way you like
• Add your own music to your movie menus
• Import and trim existing video clips
• Assemble your own photo slide shows into individual movie chapters
• Create your own custom "Pan & Zoom" effects in your slide shows
• Include PowerPoint presentations as photo slide shows
• Share your creations on convenient DVD discs in either NTSC or PAL format
That's quite a number of things you can do! But don't worry, that doesn't mean that things are difficult. In fact, the
program is separated into only three main screens! The first screen lets you add your content. The second lets
you customize the appearance of the menu. The third lets you burn your movie to disc.
- 2 -
Page 5
ADDING CONTENT
First thing's first: Let's add some content to your project! After all, you can't really do much else until you have all
the photos and videos that you'd like to include on your DVD, right? Okay, so when you start out, you can do all of
the following:
• Insert a previously saved video
• Insert an existing slide show
• Insert a PowerPoint file (each slide will be converted to a still image)
• Create a new slide show
Take a look at the main screen. The bulk is taken up by a blank movie menu. You'll add content, with each
component inserted into the menu as a separate chapter. Don't worry too much about how your menu looks just
yet. The first step focuses exclusively on adding content. You can completely customize the look and feel of your
menu(s) later.
INSERTING A VIDEO
You have your cool DV camcorder. You've recorded some cool video. You've transferred it to your computer. And
now you want to play it on your DVD player. Well, adding video clips to a DVD SlideShow project is as basic as it
gets.
To add video clips to your project:
INSERTING AN EXISTING SLIDE SHOW
You can create photo slide shows that are added as individual chapters in your movie. Whenever you create a
slide show, you can save it to your computer for use later (you aren't limited to creating a slide show for use in
only one movie).
Then, search for the slide show file you want to add, and double-click it (or highlight it and click "Open"). (See the
chapter "Creating A Slide Show" for details on making a slide show.)
INSERTING A POWERPOINT FILE
Add PowerPoint files in the same way that you add video clips and previously saved slide show files. Each slide in
the presentation will be converted to a standard image file, and the whole thing can be edited just like slide shows
that you create within the program.
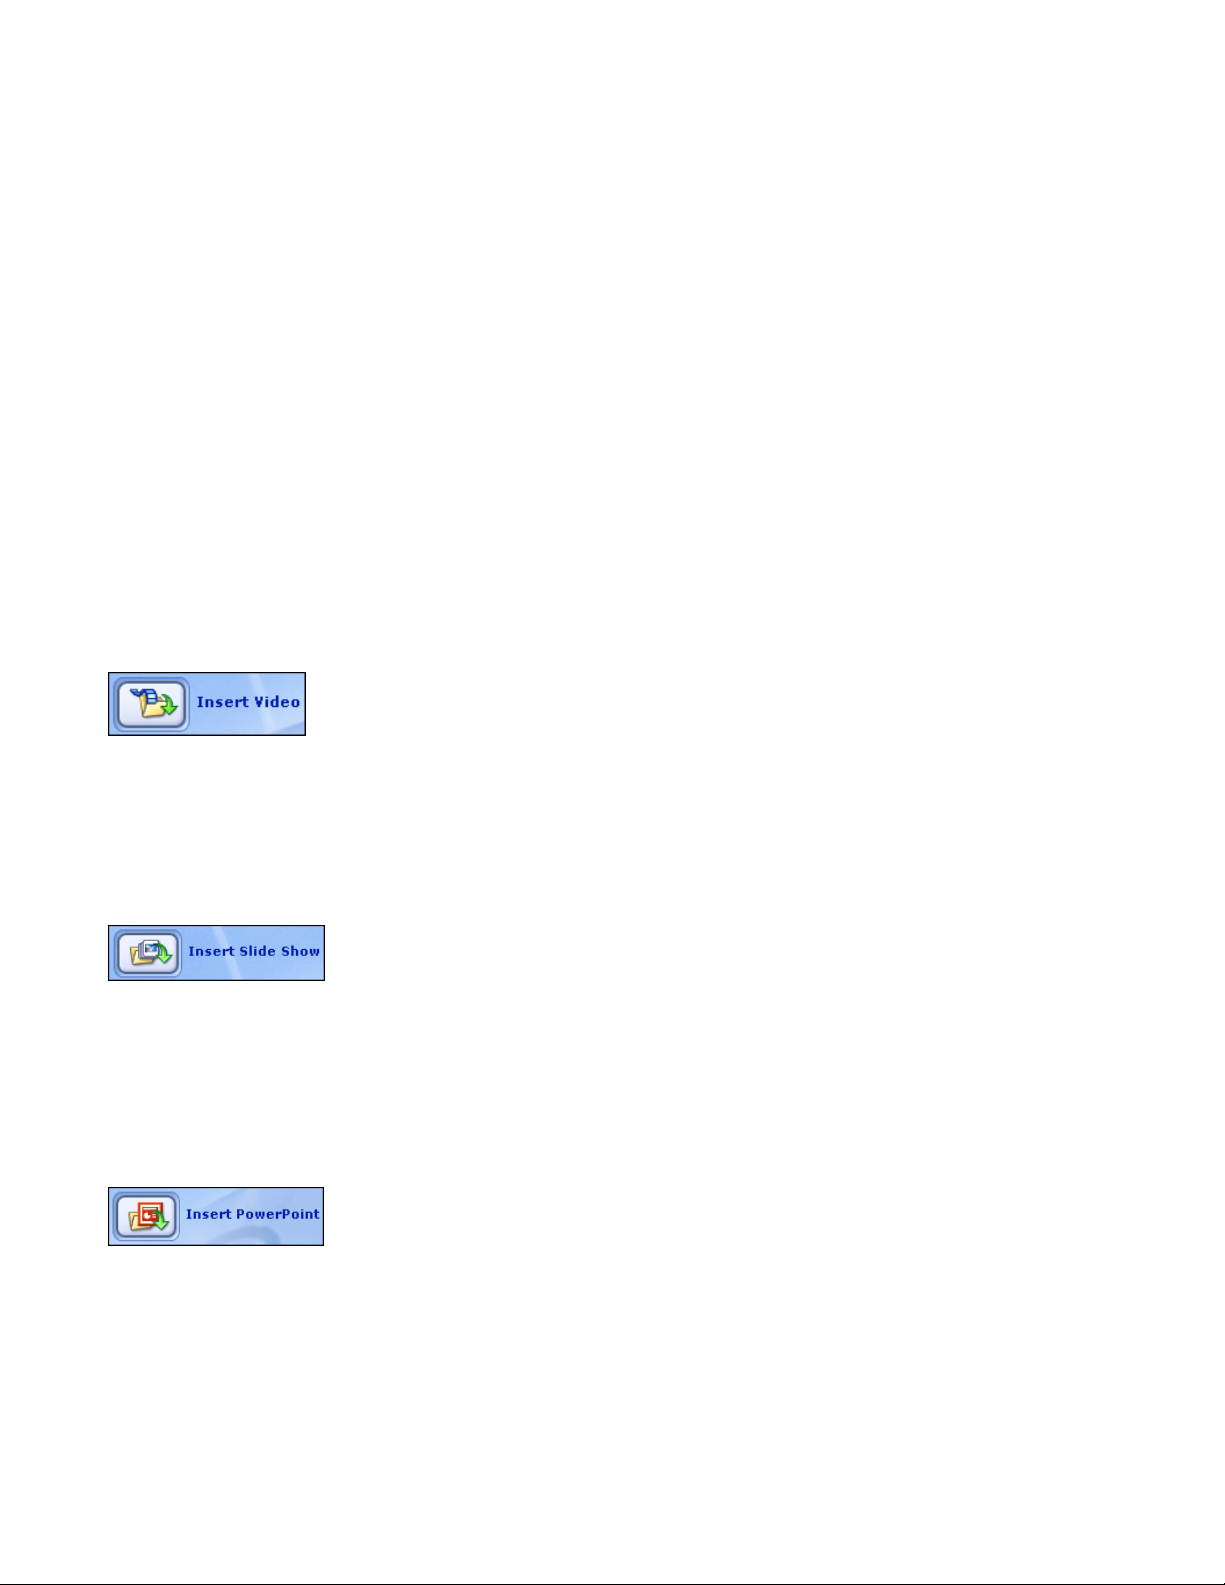
1. Click "Insert Video."
2. Navigate to the folder that contains the videos you want to add.
3. Select the file you want to add. Hold down the CTRL key while clicking to select
multiple files.
4. Click "Open." Your files will be added to your project.
To insert a previously saved slide show into your project, you basically follow the
same procedure as adding a video, except instead of clicking "Insert Video," you click
"Insert Slide Show."
To insert a PowerPoint file, click "Insert PowerPoint," then browse for and select the
file on your system.
- 3 -
Page 6
CREATING A SLIDE SHOW
Slide shows offer a great way to present photos in a fun, flashy way. When assembling a slide show, you have
lots of creative options. You can arrange photos any way you want, attach audio files to each slide, rotate and edit
photos, and even create your own "Pan & Zoom" effects. In other words, you don't need to prep photos before
adding them into a slide show. You can do it all here. Steps/options include:
• Adding Photos
• Arranging Photos
• Rotating Photos
• Inserting Blank Slides
• Attaching Audio
• Editing Photos
• Adding "Pan & Zoom" Effects
• Setting The Chapter Button Thumbnail
• Including Transitions
• Creating A Soundtrack
• Setting The Duration
• Naming Your Slide Show
• Previewing Your Work
Slide shows will appear as separate chapters on your DVD. By double-clicking the respective chapter button
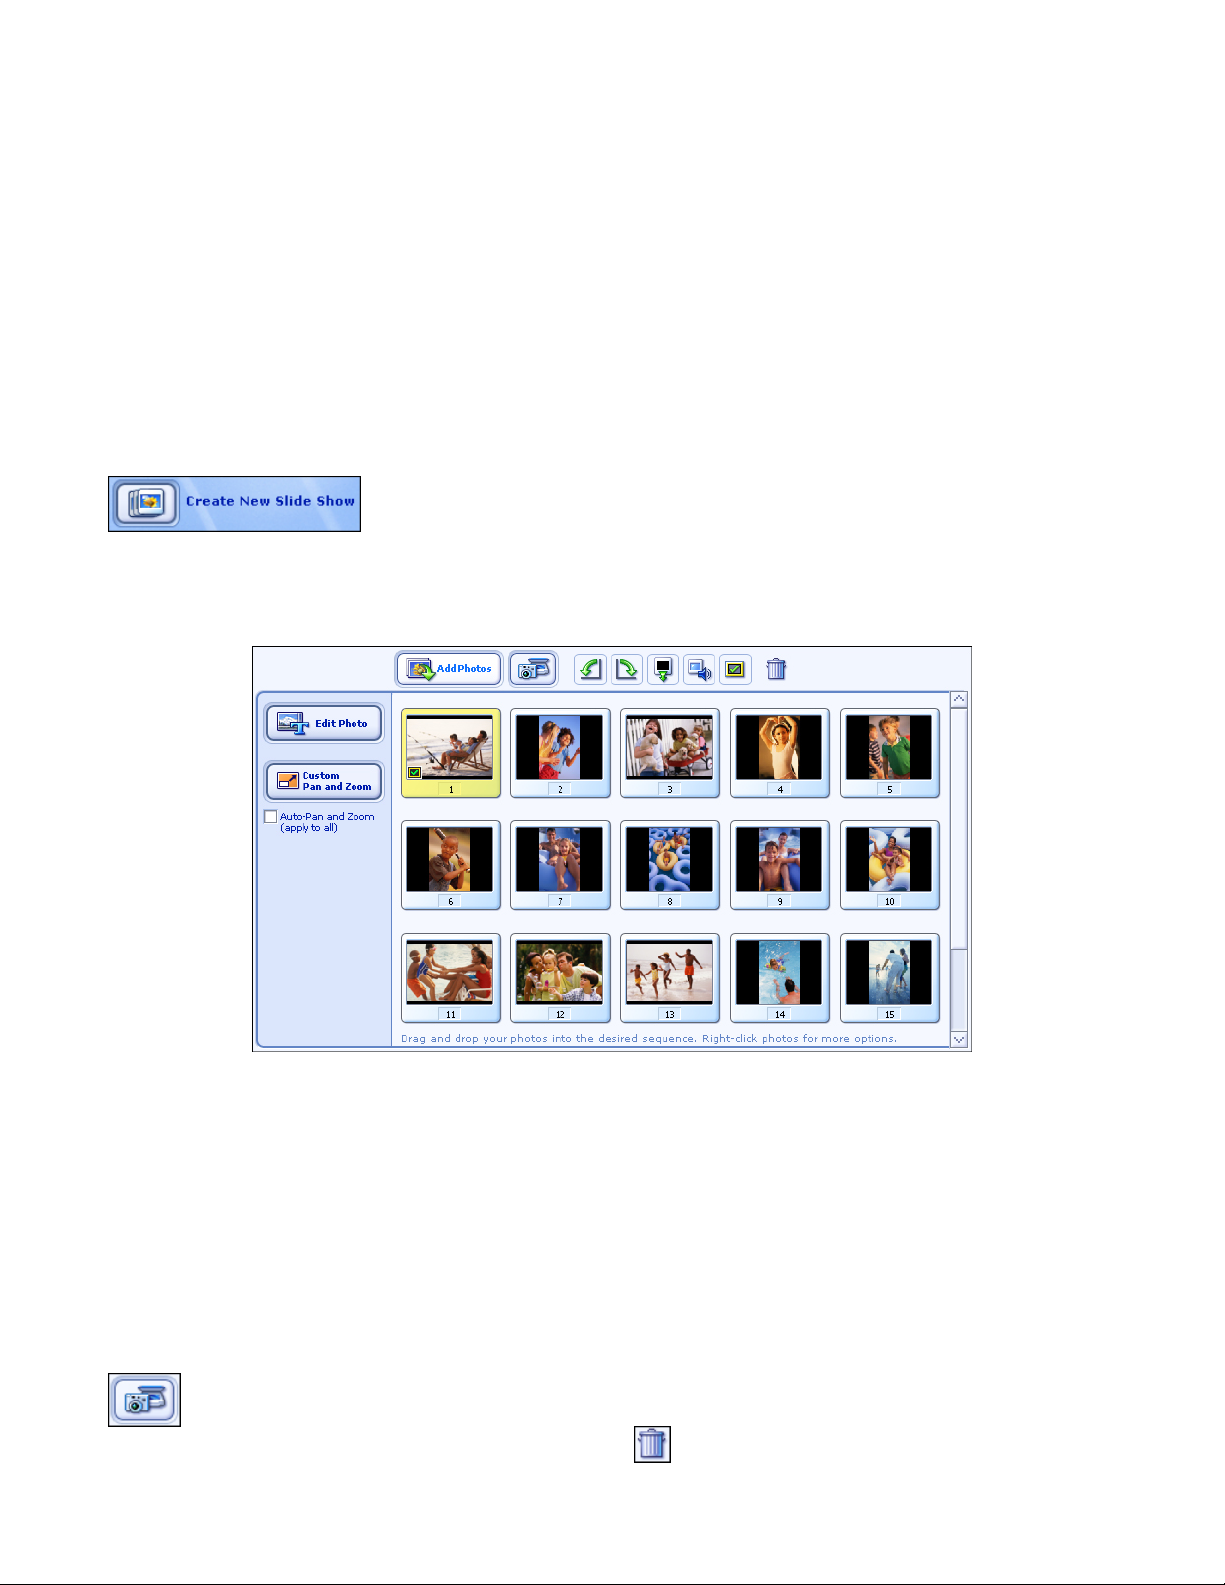
thumbnail on your menu, you can edit any slide show in your project. To create a slide show, click "Create New
Slide Show." The Slide Show Creator screen will appear.
ADDING PHOTOS
The first thing you'll need to do is grab the photos that you'd like to use for the slide show. You'll notice that most
of the buttons are initially dimmed; they'll become available after you add some pics.
To add photos to a slide show:
1. Click "Add Photos."
2. Browse to the directory that contains the photos you want to add.
3. Hold down the CTRL key on your keyboard and click the photos you want.
4. Click "Open." Your photos will appear on the screen.
To acquire photos from a scanner or other connected device:
1. Click the "Acquire Photos" button and choose the type of device from which you'll be capturing.
2. Follow the directions for acquiring photos from your device manufacturer.
To remove a slide, highlight it and click the "Delete" button:
- 4 -
Page 7
ARRANGING PHOTOS
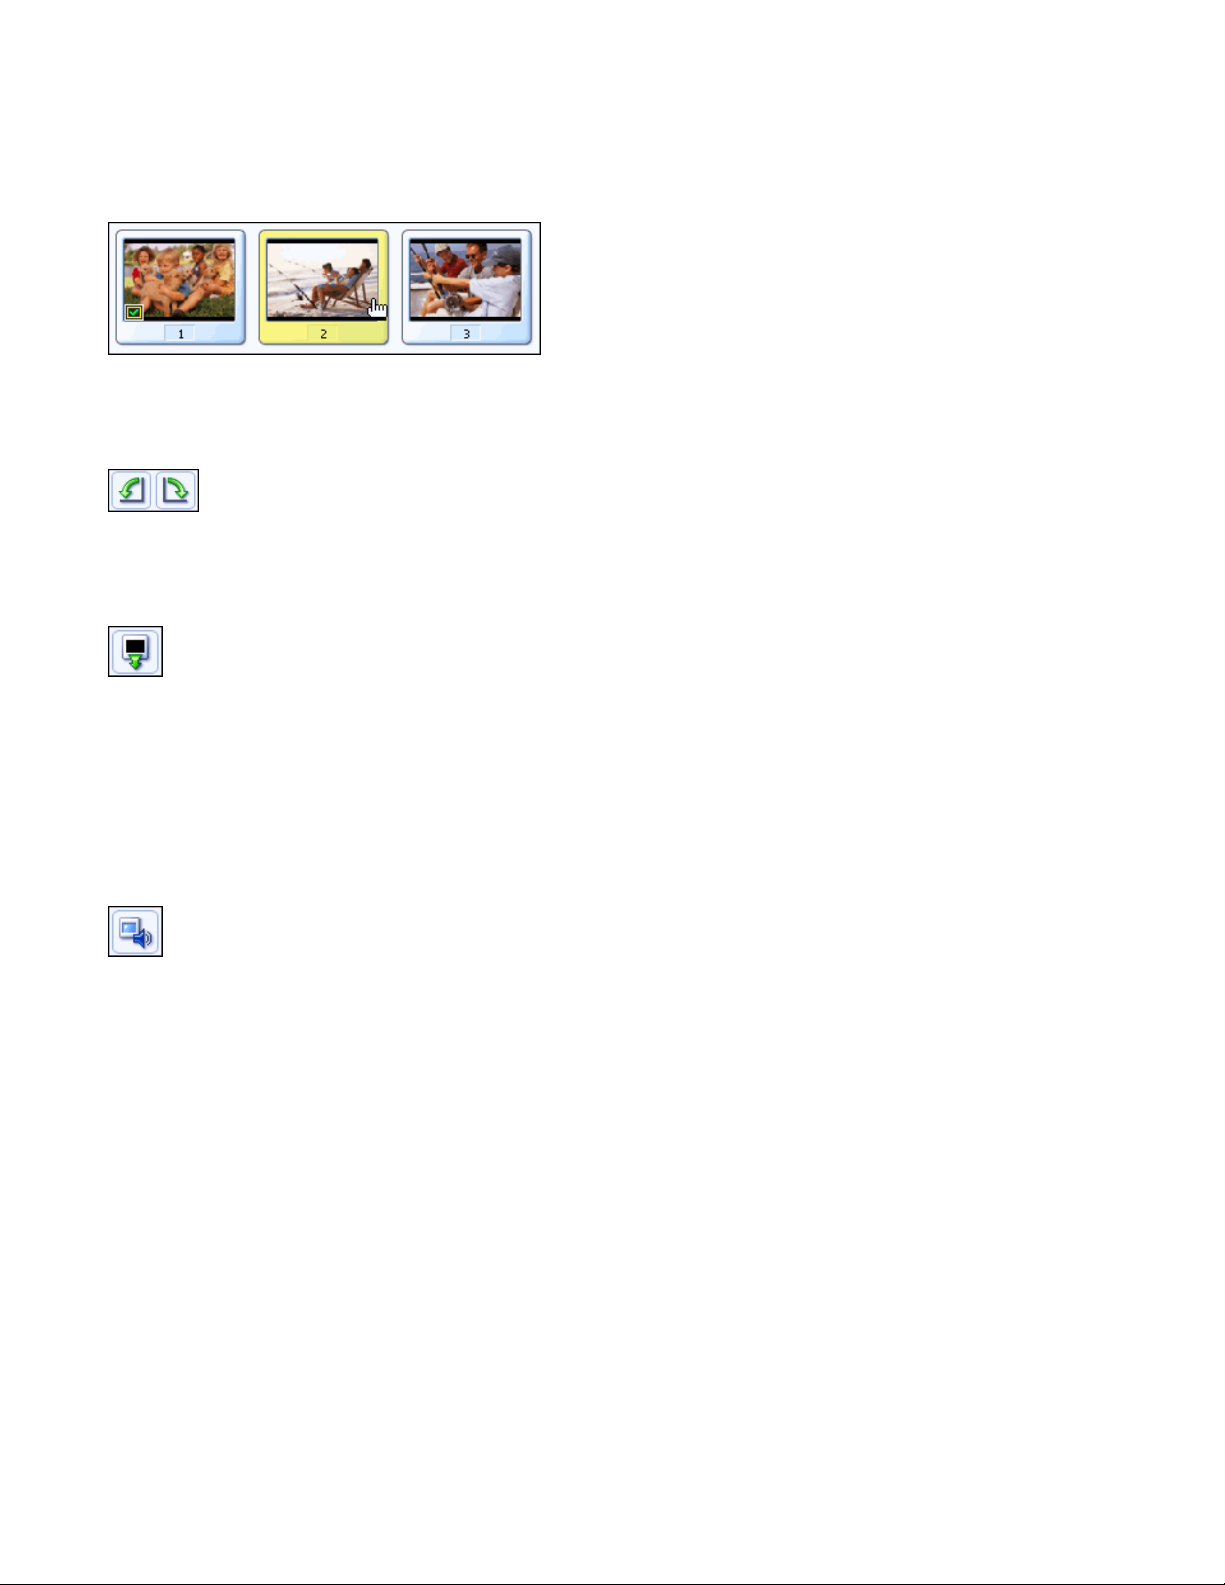
Once your photos have been added, you'll probably want to arrange the order in which they appear. Simply click
and drag a photo from one location to another.
ROTATING PHOTOS
If a photo is oriented incorrectly, click it to highlight it, and then click either of the "Rotate" buttons until the photo is
oriented the way you want.
INSERTING BLANK SLIDES
You may want to include plain, blank slides at various spots in your slide show. They can be used as
backgrounds for adding text for introductions, breaks, credits, etc.
To add a blank slide, click the "Add Blank Slide" button. A blank slide will appear before the currently selected
slide (of course, you're free to click and drag it to any location). To change the color of a blank slide, right-click it
and choose "Background Color." You can then select from a broad color palette.
ATTACHING AUDIO
Later you'll be able to add audio files that play over your entire slide show, just like a movie soundtrack. For now,
you can attach sound files to specific slides. This is ideal for narration. You can add audio commentary to each
slide, and then later add music over the entire slide show.
To attach audio to a specific slide:
1. Highlight the slide.
2. Click the "Audio Annotation" button and choose either "Attach Audio" or "Record Audio." If you would like
to attach an audio file, go to step 3. If you would like to record audio (for example, voice narration), skip to
step 4.
3. When attaching audio, a standard Open dialog will appear. Navigate to the directory that contains the file
you want, highlight the file, and click "Open."
4. Basic record and playback controls are available so you can capture narration or other audio. Click
"Format" to view and edit the audio properties. When you're finished recording, click "Save."
A speaker icon will appear on the slide once you attach audio.
To detach any audio, highlight the slide, click "Audio Annotation," and choose "Detach Audio."
EDITING PHOTOS
Highlight the photo you want to modify and click "Edit Photo." (See the "Editing Photos" chapter.)
- 5 -
Page 8
ADDING "PAN & ZOOM" EFFECTS
You can customize a "Pan & Zoom" effect for each individual slide, or have the program automatically apply
effects to your entire presentation. Pan & Zoom is only available for DVD projects; see the "Pan & Zoom" chapter
for more details.
SETTING THE CHAPTER BUTTON THUMBNAIL
As you already know, your slide show will be added to your project as its own chapter. The chapter
will be represented with a thumbnail image. You can set any slide as the thumbnail. To do this,
simply highlight the slide you want, and then click the "Set Thumbnail" button. You will see a
checkmark icon appear on the slide.
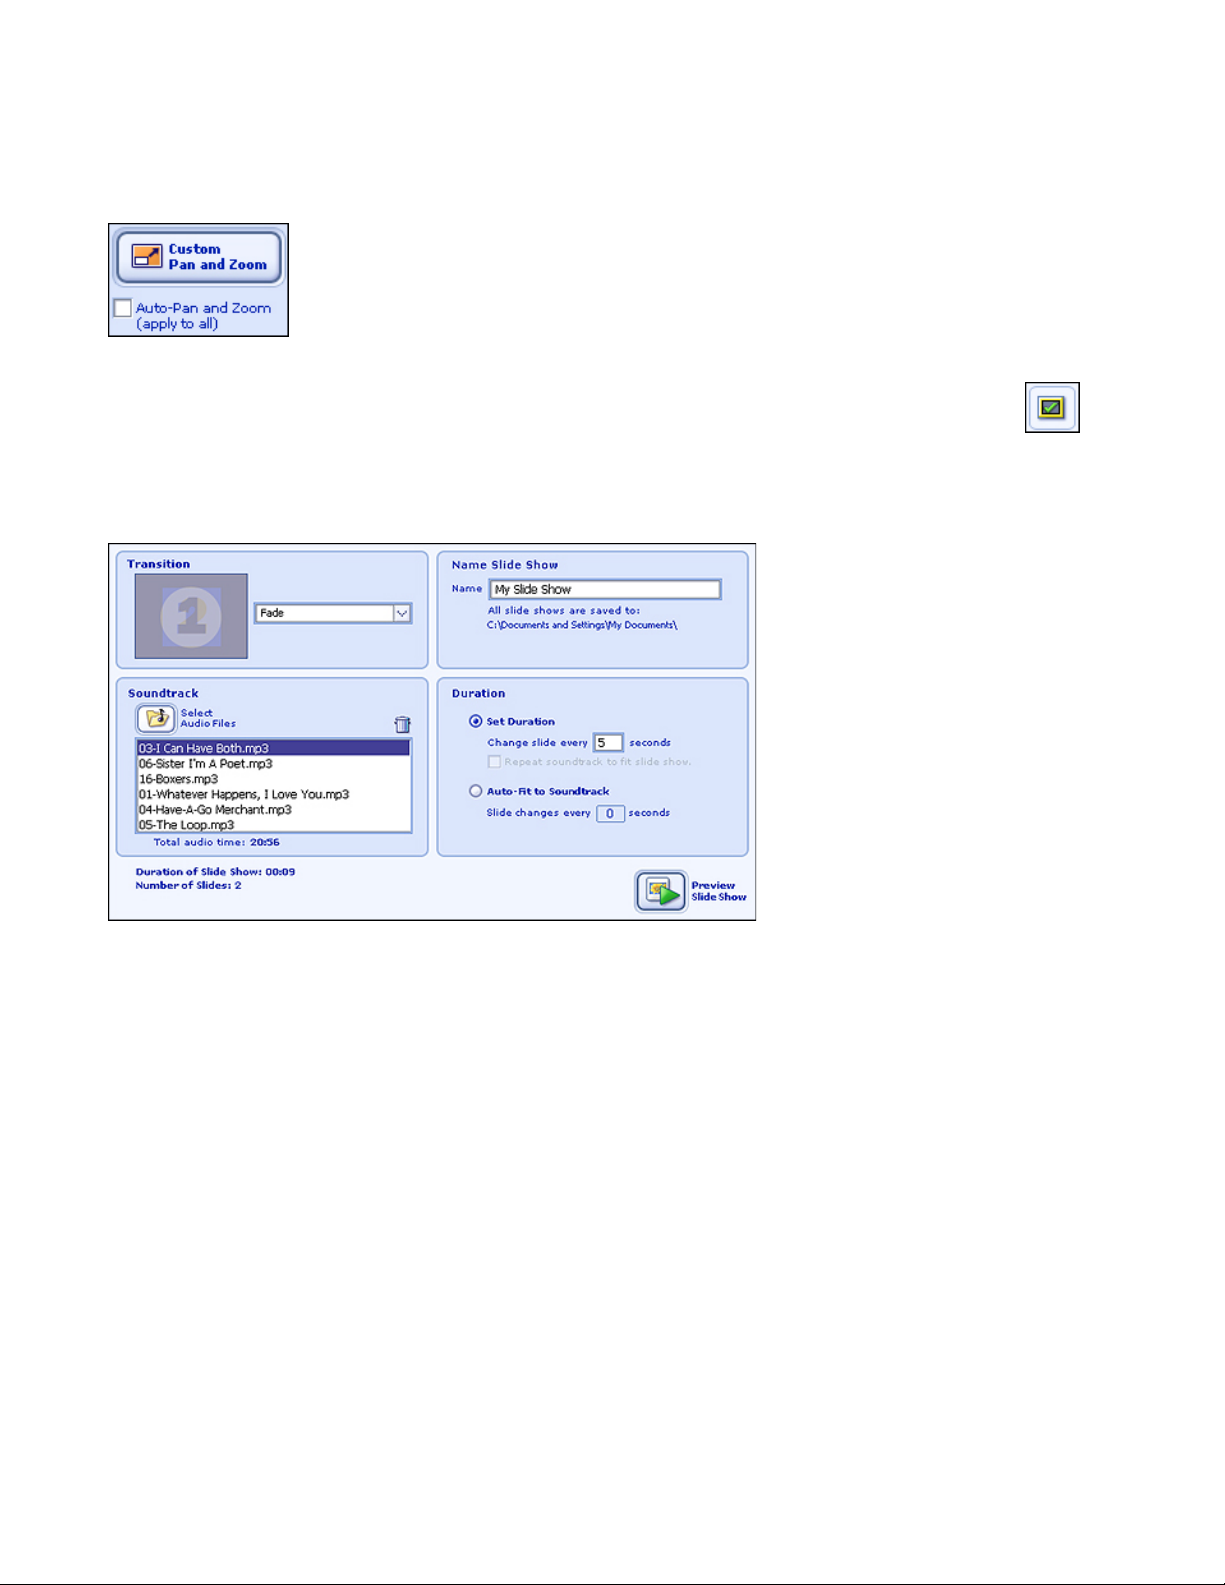
When you've completed all of the above, click "Next." You're almost finished!
INCLUDING TRANSITIONS
Instead of having your slides simply
change one to another, why not
include some special effects? You
can have your photos fade in and
out, wipe away, and more. To
include transitions between each
slide, simply choose the transition
you want from the pull-down. (If you
don't want special effects, choose
"None"; if you'd like random effects,
choose "All Effects.")
CREATING A SOUNDTRACK
You can include a soundtrack that consists of multiple audio files that play throughout your entire presentation. To
do so, simply click "Select Audio Files" and choose the tracks you want. If you change your mind and you'd like to
remove a track you've already added, simply click the track, followed by "Delete" (the trash can button).
SETTING THE DURATION
The duration of your presentation is entirely up to you. By entering a numeric value (in seconds), you set the
display time for each slide. The "Repeat soundtrack..." checkbox, if checked, loops your soundtrack so that music
constantly plays (assuming the presentation is longer than the combined length of the audio tracks you've added).
Alternately, you can choose "Auto-Fit to Soundtrack," which sets the display time automatically to match the slide
show with your soundtrack (when the last song in your soundtrack ends, the last slide ends).
NAMING YOUR SLIDE SHOW
Type in a name for your slide show. It will be saved on your computer so that you can use it later for other
projects.
PREVIEWING YOUR WORK
Click "Preview Slide Show" to see your work in action before actually compiling it. (Remember, if you click
"Finish," you can still go back at any time to edit it.)
When you're ready to go, click "Finish." The program will process all of your photos, transitions, and audio tracks
and create your slide show. After, it will add it as a new chapter on your movie menu.
- 6 -
Page 9

DESIGNING MENUS
Half the fun of making your own DVD comes from customizing the look and feel of the movie menu. Nothing's
cooler than popping in a disc and hearing your favorite song play over your personalized menu background, text,
and chapter buttons.
When designing your menu (make sure you click "Design" along the top of
the screen), you can:
• Organize chapter buttons any way you like
• Change the menu "theme" (background, text, and chapter button
frames)
• Use your own photos as backgrounds
• Customize the menu text (the title and all chapter button captions)
• Use a variety of chapter button frames
• Add music to each menu page
Note: When adding content, you may have noticed that one or more menu
pages were added to your project. Use the navigation buttons (arrows
along with the "home" icon [it looks like a house]) to jump from page to
page. You're free to customize each and every menu page independently.
ORGANIZING CHAPTER BUTTONS
Chapter buttons jump to various clips or slide shows that you've added to your project. Your movie will play each
chapter sequentially wherever you start. You can organize your chapter buttons in a variety of ways. The easiest
way is to simply use a preset layout. Basically, the program contains a variety of templates that order the chapter
buttons in numerous ways. If you want to be more creative, you can organize them yourself.
To use a preset layout:
1. Click the "Customize" tab.
2. Under "Select a Layout," choose the layout that best suits what you're looking for. Double-click the layout
to apply it to the current menu page. Alternately, you can click and drag the layout to your menu. Note
that you can apply a different layout to each different menu page in your project.
To organize your chapter buttons yourself:
Click and drag. That's it. You can move chapter buttons anywhere you want. Note that you'll probably want to
keep some sense of order, since it may otherwise be difficult for people to navigate the menu.
Note: Even if you choose a preset layout, you're still free to click and drag chapter buttons around to any location.
CHANGING THE MENU "THEME"
A "theme" is simply a menu style, consisting of a particular menu background, text color, and chapter button
frame. The program contains a variety of themes, and you may find using them quite advantageous over trying to
match text color with a custom photo that you'd like to use for the background.
- 7 -
Page 10

To apply a theme:
1. Click the "Themes" tab.
2. Use the pull-down to choose the appropriate category (there are
multiple themes within each category).
3. Double-click the specific theme you'd like to apply to the current
menu.
Note: You can apply a different theme to each menu page.
SELECTING A CUSTOM PHOTO BACKGROUND
If you'd rather not use one of the available themes, you're free to use a photo of your own as the menu
background.
To do this:
1. Click the "Customize" tab.
2. Click "Image."
3. Navigate to the directory that contains the photo you'd like to use as the menu background.
4. Double-click the file. (To remove the custom background, simply click the appropriate "Delete" button.)
Note: Each menu page can have a different background.
CUSTOMIZING MENU TEXT
You're free to change any text that appears on any menu page. This includes moving text around (simply click
and drag) and altering the words themselves.
To edit text:
1. Double-click the text you'd like to edit.
2. In the window that appears, type your text in the text box. You can also modify the font, size, style,
alignment, and color. A drop-shadow can be added by checking the "Shadow" box.
3. Check the "Apply style and color to all text" box to update all text on the current menu page to match the
font, style, and color that is currently selected.
CHANGING CHAPTER BUTTON FRAMES
Notice that each chapter button has a frame around it. If you're using a preset theme for the current menu, you'll
see that all frames are the same and match the motif of the background image. However, you're free to change
each frame to one that you like more. This option is particularly useful if you're using your own background and
need to find a frame that more closely matches your photo.
To change a chapter button frame:
1. Click the "Customize" tab.
2. On the menu, highlight (click) the chapter button that is bordered by the frame you want to update.
3. In the "Customize" tab, double-click the new frame you'd like to use.
ADDING MUSIC
You can add a single audio file to each menu page. Each time you navigate to that particular page, the associated
audio will begin playback. Playback loops after one minute.
To add audio to a menu page:
1. Navigate to the menu page you want.
2. Click the "Customize" tab.
3. Click "Music."
4. Navigate to the directory that contains the audio track you want.
5. Double-click the file. (To remove any attached audio, simply click the appropriate "Delete" button.)
- 8 -
Page 11
"PAN & ZOOM"
Note: "Pan & Zoom" is available for DVD projects only.
"Pan & Zoom" can be used to add some real neat effects to your slide shows. They can be used to add scrolling
motion and zoom to each and every photo. You can have lots of fun with this effect because you design the
movements yourself. The program can also apply random Pan & Zoom effects to every slide in your slide show
automatically (check the "Auto-Pan and Zoom" box).
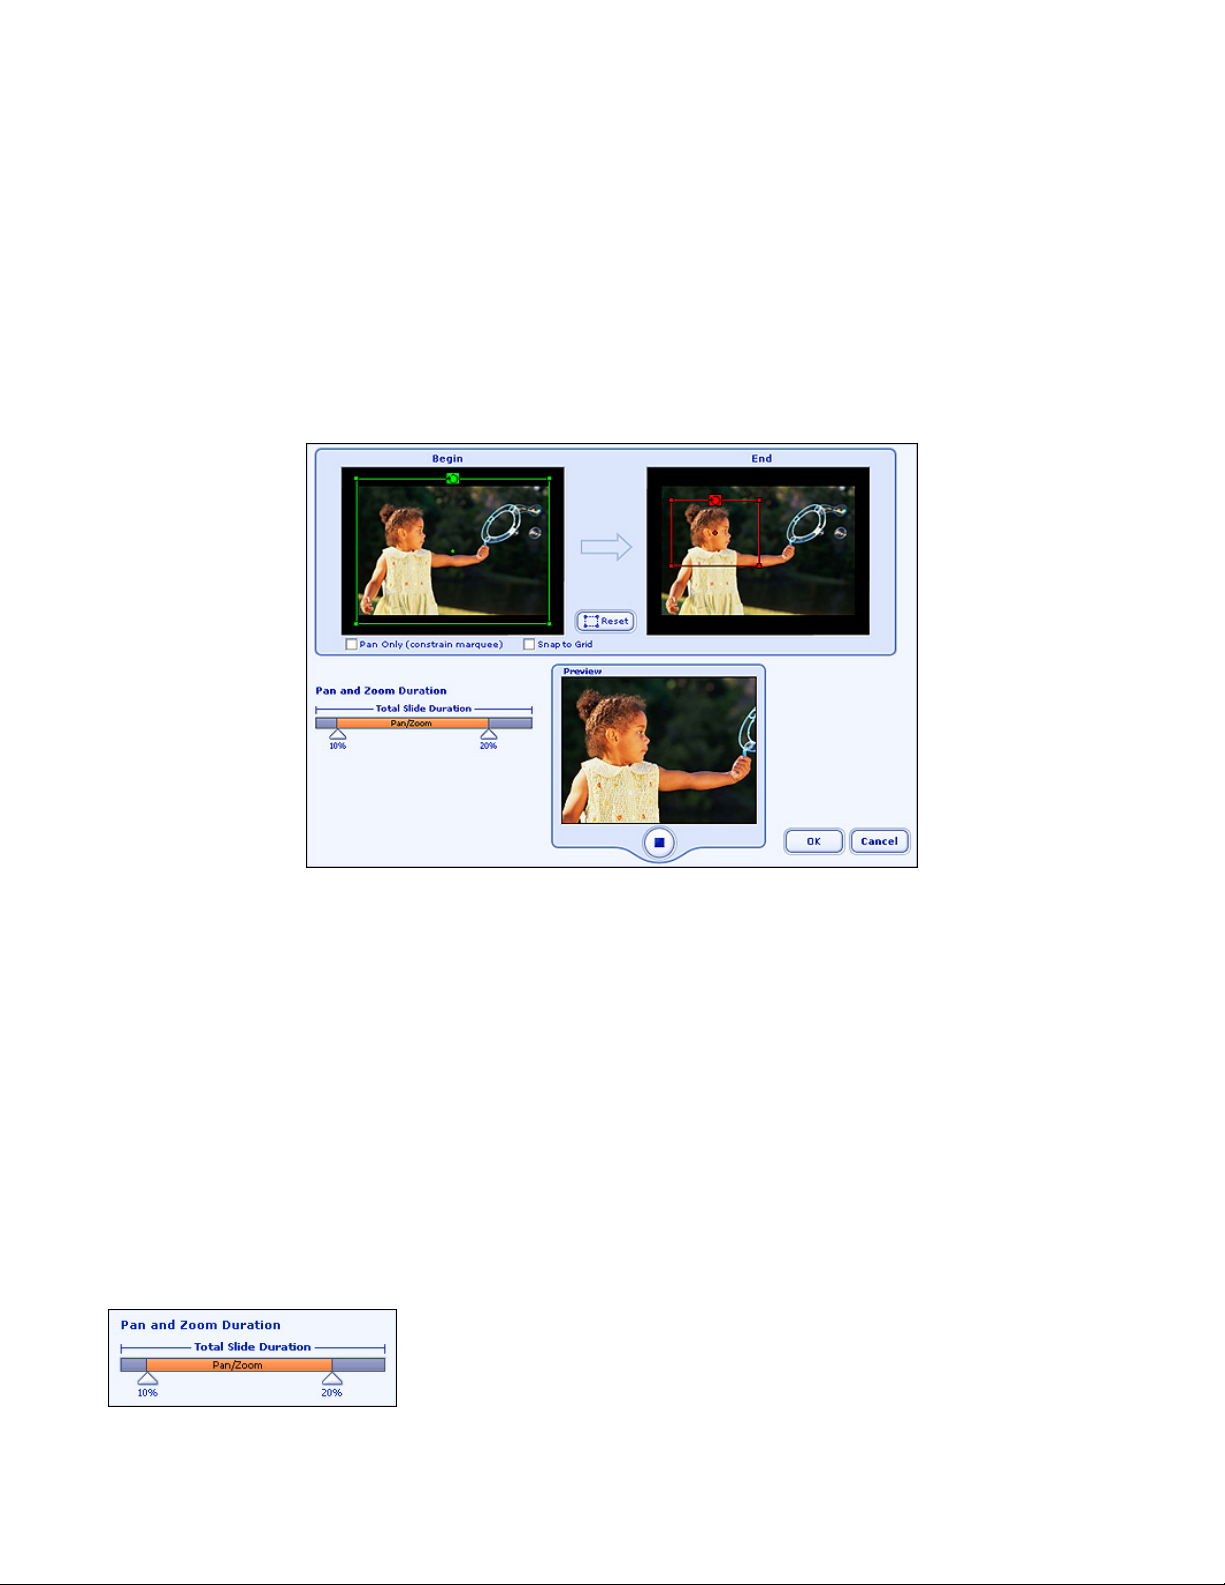
CUSTOM PAN & ZOOM
When creating a slide show, click "Custom Pan and Zoom" to create a custom Pan & Zoom effect for a specific
slide. Pan & Zoom works by setting the beginning and ending focus points on a picture. When the Pan & Zoom
effect runs, it simply shifts from one focus point to another.
The top portion of the screen consists of two smaller windows, "Begin" and "End." Here is where you determine
the focus for the beginning and end of the slide. Notice in each window there is a box (in the "Begin" window it's
green; in the "End" window it's red). These boxes set the focus of the slide and determine what is shown on the
screen. The focus shifts from the "Begin" window to the "End" window. For example, if the "Begin" area is set
around the entire photo and the "End" area is set around a specific spot, the resulting Pan & Zoom effect will
show the entire photo, then zoom in to the selected area.
• You can modify the "Begin" and "End" boxes by clicking and dragging on various the various spots. Click
and drag within a box to move it around the photo. Click and drag the rotate icon to rotate the box.
• The center points within both the "Begin" and "End" boxes represent the points around which the boxes
can be revolved. For example, if you move the center point and then rotate the box, the applied effect will
show the boxed area revolving around the center point.
• Check "Pan Only" to keep both the green "Begin" box and red "End" box the same size/proportion.
• Check "Snap to Grid" to make it easier to move and align the boxes. A grid will appear over the windows
to serve as a guide.
Take a look at the Pan and Zoom Duration section:
There are two pointers that can be adjusted. In the sample here, the 10%
indicates that for the first 10% of the slide duration, the focus will be held to
the area bounded by the Begin box. After the allotted time, the Pan and
Zoom effect will take place, until the remaining 20% of the slide duration is
met. At that point, the focus will be held to the area bounded by the End box.
- 9 -
Page 12

EDITING PHOTOS
When creating a slide show, you have the option of editing your photos to ensure they look perfect for your DVD.
You can do all sorts of simple yet effective enhancements.
You can:
• Brighten and alter image color
• Crop
• Add Text
To edit a photo in a slide show, highlight the thumbnail you want and click "Edit Photo."
ALTERING COLOR
Enhancing a photo's color is
as simple as clicking and
dragging. There are two
sliders: one for brightness,
and another for color tone.
To brighten/darken a photo,
click and drag the
"Darken/Lighten" slider. You'll
see the effects on your photo
immediately.
To alter the color tone, check
the "Color Tone" box and click
and drag the slider.
CROPPING
Like brightening your photos, cropping can be done by clicking and dragging. Notice that there is a marquee
around your photo. By clicking and dragging either the corners or sides, you can alter the shape of the marquee.
Click and drag within the marquee to move it around. Everything outside of the marquee will be removed.
For best results, check the "Fit to TV screen" box. By doing so, the program will automatically adjust the
proportion of the marquee to match that of a standard television screen. This ensures that your cropped photo will
display perfectly when you play your movie.
ADDING TEXT
Text can be added to the top, middle, or bottom of your photo. You have full control over the font, size, style,
alignment, and color. You can even add a drop shadow.
To add text:
1. Type your text in the text box.
2. Use the available buttons and pull-downs to set the text properties. By clicking the color wheel, you can
choose the text color.
3. From the "Position" area, click to choose either the top, middle, or bottom.
4. Check the "Shadow" box to add a drop shadow.
- 10 -
Page 13

TRIMMING VIDEOS
As mentioned before, you don't need to be an expert in order to not only make a DVD, but make it the way you
want. If you have overly long video clips, you can quickly and easily trim them to more desirable lengths.
To trim a video:
1. Double-click the chapter button of the video you want to trim. You can do this on either the Add Media or
Design screens.
2. A window will appear with basic playback controls that you can use to preview the video. Notice the timer
moves across as the video plays.
3. Click and drag the green and red scissors to set new start and end points, respectively.
To change the thumbnail of the chapter button on the menu, stop the video on the frame you'd like to use, and
then click "Set Thumbnail."
- 11 -
Page 14

PRODUCING YOUR MOVIE
When you're finished adding, arranging, and customizing your movie content,
go to the Produce screen (click on the big number "3" at the top of the
screen). Here you can burn your DVD/VCD.
A remote control will appear on the side. The buttons will be a little different
depending on the type of project you're making.
For DVDs, use the arrows to select the chapter from which you wish to begin
playback, and then press "Enter." Hit "Enter" to play.
For VCDs, you can press the number that corresponds to the respective
chapter button.
When you're ready to create your disc, click "Burn to DVD Disc" (or "Burn to
VCD Disc"). You may be prompted to save your project before the "Write
Disc" window appears:
• Type in a name for your disc in the "Disc Label" field.
• Choose the TV standard that you'd like to use: NTSC or PAL. If you're in the United States, choose
NTSC.
• From the "Write to" pull-down, choose where you'd like to save your movie. Choose either your DVD/CD
burner, or your hard drive.
o DVD/CD burner: Choose the write speed from the pull-down. In some cases, "Auto" may be your
only option.
o Hard drive: Choose the save location.
• The bottom checkbox allows the still images used in your slide show to be burned/saved. This way, you
can see the original files in addition to seeing them presented in your movie.
- 12 -
Page 15

PROGRAM OPTIONS
You can find all of the buttons on the "Add Media" screen (Insert Slide Show, Insert Video, etc.) available under
the File menu. In addition, there are also commands for starting and saving projects, closing the program, etc.
Here are some important commands within the menus that you should know about:
CONVERTING PROJECTS
If you'd like to change your project from a DVD project to a VCD project--or vice versa--choose the appropriate
option ("DVD" or "VCD") under "Convert Current Project To" found in the File menu.
USING MPV
If you have a PVM file that you'd like to insert into your project, choose "Insert MPV as Slide Show" from the File
menu. A standard Open dialog will appear. Locate and select the file. Only photos within the PVM file will be
used. You can treat these files that you import just like slide shows that you create.
SETTING THE DEFAULT TV STANDARD
Depending on your country, you may need to modify the standard by which your movie is compiled (NTSC or
PAL). Go to the Options menu, choose "TV Standard," and make your selection. If you're in the United States,
choose "NTSC."
CHOOSING THE BACKUP FOLDERS
Lots of temporary and backup files are written when you create and compile your project. Because your movies
may be extremely large, you may find yourself running a little short on hard drive space. Or, if you have a
separate drive that you use exclusively for videos and such, you may want to set these folders to ones on the
other drive. Go to the Options menu and choose "Temporary Folder..." Here you can specify which folders (on
any drive) you'd like to use for both backup and temporary files.
CHOOSING THE SLIDE SHOW FOLDER
When you create a slide show, separate slide show files are stored on your computer. This way, slide shows that
you create in one project can be used in any other project. To change the default location where these files are
stored, go to the Options menu and choose "Slide Show Folder."
TOGGLING THE STARTUP WIZARD
When you start the program, a wizard appears and helps you start your project. You can toggle this wizard on and
off by choosing "Startup Wizard" from the Options menu.
- 13 -
Page 16

FAQ
What's the "Pan & Zoom" feature all about?
"Pan & Zoom" offers you a cool new way of presenting your photos in a slide show. Instead of having plain slide
shows, you can virtually animate each still image by causing the zoom and focus to shift around the photo. As a
result, your slides look animated.
Can you tell me about the available transitions?
It's much better to actually see them, actually. When you create a slide show, you can choose which transition
you'd like to use as one slide changes to the next. An animation shows each transition after you select it. The one
transition you select will be used throughout your slide show, so make sure you really like it! There's also an
option to use random transitions.
What kind of multimedia files can I add to my projects?
You can add virtually any standard image file to slide shows. For your slide show soundtracks, you can add WAV,
MP3, and WMA files. Your project can also contain MPEG, M1V, M2V, MP2, AVI, DAT, MOV, and QT video files.
PowerPoint (PPT) files can be inserted as well, in addition to PVM files.
What kind of video/photo editing can I do?
You can brighten, darken, and modify the overall color tone of photos in your slide shows. You can also crop them
and add text to the top, middle, or bottom of any image. When you insert PVM or PPT files, you can treat them
just like slide shows. You can trim video clips (either at the beginning, end, or both).
What's the "TV safe" area?
It's always a good idea to enable this option whenever possible. Because your photos and videos may have
dimensions that differ from that of a standard television, using the "TV safe" area gives you a real good indication
of what you'll see when you play your movie on TV. If all your text and chapter buttons can be seen within this
area, all's well.
NTSC? PAL? Huh?
NTSC and PAL are two standards in television broadcast. Depending on where you are in the world, you'll likely
be in a region that uses one of these. The United States and many countries in Asia use NTSC. PAL is used in
several European countries.
Can I preview my slide shows/movies before burning them to disc?
You can preview both slide shows as well as your complete movie before you burn your disc. On the second slide
show creation screen, there's a button called "Preview Slide Show." To view your entire movie, go to the
"Produce" screen and use the virtual remote control just like you would on your actual DVD player.
Can I import PowerPoint files?
You can. From the "Add Media" screen, click "Insert PowerPoint." Then, browse for the file you want to add. Each
slide in your presentation will be converted to a standard image, so your presentations can then be edited just like
slide shows you create within the program.
What are "themes" exactly?
Themes are basically backgrounds that have been designed by our creative team that also include specific
chapter button frame designs and text styles.
Can I use my own images as menu backgrounds?
Sure. From the "Design" screen, click on the "Customize" tab. Then, click on the "Image" button. Browse for and
select the image you'd like to use for the menu background (you're free to use a different image on each menu
page, by the way). If the image you select is too overpowering and drowns out the chapter buttons and text, you
can lower the opacity to make it translucent, making the chapter buttons and menu title stand out a bit more.
There's a field called "Opacity"; simply lower this value until you menu looks the way you want.
Can I edit DVDs that I create?
Yes you can, assuming you used rewritable media (DVD-RW/+RW). Insert the disc, and then choose "Edit
ArcSoft DVD Disc." You can then edit your project.
- 14 -
 Loading...