


Safety Precautions
The lightning flash with an arrowhead symbol within an equilateral triangle is intended to alert the user to the presence of uninsulated "dangerous voltage" within the product's enclosure that may be of sufficient magnitude to constitute a risk of electric shock to persons.
!The exclamation point within an equilateral triangle is intended to alert the user to the presence of important operating and maintenance (servicing) instructions in the literature accompanying the appliance.
|
WARNING |
|
! |
|
RISK OF ELECTRIC SHOCK |
|
|
|
DO NOT OPEN |
|
|
AVIS |
RISQUE DE CHOC ELECTRIQUE NE |
||
PAS OUVRIR |
|
||
WARNING: TO REDUCE THE RISK OF ELECTRIC SHOCK, DO NOT REMOVE COVER (OR BACK). NO USER SERVICEABLE PART INSIDE. REFER SERVICING TO QUALIFIED SERVICE PERSONNEL.
WARNING: |
DO NOT EXPOSETHIS APPLIANCETO RAIN OR MOISTURE, DUETOTHE HIGH RISK OF FIRE OR ELECTRIC |
|
SHOCK. DO NOT OPENTHE CABINET DANGEROUS HIGH VOLTAGES ARE PRESENT INSIDETHE |
|
ENCLOSURE. ONLY QUALIFIED SERVICE PERSONNEL SHOULD ATTEMPTTHIS. |
CAUTION: |
TO PREVENT ELECTRIC SHOCK, MATCH WIDE BLADE OF PLUGTO WIDE SLOT AND INSERT. |
ATTENTION: This Digital Video Disc Player employs a Laser System. To prevent direct exposure to the laser beam, do not try to open. Visible laser radiation when open and interlocks defeated. Use of control adjustments or the performance of
CAUTION: |
procedures other than those specified may result in hazardous radiation exposure. |
DO NOT STARE INTO BEAM. |
|
|
To ensure proper use of this product, please read this owner’s manual carefully and retain for future reference. Should |
|
the unit require maintenance, contact an authorized service location, or contact APEX Digital Inc. Only qualified service |
|
personnel should remove the cover. |
FCC |
This equipment has been tested and found to comply with the limits for a Class B digital device. Pursuant with the FCC |
NOTICE: |
Rules, Part 15. These limits are designed to provide reasonable protection against harmful interference in a residential |
|
installation. |
This equipment generates, uses, and radiates radio frequency energy and used in accordance with the instructions, may cause harmful interference to radio communication. However, this is no guarantee that interference will not occur in a particular installation. The user is encouraged to try to correct the interference by one of the following measures:
-Reorient or relocate the receiving antenna
-Increase the separation between the equipment and receiver.
-Connect the equipment into an outlet on a circuit different from that to which the receiver is connected.
-Consult the dealer or an experienced radio/TV technician for help.
Changes or modifications made to this equipment, not expressly approved by APEX or parties authorized by APEX will void all the manufacture warranties.
.
WARNING: |
Since it’s usual for movies to be released at different times in different regions of the world, all players have region codes and |
|
discs can have an optional region code. If you load a disc of a different region code, you will see the region code notice on |
|
the screen. The disc will not play and should be unloaded immediately. |
THE REGION CODE FOR THIS UNIT IS 1.
CLASS 1
LASER PRODUCT
AD - 1000 |
A P E X |
D I G I T A L |
1 |

Important Safety Instructions
CAUTION:
PLEASE READ AND OBSERVE ALL WARNINGS AND INSTRUCTIONS GIVEN IN THIS OWNER’S MANUAL AND THOSE MARKED ON THE UNIT. PLEASE KEEP THIS MANUAL FOR FUTURE USE.
This product was designed and manufactured to meet strict quality and safety standards. The safeguards incorporated in this unit will protect you if you observe the following procedures for installation, use, and service. There are, however, some installation and operation precautions which you should be aware of.
1.READ THE OWNER’S MANUAL - Follow all the operating and installation instructions.
2.RETAIN INSTRUCTIONS - The safety and operating instructions should be retained for future use.
3.PAY ATTENTION TO WARNINGS - All warnings on the appliances and in the operating instructions should be followed.
4.FOLLOW INSTRUCTIONS - Follow all operating instructions to achieve optimal use.
5.POWER SOURCES - This product should only be operated from the type of power source indicated on the label.
6.HEAT - This unit should be situated away from heat sources, such as amplifiers, radiators, stoves or any other units producing heat.
7.WATER AND MOISTURE - Do not use this unit near water, for example: near the kitchen sink, a bath tub, washbowl, laundry tub, swimming pool, or in a wet basement.
8.CLEANING - Unplug the unit from the wall outlet before cleaning. Do not use liquid cleaners or aerosol cleaners directly on the unit. Use a damp cloth for cleaning.
9.CARTS AND STANDS - The unit and cart combination should be moved with care. Quick stops, excessive force and uneven surfaces may cause the unit and cart combination to overturn. The unit should be used only with a cart or stand recommended by the manufacturer.
10.POWER-CORD PROTECTION - Power-supply cords should be routed so that they are not likely to be walked on or pinched by items placed upon or against them.
11.OVERLOADING - Do not overload wall outlet, or extension cords. This can result in a risk of fire or electrical shock.
12.DISC TRAY - Keep your fingers well clear of the disc tray as it is closing. It may cause serious personal injury, or do damage to the machine.
13.WEIGHT - Do not place a heavy object (amplifier, receiver) on your DVD player. The object may fall, causing serious personal injury or death.
14.OBJECT AND LIQUID ENTRY - Care should be taken so that objects do not fall and liquids are not spilled into the units openings. Such situations could result in fire or electrical shock.
15.NON-USE PERIODS - The power cord of the unit should be unplugged, when not in use for a long time.
16.DISC - Do not use a deformed, cracked, or heavily scratched disc. Using these disc will limit your viewing pleasure, and/or may damage the internal workings of your machine.
17.LIGHTING AND POWER SURGES - Use a power strip to help eliminate surges and spikes caused by lighting and static electric charges.
18.POLARIZATION OR GROUNDING - Precautions should be taken so that the polarization or grounding means of a unit is not defeated. To prevent electric shock, match the wide blade of the plug to the wide slot of the outlet and fully insert. If the wide blade does not match up with the outlet, try reversing the plug.
19.SERVICING - Do not attempt to service this unit yourself. Only qualified APEX service technicians should work on your player.
20.SAFETY CHECK - Ask the service technician to perform safety checks upon completion of the unit.
AD - 1000
Introduction
Your DVD video player is a player for digital video discs conforming to the universal DVD video standard. With it, you will be able to enjoy full-length movies with true cinema picture quality, and multichannel sound. Unique features of this compact player include an S-video output, selecting of sound track and subtitle languages and of different camera angles (depending on the disc). What’s more, Parental Control lets you decide which discs your children can watch. Your player supports audio CD’s, video CD’s and the new MP3 format.
You will find your player remarkably easy to use, by way of the wireless remote control and on screen display you view from your TV screen.
UNPACKING
When shipping the DVD video player, the original shipping carton and packing comes in handy. For maximum protection, repack the unit as it was originally packed at the factory.
First check and identify the contents of your DVD video player package, as listed below:
-Remote control handset
-RCA cables (3) (1 yellow, 1 red, and 1 white)
-Owner’s manual
-Size AA batteries (2)
If any item should be damaged or missing, please inform your dealer without delay.
Keep the packaging materials, you may need them to transport your player in the future.
WHERE TO LOCATE YOUR DVD
A.Place the unit on a firm, flat surface.
B.When you place this DVD video player near a radio, or VCR, the playback picture may become poor and/or distorted. In this situation, move the DVD video player away from the other units.
C.If placed in a cabinet, please allow at least 2.5 cm (1 inch) of free space all around the player for proper ventilation.
TO OBTAIN A CLEAR PICTURE
The DVD video player is a precision device. If the optical pick-up lens and disc drive parts are dirty or worn down, picture quality becomes poor. We recommend regular inspection and maintenance every 1,000 hours of use depending on the operating environment.
A P E X |
D I G I T A L |
3 |
Notes on Discs
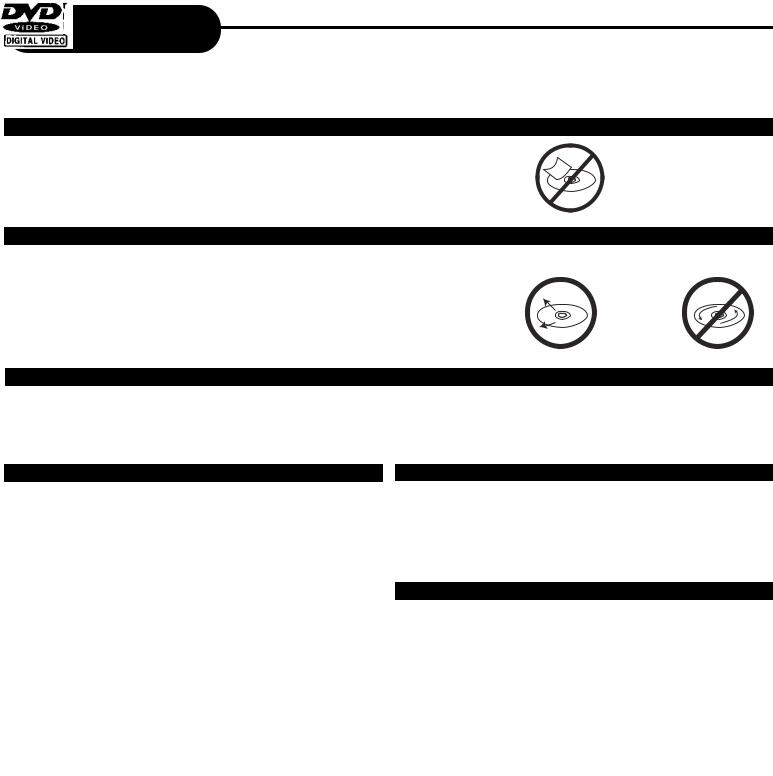
HOW TO HANDLE, CLEAN, AND STORE DISCS.
HANDLING DISCS
•Do not touch the playback side of the disc.
•Do not attach paper or tape to discs.
NOTE: Apex Digital Inc. shall not be responsible for damage that may occur to a disc from being operated in the player.
CLEANING DISCS
•Fingerprints and dirt on the disc cause picture and sound deterioration. Wipe the disc from the center outward with a soft cloth. Always keep the disc clean.
•If you cannot wipe off the dirt off, wipe the disc lightly with a slightly moistened soft cloth and finish with a dry cloth.
•Do not use any type of solvent such as a thinner, benzine, commercially available cleaners or anti-static spray for vinyl LP’s.
STORING DISCS
•Do not store discs in places subject to direct sunlight or near heat sources.
•Do not store discs in places subject to moisture and dust.
•Store discs vertically in a case. Stacking or placing objects on discs outside of their case may cause warping.
PLAYABLE DISCS
This DVD video player can play back the following discs.
|
|
|
|
Disk Mark |
|
Contains |
|
|
Disc Size |
|
Maximum playback time |
|||
|
|
|
|
|
|
|
|
|
|
|
|
|
|
|
|
|
|
|
|
|
|
|
|
|
|
|
|
|
|
|
|
|
|
|
|
|
|
|
|
|
|
|
Approx. 4 hours |
|
|
|
|
|
|
|
|
Audio |
|
|
|
|
|||
|
DVD |
|
|
|
|
|
|
|
|
|
||||
|
|
|
|
|
|
+ |
|
|
|
|
|
(single sided disc) |
|
|
|
video |
|
|
|
|
|
Video |
|
|
|
|
|
|
|
|
|
|
|
|
|
|
|
12 cm |
|
|
|
|
||
|
disc |
|
|
|
|
|
(moving |
|
|
|
|
|
|
|
|
|
|
|
|
|
|
|
|
|
|
Approx. 8 hours |
|
||
|
|
|
|
|
|
|
pictures) |
|
|
|
|
|
|
|
|
|
|
|
|
|
|
|
|
|
|
||||
|
|
|
|
|
|
|
|
|
|
|
||||
|
|
|
|
|
|
|
|
|
|
|
|
(double sided disc) |
|
|
|
|
|
|
|
|
|
|
|
|
|
|
|
|
|
|
|
|
|
|
|
|
|
|
|
|
|
|
|
|
|
|
|
|
|
|
|
|
|
|
|
|
|
|
|
|
|
|
|
|
|
|
|
|
|
|
|
|
|
|
|
|
|
|
|
|
|
Audio |
|
|
|
|
|
|
|
|
|
|
|
|
|
|
|
|
12 cm |
|
|
Approx. 74 minutes |
|
|
|
Video |
|
|
|
|
|
+ |
|
|
|
|
|
||
|
|
|
|
|
|
|
|
|
|
|
|
|
||
|
CD |
|
|
|
|
|
Video |
|
|
|
|
|
|
|
|
|
|
|
|
|
|
|
|
|
|
|
|
||
|
|
|
|
|
|
|
|
|
|
|
|
|
||
|
|
|
|
|
|
|
(moving |
|
|
|
|
|
|
|
|
|
|
|
|
|
|
|
|
|
|
|
|
Approx. 20 minutes |
|
|
|
|
|
|
|
|
pictures) |
|
|
8 cm |
||||
|
|
|
|
|
|
|
|
|
||||||
|
|
|
|
|
|
|
|
|
|
|
|
|
|
|
|
|
|
|
|
|
|
|
|
|
|
|
|
|
|
|
|
|
|
|
|
|
|
|
|
|
|
|
|
|
|
|
|
|
|
|
|
|
|
|
|
|
|
|
|
|
|
|
|
|
|
|
|
|
|
12 cm |
|
|
Approx. 74 minutes |
|
|
Audio |
|
|
|
|
|
|
|
|
|
||||
|
|
|
|
|
|
Audio |
|
|
|
|
|
|
|
|
|
CD |
|
|
|
|
|
|
|
|
|
|
|
|
|
|
|
|
|
|
|
|
|
|
8 cm |
|
|
|
||
|
|
|
|
|
|
|
|
|
|
|
|
|
||
|
|
|
|
|
|
|
|
|
|
|
Approx. 20 minutes |
|
||
|
|
|
|
|
|
|
|
|
(CD single) |
|
|
|||
|
|
|
|
|
|
|
|
|
|
|
|
|||
|
|
|
|
|
|
|
|
|
|
|
|
|
|
|
|
|
|
|
|
|
|
|
|
|
|
|
|
|
|
|
MP3 |
|
|
|
|
|
|
|
|
|
|
|
|
|
|
|
MP3 |
|
|
|
|
|
|
|
|
|
|
||
|
|
|
|
Audio |
|
|
12 cm |
|
Approx. 600+ minutes |
|
||||
|
CD |
|
|
|
|
|
|
|
||||||
|
|
|
|
|
|
|
|
|
|
|
|
|
|
|
|
|
|
|
|
|
|
|
|
|
|
|
|
|
|
|
|
|
|
|
|
|
|
|
|
|
|
|
|
|
|
|
|
|
|
|
|
|
|
|
|
|
|
|
|
NOTES ON REGIONAL NUMBERS
This DVD video player will play region 1 discs or region 1 on an all-region disc only. Region 1 is the designated area for the U.S. and Canada. Otherwise playback will not be allowed by the player due to Macrovision copyright protection.
TYPE OF TV SYSTEM
Connect this DVD video player to a TV compatible with the NTSC or PAL/3.58 system. APEX DIGITAL players will play VCD format discs. Most VCD’s are PAL. VCD’s are not region specific (no code) and APEX DIGITAL players can play them because of the PAL compatibility feature.
4 |
A P E X |
D I G I T A L |
AD - 1000 |

Table of Contents
Safety Precautions ........................... |
1 |
Important Safety Instructions ........... |
2 |
Introduction ........................................ |
3 |
Notes On Discs................................... |
4 |
Identification of Controls .................... |
6 |
Remote Control..................................... |
7 - 8 |
Connecting to a TV ............................ |
9 |
Connecting to a TV using a RF Modulator |
|
.............................................................. |
10 - 11 |
Connecting Optional Equipment............ |
12 - 13 |
What is MP3 and VCD ?........................ |
14 |
MP3 Operation...................................... |
15 |
Playing Back a Disc.............................. |
16 - 19 |
Locating a Specific Title, |
|
Chapter or Track................................... |
20 - 21 |
Playing Repeatedly............................... |
22 |
Playing in Random Order...................... |
23 |
Zooming a Picture/ Vocal Assist ........... |
24 |
Selecting the Camera Angle/Language/ |
|
Audio Settings ..................................... |
25 |
Playing in a Favorite Order.................. |
26 |
Selecting Subtitles ............................. |
27 |
Using the On-screen Display ............ |
28 |
Setting the Parental Lock ................... |
29 |
Customizing the Function Settings .... |
30 |
Memo On Output Sounds & PBC ....... |
31 |
Specifications ..................................... |
32 |
Troubleshooting Guide......................... |
33 |
Limited Warranty ................................ |
34 |
A P E X |
D I G I T A L |
5 |

Identification of Controls
FRONT PANEL
1 |
2 |
|
|
|
|
|
3 |
|
4 |
5 |
6 |
1 |
POWER ON/OFF |
4 |
PLAY |
2 |
DVD TRAY |
5 |
PAUSE |
3 |
OPEN/CLOSE |
6 |
STOP |
|
|
|
|
REAR PANEL
1 |
|
3 |
|
|
5 |
|
|
|
||
|
|
|
|
7 |
||||||
|
|
|
|
|
|
|
|
|
||
|
|
|
|
|
|
|
|
|
|
|
|
|
|
|
|
|
|
|
|
|
|
2
 4
4 
 6
6
1DIGITAL AUDIO-COAXIAL OUTPUT 2 S-VIDEO OUTPUT
3 COMPOSITE VIDEO OUTPUT 1
4 COMPOSITE VIDEO OUTPUT 2
5 ANALOG AUDIO OUTPUT L
6 ANALOG AUDIO OUTPUT R
7 POWER CORD
AD - 1000

Remote Control
THE INSTRUCTIONS IN THIS MANUAL DESCRIBE THE FUNCTIONS ON THE REMOTE CONTROL.
1. |
POWER (PAGE 7, 14) |
18. |
REPEAT (PAGE 20) |
2. |
NUMBER KEYS (PGS.19, 27) |
19. |
A-B RPT (PAGE 20) |
3. |
SHUFFLE (PAGE 21) |
20. |
MUTE (PAGE 7) |
4. |
PROGRAM (PAGE 24) |
21. |
GOTO (PAGE 19) |
5. |
VOCAL ASSIST (PAGE 22) |
22. |
CLEAR (PAGE 24) |
6. |
RESUME (PAGE 7) |
23. |
DISPLAY (PAGE 26) |
7. |
SLOW (PAGE 17) |
24. |
PBC OFF |
8. |
STEP (PAGE 16) |
|
(12, 19, 21, 24) |
|
|
|
|
9. |
SETUP (9-11, 19, 27, 28) |
25. |
ZOOM (PAGE 22) |
|
|
||
10. |
AUDIO (PAGE 23) |
26. |
P/N (PAGE 7) |
|
|
||
11. |
MENU (PAGE 7) |
27. |
ANGLE (PAGE 23) |
|
|
||
12. |
DIRECTION KEYS (13, 15, |
28. |
SUB-T (PAGE 25) |
|
|
19, 22, 27, 28)
29. TITLE (PAGE 18)
13. ENTER/PLAY (13-19, 21, 24,27, 28) 30. STOP (PGS.13,
14. PAUSE (PAGES 15-16)
15, 17, 27-28)
15. SKIP FORWARD/ BACK
31. FORWARD SCAN
(13, 18-19, 21)
(PAGES 13, 16)
16. OPEN/CLOSE (PAGES 14-15)
32. REVERSE SCAN
1
2
3
4
5
6
7
8 
9
10
11
12
13
14
15
17. VOLUME UP / DOWN (PAGE 7)
(PAGES 13, 16)
16
17
18
19
20
21
22
23
24
25
26
27
28
29
30
31
32
NOTES:
•POWER button on the remote control is for standby power only. Turn the main power button on the dvd player.
•P/N button for PAL/NTSC. Standard TV system used in N. America is NTSC. If a PAL region 1 VCD or DVD disc is played, press P/N for normal playback. Otherwise, the picture will continuously roll in black/white.
•MUTE button cuts out sound from the player; MENU returns the player to the movie menu at the beginning of a disc; VOL controls player volume.
When displayed on TV, function is not operational on the disc.
AD A P E X D I G I T A L 7

Continued
Remote Control
PREPARING THE REMOTE CONTROL
To operate the DVD video player, you must first place the batteries in the remote control.
1 |
|
2 |
|
3 |
Open the cover. |
Insert batteries (AA size). |
Close the cover. |
|
Make sure to match the + and - on |
|
|
the batteries to the marks inside the |
|
|
battery compartment. |
|
OPERATING WITH THE REMOTE CONTROL
Operating video player with the remote control.
1
30˚ 30˚
The remote control must point at the remote sensor in order for the player to function correctly.
Distance: Maximum of 7 m from the front of the remote sensor. Angle: Approximately 30º from each direction.
*Do not place the remote sensor towards any light source such as direct sunlight. The DVD video player may malfunction.
NOTICE (BATTERIES)
INCORRECT USE OF BATTERIES MIGHT CAUSE THEM TO LEAK OR CORRODE.
•Do not place the batteries in the wrong direction.
•It is dangerous to charge/heat/open or short-circuit the batteries.
•Do not leave dead batteries or mix old/new batteries in the remote control.
•When not using the remote control for a long duration of time, remove the batteries.When operating range becomes reduced, replace.
•If leakage from the battery occurs, wipe the battery liquid from the battery compartment, then replace.
NOTICE (REMOTE CONTROL)
• The remote control should be aimed directly towards the remote sensor of the DVD video player.
8 |
A P E X |
D I G I T A L |
AD - 1000 |

Connecting to a TV
GOOD, BETTER, BEST
Connecting the DVD video player to your TV.
•How to setup the sound output:
From the SETUP MENU, select GENERAL SETUP by pressing ENTER. Use “down arrow” key and set the “AUDIO OUT” to “ANALOG”.
GOOD |
|
BETTER |
TV Video Input
Yellow |
Red |
White |
Black |
White |
|
|
Red |
S-Video cord (optional)
|
|
|
TV Audio Input |
|
|
Yellow |
Red |
White |
|
Red |
White |
|
|
||||
|
|
|
|
Black |
|
Connect the DVD video player with an optional S Video cable if the TV has an S video input. Do not connect the yellow video cable if using the S Video cable.
NOTICE
•Refer to the manual of the connected TV.
•Turn off power and unplug both units before connecting.
•If you connect the DVD video player to a video cassette recorder (VCR), or TV/VCR combination, the playback picture will be distorted because all dvd players incorporate copyright protection circuitry by Macrovision.
•• If your TV only has a cable antenna connection and no video inputs to connect your TV to the DVD player, you will need to purchase an RF adapter from your dealer.
A P E X |
D I G I T A L |
9 |

Connecting to a TV using a RF Modulator
Note: Not all RF Modulators are compatible with APEX Digital players. Please see our website for recommendations.
Many older televisions do not have the newer component-video, composite-video, or s-video connections that optimize DVD technology. While it would be advised to purchase a newer television in order to take full advantage of the digital quality of DVD’s, it is possible to connect an older television to a DVD player. This connection requires a device called an RF modulator.
First, it is necessary to ascertain whether or not your TV needs a RF modulator. Look at the back of your TV. If you see three input connectors lined up in a row, in the colors of yellow, red, and white, then you will not need an RF modulator. If you see a connector labeled "s-video", then you will not need an RF modulator. If you do not have either of these connectors, then you will need to purchase an RF modulator from the store where you purchased your Apex Digital DVD player or other home electronics retailers.
Older televisions use a coaxial connection, which combines all of the video signal from an exterior source into a single line. This line is then translated by your TV into the picture you see. The RF modulator combines the output signals from the DVD player, or any other device, into the coaxial connection for use by your television.
Below are written and pictoral instructions on the proper way to connect an RF modulator to your Apex DVD player and your TV.
Connection 1
Connecting the TV to the DVD through the VCR
Note: Many VCRs will distort the picture of a DVD player. This is NOT a malfunction of the DVD player or VCR. All DVD manufacturers are required to install macrovision copyright ciruritry to prevent copying via VCR. This is what causes the distortion.
1)Connect the three-terminal composite video cable to the back of your Apex DVD player. This cable has three prongs, one each in yellow, red, and white. The yellow prong will go into the jack labeled "Video Out"; the white prong will go into the jack labeled "Front-L"; the
red prong will go into the jack labeled "Front-R".
2)Connect the opposite end of the composite-video cable into the back of the RF modulator. Make sure to match up the colors correctly.
3)Connect a coaxial cable from the "Antenna Out" jack on the back of your VCR to the "Antenna" jack on the RF modulator. The coaxial cable is the onewire, metal-ended type that you screw onto the VCR.
4)Connect a coaxial cable from the "To TV" jack on the RF modulator to the jack on the back of your TV.
Figure 1
DVD (Back)
|
|
Your TV (Back) |
AUDIO OUT |
UHF/Antenna IN |
|
COAXIAL |
L |
Coaxial |
1 |
||
(L)
(R)
2 R
VIDEO OUT
RF-Modulator
TV /Audio Input
Conntection
TV / Video Input |
(V) |
L |
R |
V |
To TV Antenna |
Conntection |
|
|
|
|
|
 (V)
(V)
(L)
 (R)
(R)
Your VCR (Back)
UHF/Antenna OUT
Coaxial
5) Make sure your TV is set to the appropriate channel before using your DVD player. In most cases, this is channel 3 or 4.
A P E X |
D I G I T A L |
10 |
Continued
Connecting to a TV using a RF Modulator
Connection 2
Connecting the TV to the DVD through the Figure 2 Cable or Satelite Box
DVD (Back)
Your TV (Back)
1)Connect the three-terminal composite video cable to the back of your Apex DVD player. This cable has three prongs, one each in yellow, red, and white. The yellow prong will go into the jack labeled "Video Out"; the white prong will go into the jack labeled "Front-L"; the red prong will go into the jack labeled "Front-R".
2)Connect the opposite end of the compositevideo cable into the back of the RF modulator. Make sure to match up the colors correctly.
3)Connect a coaxial cable from the "Antenna Out" jack on the back of your Cable or Satellite receiver to the "Antenna" jack on the RF modulator. The coaxial cable is the one-wire, metal-ended type that you screw onto the VCR.
AUDIO OUT |
UHF/Antenna IN |
|
COAXIAL |
L |
Coaxial |
1 |
||
|
|
(L) |
2 |
R |
(R) |
|
||
VIDEO OUT |
|
|
|
|
TV /Audio Input |
RF-Modulator |
||
|
|
|
|
||
TV / Video Input |
(V) |
Conntection |
L R |
V |
To TV Antenna |
|
|||||
Conntection |
|
|
|
|
|
 (V)
(V)
(L)
 (R)
(R)
Your Cable/Satelite Box
OUT IN
To your Cable/Satelite connection
4)Connect a coaxial cable from the "To TV" jack on the RF modulator to the jack on the back of your TV.
5)Make sure your TV is set to the appropriate channel before using your DVD player. In most cases, this is channel 3 or 4.
Connection 3
Connecting the TV , DVD, VCR, and Cable or Satelite Box
1)Connect the three-terminal composite video cable to the back of your Apex DVD player. This cable has three prongs, one each in yellow, red, and white. The yellow prong will go into the jack labeled "Video Out"; the white prong will go into the jack labeled "Front-L"; the red prong will go into the jack labeled "Front-R".
2)Connect the opposite end of the compositevideo cable into the back of the RF modulator. Make sure to match up the colors correctly.
3)Connect a coaxial cable from the "Antenna Out" jack on the back of your cable or satellite receiver to the "Antenna In" jack on the back of your VCR. The coaxial cable is the one-wire, metal-ended type that you screw onto the VCR.
4)Connect a coaxial cable from the "Antenna Out" jack on the back of your VCR to the "Antenna" jack on the RF modulator.
5)Connect a coaxial cable from the "To TV" jack
Figure 3
(Back) |
|
|
|
|
|
|
|
|
|
|
|
|
|
|
Your TV (Back) |
AUDIO OUT |
|
|
|
|
|
UHF/Antenna IN |
|
COAXIAL |
|
|
|
|
|
|
|
1 |
L |
|
|
|
|
|
Coaxial |
|
|
(L) |
|
|
|
|
|
2 |
R |
(R) |
|
|
|
|
|
|
|
|
|
|
|
||
VIDEO OUT |
|
|
|
|
|
|
|
|
|
|
|
|
RF-Modulator |
|
|
(V) |
|
TV / Video Input |
L |
R |
V |
To TV |
Antenna |
|
Conntection |
||||||
|
|
|
|
|
(V) |
|
|
|
|
(L) |
|
|
|
|
|
TV /Audio Input |
|
|
|
|
|
|
|
Conntection |
|
|
|
|
(R) |
|
|
|
|
|
|
|
|
|
|
Your Cable/Satelite Box |
|
|
|
|
Your VCR (Back) |
||
|
|
|
|
UHF/Antenna OUT |
|||
|
|
|
|
|
|
|
Coaxial |
OUT |
IN |
|
|
|
|
IN |
|
|
|
|
|
|
|
|
OUT |
|
|
|
|
|
|
|
To your Cable/Satelite connection |
on the RF modulator to the jack on the back of your TV.
6) Make sure your TV is set to the appropriate channel before using your DVD player. In most cases, this is channel 3 or 4. Also make sure
that the VCR is set to the appropriate channel, as well. This selector is usually on the back of your VCR. Consult your VCR manual for further information.
A P E X |
D I G I T A L |
11 |
 Loading...