

Page 1

Installation
NetShelter® AV Rack Cooling
ACF600
ACF601
ACAC40000
ACAC40001
Page 2

American Power Conversion Legal Disclaimer
The information presented in this manual is not warranted by the American Power
Conversion Corporation to be authoritative, error free, or complete. This publication is not
meant to be a substitute for a detailed operational and site specific development plan.
Therefore, American Power Conversion Corporation assumes no liability for damages,
violations of codes, improper installations, system failures, or any other problems that could
arise based on the use of this Publication.
The information contained in this publication is provided as is and has been prepared solely
for the purpose of evaluation data center design and construction. This publication has been
compiled in good faith by American Power Conversion Corporation. However, no
representation is made or warranty given, either express or implied, as to the completeness
or accuracy of the information this publication contains.
IN NO EVENT SHALL AMERICAN POWER CONVERSION CORPORATION, OR ANY
PARENT, AFFILIATE OR SUBSIDIARY COMPANY OF AMERICAN POWER
CONVERSION CORPORATION OR THEIR RESPECTIVE OFFICERS, DIRECTOS, OR
EMPLOYEES BE LIABLE FOR ANY DIRECT, INDIRECT, CONSEQUENTIAL, PUNITIVE,
SPECIAL, OR INCIDENTAL DAMAGES (INCLUDING, WITHOUT LIMITATION, DAMAGES
FOR LOSS OF BUSINESS, CONTRACT REVENUE, DATA, INFORMATION, OR
BUSINESS INTERUPTION) RESULTING FROM, ARISING OUT, OR IN CONNECTION
WITH THE USE OF, OR INABILITY TO USE THIS PUBLICATION OR THE CONTENT,
EVEN IF AMERICAN POWER CONVERSION CORPORATION HAS BEEN EXPRESSLY
ADVISED OF THE POSSIBILITY OF SUCH DAMAGES. AMERICAN POWER
CONVERSION CORPORATION RESERVES THE RIGHT TO MAKE CHANGES OR
UPDATES WITH RESPECT TO OR IN THE CONTECT OF THE PUBLICATION OR THE
FORMAT THEREOF AT ANY TIME WITHOUT NOTICE.
Copyright, intellectual, and all other proprietary right in the content (including but not limited to
software, audio, video, text, and photographs) rests with American Power Conversion
Corporation or its licensors. All rights in the content not expressly granted herein are reserved.
No rights of any kind are licensed or assigned to shall otherwise pass to persons accessing
this information.
This publication shall not be for resale in whole or in part.
NetShelter AV Rack Cooling Installation 1
Page 3
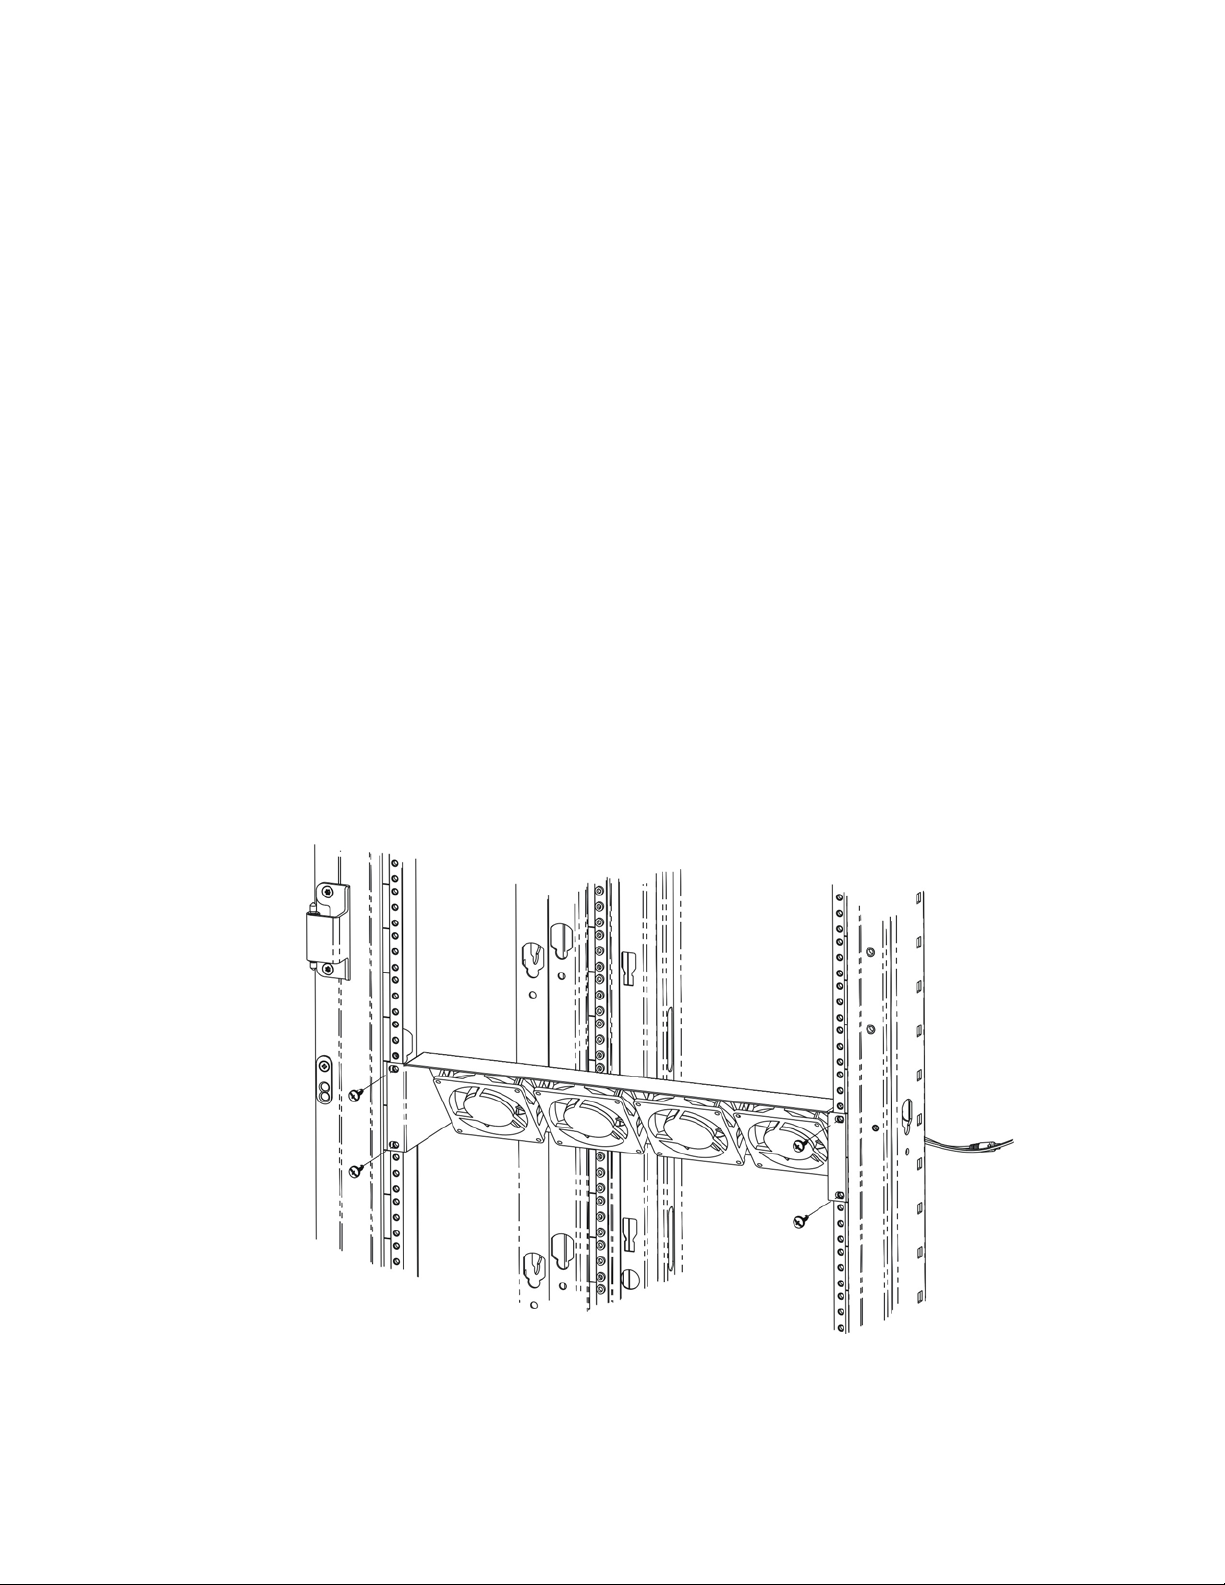
Installing the Rack Fan Panel (ACF600)
The NetShelter AV 2U rack fan panel can be used to cool individual devices or to
draw air into or out of a rack. Before installing the fan panel, determine its application.
1. Determine the desired airflow direction and reverse the fans if necessary.
Airflow direction is indicated by an arrow on each fan.
a. To reverse the airflow direction, slowly pull the fans from the rubber
mounts one at a time.
Note: All four fans are wired together
b. Turn the entire fan assembly over.
c. To reattach the fans, pull the rubber mounts through the sheet metal
housing and then pull the rubber mounts through the mounting holes
on the fans.
2. Determine the installation location in the rack.
Note: The fan panel requires 2U of available rack space.
If you are using the optional ACF601 temperature controller, install the
temperature controller before you install the fan panel. See the installation
instructions on page 4.
3. To install the unit fan panel in a standard AV enclosure, use the provided 1032 threaded screws.
Note: For installation in a standard IT equipment enclosure, use the cage
nuts provided with the enclosure.
NetShelter AV Rack Cooling Installation 2
Page 4
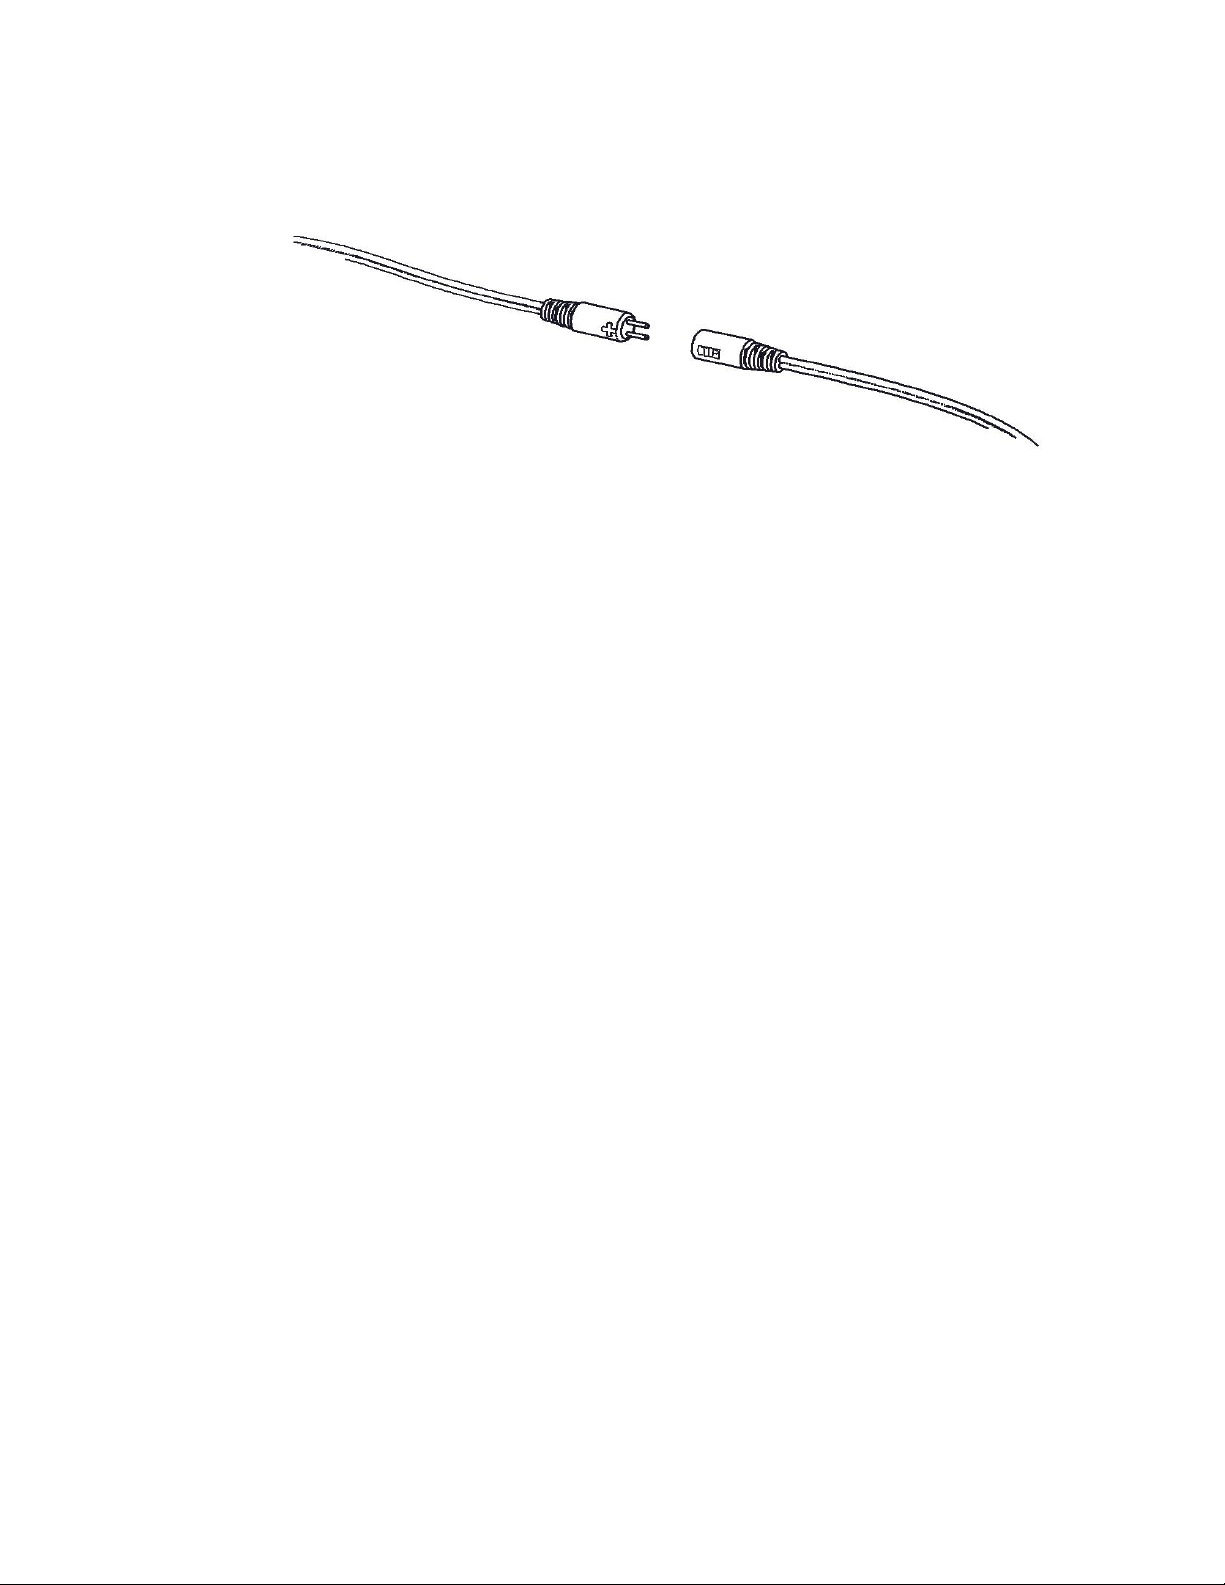
4. Connect the provided power cord to the fan panel. To ensure polarity
protection, align TIP to +.
Note: Reversing polarity will not damage the fan panel, but the fan panel will
not operate until the power cord is connected correctly.
5. Ensure that the voltage switch on the power supply is set to at least 7 Volts
and that no wires or other obstructions can come in contact with the fans.
Note: The universal power supply voltage must be set to 12 Volts when used
with the rack fan temperature controller.
6. Plug in the power supply to turn on the fan panel.
Control the speed and noise level by adjusting the voltage on the power
supply.
Enhance the effectiveness of the fan panel by changing the airflow
direction and the position of the panel.
NetShelter AV Rack Cooling Installation 3
Page 5

Installing the Rack Fan Temperature Controller (ACF601)
The Rack Fan Temperature Controller is designed to provide on/off and variable
speed fan control based on the ambient temperature of the unit. The unit features
two jumper selectable on/off set points, identified by an ’L’ (low) and ‘H’ (high) on the
unit’s circuit board.
1. Set the jumper on the unit to the appropriate position for your application.
Note: The On set point for the low setting is 80°F and is most appropriate for
equipment rooms or closets. The On set point for the high setting is 88°F and
is most appropriate for cabinets or other small enclosure applications. The
unit's Off set point is approximately 3 degrees lower than the On set point.
On the low setting, the fans will turn on at 80°F and turn off when the
temperature at the unit drops below 77°F. On the high setting, the fans will
turn on at 88°F and turn off when the temperature at the unit drops below
85°F. As the temperature increases, the fan speed will also increase in linear
progression. In the low setting, the fans will turn on at roughly 50% fan speed
when the temperature reaches 80°F and will reach full speed at 100°F. For
the high setting, the fans will turn on at 88°F and reach at full speed at 105°F.
These are fixed set points that cannot be modified.
2. Attach the provided bracket to the fan panel using the provided screw.
NetShelter AV Rack Cooling Installation 4
Page 6

3. Turn on the temperature controller by connecting it between the Rack Fan
Panel and the supplied power cord as shown below.
Note: For proper functionality, the power supply must be set to 12 Volts.
Note: Observe proper polarity by connecting TIP to +.
4. Install the sensor on the bracket using the supplied hook and loop fastener.
Note: Be sure the end of the controller extends slightly over the edge of the
bracket.
NetShelter AV Rack Cooling Installation 5
Page 7

Installing the Vent Panel (ACAC40000) and Vent Panel
with Temperature Display (ACAC40001)
1. Install the Vent Panel in an open 2U space using the 10-32 threaded screws
provided.
2. Install the temperature sensor in the area to be monitored. (ACAC40001 Only)
Note: To monitor a specific device, position the sensor near the component’s
ventilation area for the most accurate reading. The sensor wire is
approximately 36 inches long.
3. Provide power to the Temperature Display using the provided fixed 9 volt AC
to DC adapter. (ACAC40001 Only)
4. Determine the best route for the sensor and supply cables, and secure the
cables using the provided wire ties. (ACAC40001 Only)
Alternative Installation (ACAC40000 or ACAC40001)
1. Install the Vent Panel over the Fan Panel in an open 2U space using the 1032 threaded screws provided.
NetShelter AV Rack Cooling Installation 6
Page 8

2. Route the sensor cable and the power cable through the hole in the center of
the Fan Panel and secure the cables to the back of the Fan Panel using the
provided wire ties.
3. To secure cable when routing it in either direction from the center, use the
wire tie slots positioned along the edge of the Fan Panel.
NetShelter AV Rack Cooling Installation 7
Page 9

Customer support and warranty information is available at the APC Web site, www.apc.com.
© 7/22/10 APC by Schneider Electric. APC, the APC logo, and NetShelter are owned by Schneider Electric
Industries S.A.S., American Power Conversion Corporation, or their affiliated companies. All other trademarks
are property of their respective owners.
990-3938
NetShelter AV Rack Cooling Installation 8
 Loading...