

Page 1

PD4264
Plasma TV User Manual
TABLE OF CONTENTS
Before Use…………………...…………………………………..……
Safety Precautions……………………………………………………
Precautions…………………...…………………………………..……
For Your Safety Reason………………………………………………
Important Safety Instruction…………………………………………
Introduction ……………………………………………………..……
Part Names and Function …………………………………………...
Installation ……………………………………………………………
Basic Operations …………………………………………………..…
2
3
6
7
8
10
11
15
21
Wide Operations ……………………………………………………
OSD (On Screen Display) Controls …………………………………
RS232C Control ……………………………………………………...
Table of Signals Supported ……………………………………….…
Troubleshooting ………………………………………………………
Specifications …………………………………………………………
1
22
23
31
31
32
33
Page 2

Before Use
Before operating the Plasma TV, please read this manual thoroughly. This manual should be retained for future
reference.
FCC Class B Radio Frequency Interference Statement WARNING: (FOR FCC CERTIFIED MODELS)
NOTE: This equipment has been tested and found to comply with the limits resid ential installation. This equipment
generates, uses and can radiate radio frequency energy, and if not installed and used in accordance with the instructions,
may cause harmful interference to radio communications. However, there is no guarantee that interference will not
occur in a particular installation. If this equipment does cause harmful interference to radio or television reception,
which can be determined by turning the equipment off and on, the user is encouraged to try to correct the interference
by one or more of the following measures:
1. Reorient or relocate the receiving antenna.
2. Increase the separation between the equipment and receiver.
3. Connect the equipment into an outlet on a circuit different from that to which the receiver is connected.
4. Consult the dealer or an experienced radio/TV technician for help.
OPEN THE PACKAGE:
y The product is packaged in a carton together with other standard accessories. Any optional accessories shall be
packed separately in another carton.
y The weight of the Plasma TV is approx.38 kg. Due to the size & weight of the product, it is recommend that it
is moved by a minimum of 2 people.
y The protective glass and the glass substrate are installed on the front of the product. Since both glasses can be
broken and scraped easily, move the product gently. Never place the unit with the glass facing downwards
unless it is protected with pads.
y When opening the carton, check that the product is in good condition and that all standard accessories and
items are included.
y Whenever possible, use the handles on the back of the TV for transport.
INSTALLATION:
y A specified technician from the distributor or authorised agent should always install the product, otherwise the
warranty may become void.
y The power consumption of this device is 320w, always use the jack exclusively designed for this product. If an
extended line is required, please consult with your service agent.
y The product should be installed on a flat surface to avoid tipping.The distance between the back of the product
and the wall should be maintained for proper ventilation.
y Avoid installing the product in the kitch en, bathroom or any other places with higher humidity so as not to
shorten the service life of the electronic components.
y Please ensure the product be installed horizontally, any 90° clockwise or counterclockwise installation may
induce poor ventilation and subsequent component damage.
y To protect the screen and avoid screen burn, do not hold on a static picture for a long time.
y In order to receive the most consummate warranty, installation has to be done by the professional technician
from dealer or authorized distributor.
NOTICE:
1. The changes or modifications not expressly approved by the party responsible for compliance could void the user's
authority to operate the equipment.
2. Shielded interface cables and AC power cord, if any, must be used in order to comply with the emission limits.
3. The manufacturer is not responsible for any radio or TV interference caused by unauthorized modification to this
equipment. It is the responsibilities of the user to correct such interference.
4. If the PDP TV displays a fixed pattern on the screen for extended periods of time, it could make the differences of
brightness and chromaticity between fixed pattern area and other areas. This is because the brightness of fixed
pattern area becomes lower than the other areas due to degrading of the phosphor, but this phenomenon is not
failure.
2
Page 3
Safety Precautions
Safety of operators has been taken into consideration at the design and manufacture phase, but
inappropriate operation may cause electric shock or fire.To prevent the product from being
damaged, the following rules should be observed for the installation, use and maintenance of the
product. Read the following safety instructions before starting the operation.
Symbols
Various symbols are used in this Installation Manual for the safe and proper use of the product as
well as preventing any injury or damage to persons or property. These symbols and their meanings
are described below. Please have a good understanding of these matters before reading the main text
of the manual.
WARNING
CAUTION
Ignoring this indication and improper handling could be the cause of
personal injury such as a serious injury or death.
Ignoring this indication and improper handling could cause injury to a
person or damage to the surrounding household belongings.
Examples of Symbols
This symbol informs that there are contents that demand caution (including warnings).
Concrete details of the caution are written within the diagram.
This symbol indicates a prohibited matter.
Concrete details of the prohibition are written within the diagram.
This symbol indicates something that must be done.
Concrete details of the prohibition are written within the diagram.
WARNING
Be sure to have the Plasma TV installed by your store of purchase following the instructions in this manual.
If installed incorrectly, the Plasma TV could tip over, resulting in injury.
To ensure safety, tighten bolts and screws securely.
Failure to do so could cause the Plasma TV to tip over, resulting in injury.
Do not modify parts.
Doing so could cause the Plasma TV to tip over, resulting in injury.
Do not use damaged parts. Doing so could cause the Plasma TV to tip over, resulting in injury.
If a part should be damaged, contact the store of purchase.
The units are exclusively for use only with the plasma TVs. Do not mount them on other devices.
Doing so could cause the device to tip over, resulting in injury.
Do not install the product on sloping or unstable:
The product may drop or tip over.
3
Page 4
WARNING
Keep the product away from moisture:
Do not expose this appliance to rain or moisture.
If water penetrates into the product, stop the operation; unplug the connector and contact with your
dealer. Continuous use in this case may result in fire or electric shock.
Do not place any objects on the top of the product:
Spilled water or metal objects may cause short circuit, fire or electric shock if they penetrate into the
housing of the product.
Never use a damaged power cord:
Heavy objects, heat or tensile force may damage the power cord and cause fire or electric shock.
Do not change or open the back cover: Removing the back cover of the product may cause fire or
electric shock.
Contact the manufacturer when inspection or adjustment is required.
Do not use the product if any abnormality occurs:
If any smoke or odor becomes apparent, unplug the connector and contact the manufacturer
immediately. Do not try to repair the product by yourself.
Avoid using dropped or damaged appliances:
If the product is dropped and the housing is damaged, the internal components may function
abnormally. Unplug the connector immediately and contact the manufacturer for repair.
Continuous use of the product may cause fire or electric shock.
Do not touch the power cord during lightening:
To avoid electric shock, avoid handling the power cord during electrical storms.
NOTES
Do not obstruct the Plasma TV’s ventilation holes. If the ventilation holes are covered, the heat sill build up
inside, and this could lead to fire. For example, do not install the Plasma TV in narrow spaces where
ventilation is poor, do not place covers over it, etc.
Do not install the Plasma TV neat air conditioner air outlets or in places where vibrations are strong.
Doing so could lead to fire or electric shock.
Do not install the Plasma TV in humid or dusty places or places exposed to soot or vapor (such as in
kitchens, near humidifiers, etc.). Doing so could lead to fire.
When installing the Plasma TV, leave sufficient space around it,
as shown in the diagram. Failure to do so could cause heat to build up inside, leading to fire.
Hold the plasma TV securely when mounting the units on it. Failure to do so could cause the Plasma TV to
fall, resulting in injury.
When installing the Plasma TV on a stand with casters, be sure to block the casters, If the stand should
move, the Plasma TV could fall, resulting in injury.
31mm
50mm
31mm
50mm
50mm
The Plasma TV is heavy, so be sure to install in a stable place and take measures to prevent it from tipping
over and causing injury. The Plasma TV has a high center of gravity. It should be unpacked and moved by a
minimum of two people, holding it at the top and bottom. Failure to do so could cause the Plasma TV to fall,
resulting in injury.
4
Page 5
NOTES
Do not install the product close to smoke or moisture:
Fire or electric shock may be caused when the product is installed close to smoke or moisture.
Do not installed the product in an area with heavy dust or high humidity:
Fire or electric shock may be caused when the product is installed in a place with heavy dust or
high humidity.
Instructions for moving the product:
Ensure that the power connector and any other leads are unplugged before moving the product.
The power cable should be kept away from heat sources:
The heat produced by any heat source may melt the covering of the power cable.
Unplug the connector
Do not touch the connector with wet hands:
Do not block or cover the vents:
Hold the power connector when removing the power cable:
Pulling the power cable itself may damage the wires inside the cable and cause fire or electric
shock.
To avoid risk of electric shock.
Blocking the vents may cause overheating and fire.
Do not install the product in a place with little or no ventilation. Never cover the vents with
towels, blankets or dusters.
NOTES
Avoid dusty or humid rooms and rooms filled with soot or cigarette smoke.
The Plasma TV’s screen could get dirty, resulting in poor picture quality.
Avoid places where the screen is exposed to direct sunlight or strong artificial light.
If surrounding light should shine on the screen, the screen will appear white and be hard to see.
Do not install in places where the temperature is high or low.
Doing so could result in damage.
Additional fall prevention measures.
To protect the Plasma TV from tipping over due to earthquakes or shocks, fasten the two safety fittings to the screw
holes on the rear of the Plasma TV using the two safety fitting mount screws, then pass a commercially available rope
or chain through the fittings and secure the Plasma TV to a wall, pillar or other sturdy object using screws and hooks.
(Do not do this when using the separately sold ceiling mount unit or wall mount unit.) While moving the Plasma TV,
Pay attention to the rope or chain that tags along the back of the TV.
Image Sticking:
The plasma TV illuminates phosphor to display images. The phosphor has a finite illumination life. After extended
periods of illumination, the brightness of the phosphor will be degraded to such ex tend that stationary images would
burn-in that part of the scree n as grayed-out im ages.
Tips to prevent such image sticking are:
* Do not display images having sharp brightness differences or hi-contrast images, such as monochrome characters
and graphic patterns for long.
* Do not leave stationary images appearing for long, but try to refresh them at appropriate interv als of time, or try to
move them using screen saver function.
* Turn down the contrast and brightness control.
Note:
Such “Image Sticking” constitute misuse are NOT COVERED by the manufacturer’s warranty.
5
Page 6

Precautions
1. Read all safety instructions and the User Manual before using the product.
2. The safety instructions and User Manual should be maintained in good condition for future reference.
3. Unplug the power connector before cleaning the product. A wet cloth is sufficient for the cleaning of the
product, never use liquid or spray cleaner for cleaning the product.
4. Always use the accessories recommended by the manufacturer to avoid any risk.
5. When moving the product from an area of low temperature to an area of high temperature, drops of water
may condense on the housing. Do not turn on the TV immediately after moving so as not to cause fire,
electric shock or component damage.
6. Do not install the product on unstable fixtures or stands. The installation of the product should be
conducted in accordance with the instructions and using the support recommended by the manufacturer.
7. Do not remove the earthing pin on the power plug. The product is supplied with a three-pin earthing-type
power plug, this plug will only fit an earthing-type power outlet. This is a safety feature, if you are unable to
insert the plug into the outlet, contact an electrician. Do not defeat the purpose of the earthing plug.
8. Avoid overloading the power cord. Using extension cables or the cor ds of other a ppliances m ay cause fire
or electric shock.
9. If any of the following occurs please contact the retailer:
y The power supply or connector fails.
y Liquid sprays or any object drops into the TV.
y The TV is exposed to rain or other moisture.
y If the product doesn’t function properly, you can only follow the instructions of the user manual to
make adjustment. Any damage caused by improper adjustment would require even longer time for
qualified technician to repair it.
y The TV is dropped or damaged in any way.
y The performance of the TV changes substantially.
10. A distance of at least 1 metre should be maintained between the product and any heat source, i.e. radiator,
heater, oven, amplifier etc.
11. To avoid the risk of electric s hock or component dam age, switch of the power before connecting the PDP t o
other devices, such as VCR, DVD or PC.
12 The power cable must be replaced when using different voltage from that specified in the User Manual.
For more information, contact your dealer.
6
Page 7
For your safety reason
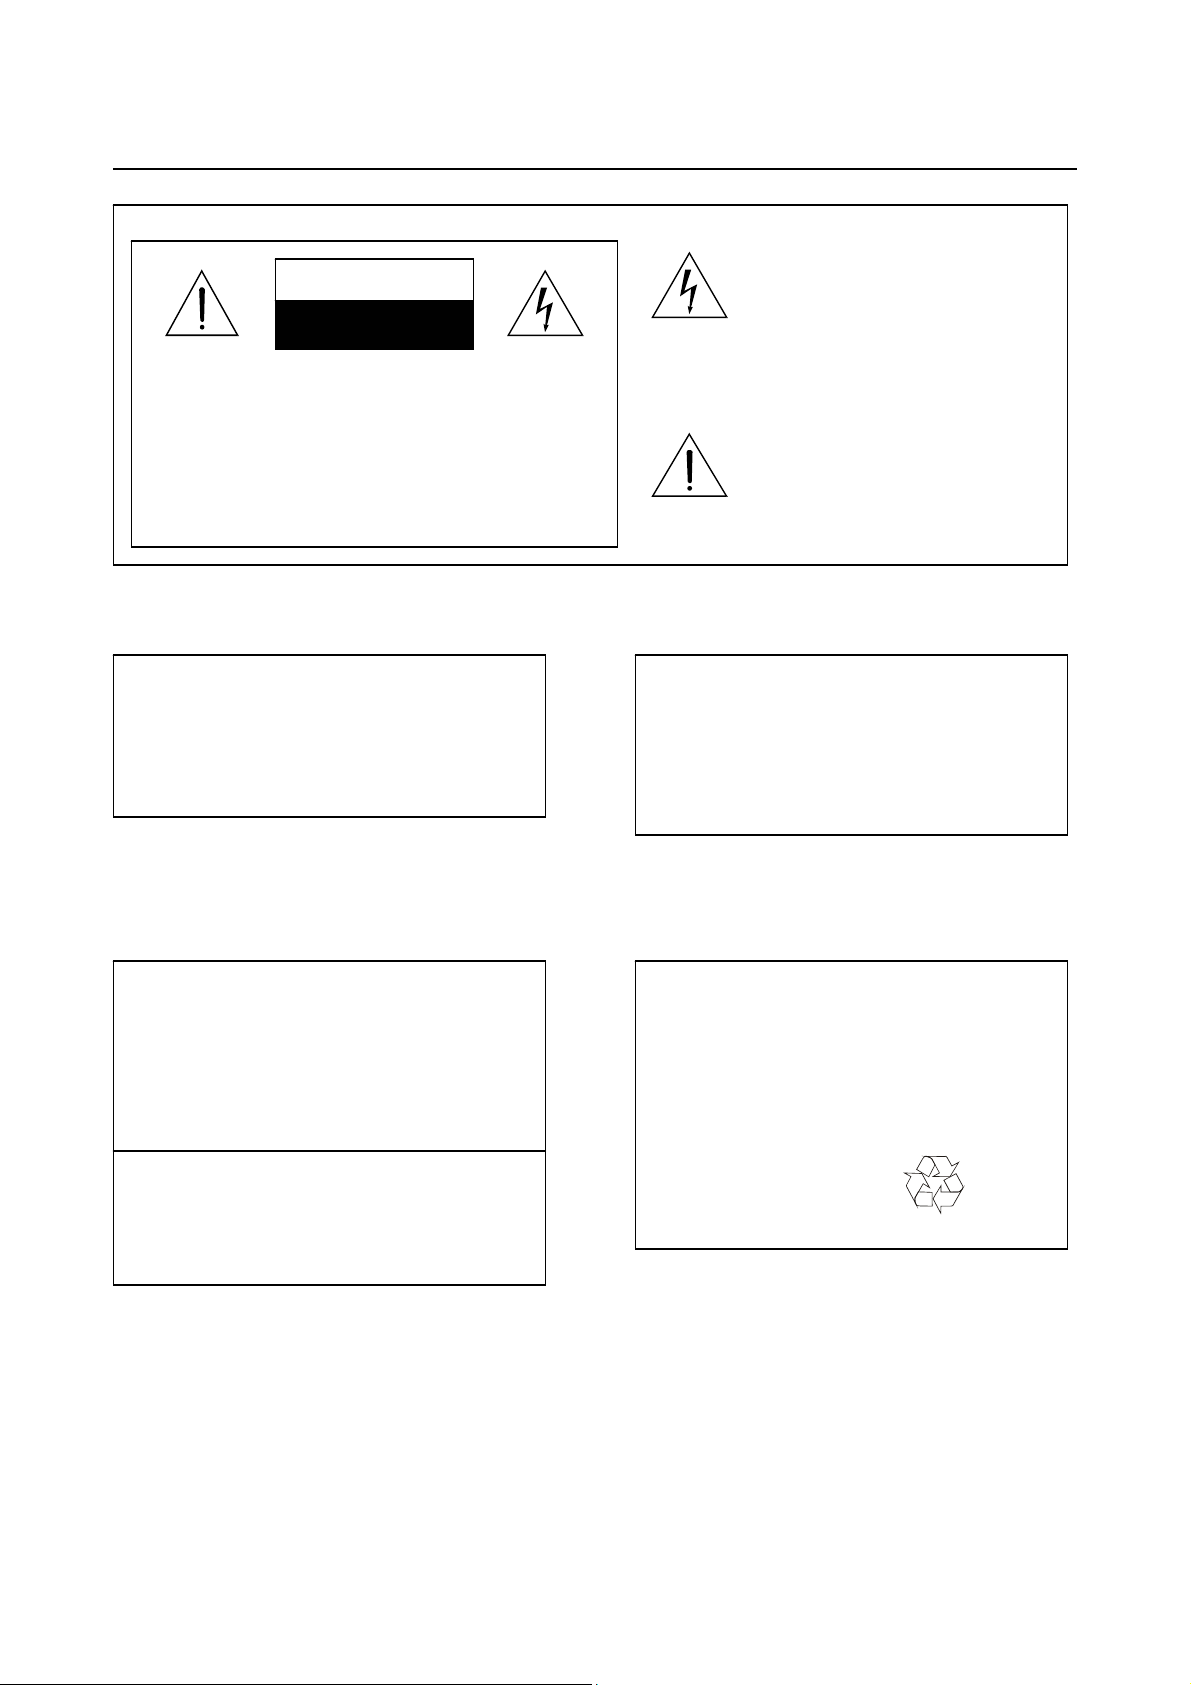
触电危险,勿开后盖!
CAUTION: TO REDUCE THE RISK OF ELECTRIC
SHOCK, DO NOT REMOVE COVER (OR BACK).
NO USER SERVICEABLE PARTS INSIDE, REFER
SERVICING TO QUALIFIED SERVICE
PERSONNEL.
CAUTION
RISK OF ELECTRIC
The lightning flash with arrowhead symbol,
within an equilateral triangle, is intended to
alert the user to the presence of uninsulated
dangerous voltage within the product’s
enclosure that may be of sufficient
magnitude to constitute a risk of electric
shock to persons.
The exclamation point within an equilateral
triangle is intended to alert the user to the
presence of important operating and
maintenance (servicing) instructions in the
literature accompanying the appliance.
Warning
To prevent fire or shock hazard, do not expose this
appliance to rain or moisture.
Power requirements
Power requirements for electrical appliances differ
from area to area. Please ensure that your appliance
meets the power requirements in your area.
Remove the power plug from the AC power outlet
when not using the TV for a long period of time.
Ventilation
There should be at least 10cm space between the top,
rear and sides of the TV.
Make your contribution to protect the
environment
Used batteries with the ISO symbol for recycling as
well as small accumulators (rechargeable batteries),
mini-batteries(cells) and starter batteries into the
garbage can. Please leave them at an appropriate
depot.
7
Page 8

INSTRUCTIONS PERTAINING TO A RISK OF FIRE, ELECTRIC SHOCK,
OR INJURY TO PERSONS.
WARNING-When using electric products, basic precautions should always be followed, including the following:
Read Instructions-All the safety and operating instructions should be read before the appliance is operated.
Retain Instructions-The safety and operating instructions should be retained for future reference.
Heed Warnings-All warnings on the appliance and in the operating instructions should be adhered to.
Follow Instructions-All operating and using instructions should be followed .
Water and Moisture-This appliance should not be used near water - for exam pl e, near a batht ub, washbowl, kitchen
sink, laundry tub, in a wet basement, or near a swimming-pool, and the like.
Carts and Stands-Do not place this appliance on an unstable cart, stand, tripod, bracket, or table. The appliance may
fall, causing serious injury to a child or adult and serious damage to the appliance. Locate the TV on a firm, flat and
stable surface.
An appliance and cart combination should be moved with care. Quick stops, excessive force, and uneven
surfaces may cause the appliance and cart combination to over turn.
PORTABLE CART WARNING
Wall or Ceiling Mounting - Do not recommend mounting this appliance on a wall or from a ceiling.
Ventilation-This appliance should be situated so that its location or position does not interfere with its properventilation. F or
example: the appliance should not be situated on a bed, sofa, rug, or similar surface that may block the ventilation
openings; or placed in a built-in situation, such as a bookcase or cabinet that may impede the flow of air through the
ventilation openings.
Heat-This appliance should be situated away from heat sources such as radiators, heat registers, stoves, or other
appliances (including amplifiers) that produce heat.
Power Sources-This appliance should be connected to a power supply only of the type described in the operating
instructions of as marked on the appliance. If you are not sure of the type of pow er supply to your home, consult your
appliance dealer or local power supply.
Power Cord Protection-Power supply cords should be routed so that they are not likely to be walked on or pinched by
items placed upon or against them, paying particular attention to cords at plugs convenience receptacles, and the point
where they exit from the appliance. Do not subject the mains lead to sharp bends, heat or chemicals. If the mains lead is
damaged, disconnect it from the wall socket and have it checked by authorized service personnel.
Cleaning - Unplug this appliance from the wall outlet before cleaning. Do not use liquid cleaners or aerosol cleaner.
Use a damp cloth for cleaning.
Lightning or Nonuse Periods-For added protection for this appliance during a lightning storm, or when it is left
unattached for long periods of time, unplug it from the wall outlet and disconnect the antenna or cable system. This will
prevent damage to the appliance due to lightning and power-surges.
8
Page 9

Object and Liquid Entry-Never push objects of any kind into this appliance through openings as they may touch
dangerous voltage points do short-out parts that could result in a fire or electric shock. Never spill liquid of any kind on
the appliance.
Damage Requiring Service-Unplug this appliance from the wall outlet and refer servicing to qualified service
personnel under the following conditions:
a. When the power-supply cord or plug is damaged.
b. If liquid has been spilled, or objects have fallen into the appliance.
c. If the appliance has been exposed to rain or water.
d. If the appliance does not operate normally by following the operating instructions. Adjust only those controls that
are covered by the operating instructions as an improper adjustment of other controls may result indamage and will
often require extensive work by a qualified technician to restore the appliance to its normal operation.
e. If the appliance has been dropped or the cabinet has been damaged.
f. When the appliance exhibits a distinct change in performance this indicates a need for service.
Servicing-Do not attempt to service this appliance yourself as opening or removing covers may expose you to
dangerous voltage or other hazards. Refer all servicing to qualified service personnel.
Overloading-Do not overload wall outlets and extension cords as this can result in a risk of fire or electric shock.
Replacement Parts-When replacement parts are required, be sure the service technician has used replacement specified
parts that have the same characteristics as the original part. Unauthorized substitutions may result in fire, electric shock,
or injury to persons.
Safety Check-Upon completion of any service or repair to this appliance, ask the service technician to perform routine
safety checks to determine that the appliance is in safe operating condition.
Other-This product either alone or in combination with an amplifier and headphones or speakers, may be capable of
producing sound levels that could cause permanent hearing loss. Do not operate for a long period of time at a high
volume level or at a level that is uncomfortable. If you experience any hearing loss or ringing in the ears, you should
consult an audiologist. Make sure the TV is at room temperature before switching it on. Do not place anything on top of
the TV. Never touch the power cord’s plug with wet hands. Always pull the power cord out by the plug, never by the
cord. Use a household AC power source only. Never use a DC power source. Avoid using the TV near appliances
generating strong magnetic fields (non shielded stereo speakers for example).
9
Page 10

Introduction
Introduction to the PD4264 Plasma TV
PD4264 is a seamless blend of cutting-edge visual technology and sophisticated d esign. At 42-inches (1 06.7cm), with a
16:9 aspect ratio, the PD4264 certainly makes a big impression. However, at a mere 4.3-inches/110 mm thin, the TV’s
sleek techno-art lines blend in well with your environment. PD4264 crisp, vivid image quality will transform data from
any graphic medium from PCs to DVD players-into art. And weighing only 83.6 lbs/38kg, it actually can be hung
almost anywhere. Has made sure that a host of multimedia resources can be easily connected and displayed as
brilliantly as intended on the PD4264 TV.
The features you’ll enjoy include:
y 42-inch (106.7 cm) screen.
y 16:9 aspect ratio.
y 4.3 inch / 110 mm thin.
y 83.6 lbs/38kg light.
y High-resolution screen: 852×480 pixels.
y 160-degrees of off-axi s vi ewing, horizontally and vertically.
y Flicker-and warp-f ree di spl ay provides excellent image geometry even in screen corners.
y Not affected by magnetic fields, no color drift or edge distortion.
y VGA, SVGA, XGA computer signal compatibility.
y 480p, 720p, 1080i and HDTV signal compatibility.
y PCs, VCRs, Laser Disc and DVD player source compatibility.
y Advance graphic scan conversion automatically converts VGA, SVGA, XGA and SXGA signals to the panel’s
native resolution.
y Advanced DCDi Sampling Progressive Scan method is employed.
y RGB input (1*), DVI input (1*), Video input (2*), S-Video input (2*),YPbPr input (1*), YCbCr input (1*),
RCA Audio input (6*), Audio Jack input (2*), RCA Audio output (1*), External Control input (1*).
y AccuColor control system provides user selectable on-screen color temperature settings.
y New Drive Technology.
y Component video input terminal for DVD, 15.75 kHz (YCbCr), 31.5 kHz (YPbPr).
y Receive terrestrial / cable broadcasting program.
y Digital broadcasting source compatibility.
y OSD menu-driven on screen control system that makes image adjustments a snap.
y Languages ( English ).
y Adopt WOW transact technology that has acquired patent of psychological acoustics audio frequency, which has
greatly improved sound effects and the tone of digital audio and even provided more exhilarating 3D effect.
y Adopt BBE technology to adequately compensate scope and phase of signals on different frequencies, thus making
sound more actual, clear, and smooth.
y NICAM function: could receive stereo and dual-language programs except digital information; it has the advantage
of wider dynamic scope, better audio quality, high SNR, low cluster sound.
Contents of the Package
Plasma TV.
Power cord.
D-Sub cable (Mini D-Sub 15-pin to Mini D-Sub 15-pin connector).
Remote control with Batteries(Size AAA).
User’s manual.
Video cable (RCA pin jack to RCA pin jack connector × 3 ).
10
Page 11
Part Names and Function
1. POWER BUTTON
2. POWER/Standby Indicator
3. REMOTE CONTROL SENSOR Window
4. INPUT BUTTON
5. MENU BUTTON
6. SETTING BUTTON
7. ADJ. + , ADJ. - / VOL + , VOL - BUTTONS
8. CH+, CH- BUTTONS
Front V iew
1. POWER
Turns the TV’s power on and off.
2. POWER/Standby Indicator
When the power is on …………………. Lights blue
When the power is standby ….……… Lights red
3. REMOTE SENSOR Windows
Receives the signals from the remote control.
4. INPUT Select
Switches the input, in the following order.
Video 1 Æ S-video 1 Æ YPbPr Æ RGB Æ DVI
TV Å YCbCr Å S-video 2 Å V i deo 2
5. MENU
Sets the on-Screen Menu (OSM) mode and displays the main menu.
6. SETTING
․ In the on screen menu mode:
Execute the selected highlight item or level setting
7. ADJ. + , ADJ. - / VOL + , VOL -
․ In the on screen menu mode:
A) Highlight the submenu or item you wish to enter
B) Adjust the level or change the setting of the selected item
․ Not in the on screen menu mode:
Adjustment volume up /down
8. CH
+, CH-
Increase / decrease TV channel number.
11
Page 12
T
Rear V iew / Terminal Board
S- VI DEO1/ S- VI DEO2, S- AUDI O1/ S- AUDI O2 I NPUT
VI DEO1/ AUDI O1 , VI DEO2/ AUDI O2 I NPUT
MAIN POWER SWITCH
Turn on / off the AC power.
AC IN
Connect the included power cord here.
RS232C
This terminal is used when power ON/OFF,
input selection and AUDIO MUTE and
other controls are operated externally (by external control).
See also page 31 for external control.
DVI (29pin) INPUT
Inputs a digital RGB signal (TMDS).
D-sub(15Pin)INPUT
Inputs the analog RGB signal of personal computer, etc.
EXT SPEAKER L and R OUTPUT
Connect speakers here. Maintain the correct polarity.
VIDEO1, VIDEO2
Connect VCR’s, DVD’s or Laser Discs, etc. here.
AUDIO1, AUDIO2
These are Audio input terminals.
AUDIO OUTPUT
Output the audio to power amplifier.
S-VIDEO1, S-VIDEO2
Connect VCR’s, DVD’s or Laser Discs, etc. here.
S-AUDIO1, S-AUDIO2
These are Audio input terminals.
COMPONENT INPUT
YPbPr Video signal : Connect DVD’s High Definitions or Laser Discs, etc. here.
YCbCr Video signal : Connect VCR’s DVD’s or Laser Discs, etc. here.
YPbPr Audio signal : These are Audio input terminals.
YCbCr Audio signal : These are Audio input terminals.
TV INPUT
Receive terrestrial / cable broadcasting program.
EXT SPEAKER L and R OUTPUT
CO MPONENT
CO MPONENT
YCbCr,YPbPr VIDEO INPUT
YCbCr,YPbPr AUDIO INPUT
AUDIO OU T P UT
TV I NP UT
21
Video
Video
Right
Inputs
Left
Audio
R
L
Output
S-Video
S-Video
Right
Inputs
Left
YPP1: 480P/7 20P/1080i
BR
Y
R
YPP2: 480i
B
P
B
Compone nt
Video
P
R
Inputs
Right
Left
21
TV ANTENNA
CABLE I N
AC INDVI-D
MA I N P OWER SWITCH
AC IN
RS-232C
AUDI O for DVI-D
DVI(29Pi n)I NPUT
D-Sub(15Pi n)I NPU
AUDI O for VGA
12
Page 13

m
Remote Control
POWER
Switches power ON/OFF.
Z
(This does not operate when
POWER/STANDBY indicator of the main
unit is off.)
VIDEO
Press this button to select video source on
main screen.
VIDEO1 Æ S-VIDEO1 Æ VIDEO2 Æ
S-VIDEO2Æ VIDEO1
COMP
Press this button to select component video
source on MAIN screen.
YPbPr Æ YCbCr
0 ~ 9 –100 numeral keypad
Direct input TV chanel number.
Example: select channel 20, directly key in
“2”, “0” select channel 8, you can directly
key in “0”、“8”,or only key in “8” you must
be wait for 5 sec.
Select channel 104, directly key in”100”, “0”,
“4”
Æ YPbPr
A, B
Preset two channel hot key.
PIP
Normal ÆPIPÆ POP 2 (LEFT &
RIGHT) ÆNORMAL
PIP I/P
Press this button to select video source on
second screen.
MENU
DISPLAY OSD MENU
ADJ+, ADJ-
Highlight the submenu or item you wish to
enter
Adjust the level or change the setting of the
selected ite
CCD、 V-CHIP
Only for US NTSC TV system.
FREEZE
freeze on Æ freeze off Æ freeze on
MUTE
MUTE ON Æ MUTE OFF Æ MUTE ON
GRAPHIC
Inputs RGB signal of personal computer,
etc.
RGB Æ DVI
TV
Switch to TV channel
CH+, CH-
Increase / decrease TV channel number.
CHRTN
At TV mode to exchange channel between
currently channel and before channel
At channel scan press “CHRTN” KEY to
stop channel scan.
VOL +, VOL –
Volume up / down.
NICAM
Select second audio program. (Only
broadcast system has second audio program).
WIDE
4:3 Æ 16:9 Æ ZOOM 1 (VIDEO ONLY) Æ
ZOOM 2 (VIDEO ONLY) Æ 4:3
ZOOM 1 / ZOOM 2 Only work on composite
video ,s-video and component video, RGB &
DVI.
SWAP (PIP & POP mode only)
Swap the main screen&sub-screen in PIP or
POP mode
ENTER
Execute the selected highlight item or
level setting
Æ RGB
13
SLEEP
NO TURN OFF Æ 30 MIN OFF Æ 60 MIN
OFF Æ 90 MIN OFF Æ 120 MIN OFF Æ
NO TURN OFF
Reserve key
TT, HOLD, SUBTITLE ,REVEAL,
R, G, Y, C, EXIT, INDEX, MIXER,
DISPLAY
* For teletext control only
Page 14
Battery Installation and Replacement
Insert the battery, making sure to set them in with the proper polarity.
1. Press and open the cover. 2. Align the batteries according
3. Replace the cover.
to the (+) and (-) indication
inside the case.
N
E
P
O
N
E
P
O
N
E
P
O
BATTERY CAUTIONS
* Use only the size and type of batteries specified.
* Be sure to follow the correct polarity when installing the batteries as indicated in the battery compartment.
Reversed batteries may cause damage to the device.
* Do not mix different types of batteries together (e.g. alkaline and carbon-zinc) or old batteries with fresh ones.
* If the device in not to be used for a long period of time, it is required to remove the batteries to prevent damage or
injury from possible battery leakage.
* Do not try to recharge batteries which is not intended to be recharged; they can overheat and rupture. (follow
battery manufacturer’s directions)
* Weak batteries can leak and severely damage the unit.
* Always remove batteries as soon as they become weak.
* The batteries of remote control may last approximately one year depending on how much the remote control is
used.
* For the best performance it is recommended the batteries of remote control be replaced on a yearly basis, or when
remote control operation becomes erratic.
* Do not take apart the batteries, heat them, or throw them into a fire.
Operating Range
* Use the remote control within a distance of about 5m/16.4ft. from the front of the TV’s remote control sensor and at
horizontal and vertical angles of up to approximately 30°.
* The remote control operation may not function if the TV’s remote control sensor is exposed to direct sunlight or
strong artificial light, or if there is an obstacle between the sensor and the remote control.
5m
O
30
E
T
U
M
V
T
C
I
H
P
H
A
C
R
G
P
R
3
M
E
O
L
W
C
O
O
V
6
P
E
D
I
O
2
E
W
N
9
T
D
I
P
R
V
A
H
R
5
C
W
E
S
M
T
A
N
1
C
I
E
8
N
4
P
/
I
P
J
I
B
7
D
P
A
0
P
E
E
L
L
A
A
S
E
P
I
V
P
E
E
R
U
Z
N
E
C
Y
E
E
E
A
L
M
L
R
T
I
F
P
S
T
I
B
D
P
U
I
J
S
Y
H
D
R
C
A
-
E
D
V
X
L
I
O
M
H
G
D
C
X
C
E
D
T
T
N
I
R
T
I
X
E
Handling the remote control
y Do not drop or mishandle the remote control.
y Do not get the remote control wet. If the remote control
gets wet, wipe it dry immediately.
y Avoid heat and humidity.
14
Page 15

Installation
Connections with Equipment that has a Digital Interface
Connections can be made with equipment that is equipped with a digital interface compliant with the DVI (Digital
Visual Inte rface) standard.
* Use a DVI 29 -pin signal cable when making connections to the DVI connector of the main unit.
Note that the DVI terminal does not support analog RGB input source.
Note:
1. Input TMDS signals conforming to DVI standards. The TMDS input corresponds to 1 link.
2. To maintain display quality, use a cable with quality prescribed by DVI standards that is within 5 meters in
length.
15
Page 16

Connecting Your VCR or Laser Disc Player
Use common RCA cables to connect your VCR or laser disc player to your plasma TV. To make these connections,
simply:
1. Turn off the power to your plasma TV and VCR or laser disc player.
2. Connect one end of your RCA cable to the video output connector on the back of your VCR or laser disc player,
connect the other end to the Video input on yo ur plasma TV.
Use standard RCA audio patch cords to connect the audio from your VCR or laser disc player to your plasma TV
(if your VCR or laser disc player has this capability). Be careful to keep your right and left channel connections
correct for stereo sound.
3. Or use a standard S-Video cable to connect the S-Video Output of the VCR or CD player to the S-Video Input of
the Plasma Multimedia TV.
Use a standard audio cable to connect the S-signal Audio Output (if applicable) of the VCR or CD player to the
S-signal Audio Input of the Plasma Multimedia TV. Make sure the Right and Left channels of the stereo signal is
connected correctly
4. Turn on the plasma TV and the VCR or laser disc player.
Note: Refer to your VCR or laser disc player owner’s manual for more information about your equipment’s
video output requirements.
.
16
Page 17

A
P
Connecting TV system
Use 75Ω standard coaxial cable to your plasma TV. To receive TV program.
For reduce noise of the RF signal level then we suggest that custom uses shielding coaxial cable to get good quality of
signal. To make these connections, simply:
1. Turn off the power to your plasma TV.
2. Connect one end of your coaxial cable to the RF input on your plasma TV.
3. Turn on the plasma TV.
4. Refer to “TV Setup” on page 30. You will be able view Cable or Air TV programs after selecting the channel.
21
Video
Video
Right
Input s
Left
Audio
L
R
Output
S-Vi deo
S-Video
Right
Input s
Left
YPP1: 480P/720P/1080i
BR
Y
YPP2: 480i
B
R
P
B
Component
P
Video
R
Input s
Right
Left
21
TV ANTENNA
CABLE IN
C INDVI-D
TV Antenna
Cable TV
17
ow er
Power
Page 18

C
Connecting Your DVD Player
You can connect your plasma TV to a DVD player. To do so, simply:
1. Turn off the power to your plasma TV and DVD player.
2. Use a standard component video cable to connect the Video Output Connector of the DVD player to the Y、Cb、Cr
or Y、Pb、Pr Video Input terminals of the Plasma Multimedia TV.
3. Use a standard Audio cable to connect the Audio Output Connector of the DVD player to the Audio-input terminals
of the Plasma Multimedia TV relating to the Y、Cb、Cr or Y、Pb、Pr Video Input.
4. Turn on the plasma TV and the DVD player.
Amplifi er
21
Video
Video
Right
Inputs
Left
Audio
R
L
Output
S-Video
S-Video
Right
Inputs
Left
YPP1: 480P/720P/1080i
BR
Y
YPP2: 480i
B
R
P
B
Component
Video
P
R
Inputs
Right
Left
21
TV ANTENNA
CABLE IN
AC INDVI-D
Speaker
DVD/VCR/LASER Disc
Settop Box
P
Power
RS-232C/DVI/D-S ub
Audio Jack
18
Page 19

Attachable Speaker Connections
Attachable speakers (Option) may be connected to the plasma TV to reproduce sound from VIDEO, DVD or RGB
signal sources.
Attachable speakers may be connected directly to the SPEAKERS terminals or indirectly by connecting a stereo syste m
amplifier to the audio output.
CAUTION: Unplug the plasma TV and all connected components before connecting external speakers. Use
only speakers with 8-ohm impedance and a power input rating of 10 watts o r more.
To connect attachable speakers directly to the plasma TV:
1. Strip the ends of the speaker wires.
2. Press down the tabs below the SPEAKERS terminals, insert the speaker wire and release the tab to secure the
speaker sire connection:
(a) Connect the right speaker (located at right side of the TV when viewed from the front) positive (+) wire to
RIGHT +.
(b) Connect the right speaker negative (-) wire to RIGHT -.
(c) Connect the left speaker negative (-) wire to LEFT -.
(d) Connect the left speaker positive (+) wire to LEFT+.
21
Video
Video
Right
Inputs
Left
Audio
R
L
Output
S-Video
S-Video
Right
Inputs
Left
YPP1: 480P/720P/1080i
BR
Y
YPP2: 480i
B
R
P
B
Component
P
Video
R
Inputs
Right
Left
21
TV ANTENNA
CABLE IN
AC INDVI-D
19
Page 20

Pin Assignments and signal for D- sub 15 pin RGB (Analog)
Pin No. Signal (Analog)
1 Red
2 Green or sync-on-green
3 Blue
4 No Connection
5 Ground
6 Red ground
7 Green ground
8 Blue ground
9 Pin9 : +5VDC
10 Sync signal ground
11 No Connection
12 Bi-directional DATA (SDA)
13 Horizontal sync or Composite sync
14 Vertical sync
15 Data clock
Pin Configuration and Signal of the DVI Connector
Pin No. Signal (Digital)
1 T.M.D.S Data 2 -
2 T.M.D.S Data 2 +
3 T.M.D.S Data 2 Shield
4 No Connection
5 No Connection
6 DDC Clock
7 DDC Data
8 No Connection
9 T.M.D.S Data 1 10 T.M.D.S Data 1 +
11 T.M.D.S Data 1 Shield
12 No Connection
13 No Connection
14 +5V Power
15 Ground
16 Hot Plug Detect
17 T.M.D.S Data 0 18 T.M.D.S Data 0 +
19 T.M.D.S Data 0 Shield
20 No Connection
21 No Connection
22 T.M.D.S Clock Shield
23 T.M.D.S Clock +
24 T.M.D.S Clock 25 No Connection
26 No Connection
27 No Connection
28 No Connection
29 No Connection
The unit is equipped with a type of connector
commonly used for both analog and digital.
(Functionally, this cannot be used for an analog
input.)
(TMDS can be used for one link only.)
20
Page 21

Basic Operations
POWER
To turn the unit ON and OFF:
1. Plug the power cord into an active AC power outlet and turn the main power switch on.
The pilot light of a Plasma Multimedia TV will flash red when the power supply has not reached a stable condition.
It lights constantly in red when the stable condition is reached.
Note: For the purpose of protecting the power supply, an interval of at least 5 seconds must be mainta ined b efore
turning ON the AC power after shutting it OFF. Shutting OFF the mains from a Standby Mode is strongly
recommended. A re-open of the unit shall be activated at least 3 seconds after the power indicator goes off.
2. Press the POWER button (on the remote control or the unit) to turn on the unit.
The TV’s POWER/STANDBY indicator will flash red LED duration data was written until data ready to light up
blue LED.
3. Press the POWER button (on the remote control or the unit) ,the TV’s POWER/STANDBY indicator will
flash red LED until finishing store up data then to light up red LED and the standby mode is set,then turn the main
power switch off.
VOLUME
To adjust the volume:
1. Press and hold the VOL + button (on the remote control or the unit) to increase to the desired level.
2. Press and hold the VOL - button (on the remote control or the unit) to decrease to the desired level.
MUTE
To cancel the sound:
Press the MUTE button on the remote control to cancel the sound; press again to restore.
SLEEP
To set the off timer:
The off timer can be set to turn the power off after 030, 060, 090 or 120 minutes.
1. Press the SLEEP button to start the timer at 30 minutes.
2. Press the SLEEP button to the desired time.
3. The timer start when the menu off.
→ 030 → 060 → 090 → 120 → 000 →
To cancel the off timer:
Press the SLEEP button until on screen display “000” to turn off the “SLEEP” function.
If you turn off the Plasma TV after the timer is set, the timer setting will be erased, please readjust the setting.
21
Page 22

WIDE Operations
Watching with a wide screen
With this function, you can select one of four screen sizes.
When watching videos or digital video discs
1. Press the WIDE button on the remote control.
2. Within 3 seconds…
Press the WIDE button again. The screen size switches as follows:
4:3 → 16:9 →ZOOM 1 → ZOOM 2
4 : 3
16 : 9
ZOOM 1
ZOOM 2
Information
Supported resolution
See page 31 for details on the display output of the various VESA signal standards supported by the TV.
When 852 (848) dot × 480 line wide VGA* SIGNALS WITH A VERTICAL FREQUENCY OF 60 Hz and
horizontal frequency of 31.7 (31.0) kHz are in-put
Select an appropriate setting for RGB SELECT mode referring to the “Table of Signals Supported” on page 31.
* “IBM PC/AT” and “VGA” are registered trademarks of IBM, Inc. of the United States.
The normal size screen is displayed.
* The picture has the same size as video pictures with a
4:3 aspect ratio.
This image is expanded in the horizontal direction.
* Images compressed in the horizontal direction (“squeezed
images”) are expanded in the horizontal direction and
displayed on the entire screen. (Normal images are
expanded in the horizontal direction.)
The picture is expanded in the horizontal and vertical
direction, maintaining the original proportions.
* Use this for theater size (wide) movies, etc.
The picture is expanded in the horizontal and vertical
directions at different ratios
22
Page 23

OSD (On Screen Display) Controls
BRIGHTNESS 10
CONTRAST 16
SHARPNESS +00
COLOR 16
TINT +00
COLOR TEMPERATURE NORMAL
EXIT MENU
: SELECT MAIN MENU :OK
BRIGHTNESS 10
CONTRAST 16
SHARPNESS +00
COLOR 16
TINT +00
COLOR TEMPERATURE NORMAL
EXIT MENU
SELECT ITEM :OK
BRIGHTNESS 10
CONTRAST 16
SHARPNESS +00
COLOR 16
TINT +00
COLOR TEMPERATURE NORMAL
EXIT MENU
: ADJUSTMENT :OK
PICTURE
PICTURE
PICTURE
Menu Operations
Your PDP screen has an easy and convenient menu operation
system. It helps you to use each PDP function quickly.
1. After powering on PDP, press the MENU button on the
remote control. The menu operation system will display on
the screen.
2. Press the ADJ+/ADJ- button on the remote control to display,
change, or use the selected menu. Press the ENTER button to
enter each item on the menu (now the item glows green); if
you need to change the selected item, press the ENTER
button again to make changes (now the item glows red). After
the change is made, press the ENTER button to exit the menu
setup. If no operation is detected, the on screen menu will
disappear after 20 seconds. You may also exit menu operation
interface quickly by pressing the MENU button on the
remote control.
23
Page 24

PICTURE
BRIGHTNESS 10
CONTRAST 16
SHARPNESS +00
COLOR 16
TINT +00
COLOR TEMPERATURE NORMAL
EXIT MENU
: SELECT MAIN MENU :OK
BRIGHTNESS 10
CONTRAST 16
SHARPNESS +00
COLOR 16
TINT +00
COLOR TEMPERATURE NORMAL
EXIT MENU
PICTURE
SELECT ITEM :OK
BRIGHTNESS 10
CONTRAST 16
SHARPNESS +00
COLOR 16
TINT +00
COLOR TEMPERATURE NORMAL
EXIT MENU
PICTURE
: ADJUSTMENT :OK
PICTURE
BRIGHTNESS 10
CONTRAST 16
SHARPNESS +00
COLOR 16
TINT +00
COLOR TEMPERATURE NORMAL
EXIT MENU
: ADJUSTMENT :OK
Picture Quality Adjustment
Your PDP has the following setup options which allow you to
improve the picture quality.
Brightness, contrast, sharpness, color, tint (only for NTSC), and
color temperature.
When the Picture is selected, you can adjust the following items:
1. Press MENU button to display the menu operation interface
on the screen.
2. Press ADJ+/ADJ- button to select Picture menu. Then press
ENTER again to enter Picture submenu (selected item glows
green).
3. Press ADJ+/ADJ- button to select the item you need then
press ENTER button again to enter the selected
adjustment submenu (Now the item glows red).
4. Adjustment items… Press ADJ+/ADJ- …
Brightness Increase or decrease
Contrast
Sharpness
Color
Tint
Color Temperature Select desired color temperature
(Normal, cold, warm)
5. If you are satisfied with your setup, press ENTER button
again to complete menu setup (selected adjustment item
glows green again).
BRIGHTNESS 10
CONTRAST 16
SHARPNESS +00
COLOR 16
TINT +00
COLOR TEMPERATURE NORMAL
EXIT MENU
PICTURE
SELECT ITEM :OK
24
Page 25

K
K
K
K
DISPLAY
POSITION
SIZE
PICTURE MODE SINGLE
PIP SETUP
CLOCK +000
FOCUS 16
AUTO FOCUS
EXIT MENU
: SELECT MAIN MENU :O
DISPLAY
POSITION
SIZE
PICTURE MODE SINGLE
PIP SETUP
CLOCK +000
FOCUS 16
AUTO FOCUS
EXIT MENU
SELECT ITEM :O
POSITION
SIZE
PICTURE MODE SINGLE
PIP SETUP
CLOCK +000
FOCUS 16
AUTO FOCUS
EXIT MENU
: ADJUSTMENT :O
DISPLAY
DISPLAY
POSITION
SIZE
PICTURE MODE SINGLE
PIP SETUP
CLOCK +000
FOCUS 16
AUTO FOCUS
EXIT MENU
: ADJUSTMENT :O
Picture-in-Picture
You can select Picture-in-Picture (PIP) display mode to display
two different pictures on the screen.
Note: TV and audio pi ct ures cannot be displayed at the same time
under PIP mode.
When the component input is YCBCR, if the primary
picture input is TV or VIDEO, then only YCBCR and
S-VIDEO can be displayed as the secondary picture.
When the component input is YPBPR, if the primary
picture input is TV or VIDEO, then only S-VIDEO can be
displayed as the secondary picture.
1. Press MENU button to display the menu operation interface
on the screen.
2. Press ADJ+/ADJ- button to select Display menu and then
press ENTER button.
3. Press ADJ+/ADJ- button to select the Display Mode under
Display menu, and then press the ENTER button (now the
Display Mode item glows red).
4. Press ADJ+/ADJ- button again to select PIP, and then press
the ENTER button. PIP mode is displayed on the screen.
You can also turn on PIP function by using remote control.
Meanwhile, you can use the buttons on the remote control to
operate more functions.
Button name Function Descriptions
1. PIP Turn on/off PIP/POP functions.
2. VIDEO Select the display mode of the
primary picture.
3. PIP I/P Select the display mode of the
secondary picture.
4. SWAP Switch between the primary and
secondary pictures.
25
Page 26

SOUND
TREBLE 08
BASS 08
BALANCE +00 +00
SPEAKER INTERNAL
SOUND MODE NORMAL
EXIT MENU
: SELECT MAIN MENU :OK
SOUND
TREBLE 08
BASS 08
BALANCE +00 +00
SPEAKER INTERNAL
SOUND MODE NORMAL
EXIT MENU
SELECT ITEM :OK
TREBLE 08
BASS 08
BALANCE +00 +00
SPEAKER INTERNAL
SOUND MODE NORMAL
EXIT MENU
: ADJUSTMENT :OK
SOUND
TREBLE 08
BASS 08
BALANCE +00 +00
SPEAKER INTERNAL
SOUND MODE NORMAL
EXIT MENU
SOUND
SELECT ITEM :OK
Sound Setup
¾ Your PDP has an external/internal speaker selecting
¾ Your PDP has three sets of audio input options which
¾ You can adju st the audio setup based on your
1. Press MENU button to display the menu operation interface
on the screen.
2. Press ADJ+/ADJ- button to select the Audio menu and then
press ENTER button.
3. Press ADJ +/ADJ - butto n to select the item you want to adjust
and then press the ENTER button to enter the selected
adjustment item (now the item glows red).
4. Adjustment Item Press ADJ+/ADJ- …
Treble Increase or decrease
Bass Increase or decrease
Balance Increase or decrease
Speaker Internal or external
Sound Mode Select the sound mode desired.
(Normal, 3D Stereo, WOW, BBE)
5. If you are satisfied with the setup, press the ENTER button
again to complete the menu setup (selected adjustment item
glows green again).
.
26
function. You can select different functions based on
your preferences.
allow you to setup the audio output method as you wish
and brings you more enjoyment.
preferences.
Treble, bass, balance, sound mode.
Your PDP was manufactured upon the certification and
authorization of BBE Company.
Page 27

K
K
K
K
FUNCTION
OSD DISPLAY ON
AUTO OFF ON
WHITE SCREEN OFF
RESET
EXIT MENU
: SELECT MAIN MENU :O
OSD DISPLAY ON
AUTO OFF ON
WHITE SCREEN OFF
RESET
EXIT MENU
FUNCTION
SELECT ITEM :O
FUNCTION
OSD DISPLAY ON
AUTO OFF ON
WHITE SCREEN OFF
RESET
EXIT MENU
: ADJUSTMENT :O
FUNCTION
OSD DISPLAY ON
AUTO OFF ON
WHITE SCREEN OFF
RESET
EXIT MENU
: ADJUSTMENT :O
Function Setup
Your PDP adds some special functions in the function setup
menu to provide you with more benefits.
OSD
By turning on this function, you can see the current screen display
mode while watching and changing programs.
Auto Off
By turning on this function, if there is no signal input detected for
a period of time, PDP will be turned off automatically to save
energy.
White Screen
This function is usually turned off under normal situations. It is
used as a screen evaluation tool while repairing PDP.
Reset
Reset to factory’s default settings.
1. Press the MENU button to display the menu operation
interface on the screen.
2. Press ADJ+/ADJ- button to select Function menu and then
press the ENTER button.
3. Press ADJ+/ADJ- button to select the item you want to adjust
and then press the ENTER button to enter the adjustment
item selected (now the item glows red).
4. Adjustment Item… Press ADJ+/ADJ-..
OSD On or off
Auto Off On or off
White Screen On or off
Reset Press ENTER button to reset
27
Page 28

CONFIGURATION
LANGUAGE ENGLISH
RGB SOURCE NORMAL
DB15 SOURCE GRAPHICS
COLOR SYSTEM AUTO
EXIT MENU
: SELECT MAIN MENU :OK
CONFIGURATION
LANGUAGE ENGLISH
RGB SOURCE NORMAL
DB15 SOURCE GRAPHICS
COLOR SYSTEM AUTO
EXIT MENU
SELECT ITEM :OK
CONFIGURATION
LANGUAGE ENGLISH
RGB SOURCE NORMAL
DB15 SOURCE GRAPHICS
COLOR SYSTEM AUTO
EXIT MENU
: ADJUSTMENT :OK
Language Selection
When you use PDP for the first time, please select the
desired OSD language.
1. Press the MENU button on the remote control to display the
menu operation interface on the screen.
2. Press the ADJ+/ADJ- button to select the Configuration menu
and then press ENTER button.
3. Press the ADJ +/ ADJ- button to select the Language option
under the Configuration menu and then press the ENTER
button (now the Language option glows red).
4. Press the ADJ+/ADJ- button again to select the language you
desire. Then press the ENTER button to exit the Language
submenu.
28
Page 29

INPUT 1
CH 10
PAL
INPUT 2
NONE
: SELECT MAIN MENU :OK
INFORMATION
Information Inquiry
You can obtain the information of the current PDP
input signal by using this function.
1. Press the MENU button to display the menu operation
interface on the screen.
2. Press the ADJ+/ADJ- button to select the Information menu.
The signal input information of the primary and secondary
pictures will be displayed on the screen.
You can also use the DISPLAY button on the remote control to
display the current signal information of the current screen.
29
Page 30

TV SETUP
USER CH 10
SYSTEM SETUP
CH MAPPING
CH FINE TUNE +00
AUTO FINE TUNE OFF
NICAM MONO
EXIT MENU
: SELECT MAIN MENU :OK
USER CH 2
SYSTEM SETUP
CH MAPING
CH FINE TUNE +00
AUTO FINE TUNE OFF
NICAM MONO
EXIT MENU
SELECT ITEM :OK
TV SETUP
COLOR SYSTEM PAL
SOUND SYSTEM DK
FREQUENCY TYPE TV
EXIT MENU
SELECT ITEM :OK
SYSTEM SETUP
USER CH 2
SYSTEM SETUP
CH MAPING
CH FINE TUNE +00
AUTO FINE TUNE OFF
NICAM MONO
EXIT MENU
SELECT ITEM :OK
TV SETUP
TV Setup Operations
You can use your PDP in many different countries. Each country
has its own TV broadcast standard. You can select the TV system
you need in the TV Setting menu based on the TV standard of
your countr
User CH
The user can setup the TV channels to a mode that he/she is more
familiar with.
CH Fine Tune/Auto Fine Tune
In some areas with weaker TV signals, you can use this function
to modify and correct the signal to obtain a better picture on the
screen.
1. Press the MENU button to display the menu operation
2. Press the ADJ+/ADJ- button to select the TV Setup menu and
3. Press the ADJ+/ADJ- button to select the item you wish to
4. Adjustment Item… Press ADJ+/ADJ- …
5. If you are satisfied with the setup, press the ENTER button
When you use the PDP’s TV function the first time, we
recommend channel scanning after selecting the required TV
system. This lets you to watch more and higher quality TV
programs.
If the signal is weaker in the area you live, we recommend you
use the auto channel scanning.
1. Press the MENU button to display the menu operation
2. Press the ADJ+/ADJ- button to select the TV Setup menu and
3. Press the ADJ+/ADJ- button to select CH Mapping option
4. Press the ADJ+/ADJ- button again to select the Auto Fine
5. Press the ADJ+/ADJ- button to select “on” and then press the
y.
interface on the screen.
then press ENTER button.
adjust and then press the ENTER button to enter the selected
item (now the item glows red).
System Setup Select the item to adjust
(The adjusting method is the same as the menu operation.)
CH Fine Tune Increase or decrease
Auto Fine Tune On or off
Nicam Automatically recognize the format
again to complete the setup (the selected adjustment item
glows green again).
interface on the screen.
then press ENTER button.
and then press ENTER button to enter the CH Mapping
adjustment item.
Tune option and then press ENTER button. This item glows
red.
ENTER button. The system turns on the channel scanning
function.
30
Page 31

RS232C Control
Only use in factory.
Table of Signals Supported
Supported resolution
y When the screen mode is NORMAL, each signal is converted to a 640 dots × 480 lines signal.
y When the screen mode is FULL, each signal is converted to a 852 dots × 480 lines signal.
Computer input signals supported by this system
Dots × Lines Vertical Horizontal Sync Polarity Presence Screen Mode
Frequency Frequency Horizontal Vertical Horizontal Vertical Normal FULL
(Hz) (kHz) (4:3) (16:9)
640 × 400 70.1 31.5 NEG NEG YES YES YES YES
640 × 480 59.9 31.5 NEG NEG YES YES YES YES
72.8 37.9 NEG NEG YES YES YES YES
75.0 37.5 NEG NEG YES YES YES YES
85.0 43.3 NEG NEG YES YES YES YES
848 × 480 60.0 31.0 POS POS YES YES YES YES
852 × 480 60.0 31.7 NEG NEG YES YES YES YES
800 × 600 56.3 35.2 POS POS YES YES YES YES
60.3 37.9 POS POS YES YES YES YES
72.2 48.1 POS POS YES YES YES YES
75.0 46.9 POS POS YES YES YES YES
85.1 53.7 POS POS YES YES YES YES
1024 × 768 60.0 48.4 NEG NEG YES YES YES YES
70.1 56.5 NEG NEG YES YES YES YES
85.0 68.7 POS POS YES YES YES YES
* Recommended display card setup format.
* DVI connector does not support HDCP agreement.
Table of HDTV resolution supported.
H(KHz) V(Hz) Dot
clock
720*480 480p 31.54 60.08 27.00
1280*720 720p 45.00 60.00 74.25
1920*1080 1080i 33.75 30.00 74.25
31
Page 32

Troubleshooting
If the picture quality is poor or there is some other problem, check the adjustments, operations, etc., before requesting
service.
Symptom Checks Remedy
Picture is disturbed.
Sound is noisy.
Remote control operates erroneously.
The remote control does not work. y Are the remote control’s batteries worn out? y Replace both batteries with new ones.
TV’s power does not turn on when
the remote control’s power
Button is pressed. y Are all the TV’s indicators off? y Press the power button on the TV to turn
y Are the remote control’s batteries worn out? y Replace both batteries with new ones.
TV does not operate when the remote
control’s buttons are pressed.
y Is direct sunlight or strong artificial light
y Are the remote control’s batteries worn out? y Replace both batteries with new ones.
No sound or picture is produced. y Is the TV’s power cord plugged into a power
Picture appears but no sound is y Is the volume set at the minimum? y Increase the volume.
Produced. y Is the mute mode se t?
y Is AUDIO INPUT set correctly? y Set AUDIO INPUT on the SOUND menu
Poor picture with VIDEO signal
input.
Poor picture with RGB signal input. y Improper control setting.
Tint is poor or colors are weak. y Are the tint and colors properly adjusted? y Adjust picture controls as needed.
Nothing appears on screen. y Is the computer’s power turned on? y Turn on the computer’s power.
y Is a source connected? y Connect source to the TV.
y Is the power management function in the
Part of picture is cut off or picture is
not centered.
Image is too large or too small. y Is the screen size adjustment appropriate? y Press the “WIDE” button on the remote
Picture is unstable. y Is the computer’s resolution setting
POWER/STANDBY indicator blinks
in red
POWER/STANDBY indicator is fast
blinking
At PC mode if position of picture is
not correct
y Is a connected component set directly in front
or at the side of the TV?
y Is the TV’s power cord plugged into a power
outlet?
y Is the remote control pointed at theTV, or is
there an obstacle between the remote control
and the TV?
shining on the TV’s remote control sensor?
outlet?
y Are the speakers properly connected?
y Improper control setting.
Local interference.
Cable interconnections.
Input impedance is not correct level.
Incorrect 15 PIN connector pin connections.
standby or off mode?
y Is the position adjustment appropriate? y Adjust the “SCREEN” properly.
appropriate?
y Horizontal and / or vertical sync signal is not
present when the Intelligent Power Manager
control is on.
y Promptly switch off the power of the main
y Is the position adjustment appropriate? y Turn on the “AUTO FOCUS” properly.
* In the following case, power off the TV immediately and contact your dealer or authorized Service Center. The TV
turns off 5 seconds after powering on and then the POWER/STANDBY indicator fast blinks. It indicates that the
power supply circuit or plasma TV panel or, temperature sensor has been damaged.
y Leave some space between the TV and the
connected components.
y Plug the TV’s power cord into a power
outlet.
on the power.
y Point the remote control at the TV’s
remote control sensor when pressing
buttons, or remove the obstacle.
y Eliminate the light by closing curtains,
pointing the light in a different direction,
etc.
y Plug the TV’s power core into a power
outlet.
y Press the remote control’s MUTE button.
y Connect the speakers properly.
correctly.
y Adjust picture control as needed.
Try another location for the TV.
Be sure all connections are secure.
y Adjust picture controls as needed.
Check pin assignments and connections.
Check pin assignments and connections.
y Operate the computer (move the mouse,
etc.)
control and adjust properly.
y Set to the proper resolution.
y Check the input signal.
unit.
y See*
32
Page 33

Specifications
Product Name Plasma TV PD4264
Screen Size 36.3"(H) × 20.4"(V) inches
921(H) × 518(V) mm diagonal 42"(1066.8mm)
Aspect Ratio 16 : 9
Resolution 852(H) × 480(V) pixels
Pixel Pitch 0.43"(H) × 0.43"(V) inches
1.08(H) × 1.08(V) mm
Color Reproduction 256 levels, 16,770,000 colors
Signals
Synchronization range Horizontal: 31 to 69kHz
Vertical: 56.0 to 85Hz
Input Signals RGB, NTSC, PAL, HD, DVD, DTV
Input Terminals
RGB
Video
DTV COMPONENT VIDEO ( YPbRr ) 3 * RCA
RF
Audio Stereo RCA (R/L) * 6
RS232C control D-sub 9-pin * 1
Audio output Internal 5W + 5W at 16 ohm / External (option) 10W + 10W at 8 ohm
Power Supply AC100V~240V 50/60Hz
Current Rating 3.5A
Power Consumption 380W (typical)
Dimensions 40.9(W) × 27.9(H) × 9.68(D) inches
Weight 83.6lbs/38kg
Environmental Considerations
Operating Tem perature
Humidity
Storage T empera ture
Humidity
Front panel User Controls Power on/off, Input source select, Volume up/down, OSD control
Remote control Functions Power on/off, Input source select, menu control, Volume up/down,
OSD Functions Picture (Brightness / Contrast / Sharpness / Color / Tint / Color temperature),
Other features 3D motion adaptive Scan Converter with 2-2 (50Hz), 2-3 (60Hz) Pull Down Converter,
Accessories Remote control with battery, VGA cable (Mini D-Sub 15-pin to Mini D-Sub 15-pin
Regulatory Compliance
ANALOG RGB: 1 * mini D-sub 15-pin
DIGITAL RGB: 1 * DVI-D 29-pin
(Not compatible with analog input)
COMPOSITE VIDEO: 2 * RCA
S-Video: 2 * DIN 4-pin
COMPONENT VIDEO ( YCbCr ) 3 * RCA
1* IEC female
TV system:PAL D/K(CHINA VHF DS1-12、UHF DS13-57 Z1-Z42)
PAL B/G、I(CCIR);NTSC3.58(US)
Audio Jack * 2
1038(W) × 708.5(H) × 245.9(D) mm
0°C to 40°C / 32°F to 104°F
20 to 80% (no condensation)
-10°C to 50°C / 14°F to 122°F
10 to 90% (no condensation)
Time setting, PIP, Freeze, Mute, Swap, Wide,etc.
Display (Position / Size / Picture mode / PIP setup / Clock / Focus / Auto focus),
Sound (Treble / Bass / Balance / Speaker / Sound mode ),
Function (OSD display / Auto off / White Screen / Reset),
Configuration (Language / RGB source / DB15 source / Color system),
Information (Main source / Second source),
TV setup (User CH / System setup / CH Mapping / CH fine tune / Auto fine tune /Nicam)
Digital Zoom function, Color Temperature Select, Power management, Plug and play
(DDC1, DDC2B)
connector), Power cord, User’s Manual, RCA cable
UL、FCC、CE
33
Page 34

34
 Loading...