

Antares AutoTune 8 Owner`s Manual

Auto-Tune 8
World Standard Professional
Pitch and Time Correction
Owner’s Manual

©2014 Antares Audio Technologies.
All rights reserved. Certified Isinglass-free.
™
All trademarks are property of their respective owners.
www.antarestech.com
v PN P--M

The Obligatory Legal Mumbo-Jumbo
The Antares Auto-Tune 8 software and this
User’s Manual are protected by copyright
law. Making copies, adaptations, or derivative
works without the prior written authorization
of Antares Audio Technologies, is prohibited
by law and constitutes a punishable violation
of the law.
Antares Audio Technologies retains all
ownership rights to the Auto-Tune 8 software
and its documentation. Use of Auto-Tune is
limited by the following license agreement.
Please carefully read all the terms and
conditions of this license agreement. At
the time of installation of the Auto-Tune 8
software you will be presented with a copy of
the agreement and asked whether or not you
agree to it. Continuing with the installation
process beyond that point constitutes such
agreement.
Auto-Tune 8 License Agreement
Antares Audio Technologies grants you a
non-transferable, non-exclusive license to use
Auto-Tune 8 under the terms and conditions
stated in this agreement. Use of Auto-Tune
8 indicates your agreement to the following
terms and conditions.
License
You may:
1. Use Auto-Tune 8 on only one computer at
a time.
You may not:
1. Make copies of Auto-Tune 8 or of the
user manual in whole or in part except as
expressly provided for in this agreement.
Your right to copy Auto-Tune 8 and the
user manual is limited by copyright
law. Making copies, verbal or media
translations, adaptations, derivative
works, or telecommunication data
transmission of Auto-Tune 8 without
prior written authorization of Antares,
is prohibited by law and constitutes a
punishable violation of the law.
2. Make alteration or modifications to AutoTune 8 (or any copy) or disassemble or
de-compile Auto-Tune 8 (or any copy), or
attempt to discover the source code of
Auto-Tune 8.
3. Sub-license, lease, lend, rent, or grant
other rights in all or any portion of AutoTun e 8 (o r a ny co py ) to ot he rs .

Term of the Agreement
This agreement is eective until terminated
by you or Antares. You may terminate the
agreement at any time by notifying Antares
and destroying all copies of the manual,
and erasing Auto-Tune 8 from all machinereadable media, whether on-line or on archival
copies.
In the event of breach of any of the terms of
this agreement, you shall pay the attorney’s
fees of Antares that are reasonably necessary
to enforce the agreement plus resulting
damages.
Limited Warranty And Disclaimer
AUTOTUNE 8 AND ACCOMPANYING MATERIALS
ARE PROVIDED “AS IS” WITHOUT WARRANTY
OF ANY KIND, EITHER EXPRESS OR IMPLIED,
INCLUDING, BUT NOT LIMITED TO, THE IMPLIED
WARRANTIES OF MERCHANTABILITY AND
FITNESS FOR A PARTICULAR PURPOSE.
Antares Audio Technologies does not warrant
that the functions contained in the program
will meet your requirements. The entire risk as
to the use, quality, and performance of AutoTune 8 is with you.
SOME JURISDICTIONS DO NOT ALLOW
LIMITATIONS ON HOW LONG AN IMPLIED
WARRANTY LASTS, SO THE ABOVE LIMITATION
MAY NOT APPLY TO YOU. THIS WARRANTY
GIVES YOU SPECIFIC LEGAL RIGHTS. YOU MAY
ALSO HAVE OTHER RIGHTS WHICH VARY FROM
JURISDICTION TO JURISDICTION.
Limitation of Liability
IN NO EVENT WILL ANTARES BE LIABLE
FOR ANY DAMAGES, INCLUDING LOSS OF
DATA, LOST PROFITS OR OTHER SPECIAL,
INCIDENTAL, CONSEQUENTIAL OR INDIRECT
DAMAGES ARISING FROM THE USE OF AUTO
TUNE OR ACCOMPANYING MATERIALS. THIS
LIMITATION WILL APPLY EVEN IF ANTARES OR
ITS AUTHORIZED AGENT HAS BEEN ADVISED
OF THE POSSIBILITY OF SUCH DAMAGE.
YOU ACKNOWLEDGE THAT THE LICENSE FEE
REFLECTS THIS ALLOCATION OF RISK. SOME
JURISDICTIONS DO NOT ALLOW LIMITATION OR
EXCLUSION OF LIABILITY FOR INCIDENTAL OR
CONSEQUENTIAL DAMAGES, SO THE ABOVE
LIMITATION MAY NOT APPLY TO YOU.
Whew! Now that that’s over, let’s get on to the
good stu.

Contents
Chapter 1 Getting Started
What’s New in Auto-Tune 8 3
Installing and Authorizing 5
Te chnical Support 5
Chapter 2 Introducing Auto-Tune 8
Some background 6
So what exactly is Auto-Tune 8? 6
A little bit about pitch 6
How Auto-Tune 8 detects pitch 7
How Auto-Tune 8 corrects pitch 8
Automatic Mode 8
Graphical Mode 11
Pitch Shifting and Formant Correction 12
Time Shifting and Correction 13
Chapter 3 Auto-Tune 8 Controls
Common Controls 15
The Options Dialog 19
Automatic Mode Controls 22
Graphical Mode Controls 34
Pitch and Envelope Graph Displays 44
Time Shifting 54

vi
Chapter 4 Auto-Tune 8 Tutorials
Tutorial 1: Automatic Mode Basics 64
Tutorial 2: Flex-Tune 66
Tutorial 3: Targeting Ignores Vibrato Function 66
Tutorial 4: Natural Vibrato Function 67
Tutorial 5: Transpose and Formant Control 68
Tutorial 6: Graphical Mode Basics 68
Tutorial 7: Precision 70
Tutorial 8: Make Curve Function 70
Tutorial 9: Import Auto Function 72
Tutorial 10: Make Notes Function 74
Tutorial 11: Time: Error Correction 76
Tutorial 12: Time: Creative Editing 78
Chapter 5 The Auto-Tune Vocal Eect 80
Chapter 6 The Auto-Tune 8 Scales 82

Welcome!
On behalf of everyone at Antares Audio Technologies, we’d like to oer both our
thanks and congratulations on your decision to purchase Auto-Tune 8, the latest
(and indisputably greatest) generation of the worldwide standard in professional
pitch and time correction and manipulation.
Before you proceed any farther, we’d like to strongly encourage you to register and authorize your
copy of Auto-Tune 8. (You can skip ahead to the Authorization and Installation instructions on
page 5. We’ll wait.) Also, if you’re planning on discarding that lovely Auto-Tune 8 box, it’s probably
a good idea to write down the serial number that appears on the bottom of the box for future
reference.
At Antares, we are committed to excellence in quality, customer service, and technological
innovation. With your purchase of Auto-Tune 8, you have created a relationship with Antares
which we hope will be long and gratifying. Let us know what you think. You can count on us to
listen.
Again, thanks.
The Whole Antares Crew
1

2

1: Getting Started
If you are new to Auto-Tune, we encourage you to read this manual and work
through the tutorials in Chapter 4. It’s the quickest way to become familiar with
what Auto-Tune 8 does and how it does it.
If you are upgrading from a previous version of Auto-Tune, you will find that most
of what you’re already doing will continue to work in Auto-Tune 8, only better. To get up to speed
quickly, just check out the new feature overview below and then refer to related sections of in
Chapter 3.
3
ONE BIG IMPORTANT NOTE
For those upgrading from versions of AutoTune prior to Auto-Tune 7, is it critical to note
the following:
Auto-Tune 8 will NOT open sessions created
with Auto-Tune Evo or earlier versions. The
improvements made to the core technology
are so extensive that it just won’t work.
For that reason, we have configured AutoTune 8 such that it and Auto-Tune Evo and all
earlier versions of Auto-Tune can be active in
your DAW simultaneously.
However, it’s important to note that AutoTune Evo (and earlier versions) have long been
discontinued and we will not be releasing
future updates to any of them. Consequently,
it’s inevitable that between computer OS
advancements and host updates, those earlier
versions will eventually stop working (if they
haven’t already).
If you have current saved sessions with
instances of Auto-Tune Evo or earlier that you
may need to access into the indefinite future,
we oer the following suggestions:
•
If you are satisfied with the current Auto-
Tune settings, use whatever method your
host oers (bouncing, oine editing, etc.)
to permanently render the corrected tracks.
•
If you believe you will need to keep editing
into the future, remove the instances of the
earlier versions of Auto-Tune and replace
them with instances of Auto-Tune 8.
What’s New in Auto-Tune 8
The following are the key new features that
have been added in Auto-Tune 8:
Automatic Mode
Flex-Tune Pitch Correction Technology
By far the most dramatic addition to AutoTune 8 is our new Flex-Tune pitch correction
technology.
Other real-time pitch correction methods,
including previous versions of Auto-Tune,
are always pulling every note towards a scale
note, in the process distorting any of the
singer’s expressive vocal gestures. In contrast,
Flex-Tune only provides correction when the
vocalist approaches a scale note. At all other
times, they are free to sing with whatever
vocal gestures best express their emotional
connection to their song, secure in the
knowledge that Auto-Tune 8 will pass them
through, exactly as they are sung.
Low Latency Mode
Auto-Tune 8’s low latency mode allows for
use when tracking or during live performance,
letting vocalists monitor their performance
with no disorienting delay.

4
Graphical Mode
Editing Tools Active During Playback
For those XIPprefer editing on the fly or with
looped segments, Auto-Tune 8’s editing tools
are now active during playback, so you never
haWF to stop and restart just to hear the results
of an edit.
Audio Feedback of Note Object Pitch
Auto-Tune’s Note mode was already the
easiest way to re-pitch already recorded
melodies. In Auto-Tune 8, you can choose to
have any note edits provide audio feedback of
the note’s pitch, so selecting new notes is just
a matter of using your ears.
Hide or Show Amplitude Envelope in
Main Edit Display
You can now choose to hide or show the
amplitude envelope plot in the main edit
window.
Hide or Show Envelope Display
You can now choose to hide or show the
dedicated envelope display. Particularly useful
when working on a laptop, where screen real
estate is at a premium.
Increased Maximum Timeline Resolution
in Bars + Beats Mode
The maximum resolution of the timeline in
Bars + Beats mode has been increased to 16th
notes.
Automatic Update Notification
Auto-Tune 8 will notify you whenever an
update to the plug-in or an upgrade is
available.
How To Use This Manual
If this is your first experience of Auto-Tune,
you will find that Auto-Tune 8 has a very
friendly user-interface and is extremely easy
to use. However, because Auto-Tune 8 does
things that have never been done before,
some aspects of the user-interface may not
be immediately obvious. You should at least
read either Chapter 3, Auto-Tune 8 Controls,
or Chapter 4, Auto-Tune 8 Tutorial, to learn the
essential information you will need to operate
Auto-Tune 8.
The Contents Of This Manual
Chapter 1: Getting Started
The chapter you are reading.
Chapter 2: Introducing Auto-Tune 8
This chapter presents some basic facts about
pitch and how Auto-Tune 8 functions to
correct pitch and timing errors. The basic
functionality of Auto-Tune 8 is discussed,
and information you need in order to use it
eectively is provided.
Chapter 3: Auto-Tune 8 Controls
This chapter is reference information for all of
the controls used in the Auto-Tune 8 interface.
Chapter 4: Auto-Tune 8 Tutorial
This chapter introduces you to details of how
Auto-Tune 8 works by guiding you through
several tutorials. The tutorials will give you
insight into how and when to use each of
Auto-Tune 8’s key functions.
Chapter 5: The Auto-Tune Vocal Eect
What it is. How to do it.
Chapter 6: The Auto-Tune 8 Scales
Brief descriptions of the various scales
available in Auto-Tune 8.

5
Installing Auto-Tune 8
Any unique instructions for installing AutoTune 8 for your specific host or plug-in format
are located in the Auto-Tune 8 Read Me file
that accompanies the plug-in. This file may
also contain any last-minute Auto-Tune 8
information that didn’t make it into this
manual.
Auto-Tune 8 is designed to work with a wide
variety of digital audio applications. Please
refer to your host application’s user manual
for more information on installing and using
plug-ins.
Authorizing Auto-Tune 8
Authorization is the process by which AutoTune 8 is allowed to permanently run on your
computer. Detailed instructions covering the
available authorization options will be found
in the file “Authorization Read Me” which is
included on the installation DVD ROM or with
your software download.
NOTE: You will need to authorize
Auto-Tune 8 before you can run it in
your host. If you plan to follow along
with the manual (a good idea), go do it now.
Technical Support
In the unlikely event that you experience a
problem using Auto-Tune 8, try the following:
Make sure you have the latest version of
the plug-in. You can download and install
the latest version of Auto-Tune 8 from the
following web page:
http://www.antarestech.com/download/
latest-software.php
If that doesn’t solve your problem, try the
following:
1. Consult our web-based support resources
at:
http://www.antarestech.com/support/
2. Submit a question directly to our
Customer Support department at:
http://www.antarestech.com/support/
contact.php
3. Join the Antares online User Forum. The
User Forum is a place where Antares
product users can gather to exchange
information, compare notes, and get to
know other Antares users from around the
world. Check it out at:
http://antarestech.invisionzone.com/
4. For the quickest access to new
developments, follow us on Twitter and
“Like” our Facebook pages:
http://twitter.com/AntaresAudio
http://www.facebook.com/pages/Antares-
Audio-Technologies/68524457680
http://www.facebook.com/pages/Auto-
Tune/81891651280

6
2: Introducing Auto-Tune 8
Some background
In 1997, Antares Audio Technologies first
introduced the ground-breaking Auto-Tune
Pitch Correcting Plug-In. Auto-Tune was a tool
that actually corrected the pitch of vocals and
other solo instruments, in real time, without
distortion or artifacts, while preserving all
of the expressive nuance of the original
performance. Recording Magazine called
Auto-Tune the “holy grail of recording.” And
went on to say, “Bottom line, Auto-Tune is
amazing… Everyone with a Mac should have
this program.” (In fact, we know of quite a few
people back then who bought kilo-buck Pro
Tools™ systems just to be able to run AutoTun e. )
In the intervening years, Auto-Tune has
established itself as the worldwide standard
in professional pitch and, as of Auto-Tune 7,
time correction. Today, it’s used daily by tens
of thousands of audio professionals around
the world to save studio and editing time, ease
the frustration of endless retakes, save that
otherwise once-in-a-lifetime performance, or
to create what has become the signature vocal
eect of our time.
Auto-Tune is, in fact, the world’s single largestselling audio plug-in.
Now, well over a decade and a half after its
introduction, Auto-Tune 8 introduces FlexTune™ pitch correction technology and
establishes yet another new standard in
natural real-time pitch correction.
So what exactly is Auto-Tune 8?
Auto-Tune 8 is a precision tool for correcting
intonation and timing errors or creatively
modifying the intonation or rhythmic
articulation of a performance.
For pitch correction, Auto-Tune 8 employs
state-of-the-art digital signal processing
algorithms (many, interestingly enough, drawn
from the geophysical industry) to continuously
detect the pitch of a periodic input signal
(typically a solo voice or instrument) and
instantly and seamlessly change it to a desired
pitch (defined by any of a number of userprogrammable scales, MIDI input, or through
the use of graphical editing tools).
To take maximum advantage of the power of
Auto-Tune 8’s pitch correction functions, you
should have a basic understanding of pitch and
how Auto-Tune 8 functions to correct pitch
errors. This chapter presents basic terminology
and introduces Auto-Tune 8’s operating
paradigm, giving you the background you
need to use it eectively.
Later in the chapter, we’ll provide an overview
of Auto-Tune 8’s time manipulation features.
A little bit about pitch
Pitch is traditionally associated with our
perception of the “highness” or “lowness” of
a particular sound. Our perception of pitch
ranges from the very general (the high pitch
of hissing steam, the low pitch of the rumble
of Godzilla’s enormous footsteps as he stomps
his way through Tokyo) to the very specific
(the exact pitch of a solo singer or violinist).
There is, of course, a wide range of variation
in the middle. A symphony orchestra playing
a scale in unison, for example, results in an
extremely complex waveform, yet you are still
able to easily sense the pitch.
The vocalists and the solo instruments that
Auto-Tune 8 is designed to process have a very
clearly defined quality of pitch. The sound
generating mechanism of these sources is a
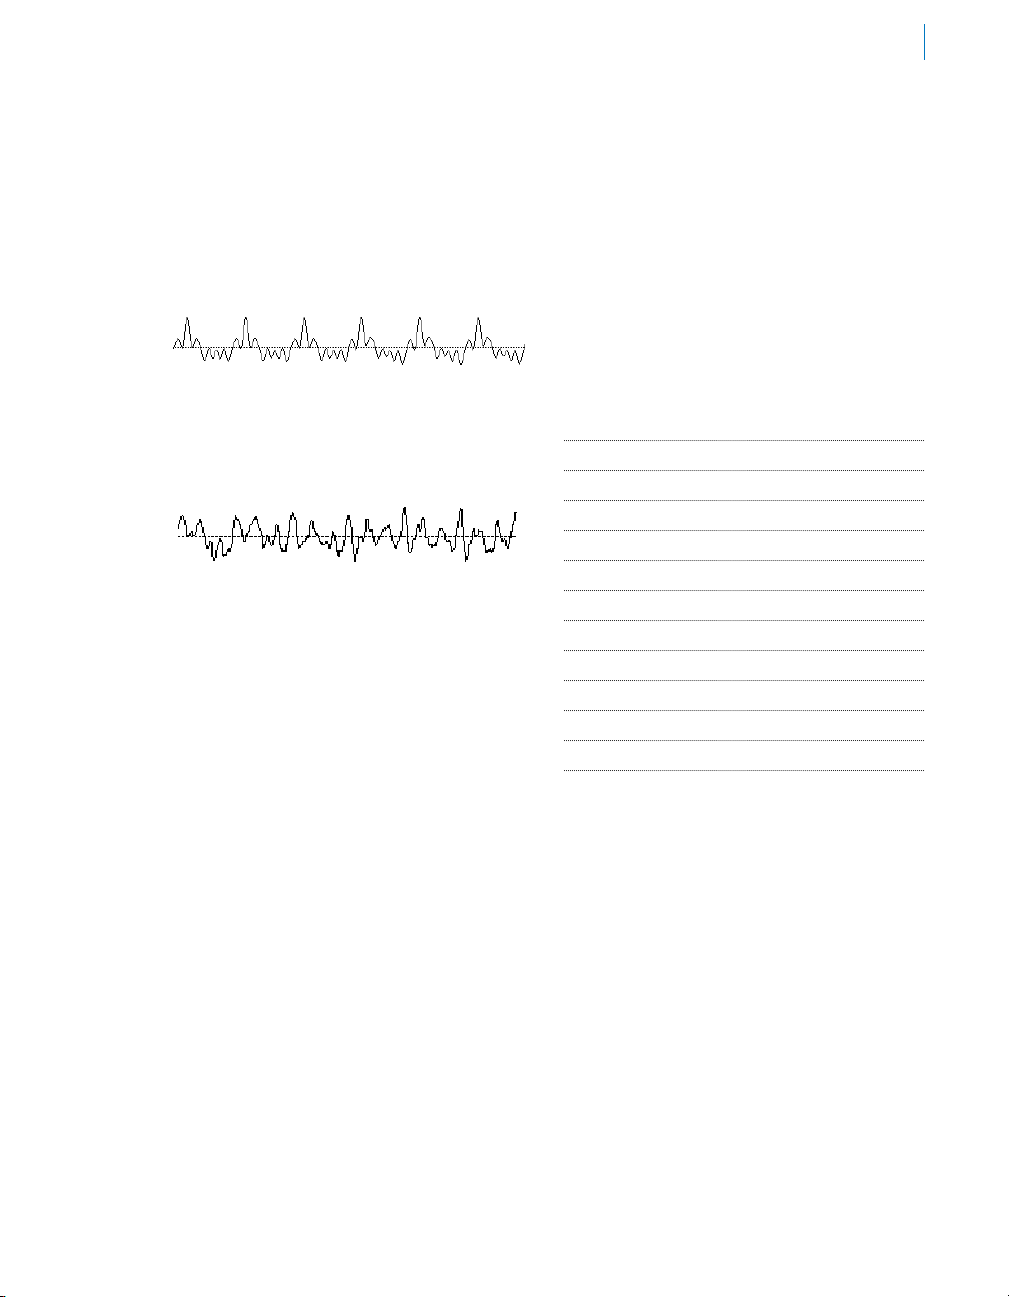
7
vibrating element (vocal chords, a string, an air
column, etc.). The sound that is thus generated
can be graphically represented as a waveform
(a graph of the sound’s pressure over time)
that is periodic. This means that each cycle of
waveform repeats itself fairly exactly, as in
the periodic waveform shown in the diagram
below:
Because of its periodic nature, this sound’s
pitch can be easily identified and processed by
Auto-Tune 8.
Other sounds are more complex. This
waveform:
is of a violin section playing a single note in
unison. Our ears still sense a specific pitch,
but the waveform does not repeat itself. This
waveform is a summation of a number of
individually periodic violins. The summation
is non-periodic because the individual violins
are slightly out of tune with respect to one
another. Because of this lack of periodicity,
Auto-Tune 8 would not be able to process this
sound.
tone Equal Tempered Scale that is used (or
rather approximated) in 99.9% of all Western
tonal music consists of tones that are, by
definition, 100 cents apart. This interval of 100
cents is called a semitone.
The twelve equally-spaced tones of the Equal
Tempered Scale happen to contain a number
of intervals that approximate integer ratios
in pitch. The following table shows these
approximations:
INTERVAL CENTS NEARBY R ATIO IN
RAT IO CENTS
minor second 100 16/15 111.75
major second 200 9/8 203.91
minor third 300 6/5 315.64
major third 400 5/4 386.31
perfect fourth 500 4/3 498.04
tritone 600
perfect fifth 700 3/2 701.65
minor sixth 800 8/5 813.69
major sixth 900 5/3 884.36
minor seventh 1000 16/9 996.09
major seventh 1100 15/8 1088.27
octave 1200 2 1200.00
Some pitch terminology
The pitch of a periodic waveform is defined
as the number of times the periodic element
repeats in one second. This is measured in
Hertz (abbreviated Hz.). For example, the
pitch of A4 (the A above middle C on a piano)
is traditionally 440Hz (although that standard
varies by a few Hz. in various parts of the
world).
Pitches are often described relative to one
another as intervals, or ratios of frequency. For
example, two pitches are said to be one octave
apart if their frequencies dier by a factor of
two. Pitch ratios are measured in units called
cents. There are 1200 cents per octave. For
example, two tones that are 2400 cents apart
are two octaves apart. The traditional twelve-
As you can see, the intervals in the Equal
Tempered Scale are NOT equal to the
harmonious integer ratios. Rather, the Equal
Tempered Scale is a compromise. It became
widely used because once a harpsichord or
piano is tuned to that scale, any composition
in any key could be played and no one chord
would sound better or worse than that same
chord in another key.
How Auto-Tune 8 detects pitch
In order for Auto-Tune 8 to automatically
correct pitch, it must first detect the pitch
of the input sound. Calculating the pitch of
a periodic waveform is a straightforward
process. Simply measure the time between

8
repetitions of the waveform. Divide this time
into one, and you have the frequency in Hertz.
Auto-Tune 8 does exactly this: It looks for a
periodically repeating waveform and calculates
the time interval between repetitions.
The pitch detection algorithm in Auto-Tune
8 is virtually instantaneous. It can recognize
the repetition in a periodic sound within a few
cycles. This usually occurs before the sound
has sucient amplitude to be heard. Used
in combination with a very slight processing
delay, the output pitch can be detected and
corrected without artifacts in a seamless
and continuous fashion. (Although it must
be kept in mind that some plug-in protocols
introduce a certain amount of inherent and
unpredictable delay.)
Auto-Tune 8 was designed to detect and
correct pitches up to the pitch C6. (If the
input pitch is higher than C6, Auto-Tune 8
will occasionally interpret the pitch an octave
lower. This is because it interprets a two cycle
repetition as a one cycle repetition.) On the low
end, Auto-Tune 8 will detect pitches as low as
25Hz (when the Bass Input Type is selected).
This range of pitches allows intonation
correction to be performed on virtually all
vocals and instruments.
Of course, Auto-Tune 8 will not detect pitch
when the input waveform is not periodic. As
demonstrated above, Auto-Tune 8 will fail to
tune up even a unison violin section. But this
can also occasionally be a problem with solo
voice and solo instruments as well. Consider,
for example, an exceptionally breathy voice,
or a voice recorded in an unavoidably noisy
environment. The added signal is nonperiodic, and Auto-Tune 8 will have diculty
determining the pitch of the composite (voice
+ noise) sound. Luckily, there is a control (the
Tracking control, discussed in Chapter 3) that
will let Auto-Tune 8 be a bit more casual about
what it considers “periodic.” Experimenting
with this setting will often allow Auto-Tune 8
to track even noisy signals.
NOTE: The above description has
been in pretty much every Auto-
Tune manual since the beginning. While it is
still true in the general case, it must be noted
that Auto-Tune 8 includes technology
(originally introduced in Auto-Tune Evo) that
does a much better job with borderline
troublesome material than any prior version
of Auto-Tune.
How Auto-Tune 8 corrects pitch
Auto-Tune 8 provides two separate and
distinct ways to approach pitch correction:
Automatic Mode and Graphical Mode. The
basic functionality of each is described below.
Automatic Mode
Auto-Tune 8’s Automatic Mode works by
continuously tracking the pitch of an input
sound and comparing it to a user-defined
scale. The scale tone closest to the input is
continuously identified. If the input pitch
exactly matches the scale tone, no correction
is applied. If the input pitch varies from
the desired scale tone, and the amount of
variation falls within the range set by the
Correction Style control (described below), an
output pitch is generated which is closer to the
scale tone than the input pitch. (The exact
amount of correction is controlled by the
Retune Speed and Humanize settings,
described below and in Chapter 3.)
Scales
The heart of Automatic Mode pitch correction
is the Scale. Auto-Tune 8 lets you choose from
major, minor, chromatic or 26 historical, ethnic
and micro-tonal scales. Individual scale notes
can be bypassed, resulting in no pitch
correction when the input is near those notes.
Individual scale notes can also be removed,
allowing a wider range of pitch correction for
neighboring pitches. The scale can be detuned,
allowing pitch correction to any pitch center.
For added flexibility, you can also select the
target pitches in real time via MIDI from a
MIDI keyboard or a pre-recorded sequencer
track.

9
Retune Speed
Auto-Tune 8 also gives you control over how
rapidly, in time, the pitch adjustment is made
toward the scale tone. This is set with the
Retune Speed control (see Chapter 3 for more
details).
Fast Speed settings are appropriate for short
duration notes and for mechanical instruments,
like oboe or clarinet, whose pitch typically
changes almost instantly. A fast enough setting
will also minimize or completely remove a
vibrato, as well as produce the iconic Auto-Tune
Vocal eect.
Slow Speed settings, on the other hand, are
appropriate for longer notes where you want
expressive pitch gestures (like vibrato) to
come through at the output and for vocal and
instrumental styles that are typified by gradual
slides (portamento) between pitches. An
appropriately selected slow setting can leave
expressive gestures intact while moving the
average pitch to the correct tonal center.
An Example of Classic Automatic Mode
Correction
As an example, consider this before-andafter graphic representation of the pitch of a
vocal phrase that contains both vibrato and
expressive gestures.
D3
C#3
B2
10.0 10.5 11.0
CORREC TED BY
AUTO-TUNE 8
ORIGINAL
PERFORMANCE

10
In the original performance, we can see that
although the final note should be centered
around D, the vocalist allowed the tail of the
note to fall nearly three semitones flat. The
“after” plot is the result of passing this phrase
through Auto-Tune 8’s Automatic Mode
programmed to a D Major Scale (with C# and
DISTORTED
GESTURES
B set to ”Remove”) and a Retune Speed setting
of 25. That Retune Speed causes the pitch
center to be moved to D, while still retaining
the vibrato and general shape of the expressive
gestures. (Setting C# and B to ”Remove” is
necessary to keep Auto-Tune 8 from trying to
correct the seriously flat tail of the last note to
those pitches. See Chapter 3 for more details.)
Flex-Tune
New in Auto-Tune 8 is the Correction Style
control. Other real-time pitch correction
This second plot shows the result of setting
the Correction Style control to the Flex-Tune
setting of 75. The vocal gestures are now
reproduced exactly as they were sung.
methods, including previous versions of AutoTune, are always pulling every note towards
a scale note, in the process distorting any
of the singer’s expressive vocal gestures. In
contrast, Flex-Tune only provides correction
when the vocalist approaches a scale note. At
all other times, they are free to sing with
whatever vocal gestures best express their
emotional connection to their song, secure in
the knowledge that Auto-Tune 8 will pass them
through, exactly as they are sung.
The new Correction Style control lets you
choose how close to the scale pitch the singer
has to be for Auto-Tune 8 to apply correction.
In the Classic position, correction is always
applied. This results in the same style of
correction as previous versions of Auto-Tune.
As you move the control into the Flex-Tune
range, the correction area around the scale
note gets smaller and smaller until, at the
extreme clockwise position, no correction will
be applied at all.
An Example of Flex-Tune Correction
In this example, we first look at the plot of
a vocal line with intricate vocal gestures
processed with the Correction Style control set
to (classic Auto-Tune correction). As you can
see, the scale notes are in tune, but the various
gestures are distorted by also being pulled to
the scale notes.
Vibrato
Auto-Tune 8 allows real-time adjustment of
the depth of any natural vibrato present in the
input.
Auto-Tune 8 can also add a vibrato to an input
that does not naturally exhibit one. You can
program the vibrato rate along with individual
vibrato depths for pitch, amplitude (loudness)
and formant (resonant frequencies). You can
also specify delayed vibrato with independently
programmable onset delay and onset rate.
By combining a fast Retune Speed setting with
Auto-Tune 8’s Vibrato settings, you can even
remove a performer’s own vibrato and replace
it with Auto-Tune 8’s programmed vibrato, all in
real time. Also, unusual combinations of Vibrato
Waveform, Rate and Depth settings can be
used for some interesting special eects.

11
Graphical Mode
The Graphical Mode is similar to the Automatic
Mode in that it also continuously tracks the
pitch of the incoming sound and modifies the
output pitch to be closer to a desired pitch.
But in the Graphical Mode, the desired pitch
is not a predefined scale tone, but rather is a
graphical representation of your desired pitch
(called a “correction object”).
As in Automatic Mode, the rate of change
towards the desired pitch is controlled by the
Retune Speed control, but in Graphical Mode
you can assign a dierent Retune Speed to
each individual correction object, ensuring
that any pitch change is as natural (or as
wacky) as you desire.
The key feature of Graphical Mode is the Pitch
Graph display. On this display, the vertical axis
represents pitch (with higher notes towards
the top) while the horizontal axis represents
time. Depending on your host, you can resize
the Graphical Mode window up to the limit of
your monitor size.
On the Pitch Graph, the red curve represents
the original pitch contour of the input
track, while the desired target pitch or
pitch contour (as defined by one of the
three possible Correction Objects described
below) is indicated in blue. The green curve
displays the exact output pitch based on the
current setting of the Retune Speed for each
correction object.

12
The horizontal grid lines (or Lanes, when Show
Lanes in selected) represent scale pitches. The
key annotation, scale name, and scale detune
value are those defined by the common area
controls at the top of the interface. They do
not aect the computations of the Graphical
Mode in any way. They are merely a reference
to guide you in setting the target pitches.
Graphical Mode also includes the Envelope
Graph, which displays the amplitude
(loudness) envelope of the sound whose pitch
is shown in the Pitch Graph. The horizontal
scale of this graph will either 1) show the
envelope of the entire extent of the pitchdetected sound or 2) align with the horizontal
scale and position of the Pitch Graph above it.
To define the desired pitches, Graphical Mode
provides three dierent Pitch Correction
Objects: Lines, Curves and Notes. You can
draw desired target pitches using the Line and
Curve drawing tools, selectively modify the
existing pitch contours using the Make Curve
function, or use Note Objects to display and
modify the pitch of each individual target
note. The dierent Objects can be freely
intermixed on a track to accomplish dierent
tasks, or just to allow you to work in whichever
way feels easiest.
In addition, Auto-Tune 8 includes the ability
to define target pitches using MIDI. Similar in
concept to the Target Notes Via MIDI function
in Automatic Mode, when tracking pitch in
Graphical Mode, Auto-Tune 8 will record any
MIDI note information routed to it (either
from another MIDI track or live from a MIDI
controller) and (optionally) display the data on
the Pitch Graph Display. You can then use the
Make Notes From MIDI function to convert
the MIDI information into Note Correction
Objects.
Complete image scaling and scrolling
controls are provided, along with a selection
of graphical tools which allow easy editing,
including cut, copy and paste functions.
Given the power of the tools, there is a huge
variety of possible Graphical Mode workflows,
but the basic steps you will typically perform
in Graphical Mode are:
•
In your host application, select some sound
for processing.
•
Bring up Auto-Tune 8. Set the buer length
to at least the number of seconds from
the beginning of the track to the end of
the audio you are going to process. Press
the Track Pitch button, then play back the
audio. The pitch will be detected and then
displayed in the Pitch Graph as a red curve.
•
When you have tracked all the audio you
want to work with, stop the transport to
exit Track Pitch mode.
•
Define target pitches using any combination
of Correction Objects (Lines, Curves or
Notes) and the graphical tools and adjust
each object’s Retune Speed and vibrato
depth for the desired eect.
•
If desired, set a transposition interval,
engage formant correction, or modify
overall vocal character with the Throat
Length control. Then use the Throat Length
Adjust control to individually set the vocal
timbre of each note.
•
Play back the track. The pitch will be
corrected or shifted as specified.
Pitch Shifting, Formant Correction
and Throat Modeling
Auto-Tune 8’s Pitch Shifting, Formant
Correction, and master Throat Modeling
functions are located in the common control
area and available in both Automatic and
Graphical Modes.
Pitch Shifting
In addition to any pitch correction applied by
either Automatic or Graphical Mode, AutoTune 8 provides a Transpose function that lets
you shift the overall pitch of your performance
over a two octave range (+/- an octave),
selectable in precise semitone increments.
In Automatic Mode, this transposition is
accomplished in real time.
In Graphical Mode, this function does not
aect the Pitch Edit Display. It provides overall
transposition on top of any pitch shifting
accomplished with the graphical editing tools.

13
Although you can also accomplish overall
transposition in Graphical Mode by selecting
all the correction objects in your track and
manually moving them up or down, in most
cases, using the Transpose function will
provide superior results.
Formant Correction
A sound’s ”formants” are the combined
acoustic resonances that result from the
physical structure of whatever is producing
the sound.
In the case of a human voice, air from your
lungs is forced through your vocal chords,
causing them to vibrate. From there, the
voice is propagated through the throat, the
mouth and out through the lips. It is the shape
of these structures that create the resonant
characteristics that define your unique vocal
identity.
When a vocal is pitch-shifted by large intervals
without formant correction, not only is the
pitch of sung notes shifted, but the formants
are shifted as well. The resulting eect is not
just of a person singing higher or lower notes,
but of a person who is literally growing or
shrinking (depending on the direction of the
shift). While this can be useful for producing
singing chipmunks, it typically does not
produce realistic pitch-shifting over ranges
larger than a semitone or two.
Engaging Auto-Tune 8’s Formant Correction
prevents the shifting of a voice’s resonant
frequencies to ensure that its vocal
characteristics are preserved over the pitch
shift range.
AN IMPORTANT NOTE: Over the very
small intervals usually associated
with basic pitch correction, formant
shifting is essentially inaudible and AutoTune’s classic pitch adjustment technology
still provides the optimum results. Formant
Correction is designed to be used with overall
transposition or on tracks where notes are
shifted by large intervals.
Throat Modeling
As mentioned above, the shape of a singer’s
throat is a prime contributor to their vocal
character. Auto-Tune 8’s Throat Length control
lets you use Antares’ unique throat modeling
technology to modify a voice’s character by
passing it through a precise physical model of
the human vocal tract.
Auto-Tune 8 also includes the ability in
Graphical Mode to individually modify the
throat modeling for each note or correction
object, oering an entirely new level of creative
control.
Time Shifting and Correction
We’ve designed Auto-Tune 8’s time control
capabilities to combine an extremely highquality time-shifting algorithm with an
exceedingly intuitive user interface designed to
make it quick and easy to correct timing errors
or exercise your creative imagination.
Time Tracking
In order to do its time shifting magic, AutoTune 8 must first create a copy of the audio
you wish to edit. This is accomplished with the
Track Pitch and Time function. To help manage
this audio data, we’ve provided a convenient
Data File Management dialog that allows you
to establish or move the location of the data
files, rename their folder, as well as delete them
if they are no longer necessary (after bouncing
the final time-modified audio, for example).
The File Management System will also alert
you if the data files are not where AutoTune 8 expects them to be and will provide
information to help you find them.
Time Tools
Although allowing for an enormous amount of
flexibility, Auto-Tune 8’s time shifting functions
make use of two easy-to-use tools; the Move
Point tool and the Move Region tool.
The Move Point tool allows you to select
a range of audio and pick any point in the
range and move it forward or back in time,
compressing and expanding the audio around
it.

14
The Move Region tool is designed for moving
notes, words, or phrases while preserving the
timing of the moved element. As with the
Move Point tool, you first select a range of
audio and then select the region within that
selection that you want to move and move it
forward or back in time, again compressing
and expanding the audio around it.
Both tools are context sensitive. That is, they
change function (from selection to moving,
for example) depending on what lies beneath
them on the screen. As a result, the time
manipulation process becomes smooth and
intuitive, never breaking your creative flow
with the need to switch tools or remember
some command key to temporarily change
function.
The time functions also have their own Undo/
Redo controls independent of the pitch
correction controls and an Enable button that
allows you to instantly switch between your
original audio and your time shifted audio.
Enhanced Amplitude Envelope Display
To he lp yo u v is ual ize t he aects of your
edits, whenever time control is enabled the
Amplitude Envelope Display will display both
the original audio (in the lower portion of
the display) and the time-shifted audio (in
the upper portion). Additionally, the display’s
horizontal axis will turn red to indicate the
ranges of audio that have been time-tracked,
so you will always know which ranges are
currently available for time editing.
Non-destructive Editing
Since Auto-Tune 8 works on a copy of your
audio, time editing always leaves your original
audio intact. At any point you can simply turn
o the Time Control Enable button to instantly
return to your track’s original timing.

3: Auto-Tune 8 Controls
This chapter is a reference for all of the controls used in the Auto-Tune 8 interface. How these
controls are used together for pitch correction and time shifting is demonstrated in Chapter 4,
Auto-Tune 8 Tutorial.
Continuous Controls
Auto-Tune 8’s continuous controls are
represented graphically as virtual knobs.
Depending on your preference, you can
control knobs by vertical, horizontal or radial
mouse movement. Set your preference in the
Options dialog described below.
Double-clicking on a knob will return it to
its default value. In some host applications,
Command (Mac)/Control (PC) clicking on a
knob will also reset it to default).
Common Controls
The following controls and displays are
visible regardless of which operating mode is
selected. Their settings aect both Automatic
and Graphical Modes.
Input Type
As a result of
Antares research
into the unique
characteristics
of various types of audio signals, Auto-Tune
8 oers a selection of optimized processing
algorithms for the most commonly pitchcorrected inputs. Choices include Soprano
Voice, Alto/Tenor Voice, Low Male Voice,
Instrument, and Bass Instrument. Matching
the appropriate algorithm to the input
results in even faster and more accurate pitch
detection and correction.
To select the desired Input Type, click on the
Input Type pop-up and then select the desired
type from the pop-up list.
able to detect pitches down to A1 (55Hz).
Selecting Bass Instrument lowers the lowest
detectable frequency by about one octave to
25Hz. Since the lowest E string on a bass guitar
is approximately 41Hz, Bass Instrument (as its
name so ably implies) allows you to apply pitch
correction to those pesky fretless bass lines
as well as other low bass range instruments.
However, when Bass Instrument is selected,
pitches above A4 may be incorrectly tuned, so
be sure to select Bass Instrument only when
correcting bass range tracks.
voice or solo instrument. The Tracking control
determines how much variation is allowed in
the incoming waveform for Auto-Tune 8 to
still consider it periodic.
If you are working with a well-isolated solo
signal (e.g., tracking in a studio or o of a
multitrack master) you can typically set the
Tr ack in g co ntr ol t o 50 an d for ge t it .
NOTE: Choosing the wrong Input
Type (or just forgetting to set it
at all) can result in compromised
performance. Pay attention.
ANOTHER NOTE: When any Input
Type other than Bass Instrument
is selected, Auto-Tune 8 is reliably
Trac ki ng
In order to
accurately identify
the pitch of the
input, AutoTune 8 requires
a periodically
repeating
waveform,
characteristic of a
15

16
If, on the other hand, your signal is noisy or
not well-isolated (as might be more common
in a live performance situation) or you are
dealing with a particularly breathy or guttural
voice, it may be necessary to allow more signal
variation (higher Tracking numbers). However,
under these circumstances tracking is not
guaranteed and a too “relaxed” setting may
introduce distortion and popping.
NOTE: The improved pitch detection
technology in Auto-Tune 8 (in
combination with the Input Type
selection described above) results in noticeably
more reliable pitch detection compared to
Auto-Tune 5 and earlier. If you have used older
versions of Auto-Tune, you may find that
situations that previously required constant
modifications of the Tracking control now
track perfectly at the default setting.
Select Pitch Reference
Auto-Tune 8 provides the
ability to pitch correct
stereo tracks while
maintaining the tracks’
phase coherence. (Refer
to your host application’s
manual for instructions on assigning a plug-in
to a stereo track.) Click the appropriate button
to select which of the two stereo tracks (left or
right) Auto-Tune 8 will use as a pitch reference.
NOTE: If there is a marked dierence
in the two tracks, pick the cleanest,
most isolated track. For example, if
one track is a close mic’d vocal while the other
is mic’d from farther away for ambience, or is
heavily processed, select the close mic’d track.
ANOTHER NOTE: Auto-Tune 8 will
only pitch correct true stereo tracks.
If the second track (i.e., the track
not selected as a pitch reference) is simply an
independent unrelated track, unpredictable
(and potentially unpleasant) sounds may
result. On the other hand, something
interesting might happen. You never know.
When Auto-Tune 8 is instantiated on a mono
track, this control is inactive (grayed out).
Low Latency
Normally, Auto-Tune makes use
of a processing delay to provide
the best processing quality when
executing transposition (as
opposed to just pitch correction).
When you do your pitch and time
correction during mixdown, your DAW’s delay
compensation will account for this processing
delay. However, if you want to use Auto-Tune
8 during the tracking process or to process
a live performance, that delay would prove
distracting. In that case, click the Low Latency
button to reduce the processing delay to a
virtually undectable level.
Key Selection
This control lets you select the
key of the track you plan to
process.
To select the desired key, click
on the Key pop-up and then select the desired
note from the pop-up list. This determines the
pitch of the first note of the scale according to
the standard A = 440 Hertz.
Scale Selection
This control is used in
combination with the Key
selection above to define
the scale of the track you
plan to process.
To select a scale, click on the Scale popup and
then select the desired scale from the pop-up
list.
NOTE: To avoid having to deal with
scales containing those annoying
double flats, double sharps and
notes like Cb, E#, Fb and B#, Auto-Tune 8
will automatically choose the simpler of two
enharmonically equivalent scales. For example,
if you select Db Major, the Edit Scale Display
will duly display the Db Major scale. However,
if you then go to the Scale selection pop-up
and select Minor, the Key will automatically be
changed to C# and the Edit Scale Display will, in
fact, display the much friendlier C# Minor scale.
This will be reflected on both the Auto Mode
Scale Edit display and the Pitch Graph Display
in the Graphical Mode.

17
Auto-Tune 8 comes with 29 preprogrammed
scales. The first three equal-tempered
scales, chromatic, major, and minor, are the
ubiquitous scales typically found in Western
tonal music. The other scales are historical,
ethnic, and micro-tonal scales. An in-depth
discussion of these scales and their history
is beyond the scope of this manual. The
interested reader will find more information
in Tuning In — Micro-tonality In Electronic
Music by Scott R. Wilkinson, published by Hal
Leonard Books.
A brief description of each scale can be found
in Chapter 8, The Auto-Tune 8 Scales
Scale Detune
The Detune
parameter
allows you to
change the
pitch standard
of Auto-Tune 8
from the default
A = 440Hz. The
value is set
in cents (100 cents = 1 semitone). The range
of adjustment is from -100 to +100 cents.
For convenience, the detune amount is also
displayed in Hertz relative to A440.
The Detune function can be used to tune a
vocal performance to some irreparably outof-tune instrument (a piano or organ, for
example), or to allow correction to other than
the conventional 440Hz standard.
It should be noted that this control functions
dierently in Automatic and Graphical modes:
AUTOMATIC MODE In Automatic Mode, the
Scale Detune control shifts the pitch reference
by the set amount.
GRAPHICAL MODE In Graphical Mode, the
Scale Detune control shifts the position of
the horizontal graph pitch reference lines (or
lanes, if Show Lanes is selected), such that any
correction objects created or adjusted relative
to those reference lines will reflect the Scale
Detune setting.
VERY IMPORTANT NOTE: If you create
any pitch correction objects and
subsequently adjust the Scale
Detune setting, this will NOT change the
output pitches of the existing objects. If you
will be working in Graphical Mode on a track
that requires scale detuning, set the proper
detune amount BEFORE beginning pitch
correction.
A TIP: If you have a tone that you
want to use as the pitch standard,
select that tone and play it in a loop.
Adjust Scale Detune until the Change meter
reads zero. (You may be required to use the
Edit Scale Display to remove adjacent notes
so that Auto-Tune 8 doesn’t tune to the wrong
note.)
The default Scale Detune setting is 0 cents.
Double-clicking or Command (Mac)/Control
(PC) clicking the Scale Detune knob will reset it
to that value.
Tran sp os e
In addition to any pitch correction applied
by either Automatic or Graphical Mode, the
Transpose control lets you shift the overall
pitch of your performance over a two octave
range (+/- one octave), selectable in precise
semitone increments.
In Automatic Mode, this transposition is
accomplished in real time.
In Graphical Mode, this function does not
aect the Pitch Edit Display. It provides overall
transposition on top of any pitch shifting
accomplished with the graphical editing tools.
As noted above, although you can also
accomplish overall transposition in Graphical
Mode by selecting all the correction objects
in your track and manually moving them up
or down, in most cases, using the Transpose
function will provide superior results.
NOTE: If you are transposing
more than a semitone or two
and your intent is to preserve the
performer’s vocal character, be sure to engage
the Formant Correction function described
below. Transposing large intervals (especially
transposing higher) without formant

18
correction will result in the “munchkinization”
eect familiar from tape speed changing and
early digital sampling. (Of course, if singing
chipmunks are what you’re going for, leave
Formant Correction o.)
The default Transpose setting is semitones
(i.e., no transposition). Double-clicking or
Command (Mac)/Control (PC) clicking the
Transpose knob will reset it to that value.
Throat Length
As mentioned above,
the shape of a singer’s
throat is a prime
contributor to their
vocal character. AutoTune 8 lets you modify
the vocal quality of a
performance by actually
varying the geometry of
a physical model of the human vocal tract and
processing the original performance through
that model.
The Throat Length control lets you modify the
length of the modeled throat. The range of the
control is 50 to 180. Values above 100 represent
a lengthening of the throat while values below
100 represent a shortening of the throat.
The actual values represent the percentage
change in the throat length. For example, a
value of 120 represents a 20% increase in throat
length, while a value of 70 represents a 30%
decrease in throat length.
NOTE: This control is only active when
Formant Correction is engaged.
When Formant Correction is not
engaged, this control is disabled (grayed out).
In addition to simply changing vocal timbre,
increasing throat length is useful when the
original performance is female and you want
to transpose it down and have it sound more
male. Conversely, decreasing throat length
is useful when the original input is male and
you want to transpose it up and have it sound
female or childlike.
NOTE: While this control gives you
the ability to radically change the
throat length, keep in mind that
the variation in the length of human vocal
tracts is rarely more than about 20% in either
direction. If you are looking for a “realistic”
vocal characteristic, start with modest settings
of this control. More extreme settings can
produce dramatic results, but probably not
what anyone would call “realistic.”
Command (Mac)/Control (PC) click the control
to reset it to its default value of 100.
IMPORTANT NOTE: This function is
specifically for changing the existing
quality of a voice, not for manual
formant compensation for pitch shifting.
Auto-Tune 8 automatically applies appropriate
formant correction when it shifts pitch with
Formant Correction Enabled.
ANOTHER NOTE: This control sets the
overall Throat Length for your entire
track. Additionally, Throat Length
can be adjusted on a note-by-note basis in
Graphical Mode using the Throat Length
Adjust function described in the Graphical
Mode section below.
Formant Correction
Click the Formant button to
toggle Auto-Tune 8’s formant
correction function on and o.
The button will turn blue when
formant correction is active and will be pale
gray when it is inactive.
Engaging Auto-Tune 8’s Formant Correction
prevents the shifting of a voice’s resonant
frequencies to ensure that its vocal
characteristics are preserved over the pitch
shift range. (For a more complete explanation
of formant correction, refer to the Pitch
Shifting and Formant Correction section in
Chapter 2.)

19
AN IMPORTANT NOTE:
small intervals usually associated
with basic pitch correction, formant
shifting is essentially inaudible and AutoTune’s classic pitch adjustment technology
still provides the optimum results. Formant
Correction is designed to be used with overall
transposition or on tracks where notes are
shifted by large intervals.
Over the very
Correction Mode
Click the appropriate
button to select either
Automatic or Graphical
Mode.
The Options Dialog
Clicking the Options button will
bring up a window containing a
number of settings that fall into
the “set and forget” category.
They are:
BUFFER SIZE This controls the number of
seconds of memory buer space that are
permanently reserved for pitch tracking and
pitch correction data in Graphical Mode.
(There is a separate buer for each plug-in
occurrence.) To change the buer allocation,
click in the data field and enter the required
number of seconds.
e maximum buer length is 14,400 seconds
Th
(i.e., 4 hours).
NOTE: For hosts that provide valid
time information, Auto-Tune 8 will
at its correct time within the track. If your host
supports this capability, setting the buer to
the length of the entire song and tracking the
pitch in one pass will allow you to quickly and
easily move to each section of audio to be
corrected as necessary.
NUMBER OF UNDOS Auto-Tune 8 provides
multiple Undo/Redo capability in Graphical
Mode. Select the maximum allowable
number here (up to 20). Choosing a higher
number allocates more memory for saving
intermediate states.
control Undo/Redos. For example, if you set
this value to 15, you will have 15 levels of undo
for pitch correction actions and an additional
15 levels for time control actions.
KNOB CONTROL Lets you select how you
want to control the “knobs” in the Auto-Tune
8 interface.
LINEAR: Position the cursor over a knob, press
and hold the left mouse button (or the only
mouse button, if you’re using a one-button
mouse) and move the cursor up or to the right
to turn the knob clockwise or down or to the
left to turn the knob counterclockwise. The
current value of the knob’s parameter appears
in its associated numeric display.
display all tracked pitch information
NOTE: The value selected here
applies independently to both pitch
correction Undo/Redos and time

20
CIRCULAR: Click any where around the
circumference of the knob, press and hold
the left mouse button and “rotate” the knob
in the desired direction. The current value of
the knob’s parameter appears in its associated
numeric display.
FOLLOW HOST: Some hosts also allow you to
select a knob control method and pass that
selection on to plug-ins. If yours does, selecting
Follow Host will automatically set Auto-Tune
8’s Knob Control to the method selected in
your host. If you select Follow Host, but your
host doesn’t supply that information to AutoTun e 8, k no b c on tr ol wi ll de fa ul t to Li ne ar.
USE CUSTOM CURSORS IN GRAPHICAL
MODE Click the check box to use Custom
Cursors in Graphical Mode. Normally, AutoTune 8 displays dierent cursor shapes in the
Pitch Graph Display to help you select ranges
and grab and drag objects (e.g., the object
cursor, the anchor point cursor, etc.). However,
some host applications mistakenly think that
they own the cursor when it is in a plug-in
window. This may cause the cursor to flash as
the host and Auto-Tune 8 alternately try to set
the cursor shape. If this annoys you, unclick this
check box. It will stop the flashing, but you will
no longer see Auto-Tune 8’s custom cursors.
DISPLAY VERTICAL LINE AT CURSOR TIME
POSITION Click the check box to cause
a vertical line to be displayed at the cursor
position in Graphical Mode. This is most useful
when you are comparing the various pitch
values (tracked pitch, correction object pitch,
and output pitch) at one or more time locations
in your track.
A TIP: Since the line indicator can be
somewhat annoying during normal
editing tasks, you can, if you prefer,
uncheck this box in the Options dialog and
then assign Toggle Time Indicator to one of the
number keys as described below. That way, you
can turn it on only when you need it, without
having to call up the Options dialog every time.
SHOW OUTPUT PITCH CURVES Click the
check box to cause the green output curve
to be visible. When not checked, only the red
tracked pitch curve and the various correction
objects (Line, Curve or Note) will be visible.
SHOW ENVELOPE IN MAIN GRAPH Click the
check box to cause the amplitude envelope to
be visible in the main editing window. This is
particularly useful when selecting edit points
during time editing.
PLAY AUDIO FOR SELECTED NOTE
OBJECT When this box is checked, clicking
and holding on a Note object will result in
a tone sounding at the current pitch of the
Note object. Continuing to hold the mouse
down and moving the Note object up or down
will result in the tone changing to match the
position of the Note. Releasing the mouse
button will end the tone.
NOTE: If you have selected “Snap
to Note,” the tone will be limited to
exact semitones.
SHOW ENVELOPE GRAPH Click the check
box to cause the dedicated Envelope Graph to
be displayed under the main editing window.
If you are working on a laptop with limited
screen real estate, unchecking this box to
cause the Envelope Graph to disappear will
give you more screen space for the main
editing window.
AUTO-SCROLL MODE Click to select the
auto-scrolling method.
With screen-by-screen scrolling, the display
remains stationary until the play position
reaches the right-hand edge of the window,
at which time the display jumps to the next
screen of data.
With smooth scrolling, Auto-Tune 8 will
automatically scroll the Pitch Graph Display to
ensure that the current play position is always
visible in the display.

21
SMOOTH SCROLLING DELAY We have
found that some hosts result in smoother
smooth scrolling than others. If you have
selected Smooth Scrolling and the display
does not scroll smoothly (I.e., it jerks or jumps),
changing the Smooth Scrolling Delay value can
often help.
DEFAULT RETUNE SPEEDS Since Auto-Tune
8 allows independent Retune Speeds for each
correction object, we’ve provided the ability
to set custom default Retune Speeds for each
of the three object types: Lines, Curves and
Notes. These are the initial Retune Speed
values that are assigned to each newly created
object. (You may, of course, modify each
individual object’s setting as needed.)
To choose your own values, just pay attention
to what values you most commonly use for
the various objects and set those as defaults.
Update as necessary.
A TIP: Your choice of default
values will depend greatly on your
particular workflow and your
typical use of the various correction objects.
If, for example, you usually use Make Curve or
Import Auto to tweak pitch while preserving
all pitch gestures, usually use Lines for quick
correction of individual out-of-tune notes,
and usually use Note Objects for precise
programming of the Auto-Tune Vocal Eect,
you might set the Curves default to 0, the Lines
default to 20 and the Notes default to .
KEY BINDINGS The Key Bindings section
allows you to assign your most commonly
used Graphical Mode tools and controls to
the 10 number keys that appear above the
letter keys on the QWERTY portion of your
keyboard.
NOTE: Since some hosts reserve the
numeric keypad for host keyboard
shortcuts even when a plug-in
window is active, the Key Bindings apply only
to the number keys on the QWERTY portion of
your keyboard.
The following functions are available for
assignment:
Graphic Tools
Line
Curve
Note
Arrow
Scissors
Zoom
I-Beam
Hand Scroll
Move Point
Move Region
Edit Functions
Clear All
Undo
Redo
Select All
Cut
Copy
Paste
Time Control
Undo Time Change
Redo Time Change
Clear All Time Changes
Control Toggles
Snap To Note
Auto-Scroll
Show Lanes
Tr ack P it ch
Cursor Time Indicator
Show Output Curve
Show MIDI
Tr ack P it ch + Ti me
Enable Time Control
Correction Objects
Make Curves
Import Auto
Make Notes
Make Notes from MIDI

22
Other Controls
Reset Internal Cock
Nudge Up
Nudge Down
Zoom In Horizontal
Zoom Out Horizontal
Zoom In Vertical
Zoom Out Vertical
Adjust Retune Speed Faster
Adjust Retune Speed Slower
Adjust Vibrato Depth More
Adjust Vibrato Depth Less
Adjust Throat Length Longer
Adjust Throat Length Shorter
WINDOW SIZE Since some hosts and/or
plug-in formats do not support real-time plugin window resizing (i.e., dragging on the corner
of the window), the Window Size controls
allow you to select among three preset sizes or
specify a custom size of your choice.
The preset sizes (measured in pixels) are:
Normal: 850 wide by 630 high
Medium: 1000 wide by 600 high
Large: 1600 wide by 900 high
Clicking any of the Preset buttons will enter
those dimensions in the Width and Height
data entry fields. To enter a custom size,
simply click in the desired field and enter the
value of your choice.
The new size will take aect when you click
the Save button.
NOTE: Some hosts do not support
immediate resizing of an open plug-
in window. If yours in one of those,
after clicking Save, you will have to close the
Auto-Tune 8 window and reopen it to have the
size change take aect.
SAVE AS DEFAULT When the “Save as
default” box is checked, any changes you make
to the various Options settings are saved as
defaults for all future instances of Auto-Tune 8.
If you want to make a temporary change to
an Option setting for a particular track, but
want to retain the previous default for future
instances, uncheck the “Save as default” box
before clicking the Save button. Your modified
value will take eect in the current instance of
Auto-Tune 8, but future instances will revert to
the previously saved value.
Bypass
Auto-Tune 8 does not include a dedicated
Bypass control as that function is typically
provided by the host application’s plug-in
interface.
Automatic Mode Controls
Pitch Correction Functions
Retune Speed
Retune Speed controls
how rapidly the pitch
correction is applied
to the incoming
sound. The units
are milliseconds. A
value of zero will
cause instantaneous
changes from one
tone to another and will completely suppress a
vibrato (note that any related volume changes
will remain). Values from 10 to 50 are typical
for vocals (unless you’re going for the AutoTun e Voc al E ect, in which case use ). Larger
values let through more vibrato and other
interpretative pitch gestures but also slow
down how rapidly pitch corrections are made.
Although the above suggestions can be used
as starting points, finding the correct Retune
Speed setting for a particular performance is
largely a matter of trial-and-error and depends
on such attributes as song tempo, note
duration and vocal style, among others. As
always, let your ears be your guide.

23
The default Retune Speed value is 20. Doubleclicking or Command (Mac)/Control (PC)
clicking the Retune Speed knob will reset it to
that value.
Correction Style
The Correction Style
control lets you
select either the
classic Auto-Tunestyle pitch correction
or our new Flex-Tune
pitch correction
technology, which is
designed to provide
pitch correction while also preserving a
singer’s expressive vocal gestures intact.
Other real-time pitch correction methods,
including previous versions of Auto-Tune, are
always pulling every note towards a target
scale note, in the process distorting any of the
singer’s expressive vocal gestures. In contrast,
Flex-Tune only provides correction when the
vocalist approaches a scale note. At all other
times, they are free to sing with whatever
vocal gestures best express their emotional
connection to their song.
The Correction Style control lets you choose
how close to the scale pitch the singer has to
be for Auto-Tune 8 to apply correction. In the
Classic position, correction is always applied.
This results in the same style of correction
as previous versions of Auto-Tune. As you
move the control into the Flex-Tune range,
the correction area around the scale note
gets smaller and smaller until, at the extreme
clockwise position, no correction will be
applied at all.
The default Correction Style value is .
Double-clicking or Command (Mac)/Control
(PC) clicking the Correction Style knob will
reset it to that value.
Humanize
One situation that
can be problematic
in Automatic Mode is
a performance that
includes both very
short notes and longer
sustained notes. The
problem is that in
order to get the short notes in tune, you’d have
to set a fast Retune Speed, which would then
make any sustained notes sound unnaturally
static. Luckily, the Humanize function easily
solves this problem.
The Humanize function dierentiates
between short and sustained notes and lets
you apply a slower Retune Speed just to the
sustained notes. Thus, the short notes are in
tune and the sustained notes still allow the
natural variations of the original performance.
Here’s how it works:
Start by setting Humanize to and adjusting
the Retune Speed until the shortest problem
notes in the performance are in tune. At
this point, any sustained notes may sound
unnaturally static. If so, start advancing the
Humanize control. The higher the Humanize
setting, the more the Retune Speed is slowed
for sustained notes. The goal is to find the
point where the sustained notes are also in
tune and just enough of the natural variation
in the performance is present in the sustained
notes to sound natural and realistic. (If you set
Humanize too high, any problem sustained
notes may not be fully corrected.)
This is another of those settings where you
have to let your ears be your guide. The
optimum Humanize setting for any particular
performance will depend on the performance
style, the other Automatic Mode settings and
the specific eect you desire.
The default Humanize setting is . Doubleclicking or Command (Mac)/Control (PC)
clicking the Humanize knob will reset it to that
value.
 Loading...