


 Loading...
MaxCommunicator™
Manual
MAX Communication Server
Release 7.0 Update 1
June 11, 2014
WARNING!
Toll fraud is committed when individuals unlawfully gain access to customer telecommunication systems. This is a criminal offense. Currently, we do not know of any telecommunications system that is immune to this type of criminal activity. AltiGen Communications, Inc., will not accept liability for any damages, including long distance charges, which result from unauthorized and/or unlawful use. Although AltiGen Communications, Inc., has designed security features into its products, it is your sole responsibility to use the security features and to establish security practices within your company, including training, security awareness, and call auditing.
NOTICE
While every effort has been made to ensure accuracy, AltiGen Communications, Inc., will not be liable for technical or editorial errors or omissions contained within the documentation. The information contained in this documentation is subject to change without notice.
This documentation may be used only in accordance with the terms of the AltiGen Communications, Inc., License Agreement.
AltiGen Communications, Inc. 410 East Plumeria Dr.
San Jose, CA 95134
Telephone: 888-AltiGen (258-4436) Fax: 408-597-9020
E-mail: info@altigen.com Web site: www.altigen.com
TRADEMARKS
MAX Communication Server, MaxAdministrator, MaxCommunicator, MaxAgent, MaxSupervisor, MaxInSight, MaxOutlook, MaxCall, Enterprise Manager, AltiServ, AltiLink, AltiConsole, VRPlayer, Zoomerang, IPTalk, Alti-Mobile Extension, InTouch Dialer, AltiReport, and SuperQ are trademarks or registered trademarks of AltiGen Communications, Inc.
All other brand names mentioned are trademarks or registered trademarks of their respective manufacturers.
Copyright © AltiGen Communications, Inc. 2014. All rights reserved.
Contents
CHAPTER 1
About MaxCommunicator . . . . . . . . . . . . . . . . . . . . . . . . . . . . 1
Microsoft Outlook and Outlook Express Support . . . . . . . . . . . . . . 1
ACT!/GoldMine® Support . . . . . . . . . . . . . . . . . . . . . . . . . . . . . . . 1
Licensing . . . . . . . . . . . . . . . . . . . . . . . . . . . . . . . . . . . . . . . . . . . . . 2
CHAPTER 2
Installation . . . . . . . . . . . . . . . . . . . . . . . . . . . . . . . . . . . . . . . . . 3
Pre-Installation Checklist . . . . . . . . . . . . . . . . . . . . . . . . . . . . . . . . . 3 Installing MaxCommunicator on a Client System . . . . . . . . . . . . . . 4 Uninstalling MaxCommunicator . . . . . . . . . . . . . . . . . . . . . . . . . . . 4 Automatic Upgrade . . . . . . . . . . . . . . . . . . . . . . . . . . . . . . . . . . . . . 4 Downgrade Procedure . . . . . . . . . . . . . . . . . . . . . . . . . . . . . . . . . . . 5
CHAPTER 3
Getting Started . . . . . . . . . . . . . . . . . . . . . . . . . . . . . . . . . . . . . 7
Logging In . . . . . . . . . . . . . . . . . . . . . . . . . . . . . . . . . . . . . . . . . . . . 7
Version Mismatch Dialog Box . . . . . . . . . . . . . . . . . . . . . . . . . . . 8
Logging In Remotely . . . . . . . . . . . . . . . . . . . . . . . . . . . . . . . . . . 8
IP Extensions Using IPTalk . . . . . . . . . . . . . . . . . . . . . . . . . . . . . 9
When Connection Is Broken . . . . . . . . . . . . . . . . . . . . . . . . . . . . . . 9
Overview of the Main Window . . . . . . . . . . . . . . . . . . . . . . . . . . . 10
Click a Number to Make a Call . . . . . . . . . . . . . . . . . . . . . . . . . 11
Status Bar . . . . . . . . . . . . . . . . . . . . . . . . . . . . . . . . . . . . . . . . . . 11
Toolbar Buttons . . . . . . . . . . . . . . . . . . . . . . . . . . . . . . . . . . . . . 11
Call Information Panel . . . . . . . . . . . . . . . . . . . . . . . . . . . . . . . . 12
Tabbed Pages . . . . . . . . . . . . . . . . . . . . . . . . . . . . . . . . . . . . . . . 13
Changing Activity Status and Recording Activity Greetings . . . . 15
Turning Do Not Disturb On and Off . . . . . . . . . . . . . . . . . . . . . . . 16
Minimizing and Exiting MaxCommunicator . . . . . . . . . . . . . . . . . 16
MaxCommunicator Manual iii
Shrinking MaxCommunicator . . . . . . . . . . . . . . . . . . . . . . . . . . . . 16
Using the Windows Tray Phone Icon . . . . . . . . . . . . . . . . . . . . . . 17
Searching in the Tabbed Windows . . . . . . . . . . . . . . . . . . . . . . . . 17
Customizing the Display . . . . . . . . . . . . . . . . . . . . . . . . . . . . . . . . 18
CHAPTER 4
Handling Calls . . . . . . . . . . . . . . . . . . . . . . . . . . . . . . . . . . . . .23
Answering Calls . . . . . . . . . . . . . . . . . . . . . . . . . . . . . . . . . . . . . . 23 Dialing Out . . . . . . . . . . . . . . . . . . . . . . . . . . . . . . . . . . . . . . . . . . 24 Shortcut-Key Dialing and Smart Tag Dialing . . . . . . . . . . . . . . 25 Dialing Speed Dial Numbers . . . . . . . . . . . . . . . . . . . . . . . . . . . 25 Redialing . . . . . . . . . . . . . . . . . . . . . . . . . . . . . . . . . . . . . . . . . . 27 Placing Calls on Hold . . . . . . . . . . . . . . . . . . . . . . . . . . . . . . . . . . 27 Using Call Waiting . . . . . . . . . . . . . . . . . . . . . . . . . . . . . . . . . . . . 27 Transferring Calls . . . . . . . . . . . . . . . . . . . . . . . . . . . . . . . . . . . . . 28 Transferring to Voice Mail. . . . . . . . . . . . . . . . . . . . . . . . . . . . . 29 Transferring to Auto Attendant . . . . . . . . . . . . . . . . . . . . . . . . . 29 Forwarding Calls Using Do Not Disturb . . . . . . . . . . . . . . . . . . 30 Conference Calls . . . . . . . . . . . . . . . . . . . . . . . . . . . . . . . . . . . . . . 30 Station Conferencing . . . . . . . . . . . . . . . . . . . . . . . . . . . . . . . . . 30 MeetMe Conference . . . . . . . . . . . . . . . . . . . . . . . . . . . . . . . . . . . 32 Working in the MeetMe Conference Window. . . . . . . . . . . . . . 33 Creating a Meeting . . . . . . . . . . . . . . . . . . . . . . . . . . . . . . . . . . . 34 E-mailing a Meeting Invitation . . . . . . . . . . . . . . . . . . . . . . . . . 39 Starting and Stopping a Meeting . . . . . . . . . . . . . . . . . . . . . . . . 40 What the MeetMe Conference Host Can Do . . . . . . . . . . . . . . . 40 Continuing a Meeting Beyond Its Duration Time . . . . . . . . . . . 41 Joining a MeetMe Conference . . . . . . . . . . . . . . . . . . . . . . . . . . 41 Recording Calls . . . . . . . . . . . . . . . . . . . . . . . . . . . . . . . . . . . . . . . 41 Recording on Demand . . . . . . . . . . . . . . . . . . . . . . . . . . . . . . . . 41 Using Account Codes . . . . . . . . . . . . . . . . . . . . . . . . . . . . . . . . . . 42 Using Voice Mail . . . . . . . . . . . . . . . . . . . . . . . . . . . . . . . . . . . . . . 43 Dealing with Voice Mail . . . . . . . . . . . . . . . . . . . . . . . . . . . . . . 44 Save at Remote Server or Export Locally . . . . . . . . . . . . . . . . . 45 Deleting Messages . . . . . . . . . . . . . . . . . . . . . . . . . . . . . . . . . . . 45 Returning a Call . . . . . . . . . . . . . . . . . . . . . . . . . . . . . . . . . . . . . 45
iv MaxCommunicator Manual
Attaching a Note . . . . . . . . . . . . . . . . . . . . . . . . . . . . . . . . . . . . . 45 Forwarding Voice Mail. . . . . . . . . . . . . . . . . . . . . . . . . . . . . . . . 45 Monitoring the Activity of Other Extensions . . . . . . . . . . . . . . . . 46 Choosing Extensions to Monitor . . . . . . . . . . . . . . . . . . . . . . . . 47 Reading the Monitor List . . . . . . . . . . . . . . . . . . . . . . . . . . . . . . 47 Calling or Picking Up Calls . . . . . . . . . . . . . . . . . . . . . . . . . . . . 48 Viewing the Call History . . . . . . . . . . . . . . . . . . . . . . . . . . . . . . . . 48 Using the Contacts Tab . . . . . . . . . . . . . . . . . . . . . . . . . . . . . . . . . 49
CHAPTER 5
Configuring MaxCommunicator . . . . . . . . . . . . . . . . . . . . . 51
General Information . . . . . . . . . . . . . . . . . . . . . . . . . . . . . . . . . . . . 51
Configuring Microsoft Office Programs to Display Max Smart
Tags . . . . . . . . . . . . . . . . . . . . . . . . . . . . . . . . . . . . . . . . . . . . 53
Enabling / Disabling the Max Smart Tag in Internet Explorer. . 53
Call Handling . . . . . . . . . . . . . . . . . . . . . . . . . . . . . . . . . . . . . . . . . 55
One Number Access (ONA) . . . . . . . . . . . . . . . . . . . . . . . . . . . . . 58
Before You Set Up ONA . . . . . . . . . . . . . . . . . . . . . . . . . . . . . . 58
Setting Up One Number Access . . . . . . . . . . . . . . . . . . . . . . . . . 58
Message Notification . . . . . . . . . . . . . . . . . . . . . . . . . . . . . . . . . . . 61
Working with Voice Mail Groups (Distribution Lists) . . . . . . . 62
Working on Voice Mail Group Lists . . . . . . . . . . . . . . . . . . . . . 62
Call Alert Options . . . . . . . . . . . . . . . . . . . . . . . . . . . . . . . . . . . . . 64
Voice Mail Play Options . . . . . . . . . . . . . . . . . . . . . . . . . . . . . . . . 65
CRM Integration . . . . . . . . . . . . . . . . . . . . . . . . . . . . . . . . . . . . . . 66
Tab Layout . . . . . . . . . . . . . . . . . . . . . . . . . . . . . . . . . . . . . . . . . . . 67
Theme Selection . . . . . . . . . . . . . . . . . . . . . . . . . . . . . . . . . . . . . . . 68
IPTalk . . . . . . . . . . . . . . . . . . . . . . . . . . . . . . . . . . . . . . . . . . . . . . . 69
Log . . . . . . . . . . . . . . . . . . . . . . . . . . . . . . . . . . . . . . . . . . . . . . . . . 71
CHAPTER 6
Using MaxCall . . . . . . . . . . . . . . . . . . . . . . . . . . . . . . . . . . . . 73
Logging in to MaxCall . . . . . . . . . . . . . . . . . . . . . . . . . . . . . . . . . . 73
The MaxCall Tab . . . . . . . . . . . . . . . . . . . . . . . . . . . . . . . . . . . . . . 74
Using a Phrase . . . . . . . . . . . . . . . . . . . . . . . . . . . . . . . . . . . . . . . . 74
MaxCommunicator Manual v
Recording a Phrase . . . . . . . . . . . . . . . . . . . . . . . . . . . . . . . . . . . . 75
Reviewing a Phrase . . . . . . . . . . . . . . . . . . . . . . . . . . . . . . . . . . . . 75
Appendix A . . . . . . . . . . . . . . . . . . . . . . . . . . . . . . . . . . . . . . .77
Errors and Troubleshooting . . . . . . . . . . . . . . . . . . . . . . . . . . . . . . 77
Troubleshooting IP Connectivity from a Remote Location . . . . 78
Index . . . . . . . . . . . . . . . . . . . . . . . . . . . . . . . . . . . . . . . . . . . . . . .79
vi MaxCommunicator Manual

C H A P T E R 1
About MaxCommunicator
MaxCommunicator is call management software for the general desktop PC user. It runs with the MAX Communication Server ACC or ACM system. MaxCommunicator users can access, configure, and perform several of the system’s PBX functions directly from the desktop, including call handling, call forwarding, voice messaging, extension monitoring, conferencing, and One Number Access.
In addition, MaxCommunicator integrates with Microsoft Outlook and Outlook Express, ACT! , and GoldMine® for caller screen pops.
Microsoft Outlook and Outlook Express Support
MaxCommunicator 7.0 Update 1 supports Microsoft Outlook 2007, 2010, and 2013, allowing you to obtain phone numbers to dial from a Microsoft Contact list. MaxCommunicator also lets you see the incoming calls that have a matching record in the Contact list.
You must set up the Outlook Contacts list prior to using this feature.
ACT!/GoldMine® Support
MaxCommunicator 7.0 Update 1 supports ACT! 2007, 2009, and 2010 and GoldMine® 6.5, 6.7, and 7.0 contact management software. MaxCommunicator lets you see the matching record from the contact database list of the incoming calls.
Note: Before ACT! can work with MaxCommunicator, you MUST install the ACT! Plugin.
Licensing
The following AltiGen licenses are required:
•MaxCommunicator requires a MaxCommunicator seat license for each user, or a MaxCommunicator session license.
•The IPTalk feature requires an IPTalk license for each user, or an IPTalk session license.
Overview
MaxCommunicator Manual 1
•ACT! and GoldMine integration require an Integration Connector license for each user.
•MaxCall requires a MaxCall seat license for each user or a MaxCall session license.
A system administrator can assign and verify seat licenses in MaxAdministrator by selecting License > Client SEAT License Management from the main menu.
2 MaxCommunicator Manual

C H A P T E R 2
Installation
The client system must meet the following minimum requirements.
Operating systems supported:
•Windows 7 (32-bit or 64-bit)
•Windows 8.1 (64-bit) System requirements:
•IBM/PC AT compatible system
•Microsoft .NET 2.0 or higher
•2GHz CPU or faster
•1GB available hard drive disk space
•1GB RAM
•SVGA monitor (1024 x 768) with 256 color display or better
•Keyboard and mouse
•A sound card in the computer, if using IPTalk
•MAX Communication Server ACC 7.0 Update 1 or MAX Communication Server ACM 7.0 Update 1 running on a server accessible to this client
Pre-Installation Checklist
Before installing MaxCommunicator, make sure the following is done:
•MAX Communication Server ACC 7.0 Update 1 or MAX Communication Server ACM 7.0 Update 1 has been installed on the system server.
•TCP/IP is enabled on both machines.
•The client is able to connect to the server on the network.
•The person installing MaxCommunicator has local administrator rights on the client computer.
Installation
MaxCommunicator Manual 3
•The extension affiliated with the client PC has a MaxCommunicator Seat License assigned to it, or there is a MaxCommunicator Session License installed in the MAXCS system.
Installing MaxCommunicator on a Client System
When the above items are done, follow these steps on the client machine:
1.Close all Windows applications.
2.Insert the MAX Communication Server 7.0 Update 1 DVD into the drive.
3.Open the MaxCommunicator folder, and run the Setup program in that folder, following the step-by-step installation instructions as they appear on the screen.
Alternatively, if your system administrator has loaded MaxCommunicator on a shared network server, you can copy the files in the MaxCommunicator folder to your desktop computer, and run the MaxCommunicator Setup program.
Uninstalling MaxCommunicator
1.From the Windows Start menu, select Control Panel > Add/ Remove Programs > MaxCommunicator 7.0 Update 1 to uninstall MaxCommunicator.
2.Click Remove, and respond to any additional prompts.
Automatic Upgrade
Each time you start up MaxCommunicator, a comparison is made with the version of MAX Communication Server ACC/ACM that is running on the server. If updates were made on the server, and your version of MaxCommunicator is out-of-date, you are prompted for upgrade permission. If you automatically upgrade, the MaxCommunicator startup is terminated and a software upgrade session is started. Restart MaxCommunicator to run the newer version.
4 MaxCommunicator Manual
Note: For remote MaxCommunicator users outside the firewall, TCP port 10050 is required to be open to allow automatic upgrade. Automatic upgrade over the Internet requires the sending of 15 MB files over the WAN, which may take some time, to perform the automatic update.
Downgrade Procedure
1.Go to Control Panel > Add/Remove Programs and remove MaxCommunicator 7.0 Update 1 and ALL OTHER 7.0 Update 1 client applications (such as MaxAgent, MaxOutlook, MaxSupervisor, AltiConsole and CDR Search).
2.Reboot your system.
3.Install the earlier software.
Installation
MaxCommunicator Manual 5
6 MaxCommunicator Manual

C H A P T E R 3
Getting Started
Start MaxCommunicator from the Microsoft Windows Start menu, by choosing Start > All Programs > MaxCommunicator > MaxCommunicator.
If you are connecting to the Internet through a modem connection, before you log in, establish a session connection from your PC to your local Internet service provider. If you’re using a lowspeed connection, the login may take some time, since a large amount of data is transferred to your desktop.
Logging In
1.If this is your first login to this MAX Communication Server ACC/ACM system, enter the system server’s IP address or the name of the system server you will be using. To obtain the server name or IP address, ask your system administrator.
(Subsequently, when you log in, you’ll see the IP address in the Server Name field. You may use the drop-down list to select a different server, if more than one server is available.)
Started Getting
MaxCommunicator Manual 7
2.Enter your Extension number and Password assigned to your phone. (You can also log in as a workgroup or a huntgroup.)
If you want to store your login password and have it entered automatically the next time you log in to MaxCommunicator, check the Always save password check box.
Note: Up to eight unsuccessful login attempts are allowed, after which login will be disabled for from 1 to 24 hours (depending on the duration set by your system administrator).
3.If your extension is an IP extension and you will be using a headset, check the Enable IPTalk softphone option. (An AltiGen IPTalk license must be assigned to your extension.)
(Even if you do not have an IP phone, as long as your extension is set up as an IP extension by your system administrator, you can check the Enable IPTalk softphone check box.)
See “Logging In Remotely” on page 8 for more information on using IP extensions remotely.
4.Click Sign In or press the Enter key. To back out of signing in, click Cancel or press the Esc key.
Version Mismatch Dialog Box
If your version of MaxCommunicator doesn’t match the version of MAX Communication Server on the system server, you are prompted for upgrade permission when you try to log in. If you allow upgrade at this time, the MaxCommunicator startup is terminated and a software upgrade session is started. Restart MaxCommunicator to run the newer version. (See “Automatic Upgrade” on page 4 for more details.)
Logging In Remotely
You can use MaxCommunicator from a remote location if
•MaxCommunicator is installed on your remote computer
•Your extension is configured as an IP or mobile extension by your system administrator
•You have an AltiGen-certified IP phone or are using IPTalk
8 MaxCommunicator Manual

Consult your system administrator or authorized AltiGen dealer for details on obtaining this equipment.
All the call handling functions are the same as when you log in locally, with the exception of the ability to configure One Number Access. You can pick up voice mail, forward local business office phone calls to another site such as a home desktop PC, and even receive phone calls as you would at the office.
To log in from a remote location,
1. |
If you connect to the Internet through a modem connection, |
Getting |
|
2. |
Log in using your Extension and Password as usual. |
||
|
establish a connection to your internet service provider (ISP). |
Started |
|
3. |
If you will be using a headset plugged into your PC, check the |
||
|
|||
|
Enable IPTalk softphone check box. (An AltiGen IPTalk |
|
|
|
license must be assigned to your extension.) |
|
|
4. |
Click OK. |
|
IP Extensions Using IPTalk
An AltiGen-certified USB headset system is recommended for IP extensions using IPTalk (your phone system administrator or AltiGen dealer can recommend headsets).
Important! You can run only one instance of MaxCommunicator with IPTalk per system.
To make and receive calls using IPTalk,
1.Connect your headset to your PC.
2.Use the MaxCommunicator dialing and call accepting functions as usual to make and receive calls.
When Connection Is Broken
When a connection with the phone server is broken, a message box pops up asking if you want to connect again. Click Yes to restore the connection without having to go through the log-in process again.
MaxCommunicator Manual 9

Overview of the Main Window
Once you log in to MaxCommunicator, the main window appears, providing tools to manage and monitor calls, and to facilitate management of your personal contacts.
You can customize the MaxCommunicator display: select the theme; the toolbar buttons, tabs, and columns you need and their order of appearance; the sort order; and so on. See “Customizing the Display” on page 18.
See call Information here |
Configure |
||||
|
Set your activity state Status bar |
Shrink window |
|
||
|
|
||||
|
|
|
|
|
|
|
|
|
|
|
|
|
|
|
|
|
|
Dialer box |
Call control tool bar |
Tabbed pages
If you checked Enable IPTalk when you logged in, the right side of the toolbar looks a little different:
Click the Down arrow to access the Mute button, the Volume button, and the Arrange Window button that lets you shrink the window.
10 MaxCommunicator Manual

Click a Number to Make a Call
All phone numbers become underlined when you pass the cursor over them. Click an underlined number to make a call to that number.
Right-click a call to see a context menu.
Status Bar
From the status bar you can do the following:
•Change your activity state from the drop-down list (see “Changing Activity Status and Recording Activity Greetings” on page 15).
•If you have configured Call Handling to forward all calls, see the target destination. For example:
•See the number of unopened voicemail messages.
•Turn Do Not Disturb (DND) on and off (see “Turning Do Not Disturb On and Off” on page 16).
•If you’re using IPTalk, you can mute the call (using the Mute toggle button) and control the volume using the volume control.
Mute button (toggle) 

 Volume control
•Shrink MaxCommunicator to a single tool bar and restore it to normal size by selecting from the drop-down menu.
•Configure MaxCommunicator (see “Configuring MaxCommunicator” on page 51).
•Open help.
Toolbar Buttons
Toolbar buttons provide single-click functions to connect, hang up, transfer, send to voicemail, hold, conference, send calls to AA (auto attendant), flash, record, redial, intercom, and enter account code.
Started Getting
MaxCommunicator Manual 11

You can choose the buttons you want and the order in which you want them. See “Customizing the Display” on page 18.
The Dialer field and Dial button are also in the toolbar. Click the Dial button to pop up the dial pad.
Dialer field Click the x to clear the dial field or close the dial pad
Dial button opens dial pad 
Call Information Panel
The call information panel displays several columns of information about calls:
Record— shows when a call is being recorded State—the state of the currently active call:
•AA—the call is being transferred to an auto attendant
•Busy—callee is busy or not available
•Call Pending—the call is placed into a workgroup queue
•Conference—the call is in conference
•Connect—the call is connected
•Dial Tone—a dial tone is present, and MaxCommunicator is ready to dial out
•Error—receipt of an error tone
•Hold—the call is on hold
•Hold Pending— the call is being transferred or conferenced
12 MaxCommunicator Manual

•Idle—the extension is not in use
•Play VM—playing voice mail (The Duration field displays the duration of the voice mail as it plays. The duration display does not reflect fast forward or fast backward.)
•Record—recording an introductory message
•Ringback—caller sees this state while the callee’s phone is ringing
•Ringing—an outgoing call is ringing another phone or an incoming call is ringing your phone
Name—the name of the person on the other end of the call, if available
Number—the phone number at the other end of the call Group—your workgroup number for this call DNIS—the DNIS number, if appropriate Duration—duration of the call
Conference—indicates the conference host
To hide a column you don’t want to see, right-click a column heading and uncheck the column.
To rearrange columns, click and drag a column heading to where you want it.
Accessing a Context Menu for a Call
You can right-click a call to access a context menu for that call. Then select from commands available for that call.
Tabbed Pages
Nine tabbed pages are available on the bottom half of the MaxCommunicator screen: Directory, History, Contacts, Voicemail, Monitor, Line Park, Speed Dial, MeetMe, and Greeting. (If you have enabled MaxCall, the MaxCall tab is available also. MaxCall requires a license and is discussed in “Using MaxCall” on page 73.)
Started Getting
MaxCommunicator Manual 13
Directory—Lists the extensions of people at the company. Columns include: Type (local, remote), Extension, Name, Activity, Department, Location.
Note: In order to see activity for remote extensions on the Directory tab, you must add those remote extensions to your Monitor list by following the steps described in “Choosing Extensions to Monitor” on page 47.
History—A history of your incoming, outgoing, and missed calls. Columns include: Direction (incoming, outgoing, missed), Number, Name, Date/Time, Duration, DNIS, Group, and Note.
Contacts—A list of contacts you have added to your MaxCommunicator. Columns include: Name, Company, Business Phone, Mobile Phone, Email Address, IM Address, Home Phone.
Voicemail—A log of unopened and opened voice mails left at your extension. Columns include: Type, Number, Caller Name (if available from extension information or from an external database), Date/Time, Duration, and Note. See “Dealing with Voice Mail” on page 44.
Monitor—A list of extensions you have chosen to monitor. Columns include: State, Extension, Name, Activity, DND/FWD, Caller Name, Number, Department, Location, DNIS, and Duration. See “Monitoring the Activity of Other Extensions” on page 47.
Line Park—Shows calls parked for line park groups that you are a member of. You can pick up a parked call from the LinePark tab. Columns include: Park (the Park ID), Extension, Caller Name, Number, DNIS, and Duration.
To park a call in MaxCommunicator, click the Flash button on the call control tool bar (you must customize your tool bar to display the Flash button), enter #41 (system call park) or #31 (personal call park) in the dialer field, then click the Connect button on the call control tool bar.
Speed Dial—A list of speed dial numbers entered by the system administrator and entered at the extension. Columns include: Type (extension speed dial or system speed dial), ID, Name, Number, and Note. See “Dialing Speed Dial Numbers” on page 25.
MeetMe—From the MeetMe tab, you can schedule and monitor phone meetings. See “MeetMe Conference” on page 32.
Greeting—From the Greeting tab, you can record and review greetings for each Activity state. See the following section.
14 MaxCommunicator Manual
Changing Activity Status and Recording Activity
Greetings
You can specify your whereabouts, so that others are informed. Click the Down arrow on the Activity button and choose the appropriate category:
• Available (System) (the system greeting is used) |
|
||
• Available (Personal) (your personal greeting is used) |
Getting |
||
• |
Away |
||
• |
Meeting |
Started |
|
• |
Travel |
||
|
|||
• PTO (personal time off) |
|
||
Your system administrator may have configured additional |
|
||
activities to select from. |
|
||
The activity category you select appears beside the button. Keep |
|
||
|
|||
your Activity status updated. |
|
||
You can record a different greeting for each Activity status. To do |
|
||
so, click the Greeting tab, and select an Activity. Then click the |
|
||
Record button at the bottom of the tab to record a greeting. |
|
||
(Alternatively, you can right-click the activity, and select Record.) |
|
||
Use your phone or headset to record the greeting. |
|
||
To hear the greeting played back, click the Review button. Change your greeting whenever you want to.
MaxCommunicator Manual 15

Turning Do Not Disturb On and Off
The DND button is a toggle that turns Do Not Disturb on and off. When Do Not Disturb is on, all incoming calls are forwarded according to your Enable Busy Call Handling settings.
Note: If the system administrator disabled the Do Not Disturb feature for your extension, the DND feature will not be available to you. If you select DND, an alert informs you that DND is not allowed.
Minimizing and Exiting MaxCommunicator
Minimize - To minimize MaxCommunicator, click the Minimize button in the top right corner of the screen. MaxCommunicator shrinks to an icon in the Windows task bar and the Windows system tray.
Exit - If you are shutting down Microsoft Windows, MaxCommunicator will close automatically. Otherwise, to close MaxCommunicator, right-click the icon in the Windows Task bar and choose Close Window or click the X in upper right corner of the MaxCommunicator window.
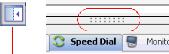
Shrinking MaxCommunicator
To shrink MaxCommunicator to a strip at the top or bottom of your screen, click the Arrange Window button and select Top or Bottom. The strip displays the MaxCommunicator status bar, plus no more than six call control buttons and the dialer field:
Default call control buttons
To restore MaxCommunicator to full view, click the Arrange Window button and select Normal.
When MaxCommunicator is shrunk and you put a call on hold (by clicking on the Hold button), the number flashes. Clicking the number reconnects to the call.
16 MaxCommunicator Manual

Note: If a new call comes in while a call is on hold, MaxCommunicator changes to normal size automatically, allowing you access to both calls.
Using the Windows Tray Phone Icon
After you log in, the MaxCommunicator icon is displayed in the Windows tray, normally at the bottom right of your screen.
When you have new voice mail, the icon changes to show you have voice mail.
If MaxCommunicator is not on your Windows desktop, but either icon appears in the Windows tray, double-click it to open the MaxCommunicator main window.
Searching in the Tabbed Windows
Searching is available in these tabs: Directory, History, Contacts, Voice Mail, and Speed Dial.
To search,
1.In the Search in field, select the column you want to search in.
2.Put your cursor in the field beside the magnifying glass, and type what you’re looking for. The search begins as you type, and the list is narrowed to records that match what you’re typing.
3.When you begin a new search, all the information that was on the tab reappears. Or you can clear the field beside the magnifying glass or make another selection in the Search in field, and you’ll see all the information on the tab.
Started Getting
MaxCommunicator Manual 17
Customizing the Display
You can customize the MaxCommunicator display to meet your needs in the following ways:
•Resize MaxCommunicator windows by using the standard Windows method: place the cursor at a window edge or corner, then drag the window to the size you want.
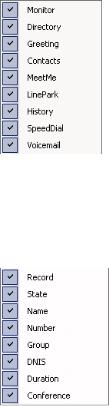
•Specify the tabs you want to see. To select the tabs you want to display, right-click on the area to the right of the tabs. A list of tabs appears:
Check the tabs you want to display, and uncheck the tabs you don’t want to display.
•Specify the columns you want to see by right-clicking a column heading and checking or unchecking columns in the pop-up list. Checked columns will be displayed.
•Resize columns by placing the cursor on a column divider in the header area until the cursor changes to a movable double bar (||). Then move the bar to resize the column.
18 MaxCommunicator Manual

•Rearrange columns by clicking and dragging a column name to the location you want.
Moving the Record column to the right |
|
||
|
|||
• Sort columns in ascending or descending order by clicking |
Getting |
||
to sort in the reverse order. If you click a column heading, and |
|||
the column heading. An ascending (first to last) or descending |
|
||
(last to first) arrow appears. Click the column heading again |
|
||
all the data in that column is the same, MaxCommunicator |
Started |
||
keeps the sort order of the previously clicked column. |
|||
|
|||
Ascending order |
Descending order |
|
|
•Add, remove, and rearrange the toolbar buttons in MaxCommunicator by right-clicking in the button area and choosing Customize Toolbar Buttons.
MaxCommunicator Manual 19
The buttons displayed in your MaxCommunicator are in the right-hand list. To remove a toolbar button, select it and click Remove. To add a toolbar button, select a button from the list on the left, and click Add. To rearrange buttons, select a button from the list on the right, and click the Up button or Down button, until the toolbar button is where you want it. When finished, click OK.
Note: When MaxCommunicator is shrunk to a strip at the top or bottom of your screen, six buttons are initially displayed by default in the shrunken toolbar: Connect,
Hold, Transfer, To VM, Hangup, Redial. These are the only buttons available to a shrunken toolbar. You can remove any of them in the way just described and add them back again.
When MaxCommunicator is made normal size, the buttons you originally selected are again displayed in the toolbar. In other words, you configure the normal toolbar and the shrunken toolbar separately, and MaxCommunicator keeps your preferences for each.
•Remove the dialer field by right-clicking a toolbar button and choosing Customize Toolbar Buttons, as above. In the Toolbar Customization dialog box, clear the check box beside Show Dialer. To display the dialer again, check the Show Dialer check box.
•Pop up MaxCommunicator when you have incoming calls. Pop ups work when MaxCommunicator is minimized or is a strip at the top or bottom of the window but not when you have exited. See “Call Alert Options” on page 64.
•Drag and dock the tabs by dragging the dotted area above them to the right arrow, the left arrow or the bottom arrow. Once you start moving the group of tabs, the arrows appear. Move the cursor to an arrow, and the tabs will be docked at the side you selected.
Dragging and docking
When the docking arrows appear, they look like this
•Drag and dock one tab by dragging it by its tab until the cursor is on the arrow where you want the tab to dock.
20 MaxCommunicator Manual

•Make a tab a separate window independent of the MaxCommunicator main window by dragging it out by its tab, or by double-clicking the tab. Then you can resize the window and move it around.
To dismiss the window, click the close button in the upper right corner. To return the window to the set of tabbed pages, drag it by its title bar to the tabs area.
A tab is being dragged from an independent window back to the tabs group.
Started Getting
MaxCommunicator Manual 21
Loading...