

Page 1

R
O
T
A
R
Y
E
N
C
O
D
E
R
/
P
U
S
H
E
N
T
E
R
IVA-C800E
Mobile Media Station
• OWNER'S MANUAL
Please read this manual to maximize your enjoyment of the outstanding performance and feature
capabilities of the equipment, then retain the
manual for future reference.
• MODE D'EMPLOI
Veuillez lire ce mode d'emploi pour tirer pleinement
profit des excellentes performances et fonctions de
cet appareil, et le conservez-le pour toute référence
future.
• !"
!"#$%&'()*+,-./"012
!"#$%&'( !"#$%&'
!"
R
Page 2

WARNING
English
Precautions
This symbol means important instructions. Failure to heed them can result
in serious injury or death.
Ce symbole désigne des instructions
importantes. Le non-respect de ces
instructions peut entraîner de graves
blessures, voire la mort.
!"#$%&'()*+,-&
!"#$%&'()*+,
INSTALL THE PRODUCT CORRECTLY
SO THAT THE DRIVER CANNOT
WATCH TV/VIDEO UNLESS THE
VEHICLE IS STOPPED AND THE
PARKING BRAKE IS APPLIED. It is
dangerous for the driver to watch the
TV/Video while driving the vehicle.
The driver may be distracted from
looking ahead and an accident could
occur. If the product is not installed
correctly, the driver will be able to
watch the TV/Video while driving the
vehicle and may be distracted from
looking ahead causing an accident.
The driver or other people could be
severely injured.
DO NOT OPERATE ANY FUNCTION
THAT TAKES YOUR ATTENTION AWAY
FROM SAFELY DRIVING YOUR
VEHICLE. Any function that requires
your prolonged attention should only
be performed after coming to a
complete stop. Always stop the
vehicle in a safe location before
performing these functions. Failure to
do so may result in an accident.
2
KEEP SMALL OBJECTS SUCH AS
BATTERY OUT OF THE REACH OF
CHILDREN. Swallowing them may
result in serious injury. If swallowed,
consult a physician immediately.
DO NOT DISASSEMBLE OR ALTER.
Doing so may result in an accident,
fire or electric shock.
Page 3

WARNING
English
Precautions
This symbol means important instructions. Failure to heed them can result
in serious injury or death.
Ce symbole désigne des instructions
importantes. Le non-respect de ces
instructions peut entraîner de graves
blessures, voire la mort.
!"#$%&'()*+,-&
!"#$%&'()*+,
USE THIS PRODUCT FOR MOBILE 12V
APPLICATIONS. Use for other than its
designed application may result in
fire, electric shock or other injury.
USE THE CORRECT AMPERE RATING
WHEN REPLACING FUSES. Failure to
do so may result in fire or electric
shock.
USE ONLY IN CARS WITH A 12 VOLT
NEGATIVE GROUND. (Check with
your dealer if you are not sure.)
Failure to do so may result in fire, etc.
DO NOT BLOCK VENTS OR RADIATOR PANELS. Doing so may cause
heat to build up inside and may result
in fire.
MINIMIZE DISPLAY VIEWING WHILE
DRIVING. Viewing the display may
distract the driver from looking ahead
of the vehicle and cause an accident.
4
DO NOT WATCH VIDEO WHILE
DRIVING. Watching the video may
distract the driver from looking ahead
of the vehicle and cause an accident.
KEEP THE VOLUME AT A LEVEL
WHERE YOU CAN STILL HEAR OUTSIDE NOISE WHILE DRIVING. Failure
to do so may result in an accident.
Page 4

CAUTION
English
Precautions
This symbol means important instructions. Failure to heed them can result
in injury or property damage.
Ce symbole désigne des instructions
importantes. Le non-respect de ces
instructions peut entraîner des blessures ou des dommages matériels.
!"#$%&'()*+,-&
!"#$%&'()*+
HALT USE IMMEDIATELY IF A PROBLEM APPEARS. Failure to do so may
cause personal injury or damage to
the product. Return it to your authorized Alpine dealer or the nearest
Alpine Service Centre for repairing.
KEEP FINGERS AWAY WHILE THE
MOTORIZED FRONT PANEL OR
MOVING MONITOR IS IN MOTION.
Failure to do so may result in personal
injury or damage to the product.
DO NOT PLACE HANDS, FINGERS
OR FOREIGN OBJECTS IN INSERTION
SLOTS OR GAPS. Doing so may result
in personal injury or damage to the
product.
DO NOT MIX NEW BATTERIES WITH
OLD BATTERIES. INSERT WITH THE
CORRECT BATTERY POLARITY. When
inserting the batteries, be sure to
observe proper polarity (+ and –) as
instructed. Rupture or chemical
leakage from the battery may cause
fire or personal injury.
6
Remove the anti-theft cover when you
drive. This prevents the cover from
falling off the unit and interfering with
the safe operation of the vehicle.
Page 5

CAUTION
English
Precautions
This symbol means important instructions. Failure to heed them can result
in injury or property damage.
Ce symbole désigne des instructions
importantes. Le non-respect de ces
instructions peut entraîner des blessures ou des dommages matériels.
!"#$%&'()*+,-&
!"#$%&'()*+
Operation of some of the functions of
this unit is very complex. Because of
this, it was deemed necessary to
place these functions into a special
screen. This will restrict operation of
these functions to times when the
vehicle is parked. This ensures the
focus of the driver's attention will be
on the road and not on the
IVA-C800E. This has been done for
the safety of the driver and passengers.
Title Input and Audio Processor
Adjustments cannot be made if the
car is moving. The car must be parked
and the parking brake must be engaged for the procedure described in
the Owner's Manual to be valid. The
warning "CAN'T OPERATE WHILE
DRIVING," will be displayed if any
attempts are made to perform these
operations while driving.
This operation is the same as when
selecting sources using the remote
control (RUE-4185). When the car is
parked, the selection is made as
described in the Owner's Manual.
8
Page 6

English
Contents
Page/ Page /
2/ 3 ........................................................................ Precautions
20/ 21 ............................................................ Using Face Cover
20/ 21 ...................................................... Resetting the System
22/ 23 ......................................................... Raising the Monitor
24/ 25 ....................................................... Lowering the Monitor
26/ 27 ................................................. Turning Power On or Off
28/ 29 .............................. Selecting the Monitor Opening Angle
28/ 29 ............................... Adjusting the Monitor Viewing Angle
30/ 31 ................................. Adjusting the Volume/Bass/Treble/
30/ 31 ............................................................ Muting the Sound
32/ 33 ............................................ Turning Loudness On or Off
34/ 35 ................................................................. Manual Tuning
36/ 37 ................................................... Automatic Seek Tuning
38/ 39 ................................... Manual Storing of Station Presets
40/ 41 ............................. Automatic Memory of Station Presets
42/ 43 .................................... Storing into Direct Access Preset
44/ 45 ................................................ Tuning to Preset Stations
46/ 47 ........................................ Selecting Preset Stations from
48/ 49 .................................. T.R.V.S. Search for Local Stations
50/ 51 ....................................................... Playing CD Player or
54/ 55 ........................................... Fast Forward and Backward
54/ 55 ........................................................... Music Sensor Skip
56/ 57 ........................................... Repeat Play on Single Track
58/ 59 ...................................................... M.I.X. (Random) Play
60/ 61 ............................ Displaying and Scrolling CD Title/Text
62/ 63 ......................................... Displaying List of Track Titles/
66/ 67 .................................................. Controlling CD Changer
70/ 71 .................................................. Multi-Changer Selection
MD Player (Optional) Operation
Basic Operation
Balance/Fader
Radio Operation
(D.A.P.) Band
List Displayed
CD Player/Changer (Optional)
Operation
Changer (Optional)
CD Titles
10
72/ 73 .................................................... Playing Mini-Disc (MD)
74/ 75 ........................................................ Music Sensor (Skip)
74/ 75 ........................................... Fast Forward and Backward
76/ 77 ..................................................................... Repeat Play
76/ 77 ...................................................... M.I.X. (Random Play)
78/ 79 ................................................ Scrolling Displayed Titles
80/ 81 ............................................ Displaying List for MD Titles
Page 7
English
Contents
Cassette Player Operation
82/ 83 ............................................. Controlling Cassette Player
84/ 85 .............................
86/ 87 ......................................................... Programme Sensor
86/ 87 ..................................................................... Repeat Play
88/ 89 ........................................................................Blank Skip
90/ 91 ..............................................Playing DVD/Video CD/CD
94/ 95 ........................................................................Still/Pause
94/ 95 .......................Chapter (DVD) /Track (Video CD) Sensor
96/ 97 .................................................. Fast Forward/Backward
96/ 97 ..................................................................... Repeat Play
98/ 99 ........................... Playing tracks in random order (M.I.X.)
100/ 101 ....................................... Auxiliary Device Operation
102/ 103.......................................Audio Processor Operation
152/ 153 .....................................Displaying Spectrum Analyzer
154/ 155 ................................ Turning Defeat Mode On and Off
156/ 157 ...........................................Titling Radio Stations/CDs
160/ 161 .......................................... Adjusting Subwoofer Level
164/ 165 .......................................................... Switching Phase
166/ 167 ......................................... Setting the External Device
170/ 171 ...................................... Setting Interrupt Icon Display
172/ 173 .............................................. Setting Bass Frequency
174/ 175 ................................................... Setting Visual Modes
176/ 177 ................................................ Selecting Rear Monitor
180/ 181 ........................................................... Displaying Time
182/ 183 ........................................................... Resetting Clock
186/ 187 ...................................... Setting Daylight Saving Time
188/ 189 ....................................Turning Sound Guide Function
190/ 191 ............................................................. Demonstration
192/ 193 ............................. Setting Automatic Opening/Closing
194/ 195 ....................................Adjusting Brightness of Picture
196/ 197 .............................................. Adjusting Tint of Picture
198/ 199 .......................................... Adjusting Colour of Picture
200/ 201 ...................................................... Illumination Control
202/ 203 .....................Switching Background Textures/Colours
204/ 205 ...................... Setting Automatic Background Texture/
206/ 207 ............................................ Switching Display Modes
208/ 209 .............................. Playing 2 Sources Simultaneously
(Optional)
Fast Forward/Rewind/Reversing Tape
Direction/Pause
DVD/Video CD/CD Player Operation
(Optional)
(Video CD/CD)
(Optional)
(Optional)
Other Useful Features
Interrupt Mode
On or Off
of Monitor
Colour Scroll
12
212/ 213 ..........................................................Remote Control
218/ 219 ................................................... In Case of Difficulty
228/ 229 ............................................................ Specifications
Page 8
English
Precautions
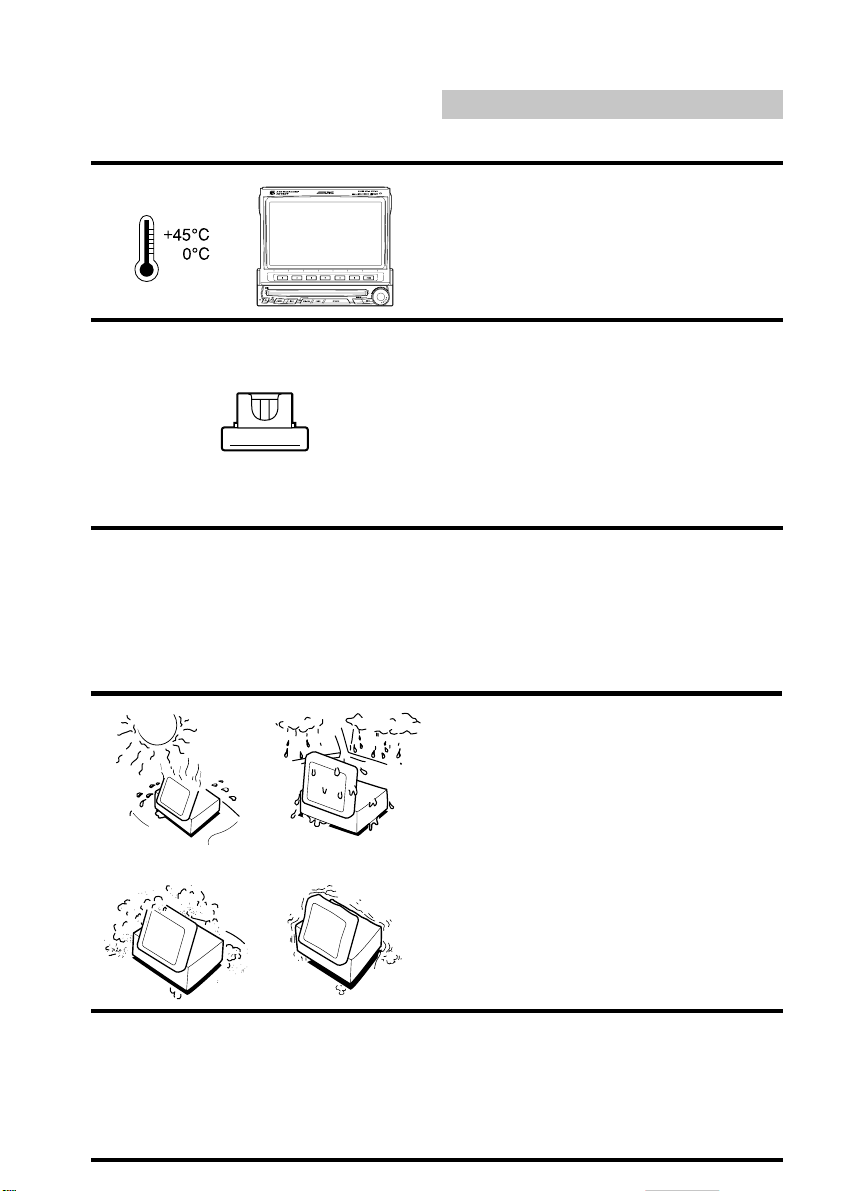
Temperature
Be sure the temperature inside the vehicle is
between +45˚C (+113˚F) and 0˚C (+32˚F)
before turning your unit on.
Y
E
N
R
C
A
T
O
O
D
R
E
R
/
P
U
S
H
E
N
T
E
R
Fuse Replacement
When replacing the fuse(s), the replacement
must be of the same amperage as shown on
the fuse holder. If the fuse(s) blows more than
once, carefully check all electrical connections
for shorted circuitry. Also have your vehicle's
voltage regulator checked.
Maintenance
If you have problems, do not attempt to repair
the unit yourself. Return it to your Alpine dealer
or the nearest Alpine Service Station for
servicing.
14
Installation Location
Make sure the IVA-C800E monitor/receiver will
not be exposed to:
• Direct sun and heat
• High humidity
• Excessive dust
• Excessive vibrations
Alpine products equipped with the Ai-NET bus,
connected to the IVA-C800E, can be operated
from the IVA-C800E. Depending on the
products connected, the functions and displays
will vary. For details, consult your Alpine dealer.
Page 9
Basic Operation
English
1
2
3
4
2
1
36
45
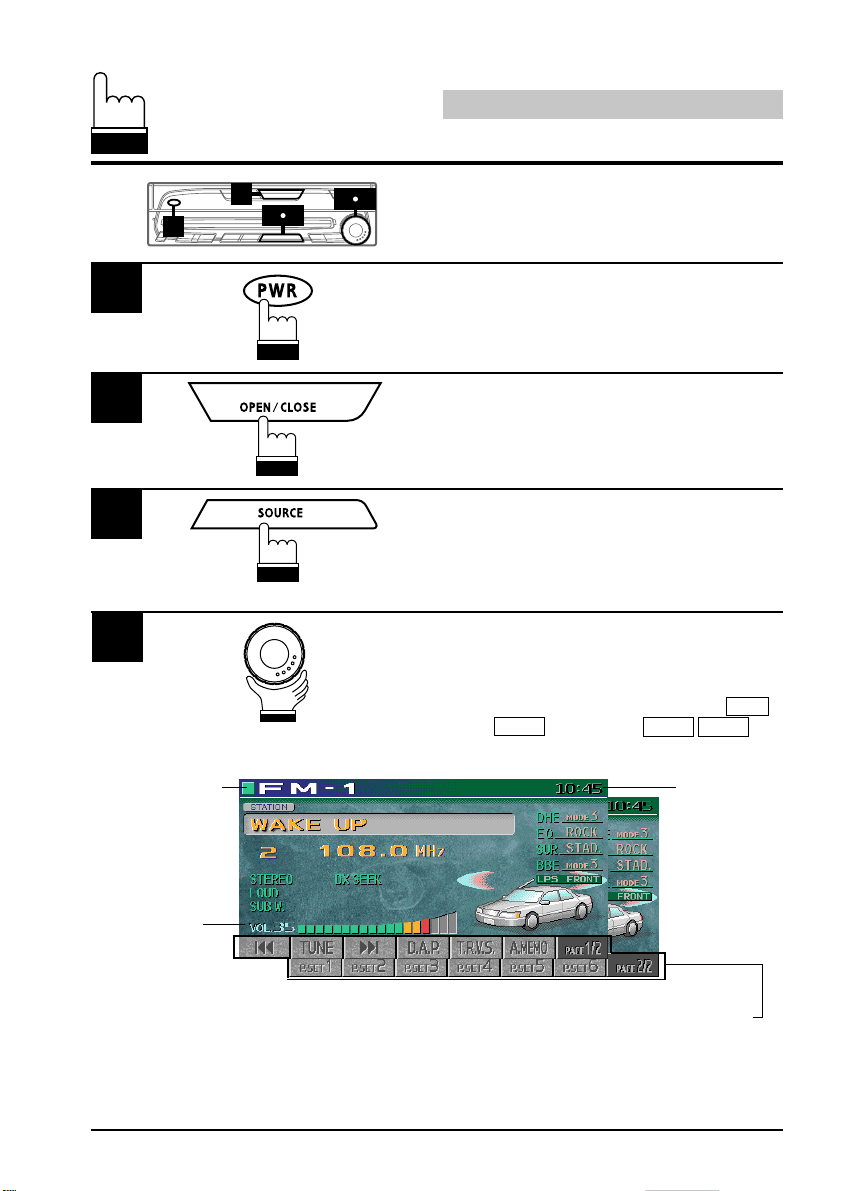
This section describes the basic operation of
the radio. These operations also apply to the
other sources.
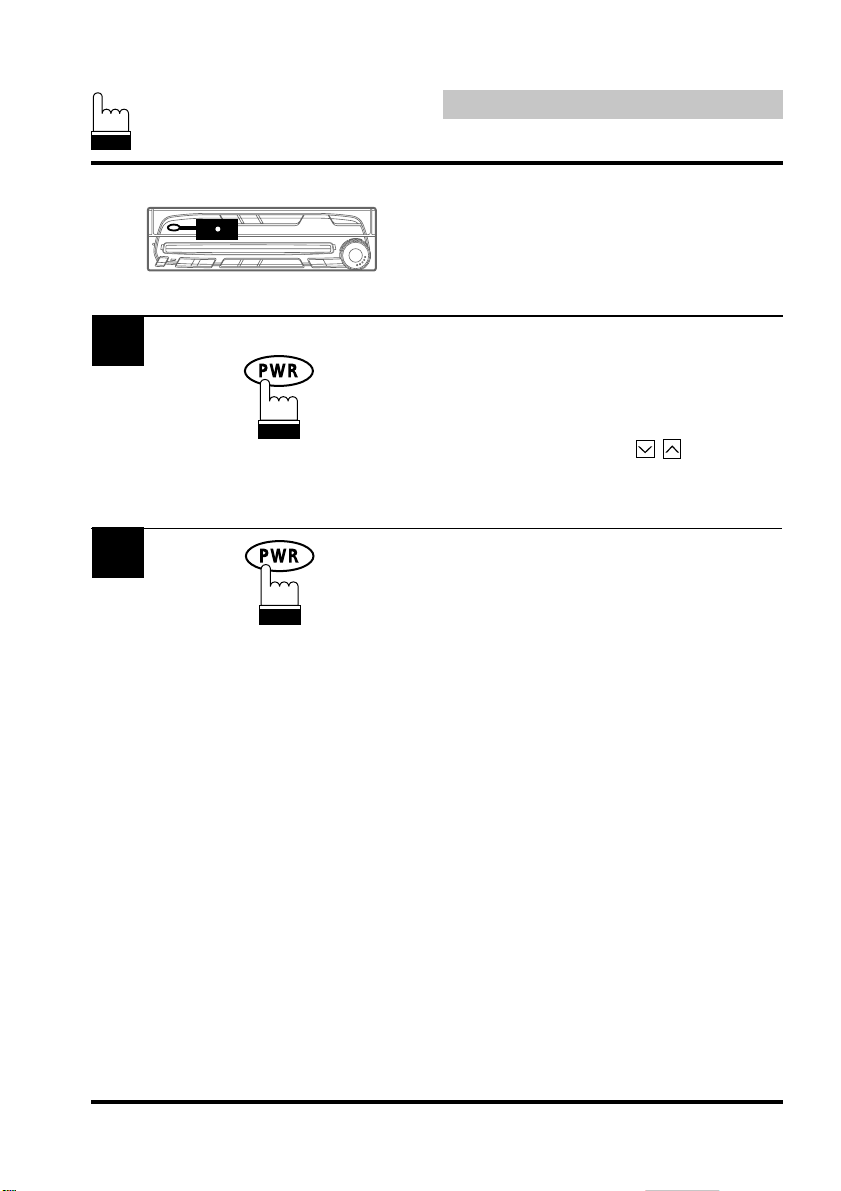
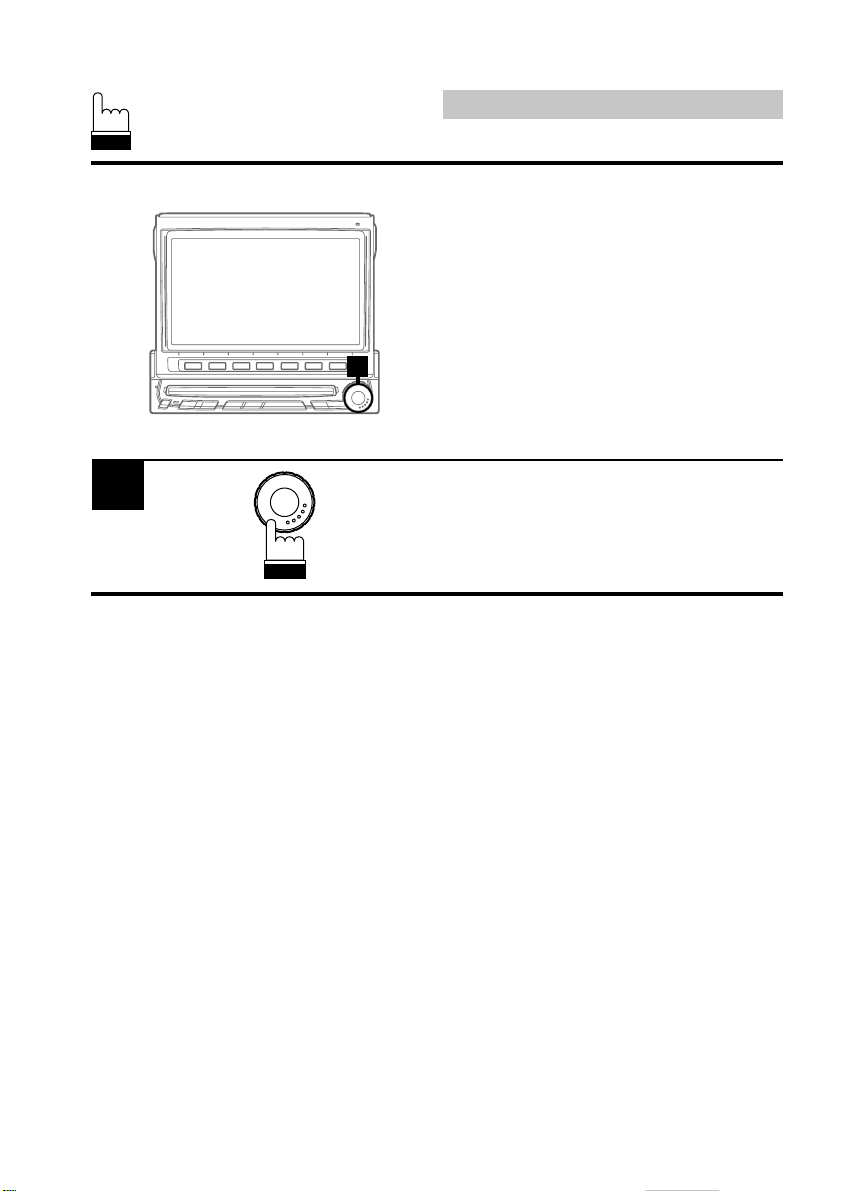
Press the PWR (Power) button on the unit to
turn the power on to the unit.
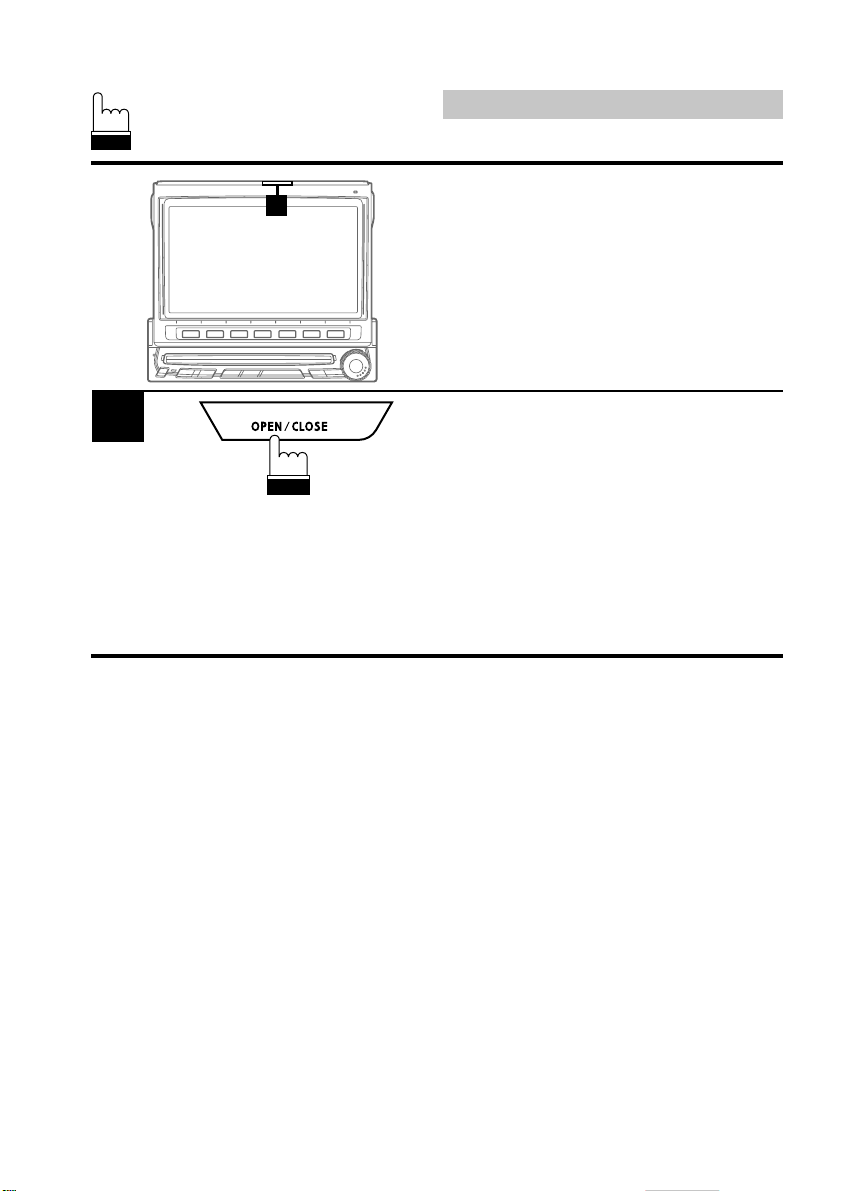
Press the OPEN/CLOSE button to open the
monitor. The unit beeps 3 times and raises the
monitor. The opening screen appears on the
monitor.
Press the SOURCE button. The display shows
the main menu screen.
Rotate the rotary encoder and select "RADIO"
from the main menu.
Note: If a DVD player is connected and its
power is on, the display shows " DVD
AUX2 " instead of " AUX1 AUX2 ."
16
Selected Source/
Source
sélectionnée/
!"#
Volume Level/
Niveau du
volume/
!
The Function Guide displays the labels for each of the Function buttons. These labels will
change depending upon the functions for the selected source./Le guide des fonctions
indique les différentes fonctions des touches de fonction. Le contenu du guide change
chaque fois que vous changez de source./ !"#$%&'()* !
!"#$%&'()*
Radio Mode Screen/Ecran du mode radio/ !"#$
(To be continued)
Current Time/
Heure
actuelle/
!
Page 10
Basic Operation
English
1
1
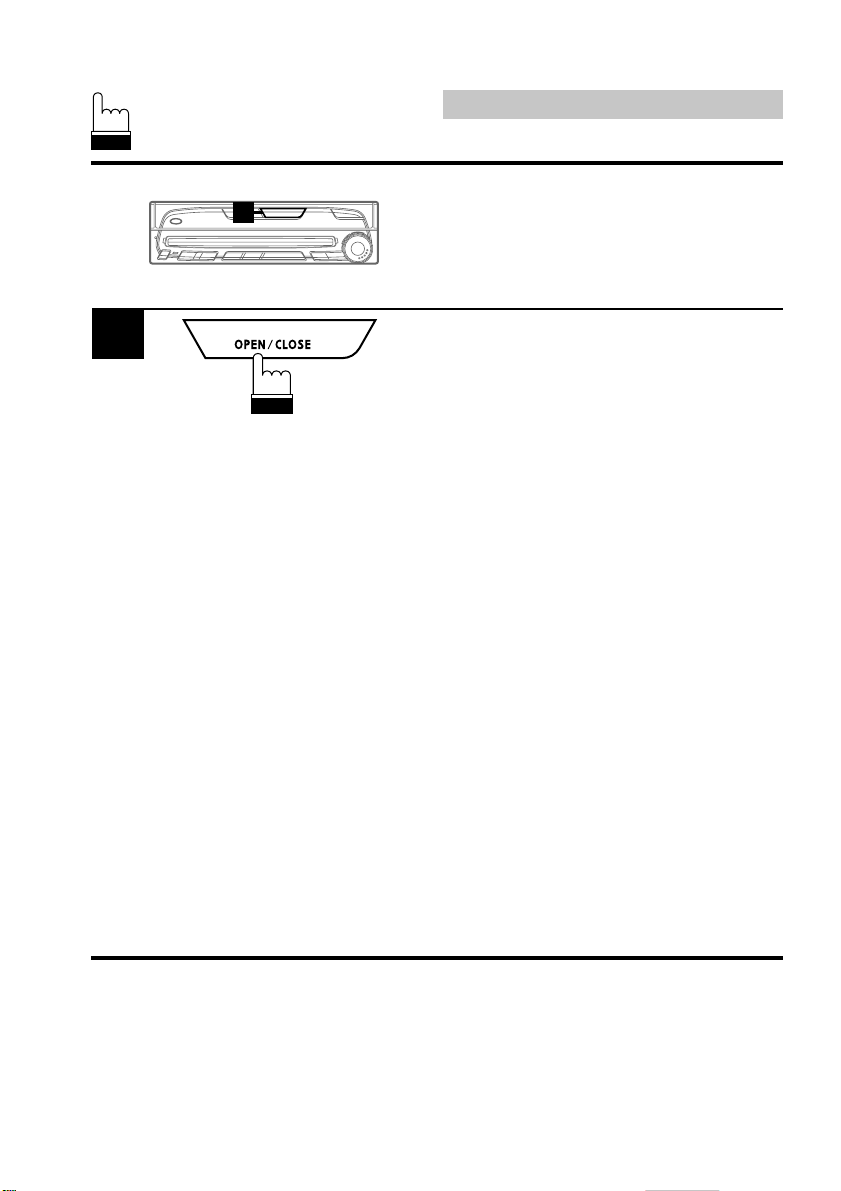
Raising the Monitor
Note: The IVA-C800E is a precision device.
With gentle handling, its unique capabilities can be enjoyed for a long time.
Press the OPEN/CLOSE button.
The unit beeps 3 times and raises the monitor
automatically.
Notes: • In the monitor touches an obstacle
while it is being raised, the unit will
stop raising the monitor immediately.
Should this occur, remove the
obstacle and press the OPEN/
CLOSE button again to raise the
monitor
• When the movable monitor is
opened, do not place any object on
the monitor and be careful not to
bump or apply any pressure to the
monitor while it is open. This can
cause damage to the mechanism.
• Under low ambient temperature
conditions, the display may be dark
for a short period of time immediately
after the power is turned on. Once
the LCD has warmed up, the display
will return to normal.
• For your safety, some operation of
the unit cannot be performed while
the vehicle is in motion. In this case,
first stop the vehicle and engage the
parking brake, then perform the
operation.
• Operation of the remote control
(described on pages 214-216) can be
carried out even while the monitor
screen is closed.
22
Page 11
1
English
Basic Operation
1
Lowering the Monitor
Note: The IVA-C800E is a precision device.
With gentle handling, its unique capabilities can be enjoyed for a long time.
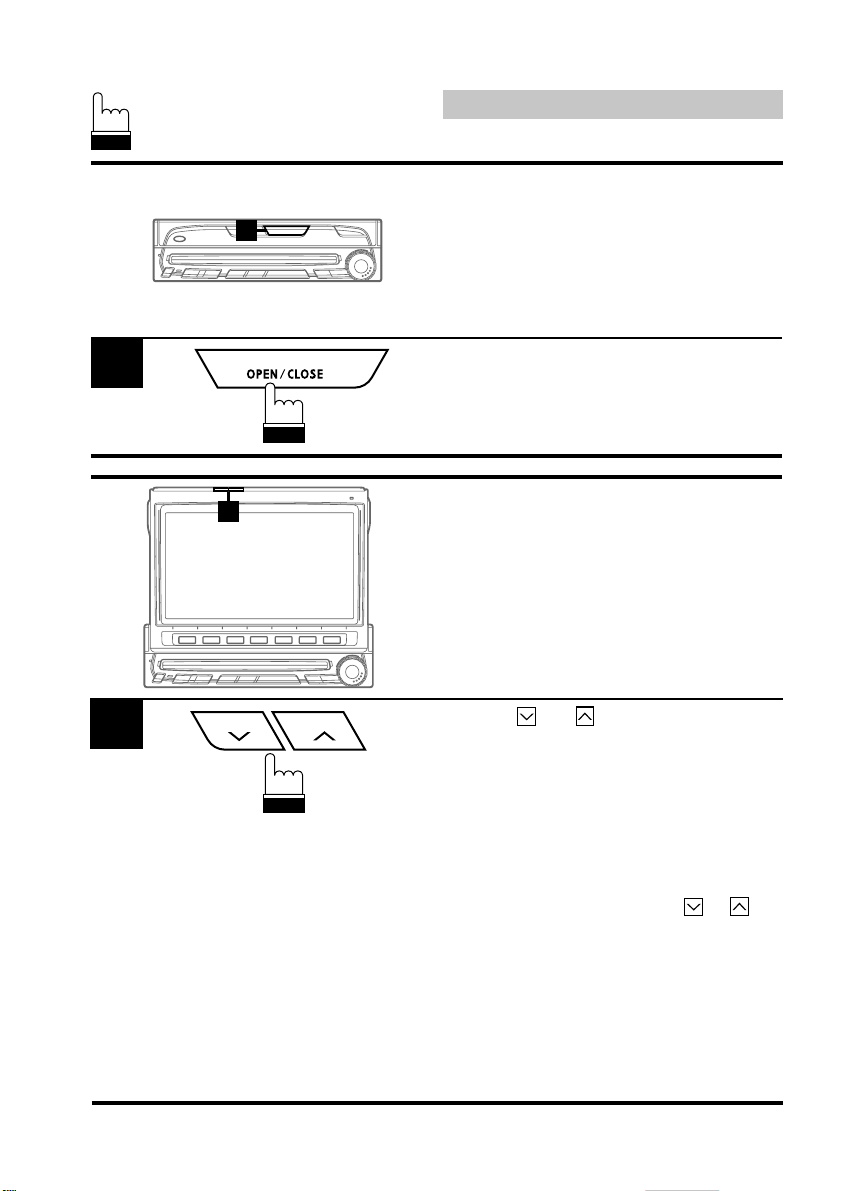
Press the OPEN/CLOSE button.
The unit will beep 3 times and lower the monitor
automatically.
Note: If the monitor touches an obstacle while
it is being lowered, the unit will stop
lowering the monitor immediately.
Should this occur, remove the obstacle
and press the OPEN/CLOSE button
again to lower the monitor.
24
Page 12
1
2
12
English
Basic Operation
Turning Power On or Off
Some of this unit’s functions, cannot be
performed while the vehicle is in motion. Be
sure to stop your vehicle in a safe location and
apply the parking brake, before attempting
these operations.
Press the PWR (Power) button to turn on the
unit.
The opening screen appears automatically.
Note: The unit can be turned on by pressing
any button on the unit except the MUTE,
OPEN/CLOSE and (ANGLE)
buttons.
Press the PWR (Power) button again to turn off
the unit.
26
Notes: • The IVA-C800E draws minimal
current even when its power switch is
turned off. If the switched power
(ignition) lead of the IVA-C800E is
connected directly to the positive (+)
post of the vehicle's battery, the
battery may be discharged. If this
lead is unswitched, it must be
disconnected from the battery post
should the vehicle be left unused for
an extended period of time.
An SPST (Single-Pole, Single-Throw)
switch (sold separately) can be
added to simplify this procedure.
Then, you can simply place it in the
OFF position when you leave the
vehicle. Turn the SPST switch back
ON before using the IVA-C800E. For
connecting the SPST switch, refer to
the Installation manual.
• Some operation of the unit cannot be
performed while the vehicle is in
motion. In this case, be sure to first
stop your vehicle and apply the
parking brake, then perform the
operation.
Page 13
Basic Operation
English
1
1
1
Selecting the Monitor
Opening Angle
The monitor opening angle can be set in 2
positions.
Press and hold the OPEN/CLOSE button for at
least 2 seconds while the monitor is being
raised. Each press changes the monitor angle
back or forth.
1
Adjusting the Monitor
Viewing Angle
Adjust the monitor's angle for better visibility.
Press the and (ANGLE) buttons to
adjust the monitor's angle so the screen will be
in the best viewing position. Each press of the
buttons produces a beep and changes the
screen angle between 80 and 104 degrees.
28
Notes: • If the monitor touches an obstacle
while the angle is being adjusted the
unit will stop the screen immediately.
Should this happen, remove the
obstacle and press the or
button again.
• The screen colour will vary when
viewed at certain angles. Adjust the
screen angle for the best viewing
position.
• If the voltage of the vehicle's battery
power is low, the screen may blink
when the screen angle is changed.
This is normal and not a malfunction.
Page 14
English
Basic Operation
Adjusting the Volume/
Bass/Treble/Balance/
1
2
12
Fader
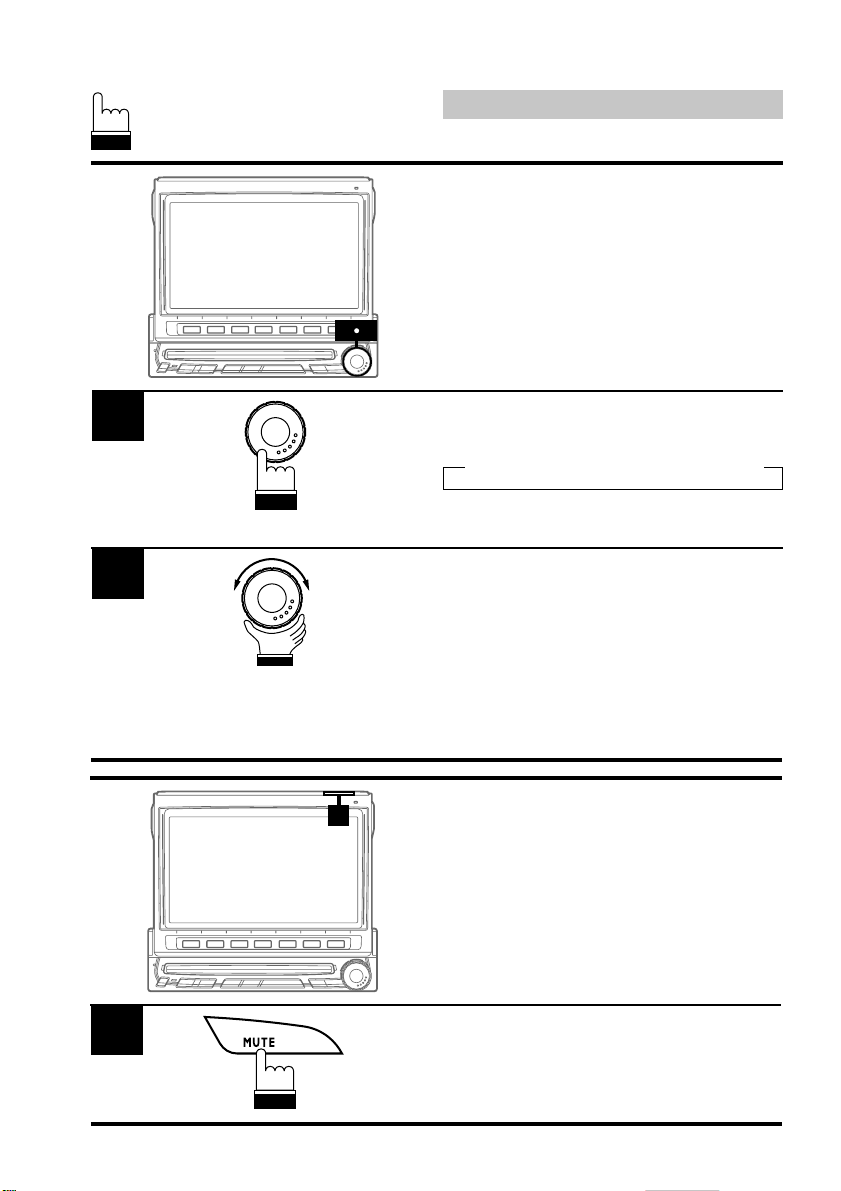
Press the rotary encoder repeatedly until the
mode you wish to adjust is obtained. Each
press changes the modes as follows:
→ BAS. → TRE. → BAL. → FAD. → VOL.
The volume level can be adjusted at any time
by just rotating the rotary encoder.
Rotate the rotary encoder to set to the desired
sound within 5 seconds after selecting the
mode.
Note: If the rotary encoder is not turned or
pressed within 5 seconds after selecting
the BAS. (Bass), TRE. (Treble), BAL.
(Balance), or FAD. (Fader), the unit
automatically defaults back to the VOL.
(Volume) mode.
1
30
1
Muting the Sound
Press the MUTE button to switch between the
Mute On and Off modes.
When the MUTE On mode is selected, the
volume level instantly decreases.
Page 15
1
English
Basic Operation
Turning Loudness On or
Off
Loudness introduces a special low and high
frequency emphasis at the lower volume
settings. This compensates for the ear's
decreased sensitivity to bass and treble sound
at these low listening levels.
1
Note: When an equalizer or digital sound
processor is connected, this function is
inoperative.
Press and hold the rotary encoder for at least 2
seconds to switch between the Loudness On
and Off modes.
32
Page 16
English
Radio Operation
1
2
3
4
5
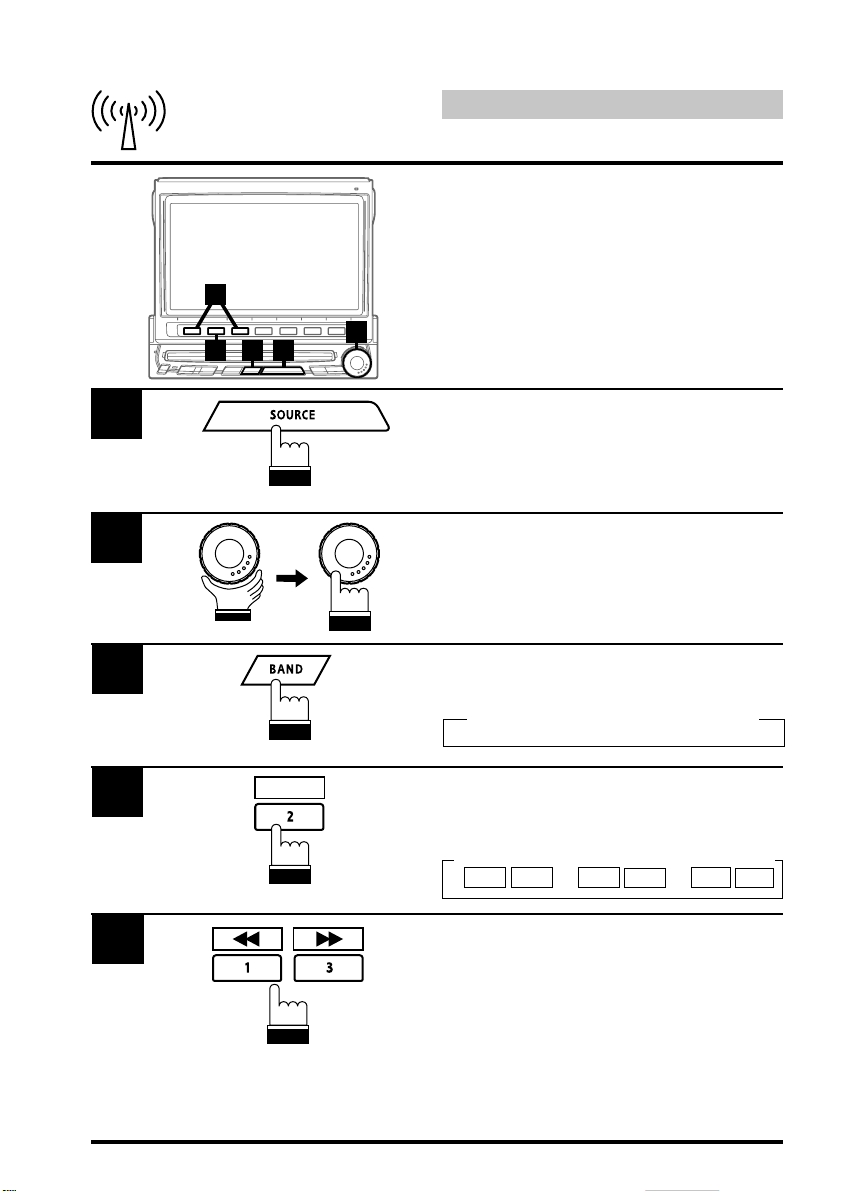
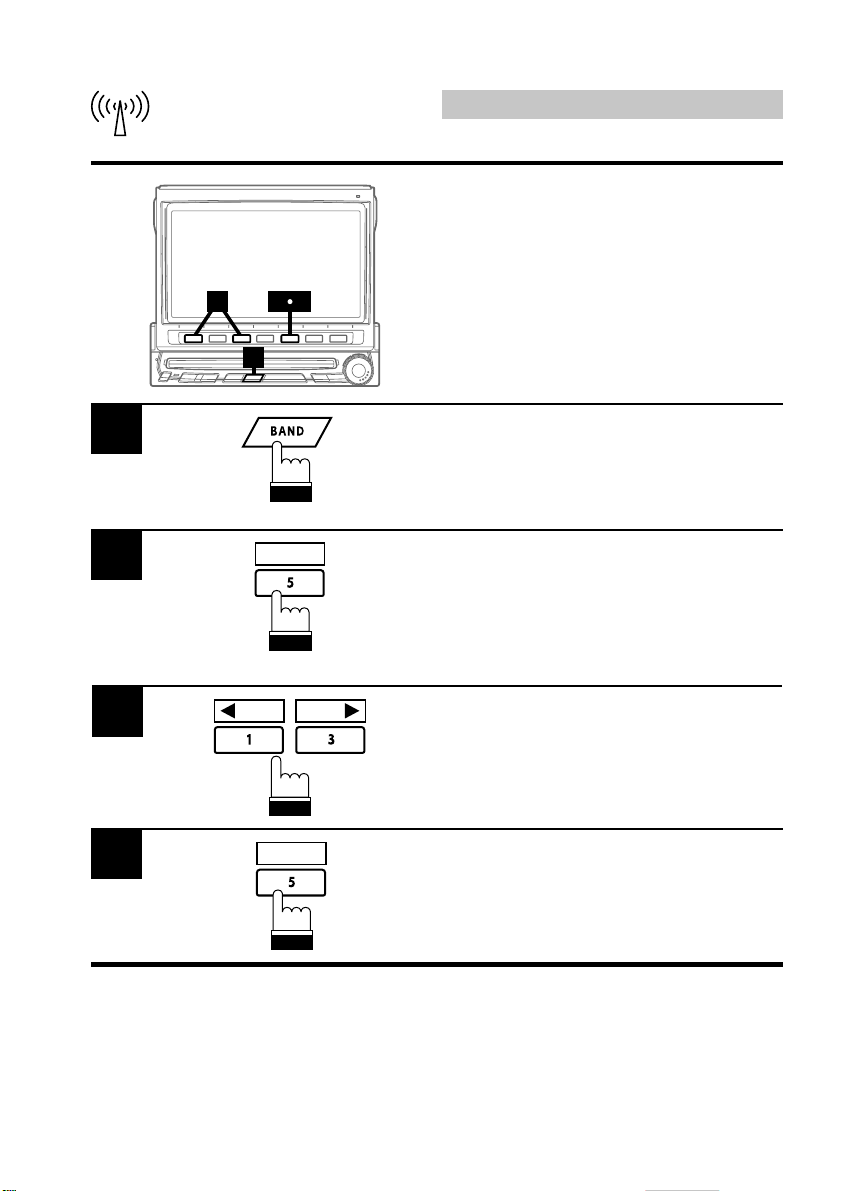
Manual Tuning
134
TUNE
2
Press the SOURCE button after turning on the
power.
The main menu screen appears.
Rotate the rotary encoder to scroll the bottom
menu and select "RADIO," then press the rotary
encoder.
The radio mode is activated and the display
changes to the Radio Mode screen.
Press the BAND button to select the desired
radio band. Each press changes the bands as
follows:
→ FM1 → FM2 → AM
Press the 2 (TUNE) button to choose the
manual tuning mode. Each press changes the
function modes for the buttons 1 and 3 as
follows:
→ Distance → Local → Manual
gg
g
gg
ff
f
ff
gg
g
gg
ff
f
ff
((
(
((
))
)
))
34
5
Press the 1 (() or 3 ()) button to
change the radio frequency downward or
upward respectively. Each press changes the
frequency by one step. When the button is
pressed and held, the frequency changes
continuously until the button is released.
Note: When a stereo FM station is tuned in,
the STEREO indicator appears in the
display.
Page 17
1
English
Radio Operation
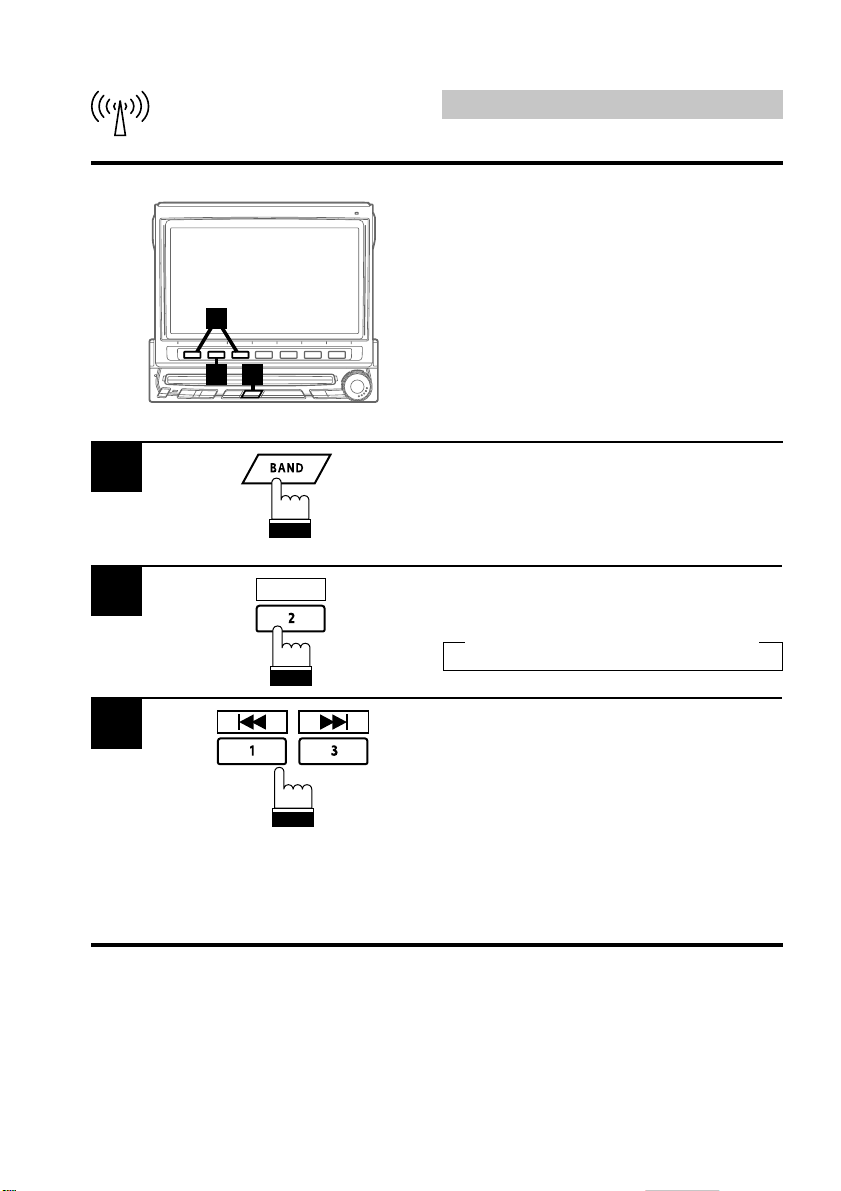
Automatic Seek Tuning
There are two modes you can select for auto
tuning, DX and Local:
• DX (Distance) mode (with DX SEEK indicator
3
12
ON); Both strong and weak stations will be
tuned in.
• Local mode (with DX SEEK indicator OFF);
Only strong stations will be tuned in.
The initial setting is DX.
Press the BAND button repeatedly to select the
desired radio band, FM or AM.
36
2
3
TUNE
Press the 2 (TUNE) button to select the
desired mode, DX or Local. Each press
changes as follows:
→ Distance → Local → Manual
Press the 1 (g) or 3 (f) button to
automatically seek a radio station downward or
upward respectively.
When the unit finds a station, it stops. To
automatically seek next station, press the same
button again.
Note: When a stereo station is tuned in, the
STEREO indicator appears in the
display.
Page 18
23
English
Radio Operation
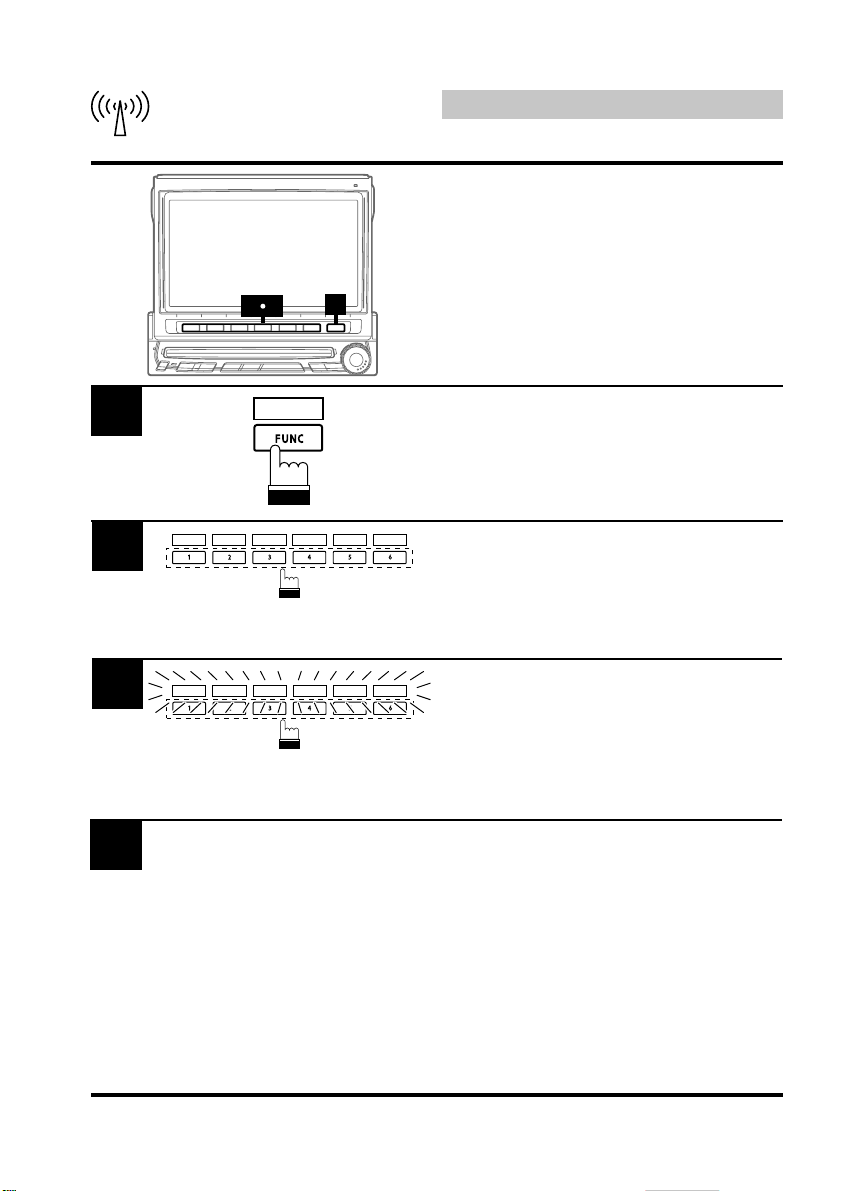
Manual Storing of Station
Presets
1
A total of 24 stations can be stored in the preset
memory (6 stations for each band; FM1, FM2,
AM or D.A.P.).
1
2
3
4
PAGE
1/2
P.SET 1 P.SET 2 P.SET 3 P.SET 4 P.SET 5 P.SET 6
P.SET 1 P.SET 2 P.SET 3 P.SET 4 P.SET 5 P.SET 6
Tune in a desired radio station you wish to store
in the preset memory by manual or automatic
seek tuning.
Press the FUNC (PAGE 1/2) button.
Press and hold any one of the Function buttons
1 (P.SET1) through 6 (P.SET6) for at least 2
seconds. The Function Guide indicators in the
display, P.SET1 through P.SET6, will blink for
5 seconds.
While the P.SET1 through P.SET6 indicators in
the display are blinking, press the Function
button into which you wish to store the station
(within 5 seconds). The indicators in the display
stop blinking, showing that the station has been
memorized at the Preset button pressed.
Repeat the above procedure (1 to 3) to store up
to 5 other stations onto the same band.
To use this procedure for other bands, simply
select the band desired and repeat the
procedure.
Note: If a preset memory has already been
set in the same Function button, it will
be cleared and the new station will be
memorized.
38
Page 19
1
English
Radio Operation
Automatic Memory
(A.MEMO) of Station Presets
2
1
The tuner can automatically seek and store 6
strong stations in the selected band in order of
signal strength.
Press the BAND button in the radio mode to
select the desired radio band.
2
A.MEMO
Press the 6 (A.MEMO) button.
The tuner automatically seeks and stores 6
strong stations into the 1 (P.SET1) to 6
(P.SET6) buttons in order of signal strength.
When the automatic storing has been completed, the tuner goes to the station stored in
the 1 (P.SET1) button.
Notes: • If no stations are stored, the tuner will
return to the original station you were
listening to before the automatic
storing procedure began.
• The radio station names (titles) may
be erased when Automatic Memory
of Station Presets function is
performed.
40
Page 20
13
English
Radio Operation
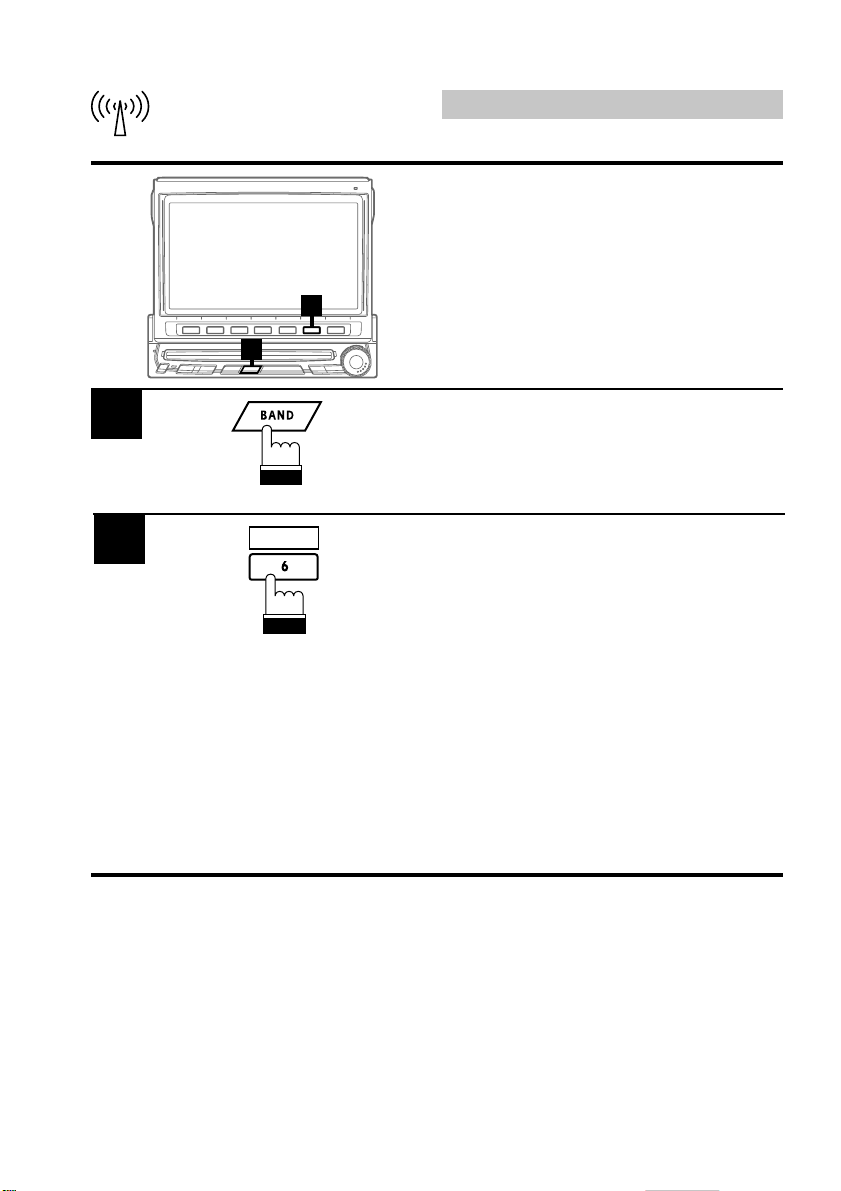
Storing into Direct Access Preset (D.A.P.) Band
Any combination of AM and FM radio stations
(up to 6 stations) can be manually preset onto
the D.A.P. band.
1
2
3
D.A.P.
D.A.P.
Press the 4 (D.A.P.) button in the radio mode
to activate the D.A.P. mode.
To memorize stations onto the D.A.P. band,
follow the steps for the Manual Storing of
Station Presets procedure on page 38.
Note: This function can be used together with
the Automatic Memory Preset if you
want to have all AM or all FM stations
stored into D.A.P.
Press the 4 (D.A.P.) button for a second time
to deactivate the D.A.P. mode.
42
Page 21
1
English
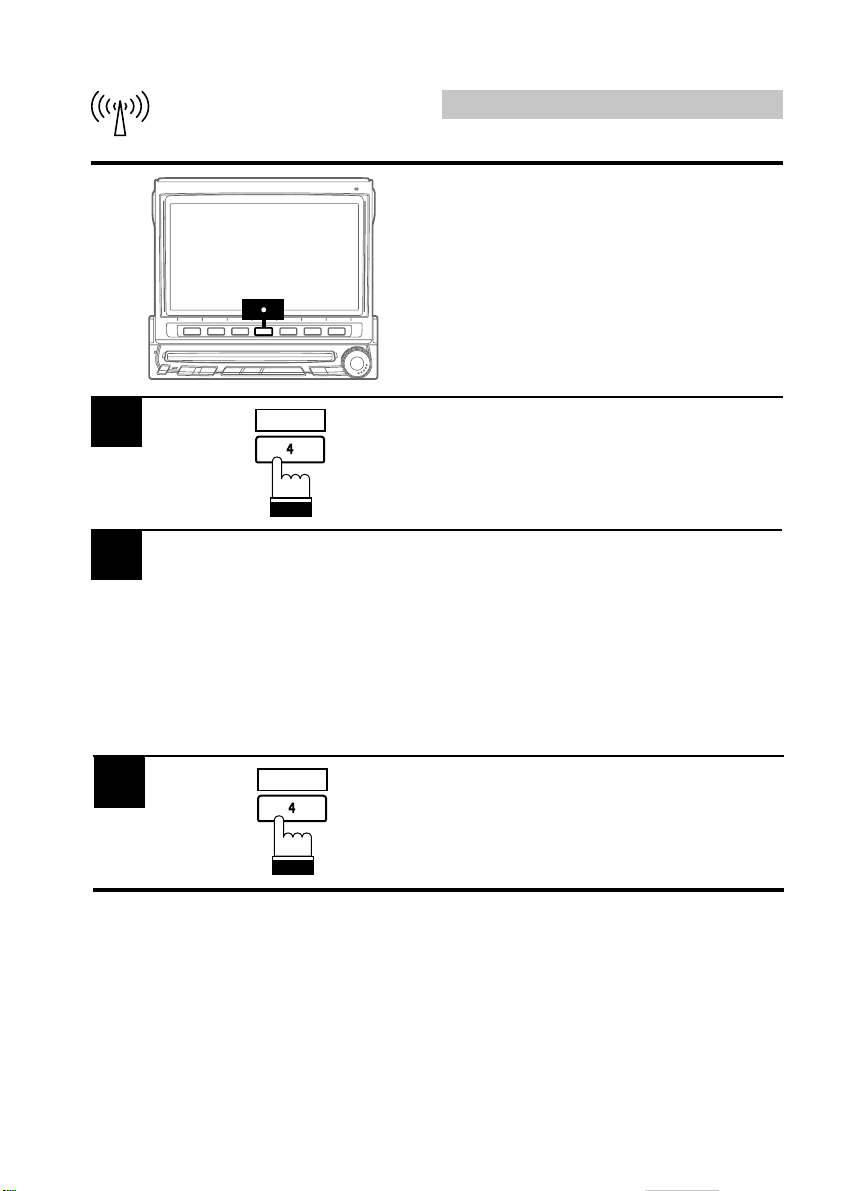
Radio Operation
Tuning to Preset Stations
You can tune in the preset stations in memory
2
1
on each band using the Function buttons.
Press the BAND button in the radio mode to
choose the desired radio band.
Each press changes the radio bands.
Note: To select the D.A.P. band, press the 4
(D.A.P.) button.
2
P.SET 1P.SET 2P.SET 3P.SET 4P.SET 5P.SET
6
Press the Function button 1 (P.SET1) through
6 (P.SET6) that has your desired preset
station in memory. The preset station is
received.
44
Page 22
1
English
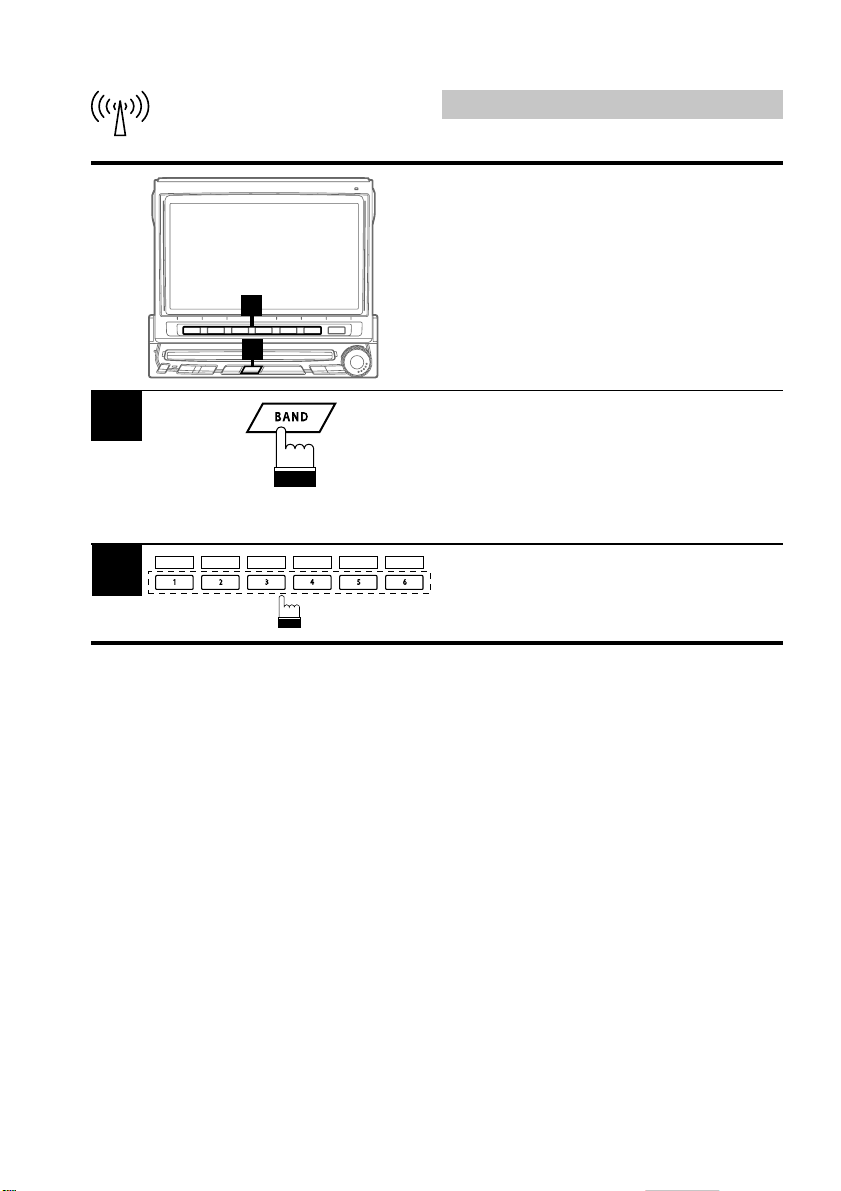
Radio Operation
Selecting Preset Stations
from List Displayed
The desired preset station can be selected from
the preset station list displayed. If stations have
been titled (named), their titles will also be
23
1
displayed. (For titling stations, see pages 156
and 158).
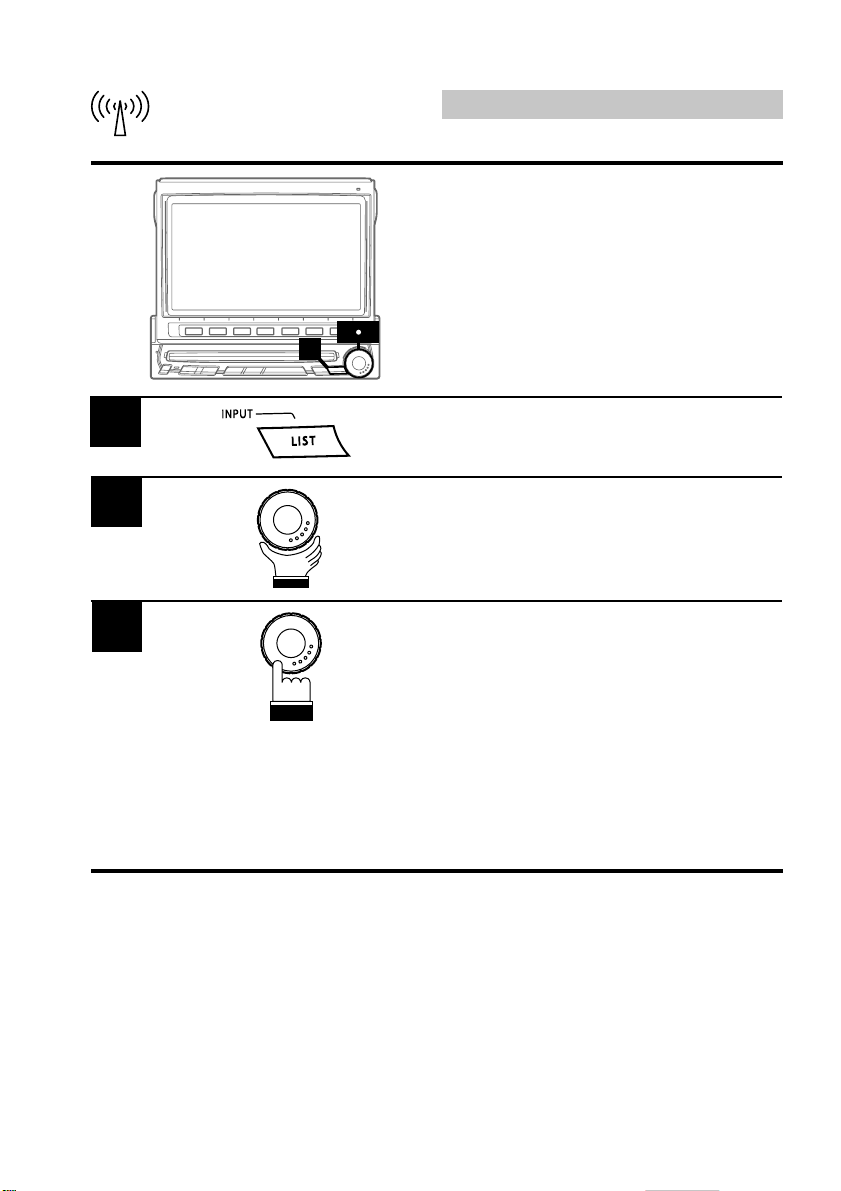
Press the LIST button. The list showing the
preset stations (with the station titles if they
have been titled).
2
3
Rotate the rotary encoder to select a desired
preset station from the list.
When a desired station is selected, press the
rotary encoder. The unit receives the selected
preset station.
Notes: • Press the LIST or FUNC (RETURN)
button while in the preset list menu
(station title list) to return to the radio
mode display.
• With the preset list menu displayed,
press the 1 (RADIO) button to
switch to the preset station list menu.
Press the BAND button to change
the radio bands.
46
Page 23
1
English
Radio Operation
T.R.V.S. Search for Local
Stations
Using the T.R.V.S. feature of this unit, you can
3
24
1
automatically seek and memorize up to 12 local
stations (max.) in a memory separate from your
regular preset memory. This keeps the currently
preset stations you normally listen to, intact.
Press the BAND button and select the desired
radio band.
2
3
4
T.R.V.S.
P.DN P.UP
T.R.V.S.
Press the 5 (T.R.V.S.) button to activate the
T.R.V.S. mode. The unit will automatically
search and store up to 12 receivable, local
stations.
Note: If no stations are memorized, the
display shows "NO MEMORY."
Press the 1 (; P.DN) or 3 (P.UP :) button
and select your desired station.
To deactivate the T.R.V.S. mode, press the 5
(T.R.V.S.) button.
48
Page 24
CD Player/Changer
English
(Optional) Operation
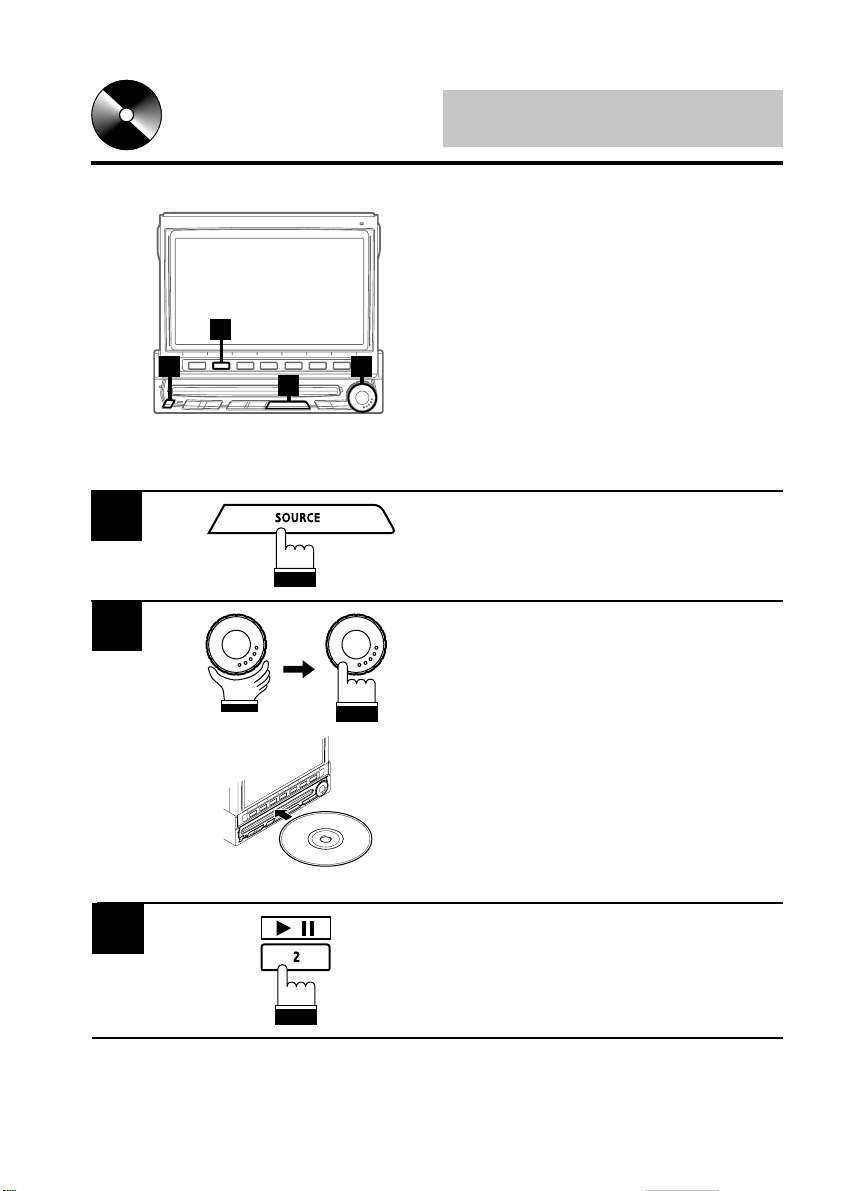
Playing CD Player or
Changer (Optional)
IVA-C800E has a built-in CD player. When an
optional Alpine CD player or CD changer is
3
4
2
1
connected, you can control it from the IVAC800E. This section describes operation
assuming that an Alpine CD player is connected.
(When a CD changer is connected, see page
66 to select your desired disc.)
1
2
3
Press the SOURCE button to display the main
menu screen.
Rotate the rotary encoder and select the CD
player mode. Then, press the rotary encoder to
execute the selection.
The display shows the CD player mode screen.
When a CD is inserted into the CD SLOT of the
IVA-C800E, with the label side facing up, the
unit starts to play the CD.
When an optional Alpine CD player is connected, inserting an CD into the optional CD
player starts playback automatically.
/
To temporarily pause playing, press the 2 (:/J)
button.
To resume play, press the 2 (:/J) button for a
second time.
50
Page 25
CD Player/Changer
English
(Optional) Operation
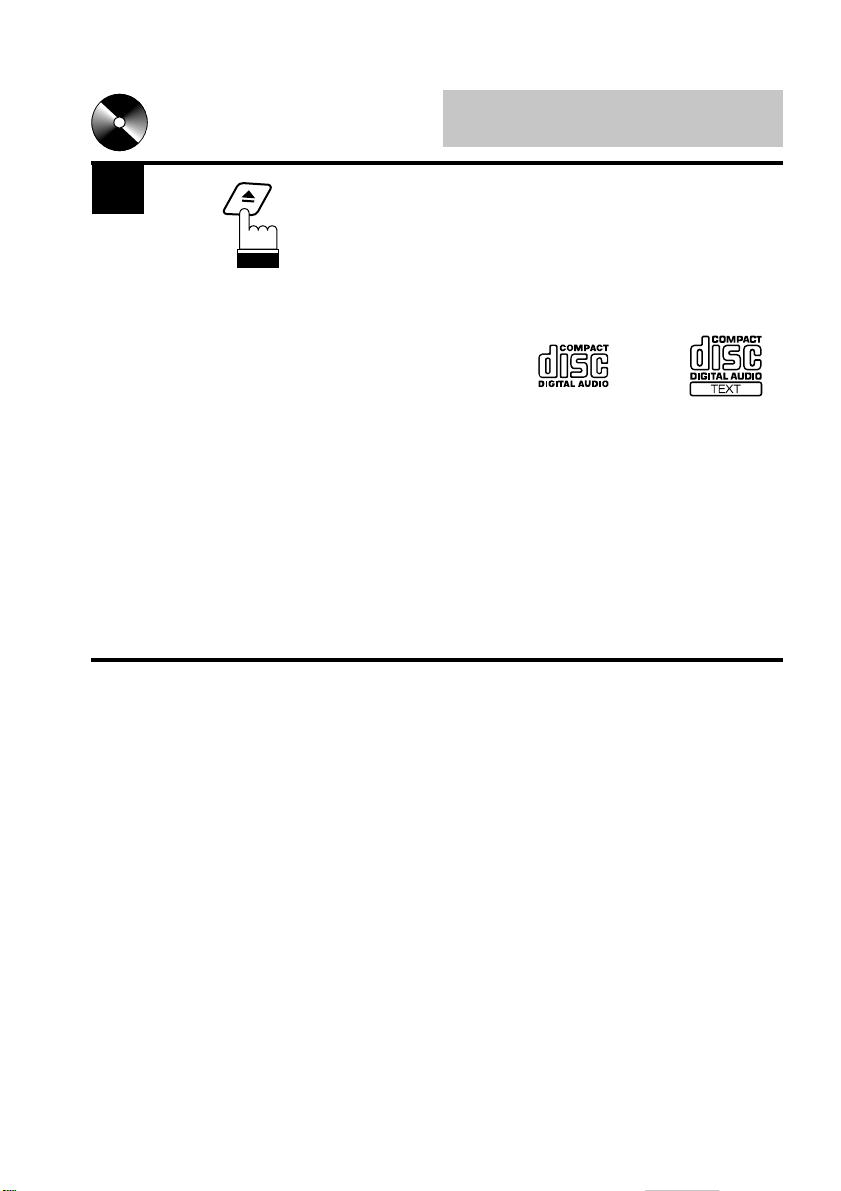
4
Press the eject (c) button when you want to
eject the CD. (If you use an optional CD player,
press the eject button on the optional CD
player.)
Notes: • Three-inch (8cm) CD's can be used.
• Only compact discs containing the
mark shown can be used.
• We cannot fully guarantee the
playback of CD-R (CD-Recordable).
You cannot playback CD-RW (CDReWritable) on this unit.
• Be sure to turn the ignition key to the
ACC or ON position before inserting
an CD. Otherwise it may cause
damage to the player.
52
Page 26
1
CD Player/Changer
English
(Optional) Operation
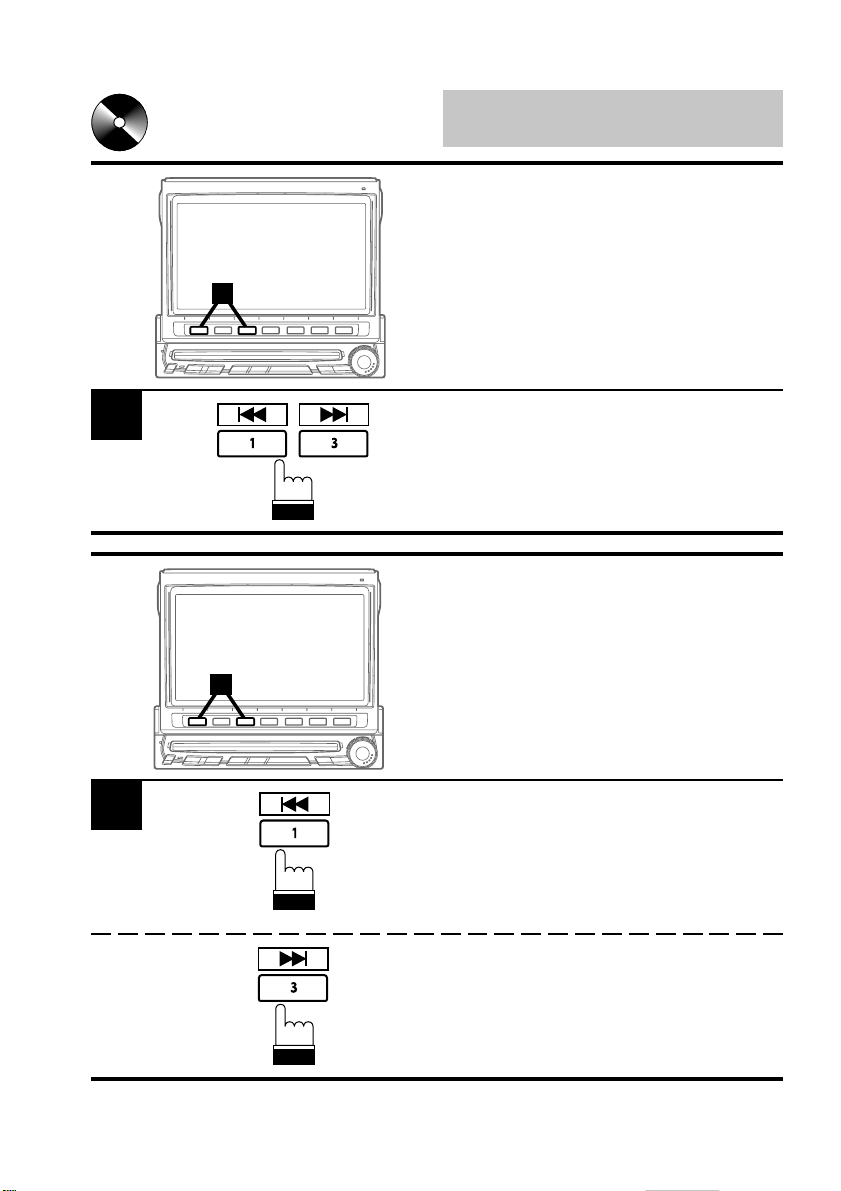
Fast Forward and
1
Backward
Press and hold the 3 (f) or 1 (g)
button to quickly move forward or backward
respectively to reach the desired music section
on the disc. Release the button when the
desired section is reached.
Music Sensor Skip
1
This feature allows you to go to the beginning of
a track.
54
1
Lightly press the 1 (g) button during the CD
play to return to the beginning of the current
track.
If you wish to return to the beginning of a track
further back, repeatedly press the 1 (g)
button until the desired track is reached.
Lightly press the 3 (f) button during the CD
play to advance to the beginning of the next
track. If you wish to advance to the beginning of
a track further ahead, repeatedly press until the
desired track is reached.
Page 27

CD Player/Changer
(Optional) Operation
Repeat Play on Single
English
1
1
REPEAT
Track
Press the 4 (REPEAT) button while the track
that you want to play repeatedly is playing.
The track will be repeatedly played until the
repeat mode is cancelled.
To cancel the repeat play, press the 4
(REPEAT) button until the REPEAT indication
disappears.
Note: Some Alpine CD changers have a
REPEAT ALL function. With REPEAT
ALL selected, all tracks on the selected
disc will be played repeatedly.
56
Page 28
CD Player/Changer
English
(Optional) Operation
M.I.X. (Random) Play
In the M.I.X. mode, the tracks on the disc will be
1
played back in a random sequence.
1
M.I.X.
Press the 5 (M.I.X.) button in the CD mode.
All the tracks on the disc will be played back in
a random sequence.
The M.I.X. play continues until the M.I.X. mode
is cancelled. To cancel the M.I.X. play, press
the 5 (M.I.X.) button repeatedly until the M.I.X.
indicator disappears.
Notes: • If the CD changer connected has the
M.I.X. ALL function, you may select
M.I.X. ALL from the menu. In this
case, all the tracks on all the discs in
the magazine will play back in a
random sequence. Once all the
tracks on all the discs have been
played back once the CD changer
begins a new random sequence.
• During M.I.X. play, Repeat Play for a
single track will be disabled.
58
Page 29
12
CD Player/Changer
English
(Optional) Operation
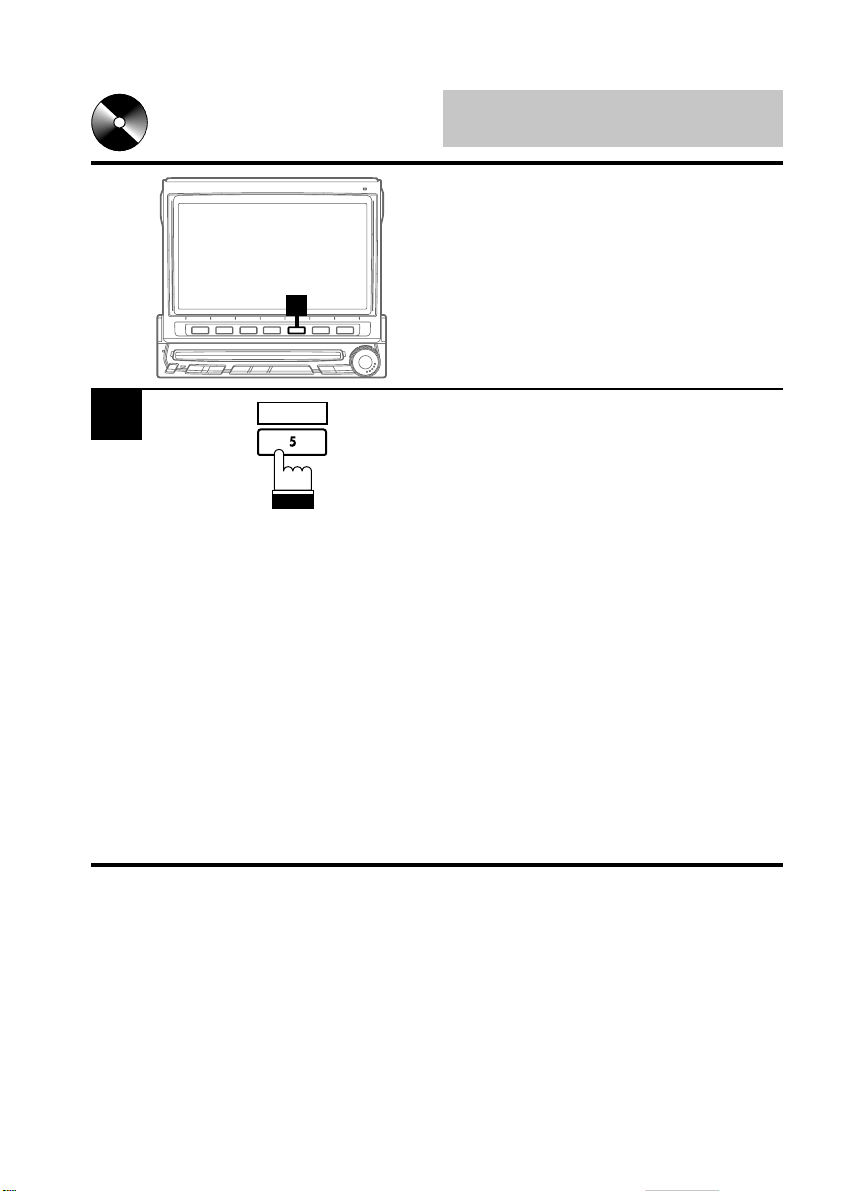
Displaying and Scrolling
CD Title/Text
If titles have been memorized for CDs, the CD
titles can be shown on the display (for titling
CDs, see "Titling Radio Stations/CDs" on page
156). If a CD changer having the CD text
feature is connected, the text for the CD titles/
tracks can be displayed and scrolled while you
are playing a music CD with title/text.
1
2
SCROLL
SCROLL
Press the 6 (SCROLL) button during CD play.
Each press changes between the CD title
scrolling mode and track title scrolling mode.
Description of "Title" and "Text":
• Title; this unit allows you to title (name) CDs
(see page 156).
• Text; Some CDs have pre-recorded text
information for the CD/track names
etc.
Notes: • If either of the disc and track titles is
unavailable, the space for that title in
the display will be left blank.
• If neither of the disc and track titles is
available, the display will show "NO
TITLE."
For the MD player, the same display
as above will be shown.
If the text/title is longer than 12 characters,
press the 6 (SCROLL) button for at least 2
seconds to scroll the text/title.
To stop the scrolling, press and hold the 6
(SCROLL) button for at least 2 seconds.
Notes: • Depending on the character styles,
characters may not be displayed
correctly.
• The unit might automatically scroll
the text.
60
Page 30
CD Player/Changer
English
(Optional) Operation
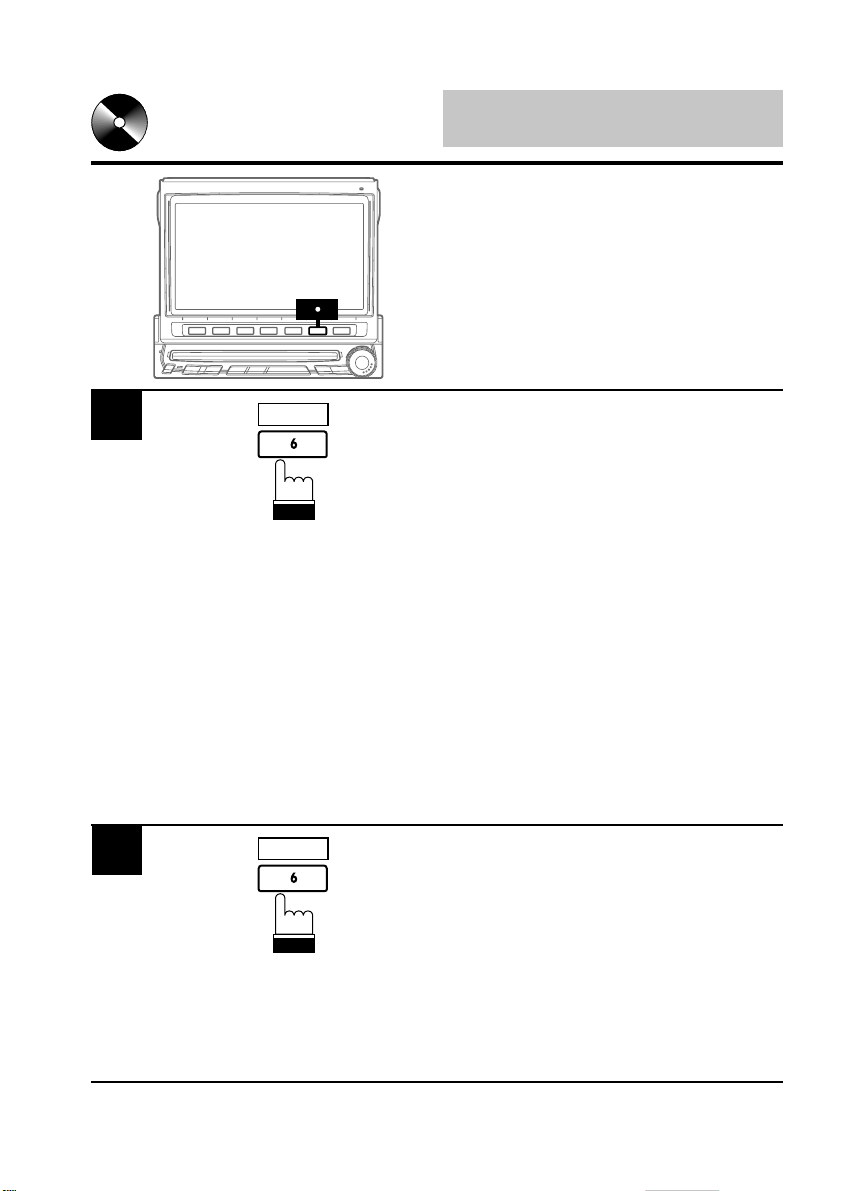
Displaying List of Track
Titles/CD Titles
If titles have been memorized for CDs, the CD
title list can be displayed and CDs can be
23
1
selected by their titles. (For memorizing titles,
see pages 156 and 158.)
1
2
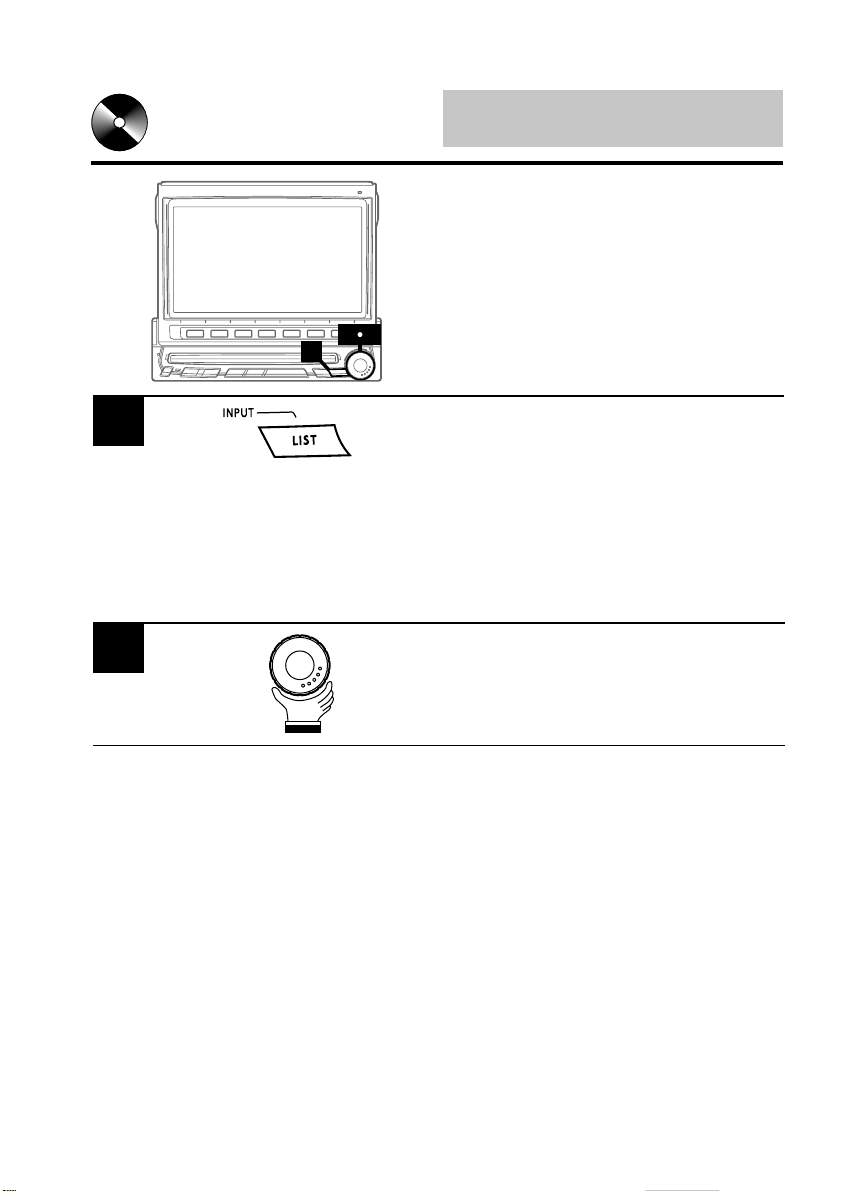
Press the LIST button in the CD/CD changer
mode.
CD (built-in player) mode:
When CD text discs are inserted, the list of
Track titles will be displayed. But if a CD without
text is inserted the list of the disc titles will be
displayed.
CD changer/CD (when connected to the CD
player) mode:
The list of CD titles will be displayed.
Rotate the rotary encoder and select (highlight)
your desired Track title or CD title to play.
(To be continued)
62
Page 31

CD Player/Changer
English
(Optional) Operation
3
Press the rotary encoder to execute the
selection.
The selected title plays, the title list screen
closes, and the CD mode main screen or CD
changer mode main screen appears.
Notes: • If the disc is not titled, the display
shows "NO TITLE." If no disc is
loaded, the display shows "NO
DISC."
• Pressing the LIST or FUNC (RETURN) button while the list of the disc
titles is being displayed, changes the
display back to the CD/CD changer
mode screen.
• To directly go to the preset radio
station list screen, press the 1
(RADIO) button. Then, press the
BAND button to change the radio
band.
Press the 2 button display the title
list or the track title list only when CD
with text is loaded in the built-in CD
player.
64
Page 32

CD Player/Changer
English
(Optional) Operation
Controlling CD Changer
If an optional Alpine CD Changer (6-Disc or 12Disc) is connected to the IVA-C800E, the CD
Changer can be controlled from the IVA-C800E.
3
2
1
You can directly select the CD Changer mode
by pressing the CHG button on the IVA-C800E.
1
2
PAGE
3
DISC 1 DISC 2 DISC 3 DISC 4 DISC 5 DISC 6
1/2
Press the SOURCE button to display the main
menu.
Rotate the rotary encoder to select "CD CHG,"
then press the rotary encoder.
The display changes to the CD Changer mode
screen.
When a 6-Disc CD Changer is connected
Press the FUNC (PAGE 1/2) button. The
Function Guide display changes.
Press the Function buttons to select your
desired disc loaded. The Function buttons 1
(DISC1) through 6 (DISC6) select the discs
from the first disc to 6th disc. For example,
press the 3 (DISC 3) button to select the third
disc.
Note: To select your desired track number on
the selected disc, lightly press the 1
(g) or 3 (f) repeatedly until your
desired track number is displayed.
66
(To be continued)
Page 33

PAGE
1/3
CD Player/Changer
English
(Optional) Operation
When a 12-Disc CD Changer is connected
You can select the disc numbers 1 to 6 in the
same manner as for 6-disc Changer.
Press the FUNC (PAGE 1/3) button twice to
select the disc numbers 7 to 12. The Function
Guide display changes and now the Function
buttons 1-6 represent disc numbers 7-12.
Press the Function buttons (1 through 6) to
select your desired disc. For example, to select
9th disc, press 3 (DISC 9) button.
Note: To select your desired track number on
the selected disc, lightly press the 1
(g) or 3 (f) repeatedly until your
desired track number is displayed.
68
Page 34

CD Player/Changer
English
(Optional) Operation
Multi-Changer Selection
Alpine's Ai-NET system will support up to 6 CD
Changers. When operating two or more
changers, the KCA-400C (Multi-Changer
Switching device) must be used. If you use 1
Switching device, you can connect up to 4 CD
13
2
Changers. If you use 2 Switching devices, you
can connect up to 6 CD Changers.
1
2
3
4
Press the SOURCE button to display the main
menu.
Rotate the rotary encoder to select changer 1-4
(when one KCA-400C is connected) or changer
1-6(when two KCA-400Cs are connected).
Then press the rotary encoder.
The display shows the selected CD changer
mode screen.
Note: When one KCA-400C is connected to
the changer, "Changer 1-4" is displayed
in the main menu. When two KCA400Cs are connected to the changer,
"Changer 1-6" is displayed in the main
menu.
In Changer mode, you can select the next
changer (connected changers only) by pressing
the BAND button on the unit or on the remote.
Note: You cannot operate this function in the
title display or Title inputting display.
To operate the selected changer, see "CD
Player/Changer Operation" section.
70
Page 35

1
2
MD Player
English
Operation (Optional)
Playing Mini-Disc (MD)
When an optional Alpine MD player is connected to the IVA-C800E, you can control the
3
2
1
player from the IVA-C800E.
(When the MDA-5051 is connected, MDs can
be played back only.)
Press the SOURCE button.
The main menu appears on the display.
Rotate the rotary encoder and select "MD" from
the main menu, then press the rotary encoder
to execute the selection.
The MD player mode screen appears on the
display.
Insert an MD into the MD player, the player
starts to play the MD.
72
3
4
Note: Before inserting an MD, use your finger
to feel around the MD cartridge. If you
feel any small bumps or irregularities,
remove them because these may cause
a malfunction or damage to the player.
/
Press the 2 (:/J) button to temporarily pause
play. To resume play, press the 2 (:/J) button
for a second time.
Press the eject (c) button on the MD player
when you want to eject the MD.
Page 36

1
MD Player
English
Operation (Optional)
Music Sensor (Skip)
21
Momentarily press the 1 (g) button once to
return to the beginning of the current track. If
you wish to access a track further back,
repeatedly press until you reach the desired
track.
2
1
Press the 3 (f) button once to advance to
the beginning of the next track. If you wish to
access a track further ahead, press repeatedly
until the desired track is reached.
Fast Forward and
1
Backward
Press and hold the 1 (g) or 3 (f)
button to quickly move backward or forward
until you reach the desired section of the track.
When you reach the desired section, release
the button. The player starts playing from that
section.
74
Page 37

MD Player
English
Operation (Optional)
Repeat Play
1
1
1
REPEAT
1
M.I.X.
Press the 4 (REPEAT) button to play back
repeatedly the track being played. The
REPEAT indicator appears and the track plays
repeatedly.
Press the 4 (REPEAT) button repeatedly until
the REPEAT indicator disappears to deactivate
the repeat play.
M.I.X. (Random Play)
Press the 5 (M.I.X.) button in the play or pause
mode. The M.I.X. indicator will illuminate and
the tracks on the disc will be played back in a
random sequence. After all the tracks on the
disc have been played back once, the player
will begin a new random sequence play until the
M.I.X. mode is deactivated.
To stop the M.I.X. play, press the 5 (M.I.X.)
button repeatedly until the M.I.X. indicator
disappears.
76
Page 38

12
MD Player
English
Operation (Optional)
Scrolling Displayed Titles
The MD player can scroll titles (disc or track
names) having up to a maximum of 32 characters.
1
2
SCROLL
SCROLL
Press the 6 (SCROLL) button repeatedly while
an MD is being played.
Each press toggles between the MD title
scrolling and track title scrolling.
Press and hold the 6 (SCROLL) button for at
least 2 seconds to start the auto scrolling.
The title will be scrolled repeatedly.
To deactivate the auto scrolling, press and hold
the 6 (SCROLL) button for at least 2 seconds.
Notes: • Depending on the MD deck used for
recordings/inputting titles, the
characters may not be displayed
correctly.
• If the MD title or track titles are not
memorized, the unit displays "NO
TITLE."
78
Page 39

MD Player
English
Operation (Optional)
Displaying List for MD
Titles
23
1
1
2
3
Press the LIST button in the MD player mode.
The list of the MD titles appears in the display.
Rotate the rotary encoder to select the desired
title by moving the cursor to that title.
Press the rotary encoder to execute the
selection.
The selected MD title will be played back and
the MD player mode screen will appear.
Notes: • If the MD is not titled, the display
shows "NO TITLE." If no MD is
loaded, the display shows "NO
DISC."
• Pressing the LIST or FUNC (RE-
TURN) button while the list of the
titles is being displayed changes the
display back to the MD player mode
screen.
• To directly return to the preset radio
station list screen while the list of the
titles is being displayed, press the 1
(RADIO) button. Then, press the
BAND button to change the radio
band.
80
When the 2 is pressed, the display
shows the title list or the track title list
only when a CD with text is loaded in
the built-in CD player.
Page 40

Cassette Player
English
Operation (Optional)
Controlling Cassette
Player
3
2
1
If an optional Alpine cassette player is connected to the IVA-C800E, it can be controlled
from the IVA-C800E.
1
2
3
4
DOLBY B
Press the SOURCE button to display the main
menu screen.
Rotate the rotary encoder and select "TAPE"
from the menu. Then, press the rotary encoder
to execute the selection.
The display shows the cassette player mode
screen.
When you play a cassette tape recorded using
Dolby B Noise Reduction, press the 5 (DOLBY
B) button to activate or deactivate Dolby B
Noise Reduction.
To stop tape play and eject the cassette tape,
press the EJECT button on the cassette player.
82
Page 41

Cassette Player
Operation (Optional)
Fast Forward/Rewind/
English
1
2
3
1 2
3
PROG
/
Reversing Tape
Direction/Pause
Press and hold the 3 (f) or 1 (g)
button for at least 2 seconds to fast forward or
fast rewind the tape respectively. When the
tape reaches the desired portion, press and
hold the 3 (f) or 1 (g) button again for
at least 2 seconds, or press the 2 (:/J) button
to resume tape play.
Press the FUNC (PROG) button to change the
tape direction to play the other side of the tape.
Press the 2 (:/J) button to temporarily pause
the tape play. Press again to resume tape play.
84
Page 42

Cassette Player
English
Operation (Optional)
Programme Sensor
21
1
2
1
1
REPEAT
Lightly press the 1 (g) button once during
tape play to return to the beginning of the
programme being currently played. If you wish
to return to a programme further back, press
repeatedly until the number of programmes you
would like to skip is obtained.
Lightly press the 3 (f) button once during
tape play to advance to the beginning of the
next programme. If you wish to advance to a
program further ahead, press repeatedly until
the number of programmes you would like to
skip is obtained.
Repeat Play
Press the 4 (REPEAT) button to play back
repeatedly the programme being currently
played.
To stop the repeat play, press the 4 (REPEAT)
button until the REPEAT indicator disappears.
86
Page 43

Cassette Player
English
Operation (Optional)
Blank Skip
1
1
B.SKIP
Press the 6 (B.SKIP) button during tape play
to skip over blank portions of the tape lasting 15
seconds or longer.
To deactivate the blank skip mode, press the 6
(B.SKIP) button for a second time.
88
Page 44

DVD/Video CD/
English
CD Player Operation (Optional)
Playing DVD/Video CD/
CD
If an optional Alpine DVD/video CD/CD player
is connected to the IVA-C800E, you can control
it from the IVA-C800E.
WARNING
1
2
It is dangerous (and illegal in many states)
for the driver to watch the TV/Video while
driving the vehicle. The driver may be
distracted from looking ahead and an
accident could occur.
Install the IVA-C800E correctly so that the driver
cannot watch TV/Video unless the vehicle is
stopped and the emergency brake is applied.
If the IVA-C800E is not installed correctly, the
driver will be able to watch the TV/Video while
driving the vehicle and may be distracted from
looking ahead causing an accident. The driver
or other people could be severely injured.
90
Page 45

DVD/Video CD/
English
CD Player Operation (Optional)
1
2
Press the SOURCE button to display the main
menu screen.
Rotate the rotary encoder and select "DVD"
from the menu. Then, press the rotary encoder
to execute the selection.
The display shows the DVD player mode
screen.
Insert a disc into the DVD/video CD/CD player,
the player starts playing.
Note:
Press the FUNC (F.GUIDE) button during
DVD/video CD/CD play to turn on or off the
Function Guide display.
In the ON position:
The Function Guide display will always be
shown.
In the OFF position:
The Function Guide display will disappear
after approx. 5 seconds if no button is
pressed.
If you want to display the Function Guide
screen again, press any one of the Function
buttons 1 through FUNC .
92
Page 46

DVD/Video CD/
English
CD Player Operation (Optional)
Still/Pause
1
1
1
/
Press the 2 (J/J:) button during DVD/video
CD/CD play to freeze frame or pause. To
resume normal play, press the 2 (J/J:)
button for a second time.
Chapter (DVD)/Track
1
(Video CD) Sensor
Lightly press the 1 (g) or 3 (f) button
during DVD/video CD/CD play to return to the
beginning of the chapter/track being currently
played or advance to the beginning of the next
chapter/track respectively.
Note: The word "chapter or track" means a
division of the recorded picture/sound on
a DVD/video CD/CD respectively.
94
Page 47

DVD/Video CD/
English
CD Player Operation (Optional)
1
1
1
REPEAT
Fast Forward/Backward
Press and hold the 1 (g) or 3 (f)
button during play to fast backward or forward
respectively. Release the button when you
reach the desired portion you wish to play.
Playback starts from that portion.
Repeat Play
1
Press the 4 (REPEAT) button during play to
repeatedly play the chapter/track or title/disc
being currently played.
Each press changes the repeat play as follows:
DVD:
Chapter Repeat Off
(repeat play) (normal play)
↔
96
Video CD/CD:
Track Disc
(repeat play) (repeat play)
Note:
The track/disc repeat modes cannot be used on
video CDs with playback control (PBC). Press
"MENU" to turn the PBC function off. For more
details, see the operating instructions of your
DVD player.
↔
Page 48

DVD/Video CD/
English
CD Player Operation (Optional)
Playing tracks in random
order (M.I.X.)(Video CD/
CD)
1
You can play all the tracks in random order.
You can use the M.I.X. function only on the
connected DVD player equipped with the M.I.X.
function.
1
M.I.X.
1. Press the 5 (M.I.X.) button while playing the
Video CD or CD. All the tracks play in
random order.
To cancel M.I.X. play and return to the
original play order, Press the 5 (M.I.X.)
button again.
Notes:
• You cannot use the repeat play mode during
M.I.X. play.
• The M.I.X. play mode cannot be used on
video CDs with the playback control (PBC).
Press "MENU" to turn the PBC function off.
For more details, see the operating instructions of your DVD player.
98
Page 49

Auxiliary Device
English
Operation (Optional)
Operating Auxiliary
Devices
To operate your devices connected to the AUX
terminals on the rear panel of IVA-C800E,
follow the procedure described below.
1
2
1
2
WARNING
It is dangerous (and illegal in many states)
for the driver to watch the TV/Video while
driving the vehicle. The driver may be
distracted from looking ahead and an
accident could occur.
Install the IVA-C800E correctly so that the driver
cannot watch TV/Video unless the vehicle is
stopped and the emergency brake is applied.
If the IVA-C800E is not installed correctly, the
driver will be able to watch the TV/Video while
driving the vehicle and may be distracted from
looking ahead causing an accident. The driver
or other people could be severely injured.
Press the SOURCE button.
The main menu screen appears on the display.
Rotate the rotary encoder and select "AUX",
then press the rotary encoder to execute the
selection.
Note: If the AUX mode is not displayed on the
main menu, select "AUX IN" in the
Initialization mode screen. Either AUX1
or AUX2 should be turned ON.
100
Page 50

24 5
1
Audio Processor
English
Operation (Optional)
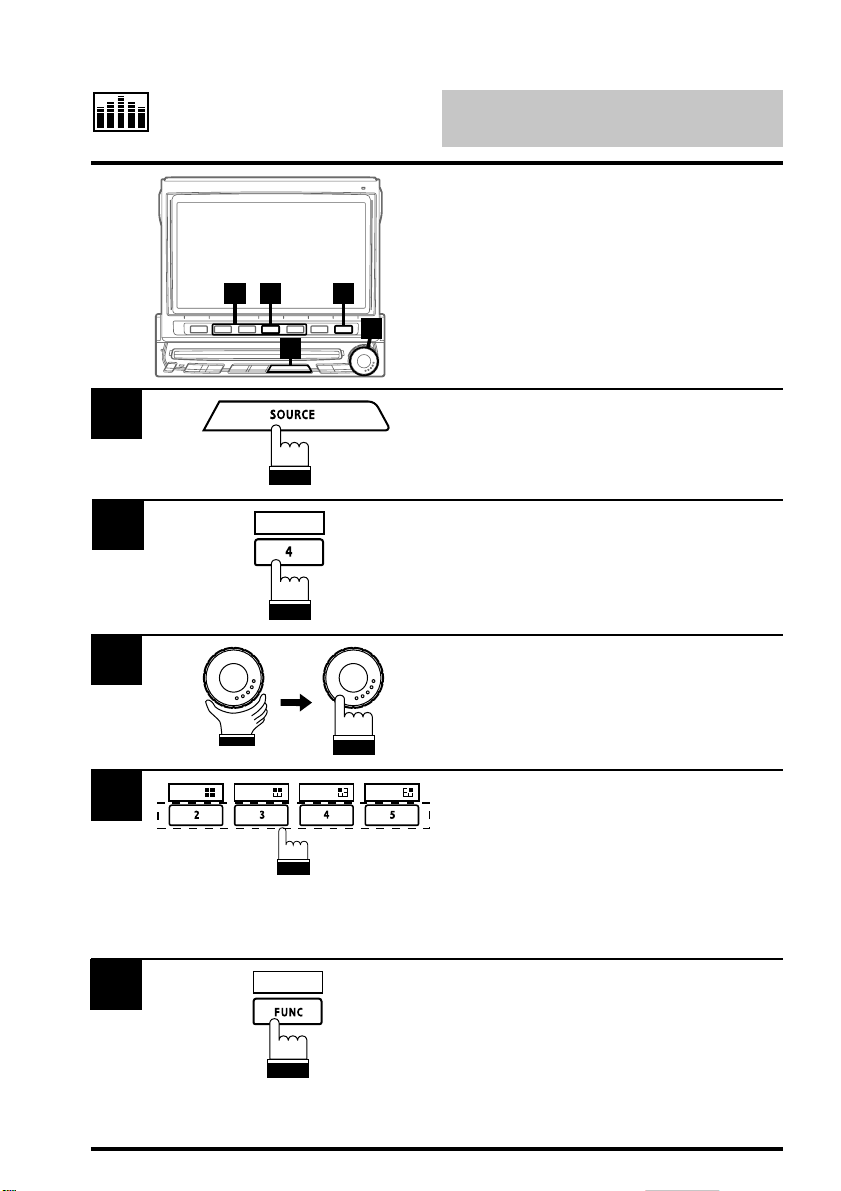
Selecting Factory
(Maker's) Equalization
Presets
If an optional Alpine Equalizer is connected to
the IVA-C800E, the Equalizer can be controlled
3
from the IVA-C800E.
Six equalization curves are preset on the
Equalizer at the factory.
1
2
3
4
A.PROC
FLAT MALE FEMALE POPS ROCK NEWS
Press the SOURCE button.
The main menu screen appears on the display.
Press the 4 (A.PROC) button to display the list
of the Audio Processors (A.PROC).
Rotate the rotary encoder and select "Equalizer." Then press the rotary encoder to execute
the selection.
The display changes to the Equalizer mode
screen.
Select a desired Equalizer characteristic curve
and press the corresponding Function button
(1 (FLAT) through 6 (NEWS)).
You can select your desired equalizer characteristic curve from 6 preset characteristic
curves; FLAT, MALE, FEMALE, POPS, ROCK
and NEWS.
(To be continued)
102
Page 51

Audio Processor
English
Operation (Optional)
5
RETURN
When you have selected your desired characteristic curve, press the FUNC (RETURN).
The display returns to the Audio Processor List
screen.
Note: When the FUNC (RETURN) button is
pressed, the display returns to the
previous screen.
Tip: In the equalizer mode, for example, you
can horizontally scroll each of the mode
screens by rotating the rotary encoder
to the left or right. You can also adjust
the volume level by pressing and
rotating the rotary encoder (DHE,
Surround, BBE, listening position, time
collection mode main screen only).
104
Page 52

1
26
435
Audio Processor
English
Operation (Optional)
Creating Personal Equalizer Characteristic
Curves
You can create your own equalizer characteristic curves. The following is the procedure.
Note: The Parking Brake must be engaged to
access the Equalizer Adjustment mode
screen. Attempting to access this screen
while driving will display the warningCAN'T OPERATE WHILE DRIVING.
1
2
3
4
5
FLAT MALE FEMALE POPS ROCK NEWS
RETURN
Display the equalizer mode screen by pressing
one of the Function buttons 1 (FLAT) through
6 (NEWS) to select the desired characteristic
curve you wish to change.
Press and hold the FUNC (RETURN) button for
at least 2 seconds.
The display changes to show the equalizer
adjustment screen .
Rotate the rotary encoder clockwise or
counterclockwise to select the frequency that
you wish to adjust. The colour of the frequency
changes when it is selected.
Press the rotary encoder to execute the
selection.
Make level adjustments by rotating the rotary
encoder. Press and release the rotary encoder
at the desired level.
Repeat the above steps to adjust other
frequencies.
106
6
RETURN
When the adjustments have been completed,
press the FUNC (RETURN) button.
The display changes to the Equalizer mode
screen.
Page 53

Audio Processor
English
Operation (Optional)
Adjusting Surround
Levels and Surround
Delay Time
1
25
34
If your equalizer connected is equipped with the
surround level/time adjustment feature, you can
adjust the surround sound levels and surround
delay time to suit to your preference.
1
2
3
4
5
STUDIUM
LIVE
RETURN
RETURN
CHURCH
DANCE HALL
Display the surround mode screen and press
one of the Function buttons 2 (STADIUM)
through 6 (HALL) (except "NORMAL") that has
the surround mode you wish to adjust.
Press and hold the FUNC (RETURN) button for
at least 2 seconds.
The display changes to the surround adjustment screen.
Press the rotary encoder to select the surround
delay time or surround level that you wish to
adjust.
Each press toggles between the surround delay
time and surround level modes.
Turn the rotary encoder clockwise or counterclockwise to adjust the surround sound level or
delay time to your preference.
After adjustment press the rotary encoder.
When your adjustments are complete, press the
FUNC (RETURN) button.
The display returns to the Surround mode
screen.
110
Page 54

1
24 5
1
Audio Processor
English
Operation (Optional)
Selecting DHE (Digital
Harmonic Enhancer)
Mode
The DHE mode enhances the sound of musical
3
instruments or vocals, while masking road
noises of a moving vehicle. The result is music
with more clarity.
Press the SOURCE button.
The main menu screen appears on the display.
2
A.PROC
3
MODE 1 MODE 2 MODE 3 MODE 4 MODE 5
4
Enhances the rhythmic bass sound
to make very harmonic bass sound.
Beat MIX
(MODE3)
Balances the bass sound
to make it brighter.
Beat MAX
(MODE1)
Press the 4 (A.PROC) button to display the
Audio Processor List screen.
Rotate the rotary encoder and select "DHE,"
then press the rotary encoder to execute the
selection.
The DHE mode screen appears.
Press one of the Function buttons 2 (MODE1)
through 6 (MODE5) that has your desired
DHE mode. There are 5 modes as follows.
When the 1 (OFF) button is pressed, the DHE
mode will be deactivated.
Enhances voice of female
singers to make it brighter.
Lyric MIX
(MODE4)
Reproduces voice of
female singers clearer.
Lyric MAX
(MODE2)
Phase MIX
(MODE5)
Reproduces any kind of
music sources more
balanced and crisp.
112
(To be continued)
Page 55

Audio Processor
English
Operation (Optional)
5
RETURN
When you have selected your desired DHE
mode, press the FUNC (RETURN) button.
The display returns to the Audio Processor List
screen.
Tip: When the FUNC (RETURN) button is
pressed, the display returns to the previous
screen.
114
Page 56

1 2
3
Audio Processor
English
Operation (Optional)
Setting DHE Power or
Fine Mode
The DHE Power and Fine modes enhance the
DHE effects. Power makes coarse adjustments
to the overall balance whereas Fine will make
more subtle changes. Listen how each mode
affects the music and select the one most
pleasing to your taste.
1
2
3
MODE 1 MODE 2 MODE 3 MODE 4 MODE 5
RETURN
Activate the DHE mode, then press one of the
Function buttons 2 (MODE1) through 6
(MODE5) that has the desired DHE mode to be
adjusted.
Press and hold the FUNC (RETURN) button for
at least 2 seconds.
The DHE adjustment mode is activated.
Press the rotary encoder to select the desired
mode either DHE Power or DHE Fine mode,
then rotate the rotary encoder to select the ON
or OFF mode. Each press toggles between the
Power/Fine on and off modes.
When it is set to the ON mode, the DHE effects
will be enhanced.
Effect of the Power On mode:
• More powerful bass sound and crisp, clear
sound will be produced.
Effect of the Fine On mode:
• Vocal/chorus music will be refined and
becomes clearer.
116
Page 57

24 5
1
Audio Processor
English
Operation (Optional)
Selecting BBE Mode
The BBE (Barcus Berry Electronics) Surround
Processor is designed to return the natural
balance of harmonic time alignment, which
disappears when the sound signal is amplified
and reproduced by loudspeakers. The result of
this processing is crisp, clean sound with tighter
3
transients and sharper imaging. If you make the
BBE adjustments after adjusting the surround
settings, the audible processing result will be
enhanced remarkably.
1
2
3
4
5
A.PROC
MODE 1 MODE 2 MODE 3
RETURN
Press the SOURCE button.
The main menu screen appears in the display.
Press the 4 (A.PROC) button. The Audio
Processor List screen is displayed.
Rotate the rotary encoder and select "BBE"
from the list displayed. Press the rotary encoder
to execute the selection.
The display changes to the BBE mode screen.
Select a desired BBE mode and press the
corresponding Function button, 2 (MODE1)
through 4 (MODE3). The effect is proportionally reduced for the BBE-2 and BBE-3 has the
least effect.
To deactivate the BBE mode, press the 1
(OFF) button.
When the setting has been completed, press
the FUNC (RETURN) button.
118
Tip: When the FUNC (RETURN) button is
pressed, the display returns to the previous
screen.
Page 58

Audio Processor
English
Operation (Optional)
Customizing BBE Mode
This function is operative only when an audio
1
25
34
processor equipped with the BBE level (Low
and High) adjustment feature is connected.
1
2
3
4
5
MODE 1 MODE 2 MODE 3
RETURN
RETURN
Activate the BBE mode, then press one of the
Function buttons 2 (MODE1) through 4
(MODE3) that has the BBE mode you wish to
adjust.
Press and hold the FUNC (RETURN) button for
at least 2 seconds.
The BBE adjustment mode is activated.
Press the rotary encoder to select "HI LEVEL"
or "LOW LEVEL." Each press toggles between
"HI LEVEL" and "LOW LEVEL."
Rotate the rotary encoder and adjust the level
to your desired level.
When adjustment is complete, press the FUNC
(RETURN) button. The display returns to the
BBE mode screen.
120
Page 59
24 5
1
Audio Processor
English
Operation (Optional)
Selecting Listening
Position
You can select the listening position for
optimum sound field depending on the number
3
of passengers in the vehicle.
1
2
3
4
5
ALL
A.PROC
FRONT
RETURN
FRONT
LEFT
FRONT
RIGHT
Press the SOURCE button.
The main menu screen appears on the display.
Press the 4 (A.PROC) button. The Audio
Processor List screen appears.
Rotate the rotary encoder and select L.P.S.
(Listening Position Setting) in the menu. Press
the rotary encoder to execute the selection. The
display changes to the L.P.S. (Listening
Position Selection) mode screen.
Press one of the Function buttons 2 (ALL)
through 5 (FRONT/RIGHT) that has your
desired listening position.
Notes: • The black squares show the listening
positions.
• When the 1 (OFF) button is
pressed, the L.P.S. mode is deactivated.
When selection has been completed, press the
FUNC (RETURN) button.
The display returns to the Audio Processor List
screen.
122
Tip: When the FUNC (RETURN) button is
pressed, the display returns to the previous
screen.
Page 60

25
34
Audio Processor
Operation (Optional)
Adjusting Listening
Position
English
1
2
3
4
5
RETURN
RETURN
Activate the L.P.S. mode and select the
listening position you wish to adjust by referring
to "Selecting Listening Position" section.
Press and hold the FUNC (RETURN) button for
at least 2 seconds.
The display changes to the L.P.S. adjustment
mode.
Press the rotary encoder and select "F/R"
(Front/Rear) or "L/R" (Left/Right) you wish to
adjust.
Rotate the rotary encoder to adjust to the
desired listening position.
When the rotary encoder is rotated in the F/R
mode, the cursor moves forward or backward,
and when it is rotated in the L/R mode, the
cursor moves to the left or right.
When adjustment is complete, press the FUNC
(RETURN) button.
The display returns to the L.P.S. mode screen.
124
Page 61

Audio Processor
English
Operation (Optional)
Adjustment of Time
2
47
Correction Value
1
2
3
4
5
1
RETURN
536
A.PROC
Press the SOURCE button.
The main menu appears on the display.
Press the 4 (A.PROC) button.
The Audio Processor List appears.
Rotate the rotary encoder and select the "TimeCorr." (Time-Correction), then press the rotary
encoder .
The display changes to the Time-Correction
mode screen.
Press and hold the FUNC (RETURN) button for
at least 2 seconds.
The display changes to the Time-Correction
Adjustment mode screen.
Press the rotary encoder repeatedly to select
the position (seat) you wish to adjust.
Each press changes the seat positions as
follows:
→ Fr/Left → Fr/Right → Rear/Left → Rear/Right
126
(To be continued)
Page 62

6
Audio Processor
English
Operation (Optional)
Rotate the rotary encoder clockwise or
counterclockwise to increase or decrease the
Time-Correction value respectively to your
desired value.
7
RETURN
When adjustment has been completed, press
the FUNC (RETURN) button. The display
returns to the Time-Correction mode screen.
Tip: When the FUNC (RETURN) button is
pressed, the display returns to the previous
screen.
128
Page 63

Audio Processor
English
Operation (Optional)
Adjusting Cross-Over
(X-Over) Point of 2-Way
Divider
If an optional Alpine Channel Divider PRA-H400
5
2
1
48
637
is connected, you can control the Divider from
the IVA-C800E.
Use this procedure when one or two 2-waysystem or 3-way system channel dividers are
connected.
1
2
3
4
5
A.PROC
RETURN
X-OVER
Press the SOURCE button.
The main menu screen appears on the display.
Press the 4 (A.PROC) button.
The display shows the Audio Processor list
screen.
Rotate the rotary encoder and select the
"Divider" (when one divider is connected) or
"Divider-F and Divider-R" (when two dividers
are connected), then press the rotary encoder
to execute the selection.
The display changes to the Divider mode
screen.
Press and hold the FUNC (RETURN) button for
at least 2 seconds.
The mode changes to the Divider Adjustment
mode.
Press the 1 (X-OVER) button. The mode
changes to the Cross-Over Adjustment mode.
130
(To be continued)
Page 64

6
Audio Processor
English
Operation (Optional)
Press the rotary encoder and select the channel
that you wish to adjust.
Each press changes the channel as follows.
When only one 2-way divider is connected:
→ Low → F-High → R-High
When two 2-way dividers are connected:
→ Low → High
Each time the 6 (F/R) button is
↑
pressed, the mode switches between
the Front adjustment and Rear adjustment modes, and the display also
↓
changes.
→ Low → High
When only one 3-way divider is connected:
→ Low → Mid-L → Mid-H → High
132
7
8
RETURN
When two 3-way dividers are connected:
→ Low → Mid-L → Mid-H → High
Each time the 6 (F/R) button is
↑
pressed, the mode switches between
the Front adjustment and Rear adjust-
↓
ment, and the display also changes.
→ Low → Mid-L → Mid-H → High
Rotate the rotary encoder clockwise or
counterclockwise to adjust the Cross-Over point
upward or downward to your desired point.
When the adjustment has been completed,
press the FUNC (RETURN) button. The display
returns to the Divider mode screen.
Page 65

Audio Processor
English
Operation (Optional)
Adjusting Levels
2
15
34
134
1
2
3
RETURN
LEVEL
Press and hold the FUNC (RETURN) button for
at least 2 seconds in the Divider mode.
The mode changes to the Divider Adjustment
mode.
Press the 2 (LEVEL) button. The mode
changes to the Level Adjustment mode.
Press the rotary encoder and select the channel
you wish to adjust.
Each press changes the channels as follows:
When only one 2-way system divider is
connected:
→ L-Low → R-Low → F-High/L
R-High/R ← R-High/L ← F-High/R ←
When two 2-way system dividers are connected:
→ L-Low → R-Low → L-High → R-High
Each time the 6 (F/R) button is pressed,
↑
the mode switches between the Front
adjustment, and Rear adjustment modes,
↓
and the display also changes.
→ L-Low → R-Low → L-High → R-High
When only one 3-way divider is connected:
→ L-Low → R-Low → L-Mid → R-Mid → L-High → R-High
When two 3-way dividers are connected:
→ L-Low → R-Low → L-Mid → R-Mid → L-High → R-High
Each time the 6 (F/R) button is pressed,
↑
the mode switches between the Front
adjustment and Rear adjustment modes,
↓
and the display also changes.
→ L-Low → R-Low → L-Mid → R-Mid → L-High → R-High
(To be continued)
Page 66

4
Audio Processor
English
Operation (Optional)
Rotate the rotary encoder clockwise or
counterclockwise to adjust to your desired level
upward or downward respectively.
5
RETURN
When adjustments have been completed, press
the FUNC (RETURN) button.
The display returns to the Divider mode.
136
Page 67

Audio Processor
English
Operation (Optional)
Adjusting Time Correction for 2-Way
2
15
34
Speaker System
Use this procedure to adjust the sound time
difference between the speakers.
1
2
3
RETURN
T-CORR
Press and hold the FUNC (RETURN) button for
at least 2 seconds in the Divider mode.
The mode changes to the Divider Adjustment
mode.
Press the 3 (T-CORR.) button.
The mode changes to the Time Correction
Adjustment mode.
Press the rotary encoder and select the channel
you wish to adjust.
Each press changes the channels as follows:
When only one 2-way divider is connected:
→ L-Low → R-Low → F-High/L
R-High/R ← R-High/L ← F-High/R ←
When two 2-way dividers are connected:
→ L-Low → R-Low → L-High → R-High
Each time the 6 (F/R) button is pressed,
↑
the mode switches between the Front
adjustment and Rear adjustment modes,
and the display also changes.
↓
→ L-Low → R-Low → L-High → R-High
When only one 3-way divider is connected:
→
L-Low → R-Low → L-Mid → R-Mid → L-High → R-High
138
When two 3-way dividers are connected:
→
L-Low → R-Low → L-Mid → R-Mid → L-High → R-High
Each time the 6 (F/R) button is pressed,
↑
the mode switches between the Front
adjustment and Rear adjustment modes,
↓
and the display also changes.
→
L-Low → R-Low → L-Mid → R-Mid → L-High → R-High
(To be continued)
Page 68

4
Audio Processor
English
Operation (Optional)
Rotate the rotary encoder clockwise or
counterclockwise to adjust the time correction
value upward or downward respectively.
5
RETURN
When adjustments have been completed, press
the FUNC (RETURN) button.
The display returns to the Divider mode screen.
140
Page 69

12
Audio Processor
English
Operation (Optional)
Memorizing Divider
Settings
You can store your settings of the divider(s) in
memory when you have adjusted them.
1
2
P.SET
1
P.SET 1 P.SET 4P.SET 3P.SET 2
P.SET
After adjusting the divider(s), display the Divider
P.SET
P.SET
2
3
4
mode screen.
Press and hold any one of the Function buttons
1 (P.SET1) through 4 (P.SET4) for at least 2
seconds.
The indicators for the 4 buttons blink for 5
seconds.
While the indicators are still blinking, Press the
Function button into which you want to
memorize (preset) the divider settings.
Repeat the above steps to memorize 3 other
divider settings.
142
Page 70

Audio Processor
English
Operation (Optional)
Recalling Memorized
Divider Settings Using
1
Function Buttons
1
P.SET
1
P.SET
P.SET
2
3
Display the Divider mode screen.
P.SET
4
Press the Function button 1 (P.SET1) through
4 (P.SET4) that has your desired divider
settings.
The divider setting stored at the Function button
will be recalled.
Tip: You can also recall your desired divider
settings memorized by pressing the 4
(;P.DN) or 5 (:P.UP) button in the
Divider mode.
144
Page 71

24 5
1
Audio Processor
English
Operation (Optional)
Recalling Divider Settings
Memorized Using
Optional Divider
If an optional Alpine divider (such as PXA-
3
H600/PXA-H510) is connected, you can recall
the settings memorized using the optional
divider.
1
2
3
4
5
A.PROC
P.SET 1P.SET 2P.SET 3P.SET 4P.SET 5P.SET
RETURN
Press the SOURCE button.
The main menu is displayed on the display.
Press the 4 (A.PROC) button.
The Audio Processor List screen is displayed.
Rotate the rotary encoder and select "Adaptive
EQ." The Function Guide screen is displayed.
6
Press one of the Function buttons 1 (P.SET1)
through 6 (P.SET6) that has your desired
setting memorized using the optional divider.
Press the FUNC (RETURN) button.
The display returns to the main menu screen.
146
Page 72

1
23
Audio Processor
English
Operation (Optional)
Memorizing Characteristic Curves
1
Equalization characteristic curves created by
yourself or factory preset can be stored in
memory.
Select one of the factory preset characteristic
curves or make your own (personal) character-
istic curve. Then, display the Audio Processor
List and select "Private Memo."
2
3
P.SET 1P.SET 2P.SET 3P.SET 4P.SET 5P.SET
P.SET 1P.SET 2P.SET 3P.SET 4P.SET 5P.SET
6
6
Press and hold any one of the Function buttons
1 (P.SET1) through 6 (P.SET6) for at least 2
seconds.
The Function Guide indicators P.SET1 through
P.SET6 in the preset mode display blink
indicating that you can memorize the character-
istic curve.
While the Function Guide indicators are
blinking, press the Function button 1 (P.SET1)
through 6 (P.SET6) into which you wish to
memorize the characteristic curve.
Now, the characteristic curve has been
memorized.
Repeat this procedure to memorize other
characteristic curves.
Note: This unit can memorize curves together
with the settings of the equalizer, DHE,
BBE and Surround Time Correction.
148
Page 73

Audio Processor
English
Operation (Optional)
Recalling Memorized
Characteristic Curves
1
Using Function Buttons
1
1
2
P.SET 1P.SET 2P.SET 3P.SET 4P.SET 5P.SET
12
6
Activate the desired mode, DHE, BBE,
surround, time correction or equalizer, then
press the Function button 1 (P.SET1) through
6 (P.SET6) that has your desired characteris-
tic curve.
The selected characteristic curve is recalled.
Selecting Characteristic
Curves from Displayed
Audio Processor List
You can select your desired characteristic
curves directly from the Audio Processor
(A.PROC) List without switching to individual
mode screens.
Display the Audio Processor List screen.
Rotate the rotary encoder and select the
desired mode by moving the cursor. The
Function Guide for the selected mode is
displayed.
Press the Function buttons 1 through 6 that
has your desired characteristic curve. The list
shows the details of the curve selected.
150
Page 74

213
Other Useful
English
Features
Displaying Spectrum
Analyzer
When this unit is connected to an external
audio processor and an external amplifier, or to
an external audio processor without a spectrum
analyzer function, this feature does not function.
1
2
3
While the main screen for a music source is
displayed, press the SPE.ANA. button to turn
on the spectrum analyzer mode.
Each time you press the SPE.ANA. button, the
spectrum analyzer modes change. There are
three modes, select your desired mode to
match the music being played.
Mode 1: This mode can be used for any genre
of music.
Mode 2: This mode is suitable to vocal song
music.
Mode 3: This mode emphasizes the rhythmical
bass sound and gives an image of
vivid low frequencies.
To deactivate the spectrum analyzer mode,
press the SPE.ANA. button for at least 2
seconds.
152
Page 75

Other Useful
English
Features
Turning Defeat Mode
On and Off
24
1
3
When the defeat mode is on, the sound signals
bypass the BBE and surround circuits and
directly go to the line output. The equalizer
curve, therefore, becomes flat.
1
2
3
4
A.PROC
ON
Press the SOURCE button. The main menu
screen appears on the display.
Press the 4 (A.PROC) button. The display
shows the Audio Processor List screen.
Rotate the rotary encoder and select "Defeat."
The Function Guide is displayed.
Press the 2 (ON) button to turn on the defeat
mode. The sound signals pass the BBE and
surround circuits.
To turn off the defeat mode, press the 1 (OFF)
button.
154
Page 76

1
2
Other Useful
English
Features
Titling Radio Stations/CDs
You can title radio stations and CDs. This manual
describes how to title radio stations.
Immediately after inputting titles or changing the
settings of Initialize Mode or Display Mode (while
34
6
2
the system is inputting the titles or data automatically) do not turn the ignition key (engine key) to
OFF.
Otherwise, the title may not be written, or the
settings may not be changed.
Note: The Parking Brake must be engaged to
access the TITLE INPUT mode screen.
Attempting to access this screen while
driving will display the warning-CAN'T
OPERATE WHILE DRIVING.
Activate the radio mode.
Tune in a radio station you wish to title.
Press and hold the INPUT button for at least 2
seconds.
The Title Inputting screen appears in the
display.
156
3
4
5
Characters are displayed at the bottom menu.
Rotate the rotary encoder and select the
desired character for the first position.
To change between upper case, lower case,
numeral and symbol, press the 3 (A/1) button.
Each press changes the bottom menu.
When the character for the first position has
been selected, press the rotary encoder. The
first character has been memorized at the first
position. See "Notes" on next page.
Repeat steps 3 and 4 to enter the rest of
characters. You can input up to 12 characters
for titling one radio station (or CD).
(To be continued)
Page 77

6
WRITE
Other Useful
English
Features
When titling has been completed, press the 6
(WRITE) button to store the title in memory.
The display changes to the Radio mode.
To title other stations (or CDs), repeat this
procedure. You can title up to 120 (max.)
stations and CDs combined. The input titles will
be displayed when a station (or CD) titled is
selected.
Notes: • If the memory capacity for radio
station titles is full and if you attempt
to title a new station, the oldest title
will be erased to make room for the
new one. To delete a title, select the
title you want to delete, then select
"SPC" (space) and press 6 (WRITE)
button.
• When the 1 (; BACK) or 2 (NEXT
-) button is pressed, the cursor
moves to the left or right on the input
titles.
• If an incorrect character has been
entered, select "SPC" (space) and
input a new character or press the 4
(DELETE) button to delete the
previous character. Press the 5
(CLEAR) button while inputting the
titles to erase all the characters you
have input.
• Pressing the FUNC (RETURN)
button in the Title Input mode
changes the display back to the
previous display.
158
Page 78

1
Other Useful
English
Features
Adjusting Subwoofer
Level (when subwoofer is
used with other
speakers)
4
1
2 7
536
Immediately after inputting titles or changing the
settings of Initialize Mode or Display Mode
(while the system is inputting the titles or data
automatically) do not turn the ignition key
(engine key) to OFF.
Otherwise, the title may not be written, or the
settings may not be changed.
Note: The Parking Brake must be engaged to
access the Initialization mode screen.
Trying to access this screen while driving
will display the warning-CAN'T OPERATE WHILE DRIVING.
Press the SOURCE button.
The main menu appears on the display.
160
2
3
4
INTLZ
ON
Press the 6 (INTLZ) button.
The Initialization mode screen is displayed.
Rotate the rotary encoder and select "Sub wf."
The Function Guide appears on the display.
Press the 2 (ON) button to turn on the
subwoofer.
To turn off the subwoofer, press the 1 (OFF)
button.
(To be continued)
Page 79

5
Other Useful
English
Features
Press the rotary encoder repeatedly to select
"SUB W." Each press changes the modes as
follows:
→ BAS. → TRE. → BAL. → FAD. → SUB.W. → VOL.
6
7
RETURN
Rotate the rotary encoder and adjust the
subwoofer output level.
When your adjustment has been completed,
press the FUNC (RETURN) button.
The display returns to the main menu.
Notes: • For further information, please
contact your Alpine dealer.
• When you connect a subwoofer, you
need an amplifier with built-in lowpass filter.*
* The low-pass filter passes only the
frequencies below the selected cutoff frequency. Any high frequency
content of the audio signal above
the cut-off will be removed.
• With the Initialization screen
displayed, pressing and rotating the
rotary encoder can adjust the volume
level.
162
Page 80

Other Useful
English
Features
Switching Phase
Use the phase-switching function after connecting your audio-processor, amplifier and
subwoofer to the IVA-C800E.
1
2
3
4
2 54
1
INTLZ
0° 180°
3
Immediately after inputting titles or changing the
settings of Initialize Mode or Display Mode
(while the system is inputting the titles or data
automatically) do not turn the ignition key
(engine key) to OFF.
Otherwise, the title may not be written, or the
settings may not be changed.
Press the SOURCE button.
The main menu appears on the display.
Press the 6 (INTLZ) button.
The Initialization mode screen is displayed.
Rotate the rotary encoder and select "Sub Wf."
The Function Guide is displayed.
Press the 2 (0°) or 3 (180°) button to switch
the phase of the subwoofer output.
164
5
RETURN
To turn off this function, press the 1 (OFF)
button.
When setting has been completed, press the
FUNC (RETURN) button.
The display returns to the main menu screen.
Page 81

1
Other Useful
English
Features
Setting the External Device Interrupt Mode
If an Alpine Ai-NET Interrupt Box (NVE-K200) is
connected to the IVA-C800E, an Auxiliary
3
24 5
1
Source will be allowed to interrupt the current
audio source. For example, use this function to
have the sound of your TV interrupt CD or MD
play when it occurs. The CD/MD player will be
automatically muted during the voice guidance.
For further details, please refer to the manual
for NVE-K200.
Immediately after inputting titles or changing the
settings of Initialize Mode or Display Mode
(while the system is inputting the titles or data
automatically) do not turn the ignition key
(engine key) to OFF.
Otherwise, the title may not be written, or the
settings may not be changed.
Press the SOURCE button.
The main menu screen appears on the display.
166
2
3
INTLZ
Press the 6 (INTLZ) button.
The Initialization mode screen appears on the
display.
Rotate the rotary encoder and select "IN-INT
MUTE" from the Initialization mode screen. The
Function Guide appears on the display.
(To be continued)
Page 82

Other Useful
Features
English
4
5
OFF
RETURN
Press the 1 (OFF) button to turn off the mute
mode.
In the mute OFF mode:
The volume level can be adjusted in the
interrupt mode.
Note: When the Mute On mode is selected,
sound will not be produced.
When your setting has been completed, press
the FUNC (RETURN) button.
The display returns to the main menu.
Note: The Auxiliary device being connected,
must have an Interrupt wire with a
positive trigger, for this function to
operate automatically. Otherwise, a
separate switch needs to be added to
switch manually.
168
Page 83

1
Other Useful
English
Features
Setting Interrupt Icon
Display (IN-INT)
The unit can display the icon of the external
device such as a telephone whenever a phone
3
24
1
call comes in to tell you there is a phone call.
Immediately after inputting titles or changing the
settings of Initialize Mode or Display Mode
(while the system is inputting the titles or data
automatically) do not turn the ignition key
(engine key) to OFF.
Otherwise, the title may not be written, or the
settings may not be changed.
Press the SOURCE button.
The main menu appears on the display.
170
2
3
4
INTLZ
TEL
Press the 6 (INTLZ) button.
The Initialization mode screen appears.
Rotate the rotary encoder and select "IN-INT."
The Function Guide is displayed.
Press 1 (TEL) button.
When the external device (telephone) sends the
interrupt signal, the telephone icon appears on
the display.
When the 2 (INT.) button is pressed, the INT
icon appears on the display.
Page 84

1
Other Useful
English
Features
Setting Bass Frequency
Immediately after inputting titles or changing the
settings of Initialize Mode or Display Mode
(while the system is inputting the titles or data
automatically) do not turn the ignition key
3
24 5
1
(engine key) to OFF.
Otherwise, the title may not be written, or the
settings may not be changed.
Note: When an equalizer or digital sound
processor is connected, this function is
inoperative.
Press the SOURCE button.
The main menu appears on the display.
172
2
3
4
5
INTLZ
60Hz 70Hz 80Hz 100Hz
RETURN
Press the 6 (INTLZ) button.
The Initialization mode screen appears.
Rotate the rotary encoder and select "BASS
Cont." to activate the Bass Control mode.
Press the Function button 1 (60 Hz) through
4 (100 Hz) that has the frequency you wish to
control.
Press the FUNC (RETURN) button.
The display returns to the main menu screen.
Page 85

1
Other Useful
English
Features
Setting Visual Modes
To gain direct access to one of the different
visual screens, preset to the desired source.
You can then display the screen of the preset
item by just pressing the V. SEL button on the
IVA-C800E.
Immediately after inputting titles or changing the
1
settings of Initialize Mode or Display Mode
(while the system is inputting the titles or data
automatically) do not turn the ignition key
(engine key) to OFF.
Otherwise, the title may not be written, or the
settings may not be changed.
Press the V.SEL button to preset the desired
item. Each press changes the visual modes.
→ AUX1 → AUX2 → DISPLAY
174
Page 86

Other Useful
English
Features
Selecting Rear Monitor
If a rear-seat monitor is connected to the IVAC800E, you can switch the picture/sound of the
rear-seat monitor from the IVA-C800E.
1
2
3
1
INTLZ
3
24
Immediately after inputting titles or changing the
settings of Initialize Mode or Display Mode
(while the system is inputting the titles or data
automatically) do not turn the ignition key
(engine key) to OFF.
Otherwise, the title may not be written, or the
settings may not be changed.
Press the SOURCE button.
The main menu appears on the display.
Press the 6 (INTLZ) button.
The Initialization mode screen appears.
Rotate the rotary encoder and select "AUX
OUT."
The Function Guide is displayed.
176
(To be continued)
Page 87

Other Useful
Features
English
4
• When the 1 (AUX1) button is pressed, the
device connected to Terminal AUX 1 will be
played on the rear-seat monitor and the
monitor produces picture and sound.
• When the 2 (AUX2) button is pressed, the
device connected to Terminal AUX 2 will be
played on the rear-seat monitor and the
monitor produces picture and sound.
Notes: • If the DVD player (DVA-5205E) is
connected to the AUX1 terminal and
the V. OUT button on the remote
control supplied with the DVD player
(DVA-5205E) is pressed and held for
more than 2 seconds after having
performed steps 1 to 4 on page
176-178, the picture and voice will be
produced.
• To deactivate the mode, preTo
deactivate the mode, press the same
button.ss the same button.
• If no particular picture is selected for
the rear-seat monitor in the AUX OUT
mode, the rear-seat monitor displays
the same picture as for the IVAC800E.
178
Page 88

Other Useful
English
Features
Displaying Time
Immediately after inputting titles or changing the
settings of Initialize Mode or Display Mode
3
2 54
1
(while the system is inputting the titles or data
automatically) do not turn the ignition key
(engine key) to OFF.
Otherwise, the title may not be written, or the
settings may not be changed.
1
2
3
4
5
INTLZ
OFF ON
RETURN
Press the SOURCE button.
The main menu appears on the display.
Press the 6 (INTLZ) button.
The Initialization mode screen appears.
Rotate the rotary encoder and select "CLOCK
DISP."
The Function Guide appears.
Press the 1 (OFF) or 2 (ON) button to turn off
or on the clock display respectively.
Press the FUNC (RETURN) button.
The display returns to the main menu screen.
180
Page 89

1
Other Useful
English
Features
Resetting Clock
Immediately after inputting titles or changing the
settings of Initialize Mode or Display Mode
3
2 64 5
1
(while the system is inputting the titles or data
automatically) do not turn the ignition key
(engine key) to OFF.
Otherwise, the title may not be written, or the
settings may not be changed.
Press the SOURCE button.
The main menu appears on the display.
2
3
4
5
INTLZ
HOUR
DN
MINUTE
DN
UP
UP
Press the 6 (INTLZ) button.
The Initialization mode screen appears.
Rotate the rotary encoder and select "CLOCK
ADJ." to activate the clock adjustment mode.
The Function Guide appears.
Press the 1 ( DN) or 2 (UP ) button to
delay or advance the hours respectively.
Press the 3 ( DN) or 4 (UP ) button to
delay or advance the minutes respectively.
(To be continued)
182
Page 90

Other Useful
Features
English
6
RETURN
Press the FUNC (RETURN) button after
adjusting the clock.
The display returns to the main menu screen.
Note: To quickly set the time to the nearest
hour, press the 5 (TIME RESET) button.
If the displayed time is before the half
hour, pressing the 5 (TIME RESET)
button sets the clock back to the previous
hour. If the displayed time is after the half
hour, pressing the 5 (TIME RESET)
button sets the clock forward to the
beginning of the next hour.
184
Page 91

1
Other Useful
English
Features
Setting Daylight Saving
Time
Immediately after inputting titles or changing the
settings of Initialize Mode or Display Mode
3
2 54
1
(while the system is inputting the titles or data
automatically) do not turn the ignition key
(engine key) to OFF.
Otherwise, the title may not be written, or the
settings may not be changed.
Press the SOURCE button.
The main menu screen is displayed.
2
3
4
5
INTLZ
ON
RETURN
Press the 6 (INTLZ) button. The Initialization
screen is displayed.
Rotate the rotary encoder and select "Summer
Time." The Function Guide is displayed.
Press the 2 (ON) button to place the Summer
Time mode ON.
The time advances by one hour.
To return to the ordinary time, press the 1
(OFF) button.
Press the FUNC (RETURN) button.
The display returns to the main menu screen.
186
Page 92

1
Other Useful
English
Features
Turning Sound Guide
Function On or Off
The Sound Guide function will give audible
feedback with a beep sound when a button on
the unit is pressed to acknowledge the receipt
3
2 54
1
of the signal from the button.
Immediately after inputting titles or changing the
settings of Initialize Mode or Display Mode
(while the system is inputting the titles or data
automatically) do not turn the ignition key
(engine key) to OFF.
Otherwise, the title may not be written, or the
settings may not be changed.
Press the SOURCE button.
The main menu appears on the display.
188
2
3
4
5
INTLZ
OFF ON
RETURN
Press the 6 (INTLZ) button.
The Initialization mode screen appears.
Rotate the rotary encoder and select "BEEP."
The Function Guide is displayed.
Press the 2 (ON) button to activate the Sound
Guide mode. The display shows "BEEP ON."
Press the 1 (OFF) button to deactivate the
Sound Guide mode. The sound guide beep will
not be produced when a button on the unit is
pressed.
When the setting has been completed, press
the FUNC (RETURN) button.
The display returns to the main menu screen.
Page 93

1
Other Useful
English
Features
Demonstration
In the Demonstration mode, the unit performs
scanning of the basic operation of each source.
Immediately after inputting titles or changing the
3
24
1
settings of Initialize Mode or Display Mode
(while the system is inputting the titles or data
automatically) do not turn the ignition key
(engine key) to OFF.
Otherwise, the title may not be written, or the
settings may not be changed.
Press the SOURCE button.
The main menu appears on the display.
190
2
3
4
INTLZ
OFF ON
Press the 6 (INTLZ) button.
The Initialization mode screen appears.
Rotate the rotary encoder and select "DEMO"
to activate the Demonstration mode.
The display shows the Function Guide screen.
Press the 2 (ON) button to activate the
Demonstration mode. When the Demonstration
mode is activated, the unit automatically starts
the demonstration (simulation). The demonstration continues until the demonstration mode is
deactivated.
To deactivate the demonstration mode, press
the 1 (OFF) button. The demonstration stops.
Page 94

Other Useful
English
Features
Setting Automatic Opening/Closing of Monitor
When the Automatic Opening/Closing mode is
"ON," the monitor automatically opens when the
ignition key is turned to the "ACC" or "ON"
3
2 54
position. The monitor automatically closes when
the ignition key is turned OFF.
1
2
3
4
1
INTLZ
OFF ON
Immediately after inputting titles or changing the
settings of Initialize Mode or Display Mode
(while the system is inputting the titles or data
automatically) do not turn the ignition key
(engine key) to OFF.
Otherwise, the title may not be written, or the
settings may not be changed.
Press the SOURCE button.
The main menu appears on the display.
Press the 6 (INTLZ) button.
The Initialization mode screen appears.
Rotate the rotary encoder and select "AUTO
OPEN."
The display shows the Function Guide.
Press the 2 (ON) button to set the Auto
Opening mode ON.
To set the Auto Opening mode OFF, press the
1 (OFF) button. If set to the "OFF" position, the
monitor should be manually opened or closed
by pressing the OPEN/CLOSE button.
192
5
RETURN
Press the FUNC (RETURN) button, the display
returns to the main menu screen.
Page 95

1
Other Useful
English
Features
Adjusting Brightness of
Picture
Immediately after inputting titles or changing the
settings of Initialize Mode or Display Mode (while
the system is inputting the titles or data automati-
2 54
3
1
cally) do not turn the ignition key (engine key) to
OFF.
Otherwise, the title may not be written, or the
settings may not be changed.
Note: The Parking Brake must be ON to access
the display mode screen. Trying to access
this screen while driving will display the
warning-CAN'T OPERATE WHILE
DRIVING.
Press the SOURCE button.
The main menu appears on the display.
194
2
3
4
5
DARK
DISPLAY
± 0
RETURN
LIGHT
Press the 5 (DISPLAY) button.
The Display mode screen appears.
Rotate the rotary encoder and select "BRIGHT" to
activate the Brightness Adjustment mode.
The display shows the Function Guide.
Press the 1 (; DARK) to make the picture darker
or press the 3 (LIGHT :) to make the picture
brighter. You can adjust the brightness between
MIN (–15) and MAX (+15). When it reaches the
minimum or maximum point, the display shows
"MIN" or "MAX" respectively. To quickly set to the
center position, press the 2 (±0) button.
When the adjustment has been completed, press
the FUNC (RETURN) button. The display returns
to the main menu screen.
Note: You can adjust the volume level while the
Display mode screen is shown by first
pressing the rotary encoder and then
rotating the rotary encoder.
Page 96

1
Other Useful
English
Features
Adjusting Tint of Picture
Tint adjustment can be made only in the DVD,
AUX1 and AUX2 modes.
Immediately after inputting titles or changing the
settings of Initialize Mode or Display Mode
2
3
1
(while the system is inputting the titles or data
automatically) do not turn the ignition key
(engine key) to OFF.
Otherwise, the title may not be written, or the
settings may not be changed.
Rotate the rotary encoder while the DISPLAY
mode screen is displayed and select "TINT" to
activate the Tint Adjustment mode. The
Function Guide is displayed.
196
2
3
GRN ± 0 RED
RETURN
Press the 1 (; GRN) button to adjust green
and press the 3 (RED :) button to adjust red.
To quickly set to the center position, press the
2 (±0) button.
When the tint adjustment has been completed,
press the FUNC (RETURN) button. The display
returns to the main menu screen.
Page 97

Other Useful
English
Features
Adjusting Colour of
Picture
Color adjustment can be made only in the DVD,
AUX1 and AUX2 modes.
1
2
3
2
THIN ± 0
RETURN
3
1
THICK
Immediately after inputting titles or changing the
settings of Initialize Mode or Display Mode
(while the system is inputting the titles or data
automatically) do not turn the ignition key
(engine key) to OFF.
Otherwise, the title may not be written, or the
settings may not be changed.
Rotate the rotary encoder while the DISPLAY
mode screen is displayed and select "COLOR"
to activate the colour adjustment mode. The
Function Guide is displayed.
Press the 1 (; THIN) or 3 (THICK :) button
to make the color of the picture brighter or
darker respectively to get your desired colour.
You can adjust the colour between MIN (–15)
and MAX (+15). When it reaches the minimum
or maximum point, the display shows "MIN" or
"MAX" respectively. To quickly set to the center
position, press the 2 (±0) button.
When the adjustment has been completed,
press the FUNC (RETURN) button. The display
returns to the main menu screen.
198
Page 98

1
Other Useful
English
Features
Illumination Control
Setting the illumination control to AUTO, decreases the illumination brightness of the IVAC800E, whenever the parking lamps of the vehicle
are ON.
Use this function if you feel the unit’s illumination is
2 54
3
1
too bright at night.
Immediately after inputting titles or changing the
settings of Initialize Mode or Display Mode (while the
system is inputting the titles or data automatically) do
not turn the ignition key (engine key) to OFF.
Otherwise, the title may not be written, or the
settings may not be changed.
Press the SOURCE button.
The main menu appears on the display.
2
3
4
5
DISPLAY
ON AUTOOFF
RETURN
Press the 5 (DISPLAY) button.
The Display mode screen is displayed.
Rotate the rotary encoder and select "DIMMER."
The Function Guide is displayed.
• Press the 3 (AUTO) button to activate the
Auto Dimmer mode. In the Auto Dimmer mode,
the background illumination of the monitor is
sychronized with the instrument illumination of
the vehicle (the dimmer input lead should be
connected).
• Press the 1 (OFF) button to deactivate the
Auto Dimmer mode to keep the background
illumination bright.
• Press the 2 (ON) button to keep the back-
ground illumination of the monitor dark.
When the setting has been completed, press the
FUNC (RETURN) button.
The display returns to the main menu screen.
200
Page 99

1
2
3
2 3
B.GND TEXTURE
B.GND COLOR
RETURN
Other Useful
English
Features
Switching Background
Textures/Colours
You have a choice of 12 different background
textures/colours preset at the factory. Select
them following the procedure below.
Immediately after inputting titles or changing the
settings of Initialize Mode or Display Mode
1
MARBLEC1SKYC2WOODC3GRAD.C4METALC5ABYSS
(while the system is inputting the titles or data
automatically) do not turn the ignition key
(engine key) to OFF.
Otherwise, the title may not be written, or the
settings may not be changed.
Rotate the rotary encoder while the Display
mode screen is displayed and select "B.GND
TEXTURE" or "B.GND COLOR." The Function
Guide appears on the display.
Press the Function buttons (1 through 6) that
has your desired texture.
The Function buttons have textures/colours as
follows.
654321
C6
The background colour changes with respect to
the selected texture.
When your selection has been made, press the
FUNC (RETURN) button.
The display returns to the main menu screen.
202
Page 100

1
Other Useful
English
Features
Setting Automatic
Background Texture/
Colour Scroll
Turn on the Automatic Background Texture/
24
3
1
colour Scroll to automatically change background texture/colours. The background
texture/colour will change each time the ignition
key is turned off and turned back on again (12
textures/colours).
Immediately after inputting titles or changing the
settings of Initialize Mode or Display Mode
(while the system is inputting the titles or data
automatically) do not turn the ignition key
(engine key) to OFF.
Otherwise, the title may not be written, or the
settings may not be changed.
Press the SOURCE button.
The main menu appears on the display.
204
2
3
4
DISPLAY
OFF ON
Press the 5 (DISPLAY) button to activate the
Display mode.
The Display mode screen appears.
Rotate the rotary encoder and select "AUTO
B.GND."
The Function Guide is displayed.
Press the 2 (ON) button to turn on the Auto
Background Texture/colour Scroll mode.
To turn off the Auto Background Texture/colour
Scroll mode, press the 1 (OFF) button.
The background textures/colours scroll when
the ignition key is turned off once and turned
back on again as follows:
→
MARBLE
C6 ← C5 ← C4 ← C3 ← C2 ← C1 ← ABYSS ←
→
SKY
→
WOOD
→
GRAD.
→
METAL
 Loading...