


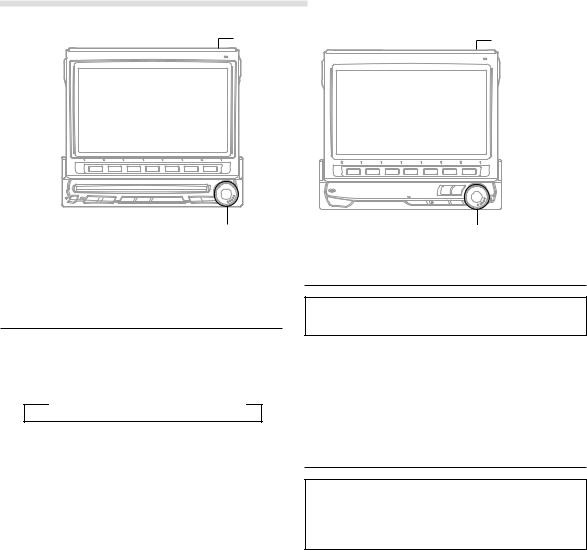
R |
IVA-C801 CVA-1006
Mobile Multimedia Station
EN
FR
• OWNER'S MANUAL |
ES |
||||
|
|||||
Please read before using this equipment. |
|
||||
• MODE D'EMPLOI |
|
||||
|
|||||
Veuillez lire avant d'utiliser cet appareil. |
|
||||
• MANUAL DE OPERACIÓN |
|
||||
Léalo antes de utilizar este equipo. |
|
||||
|
|
|
|
|
|
|
|
|
|
|
|
|
|
|
|
|
|
ALPINE ELECTRONICS, INC. |
ALPINE ELECTRONICS OF AUSTRALIA PTY. LTD. |
ALPINE ELECTRONICS FRANCE S.A.R.L. |
|
Tokyo office: 1-1-8 Nishi Gotanda, |
6-8 Fiveways Boulevarde Keysborough, |
(RCS PONTOISE B 338 101 280) |
|
Shinagawa-ku, |
Victoria 3173, Australia |
98, Rue De La Belle Etoile, Z.I. Paris Nord Il |
|
Tokyo 141-8501, Japan |
Tel.: (03) 9769-0000 |
B.P. 50016 F-95945, Roissy, Charles De Gaulle |
|
Tel.: (03) 3494-1101 |
ALPINE ELECTRONICS GmbH |
Cedex, France |
|
ALPINE ELECTRONICS OF AMERICA, INC. |
Tel.: 01-48 63 89 89 |
||
Kreuzerkamp 7-11 40878 Ratingen, Germany |
|||
|
|||
19145 Gramercy Place, Torrance, |
Tel.: 02102-45 50 |
ALPINE ELECTRONICS OF U.K., LTD. |
|
California 90501, U.S.A. |
ALPINE ITALIA S.p.A. |
13 Tanners Drive, Blakelands, Milton Keynes |
|
Tel.: 1-800-ALPINE-1 (1-800-257-4631) |
MK14 5BU, U.K. |
||
Via C. Colombo 8, 20090 Trezzano Sul Naviglio |
|||
|
Tel.: 01908-61 15 56 |
||
ALPINE ELECTRONICS OF CANADA, INC. |
MI, Italy |
||
ALPINE ELECTRONICS DE ESPAÑA, S.A. |
|||
Suite 203, 7300 Warden Ave. Markham, |
Tel.: 02-48 47 81 |
||
Ontario L3R 9Z6, Canada |
|
Portal De Gamarra 36, Pabellón 32 |
|
Tel.: 1-800-ALPINE-1 (1-800-257-4631) |
|
01013 Vitoria (Alava)-Apdo. 133, Spain |
|
|
|
Tel.: 34-45-283588 |
|
Yamagata Printing Co., Ltd. |
|
Designed by ALPINE Japan |
|
2-6-34, Takashima, Nishi-ku, |
|
||
|
Printed in Japan (Y) |
||
Yokohama, Kanagawa, Japan |
|
||
|
68P41262Y50-O |
||
|
|
CD changer for IVA-C801/ |
|
CVA-1006. |
|
CD changer for IVA-C801/ |
|
Changeur CD pour IVA-C801/ |
|
CVA-1006. |
|
CVA-1006. |
|
Changeur CD pour IVA-C801/ |
|
Cambiador de CD para |
You cannot connect to |
CVA-1006. |
|
IVA-C801/CVA-1006. |
IVA-C801/CVA-1006. |
Cambiador de CD para |
|
IVA-C801/CVA-1006. |
Il est impossible de se raccorder au IVA-C801/ |
|
IVA-1006R. |
|
No es posible conectarlo a IVA- |
|
C801/CVA-1006. |
CHA-S624
CHA-1214
CHM-S620
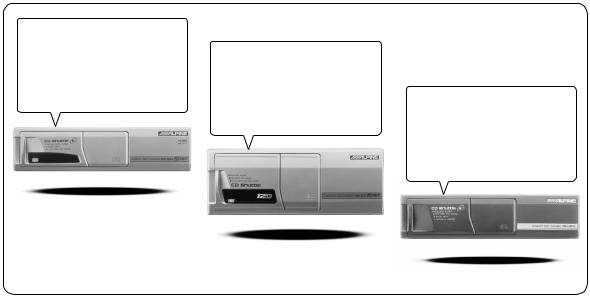
Alpine CD Changers Give You More!
More musical selections, more versatility, more convenience.
An Alpine CD Changer adds more musical choices to your sound system. All models except CHM-S620 can be controlled from Alpine head units and deliver excellent sound quality. The CHA-S624 is a high-performance 6-disc changer with a new M DAC, Ai-NET compatibility, Optical Digital Output, 150 Disc Title Memory and CD TEXT. The CHA-1214 Ai-NET model holds 12 discs, and the CHM-S620 M-Bus model is a super-compact 6-disc changer.
Changeurs de CD Alpine : vous avez le choix!
Plus de sélections musicales, plus de souplesse, plus de confort.
Un changeur de CD Alpine permet d'augmenter la plage des sélections musicales de votre système embarqué. Tous les modèles, l'exception du CHM-S620, peuvent être contrôlés à partir des autoradios Alpine et offrent une excellente qualité audio. Le modèle CHAS624 est un changeur 6 disques ultra performant compatible Ai-NET et équipé d'un convertisseur N/A standard, d'une sortie optique numérique, d'une mémoire d'une capacité de 150 titres et de la fonction CD TEXT. Le modèle CHA-1214 Ai-NET peut contenir 12 disques. Le modèle CHM-S620 M-Bus est un changeur 6 disques super compact.
¡Los cambiadores Alpine de CD le ofrecen más!
Más selecciones musicales, más versatilidad y más ventajas.
Un cambiador Alpine de CD añade más opciones musicales a su equipo de sonido. Todos los modelos, excepto el CHM-S620, pueden controlarse desde las unidades principales de Alpine y proporcionar un sonido de calidad excepcional. El modelo CHA-S624 es un cambiador de 6 discos de alto rendimiento con el nuevo DAC "M" y compatibilidad con Ai-NET, salida digital óptica, memoria de títulos de 150 discos y TEXTO CD. El modelo CHA-1214 Ai-NET admite 12 discos y el modelo CHM-S620 Bus-M es un cambiador de 6 discos y tamaño reducido.

Contents |
|
Operating Instructions |
|
WARNING |
|
WARNING .................................................. |
3 |
CAUTION ................................................... |
3 |
PRECAUTIONS ......................................... |
4 |
Basic Operation |
|
Using Face Cover .............................................. |
8 |
Initial System Start-UP ..................................... |
8 |
Raising the Monitor .......................................... |
8 |
Lowering the Monitor ....................................... |
9 |
Turning Power On or Off .................................. |
9 |
Selecting the Monitor Opening Angle .............. |
9 |
Adjusting the Monitor Viewing Angle .............. |
9 |
Adjusting the Volume/Bass/Treble/Balance |
|
(Between Left and Right)/Fader (Between |
|
Front and Rear) ............................................ |
10 |
Audio Mute Function ...................................... |
10 |
Turning Loudness On or Off ........................... |
10 |
Radio Operation |
|
Manual Tuning ................................................ |
11 |
Automatic Seek Tuning .................................. |
11 |
Manual Storing of Station Presets .................. |
12 |
Automatic Memory of Station Presets ............ |
12 |
Storing into Direct Access Preset |
|
(D.A.P.) Band .............................................. |
13 |
Tuning to Preset Stations ................................ |
13 |
Selecting Preset Stations from |
|
List Displayed .............................................. |
13 |
T.R.V.S. Search for Local Stations ................. |
13 |
CD player Operation (IVA-C801 only)
(CVA-1006.....optional) |
|
Playback .......................................................... |
14 |
Fast Forward and Backward ........................... |
14 |
Music Sensor (Skip) ........................................ |
15 |
Repeat Play ..................................................... |
15 |
M.I.X. (Random) Play .................................... |
15 |
Displaying and Scrolling CD Title/Text ......... |
15 |
Displaying List of Track Titles/CD Titles ....... |
16 |
Controlling CD Changer (Optional) ............... |
17 |
Multi-Changer Selection ................................. |
17 |
ENGLISH
MD Player Operation (Optional) |
|
Playing Mini-Disc (MD) ................................. |
18 |
Music Sensor (Skip) ........................................ |
18 |
Fast Forward and Backward ........................... |
19 |
Repeat Play ..................................................... |
19 |
M.I.X. (Random) Play .................................... |
19 |
Scrolling Displayed Titles ............................... |
19 |
Displaying List for MD Titles ......................... |
19 |
Cassette Player Operation (Optional) |
|
Controlling Cassette Player ............................ |
20 |
Fast Forward/Rewind/Reversing Tape Direction/ |
|
Pause ............................................................ |
20 |
Program Sensor ............................................... |
21 |
Repeat Play ..................................................... |
21 |
Blank Skip ....................................................... |
21 |
DVD/Video CD/CD Player/DVD |
|
changer Operation (Optional) |
|
Playing DVD/Video CD/CD ........................... |
22 |
Still/Pause ....................................................... |
22 |
Chapter (DVD)/Track (Video CD) Sensor ...... |
23 |
Fast Forward/Backward .................................. |
23 |
Repeat Play ..................................................... |
23 |
Playing tracks in random order (M.I.X.) |
|
(Video CD/CD) ............................................ |
23 |
Displaying List of Disc Titles ......................... |
23 |
Controlling DVD Changer .............................. |
24 |
Navigation System Operation (Optional) |
|
Controlling Navigation System ....................... |
25 |
Auxiliary Device Operation (Optional) |
|
Operating Auxiliary Devices ........................... |
26 |
Audio Processor Operation (Optional) |
|
Selecting Factory (Maker's) Equalization Presets ... |
27 |
Creating Personal Equalizer Characteristic Curves .. |
28 |
Selecting Factory Surround Mode Presets ...... |
28 |
Adjusting Surround Levels and Surround |
|
Delay Time .................................................. |
29 |
Selecting DHE (Digital Harmonic Enhancer) |
|
Mode ............................................................ |
29 |
Setting DHE Power or Fine Mode .................. |
30 |
Selecting BBE Mode ...................................... |
30 |
Customizing BBE Mode ................................. |
31 |
Selecting Listening Position ........................... |
31 |
1-EN

Adjusting Listening Position .......................... |
31 |
Adjustment of Time Correction Value ............ |
32 |
Adjusting Cross-Over (X-Over) |
|
Point of 2-Way Divider ................................ |
32 |
Adjusting Levels ............................................. |
33 |
Adjusting Time-Correction for 2-Way |
|
Speaker System ........................................... |
34 |
Memorizing Divider Settings .......................... |
35 |
Recalling Memorized Divider Settings |
|
Using Function Buttons ............................... |
35 |
Recalling Divider Settings Memorized |
|
Using Optional Divider ............................... |
35 |
Memorizing Characteristic Curves ................. |
35 |
Recalling Memorized Characteristic Curves |
|
Using Function Buttons ............................... |
36 |
Selecting Characteristic Curves from |
|
Displayed Audio Processor List .................. |
36 |
Other Useful Features |
|
Displaying Spectrum Analyzer .............................. |
37 |
Turning Defeat Mode On and Off ................... |
38 |
Titling Radio stations/CDs .............................. |
38 |
Adjusting Subwoofer Level (when |
|
subwoofer is used with other speakers) ....... |
40 |
Switching Phase .............................................. |
41 |
Setting the External Device Interrupt Mode ... |
41 |
Setting Interrupt Icon Display (IN-INT) ......... |
42 |
Interrupt Feature (MIX LEVEL) .................... |
42 |
Setting Bass Frequency ................................... |
43 |
Setting Visual Mode ........................................ |
43 |
Selecting Rear Monitor ................................... |
44 |
Displaying Time .............................................. |
45 |
Resetting Clock ............................................... |
45 |
Setting Daylight Saving Time ......................... |
45 |
Sound (Beep) Guide Function ........................ |
46 |
Demonstration ................................................. |
46 |
Setting Automatic Opening/Closing of Monitor .... |
47 |
Adjusting Brightness of Picture ...................... |
47 |
Adjusting Tint of Picture ................................. |
48 |
Adjusting Color of Picture .............................. |
48 |
Illumination Control ....................................... |
49 |
Switching Background Textures/Colors ......... |
49 |
Setting Automatic Background |
|
Texture/Color Scroll .................................... |
50 |
Switching Display Modes ............................... |
50 |
Playing 2 Sources Simultaneously .................. |
51 |
Remote Control Operation |
|
Controls on Remote Control ........................... |
52 |
Battery Replacement ....................................... |
53 |
Information |
|
In Case of Difficulty ....................................... |
54 |
Specifications .................................................. |
57 |
Installation and Connections |
|
Warning ........................................................... |
58 |
Caution ............................................................ |
58 |
Precautions ...................................................... |
58 |
Installation ...................................................... |
59 |
Connections .................................................... |
62 |
LIMITED WARRANTY |
|
2-EN

 WARNING
This symbol means important instructions. Failure to heed them can result in serious injury or death.
INSTALL THE PRODUCT CORRECTLY SO THAT THE DRIVER CANNOT WATCH TV/VIDEO UNLESS THE VEHICLE IS STOPPED AND THE EMERGENCY BRAKE IS APPLIED.
It is dangerous (and illegal in many states) for the driver to watch TV/Video while driving a vehicle. Installing this product incorrectly enables the driver to watch TV/Video while driving. This may cause a distraction, preventing the driver from looking ahead, thus causing an accident. The driver or other people could be severely injured.
DO NOT WATCH VIDEO WHILE DRIVING.
Watching the video may distract the driver from looking ahead of the vehicle and cause an accident.
DO NOT OPERATE ANY FUNCTION THAT TAKES YOUR ATTENTION AWAY FROM SAFELY DRIVING YOUR VEHICLE.
Any function that requires your prolonged attention should only be performed after coming to a complete stop. Always stop the vehicle in a safe location before performing these functions. Failure to do so may result in an accident.
KEEP THE VOLUME AT A LEVEL WHERE YOU CAN STILL HEAR OUTSIDE NOISE WHILE DRIVING.
Failure to do so may result in an accident.
MINIMIZE DISPLAY VIEWING WHILE DRIVING.
Viewing the display may distract the driver from looking ahead of the vehicle and cause an accident.
DO NOT DISASSEMBLE OR ALTER.
Doing so may result in an accident, fire or electric shock.
USE ONLY IN CARS WITH A 12 VOLT NEGATIVE GROUND.
(Check with your dealer if you are not sure.) Failure to do so may result in fire, etc.
KEEP SMALL OBJECTS SUCH AS BATTERIES OUT OF THE REACH OF CHILDREN.
Swallowing them may result in serious injury. If swallowed, consult a physician immediately.
 WARNING
USE THE CORRECT AMPERE RATING WHEN REPLACING FUSES.
Failure to do so may result in fire or electric shock.
DO NOT BLOCK VENTS OR RADIATOR PANELS.
Doing so may cause heat to build up inside and may result in fire.
USE THIS PRODUCT FOR MOBILE 12V APPLICATIONS.
Use for other than its designed application may result in fire, electric shock or other injury.
DO NOT PLACE HANDS, FINGERS OR FOREIGN OBJECTS IN INSERTION SLOTS OR GAPS.
Doing so may result in personal injury or damage to the product.
 CAUTION
This symbol means important instructions. Failure to heed them can result in injury or material property damage.
HALT USE IMMEDIATELY IF A PROBLEM APPEARS.
Failure to do so may cause personal injury or damage to the product. Return it to your authorized Alpine dealer or the nearest Alpine Service Center for repairing.
DO NOT MIX NEW BATTERIES WITH OLD BATTERIES. INSERT WITH THE CORRECT BATTERY POLARITY.
When inserting the batteries, be sure to observe proper polarity (+ and –) as instructed. Rupture or chemical leakage from the battery may cause fire or personal injury.
KEEP FINGERS AWAY WHILE THE MOTORIZED FRONT PANEL OR MOVING MONITOR IS IN MOTION.
Failure to do so may result in personal injury or damage to the product.
3-EN
 WARNING
 PRECAUTIONS
Temperature
Be sure the temperature inside the vehicle is between +45°C (+113°F) and 0°C (+32°F) before turning your unit on.
Moisture Condensation
You may notice the CD playback sound wavering due to condensation. If this happens, remove the disc from the player and wait about an hour for the moisture to evaporate.
Damaged Disc
Do not attempt to play cracked, warped, or damaged discs. Playing a bad disc could severely damage the playback mechanism.
Maintenance
If you have problems, do not attempt to repair the unit yourself. Return it to your Alpine dealer or the nearest Alpine Service Station for servicing.
Never Attempt the Following
Do not grip or pull out the disc while it is being pulled back into the player by the automatic reloading mechanism.
Do not attempt to insert a disc into the unit when the unit power is off.
Inserting Discs
Your player accepts only one disc at a time for playback. Do not attempt to load more than one disc.
Make sure the label side is facing up when you insert the disc. Your player will automatically eject any disc that is inserted incorrectly. If the player continues to eject a correctly inserted disc, push the RESET switch with a pointed object such as a ball-point pen.
Playing a disc while driving on a very bumpy road may result in skips, but this will not scratch the disc or damage the player.
New Discs
As a protective measure to prevent the CD from jamming, the CD player will automatically eject discs with irregular surfaces or inserted incorrectly. When a new disc is inserted into the player and ejected after initial loading, using your finger, feel around the inside of the center hole and outside edge of the disc. If you feel any small bumps or irregularities, this could inhibit proper loading of the disc. To remove the bumps, rub the inside edge of the hole and outside edge of the disc with a ball-point pen or other such instrument, then insert the disc again.
Center |
Center |
New |
Hole |
Hole |
Disc |
Bumps |
|
Outside |
|
|
|
|
|
(Bumps) |
Irregular Shaped Discs
Be sure to use round shape discs only for this unit and never use any special shape discs.
Use of special shape discs may cause damage to the mechanism.
4-EN
Installation Location
Make sure the IVA-C801/CVA-1006 will not be installed in a location subjected to:
•Direct sun and heat
•High humidity and water
•Excessive dust
•Excessive vibrations
Correct Handling
Do not drop the disc while handling. Hold the disc so you will not leave fingerprints on the surface. Do not affix tape, paper, or gummed labels to the disc. Do not write on the disc.
CORRECT
Disc Accessories
There are various accessories available on the market for protecting the disc surface and improving sound quality. However, most of them will influence the thickness and/or diameter of the disc. Using such accessories can cause the disc to be out of standard specifications and may create operational problems. We recommend not using these accessories on discs played in Alpine CD players.
Transparent Sheet |
Disc Stabilizer |
Handling the Detachable Front Panel
•Do not expose to rain or water.
•Do not drop or apply shock.
INCORRECT |
CORRECT |
Disc Cleaning
Fingerprints, dust, or soil on the surface of the disc could cause the CD player to skip. For routine cleaning, wipe the playing surface with a clean, soft cloth from the center of the disc to the outer edge. If the surface is heavily soiled, dampen a clean, soft cloth in a solution of mild neutral detergent before cleaning the disc.
•After turning the system off, a slight ghost of the image will remain temporarily. This is an effect peculiar to LCD technology and is normal.
•Under cold temperature conditions, the screen may lose contrast temporarily. After a short warm-up period, it will return to normal.
Alpine products equipped with the Ai-NET bus, connected to the IVA-C801/CVA-1006, can be operated from the IVA-C801/CVA-1006. Depending on the products connected, the functions and displays will vary. For details, consult your Alpine dealer.
5-EN

 WARNING
Remove the anti-theft cover when you drive. This prevents the cover from falling off the unit and interfering with the safe operation of the vehicle.
Operation of some of the functions of this unit is very complex. Because of this, it was deemed necessary to place these functions into a special screen. This will restrict operation of these functions to times when the vehicle is parked. This ensures the focus of the driver's attention will be on the road and not on the IVA-C801/ CVA-1006. This has been done for the safety of the driver and passengers.
Title Input and Audio Processor Adjustments cannot be made if the car is moving. The car must be parked and the parking brake must be engaged for the procedure described in the Owner's Manual to be valid. The warning "CAN'T OPERATE WHILE DRIVING," will be displayed if any attempts are made to perform these operations while driving.
This operation is the same as when selecting sources using the remote control. When the car is parked, the selection is made as described in the Owner's Manual.
6-EN

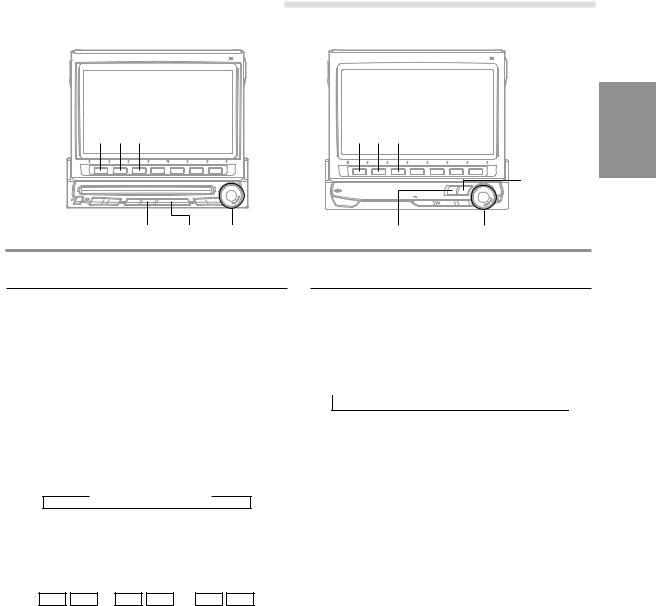
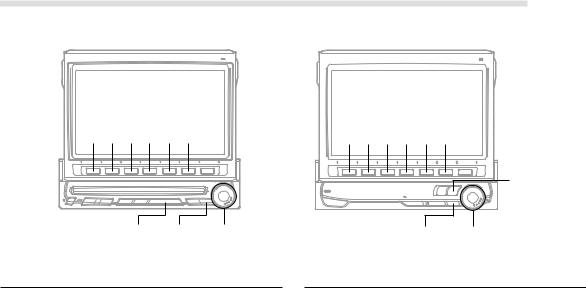
Basic Operation
PWR |
OPEN/CLOSE |
PWR |
OPEN/CLOSE |
|||||
|
|
|
|
|
|
|
|
|
SOURCE
(IVA-C801) |
(CVA-1006) |
SOURCE Rotary encoder |
Rotary encoder |
|
|
This section describes the basic operation of the radio. These operations also apply to the other sources.
1 Press the PWR (Power) button on the unit to turn |
5 Press the rotary encoder to execute the |
||||||||||||||||||||
the power on to the unit. |
selection. The Radio mode screen is displayed. |
||||||||||||||||||||
2 Press the OPEN/CLOSE button to open the |
NOTE |
||||||||||||||||||||
monitor. The unit beeps 3 times and raises the |
If PAGE 1/2 or PAGE 1/3 appears in the Function Guide |
||||||||||||||||||||
monitor. The opening screen appears on the |
menu, there are additional functions available for the |
||||||||||||||||||||
selected source. Access these functions by pressing the |
|||||||||||||||||||||
monitor. |
|||||||||||||||||||||
FUNC button. |
|||||||||||||||||||||
|
|
|
|
|
|
|
|
|
|
|
|
|
|
|
|
|
|
||||
3 Press the SOURCE button. The display shows |
6 Press the SOURCE button again to select |
||||||||||||||||||||
the main menu screen. |
|||||||||||||||||||||
another source. |
|||||||||||||||||||||
|
|
|
|
|
|
|
|
|
|
|
|
|
|
|
|
|
|
||||
4 Rotate the rotary encoder and select "RADIO" |
|
|
|
||||||||||||||||||
from the main menu. |
|
|
|
||||||||||||||||||
NOTE |
|
|
|
||||||||||||||||||
• If a DVD player or DVD Changer is connected and its |
|
|
|
||||||||||||||||||
|
power is on, the display shows " |
DVD |
or |
DVD-CHG |
, |
|
|
|
|||||||||||||
|
AUX2 |
" instead of " |
AUX1 |
AUX2 |
." |
|
|
|
|
|
|
|
|||||||||
• |
If both |
the DVD player |
and DVD Changer are |
|
|
|
|||||||||||||||
|
connected, the display shows " |
DVD |
" instead of |
|
|
|
|||||||||||||||
|
" |
AUX1 |
", and " |
DVD-CHG |
" instead of " |
AUX2 |
". |
|
|
|
|||||||||||
|
|
|
|
|
|
|
|
|
|
|
|
|
|
|
Radio Mode Screen |
||||||
|
|
|
|
|
|
|
|
|
|
|
|
|
|
|
|
|
|
(IVA-C801 screen) |
|||
|
|
|
Selected Source |
|
|
|
|
|
|
|
|
|
|
|
|
|
Current Time |
||||
|
|
|
|
|
|
|
|
|
|
|
|
|
|||||||||
Volume Level
The Function Guide displays the labels for each of the Function buttons. These labels will change depending upon the functions for the selected source.
7-EN
Basic Operation
|
|
|
and |
|
|
|
and |
||||||||||
PWR |
|
|
|
|
|
|
OPEN/CLOSE |
PWR |
|
|
|
|
|
|
|
|
OPEN/CLOSE |
|
|
|
|
|
|
|
|
|
|
|
|
|
|
||||
|
|
|
|
|
|
|
|
|
|
|
|
|
|
|
|
|
|
(IVA-C801) |
(CVA-1006) |
|
|
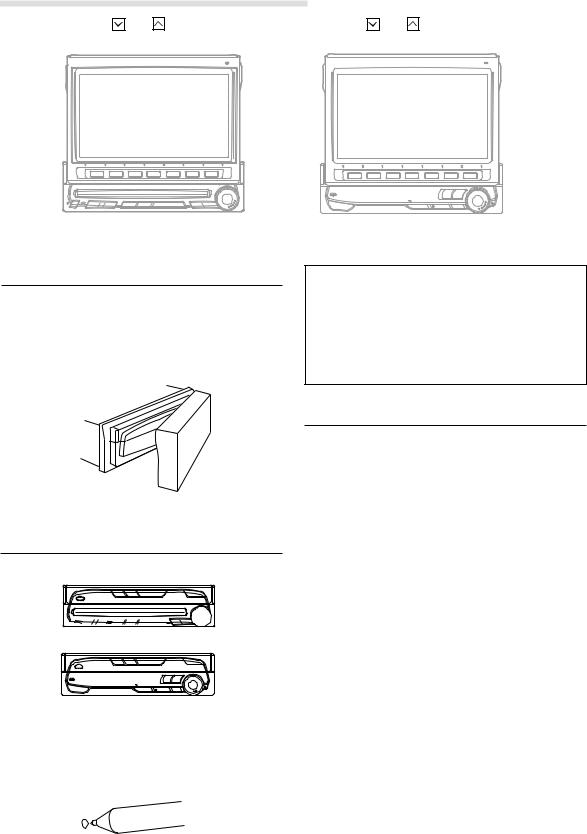
Using Face Cover
An anti-theft face cover is provided with the IVA-C801/CVA-1006.
Put the face cover onto the IVA-C801/CVA-1006 when you leave the vehicle.
Be sure to remove the anti-theft face cover when you drive.
•Compatibility with Factory Steering Wheel Radio Controls
If your vehicle has steering wheel controls for the radio, an optional steering wheel control interface may be available to connect to your Alpine radio. For details, contact your Alpine dealer.
Initial System Start-UP
(IVA-C801)
RESET 
 switch
(CVA-1006)

 RESET switch
1 Immediately after installing or applying power to the unit, it should be initialized. Press the RESET switch with a ball-point pen or any other pointed object.
Raising the Monitor
1 Press the OPEN/CLOSE button.
The unit beeps 3 times and raises the monitor automatically.
NOTES
•The IVA-C801/CVA-1006 is a precision device. With gentle handling, its unique capabilities can be enjoyed for a long time.
•If the monitor touches an obstacle while it is being raised, the unit will stop raising the monitor immediately. Should this occur, remove the obstacle and press the OPEN/CLOSE button again to lower the monitor.
•When the movable monitor is opened, do not place any object on the monitor and be careful not to bump or apply any pressure to the monitor while it is open. This can cause damage to the mechanism.
•Under low ambient temperature conditions, the display may be dark for a short period of time immediately after the power is turned on. Once the LCD has warmed up, the display will return to normal.
•For your safety, some operation of the unit cannot be performed while the vehicle is in motion. In this case, first stop the vehicle and engage the parking brake, then perform the operation.
•Operation of the remote control (described on pages 52-53) can be carried out even while the monitor screen is closed.
8-EN
Lowering the Monitor
1 Press the OPEN/CLOSE button.
The unit will beep 3 times and lower the monitor automatically.
NOTES
•The IVA-C801/CVA-1006 is a precision device. With gentle handling, its unique capabilities can be enjoyed for a long time.
•If the monitor touches an obstacle while it is being lowered, the unit will stop lowering the monitor immediately.
Should this occur, remove the obstacle and press the OPEN/CLOSE button again to lower the monitor.
Turning Power On or Off
Some of this unit's functions, cannot be performed while the vehicle is in motion. Be sure to stop your vehicle in a safe location and apply the parking brake, before attempting these operations.
1 Press the PWR (Power) button to turn on the unit. The opening screen appears automatically.
NOTE
The unit can be turned on by pressing any button on the unit except the MUTE, OPEN/CLOSE and 
 (ANGLE) buttons.
2 Press the PWR (Power) button again to turn off the unit.
NOTES
•The IVA-C801/CVA-1006 draws minimal current even when its power switch is turned off. If the switched power (ignition) lead of the IVA-C801/CVA-1006 is connected directly to the positive (+) post of the vehicle's battery, the battery may be discharged. If this lead is unswitched, it must be disconnected from the battery post should the vehicle be left unused for an extended period of time.
An SPST (Single-Pole, Single-Throw) switch (sold separately) can be added to simplify this procedure. Then, you can simply place it in the OFF position when you leave the vehicle. Turn the SPST switch back ON before using the IVA-C801/CVA-1006. For connecting the SPST switch, refer to the "Connection Diagram of SPST switch" on page 61.
•Some operation of the unit cannot be performed while the vehicle is in motion. In this case, be sure to first stop your vehicle and apply the parking brake, then perform the operation.
Selecting the Monitor Opening
Angle
The monitor opening angle can be set in 2 positions.
1 Press and hold the OPEN/CLOSE button for at least 2 seconds while the monitor is being raised. Each press changes the monitor angle back or forth.
Adjusting the Monitor Viewing
Angle
Adjust the monitor's angle for better visibility.
1 Press the  and
and  buttons to adjust the monitor's angle so the screen will be in the best viewing position. Each press of the buttons produces a beep and changes the screen angle between 80 and 104 degrees.
NOTES
•If the monitor touches an obstacle while the angle is being adjusted the unit will stop the screen immediately.
Should this happen, remove the obstacle and press the
 or
or  button again.
•The screen color will vary when viewed at certain angles. Adjust the screen angle for the best viewing position.
•If the voltage of the vehicle's battery power is low, the screen may blink when the screen angle is changed. This is normal and not a malfunction.
9-EN
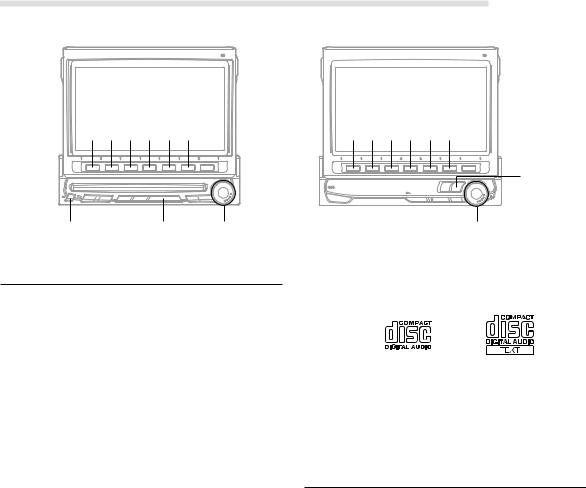
Basic Operation
MUTE |
MUTE |
(IVA-C801) |
(CVA-1006) |
Rotary encoder |
Rotary encoder |
|
|
Adjusting the Volume/Bass/Treble/
Balance (Between Left and Right)/
Fader (Between Front and Rear)
1 Press the rotary encoder repeatedly until the mode you wish to adjust is obtained. Each press changes the modes as follows:
→ BAS. → TRE. → BAL. → FAD. → VOL.
The volume level can be adjusted at any time by just rotating the rotary encoder.
NOTE
When the subwoofer mode is ON, its level may also be adjusted.
2 Rotate the rotary encoder to set to the desired sound within 5 seconds after selecting the mode.
NOTE
If the rotary encoder is not turned or pressed within 5 seconds after selecting the BAS. (Bass), TRE. (Treble), BAL. (Balance), or FAD. (Fader), the unit automatically defaults back to the VOL. (Volume) mode.
Audio Mute Function
Activating this function will instantly lower the volume level by 20 dB.
1 Press the MUTE button to activate the MUTE mode. The audio level will decrease by about 20 dB.
Pressing the MUTE button again will bring the audio back to its previous level
Turning Loudness On or Off
Loudness introduces a special lowand highfrequency emphasis at low listening levels. This compensates for the ear's decreased sensitivity to bass and treble sound.
NOTE
When an equalizer or digital sound processor is connected, this function is inoperative.
1 Press and hold the rotary encoder for at least 2 seconds to switch between the Loudness On and Off modes.
10-EN
Radio Operation
(IVA-C801) |
(CVA-1006) |
|
|
|
|
1 2 3 |
1 2 3 |
SOURCE
BAND SOURCE Rotary encoder |
BAND |
Rotary encoder |
Manual Tuning
1 Press the SOURCE button after turning on the power.
The main menu screen appears.
2 Rotate the rotary encoder to scroll the bottom menu and select "RADIO," then press the rotary encoder.
The radio mode is activated and the display changes to the Radio Mode screen.
3 Press the BAND button to select the desired radio band. Each press changes the bands as follows:
→ FM1 → FM2 → AM
4 Press the 2 (TUNE) button to choose the manual tuning mode. Each press changes the function modes for the buttons 1 and 3 as follows:
|
→ Distance → Local |
→ Manual |
|
|
|
||
|
g f g f |
( ) |
|
|
|
|
|
5 Press the 1 (() or 3 ()) button to change the radio frequency downward or upward respectively. Each press changes the frequency by one step. When the button is pressed and held, the frequency changes continuously until the button is released.
NOTE
When a stereo FM station is tuned in, the STEREO indicator appears in the display.
Automatic Seek Tuning
1 Press the BAND button repeatedly to select the desired radio band, FM or AM.
2 Press the 2 (TUNE) button to select the desired mode, DX or Local. Each press changes as follows:
→ Distance → Local → Manual 
There are two modes you can select for auto tuning, DX and Local:
•DX (Distance) mode (with DX SEEK indicator ON); Both strong and weak stations will be tuned in.
•Local mode (with SEEK indicator ON);
Only strong stations will be tuned in. The initial setting is DX.
3 Press the 1 (g) or 3 (f) button to automatically seek a radio station downward or upward respectively.
When the unit finds a station, it stops. To automatically seek next station, press the same button again.
NOTE
When a stereo FM station is tuned in, the STEREO indicator appears in the display.
11-EN
Radio Operation
(IVA-C801) |
(CVA-1006) |
|
|
|
|
|
Function buttons |
|
Function buttons |
|
(1 through 6) |
|
(1 through 6) |
1 |
3 4 5 6 |
1 |
3 4 5 6 |
|
FUNC |
|
FUNC |
BAND LIST Rotary encoder |
BAND LIST Rotary encoder |
Manual Storing of Station Presets
1 Tune in a desired radio station you wish to store in the preset memory by manual or automatic seek tuning.
Press the FUNC (PAGE 1/2) button.
2 Press and hold any one of the Function buttons 1 (P.SET1) through 6 (P.SET6) for at least 2 seconds. The Function Guide indicators in the display, P.SET1 through P.SET6, will blink for 5 seconds.
3 While the P.SET1 through P.SET6 indicators in the display are blinking, press the Function button into which you wish to store the station (within 5 seconds). The indicators in the display stop blinking, showing that the station has been memorized at the Preset button pressed.
4 Repeat the above procedure (1 to 3) to store up to 5 other stations onto the same band.
To use this procedure for other bands, simply select the band desired and repeat the procedure.
A total of 24 stations can be stored in the preset memory (6 stations for each band; FM1, FM2, AM or D.A.P.).
NOTE
If a preset memory has already been set in the same Function button, it will be cleared and the new station will be memorized.
Automatic Memory of Station
Presets
The tuner can automatically seek and store 6 strong stations in the selected band in order of signal strength.
1 Press the BAND button in the radio mode to select the desired radio band.
2 Press the 6 (A.MEMO) button.
The tuner automatically seeks and stores 6 strong stations into the 1 (P.SET1) to 6 (P.SET6) buttons in order of signal strength. When the automatic storing has been completed, the tuner goes to the station stored in the 1 (P.SET1) button.
NOTES
•If no stations are stored, the tuner will return to the original station you were listening to before the automatic storing procedure began.
•The radio station names (titles) may be erased when Automatic Memory of Station Presets function is performed.
12-EN

Storing into Direct Access Preset (D.A.P.) Band
Any combination of AM and FM radio stations (up to 6 stations) can be manually preset onto the D.A.P. band.
1 Press the 4 (D.A.P.) button in the radio mode to activate the D.A.P. mode.
2 To memorize stations onto the D.A.P. band, follow the steps for the Manual Storing of Station Presets procedure on this page.
NOTE
This function can be used together with the Automatic Memory Preset if you want to have all AM or all FM stations stored into D.A.P.
3 Press the 4 (D.A.P.) button for a second time to deactivate the D.A.P. mode.
Tuning to Preset Stations
You can tune in the preset stations in memory on each band using the Function buttons.
1 Press the BAND button in the radio mode to choose the desired radio band.
Each press changes the radio bands.
NOTE
To select the D.A.P. band, press the 4 (D.A.P.) button.
2 Press the Function button 1 (P.SET1) through
6 (P.SET6) that has your desired preset station in memory. The preset station is received.
Selecting Preset Stations from List Displayed
The desired preset station can be selected from the preset station list displayed. If stations have been titled (named), their titles will also be displayed. (For Titling Radio stations/CDs, see page 38).
1 Press the LIST button. The list showing the preset stations (with the station titles if they have been titled).
2 Rotate the rotary encoder to select a desired preset station from the list.
3 When a desired station is selected, press the rotary encoder. The unit receives the selected preset station.
NOTES
•Press the LIST or FUNC (RETURN) button while in the preset list menu (station title list) to return to the radio mode display.
•With the preset list menu displayed, press the 1 (RADIO) button to switch to the preset station list menu. Press the BAND button to change the radio bands.
T.R.V.S. Search for Local Stations
Using the T.R.V.S. feature of this unit, you can automatically seek and memorize up to 12 local stations (max.) in a memory separate from your regular preset memory. This keeps the currently preset stations you normally listen to, intact.
1 Press the BAND button in the radio mode and select the desired radio band.
2 Press the 5 (T.R.V.S.) button to activate the T.R.V.S. mode. The unit will automatically search and store up to 12 receivable, local stations.
NOTE
If no stations are memorized, the display shows "NO MEMORY."
3 Press the 1 (; P.DN) or 3 (P.UP :) button and select your desired station.
4 To deactivate the T.R.V.S. mode, press the 5 (T.R.V.S.) button.
13-EN
CD player Operation (IVA-C801 only)
(CVA-1006.....optional)
(IVA-C801) |
(CVA-1006) |
|
|
|
|
1 2 3 4 5 6 |
1 2 3 4 5 6 |
SOURCE
c |
SOURCE Rotary encoder |
Rotary encoder |
Playback
Only IVA-C801 has a built-in CD player.
When an optional Alpine CD player or CD changer is connected, you can control it from the head unit. This section describes operation assuming that an Alpine CD player/Changer is connected to the IVA-C801/ CVA-1006.
(When a CD changer is connected, see page 17 to select your desired disc.)
|
IVA-C801 |
CVA-1006 |
|
|
|
built-in CD |
\ |
× |
Slave CD player |
Option |
Option |
|
|
|
CD Changer |
Option |
Option |
|
|
|
1 Press the SOURCE button to display the main menu screen.
2 Rotate the rotary encoder and select the CD player mode. Then, press the rotary encoder to execute the selection.
The display shows the CD player mode screen.
When a CD is inserted into the CD SLOT of the IVA-C801, with the label side facing up, the unit starts to play the CD.
CVA-1006:
When an optional Alpine CD player is connected, inserting an CD into the optional CD player starts playback automatically.
3 To temporarily pause playing, press the 2 (:/J) button.
To resume play, press the 2 (:/J) button for a second time.
4 Press the eject (c) button when you want to eject the CD. (If you use an optional CD player, press the eject button on the optional CD player.)
NOTES (IVA-C801 only)
•Three-inch (8 cm) CD's can be used.
•Only compact discs containing the mark shown can be used.
•We cannot fully guarantee the playback of CD-R (CDRecordable). You cannot playback CD-RW (CDReWritable) on this unit.
•Be sure to turn the ignition key to the ACC or ON position before inserting an CD. Otherwise it may cause damage to the player.
Fast Forward and Backward
1 Press and hold the 3 (f) or 1 (g) button to quickly move forward or backward respectively to reach the desired music section on the disc.
Release the button when the desired section is reached.
14-EN

Music Sensor (Skip)
This feature allows you to go to the beginning of a track.
1 Lightly press the 1 (g) button during the CD play to return to the beginning of the current track. If you wish to return to the beginning of a track further back, repeatedly press the 1 (g) button until the desired track is reached.
Lightly press the 3 (f) button during the CD play to advance to the beginning of the next track. If you wish to advance to the beginning of a track further ahead, repeatedly press until the desired track is reached.
Repeat Play
1 Press the 4 (REPEAT) button while the track that you want to play repeatedly is playing. The track will be repeatedly played until the repeat mode is canceled.
To cancel the repeat play, press the 4 (REPEAT) button until the REPEAT indicator disappears.
NOTE
If a CD Changer is connected and the REPEAT ALL mode is selected, the unit repeatedly plays back all tracks on the disc selected.
M.I.X. (Random) Play
In the M.I.X. mode, the tracks on the disc will be played back in a random sequence.
1 Press the 5 (M.I.X.) button in the CD mode.
All the tracks on the disc will be played back in a random sequence.
The M.I.X. play continues until the M.I.X. mode is canceled. To cancel the M.I.X. play, press the 5 (M.I.X.) button repeatedly until the M.I.X. indicator disappears.
NOTES
•If a CD Changer equipped with the M.I.X. ALL function is connected, M.I.X. ALL will also be selectable.
In this mode, the tracks on all the CDs in the current magazine will be included in the random playback sequence.
•During M.I.X. play, Repeat Play for a single track will be disabled.
Displaying and Scrolling CD Title/
Text
If titles have been memorized for CDs, the CD titles can be shown on the display (for titling CDs, see "Titling Radio stations/CDs" on page 38). The text for the CD titles/tracks can be displayed and scrolled while you are playing a music CD with title/text.
1 Press the 6 (SCROLL) button during CD play. Each press changes between the CD title scrolling mode and track title scrolling mode. Description of "Title" and "Text":
• Title: this unit allows you to title (name) CDs (see page 39).
• Text:s Some CDs have pre-recorded text information for the CD/track names etc.
NOTES
•If either of the disc and track titles is unavailable, the space for that title in the display will be left blank.
•If both of the disc and track titles are unavailable, the display will show "NO TITLE."
For the MD player, the same display as above will be shown.
2 If the text/title is longer than 12 characters, press and hold the 6 (SCROLL) button for at least 2 seconds to scroll the text/title.
To stop the scrolling, press and hold the 6 (SCROLL) button for at least 2 seconds.
NOTES
•Depending on the character styles, characters may not be displayed correctly.
•The unit might automatically scroll the text.
•Text can only be displayed on CD changers that are enabled with CD TEXT.
15-EN

CD player Operation (IVA-C801 only)
(CVA-1006.....optional)
(IVA-C801) |
(CVA-1006) |
|
|
|
|
Function buttons |
Function buttons |
(1 through 6) |
(1 through 6) |
FUNC |
FUNC |
SOURCE
CHG BAND SOURCE LIST Rotary encoder CHANGER BAND LIST Rotary encoder
Displaying List of Track Titles/CD
Titles
If CD titles have been memorized, you can select a CD from the CD title list.
When CD text discs are inserted into the CD player (for IVA-C801 only), you can select a track from the displayed list of track titles. (For Titling Radio Stations/CDs, see page 38.)
1 Press the LIST button in the CD/CD changer mode.
CD (built-in player) mode:
If the titles have been memorized for CDs, the list of CD titles can be displayed.
When CD text discs are inserted. The list of Track titles will be displayed.
CD changer/CD (when connected to the CD player) mode:
If the titles have been memorized for CDs, the list of CD titles can be displayed.
2 Rotate the rotary encoder and select (highlight) your desired track title or CD title to play.
3 Press the rotary encoder to execute the selection.
The selected title plays, the title list screen closes, and the CD mode main screen or CD changer mode main screen appears.
NOTES
•If the disc is not titled, the display shows "NO TITLE CD." If no disc is loaded, the display shows "NO DISC."
•Pressing the LIST or FUNC (RETURN) button while the list of the disc titles is being displayed, changes the display back to the CD/CD Changer mode screen.
•To directly go to the preset radio station list screen, press the 1 (RADIO) button. Then, press the BAND button to change the radio band.
•IVA-C801:
Pressing the 2 button displays the title list or the track title list only when a CD with text is loaded in the built-in CD player.
•CVA-1006:
When a CD player or CD changer is connected, pressing the 2 button displays the CD title list.
16-EN

Controlling CD Changer (Optional) |
|
Multi-Changer Selection |
An optional 6-disc or 12-disc CD Changer may be connected to the IVA-C801/CVA-1006 if it is AiNET compatible. With a CD Changer connected to the Ai-NET input of the IVA-C801/CVA-1006, the CD Changer will be controllable from the IVA- C801/CVA-1006.
Using the KCA-400C (the Multi-Changer Switching device) multiple changers can be controlled by the IVA-C801/CVA-1006.
See the Multi-Changer Selection section on this page for selecting the CD Changers.
You can directly select the CD changer mode by pressing the CHG (IVA-C801) or CHANGER (CVA1006) button.
1 Press the SOURCE button to display the main menu.
2 Rotate the rotary encoder to select "CD CHG," then press the rotary encoder.
The display changes to the CD changer mode screen.
3 When a 6-Disc CD Changer is connected.
Press the FUNC (PAGE 1/2) button. The Function Guide display changes.
Press the Function buttons to select your desired disc loaded. The Function buttons 1 (DISC1) through 6 (DISC6) select the discs from the first disc to 6th disc. For example, press the 3 (DISC 3) button to select the third disc.
NOTE
To select your desired track number on the selected disc, lightly press the 1 (g) or 3 (f) repeatedly until your desired track number is displayed.
When a 12-Disc CD Changer is connected.
You can select the disc numbers 1 to 6 in the same manner as for 6-disc Changer.
Press the FUNC (PAGE 1/3) button twice to select the disc numbers 7 to 12. The Function Guide display changes and now the Function buttons 1-6 represent disc numbers 7-12. Press the Function buttons (1 through 6) to select your desired disc. For example, to select 9th disc, press 3 (DISC 9) button.
NOTES
•To select your desired track number on the selected disc, lightly press the 1 (g) or 3 (f) repeatedly until your desired track number is displayed.
•After selecting the desired, you can operate in the same way as for the CD player. For details please see the CD player operation section
•* If both the CD Changer and DVD Changer are connected, each pressing of the CHG (CHANGER) button changes between the CD Changer mode and the DVD Changer mode.
Alpine's Ai-NET system will support up to 6 CD Changers. When operating two or more changers, the KCA-400C (Multi-Changer Switching device) must be used. If you use 1 Switching device, you can connect up to 4 CD Changers. If you use 2 Switching devices, you can connect up to 6 CD Changers.
1 Press the SOURCE button to display the main menu.
2 Rotate the rotary encoder to select changer 1-4 (when one KCA-400C is connected) or changer 1-6 (when two KCA-400Cs are connected). Then press the rotary encoder.
The display shows the selected CD changer mode screen.
NOTE
When one KCA-400C is connected to the changer, "Changer 1-4" is displayed in the main menu. When two KCA-400Cs are connected to the changer, "Changer 1-6" is displayed in the main menu.
3 In Changer mode, you can select the next changer (connected changers only) by pressing the BAND button on the unit or on the remote.
NOTE
You cannot operate this function in the title display or Title inputting display.
4 To operate the selected changer, see "CD Player Operation" section.
17-EN
MD player Operation (Optional)
(IVA-C801) |
(CVA-1006) |
|
|
|
|
1 2 3 4 5 6 |
1 2 3 4 5 6 |
SOURCE
SOURCE LIST Rotary encoder |
LIST Rotary encoder |
|
|
Playing Mini-Disc (MD)
When an optional Alpine MD player is connected to the IVA-C801/CVA-1006, you can control the player from the IVA-C801/CVA-1006.
(When the MDA-5051 is connected, MDs can be played back only.)
1 Press the SOURCE button.
The main menu appears on the display.
2 Rotate the rotary encoder and select "MD" from the main menu, then press the rotary encoder to execute the selection.
The MD player mode screen appears on the display.
When an optional Alpine MD player is connected, inserting an MD into the optional MD player starts playback automatically.
NOTE
Before inserting an MD, use your finger to feel around the MD cartridge. If you feel any small bumps or irregularities, remove them because these may cause a malfunction or damage to the player.
3 Press the 2 (:/J) button to temporarily pause play. To resume play, press the 2 (:/J) button for a second time.
4 Press the eject (c) button on the MD player when you want to eject the MD.
Music Sensor (Skip)
1 Momentarily press the 1 (g) button once to return to the beginning of the current track. If you wish to access the beginning of a track further back, repeatedly press until you reach the desired track.
2 Press the 3 (f) button once to advance to the beginning of the next track. If you wish to access the beginning of a track further ahead, press repeatedly until the desired track is reached.
18-EN
Fast Forward and Backward
1 Press and hold the 1 (g) or 3 (f) button to quickly move backward or forward until you reach the desired section of the track.
When you reach the desired section, release the button. The player starts playing from that section.
Repeat Play
1 Press the 4 (REPEAT) button to play back repeatedly the track being played. The REPEAT indicator appears and the track plays repeatedly. Press the 4 (REPEAT) button repeatedly until the REPEAT indicator disappears to deactivate the repeat play.
M.I.X. (Random) Play
1 Press the 5 (M.I.X.) button in the play or pause mode. The M.I.X. indicator will illuminate and the tracks on the disc will be played back in a random sequence. After all the tracks on the disc have been played back once, the player will begin a new random sequence play until the M.I.X. mode is deactivated.
To stop the M.I.X. play, press the 5 (M.I.X.) button repeatedly until the M.I.X. indicator disappears.
Scrolling Displayed Titles
The MD player can scroll titles (disc or track names) having up to a maximum of 32 characters when it is connected.
1 Press the 6 (SCROLL) button repeatedly while an MD is being played.
Each press toggles between the MD title scrolling and track title scrolling.
2 Press and hold the 6 (SCROLL) button for at least 2 seconds to start the auto scrolling. The title will be scrolled repeatedly.
To deactivate the auto scrolling, press and hold the 6 (SCROLL) button for at least 2 seconds.
NOTES
•Depending on the MD deck used for recordings/ inputting titles, the characters may not be displayed correctly.
•If the MD title or track titles are not memorized, the unit displays "NO TITLE."
Displaying List for MD Titles
1 Press the LIST button in the MD player mode. The list of the MD titles appears in the display.
2 Rotate the rotary encoder to select the desired title by moving the cursor to that title.
3 Press the rotary encoder to execute the selection.
The selected MD title will be played back and the MD player mode screen will appear.
NOTES
•If the MD is not titled, the display shows "NO TITLE MD." If no MD is loaded, the display shows "NO DISC."
•Pressing the LIST or FUNC (RETURN) button while the list of the titles is being displayed changes the display back to the MD player mode screen.
•To directly return to the preset radio station list screen
while the list of the titles is being displayed, press the 1 (RADIO) button. Then, press the BAND button to change the radio band.
•IVA-C801:
Pressing the 2 button displays the CD title list or the track title list only when a CD with text is loaded in the built-in CD player.
•CVA-1006:
When a CD/MD player or CD changer is connected, pressing the 2 button displays the title list.
19-EN
 Loading...