

Page 1
Alpha SolarSmart Flashing Kit
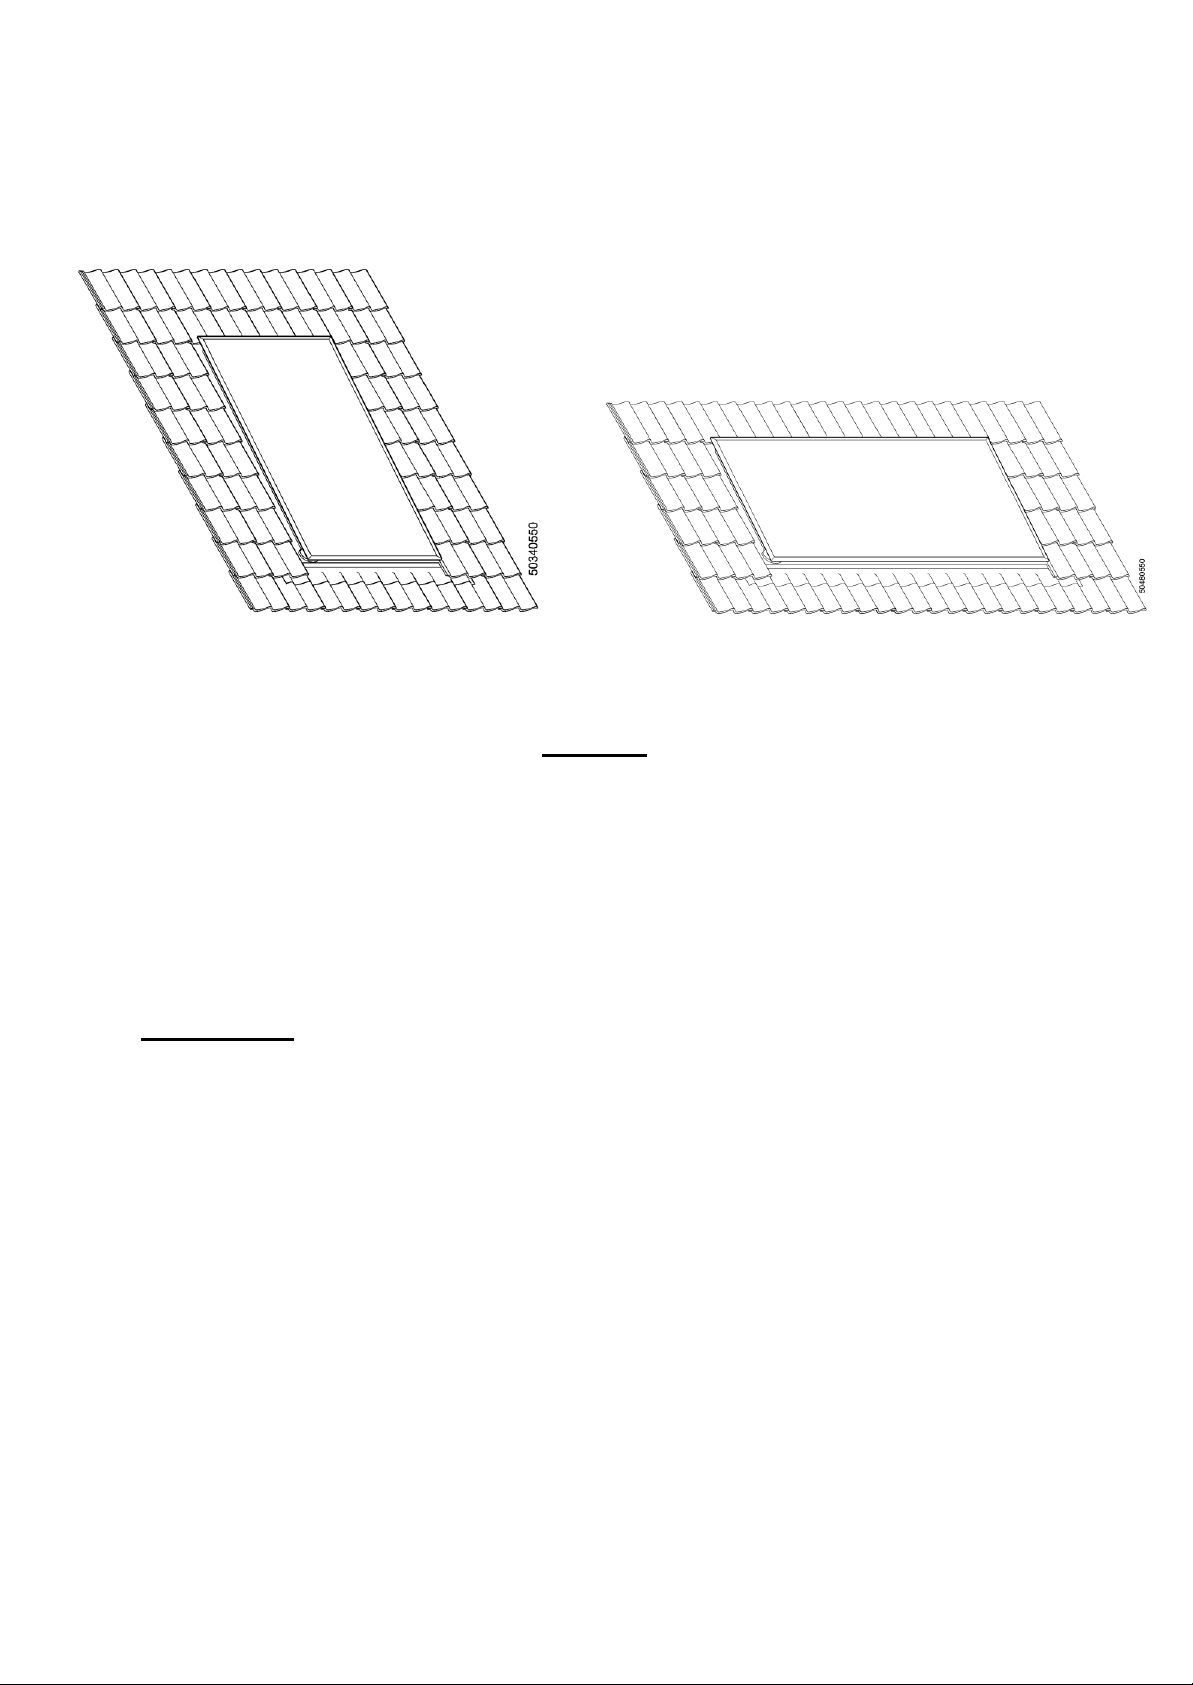
Portrait
Installation Instructions
Landscape
Contents
1. General.................................................................................................................................1
2. Points for attention..............................................................................................................2
3. Assembling instructions Flashingkit Portrait...................................................................3
3.1. Contents package Flashingkit Portrait......................................................................3
3.2. Assembling instructions Flashingkit Portrait............................................................4
4. Assembling instructions Flashingkit Landscape.............................................................7
4.1. Contents package Flashingkit Landscape..............................................................7
4.2. Assembling instructions Flashingkit Landscape .....................................................8
1. General
This assembling instruction is meant to assemble the collector in a sloping roof with the roof
integration plate (Flashing kit).
This assembling instruction consists of 3 parts:
1. Points for attention;
2. The assembling instruction for the Flashing kit portrait; (FKP)
3. The assembling instruction for the Flashing kit Landscape; (FKL)
Point 1 applies to both types, point 2 and 3 are product specific.
Before assembling and installation of the collector and the boiler, you should read the manual.
Installation of the Flashing kit and the collector should always be executed by a recognized installer.
The manufacturer will not be responsible for damage or whatsoever resulting from improper
installation of both products.
Changes in text, drawings and graphics, etc. are preserved without prior notice. The manufacturer
takes no responsability for any errors in the contents of this manual.
704-0052 v1.2 1/10
Page 2
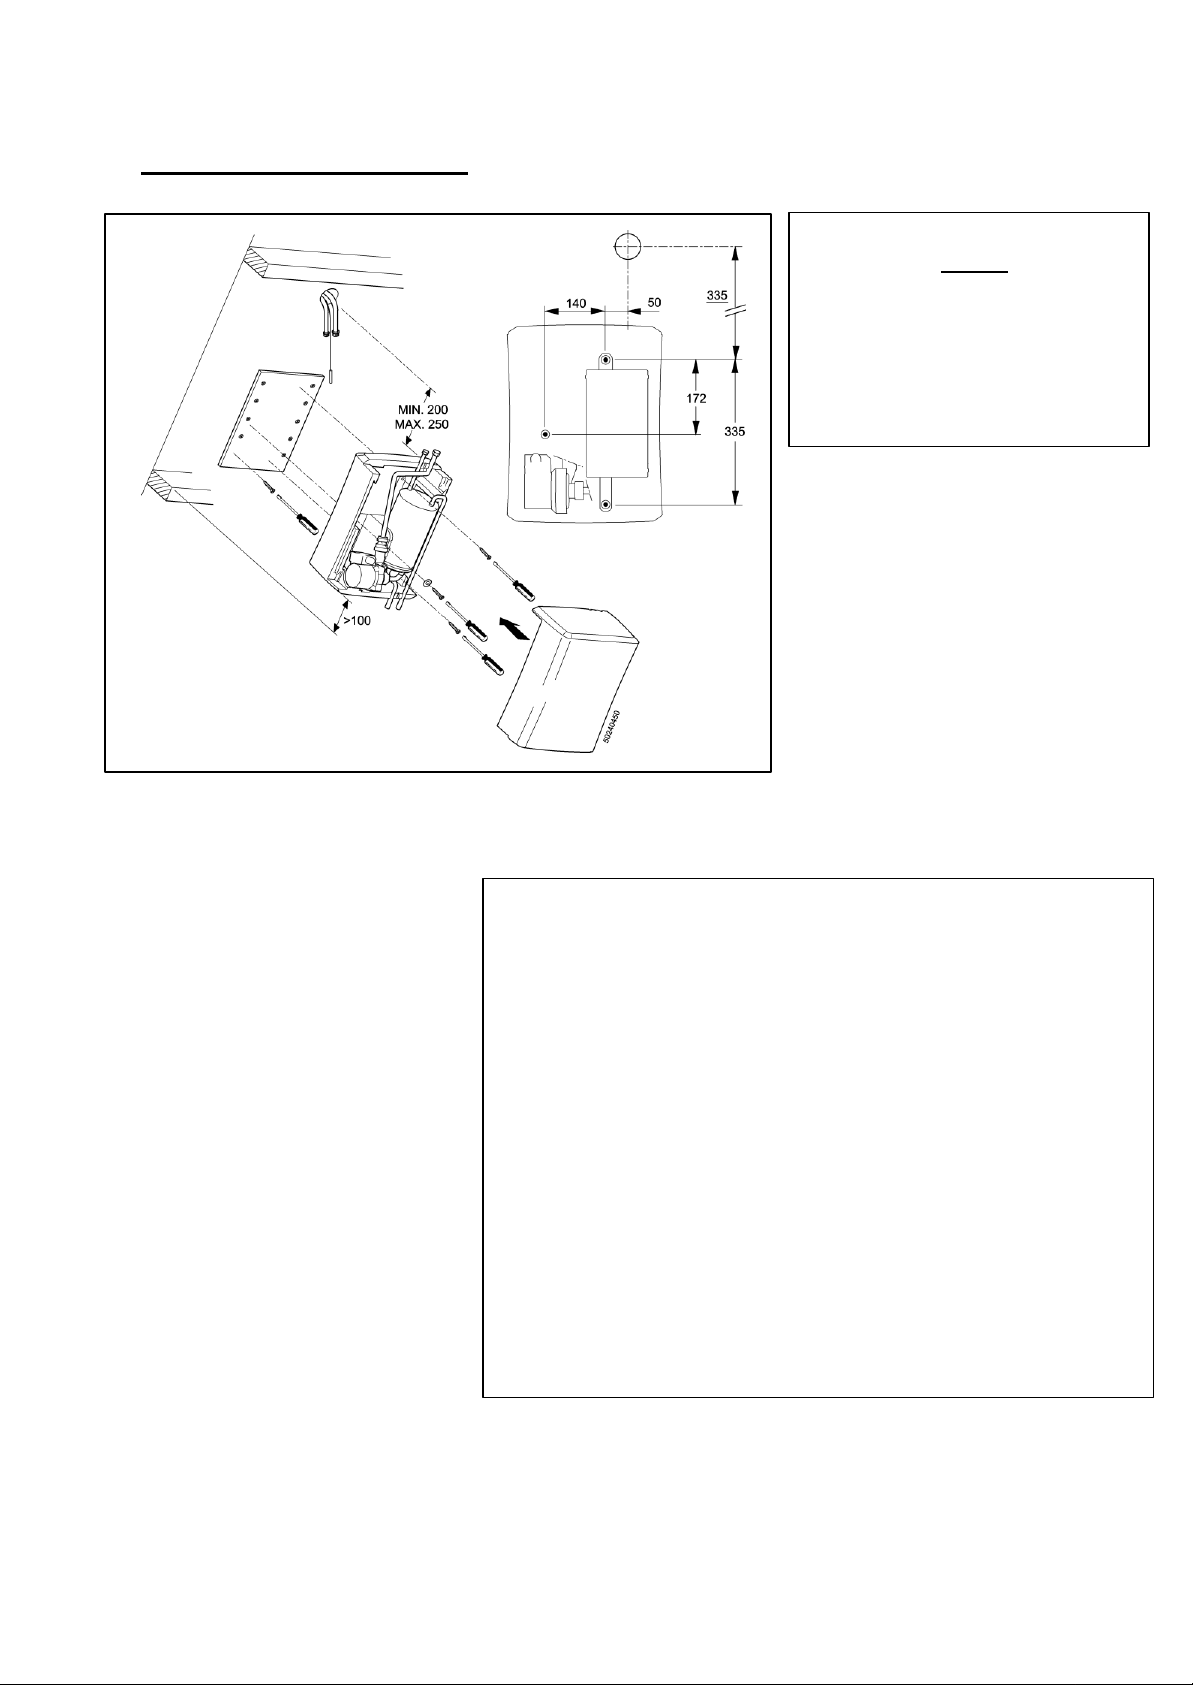
2. Points for attention
Free space required around the drain back unit
Figuur 2
• The collector can be placed at a
minimum angle of 20 degrees.
• Avoid objects causing shadows on
the collector.
• The collector should be placed as
near as possible to the drainback
unit
• The maximum height from the
bottom DBU till the upperside of the
collector is 3 meters
• The maximum distance of conduit-
pipes (both supply and return)
between the DBU and collector is 3
meters
• The flexible connections of the
collector should be installed under
slope.
• The collector should always be level.
Minimum:
- Sides 10mm
- Under side 100mm
- Upper side 100mm
- Front side 450mm *
---------------------------------------------------------------* At a closed cupboard door this dimension can
be reduced till 15 mm.
figure 1
• When installing the collector
see to the position of the
Drain Back Unit inner roof.
(picture 1+2).
• In order to achieve the
highest performance, ideally
the collector should be facing
the south or at least between
SE and SW
704-0052 v1.2 2/10
Page 3
3. Assembling instruction Flashing kit Portrait
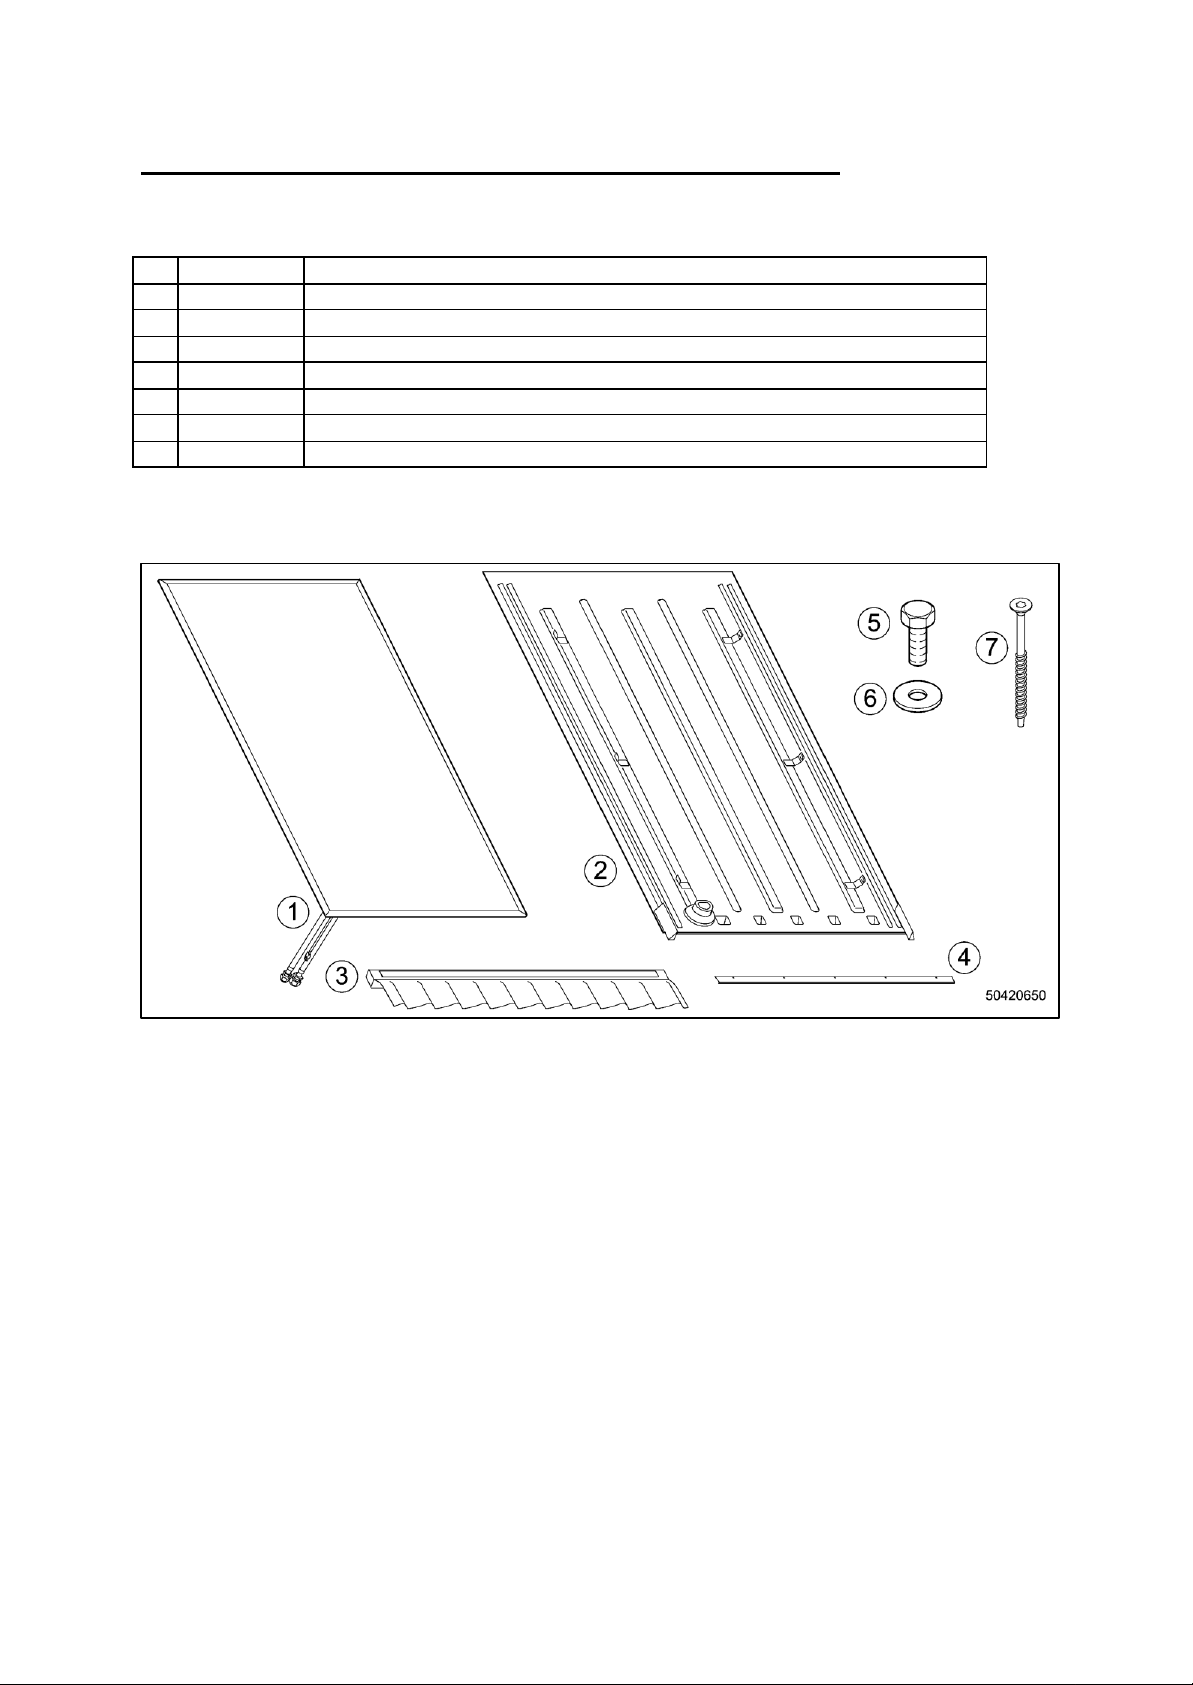
3.1. Contents package Flashing kit Portrait
Nr. Pieces. Description
1 1 Collector portrait (not included in this package)
2 1 Roof integration plate
3 1 Lead Seal (Anthracite)
4 1 Finishing strip
5 5 Hexagonal pin (M8x25mm) (1x pre-mounted on collector)
6 5 Closing ring M8
7 20 Screw Torx TX25 (5x70mm)
704-0052 v1.2 3/10
Page 4

3.2. Assembling instruction Flashingkit Portrait.
Place the lead seal centralized towards the left and right roof
-
tiles (meas.
X: Left = Right).
1
Lath
Remove roof-tiles to an area of approx.
1500x2500 mm (width x height)
2
Lead seal
Tile lath
§
§ Level the lead seal.
§ Place the lead seal 150mm above the tile-lath of the first roof-tile under the collector (view –A).
§ Fasten the le ad seal on the laths using screws.
§ Check the level.
704-0052 v1.2 4/10
Page 5

4
Put the roof integration plate into place. The studs at the bottom side of the plate should rest
Ridge
Lath
3
Under plate
strip
DETAIL-B
Lead seal
§
against the lath of the lead seal. Detail B
§ Fasten the plate on the tile-laths using screws.
§ Place the finish strip, tight to the grain side of the roof integration plate and screw down the strip.
(Detail B)
§ Make a hole through the roof partition (∅40 mm). Use the hole through the conical of the roof
integration plate as a template for drilling this hole.
§ (A) Hook the collector into the fastening clip with the pre-mounted hexagonal pin.
§ (B) Turn over the collector.
§ (C) The collector pipes and sensor cable should be guided through the roof aperture.
704-0052 v1.2 5/10
Page 6

Replace the roof
-
tiles. In order to achieve a stable row of tiles at the right, you should remove the left
Fasten the collector to the fastening clip (5x hexagonal pin M8x25)
5
§
§ Locate and tighten the hexagonal bolts with a spanner. (max. torque:7 Nm)
6
§
ridge tile.
§ In case this row is not stable enough, you may bore a hole in height of the tile-lath and fasten the
tiles with a wood-screw.
! The collector should always be in level !
704-0052 v1.2 6/10
Page 7

4. Assembling instruction Flashing kit Landscape
4.1. Contents package Flashingkit Landscape
Nr. Pieces Description
1 1 Collector landscape (not included in this package)
2 1 Roof integrationplate
3 2 Lead seal (1x Left and 1x right)
4 2 Finishing strip
5 6 Hexagonal pin (M8x25mm)
6 6 Closing ring M8
7 27 Screw Torx TX25 (5x70mm)
704-0052 v1.2 7/10
Page 8

4.2. Assembling instruction Flashing kit Landscape
1
The left lead seal should always overlap the
Mark the heart of the total lead seal on the
Remove roof -tiles till an area of approx.
2500x1500 mm (width x height)
2
roof partition. (heart collector)
§ Measure X (measure X: Left =Right)
§ Place the right lead seal first.
§ Maintain the left grain of the tile-lath of the
lead seal parallel to the heart.
§ Put the lead seal 150 mm above the tile-
lath of the first roof tile under the collector
(view A).
§ Put the lead seal in level and fasten it on
the laths.
§ Put the left lead seal with the grain of the
tile-lath, against the grain side of the right
lead seal.
§ Make sure the left lead seal overlaps the
right lead seal. (Left over Right)
§ Check level and fasten the lead seal on the
laths with screws.
right lead seal. (LEFT OVER RIGHT)
Lath lead seal
Tile lath
704-0052 v1.2 8/10
Page 9

4
3
Ridge
Lath
Roof plate
Strip
Lead seal
§ Put the roof integrationplate into place. The studs at the bottomside of the plate should rest
against the lath of the lead seal. Detail B
§ Fasten the plate on the tile-laths using screws.
§ Place the finish strip, tight to the grain side of the roof integration plate and screw down the strip.
(Detail B)
§ Sow the hole through the roof partition (∅ 40 mm). Use the hole in the fed through conical of the
roof integration plate as a template for drilling this hole.
§ Place the collector in the fastening clips.
§ Begeleid hierbij de collectorleidingen en de sensorkabel door de dakdoorvoer.
§ Fasten the collector to the fastening clips (6x hexagonal bolts M8x25mm)
§ Locate and tighten the hexagonal bolts with a spanner. (max. torque 7 Nm)
704-0052 v1.2 9/10
Page 10

5
Replace the roof
-
tiles. In order to achieve a stable row of tiles at the right, you should
§
remove the left ridge tile.
§ In case this row is not stable enough, you may bore a hole in height of the tile-lath and
fasten the tiles with a wood -screw.
! The collector should always be in level !
704-0052 v1.2 10/10
 Loading...