

Page 1
BA Akku-Kettensäge CS 36 Li
Li
Deckblatt
BETRIEBSANLEITUNG
AKKU-KETTENSÄGE
CS 36 Li
DE
GB
IT
PL
CZ
HU
DK
SE
UA
469861_a
12 | 2016
Page 2

DE
Inhaltsverzeichnis
Inhaltsverzeichnis
Deutsch ....................................................................................................................................................6
English.................................................................................................................................................... 27
Italiano....................................................................................................................................................47
Polski......................................................................................................................................................67
Česky .....................................................................................................................................................89
Magyarul............................................................................................................................................... 109
Dansk ...................................................................................................................................................129
Svensk.................................................................................................................................................. 148
Україна................................................................................................................................................. 167
© 2016
AL-KO KOBER GROUP Kötz, Germany
This documentation or excerpts therefrom may not be reproduced or disclosed to third parties without
the express permission of the AL-KO KOBER GROUP.
2 CS 36 Li
Page 3
469861_a 3
Page 4
4 CS 36 Li
Page 5
469861_a 5
Page 6

DE
Original-Betriebsanleitung
ORIGINAL-BETRIEBSANLEITUNG
Inhaltsverzeichnis
1 Zu dieser Betriebsanleitung .............................................................................................................. 8
1.1 Zeichenerklärungen und Signalwörter..................................................................................... 8
2 Produktbeschreibung........................................................................................................................ 8
2.1 Lieferumfang ........................................................................................................................... 8
2.2 Symbole am Gerät .................................................................................................................. 8
2.3 Sicherheits- und Schutzeinrichtungen ..................................................................................... 9
2.4 Überlastschutz......................................................................................................................... 9
2.5 Einschaltschutz ....................................................................................................................... 9
2.6 Kettenbremse ..........................................................................................................................9
2.7 Bestimmungsgemäße Verwendung ........................................................................................ 9
3 Produktübersicht (01) ..................................................................................................................... 10
4 Allgemeine Sicherheitshinweise für Elektrowerkzeuge (IEC 60745-1)........................................... 10
4.1 Arbeitsplatzsicherheit ............................................................................................................ 10
4.2 Elektrische Sicherheit ............................................................................................................ 10
4.3 Sicherheit von Personen .......................................................................................................10
4.4 Verwendung und Behandlung des Elektrowerkzeugs ........................................................... 11
4.5 Verwendung und Behandlung des Akkus ............................................................................. 11
4.6 Service .................................................................................................................................. 12
5 Sicherheitshinweise für Kettensägen (EN 60745 Teil 2-13) ...........................................................12
6 Ursachen und Vermeidung eines Rückschlags (EN 60745 Teil 2-13)............................................ 12
7 Montage.......................................................................................................................................... 13
7.1 Führungsschiene montieren (05, 06) .................................................................................... 13
7.2 Sägekette montieren (05, 06) ................................................................................................ 13
7.3 Sägekette spannen (05, 07) ..................................................................................................14
8 Inbetriebnahme............................................................................................................................... 14
8.1 Akku laden (02) .....................................................................................................................14
8.2 Akku einsetzen (03/A) ........................................................................................................... 14
8.3 Akku herausziehen (03/B) .....................................................................................................14
8.4 Kettenspannung kontrollieren................................................................................................ 14
8.5 Funktion der Kettenbremse testen ........................................................................................ 15
8.6 Funktionstest der Kettenbremse bei ausgeschaltetem Motor (08) ........................................ 15
8.7 Funktionstest der Kettenbremse bei eingeschaltetem Motor (08) ......................................... 15
8.8 Sägekettenöl einfüllen (09).................................................................................................... 15
6 CS 36 Li
Page 7

Original-Betriebsanleitung
9 Bedienung....................................................................................................................................... 16
9.1 Ladezustand des Akkus ermitteln (04) ..................................................................................16
9.2 Ladezustandsanzeigen am Akku .......................................................................................... 16
9.3 Sägekettenöl prüfen ..............................................................................................................16
9.4 Kettenbremse testen .............................................................................................................16
9.5 Motor ein- und ausschalten ...................................................................................................17
10 Arbeitsverhalten und Arbeitstechnik ...............................................................................................17
10.1 Sicherheitshinweise für die Arbeit ......................................................................................... 17
10.1.1 Bediener .................................................................................................................. 17
10.1.2 Betriebszeiten.......................................................................................................... 18
10.1.3 Arbeiten mit der Kettensäge.................................................................................... 18
10.1.4 Rückschlaggefahr.................................................................................................... 19
10.2 Bäume fällen ......................................................................................................................... 19
10.3 Entasten ................................................................................................................................20
10.4 Baum ablängen .....................................................................................................................20
10.5 Schnittholz ablängen (12)...................................................................................................... 21
11 Transport ........................................................................................................................................ 21
12 Wartung und Pflege ........................................................................................................................ 21
12.1 Sägekette schärfen (13) ........................................................................................................21
12.2 Kettenrad-Innenraum reinigen............................................................................................... 23
12.3 Schnellspanneinrichtung umbauen (16) ................................................................................ 23
12.4 Führungsschiene prüfen, wenden und fetten (14, 15)........................................................... 23
13 Lagerung......................................................................................................................................... 23
14 Entsorgung ..................................................................................................................................... 23
15 Hilfe bei Störungen .........................................................................................................................24
16 Technische Daten........................................................................................................................... 25
17 Garantie .......................................................................................................................................... 26
18 EG-Konformitätserklärung ..............................................................................................................26
469861_a 7
Page 8
DE
Zu dieser Betriebsanleitung
1 ZU DIESER BETRIEBSANLEITUNG
■
Lesen Sie unbedingt vor der Inbetriebnahme
diese Betriebsanleitung sorgfältig durch. Dies
ist die Voraussetzung für sicheres Arbeiten
und störungsfreie Handhabung.
■
Bewahren Sie diese Betriebsanleitung immer
so auf, dass Sie darin nachlesen können,
wenn Sie eine Information zum Gerät benötigen.
■
Geben Sie das Gerät nur mit dieser Betriebsanleitung an andere Personen weiter.
■
Lesen und beachten Sie die Sicherheits- und
Warnhinweise in dieser Betriebsanleitung.
1.1 Zeichenerklärungen und Signalwörter
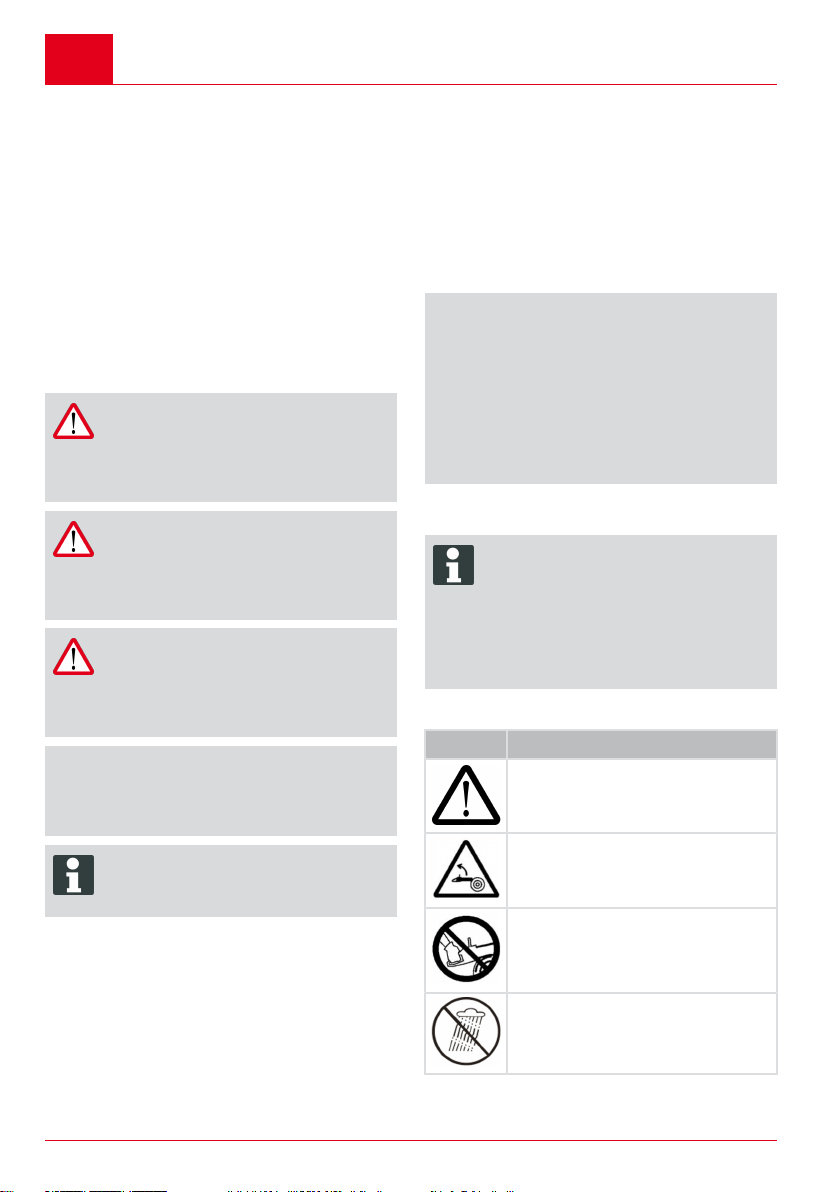
GEFAHR!
Zeigt eine unmittelbar gefährliche Situation an, die – wenn sie nicht vermieden
wird – den Tod oder eine schwere Verletzung zur Folge hat.
WARNUNG!
Zeigt eine potenziell gefährliche Situation
an, die – wenn sie nicht vermieden wird –
den Tod oder eine schwere Verletzung
zur Folge haben könnte.
VORSICHT!
Zeigt eine potenziell gefährliche Situation
an, die – wenn sie nicht vermieden wird –
eine geringfügige oder mäßige Verletzung zur Folge haben könnte.
ACHTUNG!
Zeigt eine Situation an, die – wenn sie
nicht vermieden wird – Sachschäden zur
Folge haben könnte.
HINWEIS
Spezielle Hinweise zur besseren Verständlichkeit und Handhabung.
2 PRODUKTBESCHREIBUNG
Diese Betriebsanleitung beschreibt eine handgeführte Elektrokettensäge, die mit einem Akku betrieben wird.
2.1 Lieferumfang
Die Akku-Kettensäge ist für den Betrieb mit Akkus der EnergyFlex-Familie ab einer Kapazität
von 4Ah (Akku "Li-Ion Akku 36 V, 4 Ah,
B05-3640" (Art.-Nr. 113280)) vorgesehen.
ACHTUNG!
Gefahr der Beschädigung von Ketten-
säge und Akku
Wird die Kettensäge mit ungeeignetem
Akku betrieben, kann das zu Schäden an
der Kettensäge und am Akku führen.
■
Kettensäge nur einem geeigneten
Akku ab einer Kapazität von 4Ah betreiben.
Für das Aufladen des Akkus wird das Ladegerät
"C05-4230" (Art.-Nr. 113281) benötigt.
HINWEIS
In den folgenden Betriebsanleitungen finden Sie weitere Informationen:
■
"Li-Ion Akku 36 V, 4 Ah,
B05-3640" (Dok.-Nr. 441630)
■
"Ladegerät C05-4230 für Li-Ion Akku
36 V, 4 Ah" (Dok.-Nr. 441633)
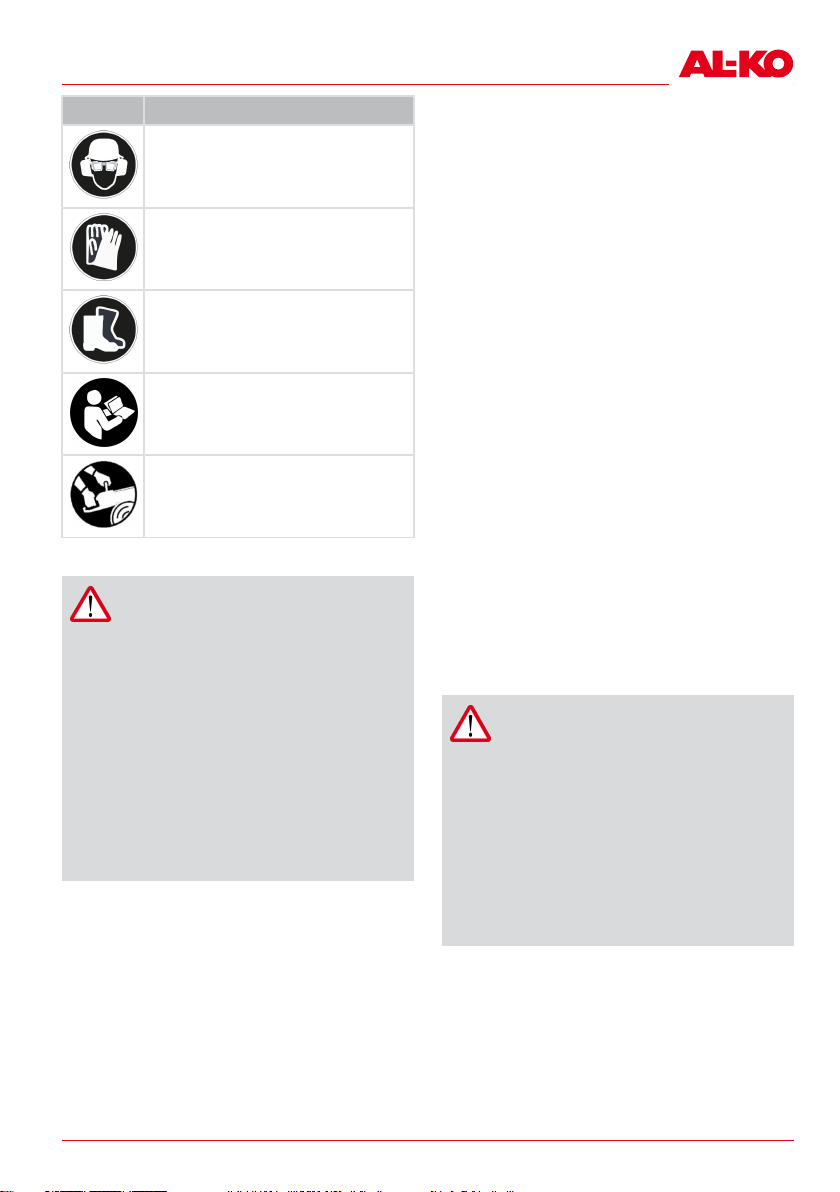
2.2 Symbole am Gerät
Symbol Bedeutung
Besondere Vorsicht bei der Handhabung!
Rückschlaggefahr!
Kettensäge nicht einhändig betreiben!
Nicht bei Regen benutzen! Vor Nässe schützen!
8 CS 36 Li
Page 9
Produktbeschreibung
Symbol Bedeutung
Schutzhelm, Gehörschutz und Augenschutz tragen!
Schutzhandschuhe tragen!
Festes Schuhwerk tragen!
Vor der Inbetriebnahme die Betriebsanleitung lesen!
Kettensäge immer beidhändig betreiben!
2.3 Sicherheits- und Schutzeinrichtungen
WARNUNG!
Gefahr schwerer Verletzungen durch
manipulierte Sicherheits- und
Schutzeinrichtungen
Aufgrund manipulierter Sicherheits- und
Schutzeinrichtungen können beim Arbeiten mit der Kettensäge schwere Verletzungen auftreten.
■
Setzen Sie die Sicherheits- und
Schutzeinrichtungen nicht außer
Funktion!
■
Arbeiten Sie mit der Kettensäge nur
dann, wenn alle Sicherheits- und
Schutzeinrichtungen korrekt funktionieren.
2.4 Überlastschutz
Die Kettensäge ist mit einem Überlastschutz ausgestattet, der bei Überlastung abschaltet.
Nach einer kurzen Abkühlphase kann die Kettensäge wieder eingeschaltet werden.
2.5 Einschaltschutz
Wenn der Bediener mehrmals schnell hintereinander Gas gibt, schaltet sich die Kettensäge für
einige Sekunden ab, um die Elektronik und die
Sägekette zu schützen. In diesem Falle warten,
bis sich die Kettensäge wieder einschalten lässt.
2.6 Kettenbremse
Die Kettensäge hat eine manuelle Kettenbremse,
welche z.B. bei einem Rückschlag (Kickback)
über den Handschutz ausgelöst wird. Bei Auslösung der Kettenbremse wird die Sägekette
schlagartig gestoppt und der Motor ausgeschaltet.
2.7 Bestimmungsgemäße Verwendung
Die Kettensäge ist ausschließlich für die Verwendung im Haus-, Hobby- und Gartenbereich ausgelegt. In diesem Bereich ist die Kettensäge für
leichte Holzsägearbeiten einsetzbar, z.B. für:
■
Schneiden von Schnittholz
■
Ausschneiden von Hecken
■
Sägen von Brennholz
Die Akku-Kettensäge kann aufgrund des elektrischen Antriebs nicht nur im Freigelände sondern
auch in geschlossenen Räumen zum Sägen von
Holz eingesetzt werden. Eine andere Anwendung
als hier beschreiben, gilt als nicht bestimmungsgemäß.
Die Kettensäge darf nicht im gewerblichen Bereich eingesetzt werden.
VORSICHT!
Verletzungsgefahr aufgrund nicht be-
stimmungsgemäßer Verwendung!
Wenn mit der Kettensäge mit Fremdkörpern durchsetztes Holz oder andere Stoffe gesägt werden, können Verletzungen
die Folge sein.
■
Kettensäge nur für leichte Holzsägearbeiten einsetzen.
■
Holz vor dem Sägen auf Fremdkörper untersuchen, z. B. Nägel,
Schrauben, Beschläge.
469861_a 9
Page 10
DE
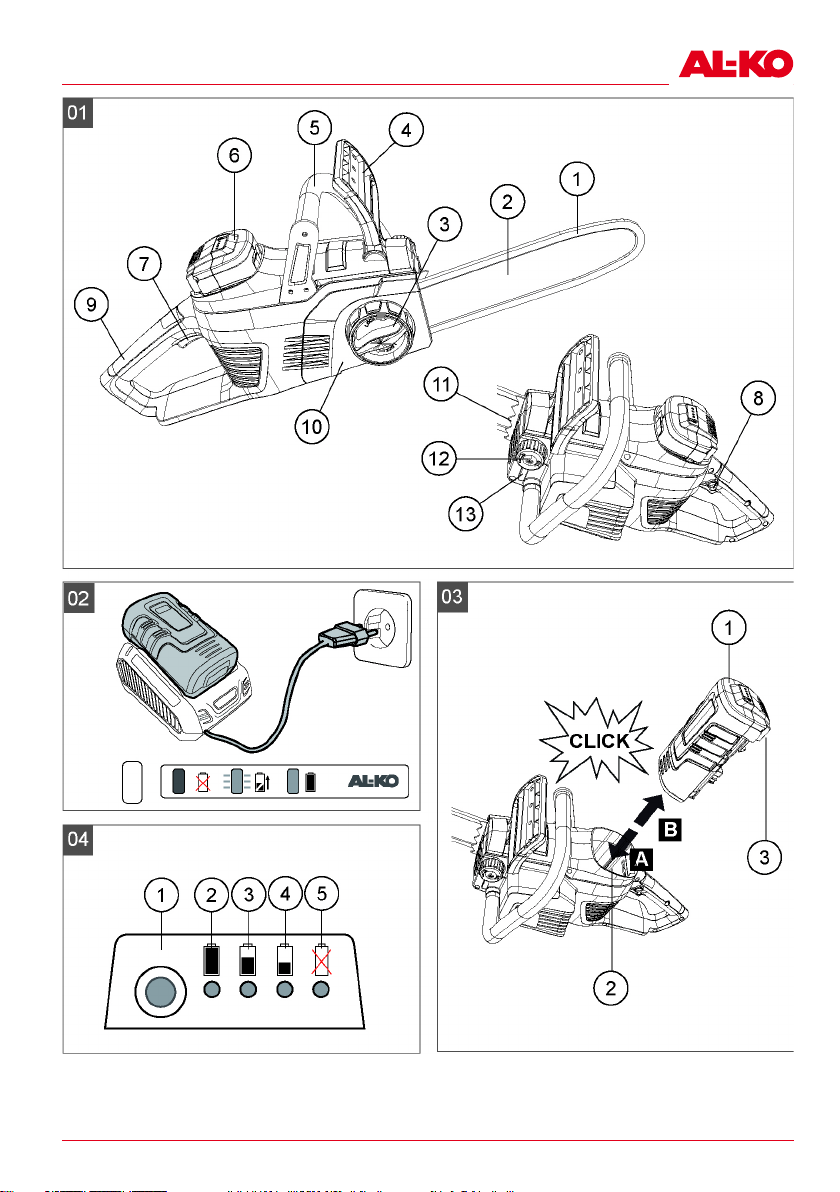
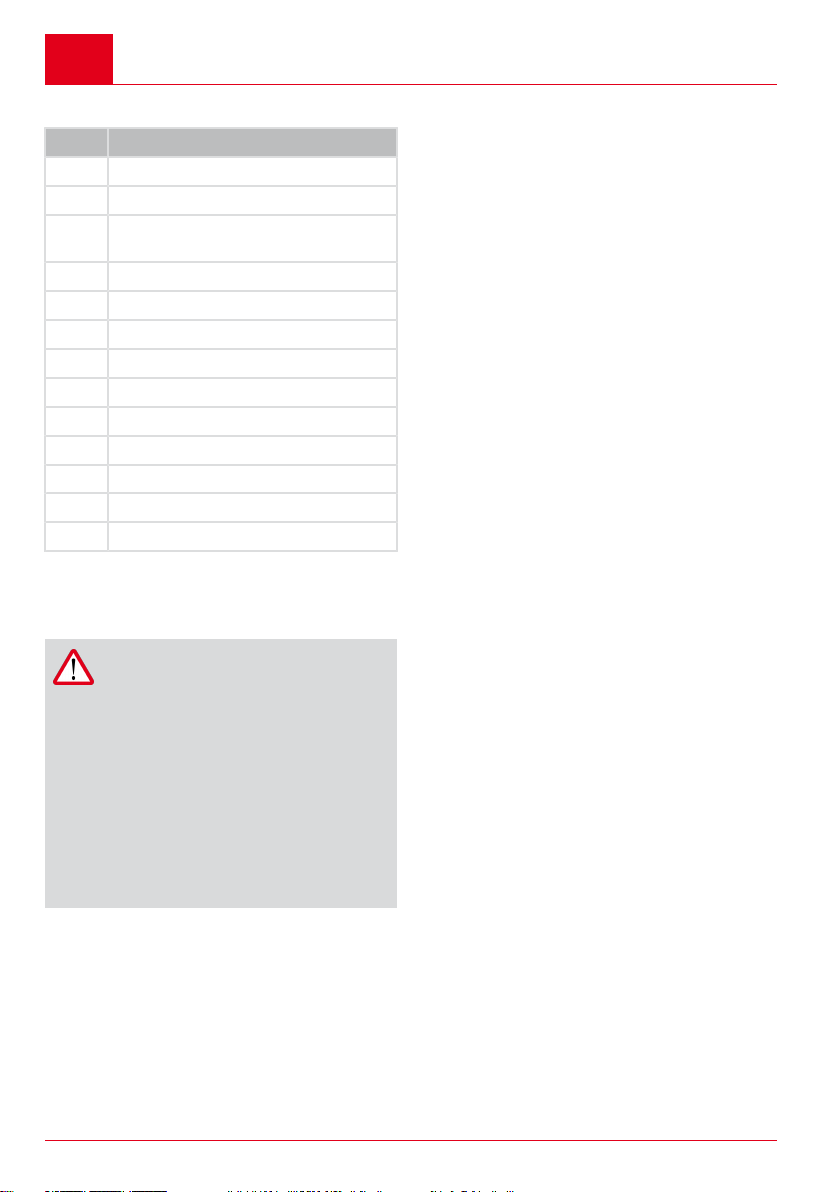
3 PRODUKTÜBERSICHT (01)
Nr. Bauteil
01/1 Sägekette
01/2 Führungsschiene
01/3 Schnellspanneinrichtung mit Zentral-
verschluss und Drehring
01/4 Handschutz
01/5 Bügelgriff
01/6 Akku
01/7 Gashebel
01/8 Sperrknopf
01/9 Hinterer Griff
01/10 Abdeckung für Kettenzahnrad
01/11 Krallenanschlag
01/12 Verschluss des Kettenöltanks
01/13 Sichtfenster des Kettenöltanks
4 ALLGEMEINE
SICHERHEITSHINWEISE FÜR
ELEKTROWERKZEUGE (IEC 60745-1)
WARNUNG!
Gefahr von elektrischem Schlag,
Brand und/oder schweren Verletzungen
Versäumnisse bei der Einhaltung der Sicherheitshinweise und Anweisungen können elektrischen Schlag, Brand und/oder
schwere Verletzungen verursachen.
■
Lesen Sie alle Sicherheitshinweise
und Anweisungen.
■
Bewahren Sie alle Sicherheitshinweise und Anweisungen für die Zukunft
auf.
Der in den Sicherheitshinweisen verwendete Begriff "Elektrowerkzeug" bezieht sich auf netzbetriebene Elektrowerkzeuge (mit Netzkabel) und
auf akkubetriebene Elektrowerkzeuge (ohne
Netzkabel).
4.1 Arbeitsplatzsicherheit
■
Halten Sie Ihren Arbeitsbereich sauber
und gut beleuchtet. Unordnung oder unbe-
leuchtete Arbeitsbereiche können zu Unfällen
führen.
Produktübersicht (01)
■
Arbeiten Sie mit dem Elektrowerkzeug
nicht in explosionsgefährdeter Umgebung, in der sich brennbare Flüssigkeiten,
Gase oder Stäube befinden. Elektrowerk-
zeuge erzeugen Funken, die den Staub oder
die Dämpfe entzünden können.
■
Halten Sie Kinder und andere Personen
während der Benutzung des Elektrowerkzeugs fern. Bei Ablenkung können Sie die
Kontrolle über das Gerät verlieren.
4.2 Elektrische Sicherheit
■
Vermeiden Sie Körperkontakt mit geerdeten Oberflächen wie von Rohren, Heizungen, Herden und Kühlschränken. Es be-
steht ein erhöhtes Risiko durch elektrischen
Schlag, wenn Ihr Körper geerdet ist.
■
Halten Sie Elektrowerkzeuge von Regen
oder Nässe fern. Das Eindringen von Was-
ser in ein Elektrowerkzeug erhöht das Risiko
eines elektrischen Schlages.
4.3 Sicherheit von Personen
■
Seien Sie aufmerksam, achten Sie darauf,
was Sie tun, und gehen Sie mit Vernunft
an die Arbeit mit einem Elektrowerkzeug.
Benutzen Sie kein Elektrowerkzeug, wenn
Sie müde sind oder unter dem Einfluss
von Drogen, Alkohol oder Medikamenten
stehen. Ein Moment der Unachtsamkeit beim
Gebrauch des Elektrowerkzeugs kann zu
ernsthaften Verletzungen führen.
■
Tragen Sie persönliche Schutzausrüstung
und immer eine Schutzbrille. Das Tragen
persönlicher Schutzausrüstung, wie Staubmaske, rutschfeste Sicherheitsschuhe,
Schutzhelm oder Gehörschutz, je nach Art
und Einsatz des Elektrowerkzeugs, verringert
das Risiko von Verletzungen.
■
Vermeiden Sie eine unbeabsichtigte Inbetriebnahme. Vergewissern Sie sich, dass
das Elektrowerkzeug ausgeschaltet ist,
bevor Sie es an die Stromversorgung und/
oder den Akku anschließen, es aufnehmen oder tragen. Wenn Sie beim Tragen
des Elektrowerkzeugs den Finger am Schalter haben oder das Gerät eingeschaltet an
die Stromversorgung anschließen, kann dies
zu Unfällen führen.
■
Entfernen Sie Einstellwerkzeuge oder
Schraubenschlüssel, bevor Sie das Elektrowerkzeug einschalten. Ein Werkzeug
10 CS 36 Li
Page 11

Allgemeine Sicherheitshinweise für Elektrowerkzeuge (IEC 60745-1)
oder Schlüssel, der sich in einem drehenden
Geräteteil befindet, kann zu Verletzungen
führen.
■
Vermeiden Sie eine abnormale Körperhaltung. Sorgen Sie für einen sicheren Stand
und halten Sie jederzeit das Gleichgewicht. Dadurch können Sie das Elektrowerk-
zeug in unerwarteten Situationen besser kontrollieren.
■
Tragen Sie geeignete Kleidung. Tragen
Sie keine weite Kleidung oder Schmuck.
Halten Sie Haare, Kleidung und Handschuhe fern von sich bewegenden Teilen.
Lockere Kleidung, Schmuck oder lange Haare können von sich bewegenden Teilen erfasst werden.
■
Wenn Staubabsaug- und -auffangeinrichtungen montiert werden können, vergewissern Sie sich, dass diese angeschlossen sind und richtig verwendet werden.
Verwendung einer Staubabsaugung kann
Gefährdungen durch Staub verringern.
4.4 Verwendung und Behandlung des Elektrowerkzeugs
■
Überlasten Sie das Gerät nicht. Verwenden Sie für Ihre Arbeit das dafür bestimmte Elektrowerkzeug. Mit dem passenden
Elektrowerkzeug arbeiten Sie besser und sicherer im angegebenen Leistungsbereich.
■
Benutzen Sie kein Elektrowerkzeug, dessen Schalter defekt ist. Ein Elektrowerk-
zeug, das sich nicht mehr ein- oder ausschalten lässt, ist gefährlich und muss repariert
werden.
■
Ziehen Sie den Stecker aus der Steckdose
und/oder entfernen Sie den Akku, bevor
Sie Geräteeinstellungen vornehmen, Zubehörteile wechseln oder das Gerät weglegen. Diese Vorsichtsmaßnahme verhindert
den unbeabsichtigten Start des Elektrowerkzeugs.
■
Bewahren Sie unbenutzte Elektrowerkzeuge außerhalb der Reichweite von Kindern
auf. Lassen Sie Personen das Gerät nicht
benutzen, die mit diesem nicht vertraut
sind oder diese Anweisungen nicht gelesen haben. Elektrowerkzeuge sind gefähr-
lich, wenn Sie von unerfahrenen Personen
benutzt werden.
■
Pflegen Sie Elektrowerkzeuge mit Sorgfalt. Kontrollieren Sie, ob bewegliche Teile
einwandfrei funktionieren und nicht klemmen, ob Teile gebrochen oder so beschä-
digt sind, dass die Funktion des Elektrowerkzeugs beeinträchtigt ist. Lassen Sie
beschädigte Teile vor dem Einsatz des
Gerätes reparieren. Viele Unfälle haben ihre
Ursache in schlecht gewarteten Elektrowerkzeugen.
■
Halten Sie Schneidwerkzeuge scharf und
sauber. Sorgfältig gepflegte Schneidwerk-
zeuge mit scharfen Schneidkanten verklemmen sich weniger und sind leichter zu führen.
■
Verwenden Sie Elektrowerkzeug, Zubehör,
Einsatzwerkzeuge usw. entsprechend diesen Anweisungen. Berücksichtigen Sie
dabei die Arbeitsbedingungen und die
auszuführende Tätigkeit. Der Gebrauch
von Elektrowerkzeugen für andere als die
vorgesehenen Anwendungen kann zu gefährlichen Situationen führen.
4.5 Verwendung und Behandlung des Akkus
■
Den Akku nur mit dem Ladegerät aufladen, das vom Hersteller angegeben wurde. Es besteht Brandgefahr, wenn mit einem
Ladegerät, das für einen speziellen Akkutyp
bestimmt ist, ein anderer Akkutyp aufgeladen
wird.
■
Das Akku-Gerät nur mit dem dafür vorgesehenen Akku betreiben. Es besteht Verlet-
zungs- und Brandgefahr bei Benutzung eines
anderen Akkus.
■
Den geladenen und nicht benutzten Akku
von metallischen Gegenständen fernhalten, um die Kontakte nicht zu überbrücken (z. B. Büroklammern, Münzen,
Schlüssel, Nägel, Schrauben). Durch einen
Kurzschluss können Verbrennungen oder
Feuer entstehen.
■
Bei unsachgemäßer Nutzung und beschädigtem Akku können Dämpfe und Elektrolytflüssigkeit austreten. Den Kontakt mit
Dämpfen und Elektrolytflüssigkeit vermeiden. Den Raum ausreichend lüften. Bei
Kontakt mit Elektrolytflüssigkeit diese
gründlich abwaschen. Wenn Elektrolytflüssigkeit in die Augen gelangt ist, diese
sofort gründlich ausspülen und einen Arzt
aufsuchen. Austretende Elektrolytflüssigkeit
kann Hautreizungen und Brände hervorrufen.
469861_a 11
Page 12

DE
Sicherheitshinweise für Kettensägen (EN 60745 Teil 2-13)
4.6 Service
■
Lassen Sie Ihr Elektrowerkzeug nur von
qualifiziertem Fachpersonal und nur mit
Original-Ersatzteilen reparieren. Damit wird
sichergestellt, dass die Sicherheit des Elektrowerkzeugs erhalten bleibt.
5 SICHERHEITSHINWEISE FÜR
KETTENSÄGEN (EN 60745 TEIL 2-13)
■
Halten Sie bei laufender Säge alle Körperteile von der Sägekette fern. Vergewissern
Sie sich vor dem Starten der Säge, dass
die Sägekette nichts berührt. Beim Arbei-
ten mit einer Kettensäge kann ein Moment
der Unachtsamkeit dazu führen, dass Bekleidung oder Körperteile von der Sägekette erfasst werden.
■
Halten Sie die Kettensäge immer mit Ihrer
rechten Hand am hinteren Griff und Ihrer
linken Hand am vorderen Griff. Das Fest-
halten der Kettensäge in umgekehrter Arbeitshaltung erhöht das Risiko von Verletzungen und darf nicht angewendet werden.
■
Halten Sie das Elektrowerkzeug an den
isolierten Griffflächen, da die Sägekette in
Berührung mit dem eigenen Netzkabel
kommen kann. Der Kontakt der Sägekette
mit einer spannungsführenden Leitung kann
metallene Geräteteile unter Spannung setzen
und zu einem elektrischen Schlag führen.
■
Tragen Sie Schutzbrille- und Gehörschutz.
Weitere Schutzausrüstung für Kopf, Hände, Beine und Füße wird empfohlen. Pas-
sende Schutzkleidung mindert die Verletzungsgefahr durch umherfliegendes Spanmaterial und zufälliges Berühren der Sägekette.
■
Arbeiten Sie mit der Kettensäge nicht auf
einem Baum. Bei Betrieb auf einem Baum
besteht Verletzungsgefahr.
■
Achten Sie immer auf festen Stand und
benutzen Sie die Kettensäge nur, wenn
Sie auf festem, sicherem und ebenem
Grund stehen. Rutschiger Untergrund oder
instabile Standflächen wie auf einer Leiter
können zum Verlust des Gleichgewichts oder
zum Verlust der Kontrolle über die Kettensäge führen.
■
Rechnen Sie beim Schneiden eines unter
Spannung stehenden Astes damit, dass
dieser zurückfedert. Wenn die Spannung in
den Holzfasern freikommt, kann der gespannte Ast die Bedienperson treffen und/
oder die Kettensäge der Kontrolle entreißen.
■
Seien Sie besonders vorsichtig beim
Schneiden von Unterholz und jungen Bäumen. Das dünne Material kann sich in der
Sägekette verfangen und auf Sie schlagen
oder Sie aus dem Gleichgewicht bringen.
■
Tragen Sie die Kettensäge am vorderen
Griff im ausgeschalteten Zustand, die Sägekette von Ihrem Körper abgewandt. Bei
Transport oder Aufbewahrung der Kettensäge stets die Schutzabdeckung aufziehen. Sorgfältiger Umgang mit der Kettensäge
verringert die Wahrscheinlichkeit einer versehentlichen Berührung mit der laufenden Sägekette.
■
Befolgen Sie Anweisungen für die
Schmierung, die Kettenspannung und das
Wechseln von Zubehör. Eine unsachgemäß
gespannte oder geschmierte Kette kann entweder reißen oder das Rückschlagrisiko erhöhen.
■
Halten Sie Griffe trocken, sauber und frei
von Öl und Fett. Fettige, ölige Griffe sind
rutschig und führen zum Verlust der Kontrolle.
■
Nur Holz sägen. Die Kettensäge nicht für
Arbeiten verwenden, für die sie nicht bestimmt ist. Beispiel: Verwenden Sie die
Kettensäge nicht zum Sägen von Plastik,
Mauerwerk oder Baumaterialien, die nicht
aus Holz sind. Die Verwendung der Ketten-
säge für nicht bestimmungsgemäße Arbeiten
kann zu gefährlichen Situationen führen.
6 URSACHEN UND VERMEIDUNG
EINES RÜCKSCHLAGS (EN 60745
TEIL 2-13)
Rückschlag kann auftreten, wenn die Spitze der
Führungsschiene einen Gegenstand berührt oder
wenn das Holz sich biegt und die Sägekette im
Schnitt festklemmt.
Eine Berührung mit der Schienenspitze kann in
manchen Fällen zu einer unerwarteten nach hinten gerichteten Reaktion führen, bei der die Führungsschiene nach oben und in Richtung des Bedieners geschlagen wird.
Das Verklemmen der Sägekette an der Oberkante der Führungsschiene kann die Schiene rasch
in Bedienerrichtung zurückstoßen.
12 CS 36 Li
Page 13

Montage
Jede dieser Reaktionen kann dazu führen, dass
Sie die Kontrolle über die Säge verlieren und sich
möglicherweise schwer verletzen. Verlassen Sie
sich nicht ausschließlich auf die in der Kettensäge eingebauten Sicherheitseinrichtungen. Als Benutzer einer Kettensäge sollten Sie verschiedene
Maßnahmen ergreifen, um unfall- und verletzungsfrei arbeiten zu können.
Ein Rückschlag ist die Folge eines falschen oder
fehlerhaften Gebrauchs des Elektrowerkzeugs.
Er kann durch geeignete Vorsichtsmaßnahmen,
wie nachfolgend beschrieben, verhindert werden:
■
Halten Sie die Säge mit beiden Händen
fest, wobei Daumen und Finger die Griffe
der Kettensäge umschließen. Bringen Sie
Ihren Körper und die Arme in eine Stellung, in der Sie den Rückschlagkräften
standhalten können. Wenn geeignete Maß-
nahmen getroffen werden, kann der Bediener
die Rückschlagkräfte beherrschen. Niemals
die Kettensäge loslassen.
■
Vermeiden Sie eine abnormale Körperhaltung und sägen Sie nicht über Schulterhöhe. Dadurch wird ein unbeabsichtigtes Be-
rühren mit der Schienenspitze vermieden und
eine bessere Kontrolle der Kettensäge in unerwarteten Situationen ermöglicht.
■
Verwenden Sie stets vom Hersteller vorgeschriebene Ersatzschienen und Sägeketten. Falsche Ersatzschienen und Säge-
ketten können zum Reißen der Kette und/
oder zu Rückschlag führen.
■
Halten Sie sich an die Anweisungen des
Herstellers für das Schärfen und die Wartung der Sägekette. Zu niedrige Tiefenbe-
grenzer erhöhen die Neigung zum Rückschlag.
7 MONTAGE
WARNUNG!
Gefahr schwerer Verletzungen.
Wenn eine unvollständig montierte Kettensäge benutzt wird, können schwere
Verletzungen hervorgerufen werden.
■
Benutzen Sie die Kettensäge erst,
wenn sie vollständig montiert wurde.
■
Vor jeder Benutzung eine Sichtkontrolle durchführen, um zu prüfen, ob
die Kettensäge vollständig ist und
keine beschädigten oder abgenutzten Bauteile enthält. Sicherheits- und
Schutzeinrichtungen müssen intakt
sein.
VORSICHT!
Gefahr von Schnittwunden.
Die scharfen Kanten der Sägekette können bei der Montage Schnittwunden verursachen.
■
Entfernen Sie vor der Montage den
Akku.
■
Tragen Sie bei der Montage der Sägekette und der Führungsschiene Sicherheitshandschuhe.
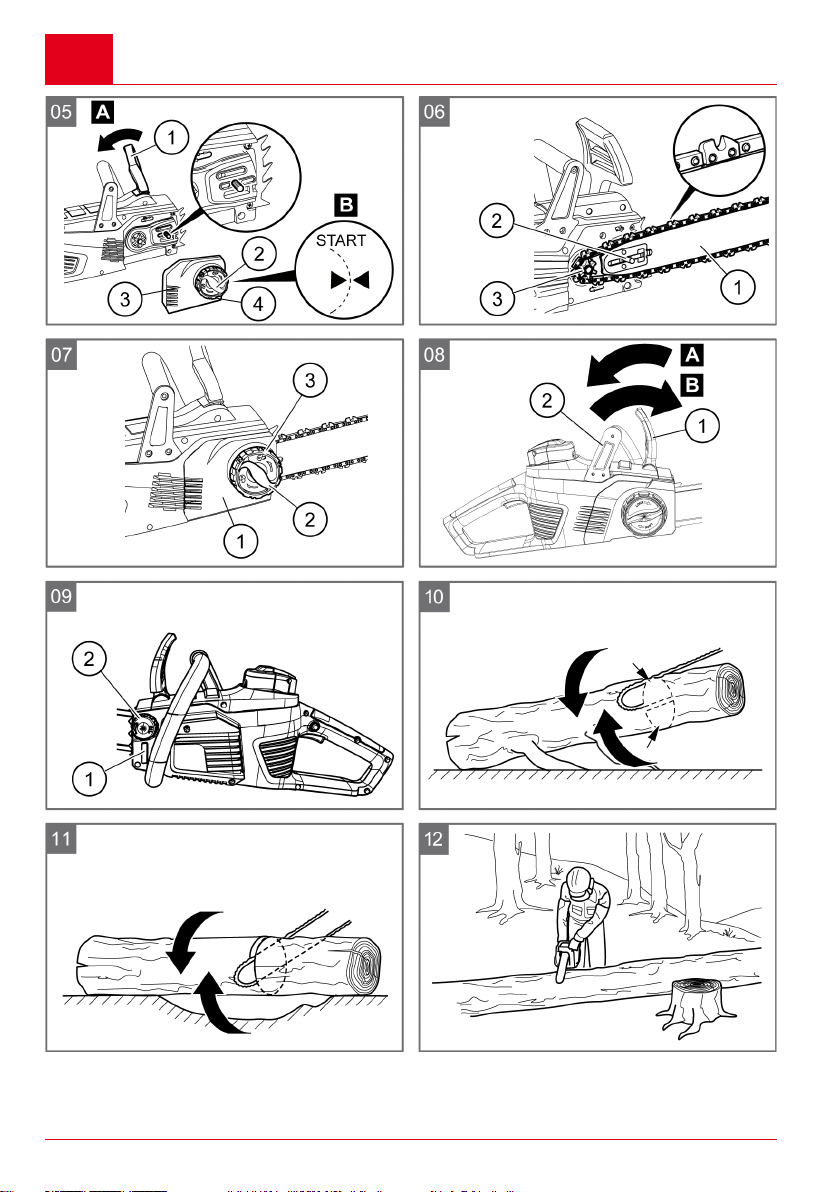
7.1 Führungsschiene montieren (05, 06)
1. Handschutz (05/1) zum Bügelgriff ziehen (05/
A), damit die Kettenbremse gelöst wird.
2. Zentralverschluss (05/2) gegen den Uhrzei-
gersinn drehen und zusammen mit der Abdeckung (05/3) abnehmen.
3. Führungsschiene (06/1) auf den Führungs-
bolzen (06/2) setzen und so weit nach hinten
schieben, dass sich die Sägekette montieren
lässt.
7.2 Sägekette montieren (05, 06)
1. Sägekette auf das Kettenzahnrad (06/3) und
in die Rille der Führungsschiene (06/1) einlegen.
2. Sägekette um den Umlenkstern der Füh-
rungsschiene führen. Die Sägekette muss an
der Unterseite der Führungsschiene leicht
durchhängen.
3. Abdeckung (05/3) aufsetzen und den Zentral-
verschluss (05/2) leicht anziehen.
469861_a 13
Page 14

DE
Inbetriebnahme
7.3 Sägekette spannen (05, 07)
HINWEIS
Die Sägekette ist richtig gespannt, wenn sie:
■
an der Unterseite der Führungsschiene anliegt und sich von Hand durchziehen lässt.
■
sich in der Mitte der Führungsschiene um 3 – 4 mm anheben lässt.
1. Den Sitz der Sägekette kontrollieren, damit
diese richtig auf dem Kettenzahnrad und in
der Führungsschiene liegt.
2. Drehring (05/4) so zur Abdeckung (05/3) drehen, dass sich die beiden Dreiecke gegenüberstehen (05/B).
3. Abdeckung (07/1) aufsetzen und Zentralverschluss (07/2) im Uhrzeigersinn drehen. Zentralverschluss dabei nicht ganz anziehen
oder eine Umdrehung zurückdrehen.
4. Drehring (07/3) im Uhrzeigersinn drehen, bis
die Sägekette, wie oben beschrieben, richtig
gespannt ist.
5. Zentralverschluss (07/2) im Uhrzeigersinn
drehen, bis er fixiert ist.
8 INBETRIEBNAHME
GEFAHR!
Lebensgefahr und Gefahr schwerster
Verletzungen.
Unkenntnis der Sicherheitshinweise und
Bedienanweisungen kann zu schwersten
Verletzungen und sogar zum Tod führen.
■
Lesen und beachten Sie alle Sicherheitshinweise und Bedienanweisungen dieser Betriebsanleitung sowie
der Betriebsanleitungen, auf die verwiesen wird, bevor Sie die Kettensäge benutzen!
WARNUNG!
Gefahr schwerer Verletzungen.
Wenn sich an der Kettensäge beschädigte Bauteile befinden, können schwere
Verletzungen hervorgerufen werden.
■
Vor jeder Benutzung eine Sichtkontrolle durchführen, um zu prüfen, ob die
Kettensäge vollständig ist und keine
beschädigten oder abgenutzten Bauteile enthält. Sicherheits- und Schutzeinrichtungen müssen intakt sein.
8.1 Akku laden (02)
Der Akku ist teilgeladen. Den Akku vor dem ersten Gebrauch vollständig aufladen. Der Akku
kann in jedem beliebigen Ladezustand geladen
werden. Eine Unterbrechung des Ladens schadet
dem Akku nicht.
HINWEIS
Beachten Sie für detaillierte Informationen die separaten Betriebsanleitungen
zum Akku und zum Ladegerät.
8.2 Akku einsetzen (03/A)
1. Akku (03/1) von oben in den Akkuschacht
(03/2) einschieben, bis er einrastet.
8.3 Akku herausziehen (03/B)
1. Entriegelungstaste (03/3) am Akku (03/1)
drücken und gedrückt halten.
2. Akku (03/1) herausziehen.
8.4 Kettenspannung kontrollieren
Kettenspannung häufig kontrollieren, da sich
neue Sägeketten längen.
Bei Betriebstemperatur längt sich die Sägekette
und hängt durch.
HINWEIS
Die Sägekette ist richtig gespannt, wenn
sie:
■
an der Unterseite der Führungsschiene anliegt und sich von Hand durchziehen lässt.
■
sich in der Mitte der Führungsschiene um 3 – 4 mm anheben lässt.
VORSICHT!
Verletzungsgefahr durch Abspringen
der Sägekette!
Eine unzureichend gespannte Sägekette
kann während des Betriebs abspringen
und zu Verletzungen führen.
■
Kettenspannung häufig kontrollieren.
Die Kettenspannung ist zu gering,
wenn die Treibglieder aus der Rille
an der Unterseite der Führungsschiene heraustreten.
■
Sägekette sachgemäß nachspannen,
wenn die Kettenspannung zu gering
ist.
14 CS 36 Li
Page 15

Inbetriebnahme
8.5 Funktion der Kettenbremse testen
Die Kettensäge hat eine manuelle Kettenbremse,
welche z. B. bei einem Rückschlag (Kickback)
über den Handschutz ausgelöst wird.
Bei Auslösung der Kettenbremse wird die Sägekette schlagartig gestoppt und der Motor ausgeschaltet.
GEFAHR!
Lebensgefahr aufgrund fahrlässigen
Umgangs!
Aufgrund unvorsichtiger und unvorhergesehener Bewegungen der Kettensäge
werden schwerste Verletzungen oder sogar der Tod hervorgerufen.
■
Arbeiten Sie mit der Kettensäge sicherheitsbewusst und hoch konzentriert.
■
Beim Lösen der Kettenbremse keinen Schalter drücken.
WARNUNG!
Lebensgefahr und Gefahr schwerster
Verletzungen durch defekte Kettenbremse
Wenn die Kettenbremse nicht funktioniert, können z.B. bei einem Rückschlag
(Kickback) durch die laufende Sägekette
schwerste Verletzungen und sogar der
Tod des Bedieners hervorgerufen werden.
■
Testen Sie die Kettenbremse vor jedem Arbeitsbeginn.
■
Schalten Sie die Kettensäge nicht
ein, wenn die Kettenbremse defekt
ist. Lassen Sie in diesem Fall die
Kettensäge in einer Kundendienstwerkstatt überprüfen.
8.6 Funktionstest der Kettenbremse bei ausgeschaltetem Motor (08)
1. Zum Ausschalten der Kettenbremse den
Handschutz (08/1) in Richtung des Bügelgriffes (08/2) ziehen (08/A). Die Sägekette kann
mit der Hand durchgezogen werden.
2. Zum Einschalten der Kettenbremse den
Handschutz (08/1) nach vorne drücken (08/
B). Die Sägekette darf sich nicht durchziehen
lassen.
8.7 Funktionstest der Kettenbremse bei eingeschaltetem Motor (08)
HINWEIS
Vor jedem Einschalten der Kettensäge
die Kettenbremse lösen.
1. Kettensäge sicher und fest am Bügel- und
Handgriff halten.
2. Kettenbremse lösen.
3. Motor einschalten.
4. Handschutz (08/1) nach vorne drücken (08/
B). Sägekette und Motor müssen sofort zum
Stillstand kommen.
8.8 Sägekettenöl einfüllen (09)
ACHTUNG!
Gefahr der Beschädigung der Ketten-
säge
Die Kettensäge wird schwer beschädigt,
wenn sich zuwenig oder gar kein Sägekettenöl im Tank befindet oder dieses
eingetrocknet/verklebt ist. Eingetrocknetes/ verklebtes Sägekettenöl kann zu
Schäden an ölführenden Bauteilen und
der Ölpumpe führen.
Eine Beschädigung tritt auch auf, wenn
Altöl verwendet wird. Die Verwendung
von Altöl führt zu Umweltschäden!
■
Füllen Sie zur Inbetriebnahme Sägekettenöl in den Tank.
■
Verwenden Sie kein Altöl!
■
Füllen Sie spätestens bei jedem Akkuwechsel den Tank erneut mit Sägekettenöl auf.
Die Sägekette und die Führungsschiene werden
durch ein automatisches Ölersystem während
des Betriebs kontinuierlich mit Öl versorgt. Das
Sägekettenöl schützt vor Korrosion und vorzeitigem Verschleiß. Um die Sägekette ausreichend
zu schmieren, muss immer genügend Sägekettenöl im Tank vorhanden sein.
Zur Schmierung der Sägekette und der Führungsschiene nur umweltschonendes biologisch
abbaubares Qualitäts-Sägekettenöl verwenden
und in zugelassenen und gekennzeichneten Behältern transportieren und lagern.
Prüfen Sie vor jedem Arbeitsbeginn und bei jedem Akkuwechsel den Ölstand und füllen Sie Sägekettenöl nach, falls nötig:
469861_a 15
Page 16

DE
Bedienung
1. Kontrollieren Sie den Ölstand im Sichtfenster
des Tanks (09/1). Es muss immer Öl zu sehen sein. Der minimale und der maximale Ölstand dürfen nicht überschritten werden.
2. Füllen Sie über den Einfüllstutzen (09/2) Sägekettenöl nach, falls nötig.
9 BEDIENUNG
GEFAHR!
Lebensgefahr und Gefahr schwerster
Verletzungen.
Unkenntnis der Sicherheitshinweise und
Bedienanweisungen kann zu schwersten
Verletzungen und sogar zum Tod führen.
■
Lesen und beachten Sie alle Sicherheitshinweise und Bedienanweisungen dieser Betriebsanleitung sowie
der Betriebsanleitungen, auf die verwiesen wird, bevor Sie die Kettensäge benutzen!
■
Landesspezifische Bestimmungen für die Betriebszeiten beachten.
■
Den hinteren Sägegriff mit der rechten
(Rechtshänder) und den vorderen Griff mit
der linken Hand fest umfassen und festhalten.
■
Griffe nicht loslassen, solange der Motor
läuft.
■
Kettensäge nicht benutzen bei:
■
Müdigkeit
■
Unwohlsein
■
Alkohol-, Medikamenten- und Drogeneinfluss
9.1 Ladezustand des Akkus ermitteln (04)
Auf der Vorderseite des Akkus befindet sich ein
Bedienfeld mit einem Drucktaster (04/1) und
LED-Ladezustandsanzeigen (04/2 bis 04/5).
1. Drücken Sie den Drucktaster (04/1).
Die Ladezustandsanzeigen leuchten in Abhängigkeit vom Ladezustand des Akkus.
2. Lesen Sie den Ladezustand ab, siehe Kapitel
9.2 "Ladezustandsanzeigen am Akku",
Seite16.
9.2 Ladezustandsanzeigen am Akku
Leuchtende
LEDs
Grün (04/2) Akku ist voll geladen.
Grün (04/3)
und (04/4)
Grün (04/4) Akku ist zu weniger als 50%
Rot (04/5) Akku ist komplett entladen
9.3 Sägekettenöl prüfen
Vorgehensweise siehe Kapitel 8.8 "Sägekettenöl
einfüllen (09)", Seite15.
ACHTUNG!
Gefahr der Beschädigung der Ketten-
säge
Die Kettensäge wird schwer beschädigt,
wenn sich zuwenig oder gar kein Sägekettenöl im Tank befindet oder dieses
eingetrocknet/verklebt ist. Eingetrocknetes/ verklebtes Sägekettenöl kann zu
Schäden an ölführenden Bauteilen und
der Ölpumpe führen.
Eine Beschädigung tritt auch auf, wenn
Altöl verwendet wird. Die Verwendung
von Altöl führt zu Umweltschäden!
■
■
■
9.4 Kettenbremse testen
Vorgehensweise siehe Kapitel 8.5 "Funktion der
Kettenbremse testen", Seite15.
Ladezustand des Akkus
Akku ist zu über 50% geladen.
geladen.
oder Akku wurde überhitzt/
unterkühlt.
Kontrollieren Sie vor jedem Arbeitsbeginn, ob genügend Sägekettenöl
im Tank vorhanden ist.
Füllen Sie bei niedrigem Ölstand Sägekettenöl nach.
Verwenden Sie kein Altöl!
16 CS 36 Li
Page 17
Arbeitsverhalten und Arbeitstechnik
WARNUNG!
Lebensgefahr und Gefahr schwerster
Verletzungen durch defekte Kettenbremse
Wenn die Kettenbremse nicht funktioniert, können z.B. bei einem Rückschlag
(Kickback) durch die laufende Sägekette
schwerste Verletzungen und sogar der
Tod des Bedieners hervorgerufen werden.
■
Testen Sie die Kettenbremse vor jedem Arbeitsbeginn.
■
Schalten Sie die Kettensäge nicht
ein, wenn die Kettenbremse defekt
ist. Lassen Sie in diesem Fall die
Kettensäge in einer Kundendienstwerkstatt überprüfen.
9.5 Motor ein- und ausschalten
VORSICHT!
Gefahr von Gehörschäden!
Durch den Betrieb der Kettensäge entsteht starker Lärm, der Gehörschäden
hervorrufen kann.
■
Tragen Sie bei der Arbeit mit der Kettensäge einen Gehörschutz.
HINWEIS
Vor jedem Einschalten der Kettensäge
die Kettenbremse lösen.
Motor einschalten:
1. Kettenbremse lösen.
2. Sperrknopf (14/1) mit dem Daumen drücken
und gedrückt halten.
3. Ein/Aus-Schalter (14/2) drücken und gedrückt halten.
4. Sperrknopf (14/1) loslassen. Es ist nicht nötig, den Sperrknopf nach dem Start der Kettensäge gedrückt zu halten. Der Sperrknopf
soll ein versehentliches Starten der Kettensäge verhindern.
Motor ausschalten:
1. Ein/Aus-Schalter (14/2) loslassen.
10 ARBEITSVERHALTEN UND
ARBEITSTECHNIK
HINWEIS
Es werden regelmäßig Kurse im Umgang
mit Kettensägen sowie Baumfällkurse
von den landwirtschaftlichen Berufsgenossenschaften angeboten.
GEFAHR!
Lebensgefahr durch unzureichendes
Fachwissen!
Unzureichendes Fachwissen kann zu
schwersten Verletzungen bis hin zum
Tod führen!
■
Nur geschulte und erfahrene Personen dürfen Bäume fällen und entasten.
GEFAHR!
Lebensgefahr durch gesplittertes
Holz!
Durch mitgerissene Holzspäne können
schwerste Verletzungen bis hin zum Tod
hervorgerufen werden!
■
Lose Späne und Holzsplitter vom zu
sägenden Teil entfernen.
10.1 Sicherheitshinweise für die Arbeit
■
Beachten Sie landesspezifische Sicherheitsvorschriften, z.B. von Berufsgenossenschaften, Sozialkassen, Behörden für Arbeitsschutz.
■
Arbeiten Sie nur bei ausreichendem Tageslicht oder künstlicher Beleuchtung.
■
Den Arbeitsbereich frei von Gegenständen
(z. B. Sägeschnitt-Teilen) – Stolpergefahr.
■
Der Benutzer ist für Unfälle mit anderen Personen und deren Eigentum verantwortlich.
10.1.1 Bediener
■
Jugendliche unter 16 Jahren oder Personen,
welche die Betriebsanleitung nicht kennen,
dürfen das Gerät nicht benutzen.
■
Wenn Sie zum ersten Mal mit einer Kettensäge arbeiten: Lassen Sie sich vom Verkäufer
oder einem anderen Fachkundigen den Umgang mit der Kettensäge erklären, oder besuchen Sie einen Lehrgang.
469861_a 17
Page 18
DE
■
Wer mit der Kettensäge arbeitet, muss ausgeruht, gesund und in guter Verfassung sein.
Wer sich aus gesundheitlichen Gründen nicht
anstrengen darf, sollte seinen Arzt fragen, ob
die Arbeit mit einer Kettensäge möglich ist.
■
Ergreifen Sie Maßnahmen, um sich gegen
Vibrationsbelastungen zu schützen. Ab-
hängig davon, wie das Elektrowerkzeug eingesetzt wird, können die tatsächlichen Vibrationswerte von den in den Technischen Daten angegebenen Werten abweichen. Berücksichtigen Sie dabei den gesamten Arbeitsablauf, also auch Zeitpunkte, zu denen
das Elektrowerkzeug ohne Last arbeitet oder
ausgeschaltet ist. Geeignete Maßnahmen
umfassen unter anderem eine regelmäßige
Wartung und Pflege des Elektrowerkzeuges
und der Werkzeugaufsätze, Warmhalten der
Hände, regelmäßige Pausen sowie eine gute
Planung der Arbeitsabläufe.
■
Maximale Handhabungsdauer und Arbeitspausen über den Schwingungswert
ermitteln.
10.1.2 Betriebszeiten
Beachten Sie die landesspezifischen Bestimmungen für die Betriebszeiten von Kettensägen. Die
Betriebszeiten von Kettensägen können durch
nationale und lokale Vorschriften begrenzt sein.
10.1.3 Arbeiten mit der Kettensäge
WARNUNG!
Gefahr schwerer Verletzungen.
Wenn eine unvollständig montierte Kettensäge benutzt wird, können schwere
Verletzungen hervorgerufen werden.
■
Benutzen Sie die Kettensäge erst,
wenn sie vollständig montiert wurde.
■
Vor jeder Benutzung eine Sichtkontrolle durchführen, um zu prüfen, ob
die Kettensäge vollständig ist und
keine beschädigten oder abgenutzten Bauteile enthält. Sicherheits- und
Schutzeinrichtungen müssen intakt
sein.
Arbeitsverhalten und Arbeitstechnik
WARNUNG!
Verletzungsgefahr durch unbeabsich-
tigt startende Kettensäge
Eine unbeabsichtigt startende Kettensäge kann zu schweren Verletzungen führen. Entfernen Sie deshalb den Akku bei:
■
Prüf-, Einstell- und Reinigungsarbeiten
■
Arbeiten an der Schneidgarnitur
■
Verlassen der Kettensäge
■
Transport
■
Aufbewahrung
■
Wartungs- und Reparaturarbeiten
■
Gefahr
■
Niemals alleine arbeiten.
■
Immer einen Verbandskasten für eventuelle
Unfälle bereithalten.
■
Vermeiden Sie die Berührung von Metallgegenständen, die sich in der Erde befinden
oder mit dieser elektrisch leitend verbunden
sind.
■
Die persönliche Schutzausrüstung besteht
aus:
■
Schutzhelm
■
Gehörschutz (z. B. Gehörschutzkapseln),
besonders bei einer täglichen Arbeitszeit
von über 2,5 Stunden
■
Schutzbrille oder Gesichtsschutz des
Schutzhelmes
■
Schutzhose mit Schnittschutzeinlage
■
Feste Arbeitshandschuhe
■
Sicherheitsschuhe mit griffiger Sohle und
Stahlkappe
■
Die Kettensäge nicht über Schulterhöhe verwenden, da eine sichere Handhabung so
nicht mehr möglich ist.
■
Beim Standortwechsel Motor ausschalten
und Kettenschutz aufstecken.
■
Auf nichtbenutzte Kettensägen immer den
Kettenschutz aufstecken und den Akku entfernen.
■
Kettensäge nur in ausgeschaltetem Zustand
ablegen.
■
Die Kettensäge nicht zum Hebeln oder Bewegen von Holz einsetzen.
■
Stämme, die stärker als die Schwertlänge
sind, dürfen nur von Fachpersonal gesägt
werden.
18 CS 36 Li
Page 19

Arbeitsverhalten und Arbeitstechnik
■
Nur die laufende Sägekette zum Schnitt ansetzen, niemals mit aufgesetzter Sägekette
die Kettensäge einschalten.
■
Darauf achten, dass kein Sägekettenöl ins
Erdreich gelangt.
■
Sägearbeiten nicht bei Regen, Schnee oder
Sturm durchführen.
■
Sicherheits- und Schutzeinrichtungen niemals außer Kraft setzen.
10.1.4 Rückschlaggefahr
GEFAHR!
Lebensgefahr durch Rückschlag
(Kickback)!
Durch einen Rückschlag (Kickback) der
Kettensäge kann der Bediener lebensgefährlich verletzt werden.
■
Halten Sie die untenstehenden Maßnahmen zur Vermeidung eines Rückschlags unbedingt ein!
■
Sägegut auf Fremdkörper (Nägel, Metall …)
untersuchen und entfernen.
■
Kettensäge nur beidhändig bedienen.
■
Beim Arbeiten mit der Kettensäge nicht zu
weit vorbeugen.
■
Niemals mehrere Äste auf einmal absägen.
■
Nur mit richtig geschärfter und gespannter
Sägekette arbeiten.
■
Kettensäge niemals mit gestreckten Armen
betreiben.
■
Mit laufender Sägekette den Schnitt beginnen und nur mit Vollgas sägen.
■
Nicht mit der Führungsschienenspitze sägen.
■
Führungsschienenspitze immer im Auge behalten.
■
Beim Fortsetzen begonnener Schnitte mit erhöhter Vorsicht arbeiten.
■
Beim Schneiden von Unterholz und jungen
Bäumen mit erhöhter Vorsicht arbeiten.
■
Nicht auf einer Leiter stehend oder über
Schulterhöhe sägen.
■
Krallenanschlag für eine erhöhte Stabilität
beim Sägen nutzen.
■
Beim Sägen auf einen festen Stand achten.
■
Hauptsächlich mit der Unterseite des
Schwertes sägen. Beim Sägen mit der Oberseite des Schwertes mit erhöhter Vorsicht arbeiten.
■
Kettensäge nur bei laufender Sägekette aus
dem Schnitt nehmen.
10.2 Bäume fällen
Bevor mit den Fällarbeiten begonnen werden
kann, müssen folgende Maßnahmen durchgeführt werden.
■
Sicherstellen, dass sich keine anderen Personen, Tiere oder Gegenstände im Gefahrenbereich befinden.
■
Der Sicherheitsabstand zwischen anderen
Arbeitsplätzen oder Gegenständen soll mindestens 2½ Baumlängen betragen.
■
Achten Sie auch auf Versorgungsleitungen
und fremdes Eigentum. Benachrichtigen Sie
gegebenenfalls das Energieversorgungsunternehmen oder den Eigentümer.
■
Die Fallrichtung des Baumes beurteilen.
Für die Fallrichtung des Baumes entscheiden
mit:
■
Natürliche Neigung des Baumes
■
Höhe des Baumes
■
Einseitige Astbildung
■
Ebene oder Hanglage
■
Asymmetrischer Wuchs, Holzschäden
■
Windrichtung und Windgeschwindigkeit
■
Schneelast
■
Bei Hanglage immer oberhalb des zu fällenden Baums arbeiten.
■
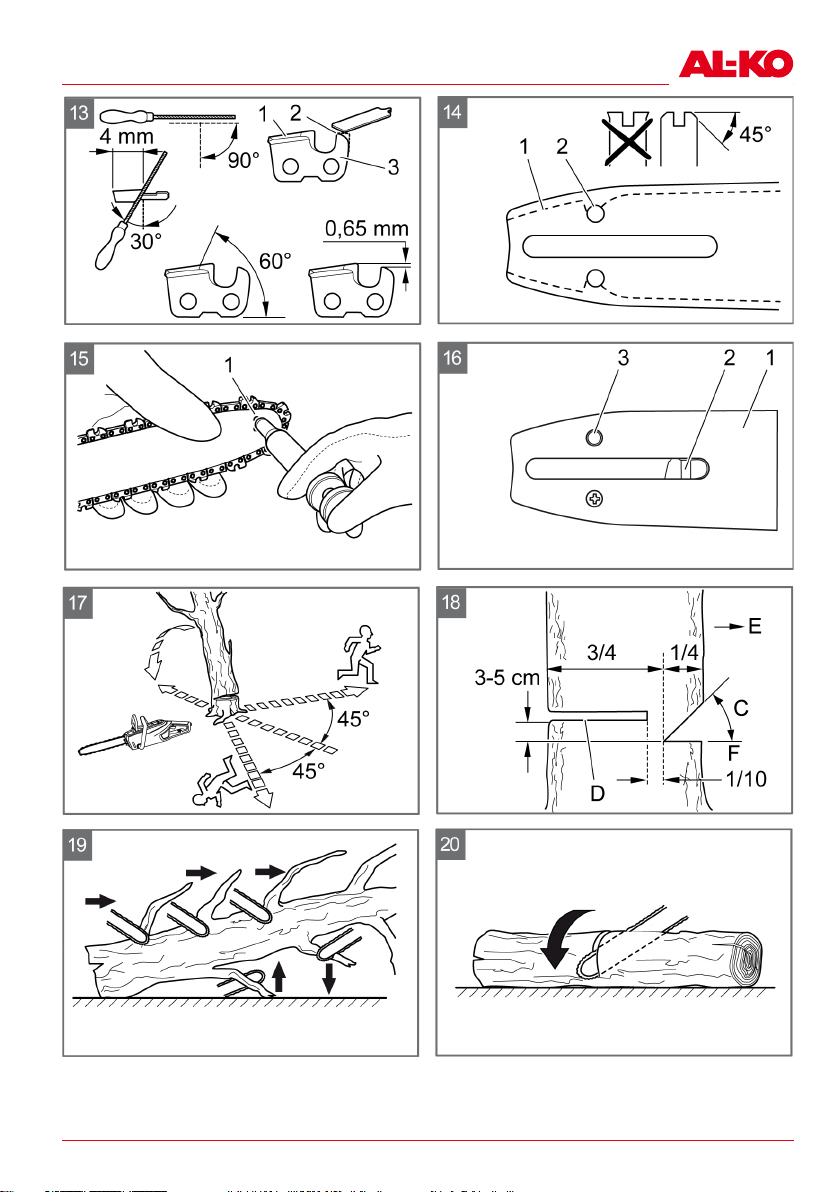
Sicherstellen, dass sich in dem vorher festgelegten Rückweichweg keine Hindernisse befinden. Der Rückweichweg soll ca. 45°
schräg rückwärts der Fallrichtung verlaufen
(17).
■
Der Stamm muss frei von Gestrüpp, Ästen
und Fremdkörpern (z. B. Schmutz, Steine, lose Rinde, Nägel, Klammern, Draht usw.)
sein.
Es sind zwei Kerbschnitte und ein Fällschnitt zu
setzen um einen Baum zu fällen.
1. Bei Fäll- und Ablängschnitten den Krallenanschlag sicher am zu schneidenden Holz anbringen.
2. Die Fallkerbe (18/C) zuerst waagerecht, dann
schräg von oben in einem Winkel von mindestens 45° einsägen. Dadurch wird das Einklemmen der Kettensäge beim Setzen des
zweiten Kerbschnittes vermieden. Die Fallkerbe muss möglichst nah am Boden und in
469861_a 19
Page 20
DE
Arbeitsverhalten und Arbeitstechnik
der gewünschten Fallrichtung (18/E) angebracht werden. Die Kerbtiefe soll ca. 1/4 des
Stammdurchmessers betragen.
3. Den Fällschnitt (18/D) gegenüber der Fallkerbe exakt waagerecht einsägen. Der Fällschnitt muss in einer Höhe von 3-5 cm über
dem waagerechten Kerbschnitt eingeschnitten werden.
4. Den Fällschnitt (18/D) so tief einsägen, dass
eine Bruchleiste (18/F) von mindestens 1/10
des Stammdurchmessers zwischen Fallkerbe
(18/C) und Fällschnitt (18/D) stehen bleibt.
Diese Bruchleiste verhindert, dass sich der
Baum dreht und in die falsche Richtung fällt.
Bei Annäherung des Fällschnitts (18/D) an
die Bruchleiste (18/F) sollte der Baum zu fallen beginnen.
Fällt der Baum während der Sägearbeit:
■
Fällt der Baum möglicherweise in die
falsche Richtung oder neigt sich zurück
und klemmt die Kettensäge ein, den Fällschnitt unterbrechen. Zum Öffnen des
Schnitts und zum Umlegen des Baumes
in die gewünschte Falllinie Keile eintreiben.
■
Kettensäge sofort aus dem Schnitt ziehen, abschalten und ablegen.
■
In den Rückweichbereich gehen.
■
Auf herunterfallende Äste und Zweige
achten.
5. Bleibt der Baum stehen, diesen durch Eintreiben von Keilen in den Fällschnitt kontrolliert
zu Fall bringen.
6. Nach Beenden der Sägearbeit sofort den Gehörschutz abnehmen und auf Signale oder
Warnrufe achten.
HINWEIS
Es dürfen nur Keile aus Holz, Kunststoff
oder Aluminium verwendet werden.
GEFAHR!
Lebensgefahr durch fallenden Baum!
Ist ein Zurückweichen beim Fallen eines
Baumes nicht möglich, kann es zu
schweren Verletzungen bis hin zum Tod
kommen!
■
Erst mit der Fällarbeit beginnen,
wenn ein hindernisfreies Zurückweichen von dem zu fällenden Baum gewährleistet ist.
GEFAHR!
Lebensgefahr durch unkontrolliert fal-
lenden Baum!
Unkontrolliert fallende Bäume können
schwerste Verletzungen bis hin zum Tod
verursachen!
■
Um das kontrollierte Fallen eines
Baumes zu garantieren, eine Bruchleiste zwischen der Fallkerbe und
dem Fällschnitt stehen lassen, die
ca. 1/10 des Stammdurchmessers
beträgt.
■
Bei Wind keine Fällarbeiten durchführen.
10.3 Entasten
Bei dieser Arbeit sind folgende Punkte zu beachten:
■
Die Kettensäge während der Arbeit am
Baumstamm abstützen.
■
Größere nach unten gerichtete Äste, die den
Baum stützen, vorerst stehen lassen (19).
■
Kleinere Äste mit einem Schnitt trennen.
■
Auf unter Spannung stehende Äste achten
und diese von unten nach oben durchsägen,
um ein Festklemmen der Kettensäge zu vermeiden (19).
■
Freihängende Äste nicht von unten absägen.
■
Einstech-, Längs- und Herzschnitte sollten
nur von erfahrenen oder geschulten Personen durchgeführt werden (18).
10.4 Baum ablängen
Bei dieser Arbeit sind folgende Punkte zu beachten:
■
Bei Hanglage immer oberhalb des Baumstammes arbeiten, da der Baumstamm wegrollen kann (19).
■
Kettensäge so führen, dass sich kein Körperteil im verlängerten Schwenkbereich der Sägekette befindet.
■
Den Krallenanschlag direkt neben der
Schnittkante ansetzen und die Kettensäge
um diesen Punkt drehen lassen. Am Ende
des Schnitts keinen Druck ausüben.
■
Darauf achten, dass die Sägekette nicht den
Boden berührt.
■
Nach Beenden des Schnitts den Stillstand
der Sägekette abwarten, bevor Sie die Kettensäge entfernen.
20 CS 36 Li
Page 21

Transport
■
Den Motor der Kettensäge immer ausschalten, bevor Sie zum nächsten Baum gehen.
Gesamte Länge des Baumstammes liegt gleichmäßig auf:
■
Baumstamm von oben her durchsägen und
nicht in den Boden sägen (20).
Baumstamm liegt an einem Ende auf:
■
Um ein Einklemmen der Kettensäge und das
Splittern des Holzes zu vermeiden, zuerst 1/3
des Stammdurchmessers von unten her sägen, dann den Rest von oben auf Höhe des
unteren Schnitts durchsägen (10).
Baumstamm liegt an beiden Enden auf:
Um ein Einklemmen der Kettensäge und das
Splittern des Holzes zu vermeiden, erst 1/3 des
Stammdurchmessers von oben her sägen, dann
den Rest von unten auf Höhe des oberen
Schnitts durchsägen (11).
GEFAHR!
Lebensgefahr durch Rückschlag
(Kickback)!
Durch einen Rückschlag (Kickback) des
Geräts kann der Bediener lebensgefährlich verletzt werden.
■
Halten Sie die Maßnahmen zur Vermeidung eines Rückschlags unbedingt ein!
10.5 Schnittholz ablängen (12)
Bei dieser Arbeit sind folgende Punkte zu beachten:
■
Sichere Schneidauflage verwenden (Säge-
bock, Keile, Balken).
■
Auf sicheren Stand und die gleichmäßige
Verteilung des Körpergewichts achten.
■
Rundhölzer gegen Verdrehen sichern.
■
Nur die laufende Sägekette zum Schnitt an-
setzen. Niemals mit aufgesetzter Sägekette
die Kettensäge einschalten.
■
Das Holz nicht mit dem Fuß oder durch eine
andere Person festhalten lassen.
11 TRANSPORT
Führen Sie vor dem Transport folgende Maßnahmen durch:
1. Kettensäge ausschalten
2. Kettenschutz aufstecken
3. Akku entfernen
Tragen Sie die Kettensäge nur am Bügelgriff.
Das Kettenschwert zeigt dabei nach hinten.
WARNUNG!
Lebensgefahr und Gefahr schwerster
Verletzungen.
Eine laufende Sägekette kann beim
Transport zu schwersten Verletzungen
und sogar zum Tode führen.
■
Niemals die Kettensäge mit laufender
Sägekette tragen und transportieren.
■
Führen Sie vor dem Transport die
o.g. Maßnahmen durch.
In Fahrzeugen: Sichern Sie die Kettensäge gegen Umkippen, Beschädigung und Auslaufen von
Kettenöl.
12 WARTUNG UND PFLEGE
Die Kettensäge entspricht allen einschlägigen Sicherheitsnormen. Reparaturen dürfen nur von
qualifiziertem Fachpersonal unter ausschließlicher Verwendung von Original-Ersatzteilen vorgenommen werden.
■
Nach jedem Gebrauch Kettensäge auf Verschleiß überprüfen und gegebenenfalls beschädigte
■
Bauteile ersetzen.
■
Gerät keiner Nässe oder Feuchtigkeit aussetzen. Kunststoffteile mit einem Tuch reinigen
und dabei keine Reinigungs- bzw. Lösungsmittel verwenden.
■
Kühlluftschlitze reinigen, wenn sie zugesetzt
sind.
■
Kettensäge nicht mit Wasser abspritzen und
keinen Hochdruckreiniger verwenden.
■
Nur vom Hersteller vorgeschriebene Ersatzteile verwenden.
WARNUNG!
Verletzungsgefahr durch unbeabsich-
tigt startende Kettensäge
Eine unbeabsichtigt startende Kettensäge kann zu schweren Verletzungen führen.
■
Entfernen Sie vor allen Wartungsund Pflegearbeiten den Akku.
■
Tragen Sie Schutzhandschuhe.
12.1 Sägekette schärfen (13)
Nicht mit stumpfer oder beschädigter Sägekette
arbeiten. Starke körperliche Beanspruchung,
schlechtes Schnittergebnis und ein hoher Kettenverschleiß sind die Folge.
469861_a 21
Page 22
DE
Wartung und Pflege
VORSICHT!
Verletzungsgefahr durch Sägekette!
Die scharfen Kanten der Sägekette können schwere Schnittwunden verursachen.
■
Tragen Sie beim Nachschärfen der
Sägekette Schutzhandschuhe.
HINWEIS
Für den unerfahrenen Benutzer von Kettensägen wird empfohlen, die Sägekette
von einem Fachmann des Kundendienstes schärfen zu lassen.
Um ein optimales Schneidergebnis zu erhalten,
muss die Sägekette in regelmäßigen Abständen
nachgeschliffen werden.
Eine richtig geschärfte Sägekette vermindert die
Rückschlaggefahr und beugt hohem Verschleiß
vor.
Die Sägekette muss nachgeschliffen werden,
wenn beim Schneiden Sägemehl entsteht oder
die Säge nur schwer durch das Holz geht. Eine
scharfe Sägekette erzeugt große und lange Späne.
1. Die Kettensäge ausschalten und den Akku
entfernen.
2. Die Kettenspannung prüfen und gegebenenfalls nachstellen.
3. Zum Schärfen nur geeignetes Werkzeug verwenden: Kettenfeile Rund Ø = 4,0 mm, Feilenführung, Kettenmesslehre.
Diese Werkzeuge sind im Fachhandel erhältlich.
4. Die einzelnen Kettenglieder bestehen aus einem Sägeglied (13/3), Sägezahn (13/1) und
einer Begrenzungsvorrichtung (13/2).
5. Die Feile mit leichtem Druck und senkrecht
(13) von der Innenseite zur Außenseite des
Schneidzahns führen. Um die Feile richtig zu
handhaben, hilft eine Feilenführung. Es genügen 2 – 3 Feilenstriche.
6. Beim Schärfen die Winkel (13) am Schneidzahn und die Höhe der Begrenzungsvorrichtung (13/2) zur Schneide einhalten. Darauf
achten, dass nach dem Schärfen alle
Schneidzähne der Kette gleich lang und breit
sind.
7. Bei Verwendung der vorgeschriebenen
Werkzeuge und bei richtiger Handhabung
werden die vorgeschriebenen Werte der Winkel automatisch erzeugt. Die Werte können
mit einer Kettenmesslehre überprüft werden.
8. Am Schluss den vorderen Teil der Begrenzungsvorrichtung (13/2) leicht abrunden.
Die Sägekette häufig schärfen und dabei wenig
Material abtragen. Nach 3- bis 4-mal eigenem
Schärfen die Sägekette von einer Fachwerkstatt
nachschärfen lassen. Dabei wird auch der Tiefenbegrenzer nachgeschliffen.
Die Sägekette austauschen, sobald die minimale
Länge der Schneidzähne von 4 mm (13) erreicht
ist.
ACHTUNG!
Maschinenschäden durch unsachge-
mäßes Schärfen!
Ungleiche Schneidzähne verursachen
einen rauen Kettenlauf bis hin zum Kettenriss! Nach dem Schärfen müssen alle
Schneidzähne gleich lang und breit sein.
■
Schärfen Sie die Sägekette sachgemäß!
GEFAHR!
Lebensgefahr durch Rückschlag
(Kickback)!
Durch einen Rückschlag (Kickback) der
Kettensäge kann der Bediener lebensgefährlich verletzt werden.
■
Schärfen Sie die Sägekette sachgemäß!
22 CS 36 Li
Page 23

Lagerung
12.2 Kettenrad-Innenraum reinigen
Die Kettensäge nach jedem Gebrauch gründlich
reinigen.
1. Akku entnehmen und die Kettensäge auf eine stabile Unterlage legen.
2. Zahnradabdeckung abschrauben.
3. Innenraum mit einem geeigneten Pinsel reinigen.
4. Sägekette abnehmen und Führungsschiene
herausnehmen.
5. Schienennut und Öleintrittsbohrung reinigen.
12.3 Schnellspanneinrichtung umbauen (16)
1. Führungsschiene (16/1) abnehmen.
2. Kreuzschlitzschraube (16/3) herausdrehen
und Adapterblech mit Spannhaken (16/2) von
der Führungsschiene lösen.
3. Führungsschiene um die Längsachse wenden.
4. Adapterblech mit Spannhaken wieder auf der
Führungsschiene anbringen und mit der
Kreuzschlitzschraube wieder fixieren.
5. Führungsschiene wieder montieren, siehe
Kapitel 7.1 "Führungsschiene montieren (05,
06)", Seite13.
12.4 Führungsschiene prüfen, wenden und
fetten (14, 15)
Führungsschiene prüfen:
Führungsschiene regelmäßig auf Beschädigun-
gen überprüfen. Gegebenenfalls überstehenden
Grat (14) entfernen.
Führungsschiene wenden:
Um eine einseitige Abnutzung zu vermeiden,
muss die Führungsschiene nach jedem Kettenschärfen und Kettenwechsel gewendet werden.
1. Schnellspanneinrichtung an der Führungsschiene umbauen, siehe Kapitel 12.3
"Schnellspanneinrichtung umbauen (16)",
Seite23.
2. Führungsschiene wenden.
Führungsschiene fetten:
1. Schienennut (14/1) und Öleintrittsbohrung
(14/2) sorgfältig reinigen.
2. Schmierbohrung (15/1) von beiden Seiten
sorgfältig reinigen.
3. Mit einer geeigneten Fettpresse nacheinander auf beiden Seiten so viel Fett einpressen,
bis das Fett an den Spitzen des Sternrades
gleichmäßig austritt. Sternrad dabei immer
wieder drehen.
13 LAGERUNG
Nach jedem Gebrauch die Kettensäge gründlich
reinigen. An einem trockenen, abschließbaren
Platz und außerhalb der Reichweite von Kindern
aufbewahren.
Bei Betriebspausen, die länger als 30 Tage dauern, folgende Arbeiten durchführen:
■
Die Kettensäge ausschalten und den Akku
entfernen.
■
Öltank für das Sägekettenöl entleeren.
■
Sägekette und Führungsschiene abnehmen,
reinigen und mit Rostschutzöl einsprühen.
■
Kettensäge gründlich reinigen und in einem
trockenen Raum aufbewahren.
ACHTUNG!
Gefahr der Beschädigung der Ketten-
säge
Eingetrocknetes/verklebtes Sägekettenöl
kann bei längerer Lagerung zu Schäden
an ölführenden Bauteilen und der Ölpumpe führen.
■
Das Sägekettenöl vor jeder längeren
Lagerung aus der Kettensäge entfernen.
14 ENTSORGUNG
Hinweise zum Elektro- und
Elektronikgerätegesetz (ElektroG)
■
Elektro- und Elektronikaltgeräte gehören nicht in den Hausmüll, sondern
sind einer getrennten Erfassung bzw.
Entsorgung zuzuführen!
■
Altbatterien oder -akkus, welche nicht
fest im Altgerät verbaut sind, müssen
vor der Abgabe entnommen werden!
Deren Entsorgung wird über das Batteriegesetz geregelt.
■
Besitzer bzw. Nutzer von Elektro- und
Elektronikgeräten sind nach deren Gebrauch gesetzlich zur Rückgabe verpflichtet.
■
Der Endnutzer trägt die Eigenverantwortung für das Löschen seiner personenbezogenen Daten auf dem zu entsorgenden Altgerät!
Das Symbol der durchgestrichenen Mülltonne bedeutet, dass Elektro- und Elektronikaltgeräte
nicht über den Hausmüll entsorgt werden dürfen.
469861_a 23
Page 24

DE
Elektro- und Elektronikaltgeräte können bei folgenden Stellen unentgeltlich abgegeben werden:
■
Öffentlich-rechtliche Entsorgungs- bzw. Sammelstellen (z.B. kommunale Bauhöfe)
■
Verkaufsstellen von Elektrogeräten (stationär
und online), sofern Händler zur Rücknahme
verpflichtet sind oder diese freiwillig anbieten.
Diese Aussagen gelten nur für Geräte, die in den
Ländern der Europäischen Union installiert und
verkauft werden und die der Europäischen Richtlinie 2012/19/EU unterliegen. In Ländern außerhalb der Europäischen Union können davon abweichende Bestimmungen für die Entsorgung
von Elektro- und Elektronikgeräten gelten.
Hinweise zum Batteriegesetz (BattG)
■
Altbatterien und Akkus gehören nicht in
den Hausmüll, sondern sind einer getrennten Erfassung bzw. Entsorgung
zuzuführen!
■
Zur sicheren Entnahme von Batterien
oder Akkus aus dem Elektrogerät und
für Informationen über deren Typ bzw.
chemisches System beachten Sie bitte
die weiteren Angaben innerhalb der
Bedienungs- bzw. Montageanleitung.
■
Besitzer bzw. Nutzer von Batterien und
Akkus sind nach deren Gebrauch gesetzlich zur Rückgabe verpflichtet. Die
Rückgabe beschränkt sich auf die Abgabe von haushaltsüblichen Mengen.
Altbatterien können Schadstoffe oder Schwermetalle enthalten, die der Umwelt und der Gesundheit Schaden zufügen können. Eine Verwertung
der Altbatterien und Nutzung der darin enthaltenen Ressourcen trägt zum Schutz dieser beiden
wichtigen Güter bei.
Das Symbol der durchgestrichenen Mülltonne bedeutet, dass Batterien und Akkus nicht über den
Hausmüll entsorgt werden dürfen.
Befinden sich zudem die Zeichen Hg, Cd oder Pb
unterhalb der Mülltonne, so steht dies für Folgendes:
■
Hg: Batterie enthält mehr als 0,0005%
Quecksilber
■
Cd: Batterie enthält mehr als 0,002% Cadmium
■
Pb: Batterie enthält mehr als 0,004% Blei
Akkus und Batterien können bei folgenden Stellen unentgeltlich abgeben werden:
Hilfe bei Störungen
■
Öffentlich-rechtliche Entsorgungs- bzw. Sammelstellen (z.B. kommunale Bauhöfe)
■
Verkaufsstellen von Batterien und Akkus
■
Rücknahmestellen des gemeinsamen Rücknahmesystems für Geräte-Altbatterien
■
Rücknahmestelle des Herstellers (falls nicht
Mitglied des gemeinsamen Rücknahmesystems)
Diese Aussagen sind nur gültig für Akkus und
Batterien, die in den Ländern der Europäischen
Union verkauft werden und die der Europäischen
Richtlinie 2006/66/EG unterliegen. In Ländern außerhalb der Europäischen Union können davon
abweichende Bestimmungen für die Entsorgung
von Akkus und Batterien gelten.
15 HILFE BEI STÖRUNGEN
Störung Mögliche Ur-
Motor
läuft
nicht.
Keine
Kettenschmierung
sache
Keine Akkuspannung vorhanden.
Überlastschutz
hat abgeschaltet.
Kettenbremse
ausgelöst.
Öltank ist leer. Öltank auf Beschä-
Führungsschiene ist
verschmutzt.
HINWEIS
Bei Störungen, die nicht in dieser Tabelle
aufgeführt sind oder die Sie nicht selbst
beheben können, wenden Sie sich bitte
an unseren Kundendienst.
Beseitigung
Stromversorgung
von Elektrofachkraft prüfen lassen.
Warten, bis der
Überlastschutz die
Stromversorgung
wiederherstellt.
Kettenbremse entriegeln.
digungen überprüfen.
Ölstand überprüfen
und ggf. Sägekettenöl einfüllen.
Öleintrittsbohrung
und Ölführungsnut
reinigen.
24 CS 36 Li
Page 25

Technische Daten
16 TECHNISCHE DATEN
Art.-Nr. 113 365
Akku-Typ Li-Ion (36V / 4,0Ah)
Leerlaufgeschwindigkeit 17 m/s
Betriebsgeschwindigkeit 16m/s
Länge – Führungsschiene (OREGON) ca. 350mm
Nutzbare Sägelänge 265 mm
Sägekette (OREGON) 91P045X
Treibgliedstärke 1,27 mm
Teilung – Kettenrad 3/8“
Kettenbremse Ja
(elektrisch, PCB und Bremsstange)
Kettennachlaufzeit
(DIN EN 60745-2-15 19.103 und 19.104)
Kettennachlaufzeit
(DIN EN 50144-2-15:2001 18.104)
Aktivierung der Kette zweifach
Volumen-Kettenöltank 0,180 l
Nettogewicht ohne Kette und Führungsschiene 3,9 kg
Nettogewicht mit Kette und Führungsschiene (ohne
Schwertschutz)
Überlastschutz Nein
Schallleistungspegel LWA (2000/14/EG) gemessen / garantiert
Schalldruckpegel LPA (k=2,5dB(A)) 91,5dB(A)
max. Schwingungsbeschleunigung vorne / hinten
ahw (k=1,5 m/s²)
Die angegebenen Werte sind nach einem genormten Prüfverfahren ermittelt worden und können verwendet werden, um verschiedene Elektrowerkzeuge miteinander zu vergleichen.
Zudem eignen sich diese Werte, um Belastungen für den Benutzer, die durch Vibrationen entstehen,
im Voraus einschätzen zu können.
+/-0,7 m/s
max. 0,15s
max. 2s
4,45kg
(PCB im Akku)
101 / 105 dB(A)
3,193 / 3,159 m/s²
469861_a 25
Page 26

DE
xxxxxx (x)
Garantie
17 GARANTIE
Etwaige Material- oder Herstellungsfehler am Gerät beseitigen wir während der gesetzlichen Verjährungsfrist für Mängelansprüche entsprechend unserer Wahl durch Reparatur oder Ersatzlieferung. Die
Verjährungsfrist bestimmt sich jeweils nach dem Recht des Landes, in dem das Gerät gekauft wurde.
Unsere Garantiezusage gilt nur bei:
■
Beachten dieser Bedienungsanleitung
■
Sachgemäßer Behandlung
■
Verwenden von Original-Ersatzteilen
Von der Garantie ausgeschlossen sind:
■
Lackschäden, die auf normale Abnutzung zurückzuführen sind
■
Verschleißteile, die auf der Ersatzteilkarte mit Rahmen
Die Garantiezeit beginnt mit dem Kauf durch den ersten Endabnehmer. Maßgebend ist das Datum auf
dem Kaufbeleg. Wenden Sie sich bitte mit dieser Erklärung und dem Original-Kaufbeleg an Ihren
Händler oder die nächste autorisierte Kundendienststelle. Die gesetzlichen Mängelansprüche des Käufers gegenüber dem Verkäufer bleiben durch diese Erklärung unberührt.
Die Garantie erlischt bei:
■
Eigenmächtigen Reparaturversuchen
■
Eigenmächtigen technischen Veränderungen
■
Nicht bestimmungsgemäßer Verwendung
gekennzeichnet sind
18 EG-KONFORMITÄTSERKLÄRUNG
Wir erklären hiermit, dass dieses Produkt in der auf dem Markt vertriebenen Form die Anforderungen
der harmonisierten EU-Richtlinien, der EU-Sicherheitsstandards und die produktspezifischen Standards erfüllt.
Produkt
Akku-Kettensäge
Seriennummer
G4124126
Hersteller
AL-KO Geräte GmbH
Ichenhauser Str. 14
D-89359 Kötz
Dokumentations-Bevollmächtigter
Andreas Hedrich
Ichenhauser Str. 14
D-89359 Kötz
Typ
CS 36 Li
Schallleistungspegel
EN ISO 3744
gemessen / garantiert
101 dB(a) / 105 dB(A)
EG-Baumuster-Prüf-Nr.
(2006/42/EG Anhang IX)
BM 50359218 0001
26 CS 36 Li
EU-Richtlinien
2006/42/EG
2014/30/EU
2000/14/EG
2011/65/EU
Konformitätsbewertung
2000/14/EG Anhang V
Benannte Stelle
TÜV Rheinland LGA Products GmbH
Tillystraße 2
D-90431 Nürnberg
Germany
No. 0197
Harmonisierte Normen
EN 60745-1:2009+A11:2010
EN 60745-2-13:2009+A1:2010
EN 55014-1:2006+A1:2009+A2:2011
EN 55014-2:2015
Kötz, 2016-12-01
Wolfgang Hergeth
Managing Director
Page 27

Translation of the original instructions for use
TRANSLATION OF THE ORIGINAL INSTRUCTIONS FOR USE
Contents
1 About these instructions for use ..................................................................................................... 29
1.1 Legends and signal words..................................................................................................... 29
2 Product description ......................................................................................................................... 29
2.1 Scope of supply ..................................................................................................................... 29
2.2 Symbols on the appliance .....................................................................................................29
2.3 Safety and protective devices ............................................................................................... 30
2.4 Overload protection ...............................................................................................................30
2.5 Switch-on protection .............................................................................................................. 30
2.6 Chain brake ...........................................................................................................................30
2.7 Designated use ..................................................................................................................... 30
3 Product overview (01)..................................................................................................................... 30
4 General power tool safety warnings (IEC 60745-1)........................................................................ 31
4.1 Work area safety ...................................................................................................................31
4.2 Electrical safety .....................................................................................................................31
4.3 Personal safety...................................................................................................................... 31
4.4 Power tool use and care........................................................................................................ 31
4.5 Battery tool use and care ...................................................................................................... 32
4.6 Service .................................................................................................................................. 32
5 Chain saw safety warnings (EN 60745 part 2-13) ..........................................................................32
6 Causes and operator prevention of kickback (EN 60745 part 2-13)............................................... 33
7 Installation....................................................................................................................................... 33
7.1 Installing the guide rail (05, 06) ............................................................................................. 33
7.2 Installing the saw chain (05, 06) ............................................................................................ 33
7.3 Tightening the saw chain (05, 07) ......................................................................................... 34
8 Start-up ........................................................................................................................................... 34
8.1 Charging the rechargeable battery (02) ................................................................................ 34
8.2 Inserting the rechargeable battery (03/A) .............................................................................. 34
8.3 Pulling out the rechargeable battery (03/B) ........................................................................... 34
8.4 Checking the chain tension ...................................................................................................34
8.5 Testing the function of the chain brake ................................................................................. 35
8.6 Function test of the chain brake with the engine switched off (08)........................................ 35
8.7 Function test of the chain brake with the motor switched on (08) ......................................... 35
8.8 Filling saw chain oil (09) ........................................................................................................35
469861_a 27
Page 28

GB
9 Operation ........................................................................................................................................ 36
9.1 Determining the charge status of the rechargeable battery (04) ...........................................36
9.2 Charge status displays on the rechargeable battery .............................................................36
9.3 Check the saw chain oil......................................................................................................... 36
9.4 Testing the chain brake .........................................................................................................36
9.5 Switching the engine on and off ............................................................................................37
10 Working behaviour and working technique..................................................................................... 37
10.1 Safety instructions for work ................................................................................................... 37
10.1.1 Operator ..................................................................................................................37
10.1.2 Operating times ....................................................................................................... 38
10.1.3 Working with the chain saw..................................................................................... 38
10.1.4 Danger of kickback.................................................................................................. 38
10.2 Felling trees ........................................................................................................................... 39
10.3 Branch lopping ...................................................................................................................... 40
10.4 Cross-cutting .........................................................................................................................40
10.5 Cutting converted timber (12) ................................................................................................ 40
11 Transport ........................................................................................................................................ 41
12 Maintenance and care ....................................................................................................................41
12.1 Sharpening the saw chain (13).............................................................................................. 41
12.2 Cleaning the chain sprocket interior ......................................................................................42
12.3 Changing over the quick-tension chain wheel (16) ............................................................... 42
12.4 Checking, turning and greasing the guide rail (14, 15).......................................................... 42
13 Storage ...........................................................................................................................................42
14 Disposal .......................................................................................................................................... 43
15 Help in case of malfunction............................................................................................................. 44
16 Technical data ................................................................................................................................ 45
17 Guarantee....................................................................................................................................... 46
18 EU declaration of conformity........................................................................................................... 46
Translation of the original instructions for use
28 CS 36 Li
Page 29
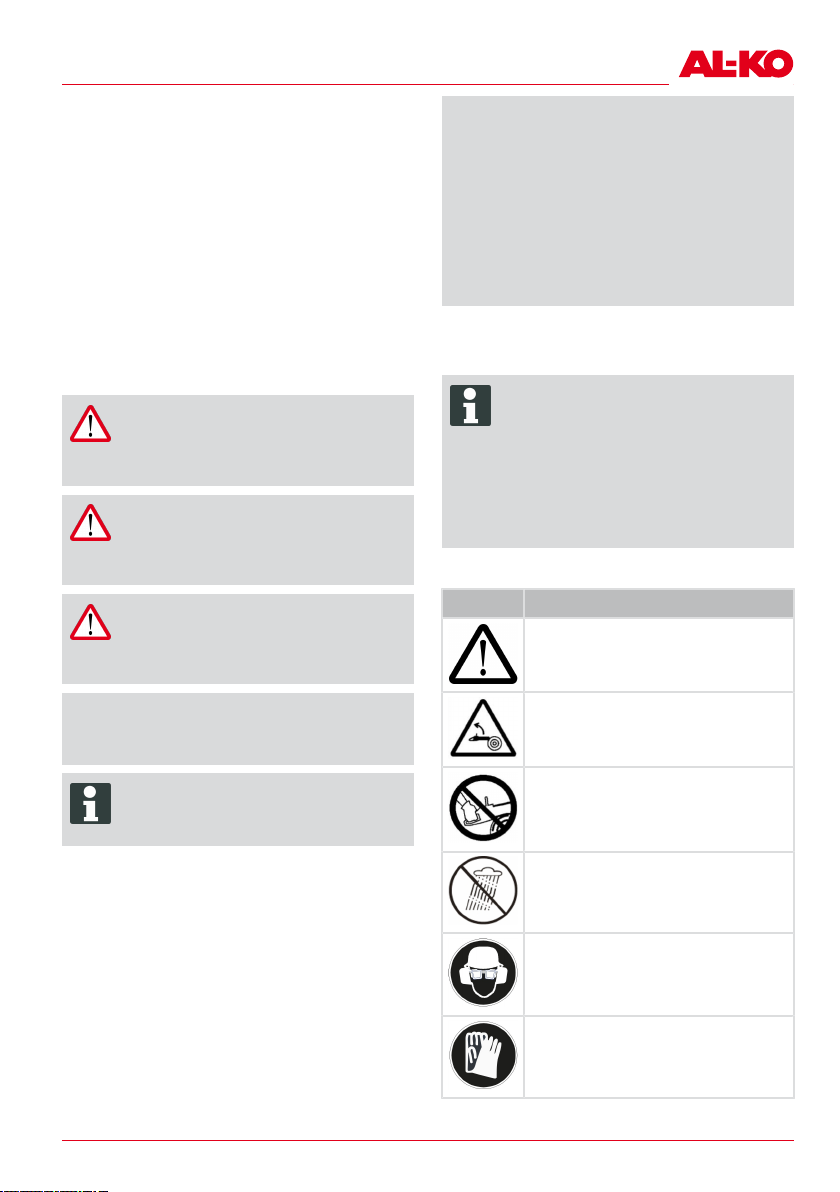
About these instructions for use
1 ABOUT THESE INSTRUCTIONS FOR
USE
■
It is essential to carefully read through these
instructions for use before start-up. This is
essential for safe working and trouble-free
handling.
■
Always safeguard these instructions for use
so that they can be consulted if you need any
information about the appliance.
■
Only pass on the appliance to other persons
together with these instructions for use.
■
Comply with the safety and warning information in these instructions for use.
1.1 Legends and signal words
DANGER!
Denotes an imminently dangerous situation which will result in fatal or serious
injury if not avoided.
WARNING!
Denotes a potentially dangerous situation
which can result in fatal or serious injury
if not avoided.
CAUTION!
Denotes a potentially dangerous situation
which can result in minor or moderate injury if not avoided.
IMPORTANT!
Danger of damaging the chain saw
and rechargeable battery
If the chain saw is operated with an unsuitable rechargeable battery, this can
lead to damage to the chain saw and to
the rechargeable battery.
■
Only operate the chain saw with a
suitable rechargeable battery from a
capacity of 4Ah.
For charging the rechargeable battery, the charging unit "C05-4230" (art. no. 113281) is required.
NOTE
You will find further information in the following operating instructions:
■
"Li-Ion rechargeable battery 36 V, 4
Ah, B05-3640" (doc. no. 441630)
■
"Charging unit C05-4230 for li-ion rechargeable battery 36 V, 4 Ah" (doc.
no. 441633)
2.2 Symbols on the appliance
Symbol Meaning
Pay special attention when handling
this product.
IMPORTANT!
Denotes a situation which can result in
material damage if not avoided.
NOTE
Special instructions for ease of understanding and handling.
2 PRODUCT DESCRIPTION
These operating instructions describe a hand-operated electric chain saw that is operated with a
rechargeable battery.
2.1 Scope of supply
The battery chain saw is intended to operate with
rechargeable batteries of the EnergyFlex family
from a capacity of 4Ah ("Li-ion rechargeable battery 36 V, 4 Ah, B05-3640" (art. no. 113280)).
469861_a 29
Danger of kickback!
Do not operate the chain saw with
one hand!
Do not use in the rain! Protect
against moisture!
Wear a protective helmet, ear defenders and eye protection!
Wear protective gloves!
Page 30
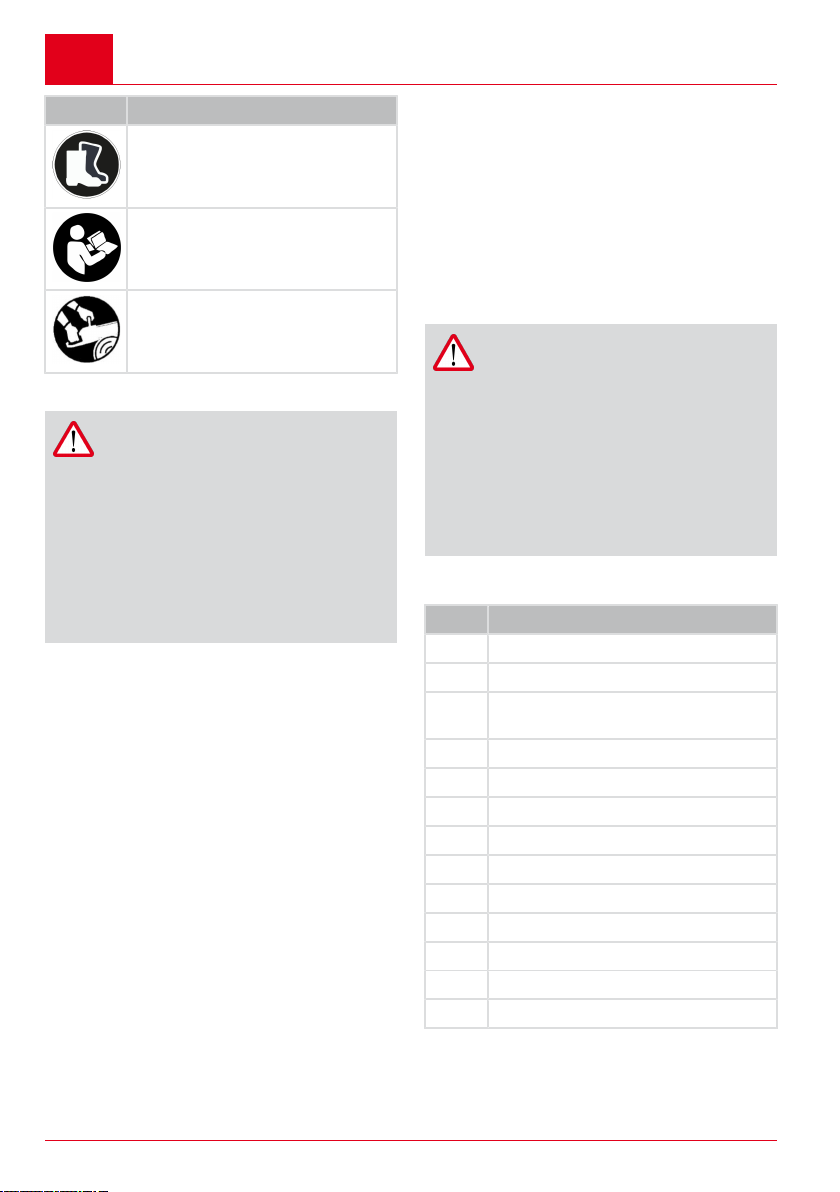
GB
Symbol Meaning
Wear sturdy shoes!
Read the operating instructions before starting operation.
Always operate the chain saw with
both hands!
2.3 Safety and protective devices
WARNING!
Danger of serious injury from manipu-
lated safety and protective devices
As a result of manipulated safety and
protective devices, serious injury can occur when working with the chain saw.
■
Never deactivate safety and protective devices.
■
Only work with the chain saw if all
safety and protective devices function correctly.
2.4 Overload protection
The chain saw is equipped with an overload protection which switches off in case of overload.
After a cooling-down phase, the chain saw can
be switched on again.
2.5 Switch-on protection
If the operator applies the throttle quickly several
times in succession, the chain saw switches off
for a few seconds to protect the electronics and
the saw chain. In this case, wait until the chain
saw can be switched on again.
2.6 Chain brake
The chain saw has a manual chain brake that is
triggered by the hand guard, for example if kickback occurs. When the chain brake is triggered,
the saw chain is abruptly stopped and the engine
switched off.
2.7 Designated use
The chain saw is exclusively designed for domestic, DIY and gardening applications. In this
sector, the chain saw can be used for light wood
sawing work, e.g. for:
Product overview (01)
■
Cutting up timber
■
Pruning hedgerows
■
Sawing firewood
Because of the electrical drive, the rechargeable
battery-chain saw can be used not only on open
ground but also in closed rooms for sawing wood.
Any application not in accordance with the application described here shall be regarded as misuse.
The chain saw must not be used in the commercial sector.
CAUTION!
Danger of injury due to non-desig-
nated use!
If wood or other substances embedded
with foreign bodies are sawn with the
chain saw, injury can result.
■
Only use the chain saw for light wood
sawing work.
■
Before sawing wood, check for foreign bodies, e.g. nails, screws, fittings.
3 PRODUCT OVERVIEW (01)
No. Component
01/1 Saw chain
01/2 Chain bar
01/3 Quick-tension chain wheel with central
lock and rotating ring
01/4 Hand guard
01/5 Handle
01/6 Battery
01/7 Throttle lever
01/8 Locking button
01/9 Rear handle
01/10 Cover for chain sprocket
01/11 Bumper spike
01/12 Cap of the chain oil tank
01/13 Viewing aperture of the chain oil tank
30 CS 36 Li
Page 31

General power tool safety warnings (IEC 60745-1)
4 GENERAL POWER TOOL SAFETY
WARNINGS (IEC 60745-1)
WARNING!
Danger of electric shock, fire and/or
serious injury
Failure to follow the warnings and instructions may result in electric shock,
fire and/or serious injury.
■
Read all safety warnings and all instructions.
■
Save all warnings and instructions for
future reference.
The term "power tool" in the warnings refers to
your mains-operated (corded) power tool or battery-operated (cordless) power tool.
4.1 Work area safety
■
Keep work area clean and well lit.
Cluttered and dark areas invite accidents.
■
Do not operate power tools in explosive
atmospheres, such as in the presence of
flammable liquids, gases or dust. Power
tools create sparks which may ignite the dust
or fumes.
■
Keep children and bystanders away while
operating a power tool. Distractions can
cause you to lose control.
4.2 Electrical safety
■
Avoid body contact with earthed or grounded surfaces such as pipes, radiators,
ranges and refrigerators. There is an in-
creased risk of electric shock if your body is
earthed or grounded.
■
Do not expose power tools to rain or wet
conditions. Water entering a power tool will
increase the risk of electric shock.
4.3 Personal safety
■
Stay alert, watch what you are doing and
use common sense when operating a
power tool. Do not use a power tool while
you are tired or under the influence of
drugs, alcohol or medication. A moment of
inattention while operating power tools may
result in serious personal injury.
■
Use personal protective equipment; always wear eye protection. Protective equip-
ment such as dust mask, non-skid safety
shoes, hard hat, or hearing protection used
for appropriate conditions will reduce personal injuries.
■
Prevent unintentional starting. Ensure the
switch is in the off-position before connecting to power source and/or battery
pack, picking up or carrying the tool. Car-
rying power tools with your finger on the
switch or energizing power tools that have
the switch on invites accidents.
■
Remove any adjusting key or wrench before turning the power tool on. A wrench or
a key left attached to a rotating part of the
power tool may result in personal injury.
■
Do not overreach. Keep proper footing
and balance at all times. This enables bet-
ter control of the power tool in unexpected
situations.
■
Dress properly. Do not wear loose clothing or jewellery. Keep your hair, clothing
and gloves away from moving parts.
Loose clothes, jewellery or long hair can be
caught in moving parts.
■
If devices are provided for the connection
of dust extraction and collection facilities,
ensure these are connected and properly
used. Use of these devices can reduce dust-
related hazards.
4.4 Power tool use and care
■
Do not force the power tool. Use the correct power tool for your application. The
correct power tool will do the job better and
safer at the rate for which it was designed.
■
Do not use the power tool if the switch
does not turn it on and off. Any power tool
that cannot be controlled with the switch is
dangerous and must be repaired.
■
Disconnect the plug from the power
source and/or the battery pack from the
power tool before making any adjustments, changing accessories, or storing
power tools. Such preventive safety meas-
ures reduce the risk of starting the power tool
accidentally.
■
Store idle power tools out of the reach of
children and do not allow persons unfamiliar with the power tool or these instructions to operate the power tool. Power
tools are dangerous in the hands of untrained
users.
■
Maintain power tools. Check for misalignment or binding of moving parts, breakage of parts and any other condition that
may affect the power tool’s operation. If
469861_a 31
Page 32

GB
damaged, have the power tool repaired
before use. Many accidents are caused by
poorly maintained power tools.
■
Keep cutting tools sharp and clean. Properly maintained cutting tools with sharp cutting edges are less likely to bind and are
easier to control.
■
Use the power tool, accessories and tool
bits etc. in accordance with these instructions, taking into account the working
conditions and the work to be performed.
Use of the power tool for operations different
from those intended could result in a hazardous situation.
4.5 Battery tool use and care
■
Recharge only with the charger specified
by the manufacturer. A charger that is suit-
able for one type of battery pack may create
a risk of fire when used with another battery
pack.
■
Use power tools only with specifically
designated battery packs. Use of any other
battery packs may create a risk of injury and
fire.
■
When battery pack is not in use, keep it
away from other metal objects, lie paperclips, coins, keys, nails, screws or other
small metal objects that can make a connection from one terminal to another.
Shorting the battery terminals together may
cause burns or a fire.
■
Under abusive conditions, liquid may be
ejected from the battery; avoid contact. If
contact accidentally occurs, flush with
water. If liquid contacts eyes, additionally
seek medical help. Liquid ejected from the
battery may cause irritation or burns.
4.6 Service
■
Have your power tool serviced by a qualified repair person using only identical replacement parts. This will ensure that the
safety of the power tool is maintained.
5 CHAIN SAW SAFETY WARNINGS (EN
60745 PART 2-13)
■
Keep all parts of the body away from the
saw chain when the chain saw is operating. Before you start the chain saw, make
sure the saw chain is not contacting anything. A moment of inattention while operat-
ing chain saws may cause entanglement of
your clothing or body with the saw chain.
Chain saw safety warnings (EN 60745 part 2-13)
■
Always hold the chain saw with your right
hand on the rear handle and your left
hand on the front handle. Holding the chain
saw with a reversed hand configuration increases the risk of personal injury and should
never be done.
■
Hold the power tool by insulated gripping
surfaces only, because the saw chain may
contact hidden wiring. Saw chains contact-
ing a "live" wire may make exposed metal
parts of the power tool "live" and could give
the operator an electric shock.
■
Wear safety glasses and hearing protection. Further protective equipment for
head, hands, legs and feet is recommended. Adequate protective clothing will reduce
personal injury by flying debris or accidental
contact with the saw chain.
■
Do not operate a chain saw in a tree. Operation of a chain saw while up in a tree may
result in personal injury.
■
Always keep proper footing and operate
the chain saw only when standing on
fixed, secure and level surface. Slippery or
unstable surfaces such as ladders may
cause a loss of balance or control of the
chain saw.
■
When cutting a limb that is under tension
be alert for spring back. When the tension
in the wood fibres is released the spring
loaded limb may strike the operator and/or
throw the chain saw out of control.
■
Use extreme caution when cutting brush
and saplings. The slender material may
catch the saw chain and be whipped toward
you or pull you off balance.
■
Carry the chain saw by the front handle
with the chain saw switched off and away
from your body. When transporting or
storing the chain saw always fit the guide
bar cover. Proper handling of the chain saw
will reduce the likelihood of accidental contact with the moving saw chain.
■
Follow instructions for lubricating, chain tensioning and changing accessories. Improp-
erly tensioned or lubricated chain may either
break or increase the chance for kickback.
■
Keep handles dry, clean, and free from oil
and grease. Greasy, oily handles are slip-
pery causing loss of control.
■
Cut wood only. Do not use chain saw for
purposes not intended. For example: do
not use chain saw for cutting plastic, ma-
32 CS 36 Li
Page 33

Causes and operator prevention of kickback (EN 60745 part 2-13)
sonry or non-wood building materials.
Use of the chain saw for operations different
than intended could result in a hazardous
situation.
6 CAUSES AND OPERATOR
PREVENTION OF KICKBACK (EN
60745 PART 2-13)
Kickback may occur when the nose or tip of the
guide bar touches an object, or when the wood
closes in and pinches the saw chain in the cut.
Tip contact in some cases may cause a sudden
reverse reaction, kicking the guide bar up and
back towards the operator.
Pinching the saw chain along the top of the guide
bar may push the guide bar rapidly back towards
the operator.
Either of these reactions may cause you to lose
control of the saw which could result in serious
personal injury. Do not rely exclusively upon the
safety devices built into your saw. As a chain saw
user, you should take several steps to keep your
cutting jobs free from accident or injury.
Kickback is the result of tool misuse and/or incorrect operating procedures or conditions and can
be avoided by taking proper precautions as given
below:
■
Maintain a firm grip, with thumbs and fingers encircling the chain saw handles, with
both hands on the saw and position your
body and arm to allow you to resist kickback forces. Kickback forces can be con-
trolled by the operator, if proper precautions
are taken. Do not let go of the chain saw.
■
Do not overreach and do not cut above
shoulder height. This helps prevent uninten-
ded tip contact and enables better control of
the chain saw in unexpected situations.
■
Only use replacement bars and chains
specified by the manufacturer. Incorrect re-
placement bars and chains may cause chain
breakage and/or kickback.
■
Follow the manufacturer’s sharpening and
maintenance instructions for the saw
chain. Decreasing the depth gauge height
can lead to increased kickback.
7 INSTALLATION
WARNING!
Danger of serious injury.
If an incompletely mounted chain saw is
used, serious injury can be caused.
■
Only use the chain saw when it has
been fully mounted.
■
Before each use, perform a visual inspection in order to check that the
chain saw is complete and does not
contain damaged or worn components. Safety and protective devices
must be intact.
CAUTION!
Danger of laceration injuries.
The sharp edges of the saw chain can
cause laceration injuries when assembling.
■
Before installation, remove the rechargeable battery.
■
Wear safety gloves when installing
the saw chain and the guide rail.
7.1 Installing the guide rail (05, 06)
1. Pull hand guard (05/1) in the direction of the
handle (05/A) in order to release the chain
brake.
2. Turn the central lock (05/2) anti clockwise
and remove together with the cover (05/3).
3. Set the guide rail (06/1) on the guide pin
(06/2) and push so far back that the saw
chain can be mounted.
7.2 Installing the saw chain (05, 06)
1. Place the saw chain on the chain sprocket
(06/3) and in the groove of the chain bar
(06/1).
2. Guide the saw chain around the reversing
sprocket of the chain bar. The saw chain
must hang down slightly on the underside of
the chain bar.
3. Put the cover (05/3) and tighten the central
lock (05/2) slightly.
469861_a 33
Page 34

GB
Start-up
7.3 Tightening the saw chain (05, 07)
NOTE
The saw chain has been tensioned correctly when:
■
It is in contact with the underside of
the chain bar and can be pulled
through by hand.
■
It can be lifted by 3 – 4 mm in the
middle of the chain bar.
1. Check the seat of the saw chain so that it sits
correctly on the chain sprocket and in the
chain bar.
2. Turn the rotating ring (05/4) towards the
cover (05/3) so that the two triangles face
each other (05/B).
3. Put on the cover (07/1) and turn the central
lock (07/2) clockwise. Do not tighten the central lock fully or turn back by one turn.
4. Turn the rotating ring (07/3) clockwise until
the saw chain has been tensioned correctly
as described above.
5. Turn the central lock (07/2) clockwise until it
is fixed in place.
8 START-UP
DANGER!
Danger of fatal injury and danger of
extremely severe injury.
Lack of knowledge of the safety instructions and operating instructions can lead
to extremely serious and even fatal injury.
■
Read and follow all safety instructions and instructions for use in these
operating instructions as well the operating instructions which are referred to before you start using the
chain saw.
WARNING!
Danger of serious injury.
Serious injury can be caused if there are
damaged components on the chain saw.
■
Before each use, perform a visual inspection in order to check that the
chain saw is complete and does not
contain damaged or worn components. Safety and protective devices
must be intact.
8.1 Charging the rechargeable battery (02)
The rechargeable battery is partially charged.
Fully charge the rechargeable battery before using it for the first time. The rechargeable battery
can be charged in any charge status. Interrupting
charging does not damage the rechargeable battery.
NOTE
For detailed information, heed the separate operating instructions for the rechargeable battery and for the charging
unit.
8.2 Inserting the rechargeable battery (03/A)
1. Push the rechargeable battery (03/1) into the
rechargeable battery slot (03/2) from above
until it engages.
8.3
Pulling out the rechargeable battery (03/B)
1. Press and hold the unlock button (03/3) on
the rechargeable battery (03/1).
2. Pull out the rechargeable battery (03/1).
8.4 Checking the chain tension
Frequently check the chain tension, because new
saw chains stretch.
At operating temperature, the saw chain
stretches and hangs down.
NOTE
The saw chain has been tensioned correctly when:
■
It is in contact with the underside of
the chain bar and can be pulled
through by hand.
■
It can be lifted by 3 – 4 mm in the
middle of the chain bar.
CAUTION!
Danger of injury due to the saw chain
jumping off!
An insufficiently tensioned saw chain can
jump off during operation and lead to injury.
■
Frequently check the chain tension.
The chain tension is too low if the
drive links come out of the groove on
the underside of the chain bar.
■
Re-tension the saw chain properly if
the chain tension is too low.
34 CS 36 Li
Page 35

Start-up
8.5 Testing the function of the chain brake
The chain saw has a manual chain brake that is
triggered by the hand guard, for example if kickback occurs.
When the chain brake is triggered, the saw chain
is abruptly stopped and the engine switched off.
DANGER!
Danger of fatal injury as a result of
negligent handling!
Extremely serious injury and even fatal
injury can be caused as a result of careless and unexpected movements of the
chain saw.
■
Pay attention to safety and work with
a high level of concentration when
using the chain saw.
■
Do not press any switch when releasing the chain brake.
WARNING!
Danger of fatal injury and danger of
extremely severe injury due to a defective chain brake
Extremely serious injury and even fatal
injury of the operator can be caused if the
chain brake does not function, e.g. due to
kickback by the running saw chain.
■
Check the chain brake each time before starting work.
■
Do not switch the chain saw on if the
chain brake is defective. in this case,
have the chain saw checked in a customer service workshop.
8.6 Function test of the chain brake with the engine switched off (08)
1. To switch off the chain brake, pull (08/A) the
hand guard (08/1) in the direction of the
handle (08/2). The saw chain can be pulled
through by hand.
2. Push the hand guard (08/1) forwards (08/B)
to switch on the chain brake. It must not be
possible to pull the saw chain through.
8.7 Function test of the chain brake with the motor switched on (08)
NOTE
Release the chain brake each time before switching on the chain saw.
1. Hold the chain saw securely and firmly by the
handle and hand grip.
2. Release the chain brake.
3. Switch on the engine.
4. Push the hand guard (08/1) forwards (08/B).
The saw chain and engine must stop immediately.
8.8 Filling saw chain oil (09)
IMPORTANT!
Danger of damaging the chain saw
The chain saw will be severely damaged
if there is too little or even no saw chain
oil in the tank or it has dried/is sticky.
Dried/sticky saw chain oil can lead to
damage to oil-channelling components or
the oil pump.
Damage also occurs if used oil is used.
The use of used oil leads to environmental damage!
■
For start-up work, fill saw chain oil
into the tank.
■
Do not use any used oil!
■
Each time before changing the rechargeable battery at the latest, fill
the tank with saw chain oil again.
The saw chain and the chain bar are continuously supplied with oil during operation by means
of an automatic oiler system. The saw chain oil
protects against corrosion and premature wear.
There must always be sufficient saw chain oil in
the tank to lubricate the saw chain sufficiently.
To lubricate the saw chain and the chain bar,
only use environmentally friendly, biodegradable,
high-quality saw chain oil. This oil must be transported and stored in approved and appropriately
labelled containers.
Each time before starting work or changing the
rechargeable battery, check the oil level and replenish the saw chain oil if necessary:
1. Check the oil level in the viewing aperture of
the tank (09/1). It must always be possible to
see oil. The minimum and the maximum oil
level must not be exceeded.
2. Refill saw chain oil via the filler neck (09/2) if
necessary.
469861_a 35
Page 36

GB
Operation
9 OPERATION
DANGER!
Danger of fatal injury and danger of
extremely severe injury.
Lack of knowledge of the safety instructions and operating instructions can lead
to extremely serious and even fatal injury.
■
Read and follow all safety instructions and instructions for use in these
operating instructions as well the operating instructions which are referred to before you start using the
chain saw.
■
Comply with working time regulations in force
in your country.
■
Grip the rear saw grip firmly with your right
hand (right-handed operator) and the front
grip with your left hand, and hold them tightly.
■
Do not release the grips for as long as the
engine is running.
■
Do not use the chain saw if you are:
■
Tired
■
Unwell
■
Under the influence of alcohol, medicines
and drugs
9.1 Determining the charge status of the rechargeable battery (04)
There is a control panel with a pushbutton (04/1)
and LED charge status displays (04/2 to 04/5) on
the front of the rechargeable battery.
1. Press the pushbutton (04/1).
The charge status displays light according to
the charge status of the rechargeable battery.
2. To identify the charge status, see section see
chapter 9.2 "Charge status displays on the
rechargeable battery", page36.
9.2 Charge status displays on the rechargeable battery
Lighting LEDs Charge status of the re-
Green (04/2) The rechargeable battery is
Green (04/3)
and (04/4)
chargeable battery
fully charged.
Rechargeable battery is
charged to over 50%.
Lighting LEDs Charge status of the re-
Green (04/4) Rechargeable battery is
Red (04/5) The rechargeable battery is
9.3 Check the saw chain oil
Procedure see chapter 8.8 "Filling saw chain oil
(09)", page35.
IMPORTANT!
Danger of damaging the chain saw
The chain saw will be severely damaged
if there is too little or even no saw chain
oil in the tank or it has dried/is sticky.
Dried/sticky saw chain oil can lead to
damage to oil-channelling components or
the oil pump.
Damage also occurs if used oil is used.
The use of used oil leads to environmental damage!
■
■
■
9.4 Testing the chain brake
Procedure see chapter 8.5 "Testing the function
of the chain brake", page35.
WARNING!
Danger of fatal injury and danger of
extremely severe injury due to a defective chain brake
Extremely serious injury and even fatal
injury of the operator can be caused if the
chain brake does not function, e.g. due to
kickback by the running saw chain.
■
■
chargeable battery
charged to less than 50%.
fully discharged or the rechargeable battery has been
overheated/undercooled.
Each time before starting work,
check that enough saw chain oil is
present in the tank.
If the oil level is low, refill saw chain
oil.
Do not use any used oil!
Check the chain brake each time before starting work.
Do not switch the chain saw on if the
chain brake is defective. in this case,
have the chain saw checked in a customer service workshop.
36 CS 36 Li
Page 37

Working behaviour and working technique
9.5 Switching the engine on and off
CAUTION!
Danger of hearing impairment!
The operation of the chain saw causes
intense noise that can cause hearing
impairment.
■
During work with the chain saw, wear
ear defenders.
NOTE
Release the chain brake each time before switching on the chain saw.
Switching on the engine:
1. Release the chain brake.
2. Press and hold locking button (14/1) with
your thumb.
3. Press and hold the on/off switch (14/2).
4. Release the locking button (14/1). It is not necessary to keep the locking button pressed
once the chain saw has started. The locking
button is intended to prevent inadvertent
starting of the chain saw.
Switching off the engine:
1. Release the on/off switch (14/2).
10 WORKING BEHAVIOUR AND
WORKING TECHNIQUE
NOTE
Courses in the use of chain saws and
techniques for felling trees are regularly
held by various forestry organisations.
DANGER!
Danger of fatal injury due to inad-
equate technical knowledge!
Inadequate technical knowledge can result in extremely serious up to fatal injury!
■
Only trained and experienced people
are allowed to fell trees and lop
branches.
DANGER!
Danger of fatal injury from splintered
wood!
Wood chips caught up in the chain can
cause extremely serious and even fatal
injury!
■
Remove loose chips and wood splinters from the part to be sawn.
10.1 Safety instructions for work
■
Observe country-specific safety regulations,
e.g. from the relevant trade associations, social security systems, authorities for industrial
safety.
■
Only work in sufficient daylight or artificial
lighting.
■
Keep the working area free from objects (e.
g. off-cuts) – danger of stumbling.
■
The user is responsible for accidents involving other people and their property.
10.1.1 Operator
■
Young people under 16 years of age and
people who do not know the instructions for
use are not allowed to use the appliance.
■
If you are working with a chain saw for the
first time: Have the salesperson or another
expert explain the operation of the chain saw,
or attend a course.
■
To operate the chain saw, you must be rested and in good physical and mental health. If
you must not exert yourself for health reasons, ask your doctor whether it is possible to
work with this chain saw.
■
Take measures to protect yourself against
vibration loads. The actual vibration values
may differ from the values specified in the
technical data, depending on what the electrical tool is used for. In doing so, take account of the entire working process, i.e. also
times during which the electrical tool is operating without load, or is switched off. Suitable
measures include regular maintenance and
care of the electrical tool and the tool attachments, keeping your hands warm, taking regular breaks, and planning the working sequences effectively.
■
Determine the maximum handling period
and set breaks in the work according to
the vibration value.
469861_a 37
Page 38

GB
10.1.2 Operating times
Heed the country-specific regulations for the operating times of chain saws. The operating times
of chain saws can be limited by national and local
regulations.
10.1.3 Working with the chain saw
WARNING!
Danger of serious injury.
If an incompletely mounted chain saw is
used, serious injury can be caused.
■
Only use the chain saw when it has
been fully mounted.
■
Before each use, perform a visual inspection in order to check that the
chain saw is complete and does not
contain damaged or worn components. Safety and protective devices
must be intact.
WARNING!
Risk of injury due to chain saw start-
ing inadvertently
A chain saw that starts inadvertently can
lead to serious injury. Therefore, remove
the rechargeable battery during:
■
Testing, adjustment work, and cleaning work
■
Work on the cutting equipment
■
Leaving the chain saw
■
Transport
■
Storage
■
Maintenance and repair work
■
Danger
■
Never work alone.
■
Always keep a first-aid kit to hand in case of
accidents.
■
Avoid touching metal objects in the ground or
which are conductively connected to the
ground.
■
The personal protective equipment comprises:
■
Protective helmet
■
Hearing protection (e.g. ear protectors,
especially when working for than 2.5
hours a day)
■
Protective glasses or a face visor incorporated in the protective helmet
Working behaviour and working technique
■
Protective trousers with cut protection inlay
■
Sturdy working gloves
■
Safety boots with high-grip sole and steel
toe caps
■
Do not use the chain saw above shoulder
height, since safe handling is no longer possible in this way.
■
When changing position, switch off the engine and put on the chain guard.
■
When chain saws are not in use, always put
on the chain guard and remove the rechargeable battery.
■
Switch the chain saw off before putting it
down.
■
Do not use the chain saw for levering or moving wood.
■
Only specialist personnel are allowed to saw
trunks that are thicker than the length of the
chain bar.
■
Only start the cut once the saw chain is running, never switch on the chain saw already
in the kerf.
■
Make sure that no saw chain oil gets onto the
ground.
■
Do not undertake sawing work in rain, snow,
or stormy weather.
■
Never disable safety and protective devices.
10.1.4 Danger of kickback
DANGER!
Danger of fatal injury due to kickback!
The operator can be fatally injured by
kickback of the chain saw.
■
It is essential to comply with the
measures stated here in order to
avoid any kickback!
■
Inspect the material to be sawn for foreign
bodies (nails, metal, etc.) and remove them.
■
Only operate the chain saw with both hands.
■
Do not bend too far forward when working
with the chain saw.
■
Never cut off several branches at once.
■
Do not work unless the saw chain is correctly
sharpened and tensioned.
■
Never operate the chain saw with your outstretched arms.
■
Start the cut with the saw chain running, and
only saw at full speed.
38 CS 36 Li
Page 39

Working behaviour and working technique
■
Do not saw with the tip of the chain bar.
■
Always keep the tip of the chain bar in sight.
■
Work with increased caution when continuing
cuts that have already been started.
■
Work with increased caution when cutting undergrowth and young trees.
■
Do not saw when standing on a ladder or
above shoulder height.
■
Use the bumper spike for increased stability
when sawing.
■
Make sure you are standing securely when
sawing.
■
Chiefly saw with the underside of the bar.
Work with increased caution when sawing
with the top of the bar.
■
Do not remove the chain saw from the cut
unless the saw chain is running.
10.2 Felling trees
Take the following measures before starting
felling work.
■
Make sure that no other people, animals or
objects are in the danger area.
■
The safe distance from other workplaces or
objects should be at least 2½ tree lengths.
■
Watch out for power lines and other people's
property. If necessary, notify the power supply company or the property owner.
■
Judge the falling direction of the tree.
Factors influencing the falling direction of the
tree:
■
Natural lean of the tree
■
Height of the tree
■
Branches growing on one side
■
Level ground or slope
■
Asymmetrical growth, wood damage
■
Wind direction and wind speed
■
Snow load
■
When working on a slope, always work uphill
of the tree to be felled.
■
Establish your escape route in advance, and
make sure that there are no obstacles in the
way. The escape route should be at an angle
of approx. 45° backwards from the falling direction (17).
■
The trunk must be free from growth,
branches and foreign bodies (e.g. dirt,
stones, loose bark, nails, staples, wire, etc.).
Make two undercuts and one back cut in order to
fell a tree.
1. During back cuts and cross-cuts, place the
bumper spike firmly against the wood to be
cut.
2. Saw the first undercut (18/C) horizontally,
then the second undercut at an angle of at
least 45° from above. This prevents the chain
saw becoming trapped when you make the
second undercut. The undercut must be as
close as possible to the ground and in the required felling direction (18/E). The depth of
the undercut should be about 1/4 of the diameter of the trunk.
3. Cut the back cut (18/D) exactly horizontally
opposite to the undercut. The back cut must
be made 3-5 cm above the horizontal undercut.
4. Saw in the back cut (18/D) sufficiently deep
so that a bridge (18/F) of at least 1/10 the
trunk diameter remains between the undercut
(18/C) and the back cut (18/D). This bridge
prevents the tree from twisting and falling in
the wrong direction. The tree should start to
fall when the back cut (18/D) approaches the
bridge (18/F).
If the tree falls whilst you are sawing:
■
Interrupt the back cut if the tree does fall
in the wrong direction or leans back and
traps the chain saw. To open the cut and
fell the tree, drive in wedges in the direction of the required felling line.
■
Immediately pull the chain saw from the
cut, switch it off and put it down.
■
Walk away in the direction of the escape
route.
■
Watch out for falling branches and twigs.
5. If the tree remains standing, drive wedges
into the back cut in order to cause it to fall in
a controlled way.
6. At the end of sawing work, immediately remove your ear defenders and listen out for
signals or warning calls.
NOTE
Only use wedges made from wood,
plastic or aluminium.
469861_a 39
Page 40

GB
DANGER!
Danger of fatal injury from a falling
tree!
Having no escape route when felling a
tree represents a danger of serious and
even fatal injury!
■
Do not start the felling work until you
are sure there is an unobstructed escape route away from the tree to be
felled.
DANGER!
Danger of fatal injury from an uncon-
trollably falling tree!
Uncontrolled falling trees can lead to extremely serious and even fatal injury!
■
In order to guarantee controlled
felling of a tree, leave a bridge
between the undercut and the back
cut. The length of this bridge should
be approx. 1/10 of the trunk diameter.
■
Do not carry out any felling work in
windy conditions.
10.3 Branch lopping
Heed the following points during this work:
■
Support the chain saw against the tree trunk
during the work.
■
In the preliminary phase, leave larger, downward-pointing branches that are supporting
the tree (19).
■
Cut off smaller branches with one cut.
■
Pay attention to branches under tension, and
saw through these from underneath upwards
in order to avoid the chain saw becoming
trapped (19).
■
Do not saw off free-hanging branches from
underneath.
■
Only experienced or trained people should
make plunge cuts, longitudinal cuts and boring cuts (18).
10.4 Cross-cutting
Heed the following points during this work:
■
When working on a slope, always stand uphill
from the tree trunk, because it could roll away
(19).
■
Guide the chain saw so that there is no part
of your body in the extended sweep arc of
the saw chain.
Working behaviour and working technique
■
Position the bumper spike directly adjacent to
the cut edge and allow the chain saw to pivot
about this point. Do not exert any pressure at
the end of the cut.
■
Make sure that the saw chain does not touch
the ground.
■
At the end of the cut, wait for the saw chain
to come to a halt before you remove the
chain saw.
■
Always switch off the engine of the chain saw
before you go to the next tree.
The entire length of the tree trunk is in contact
with the ground:
■
Saw through the tree trunk from above,
without cutting into the ground (20).
Tree trunk is lying raised at one end:
■
To prevent the chain saw becoming trapped
and the wood splintering, first saw through
1/3 of the trunk diameter from below, then
saw through the remainder from above, down
as far as the cut made from underneath (10).
Tree trunk is lying raised at both ends:
To prevent the chain saw becoming trapped and
the wood splintering, first saw through 1/3 of the
trunk diameter from above, then saw through the
remainder from underneath, up as far as the cut
made from above (11).
DANGER!
Danger of fatal injury due to kickback!
The operator can be fatally injured by
kickback of the appliance.
■
It is essential to comply with the
measures in order to avoid any kickback.
10.5 Cutting converted timber (12)
Heed the following points during this work:
■
Use a secure cutting surface (sawing trestle,
wedges, beams).
■
Make sure you are standing securely and
that your bodyweight is evenly distributed.
■
Secure logs to prevent them twisting.
■
Only start the cut once the saw chain is run-
ning. Never switch on the chain saw already
in the kerf.
■
Do not secure the wood with your foot and do
not get another person to hold it.
40 CS 36 Li
Page 41

Transport
11 TRANSPORT
Before transporting, carry out the following measures:
1. Switch off the chain saw
2. Put on the chain guard
3. Remove the battery
Only carry the chain saw using the handle. When
doing so, the chain bar must point downwards.
WARNING!
Danger of fatal injury and danger of
extremely severe injury.
During transport, a running saw chain
can lead to extremely serious and even
fatal injury.
■
Never carry and transport the chain
saw with the saw chain running.
■
Before transporting, carry out the
measures mentioned above.
In vehicles: Secure the chain saw against tipping
over, damage and leakage of chain oil.
12 MAINTENANCE AND CARE
The chain saw complies with all relevant safety
standards. Repairs are only allowed to be performed by qualified specialists, and with the exclusive use of genuine spare parts.
■
After each use, check the chain saw for wear
and renew any damaged
■
components.
■
Do not get the machine wet or expose it to
moisture. Clean plastic parts with a cloth and
do not use any cleaning agents or solvents.
■
Clean the cooling air slots if they are blocked.
■
Do not spray the chain saw not with water
and do not use a high-pressure cleaner.
■
Only use spare parts specified by the manufacturer.
WARNING!
Risk of injury due to chain saw being
started inadvertently
A chain saw that is started inadvertently
can lead to serious injury.
■
Before all maintenance and care
work, remove the rechargeable battery.
■
Wear protective gloves.
12.1 Sharpening the saw chain (13)
Do not work with a blunt or damaged saw chain.
The consequences include physical strain, a poor
cutting result and high levels of chain wear.
CAUTION!
Danger of injury from the saw chain!
The sharp edges of the saw chain can
cause serious laceration injuries.
■
Wear protective gloves when resharpening the saw chain.
NOTE
Inexperienced chain saw operators are
recommended to have the saw chain
sharpened by a specialist at the customer service.
To achieve an optimum cutting result, it is necessary for the saw chain to be resharpened at regular intervals.
A correctly sharpened saw chain reduces the
danger of kickback and prevents high levels of
wear.
The saw chain must be resharpened when sawdust is produced during cutting, or if the saw has
difficulty cutting through the wood. When a saw
chain is sharp, it generates large and long chips.
1. Switch off the chain saw and remove the rechargeable battery.
2. Check the chain tension and adjust it if necessary.
3. Only use a suitable tool for sharpening:
Round chain file Ø = 4.0 mm, file guide,
chain gauge.
These tools are available from specialist retailers.
4. The individual chain links consist of a saw
link (13/3), saw tooth (13/1) and a depth limiter (13/2).
5. Guide the file from the inside to the outside of
the cutting tooth, exerting slight pressure and
holding it perpendicular (13). A file guide is
helpful for handling the file correctly. 2 – 3 file
strokes are sufficient.
6. When sharpening, maintain the angles (13)
on the cutting tooth and the height of the
depth limiter (13/2) in relation to the cutter.
Make sure that all cutting teeth on the chain
have equally length and width after sharpening.
469861_a 41
Page 42

GB
Storage
7. If using the prescribed tools and the correct
handling, the specified angle values will be
obtained automatically. The values can be
checked with a chain gauge.
8. At the end, slightly round off the front part of
the depth limiter (13/2).
Sharpen the saw chain frequently, without removing much material while doing so. After sharpening 3 to 4 times yourself, have the saw chain resharpened by a specialist workshop. This also involves resharpening the depth limiter.
Renew the saw chain as soon as the minimum
cutting tooth length of 4 mm (13) is reached.
IMPORTANT!
Damage to the machine due to incor-
rect sharpening!
Uneven cutting teeth mean that the chain
runs roughly and may even break. All
cutting teeth must have the same length
and width after sharpening.
■
Sharpen the saw chain properly.
DANGER!
Danger of fatal injury due to kickback!
The operator can be fatally injured by
kickback of the chain saw.
■
Sharpen the saw chain properly.
12.2 Cleaning the chain sprocket interior
Thoroughly clean the chain saw after each use.
1. Remove the rechargeable battery and place
the chain saw on a stable base.
2. Unscrew the sprocket cover.
3. Clean the inside with a suitable brush.
4. Remove the saw chain and take out the
chain bar.
5. Clean the groove in the bar and the oil inlet
hole.
12.3 Changing over the quick-tension chain
wheel (16)
1. Remove the guide rail (16/1).
2. Unscrew the Phillips screw (16/3) and release the adapter sheet metal from the guide
rail with the tensioning hook (16/2).
3. Turn the guide rail around the longitudinal
axis.
4. Attach the adapter sheet metal to the chain
bar with the tensioning hook again and fix in
place with the Phillips screw again.
5. Mount the chain bar again, see chapter 7.1
"Installing the guide rail (05, 06)", page33.
12.4 Checking, turning and greasing the
guide rail (14, 15)
Checking the guide rail:
Regularly check the guide rail for damage. Re-
move any projecting burrs (14).
Turning the guide rail:
The chain bar must be turned over after each
chain sharpening and chain change in order to
avoid one-sided wear.
1. Change over the quick-tension chain wheel
on the guide rail, see chapter 12.3 "Changing
over the quick-tension chain wheel (16)",
page42.
2. Turn the guide rail.
Greasing the guide rail:
1. Carefully clean groove in bar (14/1) and oil
inlet hole (14/2).
2. Carefully clean lubricating hole (15/1) from
both sides.
3. Use a suitable grease gun to pump in sufficient grease from both sides in succession
until the grease emerges evenly at the tips of
the sprocket. Keep turning the sprocket when
doing this.
13 STORAGE
Thoroughly clean the chain saw after each use.
Store it in a dry, lockable place out of the reach of
children.
Carry out the following jobs before intervals in
work lasting for longer than 30 days:
■
Switch off the chain saw and remove the rechargeable battery.
■
Empty the oil tank for the saw chain oil.
■
Remove the saw chain and guide rail, clean it
and spray it with rust-proofing oil.
■
Thoroughly clean the chain saw and store it
in a dry place.
IMPORTANT!
Danger of damaging the chain saw
Dried/sticky saw chain oil can lead to
damage to oil-channelling components or
the oil pump after lengthy storage.
■
Remove the saw chain oil from the
chain saw before each extended
period of storage.
42 CS 36 Li
Page 43

Disposal
14 DISPOSAL
Information on the German Electrical and
Electronic Equipment Act (ElectroG)
■
Electrical and electronic appliances do
not belong in household waste, but
should be collected and disposed of
separately.
■
Used batteries or rechargeable batteries that are not installed permanently in
the old appliance must be removed before disposal. Their disposal is regulated by the battery law.
■
Owners or users of electrical and electronic appliances are obliged by law to
return them after use.
■
The end user bears personal responsibility for deleting his personal data
from the old appliance to be disposed
of.
The symbol of the crossed-through rubbish bin
means that electrical and electronic appliances
may not be disposed of in the household rubbish.
Electrical and electronic appliances can be
handed in at no charge at the following places:
■
Public service disposal or collection points
(e.g. municipal building yards)
■
Points of sale of electrical appliances (stationary and online) provided traders are obliged to take them back or offer this voluntarily.
These statements only apply to appliances that
are installed and sold in the countries of the
European Union and are subject to European Directive 2012/19/EU. Different provisions can apply
to the disposal of electrical and electronic appliances in countries outside the European Union.
Information on German Battery Act (BattG)
■
Used batteries and rechargeable batteries do not belong in household
waste, but should be collected and disposed of separately.
■
For the safe removal of batteries or rechargeable batteries from the electrical
appliance and for information on their
type or chemical system, please follow
the further information within the operating or installation instructions.
■
Owners or users of batteries and rechargeable batteries are obliged by law
to return them after use. The return is
limited to the handover of customary
household quantities.
Used batteries can contain harmful substances or
heavy metals that can cause damage to the environment and human health. Reuse of the used
batteries and use of the resources contained
therein contributes to the protection of these two
essential commodities.
The symbol of the crossed-through rubbish bin
means that batteries and rechargeable batteries
may not be disposed of in the household rubbish.
In addition, if the Hg, Cd or Pb symbol is located
under the rubbish bin, this stands for the following:
■
Hg: Battery contains more than 0.0005%
mercury
■
Cd: Battery contains more than 0.002% cadmium
■
Pb: Battery contains more than 0.004% lead
Rechargeable batteries and batteries can be
handed in at no charge at the following places:
■
Public service disposal or collection points
(e.g. municipal building yards)
■
Points of sale of batteries and rechargeable
batteries
■
Disposal point of the common take-back system for the used batteries of appliances
■
Disposal point of the manufacturer (if not a
member of the common take-back system)
These statements only apply to rechargeable batteries and batteries that are sold in the countries
of the European Union and are subject to
European Directive 2006/66/EU. Different provisions can apply to the disposal of rechargeable
batteries and batteries in countries outside the
European Union.
469861_a 43
Page 44

GB
15 HELP IN CASE OF MALFUNCTION
Help in case of malfunction
Malfunction
Engine
does not
run.
No
chain
lubrication
Possible
cause
No battery
voltage
present.
Overload protection has
switched off.
Chain brake
tripped.
Oil tank is
empty.
Guide rail is
dirty.
NOTE
For malfunctions that are not listed in this
table or that you cannot resolve yourself,
please contact our customer service.
Remedy
Have the power
supply checked by
a qualified electrician.
Wart until the overload protection reestablishes the
power supply.
Unlock the chain
brake.
Check the oil tank
for damage.
Check the oil level
and top up with
saw chain oil if necessary.
Clean the oil entry
hole and oil guide
groove.
44 CS 36 Li
Page 45

Technical data
16 TECHNICAL DATA
Art. no. 113 365
Type of rechargeable battery Li-Ion (36 V / 4,0 Ah)
Idling speed 17 m/s
Operating speed 16m/s
Length of chain bar (OREGON) approx. 350mm
Usable saw length 265 mm
Saw chain (OREGON) 91P045X
Drive link thickness 1.27 mm
Pitch – chain sprocket 3/8”
Chain brake Yes
(electric, PCB and brake rod)
Chain stopping time
(DIN EN 60745-2-15 19.103 and 19.104)
Chain stopping time
(DIN EN 50144-2-15:2001 18.104)
Chain activation double action
Volume chain oil tank 0.180 l
Net weight without chain and chain bar 3.9 kg
Net weight with chain and chain bar (without blade cover) 4.45kg
Machine overload protection Nein
(PCB in rechargeable battery)
Sound power level LWA (2000/14/EC) measured/guaranteed
Sound pressure level LPA (k=2.5 dB(A)) 91.5 dB(A)
Max. vibration acceleration, front/rear
ahw (k=1.5 m/s²)
The specified values have been established based on a standardised test process and can be used for
comparing different electrical tools with one another.
In addition, these values are suitable for estimating in advance the loads to which the user is exposed
due to vibration.
+/-0.7 m/s
max. 0,15s
max. 2s
101 / 105 dB(A)
3.193 / 3.159 m/s²
469861_a 45
Page 46

GB
xxxxxx (x)
Guarantee
17 GUARANTEE
We will resolve any material or manufacturing faults on the appliance during the legal warranty period
for claims relating to faults, in accordance with our choice either to repair or replace. The legal warranty
period is determined by the legislation of the country in which the appliance was purchased.
Our warranty promise applies only if:
■
These operating instructions are complied with
■
The appliance is handled correctly
■
Original spare parts have been used
The guarantee excludes:
■
Paint damage that can be attributed to normal wear and tear
■
Wear parts that are marked with a frame
The guarantee period commences with purchase by the first end user. The date on the proof of purchase is decisive. In the event of a guarantee claim, please take this guarantee declaration and the original proof of purchase, and contact your dealer or the nearest authorised customer service centre.
This statement does not affect the purchaser's statutory claims for defects against the vendor.
The warranty becomes void in the case of:
■
Unauthorised repair attempts
■
Unauthorised technical modifications
■
Non-intended use
on the spare parts card
18 EU DECLARATION OF CONFORMITY
We hereby declare that this product in its marketed form conforms to the requirements of the harmonised EU Directives, EU safety standards and the product-specific standards.
Product
Battery chain saw
Serial number
G4124126
Manufacturer
AL-KO Geräte GmbH
Ichenhauser Str. 14
D-89359 Kötz
Germany
Duly authorised person for technical file
Andreas Hedrich
Ichenhauser Str. 14
D-89359 Kötz
Germany
Type
CS 36 Li
Sound power level
EN ISO 3744
measured/guaranteed
101 dB(a) / 105 dB(A)
EC type examination approval No.
(2006/42/EC Annex IX)
BM 50359218 0001
46 CS 36 Li
EU directives
2006/42/EC
2014/30/EU
2000/14/EC
2011/65/EU
Conformity evaluation
2000/14/EC Appendix V
Named position
TÜV Rheinland LGA Products GmbH
Tillystraße 2
D-90431 Nuremberg
Germany
No. 0197
Harmonised standards
EN 60745-1:2009+A11:2010
EN 60745-2-13:2009+A1:2010
EN 55014-1:2006+A1:2009+A2:2011
EN 55014-2:2015
Kötz, Germany 2016-12-01
Wolfgang Hergeth
Managing Director
Page 47

Traduzione del manuale per l'uso originale
TRADUZIONE DEL MANUALE PER L'USO ORIGINALE
Sommario
1 Istruzioni per l'uso........................................................................................................................... 49
1.1 Descrizione dei simboli e parole segnaletiche ...................................................................... 49
2 Descrizione del prodotto ................................................................................................................. 49
2.1 Dotazione ..............................................................................................................................49
2.2 Simboli sull'apparecchio ........................................................................................................ 49
2.3 Dispositivi di sicurezza e di protezione.................................................................................. 50
2.4 Protezione da sovraccarico ...................................................................................................50
2.5 Protezione contro l’accensione ............................................................................................. 50
2.6 Freno catena .........................................................................................................................50
2.7 Utilizzo conforme alla destinazione .......................................................................................50
3 Panoramica prodotto (01) ............................................................................................................... 50
4 Istruzioni generali di sicurezza per apparecchi elettrici (IEC 60745-1)........................................... 51
4.1 Sicurezza sul posto di lavoro................................................................................................. 51
4.2 Sicurezza elettrica .................................................................................................................51
4.3 Sicurezza di persone ............................................................................................................. 51
4.4 Utilizzo e manipolazione di un apparecchio elettrico............................................................. 52
4.5 Utilizzo e manipolazione della batteria ..................................................................................52
4.6 Service .................................................................................................................................. 52
5 Indicazioni di sicurezza per motoseghe (EN 60745 Parte 2-13)..................................................... 52
6 Cause e prevenzione di contraccolpi (EN 60745 Teil 2-13) ........................................................... 53
7 Montaggio ....................................................................................................................................... 54
7.1 Montare la barra di guida (05, 06) .........................................................................................54
7.2 Montare la catena (05, 06) .................................................................................................... 54
7.3 Tendere la catena (05, 07) ....................................................................................................54
8 Messa in funzione........................................................................................................................... 54
8.1 Caricare la batteria (02)......................................................................................................... 55
8.2 Inserire la batteria (03/A) ....................................................................................................... 55
8.3 Estrarre la batteria (03/B) ......................................................................................................55
8.4 Controllare la tensione catena............................................................................................... 55
8.5 Controllare la funzione del freno della catena .......................................................................55
8.6 Prova di funzionamento del freno catena a motore spento (08) ........................................... 55
8.7 Prova di funzionamento del freno catena a motore acceso (08) ........................................... 55
8.8 Aggiungere olio per catena (09) ............................................................................................56
469861_a 47
Page 48

IT
9 Utilizzo ............................................................................................................................................56
9.1 Determinazione dello stato di carica della batteria (04) ........................................................ 56
9.2 Indicatori dello stato di carica sulla batteria........................................................................... 56
9.3 Controllare l’olio per catena................................................................................................... 57
9.4 Controllo del freno catena ..................................................................................................... 57
9.5 Accendere e spegnere il motore ........................................................................................... 57
10 Comportamento e tecnica di lavoro ................................................................................................ 57
10.1 Indicazioni di sicurezza per il lavoro ...................................................................................... 58
10.1.1 Operatore ................................................................................................................58
10.1.2 Tempi di funzionamento .......................................................................................... 58
10.1.3 Lavori con la motosega ...........................................................................................58
10.1.4 Pericolo di contraccolpo ..........................................................................................59
10.2 Abbattere alberi .....................................................................................................................59
10.3 Sgombero dei rami ................................................................................................................60
10.4 Troncare a misura l'albero..................................................................................................... 61
10.5 Tagliare a misura i ceppi (12) ................................................................................................ 61
11 Trasporto ........................................................................................................................................ 61
12 Manutenzione e cura ......................................................................................................................61
12.1 Affilare la catena (13) ............................................................................................................ 62
12.2 Pulire il pignone - vano interno .............................................................................................. 62
12.3 Modificare il dispositivo di tensionamento rapido (16)........................................................... 63
12.4 Verificare la barra di guida, ruotare e oliare (14, 15) ............................................................. 63
13 Conservazione................................................................................................................................ 63
14 Smaltimento.................................................................................................................................... 63
15 Supporto in caso di anomalie ......................................................................................................... 64
16 Specifiche tecniche......................................................................................................................... 65
17 Garanzia .........................................................................................................................................66
18 Dichiarazione di conformità EC ...................................................................................................... 66
Traduzione del manuale per l'uso originale
48 CS 36 Li
Page 49

Istruzioni per l'uso
1 ISTRUZIONI PER L'USO
■
Prima della messa in funzione, leggere attentamente queste istruzioni per l'uso. È il presupposto per lavorare in modo sicuro e per
una gestione regolare.
■
Conservare le presenti istruzioni per l'uso in
maniera da potervi leggere, qualora si rendesse necessaria, un'informazione a proposito dell'apparecchio.
■
Consegnare l'apparecchio ad altre persone
solo insieme alle presenti istruzioni per l'uso.
■
Attenersi alle indicazioni di sicurezza e alle
avvertenze contenute nelle presenti istruzioni
per l'uso.
1.1 Descrizione dei simboli e parole segnaletiche
PERICOLO!
Mostra una situazione pericolosa imminente che ha come conseguenza la morte o una seria lesione se non viene evitata.
ATTENZIONE!
Mostra una situazione potenzialmente
pericolosa che, se non viene evitata, ha
come conseguenza la morte o una seria
lesione.
CAUTELA!
Mostra una situazione potenzialmente
pericolosa che, se non viene evitata, ha
come conseguenza una leggera o media
lesione.
2 DESCRIZIONE DEL PRODOTTO
Le presenti istruzioni per l'uso descrivono una
motosega portatile alimentata da una batteria ricaricabile.
2.1 Dotazione
La motosega a batteria è stata progettata per il
funzionamento con batterie della famiglia EnergyFlex con una capacità di 4 Ah (batteria "Li-Ion 36
V, 4 Ah, B05-3640" (Articolo n. 113280)) .
ATTENZIONE!
Pericolo di danni per motosega e la
batteria
Se la sega viene utilizzata con una batteria non idonea, si possono causare danni
alla catena e alla batteria.
■
Far funzionare la motosega soltanto
con una batteria con capacità di 4 Ah.
Per caricare la batteria è necessario il caricabatterie "C05-4230" (articolo n. 113281).
AVVISO
Nei manuali di istruzioni seguenti sono
presenti ulteriori informazioni:
■
Batteria Li-Ion 36 V, 4 Ah, B05-3640
(n. doc. 441630)
■
Caricabatterie C05-4230 per batteria
Li-Ion 36 V, 4 Ah (n. doc. 441633)
2.2 Simboli sull'apparecchio
Simbolo Significato
Maneggiare con estrema cautela!
ATTENZIONE!
Mostra una situazione che, se non viene
evitata, potrebbe avere come conseguenza dei danni materiali.
AVVISO
Indicazioni speciali volte a migliorare la
comprensione e l'uso.
469861_a 49
Pericolo di contraccolpo!
Non utilizzare la motosega con una
sola mano!
Non utilizzare quando piove! Proteggere dall'umidità!
Page 50

IT
Panoramica prodotto (01)
Simbolo Significato
Indossare un casco di sicurezza e
protezioni per l'udito e gli occhi!
Indossare guanti di protezione!
Indossare scarpe robuste!
Prima di mettere in funzione leggere il libretto di istruzioni!
Utilizzare sempre la motosega con
due mani!
2.3 Dispositivi di sicurezza e di protezione
ATTENZIONE!
Rischio di gravi lesioni a causa di di-
spositivi di sicurezza e di protezione
manipolati
A causa di dispositivi di sicurezza e di
protezione manipolati quando si lavora
con la motosega si possono verificare
gravi lesioni.
■
Non mettere fuori uso i dispositivi di
sicurezza e di protezione.
■
Lavorare con la motosega solo quando tutti i dispositivi di sicurezza e di
protezione funzionano correttamente.
2.4 Protezione da sovraccarico
La motosega è dotata di una protezione da sovraccarico che spegne l'apparecchio in caso di
sovraccarico.
Dopo una breve fase di raffreddamento, la motosega può essere riaccesa.
2.5 Protezione contro l’accensione
Quando l'operatore dà gas più volte in rapida
successione, la motosega si spegne per alcuni
secondi per proteggere l'elettronica e la catena.
In questo caso, attendere fino a quando la sega
può essere accesa di nuovo.
2.6 Freno catena
La motosega dispone di un freno manuale della
catena che viene fatto scattare dal paramano, ad
es. in caso di contraccolpo ("kickback"). In caso
di scatto del freno la catena viene arrestata di
colpo e il motore viene spento.
2.7 Utilizzo conforme alla destinazione
La motosega è progettata per l'uso esclusivo in
ambito domestico, hobbistico e del giardinaggio.
In questa zona, la motosega si può utilizzare per
leggeri lavori di sega per legno, ad esempio per:
■
tagliare ceppi di legna
■
taglio di siepi
■
taglio di legna da ardere
Grazie al motore elettrico la motosega con batteria può essere utilizzata per segare il legno non
solo all'aperto ma anche in ambienti chiusi. Un
utilizzo diverso da quello descritto non viene considerato conforme alla destinazione d'uso.
La motosega non può essere utilizzata in esercizi
commerciali.
CAUTELA!
Pericolo di lesioni a causa di un uso
non conforme alla destinazione!
Se viene segato legno o altro materiale
con corpi estranei con la motosega possono derivare lesioni.
■
Utilizzare la motosega soltanto per
lavori leggeri di taglio del legno.
■
Esaminare il legno prima di segare
per verificare le presenza di corpi
estranei, ad esempio chiodi, viti, raccordi.
3 PANORAMICA PRODOTTO (01)
N. Componente
01/1 Catena tagliente
01/2 Barra di guida
01/3 Dispositivo di bloccaggio rapido con
chiusura centrale e anello rotante
01/4 Paramano
01/5 Impugnatura a staffa
01/6 Batteria
01/7 Leva dell'acceleratore
01/8 Pulsante di bloccaggio
50 CS 36 Li
Page 51

Istruzioni generali di sicurezza per apparecchi elettrici (IEC 60745-1)
N. Componente
01/9 Maniglia posteriore
01/10 Carter per pignone catena
01/11 Battuta dentata
01/12 Chiusura del serbatoio dell'olio della
catena
01/13 Finestra di ispezione del serbatoio
dell'olio della catena
4 ISTRUZIONI GENERALI DI
SICUREZZA PER APPARECCHI
ELETTRICI (IEC 60745-1)
ATTENZIONE!
Rischio di scosse elettriche, incendi e/
o lesioni gravi
Omissioni nel rispetto delle indicazioni di
sicurezza e delle istruzioni possono causare folgorazione, incendio e/o gravi infortuni.
■
Leggere tutte le indicazioni di sicurezza e le istruzioni.
■
Conservare tutte le indicazioni di sicurezza e le istruzioni per futuro riferimento.
Il termine utilizzato nelle indicazioni di sicurezza
"Apparecchio elettrico" si riferisce ad apparecchi
elettrici collegati alla rete di alimentazione (con
cavo di rete) e ad apparecchi elettrici a batteria
(senza cavo di rete).
4.1 Sicurezza sul posto di lavoro
■
Mantenere pulita e ben illuminata la propria zona di lavoro. La mancanza di ordine
o zone di lavoro non illuminate possono causare incidenti.
■
Non utilizzare l'apparecchio elettrico in
ambienti a rischio di esplosione in cui sono presenti liquidi, gas o polveri infiammabili. Gli apparecchi elettrici generano scin-
tille che possono innescare la polvere o i vapori.
■
Durante l'uso tenere i bambini e le altre
persone lontano dall'apparecchio elettrico. In caso di deviazione si può perdere il
controllo sull'apparecchio.
4.2 Sicurezza elettrica
■
Evitare il contatto del corpo con superfici
collegate alla terra come tubi, riscaldamenti, fornelli o frigoriferi. Quando il pro-
prio corpo è collegato alla terra esiste un elevato rischio di folgorazione.
■
Tenere gli apparecchi elettrici lontani da
pioggia o umidità. La penetrazione di acqua
in un apparecchio elettrico aumenta il rischio
di folgorazione.
4.3 Sicurezza di persone
■
Quando si lavora con un apparecchio elettrico si raccomanda di procedere con cautela, attenzione e giudizio. Non utilizzare
un apparecchio elettrico se si è stanchi o
sotto l'influsso di droghe, alcol o medicinali. Un momento di disattenzione durante
l'uso dell'apparecchio elettrico può avere come conseguenza infortuni gravi.
■
Indossare equipaggiamento di protezione
personale e sempre degli occhiali protettivi. Indossare un equipaggiamento protettivo
personale, come maschera antipolvere, scarpe di sicurezza antiscivolo, caschetto o protezione per l'udito, a seconda dell'uso dell'apparecchio elettrico, riduce il rischio di lesioni.
■
Evitare di mettere in funzione l'apparecchio involontariamente. Accertarsi che
l'apparecchio elettrico sia spento prima di
collegarlo all'alimentazione elettrica e/o
alla batteria, di imbracciarlo o di trasportarlo. Se trasportando l'apparecchio elettrico
si tiene il dito sull'interruttore oppure si collega l'apparecchio acceso all'alimentazione di
corrente possono verificarsi degli incidenti.
■
Prima di accendere l'apparecchio elettrico
rimuovere gli apparecchi di regolazione o
la chiave inglese. Un apparecchio o una
chiave che si trovino in una parte rotante
dell'apparecchio possono portare a infortuni.
■
Evitare una postura anomala. Assicurarsi
una posizione stabile e mantenere l'equilibrio in qualsiasi momento. In questo modo
è possibile controllare meglio l'apparecchio
elettrico in situazioni inaspettate.
■
Indossare abiti adatti. Non indossare abiti
ampi o gioielli. Tenere capelli, abiti e
guanti lontano dalle parti in movimento.
Abiti larghi, gioielli o capelli lunghi possono rimanere catturati dalle parti in movimento.
469861_a 51
Page 52

IT
Indicazioni di sicurezza per motoseghe (EN 60745 Parte 2-13)
■
Se possono essere montati dispositivi di
aspirazione polveri e di raccolta, accertarsi che questi siano collegati e che vengano utilizzati correttamente. L'utilizzo di
un'aspiratore può ridurre i rischi dovuti alla
polvere.
4.4 Utilizzo e manipolazione di un apparecchio elettrico
■
Non sovraccaricare l'apparecchio. Per lavorare utilizzare l'apparecchio elettrico
specificamente previsto. Con l'apparecchio
elettrico giusto si lavora meglio e in modo più
sicuro nel campo di prestazioni specificato.
■
Non utilizzare un apparecchio elettrico
che abbia l'interruttore guasto. Un appa-
recchio elettrico che non è più possibile accendere o spegnere è pericoloso e deve essere riparato.
■
Sfilare il connettore dalla presa e/o rimuovere la batteria prima di effettuare impostazioni dell'apparecchio, di sostituire accessori oppure di riporre l'apparecchio.
Questa misura precauzionale previene l'avvio
involontario dell'apparecchio elettrico.
■
Conservare gli apparecchi elettrici non
utilizzati fuori della portata dei bambini.
Non consentire di usare l'apparecchio a
persone che non ne conoscano l'utilizzo o
che non abbiano letto le istruzioni. Gli ap-
parecchi elettrici sono pericolosi se vengono
utilizzati da persone inesperte.
■
Tenere con cura gli apparecchi elettrici.
Controllare se le parti mobili funzionano
correttamente e non si bloccano, se ci sono parti rotte o danneggiate che compromettono il funzionamento dell'apparecchio elettrico. Prima di utilizzare l'apparecchio far riparare le parti danneggiate.
Molti incidenti hanno la propria causa in apparecchi elettrici sottoposti a una scarsa manutenzione.
■
Mantenere gli utensili di taglio affilati e
puliti. Utensili di taglio sottoposti a una cura
meticolosa con bordi taglienti affilati si inceppano meno e sono più facili da guidare.
■
Utilizzare apparecchi elettrici, accessori,
apparecchi a innesto, ecc. in base a queste istruzioni. Nel far questo tenere in
considerazione le condizioni di lavoro e
l'attività da svolgere. L'uso di apparecchi
elettrici per scopi diversi dalle applicazioni
previste può portare a situazioni pericolose.
4.5 Utilizzo e manipolazione della batteria
■
Ricaricare la batteria solo con il caricabatterie specificato dal produttore. Rischio di
incendio se per il caricabatterie progettato
per un tipo specifico di batteria viene caricato
un tipo di batteria diverso.
■
Utilizzare il caricabatterie soltanto con la
batteria prevista. Pericolo di lesioni o incen-
dio in caso di utilizzo di una batteria diversa.
■
Tenere lontana la batteria carica e non
usata da oggetti metallici per non cortocircuitare i contatti (ad es. graffette per ufficio, monete, chiavi, aghi, viti). Un corto-
circuito può provocare ustioni o incendi.
■
In caso di uso improprio e di batteria danneggiata, possono fuoriuscire vapori e liquido elettrolita. Evitare il contatto con
vapori e liquido elettrolita. Aerare il locale
in modo adeguato. In caso di contatto con
liquido elettrolita lavarsi accuratamente.
Se il liquido elettrolita viene a contatto
con gli occhi, risciacquare abbondantemente e consultare un medico. Il liquido
elettrolita fuoriuscito può causare irritazioni
della pelle oppure ustioni.
4.6 Service
■
Far riparare l'apparecchio elettrico solo da
personale tecnico qualificato e con ricambi originali. In questo modo si garantisce
che la sicurezza dell'apparecchio elettrico rimanga inalterata.
5 INDICAZIONI DI SICUREZZA PER
MOTOSEGHE (EN 60745 PARTE 2-13)
■
Mentre la motosega è in funzione, tenere
tutte le parti del corpo lontano dalla catena. Accertarsi che prima dell'avviamento
della motosega la catena non si trovi in
contatto con nulla. Lavorando con una mo-
tosega basta un momento di disattenzione
perché parte dell'abbigliamento o del corpo
rimangano catturate nella catena.
■
Trattenere la motosega sempre con la mano destra per la maniglia posteriore e la
mano sinistra per la maniglia anteriore.
Trattenere la motosega in modo opposto a
quello descritto aumenta il rischio di infortuni
ed è da evitare.
■
Afferrare sempre l'apparecchio elettrico
per le superfici isolate dell'impugnatura
poiché la catena potrebbe entrare in contatto con il cavo di alimentazione. Il contat-
52 CS 36 Li
Page 53

Cause e prevenzione di contraccolpi (EN 60745 Teil 2-13)
to della catena con un conduttore in tensione
può trasmettere elettricità alle parti metalliche
dell'apparecchio e causare un fenomeno di
folgorazione.
■
Indossare occhiali protettivi e protezione
per l'udito. Si raccomanda un ulteriore
equipaggiamento protettivo per testa, mani, gambe e piedi. L'abbigliamento protettivo
adatto riduce il pericolo di infortuni dovuti a
materiale vangante in trucioli e al contatto
fortuito con la catena.
■
Non lavorare con la motosega stando su
un albero. L’utilizzo su di un albero dà luogo
al pericolo di infortuni.
■
Assicurarsi sempre di assumere una posizione stabile ed utilizzare la motosega solo se ci si trova su un terreno solido, sicuro e in piano. Sottofondi scivolosi o instabili,
come su una scala, possono portare alla perdita dell'equilibrio o alla perdita del controllo
sulla motosega.
■
Se si taglia un ramo che si trova in tensione ricordare che può produrre un effetto
frusta. Se la tensione nelle fibre di legno non
viene controllata, il ramo in tensione può colpire l'operatore e/o togliere il controllo sulla
motosega.
■
Prestare particolare cautela durante il taglio di sottobosco e alberi giovani. Il mate-
riale sottile può rimanere catturato nella catena e urtarla oppure comprometterne l'equilibrio.
■
Trasportare la motosega per la maniglia
anteriore da spenta, con la catena rivolta
lontano dal corpo. Per il trasporto o il rimessaggio della motosega applicare sempre la protezione di sicurezza. Una mani-
polazione attenta della motosega riduce
l'eventualità di un contatto involontario con la
catena tagliente in funzione.
■
Seguire le istruzioni per la lubrificazione,
la tensione della catena e la sostituzione
degli accessori. Una catena tesa o lubrifica-
ta in modo scorretto può strapparsi oppure
aumentare il rischio di contraccolpo.
■
Mantenere asciutte, pulite ed esenti da
olio e grasso le maniglie. Maniglie sporche
di grasso o di olio risultano scivolose e portano alla perdita del controllo.
■
Segare solo legno. Non utilizzare la motosega per lavori a cui non è destinata.
Esempio: non utilizzare la motosega per
segare plastica, muratura o materiali edili
che non siano fatti di legno. L'uso della
motosega per lavori non conformi alla destinazione può causare situazioni pericolose.
6 CAUSE E PREVENZIONE DI
CONTRACCOLPI (EN 60745
PARTE
2-13)
Il contraccolpo può verificarsi se la punta della
barra di guida tocca un oggetto o se il legno si
piega e la catena tagliente rimane bloccata nel
taglio.
Un contatto con la punta della barra in alcuni casi
può comportare una reazione inattesa all'indietro
in cui la barra di guida viene spinta verso l'alto e
in direzione dell'operatore.
Il bloccaggio della catena tagliente sul bordo superiore della barra di guida può sbalzare rapidamente la barra in direzione dell'operatore.
Ciascuna di queste reazioni può comportare che
si perda il controllo sulla motosega e che si possano anche subire lesioni gravi. Non affidarsi
esclusivamente ai dispositivi di sicurezza integrati
nella motosega. Come utenti di una motosega è
opportuno adottare diversi provvedimenti per poter lavorare senza incidenti e infortuni.
Un contraccolpo è la conseguenza di un uso sbagliato o errato dell'utensile elettrico. Può essere
prevenuto mediante misure precauzionali adatte,
come descritto di seguito:
■
Trattenere la sega saldamente con entrambe le mani, racchiudendo le maniglie della
motosega tra pollice e dita. Portare corpo
e braccia in una posizione in cui si sia in
grado di resistere alla forza del contraccolpo. Se vengono adottate la giuste contro-
misure l'operatore è in grado di resistere alle
forze del contraccolpo. Mai lasciare andare la
motosega.
■
Evitare posture anomale e non svolgere
operazioni di segatura oltre il livello delle
spalle.
In questo modo si evita un contatto
involontario con la punta della barra e si consente un migliore controllo della motosega in
situazioni inattese.
■
Utilizzare sempre le barra di ricambio e le
catene per sega prescritte dal costruttore.
Barre di ricambio e catene errate possono
portare allo strappo della catena e/o a contraccolpi.
■
Attenersi alle istruzioni del costruttore per
l'affilatura e la manutenzione della catena
tagliente. Limitatori di profondità troppo bas-
si aumentano la tendenza al contraccolpo.
469861_a 53
Page 54

IT
Montaggio
7 MONTAGGIO
ATTENZIONE!
Rischio di gravi lesioni.
Se si utilizza una motosega montata in
modo incompleto, si possono causare lesioni gravi.
■
Utilizzare la motosega solo quando è
stato completamente montata.
■
Prima di ogni utilizzo, eseguire un
controllo visivo per vedere se la catena è completa e non contiene componenti danneggiati o usurati. I dispositivi di sicurezza e di protezione
devono essere integri.
CAUTELA!
Pericolo di lesioni da taglio.
I bordi taglienti della catena possono
causare lesioni da taglio in fase di montaggio.
■
Rimuovere la batteria prima del montaggio.
■
In fase di montaggio della catena e
della di guida indossare guanti di sicurezza.
7.1 Montare la barra di guida (05, 06)
1. Tirare il paramano (05/1) in direzione dell’impugnatura (05/A) per sbloccare il freno della
catena.
2. Girare la chiusura centrale (05/2) in senso
antiorario e rimuoverla con il coperchio
(05/3).
3. Applicare la barra di guida (06/1) sui perni di
guida (06/2) e far scorrere indietro per consentire il montaggio della catena.
7.2 Montare la catena (05, 06)
1. Inserire la catena sul pignone (06/3) e nella
scanalatura della barra di guida (06/1).
2. Condurre la catena attorno alla stella di rinvio
della barra di guida. La catena deve pendere
leggermente sul lato inferiore della barra di
guida.
3. Riposizionare il coperchio (05/3) e stringere
leggermente la chiusura centrale (05/2).
7.3 Tendere la catena (05, 07)
AVVISO
La catena della motosega è correttamente tesa quando:
■
appoggia sul lato inferiore della barra
e consente di essere tirata a mano.
■
consente di essere sollevata di 3-4
mm a metà della barra.
1. Controllare la sede della catena in modo che
appoggi correttamente sul pignone e nella
barra di guida.
2. Girare l’anello rotante (05/4) sul coperchio
(05/3) facendo trovare i due triangoli l’uno di
fronte all'altro (05/B).
3. Riposizionare il coperchio (07/1) e girare la
chiusura centrale (07/2) in senso orario. Non
stringere la chiusura centrale completamente
oppure tornare indietro di un giro.
4. Girare l’anello rotante (07/3) in senso orario
fino a quando la catena, come descritto sopra, è ben tesa.
5. Girare la chiusura centrale (07/2) in senso
orario fino a quando è fissata.
8 MESSA IN FUNZIONE
PERICOLO!
Pericolo di morte e rischio di lesioni
gravissime.
La mancata conoscenza delle istruzioni
di sicurezza e di utilizzo può causare incidenti gravissimi e anche fatali.
■
Leggere e osservare tutte le istruzioni di sicurezza e di utilizzo del presente manuale e le istruzioni operative prima di utilizzare la motosega!
ATTENZIONE!
Rischio di gravi lesioni.
Se sono presenti componenti usurati nella motosega, si possono causare lesioni
gravi.
■
Prima di ogni utilizzo, eseguire un
controllo visivo per vedere se la catena è completa e non contiene componenti danneggiati o usurati. I dispositivi di sicurezza e di protezione
devono essere integri.
54 CS 36 Li
Page 55

Messa in funzione
8.1 Caricare la batteria (02)
La batteria è parzialmente carica. Caricare completamente la batteria prima del primo utilizzo. La
batteria può essere utilizzata in qualsiasi stato di
carica a scelta. Un'interruzione della carica non
danneggia la batteria.
AVVISO
Tenere presente le informazioni dettagliate contenute nei manuali separati sulla batteria e sul caricabatterie.
8.2 Inserire la batteria (03/A)
1. Inserire la batteria (03/1) da sopra nel pozzetto batteria (03/2) finché non si blocca.
8.3 Estrarre la batteria (03/B)
1. Premere l'interruttore di sblocco (03/3) sulla
batteria (03/1) e tenerlo premuto.
2. Estrarre la batteria (03/1).
8.4 Controllare la tensione catena
Controllare spesso la tensione della catena dal
momento che da nuova tende ad allungarsi.
Alla temperatura d'esercizio la catena della motosega si allunga e pende.
AVVISO
La catena della motosega è correttamente tesa quando:
■
appoggia sul lato inferiore della barra
e consente di essere tirata a mano.
■
consente di essere sollevata di 3-4
mm a metà della barra.
CAUTELA!
Pericolo di infortuni dovuto a possibili
salti della catena!
Una catena allentata può saltare fuori durante il funzionamento causando lesioni.
■
Controllare spesso la tensione catena. La tensione della catena è insufficiente se le maglie motrici sporgono
dalla scanalatura sul lato inferiore
della barra di guida.
■
Tendere la catena correttamente
quando la tensione della catena è
troppo bassa.
8.5 Controllare la funzione del freno della catena
La motosega dispone di un freno manuale della
catena che viene fatto scattare dal paramano, ad
es. in caso di contraccolpo ("kickback").
In caso di scatto del freno la catena viene arrestata di colpo e il motore viene spento.
PERICOLO!
Pericolo di morte in caso di utilizzo
negligente!
A causa di movimenti incauti e imprevisti
della motosega si possono causare lesioni gravi o anche fatali.
■
Lavorare con la motosega con consapevolezza e con la massima concentrazione.
■
Quando si sblocca il freno della catena non premere nessun interruttore.
ATTENZIONE!
Pericolo di morte e rischio di lesioni
gravissime a causa di freno catena difettoso.
Se il freno catena non funziona, ad
esempio in caso di contraccolpo (kickback) della catena in movimento si possono causare lesioni gravi e persino la
morte dell'operatore.
■
Controllare il freno catena prima di
iniziare il lavoro.
■
Non attivare la motosega se il freno
catena è difettoso. In questo caso lasciare la motosega in un’officina del
servizio assistenza per le verifiche.
8.6 Prova di funzionamento del freno catena a motore spento (08)
1. Per disattivare il freno della catena, premere
(08/A) il paramano (08/1) in direzione dell'impugnatura (08/2). La catena può essere tirata
manualmente.
2. Per attivare il freno della catena, premere
(08/B) in avanti il paramano (08/1). La catena
della motosega non deve lasciarsi tirare.
8.7 Prova di funzionamento del freno catena a motore acceso (08)
AVVISO
Prima di ogni attivazione della motosega,
sbloccare il freno della catena.
469861_a 55
Page 56

IT
Utilizzo
1. Impugnare la motosega in modo sicuro e ben
saldo per la staffa e l'impugnatura.
2. Allentare il freno catena.
3. Accendere il motore.
4. Premere il paramano (08/1) in avanti (08/B).
Catena e motore devono arrivare immediatamente all'arresto.
8.8 Aggiungere olio per catena (09)
ATTENZIONE!
Pericolo di danneggiamento della mo-
tosega
La catena viene seriamente danneggiata
in caso di olio assente o insufficiente nel
serbatoio o se questo è asciutto/incollato.
Se l'olio per catena è asciutto/fa aderenza può causare danni alle condutture e
alla pompa.
Il danno si verifica anche quando si utilizza olio usato. L'uso di olio usato comporta inquinamento ambientale!
■
Rabboccare l'olio catena nel serbatoio per la messa in servizio.
■
Non utilizzare olio usato!
■
A ogni cambio batteria rabboccare
nuovamente il serbatoio con olio catena.
Mentre sono in funzione la catena e la barra vengono alimentate continuamente di olio mediante
un sistema di lubrificazione automatico. L'olio
protegge la catena dalla corrosione e dall'usura
prematura. Per una corretta lubrificazione della
catena nel serbatoio deve sempre essere presente olio per catena a sufficienza.
Per la lubrificazione della catena e della barra utilizzare solo olio di qualità biodegradabile a basso
impatto ambientale; inoltre, trasportare e stoccare solo in contenitori appositamente contraddistinti.
Prima di ogni utilizzo e a ogni cambio batteria
controllare il livello dell'olio e rabboccare l'olio catena, se necessario:
1. Controllare il livello dell'olio nella finestra di
ispezione del serbatoio (09/1). L’olio deve essere sempre visibile. Non deve essere superata la distanza minima e massima.
2. Rabboccare l’olio attraverso il tappo di riempimento (09/2), se necessario.
9 UTILIZZO
PERICOLO!
Pericolo di morte e rischio di lesioni
gravissime.
La mancata conoscenza delle istruzioni
di sicurezza e di utilizzo può causare incidenti gravissimi e anche fatali.
■
Leggere e osservare tutte le istruzioni di sicurezza e di utilizzo del presente manuale e le istruzioni operative prima di utilizzare la motosega!
■
Attenersi alle disposizioni specifiche del paese per quanto riguarda i tempi operativi.
■
Afferrare saldamente e trattenere l'impugnatura posteriore con la mano destra (per persone destre) e l'impugnatura anteriore con la
mano sinistra.
■
Fintanto che il motore è in funzione non lasciare andare le impugnature.
■
Non utilizzare la motosega in caso di:
■
Stanchezza
■
Malessere
■
Effetto di alcool, farmaci o droghe
9.1 Determinazione dello stato di carica della batteria (04)
Sul lato anteriore della batteria si trova un pannello di comando con un pulsante (04/1) e con indicatori dello stati di carica LED (da 04/2 a 04/5).
1. Premere il pulsante (04/1).
Gli indicatori dello stato di carica si accendono in funzione dello stato di carica della batteria.
2. Rilevare lo stato di carica della batteria, ve-
dere capitolo 9.2 "Indicatori dello stato di ca-
rica sulla batteria", pagina56.
9.2 Indicatori dello stato di carica sulla batteria
LED accesi Stato di carica della batteria
verde (04/2) la batteria è completamente
verde (04/3) e
(04/4)
verde (04/4) La batteria è carica per meno
caricata.
La batteria è carica oltre il
50%.
del 50%.
56 CS 36 Li
Page 57

Comportamento e tecnica di lavoro
LED accesi Stato di carica della batteria
rosso (04/5) La batteria è completamente
9.3 Controllare l’olio per catena
Procedimento vedere capitolo 8.8 "Aggiungere
olio per catena (09)", pagina56.
ATTENZIONE!
Pericolo di danneggiamento della mo-
tosega
La catena viene seriamente danneggiata
in caso di olio assente o insufficiente nel
serbatoio o se questo è asciutto/incollato.
Se l'olio per catena è asciutto/fa aderenza può causare danni alle condutture e
alla pompa.
Il danno si verifica anche quando si utilizza olio usato. L'uso di olio usato comporta inquinamento ambientale!
■
■
■
9.4 Controllo del freno catena
Procedimento vedere capitolo 8.5 "Controllare la
funzione del freno della catena", pagina55.
ATTENZIONE!
Pericolo di morte e rischio di lesioni
gravissime a causa di freno catena difettoso.
Se il freno catena non funziona, ad
esempio in caso di contraccolpo (kickback) della catena in movimento si possono causare lesioni gravi e persino la
morte dell'operatore.
■
■
scarica o la batteria è stata
surriscaldata/troppo raffreddata.
Prima di iniziare a lavorare, controllare se nel serbatoio è presente olio
per catena a sufficienza.
In caso di livello basso rabboccare
l’olio.
Non utilizzare olio usato!
Controllare il freno catena prima di
iniziare il lavoro.
Non attivare la motosega se il freno
catena è difettoso. In questo caso lasciare la motosega in un’officina del
servizio assistenza per le verifiche.
9.5 Accendere e spegnere il motore
CAUTELA!
Pericolo di danni all’udito!
Azionando la motosega si crea un forte
rumore che può causare danni all'udito.
■
Indossare protezioni per le orecchie
quando si lavora con la motosega.
AVVISO
Prima di ogni attivazione della motosega,
sbloccare il freno della catena.
Accendere il motore:
1. Allentare il freno catena.
2. Premere il tasto di blocco (14/1) con il pollice
e tenerlo premuto.
3. Premere l'interruttore On/Off (14/2) e tenerlo
premuto.
4. Rilasciare il tasto di blocco (14/1). Non è necessario tenere premuto il tasto di blocco dopo l'avviamento della motosega. in quanto
serve a prevenire un avviamento involontario
della motosega.
Spegnere il motore:
1. Rilasciare l'interruttore On/Off (14/2).
10 COMPORTAMENTO E TECNICA DI
LAVORO
AVVISO
Le associazioni professionali agricole
propongono regolarmente corsi per l'uso
delle seghe a catena e corsi di abbattimento alberi.
PERICOLO!
Pericolo fatale per mancanza di cono-
scenze tecniche!
Conoscenze tecniche insufficienti possono causare infortuni gravissimi o anche
fatali!
■
Solo persone addestrate ed esperte
possono abbattere e sramare alberi.
469861_a 57
Page 58

IT
Comportamento e tecnica di lavoro
PERICOLO!
Pericolo di morte dovuto a legno
scheggiato!
I trucioli di legno strappati possono causare lesioni gravissime, anche fatali!
■
Rimuovere trucioli e schegge di legno sciolti dalla parte da segare.
10.1 Indicazioni di sicurezza per il lavoro
■
Rispettare le norme di sicurezza specifiche
del paese, ad esempio delle associazioni
professionali, dei fondi sociali, delle autorità
in materia di protezione del lavoro.
■
Lavorare solo in presenza di luce diurna o illuminazione artificiale sufficiente.
■
Tenere lo spazio di lavoro libero da oggetti
(ad es. pezzi di segato e altri oggetti ). Pericolo di inciampo.
■
L'utilizzatore è responsabile di incidenti che
coinvolgano altre persone e oggetti di loro
proprietà.
10.1.1 Operatore
■
Divieto di utilizzo dell'apparecchio a minori di
16 anni o persone che non abbiano letto il
manuale d'uso.
■
Se si sta lavorando per la prima volta con la
motosega: Chiedere al venditore o altra persona esperta come gestire la motosega, in alternativa seguire un corso di addestramento.
■
Tutti coloro che lavorano con la motosega
devono essere riposati, sani e in buona forma. Chi non può fare sforzi per motivi di salute dovrebbe chiedere a un medico se è possibile lavorare con questa motosega.
■
Adottare misure per proteggersi dalle sollecitazioni da vibrazione. A seconda di come
viene utilizzato l'apparecchio elettrico, i valori
di vibrazione effettivi possono discostarsi dai
valori indicati nella scheda tecnica. Nel far
questo tenere in considerazione l'intero ciclo
di lavoro, quindi anche i momenti in cui l'apparecchio elettrico lavora senza carico oppure è
spento. Misure adeguate includono, tra l'altro,
una manutenzione e cura regolari dell'apparecchio elettrico e dei relativi accessori, tenere
calde le mani, pause regolari e una buona pianificazione dei processi di lavoro.
■
Determinare la durata massima di lavoro
e le pause attraverso il valore delle vibrazioni.
10.1.2 Tempi di funzionamento
Tenere presenti i regolamenti specifici del paese
in merito ai tempi di funzionamento delle motoseghe. I tempi di funzionamento delle motoseghe
possono essere limitati da norme nazionali e locali.
10.1.3 Lavori con la motosega
ATTENZIONE!
Rischio di gravi lesioni.
Se si utilizza una motosega montata in
modo incompleto, si possono causare lesioni gravi.
■
Utilizzare la motosega solo quando è
stato completamente montata.
■
Prima di ogni utilizzo, eseguire un
controllo visivo per vedere se la catena è completa e non contiene componenti danneggiati o usurati. I dispositivi di sicurezza e di protezione
devono essere integri.
ATTENZIONE!
Rischio di lesioni da motosega avviata
accidentalmente
La motosega avviata accidentalmente
può causare lesioni gravi. Rimuovere la
batteria nei seguenti casi:
■
Lavori di controllo, regolazione e pulizia
■
Lavori sul gruppo di taglio
■
Quando si lascia la motosega
■
Trasporto
■
Stoccaggio
■
Lavori di manutenzione e riparazione
■
Pericolo
■
Non lavorare mai da soli.
■
Tenere sempre pronta una valigetta di pronto
soccorso per eventuali incidenti.
■
Evitare di venire in contatto con oggetti metallici interrati oppure che presentino un collegamento sotto tensione con tali oggetti.
■
L'apparecchatura di protezione individuale è
costituita da:
■
casco
■
protezione dell'udito (ad es. cuffie antirumore), soprattutto quando il tempo di lavoro supera 2,5 ore
58 CS 36 Li
Page 59

Comportamento e tecnica di lavoro
■
occhiali protettivi o protezione per il viso
del casco
■
pantaloni antinfortunistici con inserto antitaglio
■
guanti da lavoro resistenti
■
calzature antinfortunistiche con suola antiscivolo e puntale d'acciaio
■
Non utilizzare la motosega a un'altezza superiore a quella delle spalle, diversamente non
è possibile garantire una gestione sicura
dell'apparecchio.
■
Quando si cambia sede, spegnere il motore e
applicare la protezione per la catena.
■
Se la motosega non viene utilizzata, inserire
sempre la protezione catena e rimuovere la
batteria.
■
Deporre la motosega solo una volta spenta.
■
Non utilizzare la motosega per sollevare o
spostare del legno.
■
I rami più spessi della lunghezza della barra
possono essere segati solo da personale tecnico.
■
Iniziare il taglio solo a motosega in funzione;
non accendere mai la motosega con la lama
appoggiata.
■
Assicurarsi che l'olio della catena non vada a
impregnare il suolo.
■
Non svolgere lavori con la motosega in caso
di pioggia, neve o temporale.
■
Non disattivare mai i dispositivi di sicurezza e
di protezione.
10.1.4 Pericolo di contraccolpo
PERICOLO!
Pericolo di morte dovuto a contraccol-
po (kickback)!
Il contraccolpo (kickback) della motosega
può ferire gravemente l'operatore.
■
Osservare le misure seguenti per evitare il contraccolpo.
■
verificare che il materiale da segare non contenga corpi estranei (chiodi, metallo…) ed
eventualmente rimuoverli.
■
Utilizzare la motosega sempre con entrambe
le mani.
■
Lavorando con la motosega non piegarsi
troppo in avanti.
■
Non segare mai più rami tutti in una volta.
■
Lavorare solo con una catena correttamente
affilata e tesa.
■
Non utilizzare mai la motosega tenendo le
braccia distese.
■
Iniziare il taglio con la catena in funzione e
segare solo quando l'apparecchio raggiunge
il pieno regime.
■
Non segare con la punta della barra di guida.
■
Tenere sempre sott'occhio la punta della barra di guida.
■
Se si proseguono tagli già iniziati lavorare
con la massima cautela.
■
Tagliando sottobosco e alberi giovani lavorare con grande cautela.
■
Non utilizzare la motosega stando su una
scala o oltre l'altezza delle spalle.
■
Per una maggiore stabilità, durante il lavoro
con la motosega utilizzare la battuta dentata.
■
Mentre si utilizza la motosega accertarsi di
mantenere la massima stabilità.
■
In generale segare con il lato inferiore della
barra. Se si sega con il lato superiore della
barra lavorare con la massima cautela.
■
Togliere la motosega dal solco solo a catena
in funzione.
10.2 Abbattere alberi
Prima di iniziare i lavori di abbattimento è necessario adottare i seguenti provvedimenti.
■
Assicurarsi che nella zona di pericolo non
siano presenti altre persone, animali o cose.
■
La distanza di sicurezza dalle altre postazioni
di lavoro od oggetti deve corrispondere ad almeno 2,5 volte la lunghezza dell'albero.
■
Prestare attenzione anche alle linee di alimentazione e alla proprietà di terzi. Eventualmente informare le aziende di erogazione
dell'energia o i proprietari.
■
Valutare la direzione di caduta dell'albero.
Per la direzione di caduta dell'albero risultano
decisivi:
■
l'inclinazione naturale dell'albero
■
l'altezza dell'albero
■
la formazione unilaterale di rami
■
la posizione in piano o in pendenza
■
crescita asimmetrica, danni al legno
■
direzione e velocità del vento
■
carico di neve
■
In caso di pendenza, lavorare sempre al di
sopra dell'albero da abbattere.
469861_a 59
Page 60

IT
Comportamento e tecnica di lavoro
■
Assicurarsi che nel percorso di emergenza
precedentemente definito non siano presenti
ostacoli. Il percorso di emergenza deve correre di circa 45° obliquo all'indietro rispetto la
senso di caduta (17).
■
Il tronco deve essere esente da sterpaglia,
rami e corpi estranei (es. sporcizia, pietre,
corteccia semistaccata, chiodi, graffe, filo
metallico, ecc.).
Per abbattere un albero è necessario definire due
intagli a cuneo e un taglio di abbattimento.
1. Per i tagli di abbattimento e ridimensionamento applicare la battuta dentata in sicurezza al legno da tagliare.
2. Praticare la tacca direzionale (18/C) dapprima in orizzontale, poi obliqua da sopra ad un
angolo di almeno 45°. In questo modo si evita che la motosega rimanga bloccata al momento di effettuare il secondo intaglio a cuneo. La tacca direzionale deve essere praticata il più vicino possibile al terreno e nella
posizione in cui si desidera che l'albero cada
(18/E). La profondità della tacca deve corrispondere a circa 1/4 del diametro del tronco.
3. Praticare il taglio di abbattimento (18/D) esattamente orizzontale rispetto alla tacca direzionale. Il taglio di abbattimento deve essere
praticato a un'altezza di 3-5 cm sopra all'intaglio a cuneo orizzontale.
4. Praticare il taglio di abbattimento (18/D) a
una profondità tale che possa rimanere una
striscia di legno-cerniera (18/F) di almeno
1/10 del diametro del tronco tra la tacca direzionale (18/C) e il taglio di abbattimento (18/
D). Il legno-cerniera impedisce che l'albero si
giri e cada nella direzione sbagliata. Mano a
mano che il taglio di abbattimento (18/D) si
avvicina alla cerniera (18/F) l'albero dovrebbe cominciare a cadere.
Se l'albero cade durante il lavoro di segatura:
■
Se dovesse capitare che l'albero cada
nella direzione sbagliata o si inclini indietro e blocchi la motosega, interrompere il
taglio di abbattimento. Per aprire il taglio
e per far cadere l'albero inserire dei cunei
nella linea di abbattimento desiderata.
■
Togliere subito la motosega dal taglio,
spegnerla e deporla.
■
Portarsi nella zona della via di fuga.
■
Prestare attenzione ai rami e alle fronde
che cadono.
5. Se l'albero rimane in piedi, indurne la caduta
controllata mediante inserimento di cunei nel
taglio di abbattimento.
6. Dopo aver terminato il lavoro di sega, togliere
immediatamente la protezione per l'udito e
prestare attenzione a segnali o gridi di avvertimento.
AVVISO
Possono essere utilizzati solo cunei di legno, plastica o alluminio.
PERICOLO!
Pericolo di morte dovuto alla caduta di
alberi!
Se non è possibile accedere alla via di
fuga durante la caduta dell'albero, possono verificarsi infortuni gravi o anche fatali!
■
Iniziare con il lavoro di abbattimento
solo una volta che sia garantita una
via di fuga senza ostacoli dall'albero
in caduta.
PERICOLO!
Pericolo di morte dovuto alla caduta
incontrollata di alberi!
Alberi che cadono in modo incontrollato
possono causare incidenti gravissimi e
anche fatali!
■
Per garantire la caduta controllata di
un albero lasciare una striscia di legno-cerniera tra la tacca direzionale
e il taglio di abbattimento che corrisponda a ca. 1/10 del diametro del
tronco.
■
In presenza di vento non svolgere lavori di abbattimento.
10.3 Sgombero dei rami
Per questo lavoro attenersi ai seguenti punti:
■
Puntellare la motosega durante il lavoro sul
tronco dell'albero.
■
In un primo momento lasciare i rami più grandi rivolti verso il basso che puntellano l'albero
(19).
■
Rimuovere i rami più piccoli con un taglio.
■
Attenzione ai rami che si trovano in tensione;
segarli dal basso verso l'alto per evitare che
la motosega rimanga bloccata (19).
■
Non segare i rami sospesi da sotto.
60 CS 36 Li
Page 61

Trasporto
■
I tagli dal centro, longitudinali e a cuore dovrebbero essere effettuati solo da persone
esperte o qualificate (18).
10.4 Troncare a misura l'albero
Per questo lavoro attenersi ai seguenti punti:
■
in pendenza lavorare sempre al di sopra del
tronco dell'albero, dato che potrebbe rotolare
via (19).
■
Condurre la motosega in modo che nessuna
parte del corpo venga a trovarsi nel suo raggio d'azione esteso.
■
Applicare la battuta dentata direttamente accanto al bordo di taglio e lasciare girare la
motosega attorno a tale punto. Al termine del
taglio non esercitare alcuna pressione.
■
Assicurarsi che la catena non tocchi il suolo.
■
Dopo aver terminato il taglio attendere l'arresto della catena prima di rimuovere la motosega.
■
Spegnere sempre il motore della motosega
prima di passare all'albero successivo.
L'intera lunghezza del tronco dell'albero appoggia
in modo uniforme:
■
segare il tronco dell'albero da sopra e non
toccare il suolo con la motosega (20).
Il tronco appoggia su un'estremità:
■
per evitare il blocco della motosega e la
scheggiatura del legno segare solo 1/3 del
diametro del tronco partendo dal basso, quindi il resto dall'alto all'altezza del taglio inferio-
re (10).
Il tronco è appoggiato su entrambe le estremità:
per evitare il blocco della motosega e la scheg-
giatura del legno segare solo 1/3 del diametro del
tronco partendo dall'alto, quindi il resto dal basso
all'altezza del taglio superiore (11).
PERICOLO!
Pericolo di morte dovuto a contraccol-
po (kickback)!
Il contraccolpo (kickback) dell’apparecchio può ferire gravemente l'operatore.
■
Osservare le misure per evitare il
contraccolpo.
10.5 Tagliare a misura i ceppi (12)
Per questo lavoro attenersi ai seguenti punti:
■
utilizzare una base di taglio sicura (cavalletto,
cunei, trave).
■
Assicurare una perfetta stabilità e una distribuzione omogenea del peso corporeo.
■
Assicurare i ceppi a sezione circolare in modo che non possano rotolare.
■
Iniziare il taglio solo a motosega in funzione.
Non accendere mai la motosega con la lama
appoggiata.
■
Non trattenere il legno con il piede o con
l'aiuto di un'altra persona.
11 TRASPORTO
Prima del trasporto osservare le misure seguenti:
1. Spegnere la motosega
2. Inserire la protezione catena
3. Rimuovere la batteria
Portare la motosega tenendola per l’impugnatura.
La barra deve essere rivolta all'indietro.
ATTENZIONE!
Pericolo di morte e rischio di lesioni
gravissime.
La catena in movimento durante il trasporto può causare incidenti gravissimi e
anche fatali.
■
Non portare o trasportare mai la motosega con la catena in funzione.
■
Prima del trasporto osservare le misure suddette.
Nei veicoli: Fissare la motosega contro il ribaltamento, i danni e la perdita di olio catena.
12 MANUTENZIONE E CURA
La motosega soddisfa tutte le norme di sicurezza
in materia. Le riparazioni possono essere svolte
esclusivamente da personale tecnico qualificato
utilizzando solo ricambi originali.
■
Dopo ogni utilizzo verificare lo stato di usura
della motosega ed eventualmente sostituire
■
i componenti danneggiati.
■
Non esporre l'apparecchio a umidità o bagnato. Pulire le parti in plastica con un panno, non utilizzare detergenti o solventi.
■
Pulire le prese d'aria di raffreddamento, se
ostruite.
■
Non spruzzare con acqua la motosega e non
utilizzare una idropulitrice.
■
Utilizzare solo i ricambi previsti dal costruttore.
469861_a 61
Page 62

IT
Manutenzione e cura
ATTENZIONE!
Rischio di lesioni da motosega avviata
accidentalmente
La motosega avviata accidentalmente
può causare lesioni gravi.
■
Rimuovere la batteria prima eseguire
lavori di riparazione e manutenzione.
■
Indossare guanti protettivi.
12.1 Affilare la catena (13)
Non lavorare con una catena senza filo o danneggiata. Ne possono derivare una forte sollecitazione fisica, un cattivo esito di taglio o un'elevata usura della catena.
CAUTELA!
Pericolo di infortunio dovuto alla cate-
na!
I bordi taglienti della catena possono
causare gravi lesioni da taglio.
■
Durante la correzione affilatura della
catena indossare guanti protettivi.
AVVISO
Agli utenti inesperti di motoseghe si consiglia di far affilare la catena a cura di un
tecnico dell'assistenza competente.
Per ottenere un risultato di taglio ottimale è necessario correggere l'affilatura della catena a intervalli regolari.
Una catena affilata correttamente riduce il pericolo di contraccolpo e previene un livello eccessivo
di usura.
La catena deve essere riaffilata quando si forma
segatura molto sottile durante il taglio oppure la
motosega ha grande difficoltà a passare attraverso il legno. La catena affilata genera trucioli grossi e lunghi.
1. Spegnere la motosega e rimuovere la batteria.
2. Verificare la tensione della catena ed eventualmente correggerla.
3. Per l'affilatura utilizzare solo un apparecchio
adatto: lima sferica per catena Ø = 4,0 mm,
Guida lima, Calibro catena.
Questi apparecchi sono disponibili presso i rivenditori specializzati.
4. Le singole maglie della catena consistono di
maglia (13/3), dente (13/1) e di un dispositivo
limitatore (13/2).
5. Condurre la lima con una leggera pressione
in verticale (13), dall'interno verso l'esterno
del dente di taglio. Per maneggiare correttamente la lima è utile utilizzare un'apposita
guida. Sono sufficienti 2-3 passate di lima.
6. Durante l'affilatura rispettare l'angolo (13) del
dente di taglio e l'altezza del dispositivo limitatore (13/2) rispetto al tagliente. Assicurarsi
che dopo l'affilatura tutti i denti di taglio della
catena presentino la medesima lunghezza e
larghezza.
7. In caso di utilizzo degli apparecchi prescritti e
data la corretta manipolazione, i valori prescritti generano automaticamente l'angolo. I
valori possono essere verificati con un calibro
per catene.
8. In chiusura della parte anteriore del dispositivo limitatore (13/2) arrotondare leggermente.
Affilare di frequente la catena e asportare poco
materiale. Dopo 3-4 affilature effettuate personalmente far correggere l'affilatura della catena da
un'officina specializzata. Contemporaneamente
viene corretta l'affilatura anche del limitatore di
profondità.
Sostituire la catena non appena si raggiunge la
lunghezza minima dei denti di taglio di 4 mm
(13).
ATTENZIONE!
Danni alla macchina dovuti a un'affila-
tura scorretta!
Denti di taglio irregolari generano un andamento faticoso della catena, fino alla
rottura! Dopo l'affilatura tutti i denti di taglio devono presentare la stessa lunghezza e larghezza.
■
Affilare regolarmente la catena.
PERICOLO!
Pericolo di morte dovuto a contraccol-
po (kickback)!
Il contraccolpo (kickback) della motosega
può ferire gravemente l'operatore.
■
Affilare regolarmente la catena.
12.2 Pulire il pignone - vano interno
Pulire a fondo la motosega dopo ogni utilizzo.
1. Rimuovere la batteria e posizionare la motosega su una superficie stabile.
2. Svitare il carter del pignone.
3. Pulire il vano interno con un pennello adatto.
62 CS 36 Li
Page 63

Conservazione
4. Rimuovere la catena e sfilare la barra.
5. Pulire il dado della guida e il foro di ingresso
dell'olio.
12.3 Modificare il dispositivo di
tensionamento rapido (16)
1. Rimuovere la barra di guida (16/1).
2. Svitare la vite con intaglio a croce (16/3) e allentare la piastra di adattamento con il gancio
di fissaggio (16/2) dalla barra di guida.
3. Girare la barra di guida intorno all’asse longitudinale.
4. Rimontare la piastra di adattamento sulla
barra di guida e fissare di nuovo con la vite
con intaglio a croce.
5. Rimontare la barra di guida, vedere capitolo
7.1 "Montare la barra di guida (05, 06)", pagina54.
12.4 Verificare la barra di guida, ruotare e
oliare (14, 15)
Controllare la barra di guida:
Verificare regolarmente se la barra presenta dei
danni. Eventualmente rimuovere la sbavatura
sporgente (14).
Girare la barra di guida:
Per evitare l'usura da un solo lato, dopo ogni affi-
latura o cambio della catena girare la barra.
1. Rimuovere il dispositivo di sgancio rapido
sulla barra di guida, vedere capitolo 12.3
"Modificare il dispositivo di tensionamento rapido (16)", pagina63.
2. Girare la barra di guida.
Oliare la barra di guida:
1. Pulire con cura il dado dalla guida (14/1) e il
foro di ingresso olio (14/2).
2. Pulire con cura il foro di lubrificazione (15/1)
su entrambi i lati.
3. Con un ingrassatore adatto introdurre grasso
su entrambi i lati fino a che fuoriesce in modo
omogeneo dalle punte della ruota a stella.
Nel far questo continuare a girare la ruota a
stella.
13 CONSERVAZIONE
Dopo ogni utilizzo pulire a fondo la motosega a
catena. Conservare in un luogo asciutto dotato di
lucchetto e al di fuori della portata dei bambini.
Durante pause dall'uso che durano più di 30 giorni svolgere le seguenti attività:
■
Spegnere la motosega e rimuovere la batteria.
■
Svuotare il serbatoio dell'olio della catena.
■
Rimuovere la catena e la barra, pulire e
spruzzare con olio antiruggine.
■
Pulire a fondo la motosega e conservarla in
un locale asciutto.
ATTENZIONE!
Pericolo di danneggiamento della mo-
tosega
Se l'olio per catena è asciutto/fa aderenza in caso di conservazione prolungata
può causare danni alle condutture e alla
pompa.
■
Prima di un rimessaggio prolungato
rimuovere l'olio per catena dalla motosega.
14 SMALTIMENTO
Note sulla legge sulle apparecchiature
elettriche ed elettroniche (ElektroG)
■
Le apparecchiature elettriche ed elettroniche non appartengono ai rifiuti domestici, ma devono essere portati
presso una raccolta o smaltimento dei
rifiuti separati!
■
Prima della consegna devono essere
rimossi pile o batterie usati che non sono installati in modo permanente sulla
vecchia unità! Lo smaltimento è regolato dalla legge sulle batterie.
■
I proprietari o gli utilizzatori di apparecchiature elettriche ed elettroniche sono
tenuti per legge alla restituzione dopo
l'uso.
■
È responsabilità dell'utente finale cancellare i propri dati personali presenti
sul vecchio apparecchio da smaltire!
Il simbolo del cestino barrato significa che le apparecchiature elettriche ed elettroniche non possono essere smaltite insieme ad altri rifiuti.
469861_a 63
Page 64

IT
Le apparecchiature elettriche ed elettroniche possono essere depositate gratuitamente nei seguenti punti:
■
Servizio pubblico di smaltimento o punti di
raccolta (ad es. cantieri comunali)
■
Rivenditori di apparecchiature elettriche (fissi
oppure online), se i gestori sono obbligati ad
accettarli oppure volontariamente il servizio.
Queste affermazioni valgono solo per apparecchi
installati e venduti nei Paesi dell'Unione Europea
e che sono soggetti alla direttiva europea
2012/19/UE. Nei Paesi al di fuori dell'Unione Europea possono valere disposizioni differenti per lo
smaltimento di apparecchi elettrici ed elettronici.
Istruzioni sulla legge sulla batterie (BattG)
■
Le batterie usate non appartengono ai
rifiuti domestici, ma devono essere portate presso una raccolta o smaltimento
dei rifiuti separati!
■
Per la rimozione sicura del batterie dal
dispositivo elettrico e per informazioni
sul tipo o sul sistema chimici, tenere
presenti le informazioni supplementari
contenute nelle istruzioni d'uso o di installazione.
■
I proprietari o gli utilizzatori di batterie
sono tenuti per legge alla restituzione
dopo l'uso. La restituzione si limita alla
consegna di piccole quantità.
Le batterie usate possono contenere sostanze
nocive o metalli pesanti che possono danneggiare l'ambiente e la salute. Un riciclaggio di batterie
usate e l'uso delle risorse in esse contenute contribuisce alla protezione di questi due beni importanti.
Il simbolo del cestino barrato significa che le batterie non possono essere smaltite insieme ad altri
rifiuti.
Sotto il cestino sono presenti inoltre dei simboli
Hg, Cd o Pb, con il significato seguente:
■
Hg: La batteria contiene oltre lo 0,0005% di
mercurio
■
Cd: La batteria contiene oltre lo 0,002% di
cadmio
■
Pb: La batteria contiene oltre lo 0,004% di
piombo
Le batterie possono essere depositate gratuitamente nei seguenti punti:
■
Servizio pubblico di smaltimento o punti di
raccolta (ad es. cantieri comunali)
Supporto in caso di anomalie
■
rivenditori di batterie
■
punto di conferimento del sistema comune di
restituzione per batterie esauste di apparecchi
■
punto di conferimento del produttore (se non
membro del sistema comune di restituzione)
Queste affermazioni valgono solo per batterie
vendute nei Paesi dell'Unione Europea e che sono soggetti alla direttiva europea 2006/66/CE.
Nei Paesi al di fuori dell'Unione Europea possono
valere disposizioni differenti per lo smaltimento
delle batterie.
15 SUPPORTO IN CASO DI ANOMALIE
Anomalia
Il motore
non parte.
Manca la
lubrificazione
della catena
Possibile
causa
Nessuna tensione della
batteria.
La protezione
da sovraccarico è scattata.
Freno catena
scattato.
Serbatoio
dell’olio vuoto.
Barra di guida
sporca.
AVVISO
In caso di anomalie che non vengono
elencate in questa tabella o che non si è
in grado di eliminare personalmente si
prega di rivolgersi al nostro servizio clienti.
Eliminazione
Far controllare l'alimentazione elettrica da un elettricista specializzato.
Attendere che la
protezione da sovraccarico ripristini
l'alimentazione
elettrica.
Sbloccare il freno
catena.
Verificare che il
serbatoio dell'olio
non presenti danni.
Verificare il livello
dell'olio ed event.
riempire con olio
per catena.
Pulire il foro di ingresso olio e la
scanalatura olio.
64 CS 36 Li
Page 65

Specifiche tecniche
16 SPECIFICHE TECNICHE
Cod. art. 113 365
Tipo di batteria Ioni di litio (36V / 4,0 Ah)
Velocità al minimo 17 m/s
Velocità operativa 16m/s
Lunghezza – barra di guida (OREGON) ca. 350mm
Lunghezza utile motosega 265 mm
Catena per motosega (OREGON) 91P045X
Spessore maglia motrice 1,27 mm
Passo - pignone catena 3/8"
Freno catena Sì
(elettrico, PCB e asta freno)
Tempo di arresto catena
(DIN EN 60745-2-15 19.103 e 19.104)
Tempo di arresto catena
(DIN EN 50144-2-15:2001 18.104)
Attivazione della catena doppia
Volume serbatoio olio catena 0,180 l
Peso netto senza catena e barra di guida 3,9 kg
Peso netto con catena e barra di guida (senza copribarra) 4,45kg
Protezione da sovraccarico No
Rumorosità LWA (2000/14/EC) misurata / garantita 101 / 105 dB(A)
Livello di pressione acustica LPA (k=2,5 dB(A)) 91,5dB(A)
max. accelerazione di vibrazione avanti / dietro
ahw (k=1,5 m/s²)
I valori indicati sono stati rilevati in conformità a una procedura di prova standardizzata e possono essere utilizzati per confrontare diversi apparecchi elettrici tra loro.
Inoltre, questi valori sono indicati per valutare in anticipo i carichi per l'utente generati dalle vibrazioni.
+/-0,7 m/s
max. 0,15s
max. 2s
(PCB nella batteria)
3,193 / 3,159 m/s²
469861_a 65
Page 66

IT
xxxxxx (x)
Garanzia
17 GARANZIA
Elimineremo - a nostra discrezione tramite riparazione o consegna sostitutiva - eventuali difetti di produzione o del materiale dell'apparecchio entro i termini di prescrizione previsti dalla legge per i diritti di
ricorso per vizi della cosa. I termini di prescrizione dipendono dalla normativa in vigore nel paese in cui
l'apparecchio è stato acquistato.
I termini della garanzia valgono solo nei casi seguenti:
■
Osservare le presenti istruzioni per l'uso
■
Trattamento corretto
■
Utilizzare parti di ricambio originali
Sono esclusi dalla garanzia:
■
danni della vernice da ricondurre alla normale usura
■
Parti usurabili che sono contraddistinte sulla scheda ricambi
Il periodo di garanzia inizia con l'acquisto da parte del primo consumatore finale. Fondamentali sono la
data e la ricevuta di acquisto. Rivolgersi al proprio rivenditore o al centro di assistenza autorizzato più
vicino presentando la presente garanzia e la ricevuta di acquisto originale. La presente dichiarazione di
garanzia non altera i diritti derivanti da vizi del prodotto spettanti per legge all'acquirente nei confronti
del venditore.
La garanzia decade nei casi seguenti:
■
Tentativi di riparazione in proprio
■
Modifiche tecniche eseguite in proprio
■
Uso non conforme alla destinazione
con telaio
18 DICHIARAZIONE DI CONFORMITÀ EC
A questo mezzo dichiariamo che questo prodotto nella forma distribuita sul mercato soddisfa i requisiti
delle direttive UE, degli standard di sicurezza UE e degli standard specifici di prodotto armonizzati.
Prodotto
Batteria motosega
Numero seriale
G4124126
Costruttore
AL-KO Geräte GmbH
Ichenhauser Str. 14
D-89359 Kötz
Rappresentante autorizzato della documentazione
Andreas Hedrich
Ichenhauser Str. 14
D-89359 Kötz
Tipo
CS 36 Li
Rumorosità
EN ISO 3744
misurata / garantita
101 dB(a) / 105 dB(A)
Test. n. modello EC
(2006/42/EC appendice IX)
BM 50359218 0001
66 CS 36 Li
Direttive EU
2006/42/EC
2014/30/EU
2000/14/EC
2011/65/EU
Valutazione della conformità
2000/14/EC appendice V
Centro nominato
TÜV Rheinland LGA Products GmbH
Tillystraße 2
D-90431 Norimberga
Germania
n. 0197
Norme armonizzate
EN 60745-1:2009+A11:2010
EN 60745-2-13:2009+A1:2010
EN 55014-1:2006+A1:2009+A2:2011
EN 55014-2:2015
Kötz, 01/12/2016
Wolfgang Hergeth
Managing Director
Page 67

Tłumaczenie oryginalnej instrukcji obsługi
TŁUMACZENIE ORYGINALNEJ INSTRUKCJI OBSŁUGI
Spis treści
1 Informacje dotyczące niniejszej instrukcji obsługi........................................................................... 69
1.1 Objaśnienia rysunkowe i słowa ostrzegawcze ...................................................................... 69
2 Opis produktu ................................................................................................................................. 69
2.1 Zakres dostawy ..................................................................................................................... 69
2.2 Symbole umieszczone na urządzeniu ................................................................................... 69
2.3 Urządzenia zabezpieczające iochronne ............................................................................... 70
2.4 Zabezpieczenie przed przeciążeniem ...................................................................................70
2.5 Zabezpieczenie przed włączeniem ....................................................................................... 70
2.6 Blokada łańcucha ..................................................................................................................70
2.7 Użytkowanie zgodne zprzeznaczeniem ............................................................................... 70
3 Przegląd produktu (01) ...................................................................................................................71
4 Ogólne wskazówki dotyczące bezpieczeństwa narzędzi elektrycznych (IEC 60745-1) ................. 71
4.1 Bezpieczeństwo na stanowisku pracy ................................................................................... 71
4.2 Bezpieczeństwo elektryczne ................................................................................................. 71
4.3 Bezpieczeństwo osób............................................................................................................ 71
4.4 Użytkowanie iobsługa narzędzia elektrycznego ................................................................... 72
4.5 Użytkowanie i obsługa akumulatora ...................................................................................... 72
4.6 Serwis.................................................................................................................................... 73
5 Wskazówki dotyczące bezpieczeństwa pił łańcuchowych (EN 60745 część 2-13) ........................ 73
6 Przyczyny i unikanie odrzutu (EN 60745 część 2-13) .................................................................... 73
7 Montaż ............................................................................................................................................ 74
7.1 Montaż prowadnicy szynowej (05, 06) .................................................................................. 74
7.2 Montaż łańcucha tnącego (05, 06) ........................................................................................74
7.3 Naprężanie łańcucha tnącego (05, 07) ................................................................................. 74
8 Uruchomienie.................................................................................................................................. 75
8.1 Ładowanie akumulatora (02) ................................................................................................. 75
8.2 Wkładanie akumulatora (03/A) ..............................................................................................75
8.3 Wyciąganie akumulatora (03/B) ............................................................................................ 75
8.4 Kontrola naprężenia łańcucha ............................................................................................... 75
8.5 Kontrolowanie sprawności blokady łańcucha ........................................................................ 75
8.6 Kontrola działania blokady łańcucha przy wyłączonym silniku (08) ...................................... 76
8.7 Kontrola działania blokady łańcucha przy włączonym silniku (08) ........................................76
8.8 Uzupełnianie oleju do smarowania łańcucha tnącego (09) ...................................................76
469861_a 67
Page 68

PL
9 Obsługa .......................................................................................................................................... 77
9.1 Ustalanie stanu naładowania akumulatora (04) .................................................................... 77
9.2 Wskaźnik stanu naładowania akumulatora ........................................................................... 77
9.3 Kontrola oleju do łańcucha ....................................................................................................77
9.4 Kontrolowanie blokady łańcucha ........................................................................................... 78
9.5 Włączenie i wyłączenie silnika .............................................................................................. 78
10 Nawyki itechnika pracy ..................................................................................................................78
10.1 Wskazówki dotyczące bezpieczeństwa pracy ....................................................................... 78
10.1.1 Operator ..................................................................................................................78
10.1.2 Czas eksploatacji ....................................................................................................79
10.1.3 Praca z użyciem piły łańcuchowej........................................................................... 79
10.1.4 Niebezpieczeństwo odrzutu ....................................................................................80
10.2 Ścinanie drzew ......................................................................................................................80
10.3 Okrzesywanie ........................................................................................................................ 81
10.4 Przycinanie drzewa na długość ............................................................................................. 81
10.5 Przycinanie drewna na długość (12) ..................................................................................... 82
11 Transport ........................................................................................................................................ 82
12 Konserwacja ipielęgnacja ..............................................................................................................82
12.1 Ostrzenie łańcucha tnącego (13) .......................................................................................... 83
12.2 Czyszczenie wnętrza koła łańcuchowego .............................................................................84
12.3 Przemontowanie uchwytu szybkomocującego (16) .............................................................. 84
12.4 Kontrola, odwracanie ismarowanie prowadnicy (14, 15) ...................................................... 84
13 Przechowywanie............................................................................................................................. 84
14 Utylizacja ........................................................................................................................................ 85
15 Pomoc wprzypadku usterek........................................................................................................... 86
16 Dane techniczne ............................................................................................................................. 87
17 Gwarancja....................................................................................................................................... 88
18 Deklaracja zgodności EC................................................................................................................ 88
Tłumaczenie oryginalnej instrukcji obsługi
68 CS 36 Li
Page 69

Informacje dotyczące niniejszej instrukcji obsługi
1 INFORMACJE DOTYCZĄCE
NINIEJSZEJ INSTRUKCJI OBSŁUGI
■
Przed uruchomieniem należy dokładnie przeczytać niniejszą instrukcję eksploatacji. Jest
to konieczne dla zapewnienia bezusterkowej
pracy ibezpiecznej obsługi.
■
Poniższa instrukcja obsługi winna być przechowywana zawsze w sposób umożliwiający
jej wykorzystanie w celu uzyskania informacji
dotyczących urządzenia.
■
Urządzenie może być przekazywane wyłącznie wraz z instrukcją obsługi.
■
Należy stosować się do wskazówek dot. bezpieczeństwa iostrzegawczych zawartych
wniniejszej instrukcji obsługi.
1.1 Objaśnienia rysunkowe i słowa
ostrzegawcze
NIEBEZPIECZEŃSTWO!
Oznacza niebezpieczeństwo prowadzące
do śmierci lub ciężkich obrażeń ciała.
OSTRZEŻENIE!
Oznacza potencjalne niebezpieczeństwo
mogące prowadzić do śmierci lub ciężkich obrażeń ciała.
OSTROŻNIE!
Oznacza potencjalne niebezpieczeństwo
mogące prowadzić do średnich lub lekkich obrażeń ciała.
UWAGA!
Oznacza potencjalne niebezpieczeństwo
mogące prowadzić do szkód rzeczowych.
WSKAZÓWKA
Szczególne wskazówki ułatwiające zrozumienie instrukcji iobsługi.
2 OPIS PRODUKTU
W niniejszej instrukcji opisano ręczną elektryczną
piłę łańcuchową, eksploatowaną zakumulatorem.
2.1 Zakres dostawy
Akumulatorowa piła łańcuchowa jest przeznaczona do użytku z akumulatorami zserii EnergyFlex
opojemności od 4Ah (akumulator „Akumulator litowo-jonowy 36V, 4Ah, B05-3640” (nr art.
113280)).
UWAGA!
Niebezpieczeństwo uszkodzenia piły
łańcuchowej iakumulatora
Jeśli piła łańcuchowa będzie użytkowana
zniewłaściwym akumulatorem, może
dojść do uszkodzenia piły łańcuchowej
iakumulatora.
■
Piłę łańcuchową należy użytkować
wyłącznie zodpowiednim akumulatorem opojemności od 4Ah.
Do ładowania akumulatora wymagana jest ładowarka „C05-4230” (na art. 113281).
WSKAZÓWKA
Więcej informacji znajduje się wnastępujących instrukcjach obsługi:
■
„Akumulator litowo-jonowy 36V,
4Ah, B05-3640” (nr dok. 441630)
■
„Ładowarka C05-4230 do akumulatora litowo-jonowego 36V, 4Ah” (nr
dok. 441633)
2.2 Symbole umieszczone na urządzeniu
Symbol Znaczenie
Zachować szczególną ostrożność
podczas obsługi urządzenia!
Niebezpieczeństwo odrzutu!
Nie używać piły łańcuchowej jedną
ręką!
469861_a 69
Page 70

PL
Opis produktu
Symbol Znaczenie
Nie używać wczasie deszczu!
Chronić przed wilgocią!
Nosić hełm ochronny, odzież
ochronną i osłonę oczu!
Zakładać rękawice ochronne!
Stosować sztywne obuwie!
Przed uruchomieniem przeczytać
instrukcję eksploatacji!
Zawsze używać piły łańcuchowej
obiema rękami!
2.3 Urządzenia zabezpieczające iochronne
OSTRZEŻENIE!
Niebezpieczeństwo odniesienia cięż-
kich obrażeń wskutek manipulacji
przy urządzeniach ochronnych izabezpieczających.
Manipulacje przy urządzeniach ochronnych izabezpieczających mogą doprowadzić do ciężkich obrażeń podczas pracy zużyciem piły łańcuchowej.
■
Nie należy dezaktywować urządzeń
ochronnych izabezpieczających!
■
Prace zużyciem piły łańcuchowej
wykonywać tylko wtedy, gdy wszystkie urządzenia ochronne izabezpieczające działają prawidłowo.
2.4 Zabezpieczenie przed przeciążeniem
Piła łańcuchowa jest wyposażona w zabezpieczenie przed przeciążeniem, które wyłącza silnik
wrazie przeciążenia urządzenia.
Po krótkim czasie schłodzenia można ponownie
uruchomić piłę łańcuchową.
2.5 Zabezpieczenie przed włączeniem
Gdy operator kilkakrotnie szybko doda gazu, piła
łańcuchowa wyłącza się na kilka sekund, aby zabezpieczyć elektronikę ipiłę łańcuchową. Należy
wówczas zaczekać, aż będzie możliwe ponowne
włączenie piły łańcuchowej.
2.6 Blokada łańcucha
Łańcuch piły posiada ręczną blokadę, której zadziałanie następuje np. wprzypadku wystąpienia
odrzutu (odbicia) oddziałującego na osłonę dłoni.
Wmomencie zadziałania blokady łańcucha piła
łańcuchowa jest natychmiast zatrzymywana,
asilnik – wyłączany.
2.7 Użytkowanie zgodne zprzeznaczeniem
Piła łańcuchowa jest przeznaczona wyłącznie do
stosowania wgospodarstwie domowym, do majsterkowania oraz prac wogrodzie. Wtym obszarze piła łańcuchowa jest przeznaczona do lekkich
prac, jak np.:
■
cięcie drewna,
■
wycinanie zarośli,
■
piłowanie drewna opałowego.
Napęd elektryczny umożliwia zastosowanie piły
łańcuchowej nie tylko na wolnym terenie, lecz
także wzamkniętych pomieszczeniach do piłowania drewna. Inne zastosowanie, niż zostało tutaj opisane, jest uważane za niezgodne z przeznaczeniem.
Piła łańcuchowa nie jest przeznaczona do zastosowań komercyjnych.
OSTROŻNIE!
Niebezpieczeństwo obrażeń wskutek
zastosowania niezgodnego zprzeznaczeniem!
Używanie piły łańcuchowej do cięcia
drewna przebitego ciałami obcymi lub innych materiałów może spowodować odniesienie obrażeń.
■
Piła łańcuchowa jest przeznaczona
wyłącznie do lekkich prac związanych zpiłowaniem drewna.
■
Przed piłowaniem skontrolować
drewno pod kątem ciał obcych, na
przykład gwoździ, śrub, okuć.
70 CS 36 Li
Page 71

Przegląd produktu (01)
3 PRZEGLĄD PRODUKTU (01)
Nr Element
01/1 Łańcuch piły
01/2 Szyna prowadząca
01/3 Urządzenie szybkomocującego zza-
mknięciem centralnym ipierścieniem
obrotowym
01/4 Osłona rąk
01/5 Pałąkowaty uchwyt
01/6 Akumulator
01/7 Dźwignia gazu
01/8 Przycisk blokady
01/9 Tylny uchwyt
01/10 Osłona koła zębatego łańcucha
01/11 Ząb oporowy
01/12 Korek zbiornika oleju do smarowania
łańcucha
01/13 Wziernik zbiornika oleju do smarowa-
nia łańcucha
4 OGÓLNE WSKAZÓWKI DOTYCZĄCE
BEZPIECZEŃSTWA NARZĘDZI
ELEKTRYCZNYCH (IEC 60745-1)
OSTRZEŻENIE!
Niebezpieczeństwo porażenia prądem
elektrycznym, pożaru i/lub poważnych
obrażeń ciała
Następstwem nieprzestrzegania wskazówek dotyczących bezpieczeństwa i innych instrukcji może być porażenie prądem elektrycznym, pożar i/lub poważne
obrażenia ciała.
■
Należy przeczytać wszystkie wskazówki dotyczące bezpieczeństwa i
pozostałe instrukcje.
■
Wszystkie wskazówki dotyczące bezpieczeństwa i inne instrukcje należy
przechowywać w razie potrzeby skorzystania z nich w przyszłości.
Użyte we wskazówkach dotyczących bezpieczeństwa pojęcie „narzędzie elektryczne” odnosi
się do narzędzi elektrycznych zasilanych z sieci
elektrycznej (z sieciowym przewodem zasilają-
cym) oraz narzędzi elektrycznych zasilanych akumulatorowo (bez sieciowego przewodu zasilającego).
4.1 Bezpieczeństwo na stanowisku pracy
■
Stanowisko pracy należy utrzymywać w
czystości i zapewnić jego dobre oświetlenie. Nieporządek lub niedostateczne oświe-
tlenie stanowiska pracy mogą doprowadzić
do wypadku.
■
Narzędzia elektrycznego nie wolno używać w obszarze zagrożonym wybuchem,
w którym znajdują się palne ciecze, gazy
lub pyły. Narzędzia elektryczne podczas
pracy wytwarzają iskry, które mogą doprowadzić do zapłonu pyłów lub oparów.
■
Podczas pracy narzędzia elektrycznego
należy trzymać dzieci i inne osoby z dala
od niego. W przypadku odwrócenia uwagi
można stracić kontrolę nad urządzeniem.
4.2 Bezpieczeństwo elektryczne
■
Należy unikać kontaktu części ciała z uziemionymi powierzchniami, jak rury, grzejniki, kuchenki i lodówki. Istnieje zwiększone
ryzyko porażenia prądem elektrycznym, kiedy ciało jest uziemione.
■
Należy chronić narzędzia elektryczne
przed deszczem lub wilgocią. Wniknięcie
wody do wnętrza narzędzia elektrycznego
zwiększa ryzyko porażenia prądem elektrycznym.
4.3 Bezpieczeństwo osób
■
Podczas pracy z narzędziem elektrycznym
należy zachować ostrożność, zwracać
uwagę na to, co się robi i postępować rozsądnie. Nie używać narzędzia elektrycznego, kiedy jest się zmęczonym, pod wpływem narkotyków, alkoholu lub leków.
Chwila nieuwagi podczas używania narzędzia elektrycznego może spowodować naprawdę poważne obrażenia.
■
Należy nosić osobiste wyposażenie
ochronne i zawsze okulary ochronne. No-
szenie osobistego wyposażenia ochronnego,
jak maska przeciwpyłowa, antypoślizgowe
obuwie ochronne, kask ochronny lub środki
ochrony słuchu, w zależności od rodzaju i
sposobu zastosowania narzędzia elektrycznego, zmniejsza ryzyko powstania obrażeń.
■
Unikać niezamierzonego uruchomienia
urządzenia. Przed podłączeniem urządzenia elektrycznego do zasilania lub akumu-
469861_a 71
Page 72

PL
Ogólne wskazówki dotyczące bezpieczeństwa narzędzi elektrycznych (IEC 60745-1)
latora, podniesieniem urządzenia i jego
przenoszeniem należy się upewnić, że jest
wyłączone. Jeżeli podczas przenoszenia na-
rzędzia elektrycznego palce znajdują się na
włączniku lub urządzenie jest włączone w
momencie podłączania do zasilania, może to
doprowadzić do wypadku.
■
Przed włączeniem narzędzia elektrycznego usunąć narzędzia nastawcze lub klucze maszynowe. Narzędzie lub klucz znaj-
dujące się na obracającym się elemencie
urządzenia mogą być przyczyną obrażeń.
■
Unikać nieprawidłowej postawy ciała.
Dbać o zachowanie bezpiecznej postawy i
zawsze utrzymywać równowagę. Dzięki te-
mu można zyskać lepszą kontrolę nad narzędziem elektrycznym w nieoczekiwanej sytuacji.
■
Należy nosić odpowiednią odzież. Nie należy nosić luźnej odzieży ani biżuterii.
Chronić włosy, odzież irękawice przed zetknięciem zruchomymi elementami urządzenia. Luźna odzież, biżuteria lub długie
włosy mogą zostać pochwycone przez ruchome elementy urządzenia.
■
Jeżeli zamontowane są urządzenia odpylające i zbierające, należy się upewnić, że
są one podłączone i prawidłowo użytkowane. Użycie urządzenia odpylającego może
zmniejszyć zagrożenia wywołane przez pyły.
4.4 Użytkowanie iobsługa narzędzia
elektrycznego
■
Nie przeciążać urządzenia. Do określonej
pracy należy używać narzędzia elektrycznego, które jest do niej przeznaczone. Z
użyciem odpowiedniego narzędzia elektrycznego pracuje się lepiej i bezpieczniej w podanym zakresie wydajności.
■
Nie używać narzędzia elektrycznego z
uszkodzonym włącznikiem. Urządzenie
elektryczne, którego nie da się już włączyć
lub wyłączyć jest niebezpieczne i musi być
naprawione.
■
Wyciągnąć wtyczkę z gniazda zasilania i/
lub wymontować akumulator, zanim dokona się regulacji urządzenia, wymiany akcesoriów lub odłożenia urządzenia. Zapo-
biega to niezamierzonemu uruchomieniu narzędzia elektrycznego.
■
Nieużywane narzędzie elektryczne należy
przechowywać z dala od dzieci. Nie pozwalać na pracę za pomocą urządzenia
osobom, które nie są obeznane z jego ob-
sługą lub nie przeczytały niniejszych instrukcji. Narzędzia elektryczne są niebez-
pieczne, jeżeli są obsługiwane przez osoby
nieobeznane z ich obsługą.
■
Narzędzie elektryczne należy utrzymywać
w dobrym stanie technicznym. Należy
kontrolować, czy ruchome części funkcjonują sprawnie i nie zacinają się, czy nie są
pęknięte lub uszkodzone tak, że zakłóca
to działanie narzędzia elektrycznego.
Przed użyciem urządzenia należy zlecić
naprawę uszkodzonych części. Wiele wy-
padków ma swoje źródło w nieprawidłowej
konserwacji narzędzi elektrycznych.
■
Narzędzia tnące należy utrzymywać w czystości i ostrości. Starannie pielęgnowane
narzędzia tnące z ostrymi krawędziami tnącymi rzadziej się zakleszczają i są łatwiejsze w
prowadzeniu.
■
Narzędzia elektrycznego, akcesoriów, narzędzi użytkowych itp. należy używać z zastosowaniem się do podanych tu instrukcji. Należy przy tym uwzględnić warunki
na stanowisku pracy oraz rodzaj wykonywanej czynności. Użycie narzędzi elektrycz-
nych do innych celów, niż przewidziane może
doprowadzić do niebezpiecznych sytuacji.
4.5 Użytkowanie i obsługa akumulatora
■
Akumulator ładować wyłącznie za pomocą
ładowarki wskazanej przez producenta.
Ładowanie akumulatora za pomocą ładowarki przeznaczonej do innego typu akumulatora
grozi pożarem.
■
Urządzenie akumulatorowe użytkować wyłącznie z przeznaczonym do niego akumulatorem. Stosowanie innego akumulatora
grozi obrażeniami i pożarem.
■
Naładowane i nieużywane akumulatory
chronić przed kontaktem z metalowymi
przedmiotami w celu uniknięcia zwarcia
styków (np. poprzez zetknięcie ze zszywkami biurowymi, monetami, kluczami,
igłami, śrubami). Zwarcie może spowodo-
wać oparzenia lub pożar.
■
Nieprawidłowa eksploatacja i eksploatacja
uszkodzonego akumulatora może spowodować powstanie dużej ilości oparów i
wydostawanie się elektrolitu. Unikać kontaktu z oparami i elektrolitem. Przewietrzyć dostatecznie pomieszczenie. W przypadku kontaktu z elektrolitem dokładnie
go spłukać. W przypadku przedostania się
elektrolitu do oczu natychmiast dokładnie
72 CS 36 Li
Page 73

Wskazówki dotyczące bezpieczeństwa pił łańcuchowych (EN 60745 część 2-13)
■
przemyć je wodą i skontaktować się z lekarzem. Wyciekający elektrolit może powo-
dować podrażnienia skóry i pożar.
4.6 Serwis
■
Naprawę narzędzia elektrycznego powierzać wyłącznie wykwalifikowanemu personelowi fachowemu i tylko z użyciem oryginalnych części zamiennych. Należy przy
tym zagwarantować, że zachowane zostanie
bezpieczeństwo narzędzia elektrycznego.
5
WSKAZÓWKI DOTYCZĄCE
BEZPIECZEŃSTWA PIŁ ŁAŃCUCHOWYCH
(EN 60745 CZĘŚĆ 2-13)
■
Gdy pilarka pracuje, wszystkie części ciała należy trzymać z dala od łańcucha tnącego. Przed uruchomieniem pilarki należy
upewnić się, że łańcuch tnący niczego nie
dotyka. Podczas pracy pilarką chwila nie-
uwagi może doprowadzić tego, że odzież lub
części ciała zostaną złapane przez łańcuch
tnący.
■
Pilarkę zawsze należy trzymać prawą ręką
za tylny uchwyt, a lewą ręką za przedni
uchwyt. Trzymanie pilarki na odwrót zwięk-
sza ryzyko obrażeń i jest niedopuszczalne.
■
Narzędzie elektryczne należy trzymać za
izolowane powierzchnie uchwytu, ponieważ pracujący łańcuch tnący może wejść
w kontakt z przewodem zasilającym. Ze-
tknięcie łańcucha tnącego z przewodem znajdującym się pod napięciem może spowodować, że metalowe części urządzenia również
znajdą się pod napięciem, co może doprowadzić do porażenia prądem elektrycznym.
■
Należy nosić okulary ochronne i ochronniki słuchu. Zaleca się stosowanie dodatkowych środków ochrony osobistej głowy,
dłoni, nóg i stóp. Dopasowana odzież
ochronna zmniejsza ryzyko obrażeń wskutek
wyrzucanego materiału lub przypadkowego
dotknięcia łańcucha tnącego.
■
Nie należy pracować pilarką przebywając
na drzewie. Używanie urządzenia na drze-
wie grozi obrażeniami.
■
Zwracać uwagę na pewną pozycję stojącą
i używać pilarki wyłącznie na stałym, pewnym i równym podłożu. Śliskie podłoże lub
niestabilne powierzchnie, jak na przykład drabina, mogą doprowadzić do utraty równowagi
lub kontroli nad pilarką.
Podczas cięcia naprężonych gałęzi należy
liczyć się z tym, że mogą one sprężynować. Gdy naprężenie we włóknach drewna
zostanie uwolnione, napięta gałąź może trafić
w użytkownika i/lub spowodować utratę kontroli nad pilarką.
■
Należy być szczególnie ostrożnym podczas cięcia podszytu i młodych drzewek.
Cienki materiał może zaplątać się w łańcuchu
tnącym i uderzyć w użytkownika lub wytrącić
go z równowagi.
■
Podczas przenoszenia pilarki silnik musi
być wyłączony i należy trzymać ją za
przedni uchwyt z łańcuchem tnącym z dala od ciała. Podczas transportu lub przechowywania pilarki zawsze należy nakładać pokrowiec ochronny. Staranne obcho-
dzenie się z pilarką zmniejsza prawdopodobieństwo przypadkowego kontaktu z pracującym łańcuchem tnącym.
■
Należy stosować się do wskazówek w zakresie smarowania, naprężania łańcucha
oraz wymiany osprzętu. Łańcuch nieprawi-
dłowo naprężony lub nasmarowany może się
zerwać zwiększyć ryzyko odrzutu.
■
Uchwyty muszą być suche, czyste i wolne
od oleju i smaru. Tłuste, oleiste uchwyty są
śliskie i prowadzą do utraty kontroli.
■
Piłować wyłącznie drewno. Nie używać pilarki do prac, do których nie jest przeznaczona. Przykład: Nie używać pilarki do piłowania plastiku, murów lub niedrewnianych materiałów budowlanych. Użycie pi-
larki do prac niezgodnych z przeznaczeniem
może prowadzić do niebezpiecznych sytuacji.
6 PRZYCZYNY I UNIKANIE ODRZUTU
(EN 60745 CZĘŚĆ 2-13)
Odrzut może wystąpić, gdy wierzchołek prowadnicy dotknie jakiegoś przedmiotu lub jeżeli drewno się ugnie i zablokuje pilarkę w nacięciu.
Dotknięcie wierzchołkiem prowadnicy w niektórych przypadkach może prowadzić do nieoczekiwanej reakcji skierowanej do tyłu, w której prowadnica zostaje odrzucona do góry i w kierunku
operatora.
Zablokowanie łańcucha tnącego na górnej krawędzi prowadnicy może ją nagle odrzucić w kierunku operatora.
Każda z tych reakcji może prowadzić do utraty
kontroli nad pilarką oraz ewentualnych ciężkich
obrażeń. Nie należy polegać wyłącznie na zabezpieczeniach zamontowanych w pilarce. Jako
469861_a 73
Page 74

PL
Montaż
użytkownik pilarki należy przedsięwziąć różne
środki, aby zapewnić bezpieczną i bezwypadkową pracę.
Odrzut jest skutkiem nieprawidłowej obsługi narzędzia elektrycznego. Można go uniknąć dzięki
środkom ostrożności opisanym poniżej:
■
Piłę trzymać w dwóch rękach, przy czym
kciuki i palce obejmują uchwyty pilarki.
Ciało i ręce ustawić w pozycji umożliwiającej oparcie się siłom odrzutu. Jeżeli zo-
staną zapewnione odpowiednie środki, operator będzie w stanie zapanować nad odrzutem. Nigdy nie puszczać pilarki.
■
Należy unikać nieprawidłowej postawy i
nie piłować powyżej wysokości ramion.
Dzięki temu uniknie się przypadkowego dotknięcia wierzchołkiem prowadnicy i umożliwiona jest lepsza kontrola nad pilarką w nieoczekiwanych sytuacjach.
■
Zawsze stosować zapasowe prowadnice i
łańcuchy tnące zalecane przez producenta. Nieodpowiednie zapasowe prowadnice i
łańcuchy tnące mogą prowadzić do zerwania
łańcucha i/lub odrzutu.
■
Należy przestrzegać instrukcji producenta
w zakresie ostrzenia i konserwacji łańcucha tnącego. Zbyt niskie ograniczniki głębo-
kości zwiększają ryzyko odrzutu.
7 MONTAŻ
OSTRZEŻENIE!
Niebezpieczeństwo ciężkich obrażeń.
Używanie niecałkowicie zmontowanej piły łańcuchowej może doprowadzić do
ciężkich obrażeń.
■
Używać piły łańcuchowej dopiero po
jej całkowitym zmontowaniu.
■
Przed każdym użyciem przeprowadzić kontrolę wzrokową, aby sprawdzić, czy piła łańcuchowa jest kompletna oraz, czy nie zawiera uszkodzonych lub zużytych podzespołów.
Urządzenia ochronne izabezpieczające muszą być sprawne inienaruszone.
OSTROŻNIE!
Niebezpieczeństwo odniesienia ran
ciętych.
Ostre krawędzie łańcucha tnącego mogą
podczas montażu spowodować rany cięte.
■
Przed montażem wyciągnąć akumulator.
■
Podczas montażu łańcucha tnącego i
prowadnicy szynowej nosić rękawice
ochronne.
7.1 Montaż prowadnicy szynowej (05, 06)
1. Pociągnąć osłonę dłoni (05/1) wkierunku
uchwytu pałąkowego (05/A), aby zwolnić blokadę łańcucha.
2. Obrócić zamknięcie centralne (05/2) przeciwnie do ruchu wskazówek zegara iściągnąć
razem zpokrywą (05/3).
3. Osadzić prowadnicę szynową (06/1) na kołkach prowadzących (06/2) iprzesunąć do tyłu na tyle, aby było możliwe zamontowanie
łańcucha tnącego.
7.2 Montaż łańcucha tnącego (05, 06)
1. Założyć łańcuch tnący na zębate koło łańcuchowe (06/3) iwrowek prowadnicy (06/1).
2. Poprowadzić łańcuch tnący wokół rolki zwrotnej prowadnicy. Łańcuch tnący musi lekko
zwisać na dolnej części prowadnicy szynowej.
3. Nałożyć osłonę (05/3) i lekko dokręcić zamknięcie centralne (05/2).
7.3 Naprężanie łańcucha tnącego (05, 07)
WSKAZÓWKA
Łańcuch tnący jest prawidłowo naprężony, jeżeli:
■
przylega do dolnej części prowadnicy
imożna go przeciągnąć ręką;
■
na środku prowadnicy można go
podnieść o3–4mm.
1. Wcelu sprawdzenia łańcucha należy go nieco przeciągnąć ręką, aby upewnić się, że jest
właściwie ułożony na kole zębatym iprowadnicy.
2. Obrócić pierścień obrotowy(05/4) wkierunku
osłony(05/3) tak, aby oba trójkąty znajdowały się naprzeciwko siebie (05/B).
74 CS 36 Li
Page 75

Uruchomienie
3. Nałożyć osłonę (07/1) i obrócić zamknięcie
centralne (07/2) w kierunku zgodnym z ruchem wskazówek zegara. Nie dokręcać przy
tym całkowicie zamknięcia centralnego lub
cofnąć je o jeden obrót.
4. Obrócić pierścień obrotowy (07/3) w kierunku
ruchu wskazówek zegara, aż łańcuch tnący
będzie prawidłowo naprężony, jak opisano
wyżej.
5. Obrócić zamknięcie centralne (07/2) w kierunku ruchu wskazówek zegara, aż zostanie
ono zamocowane.
8 URUCHOMIENIE
NIEBEZPIECZEŃSTWO!
Śmiertelne niebezpieczeństwo inie-
bezpieczeństwo najcięższych obrażeń.
Nieznajomość zasad bezpieczeństwa
iinstrukcji obsługi może prowadzić do
najcięższych obrażeń, anawet śmierci.
■
Przed użyciem piły łańcuchowej należy zapoznać się ze wszystkimi zasadami bezpieczeństwa iwskazówkami
zawartymi wniniejszej instrukcji obsługi oraz winstrukcjach, do których
odniesienia się wniej znajdują!
OSTRZEŻENIE!
Niebezpieczeństwo ciężkich obrażeń.
Jeżeli na pile łańcuchowej znajdują się
uszkodzone podzespoły, może dojść do
poważnych obrażeń.
■
Przed każdym użyciem przeprowadzić kontrolę wzrokową, aby sprawdzić, czy piła łańcuchowa jest kompletna oraz, czy nie zawiera uszkodzonych lub zużytych podzespołów.
Urządzenia ochronne izabezpieczające muszą być sprawne inienaruszone.
8.1 Ładowanie akumulatora (02)
Akumulator jest częściowo naładowany. Przed
pierwszym użyciem należy całkowicie naładować
akumulator. Akumulator można ładować w dowolnym stanie jego naładowania. Przerwanie ładowania nie powoduje uszkodzenia akumulatora.
WSKAZÓWKA
Szczegółowe informacje można znaleźć
wosobnych instrukcjach obsługi akumulatora iładowarki.
8.2 Wkładanie akumulatora (03/A)
1. Wsunąć akumulator (03/1) od góry do komory akumulator (03/2), aż ulegnie zablokowaniu.
8.3 Wyciąganie akumulatora (03/B)
1. Nacisnąć przycisk zwalniający (03/3) na akumulatorze (03/1) i go przytrzymać.
2. Wyciągnąć akumulator (03/1).
8.4 Kontrola naprężenia łańcucha
Często kontrolować naprężenie łańcucha, ponieważ nowe łańcuchy tnące mają tendencje do wydłużania się.
Przy temperaturze roboczej łańcuch tnący wydłuża się i zwisa.
WSKAZÓWKA
Łańcuch tnący jest prawidłowo naprężony, jeżeli:
■
przylega do dolnej części prowadnicy
imożna go przeciągnąć ręką;
■
na środku prowadnicy można go
podnieść o3–4mm.
OSTROŻNIE!
Ryzyko odniesienia obrażeń wskutek
odskoczenia łańcucha tnącego!
Niewystarczająco naprężone łańcuch
tnący może odskoczyć podczas pracy
ispowodować obrażenia.
■
Należy często kontrolować naprężenie łańcucha. Naprężenie łańcucha
jest zbyt małe, gdy ogniwa napędowe
wystają zrowka wdolnej części prowadnicy.
■
Jeśli naprężenie łańcucha jest zbyt
małe, naprężyć go zgodnie zinstrukcjami.
8.5 Kontrolowanie sprawności blokady
łańcucha
Łańcuch piły posiada ręczną blokadę, której zadziałanie następuje np. wprzypadku wystąpienia
odrzutu (odbicia) oddziałującego na osłonę dłoni.
Wmomencie zadziałania blokady łańcucha piła
łańcuchowa jest natychmiast zatrzymywana,
asilnik – wyłączany.
469861_a 75
Page 76

PL
Uruchomienie
NIEBEZPIECZEŃSTWO!
Śmiertelne niebezpieczeństwo wsku-
tek niedbałego postępowania!
Nieostrożne lub nieprzewidziane ruchy
piły łańcuchowej mogą doprowadzić do
najcięższych obrażeń, anawet śmierć.
■
Prace zużyciem piły łańcuchowej
wykonywać ze świadomością zagrożeń izzachowaniem koncentracji.
■
Podczas zwalniania blokady łańcucha nie naciskać żadnego włącznika.
OSTRZEŻENIE!
Śmiertelne niebezpieczeństwo inie-
bezpieczeństwo najcięższych obrażeń
przez uszkodzoną blokadę łańcucha.
Jeżeli blokada łańcucha nie działa, to np.
przy odrzucie (odbiciu) poruszający się
łańcuch tnący może spowodować najcięższe obrażenia, anawet śmierć operatora.
■
Przed przystąpieniem do pracy zawsze sprawdzić blokadę łańcucha.
■
Nie włączać piły łańcuchowej, gdy
blokada łańcucha jest uszkodzona.
Wtym przypadku należy zlecić
sprawdzenie piły łańcuchowej wspecjalistycznym serwisie.
8.6 Kontrola działania blokady łańcucha przy wyłączonym silniku (08)
1. Wcelu wyłączenia blokady łańcucha pocią-
gnąć (08/A) osłonę dłoni (08/1) wkierunku
uchwytu pałąkowego (08/2). Łańcuch tnący
można teraz przeciągnąć ręcznie.
2. Wcelu włączenia blokady łańcucha nacisnąć
(08/B) osłonę dłoni (08/1) do przodu. Przeciągnięcie łańcucha powinno być teraz niemożliwe.
8.7 Kontrola działania blokady łańcucha przy włączonym silniku (08)
WSKAZÓWKA
Przed każdym włączeniem piły łańcuchowej zwolnić blokadę łańcucha.
1. Mocno istabilnie przytrzymać piłę łańcucho-
wą za uchwyt pałąkowy irękojeść.
2. Zwolnić blokadę łańcucha.
3. Włączyć silnik.
4. Nacisnąć osłonę dłoni (08/1) do przodu (08/
B). Piła łańcuchowa isilnik muszą natychmiast się zatrzymać.
8.8 Uzupełnianie oleju do smarowania
łańcucha tnącego (09)
UWAGA!
Niebezpieczeństwo uszkodzenia łań-
cucha tnącego
Jeżeli wzbiorniku znajduje się zbyt mała
ilość oleju do smarowania łańcucha lub
jest on wyschnięty/zaklejony, może dojść
do poważnego uszkodzenia łańcucha
tnącego. Zaschnięty/przyklejony olej do
smarowania łańcucha może doprowadzić
do uszkodzenia części, przez które olej
przepływa, lub pompy olejowej.
Uszkodzenie występuje także wprzypadku użycia starego oleju. Używanie starego oleju stanowi zagrożenie dla środowiska!
■
Przed uruchomieniem uzupełnić olej
do smarowania łańcucha wzbiorniku.
■
Nie używać starego oleju!
■
Zbiornik napełniać nowym olejem do
smarowania łańcucha najpóźniej przy
każdej wymianie akumulatora.
Łańcuch tnący iprowadnica są wtrakcie pracy
stale zaopatrywane wolej przez automatyczny
system oliwiący. Olej do łańcucha tnącego chroni
przed korozją iprzedwczesnym zużyciem. Aby
zapewnić wystarczające smarowanie łańcucha
tnącego, wzbiorniku musi zawsze znajdować się
wystarczająca ilość oleju do łańcucha.
Do smarowania łańcucha tnącego iprowadnicy
należy używać wyłącznie wysokiej jakości ekologicznego, biodegradowalnego oleju do łańcuchów tnących. Olej ten należy transportować
iprzechowywać tylko wdopuszczonych do tego
iodpowiednio oznakowanych pojemnikach.
Zawsze przed rozpoczęciem pracy iprzy każdej
wymianie akumulator należy sprawdzić poziom
oleju iw razie potrzeby wlać olej do smarowania
łańcucha:
1. Skontrolować poziom oleju we wzierniku
zbiornika (09/1). Olej musi być zawsze widoczny. Nie należy przekraczać minimalnego
imaksymalnego poziomu oleju.
2. Wrazie potrzeby uzupełnić olej do łańcucha
przez króciec wlewu (09/2).
76 CS 36 Li
Page 77

Obsługa
9 OBSŁUGA
NIEBEZPIECZEŃSTWO!
Śmiertelne niebezpieczeństwo inie-
bezpieczeństwo najcięższych obrażeń.
Nieznajomość zasad bezpieczeństwa
iinstrukcji obsługi może prowadzić do
najcięższych obrażeń, anawet śmierci.
■
Przed użyciem piły łańcuchowej należy zapoznać się ze wszystkimi zasadami bezpieczeństwa iwskazówkami
zawartymi wniniejszej instrukcji obsługi oraz winstrukcjach, do których
odniesienia się wniej znajdują!
■
Przestrzegać przepisów krajowych dotyczących czasu eksploatacji.
■
Prawą dłonią (osoby praworęczne) mocno
chwycić iprzytrzymać tylny uchwyt piły, lewą
zaś – przedni uchwyt.
■
Dopóki silnik pracuje, nie puszczać uchwytów.
■
Nie używać piły łańcuchowej:
■
wstanie zmęczenia
■
wprzypadku złego samopoczucia
■
pod wpływem alkoholu, leków lub narkotyków
9.1 Ustalanie stanu naładowania akumulatora (04)
Na przedniej ścianie akumulatora znajduje się
pole z przyciskiem (04/1) oraz diody LED wskazujące stan naładowania (04/2 do 04/5).
1. Nacisnąć przycisk (04/1).
W zależności od stanu naładowania akumulatora włączona zostanie odpowiednia liczba
diod LED.
2. Odczytać stan naładowania, patrz Rozdział
9.2 "Wskaźnik stanu naładowania akumulatora", strona77.
9.2 Wskaźnik stanu naładowania akumulatora
Włączone diody LED
Stan naładowania akumulatora
Zielony (04/2) Akumulator jest całkowicie
naładowany.
Zielony (04/3)
oraz (04/4)
Akumulator jest naładowany
w 50%.
Zielony (04/4) Akumulator jest naładowany
poniżej 50%.
Czerwony
(04/5)
Akumulator jest całkowicie
rozładowany lub został przegrzany/przechłodzony.
9.3 Kontrola oleju do łańcucha
Sposób postępowania patrz Rozdział 8.8 "Uzupełnianie oleju do smarowania łańcucha tnącego
(09)", strona76.
UWAGA!
Niebezpieczeństwo uszkodzenia łań-
cucha tnącego
Jeżeli wzbiorniku znajduje się zbyt mała
ilość oleju do smarowania łańcucha lub
jest on wyschnięty/zaklejony, może dojść
do poważnego uszkodzenia łańcucha
tnącego. Zaschnięty/przyklejony olej do
smarowania łańcucha może doprowadzić
do uszkodzenia części, przez które olej
przepływa, lub pompy olejowej.
Uszkodzenie występuje także wprzypadku użycia starego oleju. Używanie starego oleju stanowi zagrożenie dla środowiska!
■
Zawsze przed rozpoczęciem pracy
sprawdzić, czy wzbiorniku znajduje
się wystarczająca ilość oleju do łańcucha.
■
Wprzypadku niskiego poziomu oleju
uzupełnić olej do łańcucha.
■
Nie używać starego oleju!
469861_a 77
Page 78

PL
Nawyki itechnika pracy
9.4 Kontrolowanie blokady łańcucha
Sposób postępowania patrz Rozdział 8.5 "Kontrolowanie sprawności blokady łańcucha", strona75.
OSTRZEŻENIE!
Śmiertelne niebezpieczeństwo inie-
bezpieczeństwo najcięższych obrażeń
przez uszkodzoną blokadę łańcucha.
Jeżeli blokada łańcucha nie działa, to np.
przy odrzucie (odbiciu) poruszający się
łańcuch tnący może spowodować najcięższe obrażenia, anawet śmierć operatora.
■
Przed przystąpieniem do pracy zawsze sprawdzić blokadę łańcucha.
■
Nie włączać piły łańcuchowej, gdy
blokada łańcucha jest uszkodzona.
Wtym przypadku należy zlecić
sprawdzenie piły łańcuchowej wspecjalistycznym serwisie.
9.5 Włączenie i wyłączenie silnika
OSTROŻNIE!
Niebezpieczeństwo uszkodzenia słu-
chu!
Podczas użytkowania piły łańcuchowej
powstaje silny hałas, który może powodować uszkodzenie słuchu.
■
Podczas pracy zużyciem piły łańcuchowej należy stosować ochronę słuchu.
WSKAZÓWKA
Przed każdym włączeniem piły łańcuchowej zwolnić blokadę łańcucha.
Włączenie silnika:
1. Zwolnić blokadę łańcucha.
2. Kciukiem nacisnąć iprzytrzymać przycisk
blokady (14/1).
3. Nacisnąć iprzytrzymać włącznik/wyłącznik
(14/2).
4. Zwolnić przycisk blokady (14/1). Po uruchomieniu piły łańcuchowej nie trzeba przytrzymywać wciśniętego przycisku blokady. Przycisk blokady zapobiega przypadkowemu włączeniu piły.
Wyłączenie silnika:
1. Zwolnić włącznik/wyłącznik (14/2).
10 NAWYKI ITECHNIKA PRACY
WSKAZÓWKA
Rolnicze stowarzyszenia zawodowe regularnie prowadzą kursy obsługi pił łańcuchowych iścinki drzew.
NIEBEZPIECZEŃSTWO!
Śmiertelne niebezpieczeństwo wprzy-
padku niedostatecznej wiedzy specjalistycznej!
Niedostateczna wiedza specjalistyczna
może doprowadzić do poważnych obrażeń, anawet śmierci!
■
Ścinaniem iokrzesywaniem drzew
mogą zajmować się tylko odpowiednio przeszkolone idoświadczone
osoby.
NIEBEZPIECZEŃSTWO!
Zagrożenie życia zpowodu odłamków
drewna!
Porwane przez piłę wióry mogą spowodować poważne obrażenia, anawet
śmierć!
■
Usunąć luźne wióry iodłamki drewna
zelementów przeznaczonych do cięcia.
10.1 Wskazówki dotyczące bezpieczeństwa pracy
■
Należy przestrzegać przepisów dotyczących
bezpieczeństwa obowiązujących wdanym
kraju, opracowanych przez np.stowarzyszenia branżowe, kasy ubezpieczeń społecznych, instytucje ochrony pracy.
■
Pracować wyłącznie przy wystarczającym
świetle dziennym lub sztucznym oświetleniu.
■
Usuwać przedmioty (np. elementy cięte piłą)
z obszaru roboczego – ryzyko potknięcia się.
■
Użytkownik odpowiada za wypadki zudziałem osób trzecich oraz uszkodzenie mienia
będącego ich własnością.
10.1.1 Operator
■
Osoby poniżej 16.roku życia oraz niezaznajomione zinstrukcją obsługi nie mogą używać urządzenia.
■
Przy pierwszym użyciu piły łańcuchowej: Poprosić sprzedawcę lub inną osobę umiejącą
obsługiwać urządzenie o wyjaśnienie sposobu użytkowania piły łańcuchowej lub udać się
na odpowiednie szkolenie.
78 CS 36 Li
Page 79

Nawyki itechnika pracy
■
Osoby pracujące z wykorzystaniem piły łańcuchowej muszą być wypoczęte, zdrowe i w
dobrej kondycji fizycznej. Osoby, które ze
względów zdrowotnych nie powinny wykonywać prac związanych z dużym wysiłkiem fizycznym, muszą skonsultować z lekarzem
możliwość pracy z użyciem piły łańcuchowej.
■
Należy podjąć działania w celu ochrony
przed obciążeniami wywołanymi przez wibracje. W zależności od tego, w jaki sposób
będzie użytkowane narzędzie elektryczne,
rzeczywiste wartości wibracji mogą odbiegać
od wartości podanych w danych technicznych. Należy przy tym uwzględnić cały czas
trwania pracy, a więc także momenty, w których narzędzie elektryczne pracuje bez obciążenia lub jest wyłączone. Właściwe działania obejmują miedzy innymi regularną konserwację i utrzymywanie narzędzia oraz nasadek do narzędzia w dobrym stanie technicznym, utrzymywanie dłoni w stanie rozgrzanym, regularne przerwy oraz dobre zaplanowanie przebiegu pracy.
■
Określić maksymalny czas pracy oraz
częstotliwość przerw na podstawie wielkości występujących drgań.
10.1.2 Czas eksploatacji
Przestrzegać krajowych przepisów dotyczących
czasu eksploatacji pił łańcuchowych. Czasy eksploatacji pił łańcuchowych mogą być ograniczone
przez przepisy krajowe ilokalne.
10.1.3 Praca z użyciem piły łańcuchowej
OSTRZEŻENIE!
Niebezpieczeństwo ciężkich obrażeń.
Używanie niecałkowicie zmontowanej piły łańcuchowej może doprowadzić do
ciężkich obrażeń.
■
Używać piły łańcuchowej dopiero po
jej całkowitym zmontowaniu.
■
Przed każdym użyciem przeprowadzić kontrolę wzrokową, aby sprawdzić, czy piła łańcuchowa jest kompletna oraz, czy nie zawiera uszkodzonych lub zużytych podzespołów.
Urządzenia ochronne izabezpieczające muszą być sprawne inienaruszone.
OSTRZEŻENIE!
Niebezpieczeństwo odniesienia obra-
żeń przez piłę łańcuchową uruchamiającą się wniekontrolowany sposób
Niekontrolowane uruchomienie piły łańcuchowej może doprowadzić do ciężkich
obrażeń. Dlatego należy usuwać akumulator wprzypadku:
■
prac kontrolnych, nastawczych ipielęgnacyjnych;
■
prac przy zestawie tnącym;
■
odkładania piły łańcuchowej;
■
Transport
■
przechowywania;
■
prac konserwacyjnych inaprawczych.
■
Niebezpieczeństwo
■
Nigdy nie należy podejmować pracy wpojedynkę.
■
Należy cały czas nosić ze sobą apteczkę
wrazie wypadków.
■
Unikać kontaktu urządzenia zprzedmiotami
metalowymi znajdującymi się na ziemi lub
przewodzącymi prąd elektryczny.
■
Środki ochrony osobistej:
■
kask ochronny
■
ochrona słuchu (np. stopery do uszu),
zwłaszcza przy codziennej pracy przez
ponad 2,5godziny
■
okulary ochronne lub ochronniki oczu
wbudowane wkask ochronny
■
spodnie ochronne odporne na przecięcie
■
mocne rękawice robocze
■
obuwie ochronne zpodeszwą antypoślizgową istalowym podnoskiem
■
Podczas pracy nie trzymać piły łańcuchowej
powyżej ramion, ponieważ uniemożliwia to jej
bezpieczną obsługę.
■
Przed zmianą stanowiska pracy wyłączyć silnik izałożyć osłonę na łańcuch.
■
Należy zawsze zakładać osłonę łańcucha na
nieużywane piły łańcuchowe oraz wyciągać
akumulator.
■
Nie pozostawiać włączonej piły łańcuchowej
po zakończeniu pracy.
■
Nie używać piły łańcuchowej do unoszenia
lub przemieszczania drewna.
469861_a 79
Page 80

PL
Nawyki itechnika pracy
■
Pnie, których grubość jest większa niż długość brzeszczotu piły, powinny być piłowane
przez odpowiednio wyszkolone osoby.
■
Łańcuch piły wmomencie wprowadzania
wcięty materiał powinien być wruchu; nigdy
nie włączać piły łańcuchowej, gdy jej łańcuch
tkwi wmateriale.
■
Zwracać uwagę, aby olej do smarowania łańcucha nie przedostawał się do gleby.
■
Nie wykonywać jakichkolwiek prac przy użyciu piły podczas deszczu, opadów śniegu lub
burzy.
■
Nigdy nie dezaktywować urządzeń ochronnych izabezpieczających.
10.1.4 Niebezpieczeństwo odrzutu
NIEBEZPIECZEŃSTWO!
Wystąpienie odrzutu (odbicia) grozi
śmiercią!
Odrzut (odbicie) piły łańcuchowej może
doprowadzić do śmiertelnych obrażeń
operatora.
■
Należy koniecznie przestrzegać poniższych zaleceń, aby uniknąć odrzutu piły!
■
Skontrolować cięty materiał pod kątem obecności przedmiotów obcych (gwoździ, metalu
itp.); wrazie potrzeby usunąć je.
■
Piłę łańcuchową należy obsługiwać wyłącznie obiema rękami.
■
Podczas pracy przy użyciu piły łańcuchowej
nie przechylać się za daleko do przodu.
■
Nigdy nie obcinać kilku gałęzi naraz.
■
Pracować tylko zprawidłowo naostrzonym
inaprężonym łańcuchem tnącym.
■
Podczas pracy nie trzymać piły, mając całkowicie wyprostowane ramiona.
■
Po uruchomieniu łańcucha tnącego rozpocząć cięcie; dopiero po wykonaniu tej czynności zwiększyć maksymalnie prędkość urządzenia.
■
Nigdy nie piłować przy użyciu końcówki prowadnicy.
■
Cały czas obserwować końcówkę prowadnicy.
■
Kontynuując rozpoczęte nacięcia, należy zachowywać szczególną ostrożność.
■
Podczas cięcia poszycia lasu imłodych drzewek należy zachowywać szczególną ostrożność.
■
Podczas piłowania nie stać na drabinie ani
nie trzymać piły powyżej ramion.
■
Celem zwiększenia stabilności podczas piłowania stosować ząb oporowy.
■
Podczas piłowania zwracać uwagę na stabilność pozycji roboczej.
■
Piłować głównie przy użyciu dolnej części
brzeszczotu. Podczas cięcia przy użyciu górnej części brzeszczotu zachowywać szczególną ostrożność.
■
Wyjmować piłę łańcuchową znacięcia tylko
wtedy, gdy jej łańcuch pracuje.
10.2 Ścinanie drzew
Przed przystąpieniem do ścinania należy podjąć
następujące działania.
■
Upewnić się, że wobszarze zagrożenia nie
znajdują się żadne inne osoby, zwierzęta lub
przedmioty.
■
Należy zachować bezpieczny odstęp od innych stanowisk pracy lub przedmiotów równy
2½ długości drzewa.
■
Uważać na przewody zasilające icudze mienie. Wrazie potrzeby zawiadomić przedsiębiorstwo energetyczne lub właściciela.
■
Oszacować kierunek upadku drzewa.
Czynniki decydujące okierunku upadku drzewa to:
■
naturalne nachylenie drzewa
■
wysokość drzewa
■
jednostronny rozrost gałęzi
■
równy teren lub zbocze
■
niesymetryczny rozrost, uszkodzenia
drzewa
■
kierunek iprędkość wiatru
■
obciążenie śniegiem
■
Wprzypadku pracy na zboczu zawsze stać
powyżej ścinanego drzewa.
■
Upewnić się, że na uprzednio ustalonej drodze wycofywania się nie znajdują się żadne
przeszkody. Droga wycofywania się powinna
przebiegać wlinii biegnącej pod kątem ok.
45° względem linii przeciwnej do kierunku
upadku drzewa (17).
■
Pień musi być oczyszczony zkrzaków, gałęzi
iciał obcych (np. zanieczyszczeń, kamieni,
luźnej kory, gwoździ, klamer, drutów itd.).
Aby ściąć drzewo, należy wykonać dwa nacięcia
ijedno cięcie obalające.
80 CS 36 Li
Page 81

Nawyki itechnika pracy
1. Przy cięciach obalających iprzerzynaniu
pewnie docisnąć ząb oporowy do przecinanego drzewa.
2. Nacięcie po stronie upadku drzewa (18/C)
wykonać najpierw poziomo, anastępnie ukośnie od góry pod kątem co najmniej 45°. Pozwala to uniknąć zakleszczenia piły łańcuchowej podczas wykonywania drugiego nacięcia. Nacięcie należy wykonać możliwie
najbliżej ziemi, od strony, na którą ma upaść
drzewo (18/E). Głębokość nacięcia powinna
wynosić ok. 1/4 średnicy pnia.
3. Cięcie obalające (18/D) po stronie przeciwnej
do nacięcia wykonać dokładnie poziomo.
Cięcie obalające należy wykonać na wysokości 3–5cm powyżej poziomego nacięcia po
przeciwnej stronie.
4. Cięcie obalające (18/D) wykonać na taką głębokość, aby pozostawić przegub (18/F) pomiędzy nacięciem (18/C) acięciem obalającym (18/D) ogrubości równej co najmniej
1/10 średnicy drzewa. Przegub ten zapobiega obróceniu się drzewa iupadkowi wzłym
kierunku. Przy zbliżaniu się cięcia obalającego (18/D) do przegubu (18/F) drzewo powinno zacząć upadać.
Jeżeli drzewo upada wtrakcie piłowania:
■
Jeżeli drzewo upada wzłym kierunku lub
pochyla się izakleszcza piłę łańcuchową,
należy przerwać wykonywanie cięcia
obalającego. Wcelu rozwarcia nacięcia
obalającego inakierowania drzewa zgodnie zkierunkiem upadku należy wbić kliny.
■
Natychmiast wyjąć piłę łańcuchową znacięcia, wyłączyć iodłożyć.
■
Przejść do obszaru wycofywania się.
■
Uważać na spadające gałęzie.
5. Jeżeli drzewo nie przewraca się, należy je
wsposób kontrolowany obalić, wbijając kliny
wnacięcie obalające.
6. Po zakończeniu piłowania natychmiast zdjąć
ochronniki słuchu inasłuchiwać sygnałów
iokrzyków ostrzegawczych.
WSKAZÓWKA
Można używać wyłącznie klinów wykonanych zdrewna, tworzywa sztucznego lub
aluminium.
NIEBEZPIECZEŃSTWO!
Zagrożenie życia wrazie uderzenia
przez upadające drzewo!
Jeżeli wycofanie się przy opadaniu drzewa jest niemożliwe, może dojść do poważnych obrażeń ciała, anawet śmierci!
■
Do ścinania drzewa można przystąpić dopiero wówczas, gdy zapewniona jest możliwość bezpiecznego wycofania się od upadającego drzewa.
NIEBEZPIECZEŃSTWO!
Zagrożenie życia wrazie niekontrolo-
wanego upadku drzewa!
Niekontrolowany upadek drzewa może
spowodować poważne obrażenia, anawet śmierć!
■
Aby zapewnić kontrolowany upadek
drzewa, pozostawić klin ogrubości
równej ok. 1/10 średnicy pnia pomiędzy nacięciem po stronie upadku
drzewa acięciem obalającym.
■
Nie ścinać drzew, gdy wieje wiatr.
10.3 Okrzesywanie
Podczas tej pracy należy dodatkowo przestrzegać następujących zaleceń:
■
Wtrakcie pracy opierać piłę łańcuchową
opień drzewa.
■
Na początku pozostawić większe gałęzie skierowane na dół, które podpierają drzewo (19).
■
Mniejsze gałęzie odciąć jednym cięciem.
■
Zwrócić uwagę na naprężone gałęzie iprzecinać je od dołu do góry, aby uniknąć zakleszczenia piły łańcuchowej (19).
■
Swobodnie wiszących gałęzi nie odcinać od
dołu.
■
Nacięcia wgłębne iwzdłużne oraz dodatkowe
nacięcia klina po stronie upadku drzewa mogą być wykonywane tylko przez doświadczone lub odpowiednio przeszkolone osoby (18).
10.4 Przycinanie drzewa na długość
Podczas tej pracy należy dodatkowo przestrzegać następujących zaleceń:
■
Wprzypadku pracy na zboczu zawsze stać
powyżej pnia drzewa, ponieważ może on się
stoczyć (19).
■
Piłę łańcuchową prowadzić wtaki sposób,
aby żadna część ciała nie znalazła się wzasięgu pracy łańcucha tnącego.
469861_a 81
Page 82

PL
Transport
■
Przyłożyć ząb oporowy bezpośrednio obok
krawędzi cięcia iobracać piłę łańcuchową
wokół tego punktu. Pod koniec cięcia nie wywierać jakiegokolwiek nacisku.
■
Zwracać uwagę na to, aby łańcuch tnący nie
stykał się zpodłożem.
■
Po zakończeniu cięcia należy odczekać, aż
łańcuch tnący zatrzyma się; dopiero potem
można go zdemontować.
■
Przed rozpoczęciem cięcia następnego drzewa należy zawsze wyłączyć silnik piły łańcuchowej.
Pień drzewa leży całą długością równomiernie na
podłożu:
■
Przepiłować pień drzewa od strony górnej,
nie wbijając piły wglebę (20).
Pień drzewa wspiera się opodłoże jednym końcem:
■
Aby uniknąć zakleszczenia się łańcucha tnącego irozszczepienia drewna, należy przepiłować pień drzewa od strony dolnej na 1/3 jego średnicy, anastępnie pozostałą część od
strony górnej na wysokości cięcia dolnego
(10).
Pień drzewa wspiera się opodłoże obydwoma
końcami:
Aby uniknąć zakleszczenia się łańcucha tnącego
irozszczepienia drewna, należy przepiłować pień
drzewa od strony górnej na 1/3 jego średnicy,
anastępnie pozostałą część od strony dolnej na
wysokości cięcia górnego (11).
NIEBEZPIECZEŃSTWO!
Wystąpienie odrzutu (odbicia) grozi
śmiercią!
Odrzut (odbicie) urządzenia może doprowadzić do śmiertelnych obrażeń operatora.
■
Należy koniecznie przestrzegać zaleceń, aby uniknąć odrzutu piły!
10.5 Przycinanie drewna na długość (12)
Podczas tej pracy należy dodatkowo przestrzegać następujących zaleceń:
■
Stosować odpowiednie zabezpieczenia (kozły do piłowania, kliny, belki).
■
Zwracać uwagę na bezpieczne położenie
irównomierny rozkład masy ciała.
■
Zabezpieczyć okrągłe kloce drewna przed toczeniem się.
■
Łańcuch piły wmomencie wprowadzania
wcięty materiał powinien być wruchu. Nigdy
nie włączać piły łańcuchowej, gdy jej łańcuch
tkwi wmateriale.
■
Nie dopuścić do przytrzymywania drewna
własną nogą bądź przez inną osobę.
11 TRANSPORT
Przed transportem wykonać następujące czynności:
1. Wyłączyć piłę łańcuchową
2. Założyć osłonę łańcucha
3. Wyjąć akumulator
Do przenoszenia piły łańcuchowej używać wy-
łącznie uchwytu pałąkowego. Brzeszczot piły musi być przy tym skierowany do tyłu.
OSTRZEŻENIE!
Śmiertelne niebezpieczeństwo inie-
bezpieczeństwo najcięższych obrażeń.
Uszkodzona piła łańcuchowa może podczas transportu doprowadzić do najcięższych obrażeń, anawet śmierci.
■
Noszenie bądź transportowanie piły
łańcuchowej, której łańcuch jest wruchu, jest bezwzględnie zabronione.
■
Prze transportem wykonać wyżej wymienione czynności.
Wpojazdach: Zabezpieczyć piłę łańcuchową
przed przechyleniem, uszkodzeniem iwyciekiem
oleju do łańcucha.
12 KONSERWACJA IPIELĘGNACJA
Piła łańcuchowa spełnia wymagania wszystkich
odnośnych norm bezpieczeństwa. Naprawy mogą być wykonywane wyłącznie przez wykwalifikowanych specjalistów zwykorzystaniem wyłącznie
oryginalnych części zamiennych.
■
Po każdym użyciu piłę łańcuchową należy
sprawdzić pod kątem uszkodzeń iwrazie potrzeby
■
wymienić uszkodzone części.
■
Nie narażać urządzenia na działanie wilgoci
lub wpływu wilgoci zotoczenia. Części ztworzywa sztucznego czyścić ściereczką, nie
używając przy tym środków do czyszczenia
ani rozpuszczalników.
■
Wyczyścić szczelinę powietrza chłodzącego,
jeśli jest zatkana.
■
Nie spryskiwać piły łańcuchowej wodą inie
używać myjki wysokociśnieniowej.
82 CS 36 Li
Page 83

Konserwacja ipielęgnacja
■
Używać tylko części zamiennych zalecanych
przez producenta.
OSTRZEŻENIE!
Niebezpieczeństwo odniesienia obra-
żeń przez piłę łańcuchową uruchamiającą się wniekontrolowany sposób
Niekontrolowane uruchomienie piły łańcuchowej może doprowadzić do ciężkich
obrażeń.
■
Przed przystąpieniem do wszelkich
prac konserwacyjnych ipielęgnacyjnych należy zawsze wyciągnąć akumulator.
■
Nosić rękawice ochronne.
12.1 Ostrzenie łańcucha tnącego (13)
Nie używać stępionego lub uszkodzonego łańcucha tnącego. Skutkuje to nadmiernym wysiłkiem
fizycznym, słabymi efektami cięcia iwysokim zużyciem łańcucha.
OSTROŻNIE!
Ryzyko odniesienia obrażeń ciała spo-
wodowanych przez łańcuch tnący!
Ostre krawędzie łańcucha tnącego mogą
spowodować poważne rany cięte.
■
Podczas ostrzenia łańcucha tnącego
nosić rękawice ochronne.
WSKAZÓWKA
Niedoświadczonym użytkownikom pił łańcuchowych zaleca się poproszenie onaostrzenie łańcucha tnącego specjalisty
wpunkcie serwisowym.
Wcelu uzyskania optymalnych efektów cięcia
łańcuch musi być ostrzony wregularnych odstępach czasu.
Prawidłowe naostrzenie łańcucha tnącego
zmniejsza ryzyko odbicia izapobiega nadmiernemu zużyciu.
Konieczne jest naostrzenie łańcucha tnącego, jeżeli podczas przecinania powstaje mączka
drzewna lub jeżeli piła ztrudnością przechodzi
przez drewno. Gdy łańcuch tnący jest ostry, powstają duże idługie wióry.
1. Wyłączyć piłę łańcuchową iwyciągnąć akumulator.
2. Sprawdzić iewentualnie wyregulować naprężenie łańcucha.
3. Do ostrzenia używać wyłącznie odpowiednich narzędzi: okrągłego pilnika do łańcuchów Ø = 4,0mm, prowadnika pilnika,
sprawdziany mierniczego do łańcuchów.
Narzędzia te są dostępne wspecjalistycznych sklepach.
4. Pojedyncze ogniwa łańcuchowe składają się
zogniwa tnącego (13/3), zęba tnącego (13/1)
ielementu ograniczającego (13/2).
5. Przesuwać pilnik zlekkim naciskiem prostopadle (13) od strony wewnętrznej do strony
zewnętrznej zęba tnącego. Prawidłowe używanie pilnika ułatwia prowadnik pilnika. Wystarczą 2–3 pociągnięcia pilnikiem.
6. Podczas ostrzenia przestrzegać kątów (13)
zęba tnącego iwysokości elementu ograniczającego (13/2) od ostrza. Zwrócić uwagę,
aby po naostrzeniu wszystkie zęby tnące łańcucha miały równą długość iszerokość.
7. Przy zastosowaniu zalecanych narzędzi
iprawidłowym ich użyciu podane wartości kątów uzyskuje się automatycznie. Wartości
można sprawdzić za pomocą suwmiarki do
łańcuchów.
8. Na koniec lekko zaokrąglić przednią część
elementu ograniczającego (13/2).
Często ostrzyć łańcuch tnący, usuwając przy tym
niewielką ilość materiału. Po 3- lub 4-krotnym samodzielnym ostrzeniu zlecić naostrzenie łańcucha wspecjalistycznym warsztacie. Wykonane
zostanie tam również szlifowanie ogranicznika
głębokości.
Wymienić łańcuch tnący, gdy tylko zostanie osiągnięta minimalna długość zębów tnących wynosząca 4mm (13).
UWAGA!
Ryzyko uszkodzenia maszyny wsku-
tek nieodpowiedniego ostrzenia!
Nierówne zęby tnące powodują zakłócenia biegu łańcucha imogą spowodować
jego zerwanie! Po naostrzeniu wszystkie
zęby tnące muszą mieć tę samą długość
iszerokość!
■
Należy zawsze prawidłowo ostrzyć
łańcuch tnący!
469861_a 83
Page 84

PL
Przechowywanie
NIEBEZPIECZEŃSTWO!
Wystąpienie odrzutu (odbicia) grozi
śmiercią!
Odrzut (odbicie) piły łańcuchowej może
doprowadzić do śmiertelnych obrażeń
operatora.
■
Należy zawsze prawidłowo ostrzyć
łańcuch tnący!
12.2 Czyszczenie wnętrza koła łańcuchowego
Po każdym użyciu dokładnie czyścić piłę łańcuchową.
1. Wyciągnąć akumulator iodłożyć łańcuch tną-
cy na stabilnym podkładzie.
2. Odkręcić osłonę koła zębatego.
3. Oczyścić wnętrze odpowiednim pędzelkiem.
4. Zdjąć łańcuch tnący iwyjąć prowadnicę.
5. Oczyścić rowek prowadnicy iotwór wlotowy
oleju.
12.3 Przemontowanie uchwytu szybkomocującego (16)
1. Zdjąć osłonę prowadnicy (16/1).
2. Wykręcić wkręt zrowkiem krzyżowym(16/3)
ioddzielić blaszkę adaptera hakiem mocującym (16/2) od prowadnicy.
3. Odwrócić prowadnicę wokół osi podłużnej.
4. Założyć blaszkę adaptera hakiem mocującym
ponownie na prowadnicę iprzymocować
wkrętem zrowkiem krzyżowym.
5. Zamontować ponownie prowadnicę, patrz
Rozdział 7.1 "Montaż prowadnicy szynowej
(05, 06)", strona74.
12.4 Kontrola, odwracanie ismarowanie
prowadnicy (14, 15)
Sprawdzenie prowadnicy:
Regularnie kontrolować prowadnicę pod kątem
uszkodzeń. Wrazie potrzeby usunąć wystające
krawędzie (14).
Odwracanie prowadnicy:
Aby uniknąć jednostronnego zużycia, prowadnicę
należy obracać po każdym ostrzeniu ikażdej wymianie łańcucha.
1. Przemontować urządzenie szybkomocujące,
patrz Rozdział 12.3 "Przemontowanie uchwy-
tu szybkomocującego (16)", strona84.
2. Odwrócić prowadnicę.
Smarowanie prowadnicy:
1. Dokładnie oczyścić rowek prowadnicy (14/1)
iotwór wlotowy oleju (14/2).
2. Dokładnie oczyścić otwór smarowy (15/1)
zobu stron.
3. Za pomocą odpowiedniej praski smarowej
kolejno wtłoczyć zobu stron taką ilość smaru, aż będzie on równomiernie wypływać na
czubkach koła gwiazdowego. Przez cały czas
obracać przy tym koło gwiazdowe.
13 PRZECHOWYWANIE
Po każdym użyciu dokładnie oczyścić piłę łańcuchową. Przechowywać wsuchym, zamykanym
pomieszczeniu niedostępnym dla dzieci.
Wprzypadku przerw weksploatacji trwających
dłużej niż 30dni wykonać następujące czynności:
■
Wyłączyć piłę łańcuchową iwyciągnąć akumulator.
■
Opróżnić zbiornik oleju do smarowania łańcucha.
■
Zdjąć łańcuch tnący iprowadnicę, oczyścić
ispryskać olejem antykorozyjnym.
■
Dokładnie oczyścić piłę łańcuchową iprzechowywać wsuchym pomieszczeniu.
UWAGA!
Niebezpieczeństwo uszkodzenia łań-
cucha tnącego
Zaschnięty/przyklejony olej do smarowania łańcucha może przy dłuższym przechowywaniu doprowadzić do uszkodzenia części, przez które olej przepływa, lub
pompy olejowej.
■
Przed wyłączeniem piły łańcuchowej
zużytku na dłuższy czas zawsze
usunąć olej.
84 CS 36 Li
Page 85

Utylizacja
14 UTYLIZACJA
Wskazówki dotyczące ustawy ozużytym
sprzęcie elektrycznym ielektronicznym
(ElektroG)
■
Zużyte urządzenia elektryczne ielektronicznie nie mogą być utylizowane
zodpadami zgospodarstwa domowego, lecz należy przekazać je do osobnej zbiórki lub utylizacji.
■
Zużyte baterie lub akumulatory, które
nie są na stałe wbudowane wzużytym
urządzeniu, należy wyciągnąć przed
oddaniem urządzenia! Ich utylizacja
jest regulowana przez ustawę ozużytych bateriach.
■
Właściciele lub użytkownicy urządzeń
elektrycznych ielektronicznych są
prawnie zobowiązani do ich oddania po
zużyciu.
■
Użytkownik końcowy odpowiada za
usunięcie danych osobowych zutylizowanego urządzenia!
Symbol przekreślonego pojemnika na odpady
oznacza, że zużyte urządzenia elektryczne ielektroniczne nie mogą być utylizowane razem zodpadami zgospodarstwa domowego.
Zużyte urządzenia elektryczne ielektroniczne
można nieodpłatnie oddać wnastępujących
punktach zbiórki:
■
publiczne punkty utylizacji lub zbiórki odpadów (np. komunalne punkty składowania odpadów);
■
punkty sprzedaży urządzeń elektrycznych
(stacjonarne ionline), oile sprzedawcy są
zobowiązani do odbioru lub oferuję tę usługę
dobrowolnie.
Wszystkie powyższe zasady obowiązują wyłącznie w odniesieniu do urządzeń sprzedawanych i
instalowanych na terenie Unii Europejskiej i objętych dyrektywą 2012/19/UE. W krajach nienależących do Unii Europejskiej obowiązywać mogą
inne przepisy dotyczące utylizacji urządzeń elektrycznych i elektronicznych.
Wskazówki dotyczące ustawy ozużytych
bateriach (BattG)
■
Zużyte baterie iakumulatory nie mogą
być utylizowane zodpadami zgospodarstwa domowego, lecz należy przekazać je do osobnej zbiórki lub utylizacji.
■
Informacje na temat bezpiecznego wyciągania baterii lub akumulatorów
zurządzenia elektrycznego oraz informacje na temat ich typu lub systemu
chemicznego są zawarte wodpowiedniej instrukcji obsługi lub montażu.
■
Właściciele lub użytkownicy baterii
iakumulatorów są prawnie zobowiązani do ich oddania po zużyciu. Zwrot
ogranicza się do przekazania standardowych ilości występujących wgospodarstwach domowych.
Zużyte baterie mogą zawierać szkodliwe substancje lub metale ciężkie, które mogą powodować poważne szkody dla środowiska naturalnego
izdrowia. Recykling zużytych baterii iwykorzystanie zawartych wnich zasobów przyczynia się
do ochrony tych obu ważnych dóbr.
Symbol przekreślonego pojemnika na odpady
oznacza, że zużyte baterie iakumulatory nie mogą być utylizowane razem zodpadami zgospodarstwa domowego.
Jeżeli pod symbolem pojemnika na odpady znajdują się dodatkowo oznaczenia Hg, Cd lub Pb,
oznacza to:
■
Hg: Bateria zawiera więcej niż 0,0005% rtęci
■
Cd: Bateria zawiera więcej niż 0,002% kadmu
■
Pb: Bateria zawiera więcej niż 0,004% ołowiu
Zużyte akumulatory ibaterie można nieodpłatnie
oddać wnastępujących punktach zbiórki:
■
publiczne punkty utylizacji lub zbiórki odpadów (np. komunalne punkty składowania odpadów);
■
punkty sprzedaży baterii iakumulatorów;
■
punkty odbioru zużytych akumulatorów i baterii;
■
punkt odbioru producenta (jeżeli nie należy
on do systemu odbioru zużytych akumulatorów i baterii).
Wszystkie powyższe zasady obowiązują wyłącznie w odniesieniu do akumulatorów ibaterii
sprzedawanych na terenie Unii Europejskiej i objętych dyrektywą 2006/66/WE. W krajach niena-
469861_a 85
Page 86

PL
leżących do Unii Europejskiej obowiązywać mogą inne przepisy dotyczące utylizacji akumulatorów ibaterii.
15 POMOC WPRZYPADKU USTEREK
Pomoc wprzypadku usterek
Usterka Możliwa przy-
Silnik nie
działa.
Brak
smarowania
łańcucha
czyna
Brak napięcia
akumulatora.
Zabezpieczenie przed
przeciążeniem
wyłączyło
pompę.
Wyzwolona
blokada łańcucha.
Zbiornik oleju
jest pusty.
Prowadnica
szynowa jest
zabrudzona.
WSKAZÓWKA
Wprzypadku usterek, które nie zostały
wyszczególnione wtej tabeli lub też, których użytkownik nie może usunąć samodzielnie, należy zwrócić się do naszego
działu obsługi klienta.
Pomoc
Zlecić specjaliścieelektrykowi kontrolę zasilania energią
elektryczną.
Zaczekać, aż zabezpieczenie
przed przeciążeniem przywróci zasilanie elektryczne.
Zwolnić blokadę
łańcucha.
Sprawdzić zbiornik
oleju pod kątem
uszkodzeń.
Sprawdzić stan
oleju iwrazie potrzeby dolać oleju
do smarowania
łańcucha piły.
Oczyścić otwór
wlewowy oleju
oraz rowek, przez
który płynie olej.
86 CS 36 Li
Page 87

Dane techniczne
16 DANE TECHNICZNE
Nr art. 113 365
Typ akumulatora Litowo-jonowy (36V / 4,0Ah)
Prędkość biegu jałowego 17 m/s
Prędkość robocza 16m/s
Długość — prowadnica (OREGON) ok. 350mm
Długość użyteczna piły 265 mm
Łańcuch piły (OREGON) 91P045X
Grubość ogniw napędowych 1,27 mm
Podział — koło łańcuchowe 3/8“
Blokada łańcucha Tak
(elektryczna, PCB i drążek hamulca)
Czas wybiegu łańcucha
(DIN EN 60745-2-15 19.103 oraz 19.104)
Czas wybiegu łańcucha
(DIN EN 50144-2-15:2001 18.104)
Aktywacja łańcucha podwójna
Pojemność zbiornika oleju łańcucha 0,180 l
Masa netto bez łańcucha iprowadnicy 3,9 kg
Masa netto z łańcuchem iprowadnicą (bez osłony prowadnicy)
Zabezpieczenie przed przeciążeniem Nie
Poziom mocy akustycznej LWA (2000/14/EC) zmierzony /
gwarantowany
Poziom ciśnienia akustycznego LPA (k=2,5dB(A)) 91,5dB(A)
Maks. przyspieszenie drgań zprzodu / ztyłu
ahw (k=1,5 m/s²)
Podane wartości zostały określone za pomocą znormalizowanych metod badawczych i można je stosować w celu porównania między sobą różnych narzędzi elektrycznych.
Ponadto wartości te mogą być przydatne do oszacowania przed rozpoczęciem pracy wywołanych wibracjami obciążeń dla użytkownika.
+/-0,7 m/s
maks. 0,15s
maks. 2s
4,45kg
(PCB w akumulatorze)
101 / 105 dB(A)
3,193 / 3,159 m/s²
469861_a 87
Page 88

PL
xxxxxx (x)
Gwarancja
17 GWARANCJA
Ewentualne wady materiałowe lub produkcyjne wurządzeniu usuwamy przed upływem ustawowego
okresu przedawnienia roszczeń ztytułu rękojmi za wady fizyczne, dokonując wedle naszego uznania
naprawy lub wymiany produktu. Okres przedawnienia ustalany jest zgodnie zprawem obowiązującym
wkraju, wktórym produkt został zakupiony.
Gwarancja obowiązuje tylko wprzypadku:
■
przestrzegania niniejszej instrukcji obsługi,
■
prawidłowego postępowania,
■
stosowania oryginalnych części zamiennych.
Gwarancja nie obejmuje:
■
uszkodzeń lakieru spowodowanych zwykłym zużyciem
■
części zużywalnych, oznaczonych na wykazie części zamiennych ramką
Okres gwarancji rozpoczyna się od momentu nabycia przez pierwszego użytkownika końcowego. Decydujące znaczenie ma tutaj data dokumentu zakupu. Należy zwrócić się do dystrybutora lub najbliższego autoryzowanego punktu serwisowego, przedkładając niniejszą deklarację gwarancyjną oraz dowód zakupu. Niniejsza deklaracja nie narusza ustawowych roszczeń nabywcy wstosunku do sprzedawcy ztytułu wad.
Gwarancja wygasa wprzypadku:
■
samodzielnych prób naprawy,
■
samodzielnych zmian technicznych,
■
zastosowania niezgodnie zprzeznaczeniem.
.
18 DEKLARACJA ZGODNOŚCI EC
Niniejszym oświadczamy, że produkt we wprowadzonej przez nas na rynek wersji spełnia wymagania
zharmonizowanych dyrektyw UE, standardów bezpieczeństwa UE oraz standardów obowiązujących
dla danego produktu.
Produkt
Akumulatorowa piła łańcuchowa
Numer seryjny
G4124126
Producent
AL-KO Geräte GmbH
Ichenhauser Str. 14
D-89359 Kötz
Osoba sporządzająca dokumentację
Andreas Hedrich
Ichenhauser Str. 14
D-89359 Kötz
Typ
CS 36 Li
Poziom mocy akustycznej
EN ISO 3744
zmierzony / gwarantowany
101 dB(a) / 105 dB(A)
Nr badania typu EC
(2006/42/EC Załącznik IX)
BM 50359218 0001
88 CS 36 Li
Dyrektywy EU
2006/42/EC
2014/30/EU
2000/14/EC
2011/65/EU
Ocena zgodności
2000/14/EC Załącznik V
Jednostka notyfikowana
TÜV Rheinland LGA Products GmbH
Tillystraße 2
D-90431 Nürnberg
Germany
Nr 0197
Normy zharmonizowane
EN 60745-1:2009+A11:2010
EN 60745-2-13:2009+A1:2010
EN 55014-1:2006+A1:2009+A2:2011
EN 55014-2:2015
Kötz, 2016-12-01r.
Wolfgang Hergeth
Managing Director
Page 89

Překlad originálního návodu kpoužití
PŘEKLAD ORIGINÁLNÍHO NÁVODU KPOUŽITÍ
Obsah
1 K tomuto návodu k použití ..............................................................................................................91
1.1 Vysvětlení symbolů a signálních slov .................................................................................... 91
2 Popis výrobku .................................................................................................................................91
2.1 Obsah dodávky ..................................................................................................................... 91
2.2 Symboly na stroji ...................................................................................................................91
2.3 Bezpečnostní a ochranná zařízení ........................................................................................ 92
2.4 Ochrana proti přetížení.......................................................................................................... 92
2.5 Ochrana při zapojení .............................................................................................................92
2.6 Řetězová brzda .....................................................................................................................92
2.7 Použití v souladu s určeným účelem ..................................................................................... 92
3 Přehled výrobku (01) ...................................................................................................................... 92
4 Všeobecné bezpečnostní pokyny pro elektrické nářadí (IEC 60745-1).......................................... 93
4.1 Bezpečnost na pracovišti ...................................................................................................... 93
4.2 Bezpečnost elektrických součástí ......................................................................................... 93
4.3 Bezpečnost osob ................................................................................................................... 93
4.4 Zacházení s elektrickým nářadím a jeho použití ................................................................... 93
4.5 Použití akumulátorů a zacházení s nimi ................................................................................ 94
4.6 Servis .................................................................................................................................... 94
5 Bezpečnostní pokyny pro řetězové pily (EN 60745 díl 2-13).......................................................... 94
6 Příčiny a prevence zpětného rázu (EN 60745 díl 2-13).................................................................. 95
7 Montáž ............................................................................................................................................ 95
7.1 Montáž vodicí lišty (05, 06).................................................................................................... 96
7.2 Montáž řetězu pily (05, 06) .................................................................................................... 96
7.3 Vypnutí řetězu pily (05, 07) ................................................................................................... 96
8 Uvedení do provozu........................................................................................................................ 96
8.1 Nabití akumulátoru (02) ......................................................................................................... 96
8.2 Vložení akumulátoru (03/A) ................................................................................................... 96
8.3 Vytažení akumulátoru (03/B) ................................................................................................. 96
8.4 Kontrola napnutí řetězu .........................................................................................................97
8.5 Otestujte funkci řetězové brzdy .............................................................................................97
8.6 Funkční test řetězové brzdy s vypnutým motorem (08) ........................................................ 97
8.7 Funkční test řetězové brzdy se zapnutým motorem (08) ...................................................... 97
8.8 Doplňte olej na pilový řetěz (09) ............................................................................................ 98
469861_a 89
Page 90

CZ
9 Obsluha .......................................................................................................................................... 98
9.1 Zjištění stavu nabití akumulátoru (04) ................................................................................... 98
9.2 Ukazatele stavu nabití akumulátoru ...................................................................................... 98
9.3 Zkontrolujte stav oleje pilového řetězu ..................................................................................99
9.4 Otestujte řetězovou brzdu ..................................................................................................... 99
9.5 Motor zapnout a vypnout ....................................................................................................... 99
10 Chování při práci a pracovní technika ............................................................................................ 99
10.1 Bezpečnostní upozornění pro práci....................................................................................... 99
10.1.1 Obsluha ................................................................................................................. 100
10.1.2 Provozní doba .......................................................................................................100
10.1.3 Práce s řetězovou pilou......................................................................................... 100
10.1.4 Nebezpečí zpětného rázu .....................................................................................101
10.2 Kácení stromů .....................................................................................................................101
10.3 Odvětvování ........................................................................................................................102
10.4 Zkracování stromu............................................................................................................... 102
10.5 Zkracování řeziva (12)......................................................................................................... 102
11 Přeprava .......................................................................................................................................103
12 Údržba a péče .............................................................................................................................. 103
12.1 Broušení pilového řetězu (13) ............................................................................................. 103
12.2 Čištění vnitřku řetězového kola ........................................................................................... 104
12.3 Přestavení rychloupínacího zařízení (16)............................................................................ 104
12.4 Kontrola, obracení a mazání vodicí lišty (14, 15) ................................................................ 104
13 Skladování .................................................................................................................................... 104
14 Likvidace....................................................................................................................................... 105
15 Pomoc při poruchách.................................................................................................................... 106
16 Technické údaje............................................................................................................................ 107
17 Záruka........................................................................................................................................... 108
18 Prohlášení o shodě EC................................................................................................................. 108
Překlad originálního návodu kpoužití
90 CS 36 Li
Page 91

K tomuto návodu k použití
1 K TOMUTO NÁVODU K POUŽITÍ
■
Před uvedením do provozu si
bezpodmínečně pečlivě přečtěte tento návod
k použití. To je předpokladem pro bezpečnou
práci a bezproblémovou manipulaci.
■
Uchovávejte tento návod vždy tak, abyste si
jej mohli přečíst, když budete potřebovat
informace o stroji.
■
Předávejte dalším osobám pouze výrobek s
tímto návodem k použití.
■
Přečtěte a dodržujte bezpečnostní pokyny a
varování uvedená v tomto návodu.
1.1 Vysvětlení symbolů a signálních slov
NEBEZPEČÍ!
Označuje bezprostředně hrozící
nebezpečnou situaci, která – pokud se jí
nevyhnete – má za následek smrt nebo
vážné zranění.
VÝSTRAHA!
Označuje možnou nebezpečnou situaci,
která – pokud se jí nevyhnete – může mít
za následek smrt nebo vážné zranění.
OPATRNĚ!
Označuje možnou nebezpečnou situaci,
která by mohla mít za následek menší
nebo středně těžké zranění, pokud se jí
nevyhnete.
POZOR!
Nebezpečí poškození pily a
akumulátoru
Jestliže je řetězová pila poháněna
nevhodným akumulátorem, pak to může
vést k poškození pily a akumulátoru.
■
Řetězovou pilu pohánějte pouze
vhodným akumulátorem s kapacitou
od 4Ah.
Pro nabíjení akumulátorů je zapotřebí nabíječka
"C05-4230" (v. č. 113281).
UPOZORNĚNÍ
V následujících Návodech k použití
naleznete další informace:
■
„Li-Ion Akku 36 V, 4 Ah,
B05-3640“ (Dok. č. 441630)
■
„Nabíječka C05-4230 pro Li-Ion Akku
36 V, 4 Ah“ (Dok. č. 441633)
2.2 Symboly na stroji
Symbol Význam
Zvláštní opatrnost při manipulaci!
Nebezpečí zpětného rázu!
POZOR!
Označuje situaci, která by mohla mít za
následek věcné škody, pokud se jí
nevyhnete.
UPOZORNĚNÍ
Speciální pokyny pro lepší srozumitelnost
a manipulaci.
2 POPIS VÝROBKU
Tento Návod k použití popisuje ruční elektrickou
řetězovou pilu poháněnou akumulátorem.
2.1 Obsah dodávky
Bateriová řetězová pila je navržena pro provoz s
akumulátory z řady EnergyFlex s kapacitou od
4Ah (akumulátor "Li-Ion Akku 36 V, 4 Ah,
B05-3640" (v.č. 113280)).
469861_a 91
Řetězovou pilu nedržte jen jednou
rukou!
Nepoužívat při dešti! Chránit před
vlhkostí!
Noste ochrannou helmu,
protihluková sluchátka a ochranné
brýle!
Nosit ochranné rukavice!
Page 92

CZ
Přehled výrobku (01)
Symbol Význam
Noste pevnou obuv!
Před uvedením do provozu si
přečtěte návod k použití!
Řetězovou pilu vždy držte oběma
rukama!
2.3 Bezpečnostní a ochranná zařízení
VÝSTRAHA!
Nebezpečí těžkého poranění při
manipulaci s bezpečnostními a
ochrannými zařízeními
Kvůli manipulacím s bezpečnostními a
ochrannými zařízeními může při práci s
řetězovou pilou dojít k těžkým zraněním.
■
Bezpečnostní a ochranná zařízení
nikdy nevyřazujte z provozu!
■
Pracujte s řetězovou pilou jen pak,
když všechna bezpečnostní a
ochranná zařízení správně fungují.
2.4 Ochrana proti přetížení
Řetězová pila je vybavena ochranným
vypínačem motoru, který přístroj v případě
přetížení vypne.
Po krátkém ochlazení je možné řetězovou pilu
opět zapnout.
2.5 Ochrana při zapojení
Pokud obsluha přidá několikrát za sebou prudce
plyn, řetězová pila se na několik sekund vypne,
aby se chránila elektronika a řetězová pila. V
tomto případě čekejte, dokud se pila nedá opět
zapnout.
2.6 Řetězová brzda
Řetězová pila má ruční řetězovou brzdu, která se
spustí např. při zpětném rázu (kickback) přes
ochranu rukou. Při spuštění řetězové brzdy se
pilový řetěz náhle zastaví a vypne se motor.
2.7 Použití v souladu s určeným účelem
Elektrická řetězová pila je konstruována
výhradně pro použití v domácnosti, na zahradě a
při hobby. V této oblasti lze řetězovou pilu použít
pro lehké práce se dřevem, např. pro:
■
řezání dřeva
■
prořezávání živých plotů
■
řezání palivového dříví
Akumulátorová řetězová pila se může vzhledem
k elektrickému pohonu používat nejen venku, ale
také v uzavřených prostorách k řezání dřeva.
Jiné používání než zde popsané je v rozporu s
určeným účelem.
Řetězová pila se nesmí používat ve výrobních
provozovnách.
OPATRNĚ!
Nebezpečí zranění kvůli použití v
rozporu s určením!
Pokud se řetězovou pilou řeže dříví nebo
jiné materiály, v kterých jsou cizí tělesa,
může to mít za následek zranění.
■
Řetězová pila se používá k lehkým
řezným pracím.
■
Před řezáním zkontrolujte dřevo, zda
neobsahuje cizí tělesa, např. hřebíky,
šrouby, kování.
3 PŘEHLED VÝROBKU (01)
Č. Součást
01/1 Řetěz
01/2 Vodicí lišta
01/3 Rychloupínací zařízení s centrálním
uzávěrem a otočným věncem
01/4 Chránič rukou
01/5 Rukojeť
01/6 Akumulátor
01/7 Páčka plynu
01/8 Blokovací tlačítko
01/9 Zadní rukojeť
01/10 Kryt řetězového ozubeného kola
01/11 Zachycovací zub
01/12 Uzávěr olejové nádrže řetězu
01/13 Průhledítko olejové nádrže řetězu
92 CS 36 Li
Page 93

Všeobecné bezpečnostní pokyny pro elektrické nářadí (IEC 60745-1)
4 VŠEOBECNÉ BEZPEČNOSTNÍ
POKYNY PRO ELEKTRICKÉ NÁŘADÍ
(IEC 60745-1)
VÝSTRAHA!
Nebezpečí úrazu elektrickým
proudem, požáru nebo těžkých úrazů
Nedbalost při dodržování bezpečnostních
upozornění a pokynů může způsobit úder
elektrickým proudem, požár a/nebo těžká
zranění.
■
Přečtěte si všechny bezpečnostní
upozornění a pokyny.
■
Všechny bezpečnostní upozornění a
pokyny si uložte pro pozdější použití.
V bezpečnostních pokynech používaný pojem
„elektrické nářadí“ se vztahuje ksíťově
napájenému elektrickému nářadí (se síťovým
kabelem) nebo akumulátorem poháněnému
elektrickému nářadí (bez síťového kabelu).
4.1 Bezpečnost na pracovišti
■
Udržujte své pracoviště čisté a dobře
osvětlené. Nepořádek nebo neosvětlené
oblasti pracoviště mohou vést knehodám.
■
Nepracujte s elektrickým nářadím ve
výbušném prostředí, kde se nacházejí
hořlavé kapaliny, plyny nebo prach.
Elektrické nářadí vytváří jiskry, které mohou
zapálit prach nebo výpary.
■
Během používání elektrického nářadí
zabraňte vpřístupu dětem a jiným
osobám. Při odvedení pozornosti můžete
ztratit kontrolu nad přístrojem.
4.2 Bezpečnost elektrických součástí
■
Vyvarujte se kontaktu těla suzemněnými
povrchy, jako jsou potrubí, topení,
sporáky a chladničky. Je-li Vaše tělo
uzemněno, zvětšuje se nebezpečí v důsledku
zásahu elektrickým proudem.
■
Nevystavujte elektrické nářadí dešti nebo
mokru. Vniknutí vody do elektrického nářadí
zvyšuje nebezpečí elektrického úderu.
4.3 Bezpečnost osob
■
Buďte pozorní, dbejte na to, co děláte, a
používejte elektrické nářadí rozumně.
Nepracujte selektrickým nářadím, pokud
jste unavení či nesoustředění, nebo
pokud jste pod vlivem drog, alkoholu
nebo medikamentů. Okamžik nepozornosti
při používání elektrického nářadí může mít za
následek vážná zranění.
■
Noste osobní ochranné pomůcky a vždy
ochranné brýle. Nošení ochranných
pomůcek, jako jsou protiprachová maska,
neklouzavá bezpečnostní obuv, helma nebo
protihluková sluchátka, podle druhu a použití
elektrického nářadí, snižuje nebezpečí
zranění.
■
Vyvarujte se neúmyslného uvedení do
provozu. Ujistěte se, že je elektrické
nářadí vypnuté, než je připojíte do sítě
nebo zapojíte akumulátor, před jeho
uchopením a přenášením. Pokud máte při
nesení elektrického nářadí prst na jeho
spínači nebo zapnutý přístroj připojujete k
napájení, může to vést k nehodám.
■
Před zapnutím elektrického nářadí
odstraňte nastavovací nářadí nebo
montážní klíče. Nářadí nebo montážní klíč,
který se nachází v pohyblivé části přístroje,
může způsobit zranění.
■
Vyvarujte se abnormálního držení těla.
Zajistěte si bezpečné stání a stále udržujte
rovnováhu. To umožňuje lepší ovládání
elektrického nářadí vneočekávaných
situacích.
■
Noste vhodný oděv. Nenoste příliš volné
oblečení ani šperky. Udržujte vlasy, oděv
a rukavice v bezpečné vzdálenosti od
pohyblivých částí. Volný oděv, šperky nebo
dlouhé vlasy mohou být zachyceny
pohybujícími se částmi.
■
Pokud je možné instalovat zařízení pro
odsávání prachu nebo sběrné odsávací
zařízení, ujistěte se, že jsou připojena a
správně používána. Používání odsávání
snižuje nebezpečí daná prachem.
4.4 Zacházení s elektrickým nářadím a jeho použití
■
Nepřetěžujte stroj. Pro každou práci
používejte pro ni určené elektrické nářadí.
S vhodným elektrickým nářadím budete lépe
a bezpečněji pracovat vuvedeném rozsahu
výkonu.
■
Nepoužívejte elektrické nářadí, jehož
spínač je vadný. Elektrické nářadí, které již
není možné zapnout nebo vypnout, je
nebezpečné a musí být opraveno.
469861_a 93
Page 94

CZ
Bezpečnostní pokyny pro řetězové pily (EN 60745 díl 2-13)
■
Než začnete provádět nastavení přístroje
nebo výměnu příslušenství a před
uložením přístroje vždy vytáhněte síťovou
zástrčku ze zásuvky a/nebo vyjměte
akumulátor. Toto preventivní opatření
zabrání nezamýšlenému zapnutí elektrického
nářadí.
■
Nepoužívané elektrické nářadí ukládejte
mimo dosah dětí. Nenechávejte přístroj
používat osobami, které sním nejsou
obeznámeny nebo nečetly tyto pokyny.
Elektrické nářadí je nebezpečné, pokud je
používáno nezkušenými osobami.
■
Pečlivě se o elektrické nářadí starejte.
Zkontrolujte, zda pohyblivé části
bezchybně fungují a nejsou zablokovány,
zda žádné části nejsou prasklé nebo tak
poškozené, že by mohly ovlivnit funkci
elektrického nářadí. Poškozené díly
nechejte před použitím přístroje opravit.
Příčinou mnoha nehod je špatná údržba
elektrického nářadí.
■
Udržujte řezné nástroje ostré a čisté.
Pečlivě ošetřované řezné nástroje sostrými
řeznými hranami mají menší sklon
kzablokování a snadněji se ovládají.
■
Používejte elektrické nářadí, příslušenství,
přídavné nástroje atd. podle těchto
pokynů. Dbejte přitom na dané pracovní
podmínky a prováděnou činnost.
Používání elektrického nářadí pro jiné než
předpokládané použití může vyvolat
nebezpečnou situaci.
4.5 Použití akumulátorů a zacházení s nimi
■
Akumulátor nabíjejte pouze nabíječkou
uváděnou výrobcem. Při použití nabíječky
určené pro určitý typ akumulátorů k nabíjení
jiného typu akumulátorů hrozí nebezpečí
požáru.
■
Akumulátorový přístroj provozujte jen s
akumulátorem, který je pro něj určený. Při
použití jiného akumulátoru hrozí nebezpečí
úrazu a požáru.
■
Nabitý a nepoužívaný akumulátor udržujte
v dostatečné vzdálenosti od kovových
předmětů, aby nedošlo ke zkratování
kontaktů (například kancelářské spony,
mince, klíče, hřebíky, šrouby). Může dojít
ke zkratu nebo požáru.
■
Nesprávné použití a poškozené
akumulátory mohou způsobit tvorbu
výparů a únik elektrolytu. Zabraňte
kontaktu s výpary a tekutým elektrolytem.
Prostor dostatečně větrejte. Při kontaktu s
tekutým elektrolytem kapalinu důkladně
umyjte. Při zasažení očí tekutým
elektrolytem oči ihned důkladně
vypláchněte a vyhledejte lékaře. Unikající
tekutý elektrolyt může způsobit podráždění
kůže a požáry.
4.6 Servis
■
Elektrické nářadí nechejte opravovat
pouze kvalifikovaným odborným
personálem apouze spoužitím
originálních náhradních dílů. Tím bude
zajištěno zachování bezpečnosti elektrického
nářadí.
5 BEZPEČNOSTNÍ POKYNY PRO
ŘETĚZOVÉ PILY (EN 60745 DÍL 2-13)
■
Při běžící pile udržujte odstup všech částí
těla od řetězu. Před zapnutím pily se
ujistěte, že se řetěz ničeho nedotýká. Při
práci s řetězovou pilou může okamžik
nepozornosti vést k zachycení oděvu nebo
částí těla řetězem.
■
Držte řetězovou pilu vždy pravou rukou za
zadní rukojeť a levou rukou za přední
rukojeť. Držení řetězové pily obráceným
způsobem zvyšuje riziko zranění a nesmí se
používat.
■
Elektrické nářadí držte za izolovaná
držadla, protože pilový řetěz se může
dostat do kontaktu s vlastním síťovým
kabelem. Při kontaktu pilového řetězu s
vedením pod napětím se kovové části
přístroje mohou dostat pod napětí a způsobit
úraz elektrickým proudem.
■
Používejte ochranné brýle a chraňte si
sluch. Doporučujeme další ochranné
pomůcky pro hlavu, ruce, nohy a
chodidla. Vhodný ochranný oděv snižuje
nebezpečí zranění odletujícími třískami a
náhodným dotykem řetězu.
■
Nepracujte s řetězovou pilou na stromě.
Při provozu na stromě hrozí nebezpečí
zranění.
■
Vždy dbejte na pevný postoj a používejte
řetězovou pilu jen tehdy, když stojíte na
pevné, bezpečné a rovné zemi. Klouzavý
podklad nebo nestabilní plochy pro stání,
jako na žebříku, mohou vést ke ztrátě
rovnováhy nebo ztrátě kontroly nad
řetězovou pilou.
94 CS 36 Li
Page 95

Příčiny a prevence zpětného rázu (EN 60745 díl 2-13)
■
Při řezání napružené větve počítejte s tím,
že odpruží zpět. Když se předpětí v
dřevných vláknech uvolní, může napružená
větev zasáhnout uživatele a/nebo dojít ke
ztrátě kontroly nad řetězovou pilou.
■
Buďte mimořádně opatrní při řezání
podrostu a mladých stromků. Tenký
materiál se může v řetězu zachytit a šlehnout
Vás nebo vyvést z rovnováhy.
■
Řetězovou pilu noste za přední držadlo ve
vypnutém stavu, s řetězem odvráceným
od těla. Pro transport nebo uložení
řetězové pily vždy nasaďte kryt proti
prachu. Pečlivé zacházení s řetězovou pilou
snižuje pravděpodobnost, že se omylem
dotknete běžícího řetězu.
■
Dodržujte pokyny pro mazání, napnutí
řetězu a výměnu příslušenství. Nesprávně
napnutý nebo promazaný řetěz se může
přetrhnout nebo zvýšit riziko zpětného rázu.
■
Rukojeti udržujte suché, čisté a bez oleje
a mastnot. Mastná, olejem potřísněná
držadla jsou kluzká a vedou ke ztrátě
kontroly.
■
Řezejte jen dřevo. Nepoužívejte řetězovou
pilu pro práce, pro něž není určena.
Příklad: Nepoužívejte řetězovou pilu k
řezání plastu, zdiva nebo stavebních
materiálů, které nejsou ze dřeva. Použití
řetězové pily pro nepřiměřené práce může
vést k nebezpečným situacím.
6 PŘÍČINY A PREVENCE ZPĚTNÉHO
RÁZU (EN 60745 DÍL 2-13)
Ke zpětnému rázu může dojít, když se špička
vodicí lišty dotkne nějakého předmětu nebo když
se dřevo ohne a pilu v řezu sevře.
Dotyk špičky lišty může v některých případech
vést k nečekané reakci směrem dozadu, při níž
se vodicí lišta zvedne nahoru a ve směru
kuživateli.
Sevření pilového řetězu na horní hraně vodicí
lišty může lištu prudce vymrštit směrem k
uživateli.
Každá z těchto reakcí může vést k tomu, že
ztratíte kontrolu nad pilou a můžete se vážně
zranit. Nespoléhejte se výhradně na
bezpečnostní zařízení vestavěná v řetězové pile.
Jako uživatel řetězové pily byste měli učinit různá
opatření, abyste mohli pracovat bez nehod a
zranění.
Zpětný ráz je následkem špatného nebo
chybného používání elektrického nářadí. Lze mu
zabránit vhodnými preventivními opatřeními,
které jsou dále popsány:
■
Držte pilu pevně oběma rukama, přičemž
palec a prsty obepínají držadla řetězové
pily. Udržujte Vaše tělo a ruce v poloze, ve
které můžete odolat silám zpětného rázu.
Když jsou provedena vhodná preventivní
opatření, může uživatel zvládnout síly
zpětného rázu. Nikdy řetězovou pilu
nepouštějte z ruky.
■
Vyvarujte se abnormálního držení těla a
neřezejte nad výškou ramen. Tím se
předejde neúmyslnému dotyku špičky lišty a
bude umožněna lepší kontrola řetězové pily v
neočekávaných situacích.
■
Vždy používejte výrobcem předepsané
náhradní lišty a řetězy. Špatné náhradní
lišty a řetězy mohou vést k roztržení řetězu a/
nebo ke zpětnému rázu.
■
Řiďte se pokyny výrobce pro broušení a
údržbu řetězu. Příliš nízké omezovače
hloubky zvyšují sklon ke zpětnému rázu.
7 MONTÁŽ
VÝSTRAHA!
Nebezpečí těžkého poranění.
Jestliže se použije nedostatečně
smontovaná řetězová pila, může dojít k
těžkým zraněním.
■
Používejte řetězovou pilu až poté, co
byla úplně smontována.
■
Před každým použitím proveďte
vizuální kontrolu, abyste si ověřili,
zda je řetězová pila úplná a nejsou
na ní poškozené nebo opotřebované
součástky. Bezpečnostní a ochranná
zařízení musí být intaktní.
OPATRNĚ!
Nebezpečí pořezání.
Ostré hrany řetězu pily mohou při
montáži zapříčinit řezné rány.
■
Před montáží vyjměte akumulátor.
■
Při montáži pilového řetězu a vodicí
lišty noste bezpečnostní rukavice.
469861_a 95
Page 96

CZ
Uvedení do provozu
7.1 Montáž vodicí lišty (05, 06)
1. Chránič rukou (05/1) vytáhněte k rukojeti (05/
A), tím se uvolní řetězová brzda.
2. Centrální zámek (05/2) otočte proti směru
hodinových ručiček a sejměte ho společně s
krytem (05/3).
3. Vodicí lištu (06/1) nasaďte na vodicí kolík
(06/2) a posuňte tak daleko dozadu, aby se
dala řetězová pila smontovat.
7.2 Montáž řetězu pily (05, 06)
1. Pilový řetěz vložte na řetězové ozubené kolo
(06/3) a do drážky vodicí lišty (06/1).
2. Poté veďte pilový řetěz kolem vratné hvězdy
vodicí lišty. Pilový řetěz se musí na spodní
straně vodicí lišty mírně prověsit.
3. Nasaďte kryt (05/3) a lehce dotáhněte
centrální zámek (05/2).
7.3 Vypnutí řetězu pily (05, 07)
UPOZORNĚNÍ
Pilový řetěz je správně napnutý, když:
■
na spodní straně přiléhá k vodicí liště
a je možné ho rukou protáhnout.
■
lze ho uprostřed vodicí lišty
nadzdvihnout o 3 - 4 mm.
1. Zkontrolujte usazení pilového řetězu, aby
správně naléhal na řetězové ozubené kolo a
do vodicí lišty.
2. Otočný věnec (05/4) natočte ke krytu tak
(05/3), aby oba trojúhelníky byly v protilehlé
poloze (05/B).
3. Nasaďte kryt (07/1) a dotáhněte centrální
zámek (07/2) ve směru hodinových ručiček.
Centrální zámek přitom nedotahujte úplně,
nebo ho vraťte o otočku zpět.
4. Otočný věnec (07/3) otočte ve směru
hodinových ručiček, až se řetěz, jak bylo
popsáno shora, správně vypne.
5. Centrální zámek (07/2) otočte ve směru
hodinových ručiček, až je zafixovaný.
8 UVEDENÍ DO PROVOZU
NEBEZPEČÍ!
Nebezpečí života a nebezpečí
nejtěžších zranění.
Neznalost bezpečnostních pokynů
obsluhy může vést k těžkým zraněním a
dokonce k smrti.
■
Než použijete řetězovou pilu,
přečtěte si a respektujte všechny
bezpečnostní pokyny a návod k
obsluze, jakož i provozní návod, na
které jste byli odkázáni!
VÝSTRAHA!
Nebezpečí těžkého poranění.
Jestliže jsou na řetězové pile poškozené
stavební dílce, pak mohou vyvolat těžká
zranění.
■
Před každým použitím proveďte
vizuální kontrolu, abyste si ověřili,
zda je řetězová pila úplná a nejsou
na ní poškozené nebo opotřebované
součástky. Bezpečnostní a ochranná
zařízení musí být intaktní.
8.1 Nabití akumulátoru (02)
Dodaný akumulátor je částečně nabitý. Před
prvním použitím akumulátor úplně nabijte.
Akumulátor je možné skladovat v jakémkoli stavu
nabití. Přerušení nabíjení akumulátor
nepoškozuje.
UPOZORNĚNÍ
Dbejte na detailní informace separátních
návodů k provozu k akumulátorům a
nabíječce.
8.2 Vložení akumulátoru (03/A)
1. Akumulátor (03/1) se nasune shora do
akumulátorové šachty (03/2), až zaklapne.
8.3 Vytažení akumulátoru (03/B)
1. Stiskněte odblokovací tlačítko (03/3) na
akumulátoru (03/1) a držte je stisknuté.
2. Vytažení akumulátoru (03/1).
96 CS 36 Li
Page 97

Uvedení do provozu
8.4 Kontrola napnutí řetězu
Často kontrolujte napnutí řetězu, nové pilové
řetězy se prodlužují.
Při provozní teplotě se pilový řetěz prodlužuje a
prověšuje.
UPOZORNĚNÍ
Pilový řetěz je správně napnutý, když:
■
Na spodní straně přiléhá k vodicí liště
a je možné ho rukou protáhnout.
■
lze ho uprostřed vodicí lišty
nadzdvihnout o 3 - 4 mm.
OPATRNĚ!
Nebezpečí zranění při odskočení
pilového řetězu!
Nedostatečně vypnutý pilový řetěz může
během provozu odskočit a způsobit
zranění.
■
Často kontrolujte napnutí řetězu.
Napnutí řetězu je příliš nízké, jestliže
vodicí patky vystupují z drážky na
spodní straně vodicí lišty.
■
Odborně napnout řetěz pily, je-li
napnutí řetězu příliš nízké.
8.5 Otestujte funkci řetězové brzdy
Řetězová pila má ruční řetězovou brzdu, která se
spustí např. při zpětném rázu (kickback) přes
chránič rukou.
Při spuštění řetězové brzdy se pilový řetěz náhle
zastaví a vypne se motor.
NEBEZPEČÍ!
Ohrožení života při nedbalém
zacházení!
Neopatrné nebo nepředvídatelné pohyby
řetězovou pilou vedou k nejtěžším
zraněním nebo dokonce k smrti.
■
Při práci s řetězovou pilou pamatujte
na bezpečnost a udržujte si vysokou
koncentrovanost.
■
Při uvolnění řetězové brzdy
netiskněte žádný spínač.
VÝSTRAHA!
Ohrožení života a nebezpečí
nejtěžších úrazů kvůli defektní
řetězové brzdě
Pokud řetězová brzda nefunguje, může
to zapříčinit např. při zpětném nárazu
(Kickback) těžká zranění či dokonce smrt
obsluhy běžící řetězovou pilou.
■
Před začátkem každé práce
odzkoušejte řetězovou brzdu.
■
Nezapínejte řetězovou pilu, pokud je
řetězová brzda defektní. V takovém
případě nechejte řetězovou pilu
zkontrolovat v dílně zákaznického
servisu.
8.6 Funkční test řetězové brzdy s vypnutým motorem (08)
1. Pro vypnutí řetězové brzdy zatáhněte chránič
rukou (08/1) ve směru (08/2) rukojeti (08/A).
Pilový řetěz je možné protáhnout rukou.
2. Pro zapnutí řetězové brzdy zatlačte chránič
rukou (08/1) dopředu (08/B). Pilový řetěz
nesmí být možné protáhnout.
8.7 Funkční test řetězové brzdy se zapnutým motorem (08)
UPOZORNĚNÍ
Před každým zapnutím řetězové pily
uvolněte řetězovou brzdu.
1. Řetězovou pilu držte bezpečně a pevně za
obloukovou rukojeť a držadlo.
2. Uvolněte řetězovou brzdu.
3. Zapněte motor.
4. Zatlačte chránič rukou (08/1) směrem
dopředu (08/B). Pilový řetěz a motor se musí
okamžitě zastavit.
469861_a 97
Page 98

CZ
Obsluha
8.8 Doplňte olej na pilový řetěz (09)
POZOR!
Nebezpečí poškození řetězové pily
Řetězová pila se těžce poškodí, jestliže v
nádrži je málo oleje nebo není žádný,
anebo pokud olej zaschnul/slepil se.
Zaschlý/zalepený olej řetězu pily může
způsobit poškození dílů vedoucích olej
nebo olejového čerpadla.
Poškození nastane i tehdy, jestliže se
používá starý olej. Použití starého oleje
vede ke škodám na životním prostředí!
■
Při uvedení do provozu dolijte olej do
nádrže.
■
Nepoužívejte starý olej!
■
Doplňte nejpozději při každé výměně
akumulátoru nádrž olejem na pilový
řetěz.
Pilový řetěz a vodicí lišta jsou přes automatický
mazací systém během provozu plynule
zásobovány olejem. Olej na pilové řetězy chrání
před korozí a předčasným opotřebením. Pro
dostatečné mazání pilového řetězu musí být v
nádrži dostatečné množství oleje na pilové
řetězy.
K mazání pilového řetězu a vodicí lišty používejte
jen ekologický biologicky rozložitelný kvalitní olej
na pilové řetězy a přepravujte a uchovávejte ho
jen ve schválených a označených nádobách.
Zkontrolujte před začátkem každé práce a při
každé výměně akumulátoru stav oleje a doplňte
ho, pokud je to nutné:
1. Kontrolujte stav oleje průhledítkem na nádrži
(09/1). Vždy musí být vidět olej. Nesmí se
překračovat minimální a maximální stav
oleje.
2. Je-li to nutné, doplňte olej pilového řetězu
přes plnicí hrdlo (09/2).
9 OBSLUHA
NEBEZPEČÍ!
Nebezpečí života a nebezpečí
nejtěžších zranění.
Neznalost bezpečnostních pokynů
obsluhy může vést k těžkým zraněním a
dokonce k smrti.
■
Než použijete řetězovou pilu,
přečtěte si a respektujte všechny
bezpečnostní pokyny a návod k
obsluze, jakož i provozní návod, na
které jste byli odkázáni!
■
Dodržujte ustanovení pro provozní dobu
specifická v dané zemi.
■
Zadní rukojeť pily pevně uchopte pravou
rukou (praváci) a přední rukojeť levou a
pevně držte.
■
Pokud motor běží, rukojeti nepouštějte.
■
Řetězovou pilu nepoužívejte v případě:
■
únavy
■
nevolnosti
■
vlivu alkoholu, léků a drog
9.1 Zjištění stavu nabití akumulátoru (04)
Na přední straně akumulátoru je situován
ovládací panel s tlačítkem (04/1) a LED ukazateli
stavu nabití (04/2 až 04/5).
1. Stiskněte tlačítko (04/1).
Ukazatele stavu nabití svítí v závislosti na
stavu nabití akumulátoru.
2. Odečtěte stav nabití, viz Kapitola 9.2
"Ukazatele stavu nabití akumulátoru",
strana98.
9.2 Ukazatele stavu nabití akumulátoru
Svítící LED Stav nabití akumulátoru
Zelená (04/2) Akumulátor je plně nabitý.
Zelená (04/3) a
(04/4)
Zelená (04/4) Akumulátor je nabitý na méně
Červená (04/5) Akumulátor je zcela vybitý
Akumulátor je nabitý na více
než 50%.
než 50%.
nebo byl akumulátor přehřátý/
podchlazený.
98 CS 36 Li
Page 99

Chování při práci a pracovní technika
9.3 Zkontrolujte stav oleje pilového řetězu
Postup viz Kapitola 8.8 "Doplňte olej na pilový
řetěz (09)", strana98.
POZOR!
Nebezpečí poškození řetězové pily
Řetězová pila se těžce poškodí, jestliže v
nádrži je málo oleje nebo není žádný,
anebo pokud olej zaschnul/slepil se.
Zaschlý/zalepený olej řetězu pily může
způsobit poškození dílů vedoucích olej
nebo olejového čerpadla.
Poškození nastane i tehdy, jestliže se
používá starý olej. Použití starého oleje
vede ke škodám na životním prostředí!
■
Zkontrolujte před začátkem každé
práce, zda je v nádrži dostatek pleje
na pilový řetěz.
■
Při nízkém stavu oleje ho doplňte.
■
Nepoužívejte starý olej!
9.4 Otestujte řetězovou brzdu
Postup viz Kapitola 8.5 "Otestujte funkci řetězové
brzdy", strana97.
VÝSTRAHA!
Ohrožení života a nebezpečí
nejtěžších úrazů kvůli defektní
řetězové brzdě
Pokud řetězová brzda nefunguje, může
to zapříčinit např. při zpětném nárazu
(Kickback) těžká zranění či dokonce smrt
obsluhy běžící řetězovou pilou.
■
Před začátkem každé práce
odzkoušejte řetězovou brzdu.
■
Nezapínejte řetězovou pilu, pokud je
řetězová brzda defektní. V takovém
případě nechejte řetězovou pilu
zkontrolovat v dílně zákaznického
servisu.
9.5 Motor zapnout a vypnout
OPATRNĚ!
Nebezpečí poškození sluchu!
Při provozu řetězové pily vzniká silný
hluk, který může vyvolat poškození
sluchu.
■
Při práci s řetězovou pilou vždy noste
chrániče sluchu.
UPOZORNĚNÍ
Před každým zapnutím řetězové pily
uvolněte řetězovou brzdu.
Zapněte motor:
1. Uvolněte řetězovou brzdu.
2. Blokovací tlačítko (14/1) stiskněte palci a
držte stisknuté.
3. Stiskněte spínač zapnuto/vypnuto (14/2) a
držte ho stisknutý.
4. Uvolněte zarážku (14/1). Po startu řetězové
pily není třeba držet blokovací tlačítko
stisknuté. Blokovací tlačítko má zabránit
náhodnému nastartování řetězové pily.
Vypněte motor:
1. Uvolněte vypínač (14/2).
10 CHOVÁNÍ PŘI PRÁCI A PRACOVNÍ
TECHNIKA
UPOZORNĚNÍ
Zemědělská profesní sdružení pravidelně
nabízejí kurzy zacházení s řetězovými
pilami a kurzy kácení stromů.
NEBEZPEČÍ!
Nebezpečí života kvůli nedostatečným
odborným znalostem!
Nedostatečné odborné znalosti mohou
vést k nejvážnějším zraněním či smrti!
■
Kácet a odvětvovat stromy smějí
pouze vyškolené a zkušené osoby.
NEBEZPEČÍ!
Ohrožení života roztříštěným dřevem!
Odletující dřevěné odštěpky mohou
způsobit vážná zranění až smrt!
■
Z řezané části odstraňte volné třísky
a odštěpky dřeva.
10.1 Bezpečnostní upozornění pro práci
■
Dbejte na specifické státní bezpečnostní
předpisy, např. profesních sdružení,
pojišťoven, úřadů bezpečnosti práce.
■
Pracujte pouze při dostatečném denním
světle nebo umělém osvětlení.
■
Pracoviště udržujte uklizené bez zbytečných
předmětů (například odřezaných částí) –
nebezpečí klopýtnutí.
■
Majitel je zodpovědný za nehody s jinými
osobami a za jejich majetek.
469861_a 99
Page 100

CZ
Chování při práci a pracovní technika
10.1.1 Obsluha
■
Mladiství mladší 16 let nebo osoby, které
nejsou seznámeny s návodem k použití,
nesmějí stroj používat.
■
Pokud pracujete s řetězovou pilou poprvé:
Nechejte si vysvětlit od prodejce nebo jiného
odborníka, jak se s řetězovou pilou zachází,
nebo absolvujte odpovídající školení.
■
Kdo pracuje s řetězovou pilou, musí být
odpočatý, zdravý a v dobrém rozpoložení.
Kdo se nesmí ze zdravotních důvodů
namáhat, měl by se zeptat lékaře, zda může
pracovat sřetězovou pilou.
■
Přijměte opatření na ochranu proti
zatížení vibracemi. Podle toho, jak je
elektrické nářadí používáno, se skutečné
hodnoty vibrací mohou od lišit od hodnot
uvedených v technických údajích. Přitom
vezměte vúvahu celý průběh práce, tedy
idobu, kdy elektrické nářadí pracuje bez
zátěže nebo je vypnuté. Vhodná opatření
zahrnují mimo jiné pravidelnou údržbu a
ošetřování elektrického nářadí a jeho
nástavců, udržování rukou v teple, pravidelné
přestávky a dobré plánování průběhu práce.
■
Zjistěte maximální dobu manipulace a
pracovních přestávek podle hodnot
vibrací.
10.1.2 Provozní doba
Dodržujte ustanovení pro provozní dobu
řetězových pil specifická pro danou zemi.
Provozní doba řetězových pil může být omezena
národními nebo lokálními předpisy.
10.1.3 Práce s řetězovou pilou
VÝSTRAHA!
Nebezpečí těžkého poranění.
Jestliže se použije nedostatečně
smontovaná řetězová pila, může dojít k
těžkým zraněním.
■
Používejte řetězovou pilu až poté, co
byla úplně smontována.
■
Před každým použitím proveďte
vizuální kontrolu, abyste si ověřili,
zda je řetězová pila úplná a nejsou
na ní poškozené nebo opotřebované
součástky. Bezpečnostní a ochranná
zařízení musí být intaktní.
VÝSTRAHA!
Nebezpečí zranění nezamýšleně
spuštěnou řetězovou pilou
Nezamýšleně nastartovaná řetězová pila
může způsobit vážná zranění. Proto
odstraňte akumulátor při:
■
kontrolních, nastavovacích a čisticích
pracích
■
pracích na řezací garnituře
■
odchodu od řetězové pil
■
Přeprava
■
uložení
■
údržbářských pracích a opravách
■
Nebezpečí
■
Nikdy nepracujte sami.
■
Pro případ úrazu mějte stále připravenou
pohotovostní lékárničku.
■
Zabraňte dotyku s kovovými předměty, které
se nacházejí v zemi nebo jsou s nimi spojeny
elektricky vodivě.
■
Osobní ochranné vybavení se skládá z:
■
Ochranná přilba
■
Ochrana sluchu (např. ochranná
sluchátka), zejména při denní práci delší
než 2,5 hodiny
■
Ochranné brýle nebo ochrana obličeje na
helmě
■
Ochranné kalhoty s vložkou chránící proti
pořezání
■
Pevné pracovní rukavice
■
Bezpečnostní obuv s drsnou podrážkou a
ocelovou špičkou
■
Řetězovou pilu nepoužívejte nad výší ramen,
neboť tak již není možná bezpečná
manipulace.
■
Při změně místa vypněte motor a nasaďte
chránič řetězu.
■
Na nepoužívané řetězové pily vždy nasaďte
chránič řetězu a vyjměte akumulátor.
■
Řetězovou pilu odkládejte jen vypnutou.
■
Řetězovou pilu nepoužívejte ke zdvihání
nebo přesouvání dřeva.
■
Kmeny, které jsou silnější než délka pily, smí
řezat pouze odborný personál.
■
K řezání nasazujte pouze běžící pilu, přístroj
nikdy nezapínejte s nasazeným řetězem.
■
Dbejte na to, aby se olej na pilový řetěz
nedostal do půdy.
100 CS 36 Li
 Loading...