

Page 1
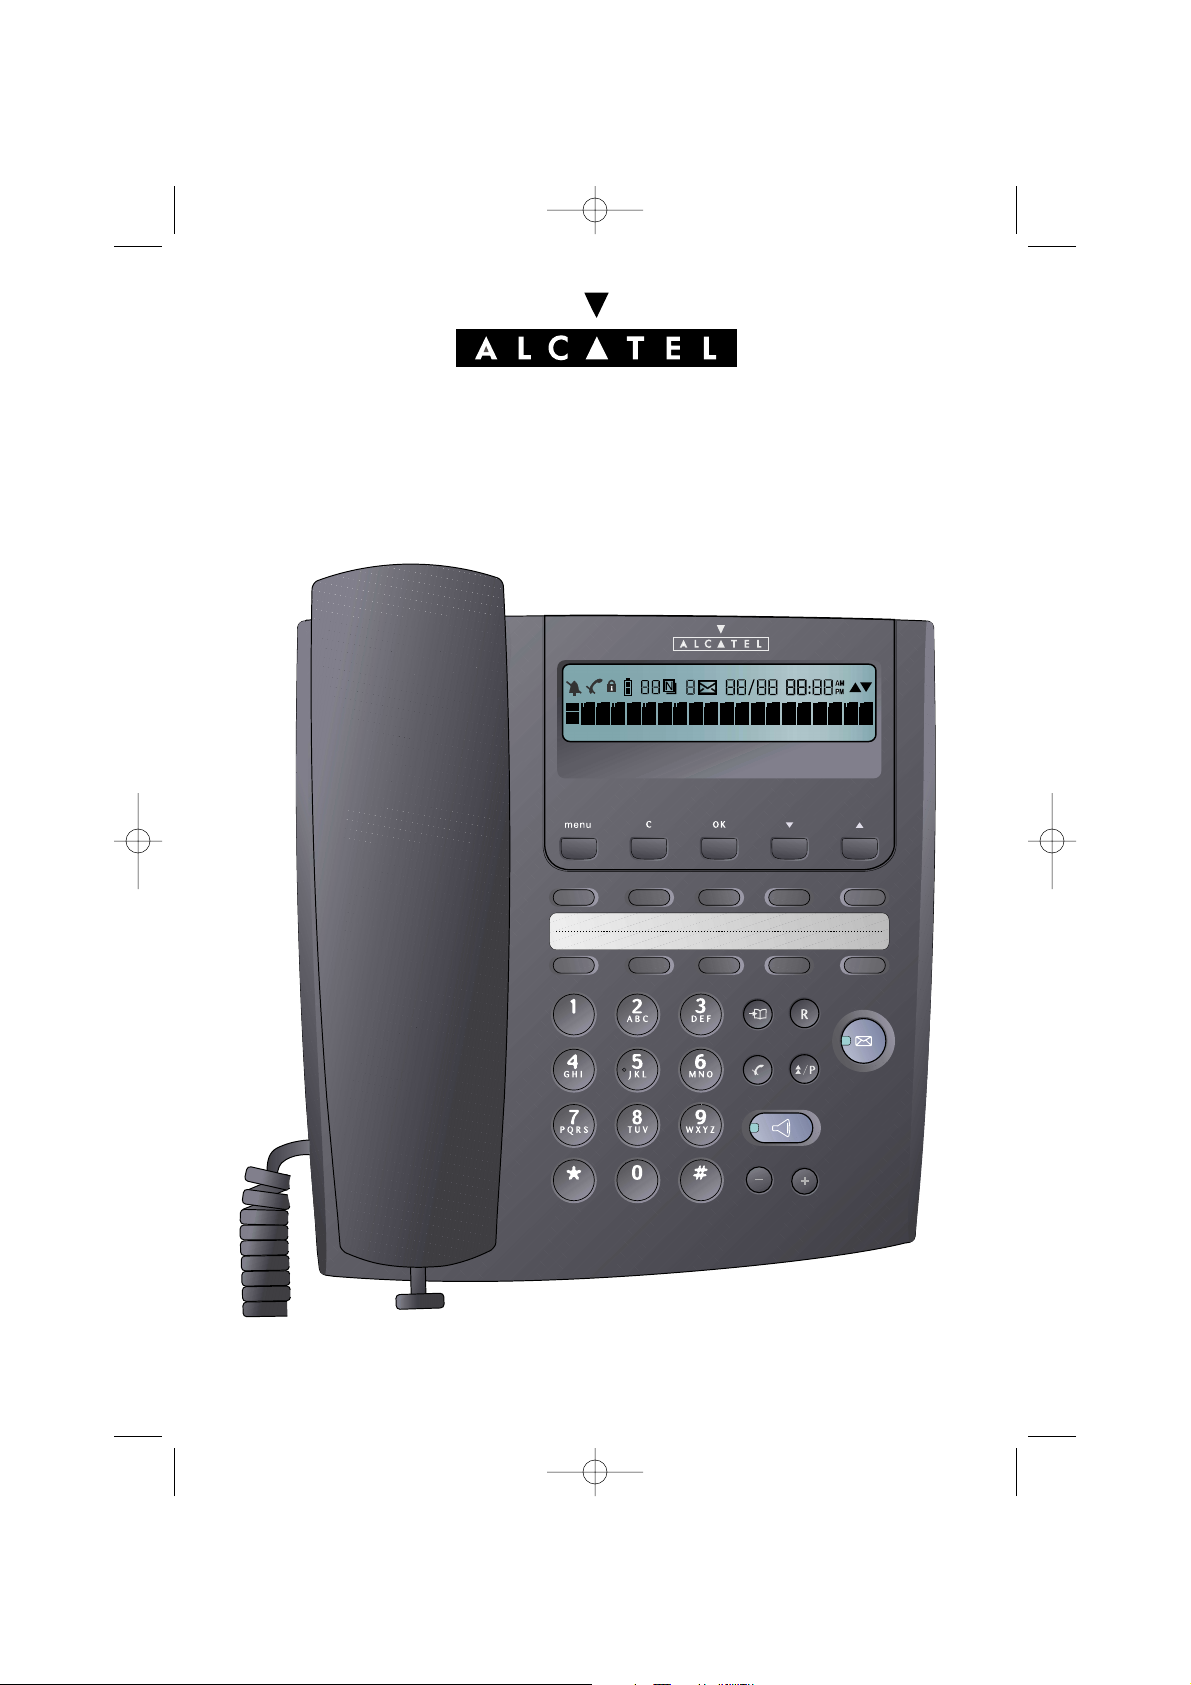
TEMPORIS 42
User guide
Temporis_42_uk.qxd 30/10/02 14:06 Page 1
Page 2

1
CONTENTS
DESCRIPTION OF THE TEMPORIS 42 PAGE 3
Display .............................................................................................................................. 4
Equipment provided.......................................................................................................... 5
Characteristics .................................................................................................................. 5
TO INSTALL YOUR TEMPORIS 42 PAGE 6
Recommandations............................................................................................................ 6
Connection of the handset .............................................................................................. 6
Telephone connections .................................................................................................... 7
Wall mounting .................................................................................................................. 7
Installation or replacement of batteries ............................................................................ 8
Precautions of use............................................................................................................ 8
Declaration of conformity.................................................................................................. 8
GENERAL USE PAGE 9
Message waiting lamp / Ringing indicator........................................................................ 9
Line lamp .......................................................................................................................... 9
Preparatory dialling / On hook dialling.............................................................................. 9
To dial using a memory .................................................................................................... 10
Receiving a call ................................................................................................................11
Hands free mode .............................................................................................................. 11
Handset sound level ........................................................................................................ 11
Mute .............................................................................................................................. 11
Hold / Transfer.................................................................................................................. 12
Last number redial............................................................................................................ 12
USING THE CLIP SERVICES PAGE 14
Call log.............................................................................................................................. 14
Call waiting ...................................................................................................................... 17
PROGRAMMING YOUR TEMPORIS 42 PAGE 18
Lock / Unlock .................................................................................................................... 19
Language.......................................................................................................................... 20
Create directory ................................................................................................................21
Modify or erase directory.................................................................................................. 22
Date/time .......................................................................................................................... 23
Alarm .............................................................................................................................. 24
Melody programming........................................................................................................ 25
Emergency number programming .................................................................................... 27
Change PIN code ............................................................................................................ 28
Mailbox number programming.......................................................................................... 29
Phone set-up ....................................................................................................................29
Temporis_42_uk.qxd 30/10/02 14:06 Page 1
Page 3

2
Call baring ........................................................................................................................ 31
Prefix access programming .............................................................................................. 32
Local phone number ........................................................................................................ 36
ADDITIONAL INFORMATION PAGE 37
If you forget the password ................................................................................................ 37
Problem? Check .............................................................................................................. 37
Guarantee ........................................................................................................................ 37
Environment/Safety .......................................................................................................... 38
Temporis_42_uk.qxd 30/10/02 14:06 Page 2
Page 4
3
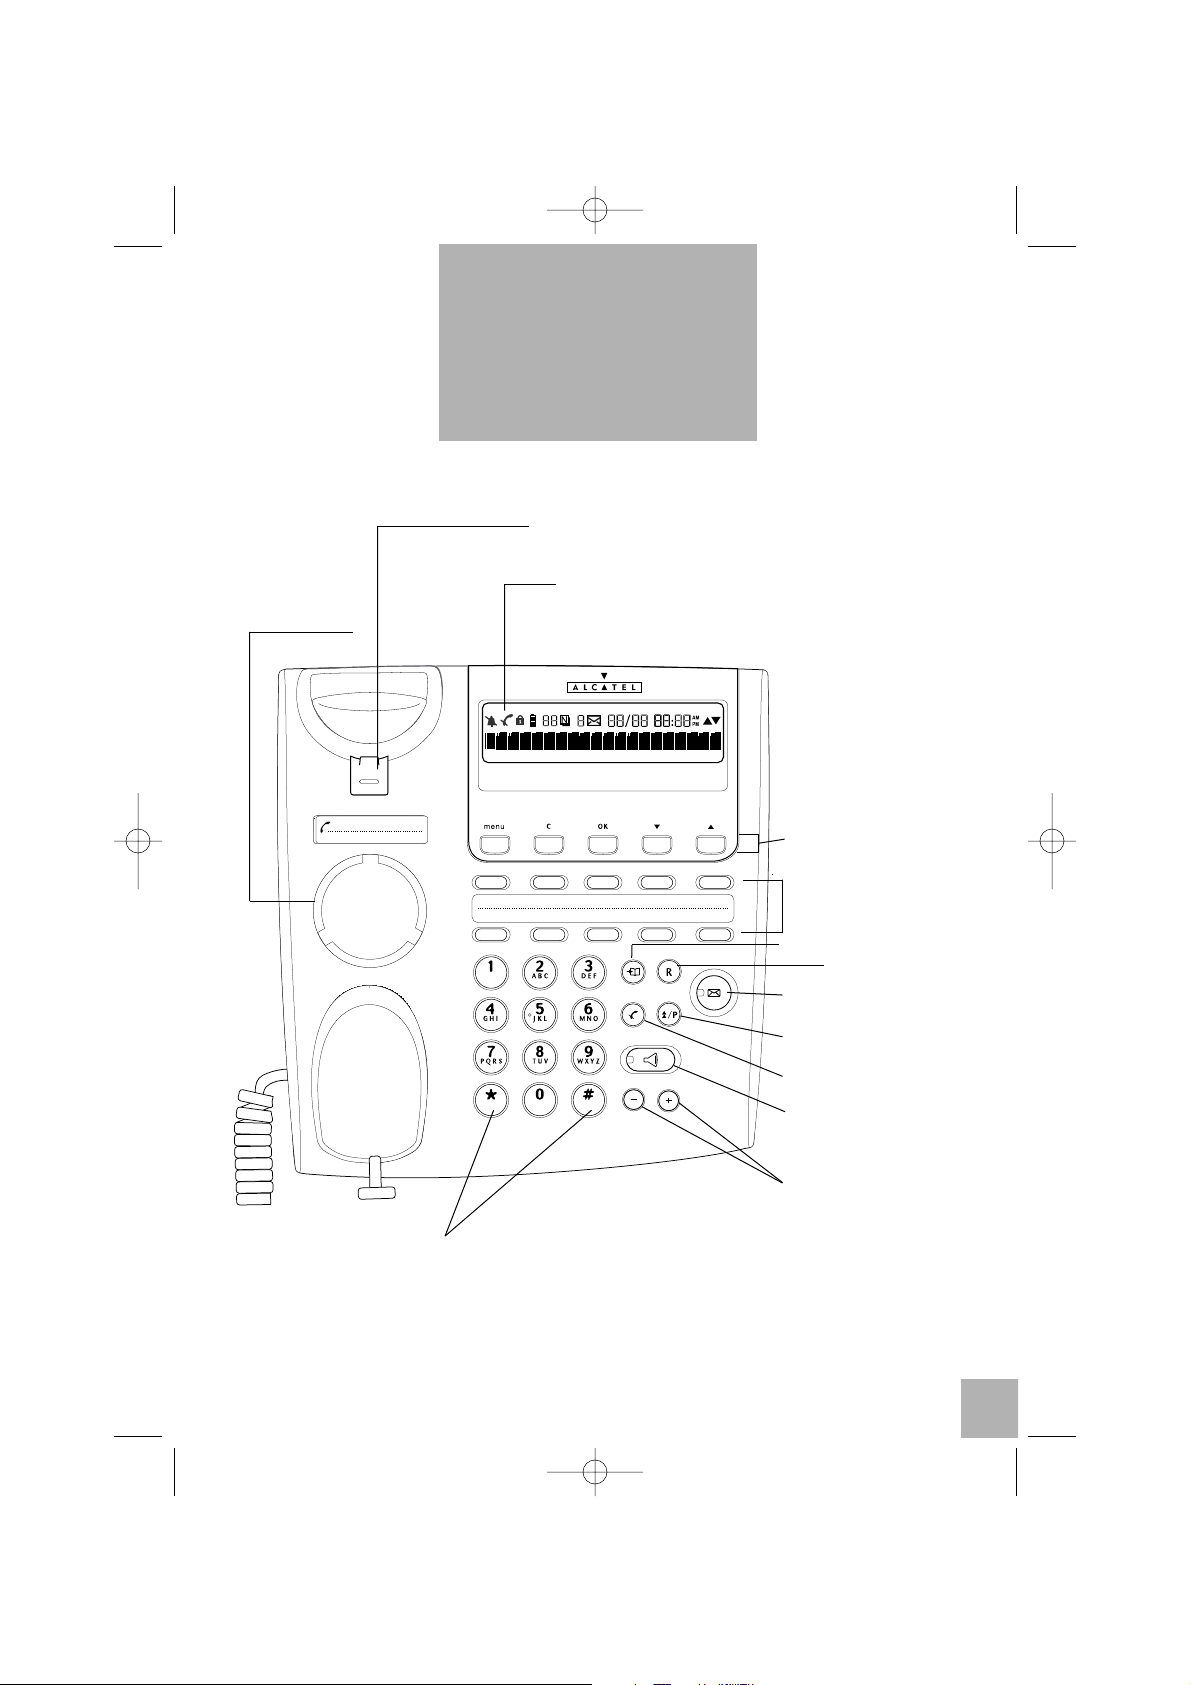
DESCRIPTION
OF THE
TEMPORIS 42
Navigator
Message waiting lamp/ringing
indicator
Access to directory
Redial / Pause key
Mute / Hold key
Ringing and
Loudspeaker levels
Handset Hearing volume
Direct memories
On hook dialling / hands free
Recall key
Access to special services
Display
Peg for wall mounting
Loudspeaker
Temporis_42_uk.qxd 30/10/02 14:06 Page 3
Page 5
4
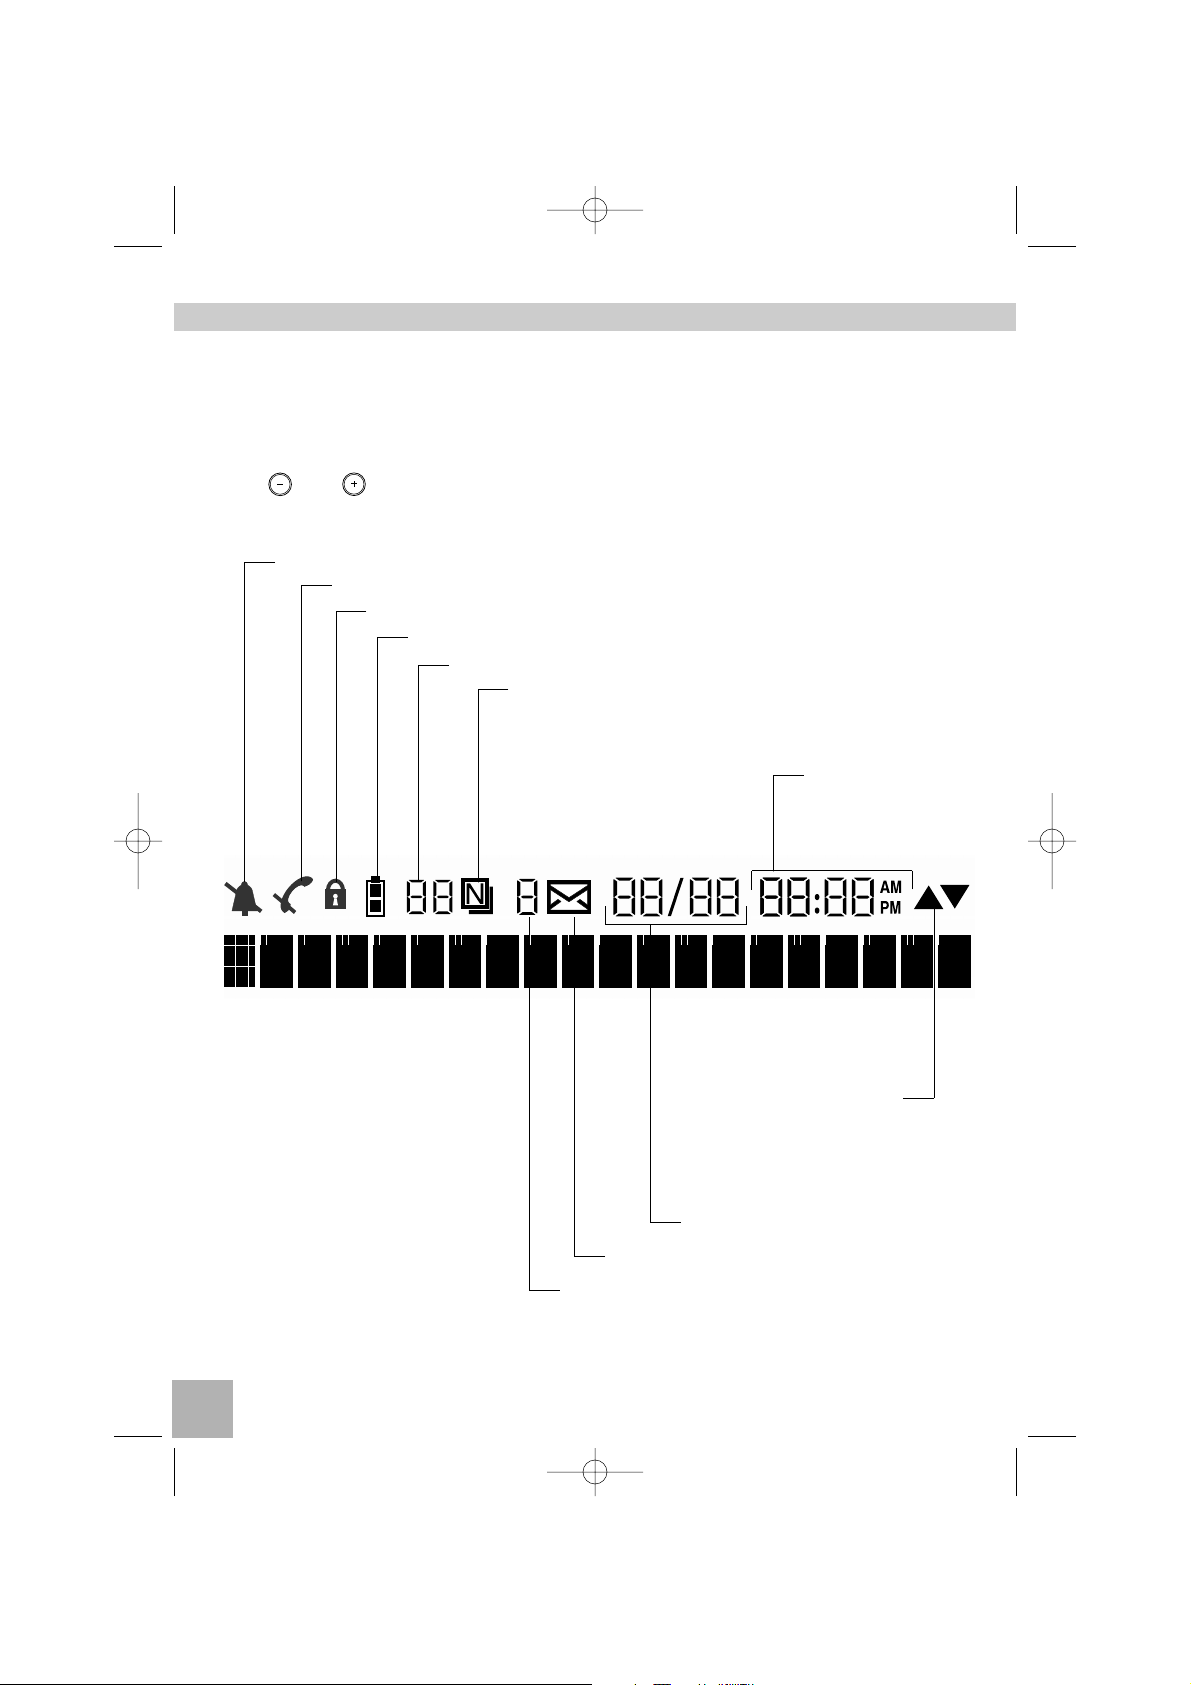
DISPLAY
The
TEMPORIS 42
has a two line display:
• 1 line of functional icons and functional information,
• 1 line of 20 alphanumerical characters.
When the set is in idle state, the display contrast can be adjusted using
the and keys.
Ringer off
Mute / Hold activated
Call baring activated
Battery status
Rank of the message in the call log
New call received
Time (HH/MM format)
Scroll up or down
for supplementary
information
Number of new calls from same caller
New voice message available
Date (DD/MM format)
Temporis_42_uk.qxd 30/10/02 14:06 Page 4
Page 6

5
EQUIPMENT PROVIDED
- 1 model
TEMPORIS 42 set
- 1 coiled cord
- 1 telephone line cord
- 1 label for emergency numbers
- 1 label for direct memories
- 1 or more user guide depending of the European country
CHARACTERISTICS
- Up to 50 name and number directory
- Call by name
- 10 direct memories
- Display with 2 lines
- Access to Caller Line Identity Presentation (CLIP) and Caller Name
Identity - Presentation (CNIP) services*
- Display of incoming name or number*
- Recording of up to 46 calling line identity*
- Voice mail access*
- Call duration
- Last number redial
- Extended redial of the two previously dialled number
- Choice of ringing melodies (4 melodies)
- Choice of ringing level (4 levels + ringer off)
- Mixed dialling: pulse or tone
- Preparatory dialling/ on hook dialling
- Handset sound level adjustment
- Hands-free mode with adjustable loudspeaker volume
- Putting your correspondent on hold or muting the microphone using
mute key
- Date and time adjustment
- Reminder call
- Call baring
* Subject to availability on the public network and subscription. On PSTN line only.
Temporis_42_uk.qxd 30/10/02 14:06 Page 5
Page 7
6
TO INSTALL
YOUR
TEMPORIS 42
A
B
RECOMMENDATIONS
• Do not expose your telephone to direct sunlight or excessive heat.
• Working range of temperature: + 5°C to + 40°C.
• Your telephone must be installed, at least, at 1 meter of a radio equipment
such as TV or radio telephone, etc.
• You have the possibility to use the optional adapter, this adapter should be
compliant with the regulatory standard EN60950 and should be replace by an
equivalent model with CE mark and following characteristics.
- input: 230VAC/50Hz.
- output: from 9VAC to 12VAC/100mA.
Warning: The grid voltage is classified as a hazard by the criteria of the same
standard.
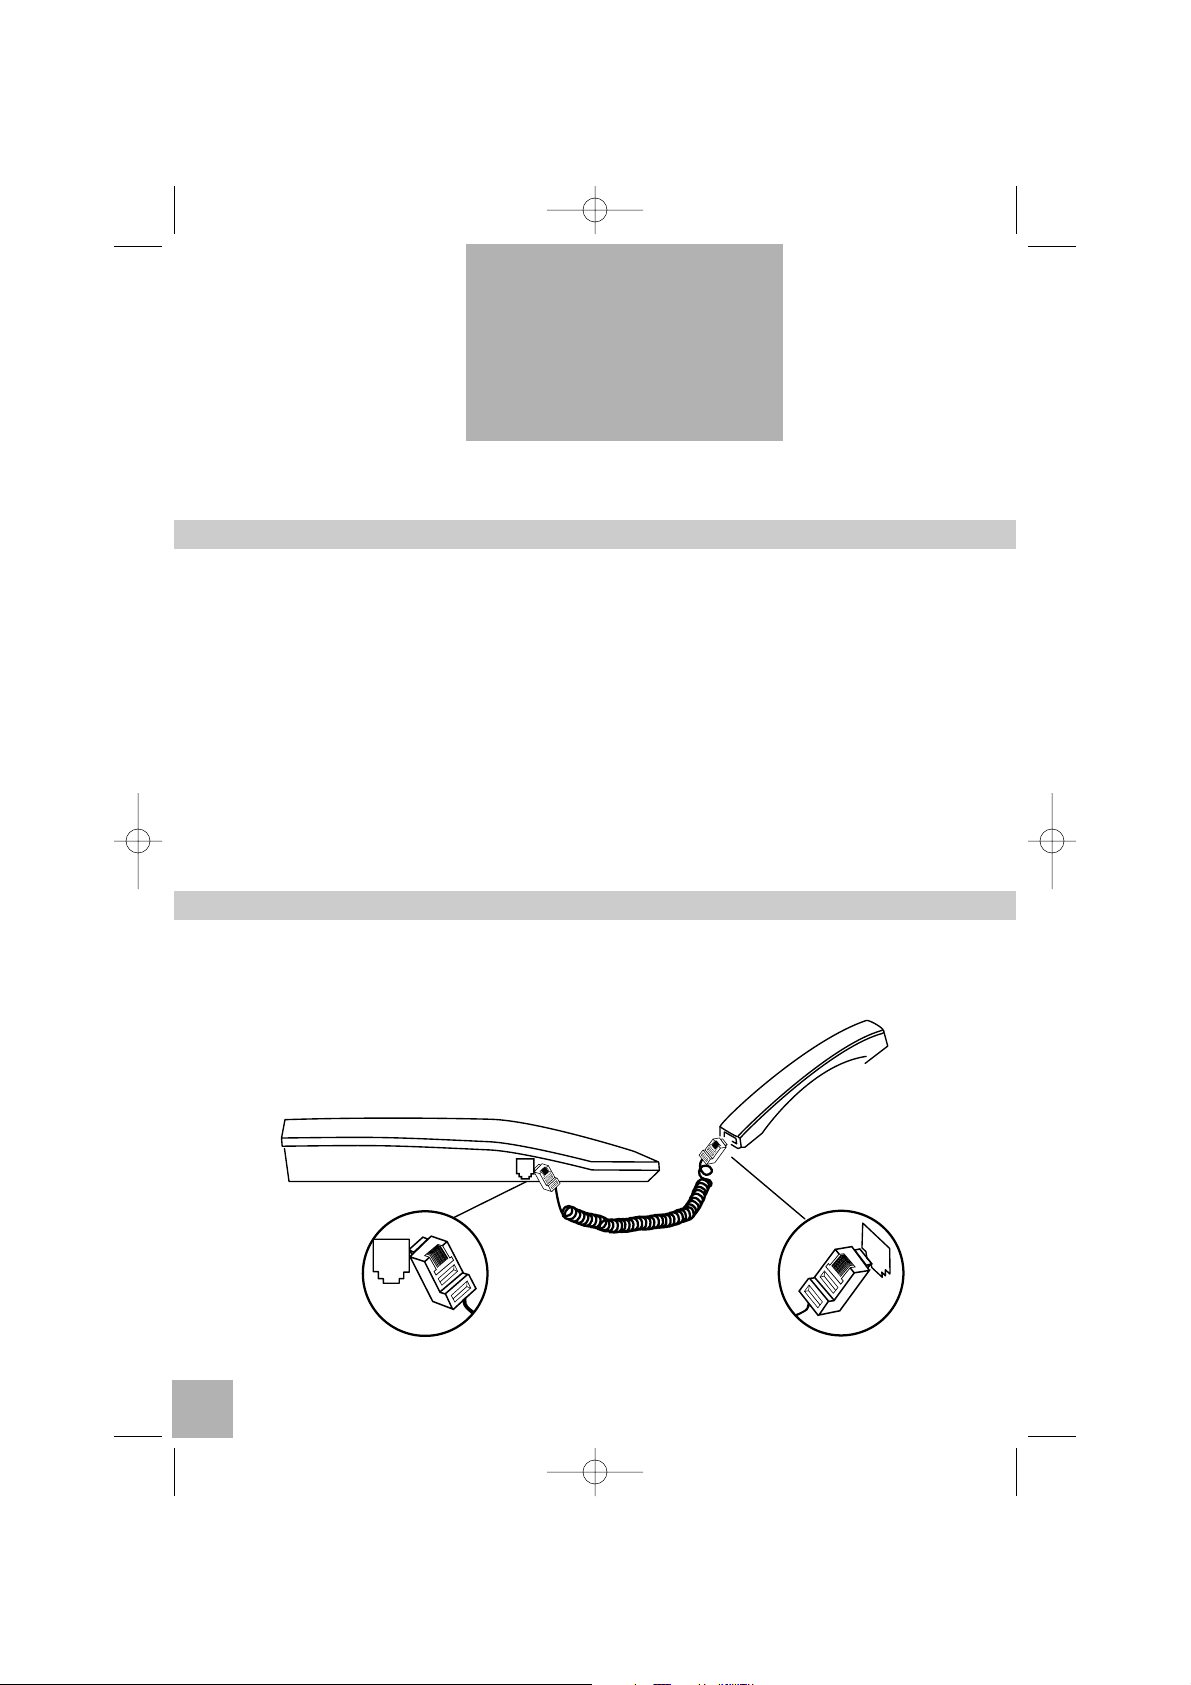
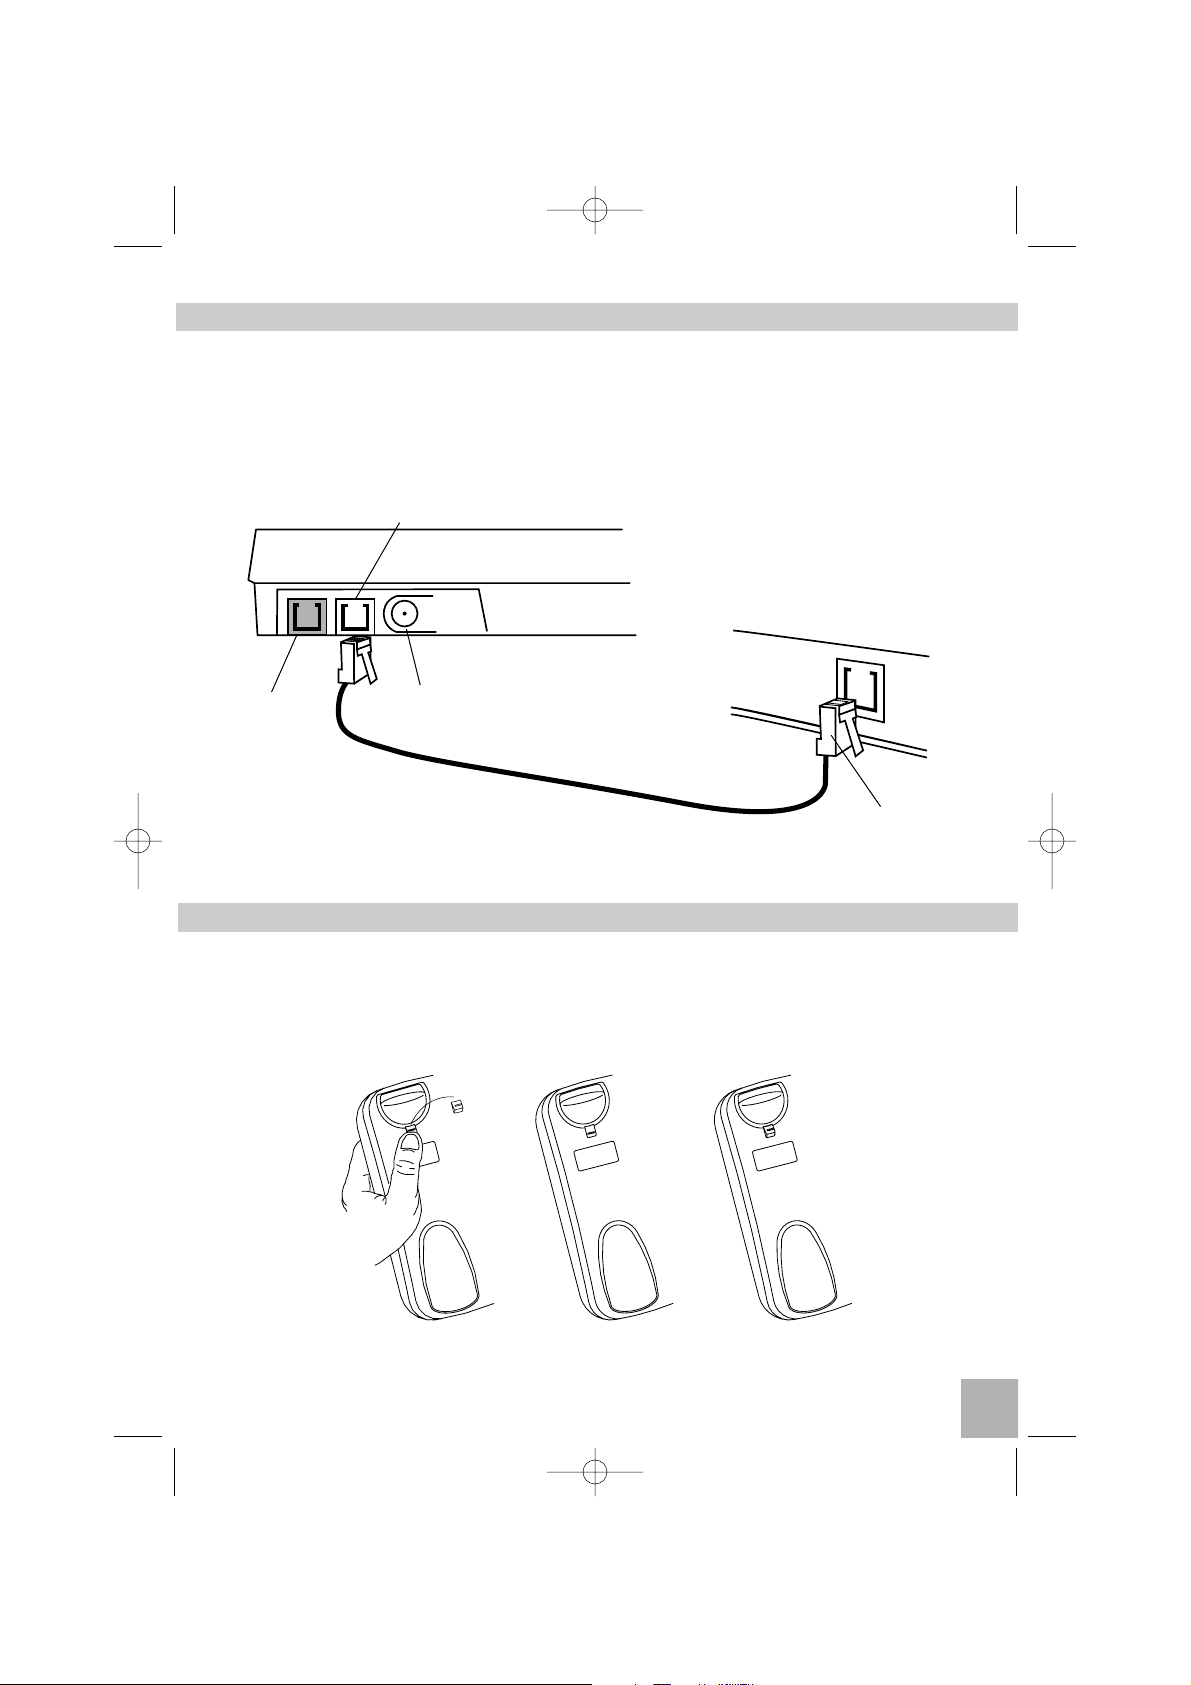
CONNECTION OF THE HANDSET
• Connect one end of the coiled cord (A) to the handset, and the other end (B)
to the plug located on the left-hand side of the phone.
Temporis_42_uk.qxd 30/10/02 14:06 Page 6
Page 8
7
TELEPHONE CONNECTIONS
• This telephone is intented to be connected to an European analog PSTN line or
to an analog PBX line.
• Connect the telephone cord (C) located on the back left-hand side, and the other
end (D) to the telephone wall plug.
• If you use an adapter instead of batteries, plug it to the jack E. (This adapter is
not supplied with the telephone set.)
C
D
F
NOTE: The plug (F) enables a modem to be connected.
WALL MOUNTING
To wall mount the set, remove the peg and reinsert it upside down as shown in the
figure below.
Bore two 6mm-large horizontal holes spaced 70mm apart. Put two pegs in and
place in two screws (3.5mm diameter and 25mm long) without tightening them.
Place the cord in the slot situated under the set, then fix it onto the screws.
E
Wall mounted position Horizontal position
Temporis_42_uk.qxd 30/10/02 14:06 Page 7
Page 9
8
INSTALLATION OR REPLACEMENT OF BATTERIES
Your phone uses 3 LR6-AA-AM3 1.5V Alkaline batteries without mercury and
cadmium, which are not supplied with the set. To avoid damaging your set, only
use leak-proof batteries.
Place/Replace the batteries as described below:
• For safety reasons, disconnect the telephone line cord from the wall socket.
• Open the battery compartment located on the bottom of the set pushing hard at
the door while sliding it back.
• Remove the used batteries and put the new ones in position, taking into account
the + and - polarities as shown engraved on the plastic inside the battery compartment.
• Close the battery compartment and connect the telephone set.
• Adjust the contrast of the display using the and keys.
• Adjust date and time as described in the paragraph "Date/Time".
• The lifetime of batteries is around 6 months in normal conditions of use.
• When batteries become weak, the battery icon starts flashing ; you have to
replace your batteries as soon as possible.
NOTE: Without batteries or with empty batteries, your
TEMPORIS 42 works pro-
perly but, if you disconnect it from the telephone line, the phone loses
since information like date and time but not the contents of memories.
PRECAUTIONS OF USE
Caution, never bring your telephone set in contact with water.
To clean your set however, you may use a damp cloth.
Never use solvents (trichlorethylene, acetone, ...) which may damage the plastic
surfaces of your telephone set. Never spray cleaning products on your set.
During storms, it is advised not to use the set.
DECLARATION OF CONFORMITY
• We would remind you that TEMPORIS 42 is approved in conformity with
European regulations, as certified by the marking.
• It is designed to send and receive telephone communications and for connection
to the French public telecommunications network.
• Appliance designed for connection to a TRT3 class analogue telephone line (telecommunications network voltage) as defined in standard NF EN 60-950.
• ATLINKS hereby declares that the TEMPORIS 42 appliance is compliant with the
essential requirements and other relevant provisions of directive 1999/5/CE.
• The certificate of conformity is available on the following Internet site:
“www.atlinks.com”.
Temporis_42_uk.qxd 30/10/02 14:06 Page 8
Page 10
MESSAGE WAITING LAMP / RINGING INDICATOR
When there is an incoming call, the lamp located inside the message key, will flash
to the rhythm of the ring.
The lamp also serves as a message indicator. It flashes to inform of any new calls or
messages in the Call Log (for those who have subscribed to the CLIP or CNIP service)
or when a message has been left in the centralised voicemail if you are connected to
a private ALCATEL telephone system equipped with a message service.
LINE LAMP
When the telephone set goes off-hook or seizes the line in hands-free mode, the
lamp, located inside the key, will switch on as long as the telephone line is
seized.
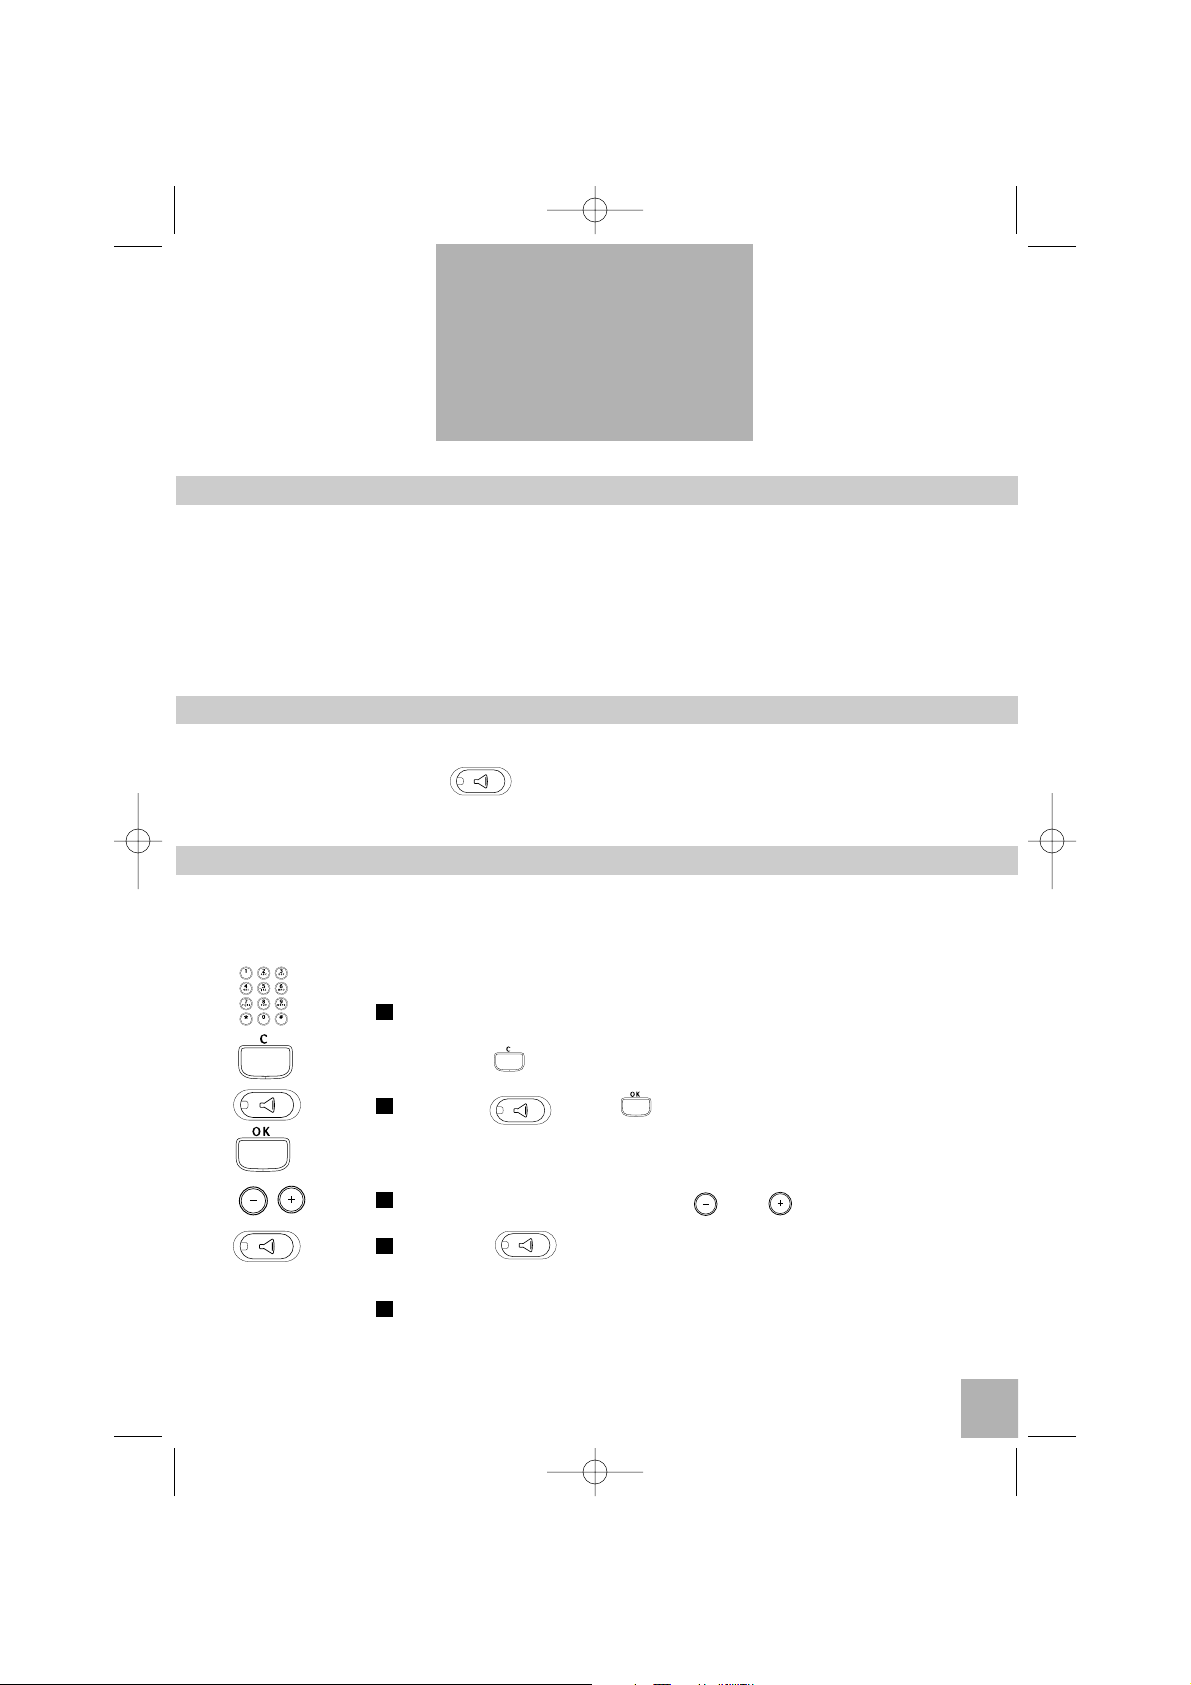
PREPARATORY DIALLING / ON HOOK DIALLING
The TEMPORIS 42 enables you to prepare your dialling number without taking the
line.
• PREPARING A CALL
Dial your correspondent’s number.
Press the key to erase a wrongly entered character.
Press the key or key.
The loudspeaker lamp lights up. The communication is
monitored during the whole establishment phase.
Adjust the sound level using the and keys.
Press the key in order to end the communication.
or
Lift the handset to go on having a private conversation.
NOTE: The call duration counter starts around 20 seconds after dialling of the
last digit.
5
4
3
2
1
9
GENERAL
USE
Temporis_42_uk.qxd 30/10/02 14:06 Page 9
Page 11
10
•
MAKING A CALL
Making a call can also be carried out in other ways:
• By dialling the correspondent's number and then lifting up
the handset.
•
By pressing the key and then dialling the correspondent's number.
•
By lifting up the handset and then dialling the correspondent's
number.
TO DIAL USING A MEMORY
The capacity of each memory is 24 digits and 20 characters.
• CALLING FROM THE DIRECTORY
Press the key.
"
There are two ways to find a correspondent’s number:
• Use the and keys to scroll the names contained in the
memory until the name of your correspondent appears on the
display.
• You can also type the first letter of the correspondent’s name on
the keyboard which will result in the names of the correspondents beginning with that letter being displayed.
Press the key to make a call.
- or press the key to make a call?
- or lift the handset to make a call.
NOTE: The call duration counter starts around 20 seconds after dialling of the last
digit;
• CALLING FROM A DIRECT MEMORY
Just press the chosen direct memory.
The loudspeaker lamp lights up. The communication is monitored
during the whole establishment phase.
Pick up the handset when your correspondent answers.
or
Go on having a conversation in hands-free mode.
NOTE: The call duration counter starts around 20 seconds after dialling of the last
digit.
2
2
1
3
2
1
ALICE
Temporis_42_uk.qxd 30/10/02 14:06 Page 10
Page 12
11
RECEIVING A CALL
There are two ways to answer the call:
• Lift the handset.
• Press the key, the telephone set goes in hands-free mode.
NOTE: - If the ringer is deactivated on the telephone set, an incoming call is signal-
led by the display and the lamp is flashing. To answer the call proceed
as mentioned above.
- The call duration counter starts as soon as you answer the call..
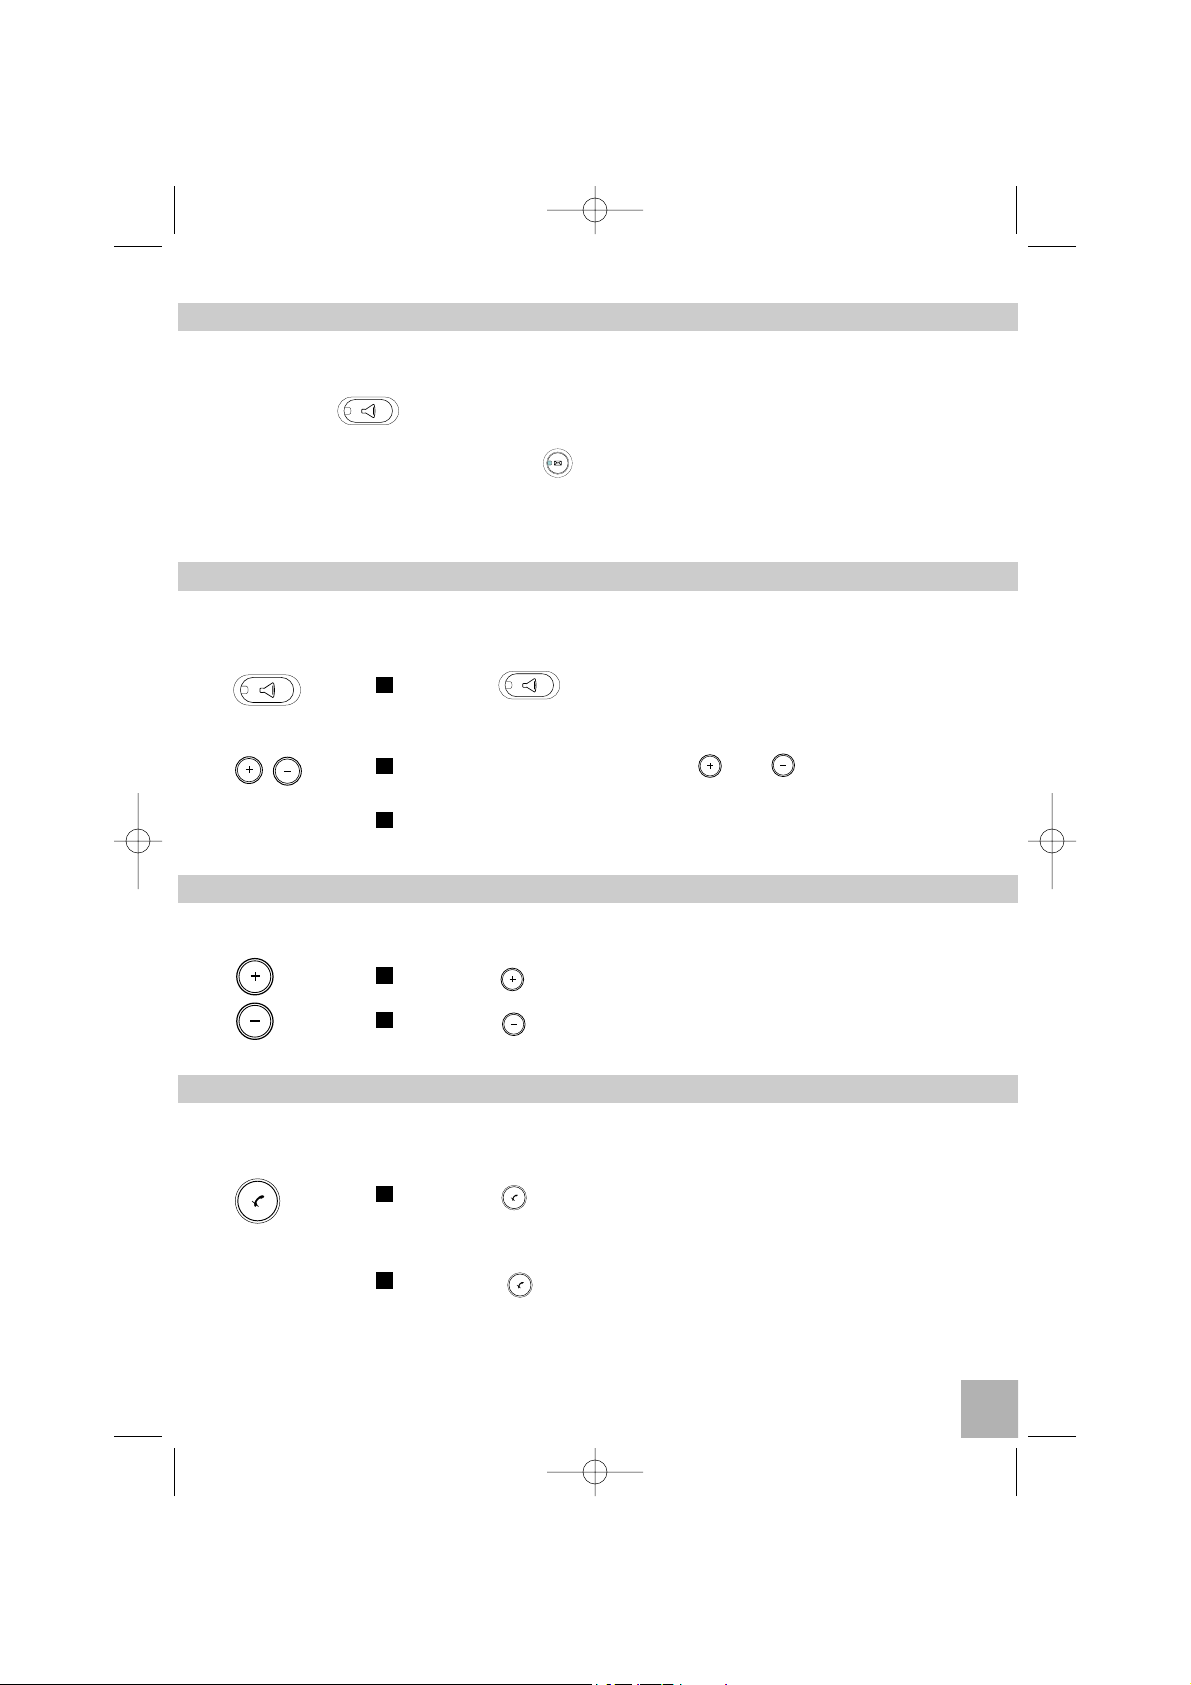
HANDS-FREE MODE
If during a conversation where the handset is off-hook, you wish to hear the
conversation on the loudspeaker:
Press the key and replace the receiver.
"The people around you listen to the conversation.
Adjust the sound level using the and keys.
Lift the handset to go on having a private conversation.
HANDSET SOUND LEVEL
When the loudspeaker is not activated, you can increase the handset sound level.
Press the key in order to increase the volume.
Press the key to go back to initial volume.
MUTE
During a conversation, you can speak to the people around you without being
heard by your correspondent.
Press the key.
"Your correspondent can no longer hear you. The icon cor-
responding to this feature appears.
Press the key once again to resume the conversation.
2
1
2
1
3
2
1
Temporis_42_uk.qxd 30/10/02 14:06 Page 11
Page 13
12
HOLD / TRANSFER
During a conversation, you can put your correspondent on hold the time you are
looking for a file or if you want to go on having the conversation on a second
telephone set in parallel on the same telephone line but in an other room.
Press the key.
"
Your correspondent can no longer hear you.
The icon corresponding to this feature appears.
Replace the receiver.
"
Your correspondent hears a beep every 10 seconds this
beep is also heard by yourself on the loudspeaker.
Pick up the handset to resume the conversation.
or
Pick up the handset of the second telephone set to resume the
conversation on it.
The TEMPORIS 42 releases the line.
NOTE: If you do not resume the conversation after a time out of 60 seconds
the telephone set automatically releases the line.
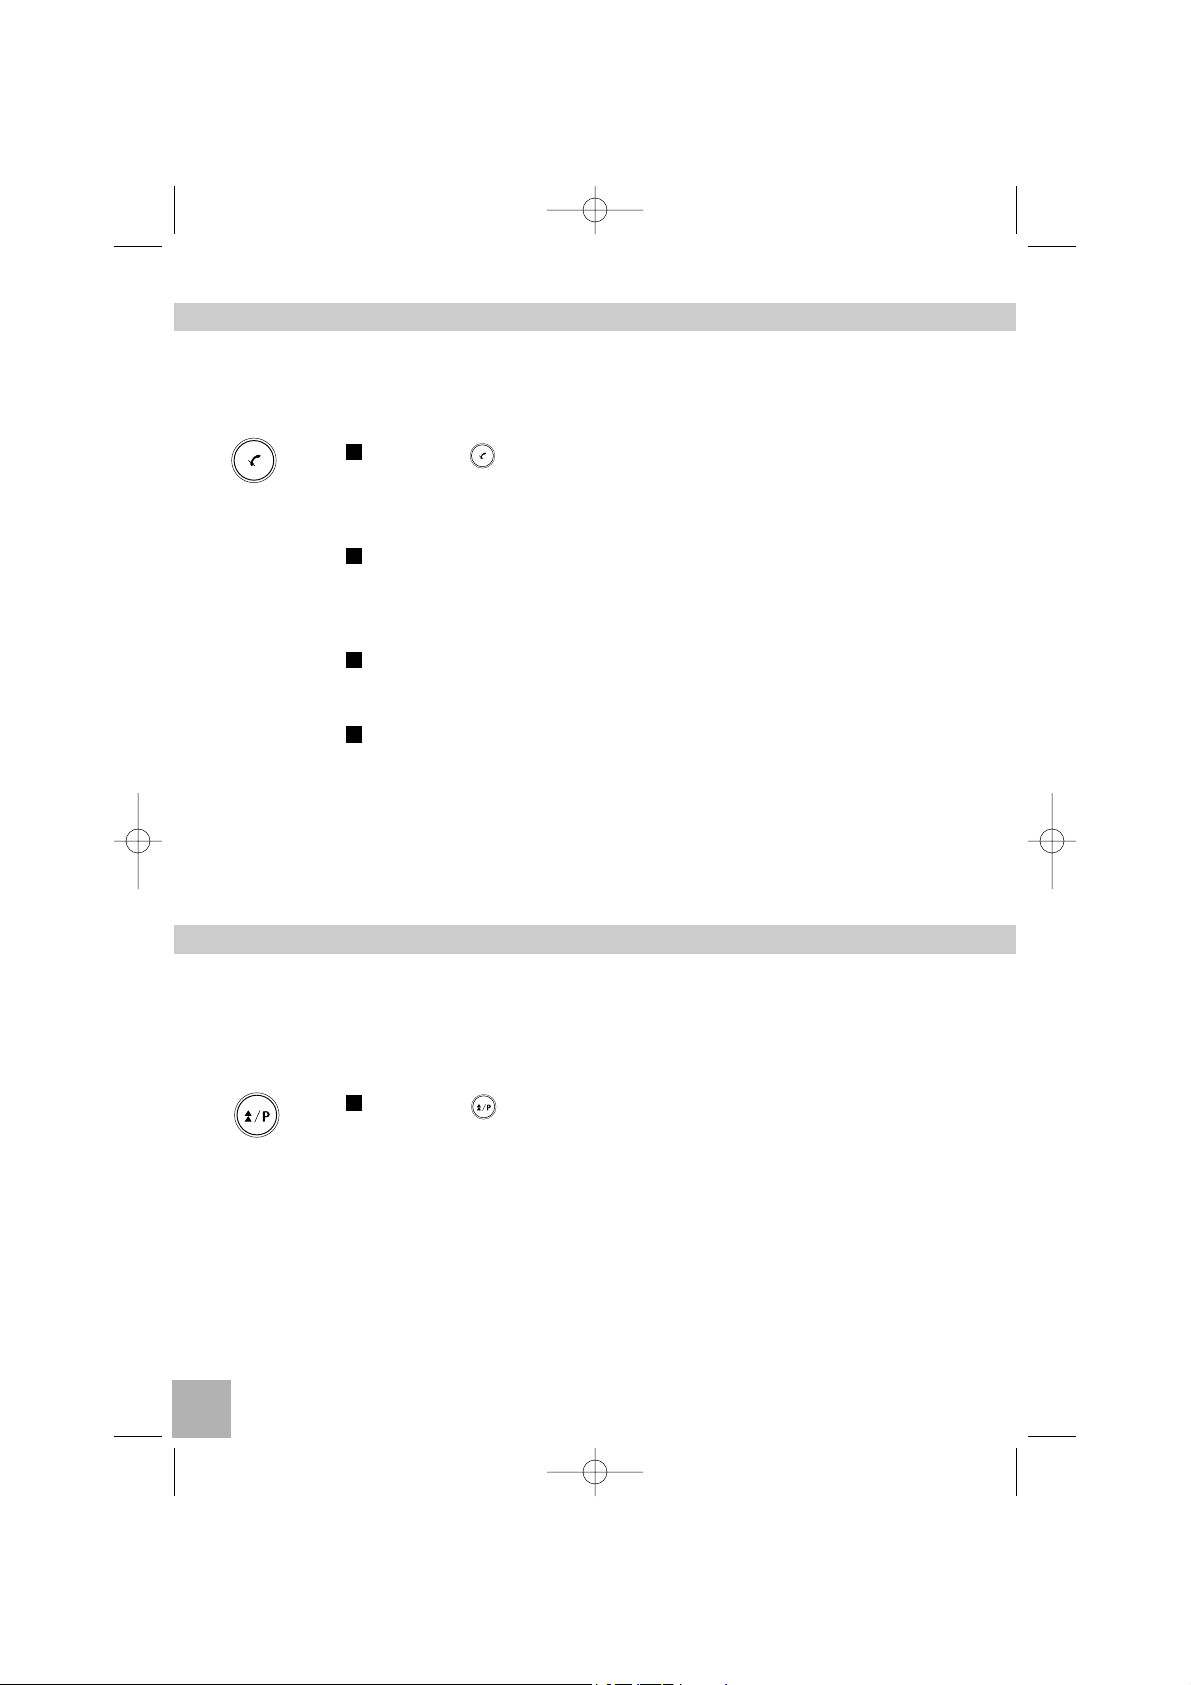
LAST NUMBER REDIAL
The capacity of the redial memory is 32 digits.
There are two ways to redial the last number previously dialled:
•
IN OFF-HOOK STATE
Press the key.
"The last number is displaying.
The telephone set automatically dials the last number previously dialled.
1
3
3
2
1
Temporis_42_uk.qxd 30/10/02 14:06 Page 12
Page 14

13
• IN ON-HOOK STATE - EXTENT LAST NUMBER REDIAL
The TEMPORIS 42 memorises the last 2 numbers previously
dialled.
Press the key.
"
The first of last number is displaying
Use the and keys to display the last 2 numbers dialled.
Press the key or lift the handset to redial the number
displayed.
The number is automatically dialled. The telephone set takes in
account the operator prefix if the service has been activated by
the user.
•
ERASING A NUMBER
If you do not want anybody to see the last numbers which you
have dialled it is possible to erase them one by one.
Press the key.
"The first of last number is displaying.
Press the key to delete the number.
2
1
3
2
1
Temporis_42_uk.qxd 30/10/02 14:06 Page 13
Page 15

Your operator offers you some services which are only available through subscription.
The TEMPORIS 42 is able to work with Calling Line Identity Presentation (CLIP
service) on hook or on Call Waiting in off hook mode.
CLIP informs you of the number or the name of the calling party before you answer the call.
These services are available through subscription on PSTN lines. To subscribe: contact your telephone company.
CALL LOG
The call log is linked to the CLI (Calling Line Identification) service offered by your
operator.
The phone numbers and names which have called you are stored in the calling list
where up to 46 different phone numbers can be stored. The oldest calls are replaced by the more recent ones when there is insufficient space.
The display gives you the following information related to CLI:
When new CLI are received, the related information are stored in the call log
and the lamp starts flashing.
14
USING
THE CLIP
SERVICES
Rank of the message
in the call log
Date (DD/MM format)
New call received
Number of NEW calls from the same caller
New voice message available
Time (HH:MM format)
Scroll up and down for
supplementary information
Temporis_42_uk.qxd 30/10/02 14:06 Page 14
Page 16

15
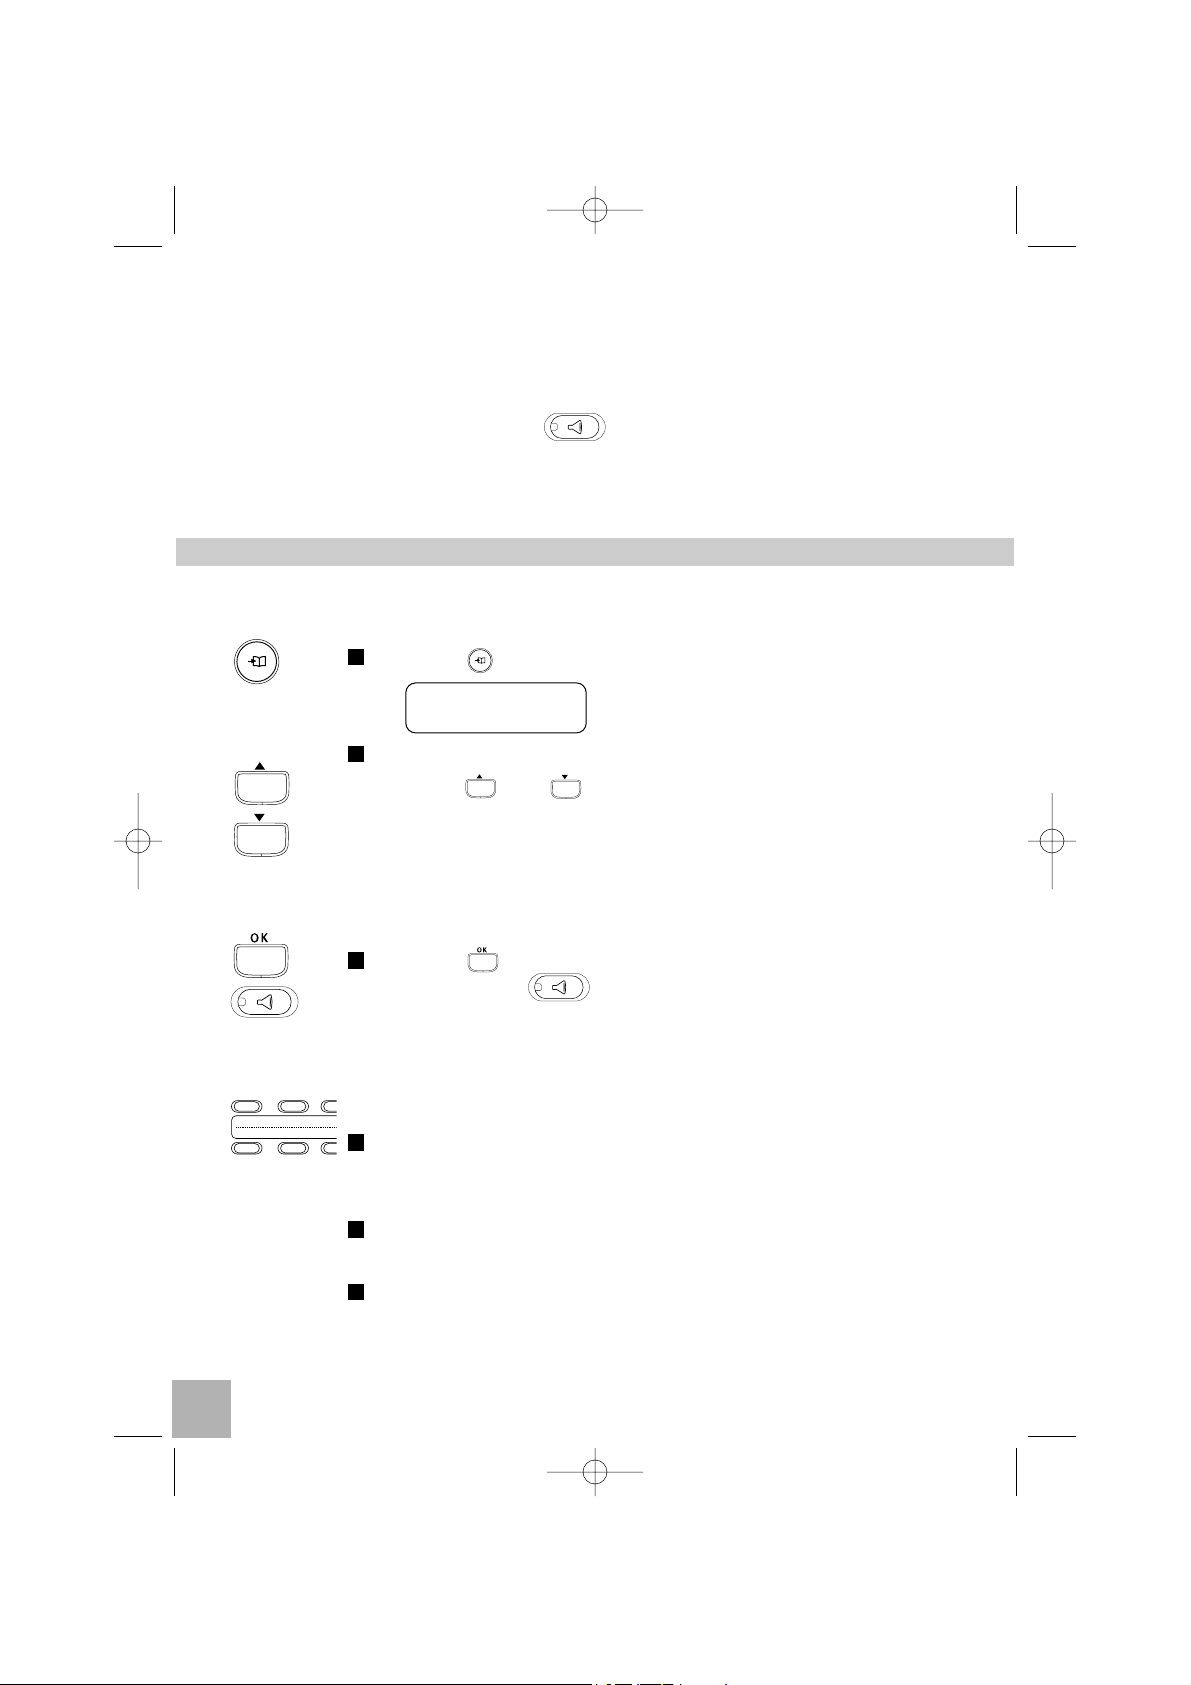
• TO CONSULT THE CALL LOG
"
Message lamp flashes.
New calls in the call log.
New voice message in your mailbox.
Press the key.
You have been called by:
• JOHN SMITH.
• From line 331 85 80 66 38.
• John called you 8 times without reaching you.
• Last call was on October 9th at 8.05 PM.
Press the key.
You see the second new call.
"
2
1
09/10
8
08:05
8
ADAMS JACK
11
3 08/10 10:10
Rank
Date of last call from John
New call
Number of calls from John
$
$
alternatively
12
8 09/10 08:05
$
Time of last call from John
12
12 NEW CALLS
33185806638
SMITH JOHN
Temporis_42_uk.qxd 30/10/02 14:06 Page 15
Page 17

16
• TO DELETE A CALL LOG RECORD
When record is displayed:
Press the key.
"
Press the key.
"
• TO SAVE A CALL LOG RECORD
When record is displayed:
Press the key.
"
Press the key.
"
• TO CALL A CORRESPONDENT FROM CALL LOG
When record is displayed:
Press the key or press key.
"
The conversation can go on having hands-free mode or picking up
the handset.
1
2
1
2
1
CREATE DIRECTORY
PROG OK
JOHN SMITH
ERASE SHEET?
OK SHEET ERASED
Temporis_42_uk.qxd 30/10/02 14:06 Page 16
Page 18

17
CALL WAITING
Independently of the CLI, if you receive a second call during a conversation you
can take this second call and put your first correspondent on hold. You can toggle
between the two parties.
Press the key.
"
Press the key.
" The telephone set dials R2, you take the second call and
the first one is put on hold.
During the conversation with the second party, you can come back
to the first one:
Press the key.
"
Press the key.
The telephone set dials R2, you come back to the first call
and the second one is put on hold.
NOTE: - You can toggle between the two parties using the key
then key.
- If you have no call waiting during a conversation, using
key enters in call waiting mode and has no action through
the public network. To let this mode use the key.
2
1
2
1
TAKE 2ND CALL
TAKE 1ST CALL
Temporis_42_uk.qxd 30/10/02 14:06 Page 17
Page 19

Your TEMPORIS 42 offers a configuration menu. In order to access the different
sub-menus proceed as below being in idle state.
Everywhere in the menu or during a procedure you can come back in the previous
state pressing once again the menu key. All started procedure abort.
If you make a mistake (wrong data) 3 beeps are heard.
" Idle screen.
Press the key.
" Call baring menu.
Press the key.
" Language selection.
Each press on the key will display a new sub-menu.
" Memory Programming
" Change of memory content.
" Date and time setting.
" Beep reminder setting.
" Ringing adjustment.
" Define a priority number.
" Change the password.
2
1
18
PROGRAMMING
YOUR
TEMPORIS 42
LOCK?(OR UNLOCK?)
LANGUAGE?
CREATE DIRECTORY?
MODIFY DIRECTORY?
DATE/TIME?
ALARM?
PROG MELODY?
PROG EMERGENCY NB?
CHANGE PIN CODE?
12 NEW CALLS
Temporis_42_uk.qxd 30/10/02 14:06 Page 18
Page 20

19
" Define the mailbox number.
" Functional parameter setting.
" Define the number of digits allowed to
dial when the telephone set is locked.
" Chose the different carrier.
" Telephone line subscriber number
setting.
NOTE: When a function is validated the screen displays "PROG OK" and the tele-
phone set comes back to the previous state after 1.5 seconds.
LOCK / UNLOCK
When your telephone is locked:
• You can receive a call.
• You can dial a limited number, number length is chosen in "Call baring" menu.
• If an emergency number is programmed, it is automatically dialled 5 seconds
after seizing the line without user action. The default value of the password is
0000.
• LOCKING
Press the key.
"
Press the key.
"
Enter your password.
"
Press the key.
"
If the password is incorrect, the display informs you and you are
asked to try again.
4
3
2
1
PHONE SET UP?
CALL BARRING?
PROG MAILBOX NB?
PROG PREFIX ACCESS?
LOCAL PHONE NUMBER?
LOCK?
ENTER PIN CODE:_
ENTER PIN CODE:****
PHONE LOCKED
Temporis_42_uk.qxd 30/10/02 14:06 Page 19
Page 21

20
• UNLOCKING
Press the key.
"
Press the key.
"
Enter your password.
"
Press the key.
"
If the password is incorrect, the display informs you and you
are asked to try again.
NOTE: If you have forgotten your password, consult the chapter "If you forget the
password".
LANGUAGE
The TEMPORIS 42 offers 4 display languages:
• English, Dutch, German and French.
or
• English, Spanish, Italian and Portuguese.
Press the key.
"
Press the key.
"
Press the key.
"
3
2
1
4
3
2
1
UNLOCK?
ENTER PIN CODE:_
ENTER PIN CODE:****
PHONE UNLOCKED
LOCK?
LANGUAGE?
ENGLISH?
Temporis_42_uk.qxd 30/10/02 14:06 Page 20
Page 22

21
Press the key.
"
Press the key.
"
Press the key.
"
Press the key.
"
NOTE: It is the same procedure for the 4 other languages.
CREATE DIRECTORY
This sub-menu allows both programming of the directory and the direct memories.
Your set has a directory containing up to 50 entries. Each file is made of a name
and a number.
Press the key.
"
Press the key until the screen displays the right sub-menu.
"
Press the key.
"
Use the keypad to enter the name of your correspondent.
To enter a new character wait until the cursor has shifted then
press another key.
To display M press once the key.
To display N press twice the key.
To display O press 3 times the key.
4
3
2
1
7
6
5
4
FRANÇAIS?
NEDERLANDS?
DEUTSCH?
PROG OK
LOCK?
CREATE DIRECTORY?
NAME:
Temporis_42_uk.qxd 30/10/02 14:06 Page 21
Page 23

22
To display Space character press once the key.
"
Press the key or key.
"
Use the keypad to enter the number of your correspondent.
"
Press the key to memorise into directory
or
Press one of the direct access memory key .
"
NOTE: - Use the key to correct a wrongly entered character or number
before validation.
- Write the name on direct memory label.
MODIFY OR ERASE DIRECTORY
•
MODIFY DIRECTORY
This sub-menu allows to modify or to delete entries in the memory.
Press the key.
"
Press the key until the screen displays the right sub-menu.
"
Press the key and use the and keys to select the
right entry or use the keypad to enter a character to go to the first
name starting with that character.
or
Press the key
"
3
3
2
1
7
7
6
5
MARY
NUMBER:
123 45 67 89
PROG OK
LOCK?
MODIFY DIRECTORY?
MARY
Temporis_42_uk.qxd 30/10/02 14:06 Page 22
Page 24

Press the key.
Select the name or the number to be modified using or
keys.
" or
Use the key to delete the characters or the digits one by one.
Use the keypad to modify name or number.
" or
•
ERASE DIRECTORY
Reproduce the sequence from to .
Press the key to erase the whole entry.
"
Press the key.
"
DATE/TIME
The date and time icons are blinking as long as the date and the time are not set.
Press the key.
"
Press the key until the screen displays the right sub-menu.
"
Press the key.
"
3
2
1
5
4
31
6
5
4
23
D./T.:01/01 12:00 P
MARY_ 123 45 67 89_
123 45 67 89_
ERASE SHEET?
OK SHEET ERASED
LOCK?
DATE/TIME?
MARY_
Temporis_42_uk.qxd 30/10/02 14:07 Page 23
Page 25

24
Use the keypad to modify the date and time in format DD/MM and
HH:MM.
"
Press the key or key to alternate between AM and PM.
"
Press the key.
"
ALARM
Your telephone can be programmed to call you every day at the same time.
In order to avoid unfortunate deprogramming of the alarm, you are advised to
insert batteries into the phone (see page 8).
•
PROGRAMMING
Press the key.
"
Press the key until the screen displays the right sub-menu.
"
Press the key.
"
Use the keypad to modify the time in format HH:MM.
"
Press the key or key to alternate between AM and PM.
"
5
4
3
2
1
6
5
4
D./T.:16/05 08:20 P
D./T.:16/05 08:20 A
PROG OK
LOCK?
ALARM?
TIME: 12:00 A
TIME: 06:30 A
TIME: 06:30 P
Temporis_42_uk.qxd 30/10/02 14:07 Page 24
Page 26

25
Press the key.
"
Press the key or key to alternate between ON and OFF.
"
Press the key.
"
NOTE: To deactivate the function select "ALARM: OFF" and validate.
•
REMINDER
At the time programmed your telephone will ring. Pressing any key
will stop the alarm.
"
MELODY PROGRAMMING
There are two ways to program the melody and to adjust the level of ringing:
- The modifications of the ringer can be carried out during a ringing signal.
- The melody and the level of ringing can be chosen through a sub-menu.
•
DURING A RINGING PHASE
Press the or keys to increase or to reduce the volume.
"
Press the key to to select the melody.
"
NOTE: The modifications are memorised, you can answer the call.
2
1
8
7
6
ALARM: OFF
ALARM: ON
PROG OK
** ALARM CLOCK **
CALL
CALL
Temporis_42_uk.qxd 30/10/02 14:07 Page 25
Page 27

26
•
PROGRAMMING
Press the key.
"
Press the key until the screen displays the right sub-menu.
"
Press the key.
"
Pick up the handset.
Press the key.
"
The telephone set starts ringing.
Use the keypad to modify the melody (1 to 4).
"
Press the key or key to increase or to decrease the
volume.
"
Press the key.
"
Replace the handset on hook.
When the level 0 is selected the ringer is off and the icon is
turned on.
9
8
7
6
5
4
3
2
1
LOCK?
PROG MELODY?
PICK UP HANDSET
MELODY:2 / LEVEL:1
MELODY:3 / LEVEL:1
MELODY:3 / LEVEL:2
PROG OK
Temporis_42_uk.qxd 30/10/02 14:07 Page 26
Page 28

27
EMERGENCY NUMBER PROGRAMMING
When an emergency number is programmed this number is automatically dialled
when the TEMPORIS 42 is in locked mode and when the handset has been lifted
for more than 5 seconds.
•
TO STORE AN EMERGENCY NUMBER
Press the key.
"
Press the key until the screen displays the right sub-menu.
"
Press the key.
"
Enter the phone number.
"
Press the key to validate.
"
•
DIALLING THE EMERGENCY NUMBER
This number can be easily called by a person in difficulty (e.g.: a
baby, an old person).
The telephone set must be in locked mode, lift up the handset and
then the emergency number is automatically dialled after 5 seconds.
A number different than the emergency number can be dialled if the
first digit is dialled before 5 seconds after going off hook and if the call
baring allows to dial all the digits.
5
4
3
2
1
LOCK?
PROG EMERGENCY NB?
NUMBER:
0123456
PROG OK
Temporis_42_uk.qxd 30/10/02 14:07 Page 27
Page 29

28
CHANGE PIN CODE
Some features of the TEMPORIS 42 need to use a four digit password.
This password is set out of box at 0000. You may choose your own code using
a sub-menu.
Press the key.
"
Press the key until the screen displays the right sub-menu.
"
Press the key.
"
Enter the old password.
"
Press the key.
"
Enter the new password.
"
Press the key.
"
Enter the new password.
"
Press the key.
"
9
8
7
6
5
4
3
2
1
LOCK?
CHANGE PIN CODE?
ENTER OLD PIN:_
ENTER OLD PIN:****
ENTER NEW PIN: _
ENTER NEW PIN:****
CONFIRM NEW PIN:_
CONFIRM NEW PIN:****
PROG OK
Temporis_42_uk.qxd 30/10/02 14:07 Page 28
Page 30

29
MAILBOX NUMBER PROGRAMMING
When a mailbox number is programmed, this number is automatically dialled when
the user presses the mailbox key.
Press the key.
"
Press the key until the screen displays the right sub-menu.
"
Press the key.
"
Enter the phone number.
"
Press the key to validate.
"
PHONE SET-UP
Some parameters of the TEMPORIS 42 may be change according to the network.
All of these parameters are factory settings according to the dedicated market
(e.g.: France, Germany,…,mass market or professional market).
Press the key.
"
Press the key until the screen displays the right sub-menu.
"
Press the key.
"
3
2
1
5
4
3
2
1
LOCK?
PROG MAILBOX NB?
NUMBER:
345678
PROG OK
LOCK?
PHONE SET UP?
DIALLING: TONE
Temporis_42_uk.qxd 30/10/02 14:07 Page 29
Page 31

30
Press the key.
"
Press the key.
"
This function has to be selected in European countries: no
automatic gain control and operator prefix management.
Press key.
"
This function should be selected according to the network: automatic gain control and operator prefix management.
Press key.
"
No automatic gain control and operator prefix management.
Press the key.
"
Press the key.
"
Press the key.
"
Press the key.
"
11
10
9
8
7
6
5
4
DIALLING: PULSE
NETWORK: PUBLIC1
NETWORK: PUBLIC2
NETWORK: PRIVATE
FLASHING : 300
FLASHING : 600
FLASHING : 100
PROG OK
Temporis_42_uk.qxd 30/10/02 14:07 Page 30
Page 32

31
CALL BARING
When your telephone is barred, numbers containing a maximum of 6 digits (set out
of box) can still be dialled besides the emergency number.
It is possible to authorise longer or shorter numbers to be dialled in range from 0
to 9 digits.
Press the key.
"
Press the key until the screen displays the right sub-menu.
"
Press the key.
"
Enter the password.
"
Press the key.
"
Select the number of digits.
"
Press the key.
"
If the telephone set is in unlocked mode it is possible to dial
more than 9 digits.
If the telephone is in locked mode it is possible to dial the number of digits defined in the sub-menu.
If the number of digits selection is 0 all calls are blocked except
the emergency number if programmed. Take care to authorise
the emergency numbers like fire brigade, police, emergency.
7
6
5
4
3
2
1
LOCK?
CALL BARRING?
ENTER PIN CODE:_
ENTER PIN CODE:****
NUMBER OF DIGITS? 6
NUMBER OF DIGITS? 9
PROG OK
Temporis_42_uk.qxd 30/10/02 14:07 Page 31
Page 33

32
PREFIX ACCESS PROGRAMMING
This feature allows the user to choose the carrier according to the charging area.
After to have defined the carrier and the charging area the user has just to dial the
telephone number in the national format (according to the carrier, for example: for
France 01 23 45 67 89) on public network as defined in chapter "Phone set-up" or
the user has to dial the prefix to access the public network if the telephone set is
used behind PBX (private network).
If the operator prefix is less than 2 digits or equal:
l public network: the telephone set substitutes the first digit of the national number
by the prefix of the selected carrier,
l private network: the telephone set keeps the PBX prefix has it is and substitutes
the first digit of the national number by the prefix of the selected carrier.
If the operator prefix is more than 2 digits:
l public network: the telephone set inserts automatically the prefix of the selected
carrier and a pause before the national number.
l private network: the telephone set keeps the PBX prefix following by a pause of
1.5 seconds before insertion of the prefix of the selected carrier and a pause
before the national number.
This selection can be done for 2 different operators.
Press the key.
"
Press the key until the screen displays the right sub-menu.
"
Public network selection:
Press the key.
"
Press the key.
"
Enter the 2 digits of the charging area.
"
5
4
3
2
1
LOCK?
OPERATOR1 ACCESS?
PROG PREFIX ACCESS?
DEFINE AREA 1:_
DEFINE AREA 1:01
Temporis_42_uk.qxd 30/10/02 14:07 Page 32
Page 34

33
Press the key.
"
Enter the 2 digits of the charging area.
"
The telephone set allows 7 areas for this carrier.
Enter the 2 digits of the charging area.
"
Press the key.
"
Enter the digits of the operator prefix.
"
Press the key.
"
Press the key.
"
Enter the 2 digits of the charging area.
"
Press the key.
"
The telephone set allows 3 areas for this carrier.
Enter the 2 digits of the charging area.
"
15
14
13
12
11
10
9
8
7
6
DEFINE AREA 2:_
DEFINE AREA 2:02
DEFINE AREA 7:08
DEFINE PREFIX1:_
DEFINE PREFIX1:7
OPERATOR2 ACCESS?
DEFINE AREA 1:_
DEFINE AREA 1:00
DEFINE AREA 2:_
DEFINE AREA 3:06
Temporis_42_uk.qxd 30/10/02 14:07 Page 33
Page 35

34
Press the key.
"
Enter the digits of the operator prefix and 3 pauses.
"
Press the key.
"
Private network selection:
Press the key.
"
Press the key.
"
Enter PBX prefix + 2 digits of the charging area.
"
Press the key.
"
Enter PBX prefix + 2 digits of the charging area.
"
The telephone set allows 7 areas for this carrier.
Enter PBX prefix + 2 digits of the charging area.
"
Press the key.
"
9
8
7
6
5
4
3
18
17
16
DEFINE PREFIX2:_
DEFINE PREFIX1:3678P
PROG OK
OPERATOR1 ACCESS?
DEFINE AREA 1:_
DEFINE AREA 1:901
DEFINE AREA 2:_
DEFINE AREA 2:902
DEFINE AREA 7:908
DEFINE PREFIX1:_
Temporis_42_uk.qxd 30/10/02 14:07 Page 34
Page 36

35
Enter the digits of the operator prefix.
"
Press the key.
" then
Press the key.
"
Enter PBX prefix + 2 digits of the charging area.
"
Press the key.
"
The telephone set allows 3 areas for this carrier.
Enter PBX prefix + 2 digits of the charging area.
"
Press the key.
"
Enter the digits of the operator prefix and 3 pauses.
"
Press the " key.
"
NOTE: This feature is only activated when you dial in on-hook mode using direct
dialling or the directory or a direct access memory.
If you dial in off-hook mode do not forget to dial the prefix before your
correspondent's number.
18
17
16
15
14
13
12
11
10
DEFINE PREFIX1:7
OPERATOR2 ACCESS?
DEFINE AREA 1:_
DEFINE AREA 1:900
DEFINE AREA 2:_
DEFINE AREA 3:906
DEFINE PREFIX2:_
DEFINE PREFIX1:3678P
PROG OK
PROG OK
Temporis_42_uk.qxd 30/10/02 14:07 Page 35
Page 37

36
LOCAL PHONE NUMBER
Operator proposes some services based on CLIP service where the telephone set
has to recognise its own phone number. The user has to enter this phone number
in the memory of the terminal equipment when he subscribes to these services.
The telephone set works properly even if this field is not filled in and if the service
is turn off.
Press the key.
"
Press the key until the screen displays the right sub-menu.
"
Press the key.
"
Press the key.
"
Press the key.
"
Enter the phone number.
"
Press the key.
"
7
6
5
4
3
2
1
LOCK?
LOCAL PHONE NUMBER?
SERVICE: OFF?
SERVICE: ON?
NUMBER:
567890
PROG OK
Temporis_42_uk.qxd 30/10/02 14:07 Page 36
Page 38

PROBLEM CAUSE SOLUTION
The display is not lit.
There is no dial tone.
The display is not lit.
There is dial tone.
The display is not lit
or is very faint.
The telephone
no longer rings.
37
PROBLEM ? CHECK…
GUARANTEE
You are covered by a legal warranty on this product and for all information concerning this warranty, please contact your reseller.
Regardless of the legal warranty on the product, the reseller guarantees conformity
of the products with their technical specifications for a period of twelve (12) months,
parts and labour, starting from the date on the proof of purchase of the product. You
should therefore keep your invoice or till receipt specifying the date of purchase of
the product and the name of the reseller. However, if the legal warranty in your
country exceeds twelve (12) months, the legal warranty alone then applies. If the
The telephone
is not plugged in.
In idle state adjust the contrast
using and keys.
Refer to the chapter
"Melody programming".
Plug line into telephone
IF YOU FORGET THE PASSWORD
If you have lost or forgotten the password:
Press the and keys simultaneously.
Keep the keys pressed while lifting up the handset.
"
Release the keys and replace the handset.
The code is now reset to 0000.
3
2
1
OK PIN CODE ERASED
ADDITIONAL
INFORMATION
The telephone is not initialised
and no batteries are present.
Pick up the handset and wait
until the display lights up.
The contrast level is too low.
The ringer is switch off.
Temporis_42_uk.qxd 30/10/02 14:07 Page 37
Page 39

38
legal warranty is on the contrary less than twelve (12) months, the total duration of
the warranty (legal and commercial) will be of twelve (12) months. The nonconforming part or product will be repaired or replaced free of charge, by an
identical part or product, or one at least equivalent in terms of function and
performance. If repair or replacement were to prove impossible, you would receive
a refund for the product.
The spare product or part, which may be either new or reconditioned, is
guaranteed for a period either of three months from the date of repair, or up to the
end of the initial warranty period if this is longer than three months. All parts or
products returned and replaced become the property of the manufacturer.
However, this warranty becomes null and void in the following cases:
l installation or use other than as instructed in this guide;
l incorrect connection or abnormal use of the product, in particular with
accessories not specifically recommended;
l products which have been knocked or dropped;
l products damaged by lightning, voltage surge, source of heat or radiation, water
damage, exposure to excessive humidity, or any other cause outside the product
itself;
l defective maintenance, negligence;
l maintenance, modification or repair by a person not approved by the manufac-
turer or reseller.
SUBJECT TO LEGAL PROVISIONS, ALL WARRANTIES OTHER THAN THOSE
DESCRIBED HEREIN ARE EXPRESSLY EXCLUDED.
ENVIRONMENT/SAFETY
l Only use batteries with specifications identical to those mentioned in this guide.
Using batteries which do not correspond to the recommended model is liable to
damage your product.
l Your handset's used batteries should be disposed of in accordance with current
environmental protection regulations. You should return them to your reseller or
take them to a specific recovery centre.
Do not attempt to open the batteries as they contain chemical substances. In the
event of leakage, avoid contact with the skin, eyes and mouth. If necessary, rinse
the affected part for several minutes with running water. Clean the product with
absorbent paper or a dry cloth and contact your reseller for new batteries.
l To prevent danger, the mains adapter acts as a 230V power isolating device. It
should therefore, as a precaution, be installed near the appliance and should be
easily accessible.
Temporis_42_uk.qxd 30/10/02 14:07 Page 38
Page 40

39
Temporis_42_uk.qxd 30/10/02 14:07 Page 39
Page 41

40
Sales and Marketing Departments:
41, boulevard de la République - Bâtiment B6
78400 Chatou - France
Head office: 46, quai Alphonse Le Gallo
92100 Boulogne Billancourt - France
Engineered by
An ALCATEL/THOMSON multimedia
Joint Venture Company
Ref: 30-146304-00 30/10/02
The manufacturer reserves the right to modify the specifications of its products in order to make technical improvements or com-
ply with new regulations. Nanterre companies registry number: 390 546 059.
ALCATEL, ATLINKS and TEMPORIS are registered trade marks.
Temporis_42_uk.qxd 30/10/02 14:07 Page 40
 Loading...