

Page 1
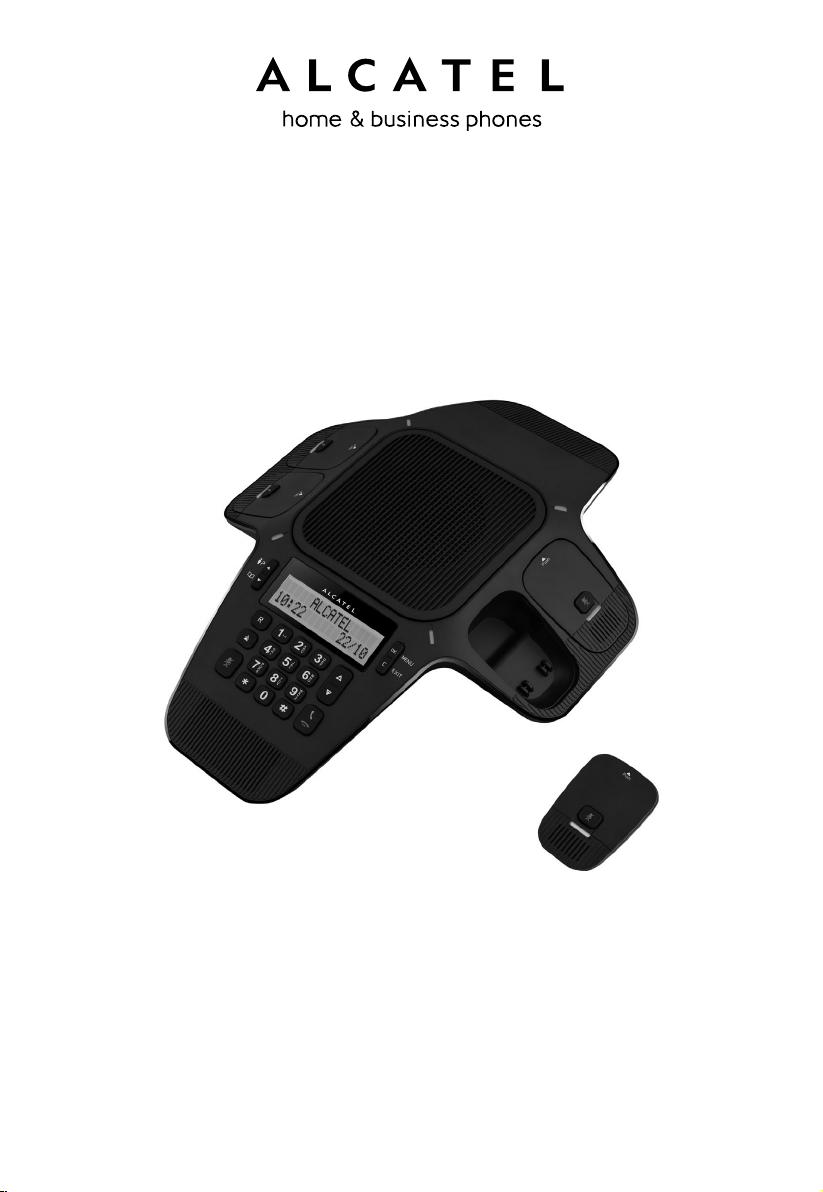
Alcatel Conference 1800
USER’S GUIDE
Page 2

TABLE OF CONTENTS
1 IMPORTANT SAFETY INSTRUCTIONS..........................................4
1.1 Package Contents.......................................................................5
1.2 Location....................................................................................6
2 INSTALLING YOUR PHONE.......................................................7
2.1 Connecting the Base Unit.............................................................7
2.2 Set Up Wireless Microphone Units.................................................8
3 GETTING TO KNOW YOUR PHONE...........................................10
3.1 Base Unit.................................................................................10
3.2 Wireless Microphone Unit...........................................................12
4 USING YOUR PHONE...............................................................13
4.1 Set Date and Time First..............................................................13
4.2 Change Language ....................................................................13
4.3 Make a Call..............................................................................13
4.4 Answer a Call............................................................................13
4.5 End a Call................................................................................13
4.6 Redial......................................................................................13
4.7 Adjust Speaker Volume.............................................................14
4.8 Mute a Call..............................................................................14
4.9 Page All Microphones.................................................................15
4.10 Temporary Ringer Silence..........................................................15
4.11 Set Up a Conference Call...........................................................15
5 PHONEBOOK..........................................................................16
5.1 Add a New Fixed Phonebook Entry...............................................16
5.2 Search a Phonebook Entry..........................................................16
5.3 Dial a Phonebook Entry..............................................................16
5.4 Edit a Phonebook Entry..............................................................17
5.5 Delete a Phonebook Entry...........................................................17
5.6 Delete all Phonebook Entries.......................................................17
5.7 Capacity of Phonebook...............................................................17
5.8 Speed Dial...............................................................................17
6 CALLER DISPLAY (Network dependent)......................................19
6.1 View the Call List.....................................................................19
6.2 Call an Entry in the Call List.......................................................19
6.3 Store a Call List Number into the Phonebook.................................19
6.4 Delete an Entry in the Call List...................................................20
6.5 Delete the Entire Call List..........................................................20
2
Page 3

7 PHONE SETTINGS...................................................................21
7.1 Set Ringer Volume.....................................................................21
7.2 Set Ringer Melody.....................................................................21
7.3 Set the Time Format..................................................................21
7.4 Set the Date Format..................................................................21
7.5 Set Key Tone...........................................................................22
7.6 Change the Flash Time..............................................................22
7.7 Rename the Base Unit...............................................................22
7.8 Change Dial Mode.....................................................................22
7.9 Reset Your Phone......................................................................22
7.10 Set PABX Mode.........................................................................23
7.11 Set a Prefix Code......................................................................23
8 TECHNICAL SPECIFICATIONS................................................24
9 TROUBLESHOOTING...............................................................25
10 SAFETY..................................................................................27
11 ENVIRONMENT.......................................................................28
3
Page 4

1 IMPORTANT SAFETY INSTRUCTIONS
When using your telephone equipment, basic safety precautions should
always be followed to reduce the risk of fire, electric shock and injury,
including the followings:
1) Read and understand all the instructions.
2) Follow all warnings and instructions marked on the product.
3) Unplug this product from the interface module before cleaning. Do not
use liquid cleaners or aerosol cleaners. Use a damp cloth for cleaning.
4) Do not use this product near water (for example, near a bath tub, kitchen
sink, swimming pool).
5) Do not expose the telephone to direct sunlight or extreme cold
environment. Do not put the telephone close to a heating source such as
radiators, cookers, etc.
6) Do not overload wall outlets and extension cords as this can result in the
risk of re or electric shock.
7) NEVER use your phone outdoors during a thunderstorm-unplug the base
from the telephone line and the mains socket when there are storms in
your area.
8) Do not use the telephone to report a gas leak in the vicinity of the leak.
9) Use only the supplied Li-ion Polymer batteries! The operation periods for
the wireless microphone units are only applicable with the default battery
capacities.
10) The use of other battery types or non-rechargeable batteries/primary
cells can be dangerous. These may cause interference and/or unit
damages. The manufacturer will not be held liable for damage arising
from such non-compliance.
11) Dispose of batteries safely. Do not immerse them in water, burn them, or
put them where they could get punctured.
4
Page 5
1.1 Package Contents
The package contains the following items:
• 1 Alcatel Conference 1800 base unit
• 4 Wireless microphone units
• 1 AC power cord
• 1 Interface module (AC power / To Phone & From Wall)
• 1 Telephone line cord
• 4 3.7V 240mAh Li-Polymer rechargeable batteries
• 1 6 metre connector cable
• User guides
User Guide
User guides
Alcatel Conference 1800
base unit
4 x 3.7V 240mAh Li-Polymer
rechargeable batteries
1 Interface module
(AC power / To Phone & From Wall)
4 x Wireless microphone units
Telephone line cord
connector cable
AC power cord
5
6 metre
Page 6

1.2 Location
For maximum coverage and reduce the interference, here are some guidelines
you should consider when you place the base unit:
- place it away from electronic appliances such as televisions, microwave
ovens, radios, personal computers, wireless devices or other cordless
phones.
- avoid facing radio frequency transmitters, such as external antennas of
mobile phone cell stations.
- avoid plugging it into the same circuit as other major household
electrical appliances because of the potential for interference. Try
moving the appliance or the base unit to another power outlet.
- If the reception between microphone unit and a base unit is not
satisfactory, move the unit to another location for better reception.
6
Page 7
2 INSTALLING YOUR PHONE
2.1 Connecting the Base Unit
1. Plug one end of 6 metre connector cable into the base unit and other end
into the interface module.
2. Plug one end of the telephone line cord into the telephone jack into the
interface module.
3. Plug the other end of the telephone line cord into the telephone jack on
the wall or micro-lter.
4. Plug the small end of power cable into a power jack into the interface
module.
5. Plug the large end of power cable into a wall power outlet.
6. Always use the cables provided in the box.
7
Page 8
2.2 Set up Wireless Microphone Units
1. Place the 1 supplied rechargeable battery carefully as indicated. Pay
extra attention to direction of battery.
1
2. Slide the battery compartment cover back.
3. Put 4 wireless microphone units on the base unit and charge for 8
hours before use for the rst time. The unit will emit red light when it is
properly placed on the base.
Notes :
1) Use only the supplied Li-ion Polymer rechargeable battery.
2) If the wireless microphone units will not be used for a long time,
disconnect and remove the battery to prevent possible leakage.
3) Take out battery, slide open cover, and then pressing the 2 ribs
outwards, use nger to lift up the battery from the end side, then slowly
take out the battery .
8
Page 9

If you have a Broadband Line
If you connect your telephone to a line with a broadband connection, you will
need to insert a micro-lter between the telephone and the telephone line,
otherwise you may get interference between the telephone and the
broadband, which could cause problems.
In a xed line with broadband, every telephone must have a micro-lter
connected, not just the one at the telephone point that your modem is
connected to. If you need more broadband micro-lters, contact your
broadband supplier.
9
Page 10

3 GETTING TO KNOW YOUR PHONE
3.1 Base Unit
12
1
2
3
4
5
6
7
8
9
10
11
1.
• In menu mode: Press to scroll up the menu items.
• In idle mode: Press to access the call list.
• While entering names or numbers in the phonebook: Press to move
the cursor to the right.
2.
• In menu mode: Press to scroll down the menu items.
• In idle mode: Press to access the phonebook list.
• While entering names or numbers in the phonebook: Press to move
the cursor to the left.
3.
• In idle / predialing mode: Press to insert a ash.
• During a call: Press to dial a ash.
• Set up conference call (see section 4.11)
4.
• In Idle mode: Press to access the redial list.
5.
• During a call: Press to mute/unmute the microphone.
10
Page 11

6.
• Press to select a menu item displayed next to the key.
• While in a menu: Press to select an item or save an entry or setting.
7.
• Press to go back or delete a character.
• Press and hold to delete all characters.
8.
• Press to increase ringer or speaker volume.
9.
• Press to decrease ringer or speaker volume.
10.
• Press to make, answer or end a call.
11.
• Press and hold to insert either a dialing pause when entering numbers.
12.
• Green during a call.
• Red when mute is on.
• Flashing green when there’s an incoming call.
11
Page 12

3.2 Wireless Microphone Unit
3
1
2
1.
• Press to mute or unmute all microphones.
• When the microphone units are on the base unit they are muted.
2. Light
• Green when the wireless microphone units are taken off the base unit
during a call.
• Red when charging or all microphones are muted.
• Flash red quickly when there’s a low battery.
• Flash red slowly when the microphone units are out of range of the base.
• Flash green when there’s an incoming call.
3.
• Press position and then take out the microphone unit from the base.
12
Page 13

4 USING YOUR PHONE
4.1 SetDateandTimerst
You should need to set the correct time and date first.
1. Press
on the base unit in idle mode to enter the main menu.
2. Press
3. Press
and year, then press
4. Press
press
or to select Set date/time, then press .
or to select the day, then press , month, then press ,
.
or to select the hour, then press , and minutes, then
. You hear a confirmation tone.
4.2 Change Language
1. Press in idle mode to enter the main menu.
2. Press
3. Press
4. Select the desired language and press
or to select Settings, and then press .
or to select LCD language, then press .
. You hear a confirmation tone.
4.3 Make a Call
4.3.1 Preparatory Dialing
Enter the phone number and press
clear the entry.
4.3.2. Direct Dialing
Press
to take the line and enter the phone number.
to dial the number. Press to
4.4. Answer a Call
Press .
4.5. End a Call
During a call, press .
Remember to put back all wireless microphone units on the base unit after
ending a call.
4.6. Redial
The base unit stores the last 10 dialled numbers (up to 30 digits each) in the
redial list.
13
Page 14

4.6.1. Review the Redial List
1. Press
2. Press
beeps twice at the end of the list.
3. Press
4.6.2. Dial a Redial Entry
1. Repeat step 1 and 2 in section 4.6.1.
2. Press
4.6.3. Save a Redial Entry to the Phonebook
1. Repeat step 1 and 2 in section 4.6.1.
2. Press
3. The base unit displays EDIT NUMBER. Use the dialling keys to edit the
number.
4. Press
input name.
5. Press
4.6.4. Delete a Redial Entry
1. Repeat step 1 and 2 in section 4.6.1.
2. Press
3. Press
in idle mode.
or or repeatedly to browse the list. The base unit
to exit.
.
twice.
, the base unit displays ENTER NAME, use the dialling keys to
and then Saved displays. You hear a confirmation tone.
, Press to select Delete.
to delete the displayed number. You hear a confirmation tone.
4.6.5. Delete the Entire Redial List
1. Repeat step 1 and 2 in section 4.6.1.
2. Press
3. Press
redial numbers. You hear a confirmation tone. The screens displays
Deleted.
, Press to select Delete all.
, the screen displays Delete All Entries? Press to delete all
4.7. Adjust Speaker Volume
During a call, press or to increase or decrease the speaker volume.
4.8. Mute a Call
You can talk to someone nearby without letting the caller hear you during a
call.
During a call:
Press
to mute all microphones and Muted will display on the LCD. Your
14
Page 15

caller cannot hear you. Press again to unmute all microphones.
4.9. Page all Microphones
You can page the wireless microphone units to help you locate them.
1. Press
2. Press
3. All registered microphone units outside charging cradle within range will
beep for 60 seconds.
4. Stop the paging beep, press
back in the base unit.
in idle mode.
or to select Find All Mics, then press .
on the microphone unit or place it
4.10. Temporary Ringer Silence
When the telephone is ringing, you can temporarily set silence for the ringer
of the base unit without disconnecting the call. The next call rings normally at
the preset volume.
To silence the ringer:
1. Press
on the base unit and Ringer muted displays.
4.11. Set Up a Conference Call
If your telephone system supports 3 party call conferencing, you can set up
conference call.
• Press
• When you hear a dial tone, dial the first phone number.
• When the first call is answered, press
• When you hear a dial tone, dial the second phone number.
• When the second call is answered, press
This conference call description may vary depending on your local public
network or your private telephone system. Please contact your local operator
or phone installer.
.
to put the first call on hold.
. Your conference call starts.
15
Page 16

5 PHONEBOOK
The phonebook stores up to 50 entries with up to 30 digits for each phone
number and 15 characters for each name.
• When there are no records in the phonebook, the screen displays
Phonebook empty first and then Add Contact?.
• When the phonebook is full and you try to save an entry, the screen
displays Phonebook full.
• When you try to save a number already stored in the phonebook, the
screen displays Number already saved.
5.1. Add a New Phonebook Entry
1. Press in idle mode to select Phonebook, then press .
1.1. If phonebook is empty, the screen displays Add contact?, then press
1.2. If phonebook record is available, press
contact. The screen displays ENTER NUMBER.
2. Enter a telephone number.
OR
Copy a number from the redial list.
• Press
Press
3. Press
4. Enter the name:
. The screen displays ENTER NUMBER.
, press to select Add
and then , or repeatedly to browse for a number.
to copy the displayed number.
. The screen displays ENTER NAME.
• press
• press 1 to add a space.
• press
• press and hold
• press
confirmation tone.
or to move the cursor to the right or left respectively.
to delete a character.
to delete all characters.
to confirm and the screen displays Saved. You hear a
5.2. Search a Phonebook Entry
1. Press in idle mode.
2. Press
letter of the name you are looking for.
or to select a phonebook or use your keypad to enter first
5.3. Dial a Phonebook Entry
1. Search for the desired entry in the phonebook.
16
Page 17

2. Press .
5.4. Edit a Phonebook Entry
1. Search for the desired entry in the phonebook and press to confirm.
2. The screen displays Edit Contact. Press
3. The screen displays EDIT NUMBER. Edit the number, and then press
4. The screen displays EDIT NAME. Edit a name, and then Press
5. The screen displays Saved. You hear a confirmation tone.
to confirm.
.
.
5.5. Delete a Phonebook Entry
1. Search for the desired entry in the phonebook.
2. Press
Delete contact? and the name of the entry. Press
3. The screen displays Contact deleted. You hear a confirmation tone, and
then the next alphabetical entry in the phonebook.
and then to select Delete. Press . The screen displays
to confirm.
5.6. Delete all Phonebook Entries
1. Press in idle mode to select Phonebook, then press twice.
2. Press
contacts? Press
3. The screen displays All contacts deleted. You hear a confirmation tone.
to select Delete all. Press . The screen displays Delete all
to confirm.
5.7. Capacity of Phonebook
1. Press in idle mode to select Phonebook, then press twice.
2. Press
3. The screen displays Capacity x/50 used. (x is the number of phonebook
stored).
to select Capacity. Press to confirm.
5.8. Speed Dial
You can assign 5 of your phonebook entries to a speed dial location (1,..5)
5.8.1 Set a Speed Dial Number
1. Press
2. Press
3. Press
4. The screen displays Copy from Phonebook, then press
select your desired phonebook.
in idle mode to select Phonebook, then press twice.
to select Speed dial, then press .
or to select an empty slot (1-5), then press .
or to
17
Page 18

5. When the desired entry appears, then press . You hear a confirmation
tone.
5.8.2. Change a Speed Dial Entry
1. Press
2. Press
3. Press
4 Select Edit, and then press
5. Press
6. Press
5.8.3. Dial a Speed Dial Entry
1. In idle mode, press and hold a desired speed dial key (1,2,3,4,5)
5.8.4. Delete a Speed Dial Entry
1. Press
2. Press
3. Press
4. Press
dial empty. You hear a confirmation tone.
in idle mode to select Phonebook, then press twice.
or to select Speed dial, then press .
or to select the desired slot (1-5), then press twice.
.
or to select the name you want to change.
to save the new entry. You hear a confirmation tone.
in idle mode to select Phonebook, then press twice.
or to select Speed dial, then press .
or to select the desired slot (1-5), then press twice.
to select Delete, and then press . The screen displays speed
18
Page 19

6 CALLER DISPLAY (Network dependent)
This feature is available if you have subscribed the Caller Line Identification
service with your telephone service provider.
Note: Alcatel Conference 1800 does not display caller number during call
waiting.
Your phone can store up to 50 received calls with date/time information in the
Call List. The number will be shown on the LCD when the phone is ringing.
If the number matches with one of the entries in your private phonebook,
the caller’s name stored in the private phonebook will be displayed with the
number.
If the caller number is disabled to send caller information, WITHHELD will be
displayed.
If the caller number is not provided by the network, UNAVAILABLE will be
displayed.
In standby, if three unanswered calls are received, “3 Missed calls” will
be displayed. Each time you review a call list, the number of missed calls
decreases by one.
If the incoming telephone number matches the last 7 digits of a telephone
number in your phonebook, the name that appears on the screen matches
the corresponding name in your phonebook.
6.1. View the Call List
All received calls are saved in Call List with the latest call putting at the top of
the list. When the call list is full, the oldest call will be replaced by a new call.
1. In idle mode, press
OR
You can also review the calling number display history by pressing
then
2. Press
to select to Call list, then press .
to browse.
to review the calling number display history.
,
6.2. Call an Entry in the Call List
1. Refer to View the call list, press .
6.3. Store a Call List Number into the Phonebook
1. Select a desired entry in the call list, and then press . The screen
displays Store to PB.
2. Press
. The screen displays EDIT NUMBER to edit the number.
19
Page 20

3. Press . The screen displays EDIT NAME to edit the name.
4. Press
confirmation tone.
to confirm and the screen displays Saved. You hear a
6.4. Delete an Entry in the Call List
1. Select a desired entry in the call list.
2. When the desired entry is displayed, press
Delete, and press
You hear a confirmation tone.
. The screen displays the next call list entry.
, then press to select
6.5. Delete the Entire Call List
1. Select a desired entry in the call list.
2. When the desired entry is displayed, press
Del all calls. Press
then press
to confirm. You hear a confirmation tone.
to confirm, the screen displays Delete all calls?,
, then press to select
20
Page 21

7 PHONE SETTINGS
7.1. Set Ringer Volume
1. In idle mode, press .
2. Press
3. Press
4. Press
volume level while adjusting.
5. Press
OR
Select Ringer off to turn off, then press
confirmation tone.
7.2. Set Ringer Melody
1. In idle mode, press .
2. Press
3. Press
4. Press
5. Press
7.3. Set the Time Format
1. In idle mode, press .
2. Press
3. Press
4. Press
Hour).
5. Press
or to select Ringers.
to confirm to choose Ringer volume, then press .
or to adjust the ringer volume. You hear a sample of each
to save. You hear a confirmation tone.
or to select Ringers.
to confirm to choose Ringer tone, then press .
or to adjust the ringer tone.
to save. You hear a confirmation tone
or to select Settings.
to confirm to choose Time format, then press .
or to choose your desired time format (12-Hour or 24-
to confirm. You hear a confirmation tone.
to save. You hear a
7.4. Set the Date Format
1. In idle mode, press .
2. Press
3. Press
4. Press
DD/YY).
5. Press
or to select Settings.
or to select Date format, then press .
or to select your desired date format (DD/MM/YY or MM/
to confirm. You hear a confirmation tone.
21
Page 22

7.5. Set Key Tone
It is set to beep with each key press if you turn on the beep tone.
1. In idle mode, press
2. Press
3. Press
4. Press
each key tone volume while adjusting. Press
OR
Select Off to turn off, then press
or
or
or
.
to select Settings.
to select Key tone, then press
to adjust the key tone volume. You hear a sample of
to save. You hear a conrmation tone.
.
to save your preference.
7.6. Change the Flash Time
1. In idle mode, press .
2. Press
3. Press
4. Press
180ms, 200ms, 250ms, 300ms, 600ms are for your selection), then press
or
or
or
. You hear a conrmation tone.
to select Settings.
to select Flash time, then press
to select your desired ash time. (80ms, 100ms, 120ms,
.
7.7. Rename the Base Unit
1. In idle mode, press .
2. Press
3. Press
4. Press
or
or
. You hear a conrmation tone.
to select Settings.
to select Rename base, then press
to edit the name.
7.8. Change Dial Mode
1. In idle mode, press .
2. Press
3. Press
Pulse.
4. Press
or
or
. You hear a conrmation tone.
to select Settings.
to select Dial Mode, then press
to select Tone or
7.9. Reset Your Phone
You can reset your phone to the default settings. After reset, all your personal
settings will be deleted, but your phonebook and speed dial entries remain
unchanged.
1. In idle mode, press
.
22
Page 23

2. Press
3. Press
Reset to default?.
4. Press
or
or
to conrm. You hear a conrmation tone.
to select Settings.
to select Reset, then press
. The screen displays
7.10. Set PABX Mode
If the Alcatel Conference 1800 unit is connected to a PABX system, you
should set PABX mode on.
1. In idle mode, press
2. Press
3. Press
4. Press
a conrmation tone.
Remarks:
1. when you connect it behind PABX system, you should need to turn Behind
PABX on, acoustic performance of Conference 1800 phone should be
better suited behind PABX system.
2. When you connect it behind public telephone network or through
broadband operator, you may need to turn Behind PABX off.
or
or
or
.
to select Settings.
to select Behind PABX, then press
to select Yes or No, then press
.
to conrm. You hear
7.11. SetaPrexCode
Normally, when you set Behind PABX on, you can set a prex (e.g. 9) before
each number is dialed externally from the call list.
1. In idle mode, press
2. Press
3. Press
4. Enter the number you want (maximum 1 digit), then press
5. If the number is added already, press
then input new digit, press
or
or
.
to select Settings.
to select PrexCode, then press
to delete the original number,
to conrm. You hear a conrmation tone.
.
.
23
Page 24

8. TECHNICAL SPECIFICATIONS
Indoor Range (wireless
microphone unit)
Battery Life (Wireless
microphone unit)
(average values)
Number of Wireless
microphone units
connected to the
base unit
Electrical Connection/
Base
Mains Adaptor
Telephone
Connection
Batteries (in each
wireless microphone
unit)
Operating
Temperature
Up to 30 metres*
5 hours talk time**
70 hours standby**
Up to 4
Base main adaptor (interface module):
Model No.: S018AGP0900200
Input: 100-240 V/50-60 Hz/500mA Output:
9VDC/2A
Only use the adaptor supplied with telephone.
Single-phase AC, excluding IT install defined by
the EN60950 standard.
Caution: The network voltage is classified as
hazard by the criteria of this standard.
Appliance designed for connection to a TNV3 class
(telecommunications network voltage) analogue
telephone line as defined by the EN60950
standard.
Battery pack – 2.4 V – 240mAh (Li-ion Polymer)
Only use the batteries supplied with the telephone.
Use any other type of battery presents a risk of
explosion. Used batteries must be disposed of in
compliance with current environmental protection
regulations.
From 5°C to 40°C
* Values may vary according to environment.
** Depending on initial battery charge.
24
Page 25

9. TROUBLESHOOTING
If you have difficulty with your phone, please try the suggestions listed below.
As a general rule, if a problem occurs, remove the batteries from all the
wireless microphone units in your installation for about 1 minute, then
disconnect and reconnect the power supply to the base and reinstall the
batteries carefully.
Conferencing unit doesn’t work
• Make sure all cables are plugged in correctly and the batteries are
installed and charged. After you’ve finished using them, remember to put
your wireless microphone units back on the base so they can charge.
No dial tone
• Is the telephone cord plugged into the phone socket?
• Check that the mains power is switched on.
• Only use the telephone cord supplied with the phone.
• The telephone line cord or 6 metre connector cable might be
malfunctioning. Install a new telephone line cord or 6 metre connector
cable.
• Move the wireless microphone unit closer to the telephone base. It might
be out of range.
• Disconnect the telephone and connect a different telephone. If there is
no dial tone on this telephone, the problem is in your wiring or local
service. Contact your local telephone company.
Wireless microphone unit doesn’t work
• Make sure your base unit’s cables are plugged in correctly.
• Make sure the base unit isn’t near other DECT phones or electronic
devices that could be causing interference.
• Make sure your wireless microphone unit isn’t out of range – try moving it
closer.
• Put back your wireless microphone unit on the base for charging for
8 hours. If still not working, the battery may be flat, dead or incorrectly
inserted, recharge or replace the battery, or following procedures below
to do registration again:
1. When the base unit is in idle, put all wireless microphone units on the
base cradle.
2. Enter a secret code *331734# quickly and then press
unit.
3. If registration is successful. the screen will display "Registration done".
• Try resetting the base unit. Unplug its power, wait for 15 seconds, then
plug it back in. Give it a minute to reset.
twice at base
25
Page 26

There's a red light flashing on my wireless microphone unit
• Put the wireless microphone unit on the base unit so it can charge. If this
doesn't work, replace the battery.
The base unit doesn’t ring
• The ringer volume may be switched off.
• Make sure your base unit’s cables are plugged in correctly.
• Make sure the base unit isn’t near other DECT phones or electronic
devices that could be causing interference.
• Try resetting the base unit. Unplug its power, wait for 15 seconds, then
plug it back in. Give it a minute to reset.
26
Page 27

10. SAFETY
In the event of an electrical hazard, the mains adapter acts as 230V power
isolating device. It should therefore, as a precaution, be installed close to the
appliance and be easily accessible. To disconnect the device from the primary
power source, the mains adapter must be removed from the 230V AC/50 Hz
socket.
If the mains adapter fails, it must be replaced by an identical model.
If not connected to the mains power or if there is a mains power failure,
the whole conference unit will not work. You will then be unable to make or
receive calls in the event of an emergency.
This is why we recommend that you also keep a conventional telephone – one
that doesn’t require a power supply – as a backup.
! Do not use your telephone to notify a gas leak when standing in the
vicinity of the leak.
It is recommended that you avoid using this device during electrical storms.
Do not attempt to open the batteries, as they contain chemical substances.
In the event of leakage, avoid contact with the skin, eyes, nose and mouth.
In the event of contact, rinse the affected part for about twenty minutes with
running water and seek urgent medical attention.
Clean the product with absorbent paper or a dry cloth and contact your
reseller for replacement batteries.
ATLINKS hereby declares that the following models conform to the essential
requirements and other applicable provisions of European directive 1999/5/
EC.
Alcatel Conference 1800
27
Page 28

11. ENVIRONMENT
This symbol means that your inoperative electronic appliance must
be collected separately and not mixed with the household waste. The
European Union has implemented a specific collection and recycling
system for which producers are responsible.
This appliance has been designed and manufactured with high quality
materials and components that can be recycled and reused. Electrical
and electronic appliances are liable to contain parts that are necessary in
order for the system to work properly but which can become a health and
environmental hazard if they are not handled or disposed of in the proper
way. Consequently, please do not throw out your inoperative appliance with
the household waste.
If you are the owner of the appliance, you must deposit it at the appropriate
local collection point or leave it with the vendor when buying a new appliance.
- If you are a professional user, please follow your supplier's instructions.
- If the appliance is rented to you or left in your care, please contact your
service provider.
Keen to preserve the environment, ATLINKS has equipped this appliance with
a switching power supply, offering better energy efficiency. The advantages
include not only very low electricity consumption, but also a more compact
format than the conventional power supply units used by the previous range.
The used batteries from your telephone (if it has batteries) must be disposed
of in compliance with current environmental protection regulations. Comply
with your local regulations.
Return your batteries to your reseller or dispose of them at an approved
recycling centre.
Help us protect the environment in which we live!
28
Page 29

www.alcatel-business.com
ATLINKS Europe
22 quai Gallieni
92150 Suresnes- France
© ATLINKS 2014 - Reproduction prohibited.
The Manufacturer reserves the right to modify the specifications of its
products in order to make technical improvements or comply with new
regulations.
ALCATEL and ATLINKS are registered trademarks.
The Alcatel logo and Alcatel name are trademarks of Alcatel Lucent and used
under licence by ATLINKS.
Alcatel Conference 1800
A/W No.: 10000941 Rev.0 (EN)
Printed in PRC
29
 Loading...