

Page 1
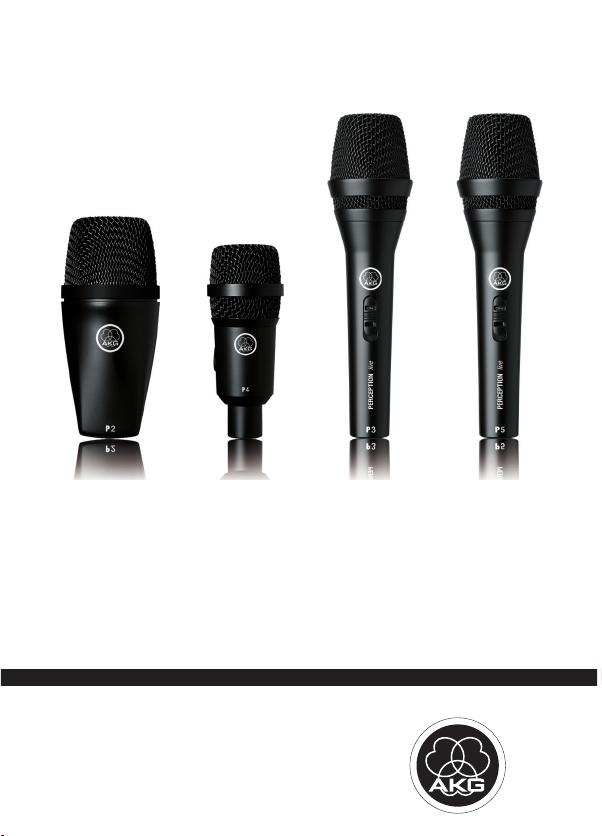
PERCEPTION live
BEDIENUNGSANLEITUNG .........................................2
Bitte vor Inbetriebnahme des Gerätes lesen!
USER INSTRUCTIONS ............................................10
Please read the manual before using the equipement!
0
Page 2

Inhaltsverzeichnis
Inhaltsverzeichnis
1 Sicherheitshinweis .............................................................. 3
2 Beschreibung....................................................................... 4
Einleitung .............................................................................. 4
P 2........................................................................................ 4
P 4........................................................................................ 4
P 3 S..................................................................................... 4
P 5 / P 5 S............................................................................. 4
Optionales Zubehör................................................................ 5
3 Anwendung.......................................................................... 6
Mikrofon anschließen ............................................................. 6
Mikrofon ein-/ausschalten ...................................................... 6
4 Reinigung............................................................................. 7
Mikrofon................................................................................ 7
Innen-Windschutz .................................................................. 7
5 Technische Daten ................................................................ 8
P 2........................................................................................ 8
P 4........................................................................................ 8
P 3 S..................................................................................... 8
P 5 / P 5 S............................................................................. 8
6 Fehlerbehebung................................................................... 9
2 PERCEPTION live
Page 3
Sicherheitshinweis
1 Sicherheitshinweis
Beschädigungsgefahr
Überprüfen Sie bitte, ob das Gerät, an das Sie das Mikrofon
anschließen möchten, den gültigen Sicherheitsbestimmungen
ACHTUNG
entspricht und mit einer Sicherheitserdung versehen ist.
PERCEPTION live 3
Page 4
Beschreibung
2 Beschreibung
Einleitung
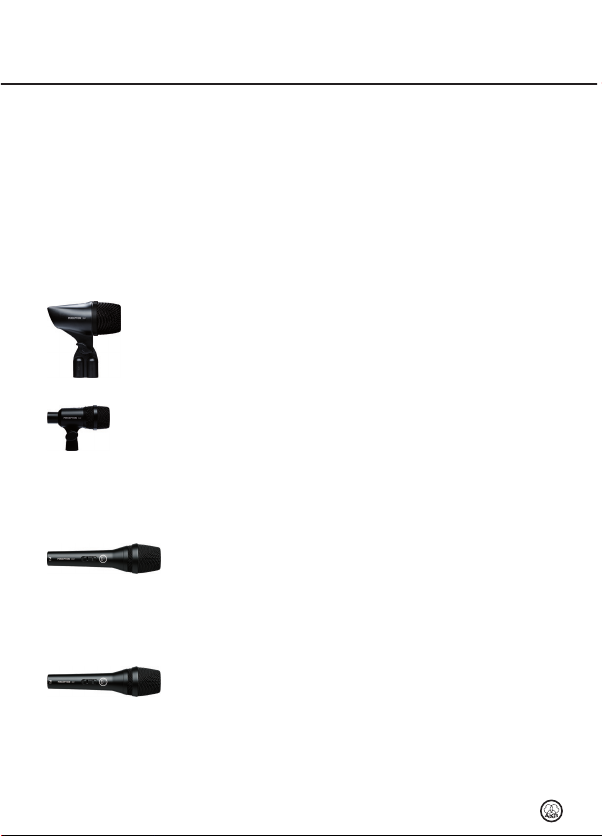
P 2
P 4
P 3
P 5 / P 5 S
Vielen Dank, dass Sie sich für ein Produkt aus dem Hause AKG
entschieden haben. Bitte lesen Sie die Bedienungsanleitung
aufmerksam durch, bevor Sie das Gerät benützen, und bewahren Sie
die Bedienungsanleitung sorgfältig auf, damit Sie jederzeit
nachschlagen können. Wir wünschen Ihnen viel Spaß und Erfolg!
x Dynamisches Instrumentalmikrofon
x Nierenförmige Richtcharakteristik
x Etui
x Für Bass Drum, Bassverstärker, Blasinstrumente
x Dynamisches Instrumentalmikrofon
x Nierenförmige Richtcharakteristik
x Halterung H 440
x Etui
x Für Toms, Percussions, Gitarrenverstärker, Blasinstrumente
x Dynamisches Instrumentalmikrofon mit Ein-/Ausschalter
S
x Nierenförmige Richtcharakteristik
x Stativadapter SA 45
x Etui
x Für Instrumente und Begleitchor
x Dynamisches Vokalmikrofon mit Ein-/Ausschalter
x Supernierenförmige Richtcharakteristik
x Stativadapter SA 45
x Etui
x Für Solo-Vocals
4 PERCEPTION live
Page 5

Beschreibung
Optionales Zubehör
Optionales Zubehör finden Sie im aktuellen AKG-Katalog/Folder oder
auf www.akg.com. Ihr Händler berät Sie gerne.
PERCEPTION live 5
Page 6
Anwendung
/
3 Anwendung
Mikrofon anschließen
Mikrofon ein-
ausschalten
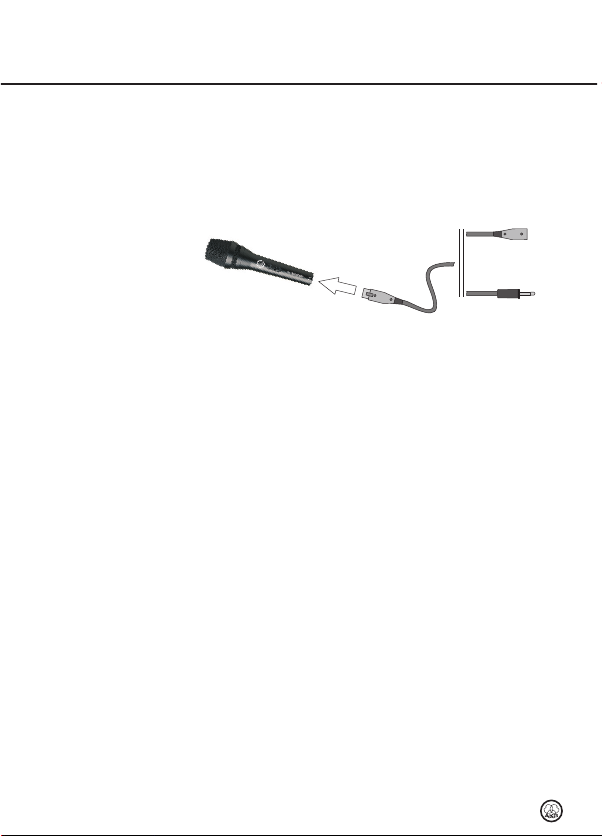
Das Mikrofon besitzt einen symmetrischen Ausgang mit 3-poligem
XLR-Stecker:
Sie können das Mikrofon sowohl an symmetrische, als auch
asymmetrische Mikrofoneingänge anschließen.
x Wenn Sie das Mikrofon an einen symmetrischen Mikrofoneingang
(XLR-Buchse) anschließen wollen, verwenden Sie ein
handelsübliches XLR-Kabel.
x Wenn Sie das Mikrofon an einen asymmetrischen Mikrofoneingang
(6,3 mm-Klinkenbuchse) anschließen wollen, verwenden Sie ein
Kabel mit XLR-Kupplung und 6,3 mm-Mono-Klinkenstecker.
Beachten Sie, dass asymmetrische Kabel Einstreuungen aus
Magnetfeldern (von Netz- und Lichtkabeln, Elektromotoren usw.)
wie eine Antenne aufnehmen können. Bei Kabeln, die länger als
5 m sind, kann dies zu Brumm- und ähnlichen Störgeräuschen
führen.
Mikrofone mit dem Namenszusatz "S" besitzen einen Ein-/Ausschalter.
1) Zum Einschalten schieben Sie den Ein-/Ausschalter in Richtung
Mikrofonkopf (Stellung "ON")
2) Zum Ausschalten schieben Sie den Ein-/Ausschalter in Richtung
Kabel (Stellung "OFF")
Um Störgeräusche zu vermeiden, schalten Sie das Mikrofon aus bevor
Sie das Mikrofonkabel anstecken oder abziehen.
6 PERCEPTION live
Page 7

Reinigung
4 Reinigung
Mikrofon
Innen-Windschutz
x Reinigen Sie die Gehäuseoberfläche des Mikrofons mit einem mit
Wasser befeuchteten Tuch.
1) Schrauben Sie die Gitterkappe des Mikrofons gegen den
Uhrzeigersinn ab.
2) Nehmen Sie den Windschutz aus der Gitterkappe heraus und
reinigen Sie den Windschutz mit Seifenwasser.
3) Lassen Sie den Windschutz über Nacht trocknen.
4) Legen Sie den Windschutz in die Gitterkappe und schrauben Sie
die Gitterkappe im Uhrzeigersinn auf das Mikrofon auf.
PERCEPTION live 7
Page 8

Technische Daten
5 Technische Daten
P 2
P 4
P 3 S
P 5 / P 5 S
Richtcharakteristik: Niere
Übertragungsbereich: 20 bis 16.000 Hz
Empfindlichkeit: 2,5 mV/Pa
Empfohlene Lastimpedanz:
Grenzschalldruck: 157 dB SPL
Richtcharakteristik: Niere
Übertragungsbereich: 40 bis 18.000 Hz
Empfindlichkeit: 2,5 mV/Pa
Empfohlene Lastimpedanz:
Grenzschalldruck: 152 dB SPL
Richtcharakteristik: Niere
Übertragungsbereich: 40 bis 20.000 Hz
Empfindlichkeit: 2,5 mV/Pa
Empfohlene Lastimpedanz:
Grenzschalldruck: 144 dB SPL
Richtcharakteristik: Superniere
Übertragungsbereich: 40 bis 20.000 Hz
Empfindlichkeit: 2,5 mV/Pa
Empfohlene Lastimpedanz:
Grenzschalldruck: 144 dB SPL
Dieses Produkt entspricht den in der Konformitätserklärung
angegebenen Normen. Sie können die Konformitätserklärung auf
http://www.akg.com oder per E-Mail an sales@akg.com anfordern.
t 2.000 Ohm
t 2.000 Ohm
t 2.000 Ohm
t 2.000 Ohm
8 PERCEPTION live
Page 9

Fehlerbehebung
6 Fehlerbehebung
Fehler Mögliche Ursache Abhilfe
Kein Ton
Verzerrungen
Mikrofon klingt dumpf
Kanal-Fader oder
Summenpegelregler am
Mischpult oder
Lautstärkeregler des
Verstärkers steht auf Null.
Mikrofon nicht an Mischpult
oder Verstärker
angeschlossen.
Kabelstecker nicht richtig
angesteckt.
Kabel defekt. Kabel überprüfen und falls
P 3 S, P 5 S: Schalter in
Stellung "OFF".
Gain-Regler am Mischpult
nicht richtig eingestellt.
Verschmutzter Innen- oder
Außenwindschutz dämpft
hohe Frequenzen.
Kanal-Fader oder
Summenpegelregler am
Mischpult oder
Lautstärkeregler des
Verstärkers auf gewünschten
Pegel einstellen.
Mikrofon an Mischpult oder
Verstärker anschließen.
Kabelstecker nochmals
anstecken.
nötig ersetzen.
P 3 S, P 5 S: Schalter in
Stellung "ON" stellen.
Gain-Regler so einstellen,
dass Verzerrungen
verschwinden.
Innen- bzw. Außenwindschutz
reinigen.
PERCEPTION live 9
Page 10

Table of Contents
Table of Contents
1 Safety................................................................................. 11
2 Description......................................................................... 12
3 Application......................................................................... 14
4 Cleaning............................................................................. 15
5 Specifications .................................................................... 16
6 Troubleshooting................................................................. 17
Introduction ......................................................................... 12
P 2...................................................................................... 12
P 4...................................................................................... 12
P 3 S................................................................................... 12
P 5 / P 5 S........................................................................... 12
Optional Accessories............................................................ 13
Connecting the microphone ..................................................14
Switching the microphone on/off........................................... 14
Microphone ......................................................................... 15
Internal Windscreen.............................................................. 15
P 2...................................................................................... 16
P 4...................................................................................... 16
P 3 S................................................................................... 16
P 5 / P 5 S........................................................................... 16
10 PERCEPTION live
Page 11

Safety
1 Safety
Risk of damage
Please make sure that the piece of equipment your microphone
will be connected to fulfills the safety regulations in force in your
ATTENTION
country and is fitted with a ground lead.
PERCEPTION live 11
Page 12

Description
2 Description
Introduction
P 2
P 4
P 3
P 5 / P 5 S
Thank you for purchasing an AKG product. This Manual contains
important instructions for setting up and operating your equipment.
Please take a few minutes to read the instructions below carefully
before operating the equipment. Please keep the Manual for future
reference. Have fun and impress your audience!
x Dynamic instrument microphone
x Cardioid polar pattern
x Carrying case
x For kick drum, bass amps, wind instruments
x Dynamic instrument microphone
x Cardioid polar pattern
x H 440 bracket
x Carrying case
x For toms, percussion, guitar amps, wind instruments
x Dynamic instrument microphone with on/off switch
S
x Cardioid polar pattern
x SA 45 stand adapter
x Carrying case
x For instruments and backing vocals
x Dynamic vocal microphone with on/off switch
x Supercardioid polar pattern
x SA 45 stand adapter
x Carrying case
x For solo vocals
12 PERCEPTION live
Page 13

Description
Optional Accessories
For optional accessories, refer to the current AKG catalog or folder, or
visit www.akg.com. Your dealer will be glad to help.
PERCEPTION live 13
Page 14

Application
3 Application
Connecting the
microphone
Switching the microphone
on/off
The microphone provides a balanced output on a 3-pin male XLR
connector:
You can connect the microphone either to a balanced or an unbalanced
microphone input.
x To connect the microphone to a balanced input (XLR connector),
use a commercial XLR cable.
x To connect the microphone to an unbalanced microphone input
(1/4" jack), use a cable with a female XLR connector and a 1/4"
TS jack plug. Please note that unbalanced cables may pick up
interference from stray magnetic fields near power or lighting
cables, electric motors, etc. like an antenna. This may cause hum
or similar noise when you use a cable that is longer than 16 feet
(5 m).
Microphones with name suffix "S" have an on/off switch.
1) To switch the microphone on, slide the on/off switch toward the
front grill ("ON" position)
2) To switch the microphone off, slide the on/off switch toward the
microphone cable ("OFF" position)
To prevent unwanted bursts of noise, be sure to switch the microphone
off before connecting or disconnecting the microphone cable.
14 PERCEPTION live
Page 15

Cleaning
4 Cleaning
Microphone
Internal Windscreen
x Use a soft cloth moistened with water to clean the surface of the
microphone body.
1) Unscrew the front grill from the microphone CCW.
2) Remove the windscreen from the grill and wash the windscreen in
soap suds.
3) Allow the windscreen to dry overnight.
4) Replace the windscreen in the front grill and screw the front grill
on the microphone CW.
PERCEPTION live 15
Page 16

Specifications
5 Specifications
P 2
P 4
P 3 S
P 5 / P 5 S
Polar pattern: cardioid
Frequency range: 20 to 16,000 Hz
Sensitivity: 2.5 mV/Pa
Recommended load impedance:
Max. sound pressure level: 157 dB SPL
Polar pattern: cardioid
Frequency range: 40 to 18,000 Hz
Sensitivity: 2.5 mV/Pa
Recommended load impedance:
Max. sound pressure level: 152 dB SPL
Polar pattern: cardioid
Frequency range: 40 to 20,000 Hz
Sensitivity: 2.5 mV/Pa
Recommended load impedance:
Max. sound pressure level: 144 dB SPL
Polar pattern: supercardioid
Frequency range: 40 to 20,000 Hz
Sensitivity: 2.5 mV/Pa
Recommended load impedance:
Max. sound pressure level: 144 dB SPL
This product conforms to the standards listed in the Declaration of
Conformity. To order a free copy of the Declaration of Conformity, visit
http://www.akg.com or contact sales@akg.com.
t2,000 ohms
t2,000 ohms
t2,000 ohms
t2,000 ohms
16 PERCEPTION live
Page 17

Troubleshooting
6 Troubleshooting
Problem Possible Cause Remedy
No sound
Distortion
Microphone sounds dull
Channel or master fader on
mixer, or volume control on
amplifier is at zero.
Microphone is not connected
to mixer or amplifier.
Cable connectors are seated
loosely.
Cable is defective. Check cable and replace if
P 3 S, P 5 S: Switch in "OFF"
position.
Gain control on mixer or
transmitter module not set
correctly.
Internal or external
windscreen attenuates high
frequencies when soiled.
Set channel or master fader
on mixer or volume control on
amplifier to desired level.
Connect microphone to mixer
or amplifier.
Check cable connectors for
secure seat.
damaged.
P 3 S, P 5 S: Set switch to
"ON" position.
Set gain control to stop
distortion.
Clean internal or external
windscreen.
PERCEPTION live 17
Page 18

Notizen – Notes – Notes – Note – Notas - Notas
18 PERCEPTION live
Page 19

Notizen – Notes – Notes – Note – Notas - Notas
PERCEPTION live 19
Page 20

Mikrofone · Kopfhörer · Drahtlosmikrofone · Drahtloskopfhörer · Kopfsprechgarnituren · Akustische Komponenten
Microphones · Headphones · Wireless Microphones · Wireless Headphones · Headsets · Electroacoustical Components
Microphones · Casques HiFi · Microphones sans fil · Casques sans fil · Micros-casques · Composants acoustiques
Microfoni · Cuffie HiFi · Microfoni senza filo · Cuffie senza filo · Cuffie-microfono · Componenti acustici
Micrófonos · Auriculares · Mic rófonos inalámbricos · Auriculares inalámbricos · Auricul ares con micrófono · Componentes acústicos
Microfones · Fones de ouvido · Microfones s/fios · Fones de ouvido s/fios · Microfones de cabeça · Componentes acústicos
AKG Acoustics GmbH
Lemböckgasse 21–25, A-1230 Vienna/AUSTRIA, phone: (+43-1) 86654-0*
e-mail: sales@akg.com
For other products and distributors worldwide visit www.akg.com or www.harman.com
Technische Änderungen vorbehalten. Specifications subject to change without notice. Ces caractéristiques sont susceptibles de modifications. Ci
riserviamo il diritto di effettuare modifiche tecniche. Nos reservamos el derecho de introducir modificaciones técnicas. Especificações sujeitas a
mudanças sem aviso prévio.
Printed in China P.R.C. 09/09/9100 U 13040
 Loading...